Samsung Electronics Co SQ10WL Mini PCI Card in Personal Computer User Manual PP 21 to 30
Samsung Electronics Co Ltd Mini PCI Card in Personal Computer PP 21 to 30
UserManual.wiki
>
Samsung Electronics Co
>
SQ10WL User Manual
>
PP 21 to 30
Contents
1.
PP 1 to 10
2.
PP 11 to 20
3.
PP 21 to 30
4.
PP 31 to 40
5.
PP 41 to 50
6.
PP 51 to 60
7.
PP 61 to 70
8.
PP 71 to 86
9.
Revised manual section with warning statements
PP 21 to 30
Navigation menu
Upload a User Manual
Namespaces
Wiki Guide
HTML
PDF
Info
Views
User Manual
Discussion / Help
Navigation
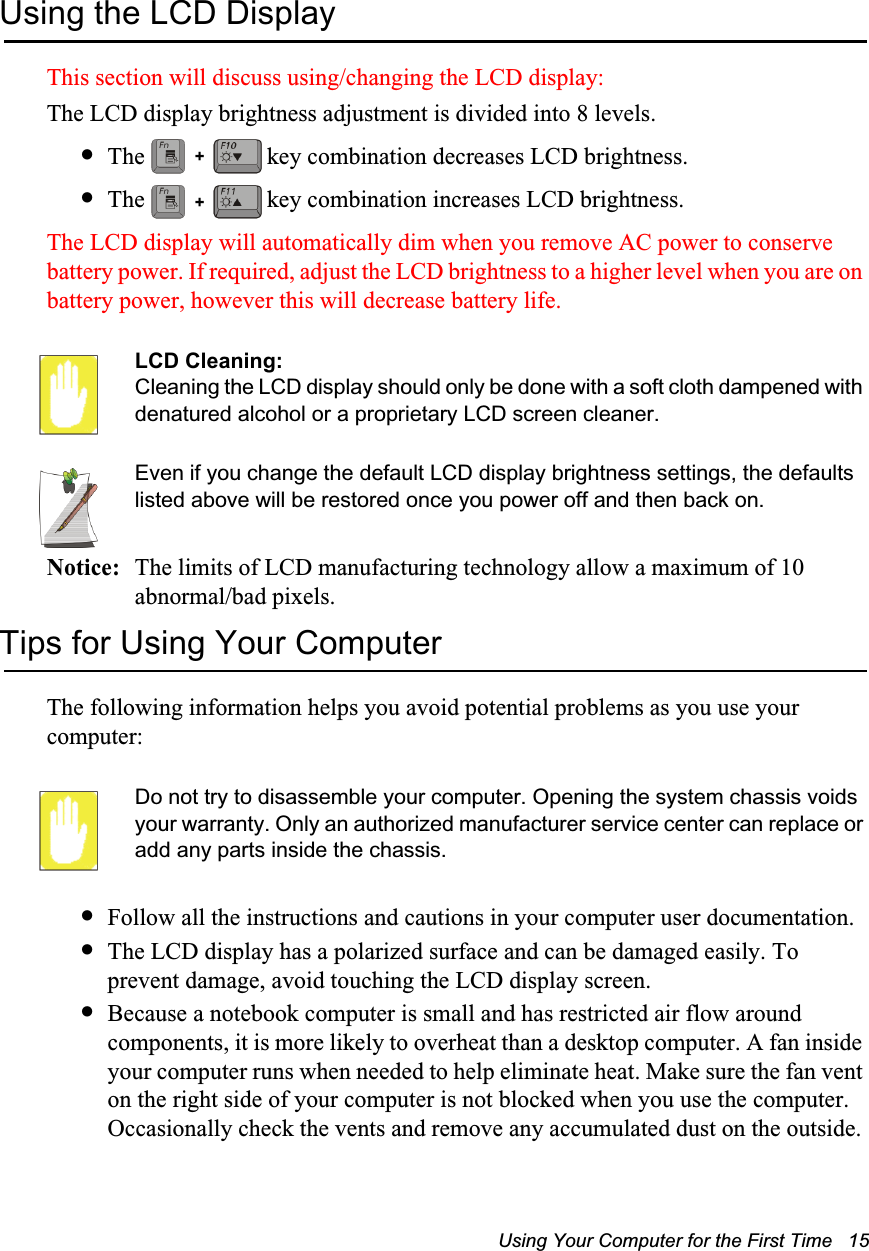

![20 Users ManualThe keys on the keyboard can be grouped into the following categories:•Full-sized Alphanumeric typewriter keys are arranged like a standard typewriter keyboard [QWERTY] and are used for text entry. The Windows key opens Windows menus and performs other special functions. •F1 to F12 and the Cursor/Screen Control keys, when pressed together with key, enable special functions.•The Application/Fn key is used for quick access to shortcut menus and help assistants in Windows as well as standard Fn key combinations.The F1 to F12 keys are assigned to different functions depending on the program in use, however the key is usually assigned to program help.•Cursor and Screen control keys move the cursor. They may perform other functions, depending on your software.Do not allow liquid to drip into the keyboard or you may damage the keyboard.To clean the computer keyboard, use slightly damp cotton swabs. Scrub the keys and the surface around the keys.](https://usermanual.wiki/Samsung-Electronics-Co/SQ10WL.PP-21-to-30/User-Guide-183613-Page-10.png)