Samsung Electronics Co SQ10WL Mini PCI Card in Personal Computer User Manual PP 61 to 70
Samsung Electronics Co Ltd Mini PCI Card in Personal Computer PP 61 to 70
UserManual.wiki
>
Samsung Electronics Co
>
SQ10WL User Manual
>
PP 61 to 70
Contents
1.
PP 1 to 10
2.
PP 11 to 20
3.
PP 21 to 30
4.
PP 31 to 40
5.
PP 41 to 50
6.
PP 51 to 60
7.
PP 61 to 70
8.
PP 71 to 86
9.
Revised manual section with warning statements
PP 61 to 70
Navigation menu
Upload a User Manual
Namespaces
Wiki Guide
HTML
PDF
Info
Views
User Manual
Discussion / Help
Navigation

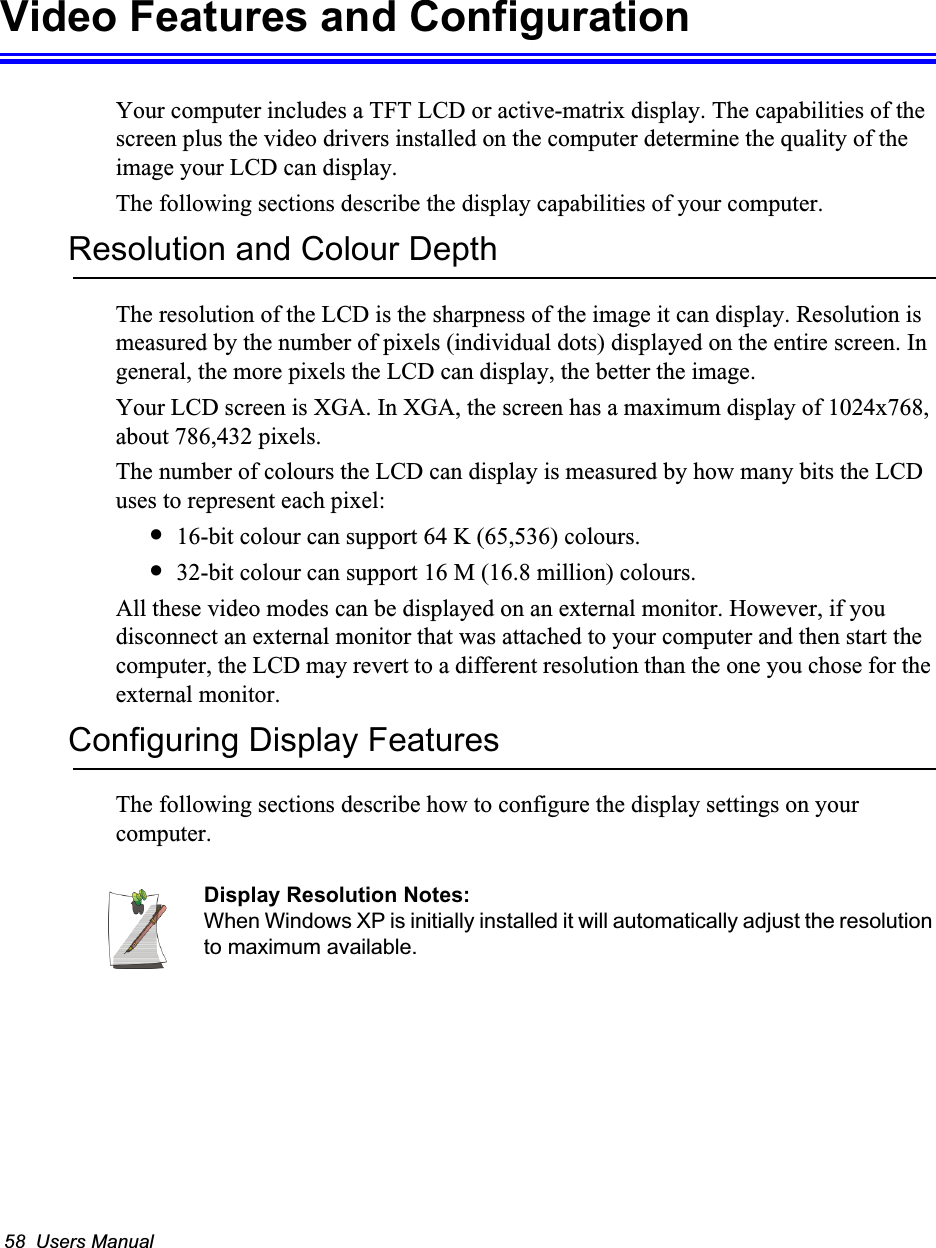
![Installing a New HDD 57Installing a New HDDThis section discusses installing a new HDD and other basic HDD operations.Installing/Reinstalling a HDDTo install a new HDD you must contact your local service representative. He will do the physical change of the drive. You should complete the instructions below before you go to the service center.See the information below before you install your HDD:•Back up data files of your old hard drive.•For system boot with CD-ROM, under the Boot menu in System setup, set Bootable CD Check to Enabled and set Boot Device Priority is ordered starting from the [DVD/CD-ROM].When you are ready to install the new HDD use the Recovery CD-ROM to install the device driver.(Re)Installing Windows and Device DriversUse the System Recovery CD to (re)install the Operating System and System Software CD to (re)install the device drivers.The System Recovery CD is used to (re)install the OS and System Software to a new HDD or recover from a system crash.](https://usermanual.wiki/Samsung-Electronics-Co/SQ10WL.PP-61-to-70/User-Guide-183617-Page-7.png)