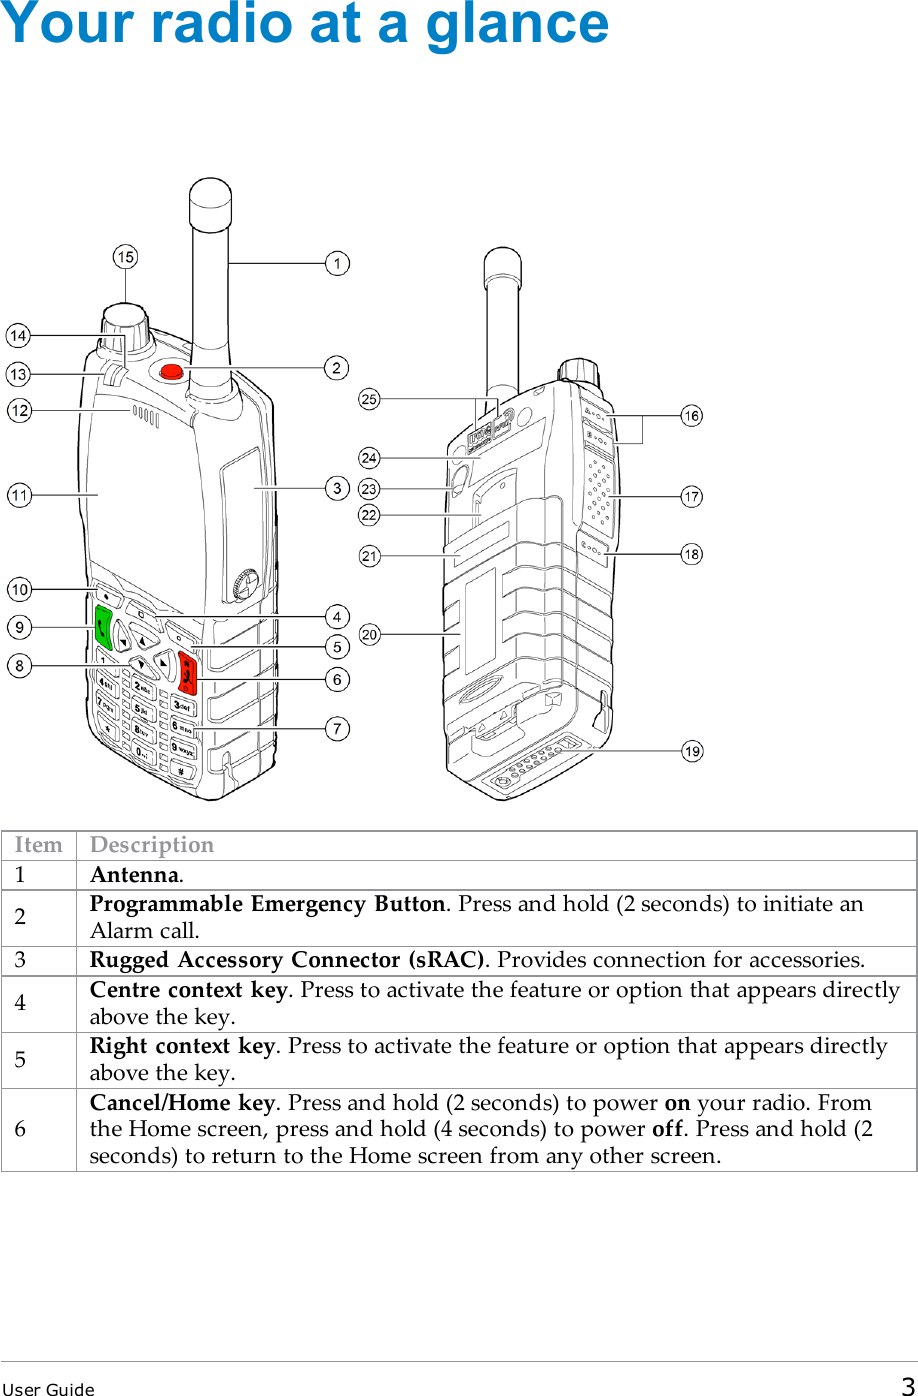
Sepura SC2024 TETRA Terminal with Bluetooth User Manual SC202x User Guide
Sepura plc TETRA Terminal with Bluetooth SC202x User Guide
Sepura >
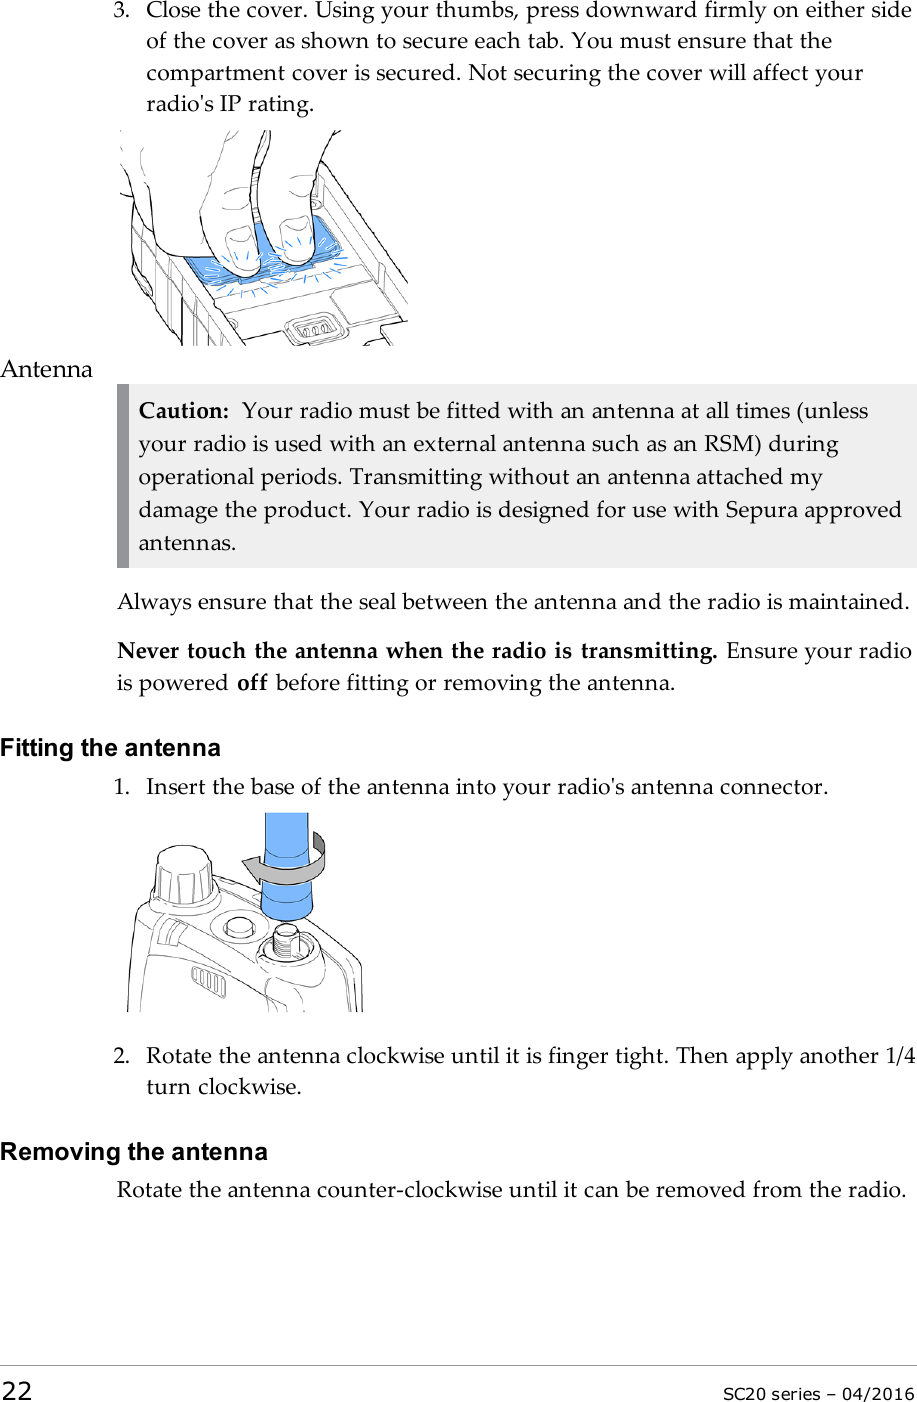
Contents
- 1. SC20_Series_Quick_Start_Guide
- 2. SC20_Series_UserGuide
- 3. Product_safety_guide
SC20_Series_UserGuide


![Push the safety latch on the bottom of the battery. Lift the battery upwardsand remove.Using Sepura approved batteriesYour radio checks the authenticity of the battery when it is powered on andhas a number of battery management features that only work when a genuineSepura battery is fitted:the remaining battery charge appears as a percentage when your radio ispowered on [customisable];battery meter icons, showing the remaining battery charge;a low battery warning appears when charge is low; andyou can check battery information, such as its authenticity, remainingcharge and serial number [customisable] (see Getting information about yourbattery on the next page).If your radio detects a non-approved battery, the message "Unidentified battery-powering down" appears. The message is cleared by pressing any key.If your radio detects a non-approved battery, the message "Unidentifiedbattery" appears.If your radio detects a non-approved battery, the message "Unidentified battery-powering down" and your radio powers off.Caution: Non-approved batteries may not have inbuilt safety protectionfeatures, and could potentially damage your radio (invalidating yourwarranty) and affect your radio's safety and IP compliance ratings.User Guide 9](https://usermanual.wiki/Sepura/SC2024.SC20-Series-UserGuide/User-Guide-3186868-Page-17.png)
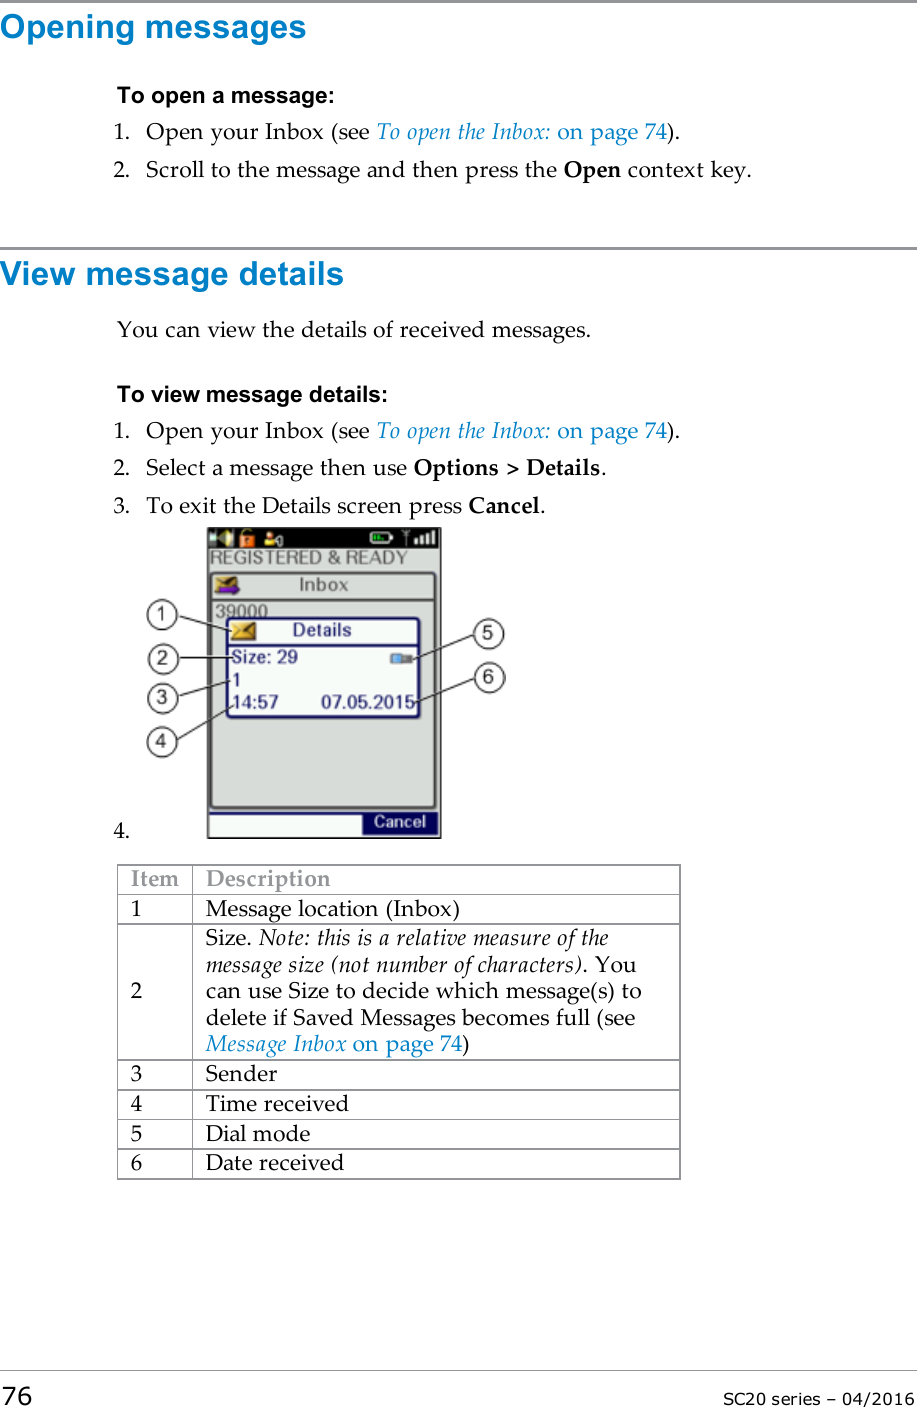
![Getting information about your batteryYou can see information about the battery attached to your radio, such as theremaining battery charge, whether the battery is authenticated (a genuineSepura battery) and the battery serial number [customisable].Select Menu >Options >Battery Information.The display shows:Charge—the current remaining charge given as a percentageAuthenticated/Unauthenticated—a Sepura/non-Sepura battery is fitted<serial number>—the serial number of the batteryNote: If a non-Sepura battery is fitted, the Charge is reported as 0%, thebattery is marked as Unauthenticated and the serial number is not shown.10 SC20 series – 04/2016](https://usermanual.wiki/Sepura/SC2024.SC20-Series-UserGuide/User-Guide-3186868-Page-18.png)
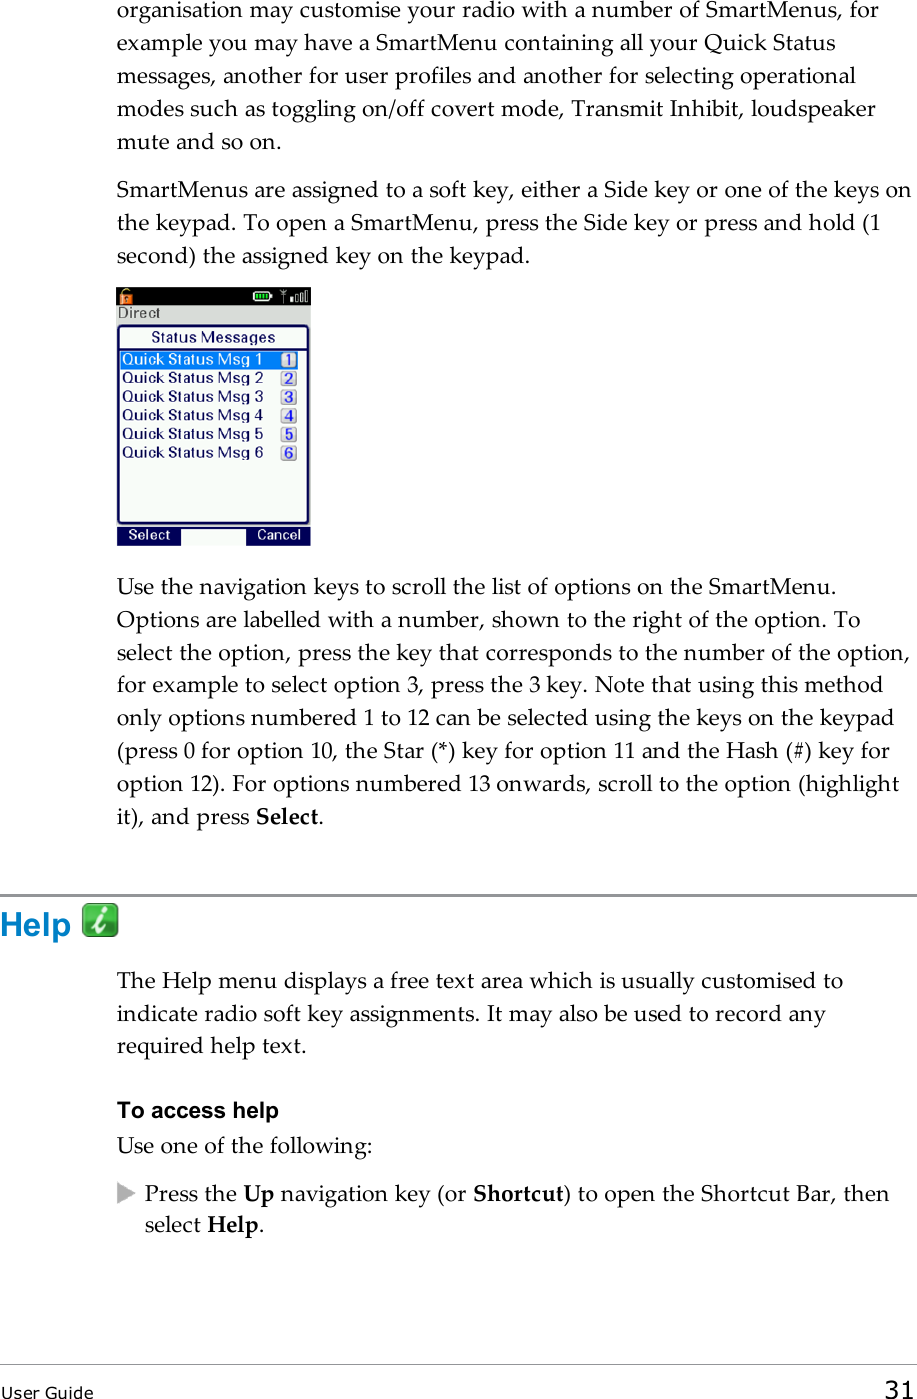
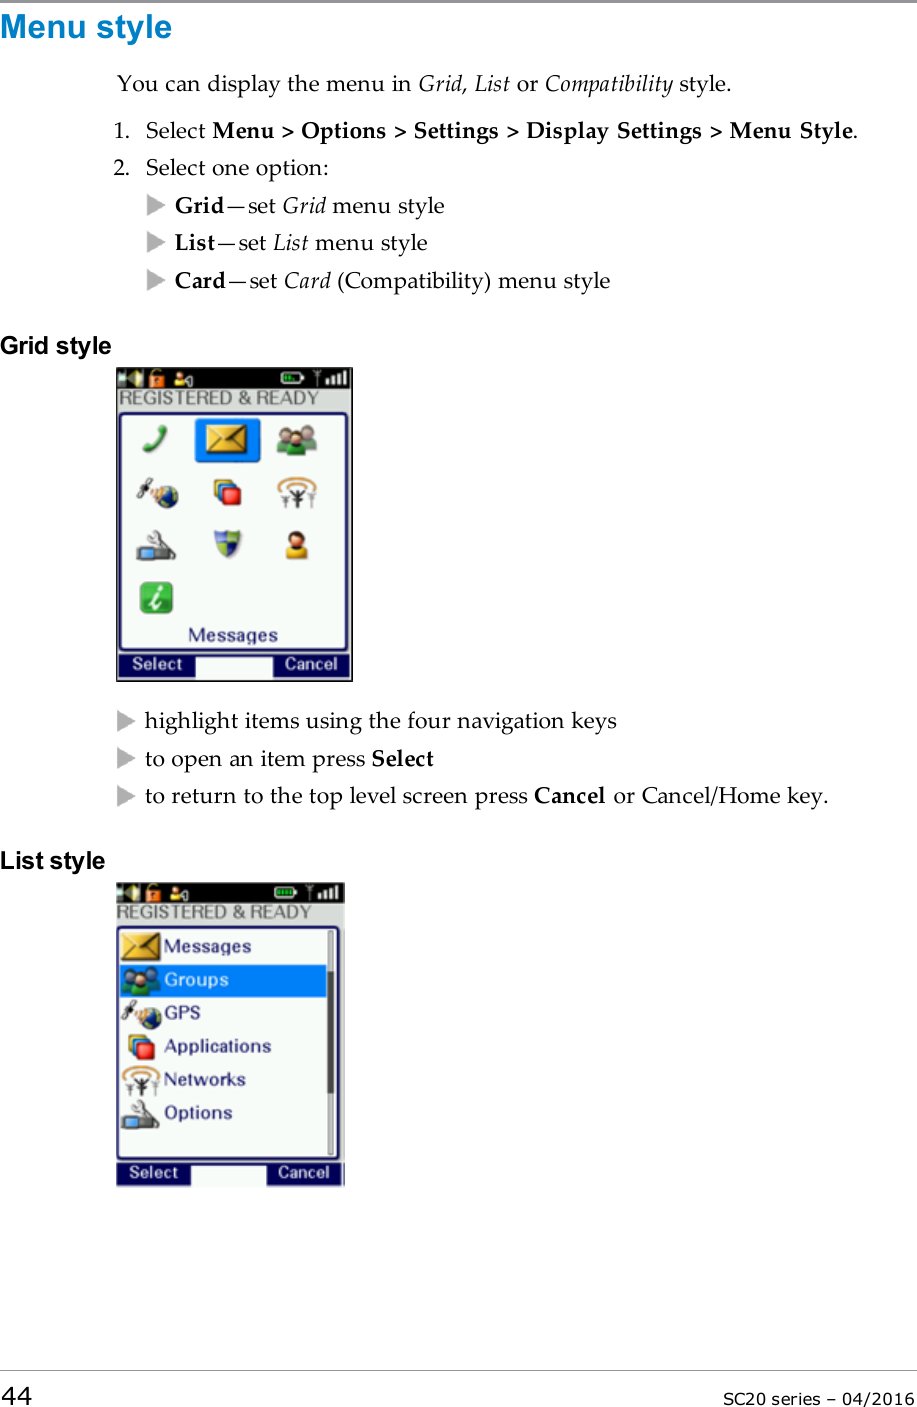
![Controls & indicatorsYour radio has a number of controls and indicators.Navi-knobThe Navi-knob is a continuous rotating knob that in its normal mode is usedto adjust the volume. The Navi-knob can also be used to perform variousother functions.To do this… Do this…Adjust loud speaker volume (orenable/disable Whisper Mode[customisable])Rotate Navi-knobMove cursor and select characters (intext entry mode)Rotate Navi-knob in Text EntryMode or Editing ModeScroll through available talkgroups From the Home screen, pressGroups + rotate the Navi-knobScroll through available StatusMessagesFrom the Home screen, pressGroups 2 times + rotate theNavi-knobScroll through available User ProfilesFrom the Home screen, pressGroups 3 times + rotate theNavi-knobNavigation KeysYour radio has four navigation keys (left/right/up/down).Key ActionUp/DownUse to move the scroll bar up and downto see more informationScroll a list of optionsUser Guide 11](https://usermanual.wiki/Sepura/SC2024.SC20-Series-UserGuide/User-Guide-3186868-Page-19.png)


![Press a customised soft keyOpen the Shortcut Bar (in the Home screen press the Shortcut context keyor the Up navigation key) then navigate to the Inbox shortcut and pressthe Select context key.Message iconsVarious icons are used to identify the type of message received:Icon DescriptionStatus messageSDS message (unread)SDS messageBroken message: there was a problem receiving the message. Itscontents are lost or damaged.Saved Messages is nearly full to capacity [customisable]SDS message with Paging Alert (unread)SDS message with Paging AlertPicture message (unread)Picture messageInbox operationsOpen the messageView the message details (See View message details on the next page.)Reply to the message (not picture messages)Forward the message to a contact (not picture messages)Save the message(See Saved messages on page 77.)Delete the messageUser Guide 75](https://usermanual.wiki/Sepura/SC2024.SC20-Series-UserGuide/User-Guide-3186868-Page-83.png)
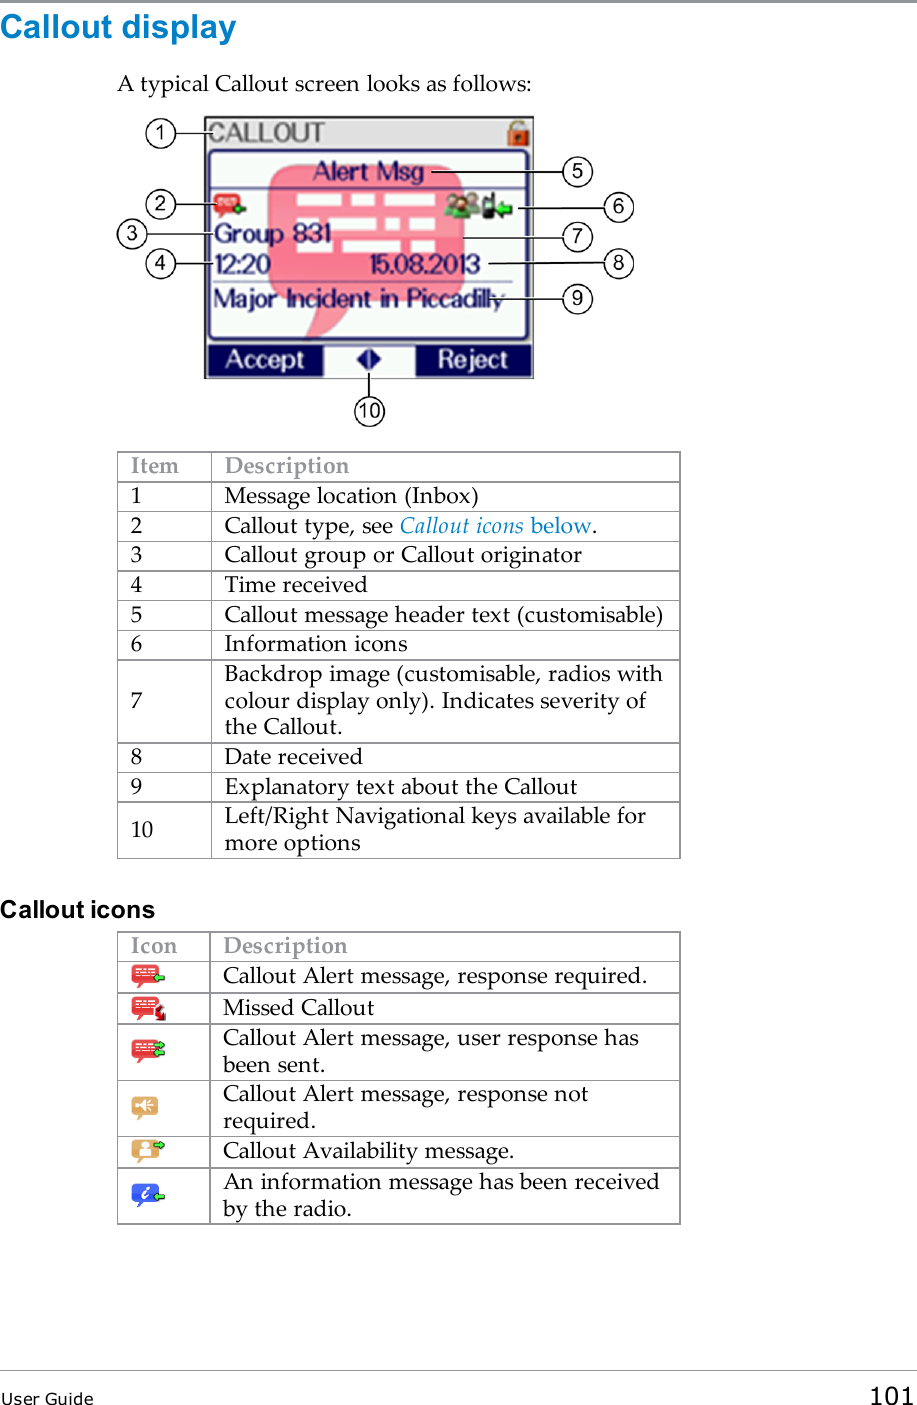
![Callout alertsYour radio can receive Callout Alerts sent over the network to inform you ofincidents. When a Callout Alert arrives the radio sounds an audible alarm anda Callout message is displayed on the screen. To silence this alarm press anykey. A voice call may also be initiated. Your radio may also be customised toalert you of Callouts in other ways (such as vibrator alert and/or a flashingLED alerts).When it receives a Callout Alert your radio goes into Protected Callout Modeon page 99 (in which many features are disabled) for a set time period or untilyou respond to or acknowledge the Callout message. This mode is designedto stop you getting distracted and to focus your attention on an incident.To view Callout messagesPress Menu then select Phone > Callout.Alternatively, press the Up navigation key (or Shortcut) to open the ShortcutBar, then select Callout.If Callout messages have been received they are listed with Callout icons onpage 101.To see the options for a CalloutHighlight a Callout and press Options ORpress the Select/Send key to activate the first option in the Options menu.(The Select/Send Key Shortcut icon between the Context keys indicatesthat this shortcut is available.)Open – view the Callout message plus more information associated with themessage dialogueAccept – indicate you are accepting the CalloutReject – indicate you are rejecting the CalloutUser Response – compose a free-form text message to send to the Calloutoriginator[customisable]Delete – delete one or more CalloutsUser Guide 95](https://usermanual.wiki/Sepura/SC2024.SC20-Series-UserGuide/User-Guide-3186868-Page-103.png)
![Details – view the details of the Callout messageStatus – send or update your current Availability status. The Callout screenindicates that an Availability Status message has been sent. [customisable]Responding to CalloutsWhen you respond to a Callout your radio may automatically send a message(if programmed in the radio) or you can select a message from a list or selectUser Response (if customised) to compose and send a free-form text message.Callouts requiring a responseSome Callouts require a response. The following responses are possible:AcceptPress Accept to indicate that you intend to act on the Callout (or selectAccept from the pop-up menu displayed from the Left or Right navigationkey. If only one acceptance message is programmed in your radio aninformative message is displayed to show that it has been sent to theoriginator of the Callout. If multiple messages have been programmed, selectone of them and press Select to send it. Alternatively (if customised) you cancompose and send a free-form text message.Depending how the Callout has been configured it may either exit once theacceptance message has been sent or it enter an Information Phase duringwhich information may be sent to and received from the originator of theCallout. This could include a pre-set message, a free-form text message or aCallout group call. Information Phase on page 103.RejectPress Reject to indicate you do not intend to act on the Callout (or selectReject from the pop-up menu displayed from the Left or Right navigationkey. Your radio exits from the Callout and Protected Callout Mode and thetop level screen is displayed.StandbySelect Standby to acknowledge receipt of the Callout and to indicate that youare “standing by” for further information before accepting or rejecting.96 SC20 series – 04/2016](https://usermanual.wiki/Sepura/SC2024.SC20-Series-UserGuide/User-Guide-3186868-Page-104.png)
![During standby the Callout goes into its Information Phase during whichinformation may be sent to and received from the originator of the Callout.During standby you can also accept or reject the Callout and—if use of thePTT is permitted—make group calls to the Callout group (See Group calls toCallout group on page 102.)During Standby you can view the following Callout message details :the ‘Response required’ iconthe Callout grouptime and date when the message was receivedthe severity of the Callout Alertthe Callout IDicons to show:whether the Callout is to a group or an individualwhether the Callout is incoming or outgoingwhether or not the Callout is End-to-End EncryptedUser ResponseAllows you to compose and send a free-form text message to the originator ofthe Callout.[customisable]Callouts not requiring a responseSome Callouts do not require a response. You can respond to or ignore thenas follows:ExitPress the Exit context key to exit the Callout and exit (see Protected CalloutMode on page 99), and return to the top level screen. No response message issent.RespondPress the Respond context key to display the Information screen offering thevarious pre-set messages to send from the radio to the originator of theCallout and vice versa. To send one of the pre-set messages select it and pressthe Select context key.User Guide 97](https://usermanual.wiki/Sepura/SC2024.SC20-Series-UserGuide/User-Guide-3186868-Page-105.png)
![User ResponseYou can compose and send a free-form text message to the originator of theCallout. When your message is ready to send press the Confirm context key.You can continue to respond and send messages as described here until theCallout ends and the top level screen is displayed.[customisable]DetailsYou can view the following Callout message details:the ‘Response required’ iconthe Callout grouptime and date when the message was receivedthe severity of the Callout Alertthe Callout IDicons to show:whether the Callout is to a group or an individualwhether the Callout is incoming or outgoingwhether or not the Callout is End-to-End EncryptedCallout Test alertIf you receive a Callout Test Message either respond or cancel the alert:to cancel the Callout Test alert press the Cancel context key. The Calloutexits and the radio displays the top level screen. You can still view thedetails from Messages > Callouts.to indicate that you are ready to respond to Callout alerts press Respond(or the Left or Right navigation key). The following response options aredisplayed:RespondPress the Respond context key to display the Response screen. Press theRight or Left navigation key to view additional options. To send a Test OKmessage to the Callout originator select it and press the Select context key.The Callout Test exits and the top level screen is displayed.User Response(If customised) allows you to compose and send a free-form text message tothe originator of the Callout. When the message has been sent the Callout98 SC20 series – 04/2016](https://usermanual.wiki/Sepura/SC2024.SC20-Series-UserGuide/User-Guide-3186868-Page-106.png)

![WAPYour radio may be configured to browse WAP websites. The browser optionsare customised using Radio Manager, and some WAP pages may be storedlocally on the radio's microSD card.Starting the WAP browserTo open activate the WAP browser:EITHERpress the Up navigation key (or Shortcut) to open the Shortcut Bar, thenselect WAP Homepage.select the WAP option from the Applications menu ORpress a programmed soft key [customisable] ORopen a WAPURL contained within a received SDSmessage (or your radiomay be customised to open the WAP URLautomatically). Open a URL in amessage on page 77.Using WAPExiting the browserExit at any time by pressing Back or the Cancel/Home key (if customised).NavigationPress the Left navigation key to display the previous screen/page and theRight navigation key to display the next screen/page.Entering textIf customised, your radio supports the entering of text to specify a URL andentering of data into a form, and so on. See Text entry on page 71.Saving check box or radio button selectionsSometimes you may need to select an option which has a check box or radiobutton. When setting an option that uses a check box or radio button, toggleUser Guide 113](https://usermanual.wiki/Sepura/SC2024.SC20-Series-UserGuide/User-Guide-3186868-Page-121.png)