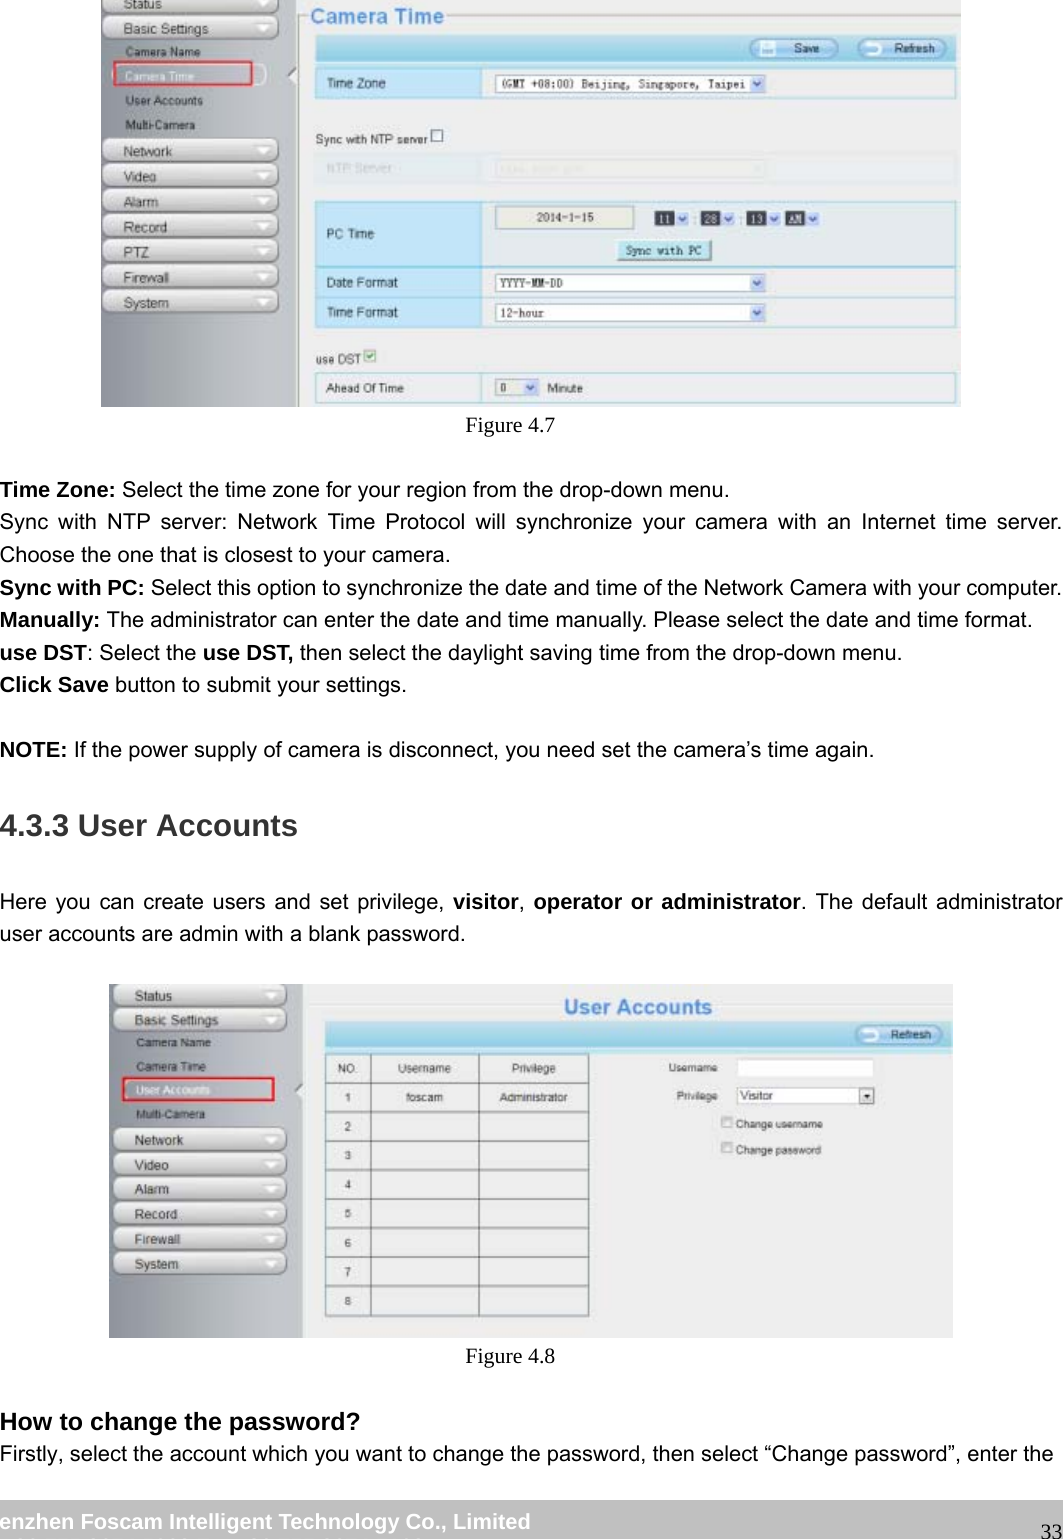
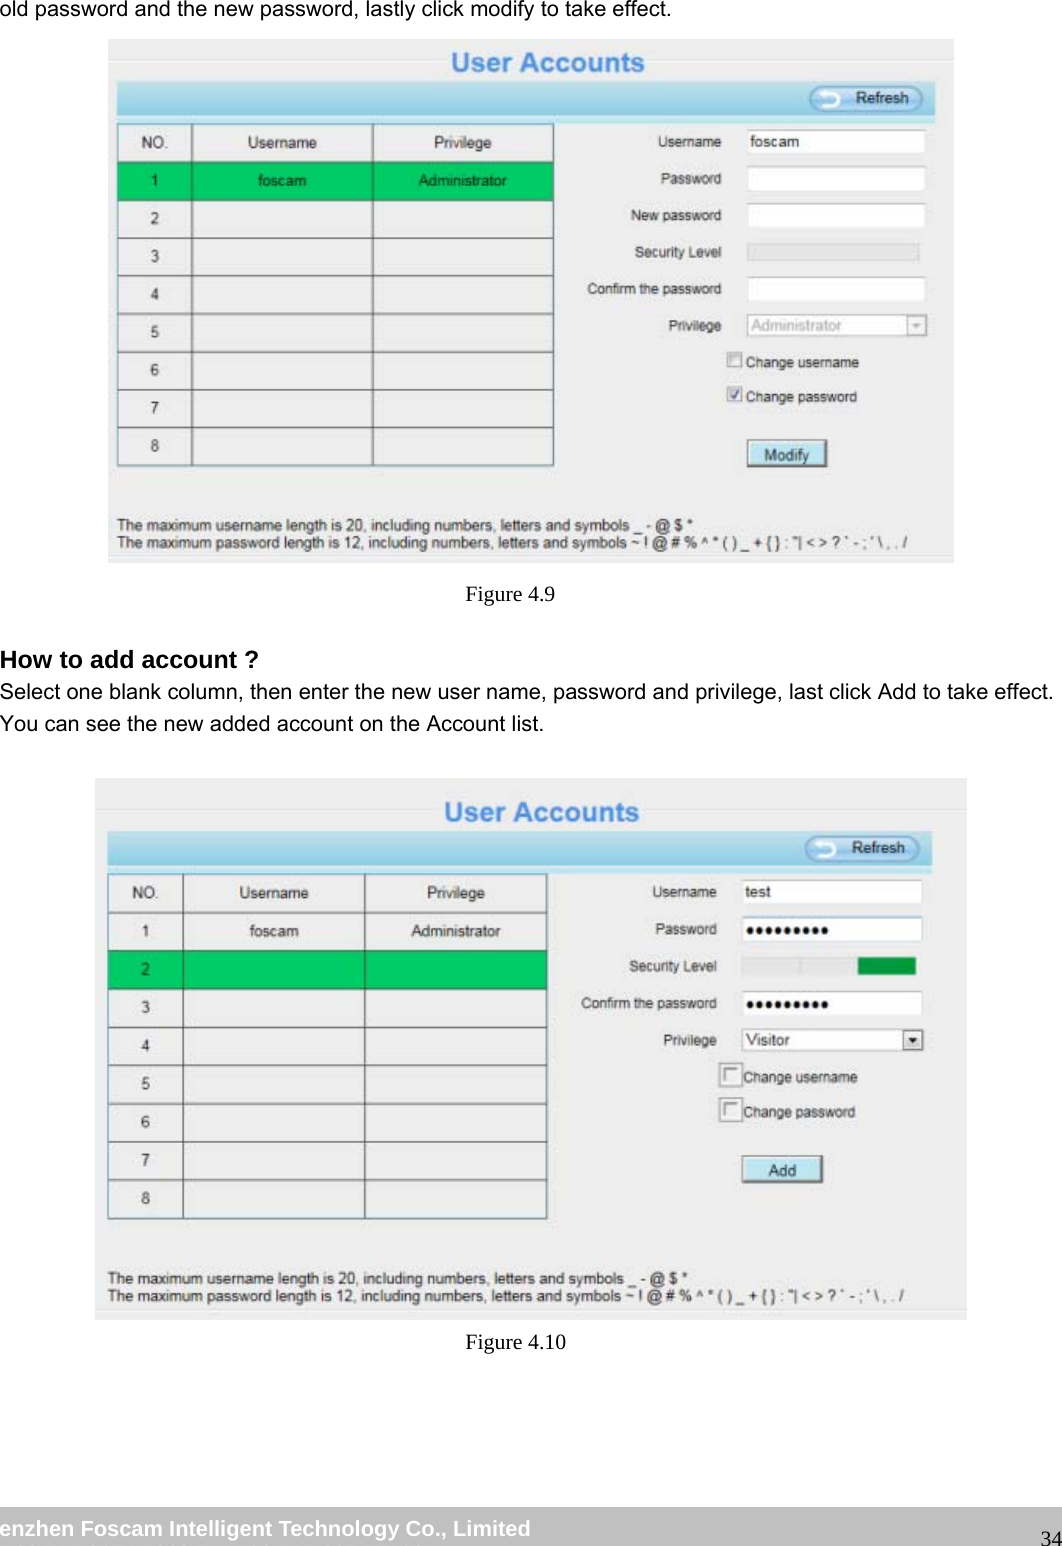
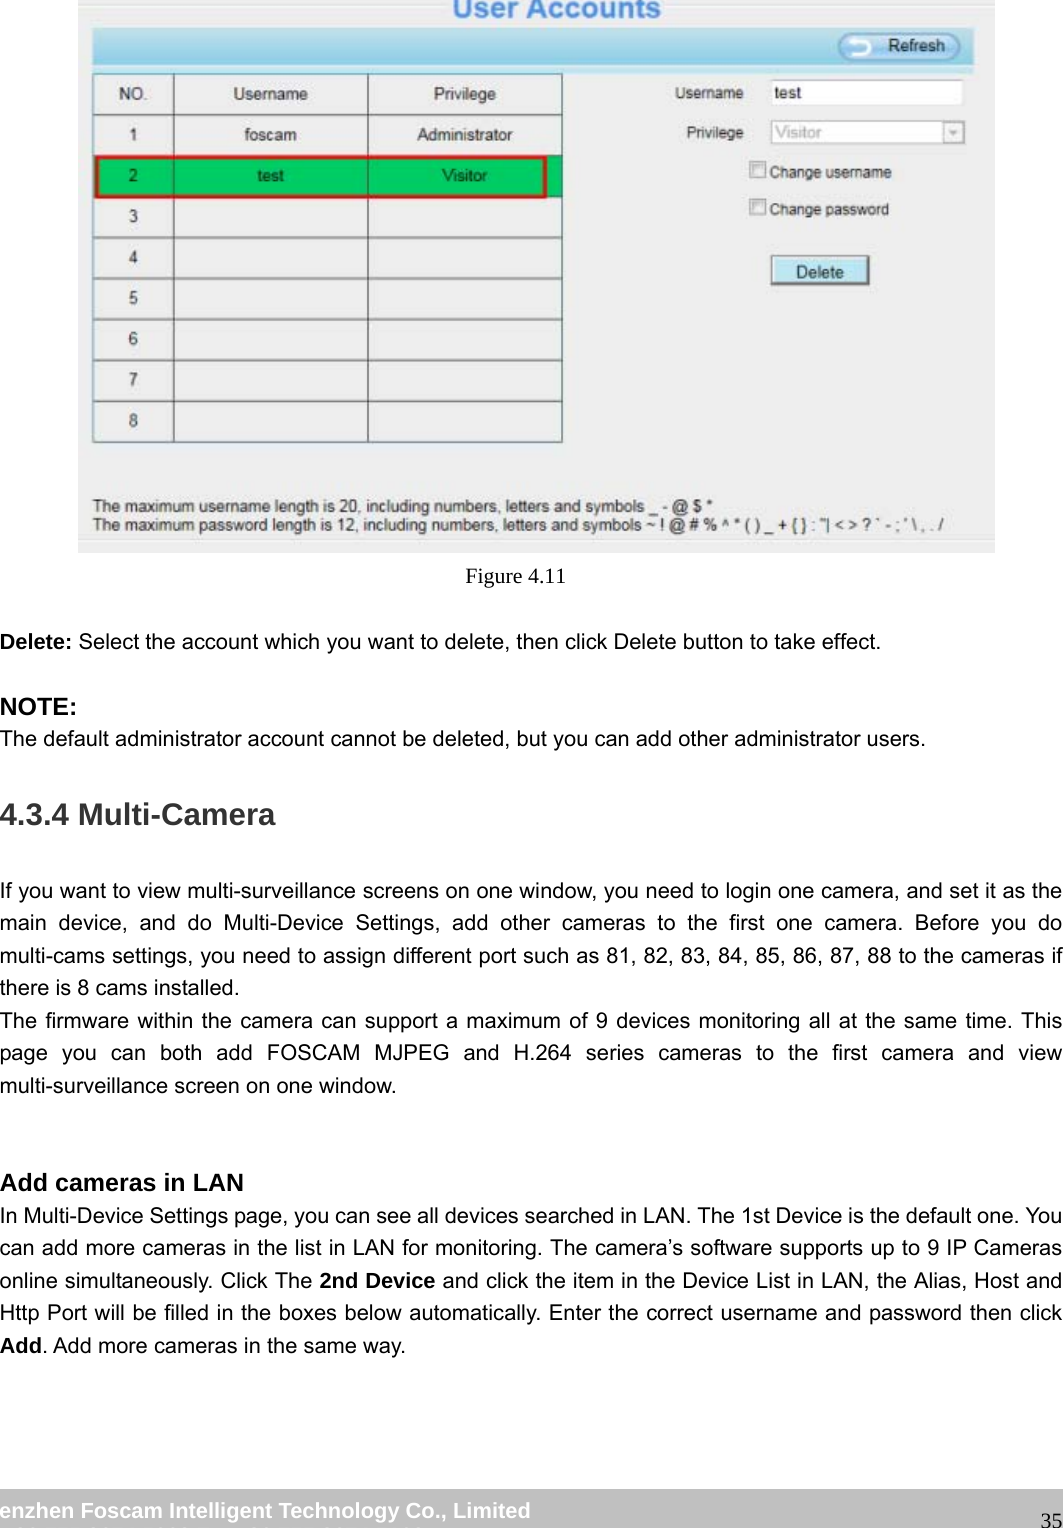
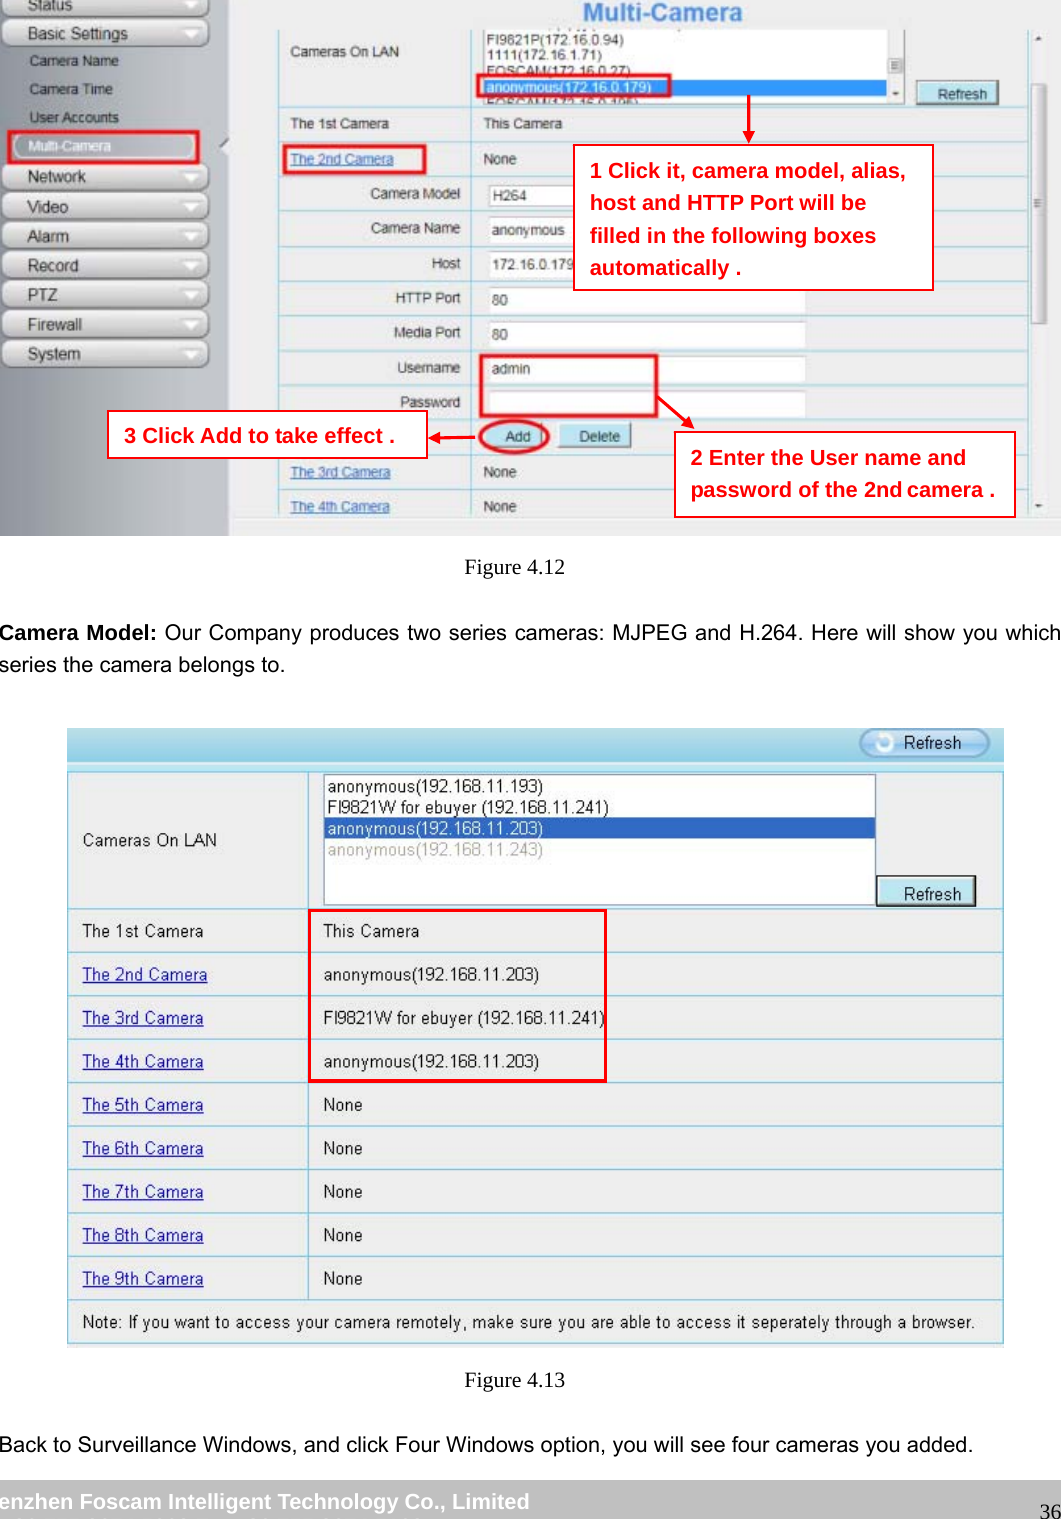
ShenZhen Foscam Intelligent Technology FI9900P Outdoor HD IP Camera User Manual Part Two
ShenZhen Foscam Intelligent Technology Co., Ltd. Outdoor HD IP Camera Users Manual Part Two
Contents
- 1. Users Manual Part One
- 2. Users Manual Part Two
- 3. Users Manual Part Three
- 4. User Manual Part Four
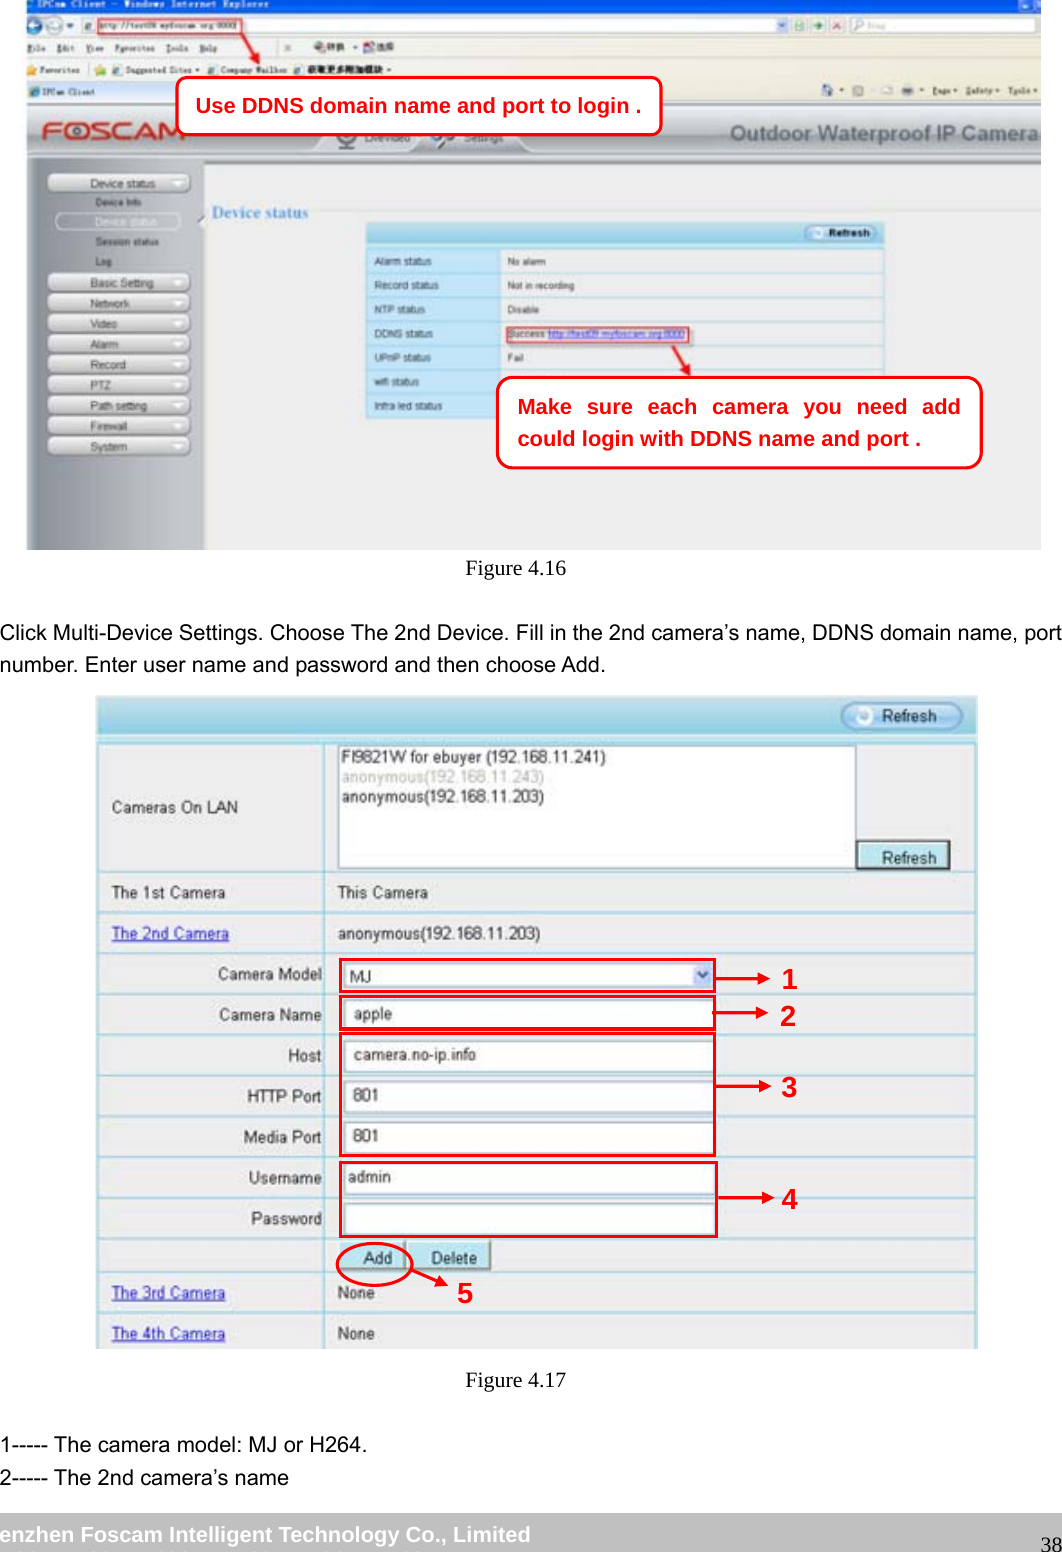
Users Manual Part Two