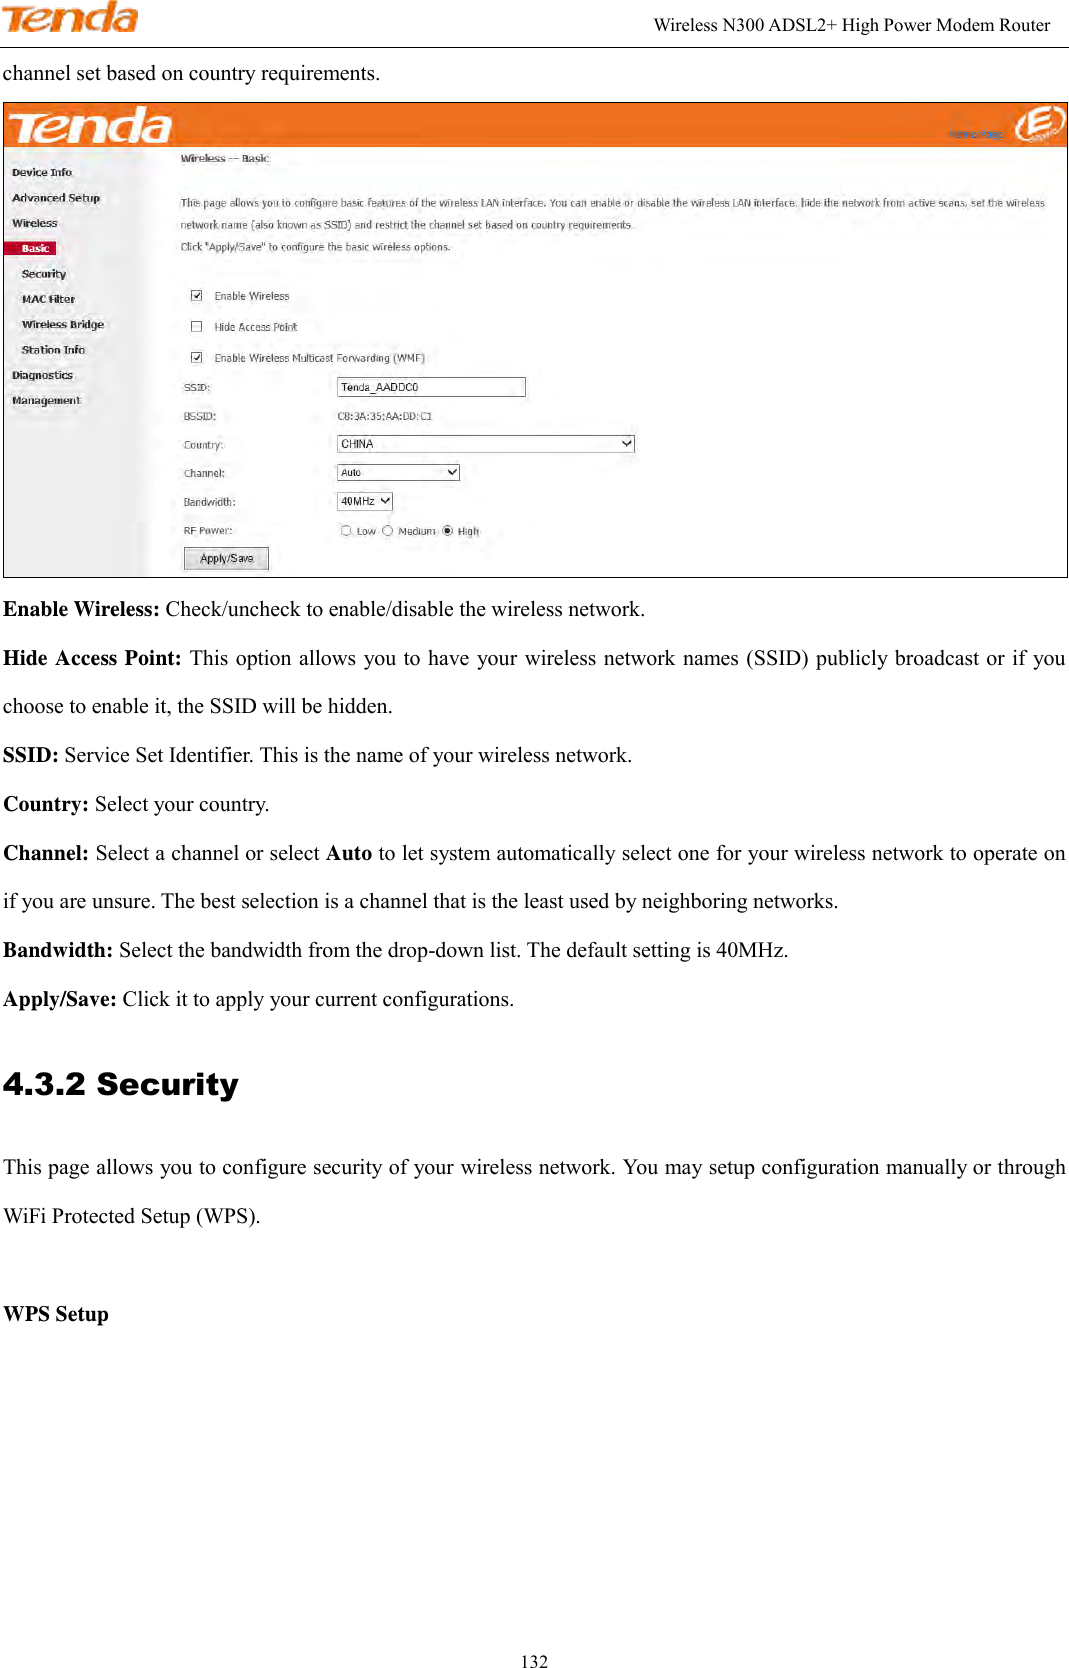
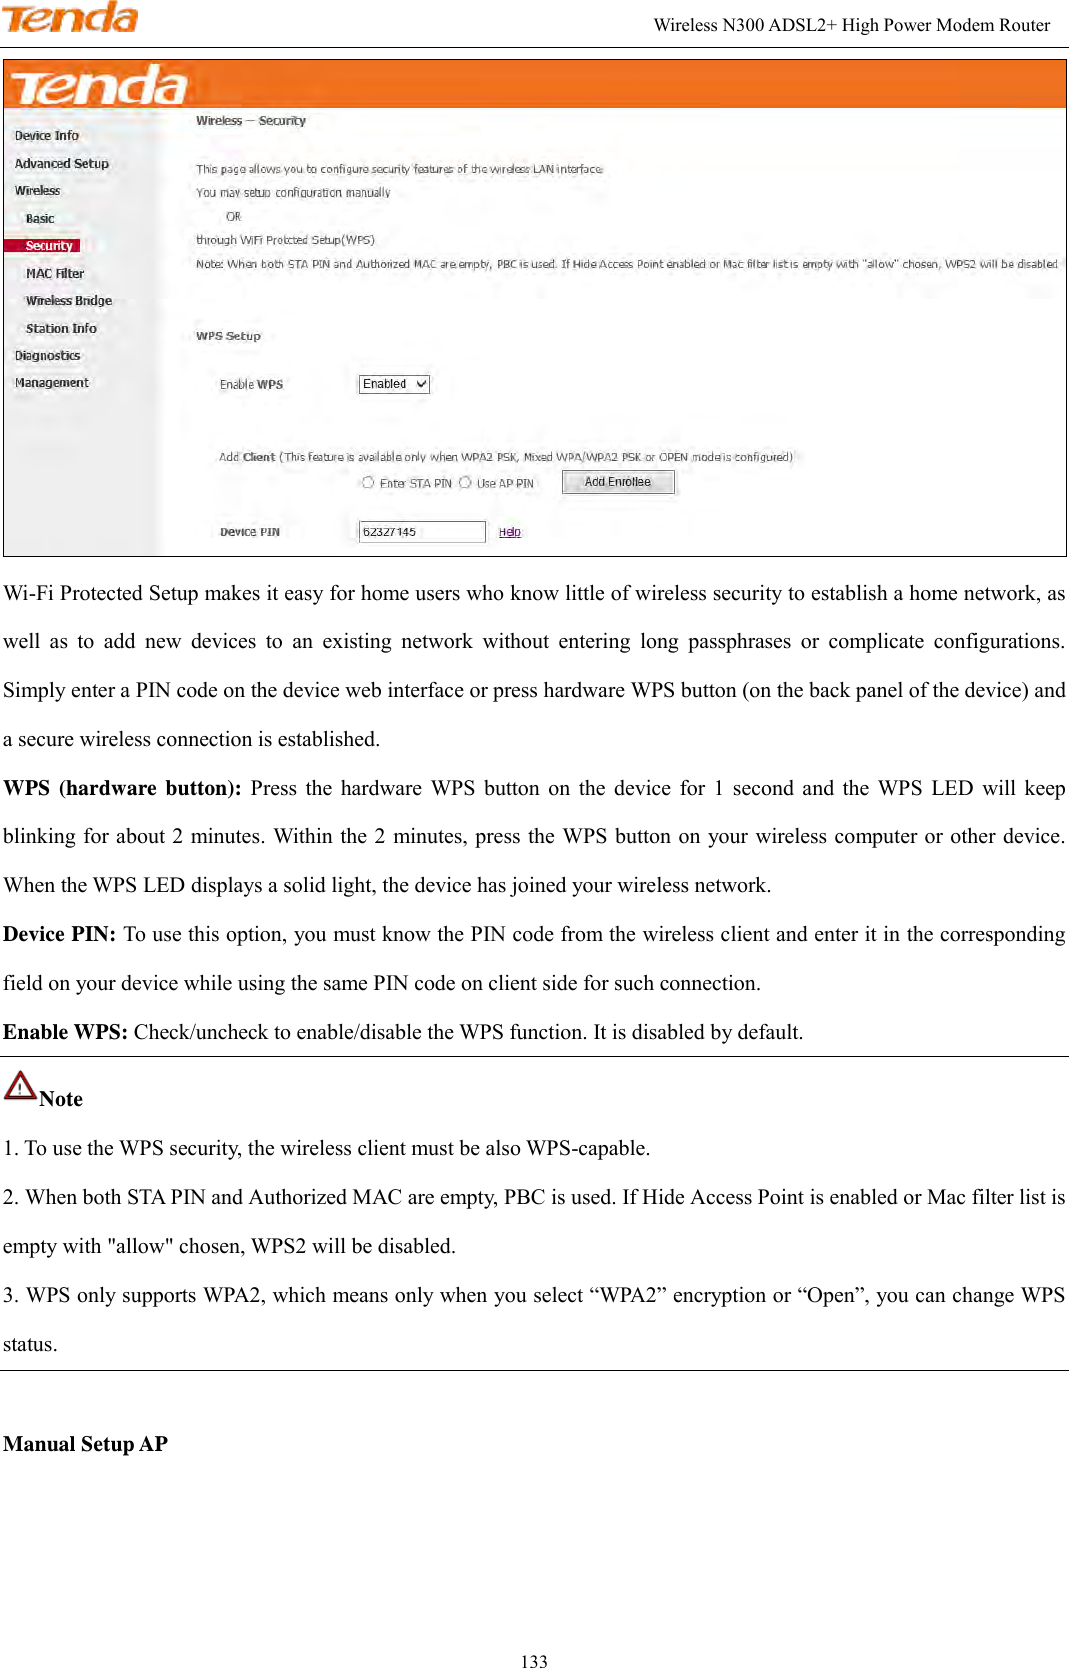
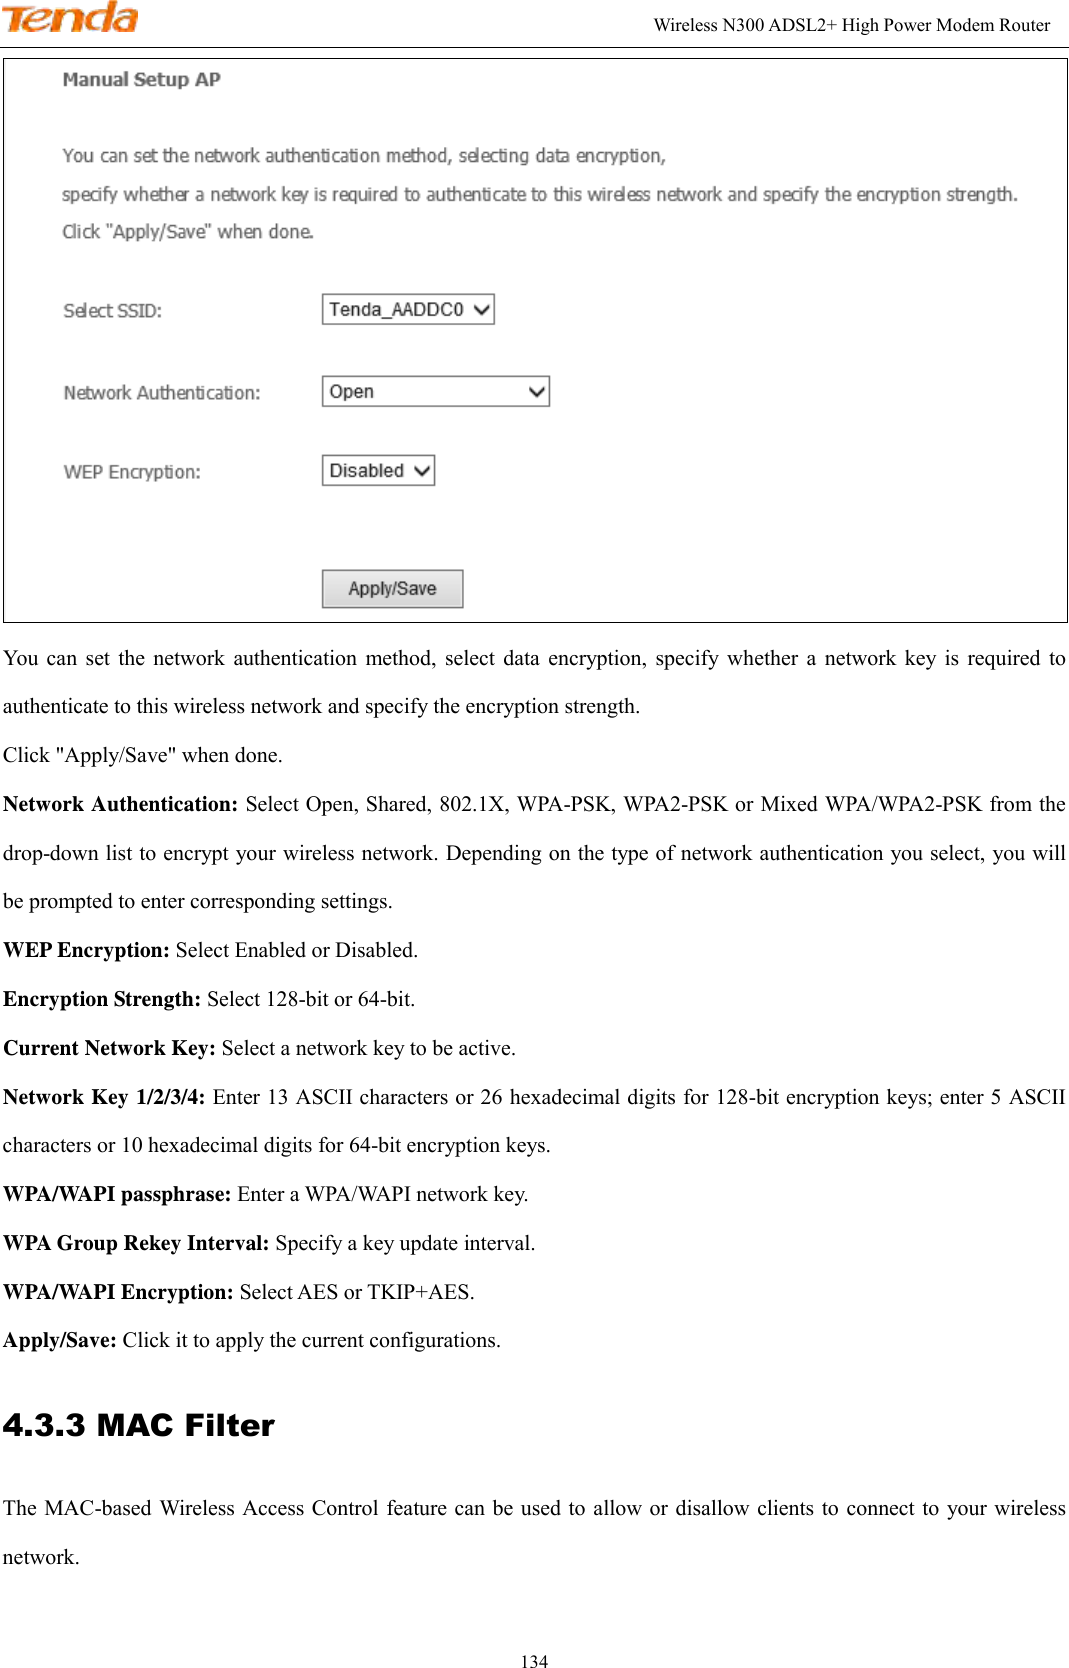
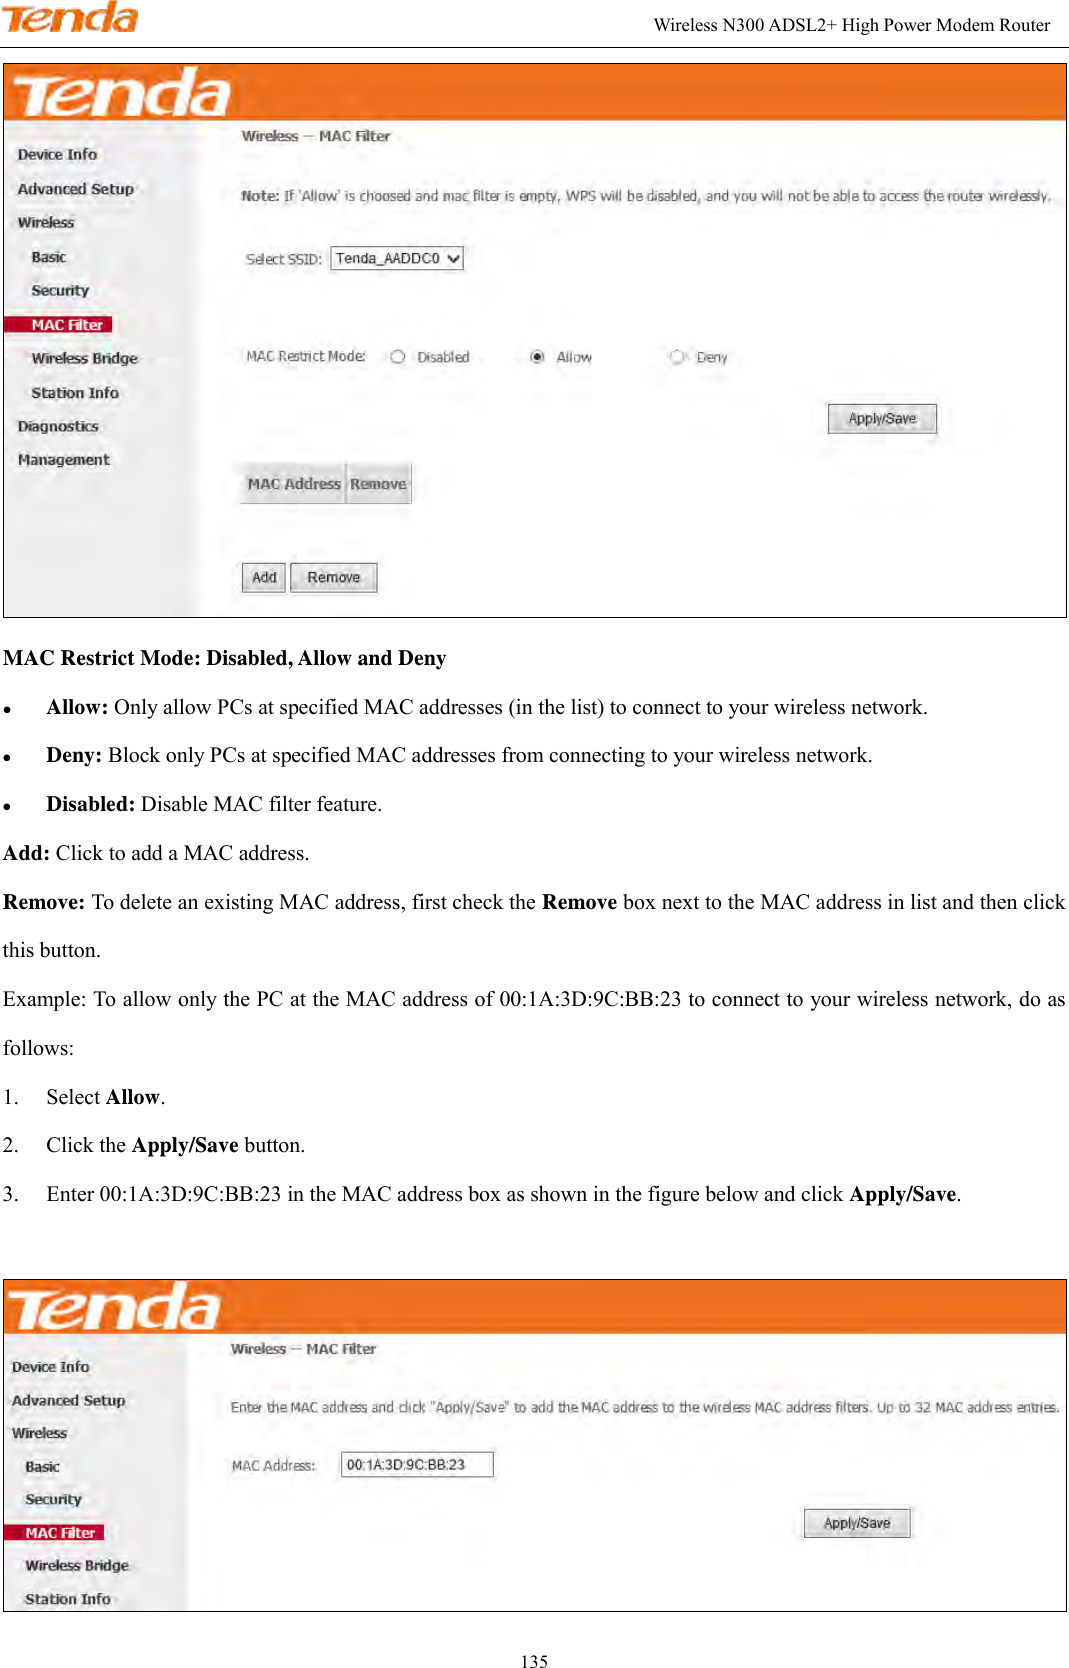
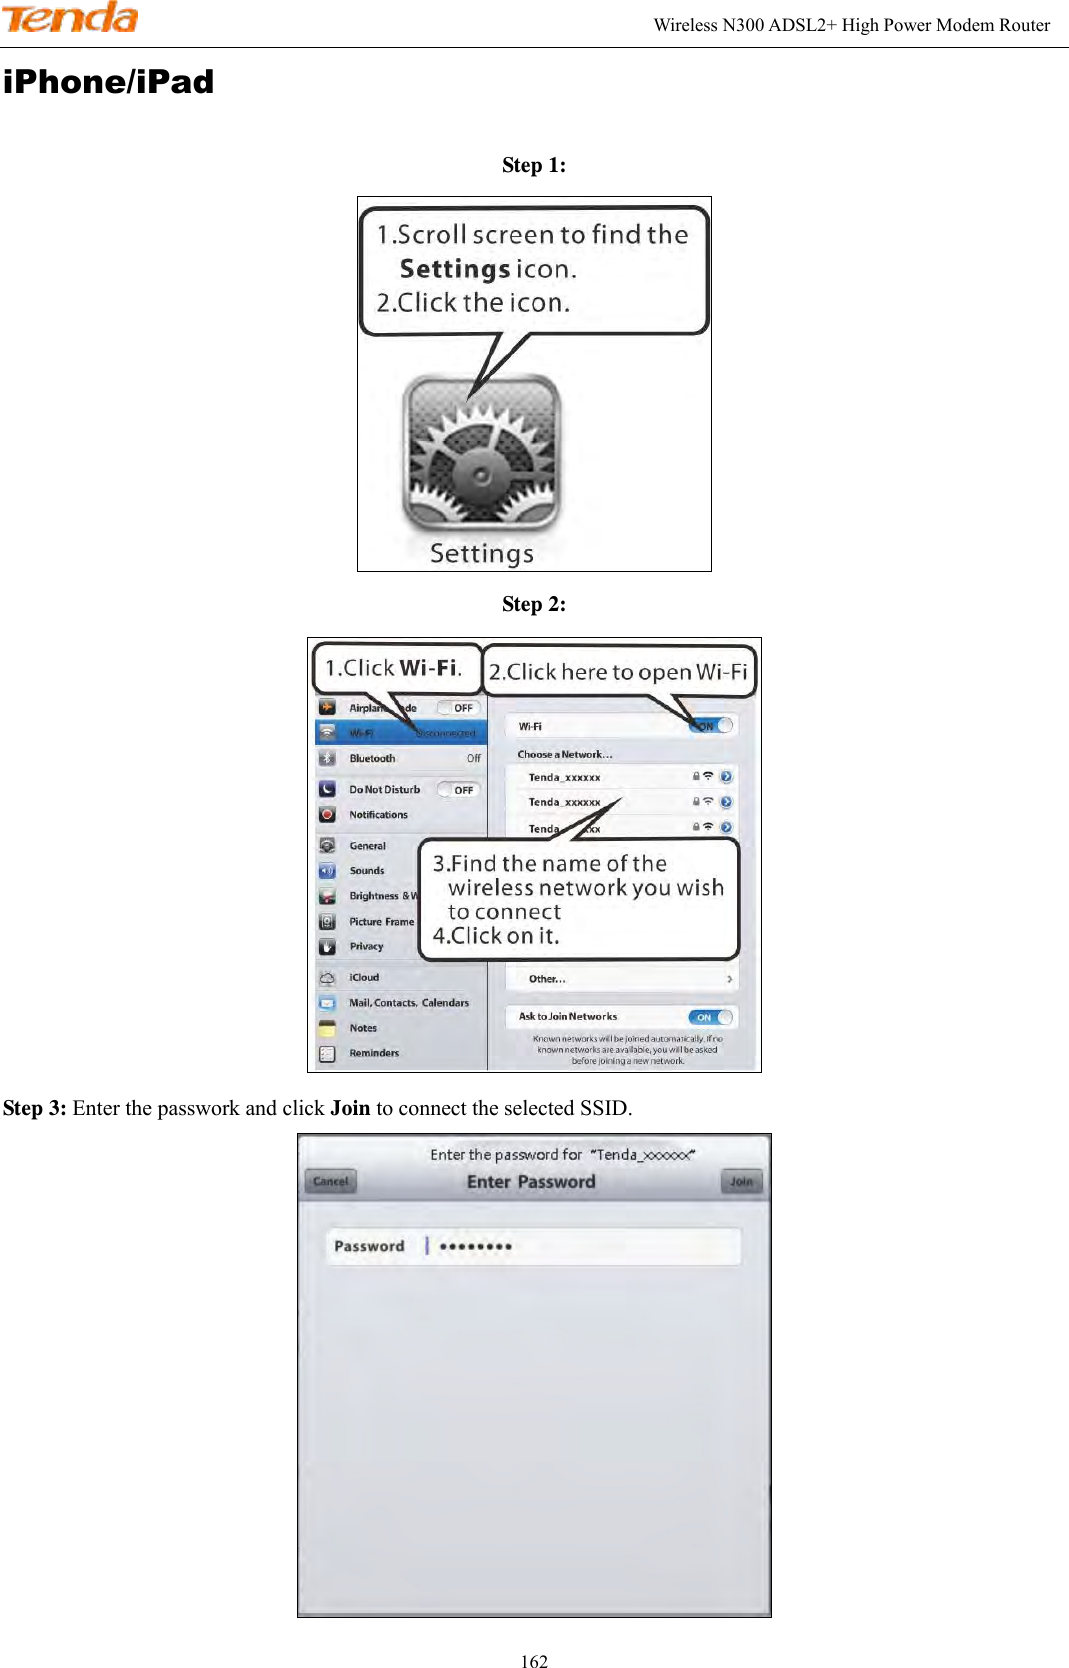
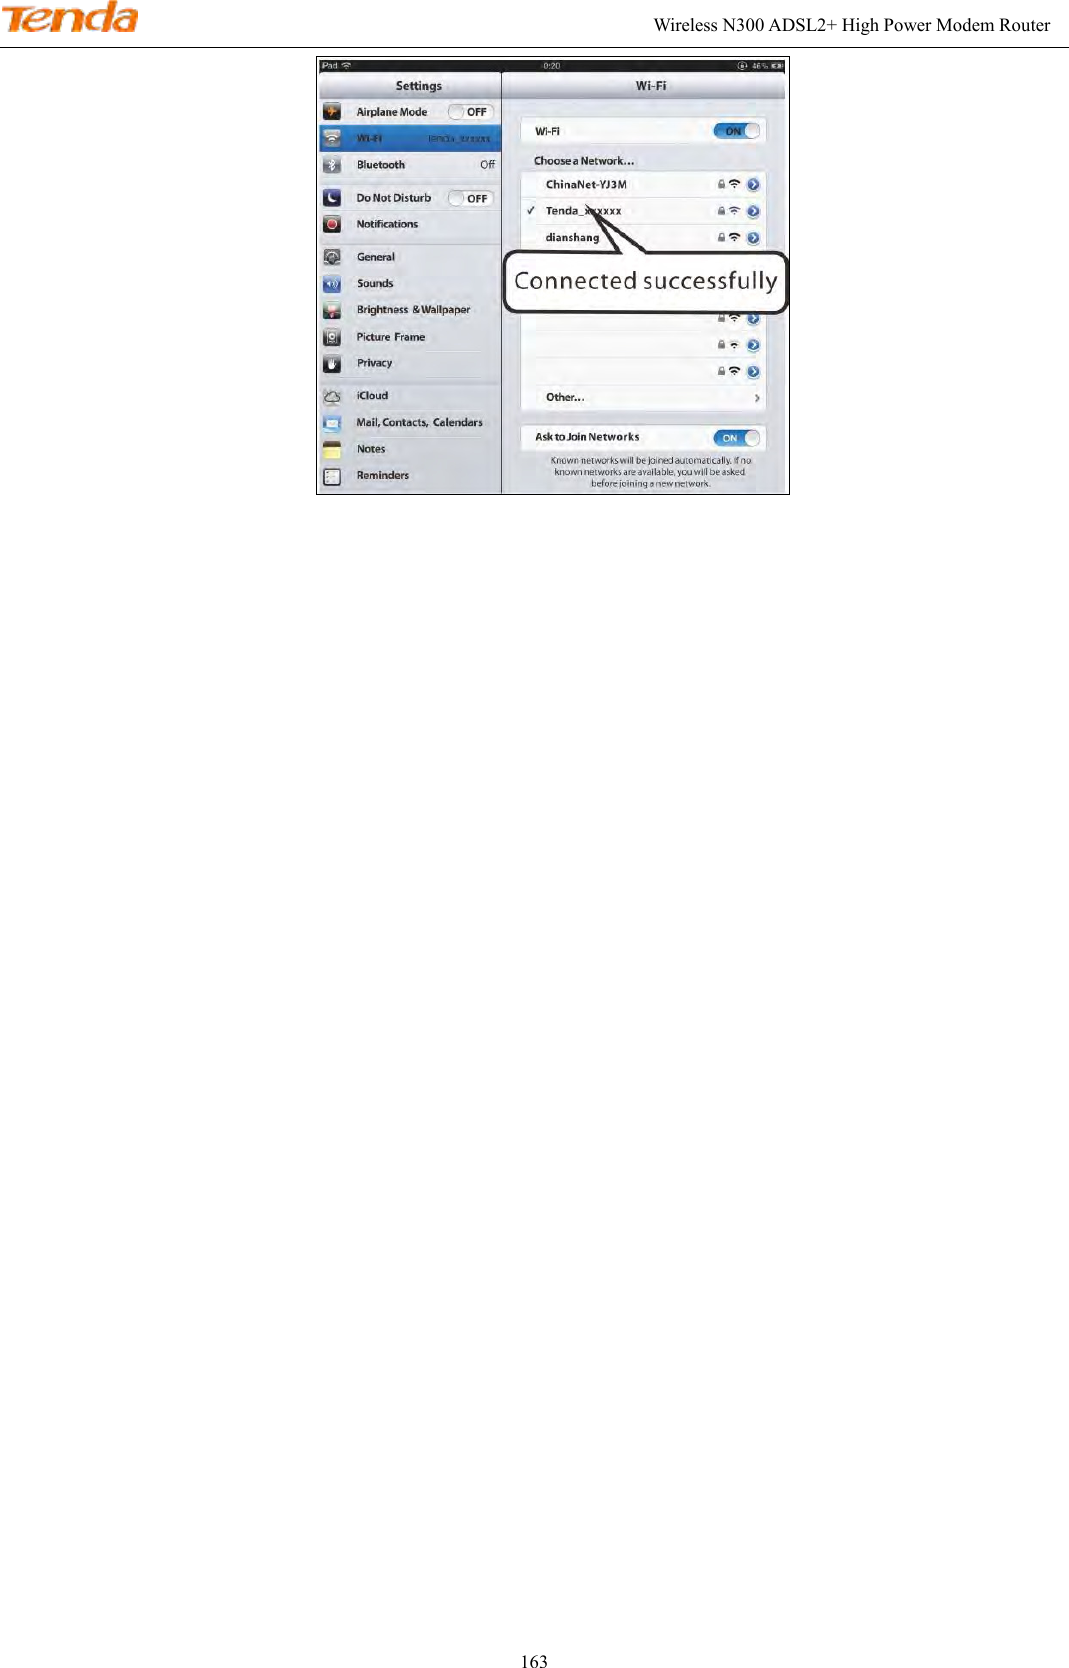
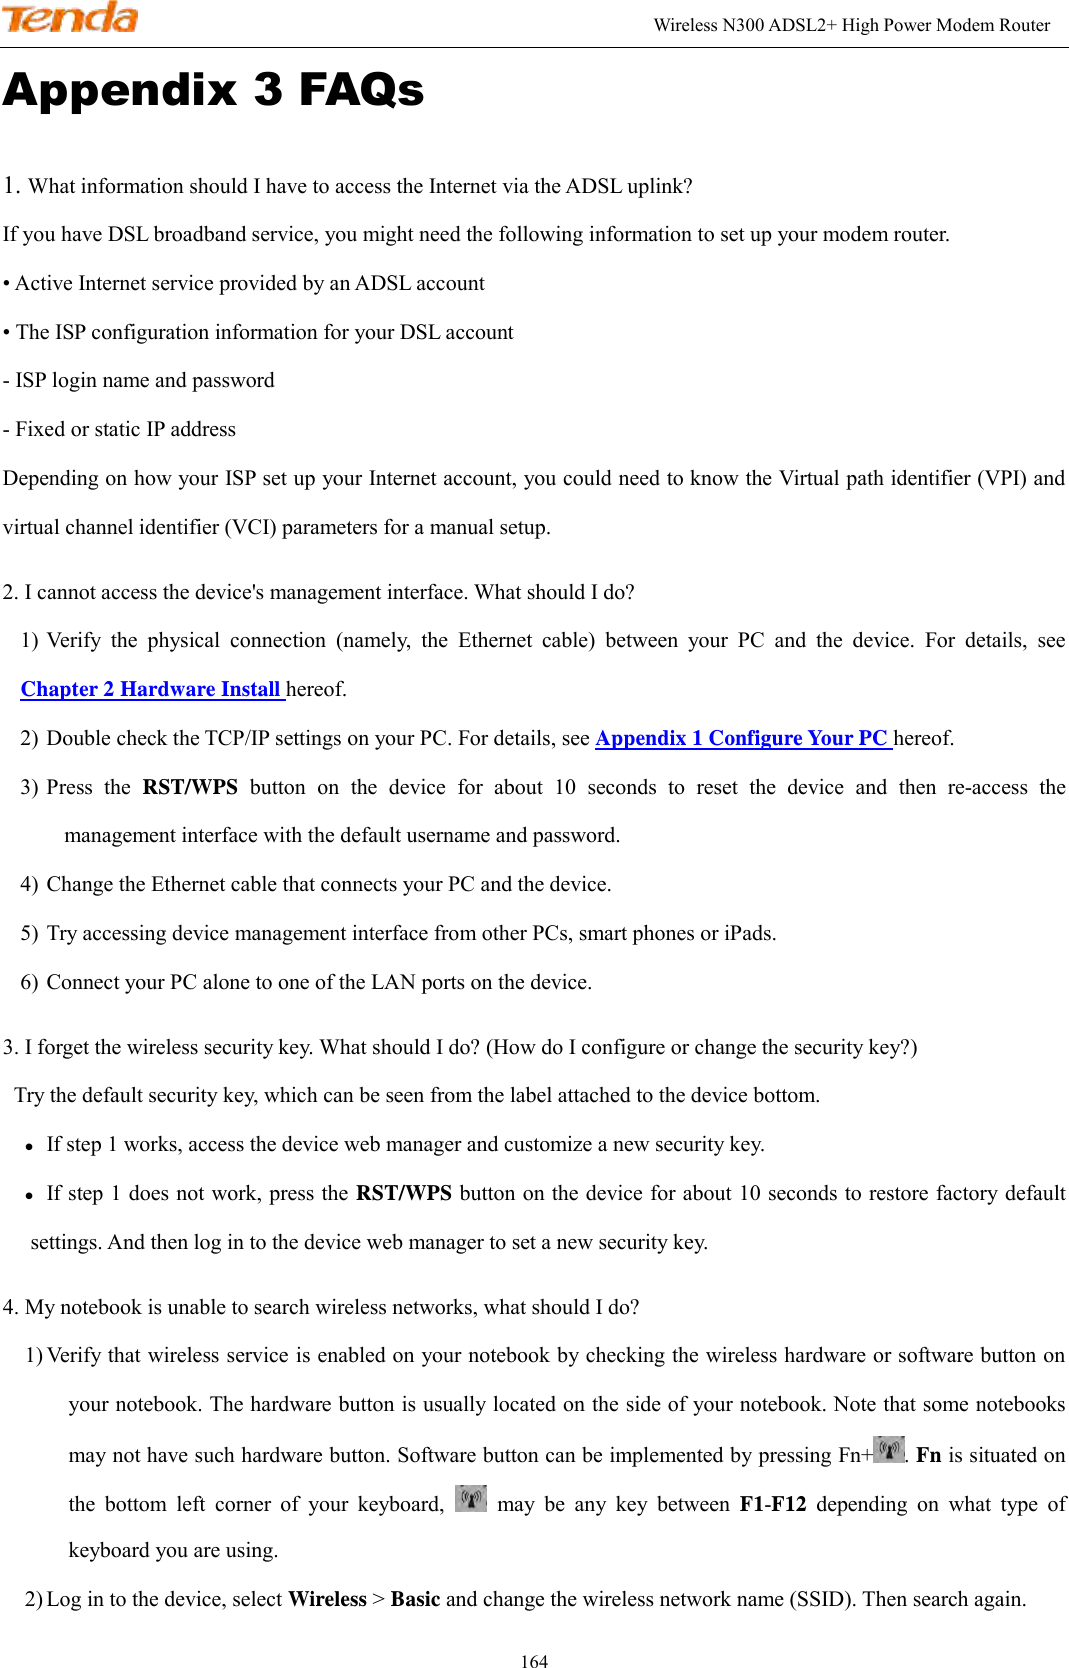
TENDA TECHNOLOGY DH301 Wireless N300 ADSL2+ High Power Modem Router User Manual
SHENZHEN TENDA TECHNOLOGY CO., LTD. Wireless N300 ADSL2+ High Power Modem Router
UserManual.wiki
>
TENDA TECHNOLOGY
>
DH301 User Manual
>
User Manual Part II
Contents
1.
Users Manual Part I
2.
User Manual Part II
User Manual Part II
Navigation menu
Upload a User Manual
Namespaces
Wiki Guide
HTML
PDF
Info
Views
User Manual
Discussion / Help
Navigation


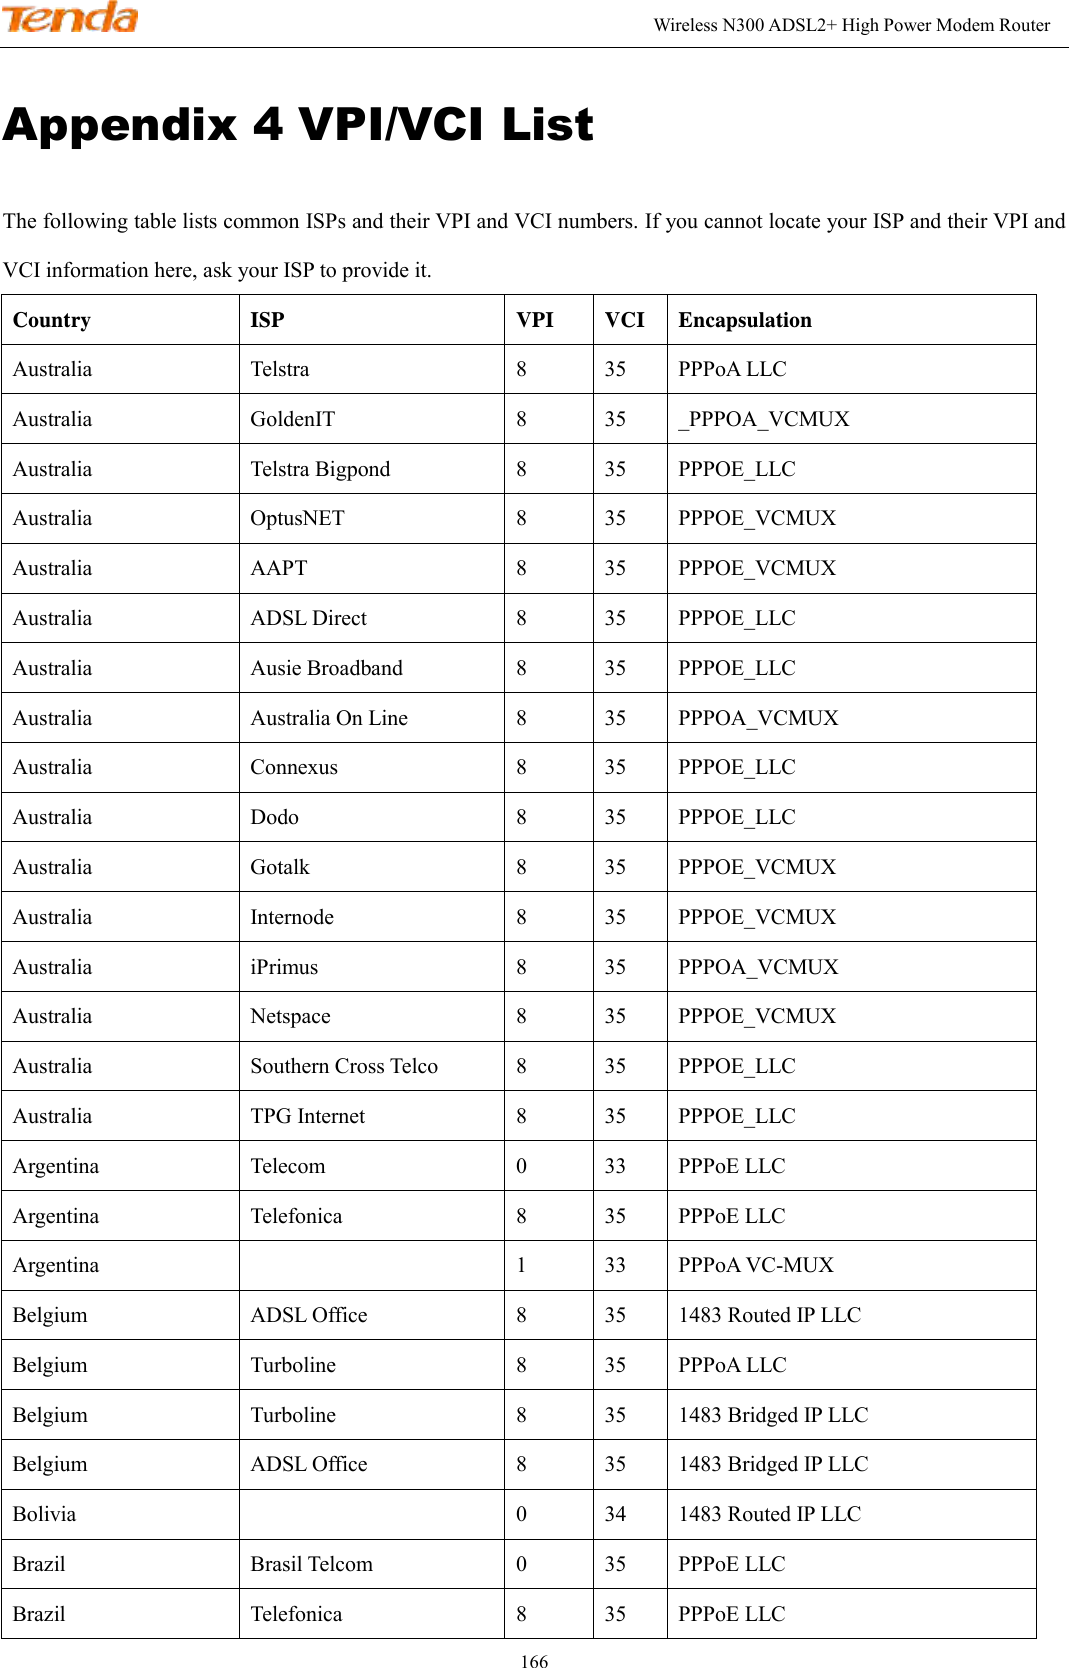
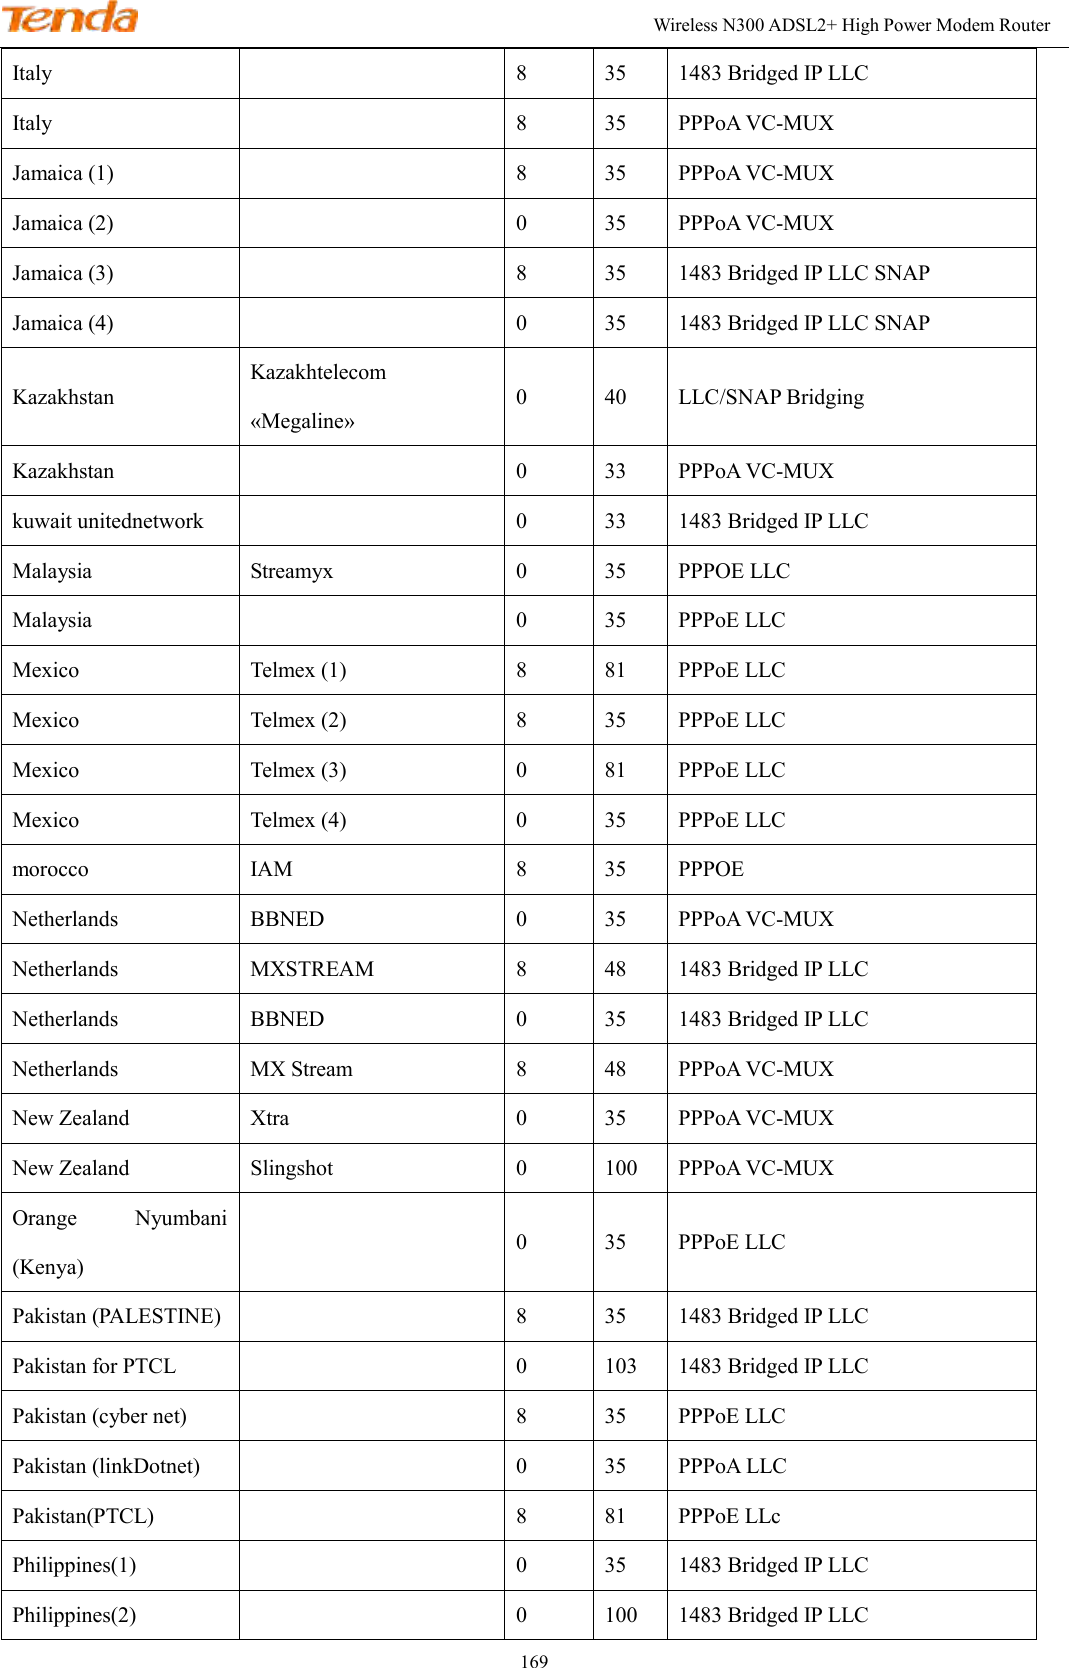
![Wireless N300 ADSL2+ High Power Modem Router 168 Hungary Sci-Network 0 35 PPPoE LLC Iceland Islandssimi 0 35 PPPoA VC-MUX Iceland Siminn 8 48 PPPoA VC-MUX India Airtel 1 32 1483 Bridged IP LLC India BSNL 0 35 1483 Bridged IP LLC India MTNL 0 35 1483 Bridged IP LLC India RELIANCE COMMUNICATION 0 35 PPPOE LLC India TATA INDICOM 0 32 PPPOE LLC India CONNECT 1 32 PPPOE LLC Indonesia Speedy Telkomnet 8 81 PPPoE LLC Iran [Shatel] Aria-Rasaneh-Tadbir 0 35 PPPOE LLC Iran Asia-Tech 0 35 PPPOE LLC Iran Pars-Online (Tehran) 0 35 PPPOE LLC Iran Pars-Online (Provinces) 0 59 PPPOE LLC Iran [Saba-Net] Neda-Gostar-Saba 0 35 PPPOE LLC Iran Pishgaman-Tose 0 35 PPPOE LLC Iran Fan-Ava 8 35 PPPOE LLC Iran Datak 0 35 PPPOE LLC Iran Laser (General) 0 35 PPPOE LLC Iran Laser (Privates) 0 32 PPPOE LLC Iran Asr-Enteghal-Dadeha 8 35 PPPOE LLC Iran Kara-Amin-Ertebat 0 33 PPPOE LLC Iran ITC 0 35 PPPOE LLC Iran (1) 0 35 PPPoE LLC Iran (2) 8 81 PPPoE LLC Iran Dadegostar Asre Novin 0 33 PPPOE LLC Israel 8 35 PPPoA VC-MUX Israel(1) 8 48 PPPoA VC-MUX](https://usermanual.wiki/TENDA-TECHNOLOGY/DH301.User-Manual-Part-II/User-Guide-2548712-Page-52.png)