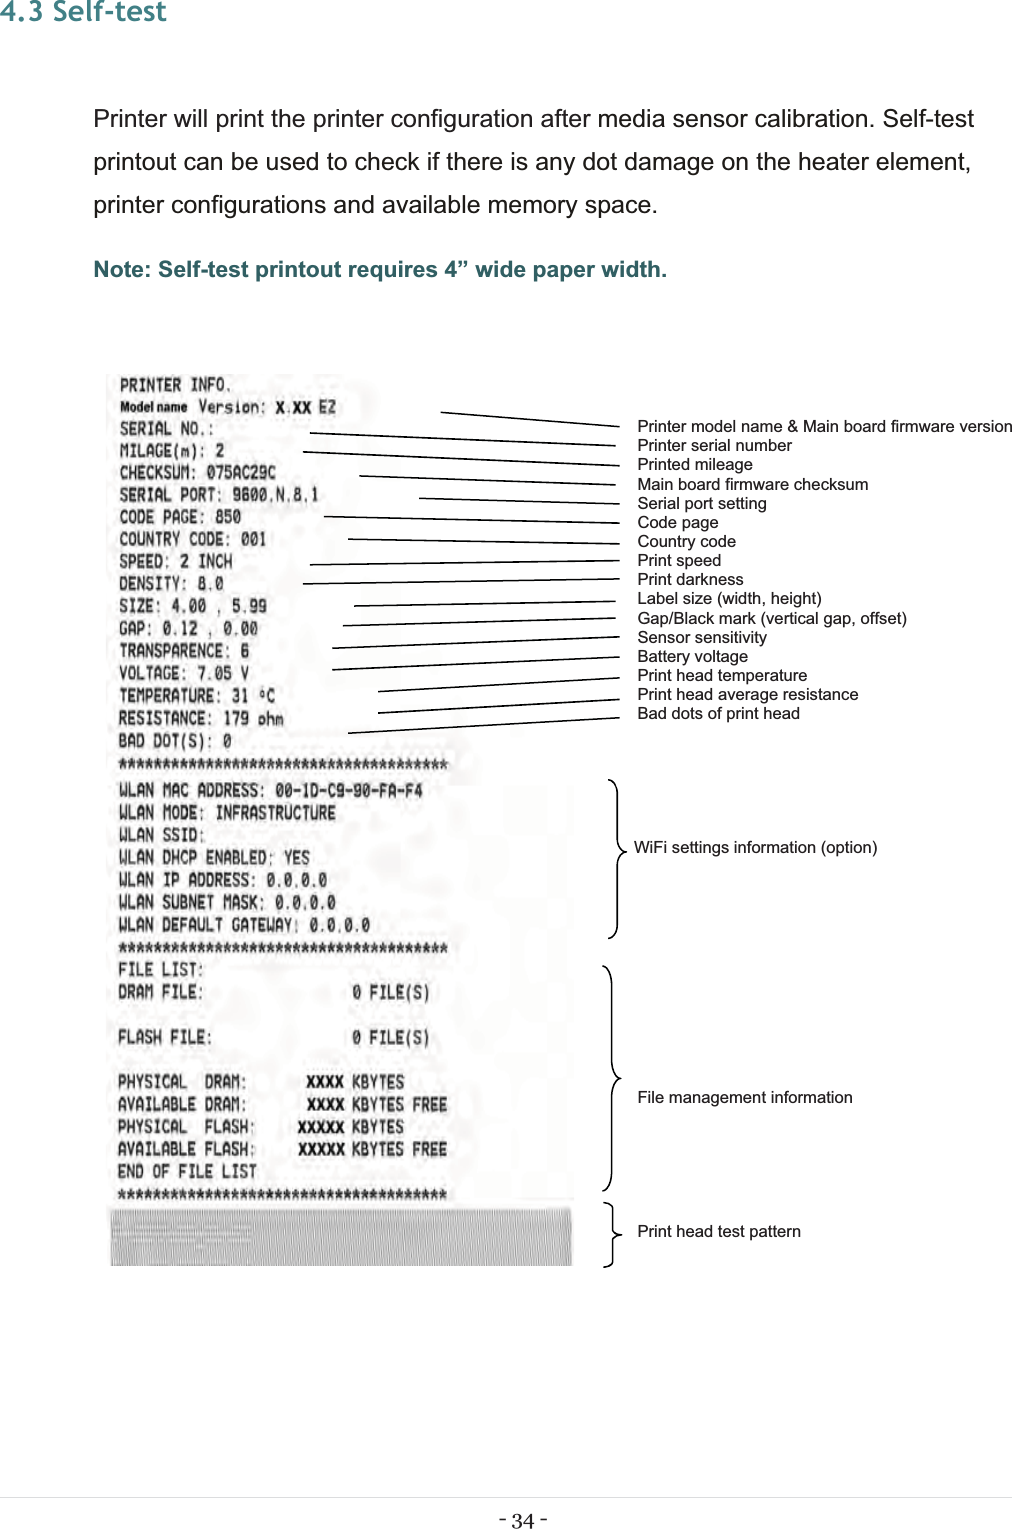
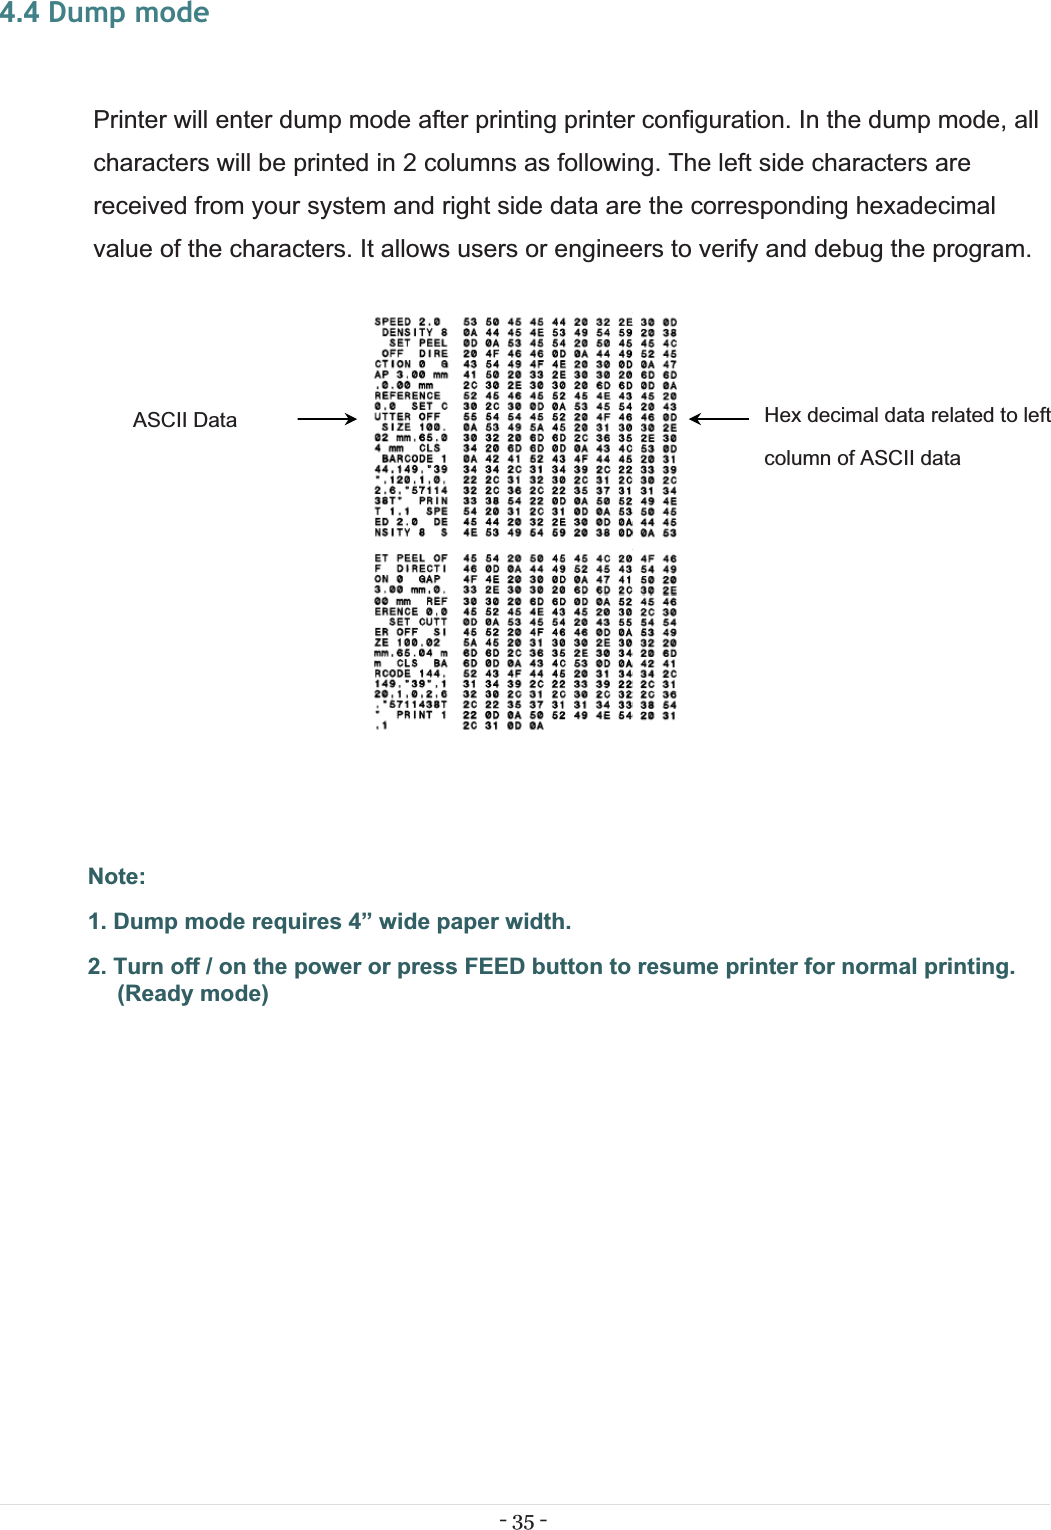
TSC Auto ID Technology RFWRN WiFi abgn module User Manual Alpha 4L user manual Page5
TSC Auto ID Technology Co., Ltd. WiFi abgn module Alpha 4L user manual Page5
Contents
- 1. Manual
- 2. User Manual
- 3. User Manual_Updated
- 4. User Manual_V1
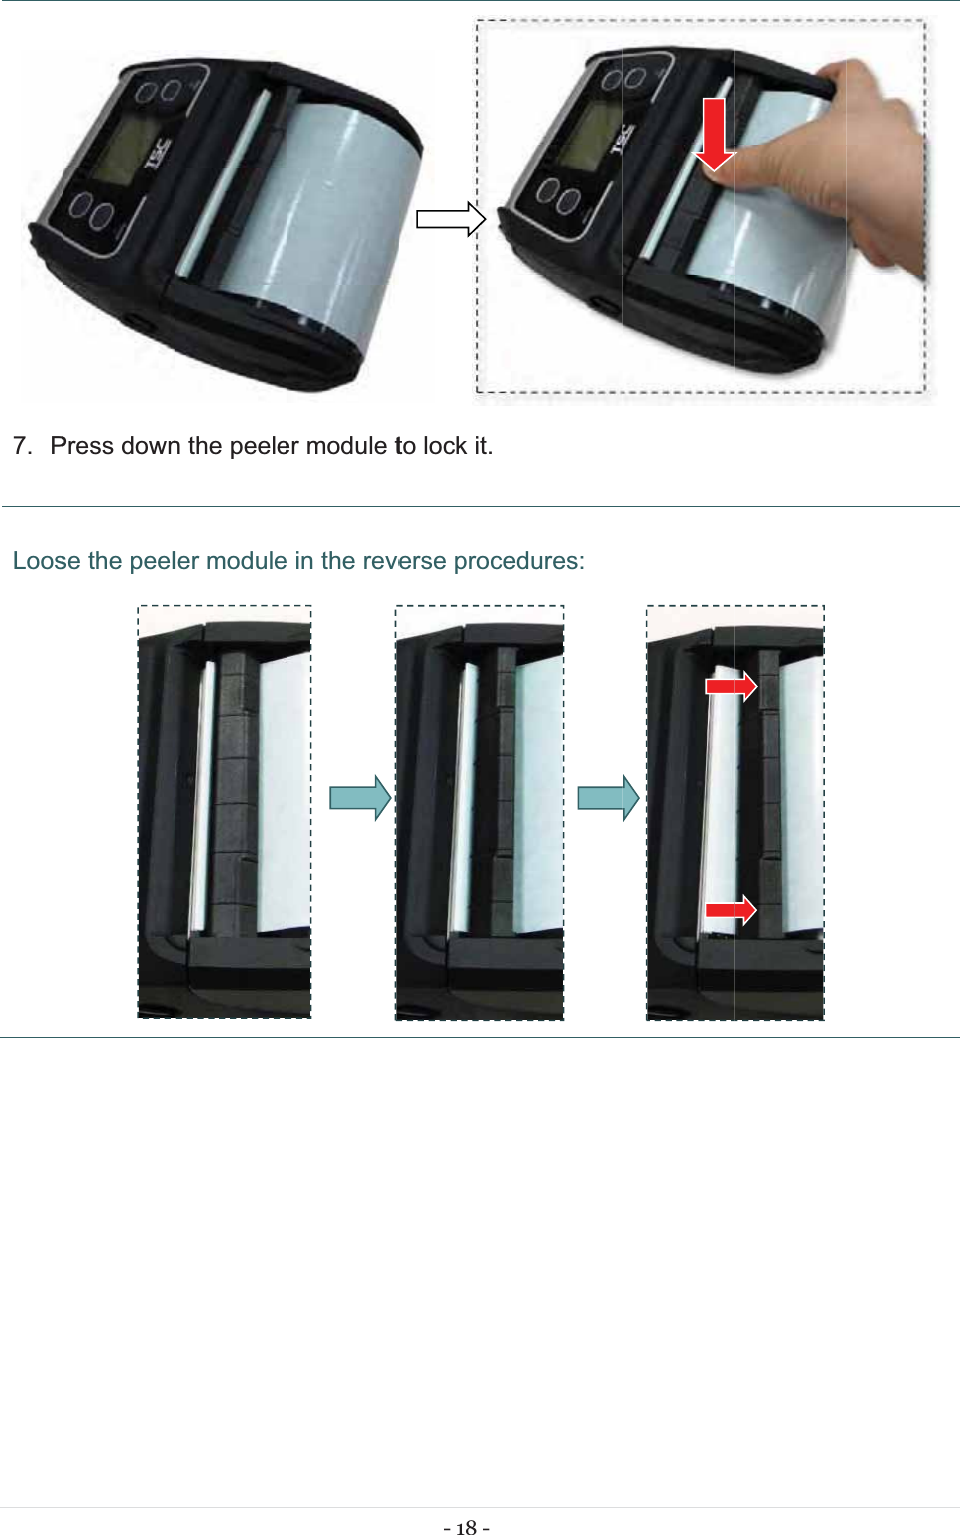
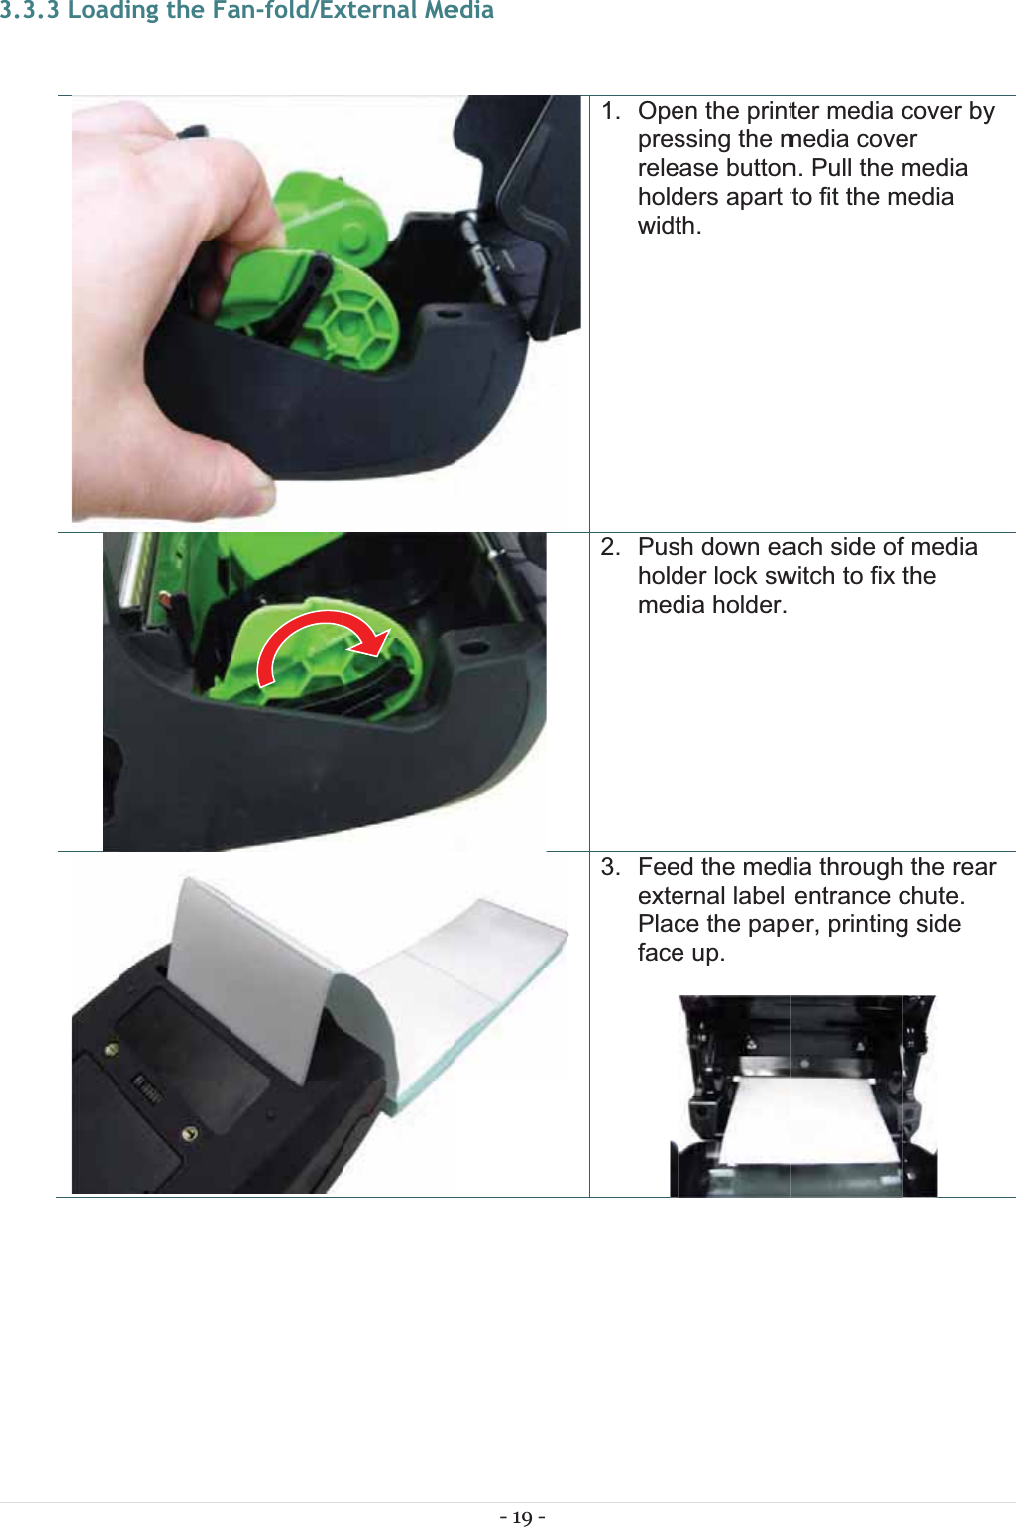
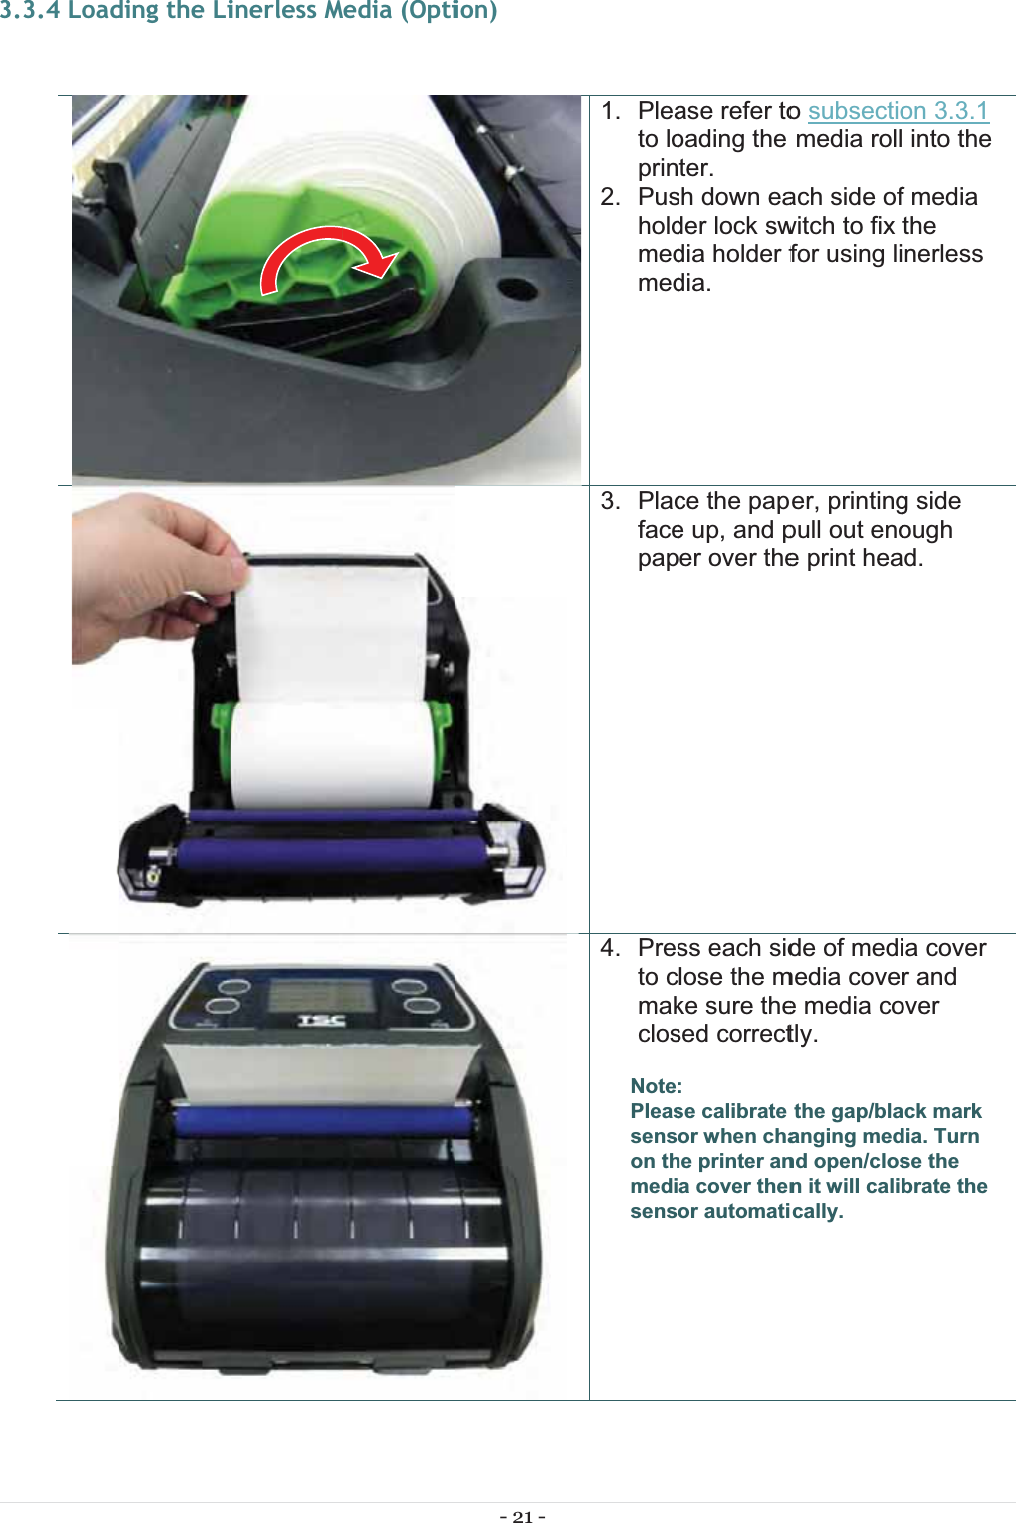
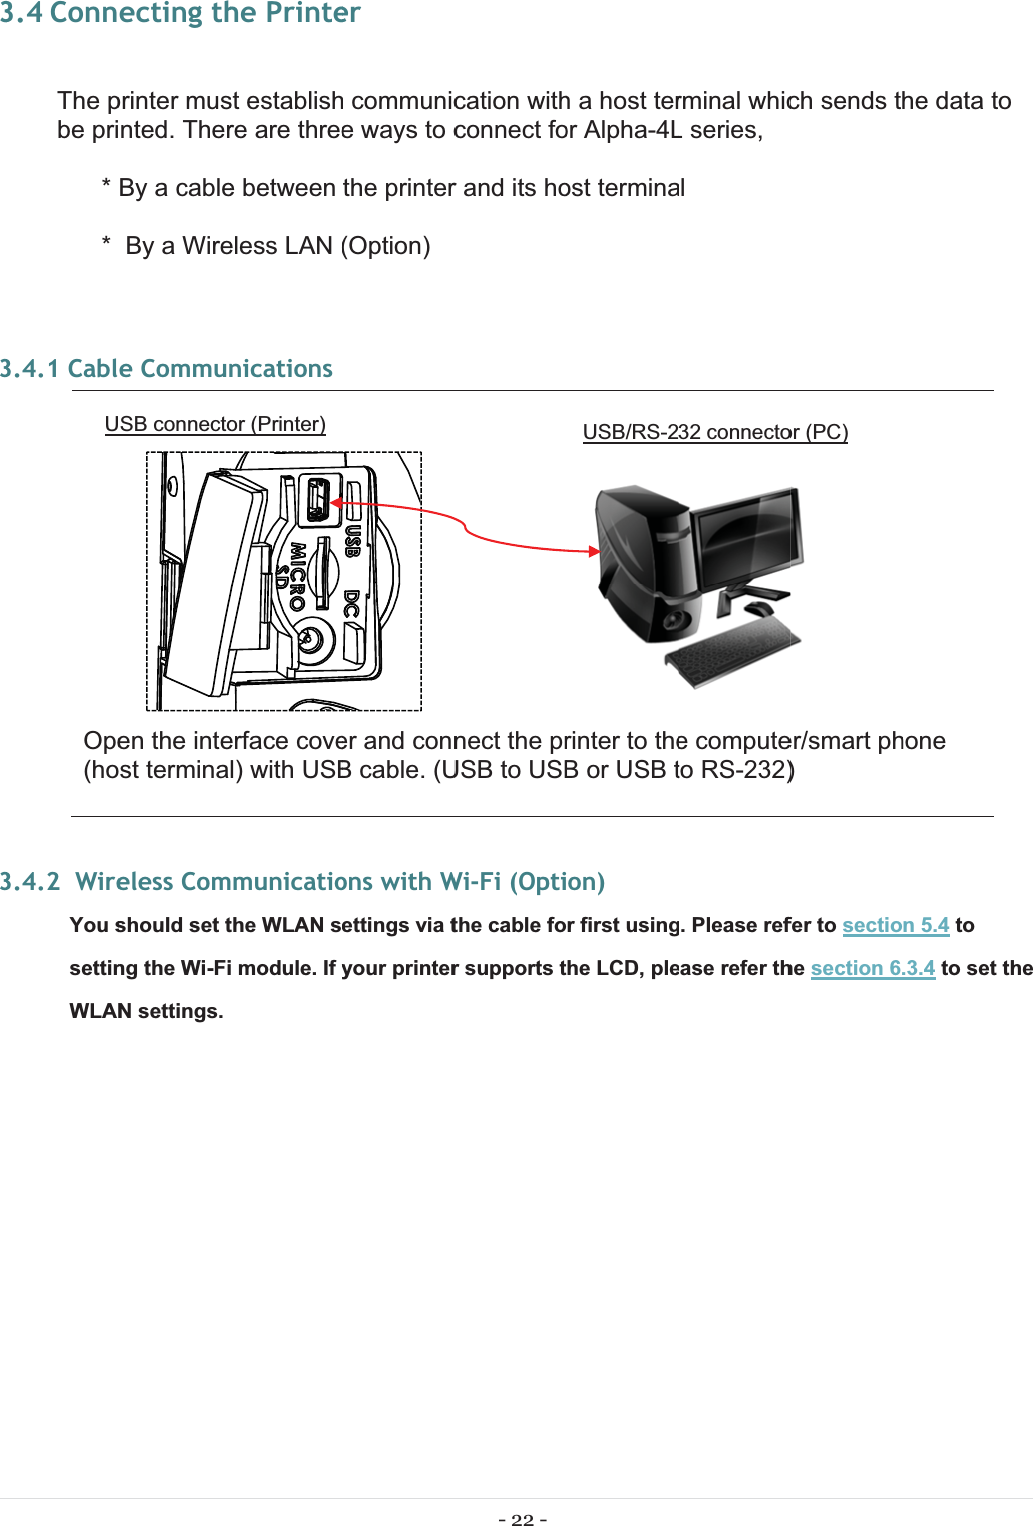
- 5. (RF-WRN) UserMan_20161115
User Manual_Updated