Thrane and Thrane A S 6300 SAILOR 6311 MF/HF 150W DSC CLass A FCC User Manual RadioTelex UM
Thrane & Thrane A/S SAILOR 6311 MF/HF 150W DSC CLass A FCC RadioTelex UM
UserManual.wiki
>
Thrane and Thrane A S
>
6300 User Manual
>
manual radio telex
Contents
1.
manual system
2.
manual system corrigendum
3.
Short emergency guide
4.
manual radio telex
5.
manual alarm panel
manual radio telex
Navigation menu
Upload a User Manual
Namespaces
Wiki Guide
HTML
PDF
Info
Views
User Manual
Discussion / Help
Navigation

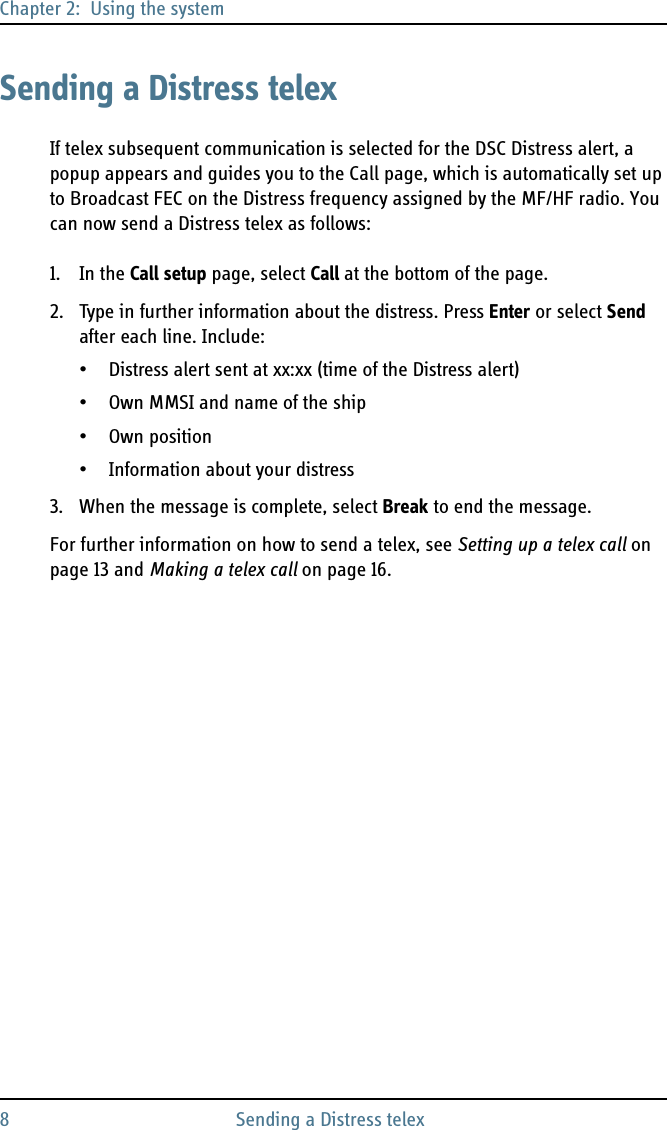
![vAbout the manual 2Manual overviewThis manual describes how to use the SAILOR 6300 MF/HF Radiotelex. Note that this manual does not cover installation of the system. For information on installation refer to the installation manuals [2] and [3] listed below.This manual has the following chapters:•Introduction contains an overview of the Radiotelex system.•Using the system explains how to send Distress alerts and how to use the Radiotelex application for sending and receiving telex messages.•Troubleshooting contains a short troubleshooting guide and explains how to check the status of the system.Related documentsThe below list shows the documents related to this manual and to the Radiotelex system.Ref Title and description Document number[1] SAILOR 6300 MF/HF DSC, User manual98-131070[2] SAILOR 6300 MF/HF DSC, Installation manual98-130890[3] SAILOR 6006 and SAILOR 6007 Message Terminal, Installation manual98-130088[4] SAILOR 6081 PSU and Charger, Installation and user manual98-130980](https://usermanual.wiki/Thrane-and-Thrane-A-S/6300.manual-radio-telex/User-Guide-1463871-Page-7.png)
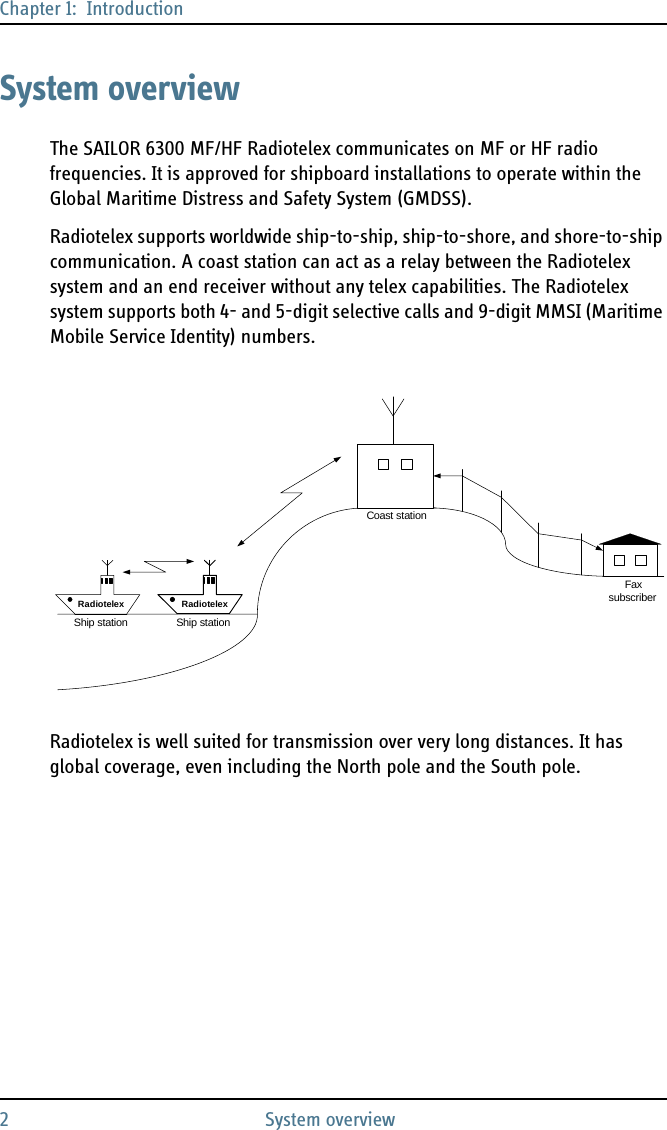
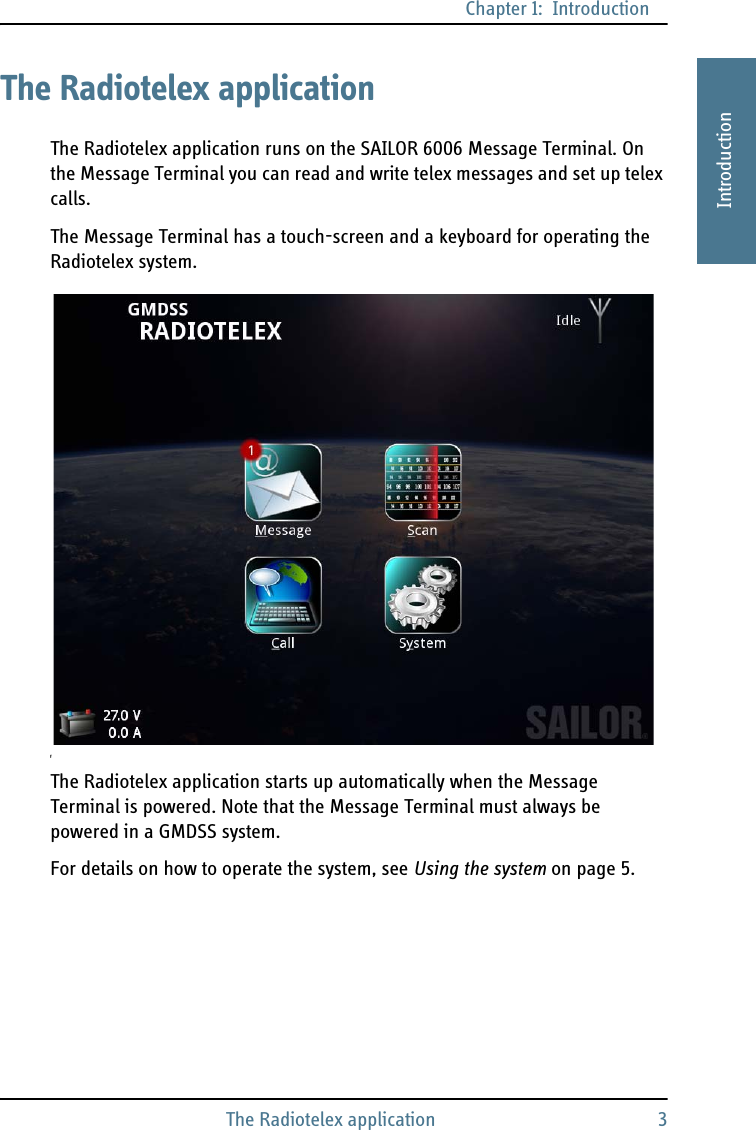
![1Chapter 11111IntroductionIntroduction 1With the SAILOR 6300 MF/HF Radiotelex system you can send and receive telex messages and send DSC Distress alerts over MF/HF radio. The Radiotelex program runs on a SAILOR 6006 Message Terminal with a keyboard. The Message Terminal is connected to a SAILOR 6300 MF/HF radio, which transmits and receives the telex messages and transmits DSC Distress alerts. The units are further described in the installation manuals for the MF/HF radio [2] and the Message Terminal [3]. This chapter has the following sections:•System overview•The Radiotelex application](https://usermanual.wiki/Thrane-and-Thrane-A-S/6300.manual-radio-telex/User-Guide-1463871-Page-11.png)
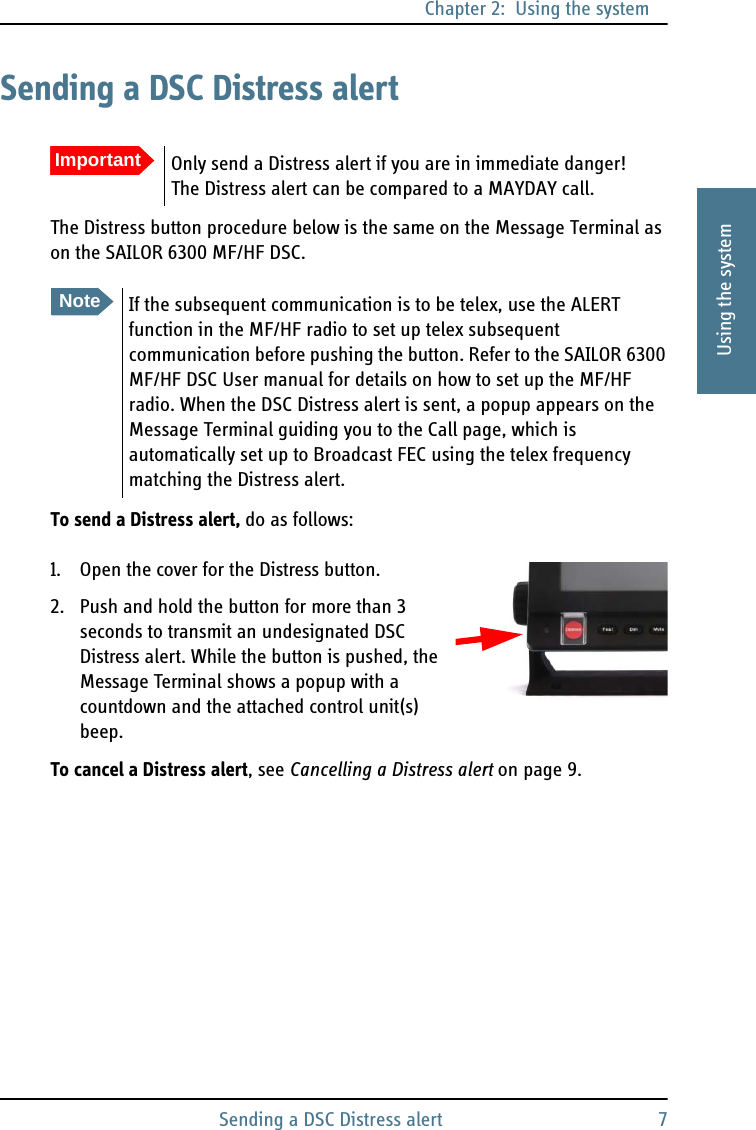
![Chapter 2: Using the system6 Before you startBefore you startThe SAILOR 6300 MF/HF Radiotelex system must be set up for telex. This involves the following steps:At the time of installation1. SAILOR 6006 is configurable to be either a mini-C GMDSS terminal or a Radiotelex terminal. At the first power-up you must set up the Message Terminal to be a Radiotelex terminal.2. At first power up you must also configure the answer back string and the ID for your system. For further information, see the installation manual for the SAILOR 6300 MF/HF DSC [2].3. The MF/HF radio must be enabled to use telex. This is done by entering a PIN code in the MF/HF transceiver. For further information, see the installation manual for the SAILOR 6300 MF/HF DSC [2]. Before use1. The Message Terminal must be on.2. The MF/HF radio must be in telex mode: On the MF/HF radio, push the Mode button repeatedly until the display shows TLX. For details, see the user manual for the SAILOR 6300 MF/HF DSC [1].](https://usermanual.wiki/Thrane-and-Thrane-A-S/6300.manual-radio-telex/User-Guide-1463871-Page-16.png)

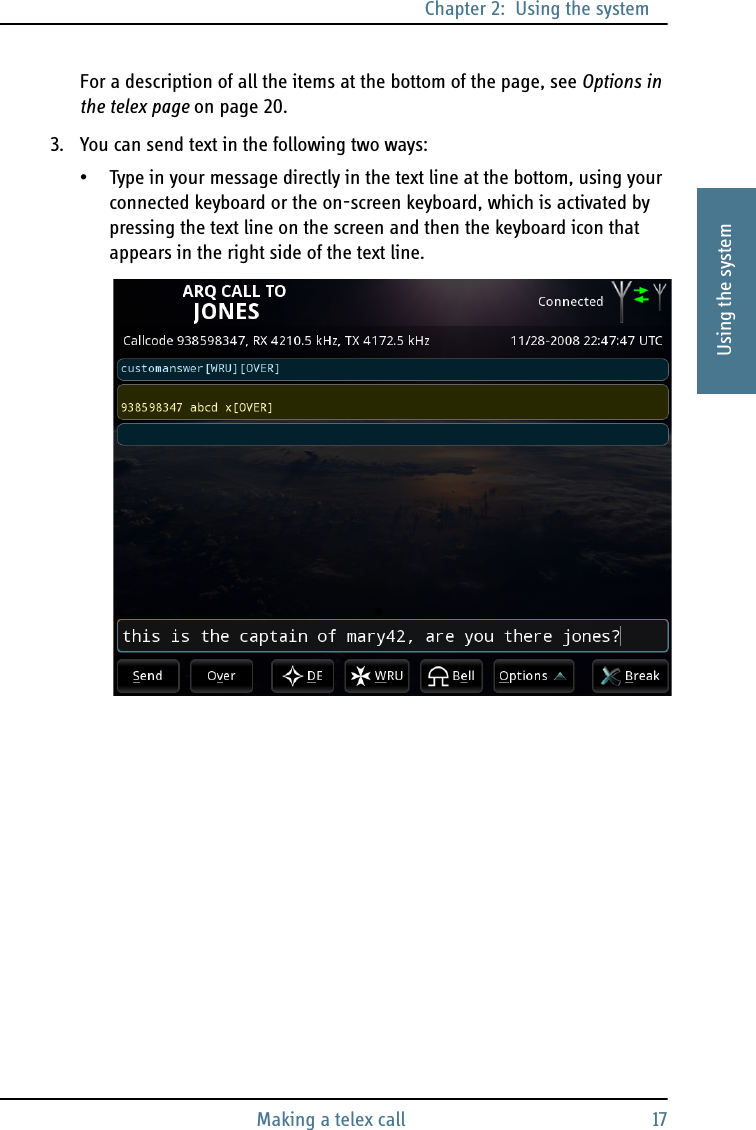
![Chapter 2: Using the systemMaking a telex call 192222Using the system5. For ARQ only: when you want the recipient to write back, select Over at the bottom of the page, or type [OVER] or +?.The recipient can now type in a message for you. The message will appear in the field just below your message.6. When the recipient has placed the [OVER] command too, you can type more text to continue the conversation.7. To end the telex session, select Break. If you do not want to wait for exchange of DE/WRU, you can select Break now! in the popup that appears after Break is selected.The call is then disconnected. You can see all telex sessions initiated by you under Sent Items in the Message page. See Viewing Sent items on page 25.NoteIf the remote station forces an OVER on your part while you are transmitting data, 1-2 characters may incorrectly be marked has having been sent while the remote station may not have received these characters. We do not recommend forcing a change of direction while the other station is sending data.](https://usermanual.wiki/Thrane-and-Thrane-A-S/6300.manual-radio-telex/User-Guide-1463871-Page-29.png)
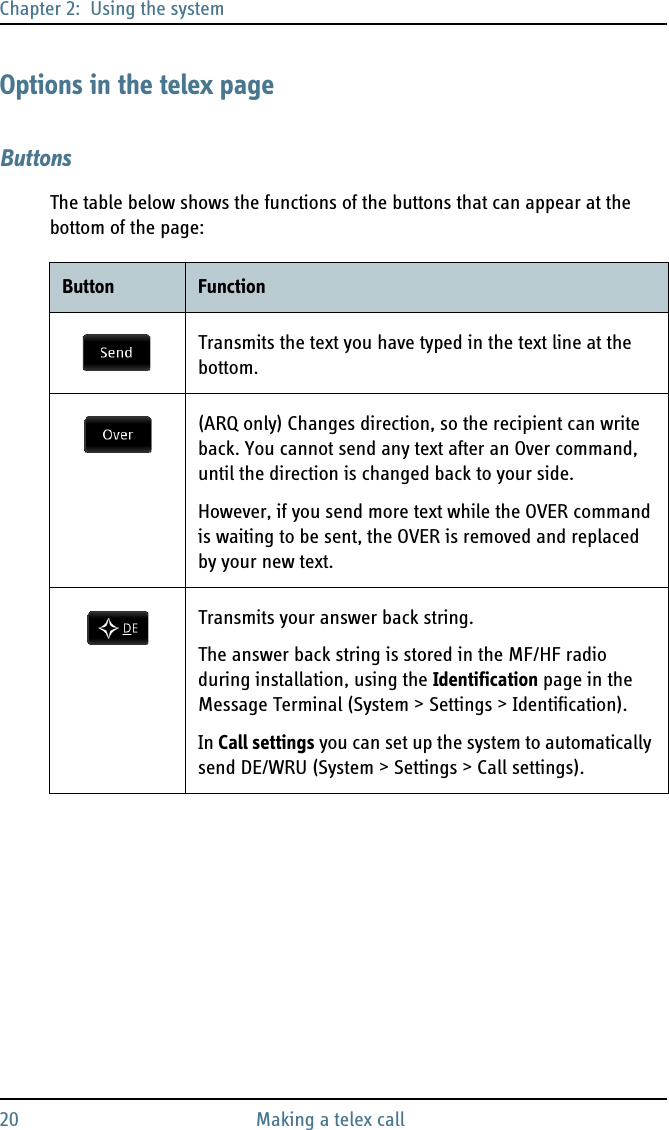
![Chapter 2: Using the systemMaking a telex call 212222Using the system(ARQ only) Inserts a WRU command (Who are you? - request for identification) in your text. This command is automatically followed by [OVER], so that the recipient can answer back. When the WRU command is sent, you cannot send any more text until the direction is changed back to your side. However, if you send more text while the WRU command is waiting to be sent, the WRU is removed and replaced by your new text.In the Call settings page you can set up the system to automatically send DE/WRU.Inserts a BELL command (can make e.g. a buzzer sound at the recipient). Opens the Options menu, described in the next section.Stops the communication link.Button Function](https://usermanual.wiki/Thrane-and-Thrane-A-S/6300.manual-radio-telex/User-Guide-1463871-Page-31.png)
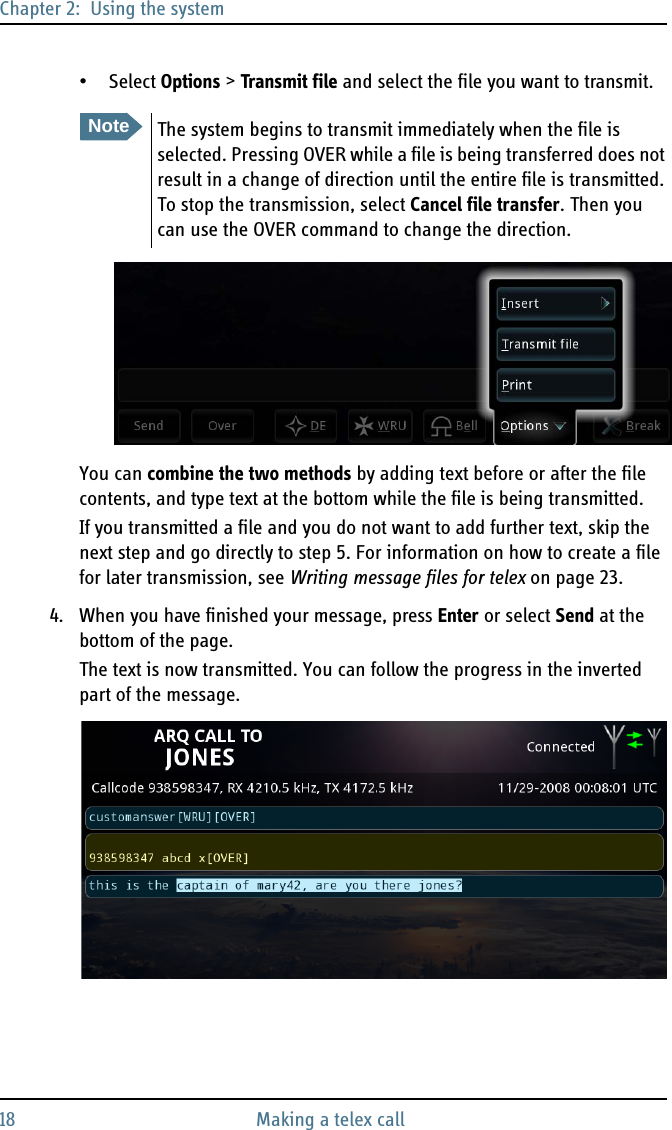
![Chapter 2: Using the system22 Making a telex callOptions menuTo open the Options menu in the telex page, select Options at the bottom of the page.You now have the following options:•Insert•Date & Time: Inserts the current date and time (UTC format) in your message. The syntax of the Date and time is the format selected under Settings > Date and Time format.•[OVER]: Inserts an OVER command in your text, so that when you select Send or press Enter, your text is sent and the direction is changed to the recipient immediately after.•[BREAK]: Inserts a BREAK command in your text, so that when you select Send or press Enter, your text is sent and the communication is stopped immediately after.•Transmit fileAllows you to select a text file to transmit. For information on how to write and save the text file, see Writing message files for telex on page 23.•PrintSends the text in the telex page to the printer.](https://usermanual.wiki/Thrane-and-Thrane-A-S/6300.manual-radio-telex/User-Guide-1463871-Page-32.png)

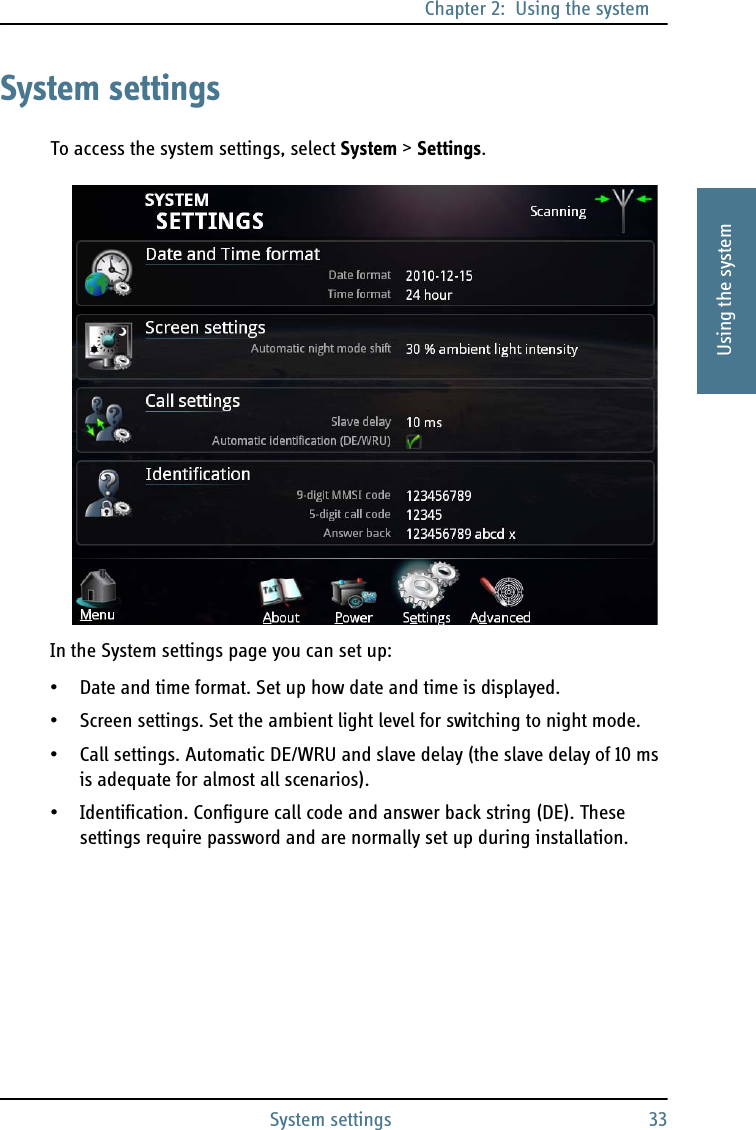
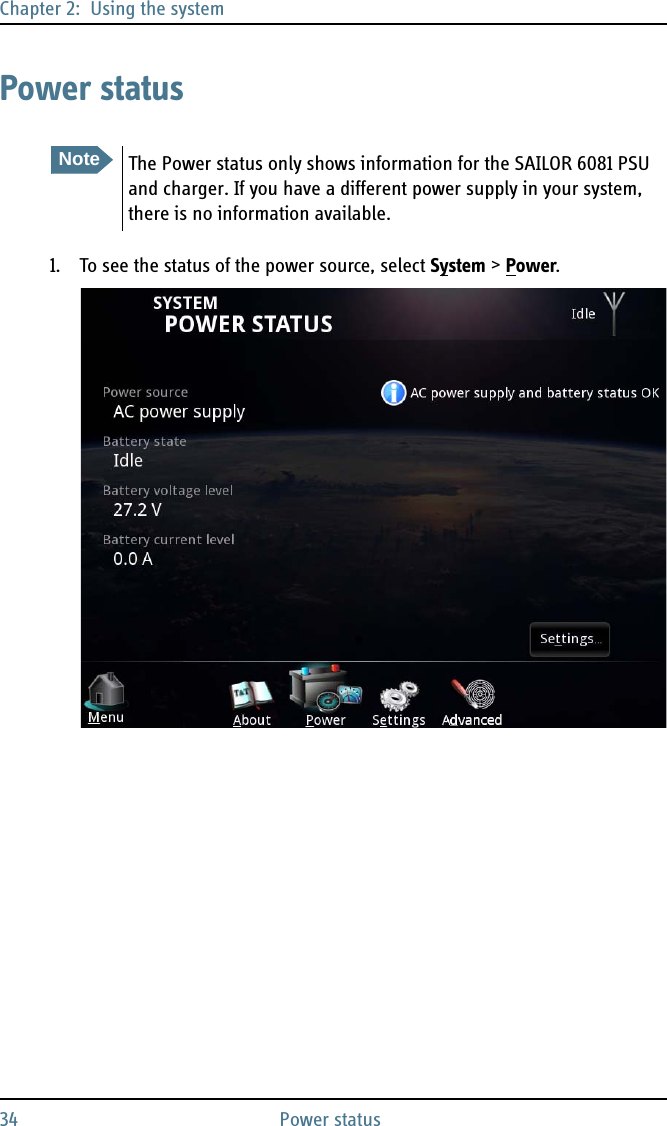
![Chapter 2: Using the systemPower status 352222Using the system2. To see the power settings, select Settings... in the lower right corner.ImportantThe default settings are suitable for most installations. Do not change these settings unless you have a special battery type or installation that requires different settings. Only skilled personnel should change the power settings.For information on how to change the settings, refer to the installation manual for the MF/HF radio [2].](https://usermanual.wiki/Thrane-and-Thrane-A-S/6300.manual-radio-telex/User-Guide-1463871-Page-45.png)

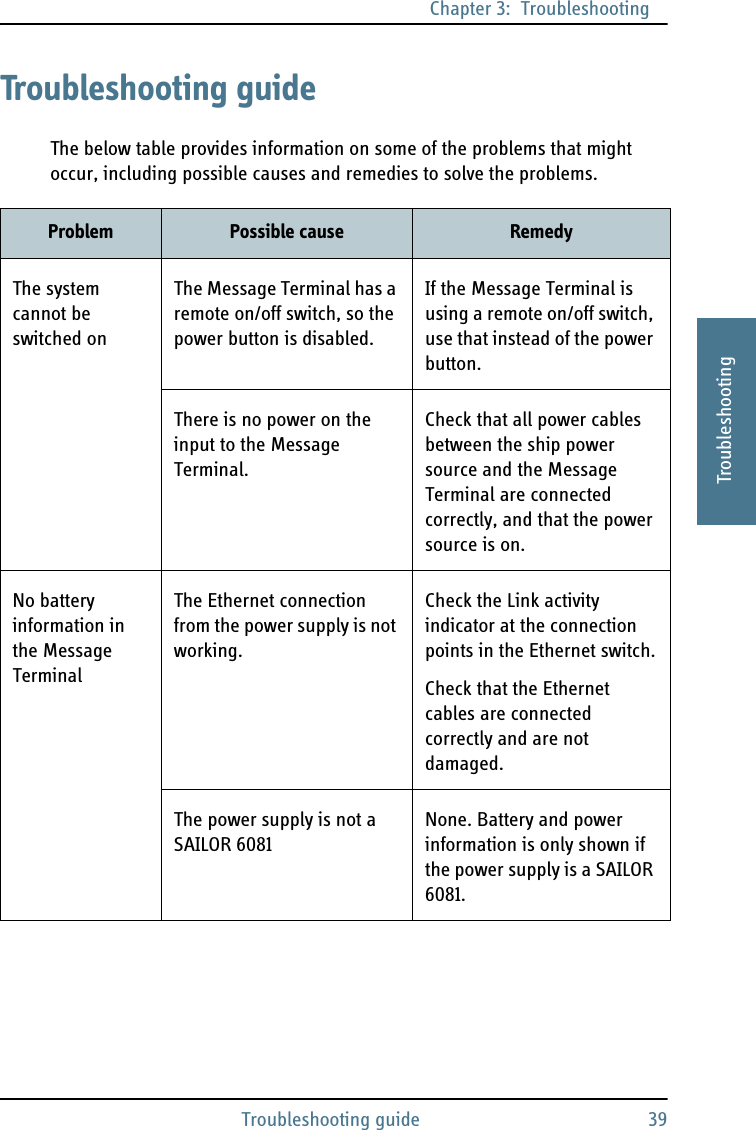
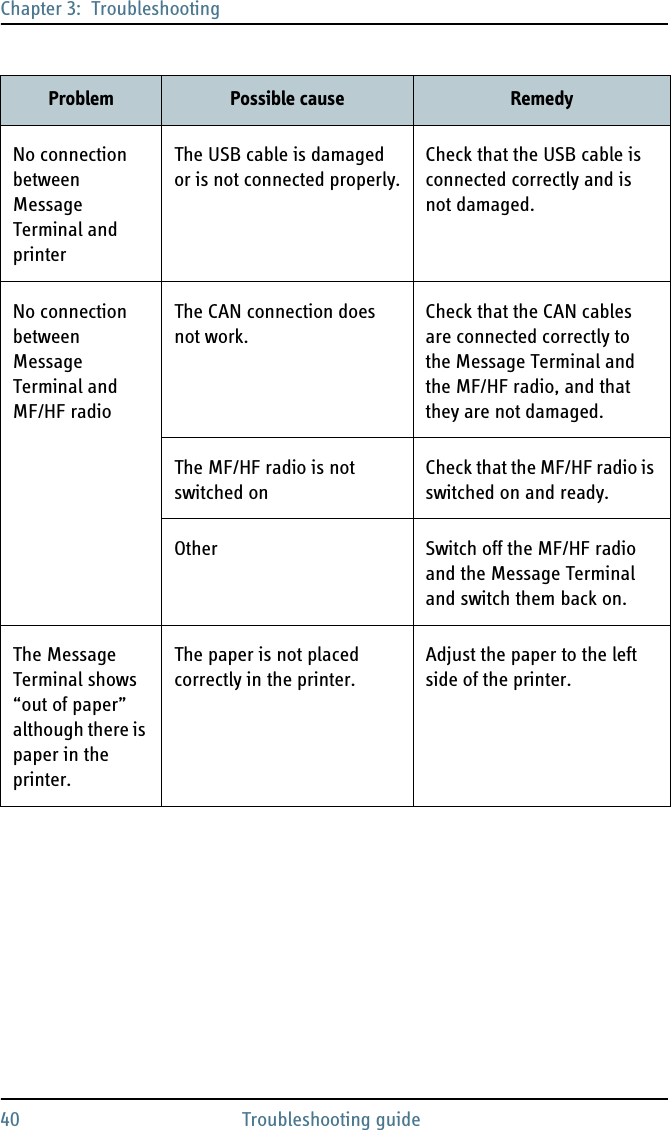
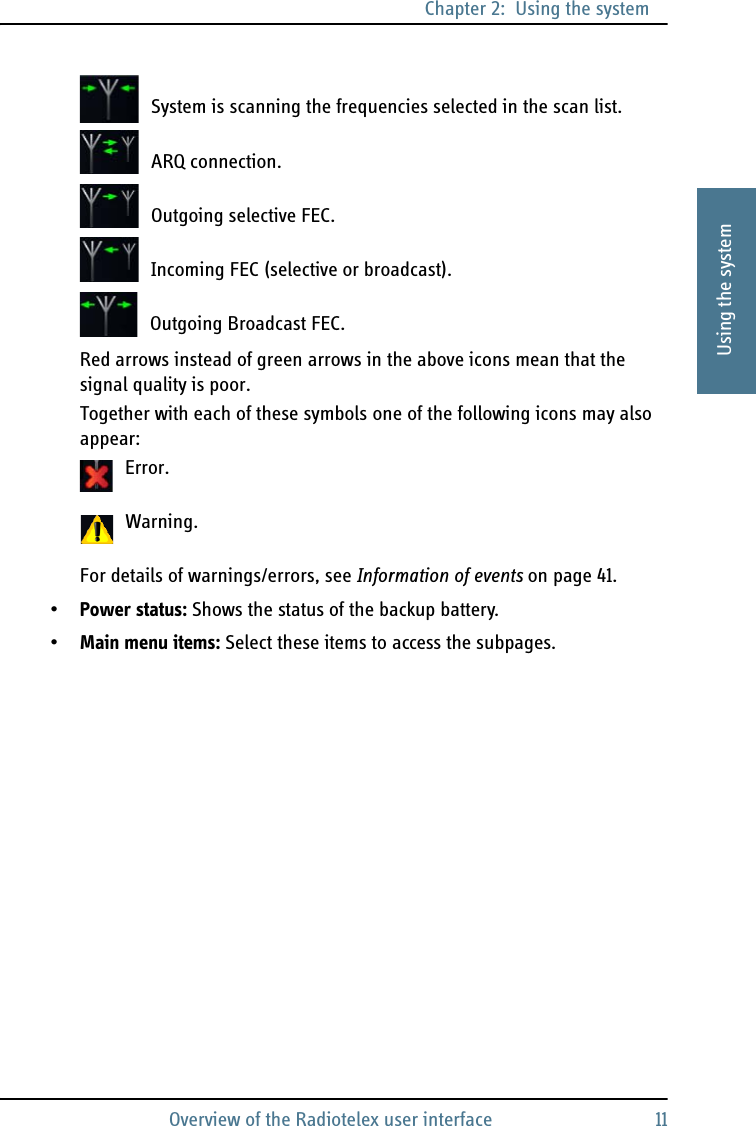
![Chapter 3: TroubleshootingStatus signaling 413333TroubleshootingStatus signalingThe Message Terminal can show basic status and error messages.The upper right corner of the display shows the most important status information.Information of eventsPopup windowsWhen an event requires your attention, a popup window appears. When you have read the text, select OK or press Esc to close the window. If the window indicates an error that requires your action, the warning or error icon will stay in the top right corner of the display as long as the problem persists.If the system uses a SAILOR 6081 PSU and Charger, the Message Terminal also shows errors or warnings related to the power supply. For information on the SAILOR 6081, see the manual for the SAILOR 6081 [4].List of active warnings and errorsThe top right corner of the display shows a short text about the current status. The icon in the corner can change depending on the situation. The following icons may show:Antenna icon: The antenna icon can look different depending on the status. For details, see page 10 in Overview of the Radiotelex user interface.Error.Warning.Select the icon or press F1 to see the list of active warnings and errors.From the list of active warnings and errors you can access the event log.](https://usermanual.wiki/Thrane-and-Thrane-A-S/6300.manual-radio-telex/User-Guide-1463871-Page-51.png)