Uniden America UB305C Trunk Tracker Scanner User Manual Pages 27 to 39
Uniden America Corporation Trunk Tracker Scanner Pages 27 to 39
Contents
Pages 27 to 39
20
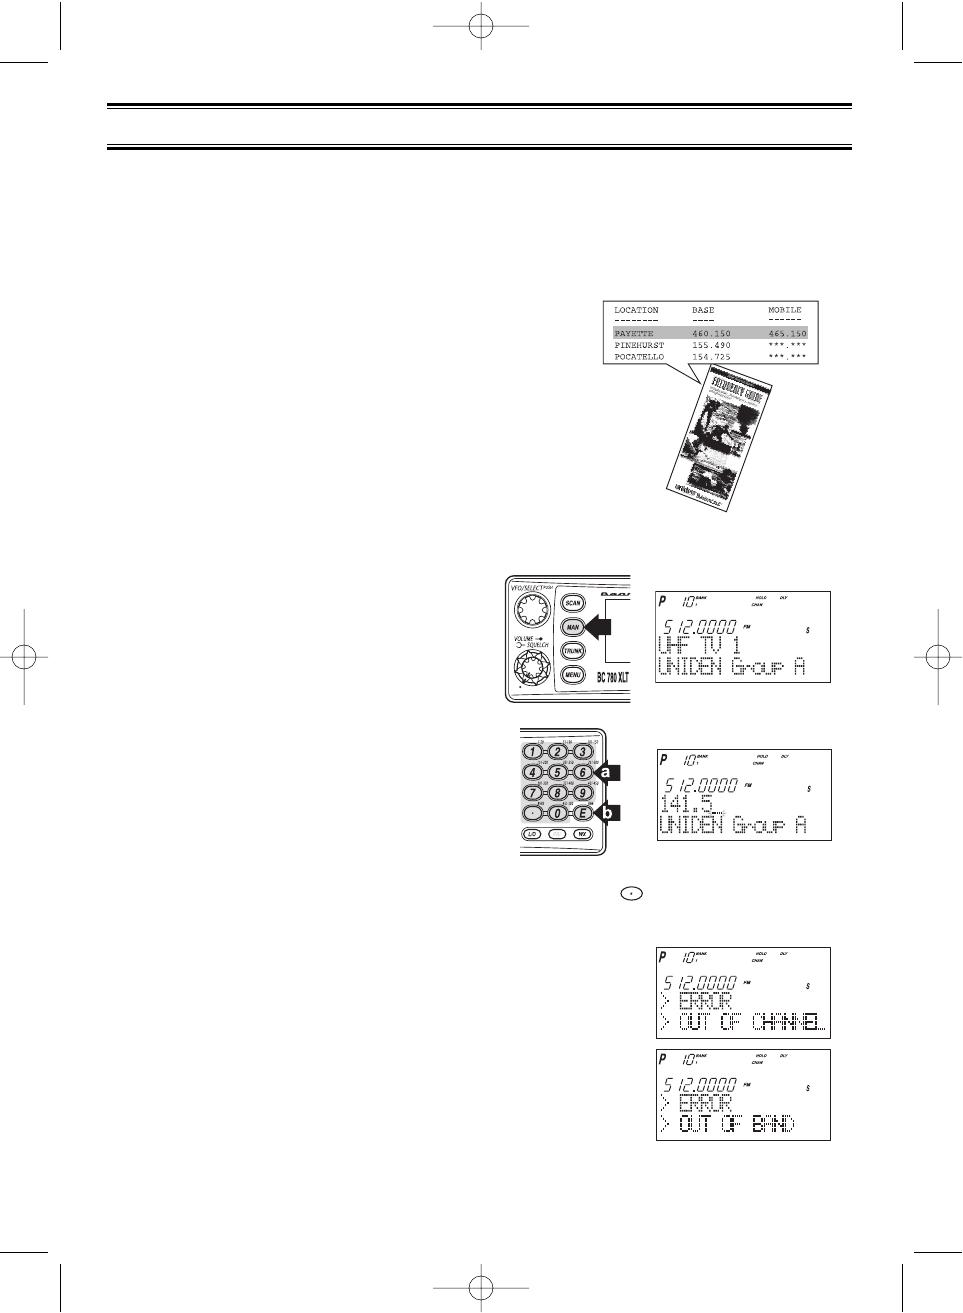
Before the BC780XLT can begin conventional scanning, you must program a frequency into
at least one channel. Repeat this procedure for each channel you want to program.
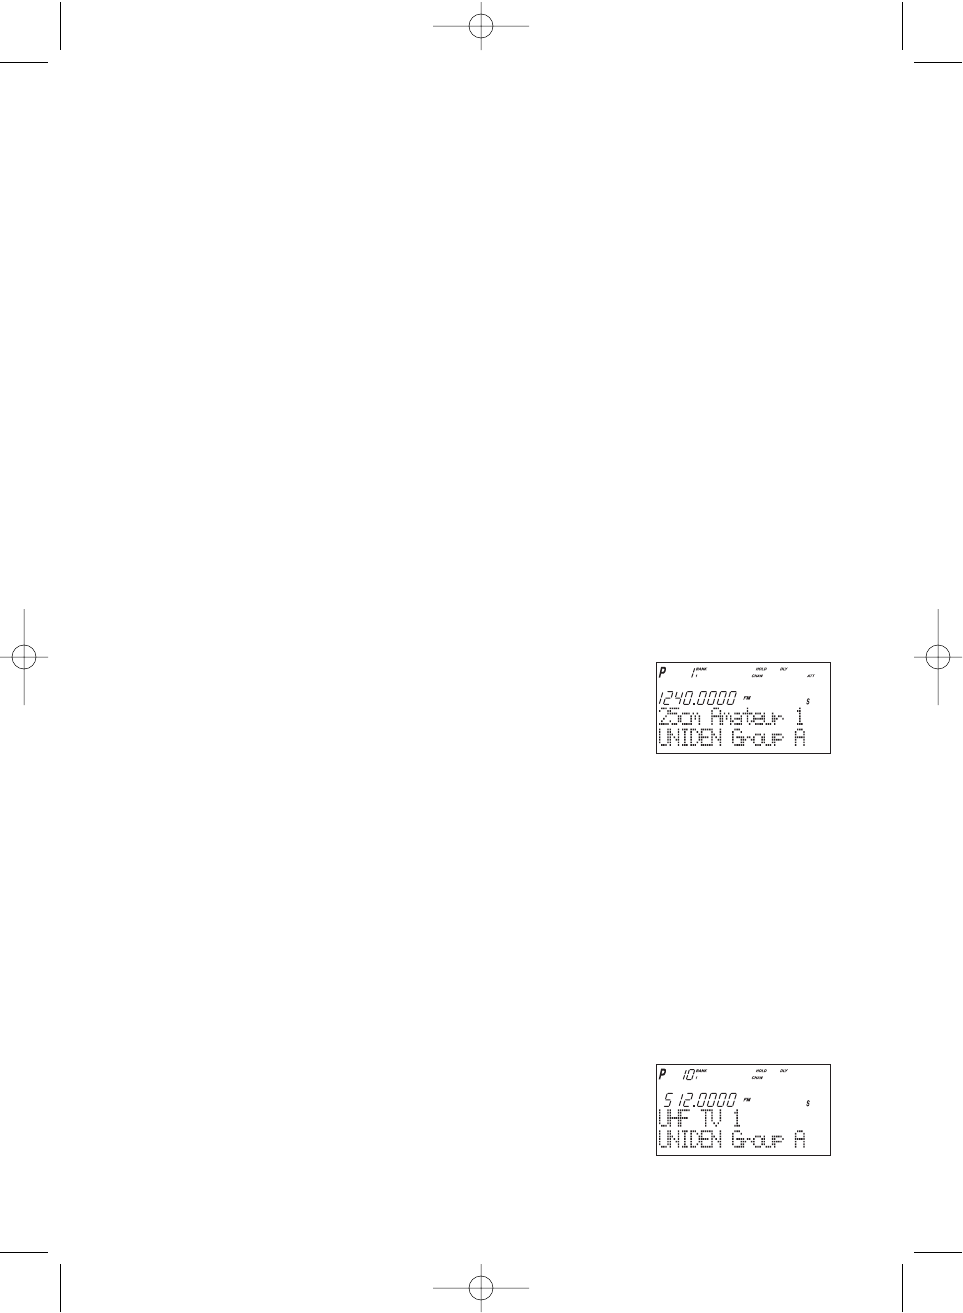
Storing Frequencies into Channels
1. Select frequencies from your dealer, from
various sources on the internet, or from one of
the guides listed on page 5.
Here is a list of sample frequencies you should try:
156.800 Marine Calling channel
155.340 Ambulance operations
155.280 Ambulance operations
155.160 Ambulance operations
462.950 Ambulance operations
462.5625 Family Radio Services (channel one)
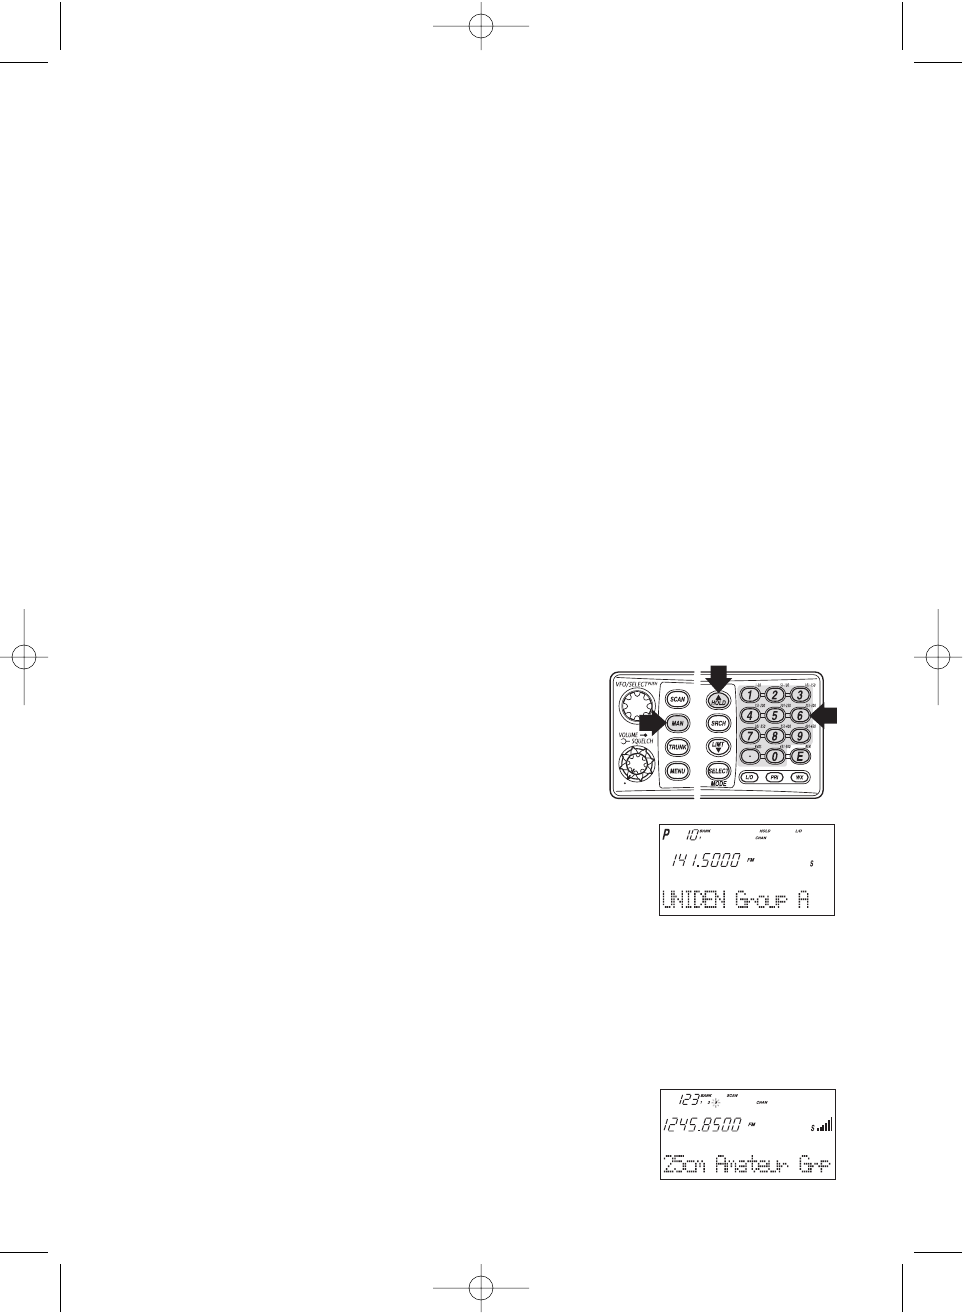
2. Press
MAN
.
3. Select a channel.
a. Enter the channel number.
b. Then press
MAN
.
4. Enter the frequency.
a. Enter the frequency number.
b. Then press
E
.
Note: • To clear a mistake while entering the frequency, press (decimal key) repeatedly
until the display is cleared.
• If you enter a channel or frequency which is out
of the scanner’s range, a distinctive beep will
sound and
ERROR
appears in the display.
• You can use ▲or ▼when selecting a channel.
Press and hold ▲or ▼for 1 second to move up/down more quickly.
Programming
BC780XLT1.qxd 10/08/2000 5:02 PM Page 20
21
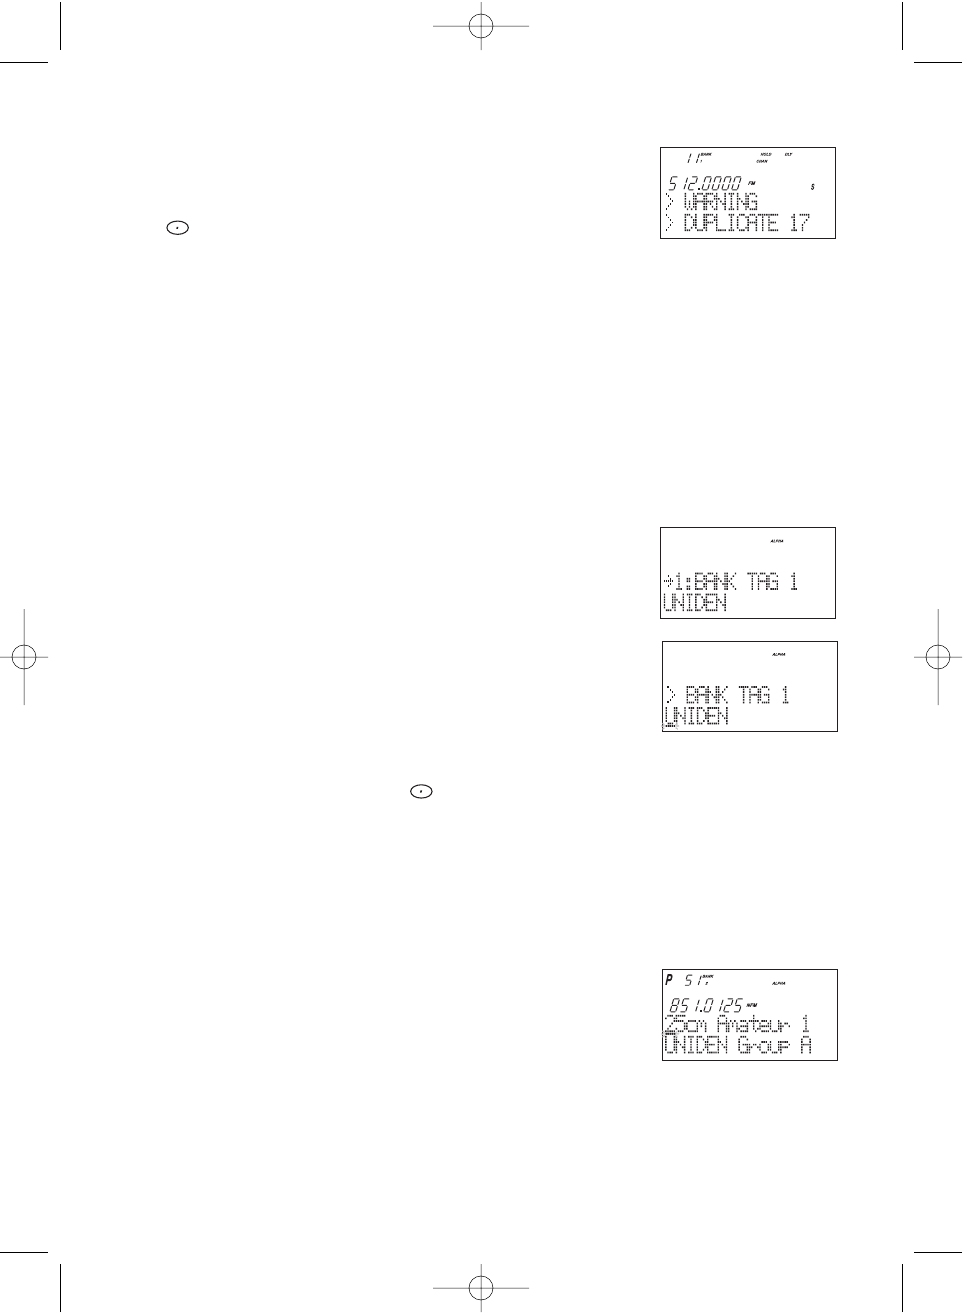
Duplicate Frequency Alert
If you enter a frequency which has been stored in
another channel, you will hear a beep and the other
channel displays
WARNING
.
Press to clear and start again.
––– OR –––
Press
E
again to store the frequency in both channels.
Storing Text Tags
You can customize your scanner by storing text tags for easy identification of banks, channel
transmissions, trunking talkgroup IDs, etc. The text tags can be set at the menu mode. (Refer
to Understanding Menu System on page 13.)
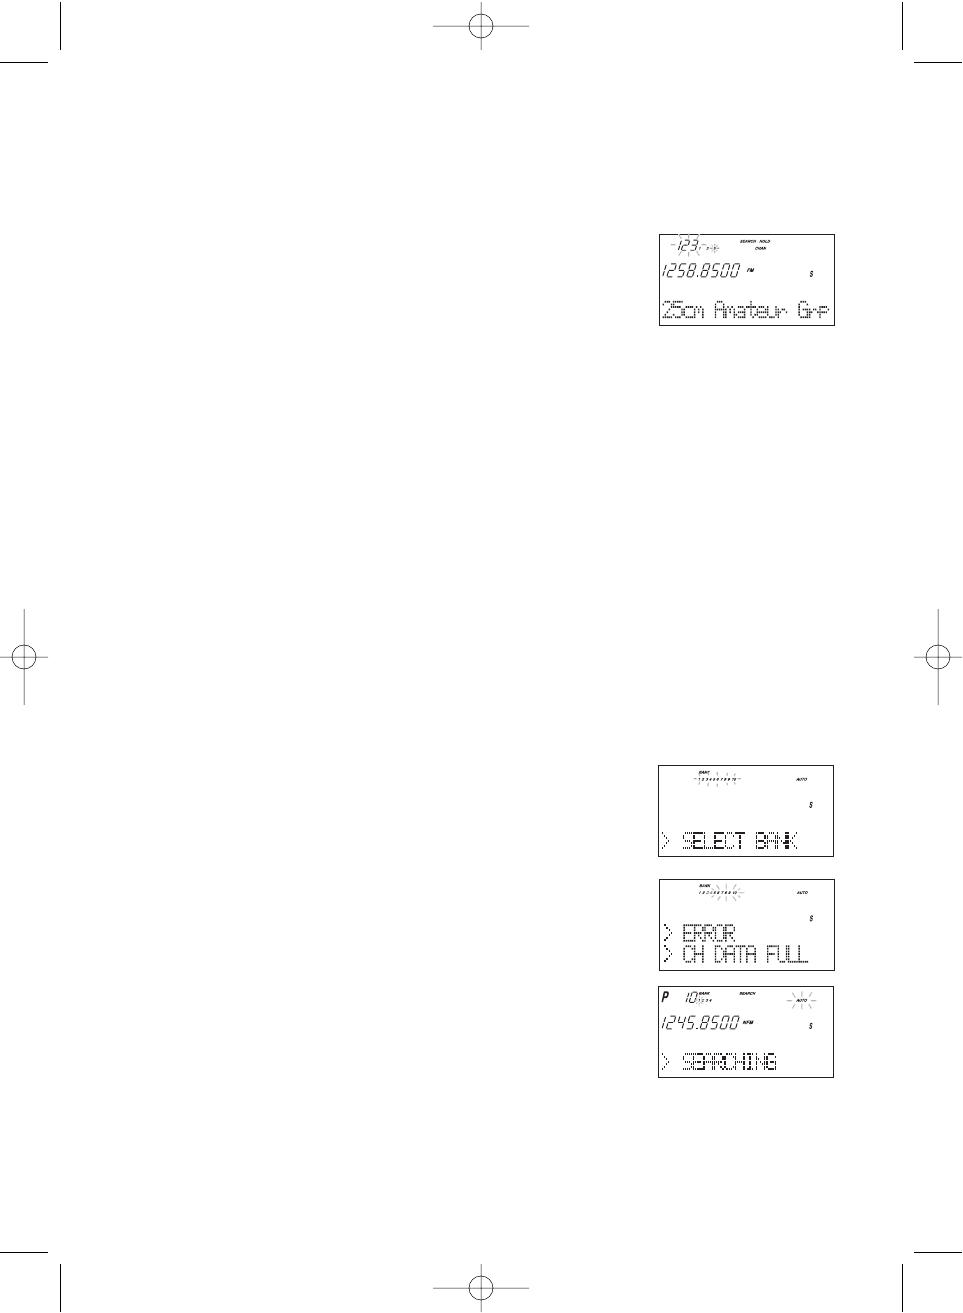
Assigning a Bank Tag to a Bank
1. Press
MENU
.
2. Press
E
to select SYSTEM DATA.
3. Press ▲ or ▼ to select BANK TAG and then press
E
.
4. Select the bank number to be tagged using ▲or ▼
and then press
E
.
5. The cursor appears on the display. Rotate VFO to change
letters, and then press ▲or ▼to shift right or left. Both
capital and lower case letters are available, as well as
numbers and punctuation marks.
6. After entering the desired text, press
E
or
SELECT
.
☞ Remember! You can also use the
VFO
control for scrolling. To clear a mistake while
entering the frequency, press (decimal key) repeatedly until the display is cleared.
Assigning a Text Tag to a Channel
1. Press
MENU
.
2. Press ▲ or ▼ to select CH DATA and then press
E
.
3. Select the channel number to be tagged using ▲or ▼and pressing
E
. You can also
enter the channel number in using the keypad and then press
E.
4. Press ▲ or ▼to select ALPHA TAG and then pressing
E
.
Note: • If you have not stored a frequency in the channel,
UNREGISTERED will appear in the display.
5. The cursor appears on the display. Rotate VFO to
change letters, and press ▲or ▼to shift right or left.
Both capital and lower case letters are available, as
well as numbers and punctuation marks.
6. After entering the desired text, press
E
,
SELECT
or VFO.
BC780XLT1.qxd 10/08/2000 5:02 PM Page 21
22
Beep Alert
The scanner can alert you with three rapid beeps at the beginning of a transmission on an
assigned frequency.
Assigning the beep alert to a channel
This alert can be set on/off to every channel (or to every ID memory for Trunking mode).
1. Press
MENU
.
2. Press ▲ or ▼ to select CH DATA and then press
E
.
3. Select the channel number to be tagged using ▲or ▼and then press
E
. (You can also
enter the channel number in using the keypad or VFO control and then press
E.)
4. Press ▲ or ▼to select BEEP ALERT and then press
E
.
5. Press ▲ or ▼to select ON or OFF and then pressing
E
.
Note: If NOT REGISTER appears, make sure a frequency is stored in the channel.
Programming Tips
• Do not program a weather frequency into one of the channels, since weather channels
transmit continuously. Use the Weather Search feature to select the weather information band.
• Group similar services into a bank. For example, program police frequencies in channels 1
through 10 and fire/emergency into channels 51 through 60, and so on.
• Put the frequency that you listen to the most or the most important frequency into a
Priority channel.
• To quickly program a series of channels, start with the lowest number channel.
For example, when you are programming five new frequencies into Channels 4 through
8, start with Channel 4. After you finish programming a channel, press
MAN
or
HOLD
/▲
to go to the next higher channel.
• Write down your programmed channels and frequencies and put in a convenient place in
case of accidental reprogramming.
• If you want to download frequencies using the SmartScan feature, go to page 59
in this manual.
• Frequencies are rounded off according to the step of each channel.
• When you are overwriting a tagged channel with a new frequency, the previous alpha tag
will be deleted. You must re-enter the alpha tag.
• When programming frequencies, a 2 second delay is set automatically but can be changed
in the Channel Data menu.
Deleting a Stored Frequency
To delete a stored frequency:
a. Select a channel.
b. Press
0
.
c. Then press
E
.
Note: Channels with no frequencies are automatically locked out.
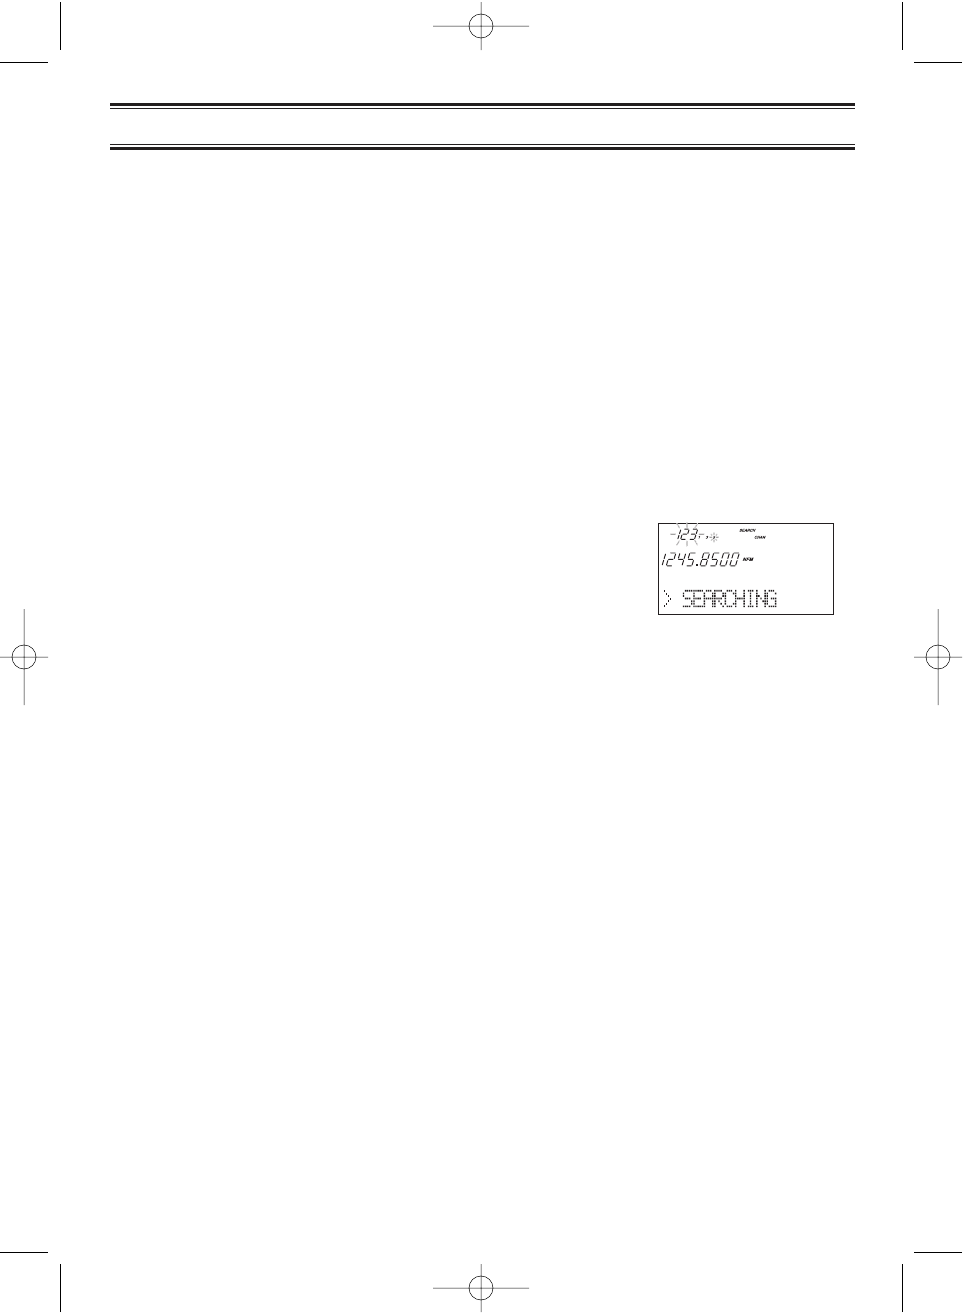
SERVICE SEARCH
PUBLIC SAFETY
BC780XLT1.qxd 10/08/2000 5:02 PM Page 22
23
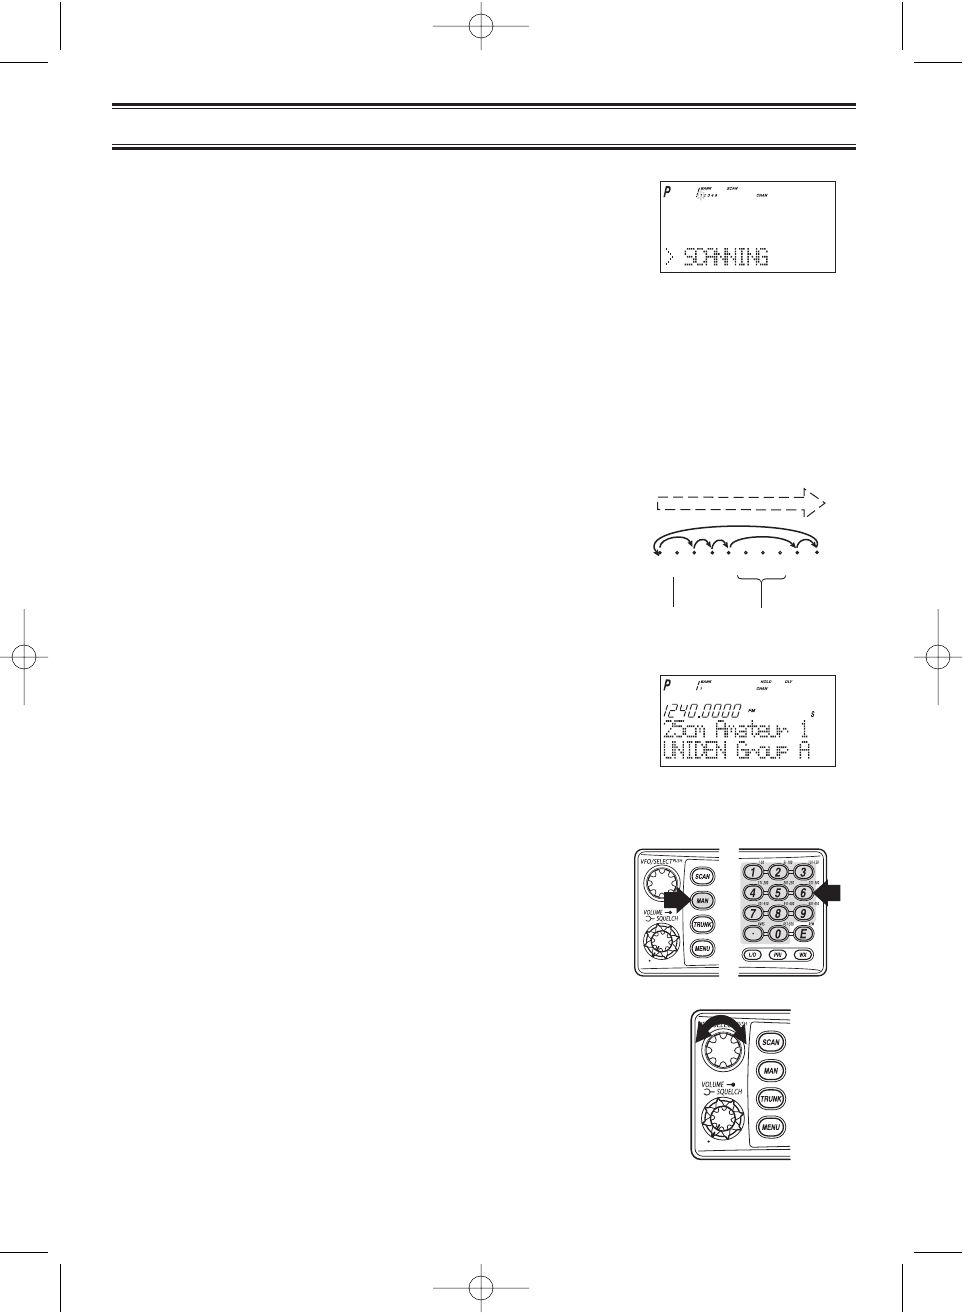
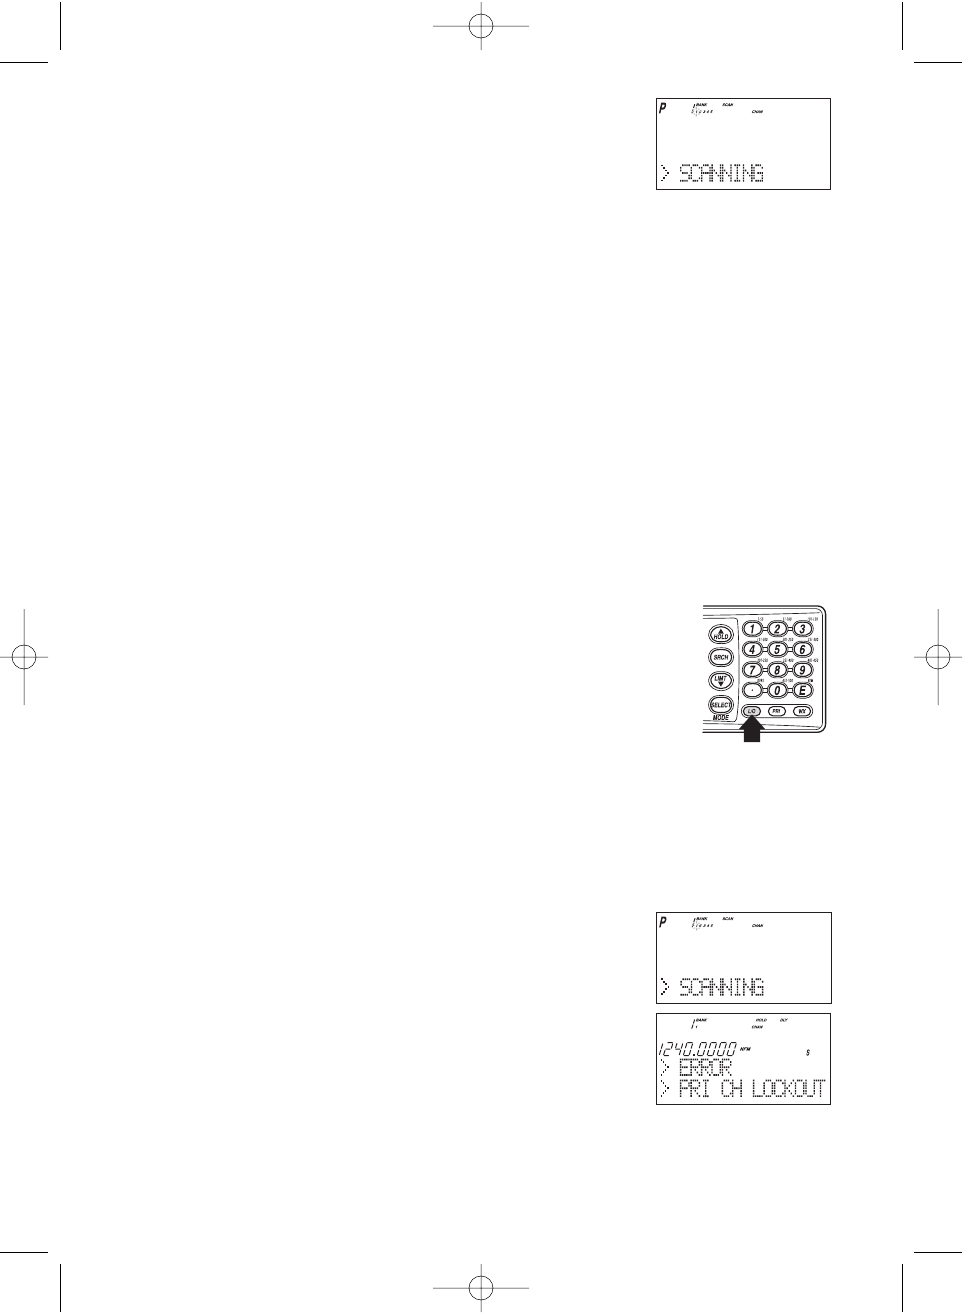
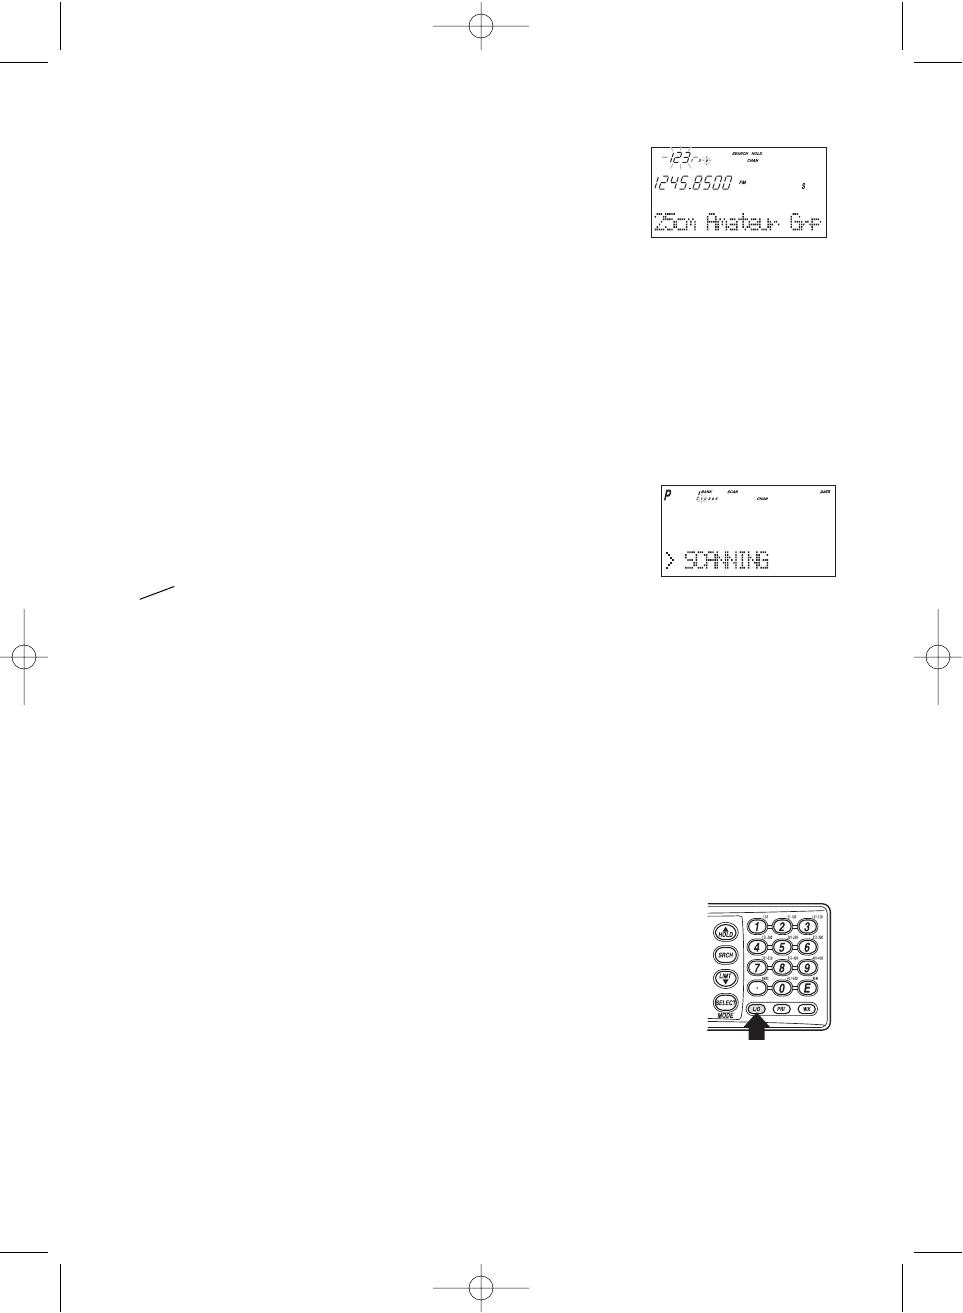
1. After programming frequencies, simply press
SCAN
to
begin scanning.
2. The bank indicators selected for scanning appear in the display, and the bank being
currently monitored flashes.You can deselect banks from active scanning by pressing
their number on your keypad. The indicator for each deselected bank turns off, and the
banks channels are not scanned.
Note: One Bank must always be active.You cannot deactivate all ten banks at the same
time. If you try to turn off all the banks, the first bank is automatically selected.
To restore a bank to active scanning, press the banks number on your keypad.
The banks indicator will display again.
3. During normal scanning the scanner skips
unprogrammed or locked out channels.
4. When a transmission is received, the scanner stops
on that channel. When the transmission ends,
scanning resumes automatically.
If you want to stop on a channel during scanning,
press
MAN
.
If you want to resume scanning,
press
SCAN
.
To directly access a specific channel:
There are several ways to access a specific channel quickly.
1. Press
MAN
.
2. Using the keypad, enter the channel number.
3. Press
MAN
again.
Another method is as follows:
1. Press the VFO control until
CHAN
is displayed.
2. Rotate the VFO control until the desired channel is
displayed. The scanner will automatically go to
manual mode.
Note: You can accidentally change the frequency if you don’t
verify that
CHAN
is displayed. If
FREQ
is displayed, you
will be changing the frequency when you rotate the
VFO control. Just don’t press
E
or it will be changed!
Scanning
1345
9 10
26
7 8
CHANNELS
Frequency
not entered
Frequency
Locked Out
(L/O)
SCAN
BC780XLT1.qxd 10/08/2000 5:02 PM Page 23
24
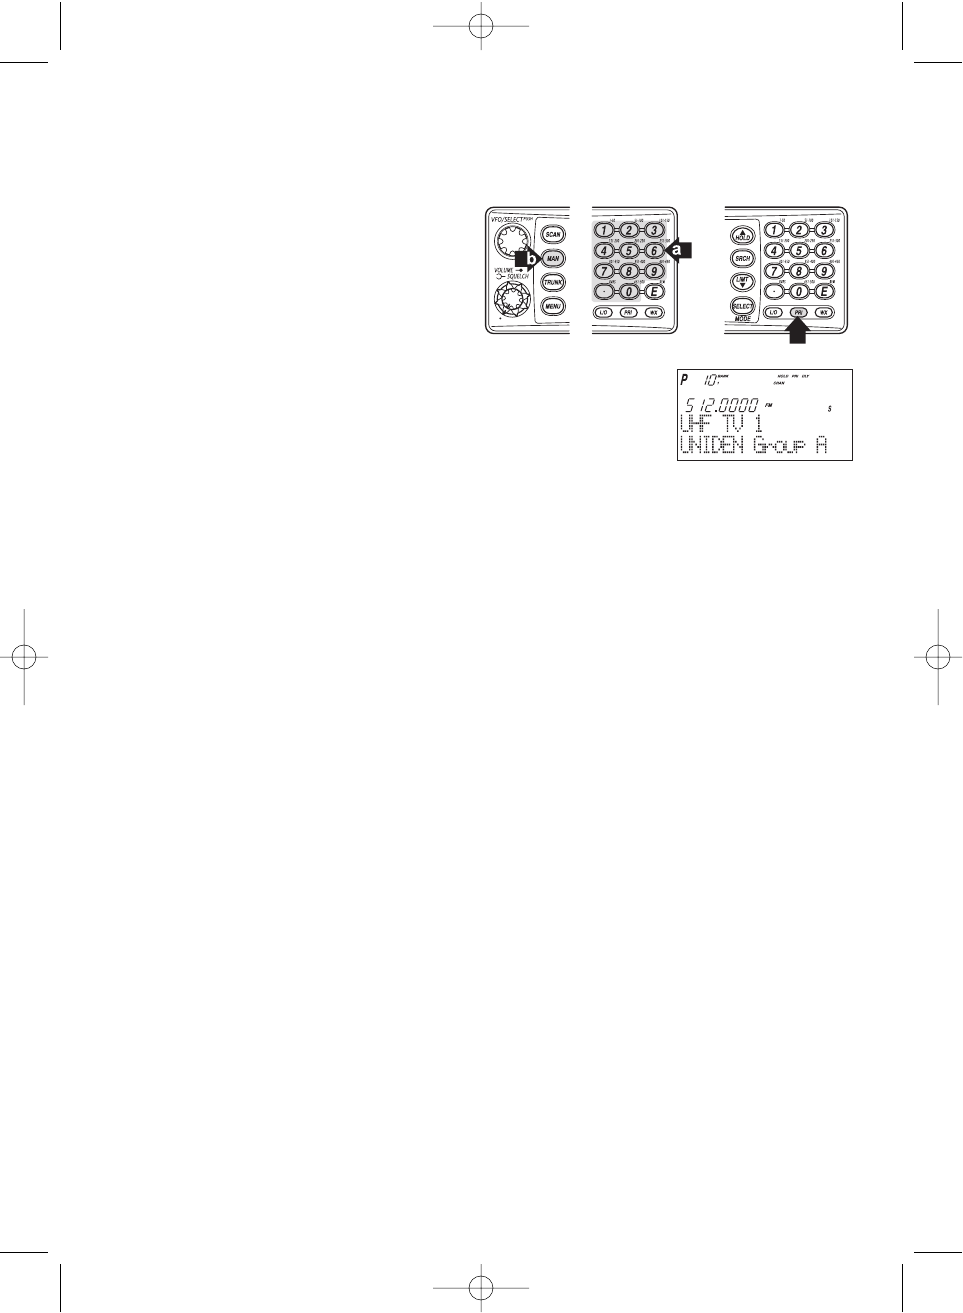
Still another method of direct access to a specific channel:
1 Press
MAN
.
2 Press ▲ or ▼to select the channel. (or press and hold ▲or ▼to scroll more quickly.)
Lastly to step up through the channels one at a time, repeatedly press
MAN.
RF Attenuation Feature
The BC 780XLT comes with an RF Attenuation feature. If you're near an unusually strong
signal source, the signal may overload the scanner. The scanner may stop repeatedly on
that signal and miss other transmissions.
The RF Attenuation feature works in all modes and attenuates (reduces) the incoming signal
strength to prevent stronger signals from overloading the scanner.
The RF attenuation is set at the menu mode.
1. Press
MENU
.
2. For Search mode, press ▲or ▼to select SEARCH
EVENT and then press
E
.
OR
For Scan mode, press ▲or ▼to select CH DATA
and then press
E
. Then you must enter your channel
data by pressing ▲, ▼or direct keypad entry. Then
press
E
.
3. Press ▲or ▼to select ATTENUATOR and then
press
E
.
4. Set to ON using ▲or ▼and then press
E
.
ATT
appears on the display.
☞ Remember! You can also use the
VFO
control for scrolling. Also instead of pressing
E
, you can press the
VFO/SELECT
control or press the
SELECT/MUTE
key.
Note: Attenuation will only be active for the specified channel. In SEARCH mode, it is applied
to the search ranges in all banks.
Setting the Delay Mode
A default delay of 2 seconds is automatically set for each frequency or talkgroup. A different
delay can be set for each programmed channel so that when scan or search stops on a
channel there is a brief pause before the scanning cycle resumes. To set the delay feature,
enter into the menu mode.
1. Press
MENU
.
2. Press ▲or ▼to select CH DATA and then press
E
.
3. Select the channel number to be delayed using ▲or ▼and
then press
E
.
4. Press ▲or ▼to select DELAY and then press
E
.
BC780XLT1.qxd 10/08/2000 5:02 PM Page 24
25
5. Press ▲or ▼to select one of the delay periods
provided and then press
E
.
DLY
appears on the
display unless no delay has been set.
6. For Search mode, select SEARCH EVENT - DELAY, then set the delay period.
Note: The delay periods are as follows:
• None: Delay feature off
• 1 sec.: Delays for 1 sec. before re-scanning
• 2 sec.: Delays for 2 sec. before re-scanning
• 4 sec.: Delays for 4 sec. before re-scanning
• Infinite: Stays on until SCAN is pressed
• -2 sec.: Stays for 2 sec. only before re-scanning *
• -5 sec.: Stays for 5 sec. only before re-scanning *
• -10 sec.: Stays for 10 sec. only before re-scanning *
*Setting negative delay periods are useful if you are only interested in small
segments of conversations. For example: If you set a -5 second delay, you will only
hear 5 seconds of the conversation and then the scanner will resume scanning,
whether or not the conversation is finished.
Channel Lockout
You can lockout any channel so it is not checked during normal scanning.You can restore the
channel to scanning when you wish.
Lockout in Manual Mode
1. Press
MAN
.
2. Select a channel.
Enter the channel numbers.
Press
MAN
again.
––– OR –––
Press
MAN
or
HOLD/
▲to change higher,
or
LIMIT/
▼to lower the channel.
3. Press
L/O
to lockout the channel.
L/O
appears in the display.
Lockout in Scanning Mode
If the scanner keeps stopping on a particular channel due to noise or too frequent
transmissions, you may want to keep that channel from scanning.
1. Wait until the scanner stops at the channel.
2. Then press
L/O
.
BC780XLT1.qxd 10/08/2000 5:02 PM Page 25
26
3. The scanner immediately resumes scanning because the
locked out channel is no longer in the scanning sequence.
Lockout Tips • Write down your locked-out channels and put in a convenient place in
case you need to restore them.
Restoring a Locked-out Channel
1. Press
MAN
.
2. Select a locked out channel.
a. Enter the channel number.
b. Then press
MAN
again.
3. Press
L/O
to unlock the channel. The
L/O
icon goes out.
Restoring All Locked-out Channels
You can restore all locked-out channels in a bank only when a bank is selected for scan. If
you have deselected a bank and you want to restore all of its locked-out channels using the
steps below, you must press
SCAN
and then press the number of the bank on your keypad.
1. Press
MAN
.
Note: You must be in Manual mode before restoring all
locked-out channels.
2. Press and hold
L/O
for about two seconds.
You will hear two beeps when all the channels have
been restored.
Priority Scan
When Priority Scan is turned on, your scanner checks the priority channel every two
seconds for activity. If a signal is present on the priority channel, your scanner monitors the
channel until the transmission ends, then resumes normal scanning. You can designate one
channel in each bank as a Priority Channel. By default, the first channel in each bank is the
priority channel, but you can change this.
To activate Priority Scan (in either the Manual or Scan Mode):
1. Press
PRI
.
Note: If you have locked out the priority channel,
ERROR
message appears when you select Priority mode.
2. Press
PRI
again at anytime to deactivate Priority Scan.
BC780XLT1.qxd 10/08/2000 5:02 PM Page 26
27
Changing the Priority Channel
You cannot eliminate the Priority Channel, but you can change it to any one of the 50
available channels in each bank.
1. Press
MAN
.
2. To select a new Priority Channel:
a. Enter the channel number.
b. Then press
MAN
again.
3. Press and hold
PRI
for two seconds to designate this
channel as your new Priority Channel.
Two beeps indicate that the Priority
channel has been changed. The
P
icon appears in
the display.
Note: • Priority in Trunking mode works just the same, except instead of setting priorities for
channels, you set them for talkgroup IDs. The scanner only checks priority
talkgroups between transmission, not in 2 second intervals.
• Priority scan is disabled while the
TRUNK
icon is lit (an error tone will sound
if you try). To make it possible, turn off the
TRUNK
icon then press
PRI
.
• At Priority scan, it scans the designated Priority Channels in the banks
you selected.
BC780XLT1.qxd 10/08/2000 5:02 PM Page 27
28
Setting a Search Range
Note: First you must set the search ranges through the menu screen prior to any searching.
The BC780XLT can search up to 10 separate frequency ranges to help you discover new
stations in your area.
To set a search range, enter into the menu mode.
1. Press
MENU
.
2. Press ▲ or ▼to select SEARCH EVENT and then press
E
.
3. Press ▲ or ▼to select SEARCH BANK and then press
E
.
4. Press ▲ or ▼to select the desired bank number and then press
E
.
5. Press ▲ or ▼to select EDIT RANGE and then press
E
.
6. Enter the lowest frequency using the keypad and
then press
E
, then repeat the same for the
highest frequency.
Then press
SRCH
.
Note: • The scanner can search up to 10 ranges by selecting specific banks which you
have programmed search ranges. (Chain Search)
• You can select or deselect the search bank freely by pressing the corresponding
number with the keypad.
• The scanner automatically increases its search speed from 100 to 300 steps per
second for the bands having 5 kHz steps. (Turbo Search)
• Press and hold ▲or ▼for more than 2 seconds while searching to switch the
search direction.
• When searching in WFM, it stops before reaching the desired frequency if the step
is other than 50 kHz or 100 kHz.
• After you have set the Search Range through the Menu the first time for a bank,
you will be able to set new ranges for the same bank by using the keypad and the
standard direct entry method.
Note: After you have entered the search range in a selected bank while still in the menu
mode, you can set your alpha tag (see page 21), change the step size of the search,
or change the mode. Once the lower and upper parameters of your search are edited,
the menu screen backs up one level to allow you to modify the step size, receive
mode, and alpha tag. Select 2: STEPS for your step size choices and then
press
E
. Select 3: MODE for the receiver mode choices and then press
E
. Select
4: ALPHA TAG to enter an alpha tag using the VFO control.
Searching
BC780XLT1.qxd 10/08/2000 5:02 PM Page 28
29
Search Hold Feature
1. Press
HOLD/
▲at anytime to stop the search.
2. Press
HOLD/
▲to move to the next higher frequency.
––– OR –––
Press
LIMIT/
▼to move down to the previous frequency.
3. Press
SRCH
to resume searching.
Data Skip
A scanner will normally stop on any transmission it receives. This means the BC780XLT will
occasionally stop on data signals and unmodulated transmissions.You can automatically
skip many of these types of transmissions during search. To activate the data skip feature,
enter into the menu mode.
1. Press
MENU
.
2. Press ▲ or ▼to select SYSTEM DATA and then press
E
.
3. Press ▲ or ▼to select DATA SKIP and then press
E
.
4. Set to ON using ▲, ▼or VFO and then press
E
.
DATA
appears on the display.
When data skip is active, your scanner may pause momentarily on an unwanted signal but
will resume searching in 2 or 3 seconds. Data Skip does not function during AM/WFM band
scan, chain search, or WX search, Priority Scan, and Trunking Mode.
Frequency Skip
If a particular frequency continues to interrupt search scanning, it is possible to set your
scanner to skip the frequency.
To skip over a frequency, press
L/O
when stopping at the frequency you want
to skip.
Note: • You can program up to 200 skip frequencies.
The 201st skip frequency entered causes the
first skipped frequency to unlock.
• If all frequencies in the search range are set to
skip, it moves to Search hold mode.
To resume searching, do as follows:
1) Cancel the frequency skip set, or
2) Reset the search frequency range.
To cancel all skipped frequencies, press and hold
L/O
for 2 seconds.
BC780XLT1.qxd 10/08/2000 5:02 PM Page 29
30
Storing Search Frequencies
You can quickly store any frequency you find during Search.
Caution: You must select the channel in which you will store the frequency before entering
the search mode. Otherwise, you may erase a stored frequency that you want
to keep.
1. During search, press
HOLD/
▲when the scanner
stops at the frequency you want to store.
2. Press
E
to store the frequency in the channel you selected.
Note: • If the frequency you want to store exists already,
WARNING
appears on the display
with a beep. (See Duplicate Frequency Alert on page 21.)
• After storing the frequency, it moves to the manual mode.
3. To store another frequency, select another channel for the new frequency by pressing
MAN
or
HOLD/
▲or
LIMIT/
▼.
4. Repeat steps 1 and 2 after starting search for all the Search frequencies you want
to store.
Auto Storing
The scanner automatically stores searched frequencies if its auto store feature is activated.
To make use of this feature, set a search range first (see page 28), then enter into the menu mode.
1. Press
MENU
.
2. Press ▲ or ▼to select SEARCH EVENT and then press
E
.
3. Press ▲ or ▼to select AUTO STORE and then press
E
.
4. Set to ON using ▲, ▼or VFO and pressing
E
. All
bank numbers start flashing and AUTO is lit on
the display.
5. Select the bank numbers you want to use with the
keypad. The selected bank numbers stop flashing.
Note: If the selected bank has no free channels to store,
ERROR
will appear on the display with a beep.
6. Press
SRCH
to start auto storing.The
AUTO
icon on the display
begins to flash. Audio is muted during the storing process.
7. After the search has gone through the search
range, press
MAN
or
MENU
to stop this feature.
STORE END appears in the display. You may
want to let it run through the search range
again because during the first pass there
may not be any transmissions at that
particular time.
☞ Remember! You can also use the VFO control for scrolling. Also instead of pressing
E
, you can press the VFO/SELECT control or press the
SELECT/MUTE
key.
BC780XLT1.qxd 10/08/2000 5:02 PM Page 30

31
Squelch (SQ) Mode
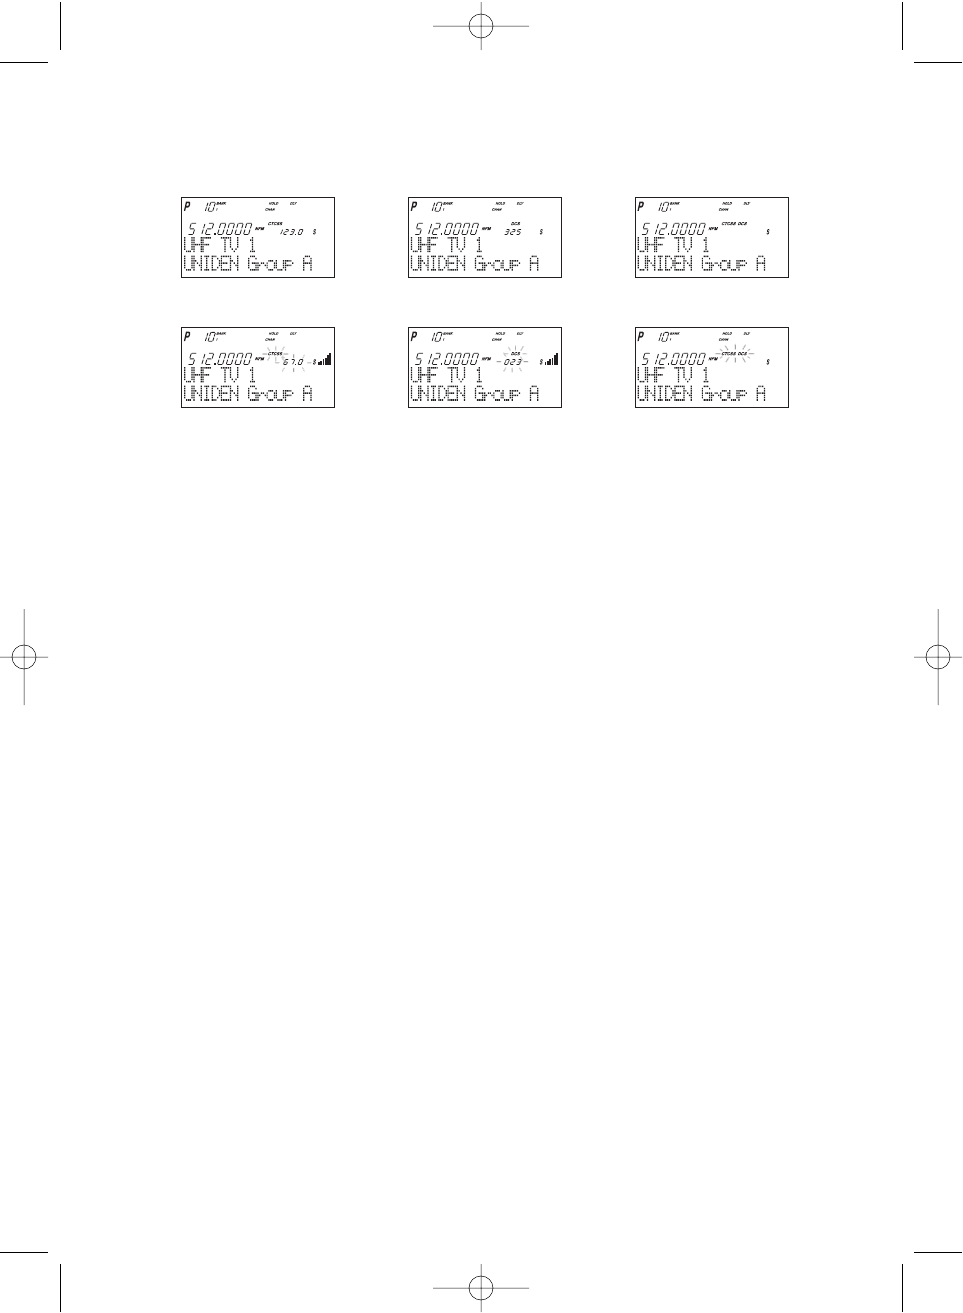
The scanner can be set to the following SQ modes.
• Carrier SQ mode (default setting)
The scanner will stop on any transmission or squelch opening, regardless of whether any
sub-audible tone has been programmed for the channel or search range.
• Tone SQ mode
The scanner will stop on any active frequency for which either no sub-audible tone has
been programmed or for which the user-programmed sub-audible tone is also active.
• Tone Search mode
During any transmission, the scanner will begin searching all possible sub-audible tones,
one of which may also be in use. The scanner counts up through the CTCSS tones and
instantly determines any possible DCS tone. See Page 83 for a listing of the tones that the
BC780XLT decodes.
Note: When Tone Search is active in Scan Mode, once the CTCSS/DCS display flashes a
tone repeatedly (meaning that it has found the tone match), you can press
E
to
program that frequency with the captured tone. When you change the mode to Tone
Squelch from Tone Search, that frequency and tone will be programmed.
• Tone Lock (out) mode
For either a memory channel or a search range, you can lock a particular sub-audible tone
by pressing
L/O
after scrolling to the desired tone. The scanner will stop on any
transmission except those which may be using the locked sub-audible.
To set your scanner, enter into the menu mode.
1. Press
MENU
.
2. Press ▲ or ▼to select SYSTEM DATA and then press
E
.
3. Press ▲ or ▼to select SQ MODE and then press
E
.
4. Press ▲ or ▼to select one type (CSQ, Tone SQ, Tone Search) and then press
E
.
5. To set Tone Lock mode, do the following first, then select Tone SQ in step 4.
1) For scan mode, enter CH DATA - CH No. - TONE DATA, select CTCSS/DCS with
▲or ▼, set Tone Lock ON by pressing
L/O
.
2) For search mode, enter SEARCH EVENT - TONE DATA, select CTCSS/DCS with
▲or ▼, set Tone Lock ON by pressing
L/O
.
BC780XLT1.qxd 10/08/2000 5:02 PM Page 31
32
Note: • CTCSS: Continuous Tone Coded Squelch System.
• DCS: Digital Coded Squelch.
• For example, the scanner shows the following displays.
• If the delay feature (-2 sec/-5 sec/-10 sec) has been set while in Tone search mode,
it resumes scanning according to the delay setting.
Additional Menu Options for Searching
Each of these additional menu options apply to all banks with search ranges entered. If there
is a bank that you do not want an option to apply, then simply press the bank number on the
numerical keypad.You will see the bank number that you have selected, disappears from
the display. (For more information on these options refer to the “Menu Descriptions” section
and “Additional Features” section.
Options:
RECORD (for more information see page 11)
1. Press
MENU
.
2. Press ▲ or ▼to select SEARCH EVENT and then press
E
.
3. Press ▲ or ▼to select RECORD and then press
E
.
4. Set to ON using ▲, ▼or VFO and pressing
E
.
LINE
is lit on the display.
ATTENUATOR (for more information see page 24)
1. Press
MENU
.
2. Press ▲ or ▼to select SEARCH EVENT and then press
E
.
3. Press ▲ or ▼to select ATTENUATOR and then press
E
.
4. Set to ON using ▲, ▼or VFO and pressing
E
.
ATT
is lit on the display.
DELAY
Refer to page 24.
Tone SQ on,
CTCSS 123.0 Hz set
Tone Search,
CTCSS 67.0 Hz detected
Tone Search,
DCS 023 detected
Tone Search,
no signal present
Tone SQ on,
DCS 325 set
Tone SQ on,
No CTCSS & DCS set
BC780XLT1.qxd 10/08/2000 5:02 PM Page 32