Uniden America UB305C Trunk Tracker Scanner User Manual Pages 40 to 55
Uniden America Corporation Trunk Tracker Scanner Pages 40 to 55
Contents
Pages 40 to 55
33
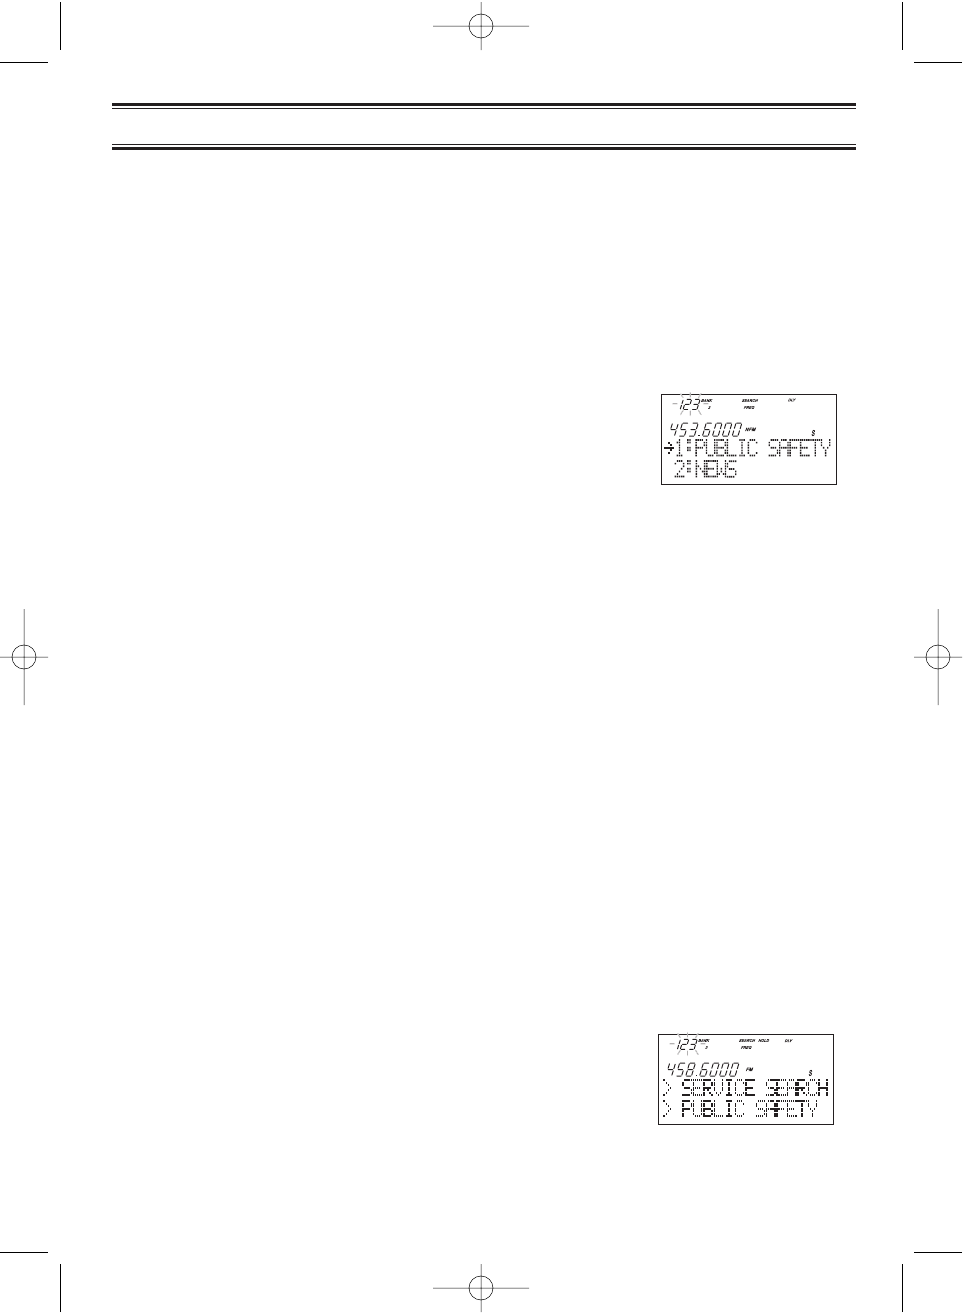
The Service Search feature allows you to toggle through the following ten preprogrammed
services. The frequencies selected for these services are the most commonly used around
the U.S.
• 1: PUBLIC SAFETY • 6: RAILROAD
• 2: NEWS • 7: AIR
• 3: TV BROADCAST • 8: CB RADIO
• 4: HAM RADIO • 9: FRS
• 5: MARINE • 0: SPECIAL (frequencies)
1. Press
SRCH
for 2 seconds. the display indicates
as illustrated.
2. After a 3 second delay, searching begins for the first
preprogrammed service – Public Safety (initial
setting).
3. If you want to skip a frequency, press
SRCH
to start searching immediately.
4. To change the searched service, use ▲, ▼or VFO after pressing SRCH for
2 seconds.
Note: • You can not change such settings as delay, during a service search.
• The channel number corresponding to certain services will appear when a
frequency within the search is active.
• You can enter one of the Service Search frequencies into Channel Memory by
pressing
E
when holding on one of the frequencies.
• Special Frequencies are low-power, itinerant, FRS, "splinters" and other frequencies
which are commonly used at special events and other locations and may or may
not be licensed.
5. To exit from the service search mode, press
MAN
or
SCAN
.
During the search of one of the preprogrammed services, the lower display line will indicate
the service that you are searching. To stop the search, press
HOLD/
▲.
HOLD
appears in the
display. Press
HOLD/
▲or
LIMIT/
▼to move up or down one programmed frequency, or press
SRCH
to resume scanning.
Service Search Skip
You can set the scanner to skip the frequencies unwanted during service search. 100
skipped frequencies are programmable.
1. To skip over a frequency, press
L/O
when stopping at the
frequency you want to skip.
2. To cancel a skip during search, press
HOLD/
▲,
tune in the desired frequency using ▲, ▼or VFO,
then press
L/O
.
To restore all skipped frequencies, press
L/O
for 2 seconds.
Service Search
BC780XLT1.qxd 10/08/2000 5:02 PM Page 33
34
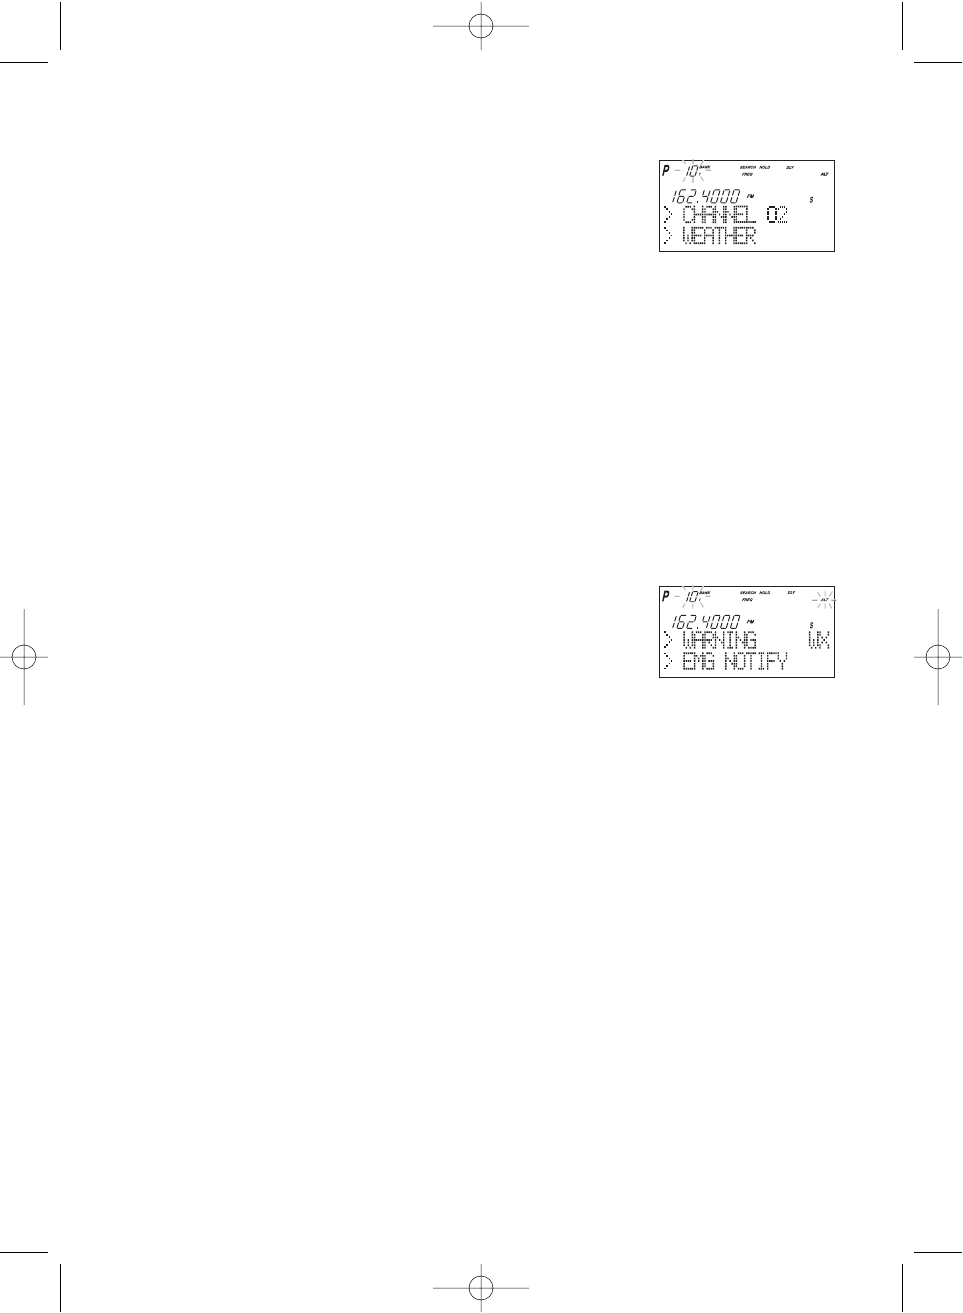
Weather Channel Search
To hear preprogrammed NOAA weather channels:
1. Press
WX
.
Note: • It’s possible to receive more than one weather broadcast in your area. If the
broadcast sounds weak or distant, press
SRCH
to look for a closer station.
• Press
HOLD/
▲if you want to stop searching (WX hold mode).
NWR-SAME Alert
In addition to the conventional weather broadcasts, your BC780XLT is compatible with
NWR-SAME weather alert. When the scanner receives NOAA’s Specific Area Message
Encoding (SAME) coded weather emergency signal, it sounds the alert tone with specified
message.You must program your FIPS code to identify the Specific Area where you are
located.
1. While receiving a weather channel or at the WX hold
mode, press
WX
to activate this feature. The ALT
icon displays.The audio is muted but the scanner is
still actively waiting to detect the coded SAME
emergency warning signals.
2. When the unit receives a warning signal, it shows a
message with the alert tone defined. (For NWR-
SAME Event Code, see the table in the Appendix.)
3. To deactivate, just press
WX
or it is automatically canceled when the channel is changed.
Testing the Alert Siren
To test and recognize the difference between the types of alert sirens, perform the
following steps:
1. During WX hold mode, press and hold the
PRI
key until you hear the
Statement Alert siren.
ALT
appears on the display and the
Statement, watch, warning sirens sound alternately.
Note: The samples of the each alert siren only last for a few seconds.You may need to
listen to each siren several times to be sure you recognize the different sirens and
tones. The sirens continue to sound rotating through the samples until you silence
the test.
2. To stop the test, press any key.
Make sure you can hear the siren in all areas that you would need to. If not, optional
accessories can be purchased to ensure that you are alerted for emergency broadcasts.
See your dealer or local electronics store for accessories. DO NOT USE THE EARPHONE
TO LISTEN TO THE TEST. DAMAGE TO YOUR HEARING COULD OCCUR.
BC780XLT1.qxd 10/11/2000 10:39 AM Page 34

35
Programming FIPS Code
The 6-digit Federal Information Processing System (FIPS) codes established by the National
Weather Service (NWS) must be programmed in your scanner. These codes specify an
emergency and the specific geographic area (such as county) affected by the emergency.
1. At the WX hold mode, press and hold
WX
for 2 seconds.
2. Select the desired memory number (F1-F15)
using ▲or ▼.
3. Enter FIPS code using the keypad.
4. Press
E
.
5. To exit from this programming mode, press
WX
.
––– OR –––
1. Press ▼when F1 is displayed or ▲when F15 is displayed.
2. Press
E
. The scanner is now set for ALL FIPS mode.
3. To cancel this ALL FIPS mode, enter individual
FIPS code again.
Note: • To cancel the entry, press .
• To obtain the FIPS code for your area, contact the NWS toll free
at 1-888-697-7263.(1-888-NWR-SAME) or visit their website
http://www.nws.noaa.gov/nwr/indexnw.htm
BC780XLT1.qxd 10/08/2000 5:02 PM Page 35

36
Trunked Systems
Your BC780XLT is designed to track three major types of trunked radio systems. These
systems are described here.
❖MOTOROLA - Including Type I, Type II, Hybrid, SMARTNET, and Privacy Plus.
Motorola systems are widely used by public safety and business users. Most are on
the 800 MHz band, and recent systems are appearing on other bands.
❖EDACS - Including "Wideband" 9600 baud, and "Narrowband" 4800 baud systems.
"Wideband" systems are mostly on the 800 MHz band, and are used by public safety,
utilities, and business users. Some systems are used on the VHF and UHF bands.
"Narrowband" systems are used in the 935-940 MHz band, many by utilities.
(See page 49)
❖LTR - These systems are mostly for business users, and found on the UHF,
800 and 900 MHz bands. (See page 52)
For details on the operation and programming for all of these systems, see pages 36-58.
When tracking these types of systems, remember these important points:
• Your scanner defaults to monitor Motorola Type II systems; however, you can change this
if the system in your area is different. (The types of systems are discussed below.)
• The frequencies for many of the trunked public safety systems are listed in the
TrunkTracker National Public Safety Trunked System Frequency Guide included with your
BC780XLT scanner. Frequencies sometimes change, check with www.trunktracker.com.
• If you have internet access, you can visit www.bc780xlt.com, www.trunktracker.com or
www.bearcat1.com/free.htm for current news and frequency information about Trunk
Tracking Scanning.
*Motorola, SMARTNET, and PRIVACY PLUS are trademarks of Motorola Inc. EDACS is a registered
trademark of the Ericsson Corporation. LTR is a registered trademark of E.F. Johnson Company.
BC780XLT1.qxd 10/08/2000 5:02 PM Page 36
37
Programming and Receiving
Trunked Systems
Programming Trunking Frequencies
The first step in tracking a trunked system is storing the frequencies in one of the 10
available banks in your scanner. Remember that you can only store one trunking system in
each bank.
Important: If you are programming an EDACS or LTR trunked system, you must enter the
frequencies in a specific order. Check the frequency guide included with the
scanner for the frequencies in your area. For additional frequencies, check the
websites listed on page 5.
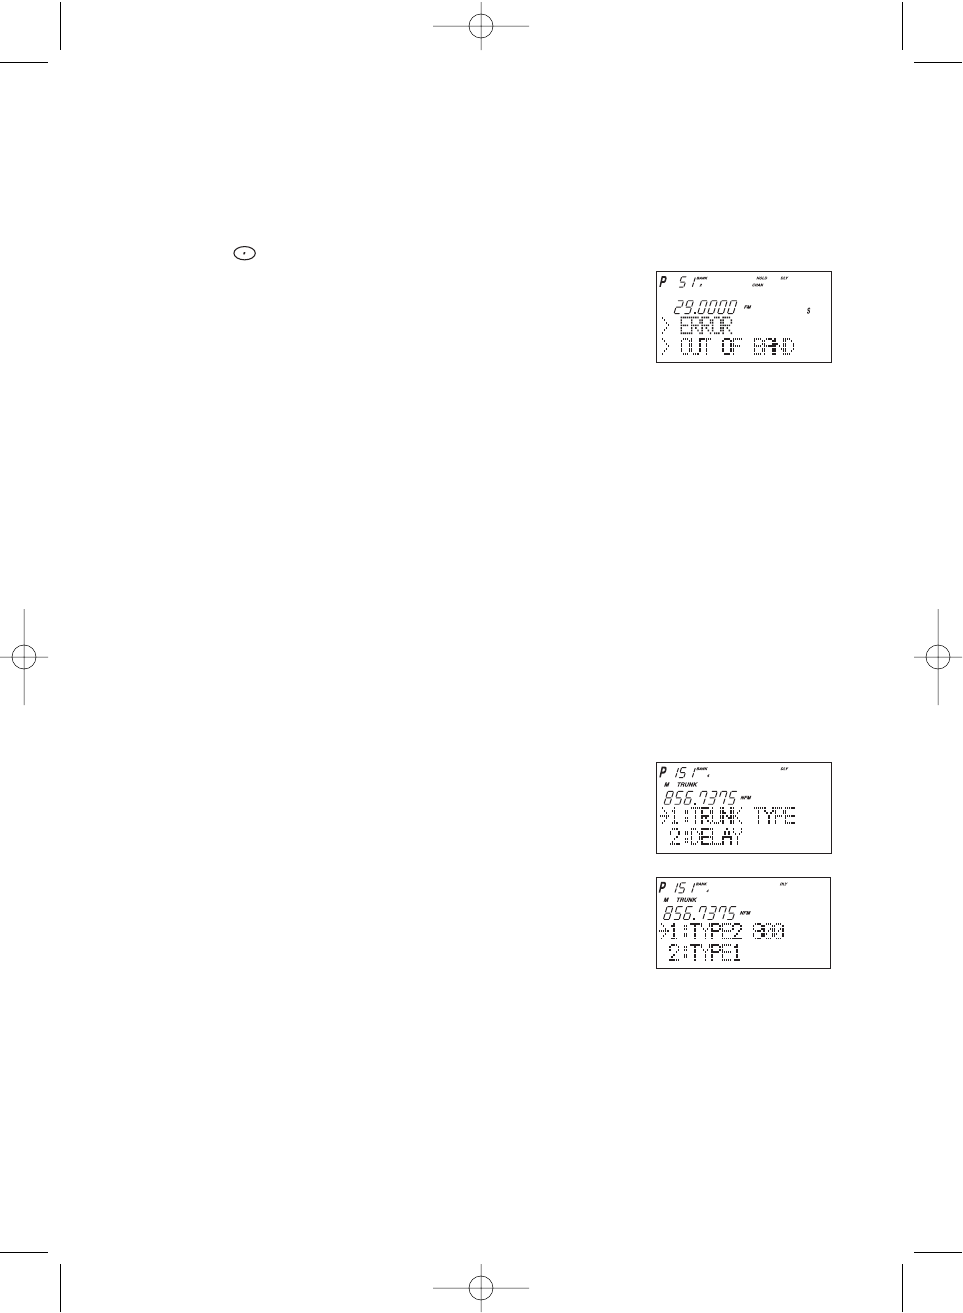
1. Press
MENU
.
2. Press ▲ or ▼to select TRUNK DATA and then
press
E
.
3. Press ▲ or ▼to select the bank no. and then press
E
.
4. Press ▲or ▼to select the TRUNK TYPE and then
press
E
.
☞ Remember! You can also use the VFO control for scrolling. Also instead of pressing
E
, you can press the VFO/SELECT control or press the
SELECT/MUTE
key.
5. Choose the system you want to track using the
keypad, ▲or ▼and then press
E
.
4. To exit from this mode, press
MENU
repeatedly.
5. Select a channel using the keypad and then press
MAN
.
6. Enter a frequency for the trunked system using
the keypad.
For example, enter
867.8375
(Type 2) or enter a
frequency you are going to track.
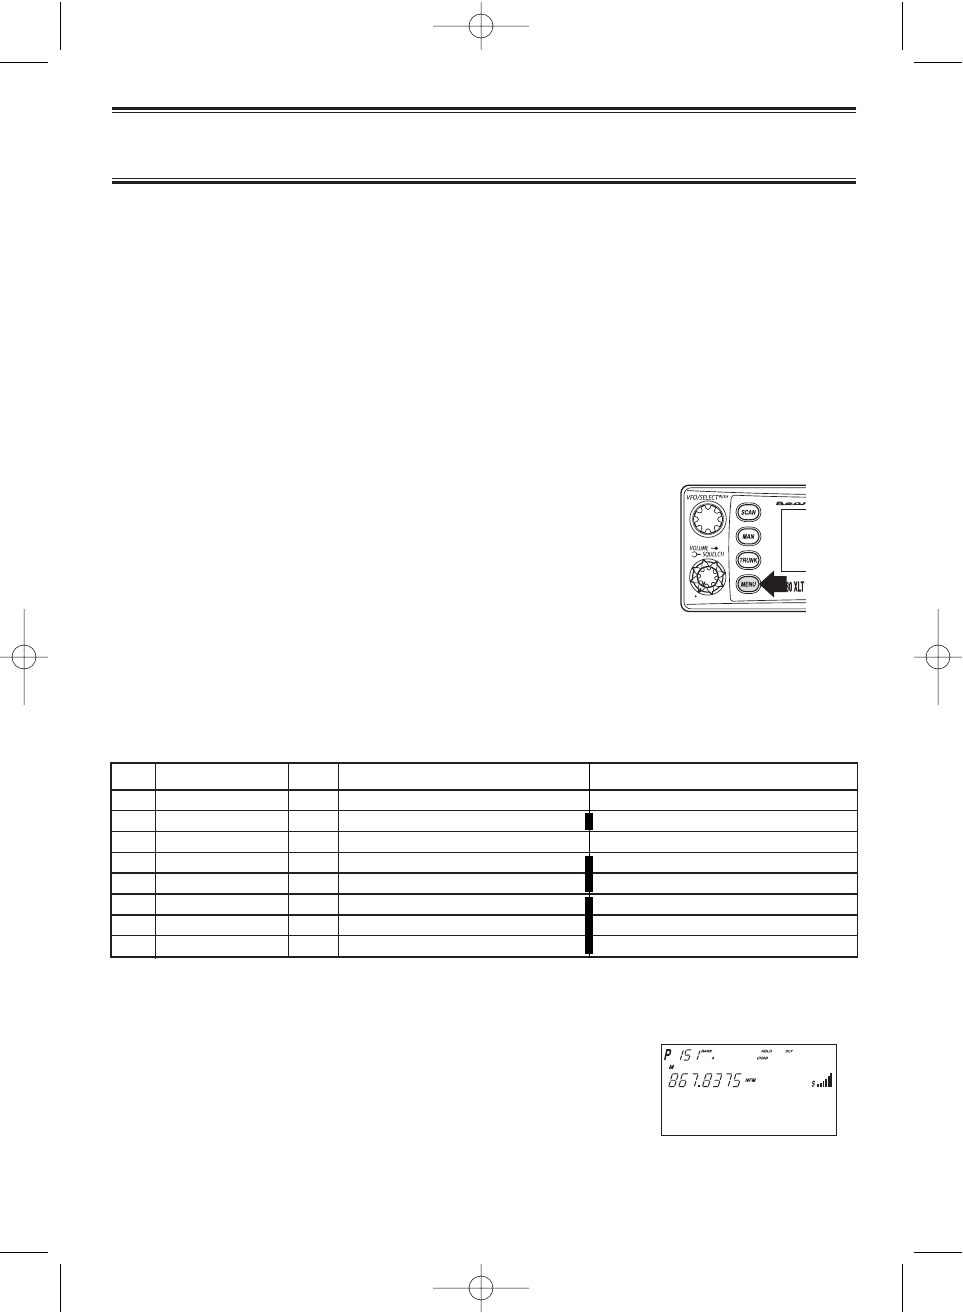
No. LCD display Icon Trunking Type Special requirements
1 Type 2 800 M Motorola Type 2 800 MHz
2 Type 1 M Motorola Type 1 a. Must program a fleet map.
3 Type 2 900 M Motorola Type 2 900 MHz
4 Type 2 UHF M Motorola Type 2 UHF b. Must program base, spacing,
5 Type 2 VHF M Motorola Type 2 VHF frequency and offset channel.
6 EDCS WIDE E EDACS Wideband 9600 baud c. Must program frequencies
7 EDCS Narrow E EDACS Narrowband 4800 baud in exact order
8 LT L LTR and location.
BC780XLT1.qxd 10/08/2000 5:02 PM Page 37
38
☞Important!
7. Press
TRUNK
for 2 seconds.
A tone sounds, and
E
,
M
, or
L
icon appears on the
display according to the system selected.
Note: • To clear a mistake while entering the frequency,
press (decimal key) repeatedly until the
display is cleared.
• If you enter a frequency which is out of the
system’s trunking range, a distinctive beep
sounds and
ERROR
appears on the display.
Selecting Trunking Programming Menu Mode
To change the system type which your scanner monitors, you must be in the Trunking
Programming menu mode.
To select this mode, follow these steps:
1. Press
MENU
.
2. Press ▲ or ▼to select TRUNK DATA and then
press
E
.
3. Select the bank you want to program using ▲, ▼or
VFO and then press
E
.
☞ Remember! You can also use the VFO control for scrolling. Also instead of pressing
E
, you can press the VFO/SELECT control or press the
SELECT/MUTE
key.
Selecting Trunking System Type
1. Select TRUNK TYPE using ▲, ▼or VFO and then
press
E
,
SELECT
or VFO.
2. Select the system type you want to program
using ▲, ▼or VFO and then press
E
,
SELECT
or VFO.
BC780XLT1.qxd 10/08/2000 5:02 PM Page 38

39
Setting the Squelch
For trunked reception, a good setting for the SQUELCH control is in the center of the range
with the red marker pointing up. See the illustration.
If set too high (CCW) in some cases it could prevent your scanner from
locking to the control channel reliably. If set too low (CW) it will slightly
delay finding the control channel. The best setting is the same as for
conventional reception, and is not critical.
Receiving Trunked Systems
When you have properly programmed all the frequencies for a trunked system, you can
receive the system several different ways.You will find that Search, Hold, Lockout, Scan and
Manual are all similar to conventional scanning.
❖TRUNKED SEARCH lets you hear all system talkgroup activity (unit-to-unit I-Calls
may be received as well). This is the best way to get started.
❖ID HOLD works with Search mode to let you quickly freeze reception on an
interesting transmission. Or you can manually specify a talkgroup with DIRECT
ENTRY ID HOLD.
❖ID LOCKOUT works with Search to exclude talkgroups that you don't want to hear.
❖ID SCAN lets you receive only those talkgroups that you store in Scan Lists.
❖MANUAL lets to selectively listen to a talkgroup in your Scan Lists
When receiving EDACS systems, remember that Uniden's AFS talkgroups give you powerful
flexibility. In a few keystrokes, you can specify a single talkgroup, a fleet, or an entire agency
in all the above modes. Read the section "EDACS Reception" to understand how this works.
Trunked Search
Once you have programmed all the frequencies for a trunked system, SEARCH will let you
immediately start hearing transmissions. It is suggested you try SEARCH mode first.
1. Press
SCAN
, and select the bank(s) you wish to receive, just as you select banks in
conventional scanning.
2. Press
TRUNK
to enable trunked reception. The radio will seek and acquire the trunked
system control channel. The scanner will now be in MONITOR mode. You will hear the
control channel and see active talkgroups on the screen. You will not hear the voice
transmissions in MONITOR mode.
☞Hint: MONITOR mode is an excellent way to observe system activity and determine
which talkgroups are most active. Locked-out IDs display during MONITOR mode.
3. Press
SRCH
to begin searching and receiving. You will hear talkgroups and see them on
the screen.
BC780XLT1.qxd 10/08/2000 5:02 PM Page 39
40
Talkgroups display differently in Motorola, EDACS and LTR systems.You should read the
appropriate parts of this guide to understand the formats.
The bottom line of the display indicates the Bank and the type of trunked system you are
monitoring. You can change this to display a bank tag by using the System Menu.
Regardless of the system, you won't know exactly who you are receiving until you listen for
awhile, or refer to frequency guides or internet sites such as www.trunktracker.com.Of
course, figuring out who each ID represents is half the fun of TrunkTracking.
Later, when you learn more about a system, you will want to store lists of talkgroups.
Then you can scan specific agencies and users, and use the many other features your
radio provides.
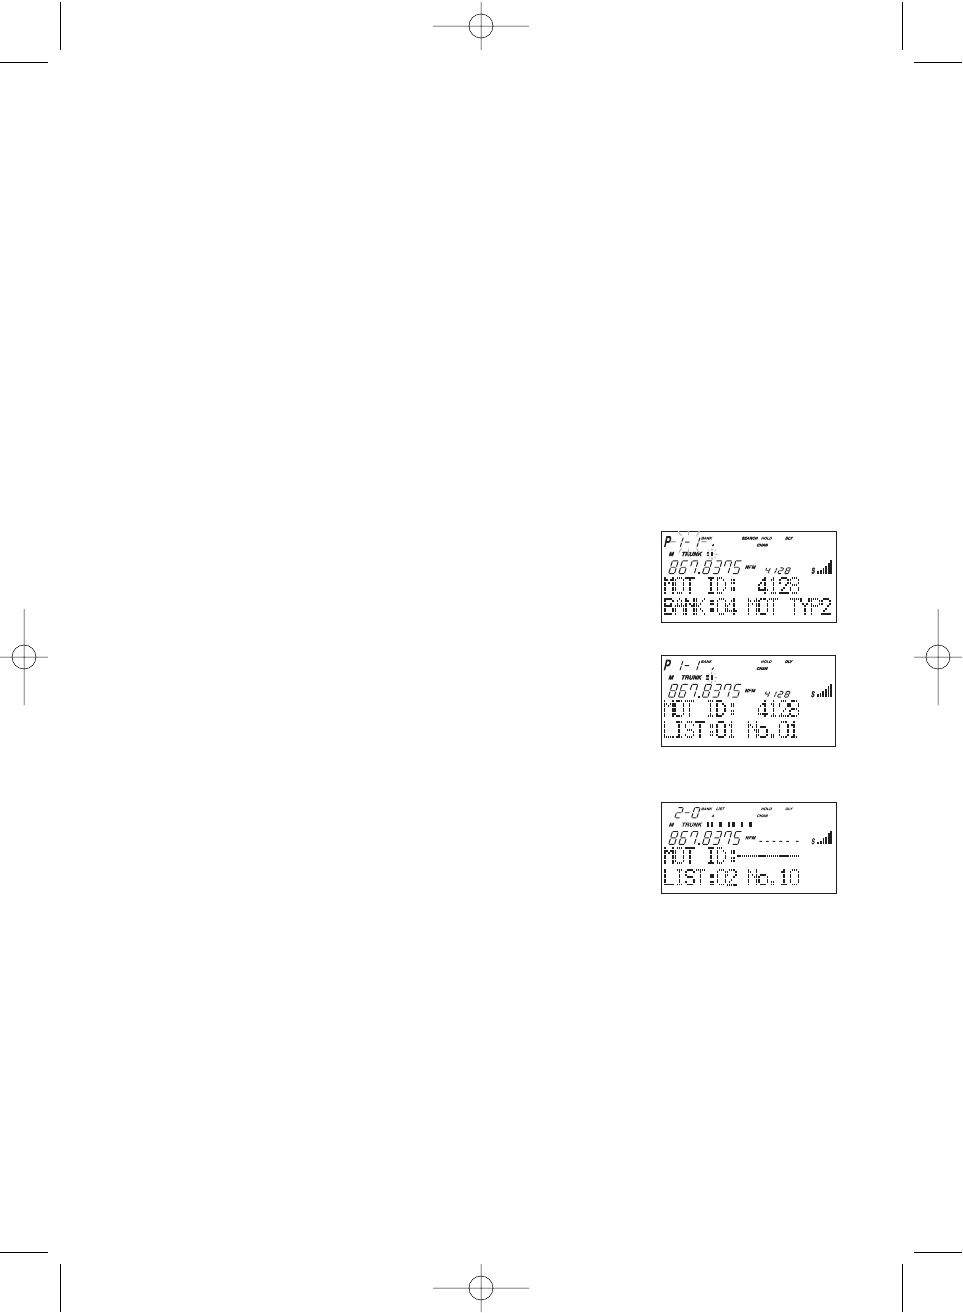
ID Hold and Direct Entry ID Hold Mode
Just like in conventional Search, HOLD lets you pause ID Search on an interesting
transmission without storing the talkgroup into memory.
If you hear an interesting ID during SEARCH mode, and want to continue listening to it --
• Press
HOLD/
▲to stop the search.
HOLD
appears in the display.
If you want to listen to a specific ID, while in HOLD --
• Use the keypad to enter the ID you want and press
HOLD/
▲.
HOLD
appears in the display.
If you want to stop holding --
• Press
SRCH
to return to Search Mode.
ID Lockout
Like conventional scanning, it’s possible to lockout unwanted traffic. This is particularly
important in trunked systems because in many areas, water meters, door alarms, traffic
signals, and other mechanical devices are assigned IDs just like other users. Also some
departments scramble or encrypt their communications, and you may want to lock out these
unintelligible broadcasts.
To lockout an ID, press
L/O
when the ID displays.
The ID is locked out. You can lockout up to 200 IDs.
Note: If you lockout an ID in Search mode, it is also locked out in Scan List mode.
Conversely, if you lockout an ID while in Scan List mode, it is locked out in Search
mode. For information about Scan Lists see page 42.
EDACS BLOCKOUT is a powerful form of ID LOCKOUT that can be used only with AFS
and EDACS systems. This feature lets you lock out entire Agencies or Fleets, not just
individual talkgroups. Using ID BLOCKOUT you can, for example, prevent Search from
stopping on any of hundreds of talkgroups in the Utilities agency. You can do this with just a
few keystrokes. To use ID BLOCKOUT just enter the Agency- part, or the Agency-Fleet part,
of the talkgroup code and press
L/O
. For example, to Blockout Agency 4 in Trunk Search,
press
HOLD/
▲, 04, (decimal key), and then
L/O
. For other ways to use partial AFS entry,
be sure to read the section "EDACS Reception".
BC780XLT1.qxd 10/08/2000 5:02 PM Page 40
41
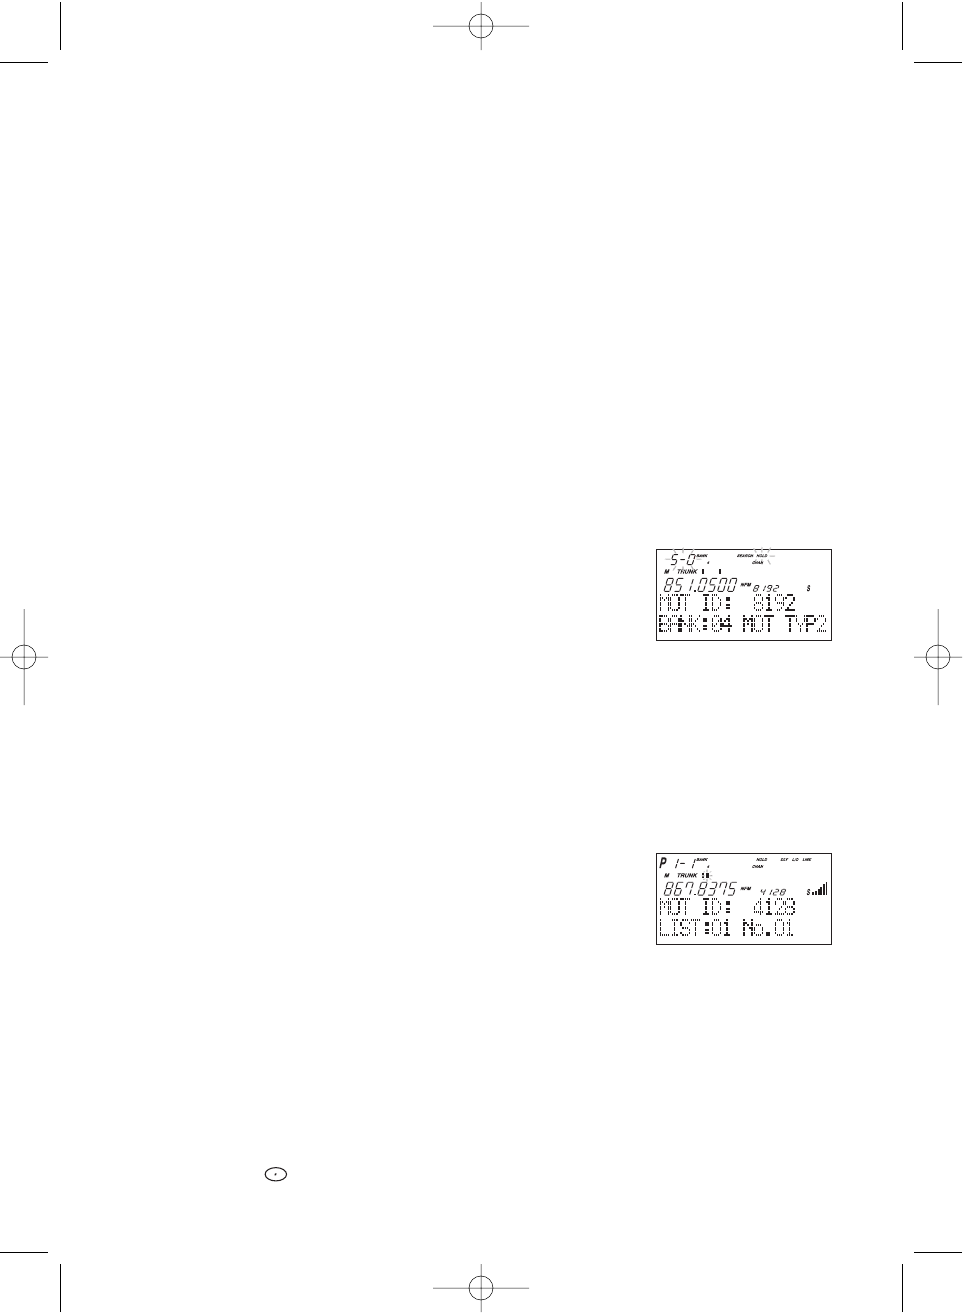
Restoring Locked-out IDs
To unlock a single ID, follow these steps:
1. Press
MENU
.
2. Select TRUNK DATA - BANK NO. - L/O ID REVIEW
using ▲, ▼or VFO and pressing
E
,
SELECT
or VFO.
3. Select the locked out ID you want to unlock using ▲or ▼.
4. Press
L/O
. The ID is unlocked and the next locked ID displays.
To unlock all locked out IDs in a bank at once:
1. Press
E
instead of
L/O
in step 4 above.
2. To exit from this mode, press
MENU
repeatedly.
Channel Activity Indicators
The BC780XLT has 30 Channel Activity Indicators to visually display a trunked systems
activity. You’ll always know which frequencies are in use and how much communication traffic
is occurring.
Each frequency you program in a trunking bank corresponds to an activity indicator at the
top of your scanners display. The way in which the Activity Indicators display provide you with
information about the system you’re tracking.
• The indicator which remains on, even if when there is
no traffic, represents the frequency being used as the
data channel.
• If an indicator turns on and you don't hear a
conversation, then the channel may be used as a
telephone interconnect call (some systems) or a
talkgroup that has been locked out.
• The indicator which flashes when an ID displays
represents the frequency being used by the talkgroup.
• If you're holding on an ID which isn't active, the
activity indicators will turn on and off as other groups
use the system.
BC780XLT1.qxd 10/08/2000 5:02 PM Page 41
42
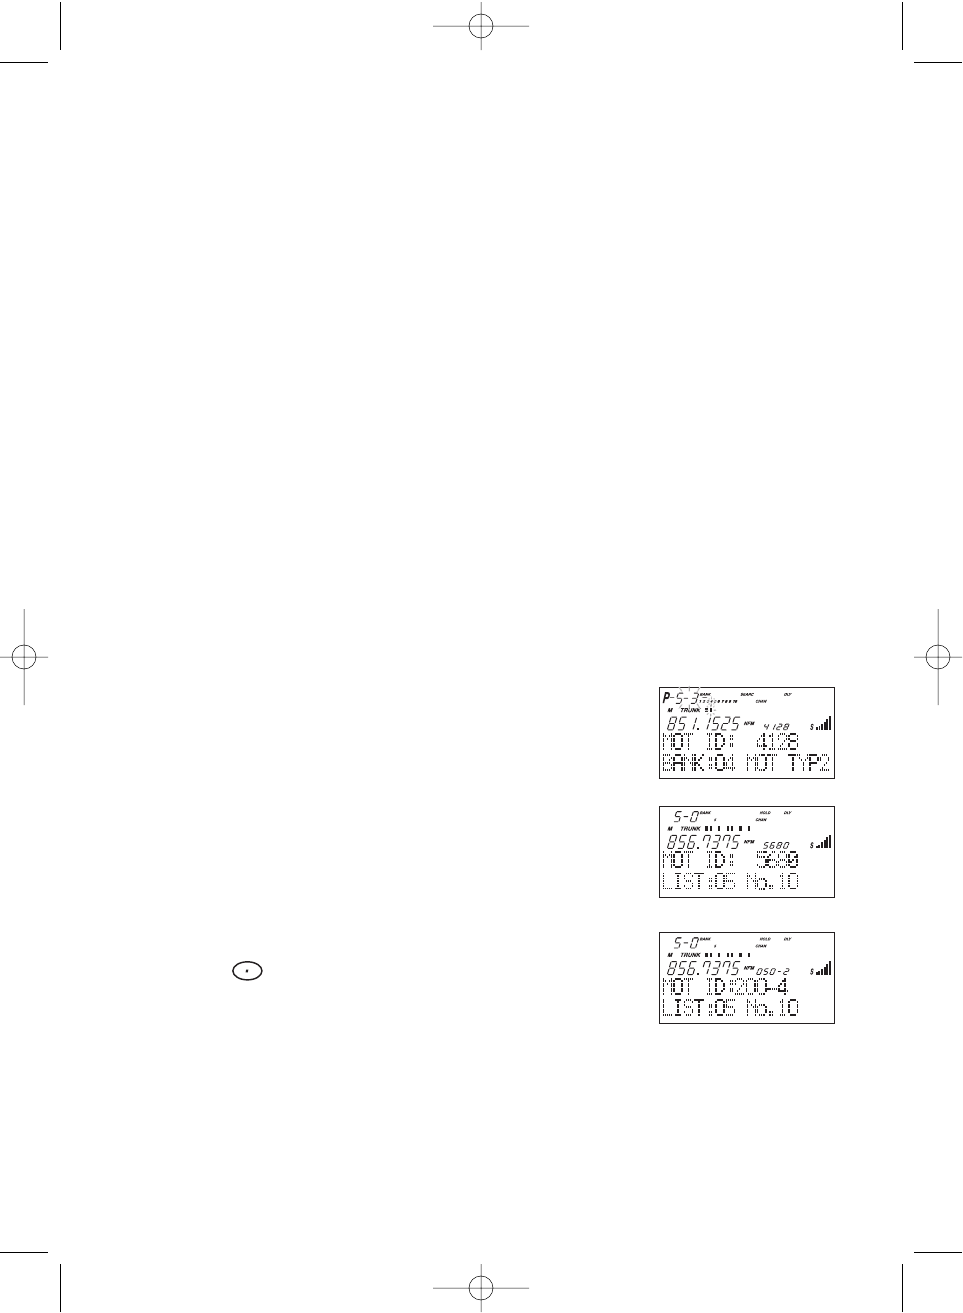
Scan Lists
Each bank of your BC780XLT can be a trunk tracking bank and it can be a conventional
scanning bank. When you designate a bank as a trunking bank, your scanner sets up 10
Scan Lists, which are simply lists used to store your favorite IDs. Each list can contain up to
10 IDs, so you can store a total of 100 IDs for each trunk tracking bank. (1000 if you use all
banks as trunking banks!)
Scan Lists help you organize the trunking system users into categories.
For example, you might use List#1 for police IDs, List#2 for fire department IDs, List#3 for
emergency medical service IDs, etc. Once IDs are stored in lists, you can scan them like you
scan conventional frequencies and you can lock out any one (and up to 9) of the 10 scan
lists by pressing the corresponding numeric key. When an ID is active, the scan list number
icon into which it is programmed will flash in the display (when the LIST icon is also active –
see below).You can program your scan lists either manually or during trunking search mode.
SELECT Key
Use the
SELECT
key while trunking to toggle between viewing the active Banks and the
active Scan Lists. To see which is currently active, check the display for either the
BANK
or
the
LIST
icon.
Check the web site www.trunktracker.com or www.bearcat1.com/free.htm for a complete
list of talkgroups for your area that you can program into your Scan Lists.
Programming ID Scan Lists Manually
1. Press
MAN
, the lowest available ID list number appears on the display.
2. Use
HOLD/
▲and
LIMIT/
▼to select the Scan List
location you want to program.
For example, select the third memory location in the
fifth scan list.
Note: You can also use the keypad to input directly.
3. Enter the Type II ID you want to store, and press
E
.
––– OR –––
To enter a Type I ID:
a. Enter the block number and fleet number.
b. Press .
c. Enter the subfleet number, and press
E
.
––– OR –––
BC780XLT1.qxd 10/08/2000 5:02 PM Page 42
To enter an EDACS®ID:
a. Enter ID you want to store.
Use the for the “dash”.
b. Press
E
.
Hint: Remember that Uniden's AFS format allows you to enter full or partial EDACS IDs for
powerful flexibility in all modes. Be sure to read the section "EDACS Reception" on
page 49 to learn how this works.
Note: The BC780XLT defaults to “AFS” talkgroup displays for EDACS®only.
––– OR –––
To enter a LTR ID:
a. Enter Area code and then press .
b. Enter Home Repeater number and then press .
c. Enter ID you want to store and then press
E
.
Note: To clear a mistake while entering an ID, press and
E
successively, and
start over.
4. Press
MAN
or
HOLD/
▲to select the next Scan List location.
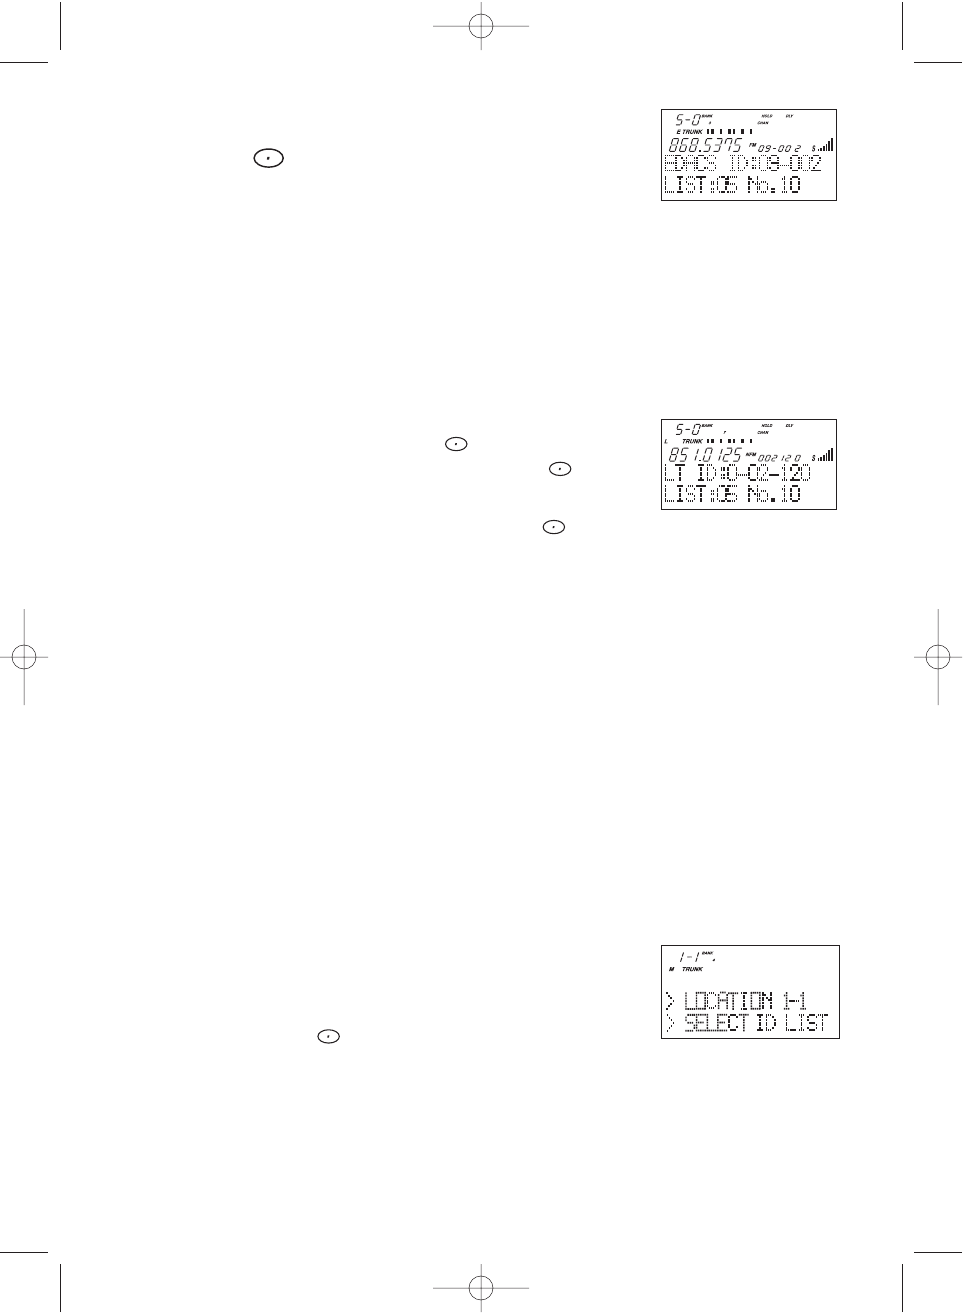
Program ID Manually with the Menu Mode
Note: It is also possible to do ID programming in the menu mode by selecting TRUNK DATA
- BANK NO. - PROGRAM ID. Do the following:
1. Press
MENU
.
2. Press ▲ or ▼to select TRUNK DATA and then
press
E
.
3. Press ▲ or ▼to select the bank no. and then press
E
.
4. Press ▲or ▼to select the PROGRAM ID and then
press
E
.
☞ Remember! You can also use the VFO control for scrolling. Also instead of pressing
E
, you can press the VFO/SELECT control or press the
SELECT/MUTE
key.
5. Select the ID location using the VFO control, keypad,
▲or ▼and then press
E
. (first number represents
the bank number and second number represents the
memory location.)(Direct entry method example: enter
“5-1” by pressing
5
, ,
1
.)
6. Press ▲ or ▼to select ID and then press
E
.
7. Enter the ID number using the keypad and then press
E
.
Note: After you have programmed the ID in a selected bank while still in the menu mode,
you can set your alpha tag (see page 21), flag the individual ID or talkgroup for
recording (see page 32 and 11), or turn on the beep alert for an individual talkgroup
(see page 22).
43
BC780XLT1.qxd 10/12/2000 9:44 AM Page 43

ID Scan Mode
1. Press
SCAN
to begin scanning the lists you
have programmed.
If you haven't programmed any IDs,
ERROR
appears
for a few seconds.
2. To remove a Scan List from active scanning, press
the number of the Scan List on your keypad.
The Scan List indicator turns off, and the IDs in that
list are not scanned.
Note: One Scan List must always be active. If you try
and deactivate all the Scan Lists, Scan List 1 will
automatically be active.
3. To restore a Scan List to active scanning, press its
number again.
4. Press
SRCH
to return to Trunk Tracking Search mode.
For motorola and EDACS system, to change your
display between the Scan List indicators and trunk
bank display, press
SELECT
.
For LTR systems only, the talkgroup must be active in
order to change the scan list and bank indicators. If
the talkgroup is not active, change the scan list by
using the menu screen.
Note: • Once you press
SCAN
or
SRCH
in one bank, all trunking banks will change to
that mode.
• Selecting a Scan List is also possible in the menu mode. (LTR only)
•ID SCANNING appears on the bottom of the screen during Trunk Scan instead
of simply SCANNING.
44
BC780XLT1.qxd 10/08/2000 5:02 PM Page 44
45
Setting Priority in Trunking Mode
You can set priority in your trunking lists, just as you do in your conventional ones. You can
set the priority by pressing and holding PRI for 2 seconds. After you’ve set up your Scan
List, press
PRI
to activate it.
It’s very similar to conventional priority although there is no “interrupt” during the
transmissions. Priorities are checked in between transmissions.
With Priority on, you can hold on an ID in your Scan List, such as Scan List 6, memory
position 7, and the scanner will check all the priorities in all the active Scan Lists every few
seconds and in between any transmissions on the ID on which you’re holding. The lowest
numbered priority will be checked first. For example, the priority ID in List 1 will be checked
before the priority in List 2, etc.
Note: This function does not work in LTR tracking.
Programming Scan Lists During Search
To select a Scan List location and store an ID during Search mode, follow these steps:
1. When your scanner stops on an ID you want to store,
press
HOLD/
▲.
2. Press
E
, or use
HOLD/
▲or
LIMIT/
▼to select the Scan
List memory location you want to change, then
press
E
.
3. Press
SRCH
to return to Trunk Tracking Search mode.
Deleting a Stored ID
To delete a stored ID:
a. Press
MAN
.
b. Use
HOLD/
▲and
LIMIT/
▼to select the scan list
location you want to delete.
c. Press
0
.
d. Then press
E
.
Moving between Scan List Memories
There are a number of ways to step and move through your Scan List memories:
1. Press
MAN
repeatedly.
2. Or, press
MAN
, then press
HOLD/
▲or
LIMIT/
▼.
3. Or, press
MAN
, next press
0
-
9
(scan list number), then press
0
-
9
(memory position), for
example. To move to Scan List 4, memory position 10, press:
MAN
,
4
,
0
,
MAN
BC780XLT1.qxd 10/08/2000 5:02 PM Page 45

46
I-Call (Motorola/EDACS)
I-Calls are direct unit-to-unit transmissions that are not heard by other system users.Your
BC780XLT can receive these transmissions. How you receive I-Calls depends on whether
you are in Search or Scan mode.
During I-Call reception the display will show the Unit ID number of either the transmitting or
receiving mobile unit, not a talkgroup. Unit IDs will display differently according to the type of
trunked system, and will replace the 'n's shown here.
EDACS and MOTOROLA TYPE 1 innnnn
MOTOROLA TYPE 2 7nnnnnn
Hint -- There are thousands of Unit IDs in typical systems, but relatively few I-Calls at a
given moment, so it is normally best to let the scanner to receive any I-Call without trying to
specify particular units.
I-CALLS IN SEARCH MODE
In SEARCH mode, the scanner default is that I-Call reception is OFF. This means that
I-Calls will not be received until you program them to be ON.You have three choices for
controlling I-Call reception. Through the Menu system, go to TRUNK DATA / BANK NO /
I-CALL , and make your selection. The menu choices are:
I-CALLs TALKGROUPS
1 OFF Not received Received normally This is the BC780XLT default
2 ON YES Received normally Use this choice to receive I-Calls
together with normal
talkgroup traffic.
3 ONLY YES NOT RECEIVED Use this setting to listen to
I-Calls, and block all talkgroup
reception. For quick access to
this mode, press then
SRCH
.
In I-Call ONLY mode, the display will show I-CALL, to warn that only I-Calls will
be received.
You can HOLD any I-Call ID. Because you can only hold on one ID, and there are two IDs
involved in any I-Call communication (the transmitting and the receiving units), you might not
hear the full conversation, but you probably will.
☞In SEARCH mode, when you hear an interesting I-Call, you can enter the instant
shortcut then
SRCH
to enter I-Call ONLY mode. This blocks all talkgroup traffic
and lets you hear just the I-Call. To return to normal reception, you must use the
Menu system to select the ON or OFF option.
Note: When storing I-Call IDs, remember that the ID will be for only one of the units -- either
the transmitting or receiving unit. Unless you specifically want to receive a certain ID,
it might be better to use the special code in the HINT below.
BC780XLT1.qxd 10/08/2000 5:02 PM Page 46

47
I-CALLS IN SCAN AND MANUAL MODE
You can store I-Call IDs in scanlists, just like talkgroup IDs, for use by ID Scan and Manual
modes. To program a specific I-Call Unit ID into a scanlist:
EDACS or Motorola Type 1
Enter followed by the Unit ID digits, then
E
.
Motorola Type 2
Enter
7
followed by the Unit ID digits, then
E
.
HINT - There is a special code to let you receive all I-Call IDs with a single scanlist entry.
Simply enter ,
0, E
. This will store the special code i0 in an EDACS scanlist, or
700000 in a Motorola scanlist. Then, whenever you SCAN this entry, or select it in
MANUAL, the scanner will receive any active I-Calls, regardless of the Unit IDs.
Note: Motorola I-CALL tracking performance may vary between systems.
Multi-Track
The BC780XLT allows you to track more than one system at a time. Here are some
highlights of this feature:
❖You can actually track up to 10 trunking systems at one time.
❖You can trunk scan or search and scan conventional frequencies at the same time.
❖You can program conventional frequencies in the same bank as trunking systems.
After the scanner finishes checking a trunked system for activity, it will conventionally
scan the other frequencies in the bank (remember, only trunking frequencies are
programmed in TRUNK mode).
To scan a mix of trunking and conventional banks, select the banks you wish to be active
with trunking off, then press
TRUNK
. The scanner will instantly begin scanning. If you have
not programmed a trunking bank with talkgroup ID’s, you will receive NO ID (----)
message for that bank. You can switch to SEARCH mode and the scanner will search for any
active ID’s on the system.
Multi-Track Operational Details
When more than one trunk system is active (for example two or more trunked systems or a
trunked system and one or more conventional frequencies), the radio jumps between
systems/frequencies as follows:
TRUNK SCAN
: The scanner moves to a trunked system and looks for IDs in your Scan
List(s) for up to one second. If it finds no activity on your programmed talkgroups, it moves
on to conventional channels in the same bank or to the next active bank.
If the scanner finds that a talkgroup in one of your active Scan Lists is on the air, you will
begin to hear that communication and the scanner will of course display the proper
talkgroup number and any alpha tag. When the communication ends, the scanner will wait
for any delay period (such as a default of two seconds) for any further replies and, if none,
the scanner will move to the conventional channels in the same bank or to the next bank.
The scanner will not look for any other IDs within the same trunked system (as this would
slow the scan process). Note that if you press
SCAN
while you are listening to one ID, the
scanner will check to see if another ID in your Scan List is active. It will disregard the ID to
which you were just monitoring.
BC780XLT1.qxd 10/08/2000 5:02 PM Page 47

48
TRUNK SEARCH
: This mode works similarly to TRUNK SCAN. If the scanner finds any
(non-locked-out) ID when it checks the control channel, you will hear it.You will then hear
any replies that follow within two seconds (or whatever delay you may have set). After that
the scanner will move on and not continuously search the system for additional IDs (on
busy systems you would never leave the system if this were the case). Note that if you
press the
SRCH
key while monitoring one ID, the radio will check if any other IDs are
active (it will disregard the ID you just left), and if none are active, it will move on.
LIMIT/
▼
KEY
: If you wish to exit a trunked system without waiting for the currently active
talkgroup to finish its communication, press the
LIMIT/
▼key. This is particularly helpful on
very busy systems where many talkgroups are active and activity is frequent and long-
lasting. Pressing this key will move the scanner on to the conventional frequencies in the
same bank or the next bank.
SCAN & SEARCH Icons
For the first time on a Uniden scanner, you will see both the
SCAN
and the
SEARCH
icons active at the same time. This indicates that the radio is scanning conventional banks
and Trunk searching trunking banks. When the radio is trunking, only the
SEARCH
icon
will be lit. Note that to start a conventional search, you must place the radio into
conventional manual mode and then press the
SEARCH
key.
BC780XLT1.qxd 10/08/2000 5:02 PM Page 48