VTech Telecommunications 80-5735-02 900MHz/5.8GHz Cordless Phone User Manual EL42208 manual 091908 ES2 0
VTech Telecommunications Ltd 900MHz/5.8GHz Cordless Phone EL42208 manual 091908 ES2 0
Contents
User Manaul 2

6
Telephone base & charger installation
If you subscribe to high-speed Internet service (Digital Subscriber Line - DSL)
through your telephone lines, you must install a DSL filter between the
telephone base and the telephone wall jack. The filter will prevent noise
and caller ID problems caused by DSL interference. Please contact your DSL
service provider for more information about DSL filters.
Install the telephone base and charger as shown below.
NOTES:
1. Use only the supplied rechargeable battery, replacement battery (part numberUse only the supplied rechargeable battery, replacement battery (part number
89-1332-00-00) or equivalent. To order a replacement battery, visit our website at
www.telephones.att.com or call 1 (800) 222-3111. In Canada, dial
1 (866) 288-4268.
2. This power adapter is intended to be correctly oriented in a vertical or floor mount position.
The prongs are not designed to hold the plug in place if it is plugged into a ceiling, under-
the-table or cabinet outlet.
Getting started
Telephone line cord
DSL filter
(available from your DSL Internet
provider)
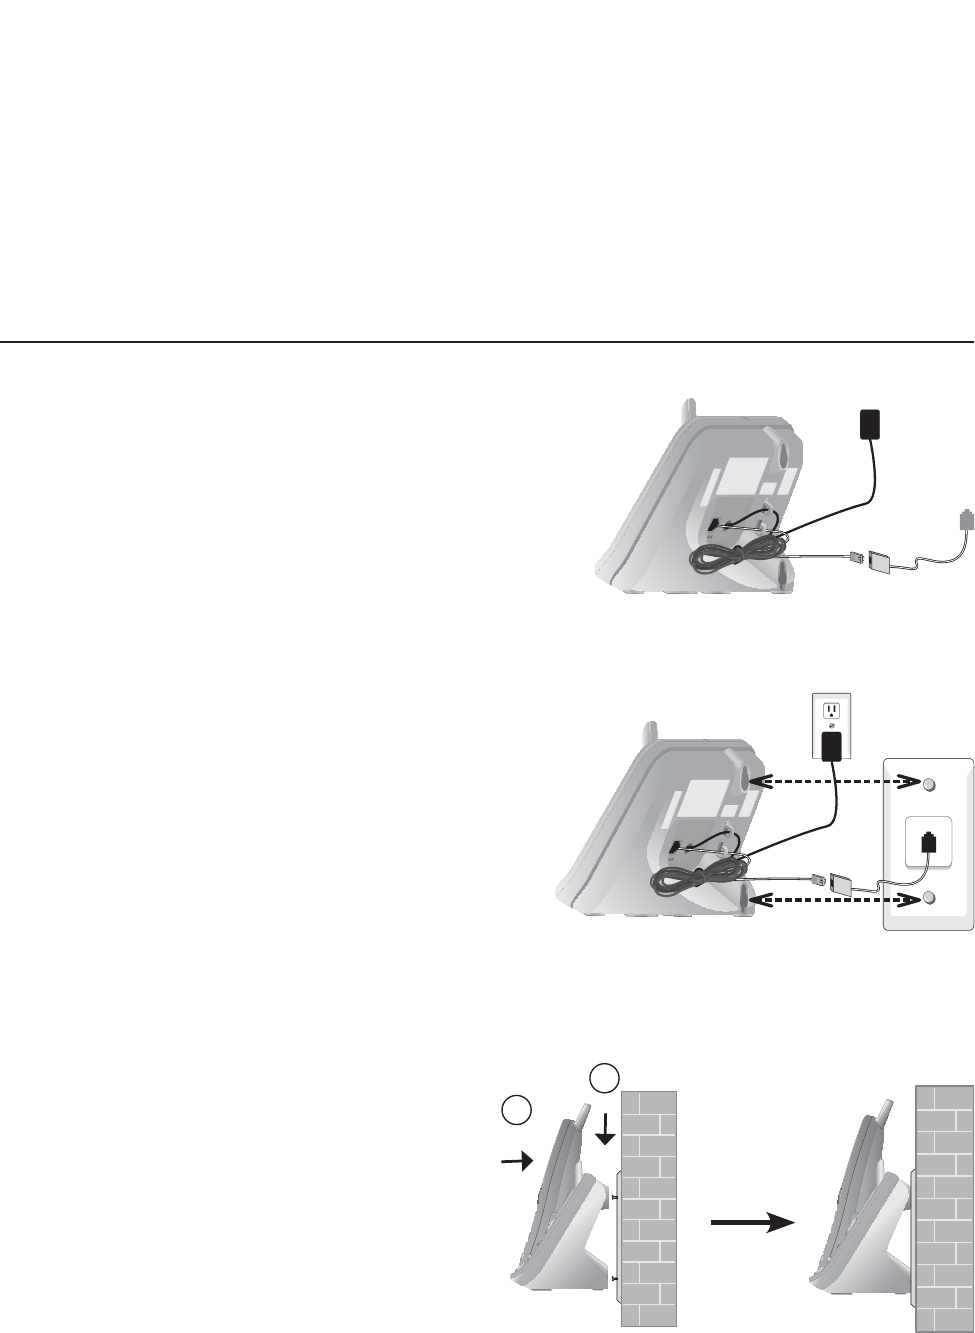
4. Plug the other
end of the
telephone line
cord into a
telephone jack.
5. Plug the
large end of
the power
adapter into an
electrical outlet
not connected
to a wall switch.
3. Route cords
through slots.
2. Plug one end of
the telephone
line cord into the
telephone jack
on the underside
of the telephone
base.
1. Plug the small
end of the power
adapter into the
power jack on
the underside of
the telephone
base.
Plug the power
adapter into an
electrical outlet not
connected to a wall
switch.
Charger installation
Telephone base installation
7
Installation options
The telephone base is designed for both desktop installation and wall mount
installation. If wall mounting is desired, a telephone outlet wall mounting
plate with mounting studs is required. This mounting plate is available for
purchase at many hardware or consumer electronics retailers and may require
professional installation.
Desktop to wall mount installation
1. Plug the telephone line
cord and power adapter
into the telephone base.
Bundle the telephone
line cord and route cords
through the slots, then
secure with a twist tie.
2. Plug the power adapter
and telephone line cord
into the wall outlets, then
align the mounting studs
on the telephone outlet
plate with the mounting
holes on the telephone
base.
3. Place the telephone
base mounting holes
just above the mounting
studs, then slide the
telephone base down
until it is secure.
1
2
Getting started

8
Installation options
Wall mount to desktop installation
To change the telephone base from the wall mount position to desktop
position, make sure that you first unplug the power adapter and telephone
line cord from the wall outlets before you begin.
1. Slide the telephone base
upwards, then pull the
telephone base away from the
wall off of the mounting studs.
2. Unplug the power adapter and
the telephone line cord from
the electrical outlet and the
telephone jack.
3. Plug the telephone line cord
into the telephone base and
telephone wall jack, then plug
the power adapter plug into the
telephone base and a power
outlet not connected to a wall
switch.
1
2
Getting started
9
Battery installation & charging
Install the battery as shown below. After installing the battery, you can make
and receive short calls, but replace the handset in the telephone base or
charger when not in use. For optimal performance, charge the handset battery
for at least 16 hours before use. When fully charged, the handset battery
provides approximately five hours of talk time or six days of standby time.
If the handset has not been used for a long time or if the battery inside is
completely depleted, put it on the telephone base or charger for recharging.
Getting started
RECORD
ANNC.
REMOVE
MENU / SEL
TRANSFER
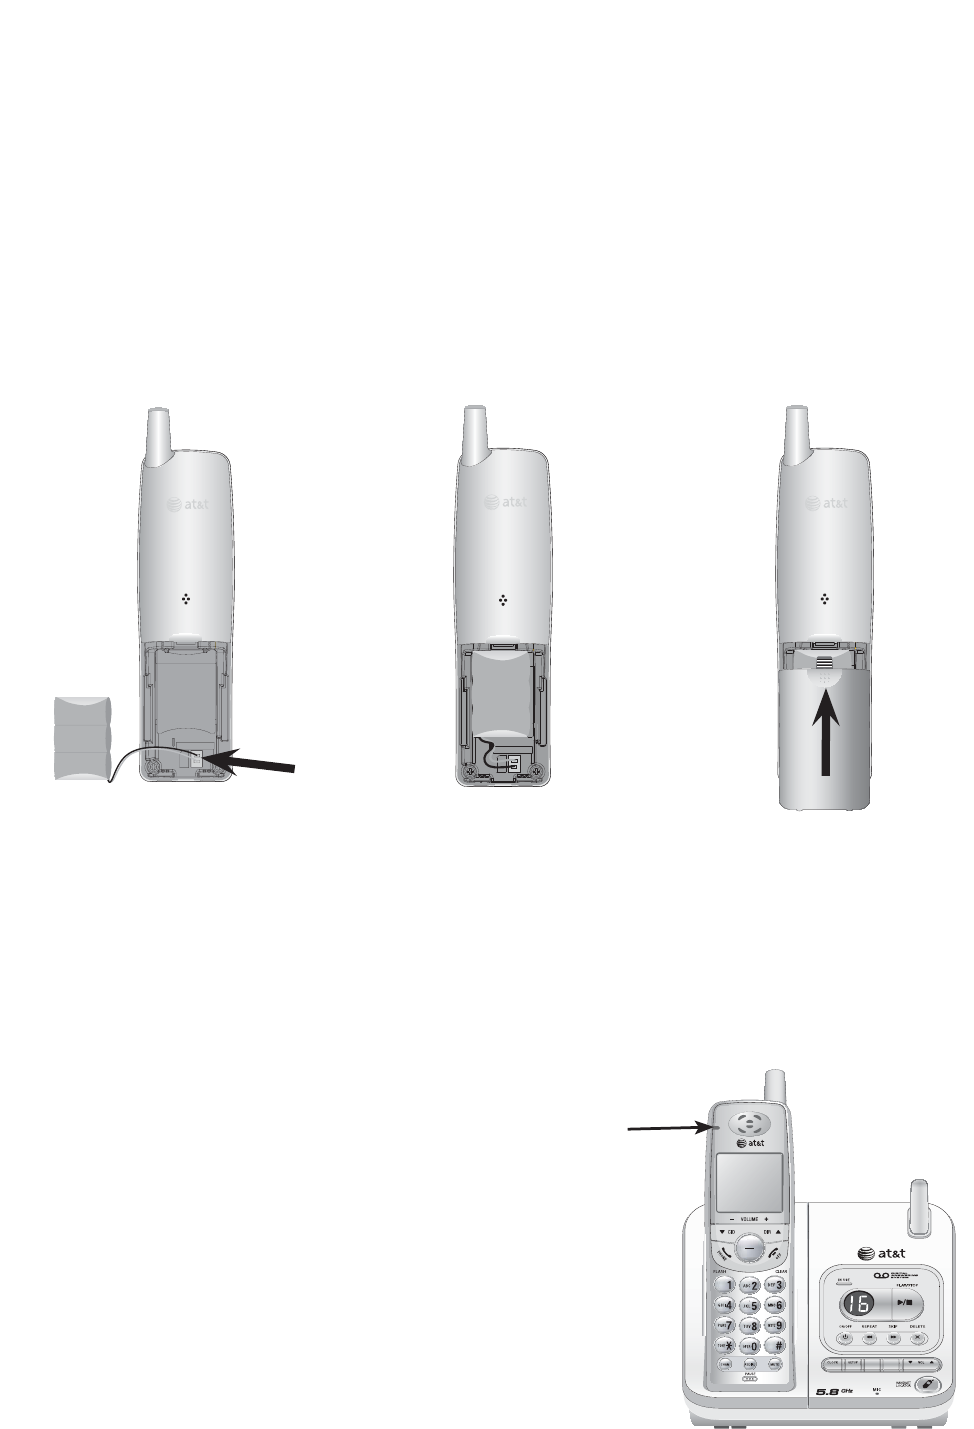
Step 1
Insert the battery plug as
indicated, making sure that
it matches the color-coded
label inside the battery
compartment.
Step 4
Charge the handset, by placing the
handset face up in the telephone
base. The CHARGE light on the
handset should be on as soon as
the handset is properly placed on
the telephone base.
Step 3
Slide the battery
compartment cover
up until it clicks.
Step 2
Place the battery
and wires inside the
compartment.
CHARGE
light
10
Getting started
Battery installation & charging
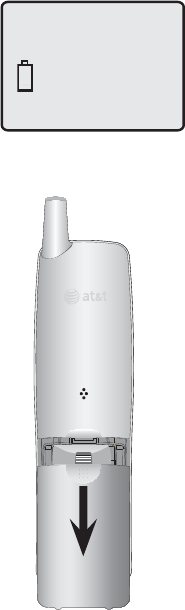
Low battery indicator
Return the handset to the telephone base or charger to
recharge when this symbol flashes and the handset beeps
or when the handset screen displays LOW BATTERY.
IMPORTANT INFORMATION
Use only the supplied rechargeable battery, replacement battery (part number 89-1332-00-00) or
equivalent. To order a replacement battery, visit our website at
www.telephones.att.com or call 1 (800) 222-3111. In Canada, dial
1 (866) 288-4268.
To replace the battery, press the tab and slide the
battery compartment cover downwards. Lift out the old
battery and disconnect it from the handset. Follow the
instructions on the previous page to install and charge the
new battery.
LOW BATTERY
10:08AM
02/14
11
Settings
Each cordless handset operates independently
from the other handsets. The ringer sound,
ringer volume, date and time, dial mode, home
area code and language must be programmed
separately for each cordless handset.
To customize how the handset works:
1. Press MENU/SEL in the idle mode to enter the
handset main menu.
2. Use CID or DIR to scroll to the desired
feature.
3. Press MENU/SEL to select the feature.
To stop at any time, press OFF/CLEAR.
Language
To change the language to Espanol, or Francais:
1. Press MENU/SEL in the idle mode to enter the
handset main menu.
2. Press CID or DIR until the screen displays
LANGUAGE.
3. Press Press MENU/SEL. The current setting is flashing.
4. Press CID or DIR to choose ENGLISH,
FRANCAIS, or ESPANOL.
5. Press MENU/SEL to save your selection and
return to the main menu.
Dial mode
The dial mode defaults to tone. If you do not have
touch tone service, you will need to change the
setting to pulse:
1. Press MENU/SEL in the idle mode to enter the
handset main menu.
2. Press CID or DIR until the screen displays
DIAL MODE: and the current setting.
3. Press MENU/SEL. The current setting is flashing.
4. Press CID or DIR to display TONE or
PULSE.
5. Press MENU/SEL to save your selection and
return to the main menu.
LANGUAGE
DIAL MODE: TONE
Telephone operation