VTech Telecommunications 80-6684-00 1.9GHZ CORDLESS PHONE User Manual USERS MANUAL 2
VTech Telecommunications Ltd 1.9GHZ CORDLESS PHONE USERS MANUAL 2
Contents
USERS MANUAL 2
9
Getting started
Installation options
The telephone base is set for desktop use. It is possible to change to wall
mounting position by installing the wall mount bracket provided. Wall
mounting requires a telephone outlet wall mounting plate with mounting
studs that may require professional installation. You can purchase the
mounting plate from many hardware or consumer electronics retailers.
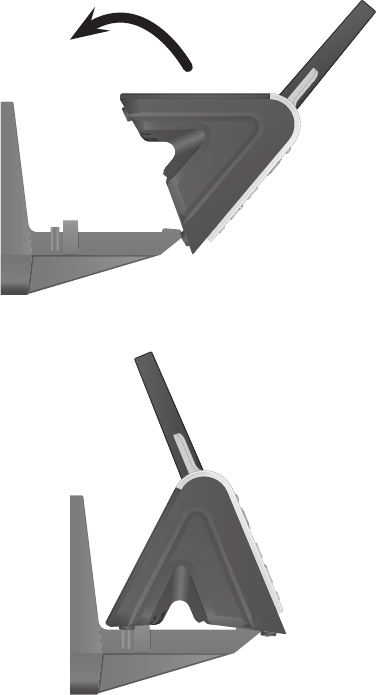
Desktop to wall mount installation
To change the telephone base to the wall mount position, make sure that
you first unplug the telephone line cord and power adapter cord from the
wall outlets before you begin. In addition, to prevent possible damage,
remove the handset from the telephone base.
2. Push down the telephone base until it clicks into place on both sides of the
bracket.
1. Position the telephone base as shown below, and insert the extended tabs of
the bracket into the slots under the telephone base.
10
Getting started
Installation options
Desktop to wall mount installation
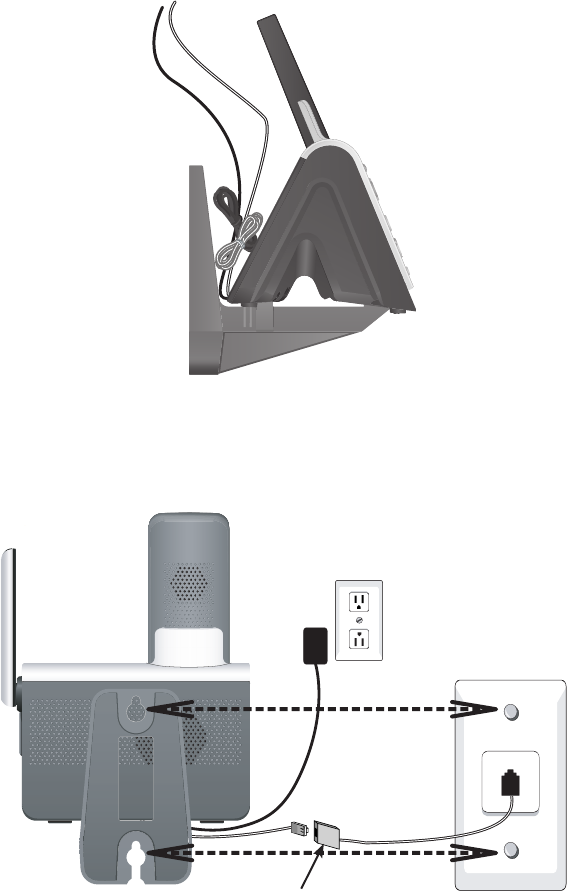
4. Align the holes on the bracket with the standard wall plate and slide the
bracket until the telephone is secured as shown below. Plug the telephone
line cord into a telephone wall jack. Plug the power adapter into a power
outlet not controlled by a wall switch.
3. Bundle the telephone line cord and power adapter cord, and secure them withBundle the telephone line cord and power adapter cord, and secure them with
a twist tie before placing them behind the telephone base as shown below.
DSL filter (not included),
required if you have DSL
high-speed Internet service.
11
Getting started
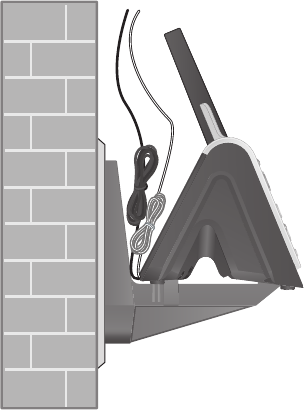
5. Make sure the telephone is securely positioned as shown below.
Installation options
Desktop to wall mount installation
12
Getting started
Installation options
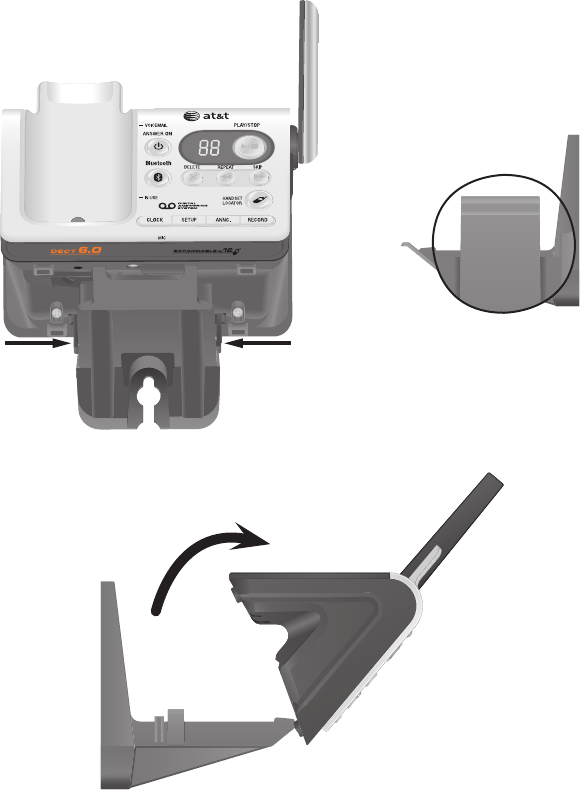
Wall mount to desktop installation
To change the telephone base to the desktop position, make sure that you firstmake sure that you first
unplug the telephone line cord and power adapter cord from the wall outlets
before you begin. In addition, to prevent possible damage, remove the handset
from the telephone base.
1. Remove the telephone base from the wall and untie the bundled telephoneuntie the bundled telephone
line cord and power adapter cord.
2. Press on the catches on both sides of the bracket (indicated by arrows below)
to unlock the telephone base from the bracket.
3. Pull the telephone base up to detach it from the bracket.
The catch on the side
of the telephone base.
13
Getting started
Installation options
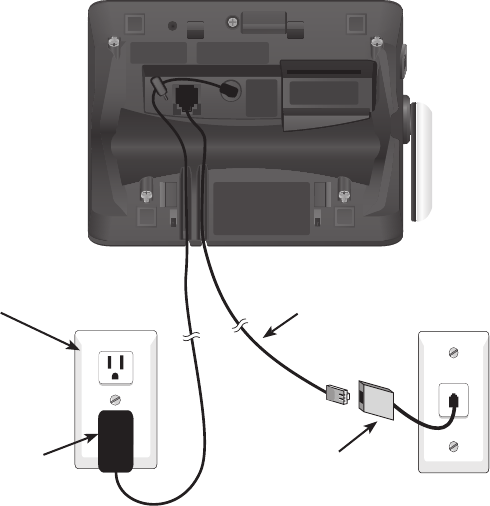
4. Plug the telephone line cord into a telephone wall jack, and plug the power
adapter cord into a power outlet not controlled by a wall switch. Route the
cords through the bracket channels.
Power
adapter DSL filter (not included),
required if you have DSL
high-speed Internet service.
Telephone
line cord
Power outlet not
controlled by a wall
switch.
14
Getting started
Expansion handset
Your new AT&T TL92278/TL92378/TL92328 telephone system canTL92278/TL92378/TL92328 telephone system can telephone system can
accommodate up to 12 handsets. You can add new handsets (AT&T TL90078,
purchased separately) to your telephone system, but each device must be
registered with the telephone base before use. To register a new handset,
see page 15.
The handsets provided with TL92278 come pre-registered as HANDSET 1 and
HANDSET 2. You can register up to 10 additional handsets to the telephone
base, and they will be assigned numbers in the order they are registered
(HANDSET �, HANDSET 4, HANDSET 5 and so on).
The handsets provided with TL92328/TL92378 come pre-registered as
HANDSET 1, HANDSET 2 and HANDSET �. You can register up to nine
additional handsets to the telephone base, and they will be assigned numbers
in the order they are registered (HANDSET 4, HANDSET 5, HANDSET 6 and
so on).
15
Getting started
Adding and registering handsets (optional)
Handsets purchased separately (AT&T TL90078)
need to be registered to the telephone base before
use. When first purchased, all expansion handsets
will show NOT REGISTERED on the screen. The new
handset(s) may need to be charged for five minutes
before registering to the telephone base.
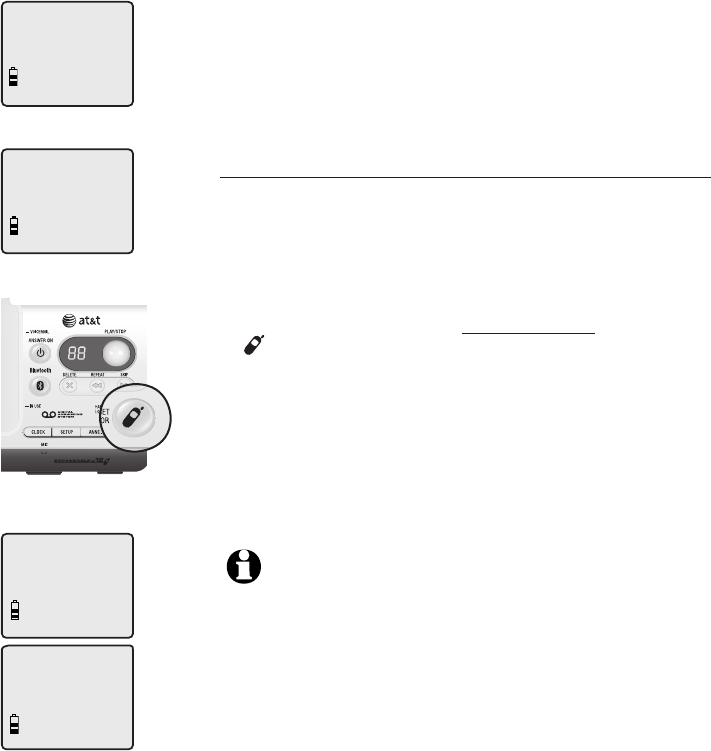
To register a handset to your telephone base
1. Place the unregistered handset into the telephone
base. If PRESS HNDST LOC 4 SEC ON BASE does
not appear on the handset screen after a few
seconds, remove the handset and place it in the
telephone base again.
2. On the telephone base, press and hold
HANDSET LOCATOR for about four seconds
(until the red IN USE light on the telephone base
turns on) and then release the button. The handset
will show PLEASE WAIT... and it will take about 10
seconds to complete the registration. The handset
will display HANDSET X REGISTERED, with X being
the handset number (1-12). There will be a beep
sound if the registration is successful.
NOTES:
1. If the registration is not successful, the display will show NOT
REGISTERED. To reset the handset, remove the handset from the
telephone base and place it back in. Try the registration process
again.
2. You cannot register a handset if any other system handset is in
use.
PRESS HNDST LOC
4 SEC ON BASE
PLEASE WAIT...
HS X REGISTERED
NOT REGISTERED

Getting started
Replacing a handset
You may need to de-register your handsets if:
You have twelve registered handsets and need to replace a unit.
-OR-
You wish to change the designated handset number of your registered
handsets.
You must first de-register ALL the handsets, and then re-register each handset
you wish to use.
Please read carefully through all the instructions on this page before
beginning the de-registration process.
To de-register all handsets
1. Press and hold HANDSET LOCATOR on the telephone base for about 10
seconds (until the IN USE light turns on and starts to flash), then release
the HANDSET LOCATOR button.
2. Immediately press and release HANDSET LOCATOR again. You must
press HANDSET LOCATOR while the IN USE light is still flashing. (The
light flashes for about seven seconds. If the light stops flashing, pick up the
handset and place it back into the telephone base, then start again with
step one above.)
3. The handset(s) will show SEARCHING FOR BASE and it will take about 10
seconds to complete the de-registration process. ALL handsets will show
NOT REGISTERED if de-registration was successful.
4. To re-register the handset(s) to the telephone base, follow the registration
instructions on page 15.
NOTES:
1. If the de-registration process was not successful, you may need to reset the system and try again.
To reset: pick up the handset and press the HOME/FLASH button, then press the OFF/CLEAR
button and place the handset back into the telephone base. You may also reset by unplugging the
power from the telephone base and plugging it back in.
2. You cannot de-register the handset(s) if any other system handset is in use.
16
Bluetooth
Introducing Bluetooth
Your new AT&T TL92278/TL92328/TL92378 telephone system with BluetoothTL92278/TL92328/TL92378 telephone system with Bluetoothtelephone system with Bluetooth
wireless technology has the following features:
• Pair a Bluetooth enabled cell phone with the telephone base. Pair a Bluetooth enabled cell phone with the telephone base.
• Connect a cell phone to make and receive Connect a cell phone to make and receive CELLULAR calls. Only one cell
phone can be paired and connected on a call at a time.
• Make and receive calls using your cell phone plan while benefiting from the Make and receive calls using your cell phone plan while benefiting from the
ease and comfort of your home telephone system.
IMPORTANT INFORMATION
• Refer to your cell phone user's manual for more information about itsRefer to your cell phone user's manual for more information about its
Bluetooth function.
• Operate your Bluetooth device within 12 feet from the telephone base.
Bluetooth technology operates best within a short range. Keeping within 12
feet will maintain the connection quality of the Bluetooth device with themaintain the connection quality of the Bluetooth device with the
telephone base.
• Make sure that your cellular phone has sufficient signal strength. You mayMake sure that your cellular phone has sufficient signal strength. You may
need to move the cellular phone and telephone base to a location where
the cellular signal may be stronger.
• Charge your Bluetooth cell phone while it is connected to the telephoneCharge your Bluetooth cell phone while it is connected to the telephone
base because your cell phone's battery will discharge faster while it is
connected wirelessly to the telephone base.
• Monitor your cell phone's usage because airtime is deducted from yourMonitor your cell phone's usage because airtime is deducted from your
cellular plan for the duration of the CELLULAR calls.
Refer to the Bluetooth Setup section (page 19) to learn how to set up your
Bluetooth device. Refer to the Handset operation section (page 26) on how
to operate your Bluetooth devices with your new AT&T telephone system with
Bluetooth wireless technology. Refer to the Troubleshooting section (page
84) if you experience difficulty when using the telephone system.
17
Bluetooth
18
Glossary of terms
Below are some terms used in this user’s manual to help you become familiar
with using your Bluetooth devices and your new AT&T telephone system.
Bluetooth cell phone - Refers to a mobile Bluetooth enabled cellular
telephone.
CELLULAR line - The communications service provided through your
Bluetooth enabled cellular telephone.
HOME line - Your conventional telephone land line.Your conventional telephone land line.
Connected - A Bluetooth device can only be used when it is connected to
the telephone base.
Paired Devices - Once a Bluetooth device has been paired with the
telephone base, it will be identified as registered to the telephone base. Only
one Bluetooth cellular phone can be paired with the telephone base.
Pairing - This refers to the process of two Bluetooth devices registering
device information with each other. The telephone base must be paired with a
Bluetooth cellular phone before the Bluetooth device can be used. Depending
on the manufacturer, this is also referred to as Bonding.
PIN - By default, the PIN is 0000 for the telephone base and for most
Bluetooth devices. PIN information must be exchanged between Bluetooth
devices before they can be used. This is also known as a Passkey or Passcode.
Bluetooth
19
Bluetooth Setup
To use a Bluetooth enabled cellular phone with
you telephone, you must first pair and connect
your Bluetooth cellular phone with the telephone
base.
Before you begin, make sure that your Bluetooth-
enabled cellular phone is not connected to any
other Bluetooth device. Refer to your cellular
phone user's manual to learn how to search for or
add new Bluetooth devices.
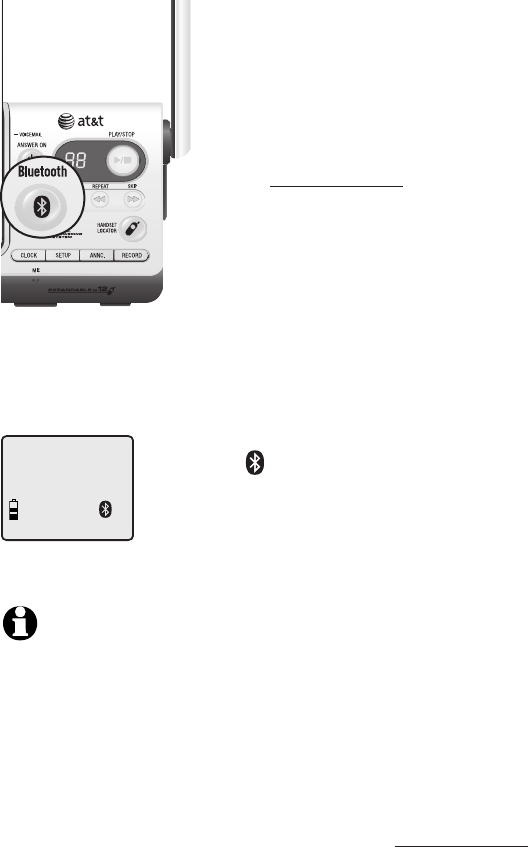
To pair and connect a cellular phone:
1. Press and hold the Bluetooth button on the
telephone base until it is flashing. The Bluetooth
feature will be activated.
2. Using your cellular phone, turn on the Bluetooth
feature and search for a new device.
3. Once your cellular phone has found the AT&T
DECT 6.0 telephone base, select it.
4. Using your cellular phone, enter the PIN of the
telephone base (the default PIN is 0000) to
continue the pairing process.
When a device is successfully connected, the
status icon will display on the cordless handset
screen, and the light of the Bluetooth button on
the telephone base will be on steadily.
Once your have paired a device with the telephone
base, the pairing information is stored in the
telephone base. However, if the paired device
becomes disconnected, the telephone base will
not automatically search and re-connect to that
device. To re-connect a paired device, make sure
the Bluetooth feature is turned on in your cellular
phone, select AT&T DECT 6.0 from the paired
device list in your cellular phone. The connection
will then be established again.
If you want to pair and connect a new device
when there is already a connected device on the
telephone base, press and hold the Bluetooth
button on the telephone base until it is flashing,
then start with step two above. If you do not pair
a new device within two minutes, the Bluetooth
light on the telephone base will turn off and the
system will return to idle.
HANDSET 1
NOTE:
Only one
Bluetooth device
can be paired with
the telephone base
at a time.
20
CALL LOG
>
DIRECTORY
Handset settings
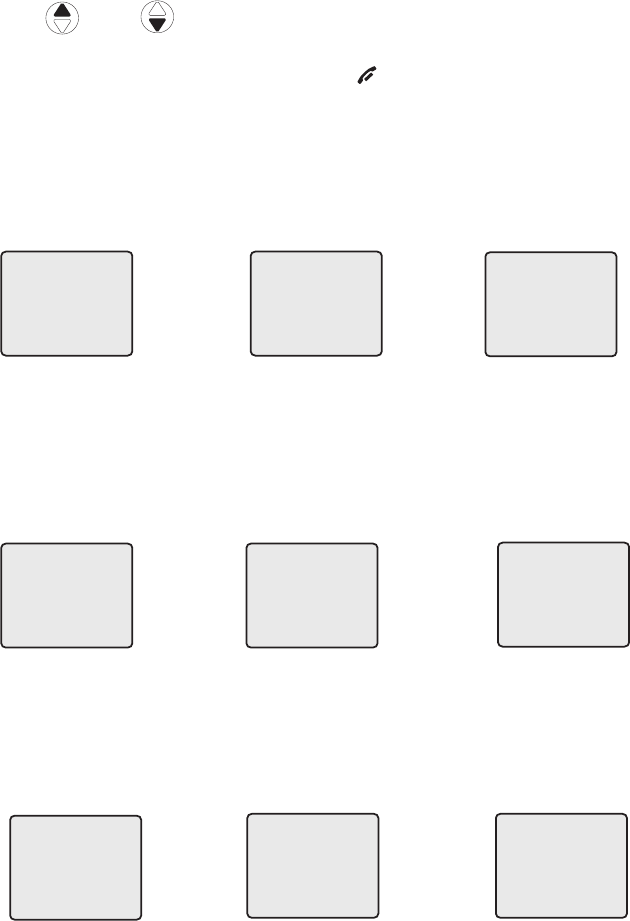
Handset main menu
To enter the main menu:
1. Press Press MENU/SELECT when the handset is in idle mode.
2. Press DIR / CID to select a handset feature menu, then press
MENU/SELECT to enter that menu.
To return to the idle mode, press and hold OFF/CLEAR.
DIRECTORY allows you
to store and search for
names and numbers
(page 40).
INTERCOM allows you
to intercom with other
handsets (page 36).
RINGER TONE allows
you to set the ringer
for the HOME and
CELLULAR lines (page
22).
RINGER VOLUME
allows you to set the
ringer volume (page
21).
KEY TONE allows you
to turn the keypad
tones on or off (page
23).
CLR VOICEMAIL allows
you to turn off the new
voicemail indication
(page 24).
HOME AREA CODE
allows you to set your
home area code
(page 25).
LANGUAGE allows you
to set your handset
display language
(page 23).
CALL LOG allows you
to view caller ID history
(page 46).
>
CALL LOG
INTERCOM
>
INTERCOM
RINGER VOLUME
>
RINGER VOLUME
RINGER TONE
>
RINGER TONE
KEY TONE
>
KEY TONE
LANGUAGE
>
LANGUAGE
CLR VOICEMAIL
>
CLR VOICEMAIL
HOME AREA CODE
>
HOME AREA CODE
DIRECTORY
21
Handset settings
Handset settings
Using the feature menu, you can customize many
of the telephone’s settings.
1. Press MENU/SELECT when in idle mode (when
the phone is not in use) to enter the feature
menu.
2. Use DIR / CID to scroll to the feature
to be changed. When scrolling through the
menu, the top menu item is always highlighted
with a > symbol.
3. Press MENU/SELECT to select the highlighted
item.
NOTE:
Press OFF/CLEAR to cancel an operation, back
up to the previous menu or exit the menu display. Press
and hold OFF/CLEAR to return to idle mode.
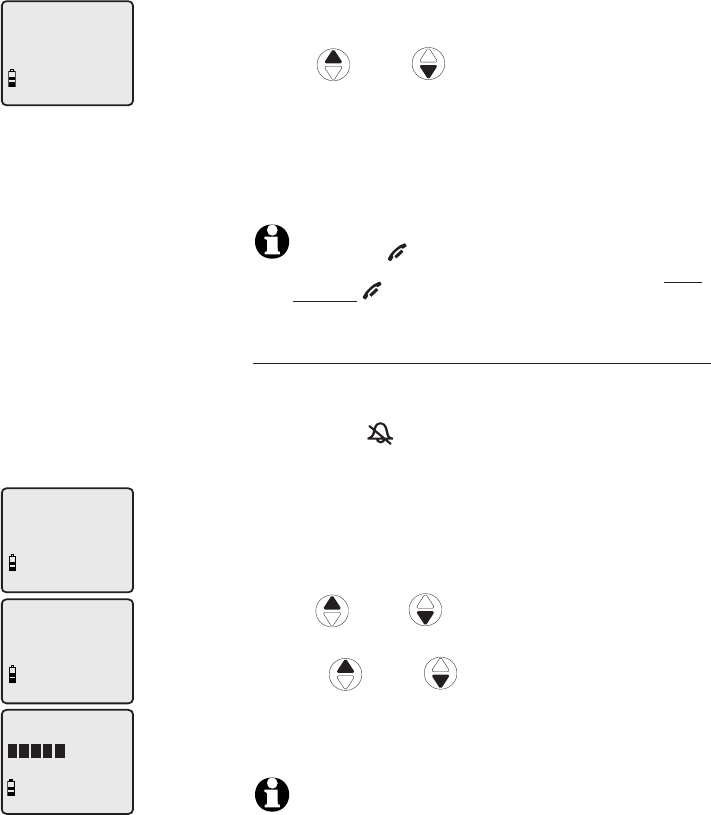
Ringer volume
Using this menu, you can set the ringer volume
level (1-6), or turn the ringer off. When the ringer
is turned off, will appear on the handset screen.
The volume setting will applies to both HOME and
CELLULAR calls.
To adjust the RINGER VOLUME:
1. Press MENU/SELECT when in idle mode to enter
the feature menu.
2.
Use DIR / CID to scroll to >RINGER
VOLUME, then press MENU/SELECT.
3. Press DIR / CID to sample each volume
level.
4. Press MENU/SELECT to save your preference and
return to the feature menu.
NOTE: The ringer volume also determines the ringer
volume of the intercom calls (pages 36-37) and the
paging tone for the handset locator feature (page 31). If
the handset ringer volume is set to off, that handset is
silenced for all incoming calls and paging.
>
DIRECTORY
CALL LOG
>
RINGER VOLUME
RINGER TONE
>
DIRECTORY
CALL LOG
RINGER VOLUME
22
Handset settings
Handset settings
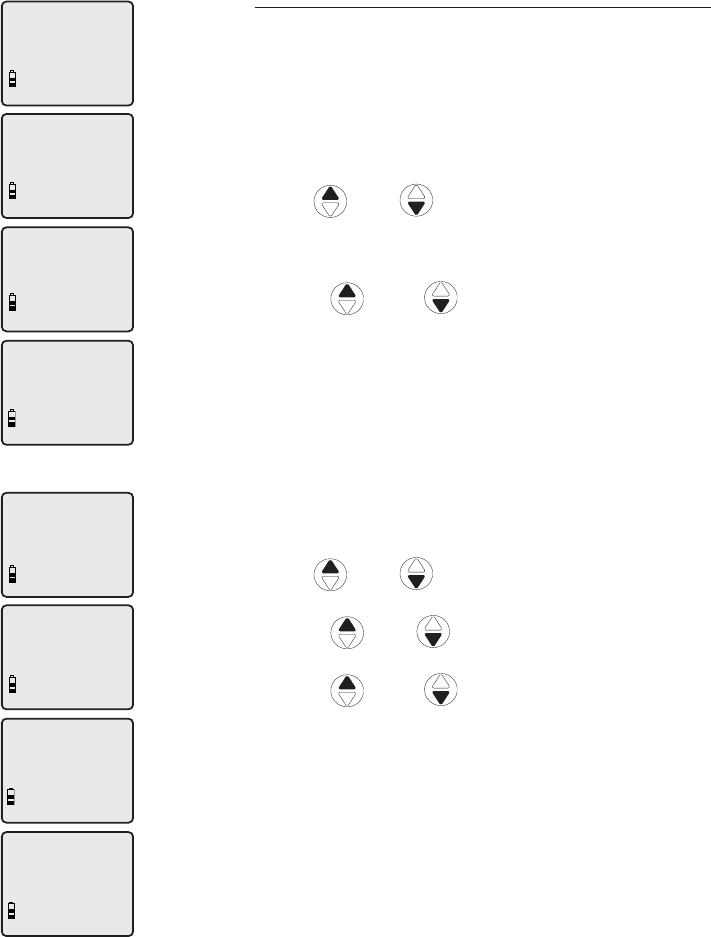
Ringer tone
You can select different ringer tones for the HOME
and CELLULAR calls. You may choose one of 10
ringer tones.
To choose a ringer tone for the HOME line:
1. Press MENU/SELECT when in idle mode to enter
the feature menu.
2. Use DIR / CID to scroll to >RINGER
TONE,
then press MENU/SELECT.
3. Press MENU/SELECT to select HOME TONE.
4. Press
DIR / CID
to get to the next ringer
tone and to hear a sample of it.
5. Press MENU/SELECT to save your preference and
return to the feature menu.
To choose a ringer tone for the CELLULAR line:
1. Press MENU/SELECT when in idle mode to enter
the feature menu.
2. Use DIR / CID to scroll to >RINGER
TONE,
then press MENU/SELECT.
3. Press
DIR / CID
to
scroll to
CELLULAR
TONE, then press MENU/SELECT.
4. Press
DIR / CID
to get to the next ringer
tone and to hear a sample of it.
5. Press MENU/SELECT to save your preference and
return to the feature menu.
HOME TONE
1
>
DIRECTORY
CALL LOG
>
RINGER TONE
KEY TONE
>
HOME TONE
CELLULAR TONE
CELLULAR TONE
1
>
DIRECTORY
CALL LOG
>
RINGER TONE
KEY TONE
>
CELLULAR TONE
HOME TONE
23
Handset settings
Handset settings
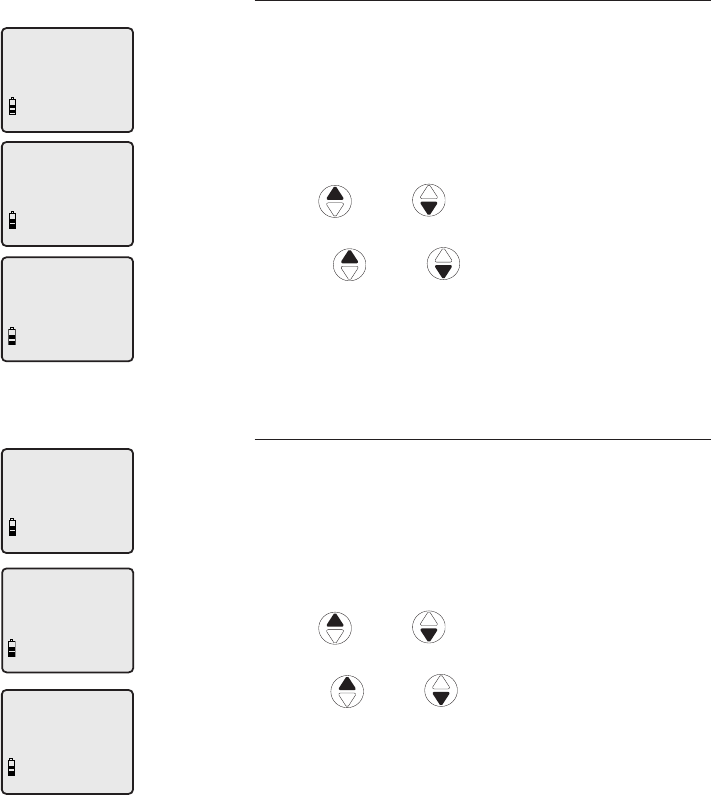
Key tone
The handset is factory programmed to beep with
each key press. If you turn off the KEY TONE,
there will be no beeps when keys are pressed.
To turn the KEY TONE on or off:
1. Press MENU/SELECT when in idle mode to enter
the feature menu.
2. Use
DIR / CID
to scroll to >KEY TONE,
then press MENU/SELECT.
3. Press
DIR / CID
to select ON or OFF.
4. Press MENU/SELECT to save your preference
and return to the feature menu.
Language
In this menu, you can select the language used for
all screen displays.
To select a language:
1. Press MENU/SELECT when in idle mode to enter
the feature menu.
2. Use
DIR / CID
to scroll to
>LANGUAGE, then press MENU/SELECT.
3. Press
DIR / CID
to select ENGLISH,
FRANCAIS or ESPANOL.
4. Press MENU/SELECT to save your preference and
return to the feature menu.
LANGUAGE
ENGLISH
>
DIRECTORY
CALL LOG
>
LANGUAGE
CLR VOICEMAIL
KEY TONE
ON
>
DIRECTORY
CALL LOG
>
KEY TONE
LANGUAGE
24
Handset settings
Handset settings
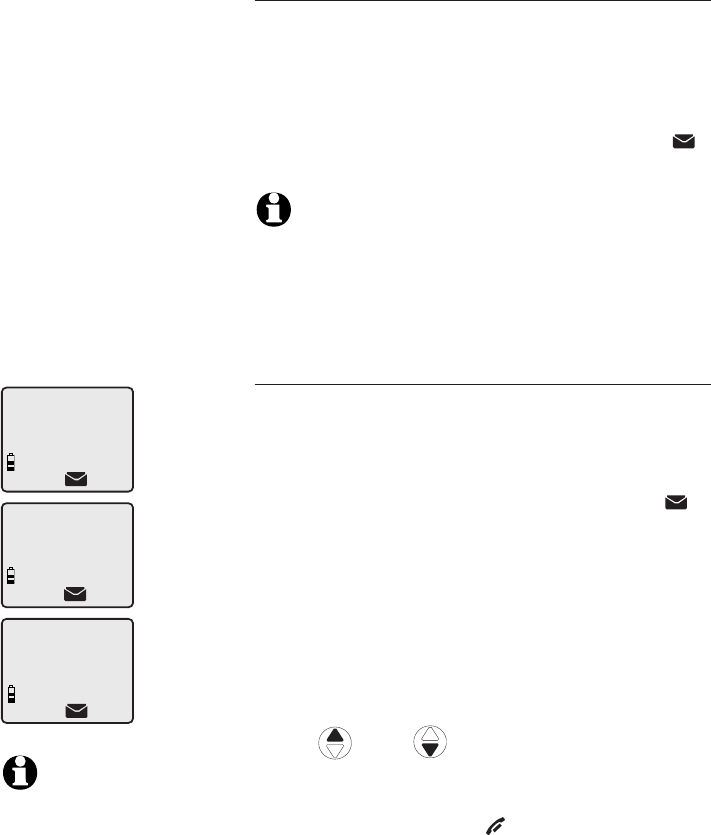
Visual message waiting (voicemail) indicator
If you subscribe to a voicemail service offered
by your local telephone company, the voicemail
waiting indicator feature will provide a visual
indication when you have new voicemail
messages. The VOICEMAIL light on the telephone
base will flash, and NEW VOICEMAIL and the
icon will appear on the handset screen(s).
NOTES:
1. This feature does not indicate new answering system
messages recorded on your phone.
2. For more information about the difference between your
answering system and voicemail, see page 52.
Clear voicemail indication
Use this feature when the telephone indicates
there is new voicemail but there are none (for
example, when you have accessed your voicemail
while away from home). This feature only turns
off the displayed NEW VOICEMAIL message,
icon and VOICEMAIL light; it does not delete
your voicemail message(s). As long as you have
new voicemail messages, your local telephone
company will continue to send the signal to
activate the visual message waiting indicator.
To manually turn off the new voicemail indicator:
1. Press MENU/SELECT when in idle mode to enter
the feature menu.
2. Use DIR / CID to scroll to
>CLR VOICEMAIL, then press MENU/SELECT.
3. Press MENU/SELECT again to turn the voicemail
indication off, or press OFF/CLEAR to cancel
the procedure.
>
DIRECTORY
CALL LOG
>
CLR VOICEMAIL
HOME AREA CODE
TURN OFF
INDICATOR?
NOTES:
1. Telephone company
voicemail may alert you
to new messages with
stutter (broken) dial tone.
Contact your telephone
company for more details.
2. For information about
using your voicemail
service, contact your
telephone company for
assistance.