Contents
- 1. User Manual Part One
- 2. User Manual Part Three
- 3. User Manual Part Two a
- 4. User Manual Part Two b
User Manual Part Two b

030-300536 Rev. A 108 August 2007
User GuideVersaLink Wireless Gatewa
y
(
Model 7500
)
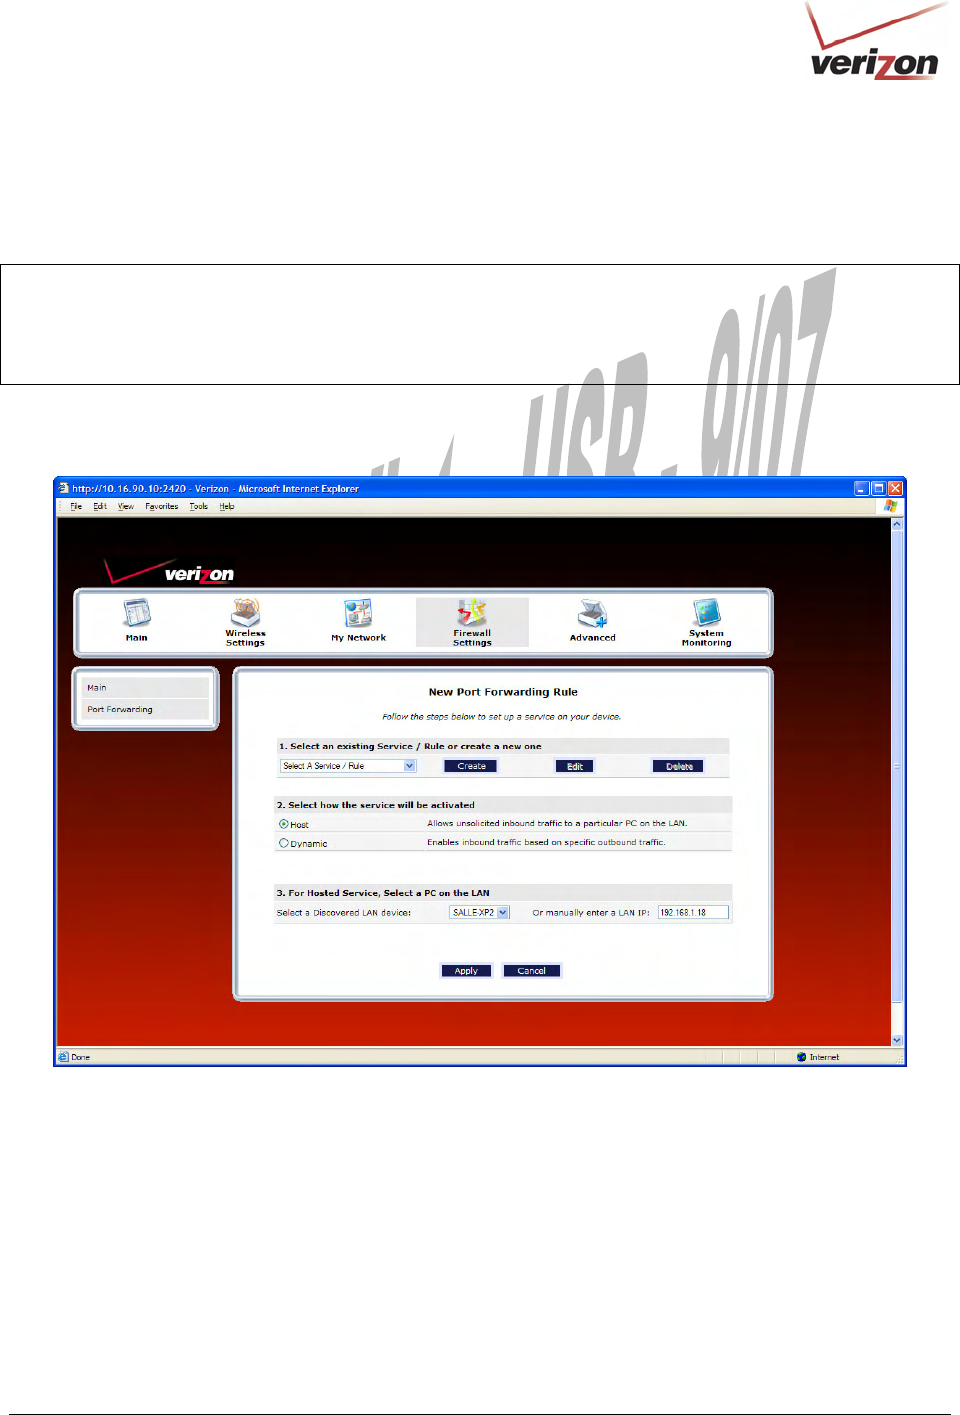
If you clicked Add, the following screen will be displayed. Click Create.
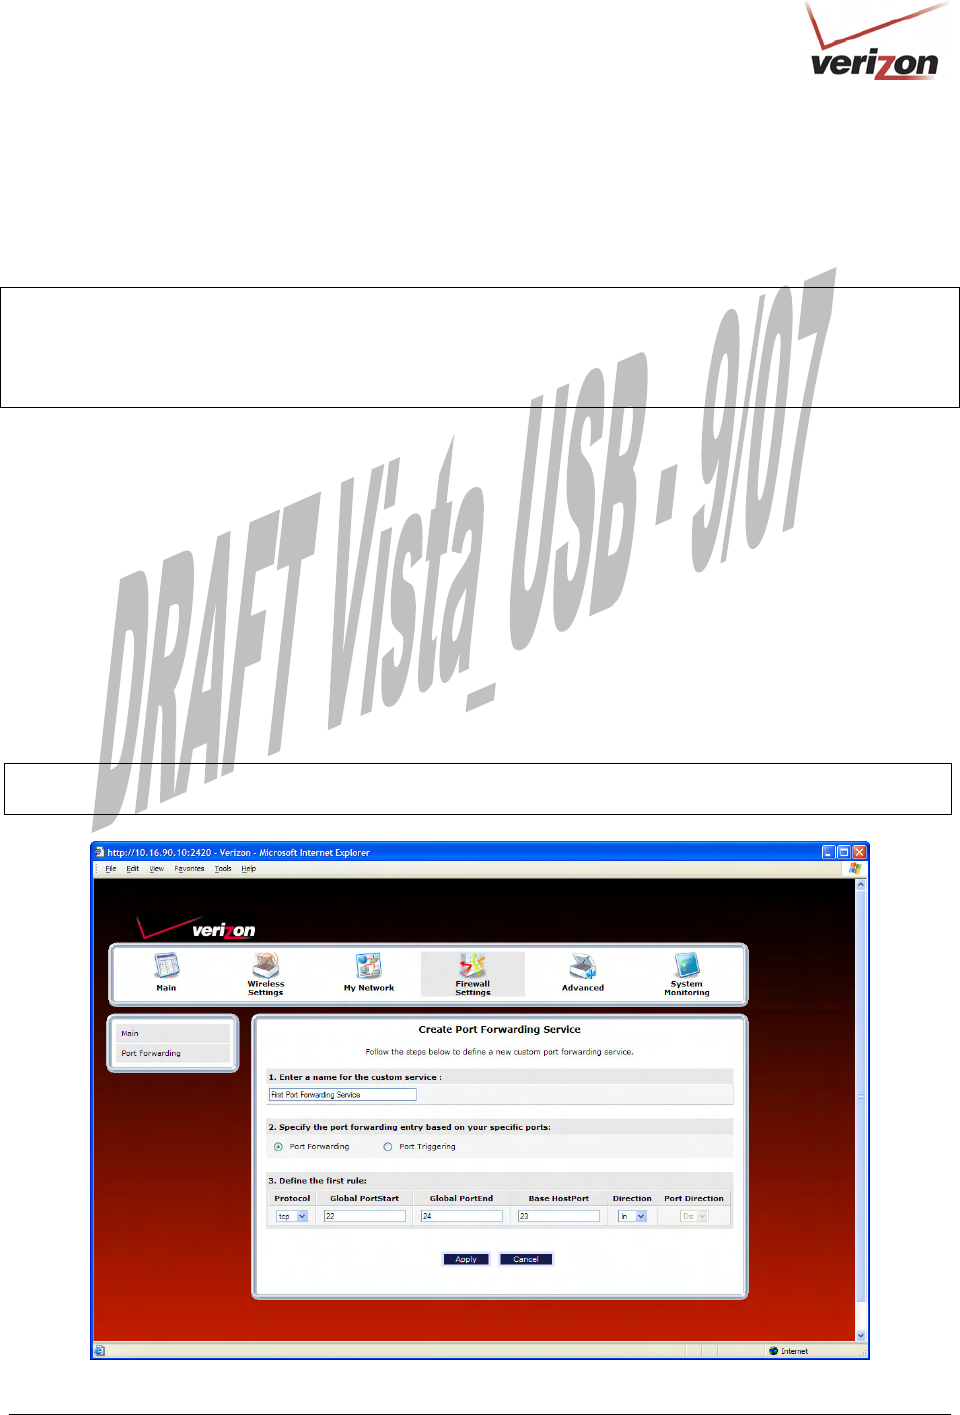
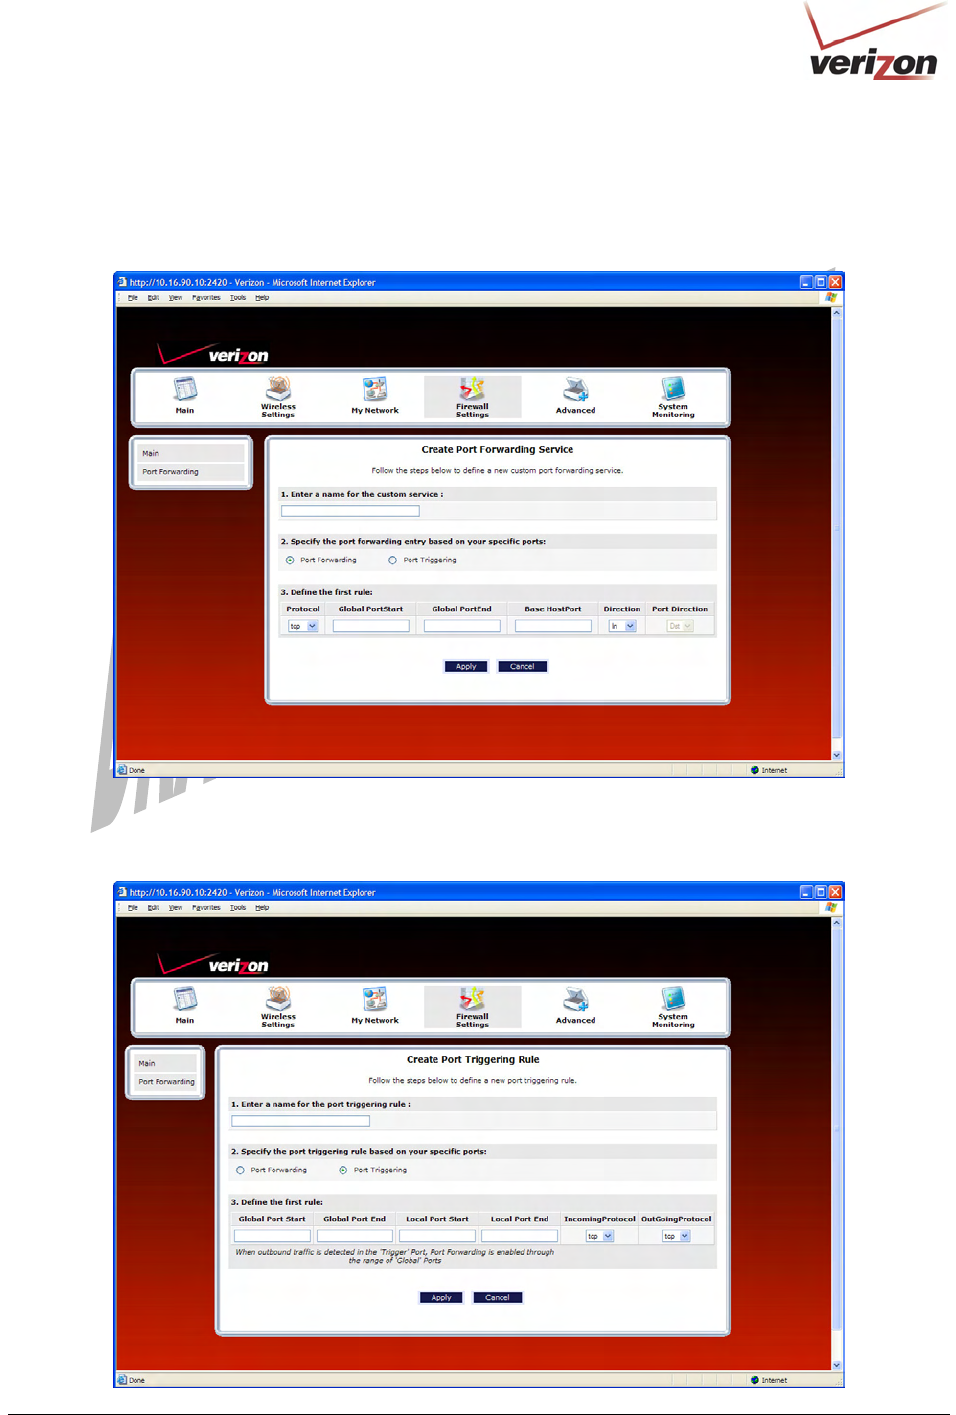
If you clicked Create, the following Create Port Forwarding Service screen will appear. Using this screen, you
can create port forwarding and port triggering services for your Router. The following sections explain how to
customize these services in your Router.
• Port Forwarding Ranges of Ports: This option allows you to forward a range of WAN ports to an IP
address on the LAN.
• Trigger Ports: This option allows you to forward a range of ports to an IP address on the LAN only after
specific outbound traffic.
030-300536 Rev. A 109 August 2007
User GuideVersaLink Wireless Gatewa
y
(
Model 7500
)
15.3.3.3.1 Creating a Service Based on Specific Port Forwarding Ports
The Port Forwarding feature allows you to forward a range of WAN ports to an IP address on the LAN. You can set
up a port forwarding entry based on your specific ports.
IMPORTANT: Using various Internet applications depends on the Router’s firewall settings. Make sure that the
Router’s firewall is set to Medium Security or lower to take advantage of all the port forwarding features. Firewall
settings take precedence over port forwarding services configured in the Router. For example, if the firewall is set to
Medium Security, this will block ICMP packets even if the ICMP service is enabled. If a port forwarding service is
not working, try setting the firewall to a lower setting.
To create a port forwarding service based on specific port forwarding ports, at the Create Port Forwarding Service
screen, do the following:
1. Type the name of the custom service that you are creating in the field provided. This will be the name of the
port forwarding service for which you are configuring specific Port Forwarding rules.
2. Click the Port Forwarding option.
3. Select the desired protocol from the Protocol drop-down menu.
4. Enter the desired Global Port Start, Global Port End, and Base Host Port values in the fields provided, as shown
in the example below.
5. Select the desired direction settings
6. Click Apply to allow the changes to take effect.
NOTE: If you clicked Cancel in the Create Port Forwarding Service screen, the service you created will be
displayed; however, it will not be activated in your Router. You must click Apply to allow the settings to take effect.
030-300536 Rev. A 110 August 2007
User GuideVersaLink Wireless Gatewa
y
(
Model 7500
)
Port Forwarding Service
Protocol TCP – Transmission Control Protocol
UDP – User Datagram Protocol
Global Port Start The WAN-side TCP/UDP start port.
Global Port End The WAN-side TCP/UDP end port.
Base Host Port The port on the WAN that will host the port forwarding service selected. Base Host Port is
the first port that will be used for a specific service when configured for a range of ports.
Direction/
Port Directon
The port direction for the port forwarding rule.
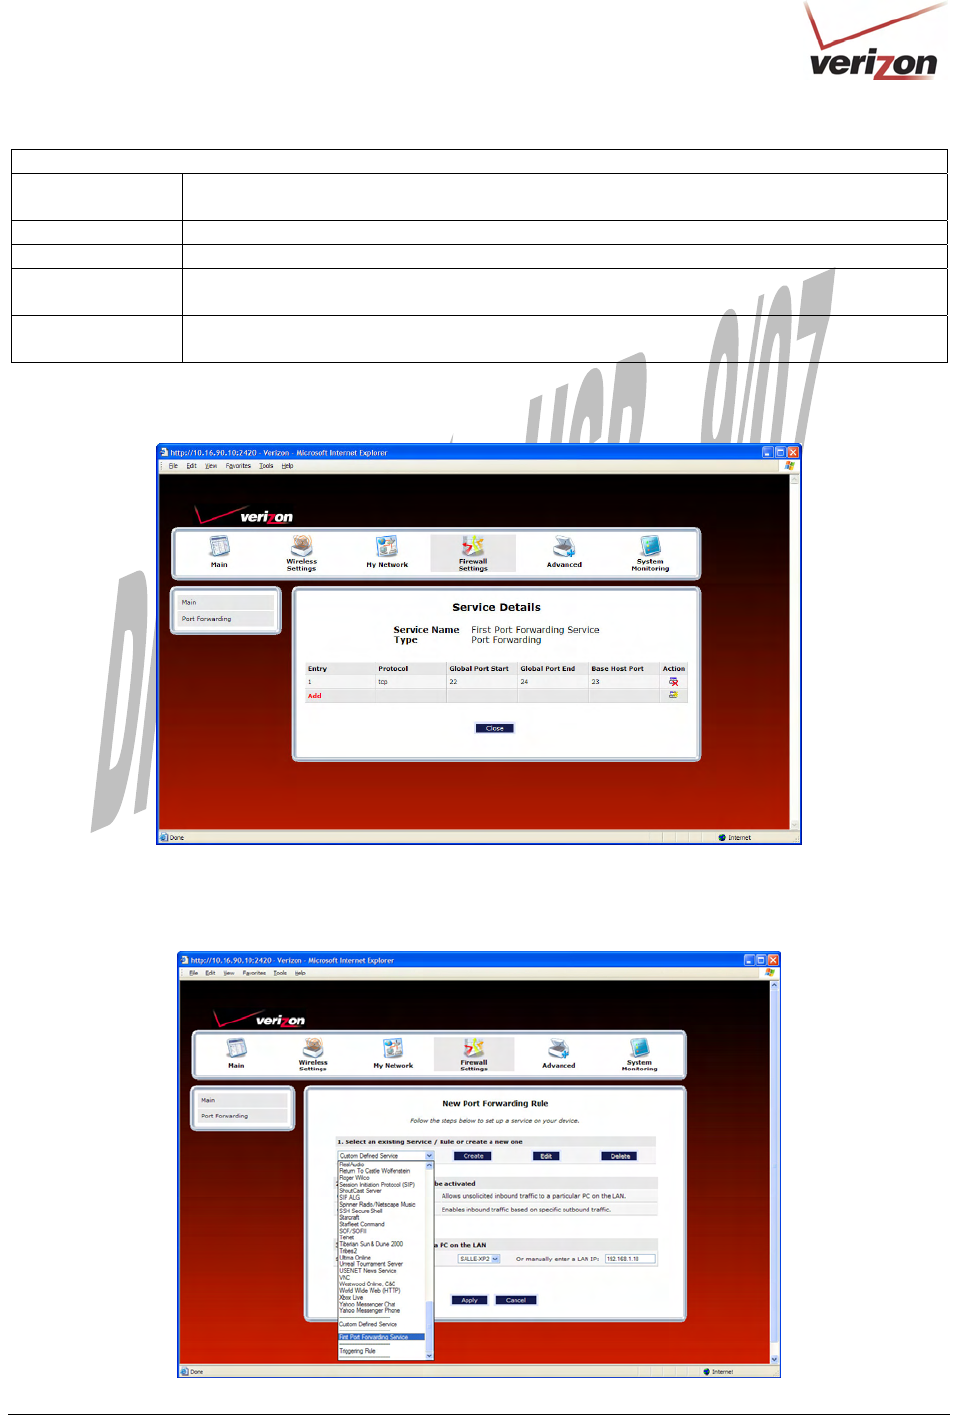
If you clicked Apply, the following Service Details screen will be displayed. Click Done.
7. Return to the New Port Forwarding Rule screen and, from the drop-down menu, select the name of the custom
service that you created (the name should appear at the bottom of the list under Custom Defined Service).
030-300536 Rev. A 111 August 2007
User GuideVersaLink Wireless Gatewa
y
(
Model 7500
)
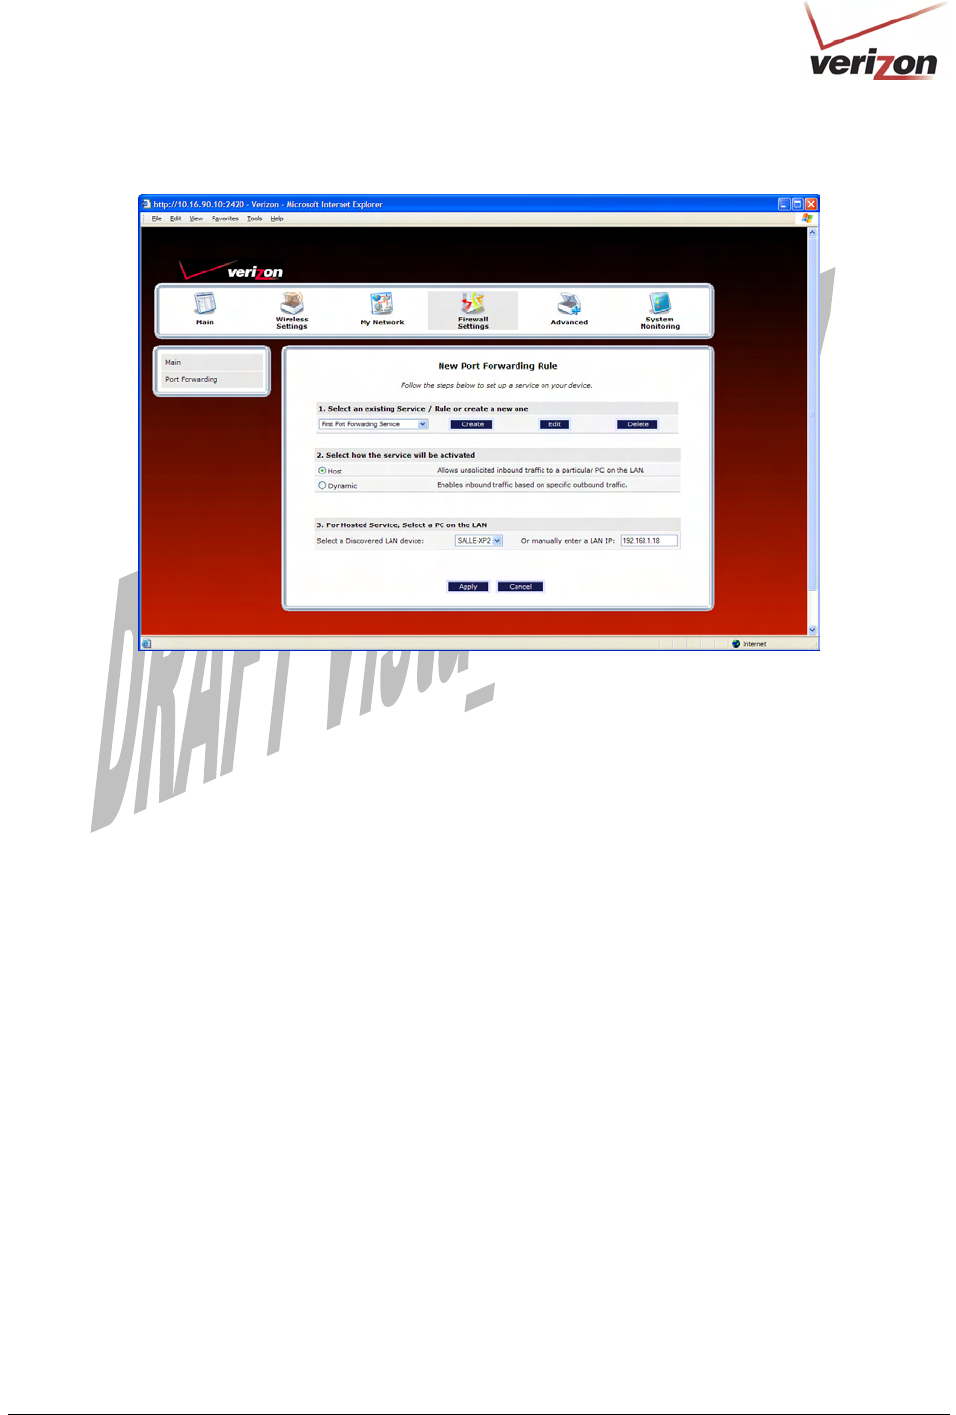
This screen displays the service name in the field.
8. Select how the service will be activated.
• Host allows unsolicited inbound traffic to a particular PC on the LAN.
• Dynamic enables inbound traffic based on specific outbound traffic.
9. Select the IP address of the device that will host the service (select a device from the Select a Discovered LAN
device drop-down menu or type an IP address in the field provided).
10. Click Apply to allow the service to be added to the Router’s list of active services.
030-300536 Rev. A 112 August 2007
User GuideVersaLink Wireless Gatewa
y
(
Model 7500
)
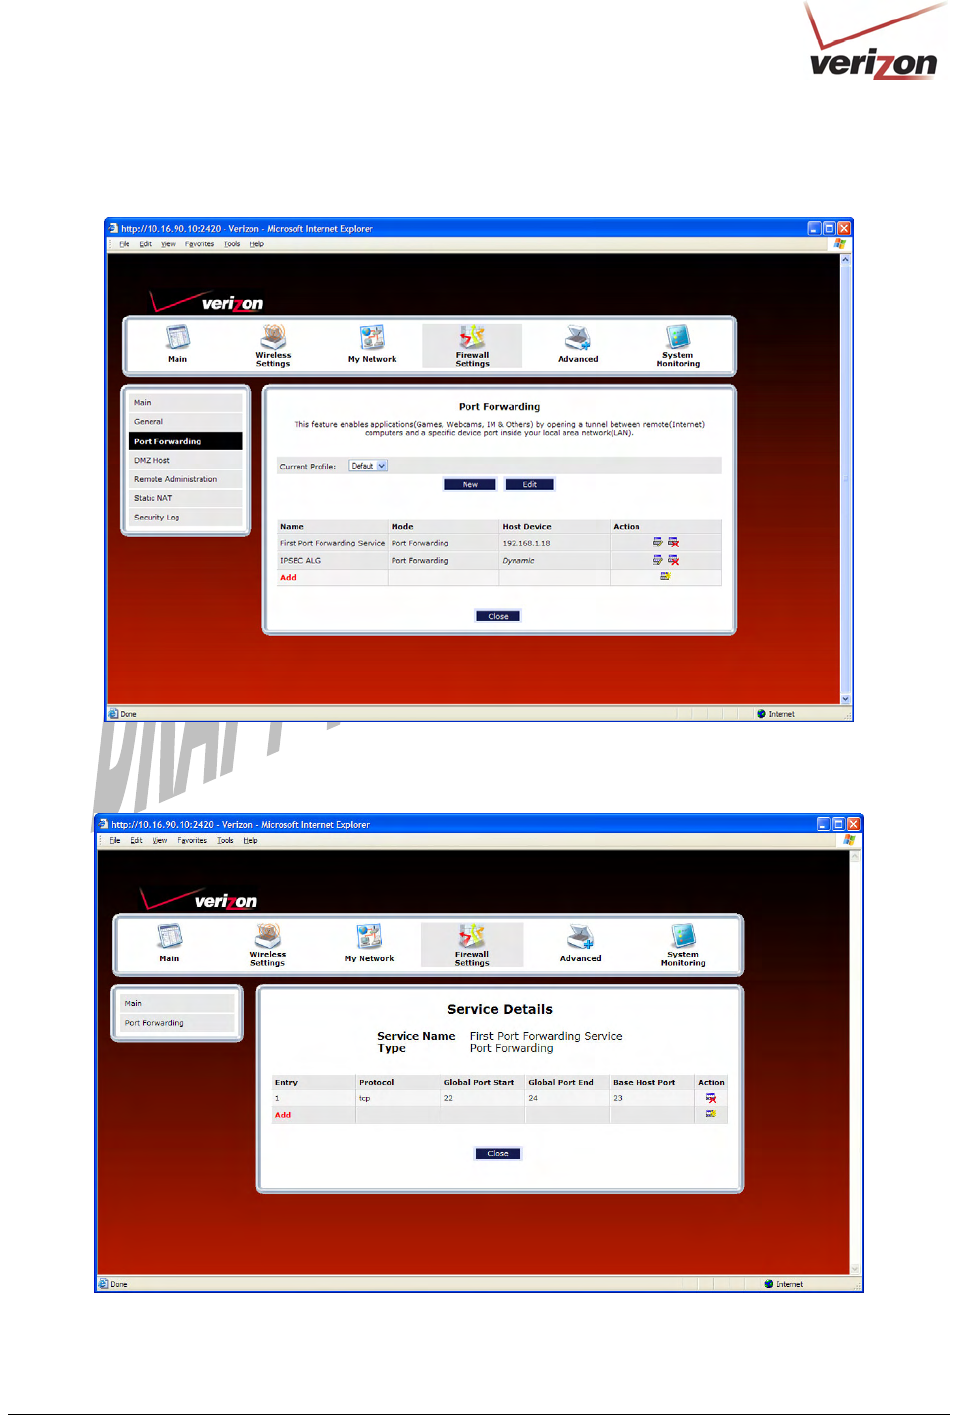
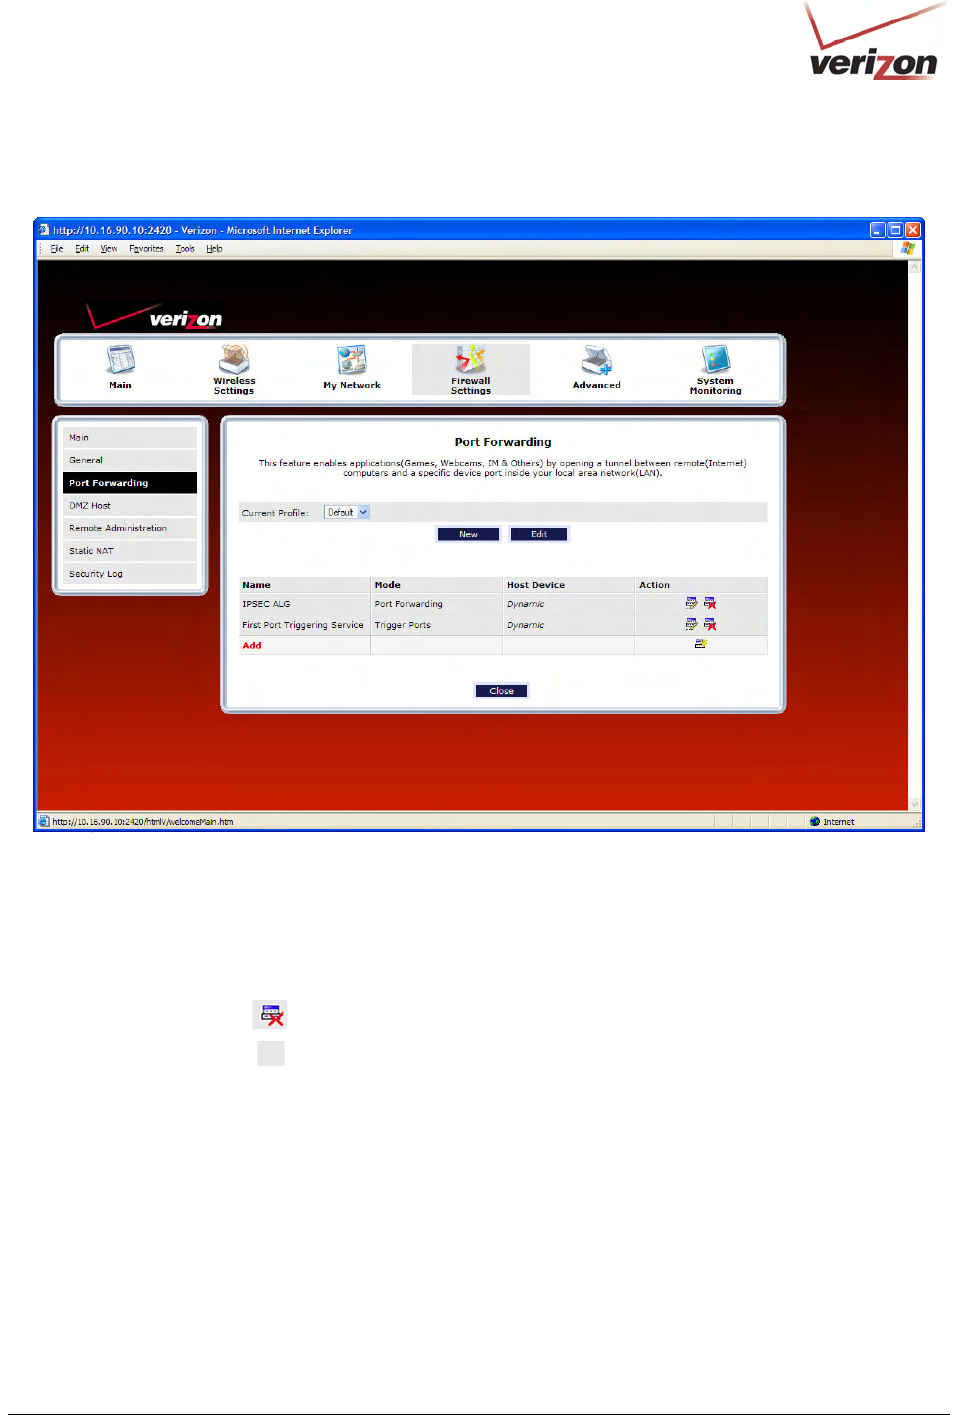
If you clicked Apply, the following screen will appear. The Port Forwarding service has been added to the list of
active services. To add additional port forwarding services to your Router, repeat steps 1 through 10.
To view the details for the service, click the details icon in the Action field. The following screen will appear. Click
Close to return to the Port Forwarding screen.
030-300536 Rev. A 113 August 2007
User GuideVersaLink Wireless Gatewa
y
(
Model 7500
)
15.3.3.3.2 Creating a Service Based on Specific Port Triggering Ports
The Trigger Ports feature allows you to forward a range of ports to an IP address on the LAN only after specific
outbound traffic. You can set up a port triggering entry based on your specific ports.
IMPORTANT: Using various Internet applications depends on the Router’s firewall settings. Make sure that the
Router’s firewall is set to Medium Security or lower to take advantage of all the port forwarding features. Firewall
settings take precedence over port forwarding services configured in the Router. For example, if the firewall is set to
Medium Security, this will block ICMP packets even if the ICMP service is enabled. If a port forwarding service is
not working, try setting the firewall to a lower setting.
To create a port forwarding service based on specific port triggering ports, at the New Port Forwarding Rule
screen, click Create.
030-300536 Rev. A 114 August 2007
User GuideVersaLink Wireless Gatewa
y
(
Model 7500
)
If you clicked Create in the preceding screen, the following screen will appear. Complete the following steps to add
a port triggering rule.
1. Click the Port Triggering option. (By factory default, the Port Forwarding option will be selected.)
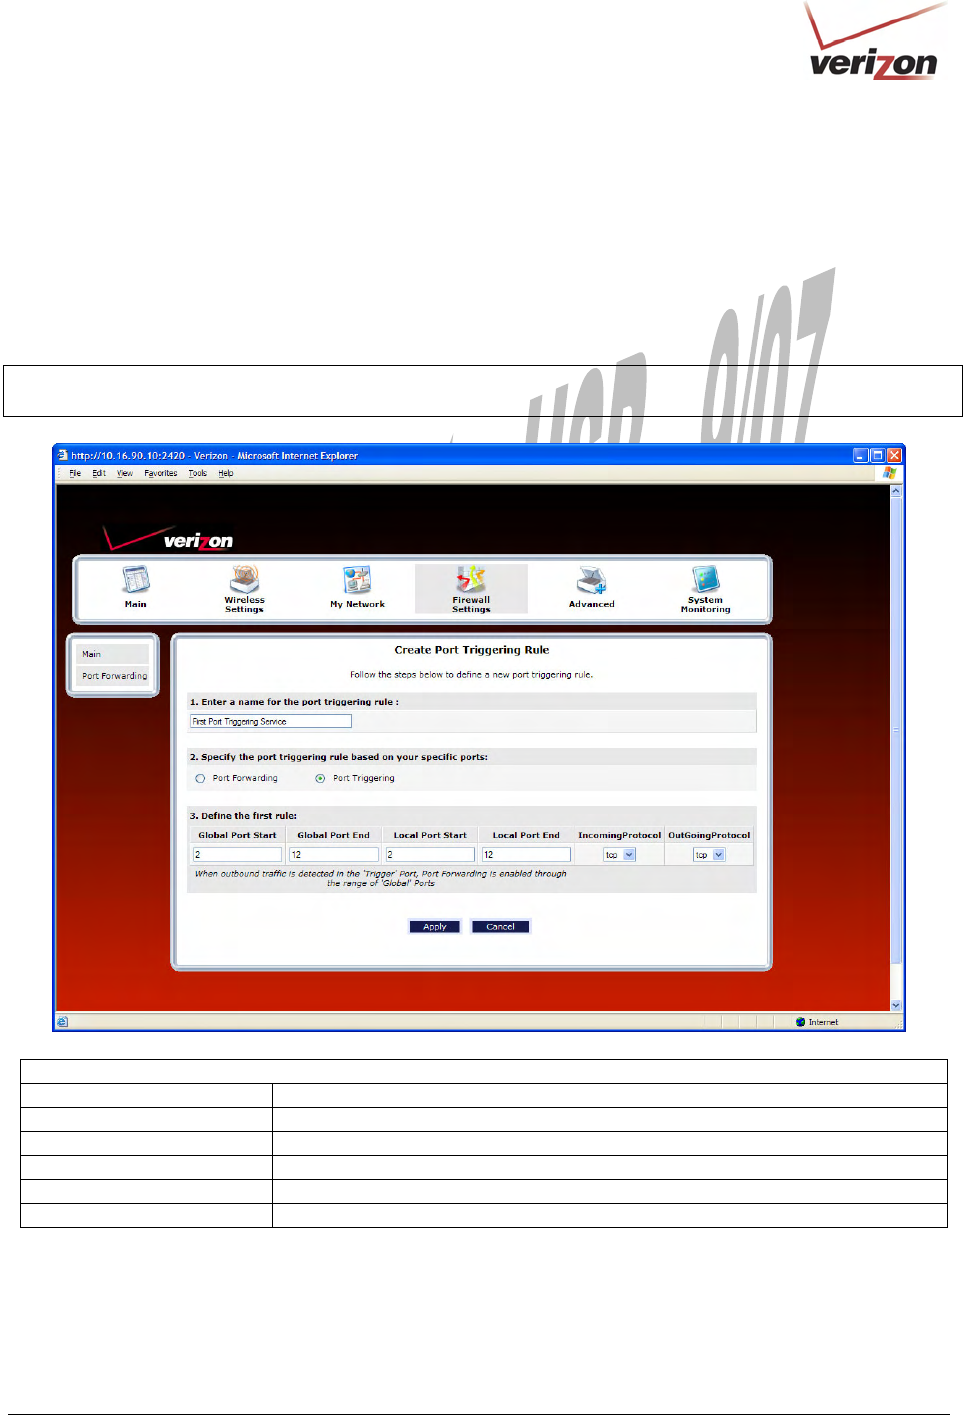
If you clicked the Port Triggering option in the preceding screen, the following Create Port Triggering Rule
screen will be displayed.
030-300536 Rev. A 115 August 2007
User GuideVersaLink Wireless Gatewa
y
(
Model 7500
)
2. Type the name of the custom service that you are creating in the field provided. This will be the name of the
port forwarding service for which you are configuring specific Port Triggering rules.
3. Enter the desired Global Port Start, Global Port End, Local Port Start, and Local Port End values in the fields
provided, as shown in the example below.
4. Select the desired Incoming and Outgoing protocol for the rule.
5. Click Apply to allow the changes to take effect.
NOTE: If you clicked Cancel in the Create Port Triggering Service screen, the values you entered will be
displayed; however, they will not be active in your Router. You must click Apply to allow the settings to take effect.
Port Triggering Service
Global Port Start The WAN side TCP/UDP start port.
Global Port End The WAN side TCP/UDP end port.
Local Port Start The local LAN side TCP/UDP start port.
Local Port End The local LAN side TCP/UDP end port.
Incoming Protocol The protocol to use for inbound traffic.
Outgoing Protocol The protocol to use for outbound traffic.
030-300536 Rev. A 116 August 2007
User GuideVersaLink Wireless Gatewa
y
(
Model 7500
)
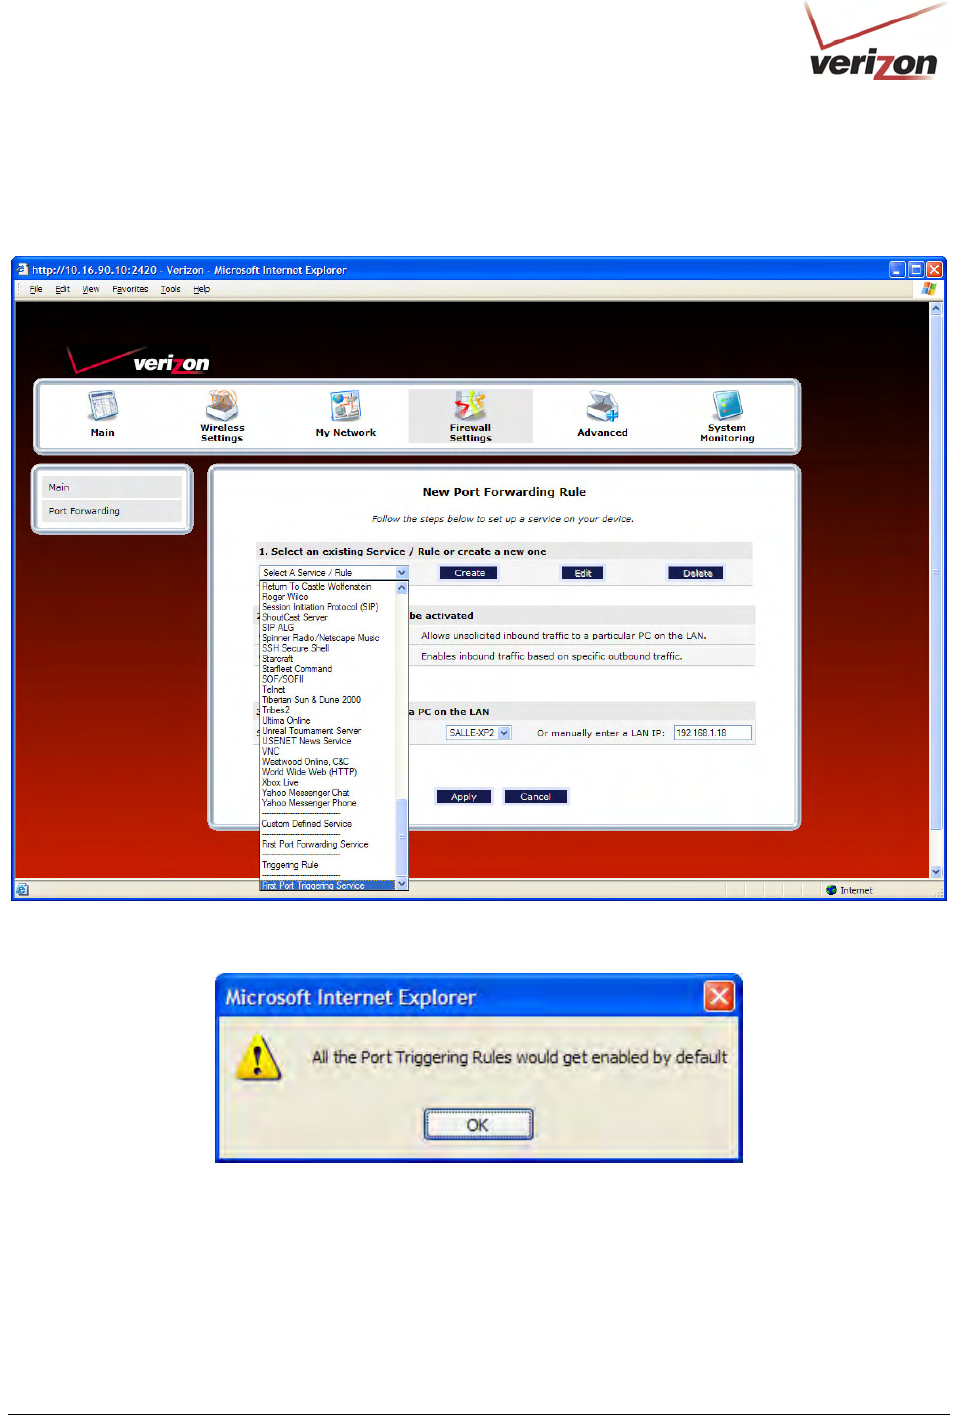
6. After you click Apply, the following screen will be displayed. From the drop-down list, select name of your
custom port triggering rule (the name will appear at the bottom of the list under Triggering Rule).
7. Click Apply to allow the service to be added to the Router’s list of active services.
If you click Apply, the following pop-up screen will appear. Click OK to continue.
030-300536 Rev. A 117 August 2007
User GuideVersaLink Wireless Gatewa
y
(
Model 7500
)
If you click OK in the pop-up screen, the following screen will appear. The Port Triggering service has been added
to the list of active services. To add additional port triggering services to your Router, repeat steps 1 through 7.
15.3.3.4 Deleting a Port Forwarding or Port Triggering Service
If you have created a port forwarding or port triggering service and have added it to your Router’s list of active
services, at the Port Forwarding screen you can do one of the following:
• Click the delete icon adjacent to the service you want to delete.
• Click the details icon adjacent to the service you want to view.
030-300536 Rev. A 118 August 2007
User GuideVersaLink Wireless Gatewa
y
(
Model 7500
)
15.4 DMZ Host—Single IP Address Passthrough
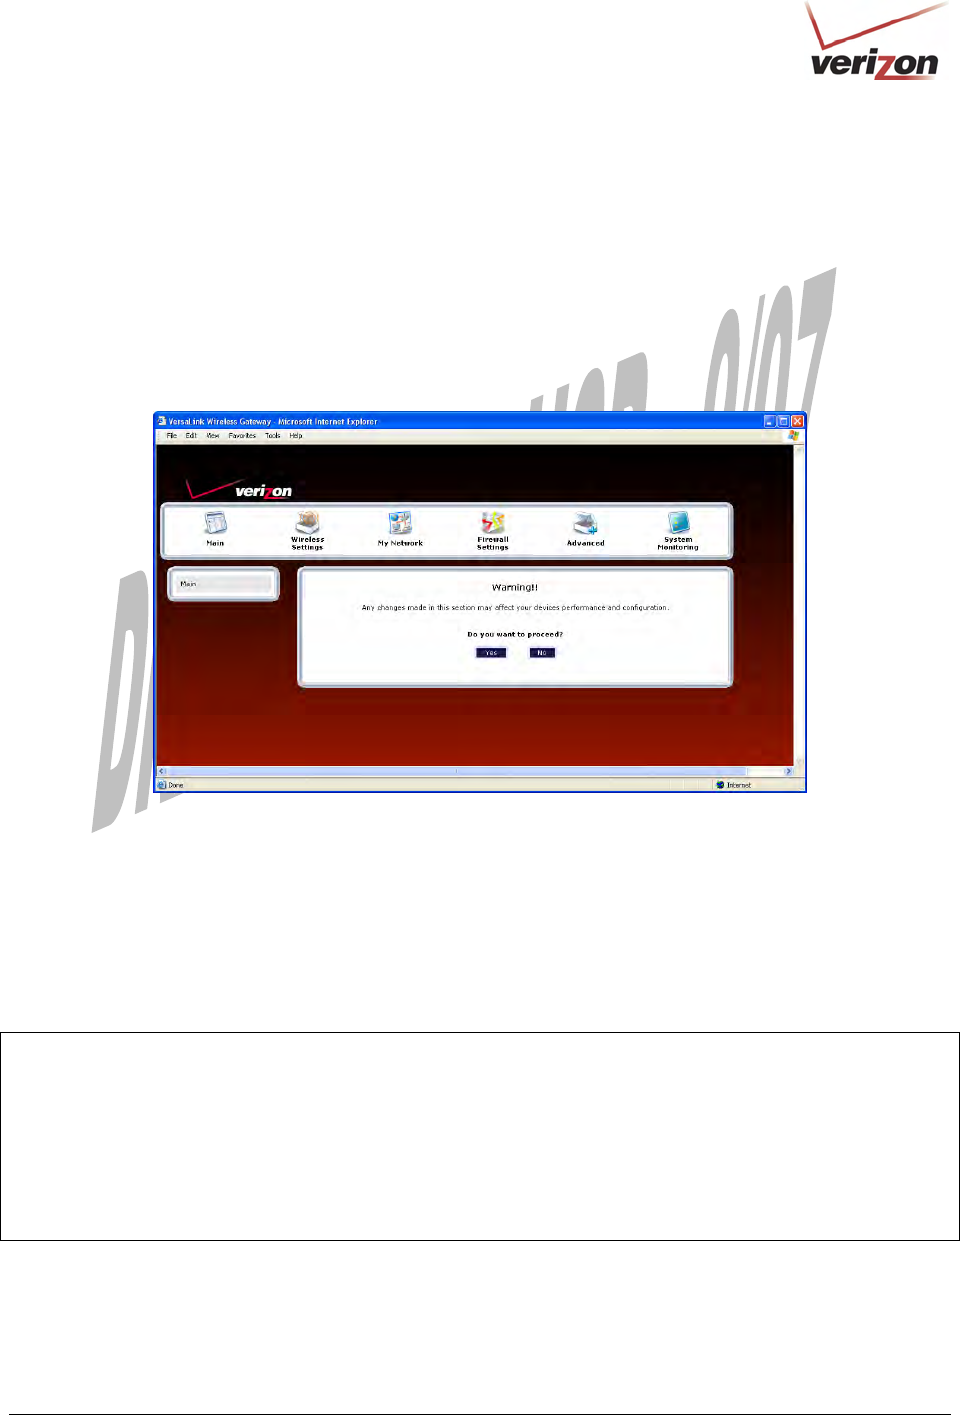
In the Firewall Settings screen, select DMZ Host from the submenu options displayed at the left of the screen. A
warning screen will display the following message:
Any changes made in this section may affect your device’s performance and configuration.
Do you want to proceed?
Click Yes to proceed.
15.4.1 Enabling DMZ Host
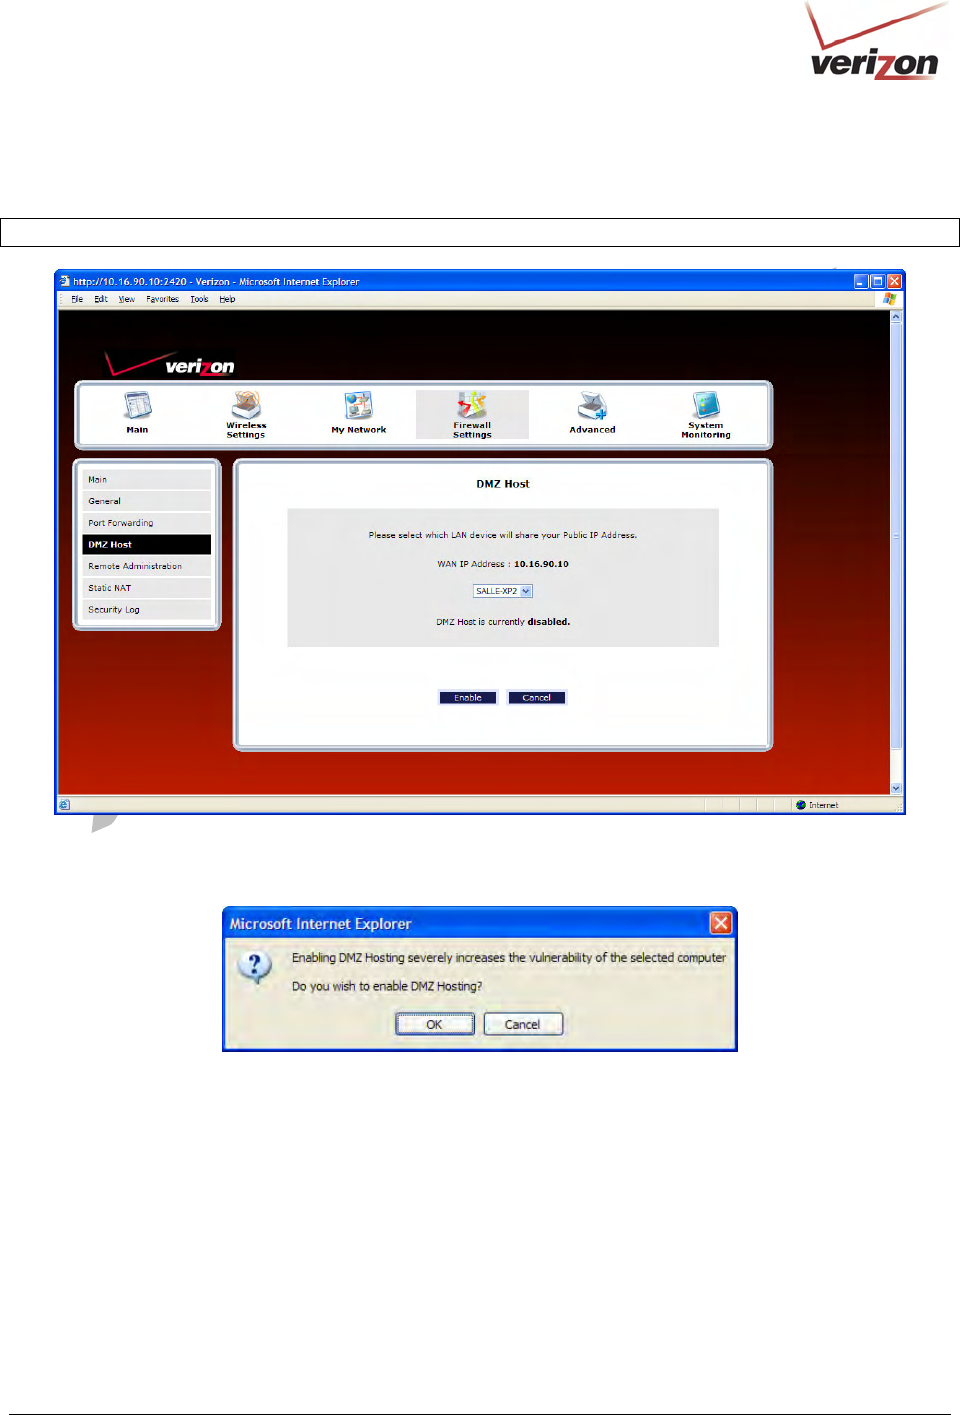
If you clicked Yes, in the preceding warning screen, the following DMZ Host screen will be displayed. The
demilitarized zone (DMZ) feature allows you to select one device on the LAN that will share the WAN-assigned IP
address. By enabling DMZ, the selected device becomes visible on the Internet. Network Address Translation
(NAT) and Firewall rules do not apply to the device configured for DMZ. If you are using Bridge protocol, you will
not be able to configure DMZ Host in the Router.
IMPORTANT:
1. Before you configure DMZ Host, configure your PC settings to obtain an IP address from VersaLink
automatically. If needed, refer to your computer’s Windows help screen for instructions.
2. If you have previously enabled Public LAN, you will need to disable Public LAN and enable the DHCP for
Private LAN and the Private LAN settings before you configure DMZ Host.
3. DMZ Host and Static NAT are mutually exclusive features. Before you enable DMZ Host, confirm that Static
NAT is disabled. If needed, refer to section 15.6.2 for details on disabling Static NAT.
030-300536 Rev. A 119 August 2007
User GuideVersaLink Wireless Gatewa
y
(
Model 7500
)
To configure DMZ Host, in the DMZ Host screen, select a device from the drop-down menu. The selected device
will share your WAN IP address. Next, click Enable to allow the setting to take effect.
NOTE: The actual values may differ from the values displayed in this screen.
If you clicked Enable in the preceding screen, the following pop-up screen will appear. The Router must be reset to
allow the new configuration to take effect. Click OK to continue.
030-300536 Rev. A 120 August 2007
User GuideVersaLink Wireless Gatewa
y
(
Model 7500
)
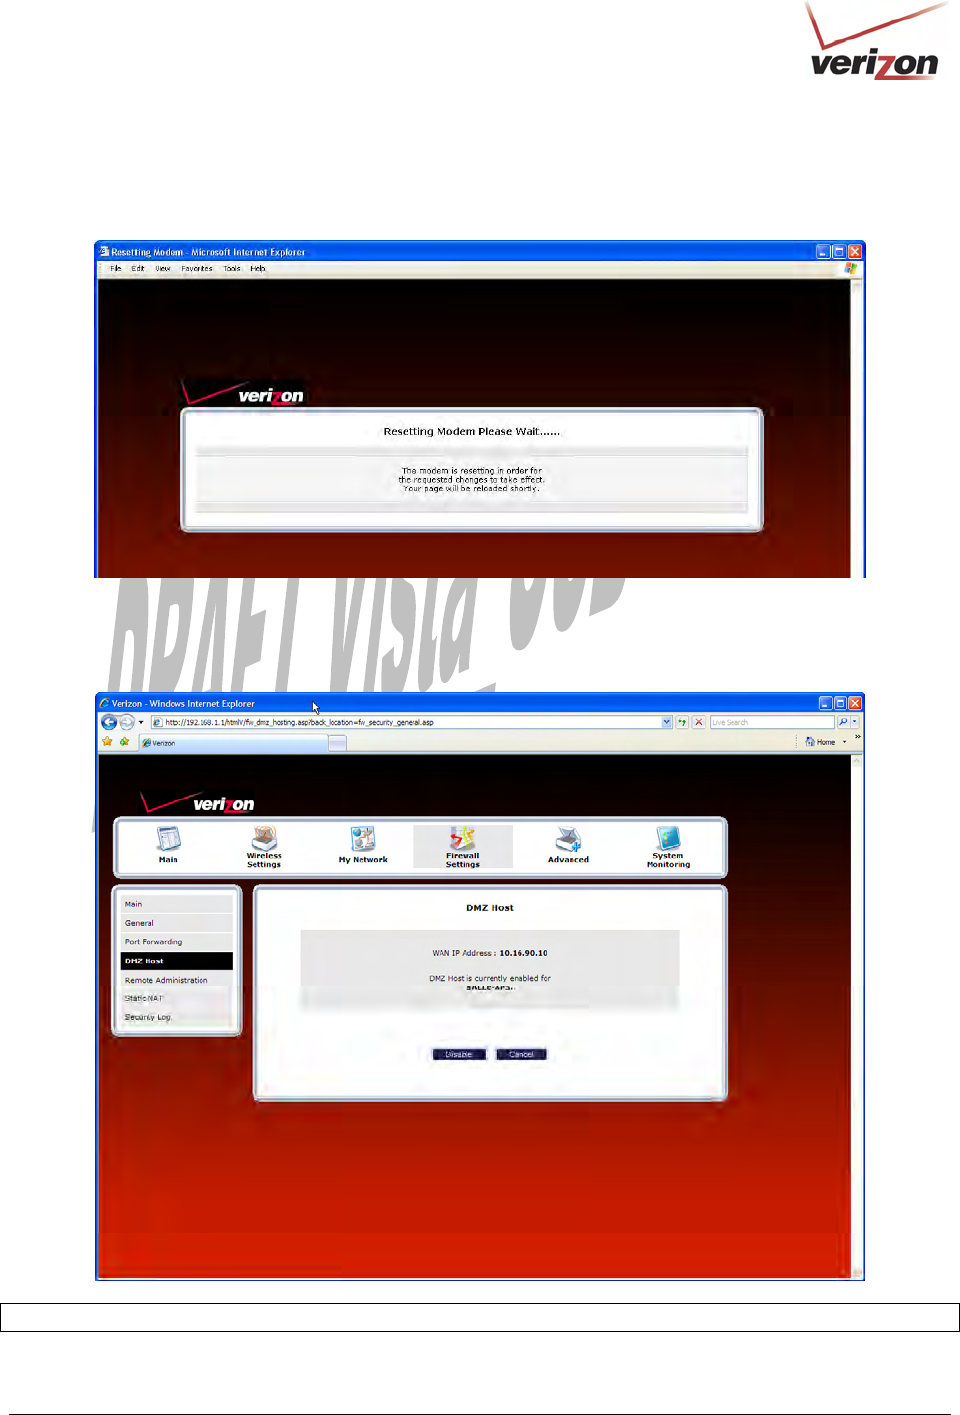
If you clicked OK, the following screen will appear. After a brief delay, the home page will be displayed. Confirm
that you have a DSL link and that your PPP Status displays UP. (If necessary, click the Connect button to establish
a PPP session).
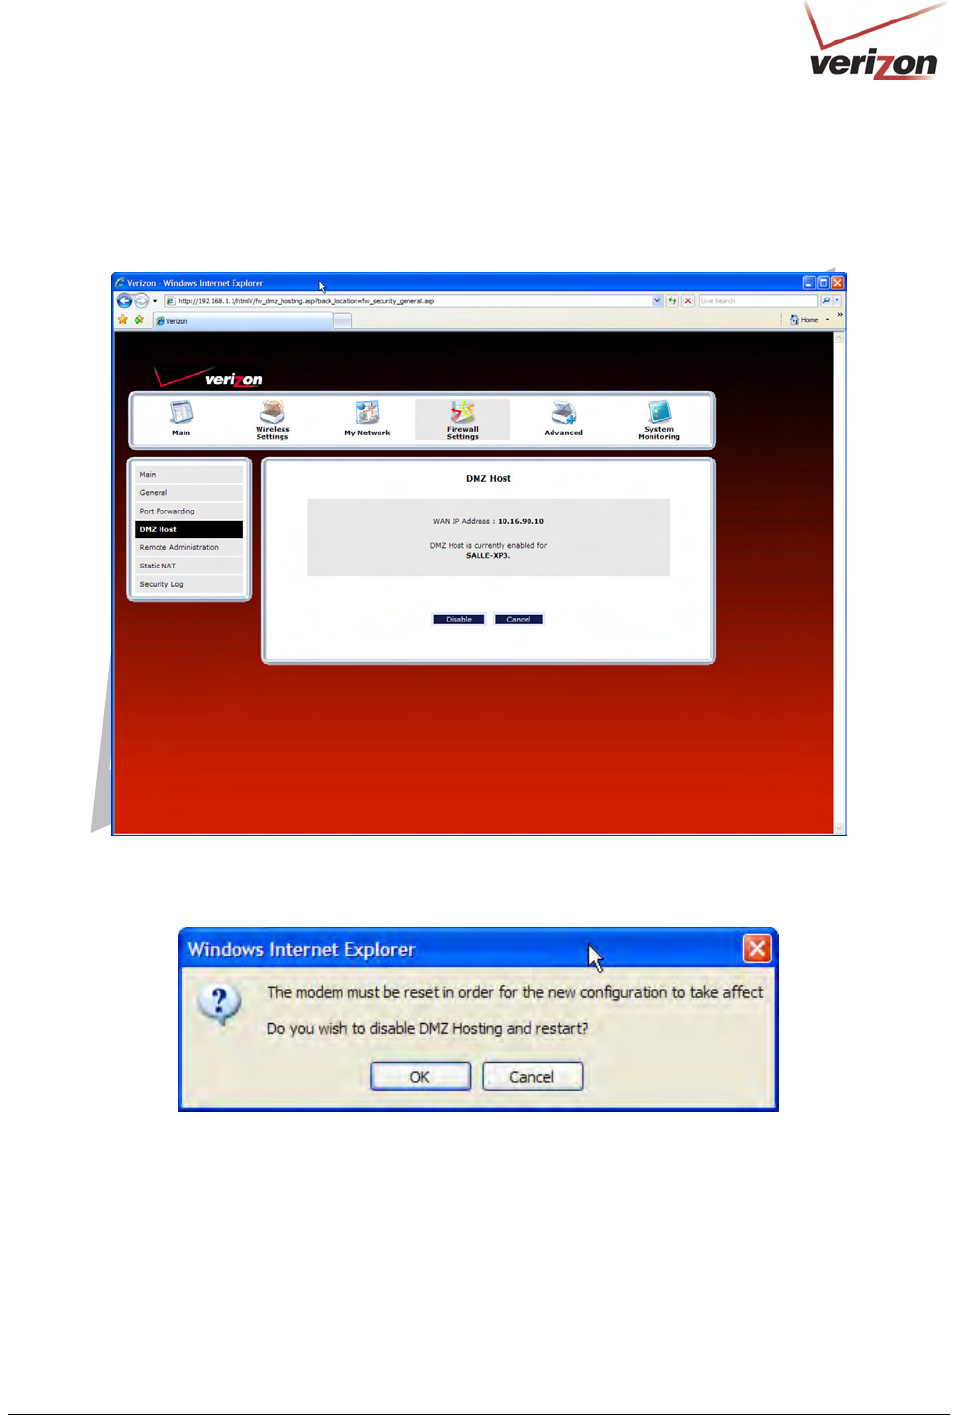
To confirm that DMZ Host has been enabled, select Firewall Settings in the top navigational menu, and then click
DMZ Host in the submenu options at the left of the screen. Next, click Yes in the warning screen. The following
DMZ Host screen will be displayed. This screen shows that DMZ Host is currently enabled for the selected device.
IMPORTANT: After you enable DMZ Host, you will need to reboot your computer.
030-300536 Rev. A 121 August 2007
User GuideVersaLink Wireless Gatewa
y
(
Model 7500
)
15.4.2 Disabling DMZ Host
To disable DMZ Host (if it has been previously enabled), click Disable in the DMZ Host screen.
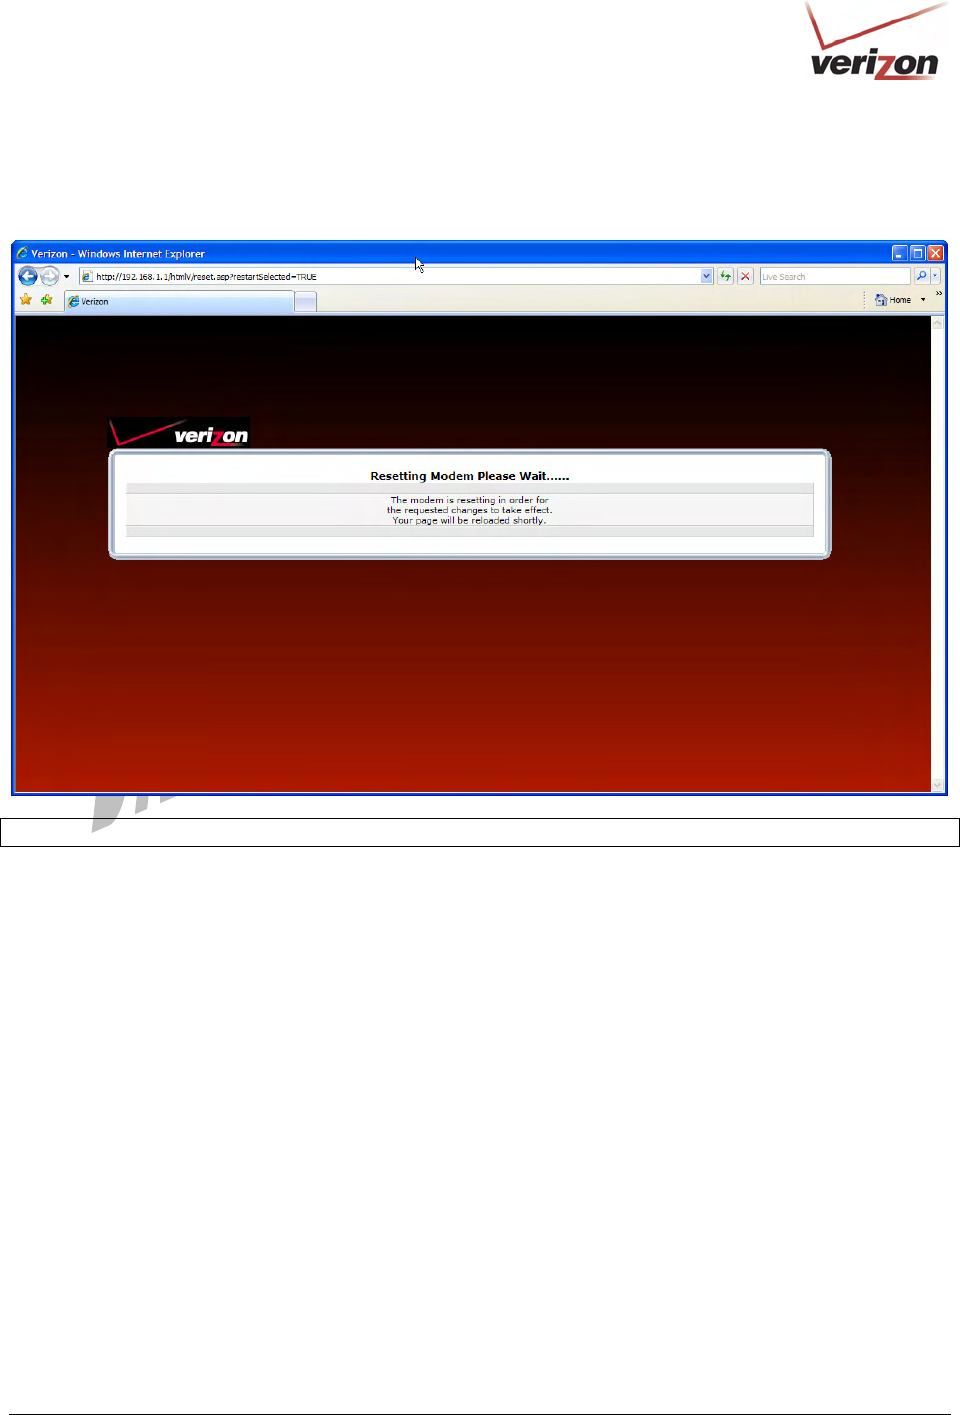
If you clicked Disable, the following screen will be displayed. The Router must be reset to allow the new
configuration to take effect. Click OK to continue.
030-300536 Rev. A 122 August 2007
User GuideVersaLink Wireless Gatewa
y
(
Model 7500
)
If you clicked OK, the following pop-up screen will appear. After a brief delay, the home page will be displayed.
Confirm that you have a DSL link and that your PPP Status displays UP. (If necessary, click the Connect button to
establish a PPP session).
IMPORTANT: After you disable DMZ Host, you will need to reboot your computer.
030-300536 Rev. A 123 August 2007
User GuideVersaLink Wireless Gatewa
y
(
Model 7500
)
15.5 Remote Administration
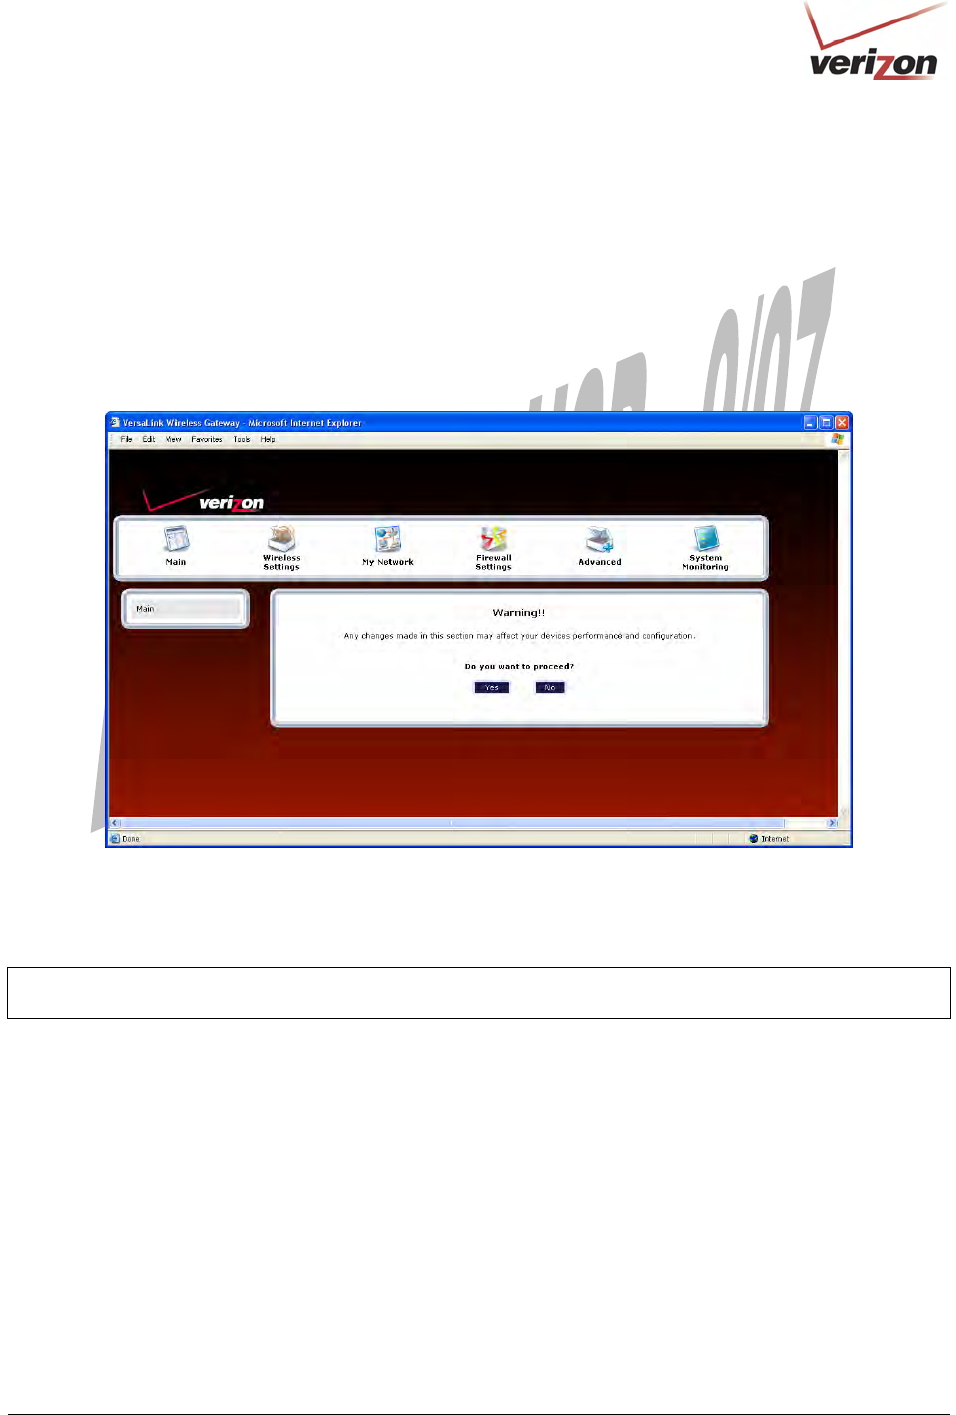
In the Firewall Settings screen, select Remote Administration from the submenu options displayed at the left of
the screen. A warning screen will display the following message:
Any changes made in this section may affect your device’s performance and configuration.
Do you want to proceed?
Click Yes to proceed.
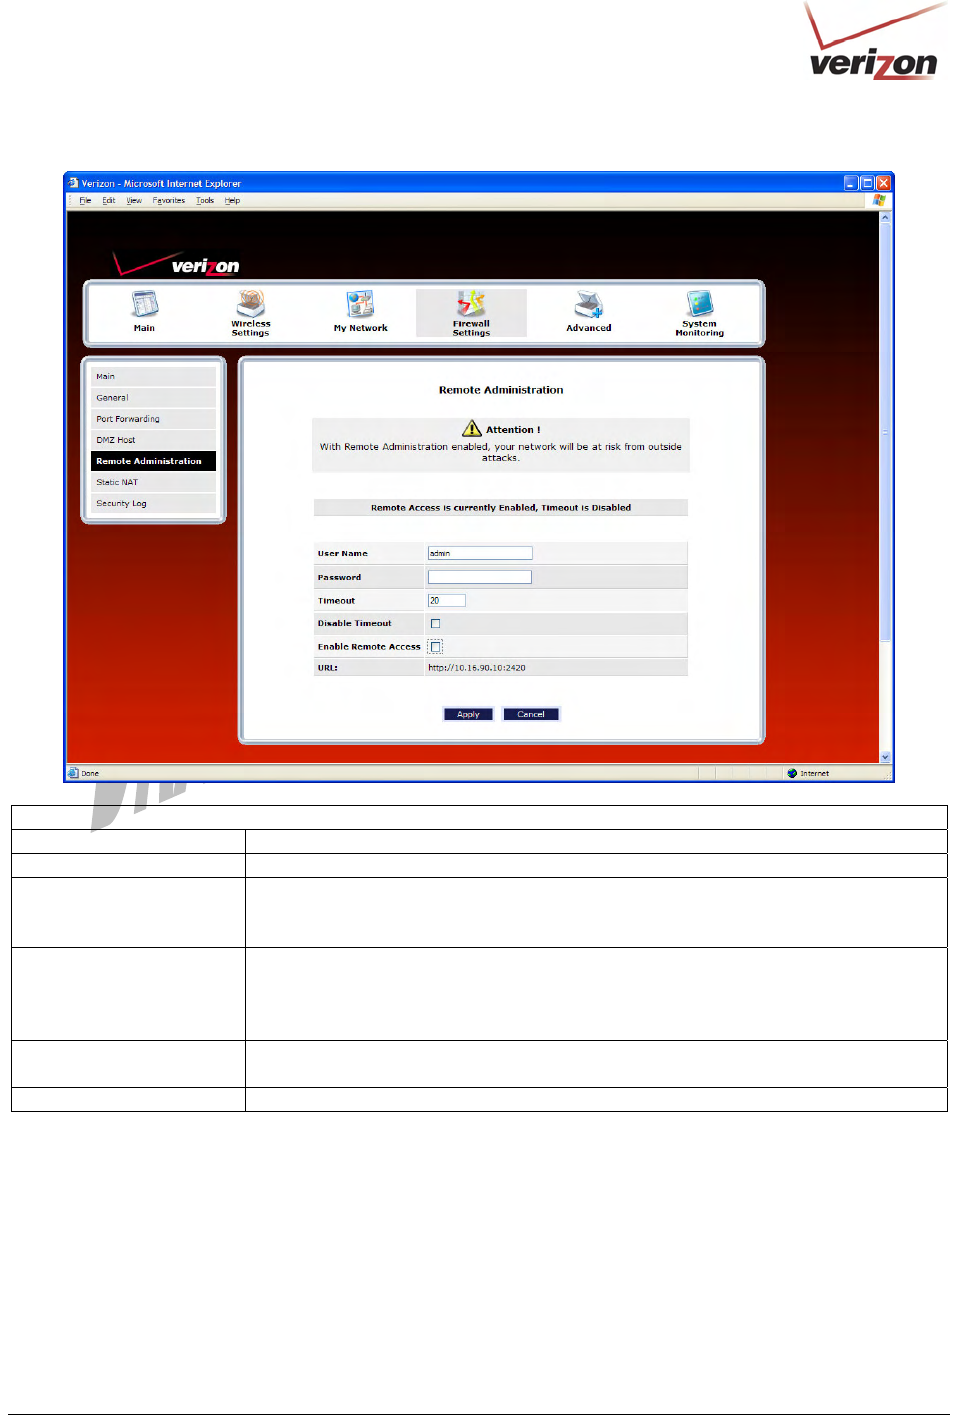
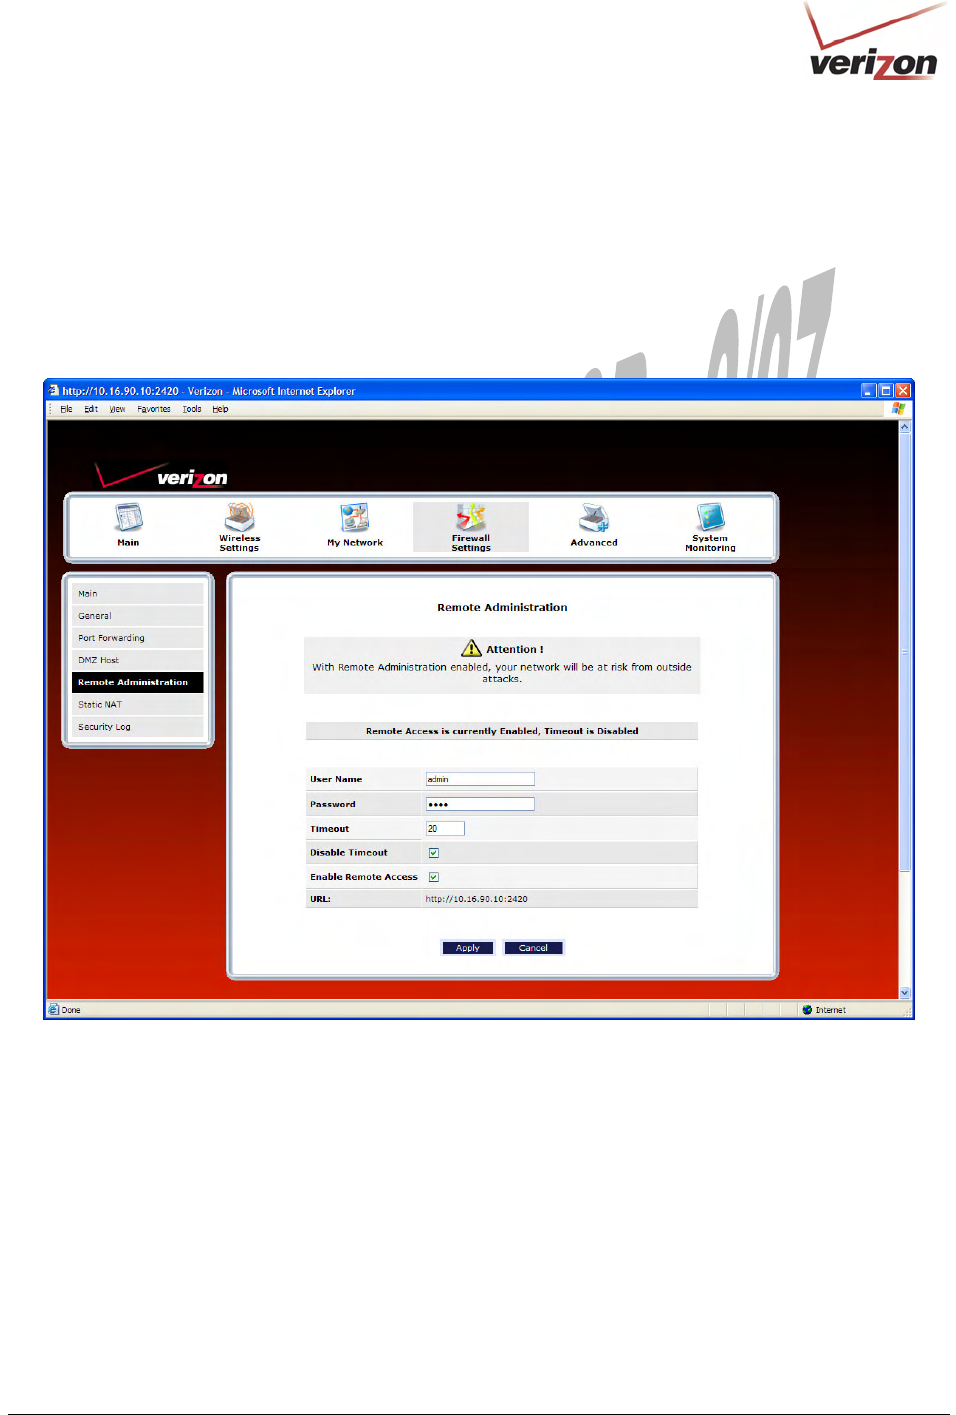
If you clicked Yes in the warning screen, the following Remote Administration screen will appear. Follow the
steps below to configure Remote Administration in your Router.
NOTE: The User Name and Password should be at least 4 characters long and should not exceed 32 characters. Do
not type a blank space or asterisks. The user name and password are case sensitive.
1. Type the administrator’s User Name. (By default admin appears in this field; however, you can change this
value, if desired).
2. Type the administrator’s Password.
3. Enter the number of minutes after which you want remote access to time out.
4. Click the Enable Remote Access box (a check mark will appear in the box).
5. Click Apply to allow the settings to take effect.
030-300536 Rev. A 124 August 2007
User GuideVersaLink Wireless Gatewa
y
(
Model 7500
)
Remote Administration
User Name Enter the user name in this field.
Password Enter your password in this field.
Timeout Default = 20 minutes
Enter the number of minutes after which remote access will be deactivated. (It will
also be deactivated if the Router is reset to factory defaults).
Disable Timeout Click this box (a check mark will appear) to activate the Disable Timeout feature.
This means that once you enable Remote Access, it will remain on until you reset
the Router to factory defaults. This function overrides any timeout values.
Deselect the box to deactivate this feature.
Enable Remote Access Click this box (a check mark will appear) to enable Remote Access.
Deselect the box to disable this feature.
Remote URL Displays the URL of the remote management device (VersaLink).
030-300536 Rev. A 125 August 2007
User GuideVersaLink Wireless Gatewa
y
(
Model 7500
)
The following screen shows a check mark in the Enable Remote Access and Disable Timeout check boxes. The
following message is displayed:
Remote access is currently enabled. After 20 minutes of inactivity, or on reboot, remote access will be
automatically disabled.
After 20 minutes of inactivity or on reboot, Remote Access will be automatically disabled. To disable Remote
Access, click the Enable Remote Access box to clear the check mark. Then click Apply to allow the change to take
effect.