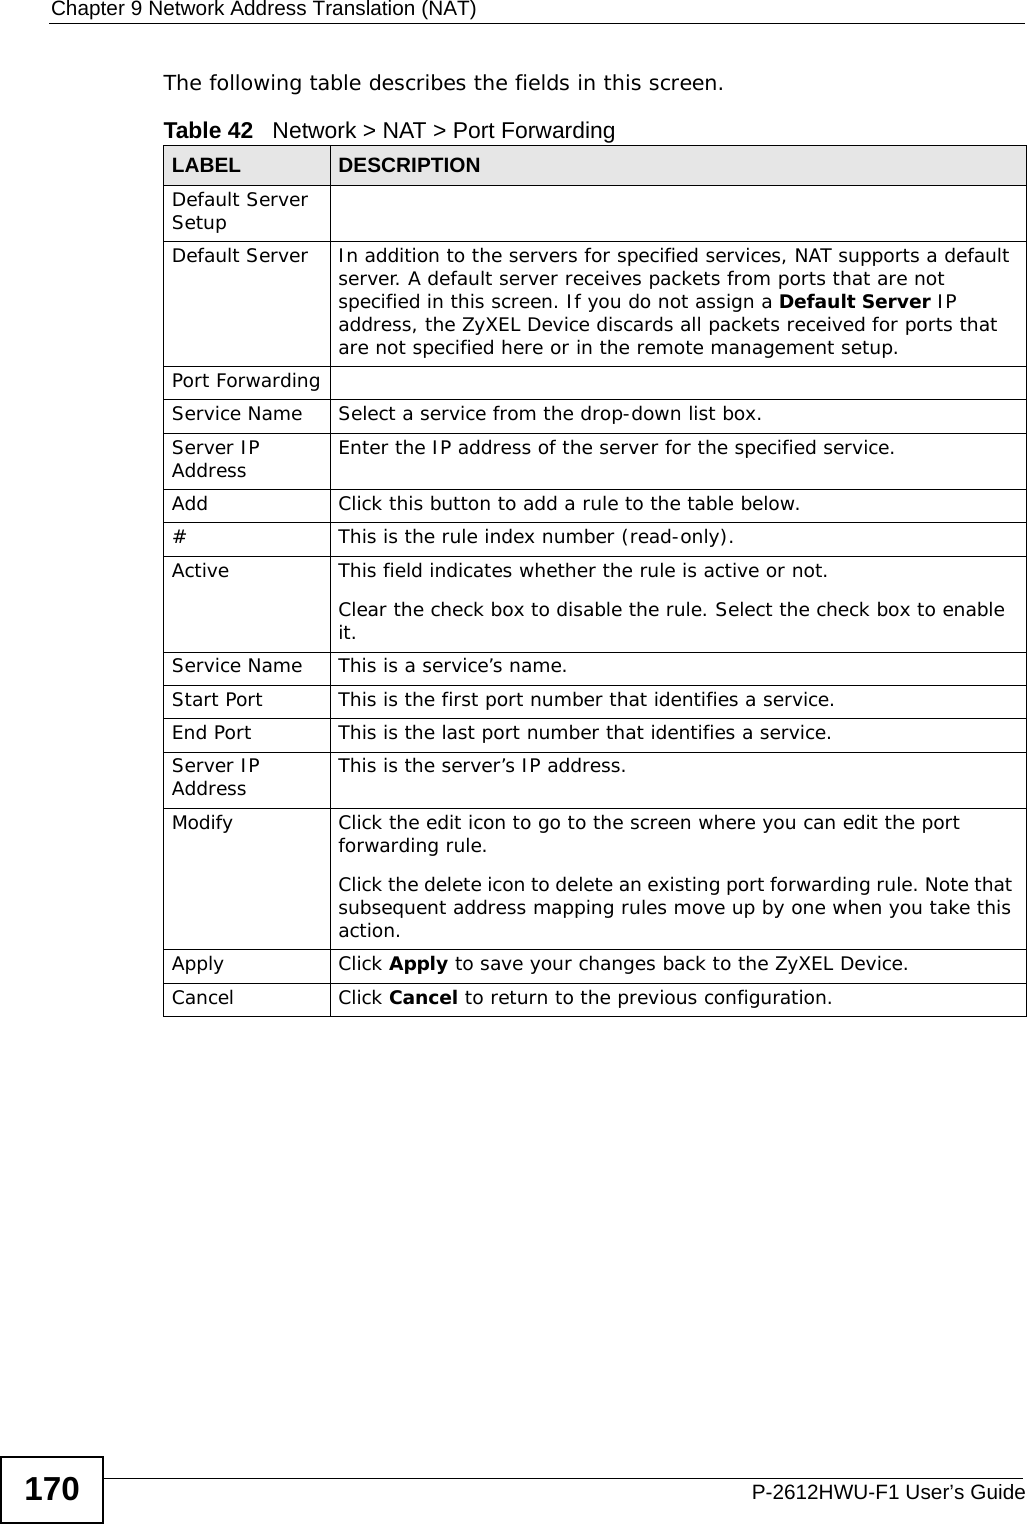
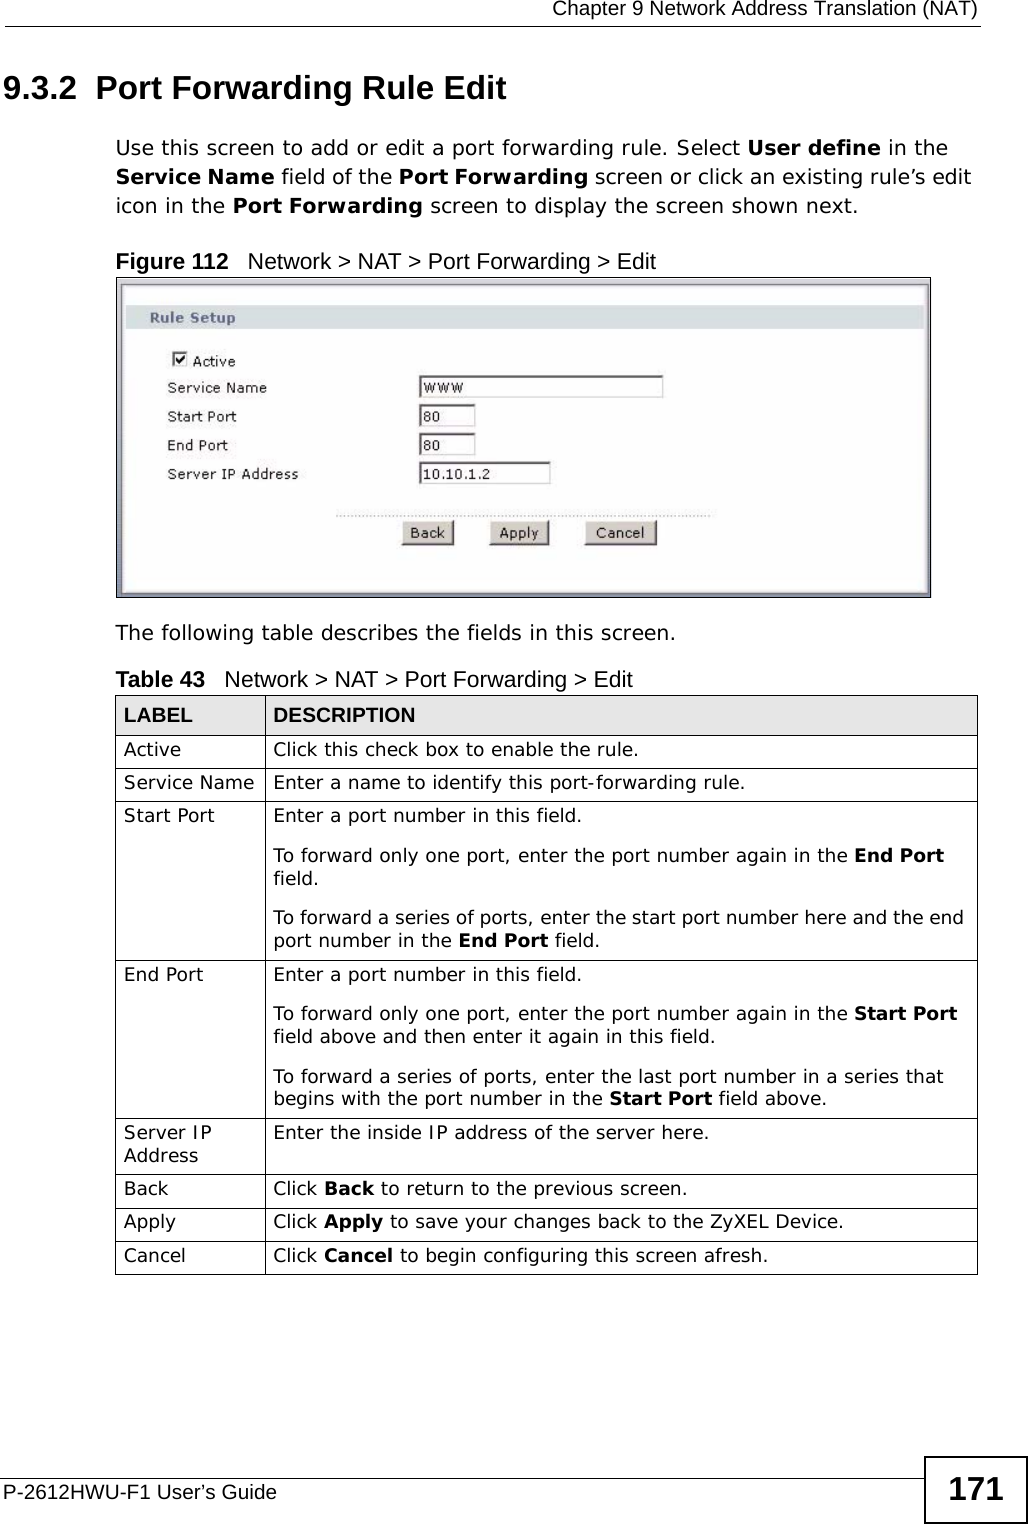
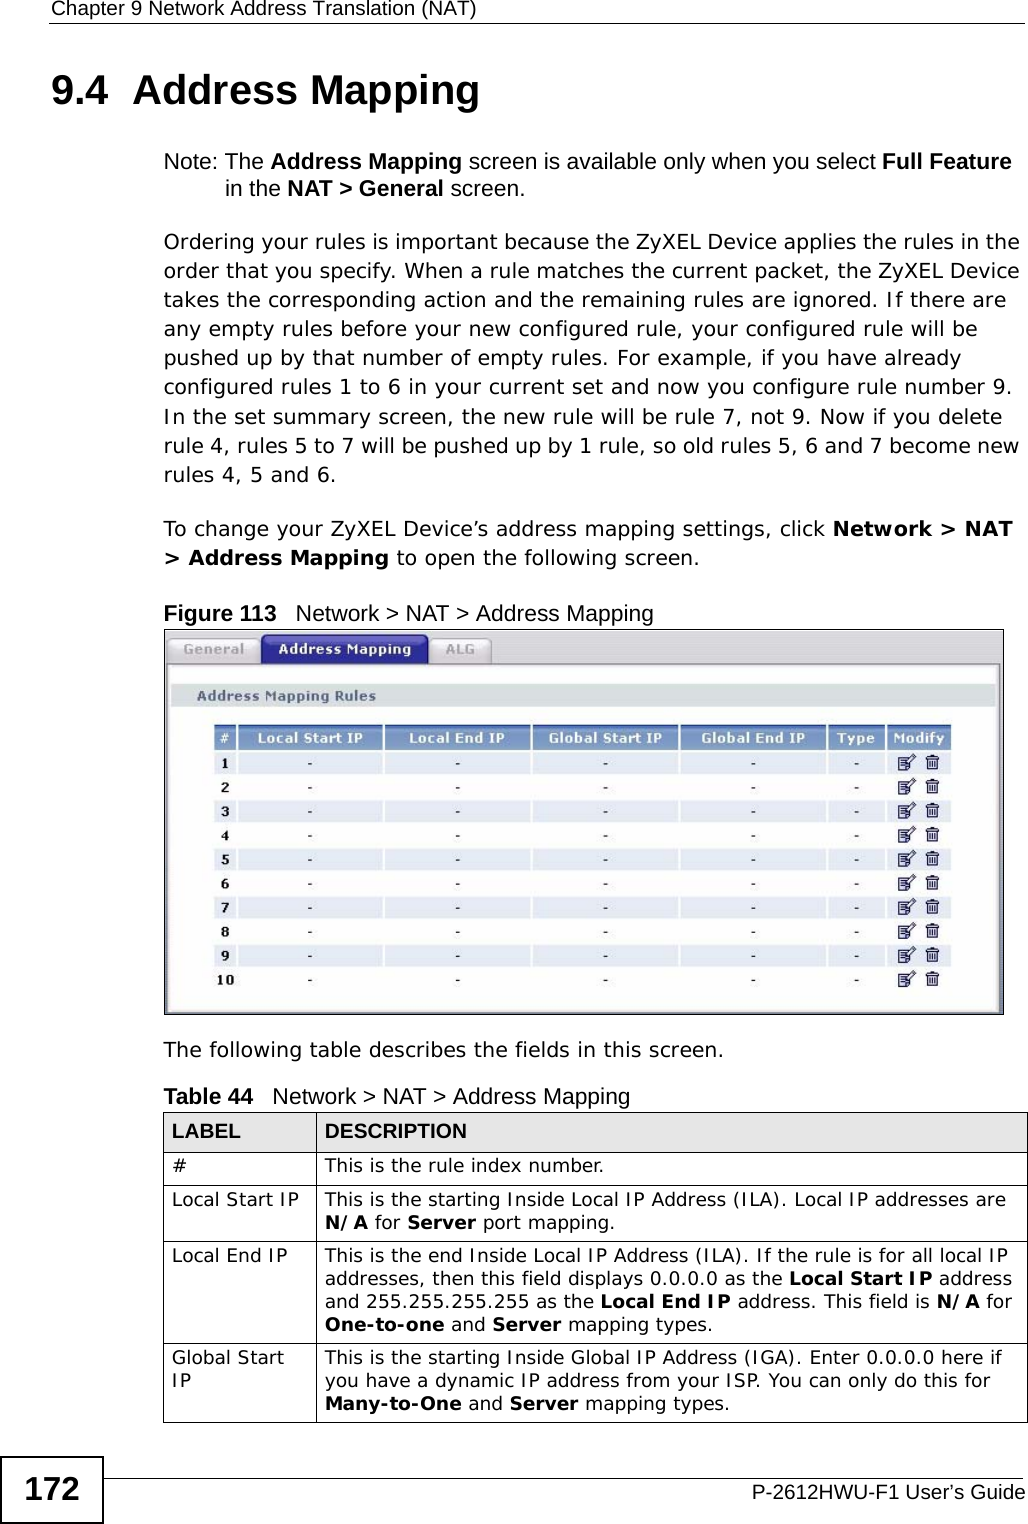
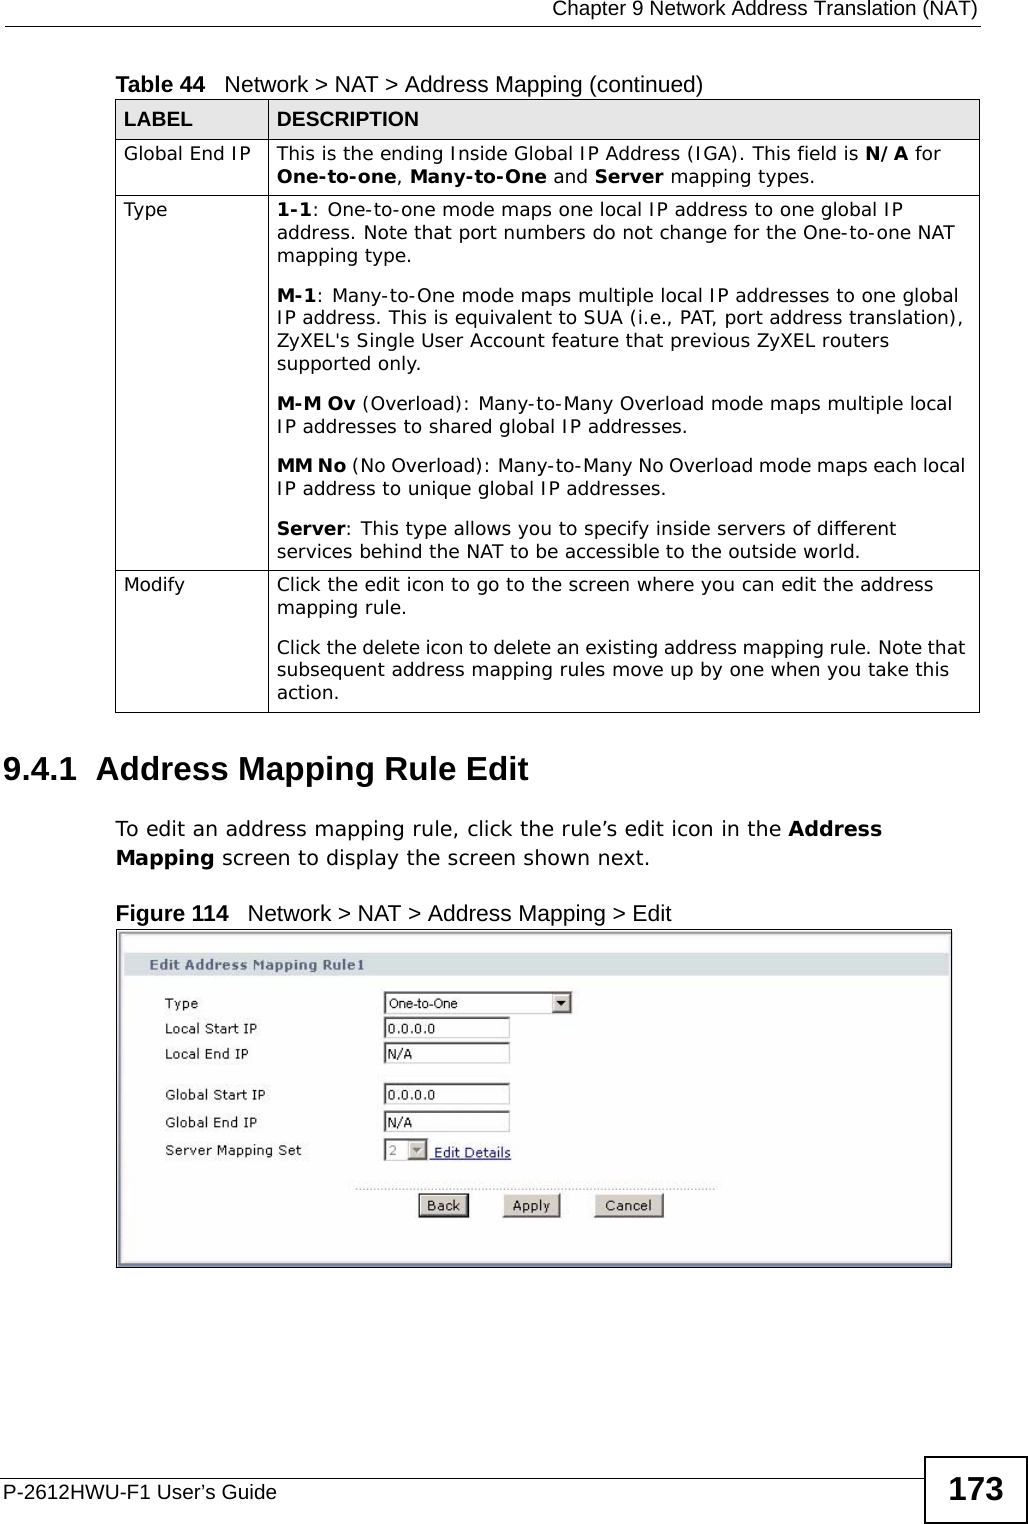
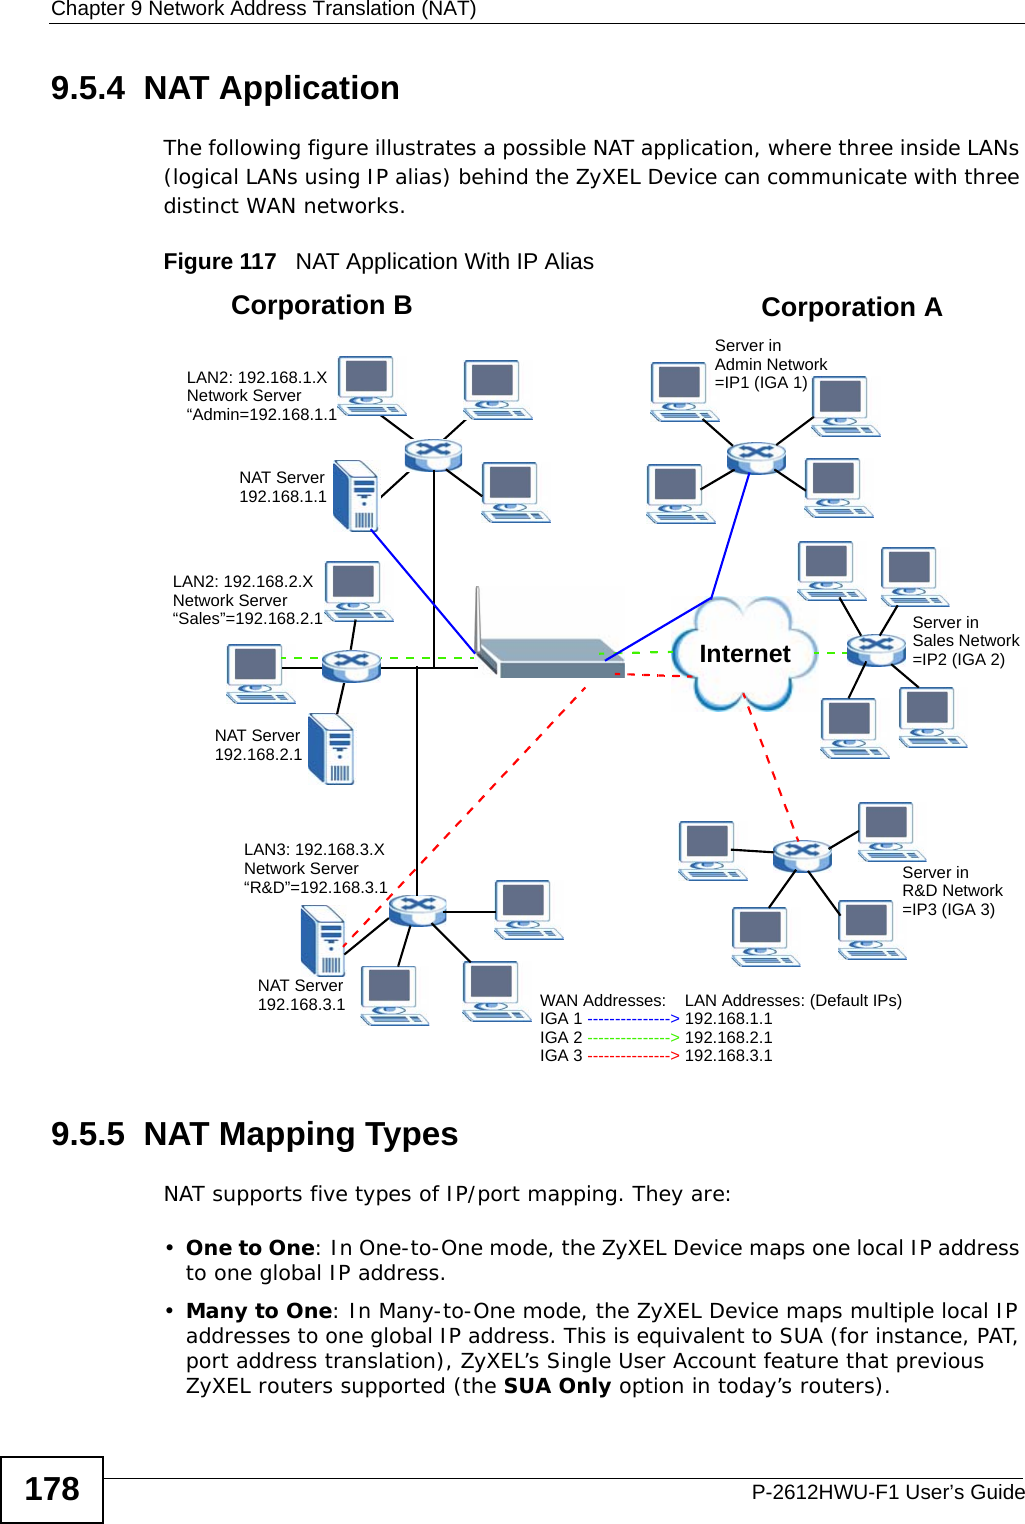
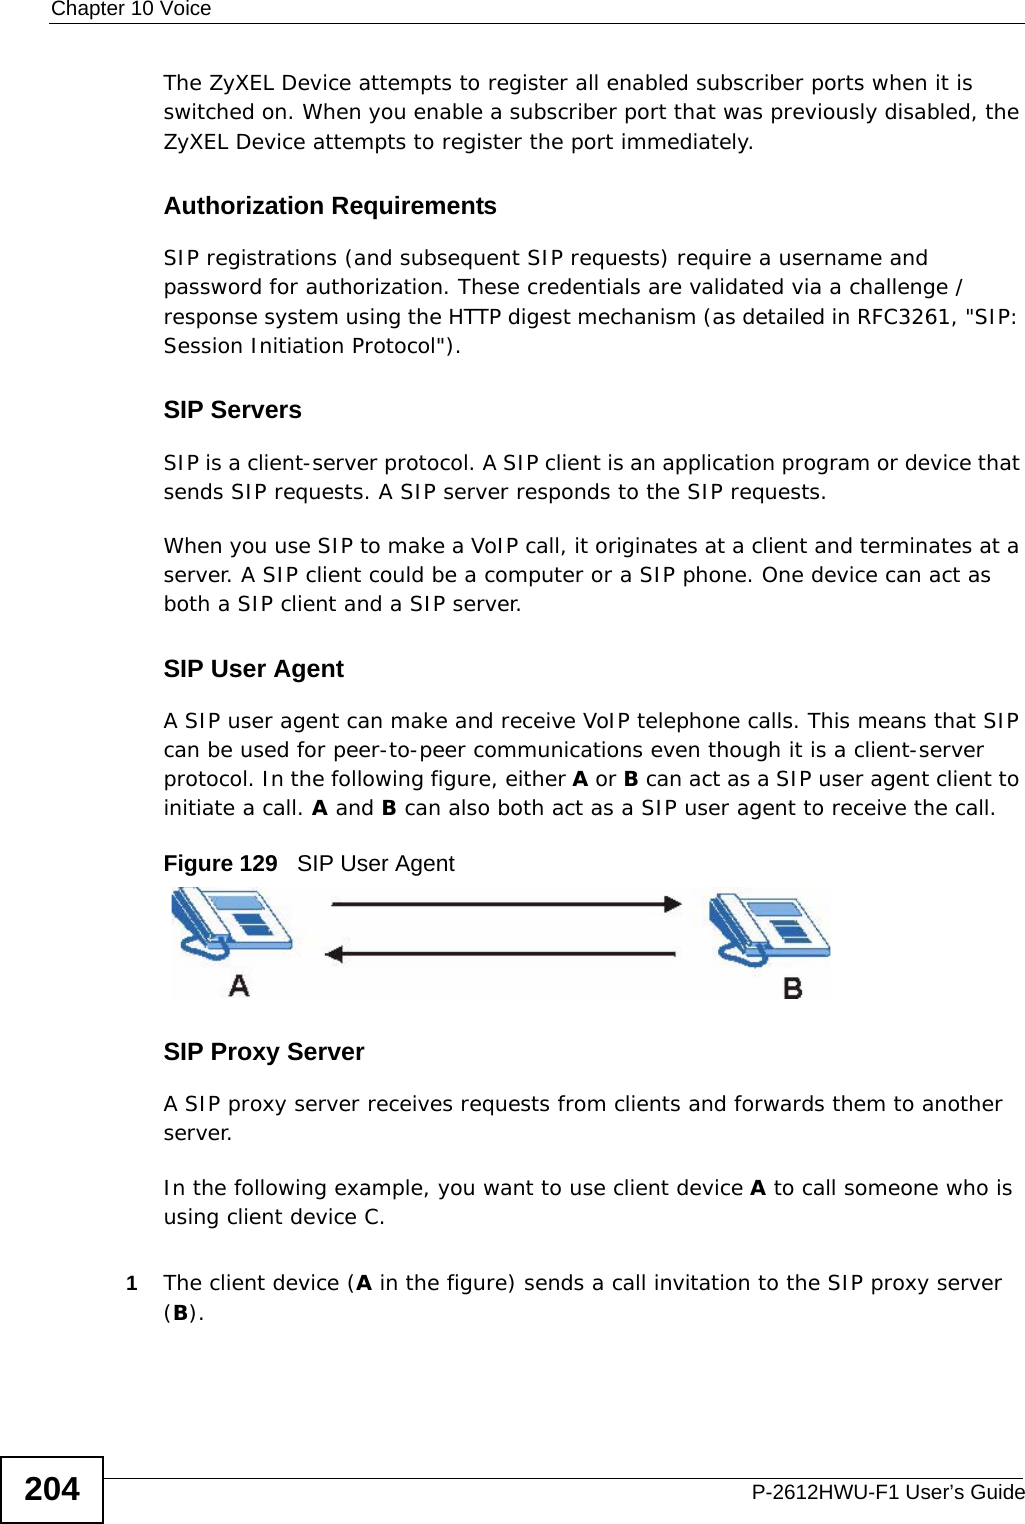
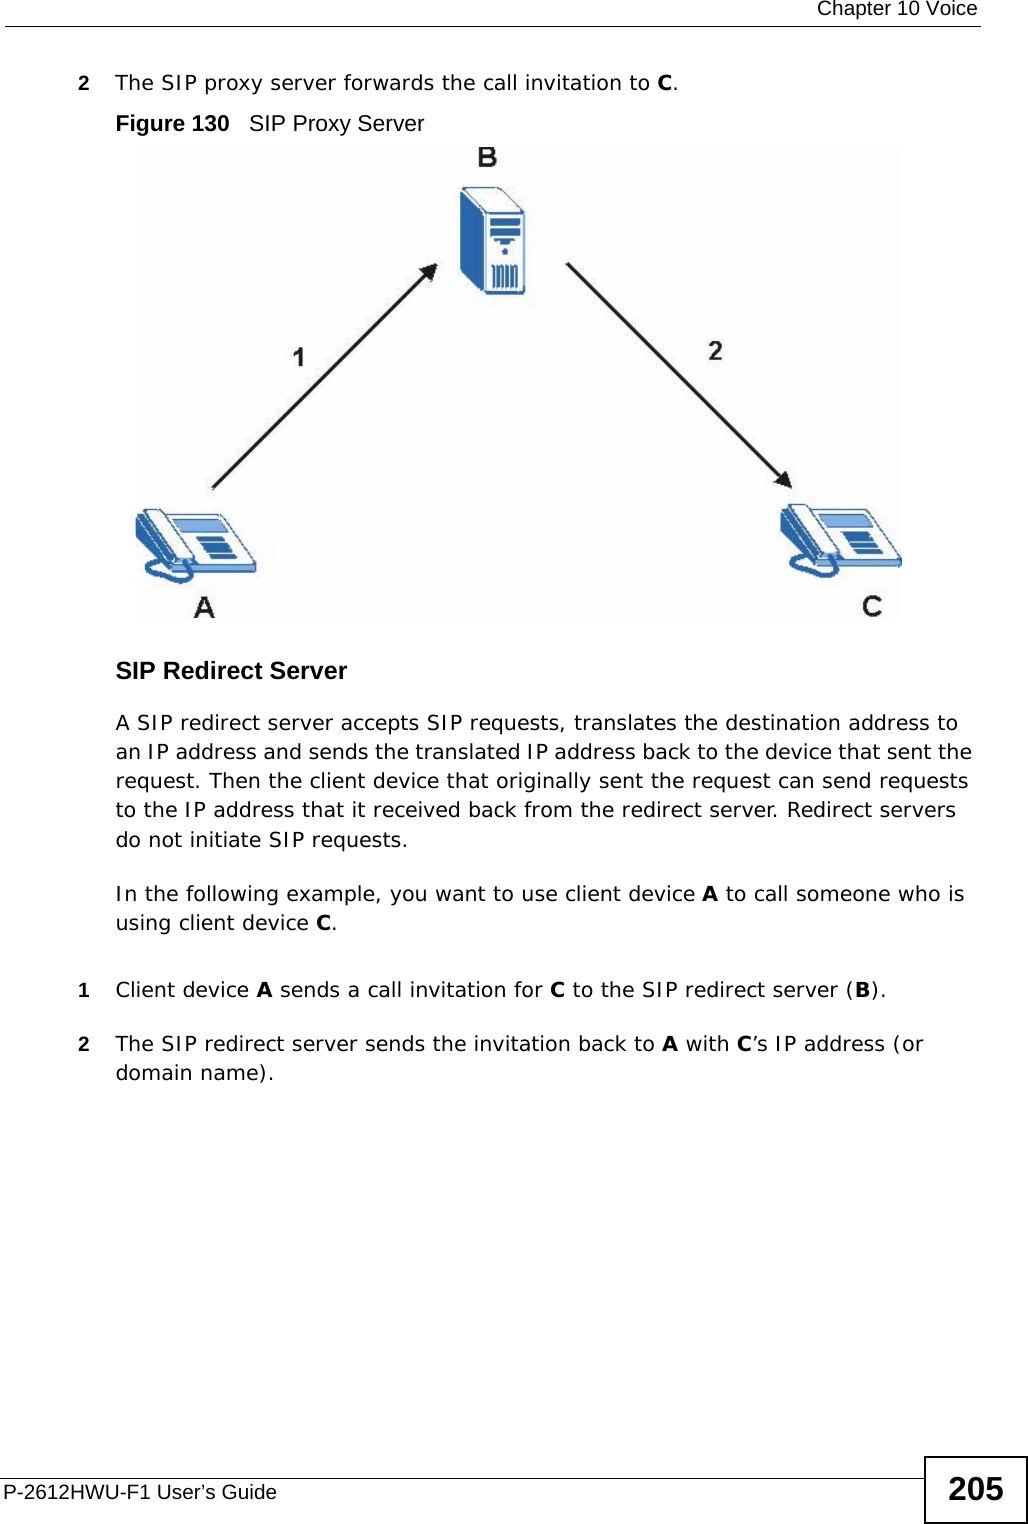
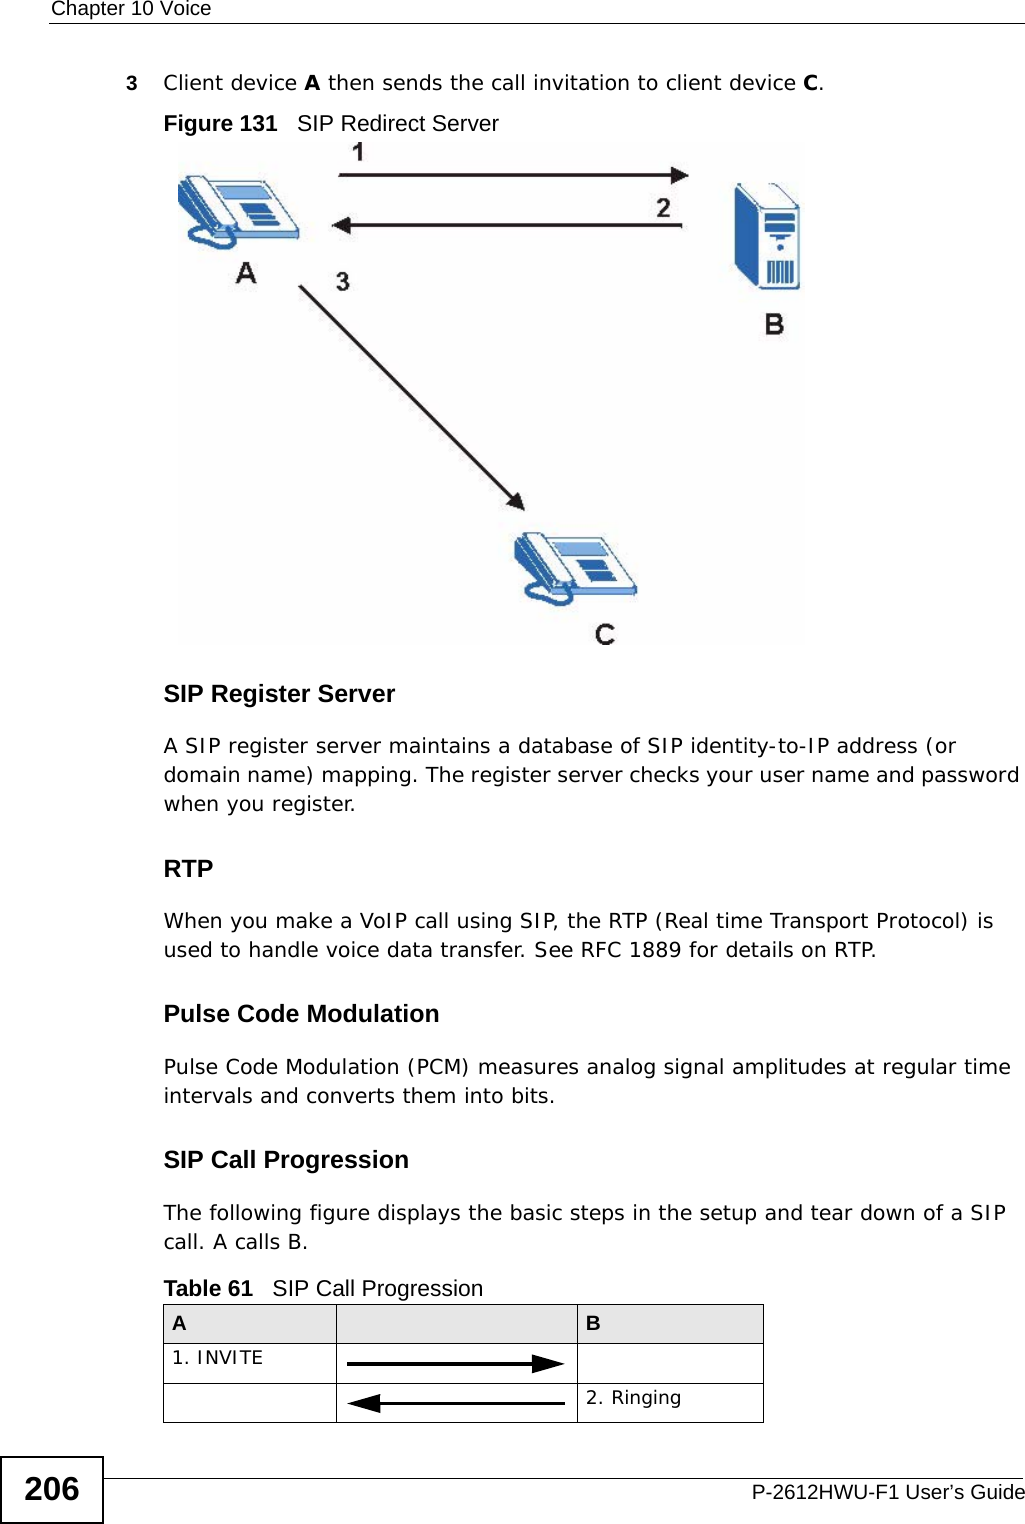
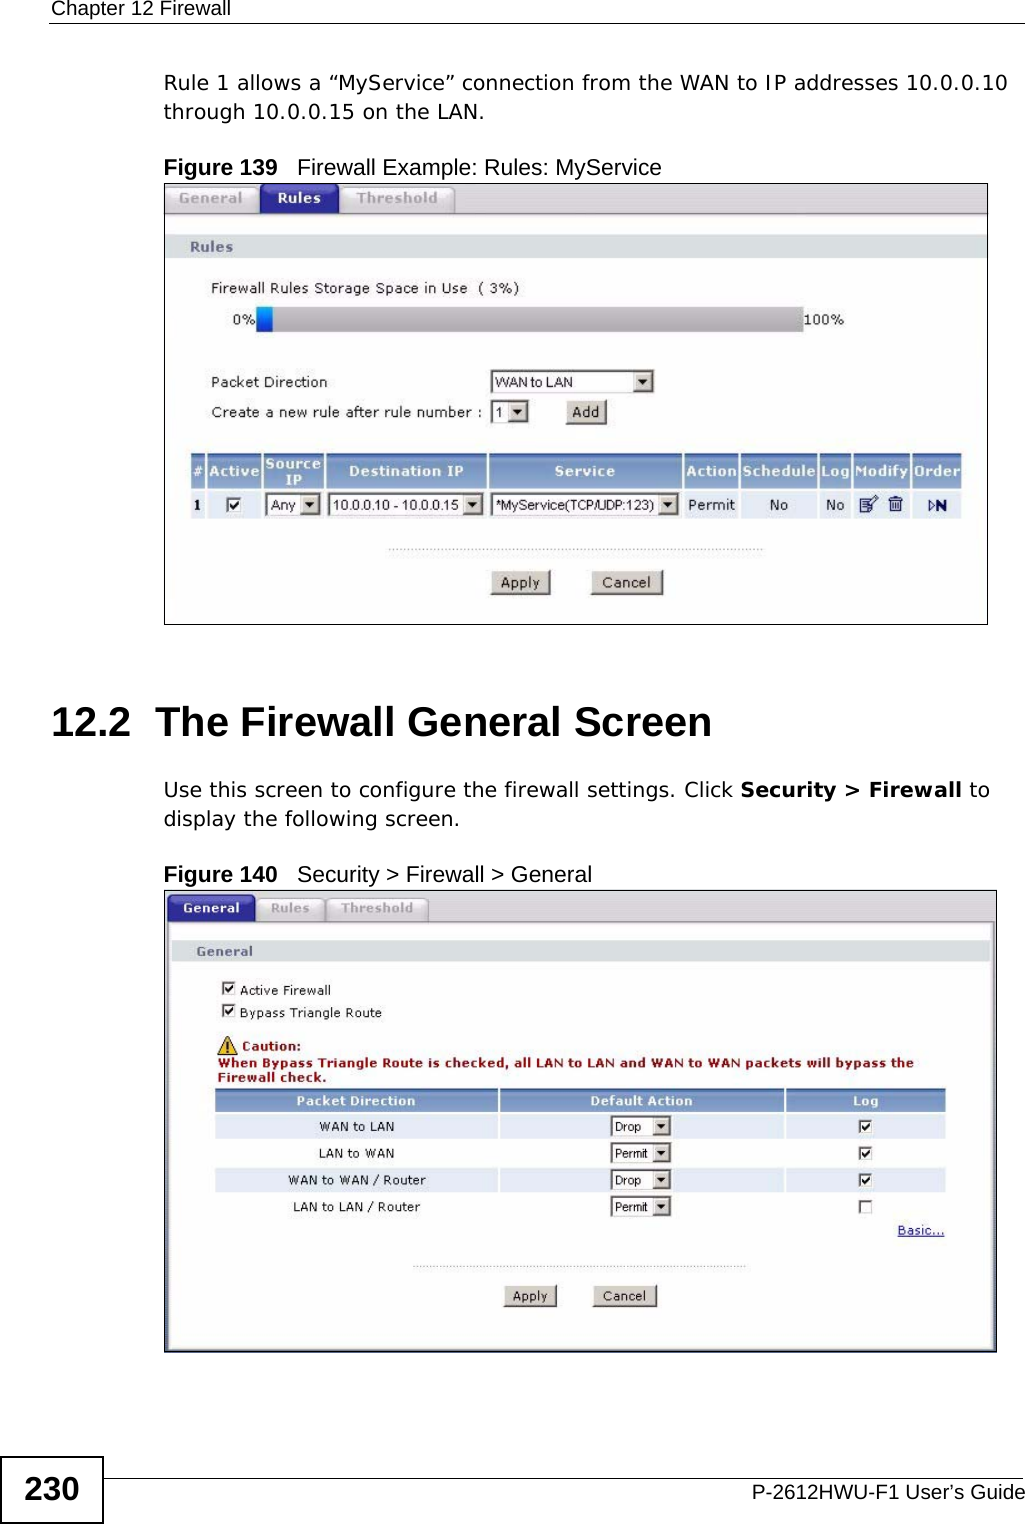
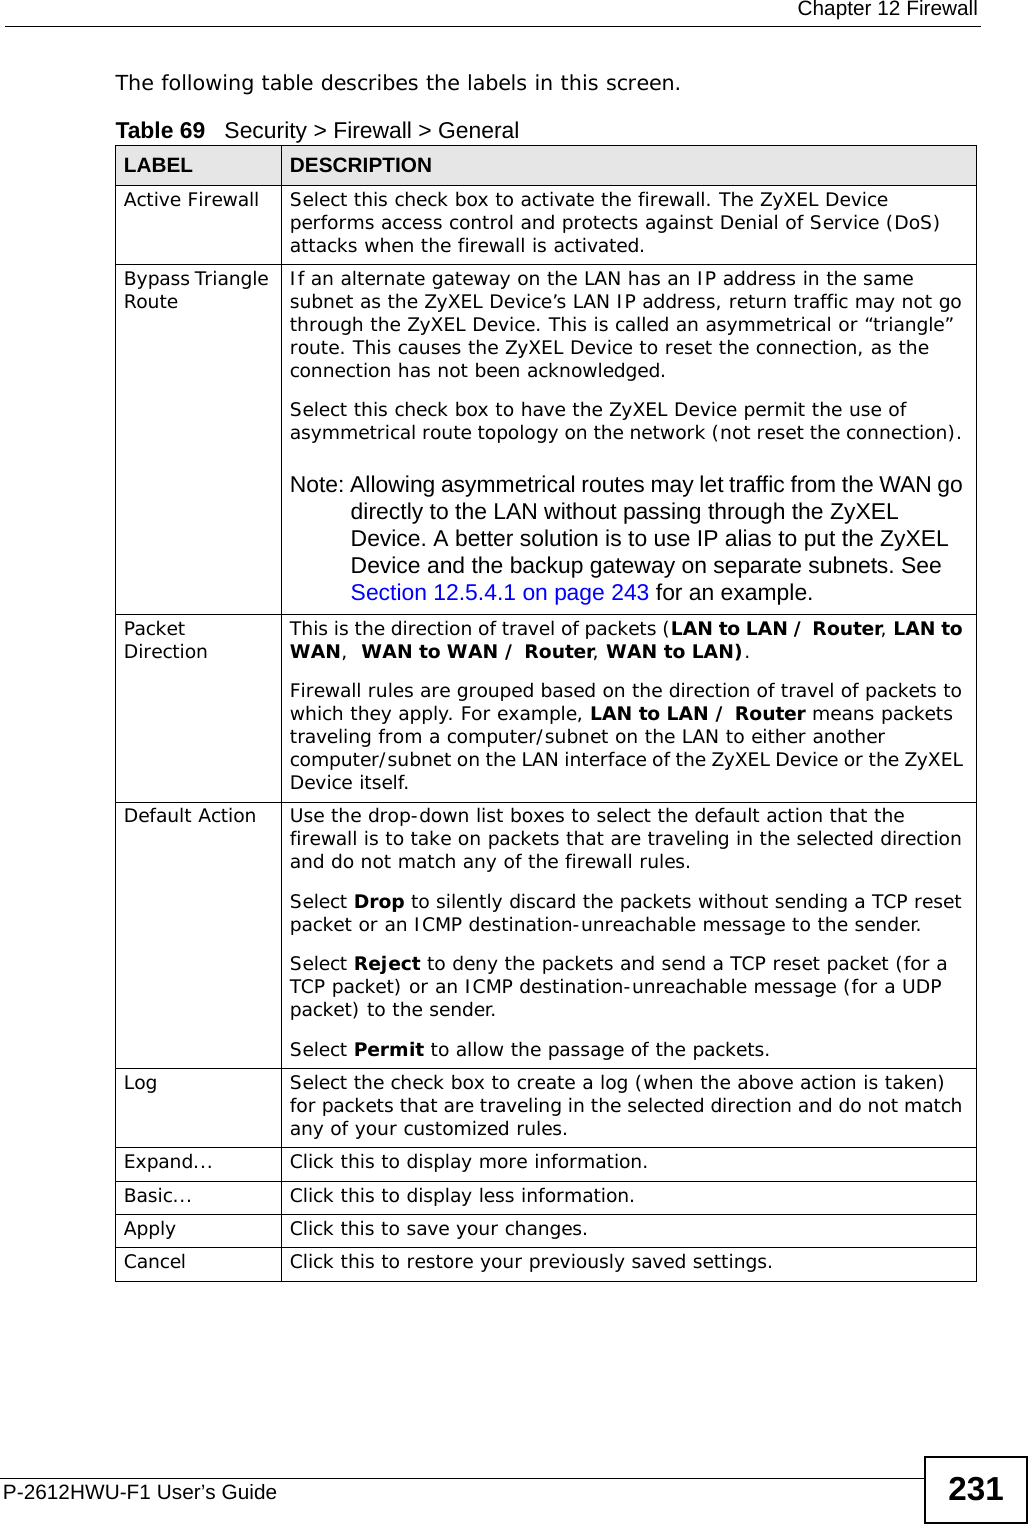
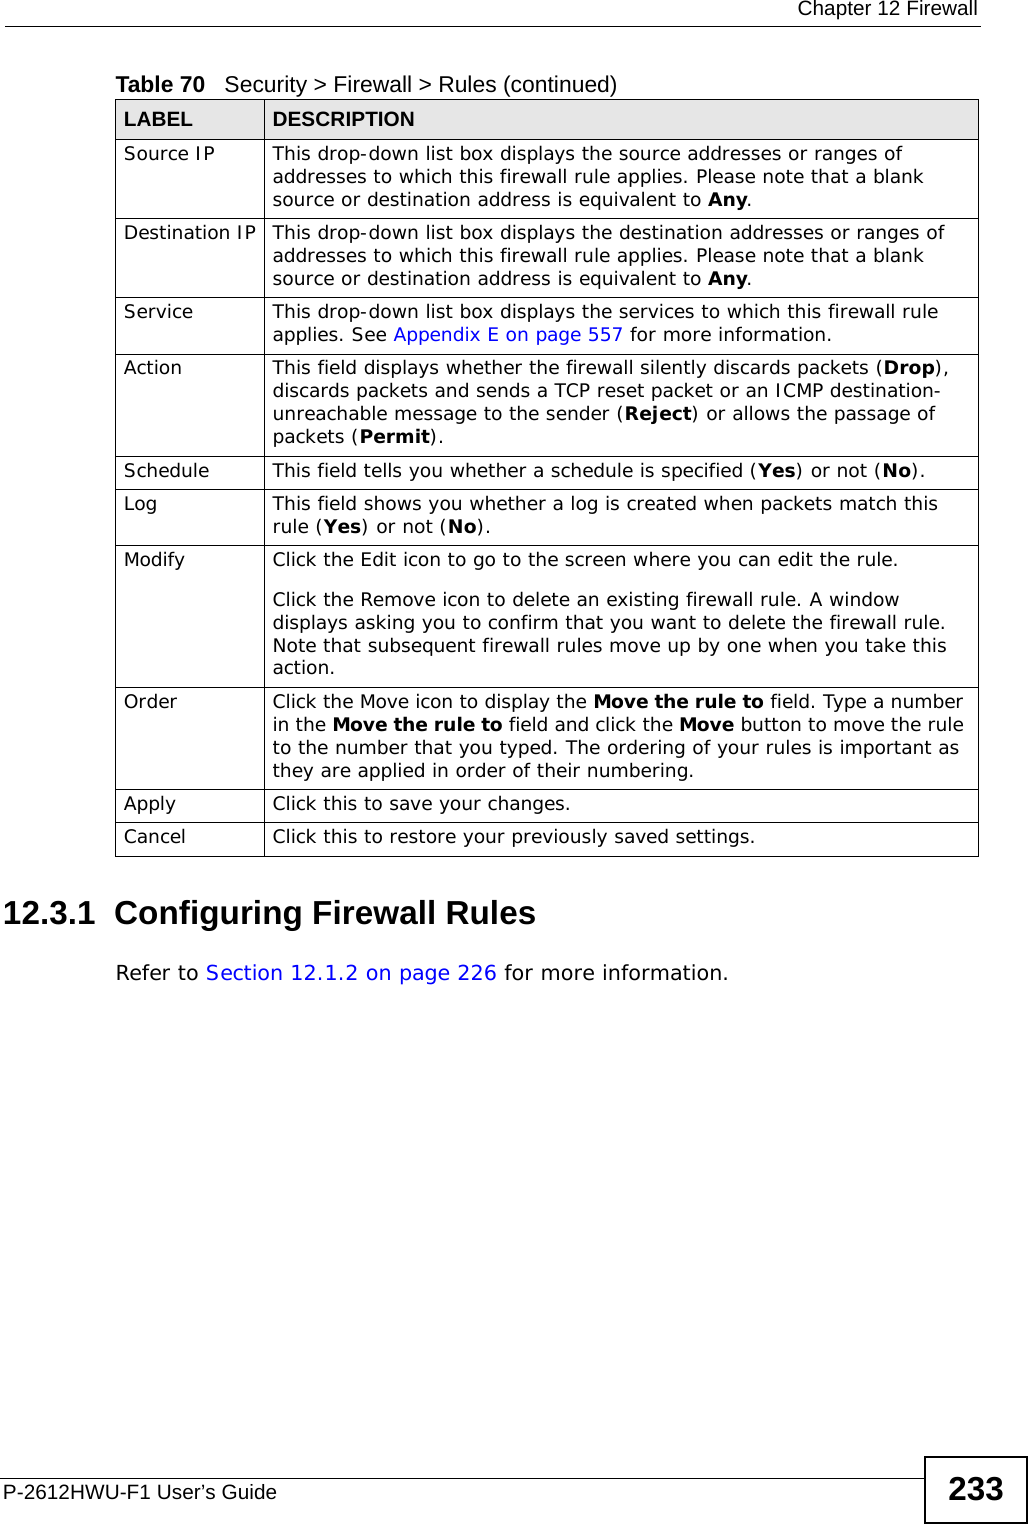
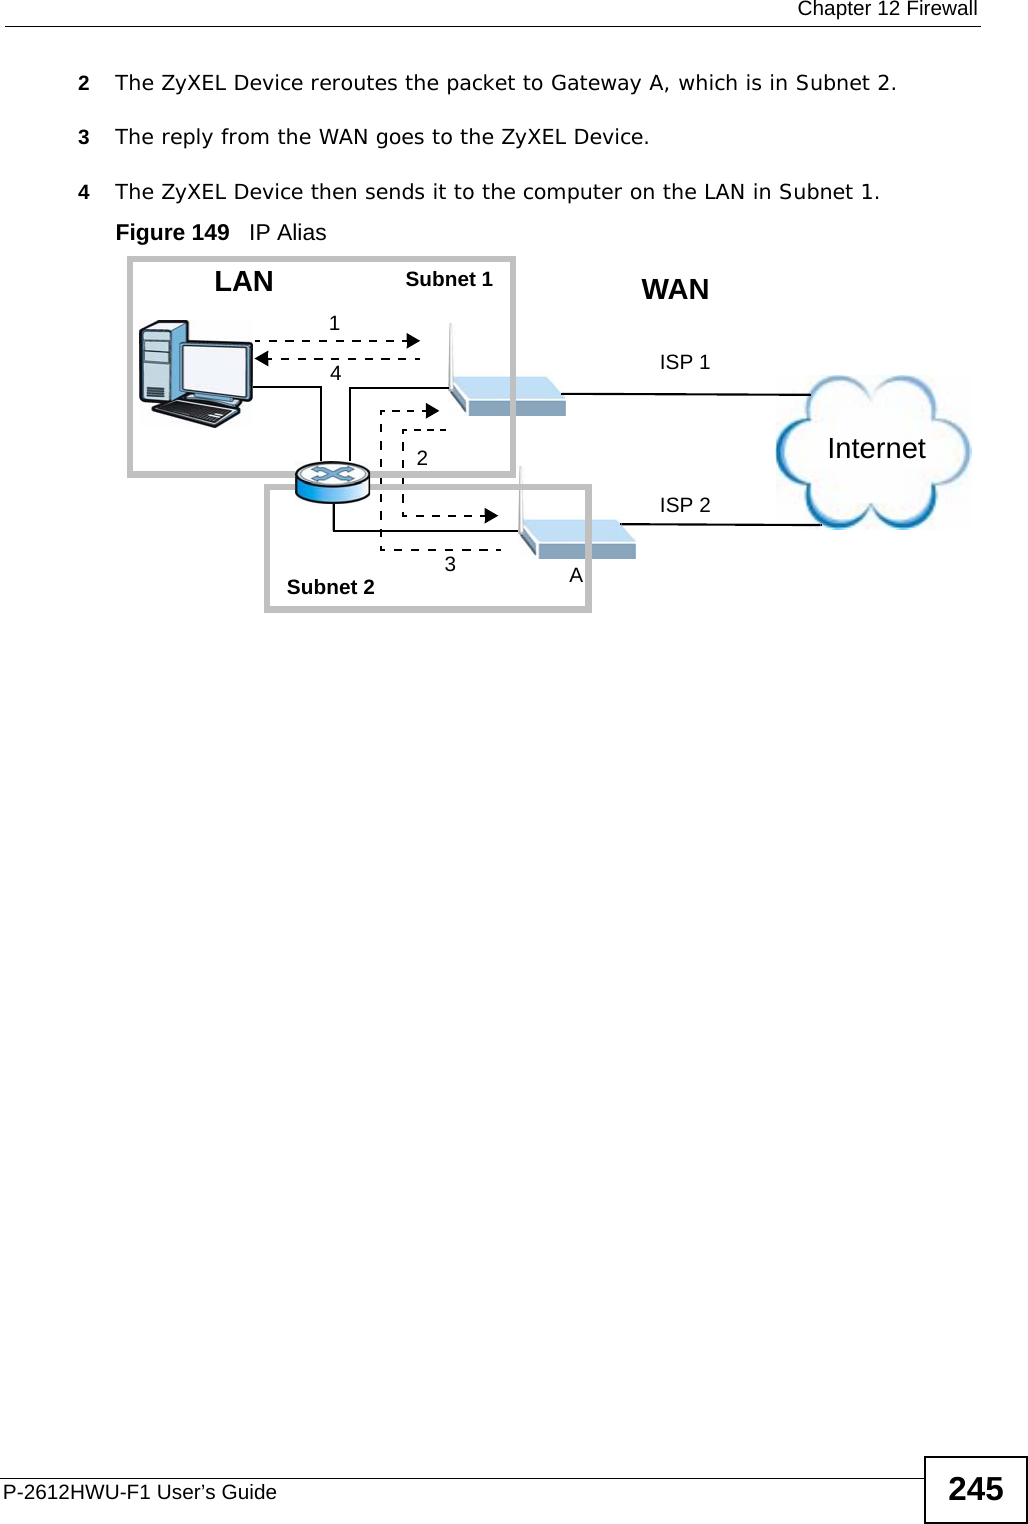
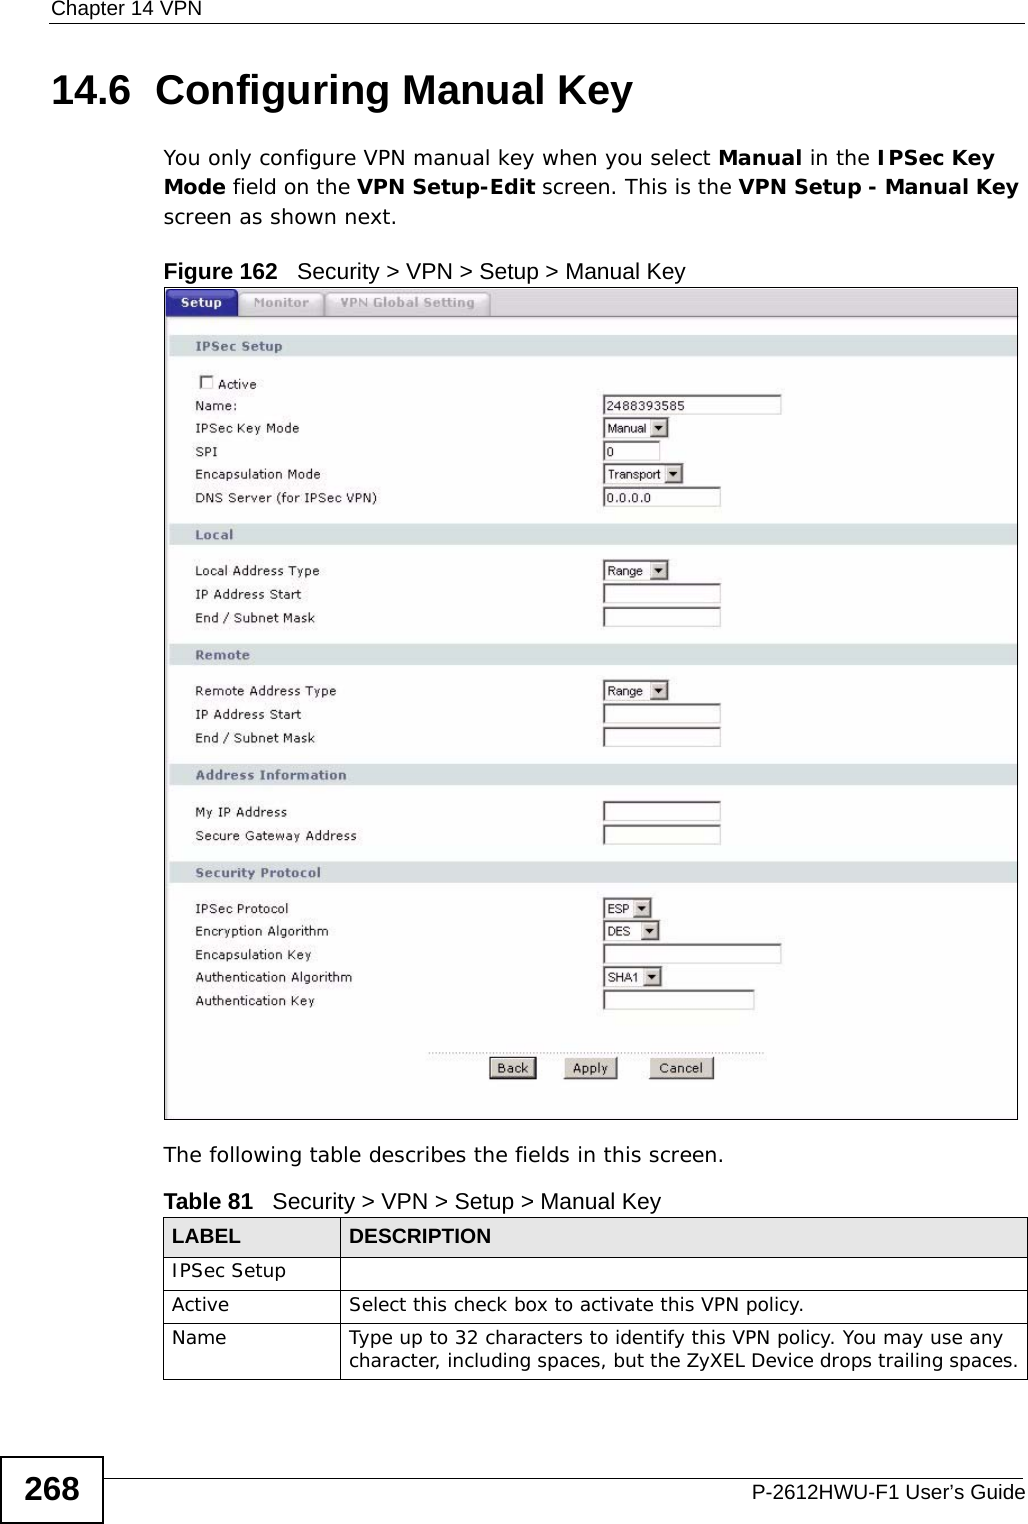
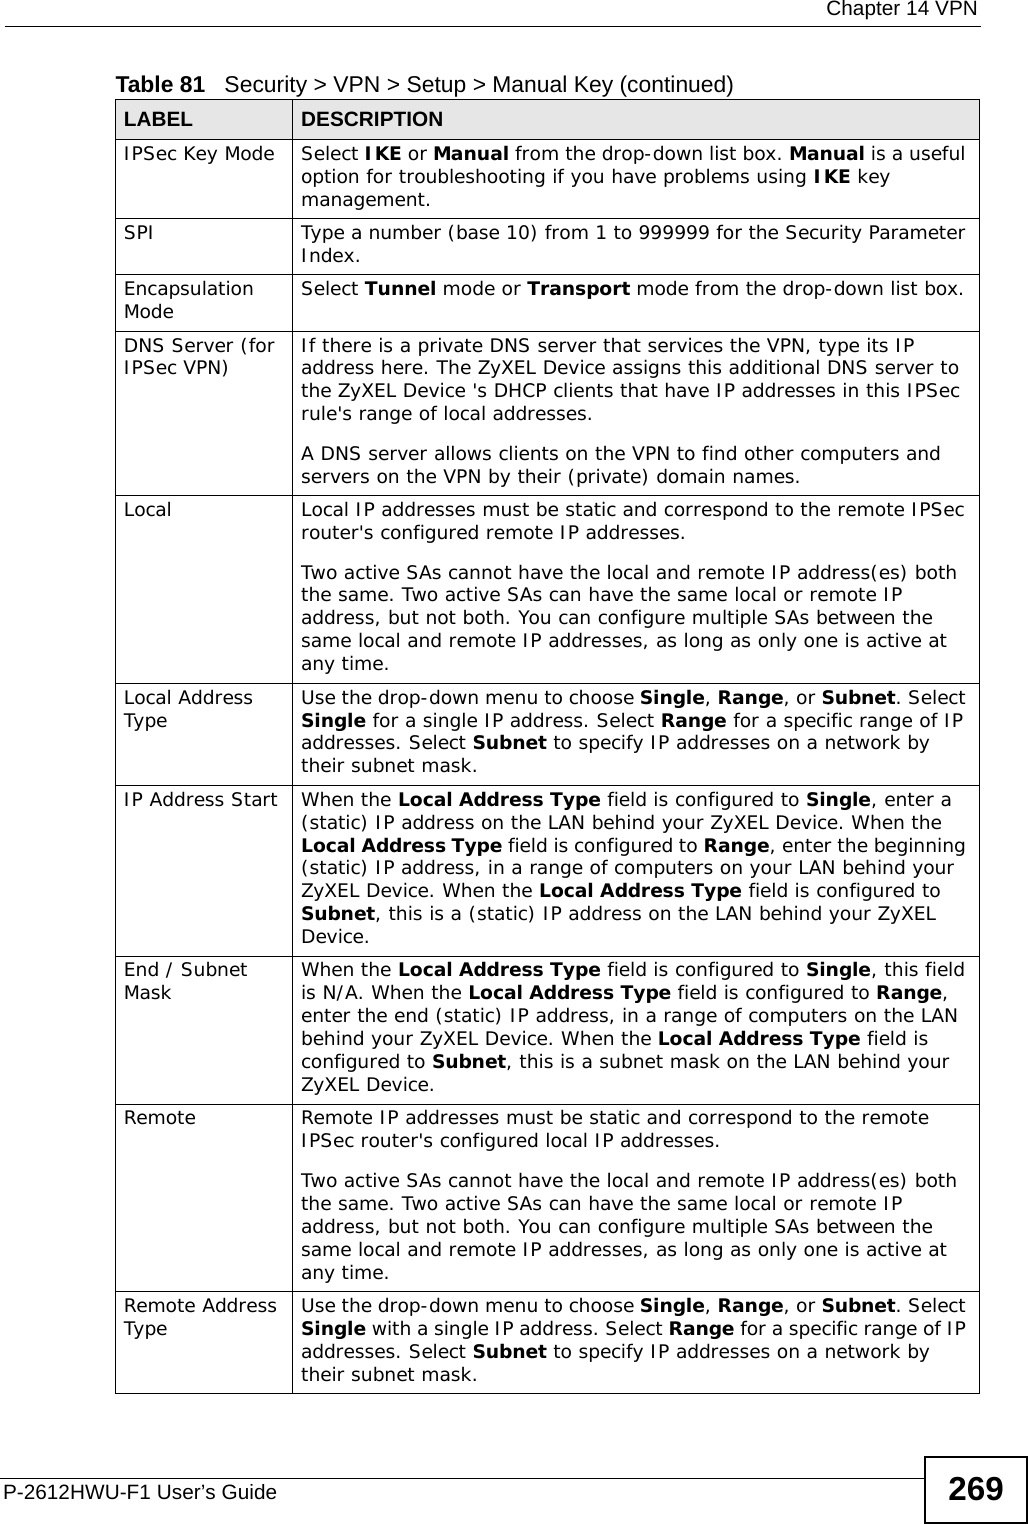
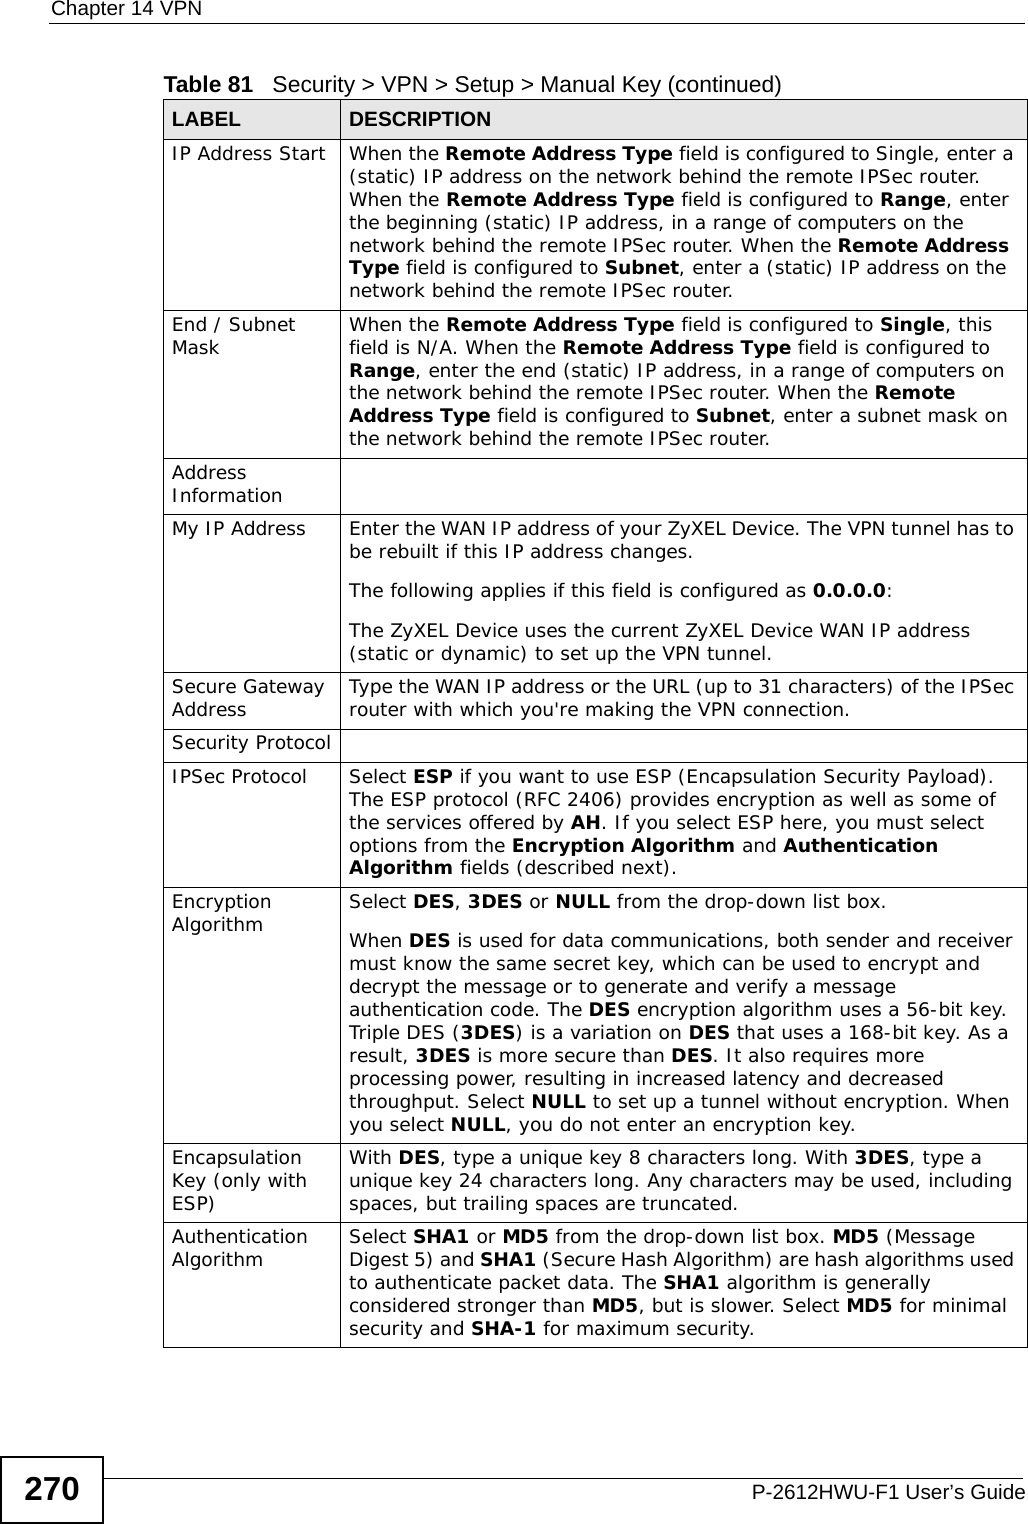
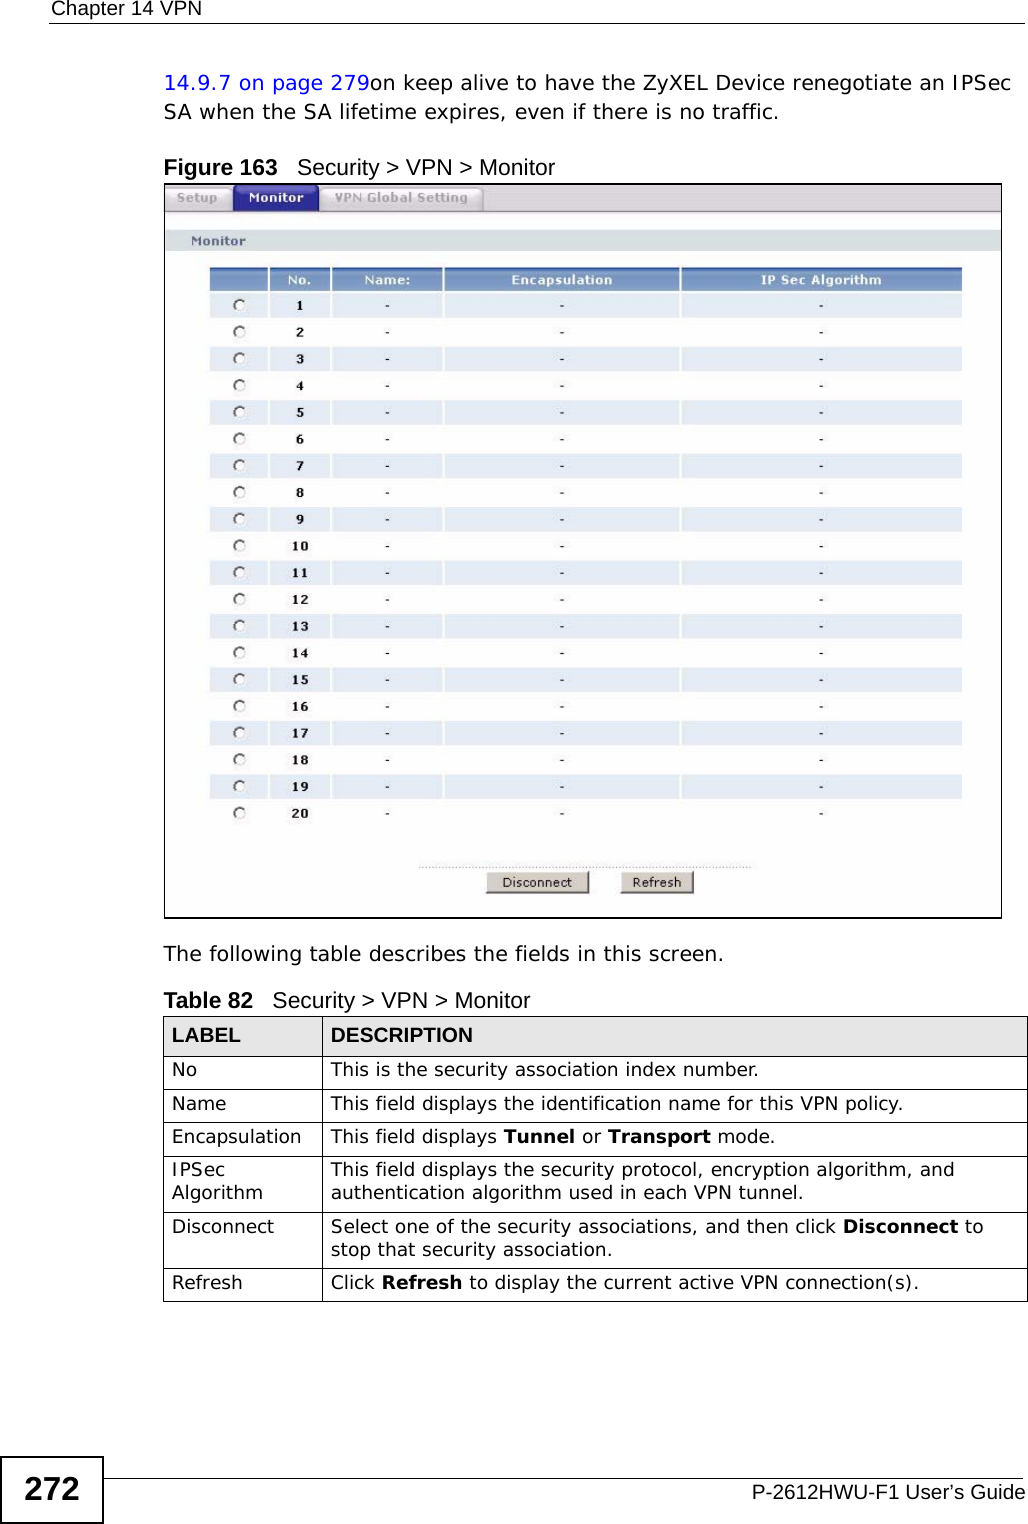
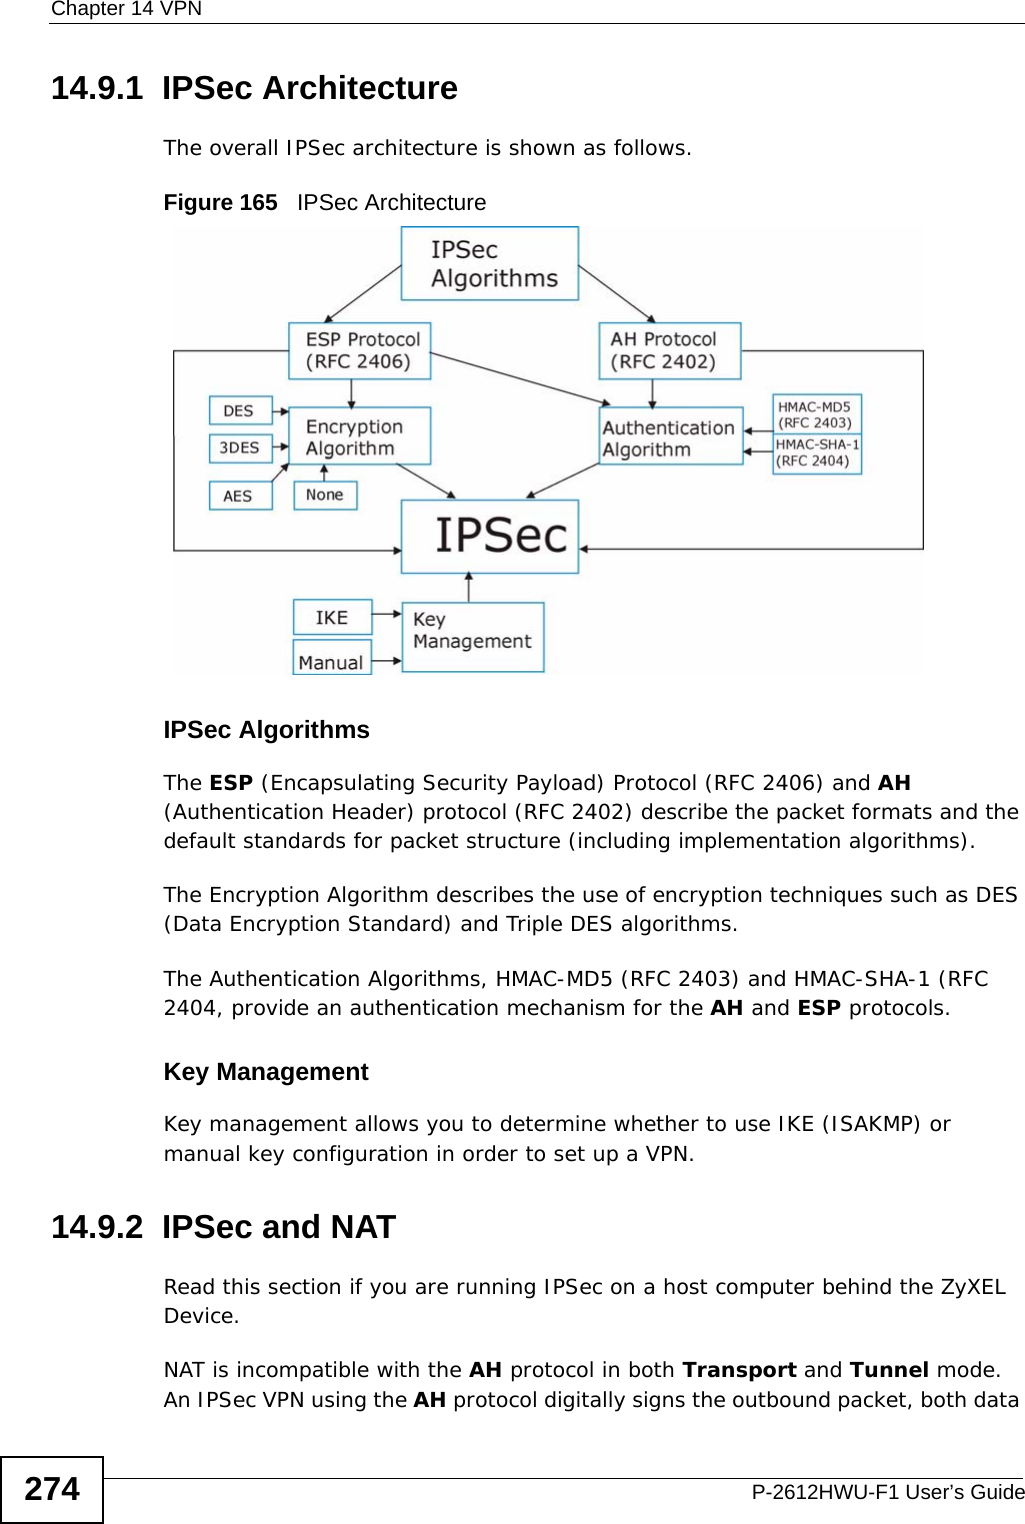
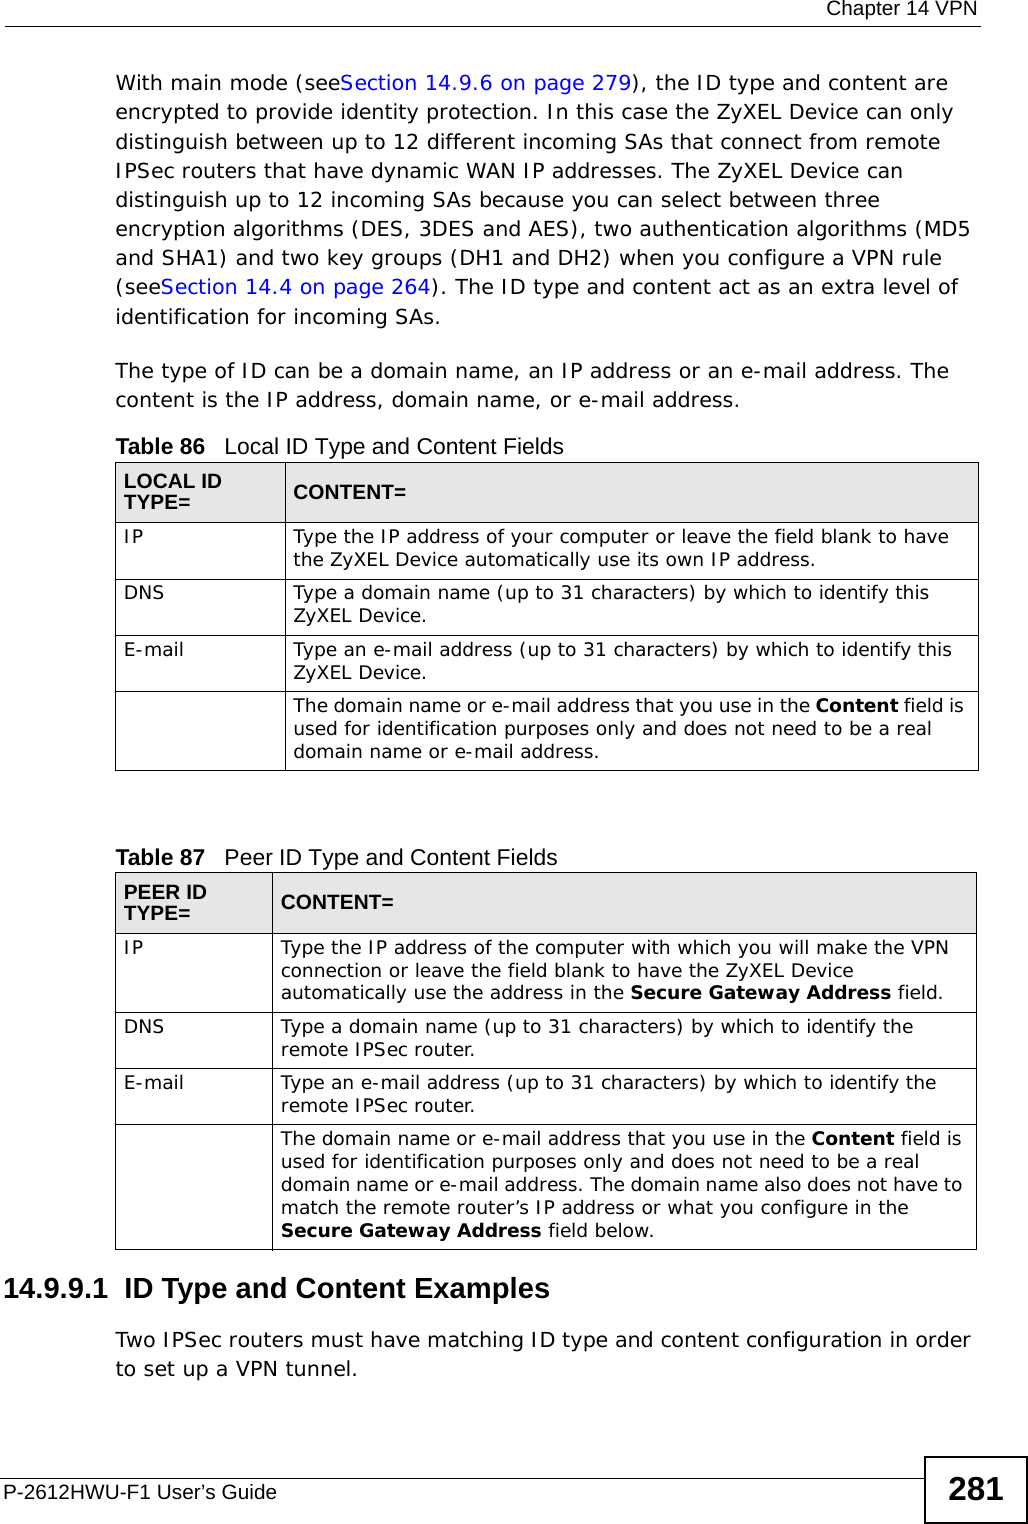
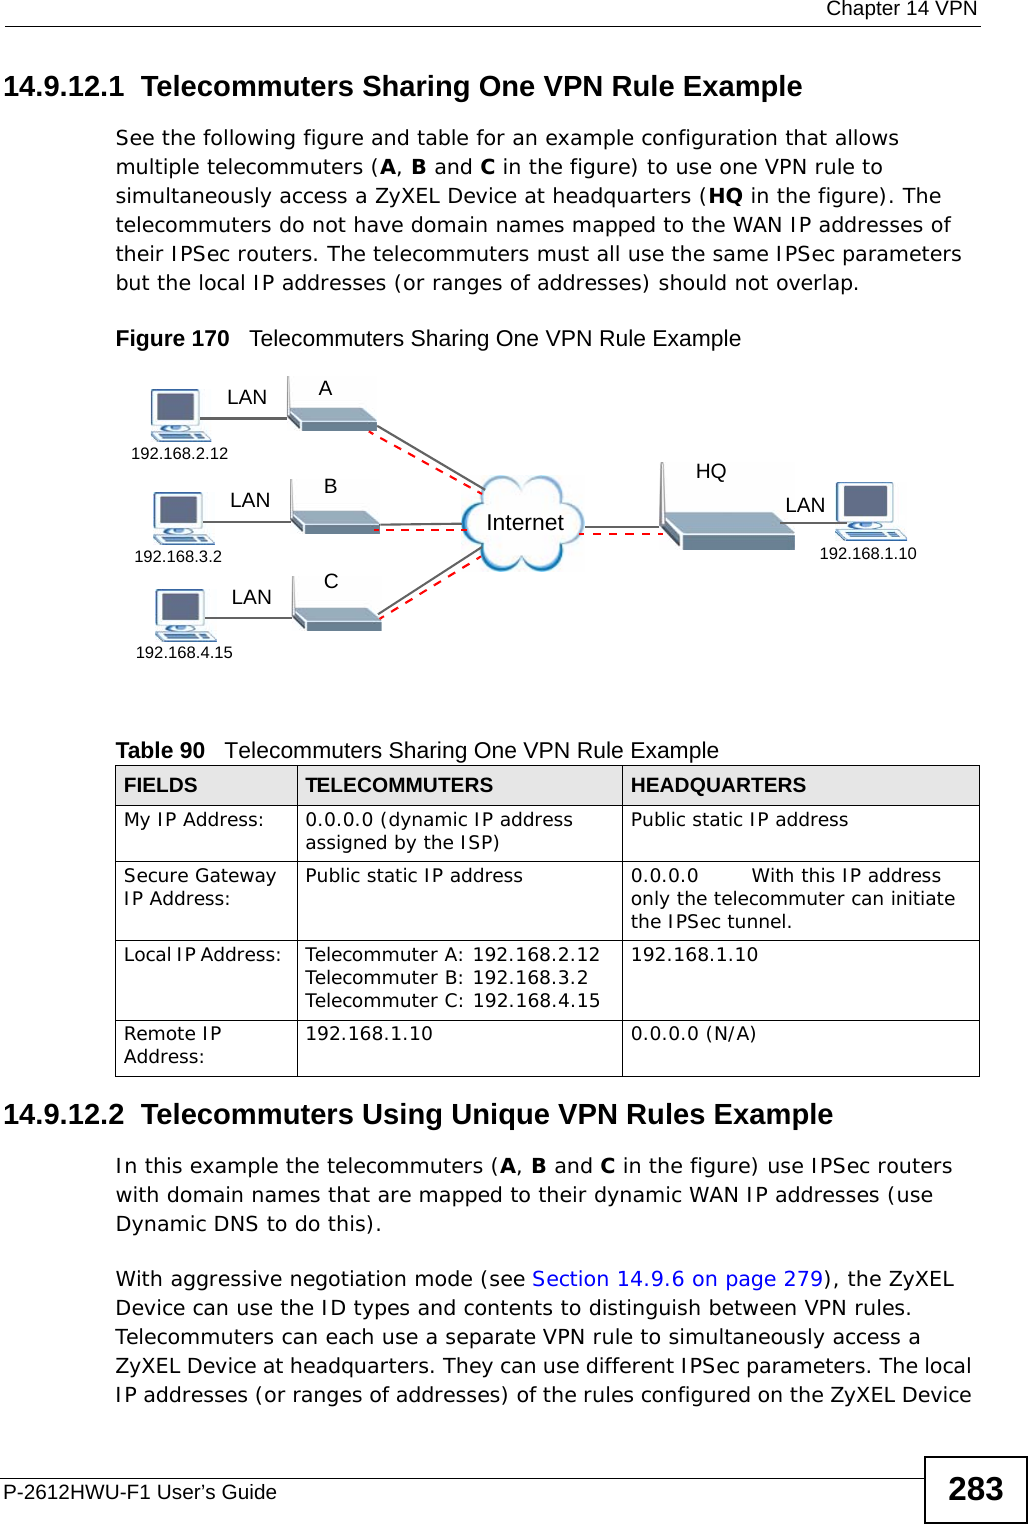
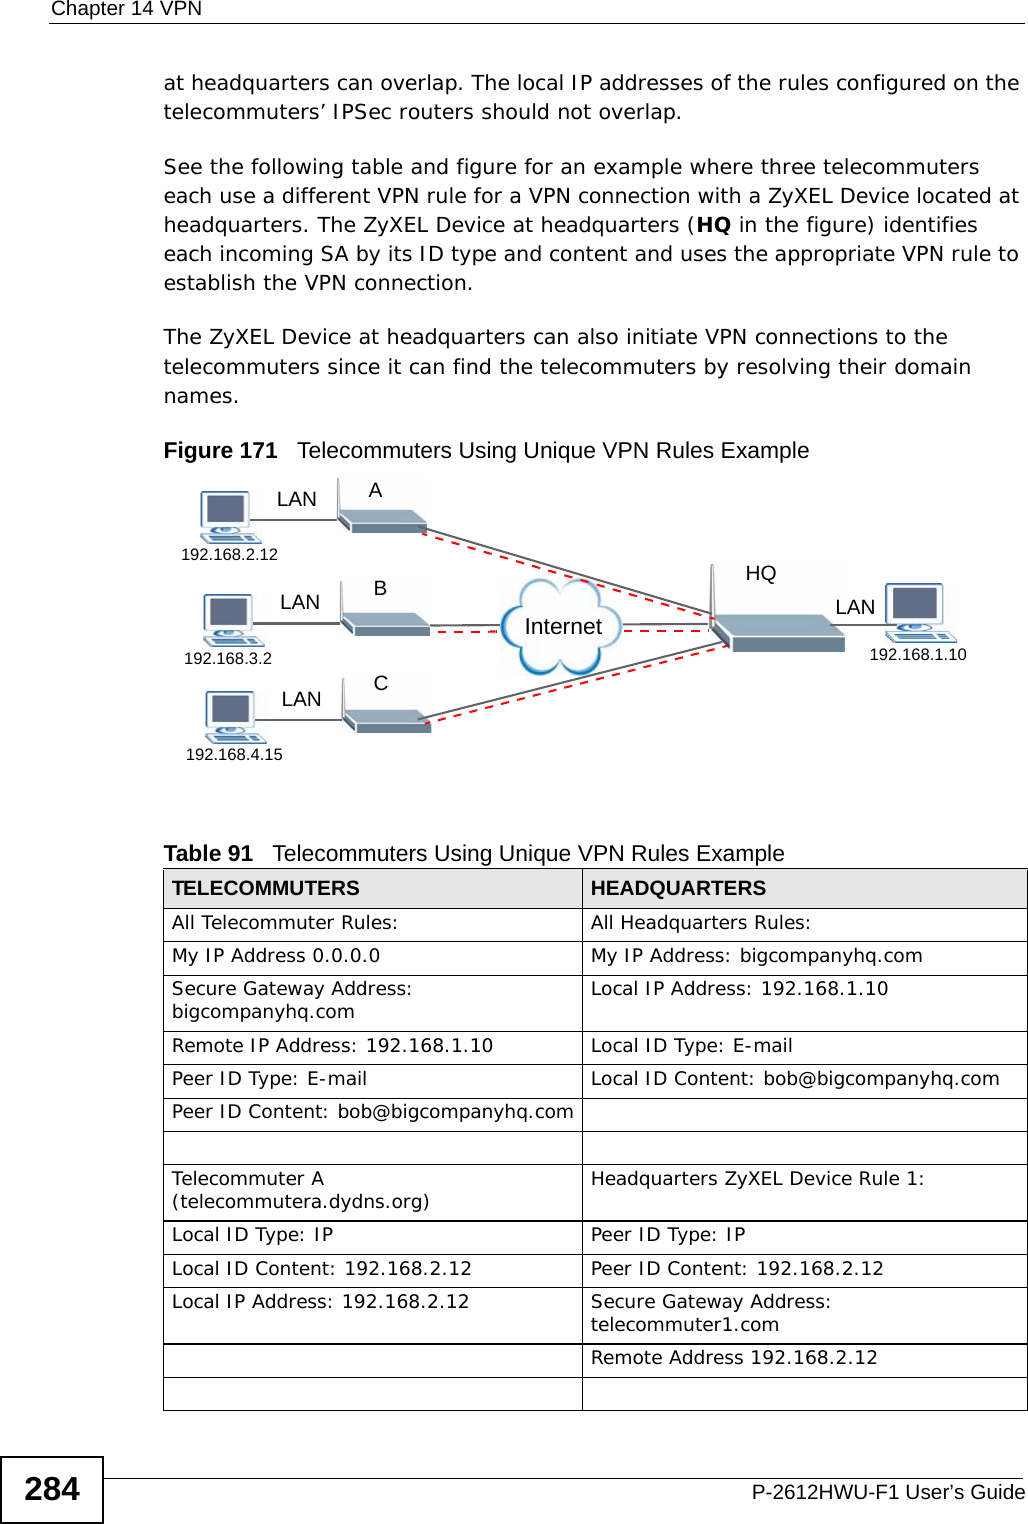
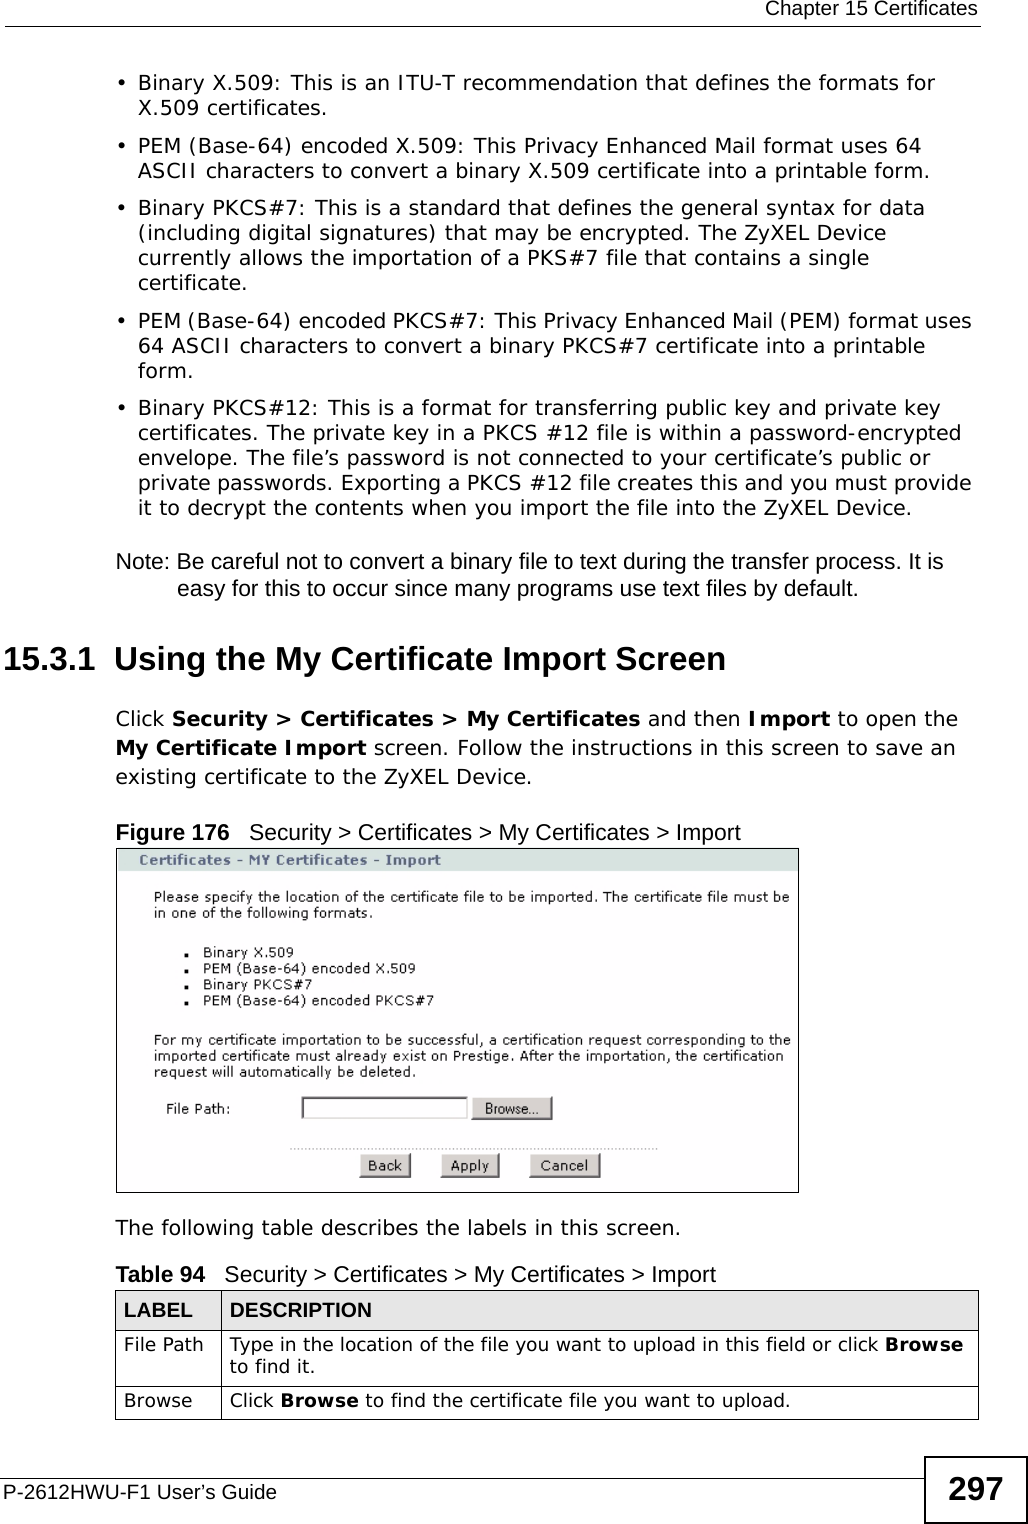
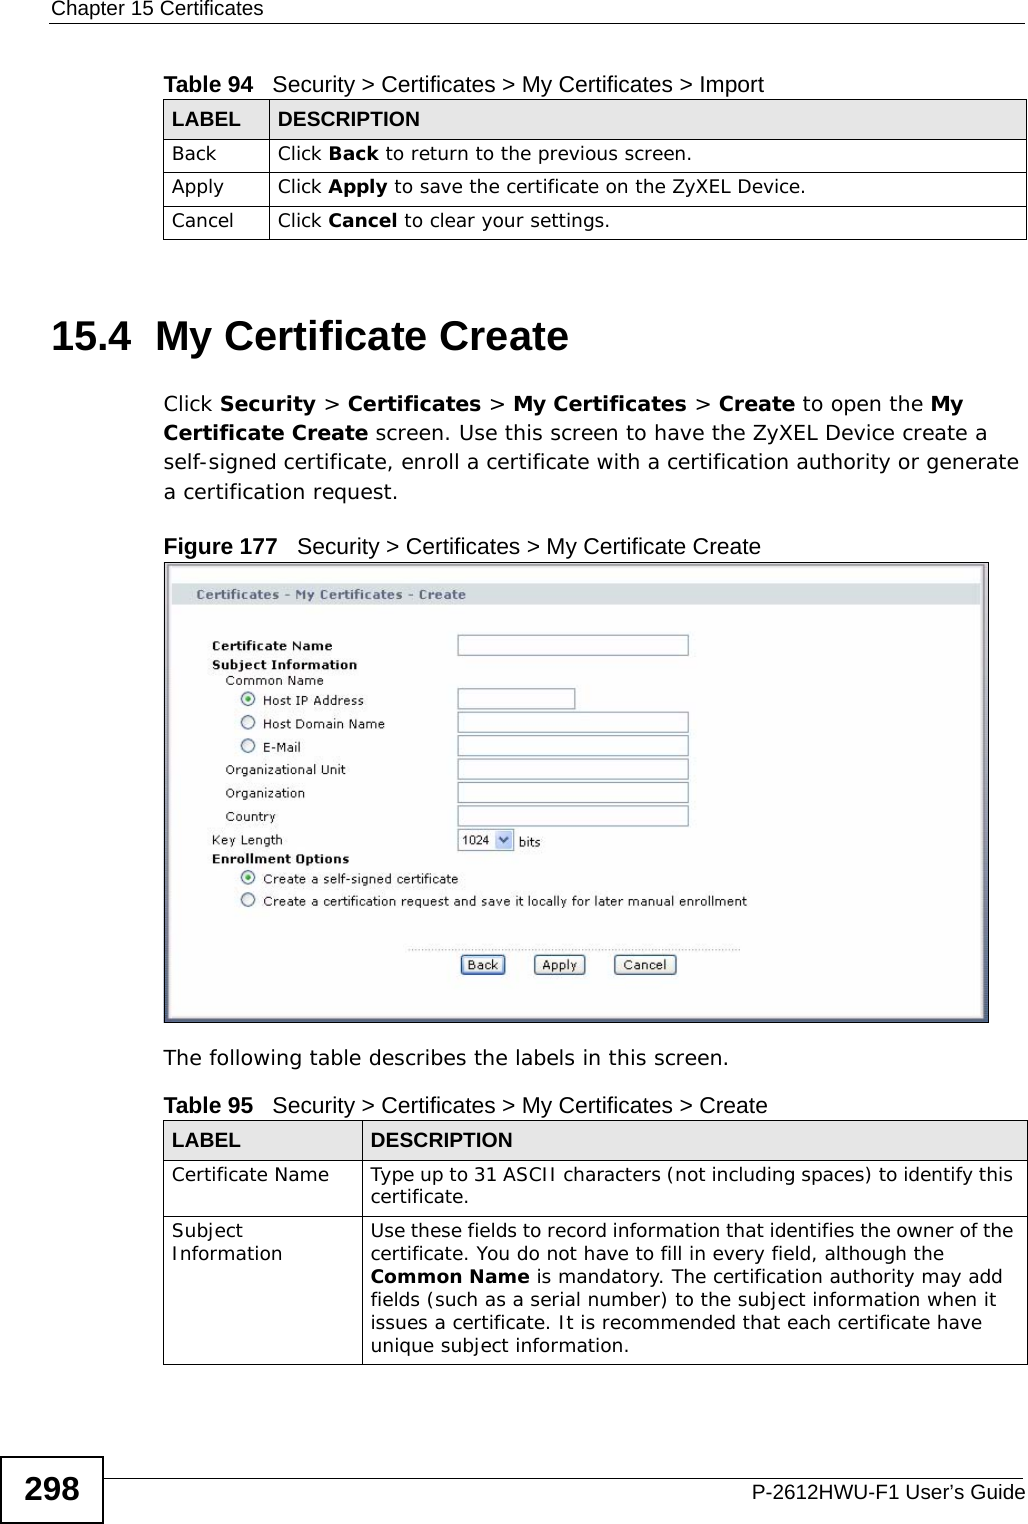
ZyXEL Communications P2612HWUFX Dual WAN ADSL2+ VoIP IAD User Manual SMG 700 User s Guide V1 00 Nov 2004
ZyXEL Communications Corporation Dual WAN ADSL2+ VoIP IAD SMG 700 User s Guide V1 00 Nov 2004
Contents
- 1. manual part 3
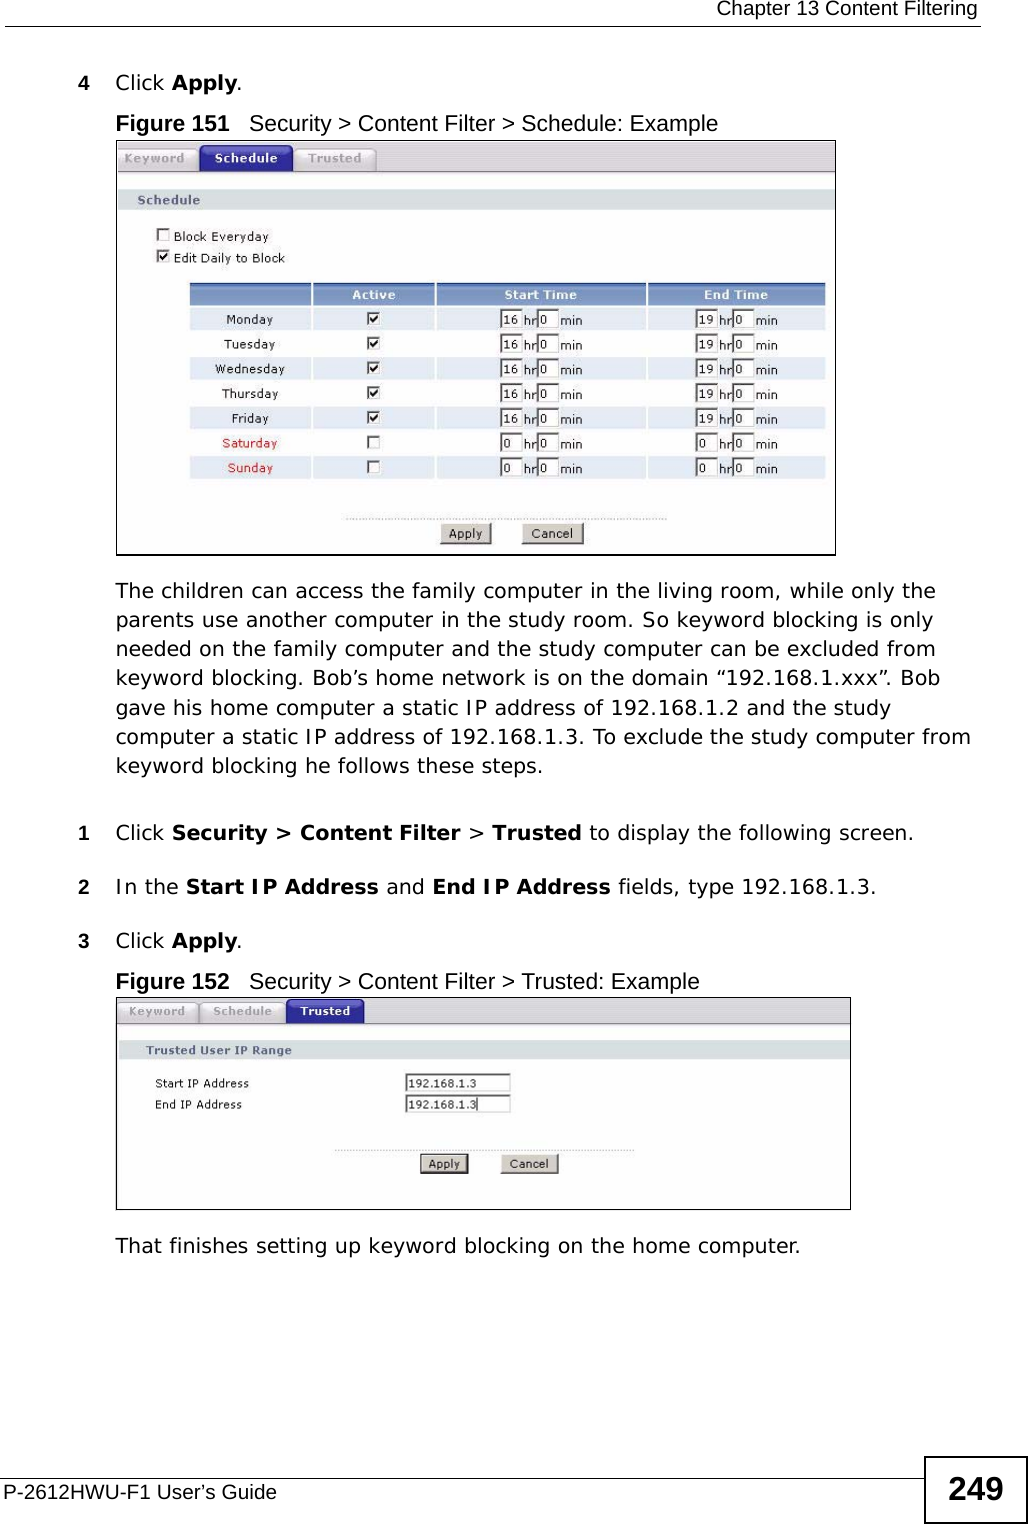
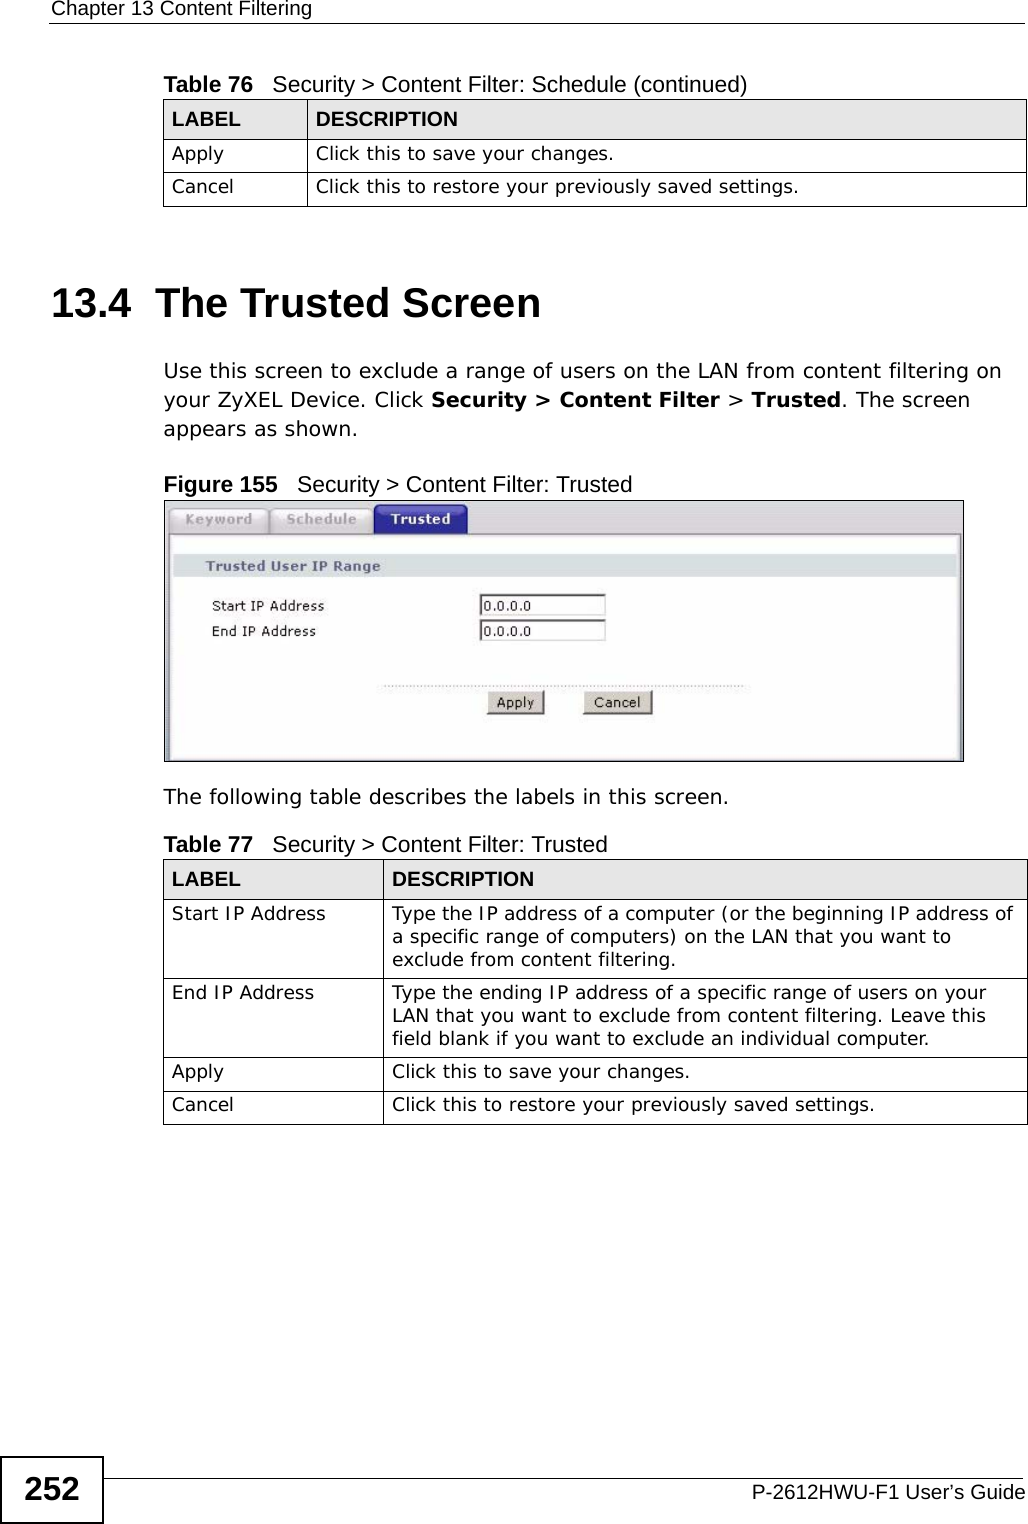
- 2. Usermanual part 1
- 3. Usermanual part 2
- 4. Usermanual part 4
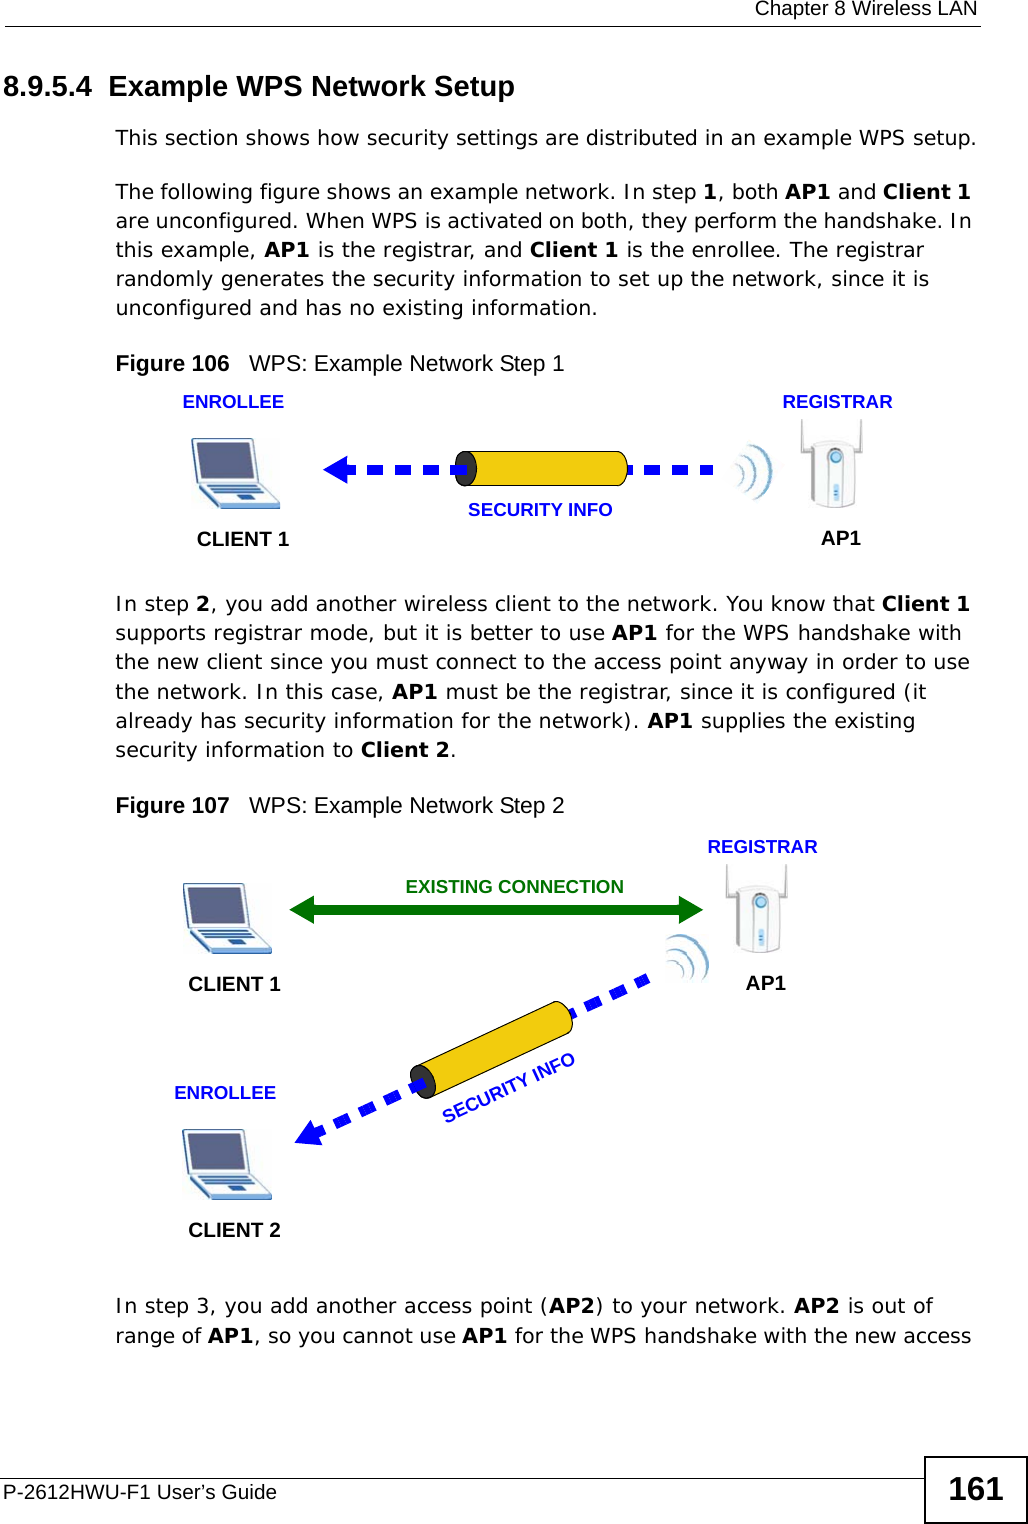
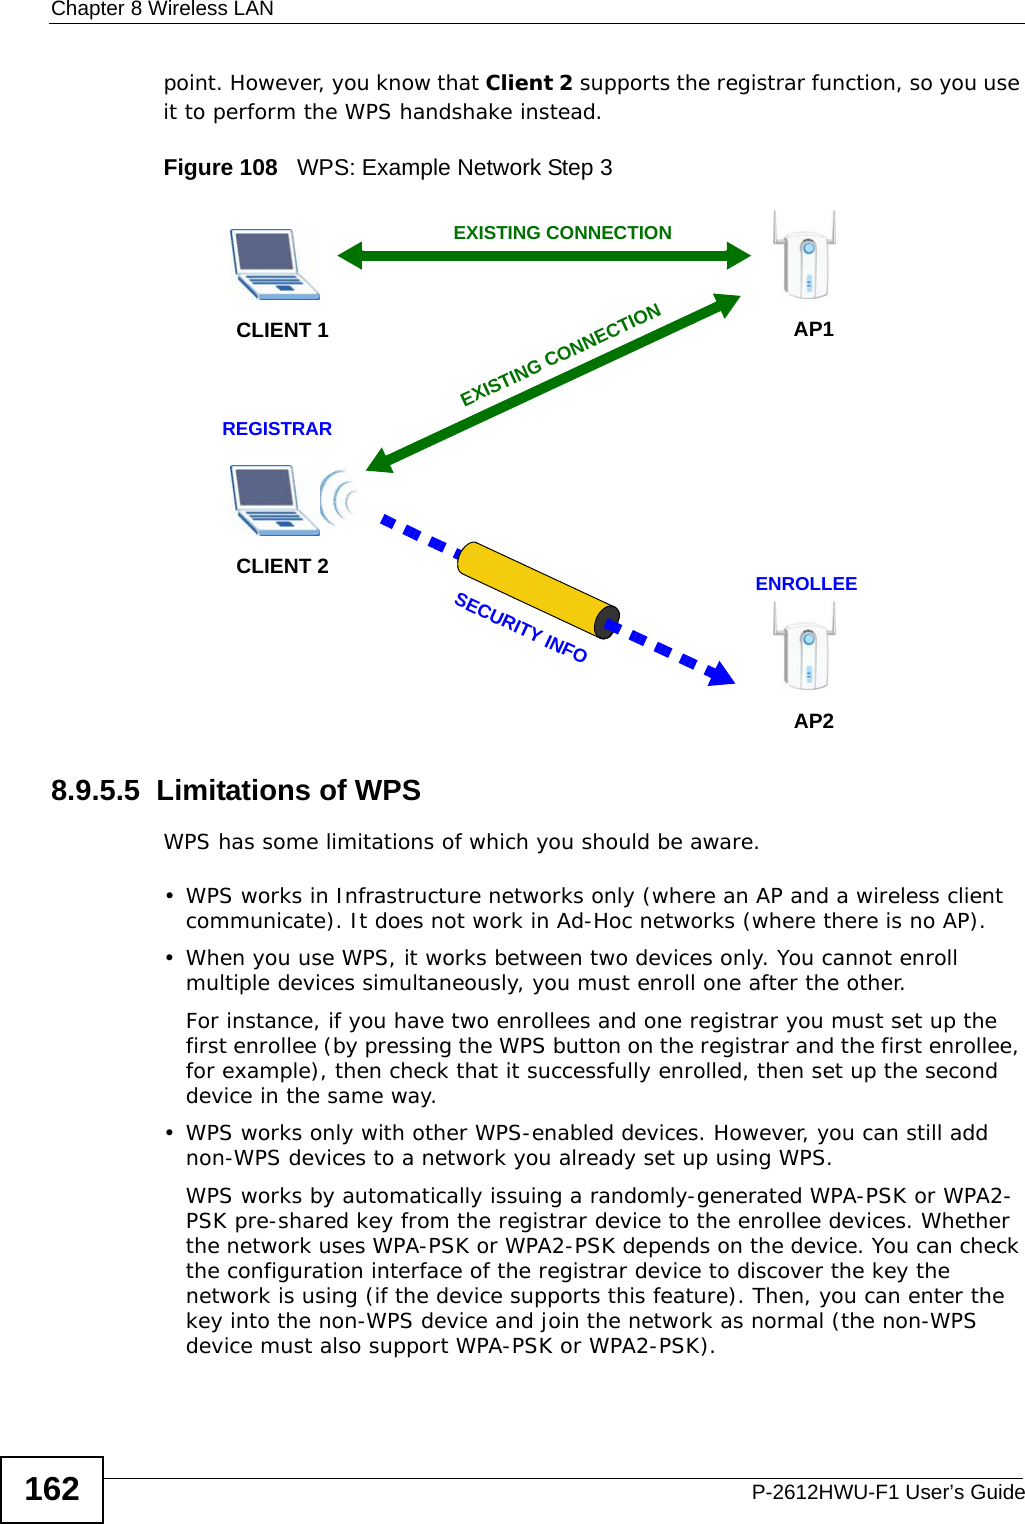
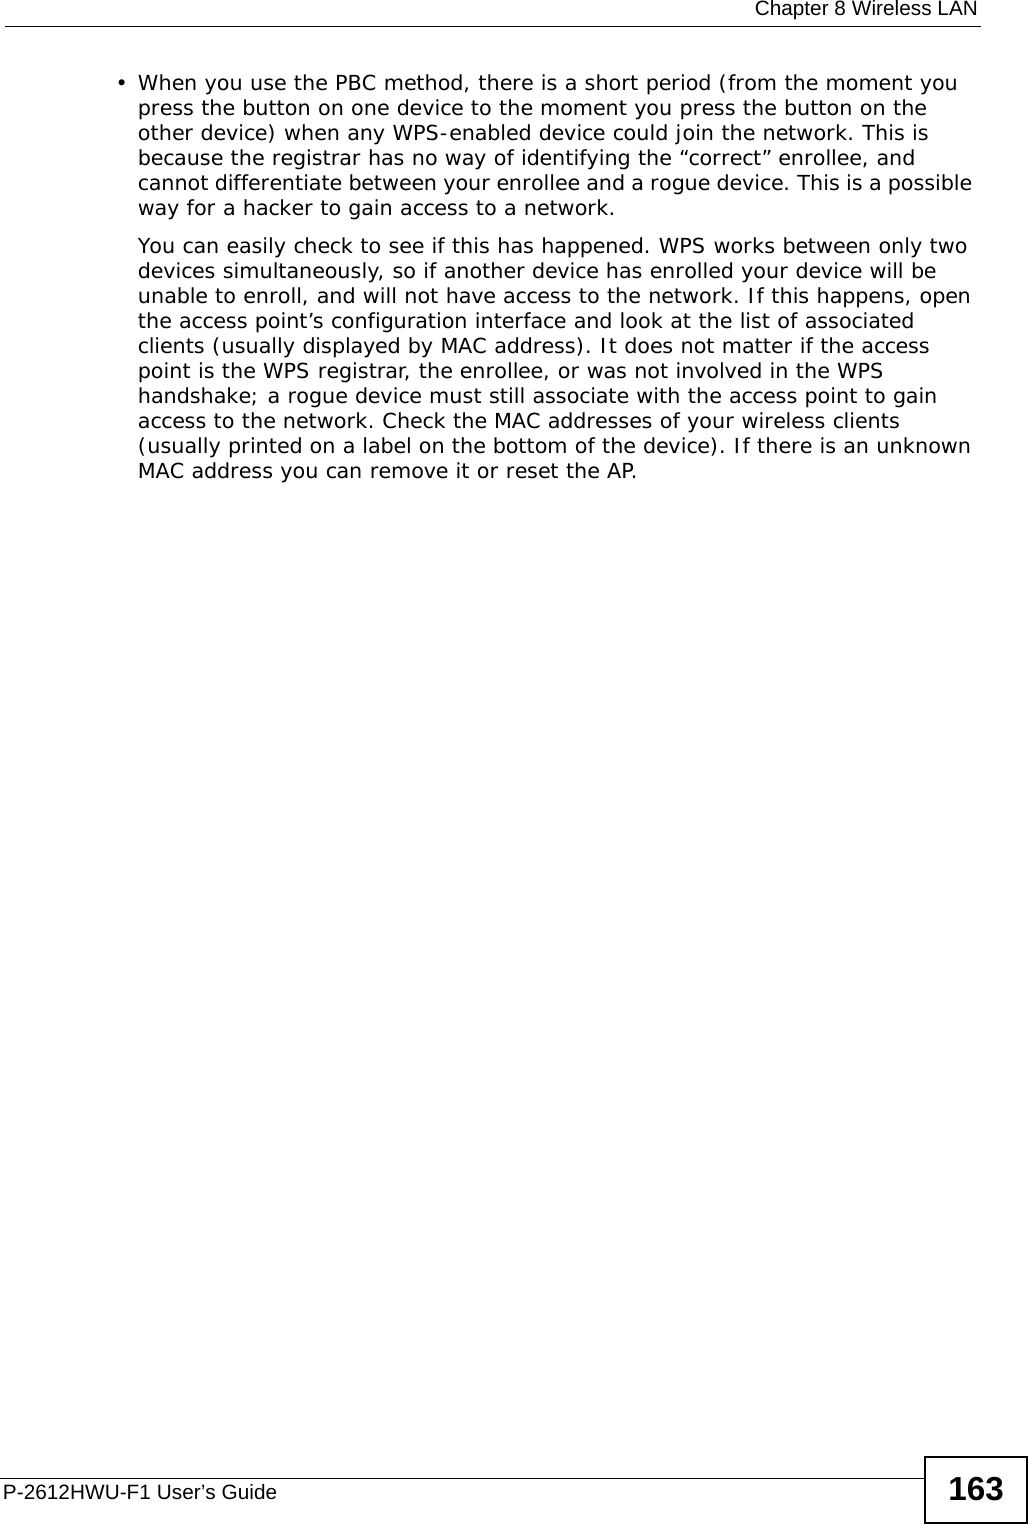
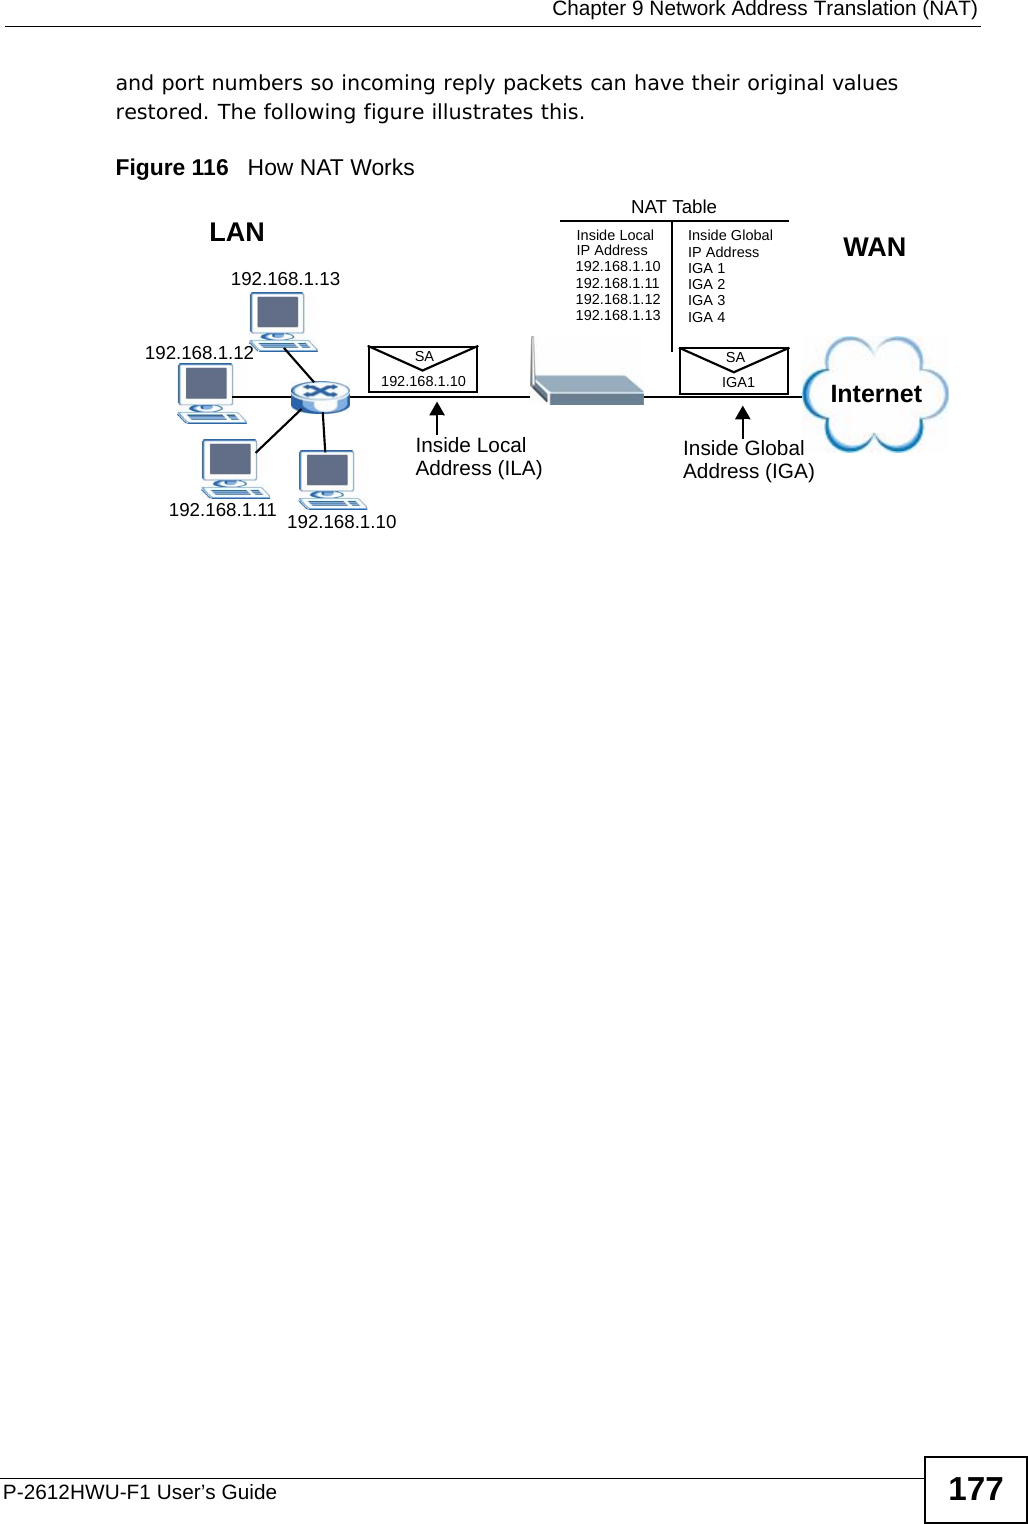
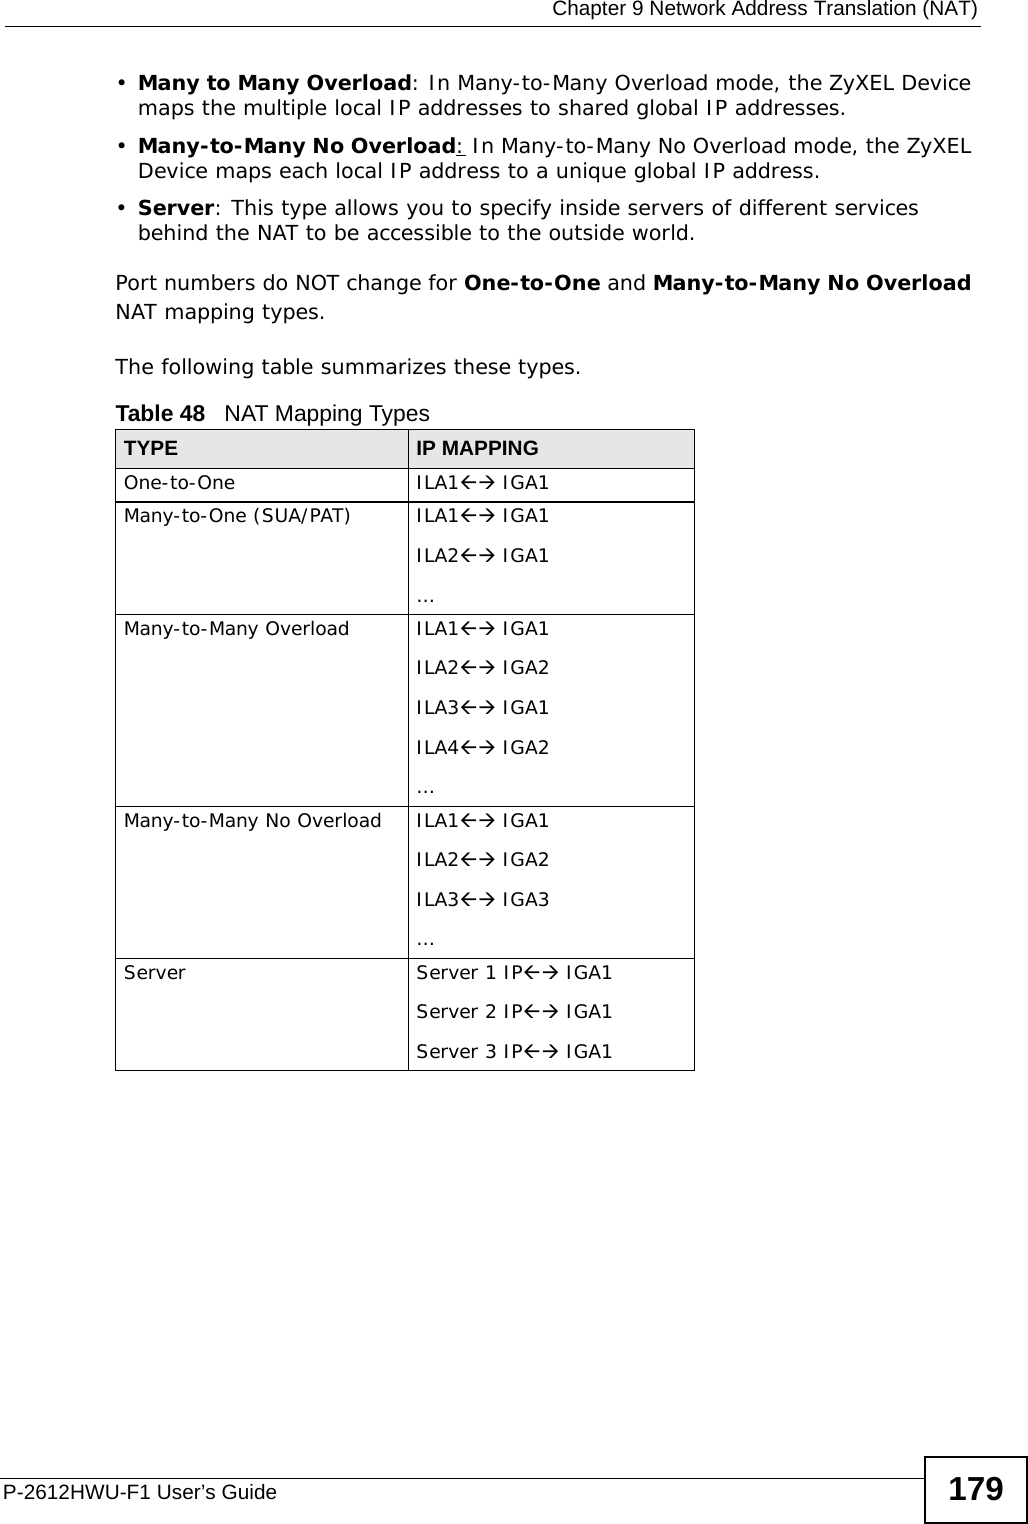
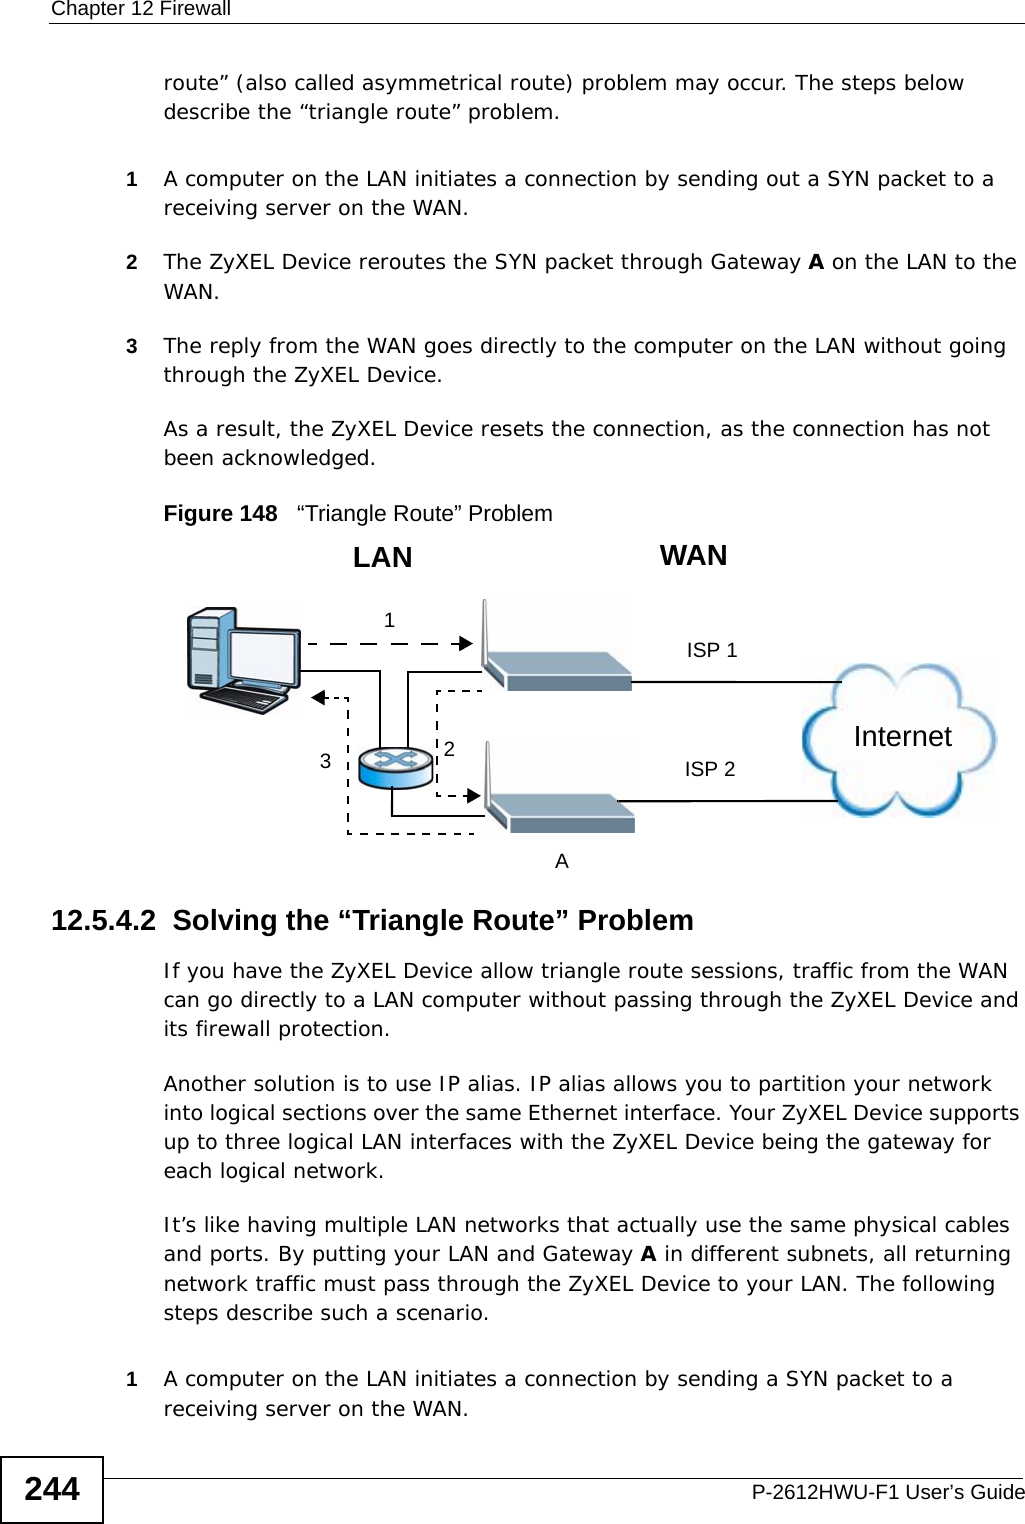
Usermanual part 2