u blox Malmo 0941 Wireless Communication System Module User Manual
u-blox Malmo AB Wireless Communication System Module
UserManual.wiki
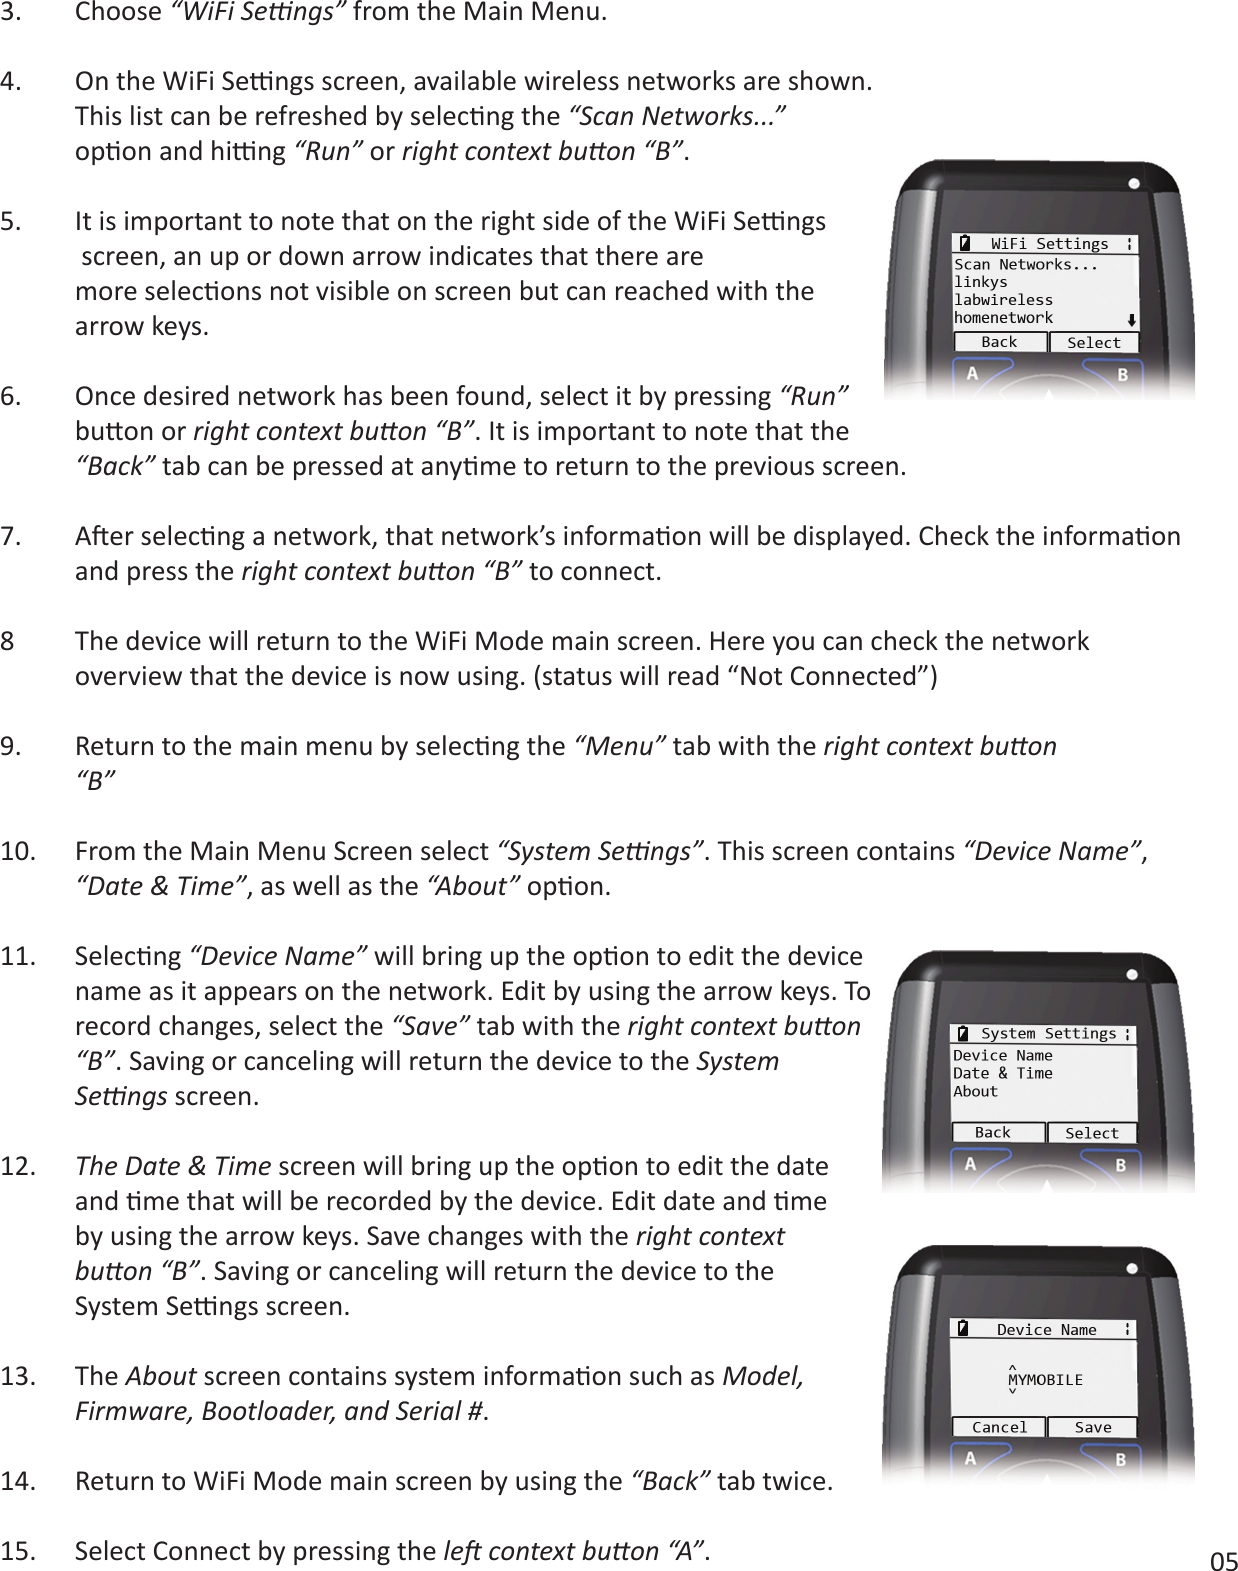
>
u blox Malmo
>
0941 User Manual
>
User Manual
Contents
1.
Electrical and Mechanical Datasheet
2.
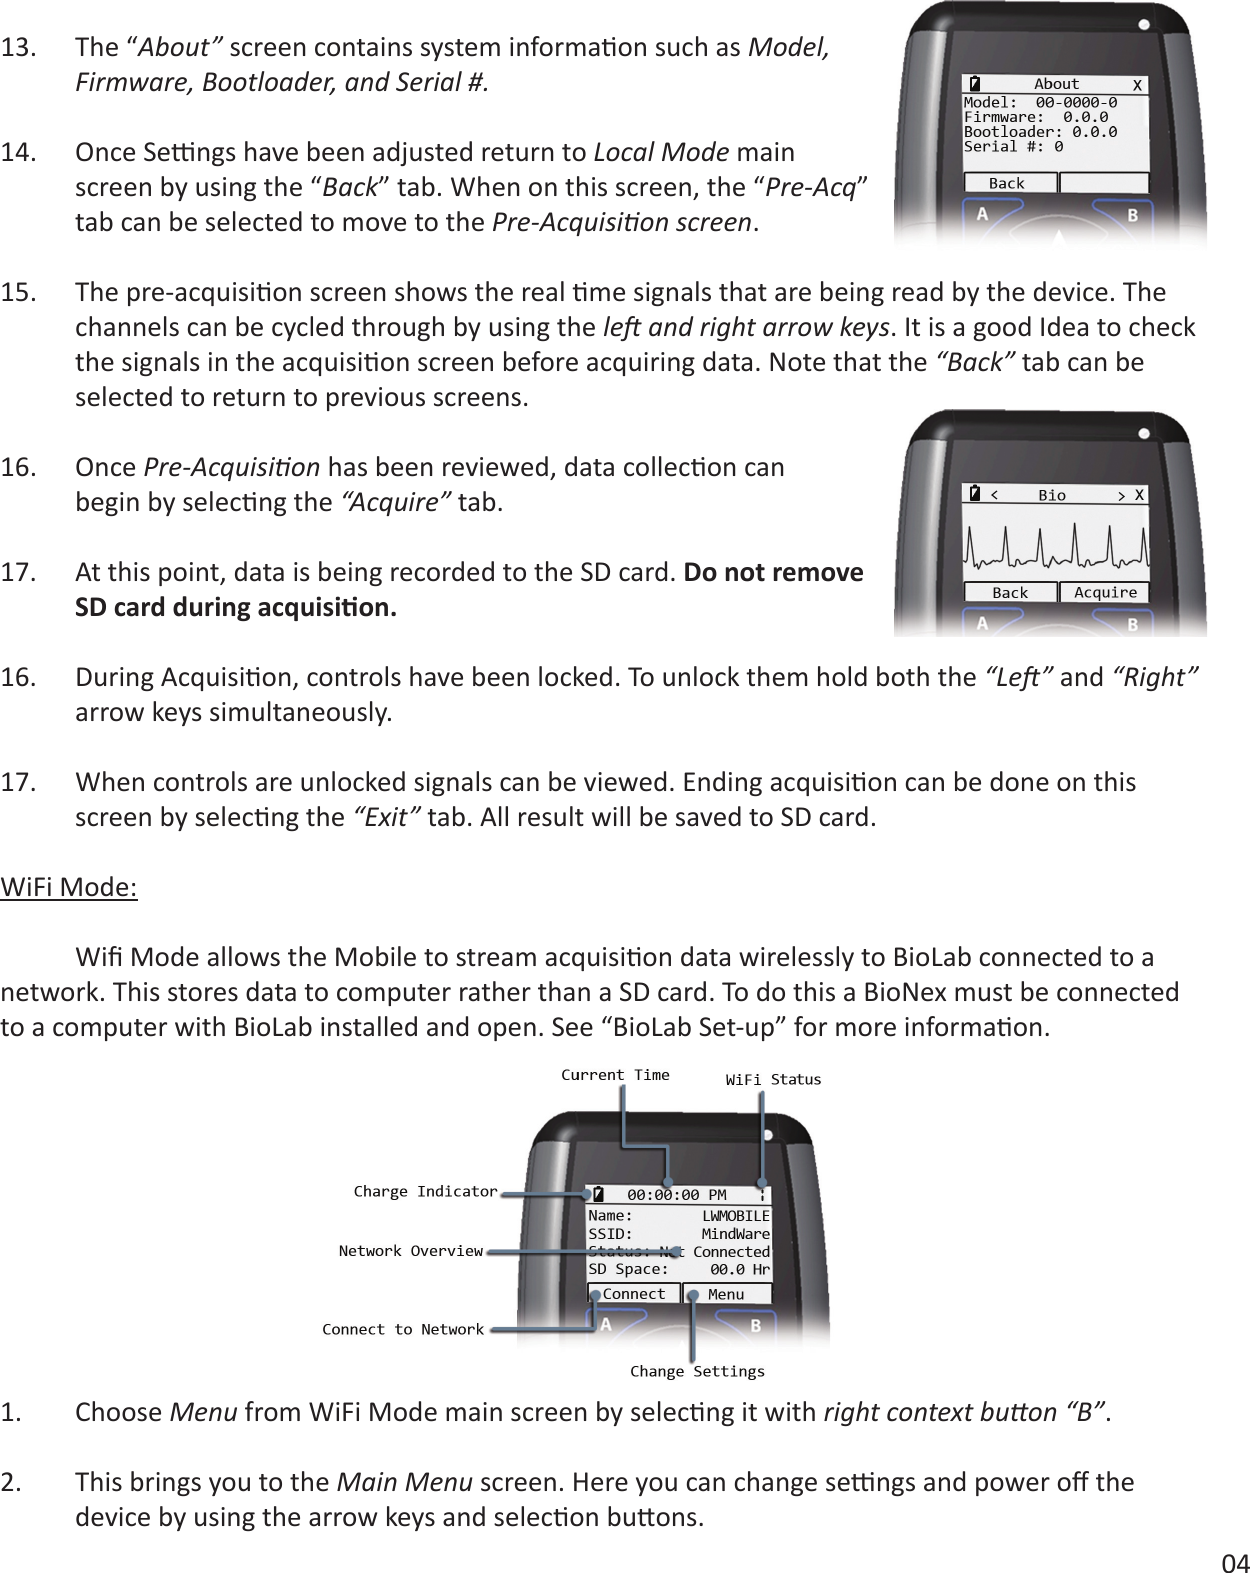
Electrical and Mechaniocal Datasheet
3.
Users Manual
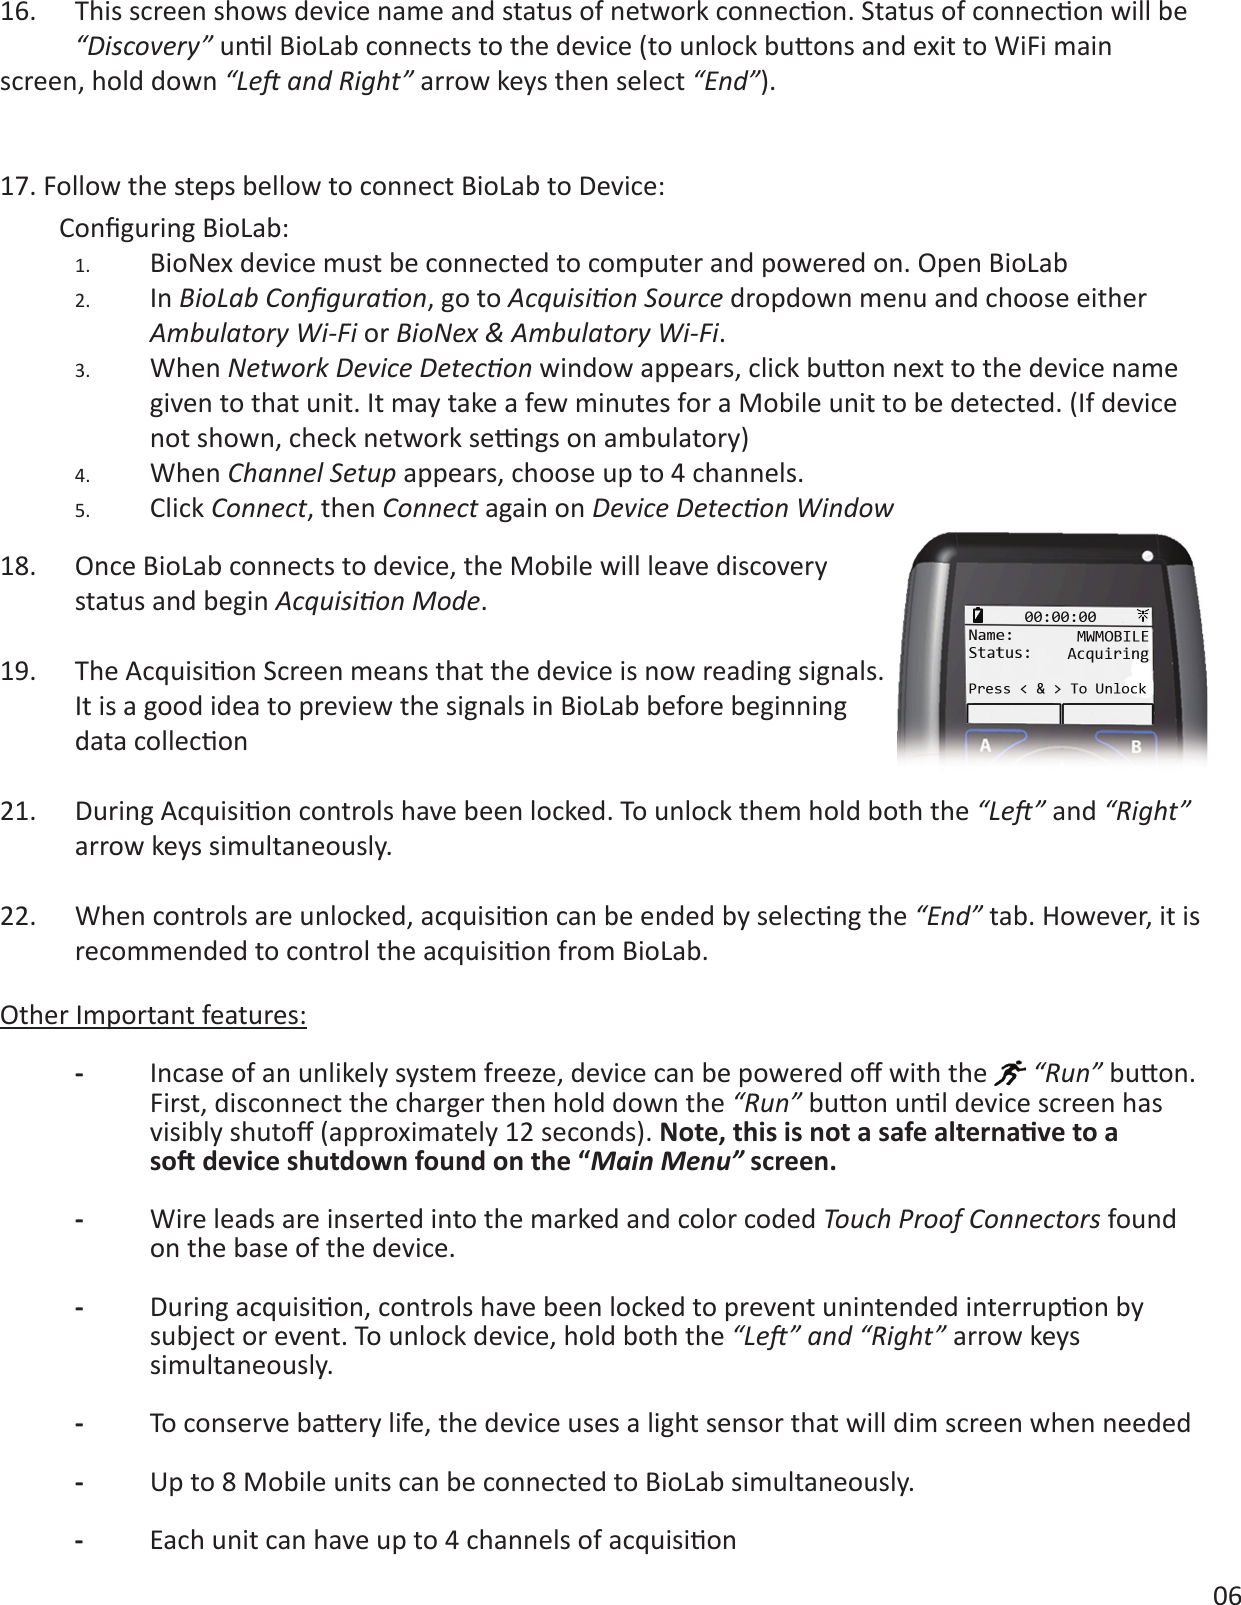
4.
Antenna Guide
5.
User Manual
User Manual
Navigation menu
Upload a User Manual
Namespaces
Wiki Guide
HTML
PDF
Info
Views
User Manual
Discussion / Help
Navigation