ASUSTeK Computer W5G00UGPZ50 NOTEBOOK P.C. BLUETOOTH DEVICE User Manual USERS MANUAL 3
ASUSTeK Computer Inc NOTEBOOK P.C. BLUETOOTH DEVICE USERS MANUAL 3
Contents
- 1. USERS MANUAL 1
- 2. USERS MANUAL 2
- 3. USERS MANUAL 3
- 4. USERS MANUAL 4
- 5. USERS MANUAL 5
USERS MANUAL 3
Introduction 第 97 頁,共 224 頁
file://C:\Documents and Settings\anitachou\Local Settings\Temp\~hh114B.htm 2004/11/30
{You can change the connection icon and icon name.
→"Changing the connection icon name "
→"Changing the connection icon"
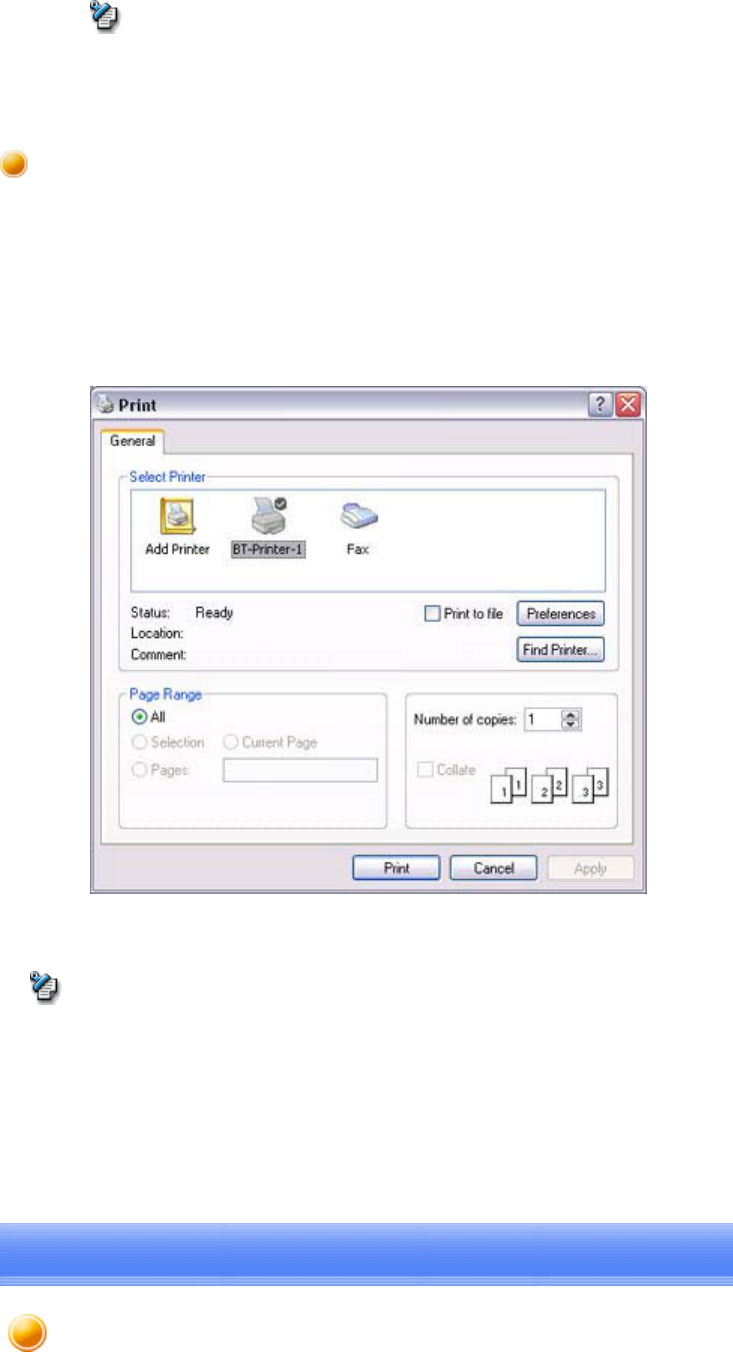
Try to print from the message pad.
1. Click [File]→[Print]
The [Print] screen will appear.
2. Select wireless printer from under [Select Printer], and then click on the [Print]
button
Printing will commence.
zIf you have connected to a printer using HCRP or SPP profiles, all future Bluetooth
connections to that printer will be established automatically once you have printed a
document from your PC.
Note
Printing
Note
If
y
ou have a
p
rinter that su
pp
orts BIP
(
Basic Ima
g
in
g
Profile
),
y
ou can send ima
g
es dir
e
Printing images directly from a digital camera or other device
[BIP]
Introduction 第 98 頁,共 224 頁
file://C:\Documents and Settings\anitachou\Local Settings\Temp\~hh114B.htm 2004/11/30
to a
p
rinter to be
p
rinted out
,
without havin
g
to
p
erform an
y
s
p
ecial set -u
p
p
rocedure.
→Printing image files on a printer (using icons)
→Printing image files on a printer (by right -clicking the mouse)
zBelow is a list of file t
yp
es
(
extensions
)
of ima
g
es that can be
p
rinted out directl
y
.
{Bitmap (*.bmp)
{JPEG (*.jpg; *.jpeg)
{PNG (*.png)
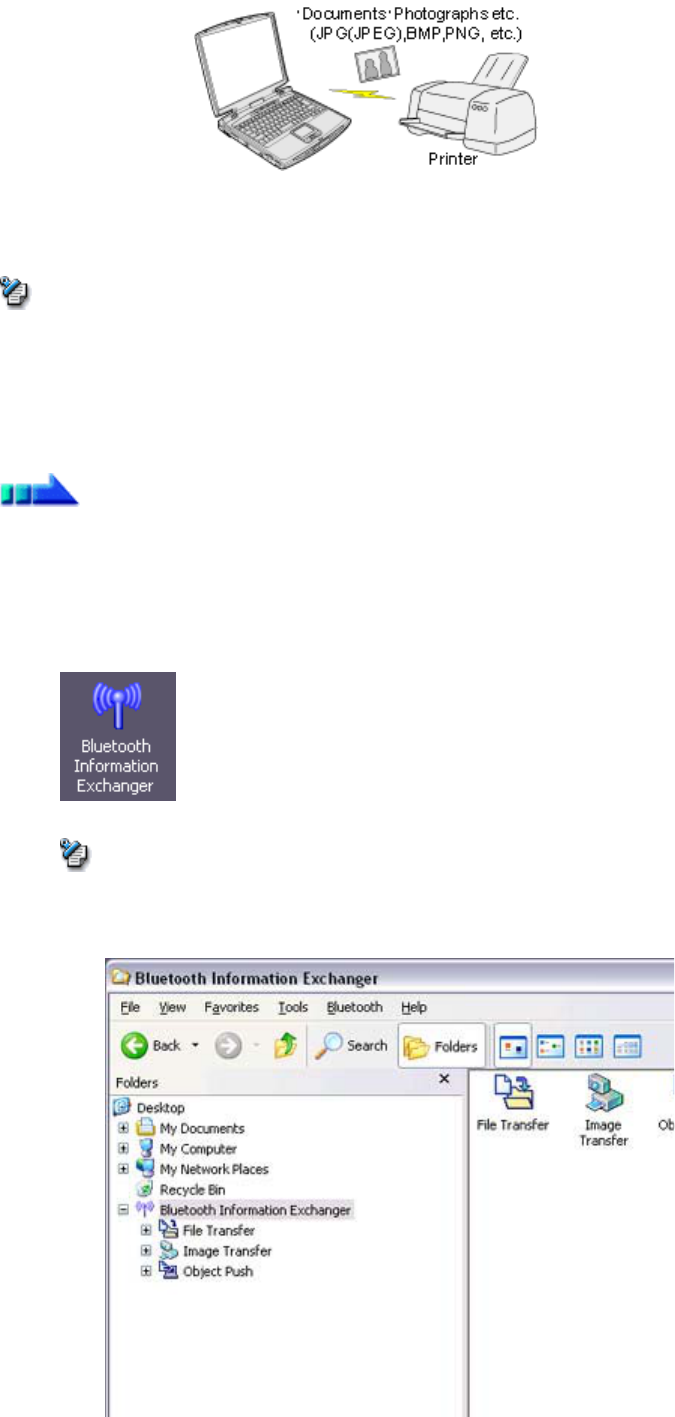
■Printing image files on a printer (using icons)
1. Turn on the printer
2. Click on the Bluetooth Information Exchanger icon on the Desktop
{Alternativel
y,
o
p
en Ex
p
lorer and click on the Bluetooth Information Exch
a
folder for the same result.
Note
Procedure
Note
Introduction 第 99 頁,共 224 頁
file://C:\Documents and Settings\anitachou\Local Settings\Temp\~hh114B.htm 2004/11/30
The [Bluetooth Information Exchanger] window will appear.
3. Double-click on the [Image Transfer] icon
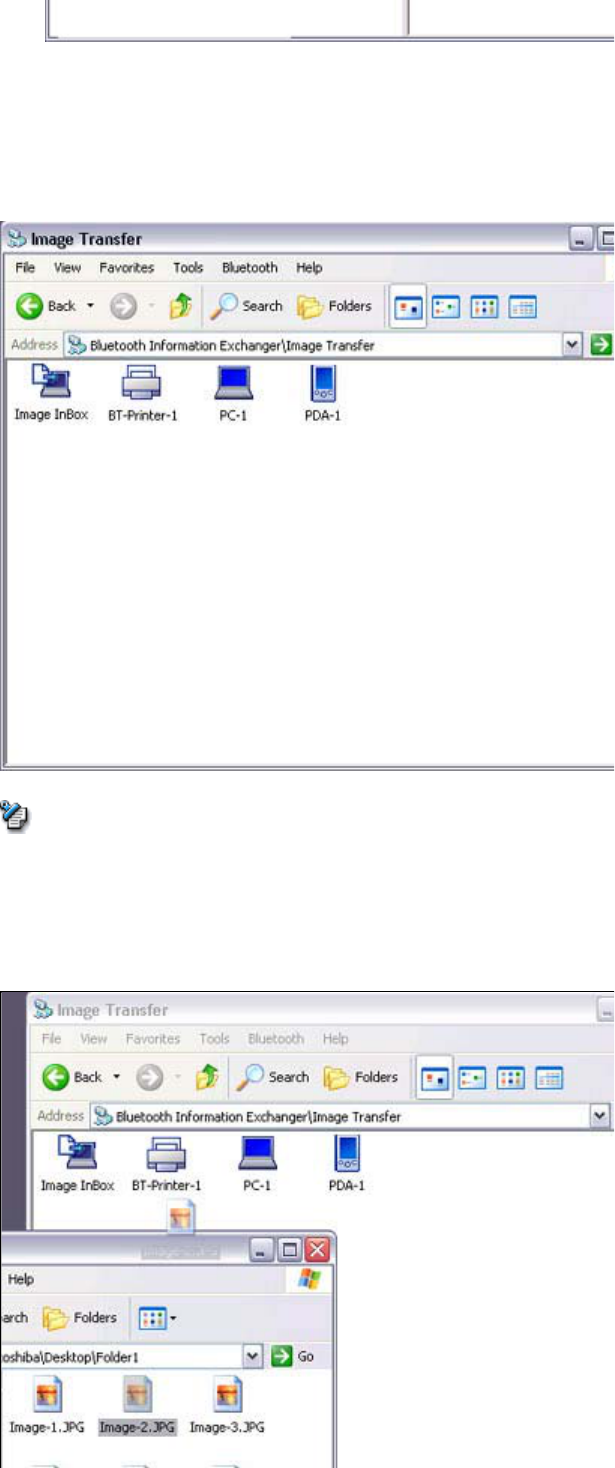
A list of devices will appear in the [Image Transfer] window.
{If
y
our desired
p
rinter does not a
pp
ear in the list
,
p
lease confirm that the
pr
has been turned on, and then click on [Bluetooth] →[Search Devices]
A device search will be performed.
4. Drag and drop the file to be sent on top of the icon of the destination printer
Note
Introduction 第 100 頁,共 224 頁
file://C:\Documents and Settings\anitachou\Local Settings\Temp\~hh114B.htm 2004/11/30
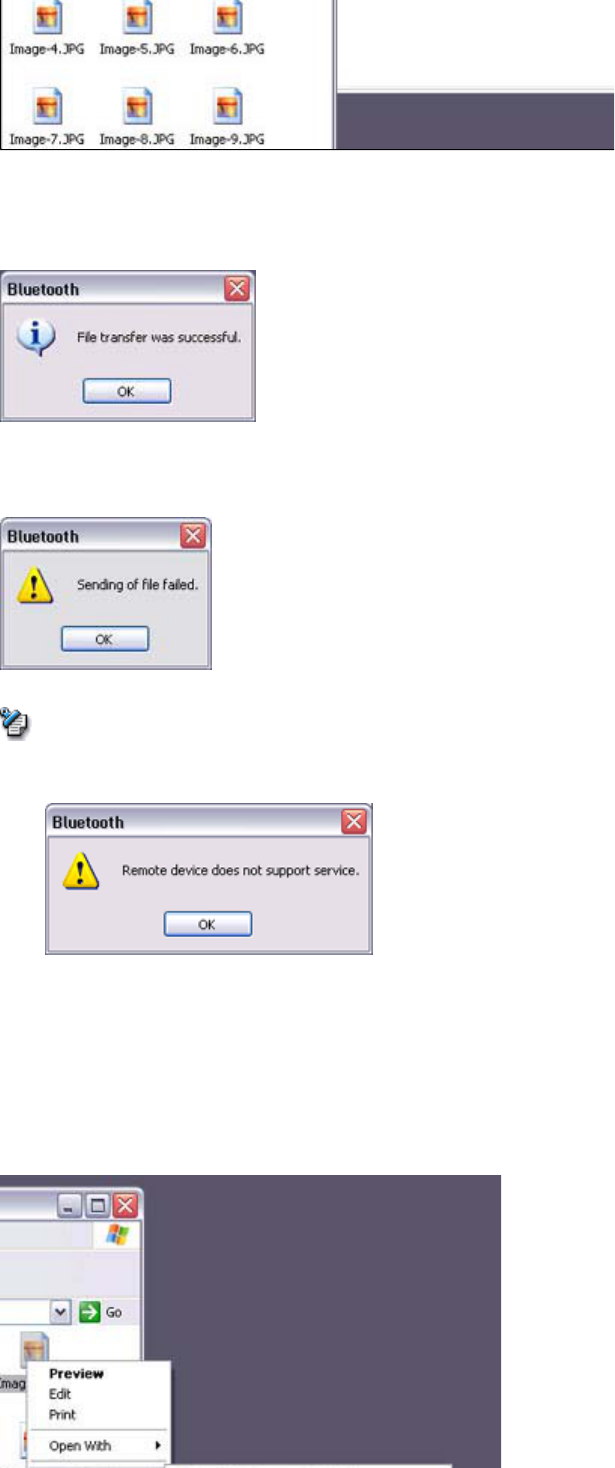
The file will be sent to the printer.
If the file has been sent to the
p
rinter successfull
y,
the messa
g
e below will a
pp
e
a
the image will be printed out. Please click on the [OK] button.
The messa
g
e below will a
pp
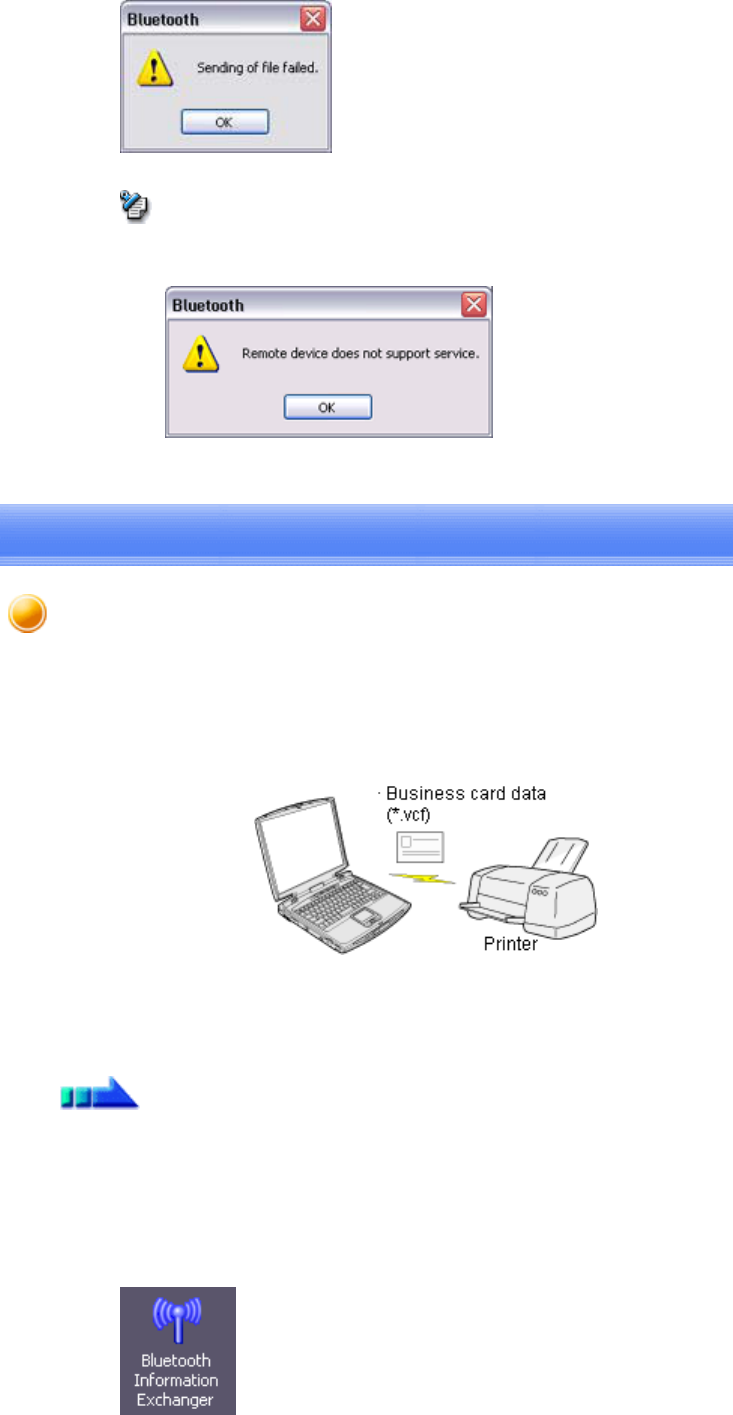
ear if the file transmission was unsuccessful. Please
on the [OK] button to close the message, and repeat the printing procedure.
{If the
p
rinter does not su
pp
ort the BIP
p
rofile
,
the messa
g
e below will a
ppe
■Printing image files to a printer (by right -clicking the mouse)
1. Turn on the printer
2. Right-click on the file to be sent
,
and then click on the destination
p
rinter under
[
Bluetooth]
Note
Introduction 第 101 頁,共 224 頁
file://C:\Documents and Settings\anitachou\Local Settings\Temp\~hh114B.htm 2004/11/30
{If
y
our desired device does not a
pp
ear in the list
,
p
lease confirm that the d
e
has been turned on, and then click on [to Bluetooth] →[Search Other Dev
i
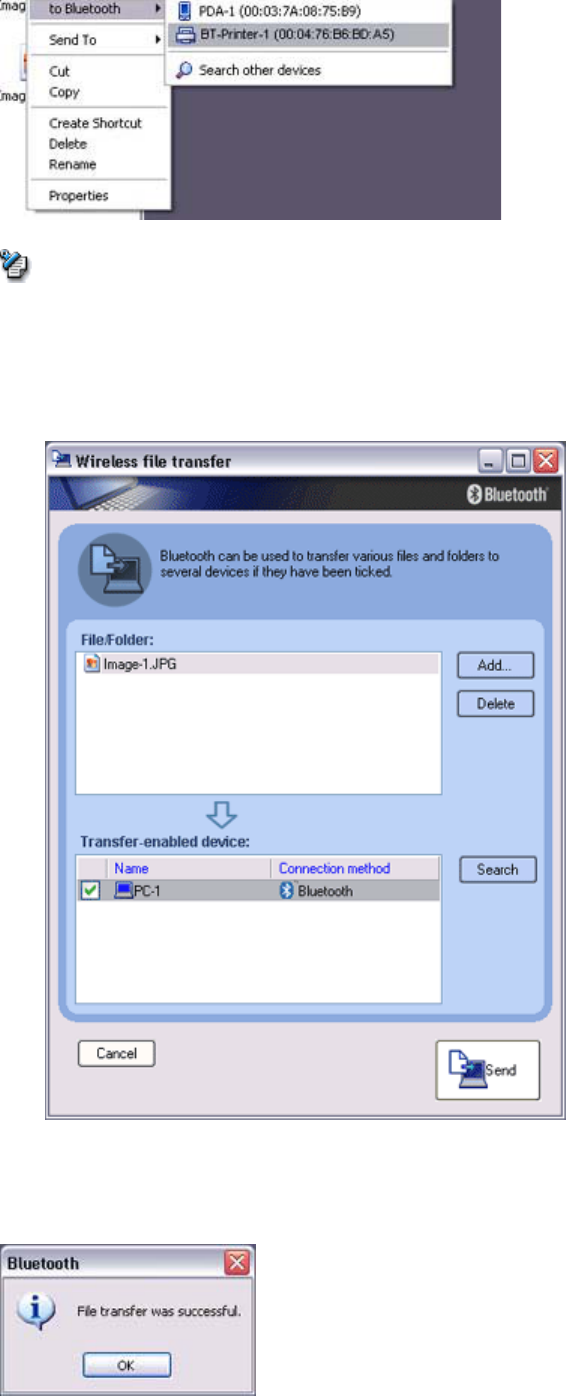
Once the device has been detected
,
the messa
g
e below will a
pp
ear. Please
s
the destination device, and click on the [Send] button.
A window indicating that the file is being sent to the printer will appear.
If the file has been sent to the
p
rinter successfull
y,
the messa
g
e below will a
pp
e
a
the image will be printed out. Please click on the [OK] button.
The messa
g
e below will a
pp
ear if the file transmission was unsuccessful. Please
on the [OK] button to close the message, and repeat the printing procedure.
Note
Introduction 第 102 頁,共 224 頁
file://C:\Documents and Settings\anitachou\Local Settings\Temp\~hh114B.htm 2004/11/30
{If the
p
rinter does not su
pp
ort the BIP
p
rofile
,
the messa
g
e below will a
ppe
Note
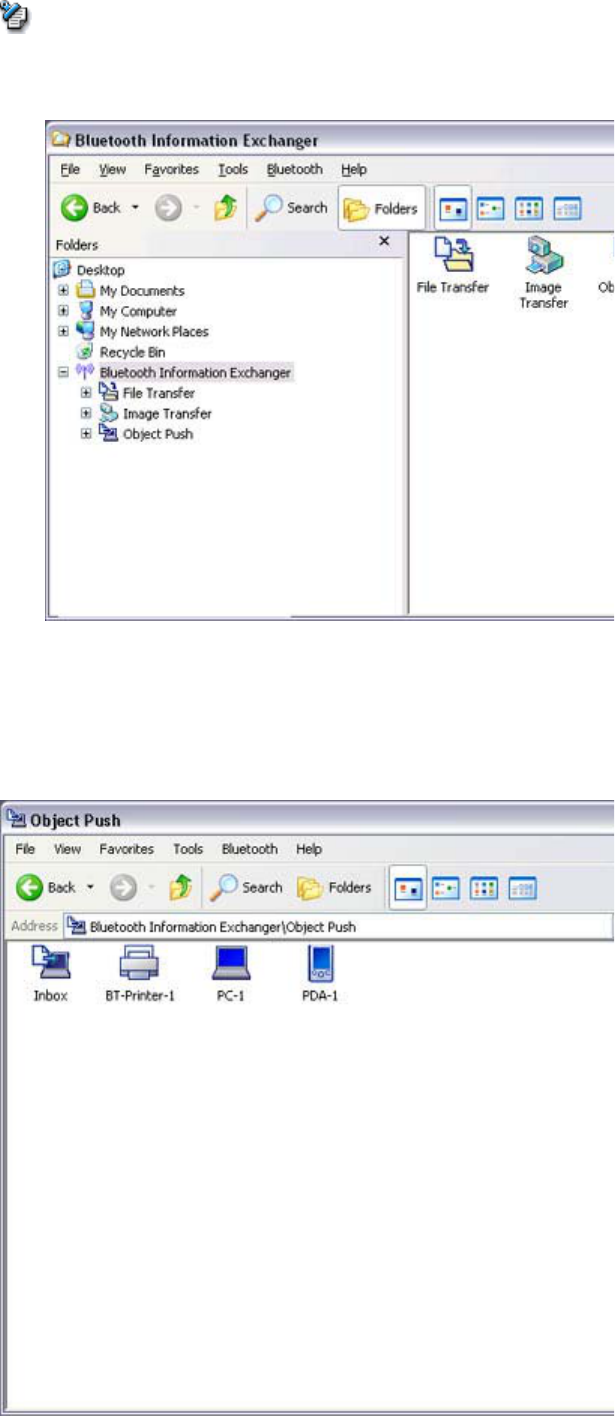
If
y
ou have a
p
rinter that su
pp
orts OPP
(
Ob
j
ect Push Profile
),
y
ou can directl
y
send busi
n
card data that conforms to the "vCard" standard to a printer and print it out.
→Printing business card data (using icons)
→Printing business card data (by right -clicking the mouse)
■Printing business card data (using icons)
1. Turn on the printer
2. Click on the Bluetooth Information Exchanger icon on the Desktop
Procedure
Printing business card data [OPP]
Introduction 第 103 頁,共 224 頁
file://C:\Documents and Settings\anitachou\Local Settings\Temp\~hh114B.htm 2004/11/30
{Alternativel
y,
o
p
en Ex
p
lorer and click on the Bluetooth Information Exch
a
folder for the same result.
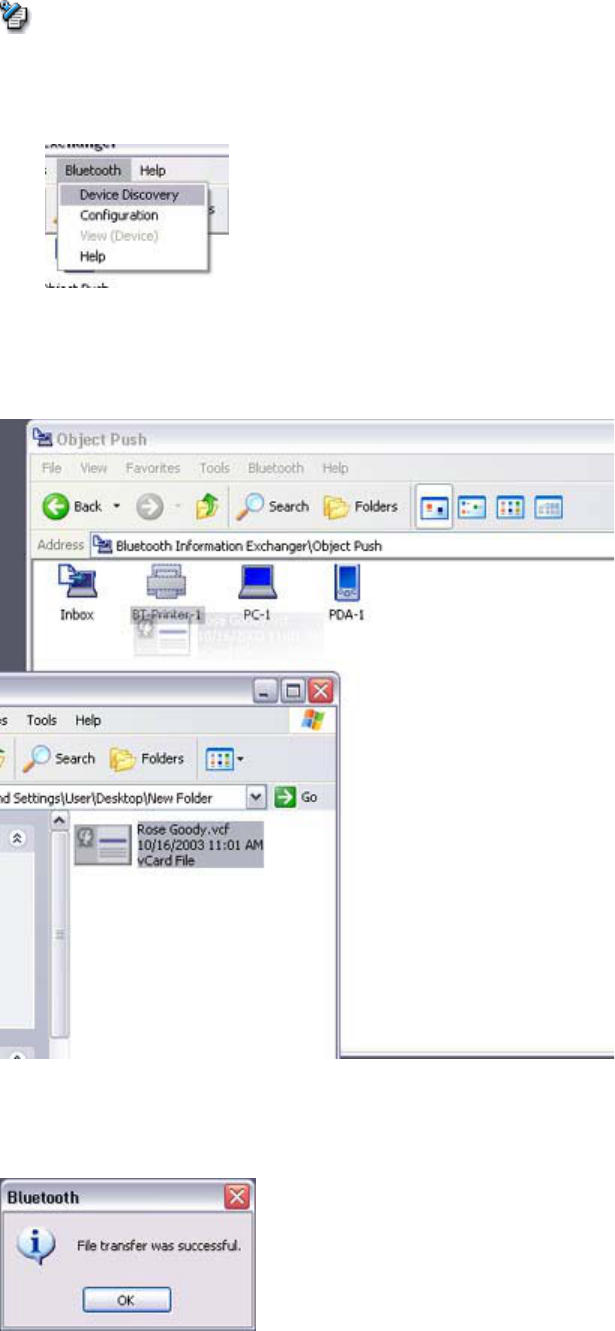
The [Bluetooth Information Exchanger] window will appear.
3. Double-click on the [Object Push] icon
A list of devices will appear in the [Object Push] window.
Here, the image will be sent to the target printer.
Note
Introduction 第 104 頁,共 224 頁
file://C:\Documents and Settings\anitachou\Local Settings\Temp\~hh114B.htm 2004/11/30
{If
y
our desired
p
rinter does not a
pp
ear in the list
,
p
lease confirm that the
pr
has been turned on, and then click on [Bluetooth] →[Search Devices]
A device search will be performed.
4. Dra
g
and dro
p
the business card data to be sent on to
p
of the icon of the destinat
i
printer
The business card will be sent to the printer.
If the business card has been sent to the
p
rinter successfull
y,
the messa
g
e below
w
appear, and the image will be printed out. Please click on the [OK] button.
The messa
g
e below will a
pp
ear if the business card transmission was unsuccessf
u
Please click on the [OK] button to close the message, and repeat the printing
procedure.
Note
Introduction 第 105 頁,共 224 頁
file://C:\Documents and Settings\anitachou\Local Settings\Temp\~hh114B.htm 2004/11/30
■Printing business card data (by right -clicking the mouse)
1. Turn on the printer
2. Right-click on the business card data to be sent
,
and then click on the destinatio
n
printer under [to Bluetooth]
{If
y
our desired device does not a
pp
ear in the list
,
p
lease confirm that the d
e
has been turned on, and then click on [to Bluetooth] →[Search Other Dev
i
Once the device has been detected
,
the messa
g
e below will a
pp
ear. Please
s
the destination device, and click on the [Send] button.
Note
Introduction 第 106 頁,共 224 頁
file://C:\Documents and Settings\anitachou\Local Settings\Temp\~hh114B.htm 2004/11/30
The business card will be sent to the printer.
If the business card has been sent to the
p
rinter successfull
y,
the messa
g
e below
w
appear, and the image will be printed out. Please click on the [OK] button.
The messa
g
e below will a
pp
ear if the business card transmission was unsuccessf
u
Please click on the [OK] button to close the message, and repeat the printing
procedure.
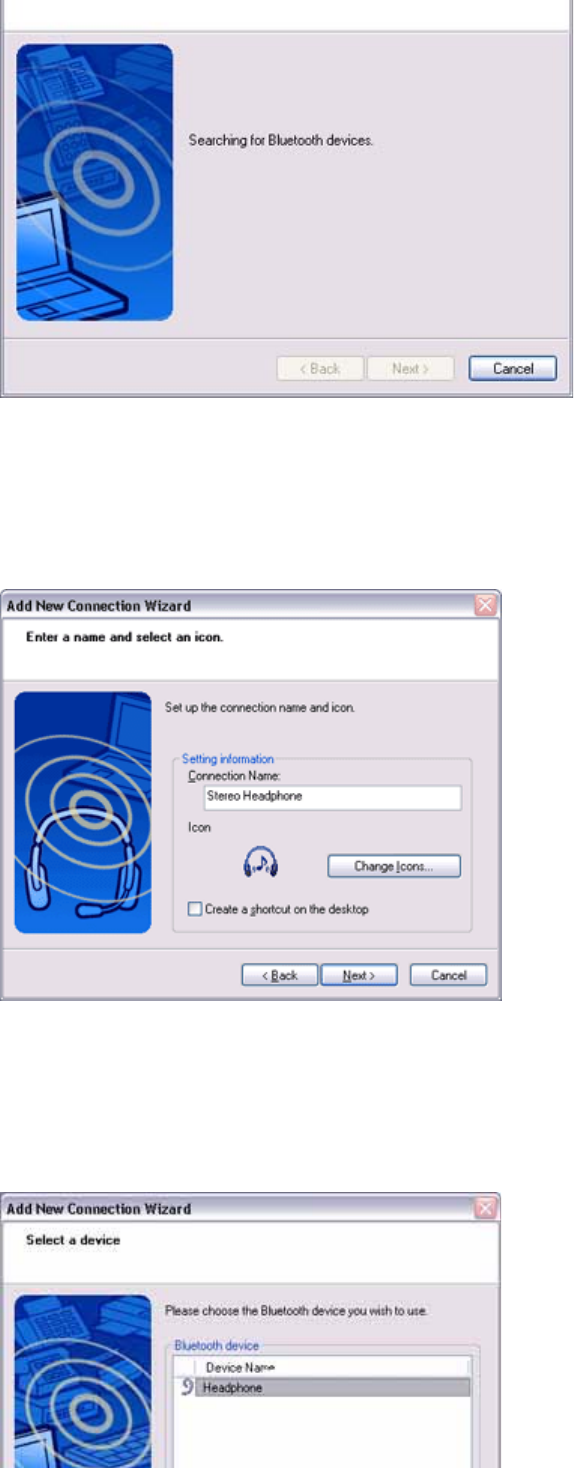
This section describes how to use the stereo head
p
hones to listen to
y
our favourite music or
o
audio files stored on your PC.
→Configuring the stereo headphones
→Connecting to the stereo headphones
→Listening to music or other audio files
→Playing music using remote control
→Copyright protection function
Configuring the stereo headphones
Procedure
Listening to music using the stereo headphones 【GAVDP】
【A2DP】 【AVRCP】
Introduction 第 107 頁,共 224 頁
file://C:\Documents and Settings\anitachou\Local Settings\Temp\~hh114B.htm 2004/11/30
1. Ri
g
ht-click on the Bluetooth icon in the task tra
y,
and click on
[
Add New
Connection].
{Alternatively, click [Start]→[All Programs]→[Bluetooth]→[Bluetooth
Settin
g
s
],
and then click on
[
New Connection
]
from the
[
Bluetooth Settin
gs
screen that has opened.
The
[
Add New Connection Wizard
(
Welcome to the Add New Connection Wiza
r
will appear.
2. Switch ON the stereo headphones and activate "Discoverable" mode
Please refer to the user
g
uide for the stereo head
p
hones for further information o
n
how to operate them.
3. Confirm that
[
Ex
p
ress Mode
]
has been selected
,
and then click on the
[
Next
]
but
t
The
[
Add New Connection Wizard
(
Searchin
g
for Bluetooth Devices
)]
screen w
i
appear.
Note
Introduction 第 108 頁,共 224 頁
file://C:\Documents and Settings\anitachou\Local Settings\Temp\~hh114B.htm 2004/11/30
Once the search for the devices has ended
,
the
[
Add New Connection Wizard
(
S
e
Device)] screen will appear.
4. Select the device name of the stereo head
p
hones from the list
,
and click on the
[N
button
The
[
Add New Connection Wizard
(
Searchin
g
for Services
)]
screen will a
pp
ear.
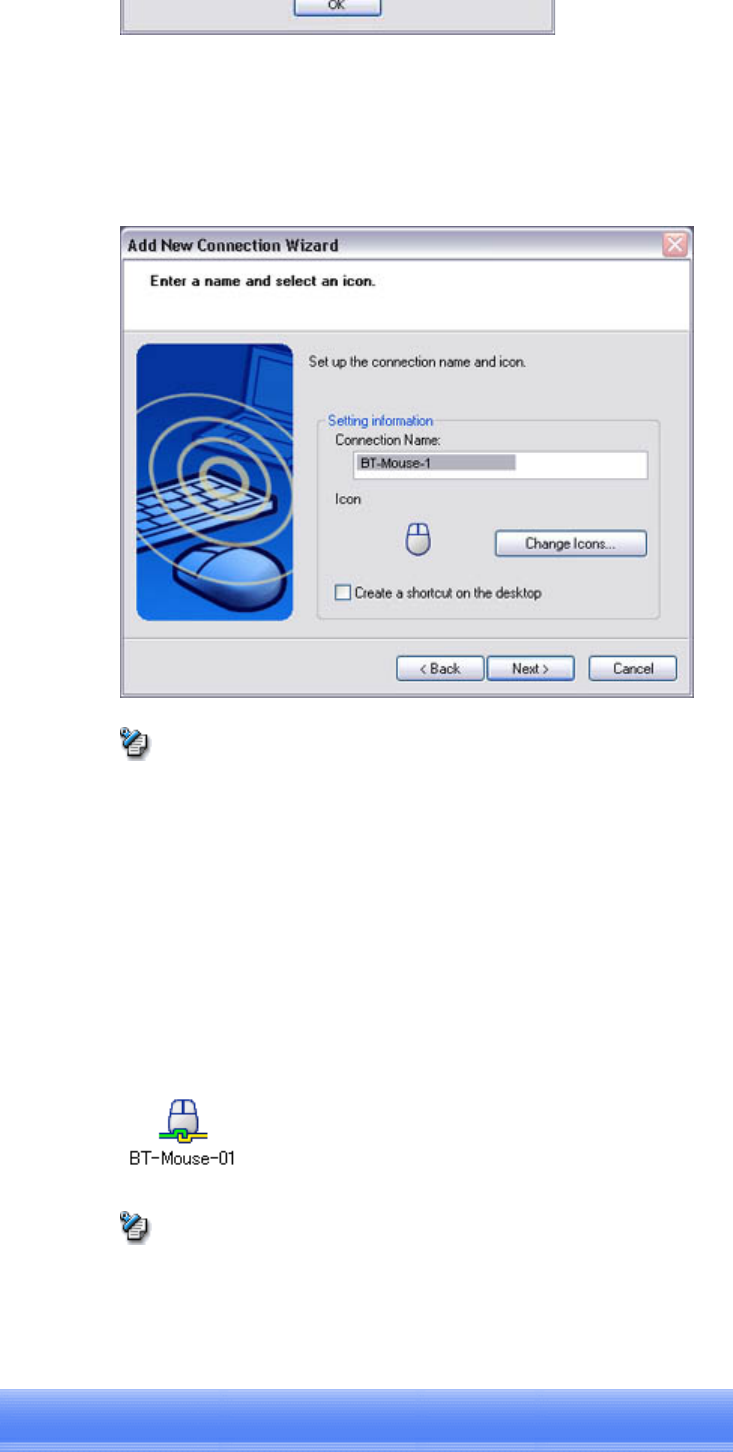
5. Confi
g
ure the t
yp
e and name of the icon to a
pp
ear once re
g
istration is com
p
lete
,
click on the [Next] button
Please click the [Next] button once you are satisfied with the configuration.
Introduction 第 109 頁,共 224 頁
file://C:\Documents and Settings\anitachou\Local Settings\Temp\~hh114B.htm 2004/11/30
The [Add New Connection Wizard (Configure Connection Name)] screen will
appear.
6. Click on the [Finish] button
The settin
g
s will be re
g
istered
,
and the icon will a
pp
ear on the
[
Bluetooth Settin
g
screen.
You can connect to the stereo head
p
hones from the icon re
g
istered in
[
Bluetooth Settin
gs
Please refer to the user
g
uide for information on how to make a connection from the ster
e
headphones.
zPlease close the followin
g
audio a
pp
lications before an
y
connection is made betwe
your stereo headphones and PC.
{Music/video playback applications
{e-Conferencing applications
{Voice-recognition applications
Please finish connecting the stereo headphones before launching any of these
applications.
1. Playing music or other audio files on your PC
{Please confirm the
p
oints below if
y
ou are unable to hear an
y
thin
g
des
p
ite
having properly connected the stereo headphones.
Click [Start]→[All Programs]→[Accessories]→[Entertainment]→[Volu
m
Control].
Remove the tick next to
[
Mute
]
if it has been ticked. If the volume is at its
lowest setting, please adjust it to an appropriate level.
{Music
p
la
y
back ma
y
be interru
p
ted if other Bluetooth devices are currentl
y
connected to
y
our PC. When
y
ou are listenin
g
to music
,
it is recommende
d
the stereo headphones be the only connected device.
{Music
p
la
y
back ma
y
be interru
p
ted if
y
ou are some distance awa
y
from th
e
or if there are any obstructions between you and the PC.
{If
y
ou are unable to hear an
y
sound out of
y
our stereo head
p
hones while
m
or audio is currentl
y
p
la
y
in
g
in a related a
pp
lication
,
p
lease sto
p
the files b
e
Connecting to the stereo headphones
Important
Listening to music or other audio files
Important
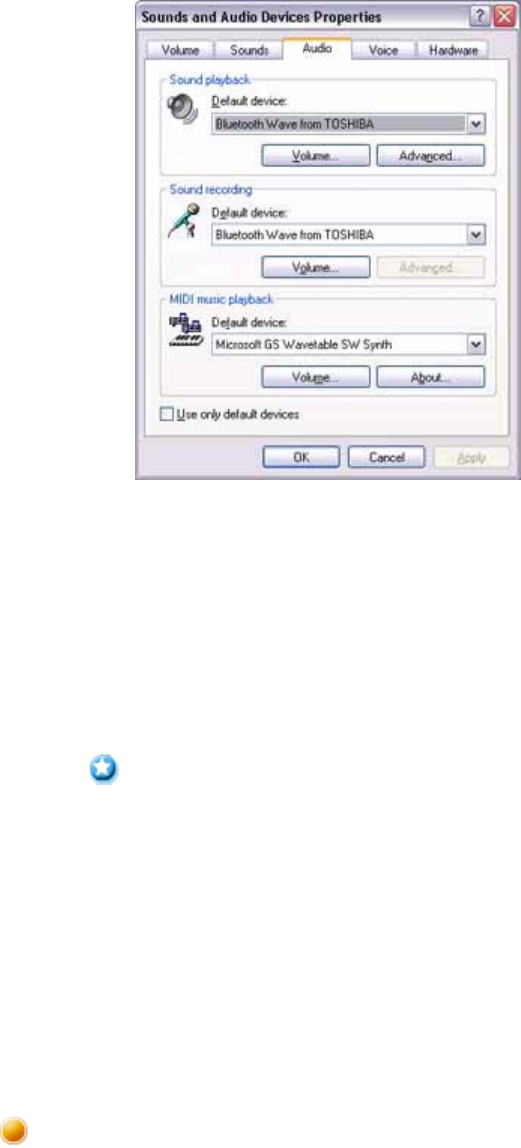
Introduction 第 110 頁,共 224 頁
file://C:\Documents and Settings\anitachou\Local Settings\Temp\~hh114B.htm 2004/11/30
p
la
y
ed
,
o
p
en
[
Sounds and Audio Devices
]
from the Control Panel
,
and cha
n
the default device to "Toshiba Bluetooth Wave."
If
y
ou are still unable to hear an
y
sound from the stereo head
p
hones even
a
having set "Toshiba Bluetooth Wave" as the default device, please re -lau
n
application.
2. Finishing listening to music and disconnecting
1. Right-click on the icon for the currentl
y
connected mode from
[
Bluetoot
h
Settings] on your PC, and click on "Disconnect."
A message confirming the disconnection may appear.
2. Click on the "Yes" button after having followed the instructions in the
message.
The icon will indicate that the device has been disconnected.
{Please close the followin
g
audio a
pp
lications before
y
ou disconnect the ste
r
headphones from your PC:
Music/video playback applications
e-Conferencing applications
Voice-recognition applications
Please com
p
letel
y
disconnect the stereo head
p
hones before launchin
g
an
y
o
these applications.
Please refer to the user
g
uide for information on terminatin
g
a connection
f
the stereo headphones.
Music applications and video playback applications installed on your PC
(e.g.,"Windows Media Player 9" and "InterVideo WinDVD") may be operated
with the remote control button/switch on your stereo headphones.
The remote control used with the stereo headphones must be compliant with
th Bl t th AVRCP fil Pl f t th h d h id f
Important
Playing music using remote control

Introduction 第 111 頁,共 224 頁
file://C:\Documents and Settings\anitachou\Local Settings\Temp\~hh114B.htm 2004/11/30
th
e
Bl
ue
t
oo
th
AVRCP
p
ro
fil
e.
Pl
ease re
f
er
t
o
th
e
h
ea
dph
ones user
g
u
id
e
f
or
further information.
You can configure the application to be operated using the switch/button
according to the following procedure.
1. Double-click on the Bluetooth icon in the taskbar
Launches "Bluetooth Settings."
2. Click on [Bluetooth]→[Select AV Player] from the menu bar
The [Select AV Player] screen will appear.
3. Select the application, and click on the [OK] button
The functions and switch/button that can be operated may differ depending on
the application used for music/video playback as well as the version.
The procedure below can be performed in order to change the position where
the receive command is displayed or to not have the command displayed.
1. Double-click on the Bluetooth icon in the taskbar
Launches "Bluetooth Settings."
2. Click on [Bluetooth]→[Select AV Player] from the menu bar.
The [Select AV Player] screen will appear.
3. Select the appropriate item from the pull -down menu of positions
where the receive command is to be displayed, and then click on the
[OK] button.
If the receive command appears but does not function properly, sometimes
the problem may be rectified by changing the setting to "Do not display."
The commands supported by this application are shown below. Please refer to
the headphone user guide for commands that are supported by the stereo
headphones. Problems with operation may be encountered with certain
versions of "Windows Media Player 9" and "InterVideo WinDVD."
[Windows Media Player 9]
zPlay
zStop
zPause
zNext
zPrevious
zFast forward
zRewind
[InterVideo WinDVD]
zPlay
zStop
zPause
zNext chapter
zPrevious chapter
zFast Forward
zFast Backward
Procedure
Procedure
Introduction 第 112 頁,共 224 頁
file://C:\Documents and Settings\anitachou\Local Settings\Temp\~hh114B.htm 2004/11/30
zU
p
zDown
zLeft
zRight
zSelect
zRoot menu
zAngle
A copyright protection function is supported according to the SCMS -T format
as defined in the Bluetooth specifications. Follow the configuration procedure
below to establish connections only with devices that support this function.
1. Double-click on the Bluetooth icon in the task tray.
Launches "Bluetooth Settings."
2. Select
[
Bluetooth
]
from the menu
,
and click on
[
Co
py
ri
g
ht Protection Settin
g
The copyright protection dialog will appear.
3. Tick the box next to "Only connect to devices that are copyright -
p
rotected
u
the SCMS-T format," and click on the OK button.
Copyright protection function
Procedure
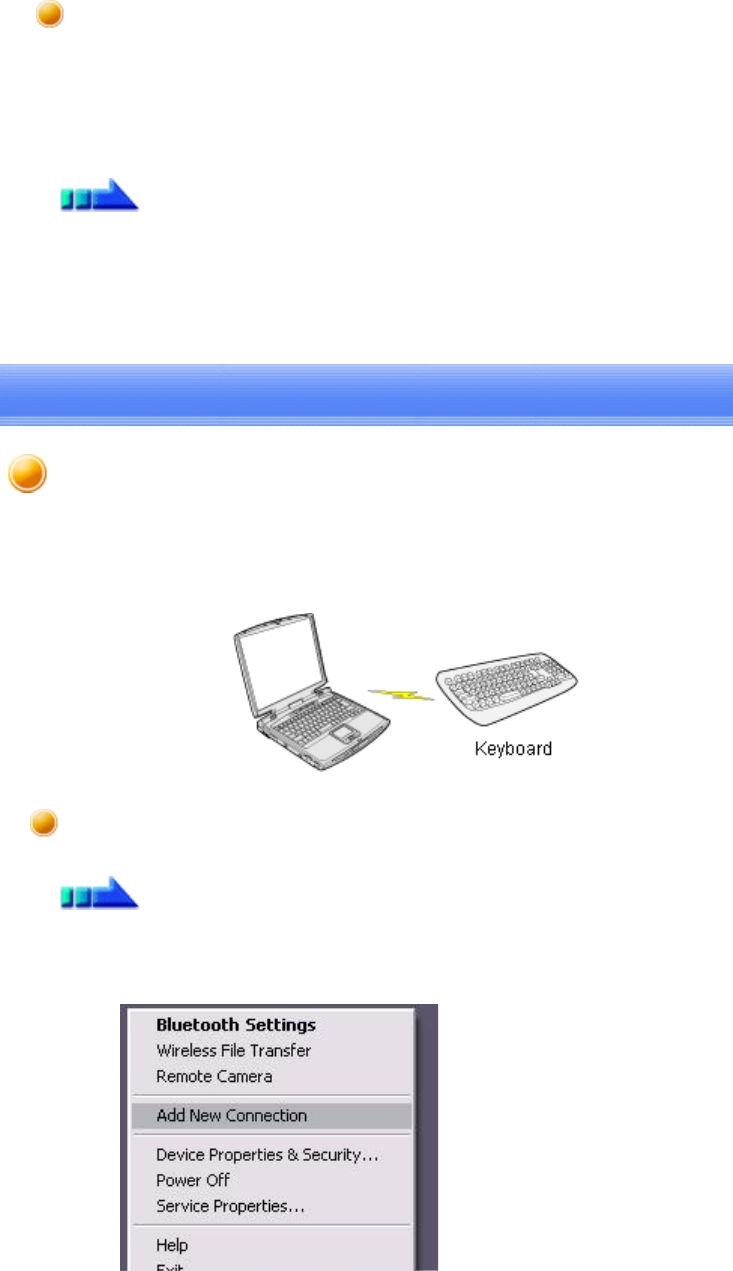
This section describes how to connect a Bluetooth -compatible keyboard to a PC.
1. Right-click on the Bluetooth icon in the task tray, and then click on [Add New
Connection]
Setting up the wireless keyboard
Procedure
Using a wireless keyboard [HID]
Introduction 第 113 頁,共 224 頁
file://C:\Documents and Settings\anitachou\Local Settings\Temp\~hh114B.htm 2004/11/30
{Alternatively, click [Start]→[All Programs]→[Bluetooth]→[Bluetooth S
e
and then click on [New Connection] from the active [Bluetooth Settings]
window.
The
[
Add New Connection Wizard
(
Welcome to the Add New Connection Wiza
r
window will appear.
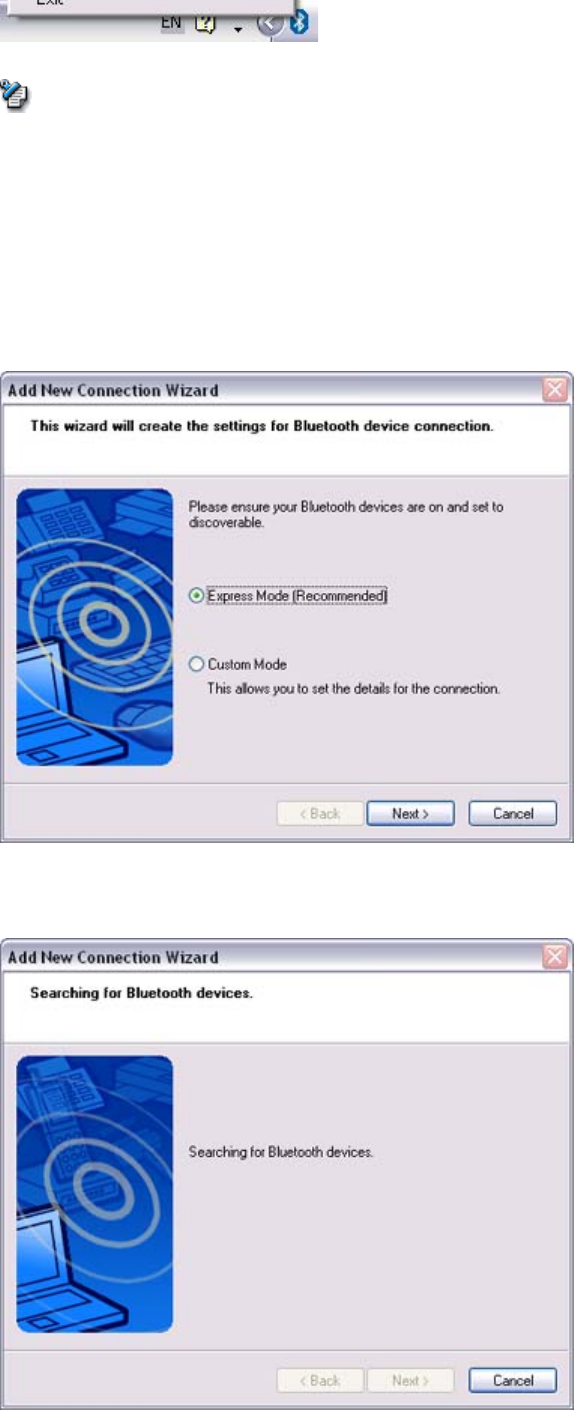
2. Confirm that
[
Ex
p
ress Mode
]
has been selected
,
and then click on the
[
Next
]
but
t
The
[
Add New Connection Wizard
(
Searchin
g
for Bluetooth devices
)]
window
w
appear.
Once the
p
ro
g
ram has finished searchin
g
for the devices
,
the
[
Add New Connect
i
Wizard (Device Selection)] window will appear
Note
Introduction 第 114 頁,共 224 頁
file://C:\Documents and Settings\anitachou\Local Settings\Temp\~hh114B.htm 2004/11/30
Wizard
(Device
Selection)]
window
will
appear
.
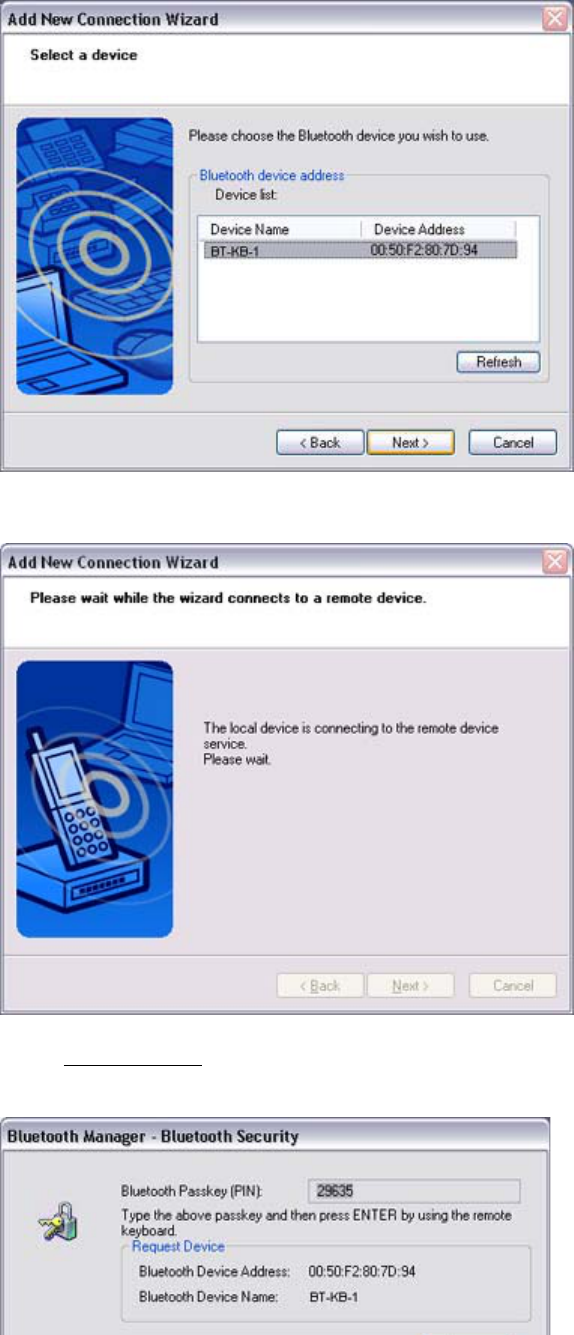
3. Select the device name of the ke
y
board from
[
Device List
],
and then click on th
e
[Next] button
The
[
Add New Connection Wizard
(
Searchin
g
for Services
)]
window will a
pp
ea
r
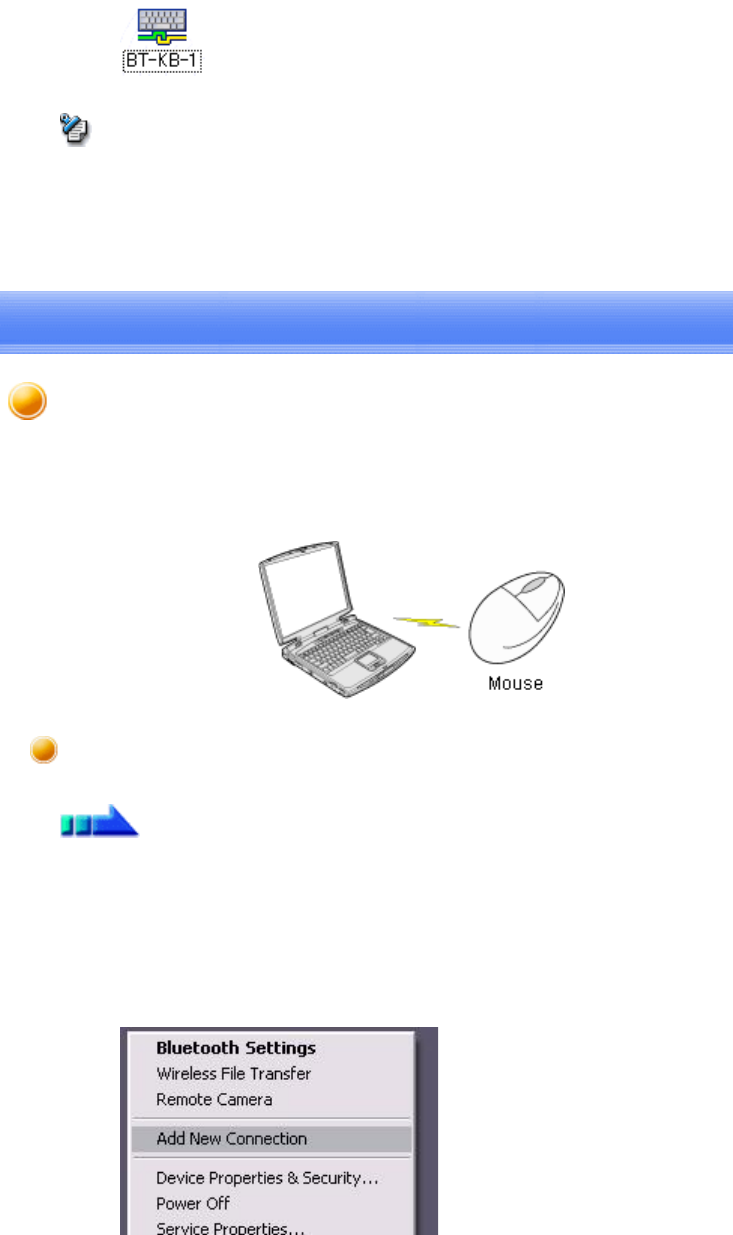
4. Use the wireless keyboard to enter the numbers that a
pp
ear in
[
Bluetooth Passke
Code)], and then hit the [Enter] key

Introduction 第 115 頁,共 224 頁
file://C:\Documents and Settings\anitachou\Local Settings\Temp\~hh114B.htm 2004/11/30
Once the
p
ro
g
ram has detected the services successfull
y,
connection to the devic
e
registration of settings information will be performed automatically.
The
[
Add New Connection Wizard
(
Connection Name Settin
g
s
)]
window will a
p
5. Enter the t
yp
e and name of the icon dis
p
la
y
ed after re
g
istration
,
and then click o
n
[Next] button
Please click on the [Next] button if you are satisfied with the settings.
{You can change the connection icon and icon name.
→"Changing a connection icon name"
→"Changing a connection icon"
Note
Introduction 第 116 頁,共 224 頁
file://C:\Documents and Settings\anitachou\Local Settings\Temp\~hh114B.htm 2004/11/30
The
[
Add New Connection Wizard
(
Com
p
letin
g
the Add New Connection Wiza
r
window will appear.
6. Click on the [Finish] button
The settin
g
s information will be re
g
istered
,
and an icon will a
pp
ear in the
[
Bluet
o
Settings] window.
zPressin
g
an
y
ke
y
on the wireless ke
y
board will automaticall
y
connect it to the PC
thereafter.
Please connect manually if automatic connection is unsuccessful.
Note
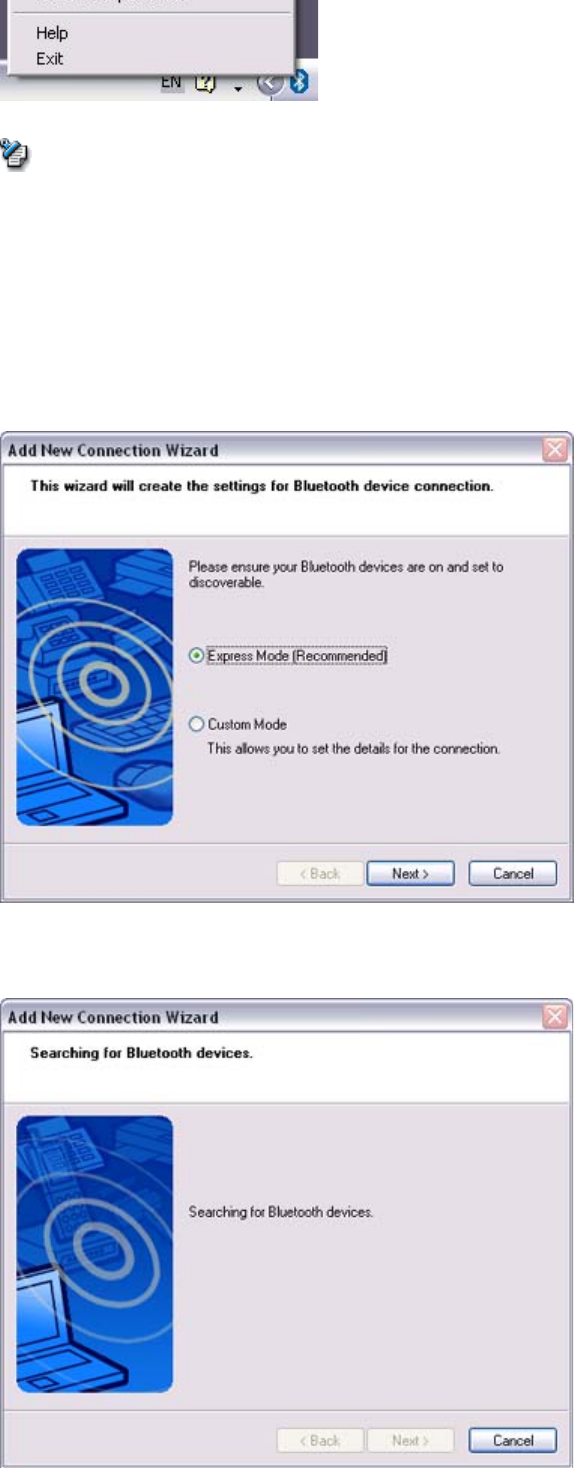
This section describes how to connect a Bluetooth -compatible mouse to a PC.
1. Turn on the wireless mouse, and set it to be connectable via Bluetooth
Please refer to the instruction manual for details on how to operate the mouse.
2. Right-click on the Bluetooth icon in the task tray, and then click on [Add New
Connection]
Setting up the wireless mouse
Procedure
Using a wireless mouse [HID]
Introduction 第 117 頁,共 224 頁
file://C:\Documents and Settings\anitachou\Local Settings\Temp\~hh114B.htm 2004/11/30
{Alternatively, click [Start]→[All Programs]→[Bluetooth]→[Bluetooth S
e
and then click on [New Connection] from the active [Bluetooth Settings]
window.
The
[
Add New Connection Wizard
(
Welcome to the Add New Connection Wiza
r
window will appear.
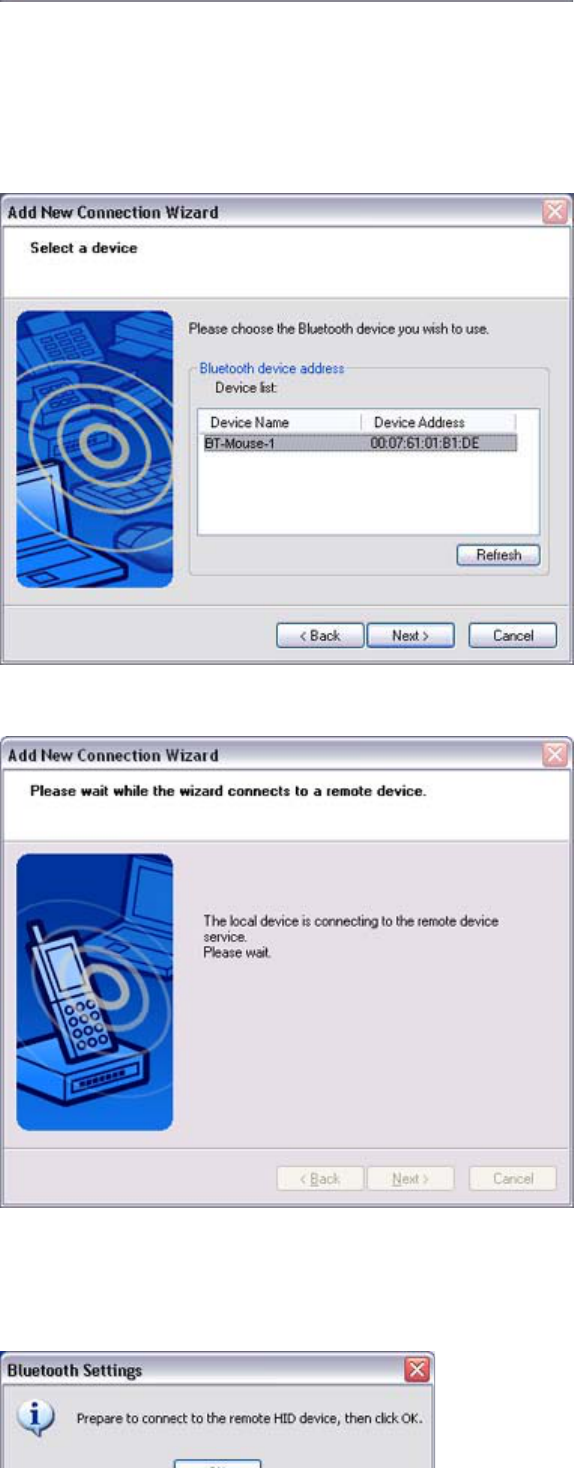
3. Confirm that
[
Ex
p
ress Mode
]
has been selected
,
and then click on the
[
Next
]
but
t
The
[
Add New Connection Wizard
(
Searchin
g
for Bluetooth devices
)]
window
w
appear.
Note
Introduction 第 118 頁,共 224 頁
file://C:\Documents and Settings\anitachou\Local Settings\Temp\~hh114B.htm 2004/11/30
Once the
p
ro
g
ram has finished searchin
g
for the devices
,
the
[
Add New Connect
i
Wizard (Device Selection)] window will appear.
4. Select the device name of the mouse from
[
Device List
],
and then click on the
[N
button
The
[
Add New Connection Wizard
(
Searchin
g
for Services
)]
window will a
pp
ea
r
A message confirming a device connection will appear.
5. Click on the [OK] button
Introduction 第 119 頁,共 224 頁
file://C:\Documents and Settings\anitachou\Local Settings\Temp\~hh114B.htm 2004/11/30
The
[
Add New Connection Wizard
(
Connection Name Settin
g
s
)]
window will a
p
6. Enter the t
yp
e and name of the icon dis
p
la
y
ed after re
g
istration
,
and then click o
n
[Next] button
Please click on the [Next] button if you are satisfied with the settings.
{Please use this window to change the connection name and icon.
- Changing the connection icon name
- Changing the connection icon
The
[
Add New Connection Wizard
(
Com
p
letin
g
the Add New Connection Wiza
r
window will appear.
7. Click on the [Finish] button
The settin
g
s information will be have been re
g
istered
,
and an icon will a
pp
ear in
[Bluetooth Settings] window.
{Clicking on one of the mouse buttons or otherwise operating it will
automatically connect it to the PC thereafter. Please connect manually if
automatic connection is unsuccessful.
Note
Note
Introduction 第 120 頁,共 224 頁
file://C:\Documents and Settings\anitachou\Local Settings\Temp\~hh114B.htm 2004/11/30
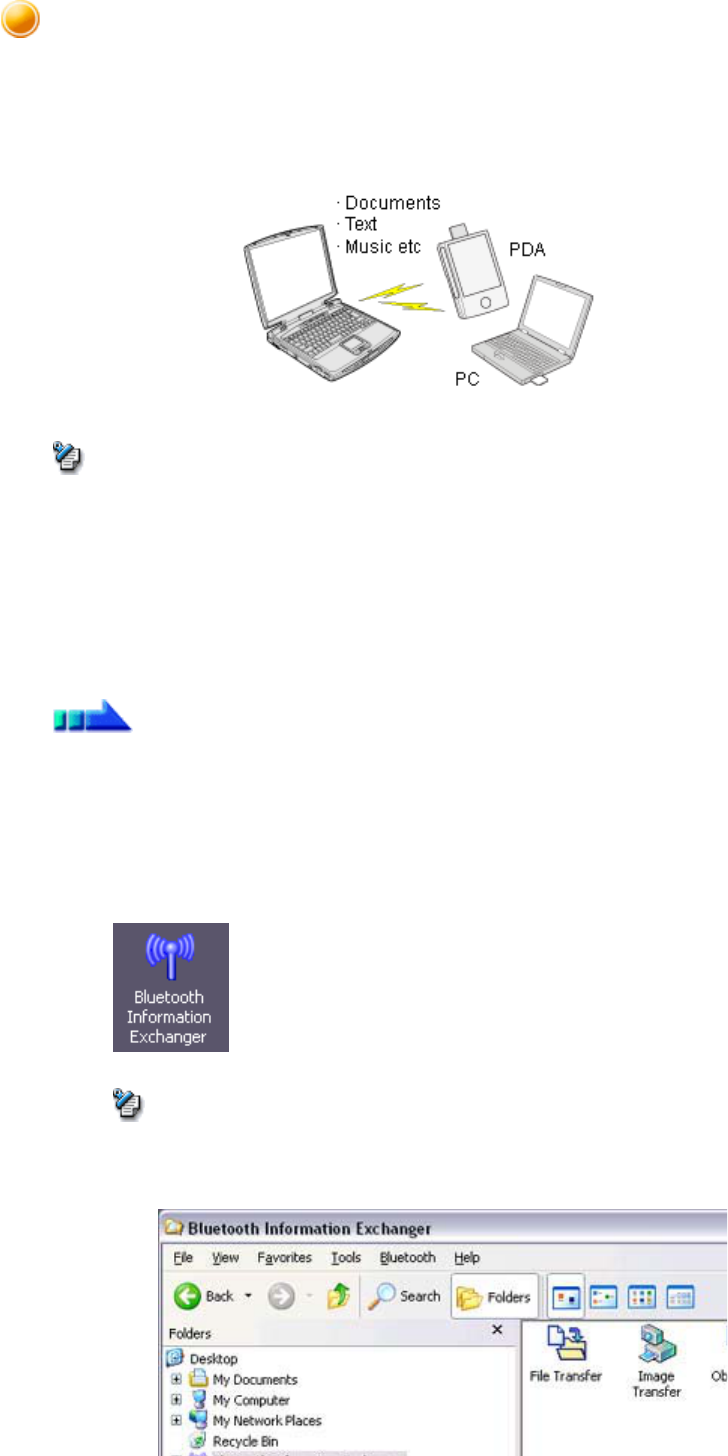
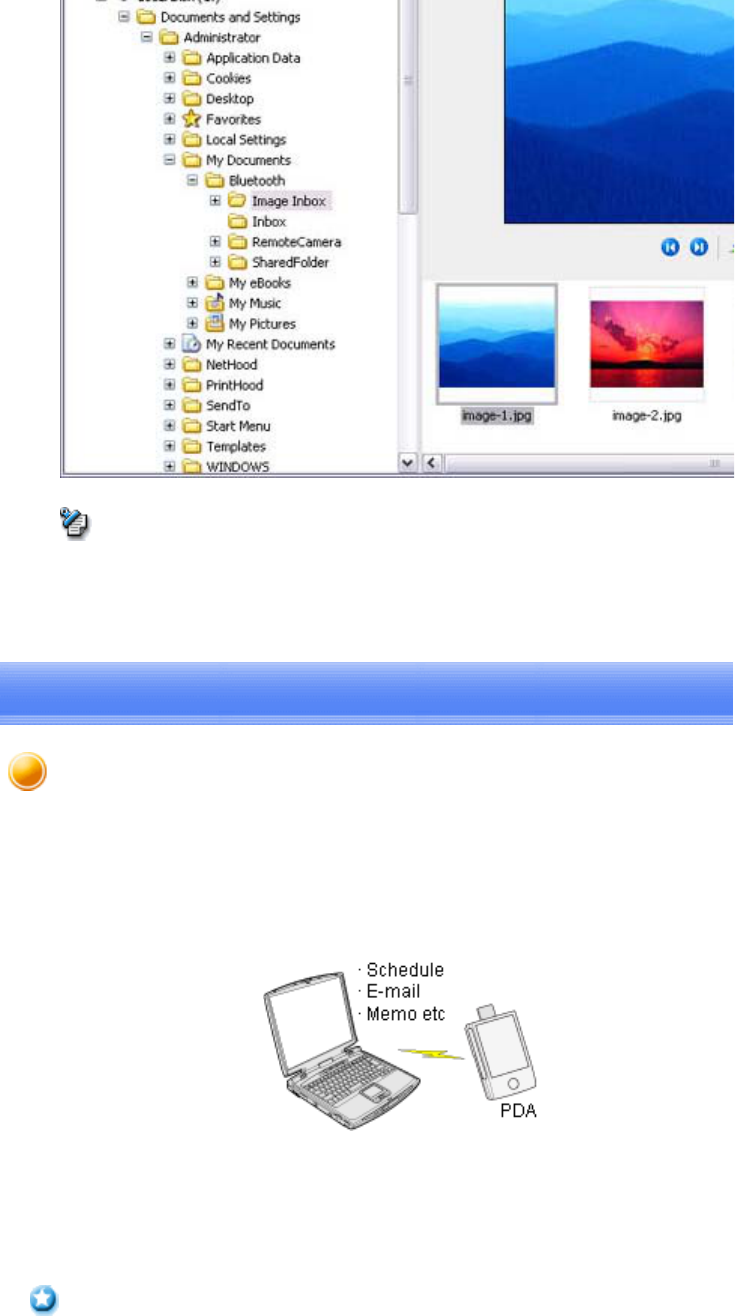
You can send and receive files other than business card data with a Bluetooth -enabled
P
PDA.
Use "File transfer" in the Bluetooth Information Exchanger to exchange files.
zThe same o
p
erations will be valid as lon
g
as the PC and PDA su
pp
ort the FTP
p
ro
f
z"File transfer" cannot be used to send or receive business card data. Please instead
"Object Push" to perform these activities.
→Sending files to a PC or PDA (using icons)
→Sending files to a PC or PDA (by right-clicking the mouse)
→Receiving files from a PC or PDA
■Sending files to a PC or PDA (using icons)
1. Turn on the PC or PDA
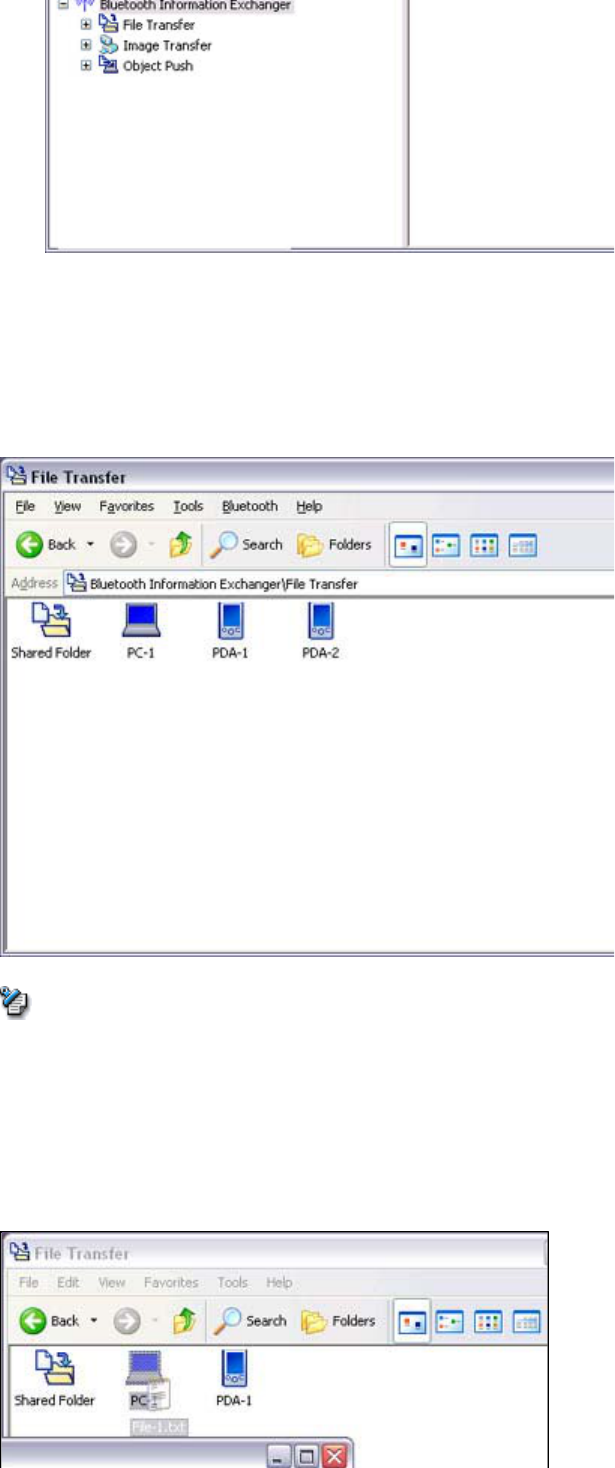
2. Double-click on the Bluetooth Information Exchanger icon on the Desktop
{Alternativel
y,
o
p
enin
g
Ex
p
lorer and clickin
g
on the Bluetooth Information
Exchanger folder will produce the same result.
Note
Procedure
Note
Exchanging files with a PC or PDA [FTP]
Introduction 第 121 頁,共 224 頁
file://C:\Documents and Settings\anitachou\Local Settings\Temp\~hh114B.htm 2004/11/30
The [Bluetooth Information Exchanger] window will appear.
3. Double-click on the [File transfer] icon
A list of devices will appear in the [File transfer] window.
{If the desired device does not a
pp
ear in the list
,
p
lease confirm that the de
v
has been turned on, and then select [Bluetooth] →[Search Devices].
A device search will be performed.
{You can also use "Image transfer" when sending individual image files.
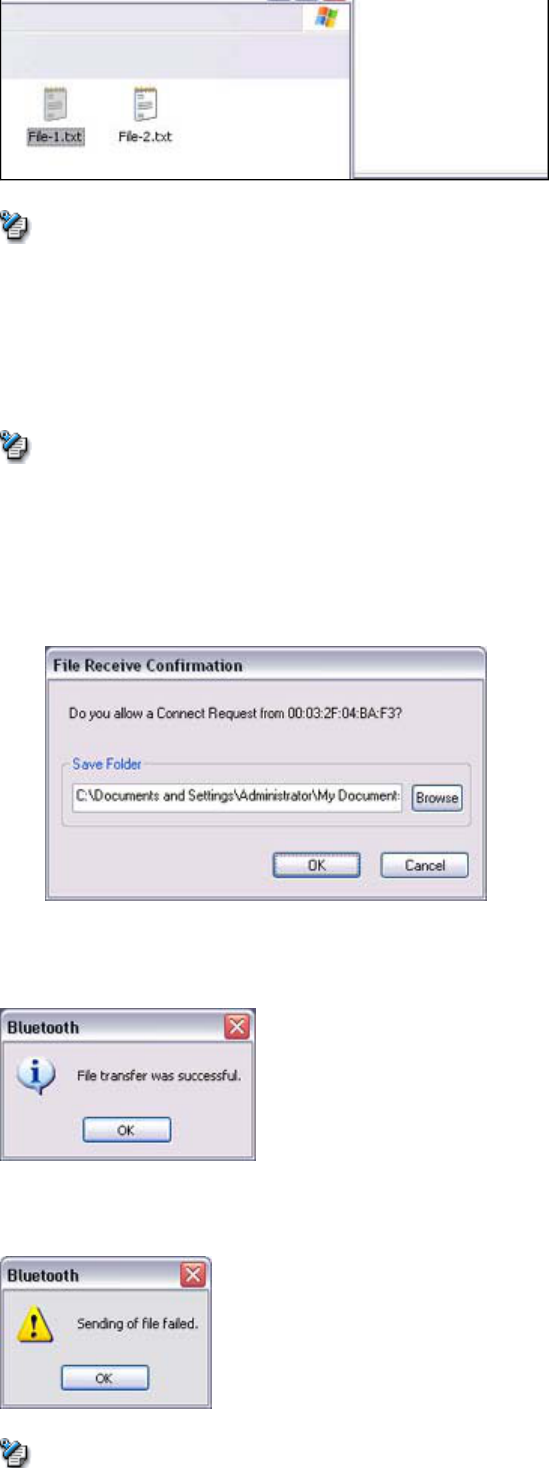
4. Use the mouse to dra
g
and dro
p
the file
y
ou wish to send over the destination ic
o
In this case, the file will be sent to a PC named "PC -1".
Note
Introduction 第 122 頁,共 224 頁
file://C:\Documents and Settings\anitachou\Local Settings\Temp\~hh114B.htm 2004/11/30
{When usin
g
"File transfer"
,
y
ou can send individual files as well as entire
folders.
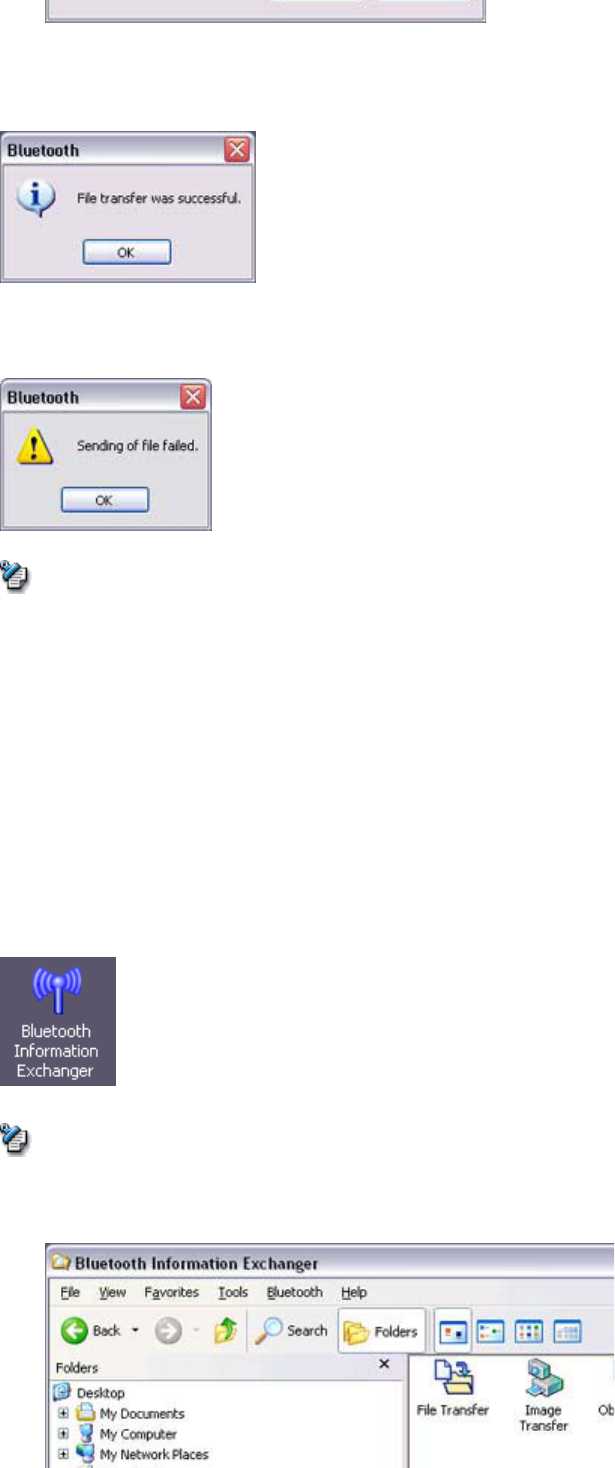
5. Confirm that the file is being sent
The file will be sent to the PC.
{When sendin
g
files usin
g
"File transfer"
,
a messa
g
e re
q
uestin
g
p
ermission
t
receive the files ma
y
a
pp
ear on the destination
(
receivin
g)
device. The con
t
the messa
g
e will var
y
with the Bluetooth software installed on the destinat
i
device, so please be sure to follow the instructions provided.
If
y
ou are usin
g
the Bluetooth Utilit
y,
a messa
g
e similar to the one below
w
appear.
If the file has been sent successfully, the message below will appear.
Please click on the [OK] button.
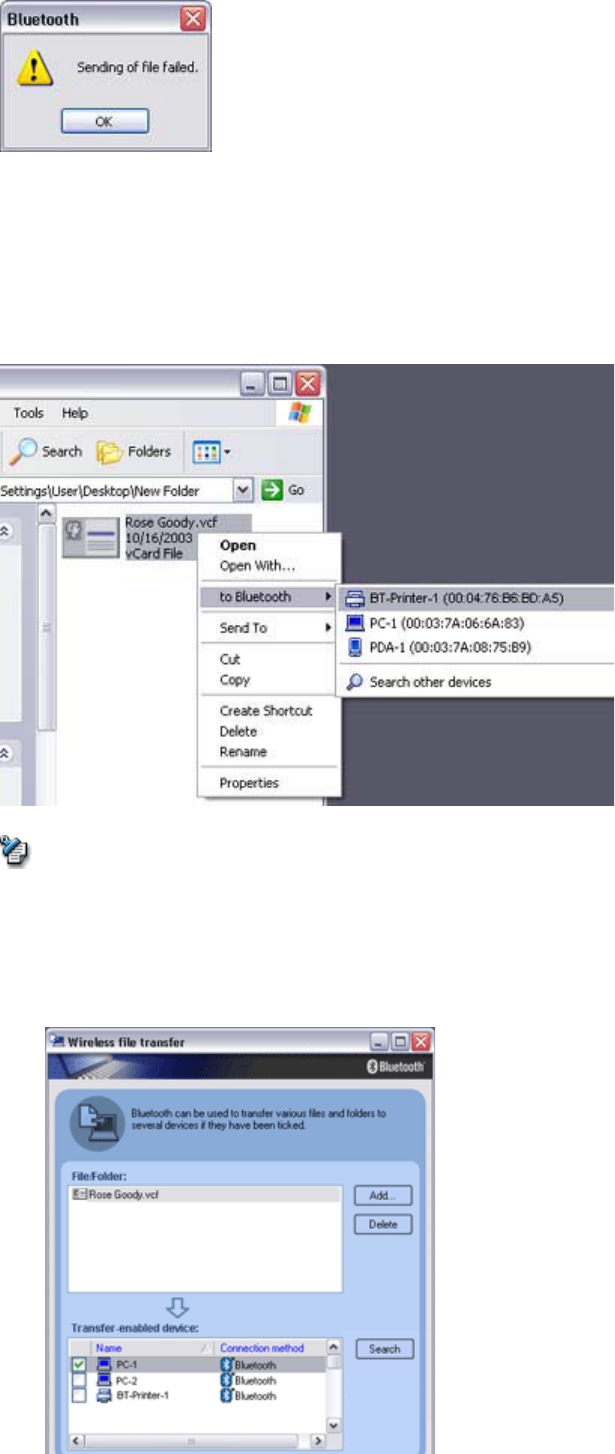
The message below will appear if the file transmission was unsuccessful.
Please click on the [OK] button to close the message, and repeat the procedure.
Note
Note
Note
Introduction 第 123 頁,共 224 頁
file://C:\Documents and Settings\anitachou\Local Settings\Temp\~hh114B.htm 2004/11/30
{Files that have been sent will be saved in a file transfer shared folder on th
e
destination device.
{Additionally, with "File transfer", you can open the shared folder on the
destination device usin
g
Ex
p
lorer
,
s
p
ecif
y
a subfolder
,
and then send the fi
l
there.
{You can use Properties in the Bluetooth Information Exchan
g
er to chan
g
e
location of the "Shared folder" on the hard drive.
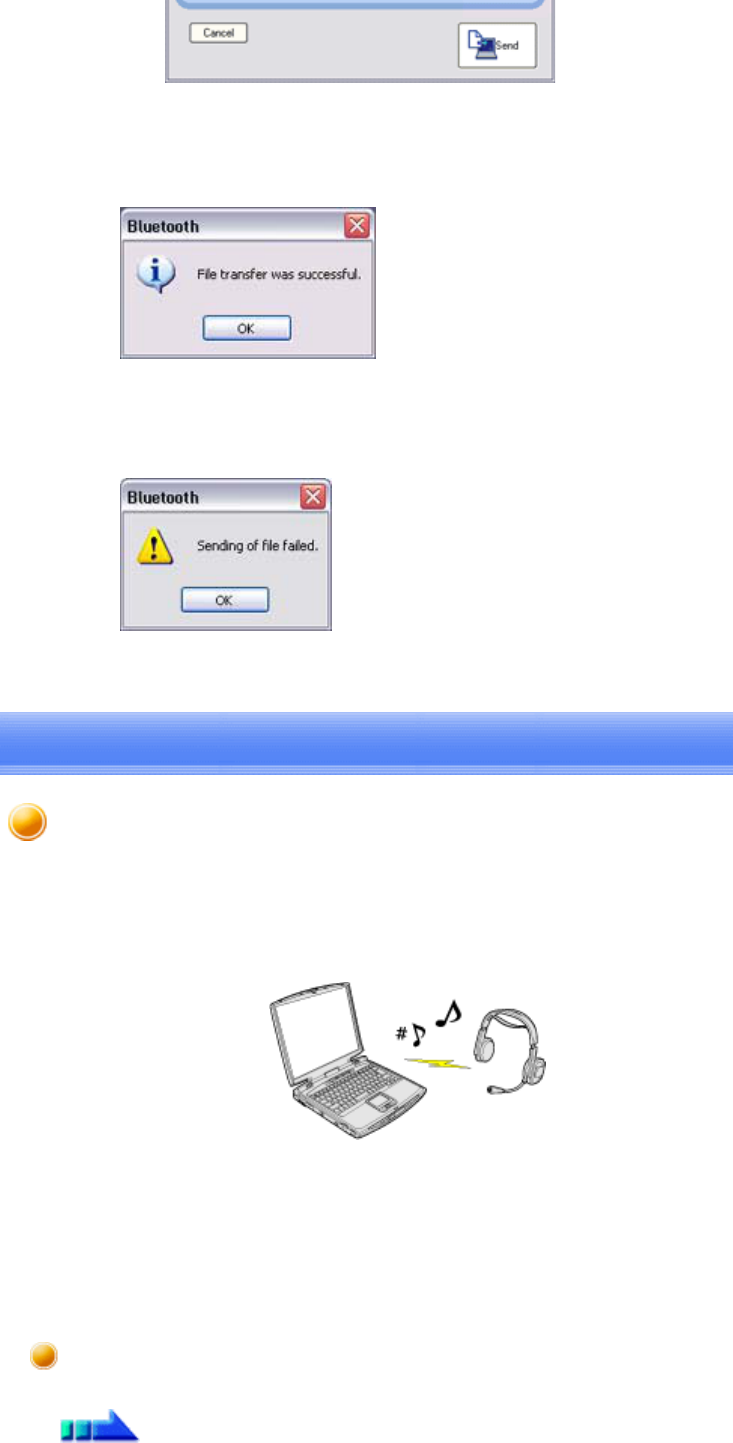
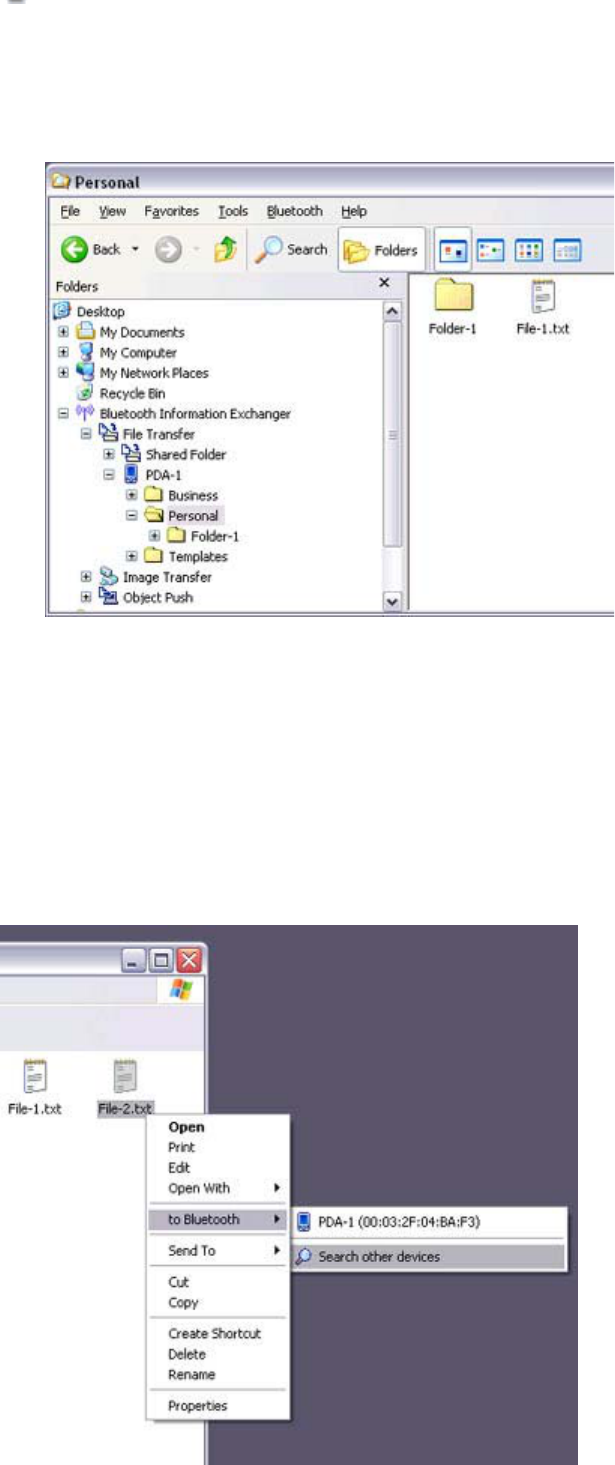
■Sending files to a PC or PDA (by right -clicking the mouse)
1. Turn on the PC or PDA
Confirm that a Bluetooth connection has been enabled before proceeding.
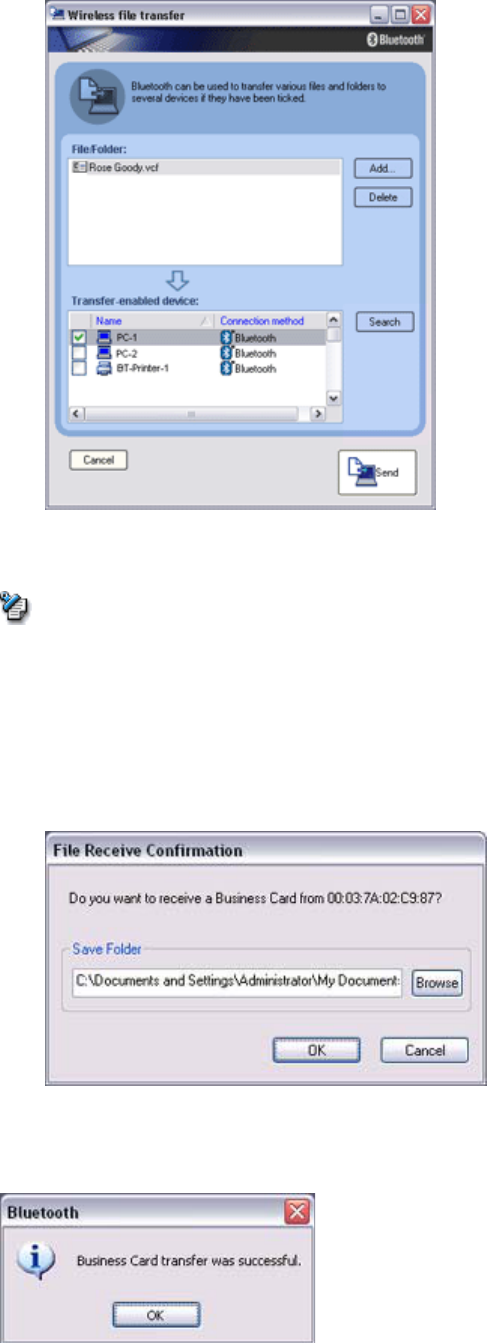
2. Right-click on the file
y
ou wish to send
,
and then select its destination from
[
to
Bluetooth]
Introduction 第 124 頁,共 224 頁
file://C:\Documents and Settings\anitachou\Local Settings\Temp\~hh114B.htm 2004/11/30
{If the desired device does not a
pp
ear in the list
,
p
lease confirm that the de
v
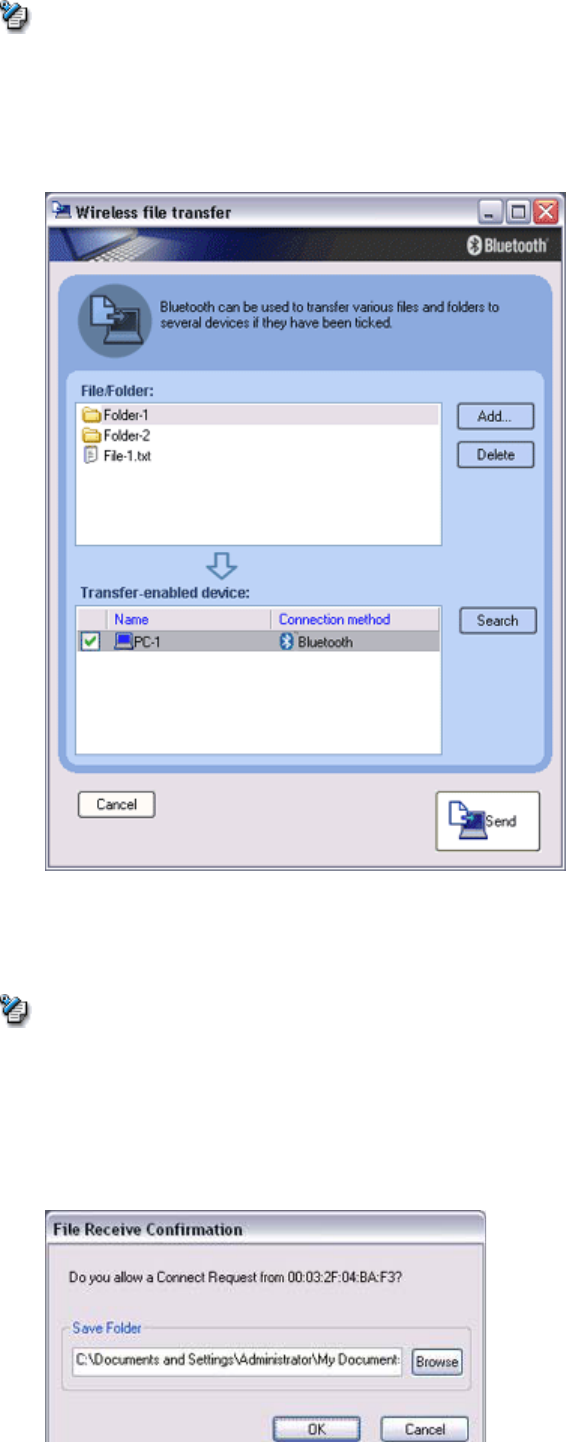
has been turned on, and then select [to Bluetooth] →[Search other devices
]
Once the devices have been detected
,
the messa
g
e below will a
pp
ear. Plea
s
select the destination device, and then click on the [Send] button.
3. Confirm that the file is being sent
The file will be sent to the PC.
{When sendin
g
files usin
g
"File transfer"
,
a messa
g
e re
q
uestin
g
p
ermission
t
receive the files ma
y
a
pp
ear on the destination
(
receivin
g)
device. The con
t
the messa
g
e will var
y
with the Bluetooth software installed on the destinat
i
device, so please be sure to follow the instructions provided.
If
y
ou are usin
g
the Bluetooth Utilit
y,
a messa
g
e similar to the one below
w
appear.
Note
Note
Introduction 第 125 頁,共 224 頁
file://C:\Documents and Settings\anitachou\Local Settings\Temp\~hh114B.htm 2004/11/30
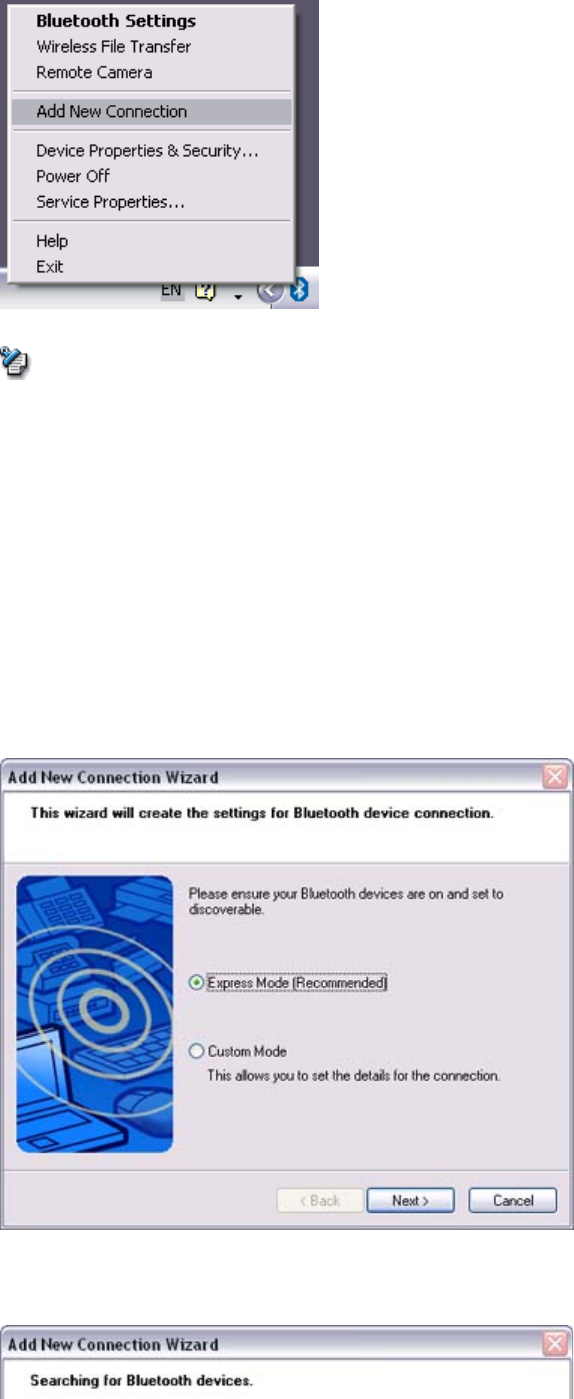
If the file has been sent successfully, the message below will appear.
Please click on the [OK] button.
The message below will appear if the file transmission was unsuccessful.
Please click on the
[
OK
]
button to close the messa
g
e
,
and then re
p
eat the
p
roced
u
{Files that have been sent will be saved in a file transfer shared folder on th
e
destination device.
■Receiving files from a PC or PDA
Your PC is able to receive files that have been saved in the shared folder on the destinat
i
PC or PDA. Received files will be saved in the shared folder under "File transfer".
1. Turn on the PC or PDA
Confirm that a Bluetooth connection has been enabled before proceeding.
2. Double-click on the Bluetooth Information Exchanger icon on the Desktop
{Alternativel
y,
o
p
enin
g
Ex
p
lorer and clickin
g
on the Bluetooth Information
Exchanger folder will produce the same result.
Note
Note
Introduction 第 126 頁,共 224 頁
file://C:\Documents and Settings\anitachou\Local Settings\Temp\~hh114B.htm 2004/11/30
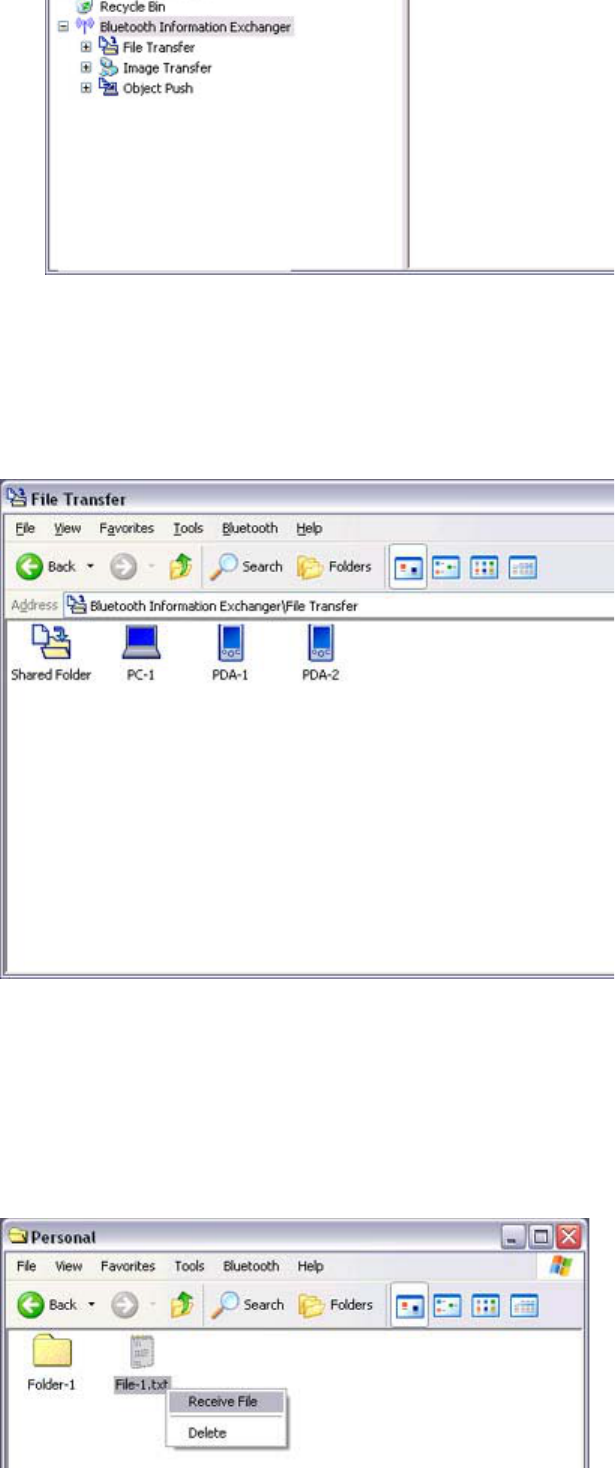
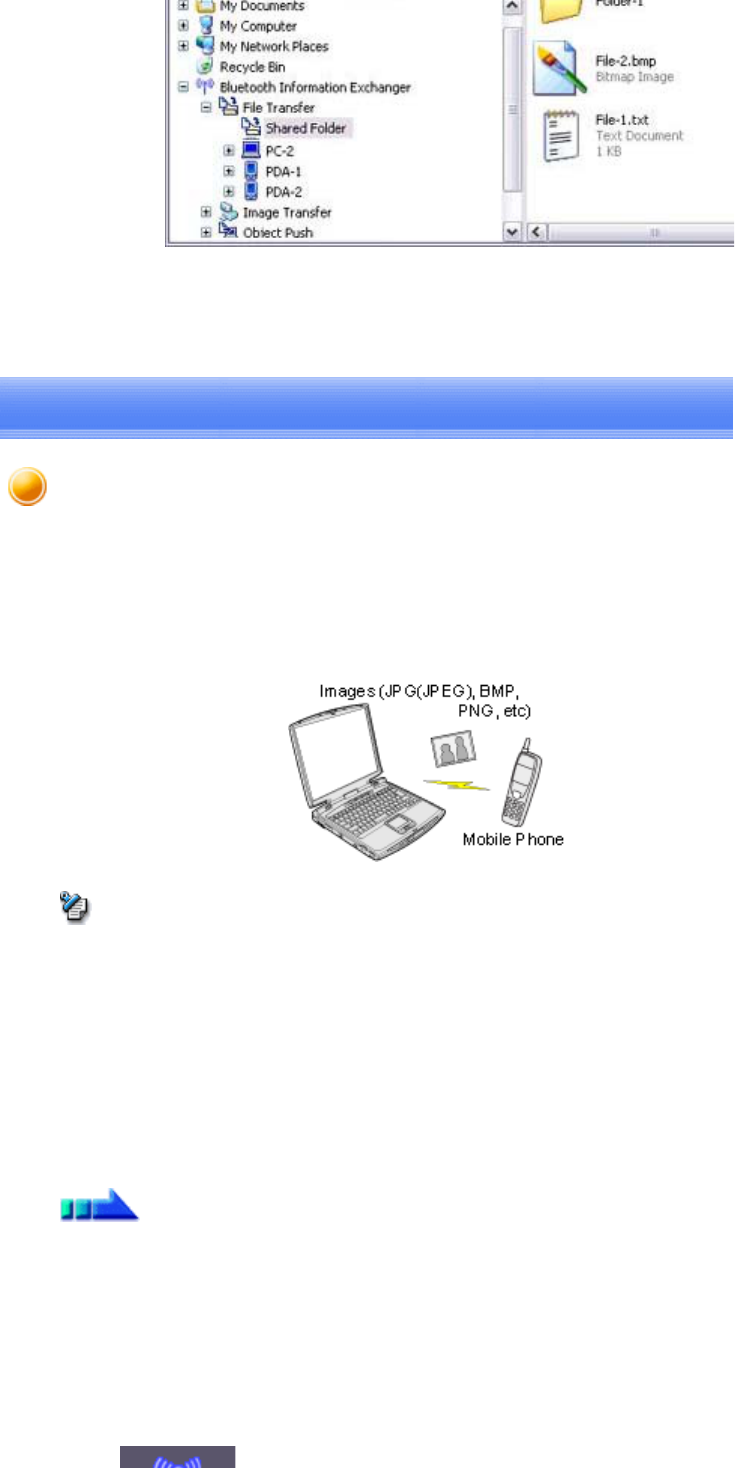
The [Bluetooth Information Exchanger] window will appear.
3. Double-click on the [File transfer] icon
A list of devices will appear in the [File transfer] window.
In this case, the file will be received from the PDA named "My Mobile".
4. Double-click on the [PDA-1] icon
The file saved in the shared folder in "My Mobile" will appear.
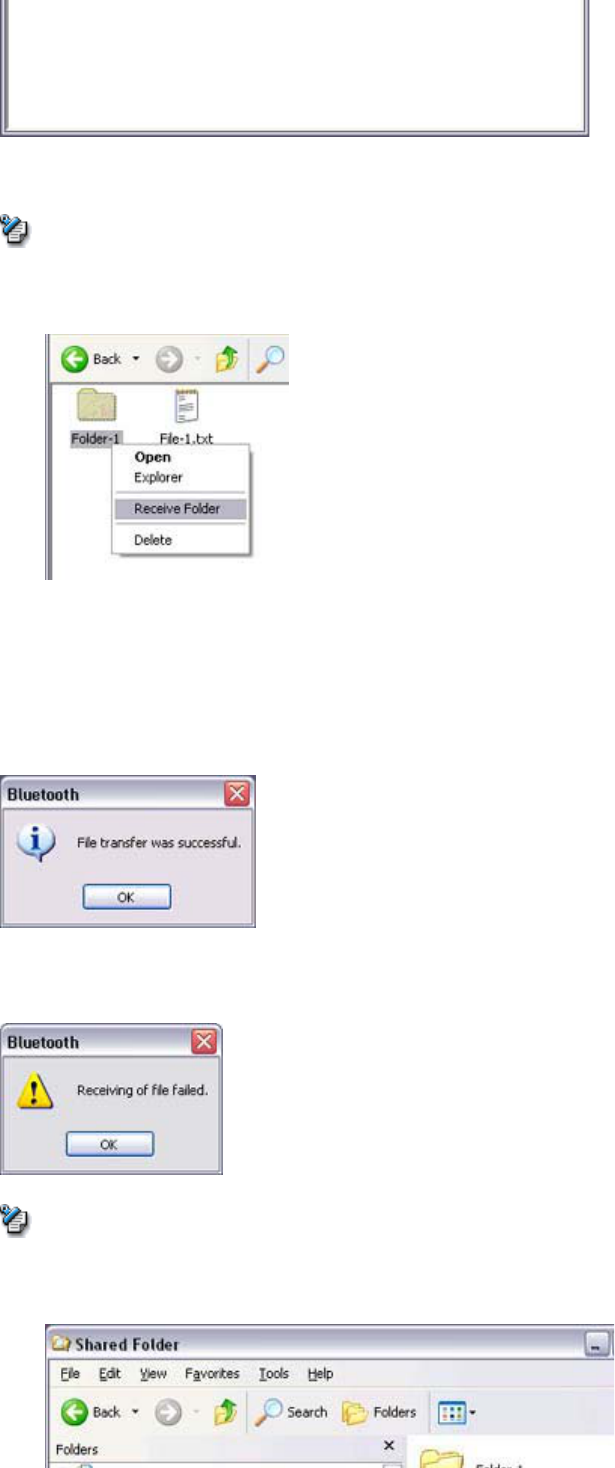
5. Right-click on the file you wish to receive, and then select "Receive file".
Introduction 第 127 頁,共 224 頁
file://C:\Documents and Settings\anitachou\Local Settings\Temp\~hh114B.htm 2004/11/30
The file will be received from a PDA.
{With "File transfer"
,
y
ou can send individual files as well as entire folders.
Please right-click on the folder
y
ou wish to receive
,
and select "Receive fo
Subsequent operations should be performed in the same manner as when
receiving individual files.
If the file has been received successfully, the message below will appear.
Please click on the [OK] button.
The messa
g
e below will a
pp
ear if the file transmission was unsuccessful. Please
on the [OK] button to close the message, and repeat the procedure.
{The received file will be saved in the "Shared folder" under "File transfer"
Bluetooth Information Exchanger
Note
Note
Introduction 第 128 頁,共 224 頁
file://C:\Documents and Settings\anitachou\Local Settings\Temp\~hh114B.htm 2004/11/30
You can use Properties under the Bluetooth Information Exchan
g
er to s
p
e
c
the location of the "Shared folder" on the hard drive.
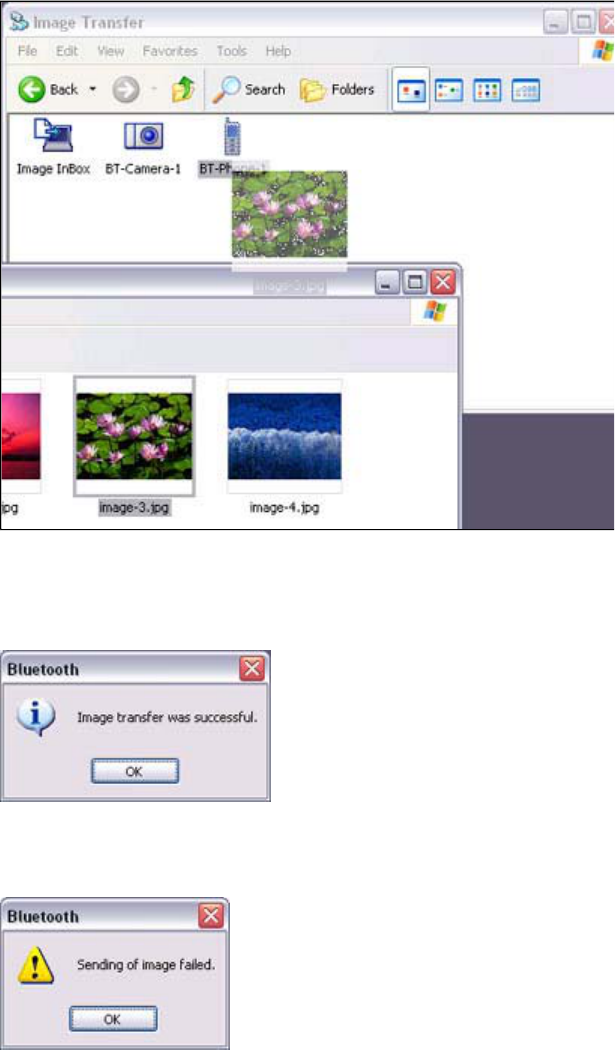
You can send image data to a Bluetooth -compatible mobile telephone.
Large images will be automatically reduced to fit on the telephone display screen.
Images are sent using "Image transfer" under Bluetooth Information Exchanger.
zThe mobile telephone must support the BIP profile.
zThe followin
g
ima
g
e file formats can be sent and received usin
g
"Ima
g
e transfer":
{Bitmap (*.bmp)
{JPEG (*.jpg, *.jpeg)
{PNG (*.png)
→Sending images to a mobile telephone (using icons)
→Sending images to a mobile telephone (by right -clicking the mouse)
■Sending images to a mobile telephone (using icons)
1. Turn on the PC or PDA
Confirm that a Bluetooth connection has been enabled before proceeding.
2. Double-click on the Bluetooth Information Exchanger icon on the Desktop
Note
Procedure
Sending images to a mobile telephone [BIP]

Introduction 第 129 頁,共 224 頁
file://C:\Documents and Settings\anitachou\Local Settings\Temp\~hh114B.htm 2004/11/30
{Alternativel
y,
o
p
enin
g
Ex
p
lorer and clickin
g
on the Bluetooth Information
Exchanger folder will produce the same result.
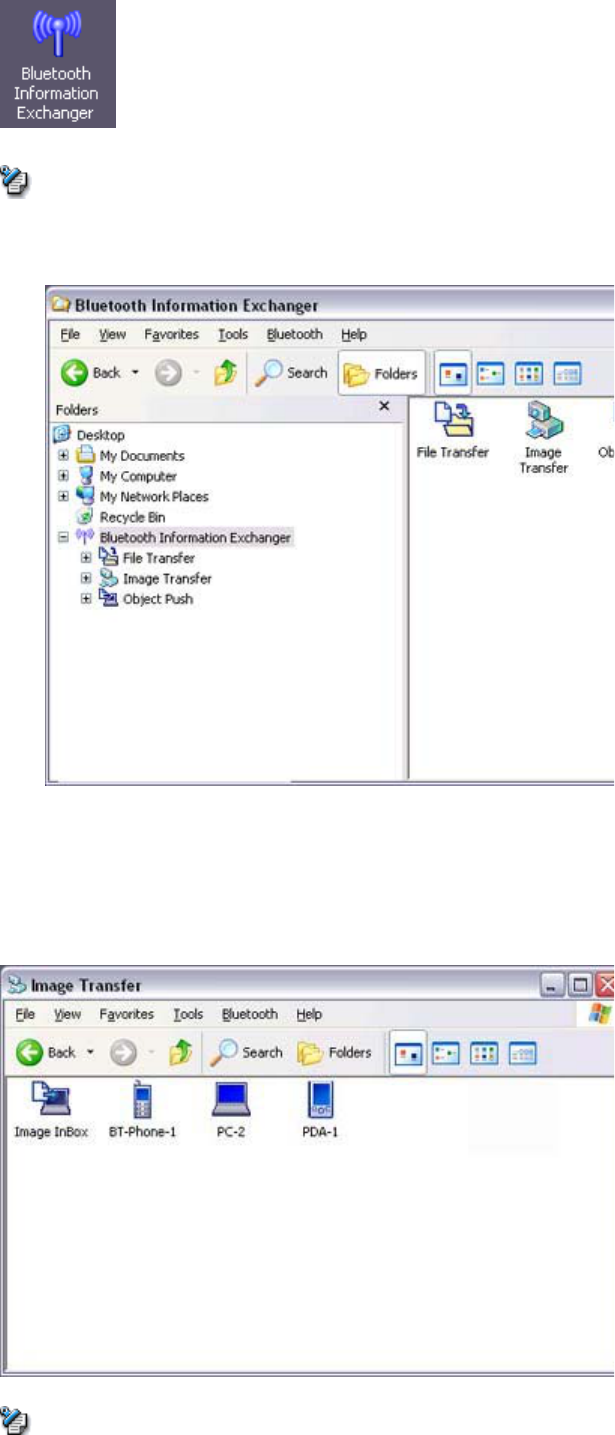
The [Bluetooth Information Exchanger] window will appear.
3. Double-click on the [Image transfer] icon
A list of devices will appear in the [Image transfer] window.
{If the desired device does not a
pp
ear in the list
,
p
lease confirm that the de
v
has been turned on and then select [Bluetooth]
→
[
Search Devices]
Note
Note
Introduction 第 130 頁,共 224 頁
file://C:\Documents and Settings\anitachou\Local Settings\Temp\~hh114B.htm 2004/11/30
has
been
turned
on,
and
then
select
[Bluetooth]
→
[
Search
Devices]
.
A device search will be performed.
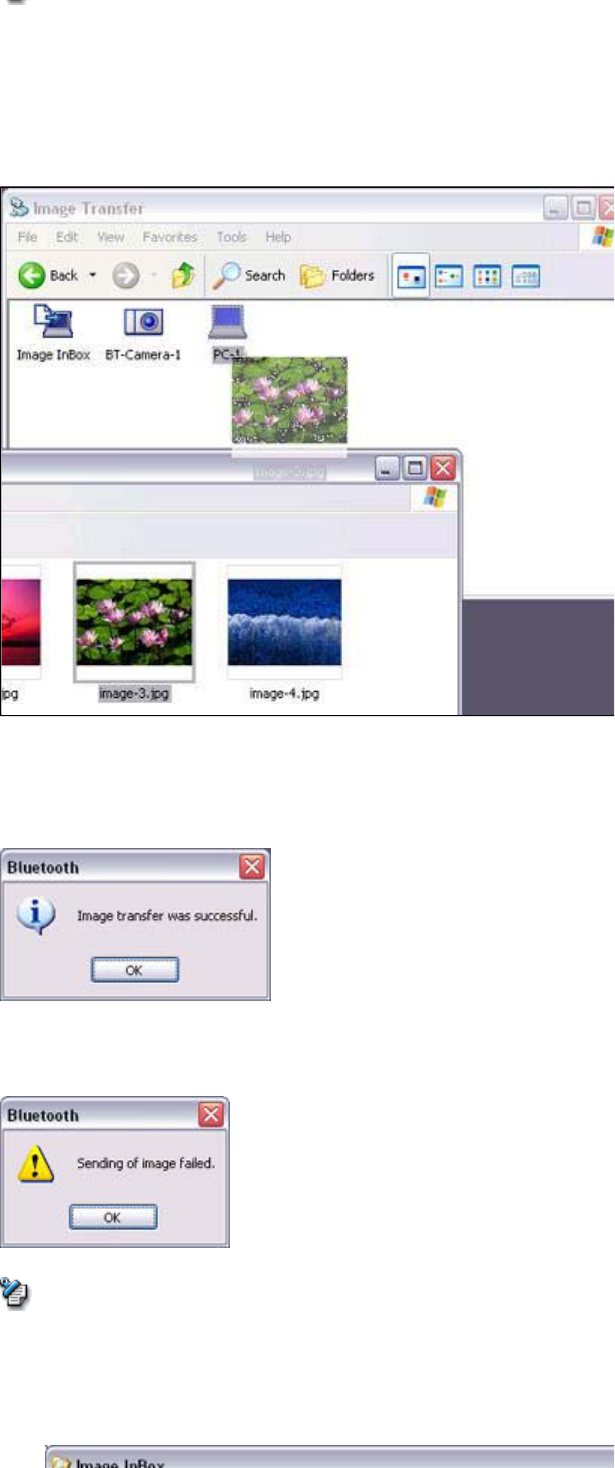
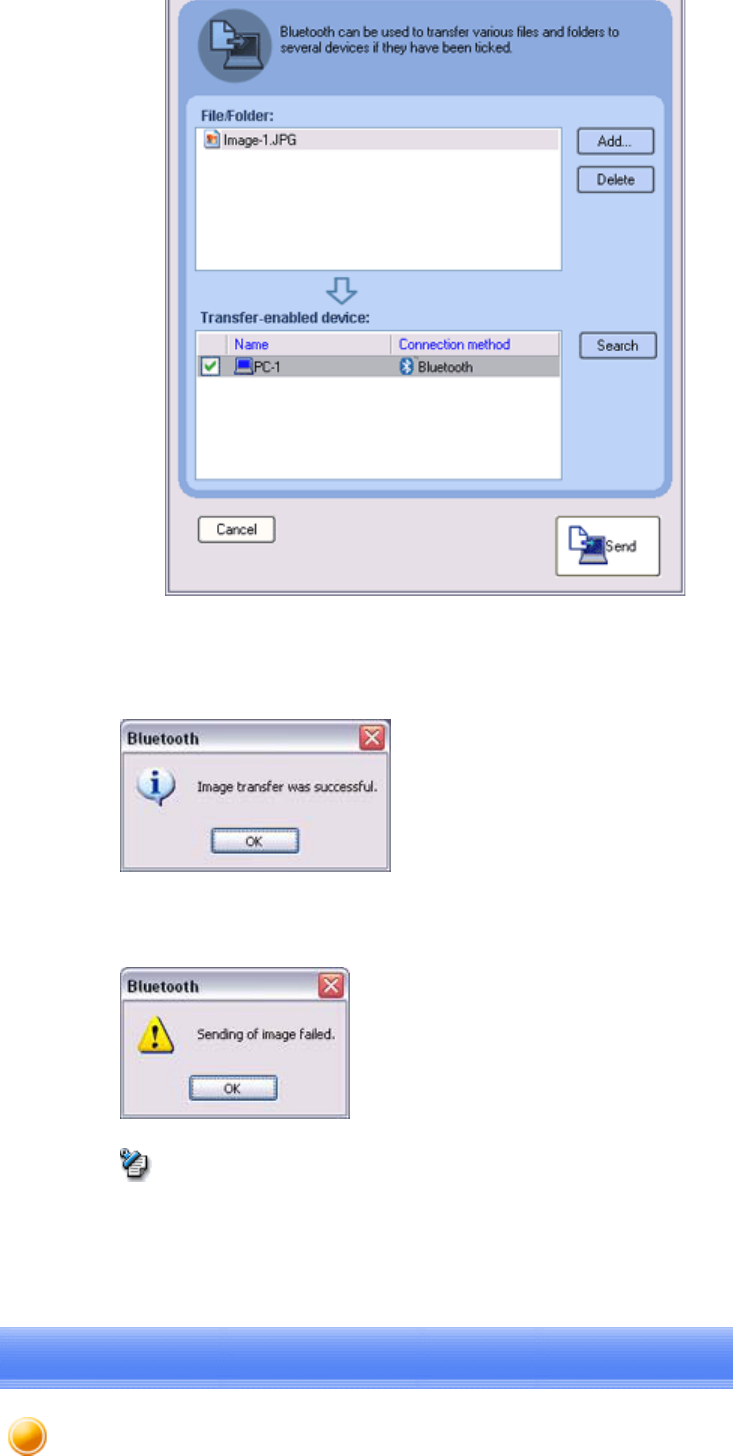
4. Drag and drop the file you wish to send over the destination icon
In this case, the image will be sent to a mobile telephone named "BT -Phone-1".
The image will be sent.
If the image has been sent successfully, the message below will appear.
Please click on the [OK] button.
The message below will appear if the image transmission was unsuccessful.
Please click on the [OK] button to close the message, and repeat the procedure.
■Sending images to a mobile telephone (by right -clicking the mouse)
1. Turn on the mobile telephone
Confirm that a Bluetooth connection has been enabled before proceeding.
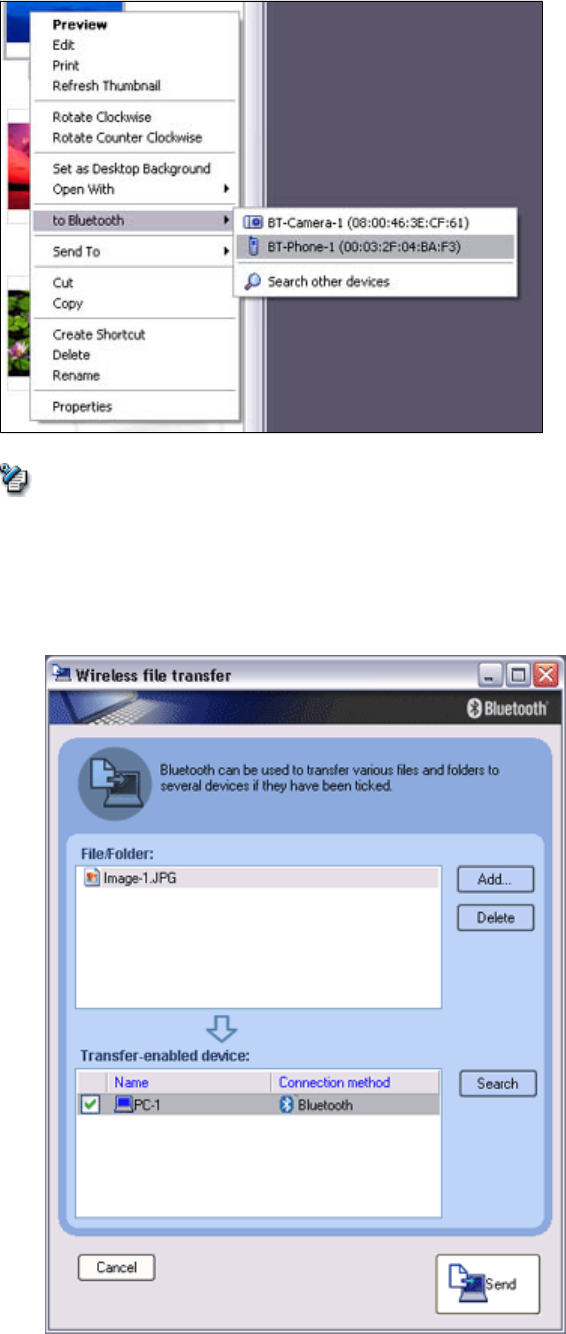
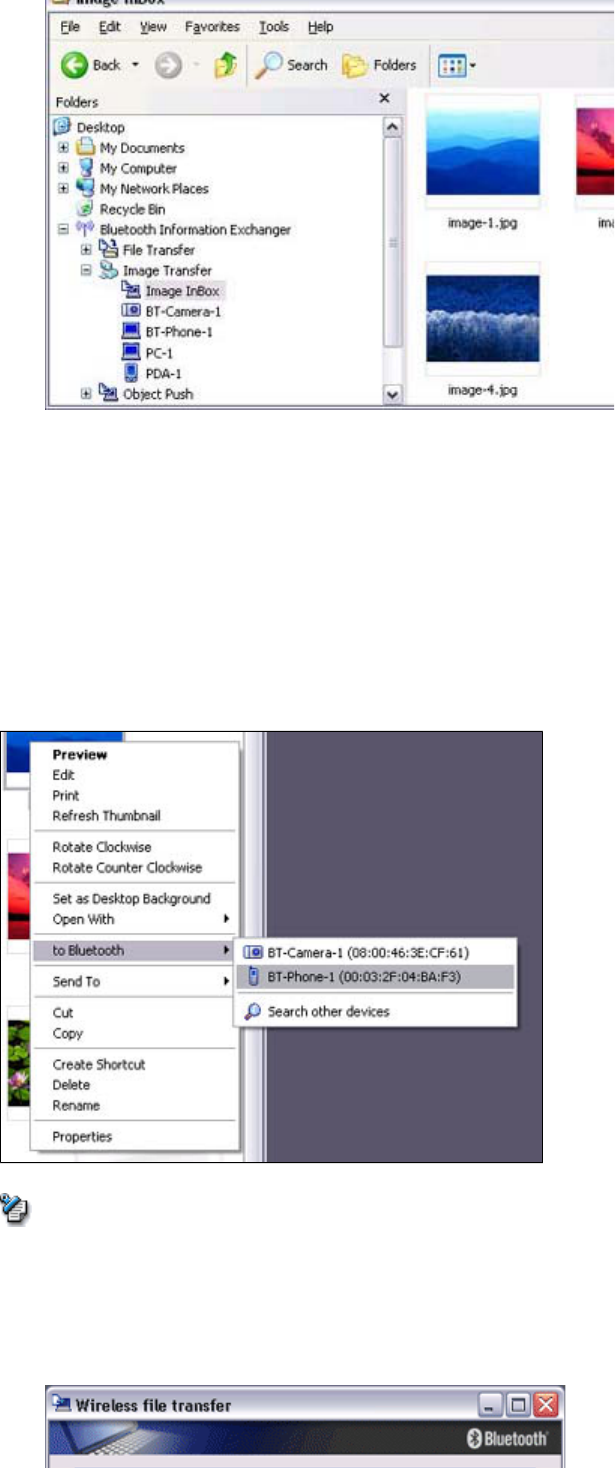
2. Right-click on the file
y
ou wish to send
,
and then click on its destination from
[
t
o
Bluetooth]
Introduction 第 131 頁,共 224 頁
file://C:\Documents and Settings\anitachou\Local Settings\Temp\~hh114B.htm 2004/11/30
{If the desired device does not a
pp
ear in the list
,
p
lease confirm that the de
v
has been turned on, and then select [to Bluetooth] →[Search other devices
]
Once the devices have been detected
,
the messa
g
e below will a
pp
ear. Plea
s
select the destination device, and then click on the [Send] button.
The image will be sent.
If the image has been sent successfully, the message below will appear.
Please click on the [OK] button.
Note
Introduction 第 132 頁,共 224 頁
file://C:\Documents and Settings\anitachou\Local Settings\Temp\~hh114B.htm 2004/11/30
The message below will appear if the image transmission was unsuccessful.
Please click on the [OK] button to close the message, and repeat the procedure.
You can send image data to a Bluetooth -enabled PC or PDA.
Images are sent using "Image transfer" under Bluetooth Information Exchanger.
zThe followin
g
ima
g
e file formats can be sent and received usin
g
"Ima
g
e transfer":
{Bitmap (*.bmp)
{JPEG (*.jpg, *.jpeg)
{PNG (*.png)
→Sending images to a PC or PDA (using icons)
→Sending images to a PC or PDA (by right-clicking the mouse)
■Sending images to a PC or PDA (using icons)
1. Turn on the PC or PDA
Confirm that a Bluetooth connection has been enabled before proceeding.
2
Double
-
click on the Bluetooth Information Exchanger icon on the Desktop
Note
Procedure
Sending images to a PC or PDA [BIP]
Introduction 第 133 頁,共 224 頁
file://C:\Documents and Settings\anitachou\Local Settings\Temp\~hh114B.htm 2004/11/30
2
.
Double
click
on
the
Bluetooth
Information
Exchanger
icon
on
the
Desktop
{Alternativel
y,
o
p
enin
g
Ex
p
lorer and clickin
g
on the Bluetooth Information
Exchanger folder will produce the same result.
The [Bluetooth Information Exchanger] window will appear.
3. Double-click on the [Image transfer] icon
A list of devices will appear in the [Image transfer] window.
Note
Note
Introduction 第 134 頁,共 224 頁
file://C:\Documents and Settings\anitachou\Local Settings\Temp\~hh114B.htm 2004/11/30
{If the desired device does not a
pp
ear in the list
,
p
lease confirm that the de
v
has been turned on, and then select [Bluetooth] →[Search Devices].
A device search will be performed.
4. Drag and drop the file you wish to send over the destination icon
In this case, the image will be sent to a PC named "PC -1".
The image will be sent.
If the image has been sent successfully, the message below will appear.
Please click on the [OK] button.
The message below will appear if the image transmission was unsuccessful.
Please click on the [OK] button to close the message, and repeat the procedure.
{Ima
g
es that have been sent will be saved in an ima
g
e transfer folder on th
e
destination device.
{Ima
g
es received usin
g
"Ima
g
e transfer" in the Bluetooth Information Exch
a
will be saved in the "Image Box" in "Image transfer".
Note
Introduction 第 135 頁,共 224 頁
file://C:\Documents and Settings\anitachou\Local Settings\Temp\~hh114B.htm 2004/11/30
{You can use Properties under the Bluetooth Information Exchan
g
er to cha
n
the location of the "Image Box" folder on the hard drive.
■Sending images to a PC or PDA (by right -clicking the mouse)
1. Turn on the PC or PDA
Confirm that a Bluetooth connection has been enabled before proceeding
2. Right-click on the file
y
ou wish to send
,
and then click on its destination from
[
t
o
Bluetooth]
{If the desired device does not a
pp
ear in the list
,
p
lease confirm that the de
v
has been turned on, and then select [to Bluetooth] →[Search other devices
]
Once the devices have been detected
,
the messa
g
e below will a
pp
ear. Plea
s
select the destination device, and then click on the [Send] button.
Note
Introduction 第 136 頁,共 224 頁
file://C:\Documents and Settings\anitachou\Local Settings\Temp\~hh114B.htm 2004/11/30
The image will be sent.
If the image has been sent successfully, the message below will appear.
Please click on the [OK] button.
The message below will appear if the image transmission was unsuccessful.
Please click on the [OK] button to close the message, and repeat the procedure.
{When you send images by right-clickin
g
the mouse
,
the ima
g
e data that h
a
sent will be saved in the ima
g
e transfer shared folder on the destination de
v
This is also the case when you send images using icons.
Note
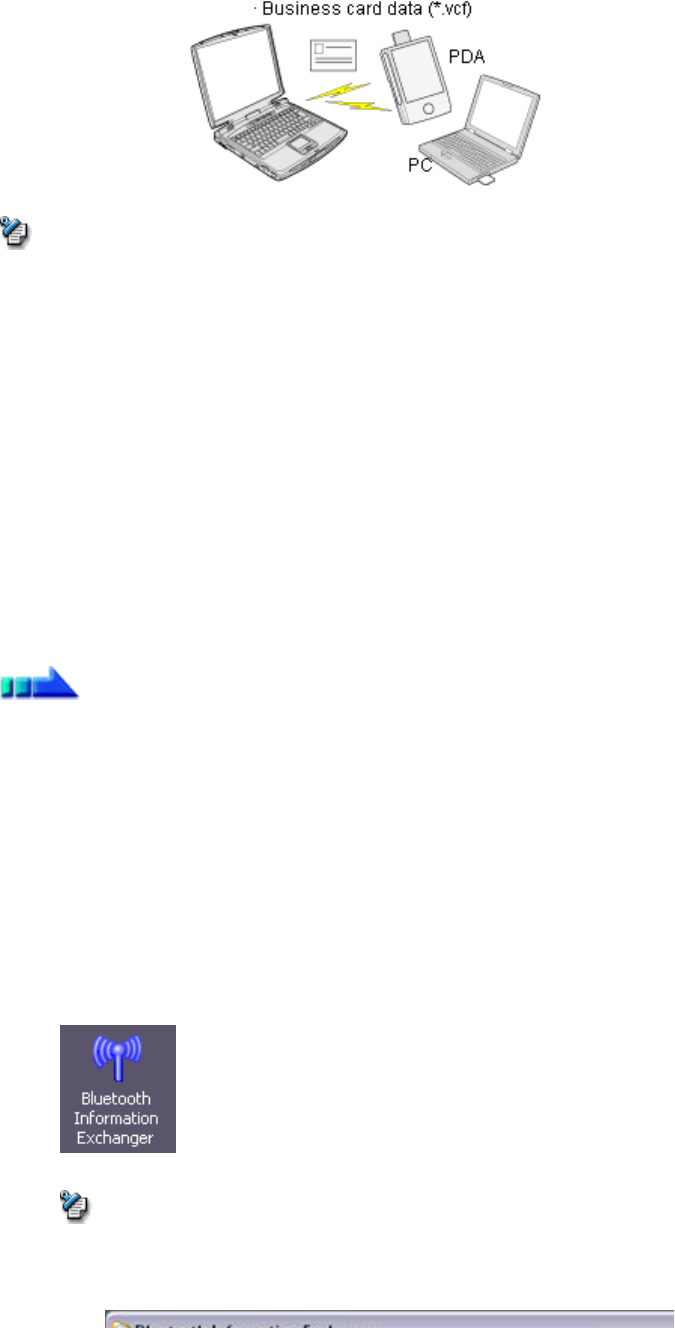
Exchanging business card data with a PC or PDA [OPP]
Introduction 第 137 頁,共 224 頁
file://C:\Documents and Settings\anitachou\Local Settings\Temp\~hh114B.htm 2004/11/30
You can exchange business card data with a Bluetooth -enabled PC or PDA.
Business card data are exchanged using "Object Push" under Bluetooth Information
Exchanger.
zData com
p
liant with the "vCARD" standard are the onl
y
t
yp
e of business card dat
a
to be sent and received with "Object Push".
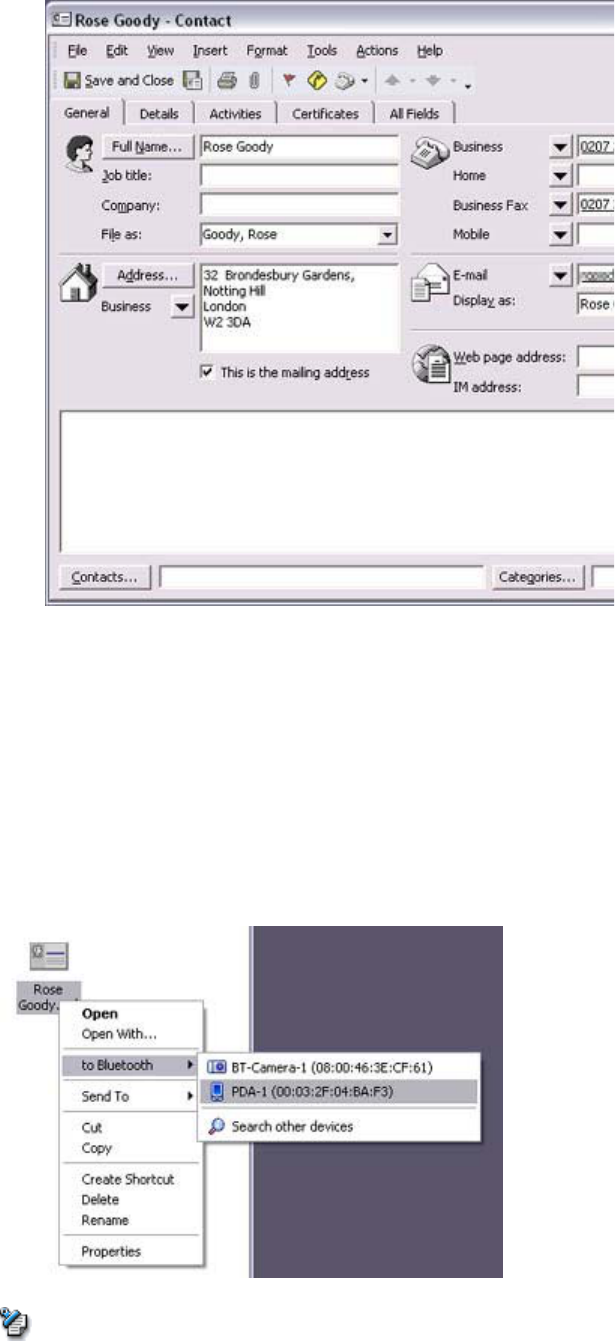
Business card data can be used by applications such as Microsoft Outlook.
zBusiness card data can be created in vCARD format b
y
Microsoft Outlook and oth
similar applications.
→"Creating business card data in the vCARD format "
zYou can send business card data directly from Microsoft Outlook.
→"Sending business card data from Outlook "
zThe OPP profile must be supported by the PC or PDA of the other party.
→Selecting a business card and sending it to a PC or PDA (using icons)
→Selecting a business card and sending it to a PC or PDA (by right -clickin
g
the mous
e
→Sending your personal business card
→Receiving a business card from another party
→Exchanging business cards
■Selecting a business card and sending it to a PC or PDA (using icons)
Select a business card
y
ou wish to send from amon
g
all the business card data
y
ou have
alread
y
received throu
g
h exchan
g
es with
y
our business or other contacts
,
and then send
i
another party.
1. Turn on the PC or PDA
Confirm that a Bluetooth connection has been enabled before proceeding.
2. Double-click on the Bluetooth Information Exchanger icon on the Desktop
{Alternativel
y,
o
p
enin
g
Ex
p
lorer and clickin
g
on the Bluetooth Information
Exchanger folder will produce the same result.
Note
Procedure
Note
Introduction 第 138 頁,共 224 頁
file://C:\Documents and Settings\anitachou\Local Settings\Temp\~hh114B.htm 2004/11/30
The [Bluetooth Information Exchanger] window will appear.
3. Double-click on the [Object Push] icon
A list of devices will appear in the [Object Push] window.
{If the desired device does not a
pp
ear in the list
,
p
lease confirm that the de
v
has been turned on, and then select [Bluetooth] →[Search Devices].
A device search will be performed.
4. Use the mouse to drag and drop the business card you wish to send over the
destination icon
In this case, the business card will be sent to a PC named "PC -1".
Note
Introduction 第 139 頁,共 224 頁
file://C:\Documents and Settings\anitachou\Local Settings\Temp\~hh114B.htm 2004/11/30
The business card will be sent.
{When
y
ou tr
y
to send a business card
,
a messa
g
e re
q
uestin
g
p
ermission to
receive the card ma
y
a
pp
ear on the device belon
g
in
g
to the other
p
art
y
(
i.e
.
the receivin
g
end
)
. The content of the messa
g
e will var
y
with the Bluetoot
h
software installed on the destination device
,
so
p
lease be sure to follow the
instructions
p
rovided. If
y
ou are usin
g
the Bluetooth Utilit
y,
a messa
g
e si
m
the one below will appear.
If the business card has been sent successfully, the message below will appear.
Please click on the [OK] button.
The messa
g
e below will a
pp
ear if the business card transmission was unsuccessf
u
Please click on the [OK] button to close the message, and repeat the procedure.
{Data that have been sent will be saved in a folder for exchan
g
ed business
c
on the destination device.
Note
Memo
Introduction 第 140 頁,共 224 頁
file://C:\Documents and Settings\anitachou\Local Settings\Temp\~hh114B.htm 2004/11/30
{You can confi
g
ure an associated a
pp
lication
(
Microsoft Outlook etc
)
to sta
r
automaticall
y
when
y
ou have received a business card
,
allowin
g
y
ou to vie
card details.
You can use Properties under Bluetooth Information Exchan
g
er to confi
g
u
r
whether or not you would like such an application to start automatically.
■Selecting a business card and sending it to a PC or PDA (by right -clickin
g
the mous
e
1. Turn on the PC or PDA
Confirm that a Bluetooth connection has been enabled before proceeding.
2. Right-click on the business card
y
ou wish to send
,
and then click on its destinati
o
from [to Bluetooth]
{If the desired device does not a
pp
ear in the list
,
p
lease confirm that the de
v
Note
Introduction 第 141 頁,共 224 頁
file://C:\Documents and Settings\anitachou\Local Settings\Temp\~hh114B.htm 2004/11/30
pp , p
has been turned on, and then select [to Bluetooth] →[Search other devices
]
Once the devices have been detected
,
the messa
g
e below will a
pp
ear. Plea
s
select the destination device, and then click on the [Send] button.
The business card will be sent.
{When
y
ou tr
y
to send a business card
,
a messa
g
e re
q
uestin
g
p
ermission to
receive the files ma
y
a
pp
ear on the device belon
g
in
g
to the other
p
art
y
(
i.e
.
the receivin
g
end
)
. The content of the messa
g
e will var
y
with the Bluetoot
h
software installed on the destination device
,
so
p
lease be sure to follow the
instructions provided.
If
y
ou are usin
g
the Bluetooth Utilit
y,
a messa
g
e similar to the one below
w
appear.
If the business card has been sent successfully, the message below will appear.
Please click on the [OK] button.
Note
Introduction 第 142 頁,共 224 頁
file://C:\Documents and Settings\anitachou\Local Settings\Temp\~hh114B.htm 2004/11/30
The messa
g
e below will a
pp
ear if the business card transmission was unsuccessf
u
Please click on the [OK] button to close the message, and repeat the procedure.
{Data that have been sent will be saved in a folder for exchan
g
ed business
c
on the destination device.
■Sending your personal business card
You can
p
re
p
are a business card bearin
g
y
our name and other details such as
y
our com
pa
and telephone numbers, and then send it to another party.
zPlease use Properties under Bluetooth Information Exchan
g
er beforehand to confi
g
which data to use for your own business card.
zYou can onl
y
have one business card re
g
istered as
y
our own that is able to be sent
.
1. Turn on the PC or PDA
Confirm that a Bluetooth connection has been enabled before proceeding
2. Double-click on the Bluetooth Information Exchanger icon on the Desktop
{Alternativel
y,
o
p
enin
g
Ex
p
lorer and clickin
g
on the Bluetooth Information
Exchanger folder will produce the same result.
Note
Note
Note

Introduction 第 143 頁,共 224 頁
file://C:\Documents and Settings\anitachou\Local Settings\Temp\~hh114B.htm 2004/11/30
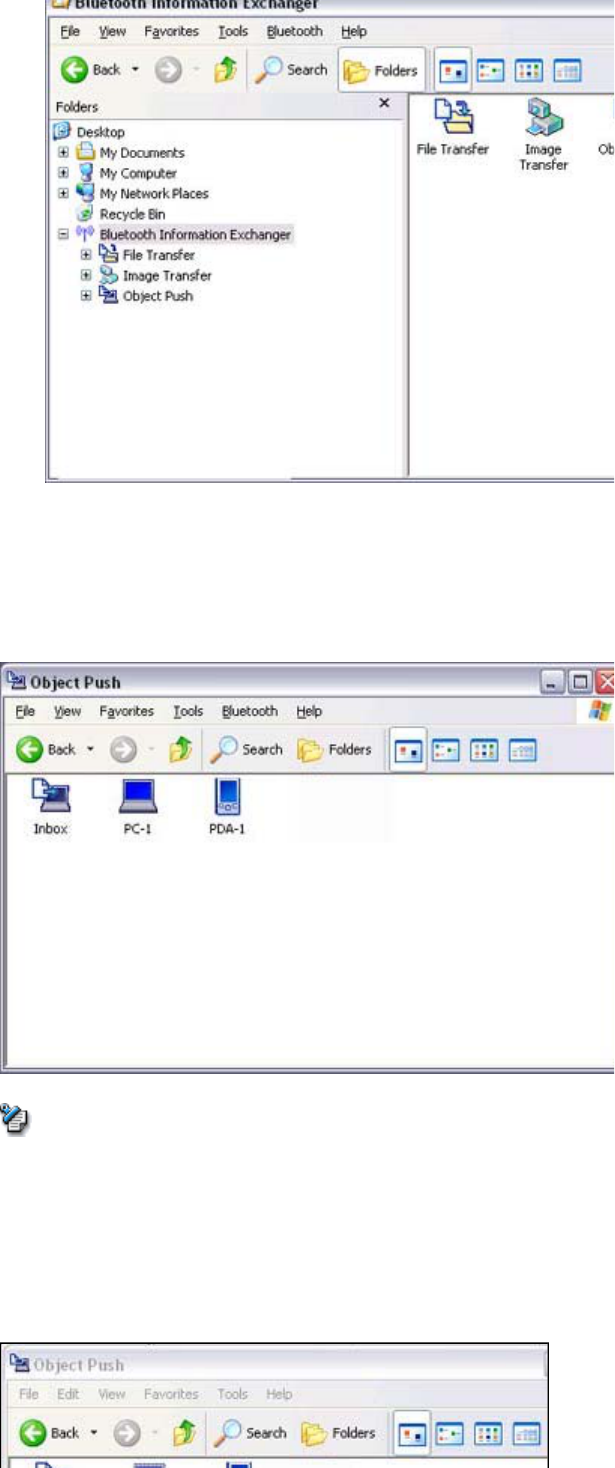
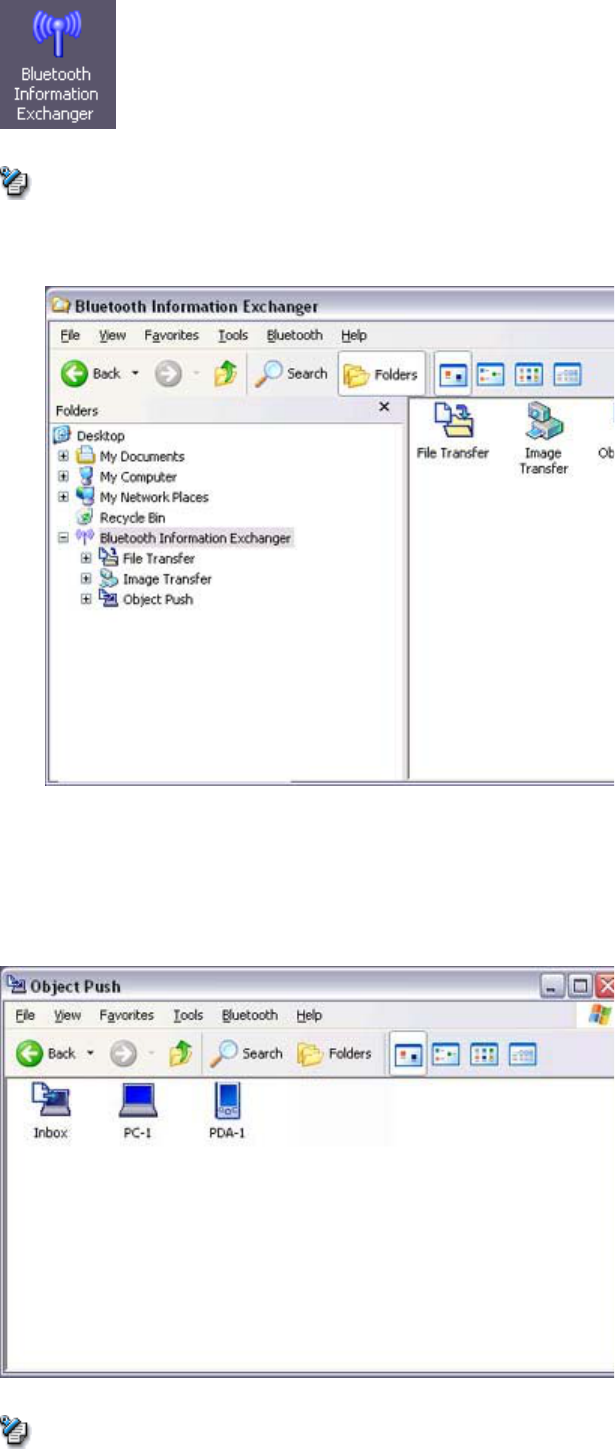
The [Bluetooth Information Exchanger] window will appear.
3. Double-click on the [Object Push] icon
A list of devices will appear in the [Object Push] window.
{If the desired device does not a
pp
ear in the list
,
p
lease confirm that the de
v
has been turned on, and then select [Bluetooth] →[Search Devices].
A device search will be performed.
4. Right-click on the destination icon, and then click on [Send business card To]
In this case, your personal business card will be sent to a PC named "PC -1".
The business card will be sent.
Note

Introduction 第 144 頁,共 224 頁
file://C:\Documents and Settings\anitachou\Local Settings\Temp\~hh114B.htm 2004/11/30
{When
y
ou tr
y
to send a business card
,
a messa
g
e re
q
uestin
g
p
ermission to
receive the files ma
y
a
pp
ear on the device belon
g
in
g
to the other
p
art
y
(
i.e
.
the receivin
g
end
)
. The content of the messa
g
e will var
y
with the Bluetoot
h
software installed on the destination device
,
so
p
lease be sure to follow the
instructions
p
rovided. If
y
ou are usin
g
the Bluetooth Utilit
y,
a messa
g
e si
m
the one below will appear.
{Business cards that have been sent will be saved in the Inbox of the destin
a
party.
If
y
our business card has been sent successfull
y,
the messa
g
e below will a
pp
ear.
Please click on the [OK] button.
The messa
g
e below will a
pp
ear if the business card transmission was unsuccessf
u
Please click on the [OK] button to close the message, and repeat the procedure.
{Data that has been sent will be saved in a folder for exchan
g
ed business ca
r
the destination device.
■Acquiring a business card from another party
You can use your PC to acquire a business card from a party containing their details.
1. Turn on the PC or PDA
Confirm that a Bluetooth connection has been enabled before proceeding
2. Double-click on the Bluetooth Information Exchanger icon on the Desktop
Note
Note
Introduction 第 145 頁,共 224 頁
file://C:\Documents and Settings\anitachou\Local Settings\Temp\~hh114B.htm 2004/11/30
{Alternativel
y,
o
p
enin
g
Ex
p
lorer and clickin
g
on the Bluetooth Information
Exchanger folder will produce the same result.
The [Bluetooth Information Exchanger] window will appear.
3. Double-click on the [Object Push] icon
A list of devices will appear in the [Object Push] window.
fhd i dd i d i hli l fi h hd
Note
Note
Introduction 第 146 頁,共 224 頁
file://C:\Documents and Settings\anitachou\Local Settings\Temp\~hh114B.htm 2004/11/30
{I
f
t
h
e
d
es
i
re
d
d
ev
i
ce
d
oes not a
pp
ear
i
n t
h
e
li
st
,
pl
ease con
fi
rm t
h
at t
h
e
d
e
v
has been turned on, and then select [Bluetooth] →[Search Devices].
A device search will be performed.
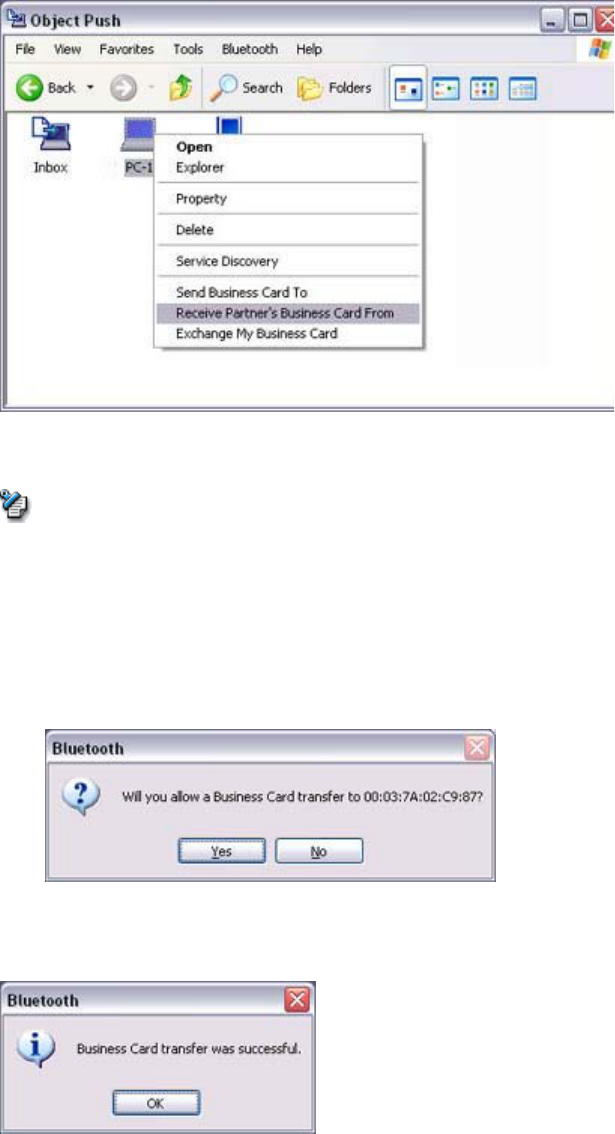
4. Right-click on the icon of the
p
art
y
whose card
y
ou wish to ac
q
uire
,
and then cli
c
[Receive business card]
In this case
,
the business card of the other
p
art
y
will be ac
q
uired from a PC nam
e
"PC-1".
The business card will be received.
{When
y
ou tr
y
to ac
q
uire a business card
,
a messa
g
e re
q
uestin
g
p
ermission
send the files ma
y
a
pp
ear on the device belon
g
in
g
to the other
p
art
y
(
i.e.
,
o
sendin
g
end
)
. The content of the messa
g
e will var
y
with the Bluetooth soft
w
installed on the destination device
,
so
p
lease be sure to follow the instructi
o
provided.
If
y
ou are usin
g
the Bluetooth Utilit
y,
a messa
g
e similar to the one below
w
appear.
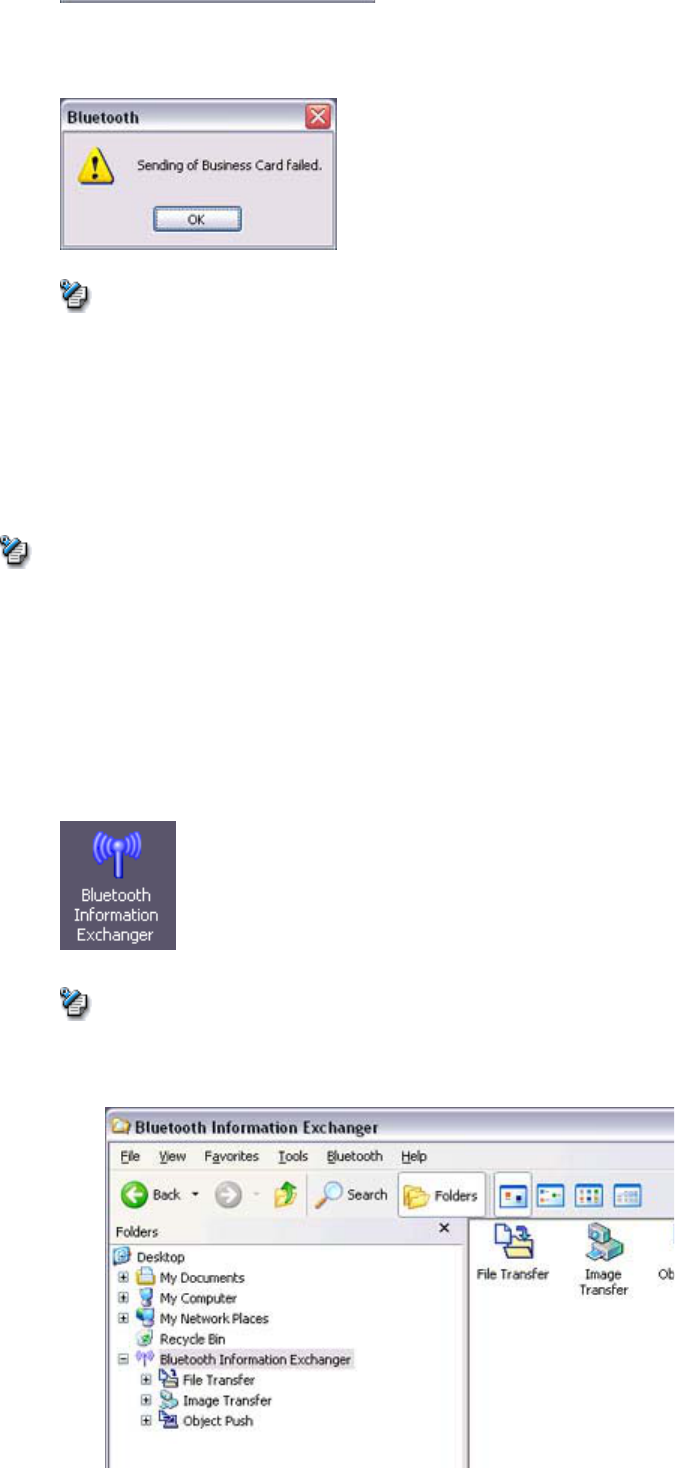
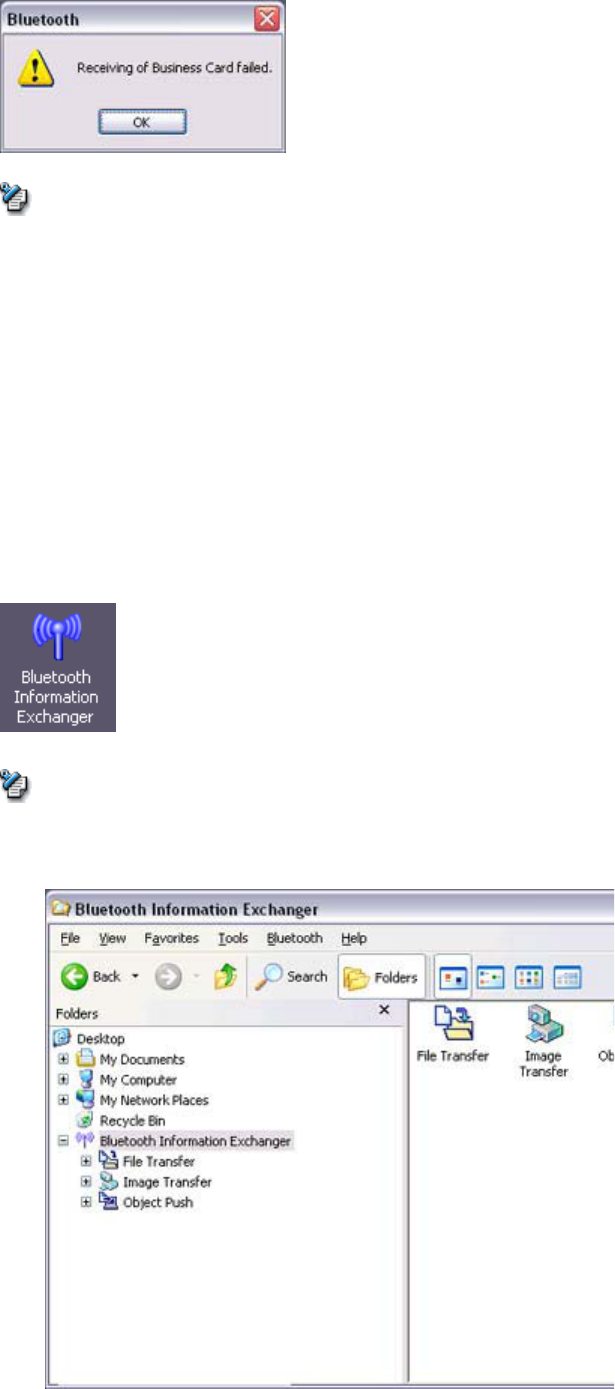
If the business card has been received successfull
y,
the messa
g
e below will a
pp
e
a
Please click on the [OK] button.
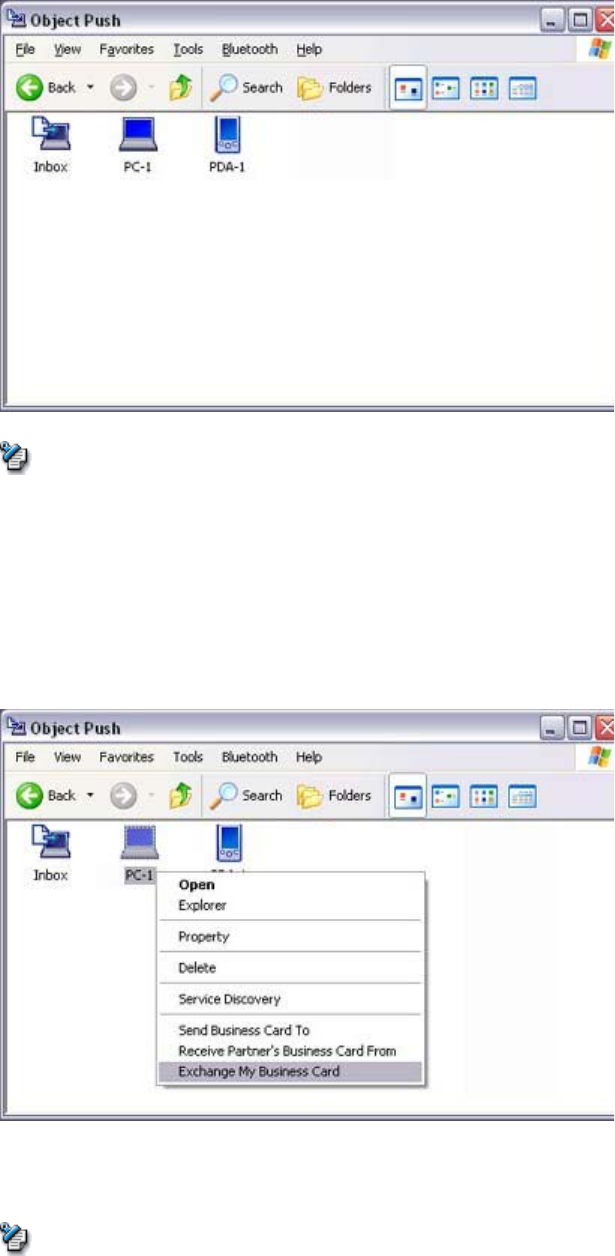
The messa
g
e below will a
pp
ear if the business card was unsuccessfull
y
received.
Please click on the [OK] button to close the message, and repeat the procedure.
Note
Introduction 第 147 頁,共 224 頁
file://C:\Documents and Settings\anitachou\Local Settings\Temp\~hh114B.htm 2004/11/30
{Business card data that have been received will be saved in the Inbox und
e
"Object Push".
You can use Properties under the Bluetooth Information Exchan
g
er to set
t
location of the Inbox on the hard drive.
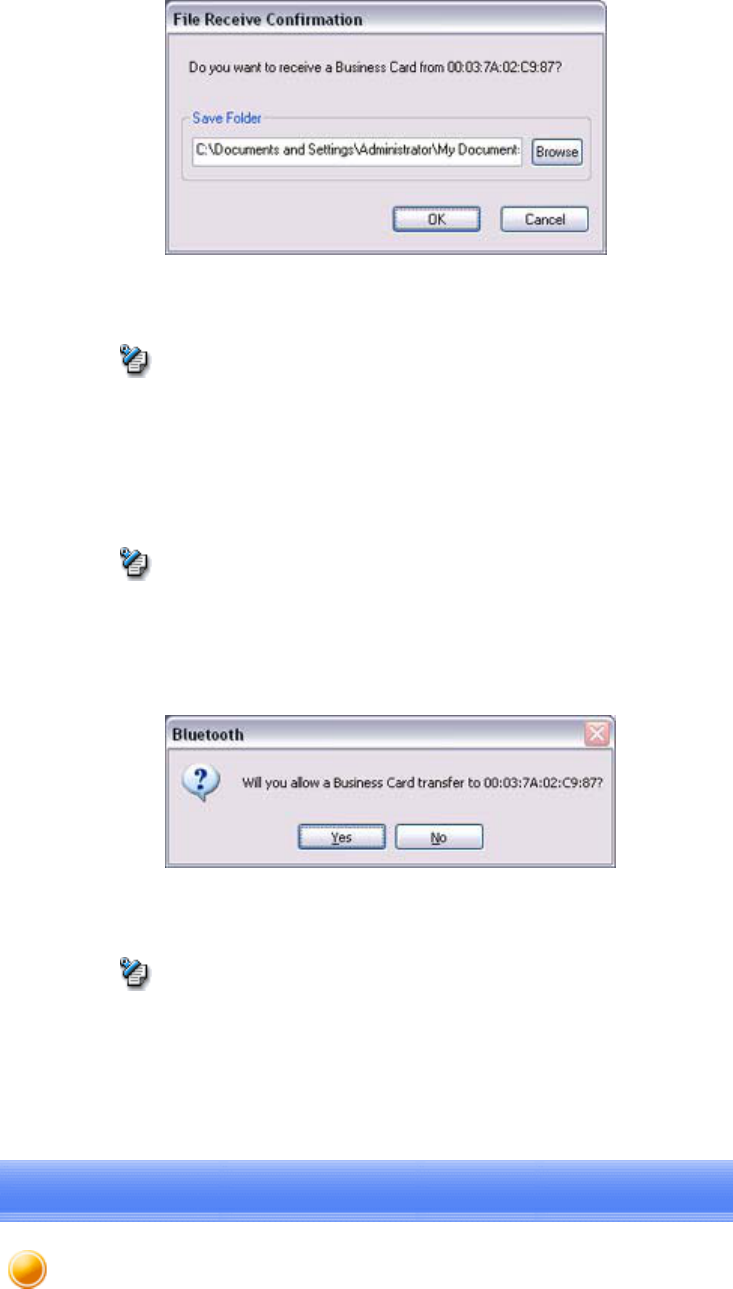
■Exchanging business cards
Simultaneously exchange your business card with one belonging to another party.
1. Turn on the PC or PDA
Confirm that a Bluetooth connection has been enabled before proceeding.
2. Double-click on the Bluetooth Information Exchanger icon on the Desktop
{Alternativel
y,
o
p
enin
g
Ex
p
lorer and clickin
g
on the Bluetooth Information
Exchanger folder will produce the same result.
The [Bluetooth Information Exchanger] window will appear.
Note
Note
Introduction 第 148 頁,共 224 頁
file://C:\Documents and Settings\anitachou\Local Settings\Temp\~hh114B.htm 2004/11/30
3. Double-click on the [Object Push] icon
A list of devices will appear in the [Object Push] window.
{If the desired device does not a
pp
ear in the list
,
p
lease confirm that the de
v
has been turned on, and then select [Bluetooth] →[Search Devices].
A device search will be performed.
4. Right-click on the icon of the
p
art
y
with whom
y
ou wish to exchan
g
e business c
a
and then click on [Object Push]
In this case, the business cards will be exchanged with a PC named "PC -1".
The business card from the party who executed the "Exchange business cards"
command will be sent first.
{When
y
ou tr
y
to send a business card
,
a messa
g
e re
q
uestin
g
p
ermission to
receive the files ma
y
a
pp
ear on the device belon
g
in
g
to the other
p
art
y
(
i.e
.
the receivin
g
end
)
. The content of the messa
g
e will var
y
with the Bluetoot
h
software installed on the destination device
,
so
p
lease be sure to follow the
Note
Note
Introduction 第 149 頁,共 224 頁
file://C:\Documents and Settings\anitachou\Local Settings\Temp\~hh114B.htm 2004/11/30
instructions provided.
If
y
ou are usin
g
the Bluetooth Utilit
y,
a messa
g
e similar to the one below
w
appear.
A message of confirmation will appear if the card has been successfully sent.
{Business cards that have been sent will be saved in the Inbox of the destin
a
party.
Once
y
our business card has finished bein
g
sent
,
the
p
ro
g
ram will start receivin
g
business card belonging to the other party.
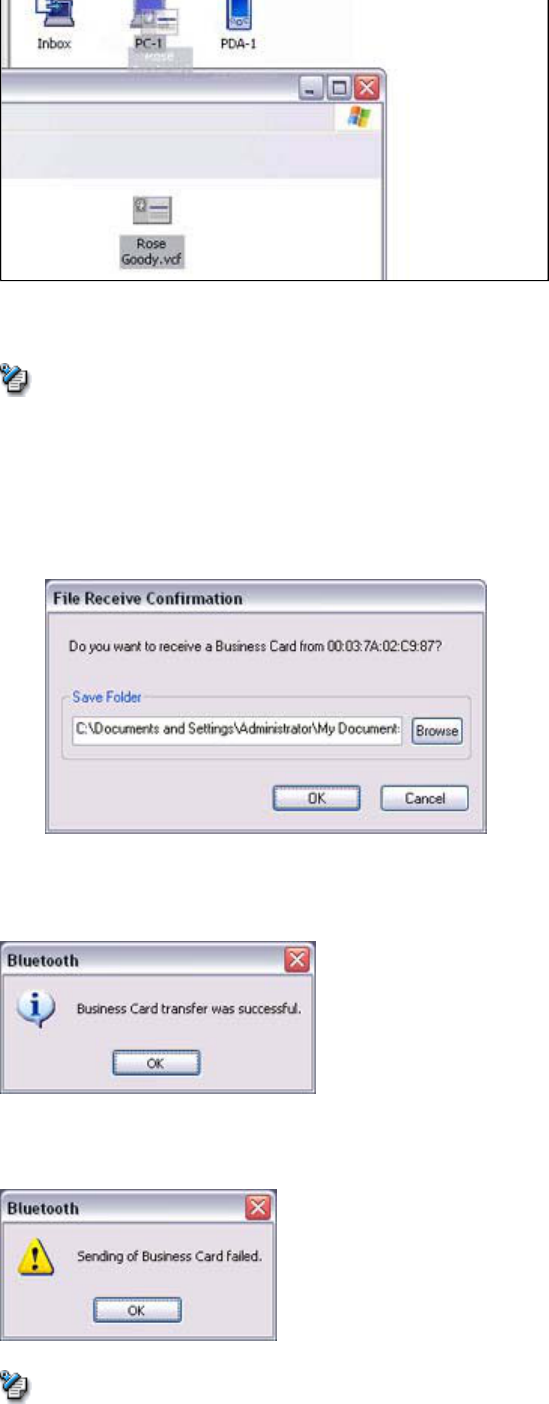
{When a business card is to be received
,
a messa
g
e such as the one below
m
appear on the device belonging to the other party.
Please click on the
[
Yes
]
button if
y
ou
g
ive
p
ermission for the business ca
r
be sent.
A messa
g
e of confirmation will a
pp
ear if the card has been successfull
y
receive
d
{Business cards that have been received will be saved in the "Inbox" under
"Object Push".
You can use Properties under the Bluetooth Information Exchan
g
er to set
t
location of the Inbox on the hard drive.
Note
Note
Note
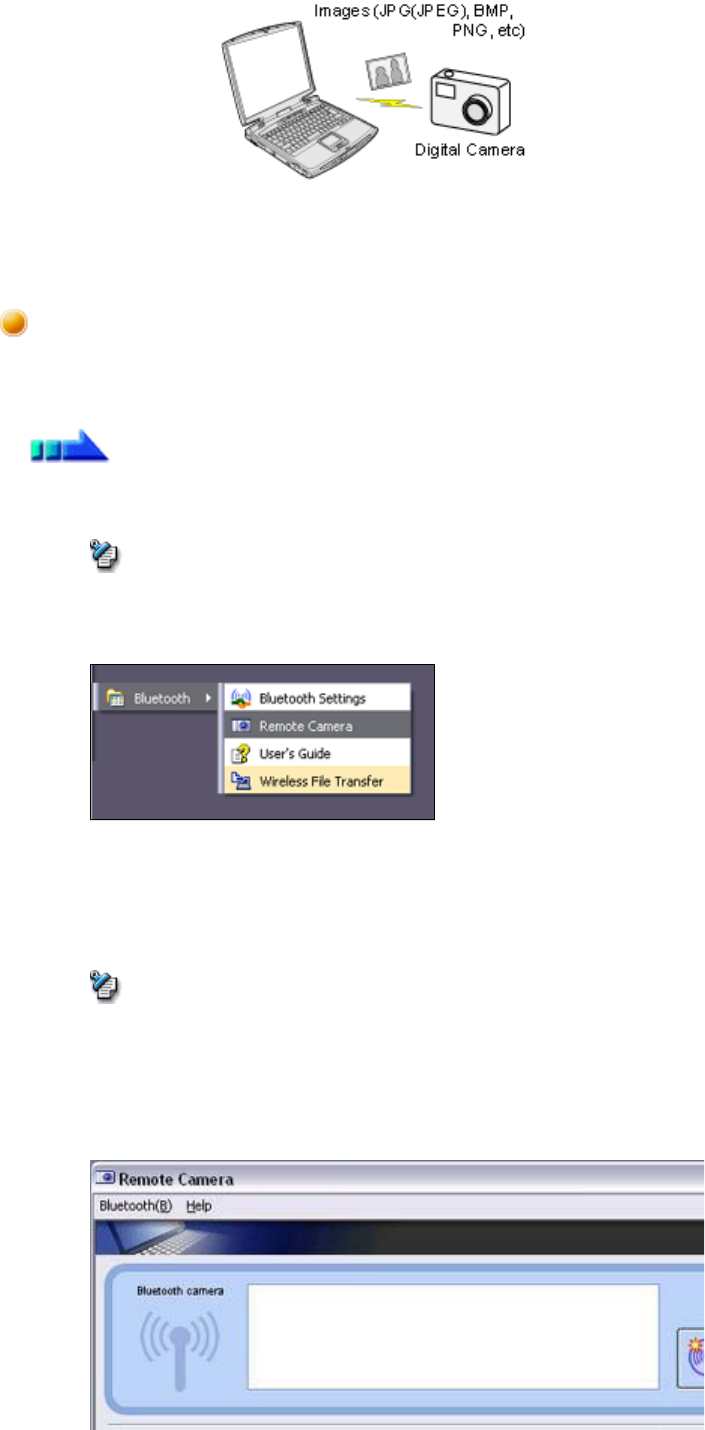
By connecting a Bluetooth-com
p
atible di
g
ital camera to
y
our PC via Bluetooth
,
y
ou will be
to operate the camera shutter from the PC and transmit the captured images to it as well
Using a Bluetooth-compatible camera [BIP]
Introduction 第 150 頁,共 224 頁
file://C:\Documents and Settings\anitachou\Local Settings\Temp\~hh114B.htm 2004/11/30
to
operate
the
camera
shutter
from
the
PC
and
transmit
the
captured
images
to
it
as
well
.
→Connecting the camera
→Taking pictures
→Viewing images saved on your PC
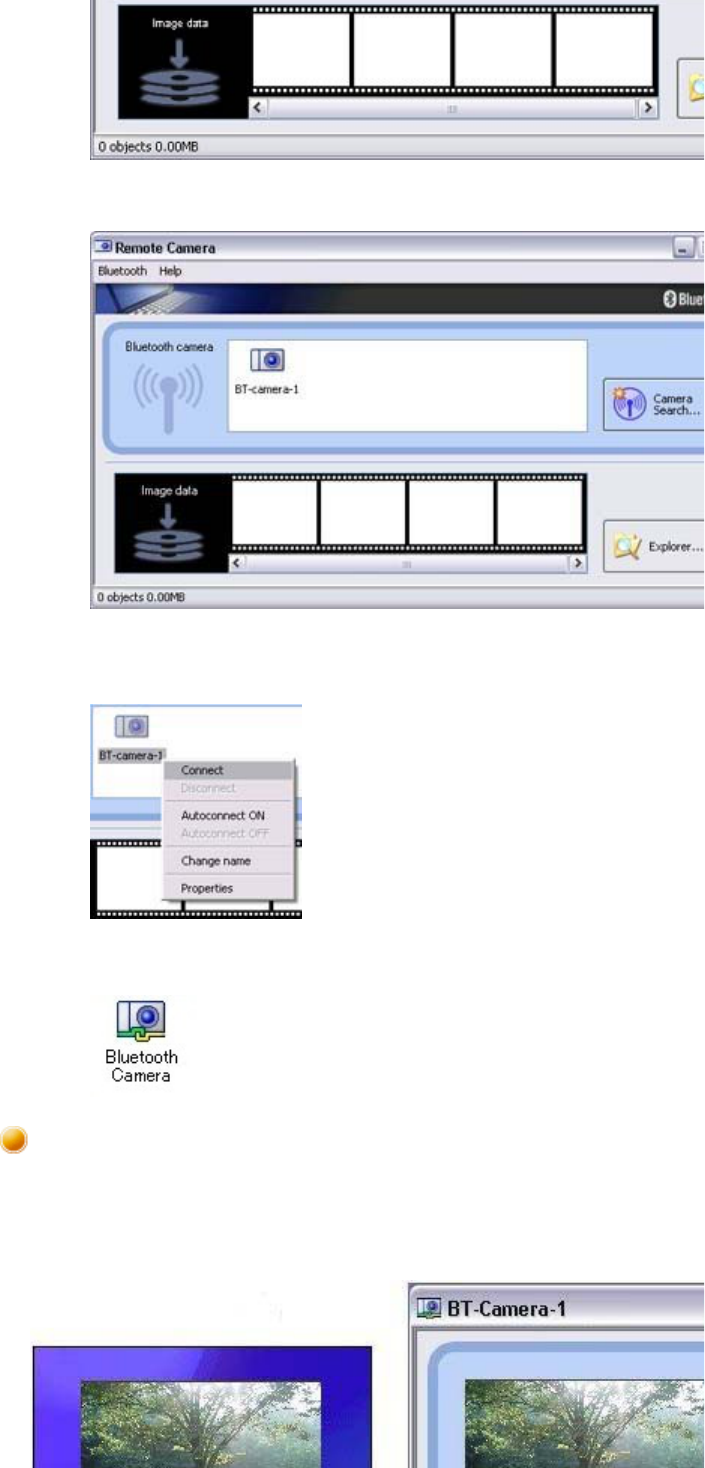
Use the "Remote Camera" tool in the Bluetooth Utilit
y
to connect the camera to
y
our P
C
1. Click on [Start ]→[All Programs]→[Bluetooth]→[Remote Camera]
{In Windows 2000, click on [Start]→[Programs]→[Bluetooth]→[Remote
Camera].
The [Remote Camera] window will appear.
2. Turn on the camera, and set it to be connectable via Bluetooth
{Different cameras are o
p
erated in different wa
y
s
,
de
p
endin
g
on the manuf
a
and model used. Please refer to the instruction manual for further details o
n
to operate your camera.
3. Click on the [Camera Search...] button
Connecting the camera
Procedure
Note
Note
Introduction 第 151 頁,共 224 頁
file://C:\Documents and Settings\anitachou\Local Settings\Temp\~hh114B.htm 2004/11/30
The camera will be detected and its icon displayed.
4. Right-click on the camera icon, and select [Connect]
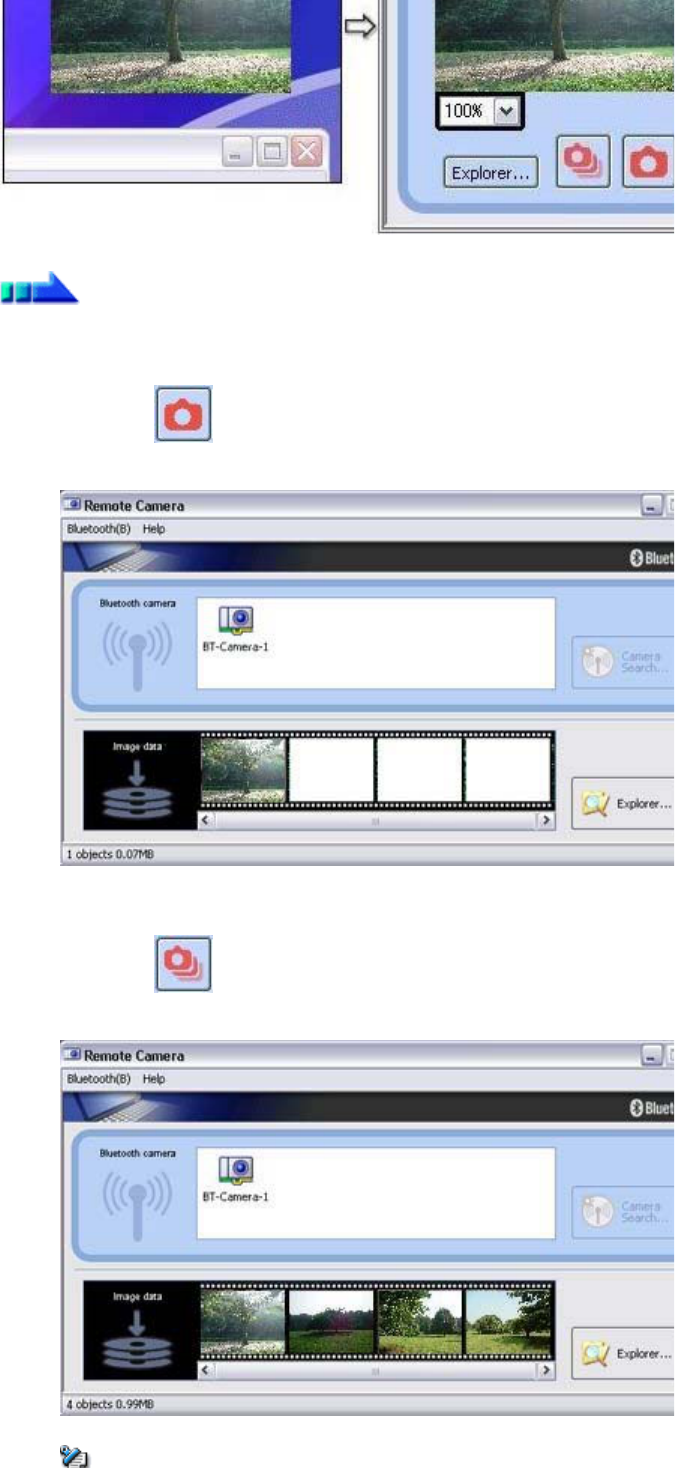
The camera will be connected, and images from the camera will appear on -scre
e
By placing the mouse cursor over the on -screen ima
g
e
,
the camera's o
p
eratin
g
window
w
appear.
You can operate the camera from this window.
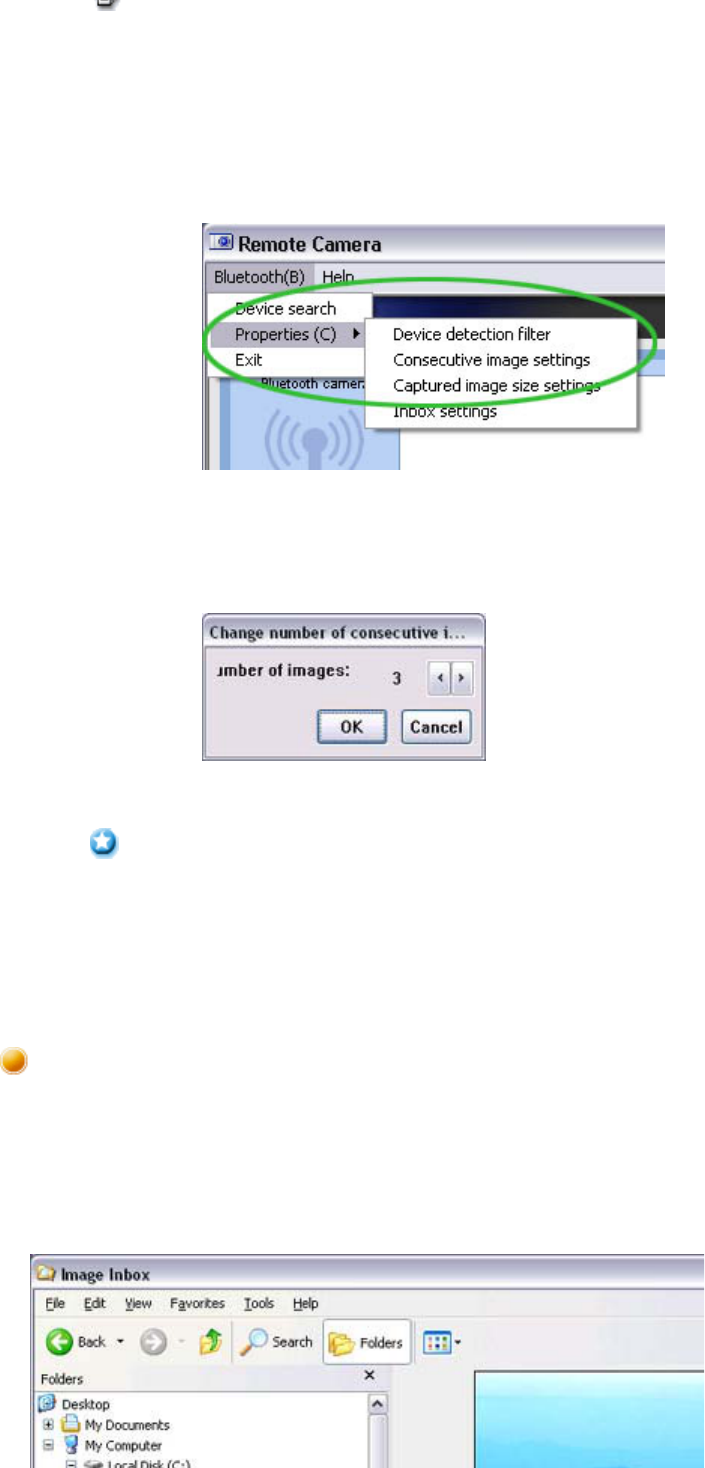
Taking pictures
Introduction 第 152 頁,共 224 頁
file://C:\Documents and Settings\anitachou\Local Settings\Temp\~hh114B.htm 2004/11/30
■Taking a single picture
1. Click on the button in the operating window.
A single image will be captured and sent to the PC.
■Taking several consecutive frames
1. Click on the button in the operating window
A succession of images will be captured and sent to the PC.
Procedure
Note
Introduction 第 153 頁,共 224 頁
file://C:\Documents and Settings\anitachou\Local Settings\Temp\~hh114B.htm 2004/11/30
{The remote camera shutter cannot be o
p
erated while the camera is connect
e
the PC.
{The number of consecutive
p
ictures taken can be set to an
y
where between
16
{Images are not only sent to the PC, but are stored in the camera's on -boar
d
memory as well.
Please be aware of the remainin
g
memor
y
ca
p
acit
y
when
y
ou are takin
g
a
l
number of pictures.
{Large file sizes are common for high-resolution ima
g
es
,
and ma
y
take so
m
to be transferred to the PC.
A "Remote Camera" folder will be created in the "Bluetooth" folder under "M
y
Docume
n
during initial set-u
p
. A folder bearin
g
the same name as the camera will be created in it
,
images will be saved in this folder.
Click the
[
Ex
p
lorer
]
button in the
[
Remote Camera
]
window to dis
p
la
y
the folder where
images have been saved.
1. In the [Remote Camera] window, click on [Bluetooth]→[Pro
p
erti
e
[Consecutive Image Settings]
The
[
Chan
g
e number of consecutive ima
g
es
]
dialo
g
box will a
pp
e
2. Click on the
[
<
][
>
]
buttons to select the number of consecutive i
m
to be captured
Important
Viewing images saves on your PC
Introduction 第 154 頁,共 224 頁
file://C:\Documents and Settings\anitachou\Local Settings\Temp\~hh114B.htm 2004/11/30
zThis window is an exam
p
le showin
g
p
ictures when
[
Filmstri
p]
has been selected f
r
the [View] menu in Explorer.
Note
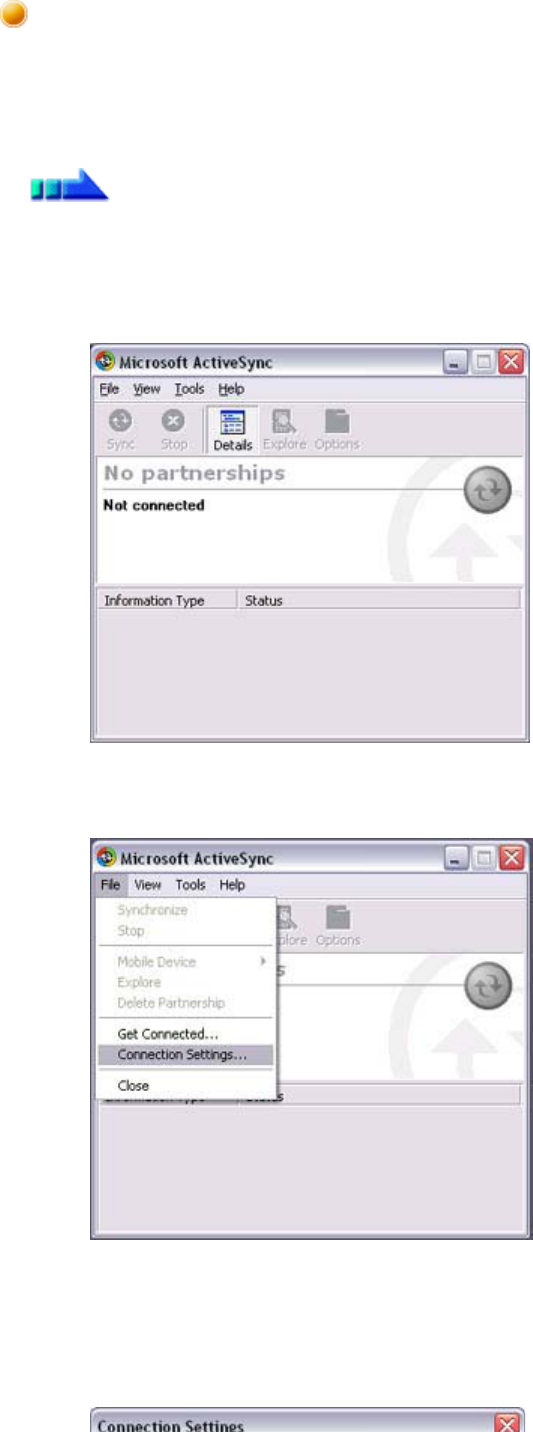
This section describes how to s
y
nchronize information on
y
our PDA
(
calendars
,
contacts
,
in
b
etc) with your PC using Microsoft ActiveSync.
When
y
ou connect via Bluetooth instead of with a standard cable
,
y
ou will alwa
y
s be able t
o
synchronise your data without the hassle of having to connect the cable.
→Connecting using ActiveSync
→Establishing a partnership between ActiveSync and a PDA
→Finishing an ActiveSync connection
→Cancelling a partnership
zPlease use ActiveS
y
nc v.3.7 or hi
g
her. Also
p
lease establish a
p
artnershi
p
between the
devices using a USB or infrared link before you connect via Bluetooth.
zPlease refer to the ActiveS
y
nc Hel
p
or other manuals for information on how to use th
e
application.
zMicrosoft Outlook 2002 or another schedule mana
g
ement tool must also be installed o
n
PC.
Important
Synchronising information using ActiveSync [SPP]
Introduction 第 155 頁,共 224 頁
file://C:\Documents and Settings\anitachou\Local Settings\Temp\~hh114B.htm 2004/11/30
Both the PC and PDA must be set up in order for a connection to be established.
■Preparing the PC
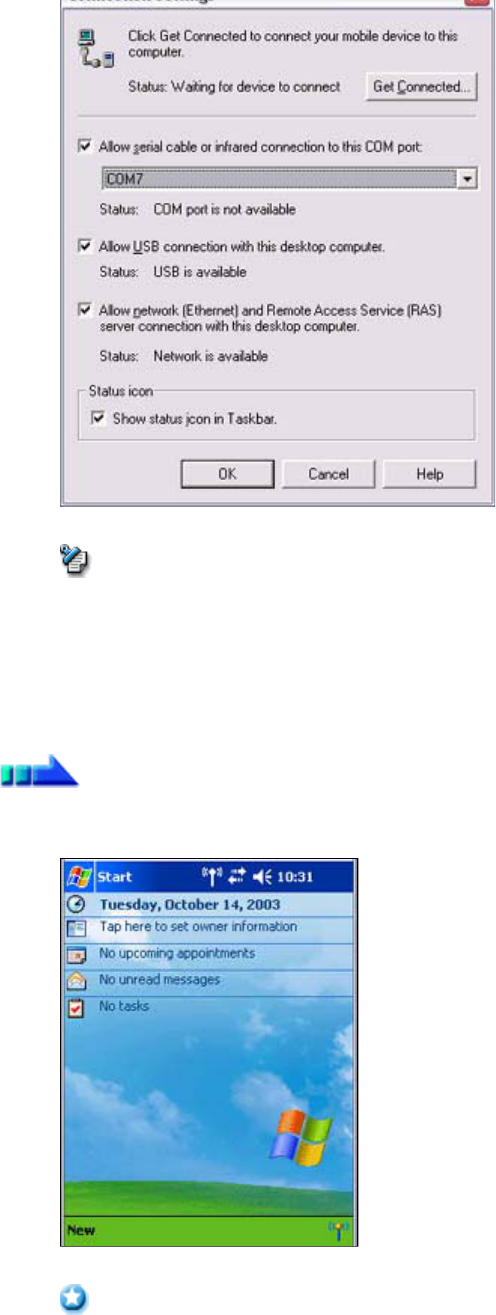
1. On the PC, click on [Start]→[All Programs]→[Microsoft ActiveSync]
The initial ActiveSync set-up window will appear.
It is assumed in the ex
p
lanation below that no ActiveS
y
nc connections have bee
n
established with other devices.
2. Click [File]→[Connection Settings]
The [Connection Settings] window will appear.
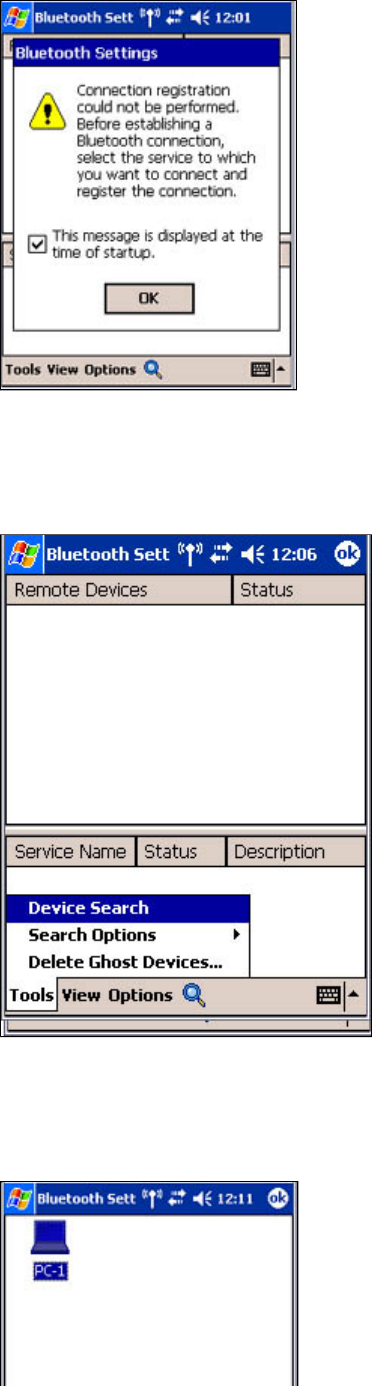
3. Place a check next to
[
Allow serial cable or infrared connection to this COM
p
o
r
and then select "COM7".
Connecting using ActiveSync
Procedure
Introduction 第 156 頁,共 224 頁
file://C:\Documents and Settings\anitachou\Local Settings\Temp\~hh114B.htm 2004/11/30
{In the standard set-u
p,
the
p
ort is confi
g
ured to "COM7"
(
refer to Ste
p
s
(
3
)
(
4
)
under "Pre
p
arin
g
the PDA" below
)
. When usin
g
a different
p
ort
,
p
lease
change the port number selected in this window.
■Preparing the PDA
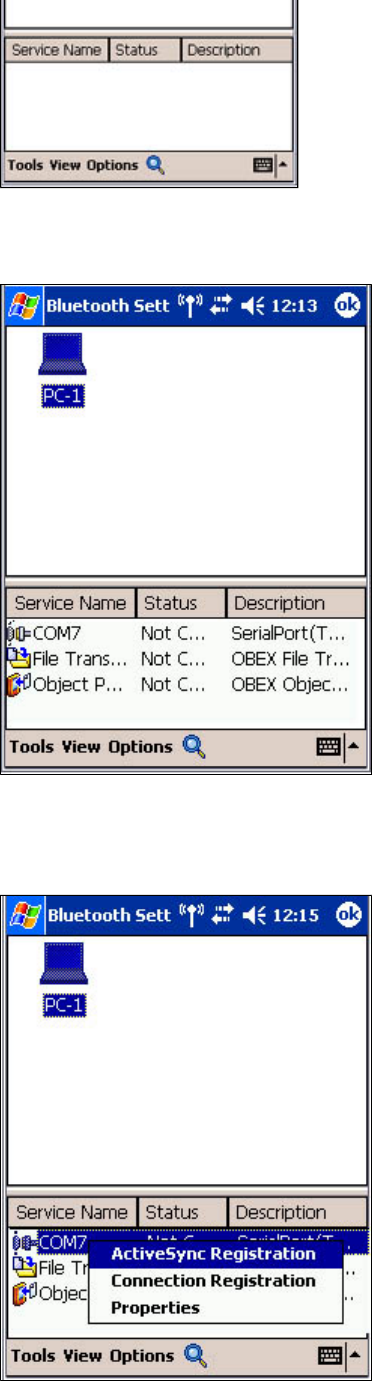
1. Tap on the Bluetooth icon in the bottom right of the screen
{The graphic above shows an example of a PDA operating window.
The connection
p
rocedure ma
y
be different de
p
endin
g
on the manufacture
r
model of PDA
y
ou use. Please refer to the
p
roduct instruction manuals for
further details.
The [Bluetooth Settings] window will open
Note
Procedure
Important
Introduction 第 157 頁,共 224 頁
file://C:\Documents and Settings\anitachou\Local Settings\Temp\~hh114B.htm 2004/11/30
The
[Bluetooth
Settings]
window
will
open
.
The messa
g
e "Connection not re
g
istered" will a
pp
ear if no Bluetooth device has
registered.
Please tap on [OK] to close the message.
2. Double click on [Tools]→[Search for peripheral components]
The application searches for nearby Bluetooth devices.
3. Tap and hold on the destination PC icon, and then select [Update Services]
Introduction 第 158 頁,共 224 頁
file://C:\Documents and Settings\anitachou\Local Settings\Temp\~hh114B.htm 2004/11/30
A search for services will be carried out
,
and then a list of service names and the
connection status will appear as list in the lower window.
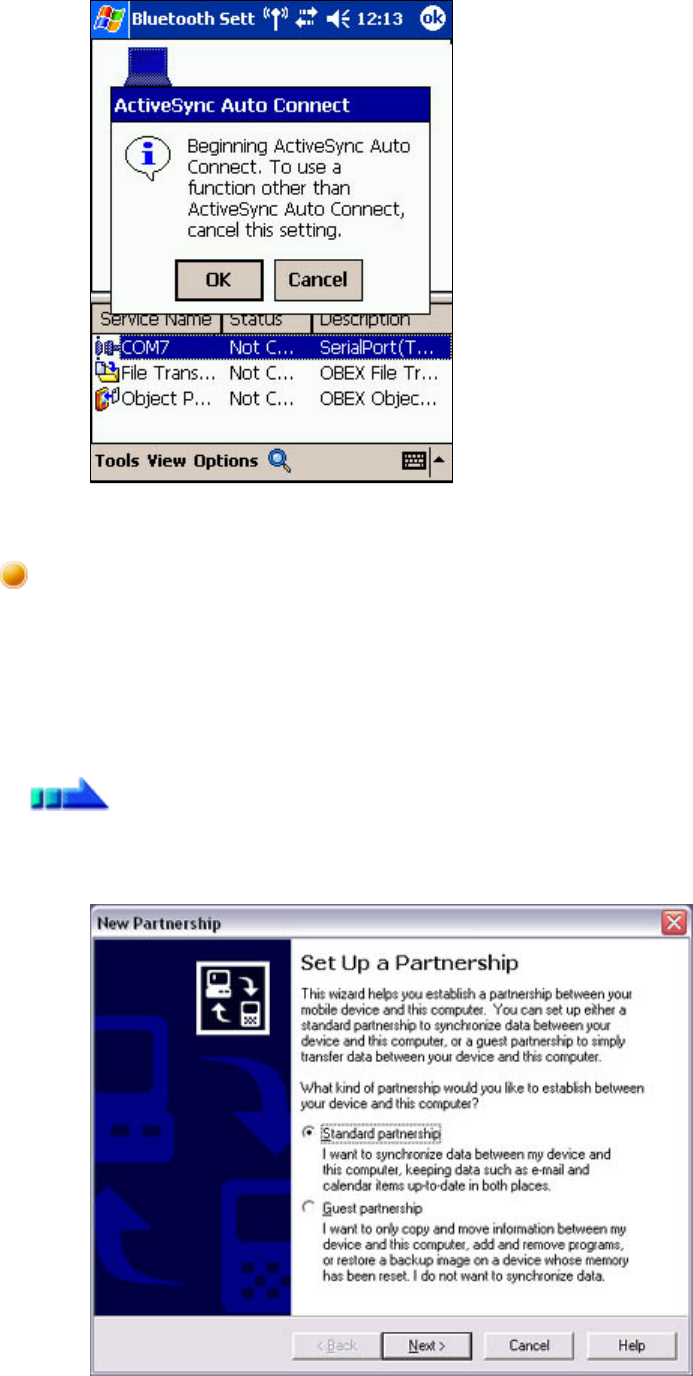
4. Ta
p
and hold on "COM7" from the list of service names
,
and then select "Re
g
ist
e
ActiveSync".
5. Tap [OK] in the confirmation message window
Introduction 第 159 頁,共 224 頁
file://C:\Documents and Settings\anitachou\Local Settings\Temp\~hh114B.htm 2004/11/30
An ActiveSync connection will be initiated.
Once a connection has been successfully established with a PDA, the procedure for
establishin
g
a
p
artnershi
p
with the PDA will be started b
y
the ActiveS
y
nc a
pp
lication on
PC.
Performing this set-u
p
p
rocedure will enable data to be s
y
nchronised between
y
our PC
a
PDA.
1. In the [New Partnership (Set Up a Partnership)] window, select "Standard
partnership", and then click on the [Next] button
The
[
New Partnershi
p
(
S
p
ecif
y
Data S
y
nchronisation Method
)]
window will a
ppe
Establishing a partnership between ActiveSync and a PDA
Procedure
Introduction 第 160 頁,共 224 頁
file://C:\Documents and Settings\anitachou\Local Settings\Temp\~hh114B.htm 2004/11/30
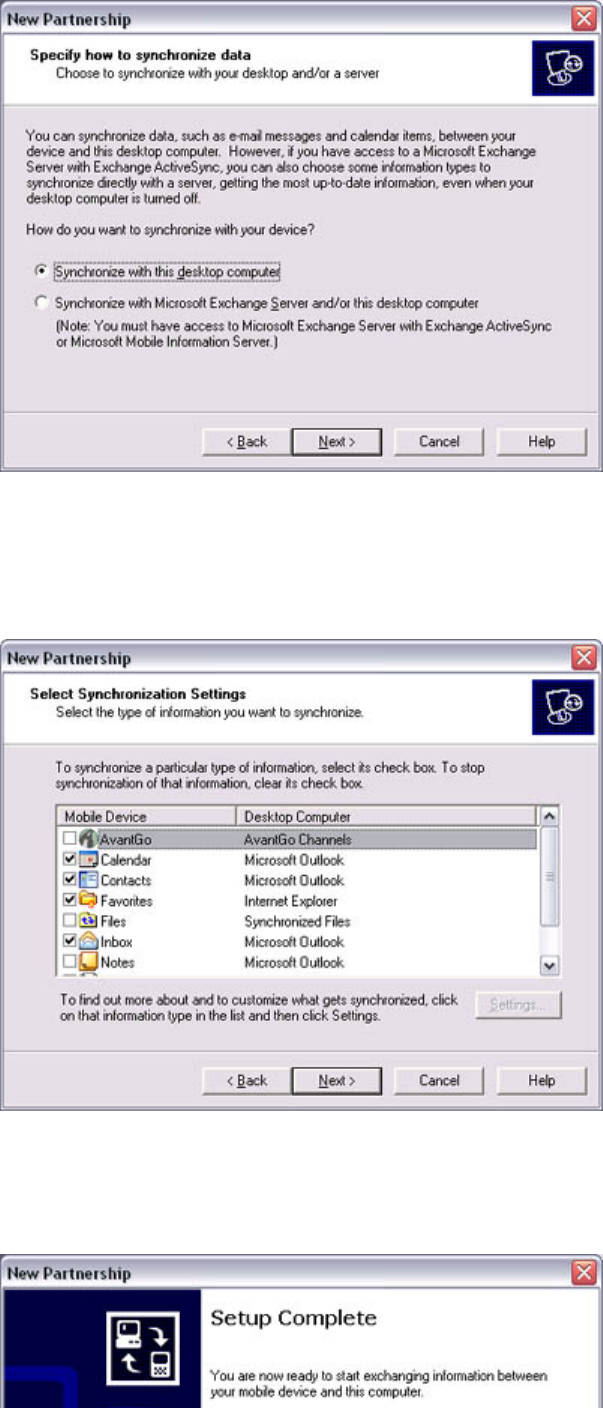
2. Select "Synchronise with this PC", and then click on the [Next] button
The [New Partnership (Select Synchronisation Settings)] window will appear.
3. Select the t
yp
e of information to be s
y
nchronised between
y
our PC and PDA
,
an
d
click on the [Next] button
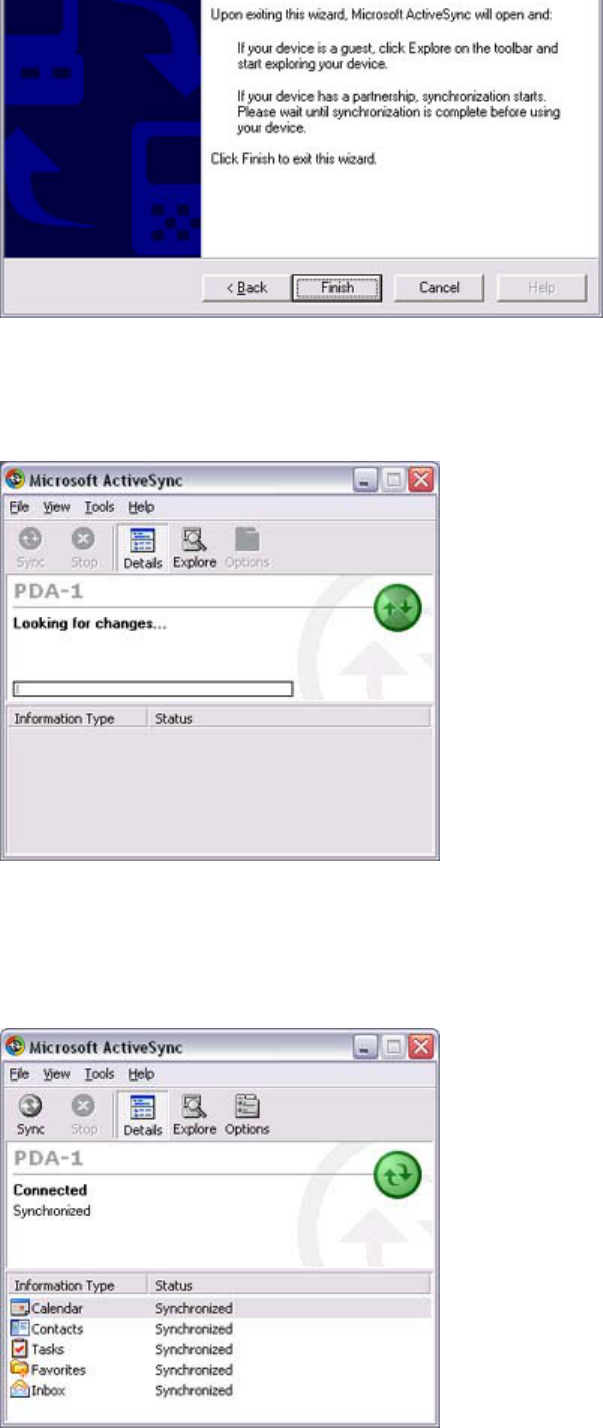
The [New Partnership (Completing Setup)] window will appear.
4. Click on the [Finish] button
Introduction 第 161 頁,共 224 頁
file://C:\Documents and Settings\anitachou\Local Settings\Temp\~hh114B.htm 2004/11/30
When
y
ou click on the
[
Finish
]
button
,
ActiveS
y
nc will be
g
in to s
y
nchronise
y
o
u
information.
[Confirming changes]
↓
(Synchronisation process)
↓
[Synchronisation complete]
While
the
ActiveSync
connection
is
active,
synchronisation
will
be
performed
Introduction 第 162 頁,共 224 頁
file://C:\Documents and Settings\anitachou\Local Settings\Temp\~hh114B.htm 2004/11/30
While
the
ActiveSync
connection
is
active,
synchronisation
will
be
performed
whenever information is changed on either the PC or the PDA.
Once a
p
artnershi
p
has been established
,
ever
y
time
y
ou start
y
our PC
(
and PDA
thereafter
,
a Bluetooth connection will be o
p
ened and ActiveS
y
nc will s
y
nchroni
your information.
Follow the
p
rocedure below on
y
our PDA if
y
ou want to end an ActiveS
y
nc connection
manually.
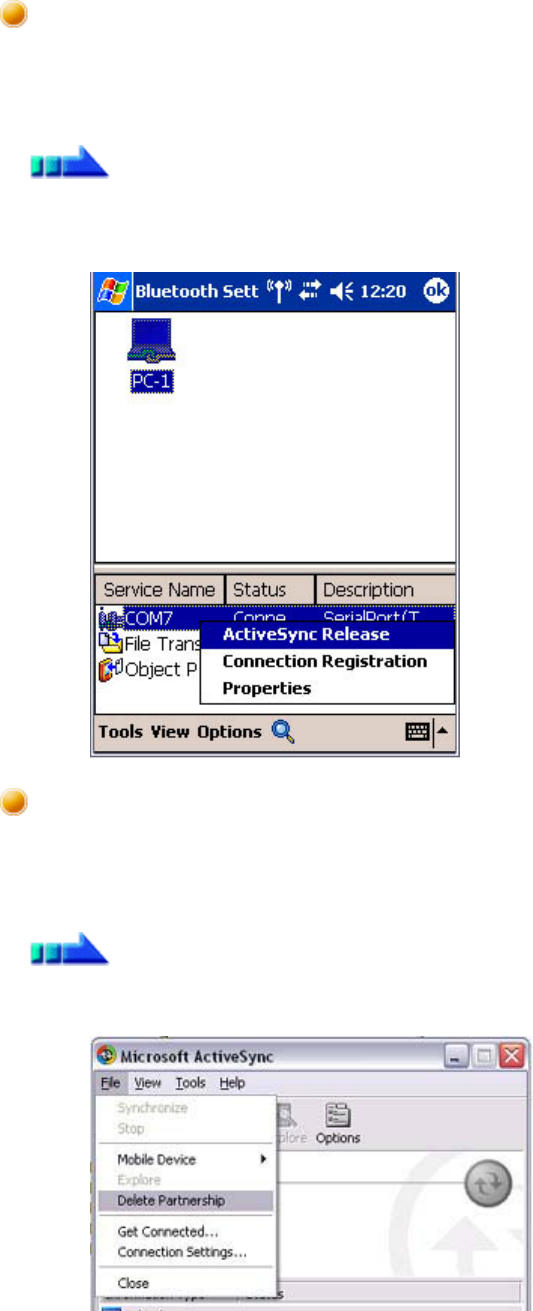
1. Ta
p
and hold on "COM7" in the Bluetooth Settin
g
s window
,
and select
[
ActiveS
y
Release]
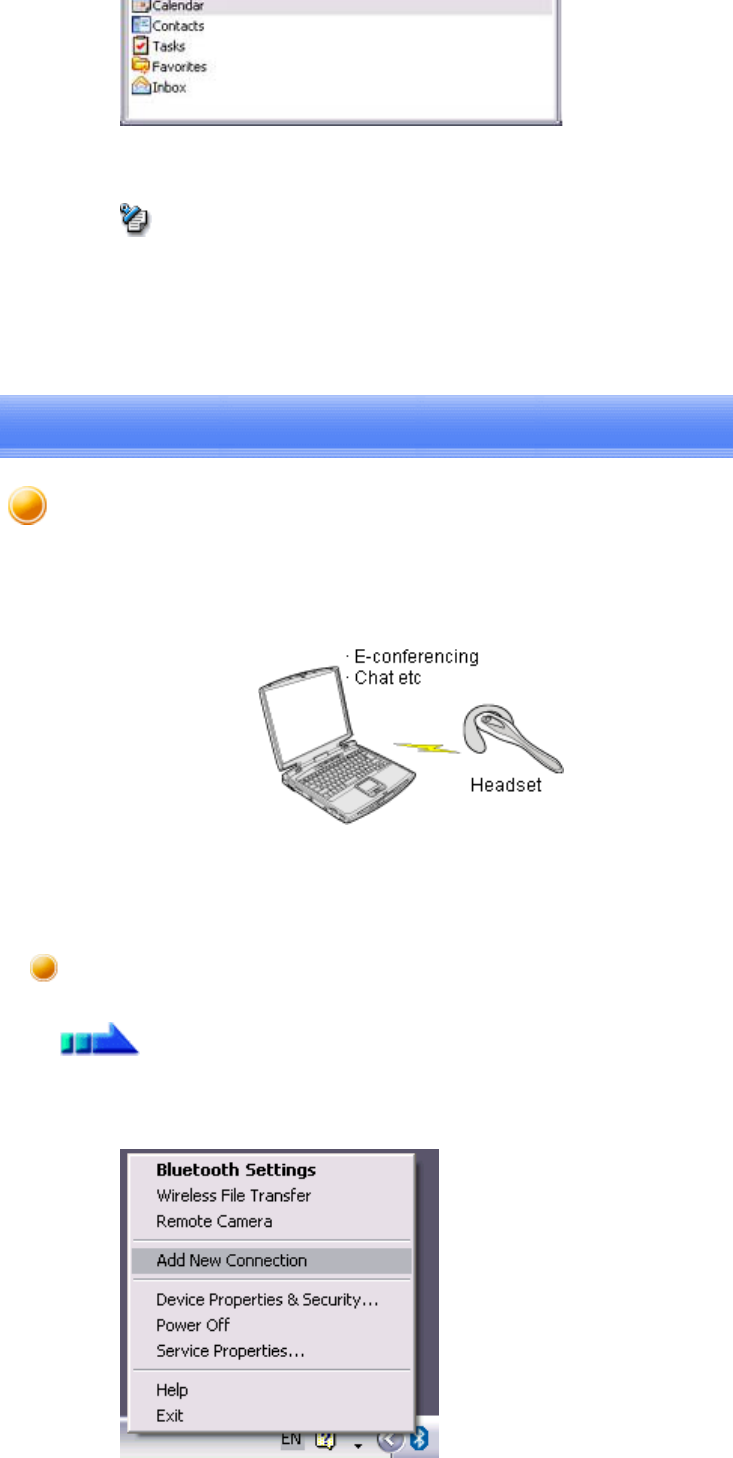
Follow the
p
rocedure below from the ActiveS
y
nc window on the PC if
y
ou want to canc
partnership between your PC and PDA.
1. Click on [File]→"Delete partnership"
Finishing an ActiveSync connection
Procedure
Cancelling a partnership
Procedure
Introduction 第 163 頁,共 224 頁
file://C:\Documents and Settings\anitachou\Local Settings\Temp\~hh114B.htm 2004/11/30
Click on the [Yes] button when the confirmation message appears.
{If
y
ou wish to create another ActiveS
y
nc connection
,
y
ou will have to re
pe
above procedure to re-establish a partnership.
Note
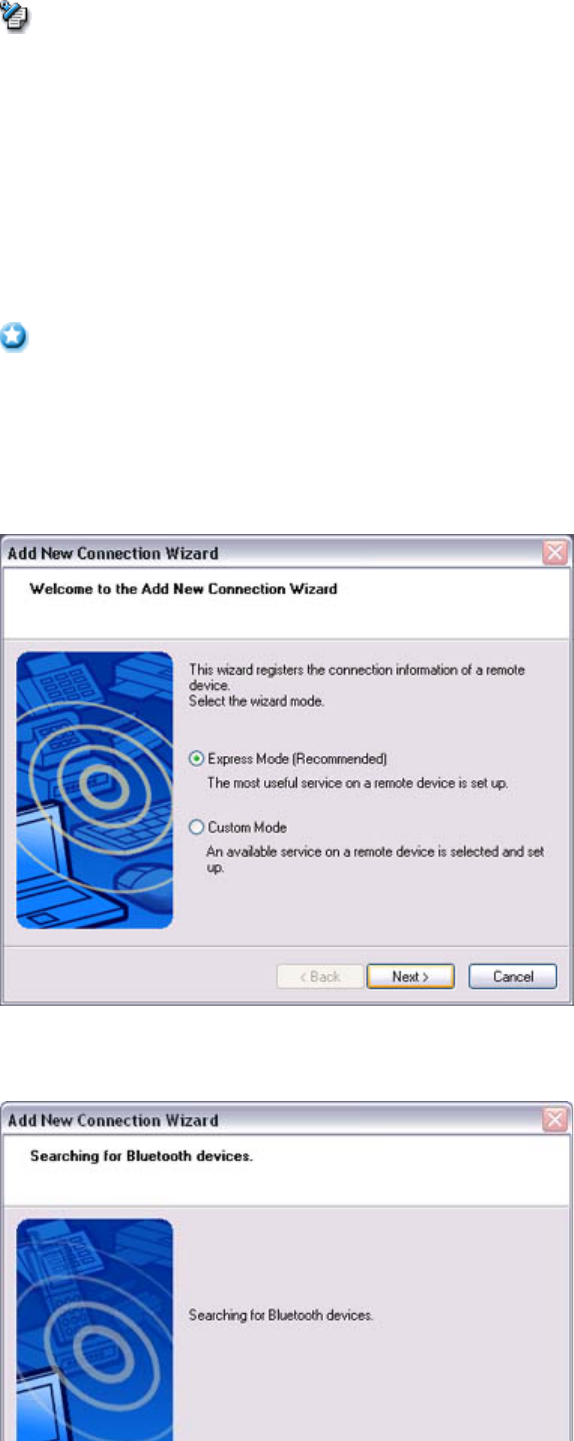
This section provides a description of how to use a Bluetooth -com
p
atible wireless headset t
o
communicate (chat) using Microsoft NetMeeting or other software.
→Registering the headset
→Making a connection to the headset
→Disconnecting from the headset
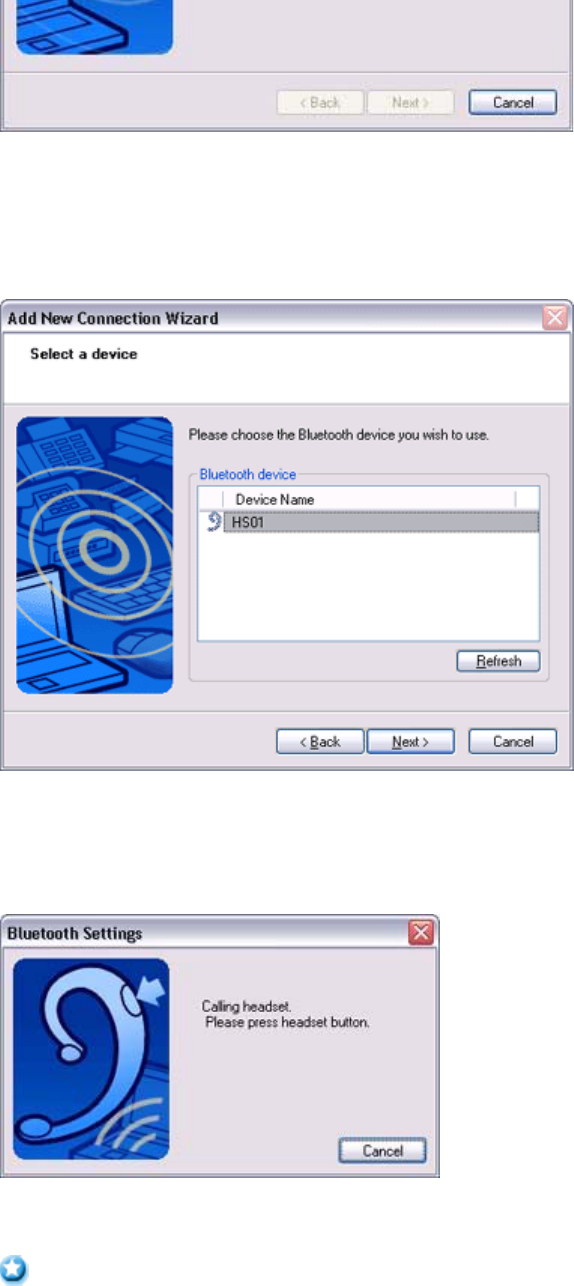
1. Right-click on the Bluetooth icon in the tasktra
y,
then click on
[
Add New Conn
e
Wizard]
Registering the headset
Procedure
Using a headset to communicate [HSP]
Introduction 第 164 頁,共 224 頁
file://C:\Documents and Settings\anitachou\Local Settings\Temp\~hh114B.htm 2004/11/30
{Alternativel
y,
y
ou can click on
[
Start
]
>
[
All Pro
g
rams
]
>
[
Bluetooth
]
>
[
Bluet
o
Settin
g
s
],
then click on
[
New Connection
]
in the
[
Bluetooth Settin
g
s
]
scre
e
has opened.
The
[
Add New Connection Wizard
(
Welcome to the Add New Connection Wiza
r
screen will appear.
2. Turn the headset power on
Once
y
ou have turned on the headset
,
set the mode to enable a Bluetooth connec
t
{The procedure for operating the headset may differ depending on the
manufacturer and model.
Please consult
y
our user
g
uide for a detailed descri
p
tion of how to o
p
erate
unit.
3. Confirm that [Express Mode] has been selected, then click on the [Next] button
The
[
Add New Connection Wizard
(
Searchin
g
for Bluetooth Devices
)]
screen w
i
appear.
Note
Important
Introduction 第 165 頁,共 224 頁
file://C:\Documents and Settings\anitachou\Local Settings\Temp\~hh114B.htm 2004/11/30
Once the device search has been com
p
leted
,
the
[
Add New Connection Wizard
(S
a Device)] screen will appear.
4. Select the name of the headset device from the list
,
then click on the
[
Next
]
butt
o
5. Answering with the headset
If the service has been
p
ro
p
erl
y
detected
,
a screen will a
pp
ear indicatin
g
that the
headset is being called, and a tone will accordingly sound in the headset.
Please press the headset switch.
{The procedure for operating the headset may differ depending on the
manufacturer and model.
Please consult
y
our user
g
uide for a detailed descri
p
tion of how to o
p
erate
unit.
The
[
Add New Connection Wizard
(
Confi
g
urin
g
(
Connectin
g
to Voice Circuit
))]
screen will a
pp
ear
,
and device confi
g
uration will be
p
erformed.
Important
Introduction 第 166 頁,共 224 頁
file://C:\Documents and Settings\anitachou\Local Settings\Temp\~hh114B.htm 2004/11/30
pp , g p
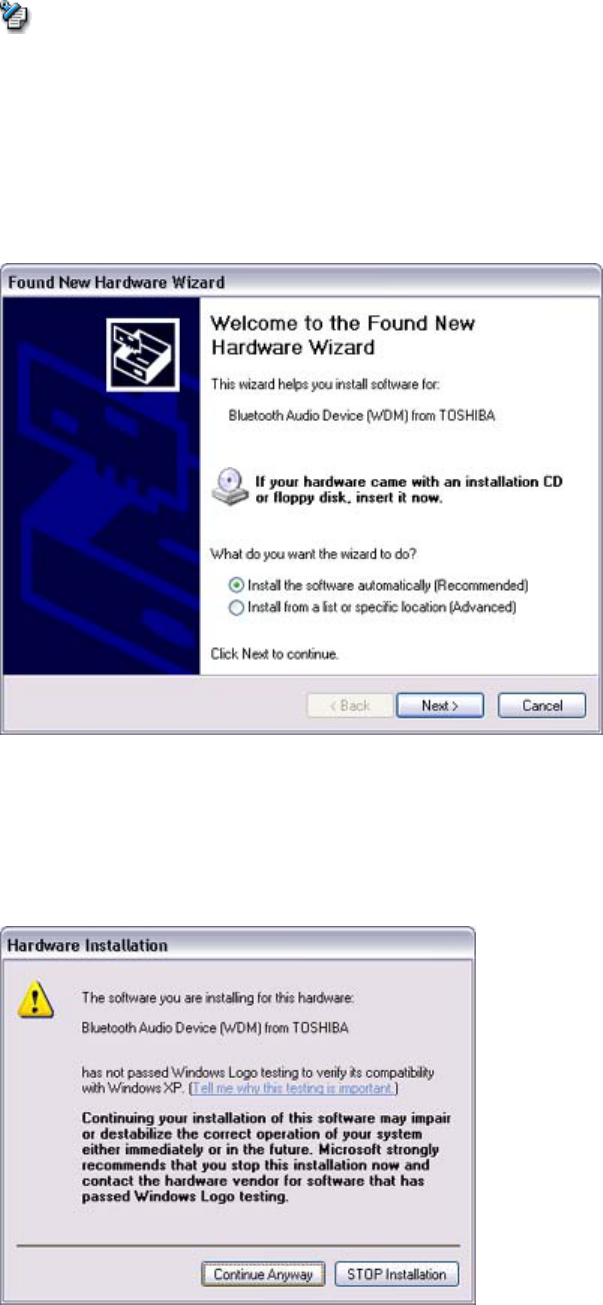
{If
y
ou are connectin
g
to the headset for the first time
,
or if another Blueto
o
audio device has not
y
et been re
g
istered
,
the followin
g
[
Found New Hard
w
Wizard
]
screen will a
pp
ear
,
from which
y
ou can
p
roceed to install the driv
e
If another audio device has alread
y
been re
g
istered
(
i.e.
,
the driver has bee
n
installed), you can proceed to Step 9 without having to install the driver.
6. Click on the [Next] button
The [Install Hardware] screen will appear.
7. Click on the [Continue Anyway] button
The followin
g
screen will a
pp
ear automaticall
y
. You ma
y
disre
g
ard it and click
o
[Continue Anyway] button.
The
[
Add New Connection Wizard
(
Com
p
letin
g
the Found New Hardware Wiza
r
screen, which is the final screen of the installation wizard, will appear.
8
Click on the [Finish] button
Note
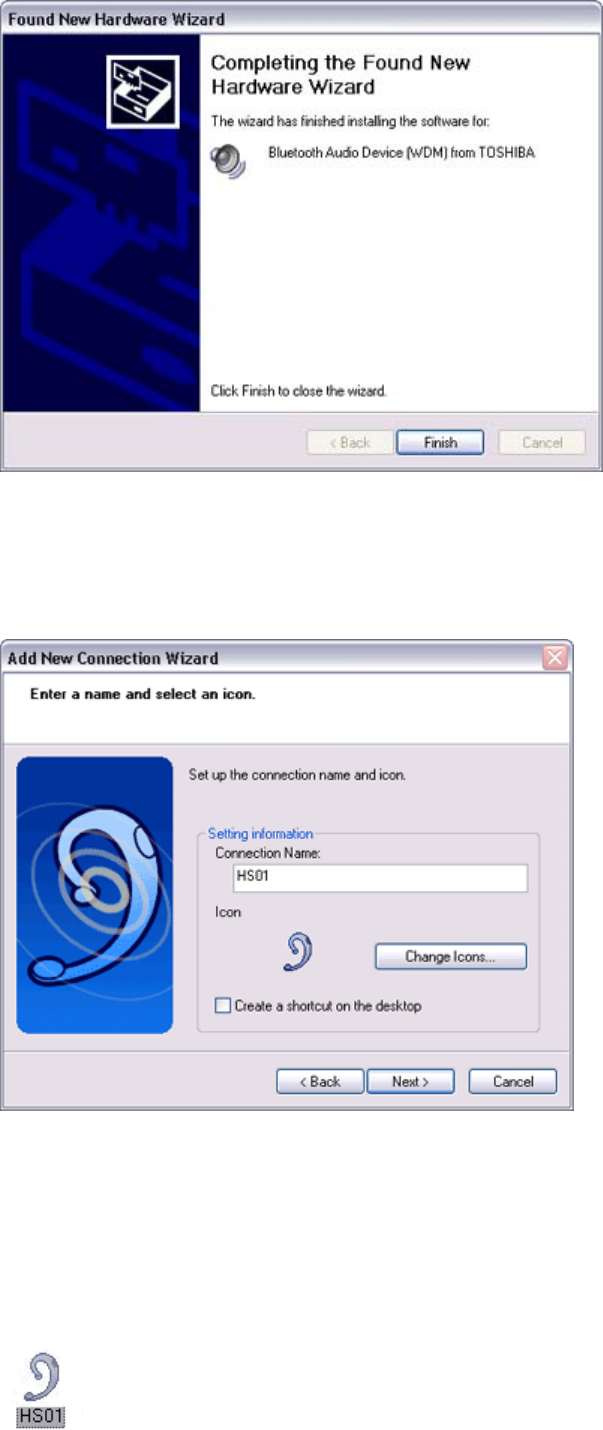
Introduction 第 167 頁,共 224 頁
file://C:\Documents and Settings\anitachou\Local Settings\Temp\~hh114B.htm 2004/11/30
8
.
Click
on
the
[Finish]
button
Once driver installation is complete, the [Add New Connection Wizard (Enter
Connection Name)] will appear.
9. Confirm the information you have entered, and click on the [Next] button
The
[
Add New Connection Wizard
(
Com
p
letin
g
the Add New Connection Wiza
r
screen will appear.
10. Click on the [Finish] button
The confi
g
uration information will be re
g
istered
,
and an icon will be dis
p
la
y
ed i
n
[Bluetooth Settings] screen.
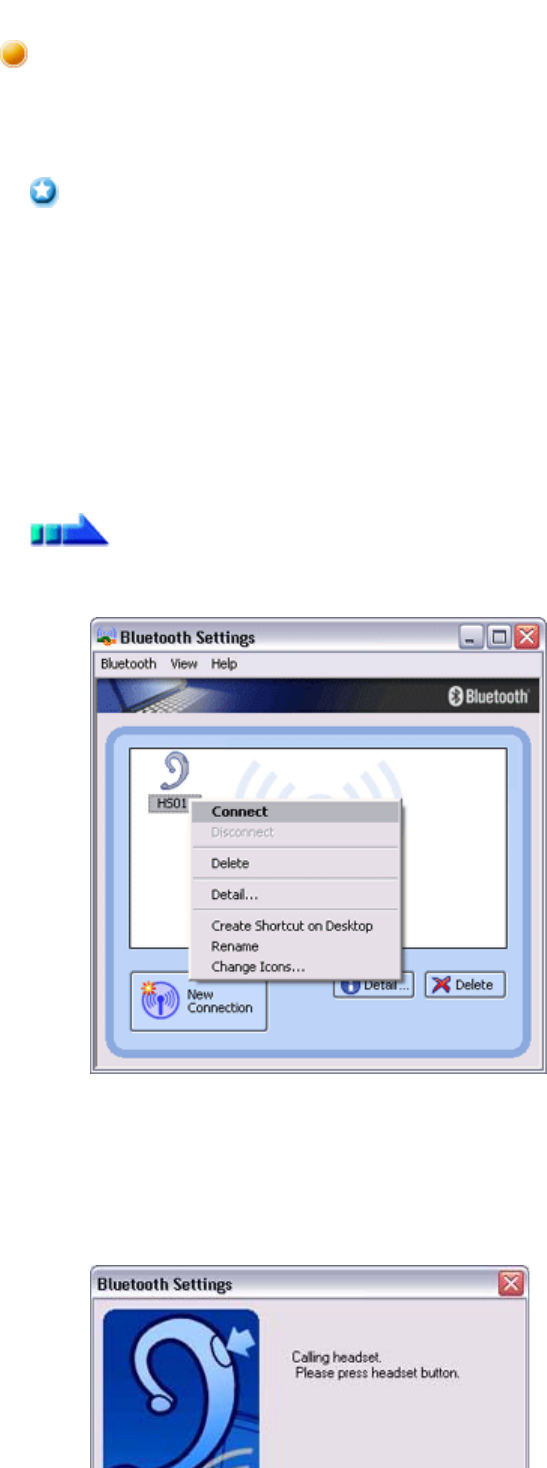
Introduction 第 168 頁,共 224 頁
file://C:\Documents and Settings\anitachou\Local Settings\Temp\~hh114B.htm 2004/11/30
You can make a connection to the headset from an icon that has been re
g
istered in
[
Blue
Settings].
zBefore makin
g
a connection to the headset
,
p
lease check that
y
ou have turned on t
h
headset's power, and that it has been enabled for a Bluetooth connection.
Please ensure that the following audio -related a
pp
lications have been closed befor
e
connect the headset to your PC.
{Windows Media Pla
y
er
,
BeatJam
,
InterVideo WinDVD and other music/aud
i
playback software
{Windows Messenger and other e-conferencing software
If
y
ou wish to use these a
pp
lications
,
p
lease terminate the headset connection befo
r
launch them.
1. Right-click on the headset icon, then click on [Connect].
2. Answer with the headset
A screen will appear indicating that the headset is being called, and a tone will
accordingly sound in the headset.
Please press the headset switch.
Making a connection to the headset
Important
Procedure
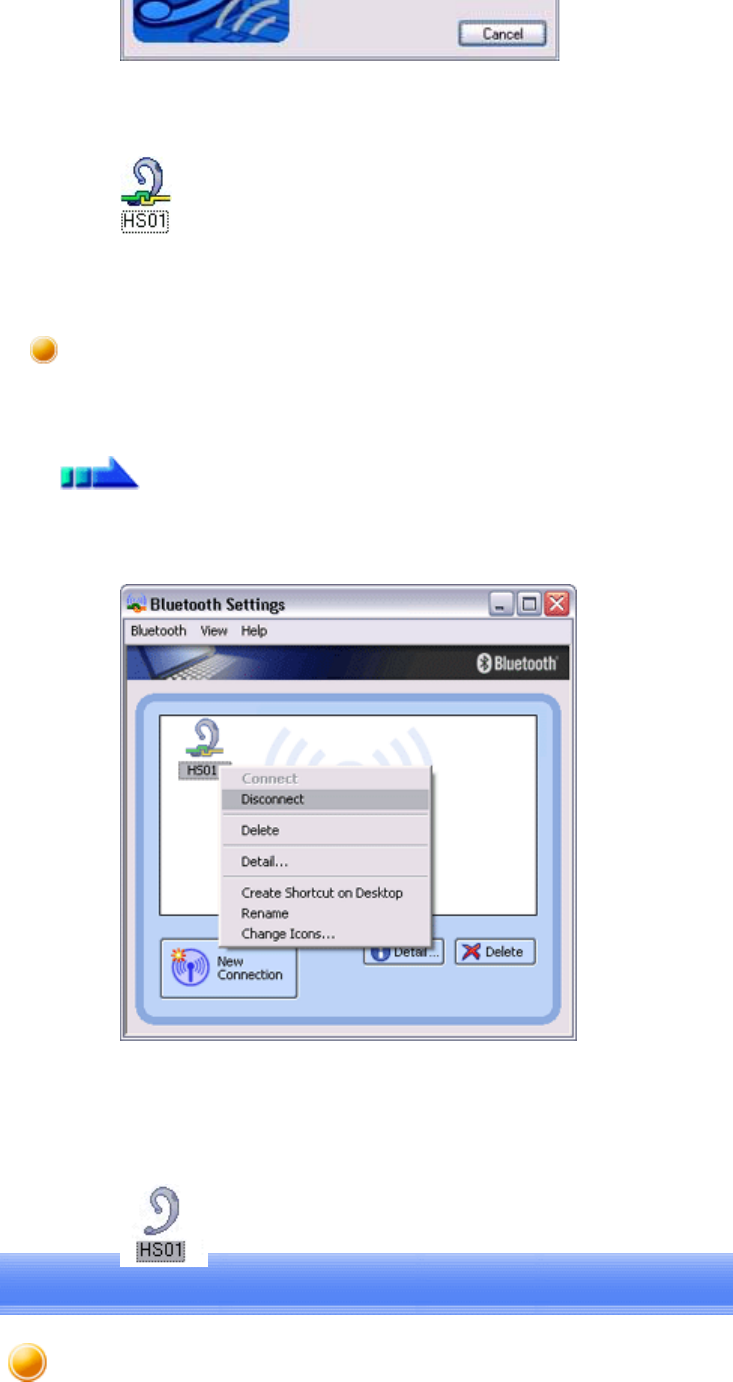
Introduction 第 169 頁,共 224 頁
file://C:\Documents and Settings\anitachou\Local Settings\Temp\~hh114B.htm 2004/11/30
If the connection has been
p
ro
p
erl
y
established
,
the icon's a
pp
earance will chan
ge
indicate a connected state.
You may now launch conferencing and voice -recognition software and use the
headset.
Please follow the steps below to disconnect from the headset.
1. Right-click on the headset icon in the
[
Bluetooth Settin
g
s
]
screen
,
then click on
[Disconnect].
A messa
g
e will a
pp
ear
,
re
q
uestin
g
confirmation that
y
ou wish to disconnect. Cli
c
the [Yes] button.
The icon on the
[
Bluetooth Settin
g
s
]
screen will a
pp
ear as shown below
,
indicati
n
that the device has been disconnected.
Disconnecting from the headset
Procedure
For securit
y
p
ur
p
oses
,
y
ou ma
y
not wish
y
our device to be detected b
y
other Bluetooth user
s
p
rocedure for accom
p
lishin
g
this is
p
rovided below.
Making a device undiscoverable to other users
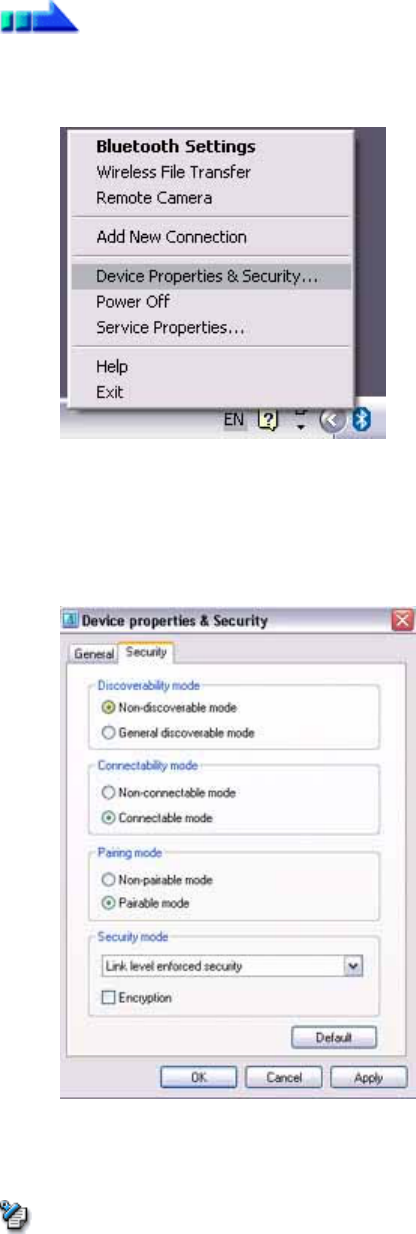
Introduction 第 170 頁,共 224 頁
file://C:\Documents and Settings\anitachou\Local Settings\Temp\~hh114B.htm 2004/11/30
ppgp
1. Right-click on the Bluetooth icon in the task tra
y,
and click on
[
Device Pro
p
erti
e
Security]
The [Device Properties] window will appear.
2. Select [Non-discoverable mode
]
in
[
Discoverabilit
y
mode
]
under the
[
Securit
y]
t
and then click on the [OK] button
Your device will now be undetectable b
y
other users
,
even when the
y
search for
devices.
zOther devices are still able to establish connections with
y
our device even if
y
ou h
a
enabled the Non-discoverable mode.
Please enable "Non-connectable mode" if
y
ou wish to re
j
ect connections from oth
e
devices.
Related topic: "Bluetooth Manager"
Procedure
Note
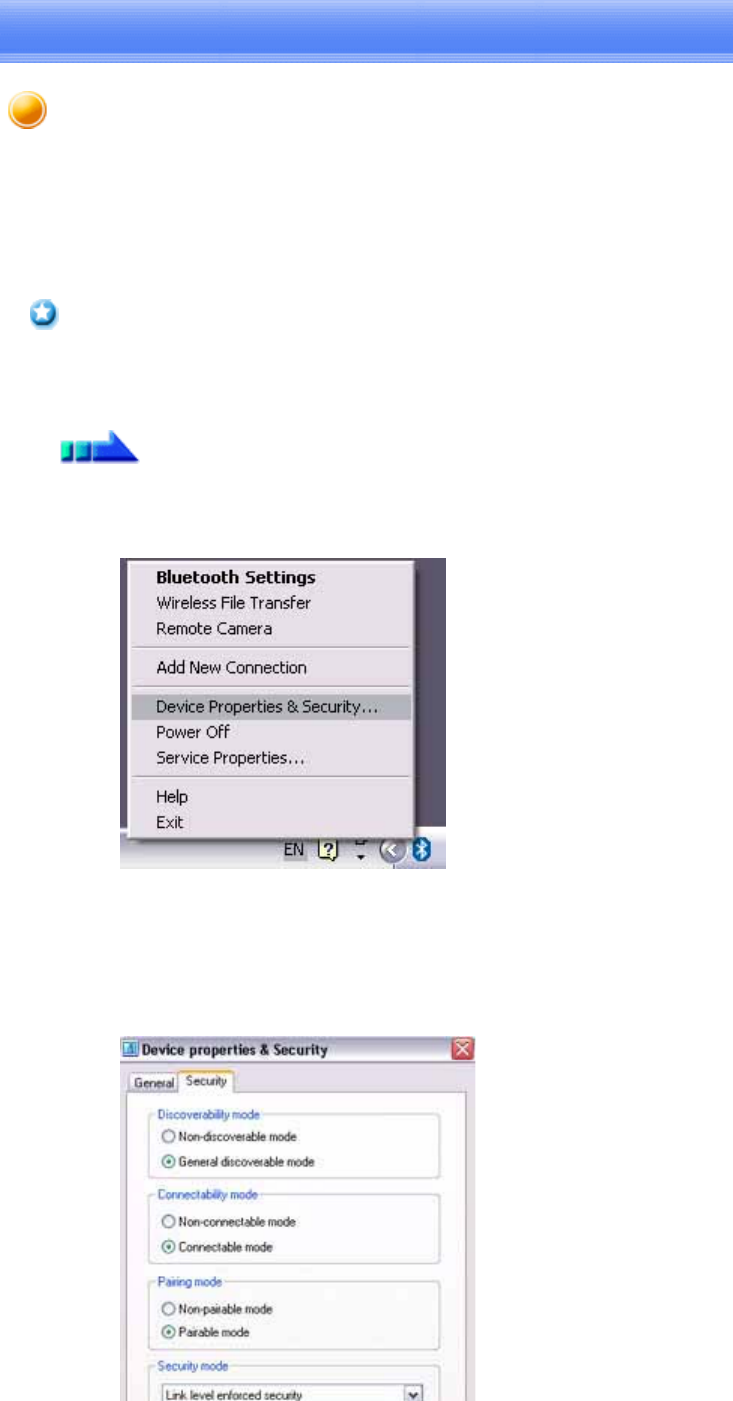
Introduction 第 171 頁,共 224 頁
file://C:\Documents and Settings\anitachou\Local Settings\Temp\~hh114B.htm 2004/11/30
Since Bluetooth communication is conducted wirelessl
y,
there is alwa
y
s the
p
ossibilit
y
that
a
party may be able to intercept your transmissions.
You can use encr
yp
tion to render the content indeci
p
herable to an
y
one who mana
g
es to inte
r
it.
zEncr
yp
tin
g
y
our transmissions will still not
g
uarantee com
p
lete securit
y
. Accordin
g
l
y,
p
lease be aware that transmittin
g
data is conducted with an element of risk for the use
r
1. Right-click on the Bluetooth icon in the task tra
y,
and click on
[
Device Pro
p
erti
e
Security].
The [Device Properties] window will appear.
2. Select
[
Link Level Enforced Securit
y]
in
[
Securit
y
Mode
]
under the
[
Securit
y]
t
a
a check next to [Encryption], and then click on the [OK] button
Important
Procedure
Encrypting the content of your transmissions
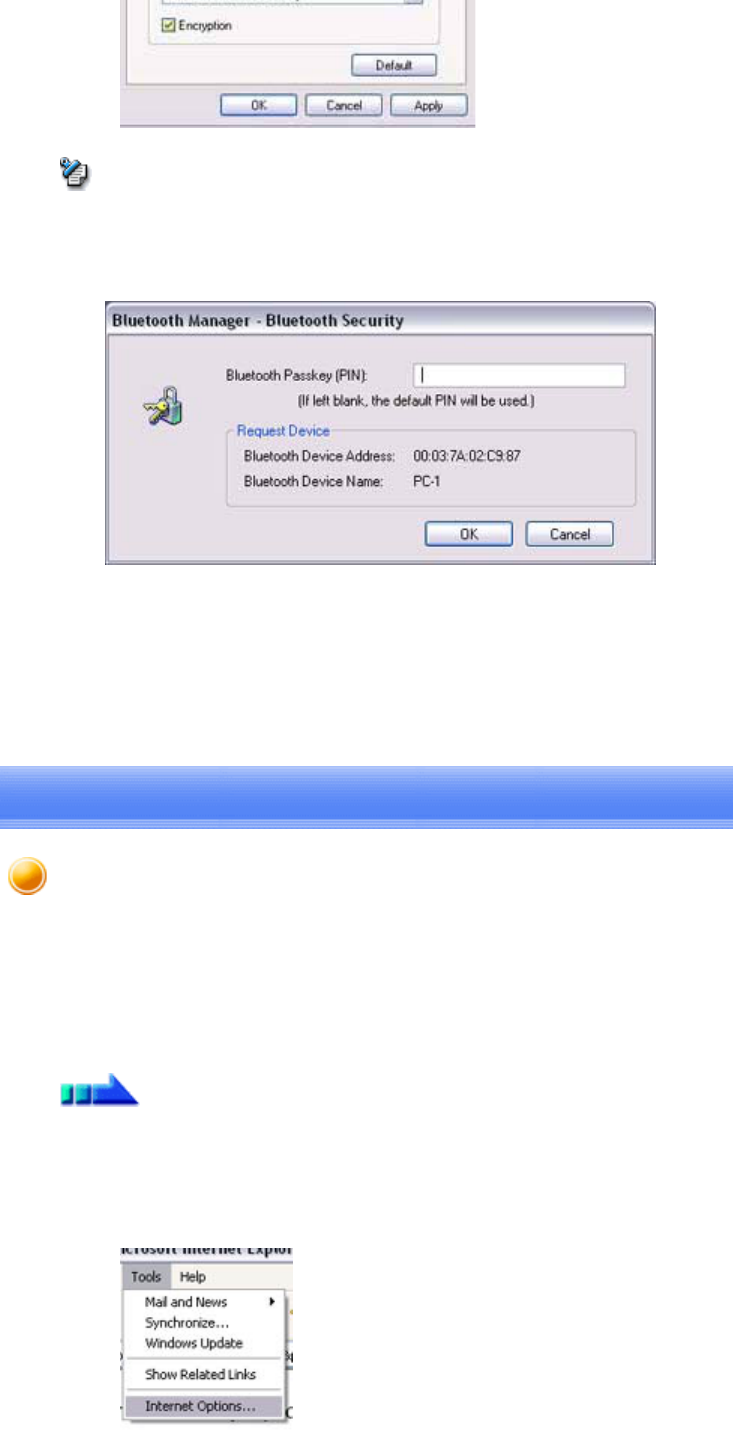
Introduction 第 172 頁,共 224 頁
file://C:\Documents and Settings\anitachou\Local Settings\Temp\~hh114B.htm 2004/11/30
zOnce
y
ou have confi
g
ured the securit
y
mode
,
a window will a
pp
ear when
y
ou firs
t
a connection to another device
,
p
rom
p
tin
g
y
ou to enter a Bluetooth
p
asske
y
(
PIN
c
Please click on the [OK] button after you have entered the passkey.
zThe window in which
y
ou enter the
p
asske
y
will not a
pp
ear once
y
ou have connec
t
more than two times to the device.
Related topic: "Bluetooth Manager"
Note
The "default connection" refers to the dial -up connection configured for use whenever a
connection is made to the Internet.
If several connections have been re
g
istered
,
y
ou can chan
g
e the default connection b
y
follo
w
the procedure below.
1. Start Internet Explorer
2. Click on [Tools]→[Internet Options...]
The [Internet Options] window will appear
Procedure
Changing the default connection
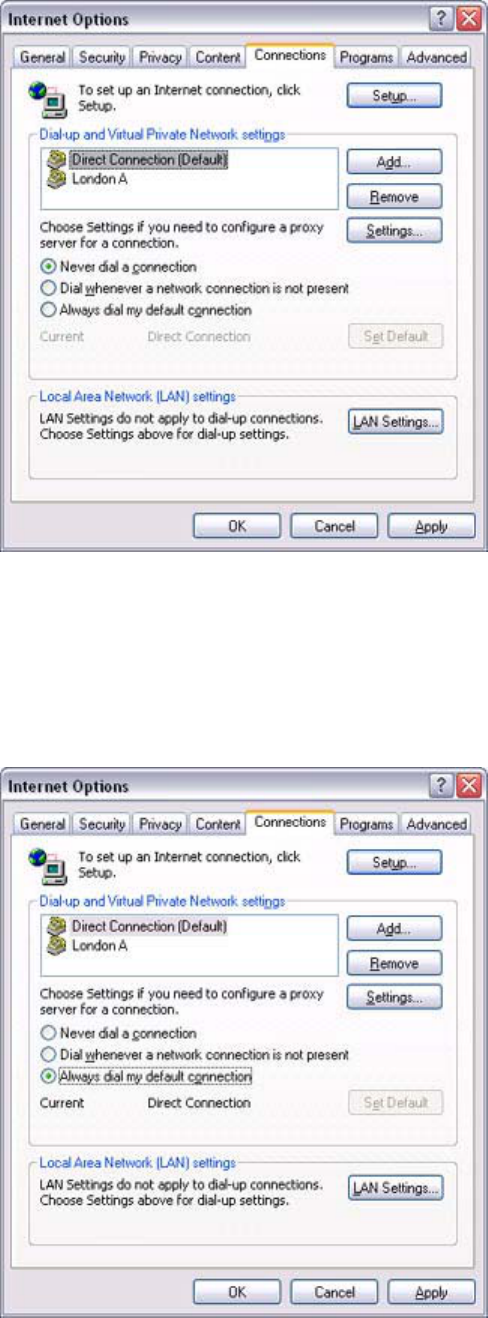
Introduction 第 173 頁,共 224 頁
file://C:\Documents and Settings\anitachou\Local Settings\Temp\~hh114B.htm 2004/11/30
The
[Internet
Options]
window
will
appear
.
3. Click on the [Connections] tab
In this window, "Direct Connection" is set as the default, and "Never dial a
connection" has been selected.
Chan
g
e the settin
g
s so that "London A" will alwa
y
s be dialled when
y
ou connec
t
the Internet.
4. Select "Always dial my default connection"
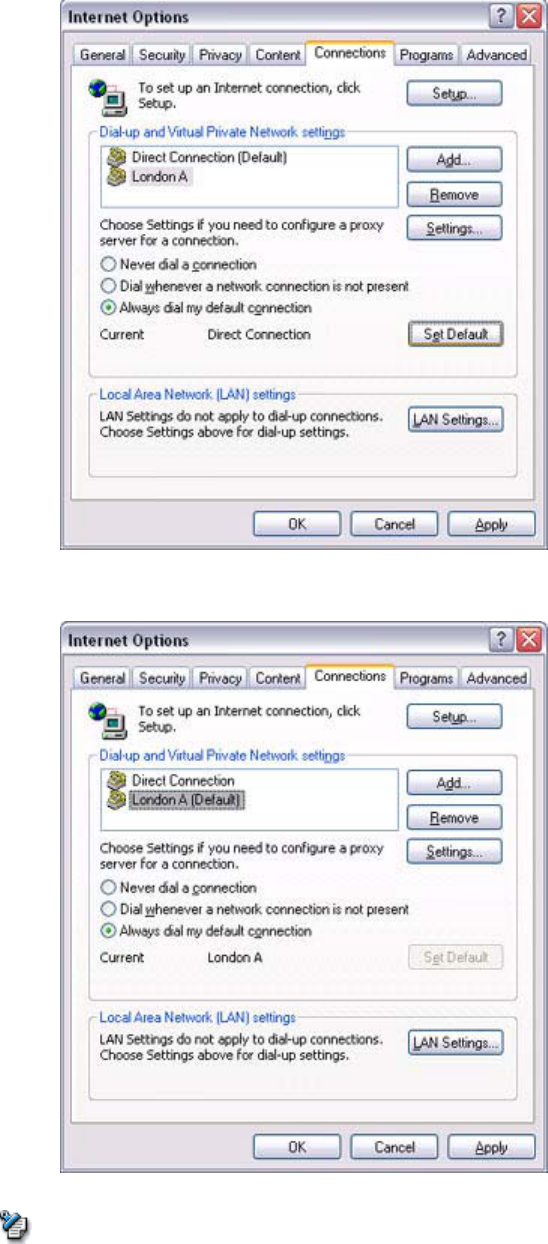
Introduction 第 174 頁,共 224 頁
file://C:\Documents and Settings\anitachou\Local Settings\Temp\~hh114B.htm 2004/11/30
5. Click on "London A", and then click on the [Set Default] button
"London A" has been changed to the default connection.
zAlternativel
y,
if
y
ou wish to connect to the Internet from a LAN in a com
p
an
y
or
o
environment where a LAN can be accessed
,
select "Never dial a connection" if
y
o
u
a dial-up configuration, but do not want dial -up to occur automatically.
zWhen connectin
g
to the Internet via a LAN
,
y
ou must enter the a
pp
ro
p
riate LAN
settings under [LAN Settings...].
Note
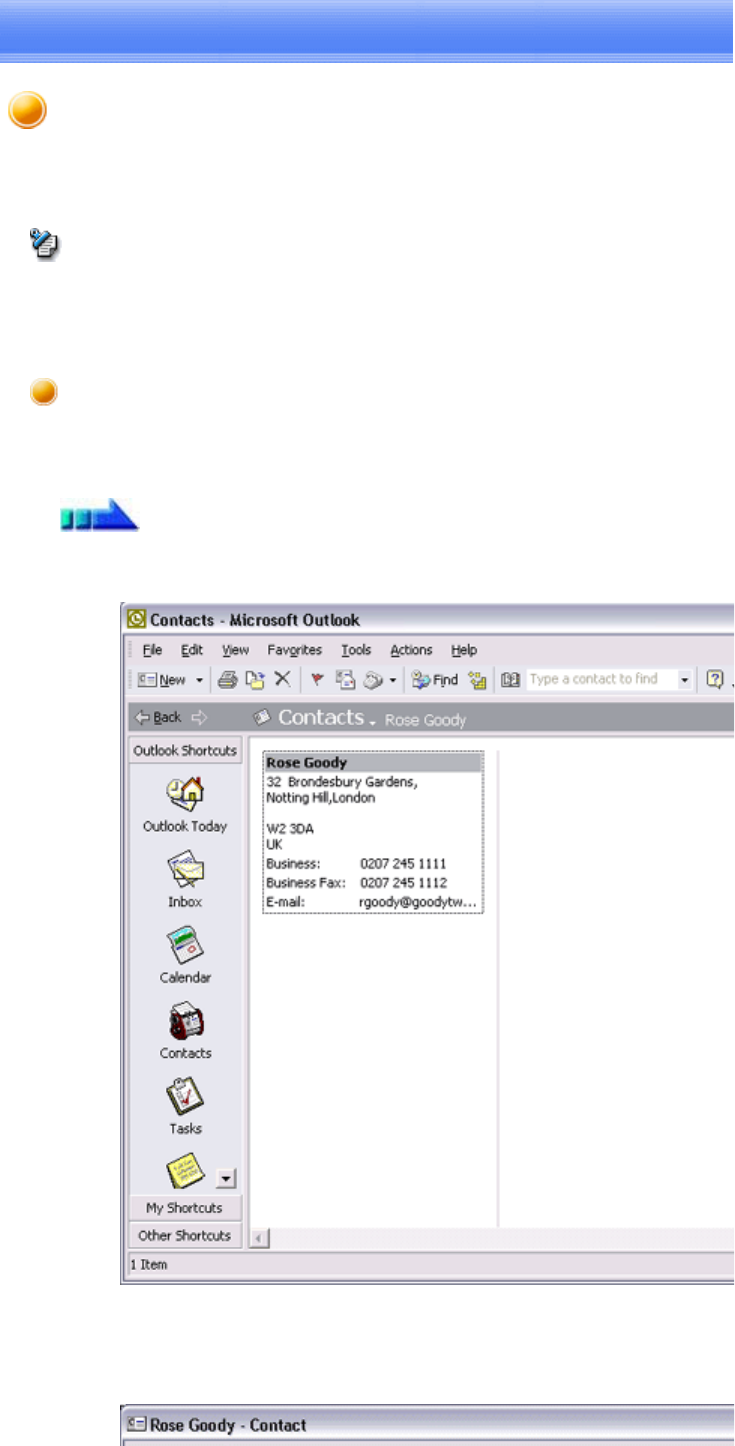
Introduction 第 175 頁,共 224 頁
file://C:\Documents and Settings\anitachou\Local Settings\Temp\~hh114B.htm 2004/11/30
This section describes how to send business card data wirelessly using Microsoft Outlook
zThe ex
p
lanation below relates to an exam
p
le in which Microsoft Outlook 2002 has be
e
used to
p
erform the
p
rocedure. Subtle differences ma
y
arise when usin
g
other versions
software.
You can send business card data directly from the "Contacts" window in Outlook.
1. Start Microsoft Outlook, and open the "Contacts" window
2. Double-click on the contact whose details you wish to send as a business card
The details of the contact you selected will appear.
Note
Sending business card data
Procedure
Sending business card data from Outlook
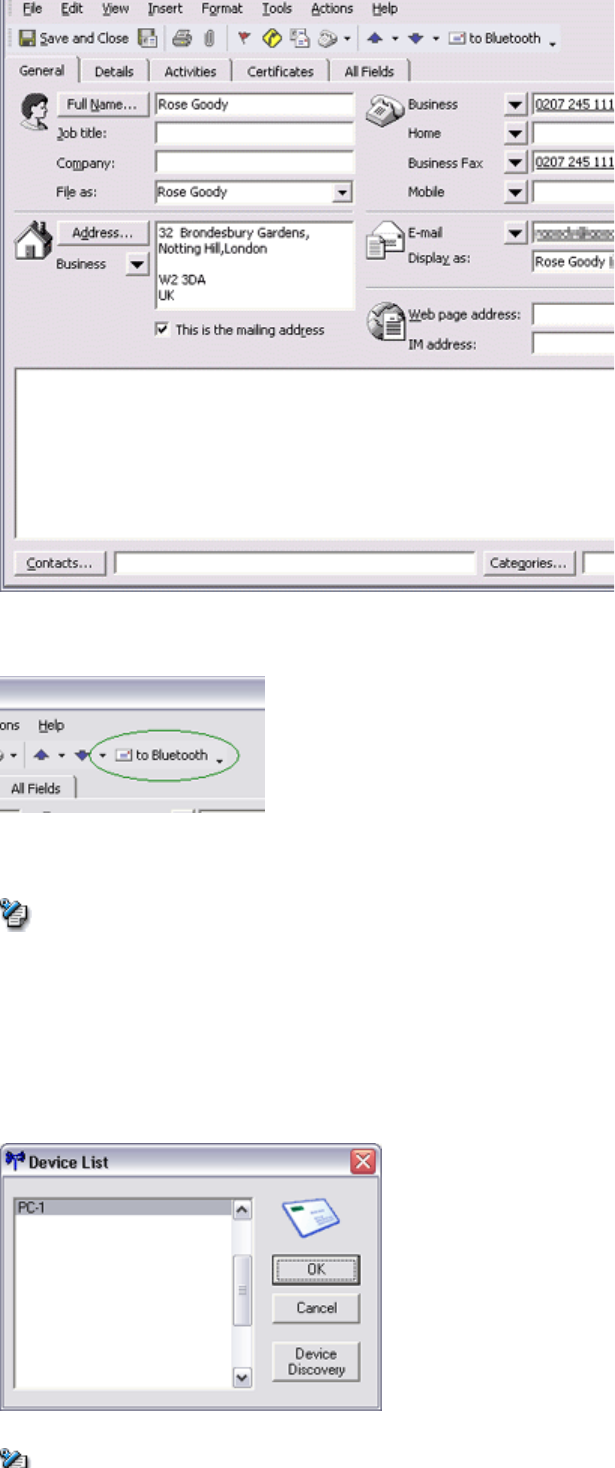
Introduction 第 176 頁,共 224 頁
file://C:\Documents and Settings\anitachou\Local Settings\Temp\~hh114B.htm 2004/11/30
3. Click on the [to Bluetooth] from the toolbar
The [Device List] window will appear.
{If the
[
to Bluetooth
]
button does not a
pp
ear on the toolbar
,
p
lease refer to
Installing business card-sending functionality in Outlook as an Add -in" b
e
and change the settings accordingly.
4. Select the destination for the business card data
,
and then click on the
[
Send
]
but
Note
Note
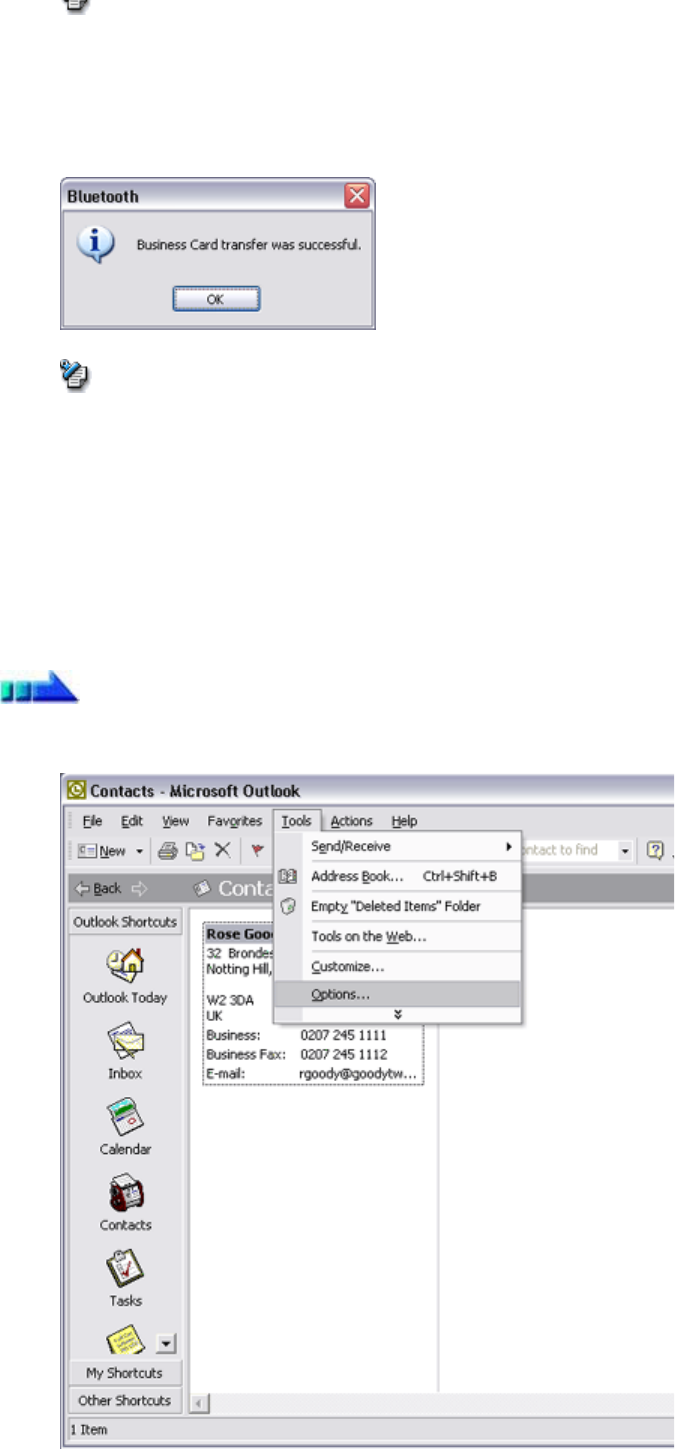
Introduction 第 177 頁,共 224 頁
file://C:\Documents and Settings\anitachou\Local Settings\Temp\~hh114B.htm 2004/11/30
{If you cannot find the destination device in the list, please click on the
[Searching for devices] button to discover it.
The business card will be sent.
If the business card has been sent successfully, the message below will appear.
{If the transmission was unsuccessful
,
p
lease attem
p
t to send the data once
m
after havin
g
confirmed the o
p
eratin
g
conditions
(p
ower status
,
securit
y
set
t
etc) of the destination device.
■Installing business card-sending functionality in Outlook as an Add -in
You can install one of the functions of the Bluetooth Utility in Outlook as an "Add -in"
,
will enable you to send business cards from the Outlook toolbar.
1. Click on [Tools]-[Options...] in Outlook
Note
Note
Procedure
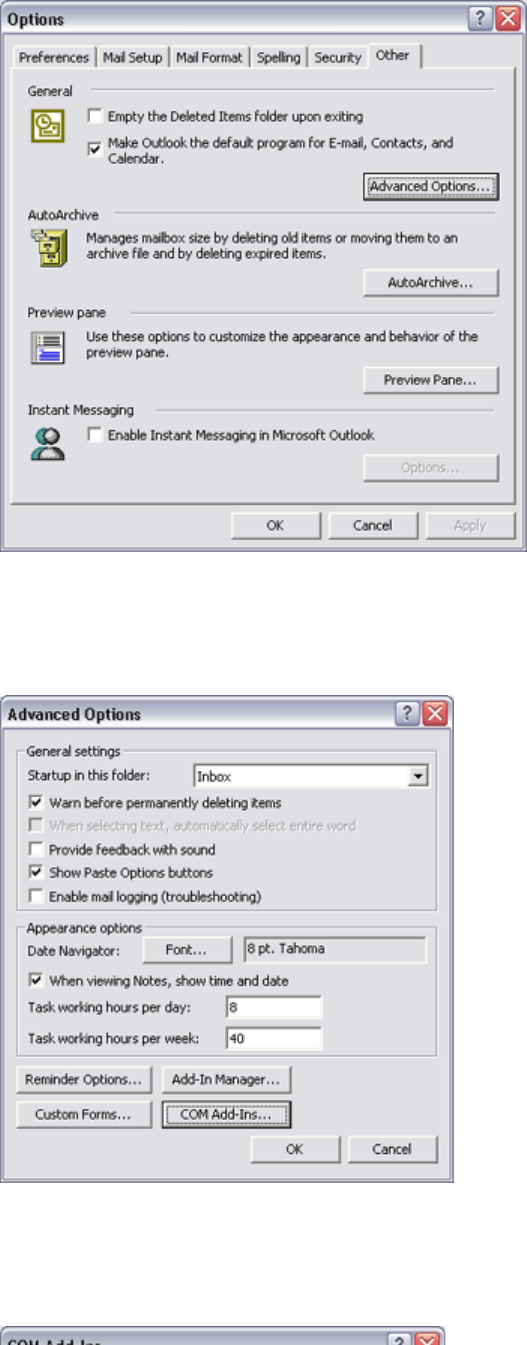
Introduction 第 178 頁,共 224 頁
file://C:\Documents and Settings\anitachou\Local Settings\Temp\~hh114B.htm 2004/11/30
The [Options] dialog box will appear.
2. Select the
[
Other
]
tab
,
and then click on the
[
Advanced O
p
tions...
]
button in the
"General" field
The [Advanced Options] dialog box will appear
3. Click on the [COM Add-Ins...] button
The [COM Add-Ins] dialog box will appear.
4. Click on the [Add...] button
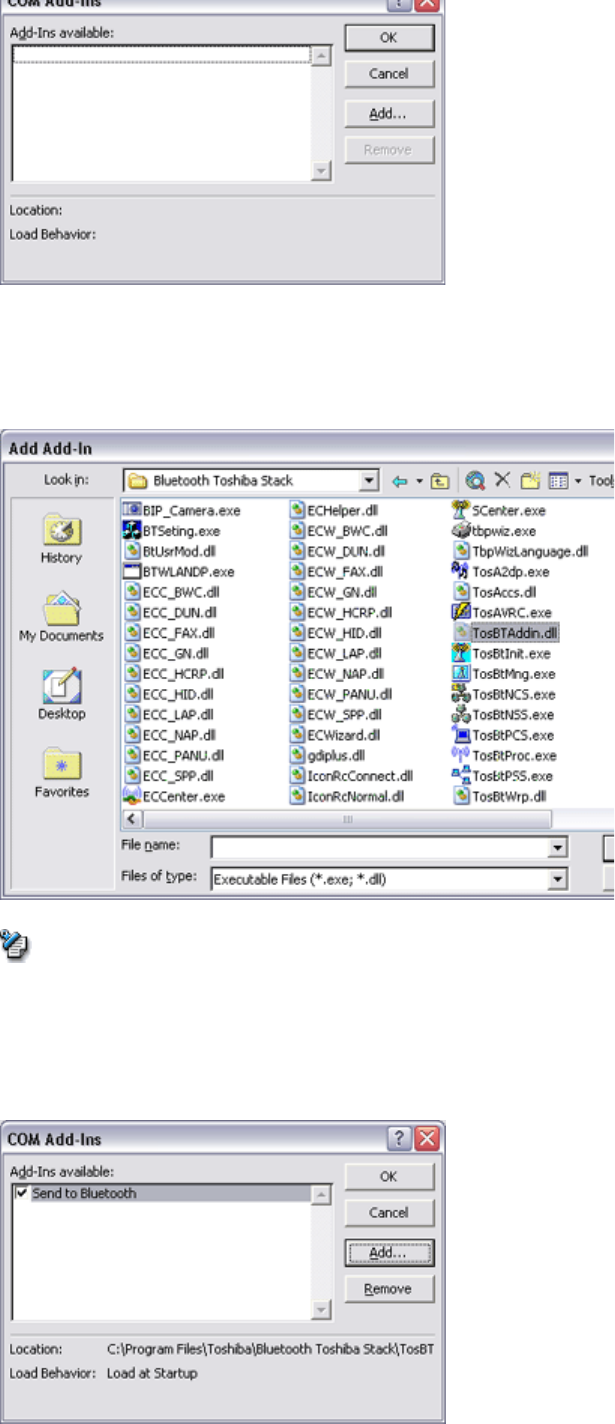
Introduction 第 179 頁,共 224 頁
file://C:\Documents and Settings\anitachou\Local Settings\Temp\~hh114B.htm 2004/11/30
The [Add Add-In] dialog box will appear.
5. Select "TosBTAddin.dll", and then click on the [OK] button
{"TosBTAddin.dll" can be found on the hard drive at the address below.
C:\Program Files\Toshiba\Bluetooth Toshiba Stack
6. Confirm that "Send to Bluetooth" has been added to the list and that a check a
ppe
next to it, and then click on the [OK] button
This will complete the Add
in process
Note

Introduction 第 180 頁,共 224 頁
file://C:\Documents and Settings\anitachou\Local Settings\Temp\~hh114B.htm 2004/11/30
This
will
complete
the
Add
-
in
process
.
In order for a PC to connect to and communicate with a Bluetooth device
,
the Bluetooth Uti
l
will create a
g
atewa
y
for data to be exchan
g
ed between the res
p
ective devices. This
g
atewa
y
known as a "port" (or "virtual COM port").
Since one virtual COM port will be allocated to each device, trouble -free communication
w
be possible even if several devices are being used.
When
y
ou use the Bluetooth Utilit
y,
a virtual COM
p
ort will be automaticall
y
created on set
however, virtual COM ports can be created manually if so needed.
zBluetooth Manager must be active in order for
y
ou to be able to use Bluetooth Local
C
When Bluetooth communications are performed, there will always be a "client/server"
relationshi
p
between the various devices. A "client" is a device that sends certain re
q
ues
t
another device
,
while a "server" is a device that
p
rovides a service on recei
p
t of such re
q
from another device.
For exam
p
le
,
when a PC issues a
p
rint command to a wireless
p
rinter
,
the PC functions
a
client, while the printer functions as the server.
When a PDA or other device attem
p
ts to receive files located on a PC b
y
means of file
transfer protocol, the PC functions as the server, while the PDA functions as the client.
Virtual Bluetooth COM ports can be created both for clients and servers.
zBluetooth virtual COM port for a client
Virtual COM
p
ort used when
y
our device is the client
,
and re
q
uests are sent to ano
device.
zBluetooth virtual COM port for a server
Virtual COM
p
ort used when
y
our device is the server
,
and re
q
uests are received f
r
another device.
Bluetooth virtual COM ports are created according to the procedure below.
1. Click on the [Printers and Other Hardware] icon in the Control Panel
Note
Clients and servers
Creating a virtual COM port
Procedure
Manually creating a virtual Bluetooth COM port

Introduction 第 181 頁,共 224 頁
file://C:\Documents and Settings\anitachou\Local Settings\Temp\~hh114B.htm 2004/11/30
The [Printers and Other Hardware] window appears.
2. Double-click on the [Bluetooth Local COM] icon
The main Bluetooth Local COM window will appear.
{Even when the Control Panel a
pp
ears in Classic view
,
p
lease sim
p
l
y
click
o
[Bluetooth Local COM] icon.
Note
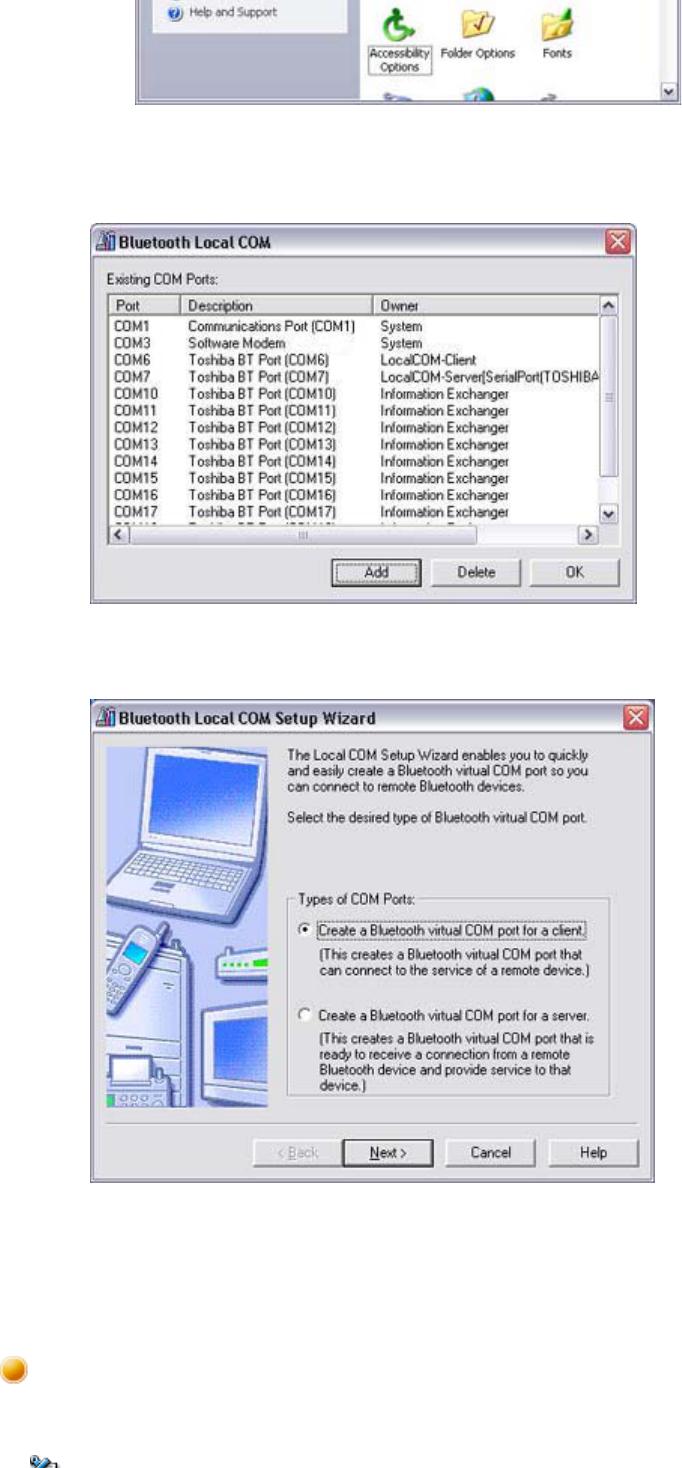
Introduction 第 182 頁,共 224 頁
file://C:\Documents and Settings\anitachou\Local Settings\Temp\~hh114B.htm 2004/11/30
{No such distinction between viewing formats exists in Windows 2000.
3. Click on the [Add...] button
The
[
Bluetooth Local COM Wizard
]
window
,
from where
y
ou can create a virtu
a
COM port, will appear.
Start from this window when creatin
g
Bluetooth virtual COM
p
orts for either se
r
or clients.
→Creating a Bluetooth virtual COM port for a client
→Creating a Bluetooth virtual COM port for a server
Please follow the
p
rocedure below to delete a virtual COM
p
ort when it is no lon
g
er nee
d
Deleting a virtual COM port
Note
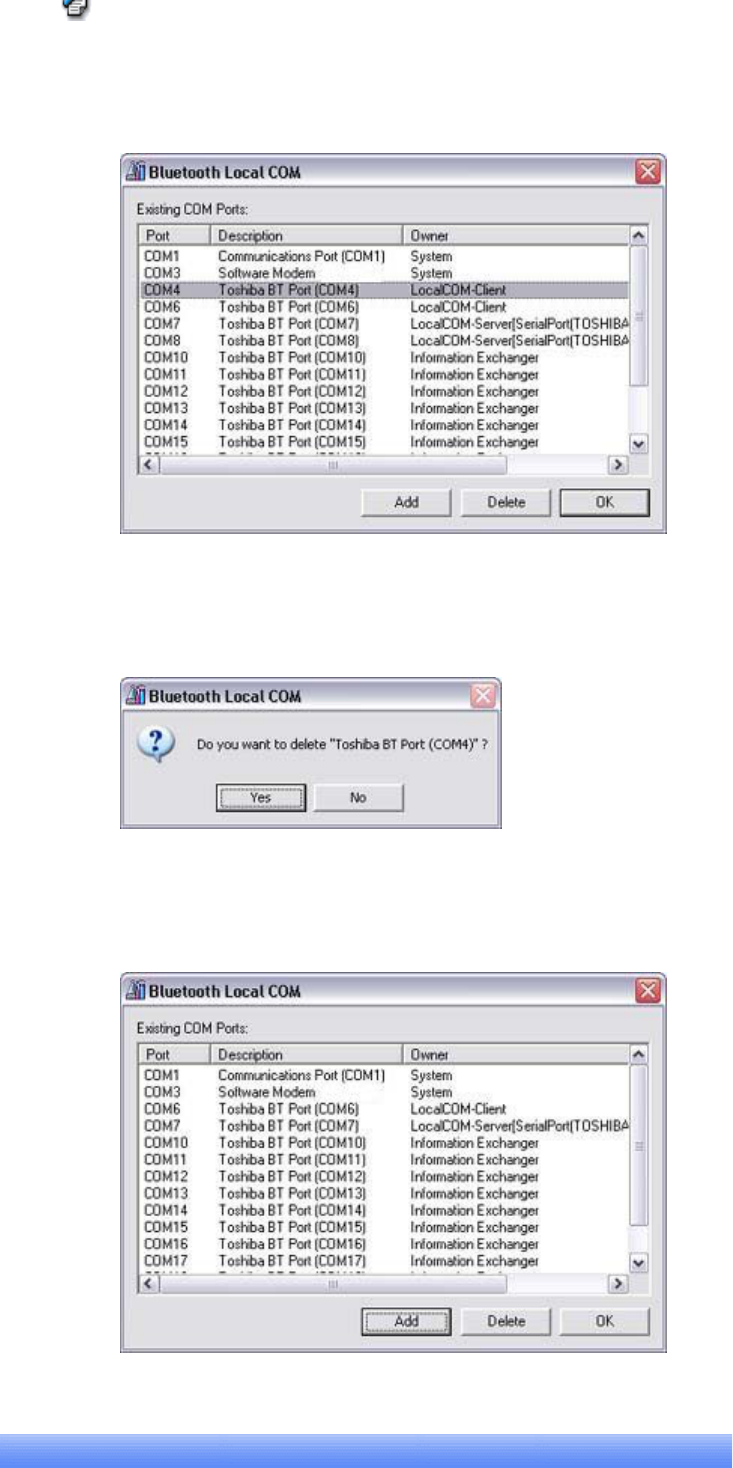
Introduction 第 183 頁,共 224 頁
file://C:\Documents and Settings\anitachou\Local Settings\Temp\~hh114B.htm 2004/11/30
zYou can onl
y
delete virtual COM
p
orts created b
y
the Bluetooth Local COM utilit
y
1. Select the
p
ort
y
ou wish to delete from the
[
Bluetooth Local COM
]
window
,
an
d
click on the [Delete] button
A message will appear asking you to confirm that you wish to delete the port.
2. Click on the [Yes] button
The port will be deleted.
3. Click on the [OK] button
Note
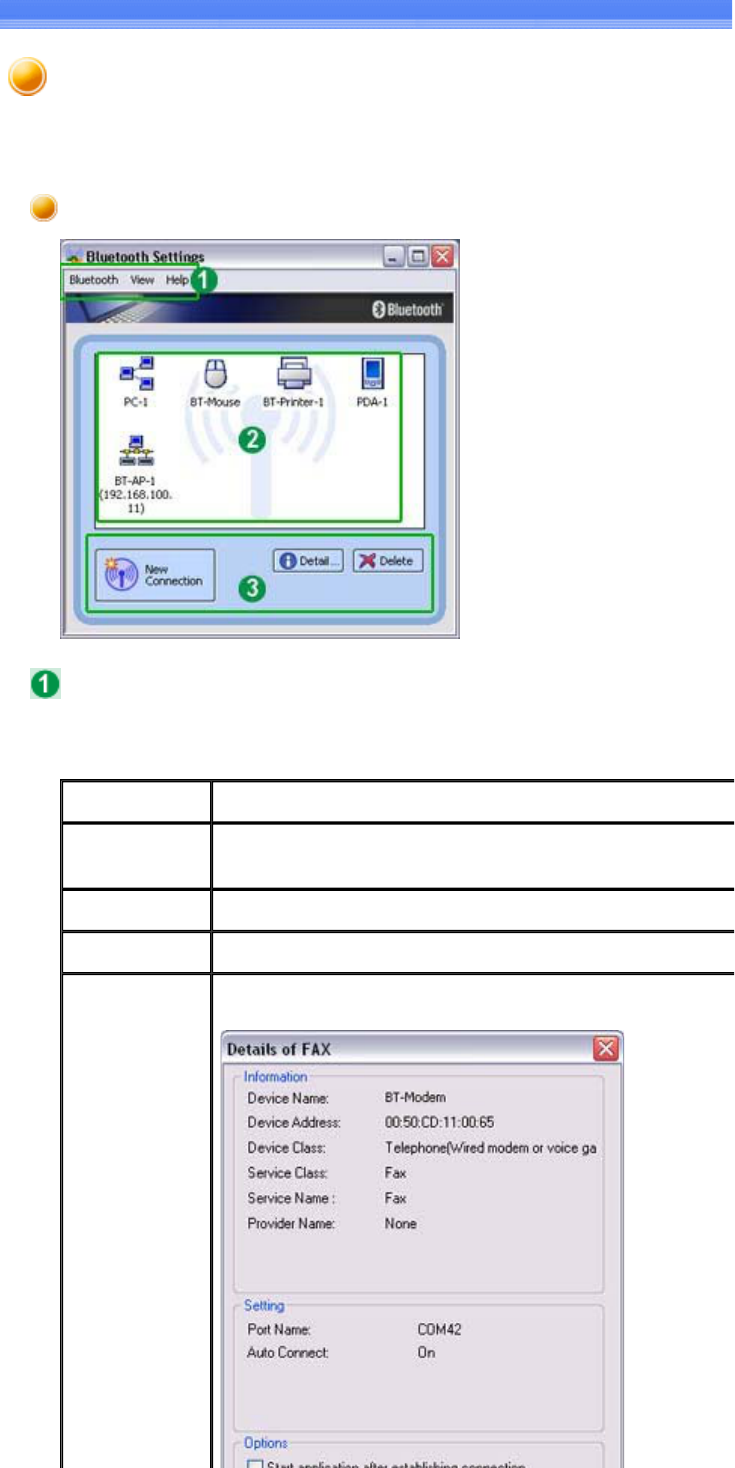
Introduction 第 184 頁,共 224 頁
file://C:\Documents and Settings\anitachou\Local Settings\Temp\~hh114B.htm 2004/11/30
This section provides detailed information on the [Bluetooth Settings] window.
■[Bluetooth] menu
Main window
Menu
Category Description
Add New
Connection O
p
ens the
[
Add New Connection Wizard
]
window
,
and then search
new devices.
Connect Connects to selected device.
Disconnect Disconnects from selected device.
Details Displays detailed information about selected device.
Bluetooth Settings

Introduction 第 185 頁,共 224 頁
file://C:\Documents and Settings\anitachou\Local Settings\Temp\~hh114B.htm 2004/11/30
Delete Deletes selected device.
Create shortcut
on Desktop Creates a shortcut icon for the selected device on the Desktop.
Rename Changes the name of the device you have selected.
Change Icon Changes the icon of the device you have selected.
COM Auto
Connect Settings O
p
ens the
[
COM Auto Connect Settin
g
s
]
window
,
and allows
y
ou
t
enable/disable Auto Connect.
Dis
p
la
y
s the device connection name and
p
ort used. Check the box
enable Auto Connect
,
and remove the check to disable Auto Conne
c
You will need to connect manually to use a device in the latter case
AV player
selection Opens [Select AV Payer] window, and allows you to select the
application to be used when you want to play sound files or CDs.
Exit Closes the [Bluetooth Settings] window.
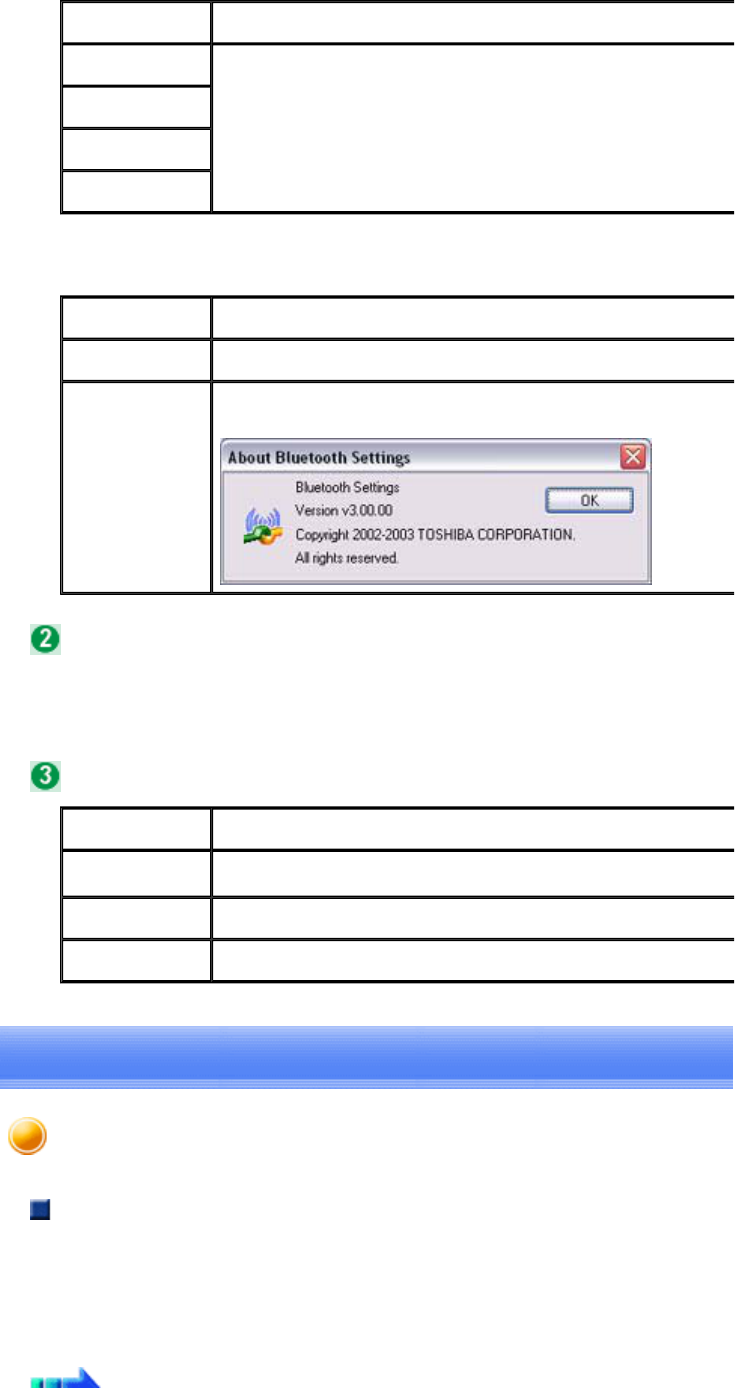
Introduction 第 186 頁,共 224 頁
file://C:\Documents and Settings\anitachou\Local Settings\Temp\~hh114B.htm 2004/11/30
■[View] menu
■[Help] menu
Displays a list of devices that have been registered in [Bluetooth Settings].
Category Description
Large icons Changes the way icons are displayed on a device.
Small icons
List
Details
Category Description
Help Opens the Bluetooth Utility User Guide.
Version Displays the version information for Bluetooth Settings.
Device List
Function buttons
Category Description
New Connection Opens [Add New Connection Wizard] window.
Details... Shows details of selected device.
Delete Deletes selected device.
Creating a Shortcut
If
y
ou have created a shortcut icon on the Deskto
p,
y
ou can easil
y
establish a connection to
a
device that has been re
g
istered usin
g
Bluetooth Settin
g
s without havin
g
to o
p
en the Bluetoot
h
Settings window.
Procedure
One-touch connection to Bluetooth devices
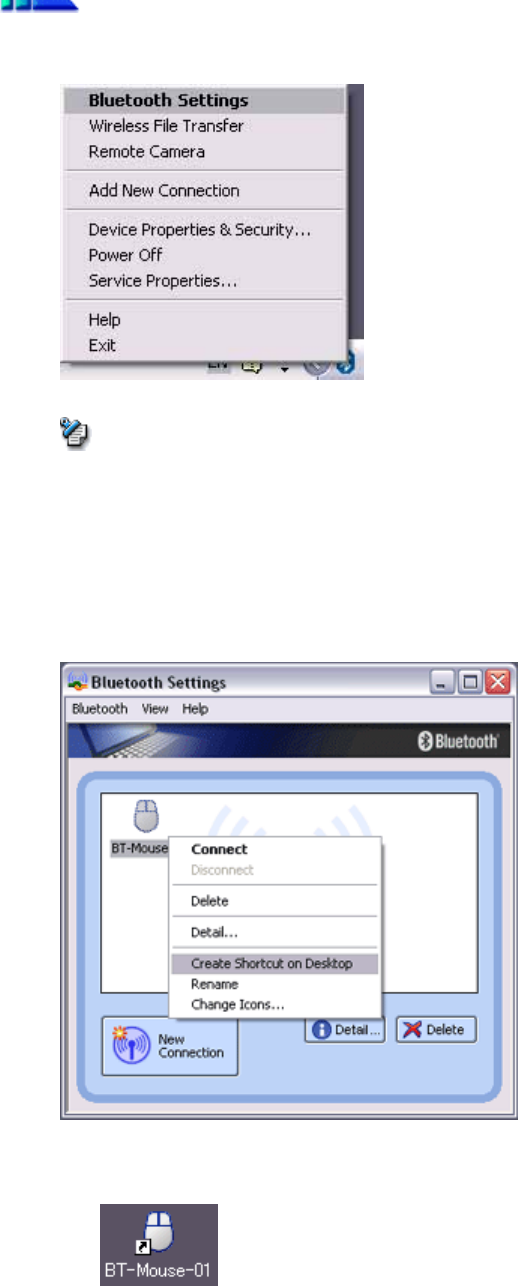
Introduction 第 187 頁,共 224 頁
file://C:\Documents and Settings\anitachou\Local Settings\Temp\~hh114B.htm 2004/11/30
1. Right-click on Bluetooth icon in task tray and click on [Bluetooth Settings]
{Alternatively, you can click [Start] →[All Programs]→[Bluetooth]→[Bluetoo
t
Settings].
The
[
Bluetooth Settin
g
s
]
screen will a
pp
ear
,
from where
y
ou can create a Shortcut e
n
"Bluetooth Mouse."
2. Right-click on the [BT-Mouse-01
]
icon
,
and then click on
[
Create Shortcut on Desk
t
A shortcut icon entitled "BT-Mouse-01" will appear on the Desktop.
■Establishing a connection from the Shortcut
1. Double-click on the "BT-Mouse-01" icon from the Desktop
The [Bluetooth Settings] window will open.
Procedure
Note
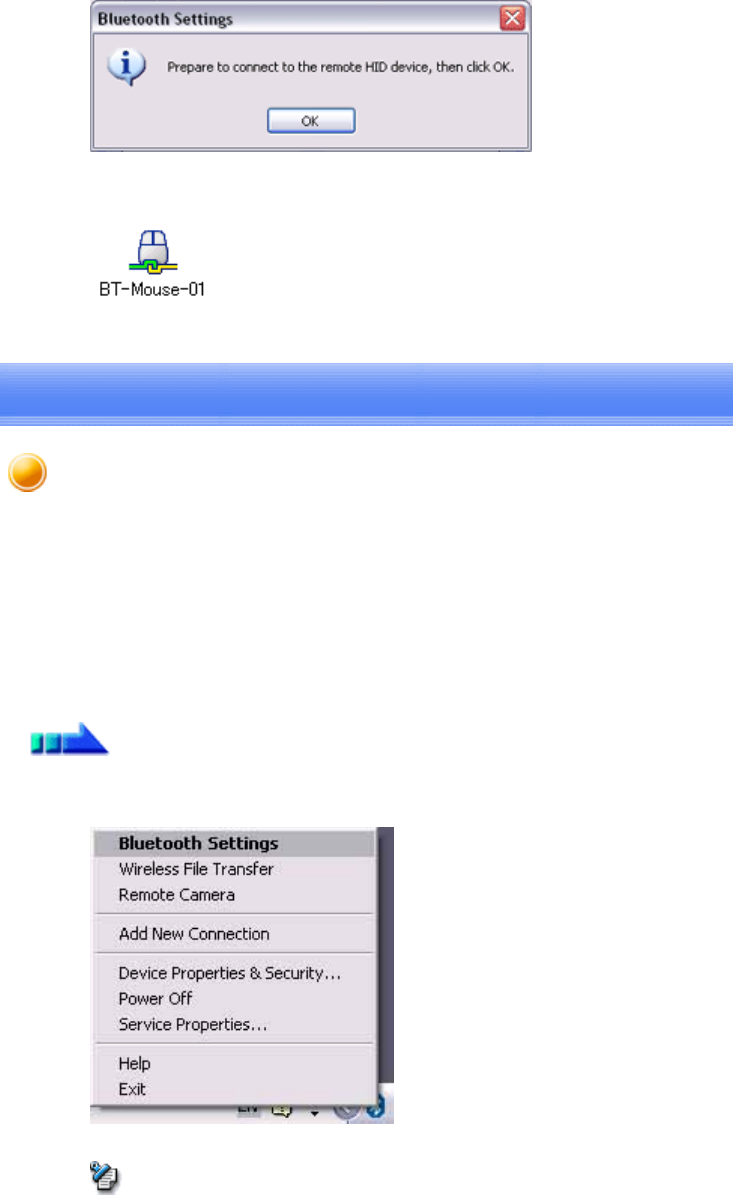
Introduction 第 188 頁,共 224 頁
file://C:\Documents and Settings\anitachou\Local Settings\Temp\~hh114B.htm 2004/11/30
2. Turn on the mouse, set it to Bluetooth -connectable mode
,
and then click on the
[
OK
button in the [Bluetooth Settings] window.
The mouse will be connected.
After a ke
y
board or mouse
(
HID
p
rofile
),
p
rinter
(
HCRP or SPP
p
rofiles
),
or other device h
a
been set u
p
for the first time
,
subse
q
uent connections will be automaticall
y
restored whenev
e
operate the device, print out a document from the PC, or perform another similar activity.
Should the connection not have been
p
ro
p
erl
y
restored
,
p
lease establish a manual connectio
n
the device using the procedure below.
1. Right-click on Bluetooth icon in task tray and click on [Bluetooth Settings]
{Alternatively, click [Start]→[All Programs]→[Bluetooth]→[Bluetooth Settin
g
The
[
Bluetooth Settin
g
s
]
screen will a
pp
ear
,
from where
y
ou can create a Shortcut e
n
"BT Mouse."
2. Ri
g
ht-click on the
[
BT-Mouse-01
]
icon
,
and then click on the
[
Connect
]
button
Procedure
Note
Manually connecting to a Bluetooth device
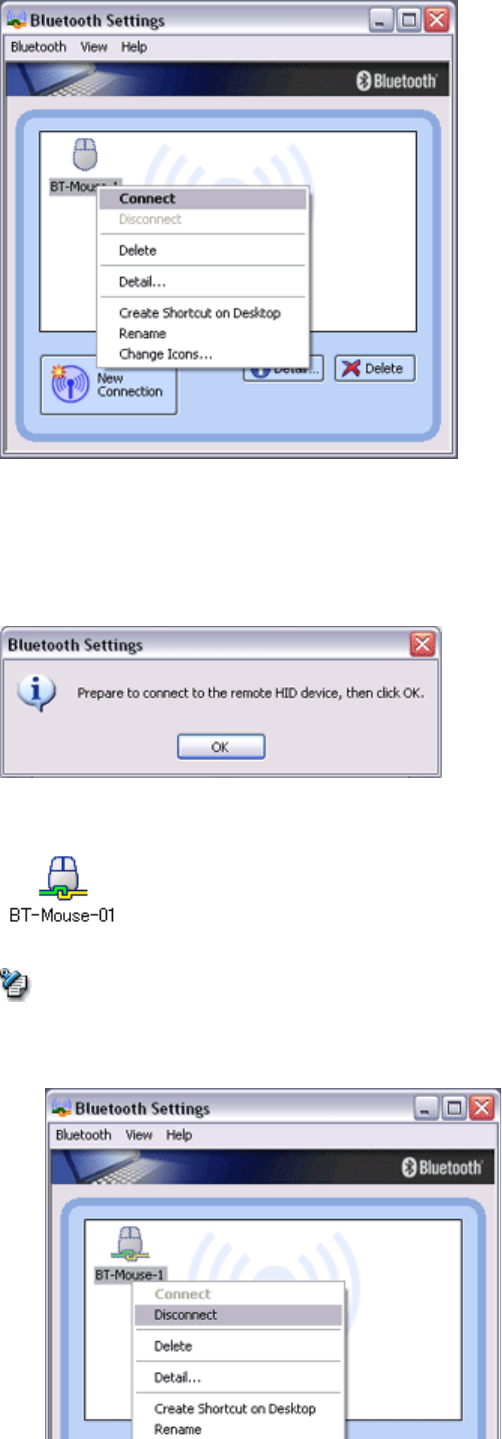
Introduction 第 189 頁,共 224 頁
file://C:\Documents and Settings\anitachou\Local Settings\Temp\~hh114B.htm 2004/11/30
g
[
], [ ]
The [Bluetooth Settings] window will open.
3. Turn on the mouse, enable Bluetooth-connection mode
,
and click on the
[
OK
]
butto
n
the [Bluetooth Settings] window.
The mouse will be connected.
{If you wish to manually disconnect a device, right -click on its icon and click
[Disconnect].
Note
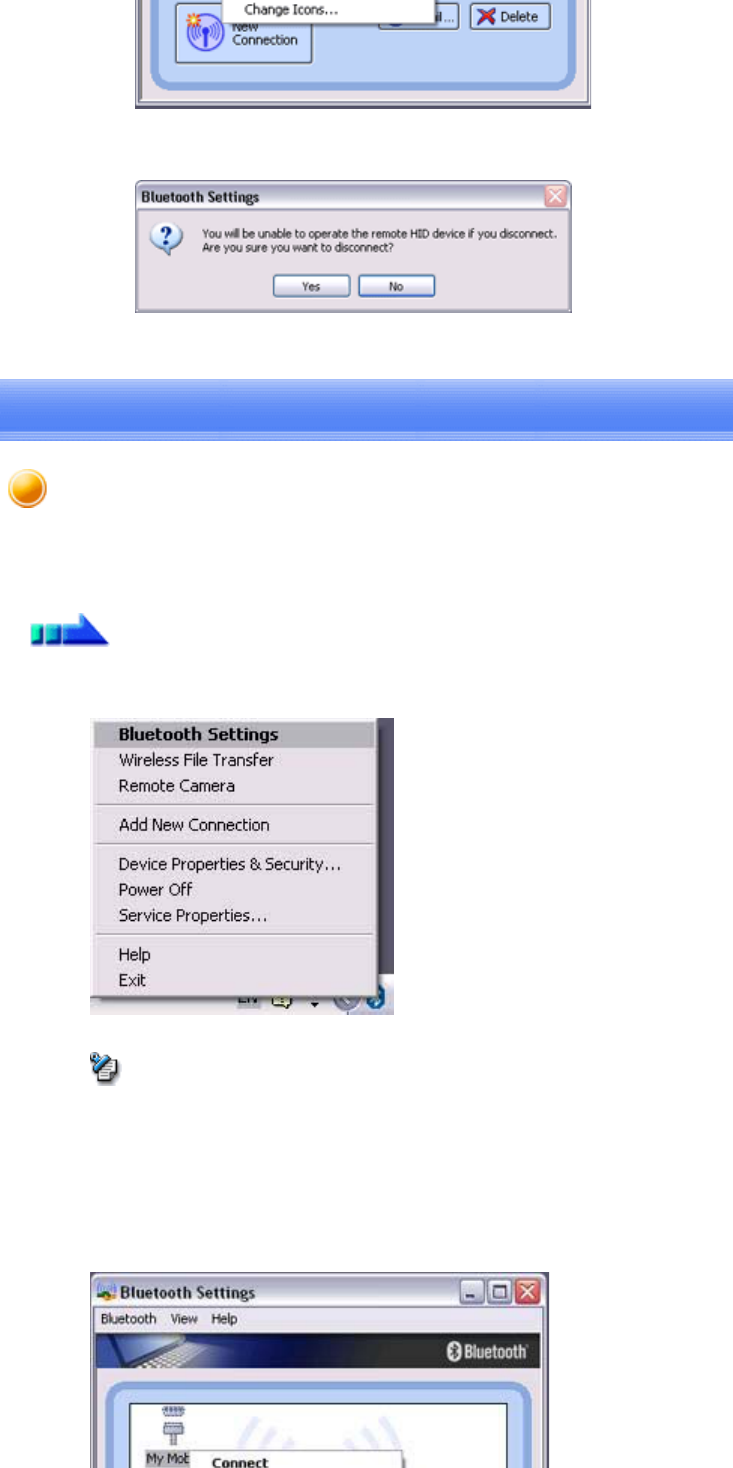
Introduction 第 190 頁,共 224 頁
file://C:\Documents and Settings\anitachou\Local Settings\Temp\~hh114B.htm 2004/11/30
When the following message appears, click on the [Yes] button.
You can change a device icon that has been registered on the Bluetooth Settings screen.
1. Right-click on the Bluetooth icon in the task tra
y,
and then click on
[
Bluetooth Setti
n
{Alternatively, click [Start]→[All Programs]→[Bluetooth]→[Bluetooth Settin
g
The [Bluetooth Settings] window will appear. Now try to change the icon for "My
Mobile."
2. Right-click on the "My Mobile" icon, and then click on [Change Icon]
Procedure
Note
Changing a connection icon
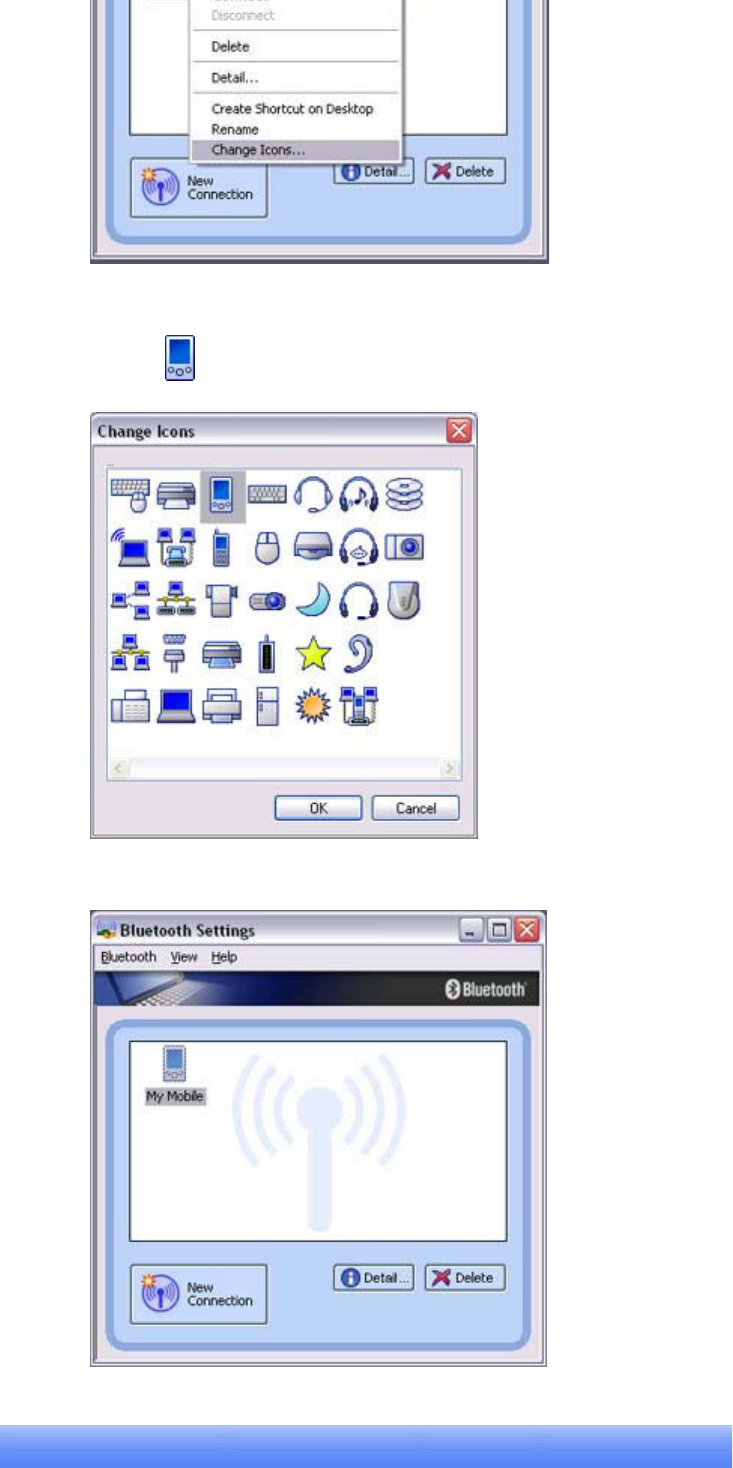
Introduction 第 191 頁,共 224 頁
file://C:\Documents and Settings\anitachou\Local Settings\Temp\~hh114B.htm 2004/11/30
A list of available icons will appear.
3. Select the icon, and then click on the [OK] button
The new icon will appear.
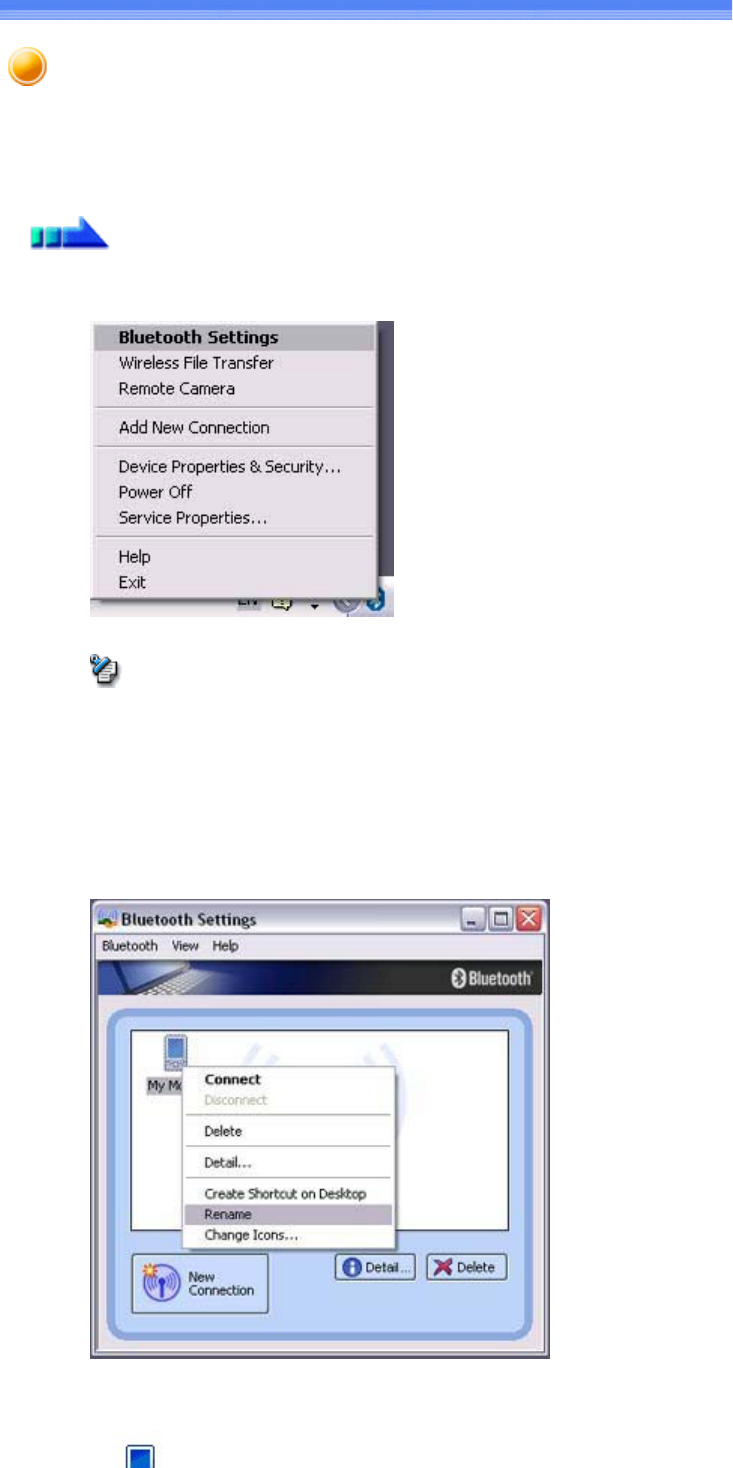
Introduction 第 192 頁,共 224 頁
file://C:\Documents and Settings\anitachou\Local Settings\Temp\~hh114B.htm 2004/11/30
You can chan
g
e a the name of a device icon that has been re
g
istered on the Bluetooth Settin
g
screen.
1. Right-click on the Bluetooth icon in the task tra
y,
and then click on
[
Bluetooth Setti
n
{Alternatively, click [Start]→[All Programs]→[Bluetooth]→[Bluetooth Settin
g
The
[
Bluetooth Settin
g
s
]
window will a
pp
ear. Now tr
y
to chan
g
e the connection na
m
"My Mobile" to "Pocket PC."
2. Right-click on "My Mobile", and then click on [Change Name]
You will now be able to enter a name.
Procedure
Note
Changing a connection icon name