ASUSTeK Computer W5G00UGPZ50 NOTEBOOK P.C. BLUETOOTH DEVICE User Manual USERS MANUAL 5
ASUSTeK Computer Inc NOTEBOOK P.C. BLUETOOTH DEVICE USERS MANUAL 5
Contents
- 1. USERS MANUAL 1
- 2. USERS MANUAL 2
- 3. USERS MANUAL 3
- 4. USERS MANUAL 4
- 5. USERS MANUAL 5
USERS MANUAL 5
![Quick Start Guide - Introduction 第 64 頁,共 160 頁file://C:\Documents and Settings\anitachou\Local Settings\Temp\~hh3F24.htm 2004/11/30 The [Fax Console] window will appear.3. In the [Fax Console] window, double-click on the fax that has arrivedAn image of the received fax will be displayed.Related topic: "Sending a fax"Printing](https://usermanual.wiki/ASUSTeK-Computer/W5G00UGPZ50.USERS-MANUAL-5/User-Guide-494444-Page-1.png)
![Quick Start Guide - Introduction 第 65 頁,共 160 頁file://C:\Documents and Settings\anitachou\Local Settings\Temp\~hh3F24.htm 2004/11/30 This section describes how to use a Bluetooth -compatible printer for printing.When printing using Bluetooth, the methods for configuring and using the printer will vary with the corresponding profile.z(*1) The majority of Bluetooth-compatible printers support HCRP.If you have selected Express Mode, HCRP will be chosen as the default profile. If the printer does not support HCRP, then SPP will be the next choice. z(*2) The printing of business cards using OPP complies exclusively with the business card (vCARD) standard. Types of printer functionsProfile Bluetooth Settings OperationHCRP (*1) You must register the printer in Bluetooth SettingsAllows you to print from various applications, as with ordinary cable-connected printers.→"Printing document and images"SPPOPP (*2) Not required Allows you to print business card data directly.→"Printing business card data"BIP Not required Allows you to print image data directly. →"Printing images directly from a digital camera or other device"NoteThis section describes how to print using a Bluetooth -compatible printer. →Setting up the printer→Printing zPlease ensure that any printer-specific drivers have been installed on the PC before you have established a Bluetooth connection. zA Bluetooth passkey (PIN code) is required for you to connect to the printer. Please make a note of your Bluetooth passkey before you start the set -up process. ImportantS tti th i tPrinting documents and images [HCRP] [SPP]](https://usermanual.wiki/ASUSTeK-Computer/W5G00UGPZ50.USERS-MANUAL-5/User-Guide-494444-Page-2.png)
![Quick Start Guide - Introduction 第 66 頁,共 160 頁file://C:\Documents and Settings\anitachou\Local Settings\Temp\~hh3F24.htm 2004/11/301. Turn on the printer2. Right-click on the Bluetooth icon in the task tray, and then click on [Add New Connection] {Alternatively, click [Start]→[All Programs]→[Bluetooth]→[Bluetooth Settings], and then click on [New Connection] from the active [Bluetooth Settings] window. The [Add New Connection Wizard (Welcome to the Add New Connection Wizard)] window will appear.3. Confirm that [Express Mode] has been selected, and then click on the [Next] buttonThe [Add New Connection Wizard (Searching for Bluetooth devices)] window will appear.Setting up the printerProcedureNote](https://usermanual.wiki/ASUSTeK-Computer/W5G00UGPZ50.USERS-MANUAL-5/User-Guide-494444-Page-3.png)
![Quick Start Guide - Introduction 第 67 頁,共 160 頁file://C:\Documents and Settings\anitachou\Local Settings\Temp\~hh3F24.htm 2004/11/30Once the program has finished searching for the devices, the [Add New Connection Wizard (Device Selection)] window will appear.4. Select the device name of the printer from [Device List], and then click on the [Next] buttonThe [Add New Connection Wizard (Searching for Services)] window will appear.](https://usermanual.wiki/ASUSTeK-Computer/W5G00UGPZ50.USERS-MANUAL-5/User-Guide-494444-Page-4.png)
![Quick Start Guide - Introduction 第 68 頁,共 160 頁file://C:\Documents and Settings\anitachou\Local Settings\Temp\~hh3F24.htm 2004/11/30 5. If you are connecting to the printer for the first time, enter the passkey for the device from the [Bluetooth Passkey (PIN Code)] window, and then click on the [OK] button.Once the services have been detected successfully, connection to the device and creation of the HCRP port will be performed automatically. If you have not yet installed a printer, a message prompting you to install a printer will appear.6. Click on the [OK] buttonThe [Add Printer Wizard (Starting the Add Printer Wizard)] window will appear.7. Click on the [Next] button](https://usermanual.wiki/ASUSTeK-Computer/W5G00UGPZ50.USERS-MANUAL-5/User-Guide-494444-Page-5.png)
![Quick Start Guide - Introduction 第 69 頁,共 160 頁file://C:\Documents and Settings\anitachou\Local Settings\Temp\~hh3F24.htm 2004/11/30The [Add Printer Wizard (Local Printer or Network Printer)] window will appear.8. Select "Local printer attached to this computer", remove the check next to "Automatically detect and install my Plug and Play printer", and then click on the [Next] button The [Add Printer Wizard (Select Printer Port)] window will appear.9. Select the desired port, and then click on the [Next] buttonThe [Add Printer Wizard (Install Printer Software)] window will appear.](https://usermanual.wiki/ASUSTeK-Computer/W5G00UGPZ50.USERS-MANUAL-5/User-Guide-494444-Page-6.png)
![Quick Start Guide - Introduction 第 70 頁,共 160 頁file://C:\Documents and Settings\anitachou\Local Settings\Temp\~hh3F24.htm 2004/11/3010. Select the [Manufacturer] and [Printer] as pertains to the printer to be installed, or click on the [Use Device] button, and then click on the [Next] button Please install the printer according to the instructions in the windows that follow.Once installation is complete, a message of confirmation will appear in the [Add New Connection Wizard (Printer Settings)] window.11. Click on [Next]The [Add New Connection Wizard (Connection Name Settings)] window will appear.12. Enter the type and name of the icon displayed after registration, and then click on the [Next] buttonPlease click on the [Next] button if you are satisfied with the settings.](https://usermanual.wiki/ASUSTeK-Computer/W5G00UGPZ50.USERS-MANUAL-5/User-Guide-494444-Page-7.png)
![Quick Start Guide - Introduction 第 71 頁,共 160 頁file://C:\Documents and Settings\anitachou\Local Settings\Temp\~hh3F24.htm 2004/11/30 {You can change the connection icon and icon name.→"Changing the connection icon name "→"Changing the connection icon" Try to print from the message pad. 1. Click [File]→[Print]The [Print] screen will appear.2. Select wireless printer from under [Select Printer], and then click on the [Print] buttonPrinting will commence. NotePrintingNote](https://usermanual.wiki/ASUSTeK-Computer/W5G00UGPZ50.USERS-MANUAL-5/User-Guide-494444-Page-8.png)
![Quick Start Guide - Introduction 第 72 頁,共 160 頁file://C:\Documents and Settings\anitachou\Local Settings\Temp\~hh3F24.htm 2004/11/30zIf you have connected to a printer using HCRP or SPP profiles, all future Bluetooth connections to that printer will be established automatically once you have printed a document from your PC. If you have a printer that supports BIP (Basic Imaging Profile), you can send images direto a printer to be printed out, without having to perform any special set -up procedure.→Printing image files on a printer (using icons)→Printing image files on a printer (by right -clicking the mouse)zBelow is a list of file types (extensions) of images that can be printed out directly.{Bitmap (*.bmp){JPEG (*.jpg; *.jpeg){PNG (*.png)■Printing image files on a printer (using icons) 1. Turn on the printer2. Click on the Bluetooth Information Exchanger icon on the Desktop {Alternatively, open Explorer and click on the Bluetooth Information Exchafolder for the same result.NoteProcedureNotePrinting images directly from a digital camera or other device [BIP]](https://usermanual.wiki/ASUSTeK-Computer/W5G00UGPZ50.USERS-MANUAL-5/User-Guide-494444-Page-9.png)
![Quick Start Guide - Introduction 第 73 頁,共 160 頁file://C:\Documents and Settings\anitachou\Local Settings\Temp\~hh3F24.htm 2004/11/30The [Bluetooth Information Exchanger] window will appear.3. Double-click on the [Image Transfer] iconA list of devices will appear in the [Image Transfer] window.{If your desired printer does not appear in the list, please confirm that the prhas been turned on, and then click on [Bluetooth] →[Search Devices]A device search will be performed. 4. Drag and drop the file to be sent on top of the icon of the destination printerNote](https://usermanual.wiki/ASUSTeK-Computer/W5G00UGPZ50.USERS-MANUAL-5/User-Guide-494444-Page-10.png)
![Quick Start Guide - Introduction 第 74 頁,共 160 頁file://C:\Documents and Settings\anitachou\Local Settings\Temp\~hh3F24.htm 2004/11/30The file will be sent to the printer. If the file has been sent to the printer successfully, the message below will appeathe image will be printed out. Please click on the [OK] button.The message below will appear if the file transmission was unsuccessful. Please on the [OK] button to close the message, and repeat the printing procedure. {If the printer does not support the BIP profile, the message below will appe ■Printing image files to a printer (by right -clicking the mouse)Note](https://usermanual.wiki/ASUSTeK-Computer/W5G00UGPZ50.USERS-MANUAL-5/User-Guide-494444-Page-11.png)
![Quick Start Guide - Introduction 第 75 頁,共 160 頁file://C:\Documents and Settings\anitachou\Local Settings\Temp\~hh3F24.htm 2004/11/301. Turn on the printer2. Right-click on the file to be sent, and then click on the destination printer under [Bluetooth]{If your desired device does not appear in the list, please confirm that the dehas been turned on, and then click on [to Bluetooth] →[Search Other DeviOnce the device has been detected, the message below will appear. Please sthe destination device, and click on the [Send] button.Note](https://usermanual.wiki/ASUSTeK-Computer/W5G00UGPZ50.USERS-MANUAL-5/User-Guide-494444-Page-12.png)
![Quick Start Guide - Introduction 第 76 頁,共 160 頁file://C:\Documents and Settings\anitachou\Local Settings\Temp\~hh3F24.htm 2004/11/30A window indicating that the file is being sent to the printer will appear.If the file has been sent to the printer successfully, the message below will appeathe image will be printed out. Please click on the [OK] button.The message below will appear if the file transmission was unsuccessful. Please on the [OK] button to close the message, and repeat the printing procedure. {If the printer does not support the BIP profile, the message below will appe NoteIf you have a printer that supports OPP (Object Push Profile), you can directly send busincard data that conforms to the "vCard" standard to a printer and print it out. Printing business card data [OPP]](https://usermanual.wiki/ASUSTeK-Computer/W5G00UGPZ50.USERS-MANUAL-5/User-Guide-494444-Page-13.png)
![Quick Start Guide - Introduction 第 77 頁,共 160 頁file://C:\Documents and Settings\anitachou\Local Settings\Temp\~hh3F24.htm 2004/11/30→Printing business card data (using icons)→Printing business card data (by right -clicking the mouse)■Printing business card data (using icons)1. Turn on the printer2. Click on the Bluetooth Information Exchanger icon on the Desktop {Alternatively, open Explorer and click on the Bluetooth Information Exchfolder for the same result.The [Bluetooth Information Exchanger] window will appear.3. Double-click on the [Object Push] iconA list of devices will appear in the [Object Push] window.ProcedureNote](https://usermanual.wiki/ASUSTeK-Computer/W5G00UGPZ50.USERS-MANUAL-5/User-Guide-494444-Page-14.png)
![Quick Start Guide - Introduction 第 78 頁,共 160 頁file://C:\Documents and Settings\anitachou\Local Settings\Temp\~hh3F24.htm 2004/11/30Here, the image will be sent to the target printer. {If your desired printer does not appear in the list, please confirm that the prhas been turned on, and then click on [Bluetooth] →[Search Devices]A device search will be performed. 4. Drag and drop the business card data to be sent on top of the icon of the destinatiprinterNote](https://usermanual.wiki/ASUSTeK-Computer/W5G00UGPZ50.USERS-MANUAL-5/User-Guide-494444-Page-15.png)
![Quick Start Guide - Introduction 第 79 頁,共 160 頁file://C:\Documents and Settings\anitachou\Local Settings\Temp\~hh3F24.htm 2004/11/30The business card will be sent to the printer. If the business card has been sent to the printer successfully, the message below wappear, and the image will be printed out. Please click on the [OK] button.The message below will appear if the business card transmission was unsuccessfuPlease click on the [OK] button to close the message, and repeat the printing procedure.■Printing business card data (by right -clicking the mouse)1. Turn on the printer2. Right-click on the business card data to be sent, and then click on the destinationprinter under [to Bluetooth]{If your desired device does not appear in the list, please confirm that the dehas been turned on, and then click on [to Bluetooth] →[Search Other DeviOnce the device has been detected, the message below will appear. Please sthe destination device, and click on the [Send] button.Note](https://usermanual.wiki/ASUSTeK-Computer/W5G00UGPZ50.USERS-MANUAL-5/User-Guide-494444-Page-16.png)
![Quick Start Guide - Introduction 第 80 頁,共 160 頁file://C:\Documents and Settings\anitachou\Local Settings\Temp\~hh3F24.htm 2004/11/30,[]The business card will be sent to the printer. If the business card has been sent to the printer successfully, the message below wappear, and the image will be printed out. Please click on the [OK] button.The message below will appear if the business card transmission was unsuccessfuPlease click on the [OK] button to close the message, and repeat the printing procedure.This section describes how to use the stereo headphones to listen to your favourite music or oaudio files stored on your PC.Listening to music using the stereo headphones 【GAVDP】 【A2DP】 【AVRCP】](https://usermanual.wiki/ASUSTeK-Computer/W5G00UGPZ50.USERS-MANUAL-5/User-Guide-494444-Page-17.png)
![Quick Start Guide - Introduction 第 81 頁,共 160 頁file://C:\Documents and Settings\anitachou\Local Settings\Temp\~hh3F24.htm 2004/11/30→Configuring the stereo headphones→Connecting to the stereo headphones→Listening to music or other audio files→Playing music using remote control→Copyright protection function 1. Right-click on the Bluetooth icon in the task tray, and click on [Add New Connection]. {Alternatively, click [Start]→[All Programs]→[Bluetooth]→[Bluetooth Settings], and then click on [New Connection] from the [Bluetooth Settingsscreen that has opened. The [Add New Connection Wizard (Welcome to the Add New Connection Wizarwill appear.2. Switch ON the stereo headphones and activate "Discoverable" modePlease refer to the user guide for the stereo headphones for further information onhow to operate them.3. Confirm that [Express Mode] has been selected, and then click on the [Next] buttConfiguring the stereo headphonesProcedureNote](https://usermanual.wiki/ASUSTeK-Computer/W5G00UGPZ50.USERS-MANUAL-5/User-Guide-494444-Page-18.png)
![Quick Start Guide - Introduction 第 82 頁,共 160 頁file://C:\Documents and Settings\anitachou\Local Settings\Temp\~hh3F24.htm 2004/11/30The [Add New Connection Wizard (Searching for Bluetooth Devices)] screen wiappear.Once the search for the devices has ended, the [Add New Connection Wizard (SeDevice)] screen will appear.4. Select the device name of the stereo headphones from the list, and click on the [Nbutton](https://usermanual.wiki/ASUSTeK-Computer/W5G00UGPZ50.USERS-MANUAL-5/User-Guide-494444-Page-19.png)
![Quick Start Guide - Introduction 第 83 頁,共 160 頁file://C:\Documents and Settings\anitachou\Local Settings\Temp\~hh3F24.htm 2004/11/30The [Add New Connection Wizard (Searching for Services)] screen will appear.5. Configure the type and name of the icon to appear once registration is complete, click on the [Next] buttonPlease click the [Next] button once you are satisfied with the configuration.The [Add New Connection Wizard (Configure Connection Name)] screen will appear.6. Click on the [Finish] buttonThe settings will be registered, and the icon will appear on the [Bluetooth Settingscreen.You can connect to the stereo headphones from the icon registered in [Bluetooth SettingsPlease refer to the user guide for information on how to make a connection from the stereheadphones.zPlease close the following audio applications before any connection is made betweyour stereo headphones and PC.{Music/video playback applications{e-Conferencing applications{Voice-recognition applicationsPlease finish connecting the stereo headphones before launching any of these applications.1Pl i i th di fil PCConnecting to the stereo headphonesImportantListening to music or other audio files](https://usermanual.wiki/ASUSTeK-Computer/W5G00UGPZ50.USERS-MANUAL-5/User-Guide-494444-Page-20.png)
![Quick Start Guide - Introduction 第 84 頁,共 160 頁file://C:\Documents and Settings\anitachou\Local Settings\Temp\~hh3F24.htm 2004/11/301.Playing music or other audio files on your PC{Please confirm the points below if you are unable to hear anything despite having properly connected the stereo headphones.Click [Start]→[All Programs]→[Accessories]→[Entertainment]→[VolumControl].Remove the tick next to [Mute] if it has been ticked. If the volume is at its lowest setting, please adjust it to an appropriate level.{Music playback may be interrupted if other Bluetooth devices are currentlyconnected to your PC. When you are listening to music, it is recommendedthe stereo headphones be the only connected device.{Music playback may be interrupted if you are some distance away from theor if there are any obstructions between you and the PC.{If you are unable to hear any sound out of your stereo headphones while mor audio is currently playing in a related application, please stop the files beplayed, open [Sounds and Audio Devices] from the Control Panel, and chanthe default device to "Toshiba Bluetooth Wave."If you are still unable to hear any sound from the stereo headphones even ahaving set "Toshiba Bluetooth Wave" as the default device, please re -launapplication. 2. Finishing listening to music and disconnecting1. Right-click on the icon for the currently connected mode from [BluetoothSettings] on your PC, and click on "Disconnect."A message confirming the disconnection may appear.2. Click on the "Yes" button after having followed the instructions in the message.The icon will indicate that the device has been disconnected. {Please close the following audio applications before you disconnect the sterheadphones from your PC:ImportantImportant](https://usermanual.wiki/ASUSTeK-Computer/W5G00UGPZ50.USERS-MANUAL-5/User-Guide-494444-Page-21.png)
![Quick Start Guide - Introduction 第 85 頁,共 160 頁file://C:\Documents and Settings\anitachou\Local Settings\Temp\~hh3F24.htm 2004/11/30Music/video playback applicationse-Conferencing applicationsVoice-recognition applicationsPlease completely disconnect the stereo headphones before launching any othese applications.Please refer to the user guide for information on terminating a connection fthe stereo headphones. Music applications and video playback applications installed on your PC (e.g.,"Windows Media Player 9" and "InterVideo WinDVD") may be operated with the remote control button/switch on your stereo headphones.The remote control used with the stereo headphones must be compliant with the Bluetooth AVRCP profile. Please refer to the headphones user guide for further information.You can configure the application to be operated using the switch/button according to the following procedure.1. Double-click on the Bluetooth icon in the taskbarLaunches "Bluetooth Settings."2. Click on [Bluetooth]→[Select AV Player] from the menu barThe [Select AV Player] screen will appear.3. Select the application, and click on the [OK] button The functions and switch/button that can be operated may differ depending on the application used for music/video playback as well as the version.The procedure below can be performed in order to change the position where the receive command is displayed or to not have the command displayed.1. Double-click on the Bluetooth icon in the taskbarLaunches "Bluetooth Settings."2. Click on [Bluetooth]→[Select AV Player] from the menu bar.The [Select AV Player] screen will appear.3. Select the appropriate item from the pull -down menu of positions where the receive command is to be displayed, and then click on the [OK] button. If the receive command appears but does not function properly, sometimes the problem may be rectified by changing the setting to "Do not display."The commands supported by this application are shown below. Please refer to the headphone user guide for commands that are supported by the stereo headphones. Problems with operation may be encountered with certain versions of "Windows Media Player 9" and "InterVideo WinDVD."[Windows Media Player 9]Playing music using remote controlProcedureProcedure](https://usermanual.wiki/ASUSTeK-Computer/W5G00UGPZ50.USERS-MANUAL-5/User-Guide-494444-Page-22.png)
![Quick Start Guide - Introduction 第 86 頁,共 160 頁file://C:\Documents and Settings\anitachou\Local Settings\Temp\~hh3F24.htm 2004/11/30[Windows Media Player 9]zPlayzStop zPausezNextzPreviouszFast forwardzRewind[InterVideo WinDVD]zPlayzStopzPausezNext chapterzPrevious chapterzFast ForwardzFast BackwardzUpzDownzLeftzRightzSelectzRoot menuzAngleA copyright protection function is supported according to the SCMS -T format as defined in the Bluetooth specifications. Follow the configuration procedure below to establish connections only with devices that support this function.1. Double-click on the Bluetooth icon in the task tray.Launches "Bluetooth Settings."2. Select [Bluetooth] from the menu, and click on [Copyright Protection SettingThe copyright protection dialog will appear.3. Tick the box next to "Only connect to devices that are copyright -protected uthe SCMS-T format," and click on the OK button. Copyright protection functionProcedureThis section describes how to connect a Bluetooth -compatible keyboard to a PC. S tti th i l k b dUsing a wireless keyboard [HID]](https://usermanual.wiki/ASUSTeK-Computer/W5G00UGPZ50.USERS-MANUAL-5/User-Guide-494444-Page-23.png)
![Quick Start Guide - Introduction 第 87 頁,共 160 頁file://C:\Documents and Settings\anitachou\Local Settings\Temp\~hh3F24.htm 2004/11/301. Right-click on the Bluetooth icon in the task tray, and then click on [Add New Connection] {Alternatively, click [Start]→[All Programs]→[Bluetooth]→[Bluetooth Seand then click on [New Connection] from the active [Bluetooth Settings] window. The [Add New Connection Wizard (Welcome to the Add New Connection Wizarwindow will appear.2. Confirm that [Express Mode] has been selected, and then click on the [Next] buttThe [Add New Connection Wizard (Searching for Bluetooth devices)] window wappear.Setting up the wireless keyboardProcedureNote](https://usermanual.wiki/ASUSTeK-Computer/W5G00UGPZ50.USERS-MANUAL-5/User-Guide-494444-Page-24.png)
![Quick Start Guide - Introduction 第 88 頁,共 160 頁file://C:\Documents and Settings\anitachou\Local Settings\Temp\~hh3F24.htm 2004/11/30Once the program has finished searching for the devices, the [Add New ConnectiWizard (Device Selection)] window will appear.3. Select the device name of the keyboard from [Device List], and then click on the[Next] buttonThe [Add New Connection Wizard (Searching for Services)] window will appear](https://usermanual.wiki/ASUSTeK-Computer/W5G00UGPZ50.USERS-MANUAL-5/User-Guide-494444-Page-25.png)
![Quick Start Guide - Introduction 第 89 頁,共 160 頁file://C:\Documents and Settings\anitachou\Local Settings\Temp\~hh3F24.htm 2004/11/30 4. Use the wireless keyboard to enter the numbers that appear in [Bluetooth PasskeCode)], and then hit the [Enter] keyOnce the program has detected the services successfully, connection to the deviceregistration of settings information will be performed automatically.The [Add New Connection Wizard (Connection Name Settings)] window will ap5. Enter the type and name of the icon displayed after registration, and then click on[Next] buttonPlease click on the [Next] button if you are satisfied with the settings.](https://usermanual.wiki/ASUSTeK-Computer/W5G00UGPZ50.USERS-MANUAL-5/User-Guide-494444-Page-26.png)
![Quick Start Guide - Introduction 第 90 頁,共 160 頁file://C:\Documents and Settings\anitachou\Local Settings\Temp\~hh3F24.htm 2004/11/30 {You can change the connection icon and icon name.→"Changing a connection icon name"→"Changing a connection icon" The [Add New Connection Wizard (Completing the Add New Connection Wizarwindow will appear.6. Click on the [Finish] buttonThe settings information will be registered, and an icon will appear in the [BluetoSettings] window. zPressing any key on the wireless keyboard will automatically connect it to the PC thereafter.Please connect manually if automatic connection is unsuccessful. NoteNoteThis section describes how to connect a Bluetooth -compatible mouse to a PC. Setting up the wireless mouseUsing a wireless mouse [HID]](https://usermanual.wiki/ASUSTeK-Computer/W5G00UGPZ50.USERS-MANUAL-5/User-Guide-494444-Page-27.png)
![Quick Start Guide - Introduction 第 91 頁,共 160 頁file://C:\Documents and Settings\anitachou\Local Settings\Temp\~hh3F24.htm 2004/11/301. Turn on the wireless mouse, and set it to be connectable via BluetoothPlease refer to the instruction manual for details on how to operate the mouse.2. Right-click on the Bluetooth icon in the task tray, and then click on [Add New Connection] {Alternatively, click [Start]→[All Programs]→[Bluetooth]→[Bluetooth Seand then click on [New Connection] from the active [Bluetooth Settings] window. The [Add New Connection Wizard (Welcome to the Add New Connection Wizarwindow will appear.3. Confirm that [Express Mode] has been selected, and then click on the [Next] buttThe [Add New Connection Wizard (Searching for Bluetooth devices)] window wappear.ProcedureNote](https://usermanual.wiki/ASUSTeK-Computer/W5G00UGPZ50.USERS-MANUAL-5/User-Guide-494444-Page-28.png)
![Quick Start Guide - Introduction 第 92 頁,共 160 頁file://C:\Documents and Settings\anitachou\Local Settings\Temp\~hh3F24.htm 2004/11/30Once the program has finished searching for the devices, the [Add New ConnectiWizard (Device Selection)] window will appear.4. Select the device name of the mouse from [Device List], and then click on the [NbuttonThe [Add New Connection Wizard (Searching for Services)] window will appear](https://usermanual.wiki/ASUSTeK-Computer/W5G00UGPZ50.USERS-MANUAL-5/User-Guide-494444-Page-29.png)
![Quick Start Guide - Introduction 第 93 頁,共 160 頁file://C:\Documents and Settings\anitachou\Local Settings\Temp\~hh3F24.htm 2004/11/30A message confirming a device connection will appear.5. Click on the [OK] buttonThe [Add New Connection Wizard (Connection Name Settings)] window will ap6. Enter the type and name of the icon displayed after registration, and then click on[Next] buttonPlease click on the [Next] button if you are satisfied with the settings.{Please use this window to change the connection name and icon. - Changing the connection icon name- Changing the connection icon The [Add New Connection Wizard (Completing the Add New Connection Wizarwindow will appear.7. Click on the [Finish] buttonNote](https://usermanual.wiki/ASUSTeK-Computer/W5G00UGPZ50.USERS-MANUAL-5/User-Guide-494444-Page-30.png)
![Quick Start Guide - Introduction 第 94 頁,共 160 頁file://C:\Documents and Settings\anitachou\Local Settings\Temp\~hh3F24.htm 2004/11/30The settings information will be have been registered, and an icon will appear in [Bluetooth Settings] window. {Clicking on one of the mouse buttons or otherwise operating it will automatically connect it to the PC thereafter. Please connect manually if automatic connection is unsuccessful. NoteYou can send and receive files other than business card data with a Bluetooth -enabled PPDA.Use "File transfer" in the Bluetooth Information Exchanger to exchange files. zThe same operations will be valid as long as the PC and PDA support the FTP profz"File transfer" cannot be used to send or receive business card data. Please instead "Object Push" to perform these activities. →Sending files to a PC or PDA (using icons)→Sending files to a PC or PDA (by right-clicking the mouse)→Receiving files from a PC or PDA ■Sending files to a PC or PDA (using icons) 1. Turn on the PC or PDA2. Double-click on the Bluetooth Information Exchanger icon on the DesktopNoteProcedureExchanging files with a PC or PDA [FTP]](https://usermanual.wiki/ASUSTeK-Computer/W5G00UGPZ50.USERS-MANUAL-5/User-Guide-494444-Page-31.png)
![Quick Start Guide - Introduction 第 95 頁,共 160 頁file://C:\Documents and Settings\anitachou\Local Settings\Temp\~hh3F24.htm 2004/11/30 {Alternatively, opening Explorer and clicking on the Bluetooth Information Exchanger folder will produce the same result.The [Bluetooth Information Exchanger] window will appear.3. Double-click on the [File transfer] iconA list of devices will appear in the [File transfer] window.NoteNote](https://usermanual.wiki/ASUSTeK-Computer/W5G00UGPZ50.USERS-MANUAL-5/User-Guide-494444-Page-32.png)
![Quick Start Guide - Introduction 第 96 頁,共 160 頁file://C:\Documents and Settings\anitachou\Local Settings\Temp\~hh3F24.htm 2004/11/30{If the desired device does not appear in the list, please confirm that the devhas been turned on, and then select [Bluetooth] →[Search Devices].A device search will be performed. {You can also use "Image transfer" when sending individual image files. 4. Use the mouse to drag and drop the file you wish to send over the destination icoIn this case, the file will be sent to a PC named "PC -1".{When using "File transfer", you can send individual files as well as entire folders.5. Confirm that the file is being sentThe file will be sent to the PC.{When sending files using "File transfer", a message requesting permission treceive the files may appear on the destination (receiving) device. The contthe message will vary with the Bluetooth software installed on the destinatidevice, so please be sure to follow the instructions provided.If you are using the Bluetooth Utility, a message similar to the one below wappear. If the file has been sent successfully, the message below will appear.Please click on the [OK] button.NoteNote](https://usermanual.wiki/ASUSTeK-Computer/W5G00UGPZ50.USERS-MANUAL-5/User-Guide-494444-Page-33.png)
![Quick Start Guide - Introduction 第 97 頁,共 160 頁file://C:\Documents and Settings\anitachou\Local Settings\Temp\~hh3F24.htm 2004/11/30The message below will appear if the file transmission was unsuccessful.Please click on the [OK] button to close the message, and repeat the procedure.{Files that have been sent will be saved in a file transfer shared folder on thedestination device.{Additionally, with "File transfer", you can open the shared folder on the destination device using Explorer, specify a subfolder, and then send the filthere.{You can use Properties in the Bluetooth Information Exchanger to change location of the "Shared folder" on the hard drive. ■Sending files to a PC or PDA (by right -clicking the mouse)1. Turn on the PC or PDAConfirm that a Bluetooth connection has been enabled before proceeding.2. Right-click on the file you wish to send, and then select its destination from [to Bluetooth]Note](https://usermanual.wiki/ASUSTeK-Computer/W5G00UGPZ50.USERS-MANUAL-5/User-Guide-494444-Page-34.png)
![Quick Start Guide - Introduction 第 98 頁,共 160 頁file://C:\Documents and Settings\anitachou\Local Settings\Temp\~hh3F24.htm 2004/11/30{If the desired device does not appear in the list, please confirm that the devhas been turned on, and then select [to Bluetooth] →[Search other devices]Once the devices have been detected, the message below will appear. Pleasselect the destination device, and then click on the [Send] button.3. Confirm that the file is being sentThe file will be sent to the PC.Note](https://usermanual.wiki/ASUSTeK-Computer/W5G00UGPZ50.USERS-MANUAL-5/User-Guide-494444-Page-35.png)
![Quick Start Guide - Introduction 第 99 頁,共 160 頁file://C:\Documents and Settings\anitachou\Local Settings\Temp\~hh3F24.htm 2004/11/30{When sending files using "File transfer", a message requesting permission treceive the files may appear on the destination (receiving) device. The contthe message will vary with the Bluetooth software installed on the destinatidevice, so please be sure to follow the instructions provided.If you are using the Bluetooth Utility, a message similar to the one below wappear. If the file has been sent successfully, the message below will appear.Please click on the [OK] button.The message below will appear if the file transmission was unsuccessful.Please click on the [OK] button to close the message, and then repeat the procedu{Files that have been sent will be saved in a file transfer shared folder on thedestination device.■Receiving files from a PC or PDAYour PC is able to receive files that have been saved in the shared folder on the destinatiPC or PDA. Received files will be saved in the shared folder under "File transfer".1. Turn on the PC or PDAConfirm that a Bluetooth connection has been enabled before proceeding.2. Double-click on the Bluetooth Information Exchanger icon on the DesktopNoteNote](https://usermanual.wiki/ASUSTeK-Computer/W5G00UGPZ50.USERS-MANUAL-5/User-Guide-494444-Page-36.png)
![Quick Start Guide - Introduction 第 100 頁,共 160 頁file://C:\Documents and Settings\anitachou\Local Settings\Temp\~hh3F24.htm 2004/11/30 {Alternatively, opening Explorer and clicking on the Bluetooth Information Exchanger folder will produce the same result.The [Bluetooth Information Exchanger] window will appear.3. Double-click on the [File transfer] iconA list of devices will appear in the [File transfer] window.In this case the file will be received from the PDA named"My Mobile"Note](https://usermanual.wiki/ASUSTeK-Computer/W5G00UGPZ50.USERS-MANUAL-5/User-Guide-494444-Page-37.png)
![Quick Start Guide - Introduction 第 101 頁,共 160 頁file://C:\Documents and Settings\anitachou\Local Settings\Temp\~hh3F24.htm 2004/11/30In this case, the file will be received from the PDA named My Mobile.4. Double-click on the [PDA-1] iconThe file saved in the shared folder in "My Mobile" will appear.5. Right-click on the file you wish to receive, and then select "Receive file".The file will be received from a PDA.{With "File transfer", you can send individual files as well as entire folders.Please right-click on the folder you wish to receive, and select "Receive foSubsequent operations should be performed in the same manner as when receiving individual files. If the file has been received successfully, the message below will appear.Please click on the [OK] button.The message below will appear if the file transmission was unsuccessful. Please on the [OK] button to close the message, and repeat the procedure.Note](https://usermanual.wiki/ASUSTeK-Computer/W5G00UGPZ50.USERS-MANUAL-5/User-Guide-494444-Page-38.png)
![Quick Start Guide - Introduction 第 102 頁,共 160 頁file://C:\Documents and Settings\anitachou\Local Settings\Temp\~hh3F24.htm 2004/11/30{The received file will be saved in the "Shared folder" under "File transfer" Bluetooth Information ExchangerYou can use Properties under the Bluetooth Information Exchanger to specthe location of the "Shared folder" on the hard drive. NoteYou can send image data to a Bluetooth -compatible mobile telephone.Large images will be automatically reduced to fit on the telephone display screen.Images are sent using "Image transfer" under Bluetooth Information Exchanger.zThe mobile telephone must support the BIP profile.zThe following image file formats can be sent and received using "Image transfer": {Bitmap (* bmp)NoteSending images to a mobile telephone [BIP]](https://usermanual.wiki/ASUSTeK-Computer/W5G00UGPZ50.USERS-MANUAL-5/User-Guide-494444-Page-39.png)
![Quick Start Guide - Introduction 第 103 頁,共 160 頁file://C:\Documents and Settings\anitachou\Local Settings\Temp\~hh3F24.htm 2004/11/30{Bitmap (*.bmp){JPEG (*.jpg, *.jpeg) {PNG (*.png)→Sending images to a mobile telephone (using icons)→Sending images to a mobile telephone (by right -clicking the mouse) ■Sending images to a mobile telephone (using icons)1. Turn on the PC or PDAConfirm that a Bluetooth connection has been enabled before proceeding.2. Double-click on the Bluetooth Information Exchanger icon on the Desktop {Alternatively, opening Explorer and clicking on the Bluetooth Information Exchanger folder will produce the same result.The [Bluetooth Information Exchanger] window will appear.3. Double-click on the [Image transfer] iconA list of devices will appear in the [Image transfer] window.ProcedureNote](https://usermanual.wiki/ASUSTeK-Computer/W5G00UGPZ50.USERS-MANUAL-5/User-Guide-494444-Page-40.png)
![Quick Start Guide - Introduction 第 104 頁,共 160 頁file://C:\Documents and Settings\anitachou\Local Settings\Temp\~hh3F24.htm 2004/11/30{If the desired device does not appear in the list, please confirm that the devhas been turned on, and then select [Bluetooth] →[Search Devices].A device search will be performed. 4. Drag and drop the file you wish to send over the destination iconIn this case, the image will be sent to a mobile telephone named "BT -Phone-1".The image will be sent.If the image has been sent successfully, the message below will appear.Please click on the [OK] button.The message below will appear if the image transmission was unsuccessful.Please click on the [OK] button to close the message, and repeat the procedure.Note](https://usermanual.wiki/ASUSTeK-Computer/W5G00UGPZ50.USERS-MANUAL-5/User-Guide-494444-Page-41.png)
![Quick Start Guide - Introduction 第 105 頁,共 160 頁file://C:\Documents and Settings\anitachou\Local Settings\Temp\~hh3F24.htm 2004/11/30 ■Sending images to a mobile telephone (by right -clicking the mouse)1. Turn on the mobile telephoneConfirm that a Bluetooth connection has been enabled before proceeding.2. Right-click on the file you wish to send, and then click on its destination from [toBluetooth]{If the desired device does not appear in the list, please confirm that the devhas been turned on, and then select [to Bluetooth] →[Search other devices]Once the devices have been detected, the message below will appear. Pleasselect the destination device, and then click on the [Send] button.Note](https://usermanual.wiki/ASUSTeK-Computer/W5G00UGPZ50.USERS-MANUAL-5/User-Guide-494444-Page-42.png)
![Quick Start Guide - Introduction 第 106 頁,共 160 頁file://C:\Documents and Settings\anitachou\Local Settings\Temp\~hh3F24.htm 2004/11/30The image will be sent.If the image has been sent successfully, the message below will appear.Please click on the [OK] button.The message below will appear if the image transmission was unsuccessful.Please click on the [OK] button to close the message, and repeat the procedure. You can send image data to a Bluetooth -enabled PC or PDA.Images are sent using "Image transfer" under Bluetooth Information Exchanger.NoteSending images to a PC or PDA [BIP]](https://usermanual.wiki/ASUSTeK-Computer/W5G00UGPZ50.USERS-MANUAL-5/User-Guide-494444-Page-43.png)
![Quick Start Guide - Introduction 第 107 頁,共 160 頁file://C:\Documents and Settings\anitachou\Local Settings\Temp\~hh3F24.htm 2004/11/30zThe following image file formats can be sent and received using "Image transfer": {Bitmap (*.bmp){JPEG (*.jpg, *.jpeg){PNG (*.png)→Sending images to a PC or PDA (using icons)→Sending images to a PC or PDA (by right-clicking the mouse)■Sending images to a PC or PDA (using icons)1. Turn on the PC or PDAConfirm that a Bluetooth connection has been enabled before proceeding.2. Double-click on the Bluetooth Information Exchanger icon on the Desktop {Alternatively, opening Explorer and clicking on the Bluetooth Information Exchanger folder will produce the same result.The [Bluetooth Information Exchanger] window will appear.3. Double-click on the [Image transfer] iconA list of devices will appear in the [Image transfer] window.ProcedureNote](https://usermanual.wiki/ASUSTeK-Computer/W5G00UGPZ50.USERS-MANUAL-5/User-Guide-494444-Page-44.png)
![Quick Start Guide - Introduction 第 108 頁,共 160 頁file://C:\Documents and Settings\anitachou\Local Settings\Temp\~hh3F24.htm 2004/11/30{If the desired device does not appear in the list, please confirm that the devhas been turned on, and then select [Bluetooth] →[Search Devices].A device search will be performed. 4. Drag and drop the file you wish to send over the destination iconIn this case, the image will be sent to a PC named "PC -1".The image will be sent.If the image has been sent successfully, the message below will appear.Please click on the [OK] button.Note](https://usermanual.wiki/ASUSTeK-Computer/W5G00UGPZ50.USERS-MANUAL-5/User-Guide-494444-Page-45.png)
![Quick Start Guide - Introduction 第 109 頁,共 160 頁file://C:\Documents and Settings\anitachou\Local Settings\Temp\~hh3F24.htm 2004/11/30The message below will appear if the image transmission was unsuccessful.Please click on the [OK] button to close the message, and repeat the procedure.{Images that have been sent will be saved in an image transfer folder on thedestination device.{Images received using "Image transfer" in the Bluetooth Information Exchawill be saved in the "Image Box" in "Image transfer". {You can use Properties under the Bluetooth Information Exchanger to chanthe location of the "Image Box" folder on the hard drive. ■Sending images to a PC or PDA (by right -clicking the mouse)1. Turn on the PC or PDAConfirm that a Bluetooth connection has been enabled before proceeding2. Right-click on the file you wish to send, and then click on its destination from [toBluetooth]Note](https://usermanual.wiki/ASUSTeK-Computer/W5G00UGPZ50.USERS-MANUAL-5/User-Guide-494444-Page-46.png)
![Quick Start Guide - Introduction 第 110 頁,共 160 頁file://C:\Documents and Settings\anitachou\Local Settings\Temp\~hh3F24.htm 2004/11/30{If the desired device does not appear in the list, please confirm that the devhas been turned on, and then select [to Bluetooth] →[Search other devices]Once the devices have been detected, the message below will appear. Pleasselect the destination device, and then click on the [Send] button.The image will be sent.If the image has been sent successfully, the message below will appear.Please click on the [OK] button.The message below will appear if the image transmission was unsuccessful.Please click on the [OK] button to close the message, and repeat the procedure.Note](https://usermanual.wiki/ASUSTeK-Computer/W5G00UGPZ50.USERS-MANUAL-5/User-Guide-494444-Page-47.png)
![Quick Start Guide - Introduction 第 111 頁,共 160 頁file://C:\Documents and Settings\anitachou\Local Settings\Temp\~hh3F24.htm 2004/11/30{When you send images by right-clicking the mouse, the image data that hasent will be saved in the image transfer shared folder on the destination devThis is also the case when you send images using icons. NoteYou can exchange business card data with a Bluetooth -enabled PC or PDA.Business card data are exchanged using "Object Push" under Bluetooth Information Exchanger.zData compliant with the "vCARD" standard are the only type of business card datato be sent and received with "Object Push".Business card data can be used by applications such as Microsoft Outlook.zBusiness card data can be created in vCARD format by Microsoft Outlook and othsimilar applications.→"Creating business card data in the vCARD format "zYou can send business card data directly from Microsoft Outlook.→"Sending business card data from Outlook "zThe OPP profile must be supported by the PC or PDA of the other party.→Selecting a business card and sending it to a PC or PDA (using icons)→Selecting a business card and sending it to a PC or PDA (by right -clicking the mouse→Sending your personal business card→Receiving a business card from another party→Exchanging business cards ■Selecting a business card and sending it to a PC or PDA (using icons)Select a business card you wish to send from among all the business card data you have already received through exchanges with your business or other contacts, and then send ianother party.NoteProcedureExchanging business card data with a PC or PDA [OPP]](https://usermanual.wiki/ASUSTeK-Computer/W5G00UGPZ50.USERS-MANUAL-5/User-Guide-494444-Page-48.png)
![Quick Start Guide - Introduction 第 112 頁,共 160 頁file://C:\Documents and Settings\anitachou\Local Settings\Temp\~hh3F24.htm 2004/11/301. Turn on the PC or PDAConfirm that a Bluetooth connection has been enabled before proceeding.2. Double-click on the Bluetooth Information Exchanger icon on the Desktop {Alternatively, opening Explorer and clicking on the Bluetooth Information Exchanger folder will produce the same result.The [Bluetooth Information Exchanger] window will appear.3. Double-click on the [Object Push] iconA list of devices will appear in the [Object Push] window.Note](https://usermanual.wiki/ASUSTeK-Computer/W5G00UGPZ50.USERS-MANUAL-5/User-Guide-494444-Page-49.png)
![Quick Start Guide - Introduction 第 113 頁,共 160 頁file://C:\Documents and Settings\anitachou\Local Settings\Temp\~hh3F24.htm 2004/11/30{If the desired device does not appear in the list, please confirm that the devhas been turned on, and then select [Bluetooth] →[Search Devices].A device search will be performed. 4. Use the mouse to drag and drop the business card you wish to send over the destination iconIn this case, the business card will be sent to a PC named "PC -1".The business card will be sent. {When you try to send a business card, a message requesting permission to receive the card may appear on the device belonging to the other party (i.e.the receiving end). The content of the message will vary with the Bluetoothsoftware installed on the destination device, so please be sure to follow the instructions provided. If you are using the Bluetooth Utility, a message simthe one below will appear. If the business card has been sent successfully, the message below will appear.Please click on the [OK] button.NoteNote](https://usermanual.wiki/ASUSTeK-Computer/W5G00UGPZ50.USERS-MANUAL-5/User-Guide-494444-Page-50.png)
![Quick Start Guide - Introduction 第 114 頁,共 160 頁file://C:\Documents and Settings\anitachou\Local Settings\Temp\~hh3F24.htm 2004/11/30The message below will appear if the business card transmission was unsuccessfuPlease click on the [OK] button to close the message, and repeat the procedure.{Data that have been sent will be saved in a folder for exchanged business con the destination device.{You can configure an associated application (Microsoft Outlook etc) to starautomatically when you have received a business card, allowing you to viecard details.You can use Properties under Bluetooth Information Exchanger to configurwhether or not you would like such an application to start automatically.■Selecting a business card and sending it to a PC or PDA (by right -clicking the mouse1. Turn on the PC or PDAConfirm that a Bluetooth connection has been enabled before proceeding.2. Right-click on the business card you wish to send, and then click on its destinatiofrom [to Bluetooth]Memo](https://usermanual.wiki/ASUSTeK-Computer/W5G00UGPZ50.USERS-MANUAL-5/User-Guide-494444-Page-51.png)
![Quick Start Guide - Introduction 第 115 頁,共 160 頁file://C:\Documents and Settings\anitachou\Local Settings\Temp\~hh3F24.htm 2004/11/30{If the desired device does not appear in the list, please confirm that the devhas been turned on, and then select [to Bluetooth] →[Search other devices]Once the devices have been detected, the message below will appear. Pleasselect the destination device, and then click on the [Send] button.The business card will be sent. {When you try to send a business card, a message requesting permission to receive the files may appear on the device belonging to the other party (i.e.the receiving end). The content of the message will vary with the Bluetoothsoftware installed on the destination device, so please be sure to follow the instructions provided. If you are using the Bluetooth Utility, a message similar to the one below wappear.NoteNote](https://usermanual.wiki/ASUSTeK-Computer/W5G00UGPZ50.USERS-MANUAL-5/User-Guide-494444-Page-52.png)
![Quick Start Guide - Introduction 第 116 頁,共 160 頁file://C:\Documents and Settings\anitachou\Local Settings\Temp\~hh3F24.htm 2004/11/30 If the business card has been sent successfully, the message below will appear.Please click on the [OK] button.The message below will appear if the business card transmission was unsuccessfuPlease click on the [OK] button to close the message, and repeat the procedure.{Data that have been sent will be saved in a folder for exchanged business con the destination device.■Sending your personal business cardYou can prepare a business card bearing your name and other details such as your compaand telephone numbers, and then send it to another party.zPlease use Properties under Bluetooth Information Exchanger beforehand to configwhich data to use for your own business card. zYou can only have one business card registered as your own that is able to be sent.1. Turn on the PC or PDAConfirm that a Bluetooth connection has been enabled before proceeding2. Double-click on the Bluetooth Information Exchanger icon on the Desktop NoteNoteNote](https://usermanual.wiki/ASUSTeK-Computer/W5G00UGPZ50.USERS-MANUAL-5/User-Guide-494444-Page-53.png)
![Quick Start Guide - Introduction 第 117 頁,共 160 頁file://C:\Documents and Settings\anitachou\Local Settings\Temp\~hh3F24.htm 2004/11/30{Alternatively, opening Explorer and clicking on the Bluetooth Information Exchanger folder will produce the same result.The [Bluetooth Information Exchanger] window will appear.3. Double-click on the [Object Push] iconA list of devices will appear in the [Object Push] window.{If the desired device does not appear in the list, please confirm that the devhas been turned on, and then select [Bluetooth] →[Search Devices].A device search will be performed. 4. Right-click on the destination icon, and then click on [Send business card To]In this case, your personal business card will be sent to a PC named "PC -1".Note](https://usermanual.wiki/ASUSTeK-Computer/W5G00UGPZ50.USERS-MANUAL-5/User-Guide-494444-Page-54.png)
![Quick Start Guide - Introduction 第 118 頁,共 160 頁file://C:\Documents and Settings\anitachou\Local Settings\Temp\~hh3F24.htm 2004/11/30The business card will be sent. {When you try to send a business card, a message requesting permission to receive the files may appear on the device belonging to the other party (i.e.the receiving end). The content of the message will vary with the Bluetoothsoftware installed on the destination device, so please be sure to follow the instructions provided. If you are using the Bluetooth Utility, a message simthe one below will appear.{Business cards that have been sent will be saved in the Inbox of the destinaparty. If your business card has been sent successfully, the message below will appear.Please click on the [OK] button.The message below will appear if the business card transmission was unsuccessfuPlease click on the [OK] button to close the message, and repeat the procedure.Note](https://usermanual.wiki/ASUSTeK-Computer/W5G00UGPZ50.USERS-MANUAL-5/User-Guide-494444-Page-55.png)
![Quick Start Guide - Introduction 第 119 頁,共 160 頁file://C:\Documents and Settings\anitachou\Local Settings\Temp\~hh3F24.htm 2004/11/30{Data that has been sent will be saved in a folder for exchanged business carthe destination device. ■Acquiring a business card from another partyYou can use your PC to acquire a business card from a party containing their details.1. Turn on the PC or PDAConfirm that a Bluetooth connection has been enabled before proceeding2. Double-click on the Bluetooth Information Exchanger icon on the Desktop {Alternatively, opening Explorer and clicking on the Bluetooth Information Exchanger folder will produce the same result.The [Bluetooth Information Exchanger] window will appear.3. Double-click on the [Object Push] iconA list of devices will appear in the [Object Push] window.NoteNote](https://usermanual.wiki/ASUSTeK-Computer/W5G00UGPZ50.USERS-MANUAL-5/User-Guide-494444-Page-56.png)
![Quick Start Guide - Introduction 第 120 頁,共 160 頁file://C:\Documents and Settings\anitachou\Local Settings\Temp\~hh3F24.htm 2004/11/30{If the desired device does not appear in the list, please confirm that the devhas been turned on, and then select [Bluetooth] →[Search Devices].A device search will be performed. 4. Right-click on the icon of the party whose card you wish to acquire, and then clic[Receive business card]In this case, the business card of the other party will be acquired from a PC name"PC-1".The business card will be received.{When you try to acquire a business card, a message requesting permission send the files may appear on the device belonging to the other party (i.e., osending end). The content of the message will vary with the Bluetooth softwinstalled on the destination device, so please be sure to follow the instructioprovided.If you are using the Bluetooth Utility, a message similar to the one below wappear.NoteNote](https://usermanual.wiki/ASUSTeK-Computer/W5G00UGPZ50.USERS-MANUAL-5/User-Guide-494444-Page-57.png)
![Quick Start Guide - Introduction 第 121 頁,共 160 頁file://C:\Documents and Settings\anitachou\Local Settings\Temp\~hh3F24.htm 2004/11/30If the business card has been received successfully, the message below will appeaPlease click on the [OK] button.The message below will appear if the business card was unsuccessfully received.Please click on the [OK] button to close the message, and repeat the procedure.{Business card data that have been received will be saved in the Inbox unde"Object Push".You can use Properties under the Bluetooth Information Exchanger to set tlocation of the Inbox on the hard drive. ■Exchanging business cardsSimultaneously exchange your business card with one belonging to another party.1. Turn on the PC or PDAConfirm that a Bluetooth connection has been enabled before proceeding.2. Double-click on the Bluetooth Information Exchanger icon on the Desktop {Alternatively, opening Explorer and clicking on the Bluetooth Information Exchanger folder will produce the same result.NoteNote](https://usermanual.wiki/ASUSTeK-Computer/W5G00UGPZ50.USERS-MANUAL-5/User-Guide-494444-Page-58.png)
![Quick Start Guide - Introduction 第 122 頁,共 160 頁file://C:\Documents and Settings\anitachou\Local Settings\Temp\~hh3F24.htm 2004/11/30The [Bluetooth Information Exchanger] window will appear.3. Double-click on the [Object Push] iconA list of devices will appear in the [Object Push] window.{If the desired device does not appear in the list, please confirm that the devhas been turned on, and then select [Bluetooth] →[Search Devices].A device search will be performed. 4. Right-click on the icon of the party with whom you wish to exchange business caand then click on [Object Push]In this case, the business cards will be exchanged with a PC named "PC -1".Note](https://usermanual.wiki/ASUSTeK-Computer/W5G00UGPZ50.USERS-MANUAL-5/User-Guide-494444-Page-59.png)
![Quick Start Guide - Introduction 第 123 頁,共 160 頁file://C:\Documents and Settings\anitachou\Local Settings\Temp\~hh3F24.htm 2004/11/30The business card from the party who executed the "Exchange business cards" command will be sent first.{When you try to send a business card, a message requesting permission to receive the files may appear on the device belonging to the other party (i.e.the receiving end). The content of the message will vary with the Bluetoothsoftware installed on the destination device, so please be sure to follow the instructions provided.If you are using the Bluetooth Utility, a message similar to the one below wappear. A message of confirmation will appear if the card has been successfully sent.{Business cards that have been sent will be saved in the Inbox of the destinaparty. Once your business card has finished being sent, the program will start receiving business card belonging to the other party.{When a business card is to be received, a message such as the one below mappear on the device belonging to the other party.Please click on the [Yes] button if you give permission for the business carbe sent. A message of confirmation will appear if the card has been successfully receivedNoteNoteNote](https://usermanual.wiki/ASUSTeK-Computer/W5G00UGPZ50.USERS-MANUAL-5/User-Guide-494444-Page-60.png)
![Quick Start Guide - Introduction 第 124 頁,共 160 頁file://C:\Documents and Settings\anitachou\Local Settings\Temp\~hh3F24.htm 2004/11/30A message of confirmation will appear if the card has been successfully received{Business cards that have been received will be saved in the "Inbox" under "Object Push".You can use Properties under the Bluetooth Information Exchanger to set tlocation of the Inbox on the hard drive. NoteBy connecting a Bluetooth-compatible digital camera to your PC via Bluetooth, you will be to operate the camera shutter from the PC and transmit the captured images to it as well.→Connecting the camera→Taking pictures→Viewing images saved on your PCUse the "Remote Camera" tool in the Bluetooth Utility to connect the camera to your PC1. Click on [Start ]→[All Programs]→[Bluetooth]→[Remote Camera] {In Windows 2000, click on [Start]→[Programs]→[Bluetooth]→[Remote Camera]. The [Remote Camera] window will appear.2. Turn on the camera, and set it to be connectable via BluetoothConnecting the cameraProcedureNoteUsing a Bluetooth-compatible camera [BIP]](https://usermanual.wiki/ASUSTeK-Computer/W5G00UGPZ50.USERS-MANUAL-5/User-Guide-494444-Page-61.png)
![Quick Start Guide - Introduction 第 125 頁,共 160 頁file://C:\Documents and Settings\anitachou\Local Settings\Temp\~hh3F24.htm 2004/11/30{Different cameras are operated in different ways, depending on the manufaand model used. Please refer to the instruction manual for further details onto operate your camera. 3. Click on the [Camera Search...] buttonThe camera will be detected and its icon displayed.4. Right-click on the camera icon, and select [Connect]The camera will be connected, and images from the camera will appear on -screeNote](https://usermanual.wiki/ASUSTeK-Computer/W5G00UGPZ50.USERS-MANUAL-5/User-Guide-494444-Page-62.png)
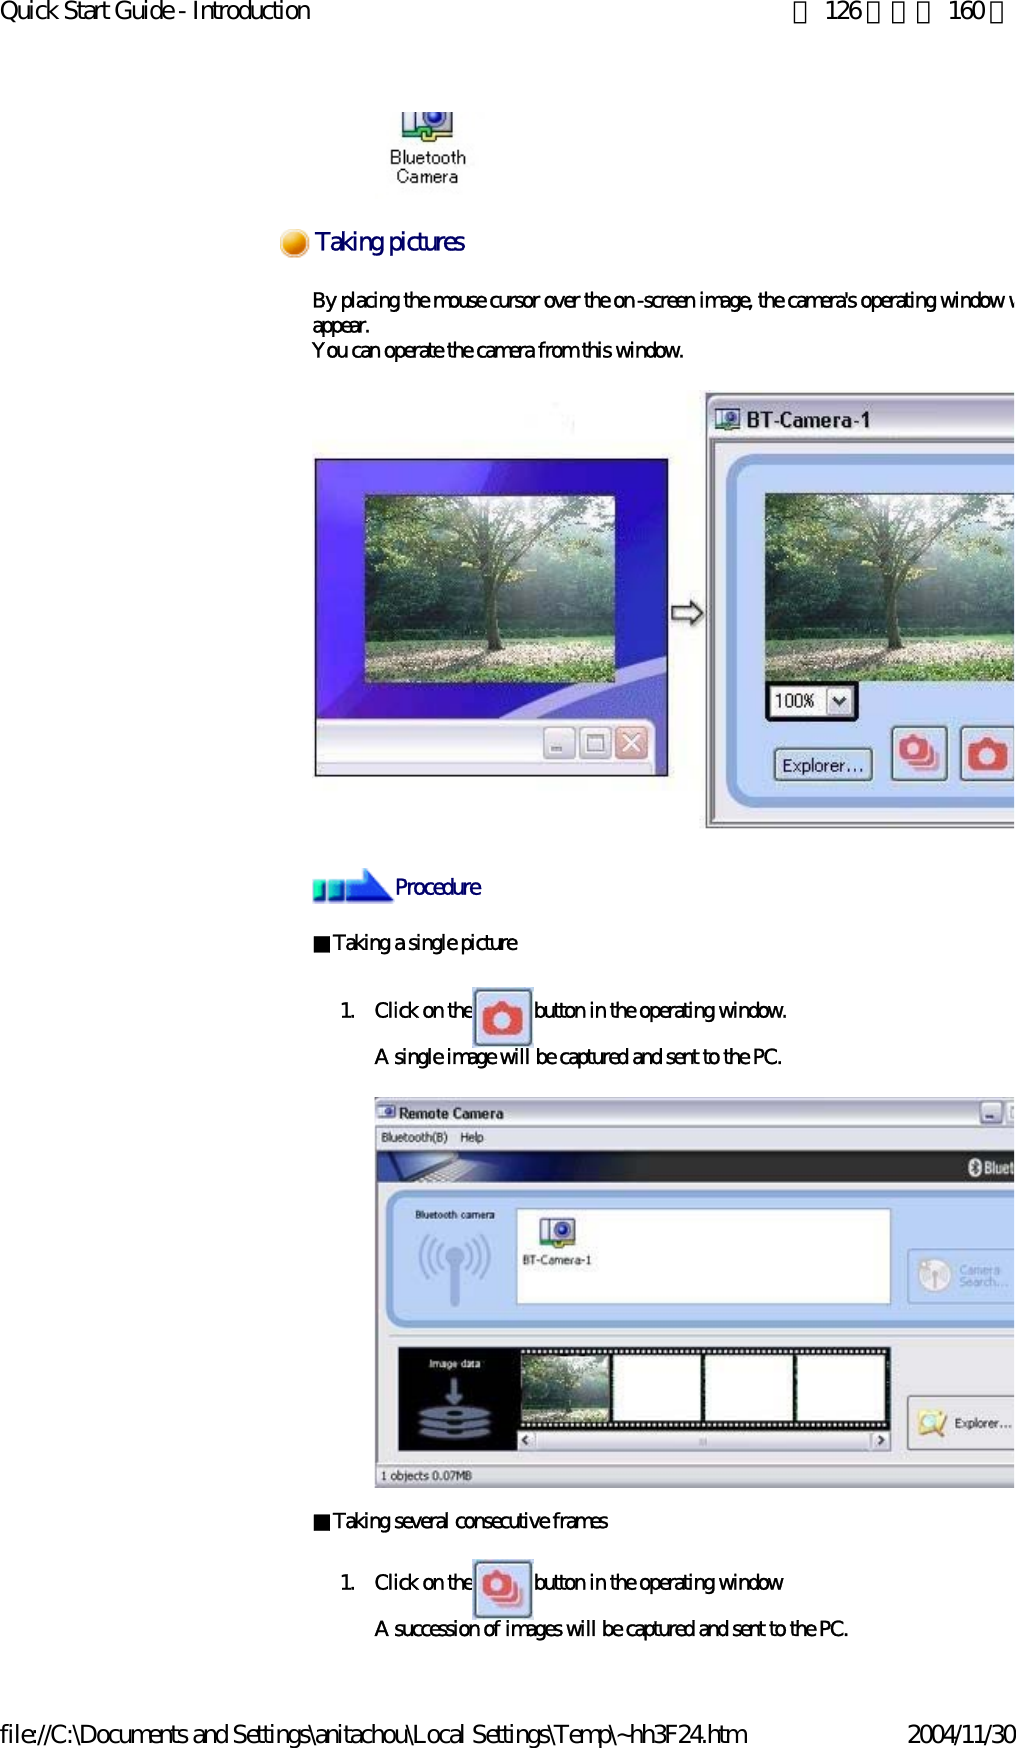
![Quick Start Guide - Introduction 第 127 頁,共 160 頁file://C:\Documents and Settings\anitachou\Local Settings\Temp\~hh3F24.htm 2004/11/30{The remote camera shutter cannot be operated while the camera is connectethe PC. {The number of consecutive pictures taken can be set to anywhere between 16{Images are not only sent to the PC, but are stored in the camera's on -boardmemory as well.Please be aware of the remaining memory capacity when you are taking a lnumber of pictures.{Large file sizes are common for high-resolution images, and may take somto be transferred to the PC.Note1. In the [Remote Camera] window, click on [Bluetooth]→[Propertie[Consecutive Image Settings]The [Change number of consecutive images] dialog box will appe2. Click on the [<][>] buttons to select the number of consecutive imto be captured Important](https://usermanual.wiki/ASUSTeK-Computer/W5G00UGPZ50.USERS-MANUAL-5/User-Guide-494444-Page-64.png)
![Quick Start Guide - Introduction 第 128 頁,共 160 頁file://C:\Documents and Settings\anitachou\Local Settings\Temp\~hh3F24.htm 2004/11/30A "Remote Camera" folder will be created in the "Bluetooth" folder under "My Documenduring initial set-up. A folder bearing the same name as the camera will be created in it, images will be saved in this folder.Click the [Explorer] button in the [Remote Camera] window to display the folder where images have been saved.zThis window is an example showing pictures when [Filmstrip] has been selected frthe [View] menu in Explorer. Viewing images saves on your PCNoteThis section describes how to synchronize information on your PDA (calendars, contacts, inbetc) with your PC using Microsoft ActiveSync.When you connect via Bluetooth instead of with a standard cable, you will always be able tosynchronise your data without the hassle of having to connect the cable. Synchronising information using ActiveSync [SPP]](https://usermanual.wiki/ASUSTeK-Computer/W5G00UGPZ50.USERS-MANUAL-5/User-Guide-494444-Page-65.png)
![Quick Start Guide - Introduction 第 129 頁,共 160 頁file://C:\Documents and Settings\anitachou\Local Settings\Temp\~hh3F24.htm 2004/11/30→Connecting using ActiveSync→Establishing a partnership between ActiveSync and a PDA→Finishing an ActiveSync connection→Cancelling a partnershipzPlease use ActiveSync v.3.7 or higher. Also please establish a partnership between the devices using a USB or infrared link before you connect via Bluetooth. zPlease refer to the ActiveSync Help or other manuals for information on how to use theapplication. zMicrosoft Outlook 2002 or another schedule management tool must also be installed onPC. Both the PC and PDA must be set up in order for a connection to be established.■Preparing the PC1. On the PC, click on [Start]→[All Programs]→[Microsoft ActiveSync]The initial ActiveSync set-up window will appear.It is assumed in the explanation below that no ActiveSync connections have beenestablished with other devices.2. Click [File]→[Connection Settings]ImportantConnecting using ActiveSyncProcedure](https://usermanual.wiki/ASUSTeK-Computer/W5G00UGPZ50.USERS-MANUAL-5/User-Guide-494444-Page-66.png)
![Quick Start Guide - Introduction 第 130 頁,共 160 頁file://C:\Documents and Settings\anitachou\Local Settings\Temp\~hh3F24.htm 2004/11/30The [Connection Settings] window will appear.3. Place a check next to [Allow serial cable or infrared connection to this COM porand then select "COM7". {In the standard set-up, the port is configured to "COM7" (refer to Steps (3)(4) under "Preparing the PDA" below). When using a different port, pleasechange the port number selected in this window. ■Preparing the PDA1. Tap on the Bluetooth icon in the bottom right of the screenNoteProcedure](https://usermanual.wiki/ASUSTeK-Computer/W5G00UGPZ50.USERS-MANUAL-5/User-Guide-494444-Page-67.png)
![Quick Start Guide - Introduction 第 131 頁,共 160 頁file://C:\Documents and Settings\anitachou\Local Settings\Temp\~hh3F24.htm 2004/11/30 {The graphic above shows an example of a PDA operating window.The connection procedure may be different depending on the manufacturermodel of PDA you use. Please refer to the product instruction manuals for further details. The [Bluetooth Settings] window will open.The message "Connection not registered" will appear if no Bluetooth device has registered.Please tap on [OK] to close the message.2. Double click on [Tools]→[Search for peripheral components]Important](https://usermanual.wiki/ASUSTeK-Computer/W5G00UGPZ50.USERS-MANUAL-5/User-Guide-494444-Page-68.png)
![Quick Start Guide - Introduction 第 132 頁,共 160 頁file://C:\Documents and Settings\anitachou\Local Settings\Temp\~hh3F24.htm 2004/11/30The application searches for nearby Bluetooth devices.3. Tap and hold on the destination PC icon, and then select [Update Services]A search for services will be carried out, and then a list of service names and theconnection status will appear as list in the lower window.4. Tap and hold on "COM7" from the list of service names, and then select "RegisteActiveSync".](https://usermanual.wiki/ASUSTeK-Computer/W5G00UGPZ50.USERS-MANUAL-5/User-Guide-494444-Page-69.png)
![Quick Start Guide - Introduction 第 133 頁,共 160 頁file://C:\Documents and Settings\anitachou\Local Settings\Temp\~hh3F24.htm 2004/11/305. Tap [OK] in the confirmation message windowAn ActiveSync connection will be initiated.Once a connection has been successfully established with a PDA, the procedure for establishing a partnership with the PDA will be started by the ActiveSync application on PC.Performing this set-up procedure will enable data to be synchronised between your PC aPDA.1. In the [New Partnership (Set Up a Partnership)] window, select "Standard partnership", and then click on the [Next] buttonEstablishing a partnership between ActiveSync and a PDAProcedure](https://usermanual.wiki/ASUSTeK-Computer/W5G00UGPZ50.USERS-MANUAL-5/User-Guide-494444-Page-70.png)
![Quick Start Guide - Introduction 第 134 頁,共 160 頁file://C:\Documents and Settings\anitachou\Local Settings\Temp\~hh3F24.htm 2004/11/30The [New Partnership (Specify Data Synchronisation Method)] window will appe2. Select "Synchronise with this PC", and then click on the [Next] buttonThe [New Partnership (Select Synchronisation Settings)] window will appear.3. Select the type of information to be synchronised between your PC and PDA, andclick on the [Next] button](https://usermanual.wiki/ASUSTeK-Computer/W5G00UGPZ50.USERS-MANUAL-5/User-Guide-494444-Page-71.png)
![Quick Start Guide - Introduction 第 135 頁,共 160 頁file://C:\Documents and Settings\anitachou\Local Settings\Temp\~hh3F24.htm 2004/11/30The [New Partnership (Completing Setup)] window will appear.4. Click on the [Finish] buttonWhen you click on the [Finish] button, ActiveSync will begin to synchronise youinformation.[Confirming changes] ↓ (Synchronisation process) ↓[Synchronisation complete]](https://usermanual.wiki/ASUSTeK-Computer/W5G00UGPZ50.USERS-MANUAL-5/User-Guide-494444-Page-72.png)
![Quick Start Guide - Introduction 第 136 頁,共 160 頁file://C:\Documents and Settings\anitachou\Local Settings\Temp\~hh3F24.htm 2004/11/30While the ActiveSync connection is active, synchronisation will be performed whenever information is changed on either the PC or the PDA.Once a partnership has been established, every time you start your PC (and PDAthereafter, a Bluetooth connection will be opened and ActiveSync will synchroniyour information.Follow the procedure below on your PDA if you want to end an ActiveSync connection manually.1. Tap and hold on "COM7" in the Bluetooth Settings window, and select [ActiveSyRelease]Follow the procedure below from the ActiveSync window on the PC if you want to cancFinishing an ActiveSync connectionProcedureCancelling a partnership](https://usermanual.wiki/ASUSTeK-Computer/W5G00UGPZ50.USERS-MANUAL-5/User-Guide-494444-Page-73.png)
![Quick Start Guide - Introduction 第 137 頁,共 160 頁file://C:\Documents and Settings\anitachou\Local Settings\Temp\~hh3F24.htm 2004/11/30Follow the procedure below from the ActiveSync window on the PC if you want to cancpartnership between your PC and PDA.1. Click on [File]→"Delete partnership"Click on the [Yes] button when the confirmation message appears.{If you wish to create another ActiveSync connection, you will have to repeabove procedure to re-establish a partnership. ProcedureNoteThis section provides a description of how to use a Bluetooth -compatible wireless headset tocommunicate (chat) using Microsoft NetMeeting or other software. →Registering the headset→Making a connection to the headset→Disconnecting from the headsetRegistering the headsetUsing a headset to communicate [HSP]](https://usermanual.wiki/ASUSTeK-Computer/W5G00UGPZ50.USERS-MANUAL-5/User-Guide-494444-Page-74.png)
![Quick Start Guide - Introduction 第 138 頁,共 160 頁file://C:\Documents and Settings\anitachou\Local Settings\Temp\~hh3F24.htm 2004/11/301. Right-click on the Bluetooth icon in the tasktray, then click on [Add New ConneWizard] {Alternatively, you can click on [Start]>[All Programs]>[Bluetooth]>[BluetoSettings], then click on [New Connection] in the [Bluetooth Settings] screehas opened. The [Add New Connection Wizard (Welcome to the Add New Connection Wizarscreen will appear.2. Turn the headset power onOnce you have turned on the headset, set the mode to enable a Bluetooth connect{The procedure for operating the headset may differ depending on the manufacturer and model.Please consult your user guide for a detailed description of how to operate unit. 3. Confirm that [Express Mode] has been selected, then click on the [Next] buttonProcedureNoteImportant](https://usermanual.wiki/ASUSTeK-Computer/W5G00UGPZ50.USERS-MANUAL-5/User-Guide-494444-Page-75.png)
![Quick Start Guide - Introduction 第 139 頁,共 160 頁file://C:\Documents and Settings\anitachou\Local Settings\Temp\~hh3F24.htm 2004/11/30The [Add New Connection Wizard (Searching for Bluetooth Devices)] screen wiappear.Once the device search has been completed, the [Add New Connection Wizard (Sa Device)] screen will appear.4. Select the name of the headset device from the list, then click on the [Next] butto5. Answering with the headsetIf the service has been properly detected, a screen will appear indicating that the headset is being called, and a tone will accordingly sound in the headset.](https://usermanual.wiki/ASUSTeK-Computer/W5G00UGPZ50.USERS-MANUAL-5/User-Guide-494444-Page-76.png)
![Quick Start Guide - Introduction 第 140 頁,共 160 頁file://C:\Documents and Settings\anitachou\Local Settings\Temp\~hh3F24.htm 2004/11/30Please press the headset switch. {The procedure for operating the headset may differ depending on the manufacturer and model.Please consult your user guide for a detailed description of how to operate unit. The [Add New Connection Wizard (Configuring (Connecting to Voice Circuit))]screen will appear, and device configuration will be performed.{If you are connecting to the headset for the first time, or if another Bluetooaudio device has not yet been registered, the following [Found New HardwWizard] screen will appear, from which you can proceed to install the driveIf another audio device has already been registered (i.e., the driver has beeninstalled), you can proceed to Step 9 without having to install the driver. 6. Click on the [Next] buttonThe [Install Hardware] screen will appear.7. Click on the [Continue Anyway] buttonThe following screen will appear automatically. You may disregard it and click o[Continue Anyway] button.ImportantNote](https://usermanual.wiki/ASUSTeK-Computer/W5G00UGPZ50.USERS-MANUAL-5/User-Guide-494444-Page-77.png)
![Quick Start Guide - Introduction 第 141 頁,共 160 頁file://C:\Documents and Settings\anitachou\Local Settings\Temp\~hh3F24.htm 2004/11/30The [Add New Connection Wizard (Completing the Found New Hardware Wizarscreen, which is the final screen of the installation wizard, will appear.8. Click on the [Finish] buttonOnce driver installation is complete, the [Add New Connection Wizard (Enter Connection Name)] will appear.9. Confirm the information you have entered, and click on the [Next] button](https://usermanual.wiki/ASUSTeK-Computer/W5G00UGPZ50.USERS-MANUAL-5/User-Guide-494444-Page-78.png)
![Quick Start Guide - Introduction 第 142 頁,共 160 頁file://C:\Documents and Settings\anitachou\Local Settings\Temp\~hh3F24.htm 2004/11/30The [Add New Connection Wizard (Completing the Add New Connection Wizarscreen will appear.10. Click on the [Finish] buttonThe configuration information will be registered, and an icon will be displayed in[Bluetooth Settings] screen. You can make a connection to the headset from an icon that has been registered in [BlueSettings].zBefore making a connection to the headset, please check that you have turned on thheadset's power, and that it has been enabled for a Bluetooth connection.Please ensure that the following audio -related applications have been closed beforeconnect the headset to your PC. {Windows Media Player, BeatJam, InterVideo WinDVD and other music/audiplayback software {Windows Messenger and other e-conferencing software If you wish to use these applications, please terminate the headset connection beforlaunch them. 1. Right-click on the headset icon, then click on [Connect].Making a connection to the headsetImportantProcedure](https://usermanual.wiki/ASUSTeK-Computer/W5G00UGPZ50.USERS-MANUAL-5/User-Guide-494444-Page-79.png)
![Quick Start Guide - Introduction 第 143 頁,共 160 頁file://C:\Documents and Settings\anitachou\Local Settings\Temp\~hh3F24.htm 2004/11/302. Answer with the headset A screen will appear indicating that the headset is being called, and a tone will accordingly sound in the headset.Please press the headset switch.If the connection has been properly established, the icon's appearance will changeindicate a connected state.You may now launch conferencing and voice -recognition software and use the headset.Please follow the steps below to disconnect from the headset.1. Right-click on the headset icon in the [Bluetooth Settings] screen, then click on [Disconnect].Disconnecting from the headsetProcedure](https://usermanual.wiki/ASUSTeK-Computer/W5G00UGPZ50.USERS-MANUAL-5/User-Guide-494444-Page-80.png)
![Quick Start Guide - Introduction 第 144 頁,共 160 頁file://C:\Documents and Settings\anitachou\Local Settings\Temp\~hh3F24.htm 2004/11/30A message will appear, requesting confirmation that you wish to disconnect. Clicthe [Yes] button.The icon on the [Bluetooth Settings] screen will appear as shown below, indicatinthat the device has been disconnected.This section describes possible causes and countermeasures to be considered when your Bluedevice cannot be configured properly, functions abnormally or presents other problems relateits operation.The section "What you need to know about using Bluetooth " describes the basic concepbe aware of when using Bluetooth. Should you still encounter problems after having readthrough this information, please refer to the following list, which has been arranged accoto application. zGeneral operation of the Bluetooth UtilityzUsing a wireless modem stationzUsing an access pointzUsing a printerzUsing a Bluetooth headset zUsing a keyboard or mouse zUsing a camera zUsing a PDA zUsing a mobile telephone Basic understandingTroubleshooting by applicationzPlease refer to "What you need to know about using Bluetooth " for an understandithe basic concepts to be aware of when using Bluetooth. ImportantBluetooth ManagerTroubleshootingGeneral operation of the Bluetooth Utility](https://usermanual.wiki/ASUSTeK-Computer/W5G00UGPZ50.USERS-MANUAL-5/User-Guide-494444-Page-81.png)
![Quick Start Guide - Introduction 第 145 頁,共 160 頁file://C:\Documents and Settings\anitachou\Local Settings\Temp\~hh3F24.htm 2004/11/30zIf the Bluetooth icon does not appear in the task tray, Bluetooth Manager will not bactive, which will prevent you from being able to use any of the functions of the Bluetooth Utility.Start the utilities as instructed below to enable Bluetooth Manager to start automatiand allow all functions to be utilized.Bluetooth Settings(from Windows XP)[Start] > [All Programs] > [Bluetooth] > [Bluetooth Settings](from Windows 2000)[Start] > [Programs] > [Bluetooth] > [Bluetooth Settings]Remote Camera(from Windows XP)[Start] > [All Programs] > [Bluetooth] > [Remote Camera](from Windows 2000)[Start] > [Programs] > [Bluetooth] > [Remote Camera]Wireless File Transfer(from Windows XP)[Start] > [All Programs] > [Bluetooth] > [Wireless File Transfer](from Windows 2000)[Start] > [Programs] > [Bluetooth] > [Wireless File Transfer]zThe wireless communication switch is turned off. Please switch it on.zThe other device(s) may have been set to Non -discoverable mode.Please check the mode settings on the device.zThe other device may be using a profile that is not supported by the Bluetooth UtilPlease check the profile being used on the other device.zThe following profiles are compatible with Bluetooth Settings.DUN, FAX, LAP, SPP, HID, HCRP, FTP, OPP, HSP, PAN and BIPDevices running profiles other than those above will not be able to be registered wiBluetooth Settings.Bluetooth icon does not appear in task trayBluetooth SettingsClicking on the [New Connection] button brings up the message "Unable to prepare Bluetooth."Remote device(s) cannot be detectedServices on a remote device are undiscoverableBluetooth Information ExchangerAn error occurs when you try to send a file using the right -click menu.](https://usermanual.wiki/ASUSTeK-Computer/W5G00UGPZ50.USERS-MANUAL-5/User-Guide-494444-Page-82.png)
![Quick Start Guide - Introduction 第 146 頁,共 160 頁file://C:\Documents and Settings\anitachou\Local Settings\Temp\~hh3F24.htm 2004/11/30zSelect and right-click on a file, and then you can choose either the FTP or OPP prouse when you click on [Send to Bluetooth Device].If neither profile is supported by the destination device, the file will not be able to bsent from the right-click menu.The transmission will also fail if you use FTP to send a file to a device that only supports the OPP profile.Should this occur, please click on [Bluetooth] →[Profiles] under [Bluetooth InformExchanger] to configure the Transfer mode. zThe other device may have a certain security level enforced (Non -connectable moetc). Please confirm the security settings of the other device.Please enter the correct password if you are asked to enter one. zSee "Using a camera"zA maximum of 64 virtual COM ports can be added. You will be unable to add anoport if 64 ports have already been configured.yy g gCannot open shared folder on remote device using [File Transfer].Remote CameraBluetooth Local COMCannot add portzPlease refer to "What you need to know about using Bluetooth " for an understandithe basic concepts to be aware of when using Bluetooth. zIf the modem station is connected to and is being used by another device, the modestation will be undetectable even if you search for it. zIf the modem station is connected to and is being used by another device, no other device will be able to connect to the modem stationImportantModem station cannot be detectedCannot connect to modem stationUsing a wireless modem station](https://usermanual.wiki/ASUSTeK-Computer/W5G00UGPZ50.USERS-MANUAL-5/User-Guide-494444-Page-83.png)
![Quick Start Guide - Introduction 第 147 頁,共 160 頁file://C:\Documents and Settings\anitachou\Local Settings\Temp\~hh3F24.htm 2004/11/30device will be able to connect to the modem station.zThe Bluetooth passkey (PIN code) comprises a sequence of alphanumeric characterwith the letters able to be rendered in upper and lower case.If [Caps Lock] is on, the Bluetooth passkey may not be able to be entered correctlyzPlease ensure that the telephone cable is connected from the socket to the "LINE" terminal on the modem station. {If the telephone cable has come loose because it has not been fully inserted inthe socket, the resulting poor contact may prevent data from being transmitteaccurately.{Communication will be impossible if the interior of the cable has been brokePlease replace the cable with another one. zPlease ensure that the two slide switches on the underside of the main unit have beto the "NORMAL" and "MODEM" positions respectively. zThe telephone number of the connection (i.e., the telephone number for the access of your Internet service provider) may not be correct. Please check the telephone number.zThe user ID and/or password for the provider with whom you have signed up may been entered incorrectly. Please check the user ID and password.zThe default connection may have been configured with different settings. Please seconnection configured for mobile telephone use as the default connection.zWhen you place a call using a company switchboard or other exchange, the systemrequire you to enter a "0" before the telephone number itself. Please check the typetelephone line you are using.zOnce you have registered a wireless modem station as your fax server, you will neeenter the fax settings from the [Printer and Faxes] window in the Control Panel.Please refer to "Using a modem station for fax transmissions " for information on tconfiguration procedure.zThe telephone number of the fax destination may have been entered incorrectly. Plcheck the telephone number.zIf the setting under COM Auto Connect Settings has been set to "Off", a connectionot automatically be established with the modem. Please connect to the modem manually.zWhen you place a call using a company switchboard or other exchange, the systemrequire you to enter a "0" before the telephone number itself. Please check the typetelephone line you are using.Bluetooth passkey entry failedCannot connect to telephone lineNoteCannot connect to the InternetCannot send or receive faxes](https://usermanual.wiki/ASUSTeK-Computer/W5G00UGPZ50.USERS-MANUAL-5/User-Guide-494444-Page-84.png)
![Quick Start Guide - Introduction 第 148 頁,共 160 頁file://C:\Documents and Settings\anitachou\Local Settings\Temp\~hh3F24.htm 2004/11/30zThe fax service may not have been enabled for sending (or receiving).Please check the settings by following the procedure below.1. Open [Printers and Faxes] from the Control Panel, right -click on the [Fax]and then click on [Properties]The [Fax properties] window will appear.2. Select the [Device] tab, right-click on the modem you wish to use, and theon [Properties]3. Select the [Send] tab, and then confirm that "Enable device to send" has bechecked.](https://usermanual.wiki/ASUSTeK-Computer/W5G00UGPZ50.USERS-MANUAL-5/User-Guide-494444-Page-85.png)
![Quick Start Guide - Introduction 第 149 頁,共 160 頁file://C:\Documents and Settings\anitachou\Local Settings\Temp\~hh3F24.htm 2004/11/304. Select the [Receive] tab, and then confirm that "Enable device to receive" hbeen checked (when you wish to receive faxes)5. Click on the [OK] buttonPl f "Wh d k b i Bl h"f d diImportantUsing an access point](https://usermanual.wiki/ASUSTeK-Computer/W5G00UGPZ50.USERS-MANUAL-5/User-Guide-494444-Page-86.png)
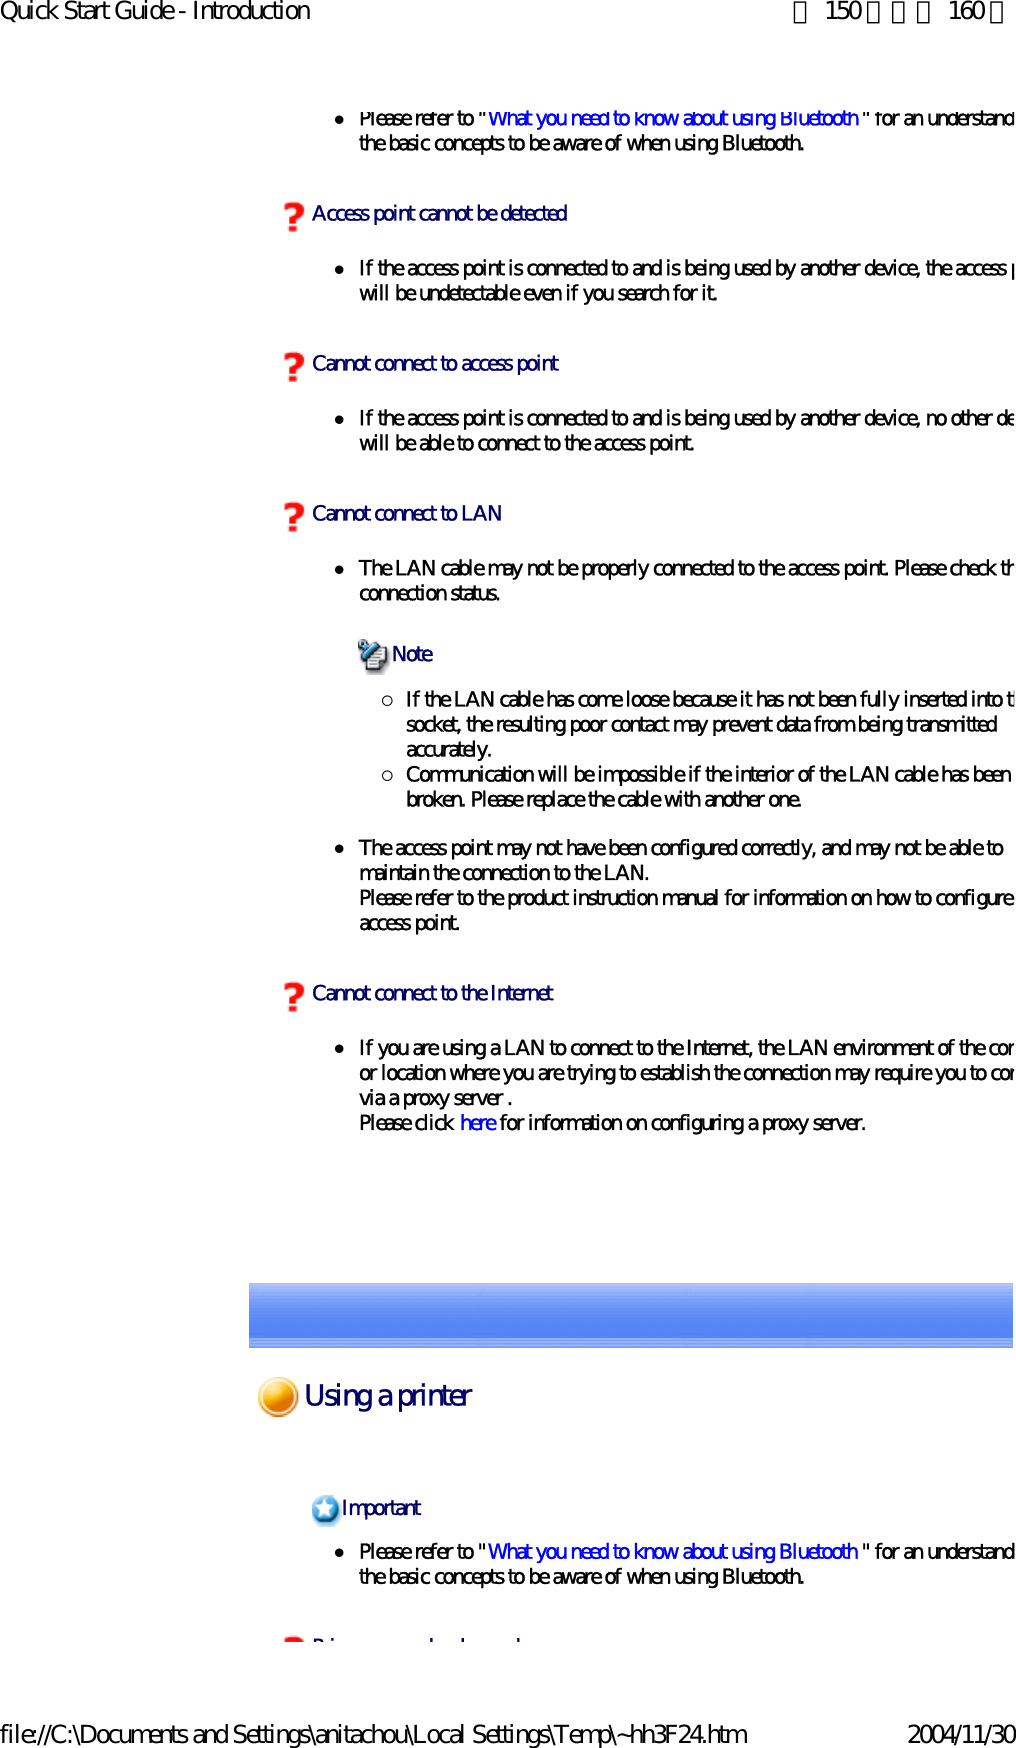


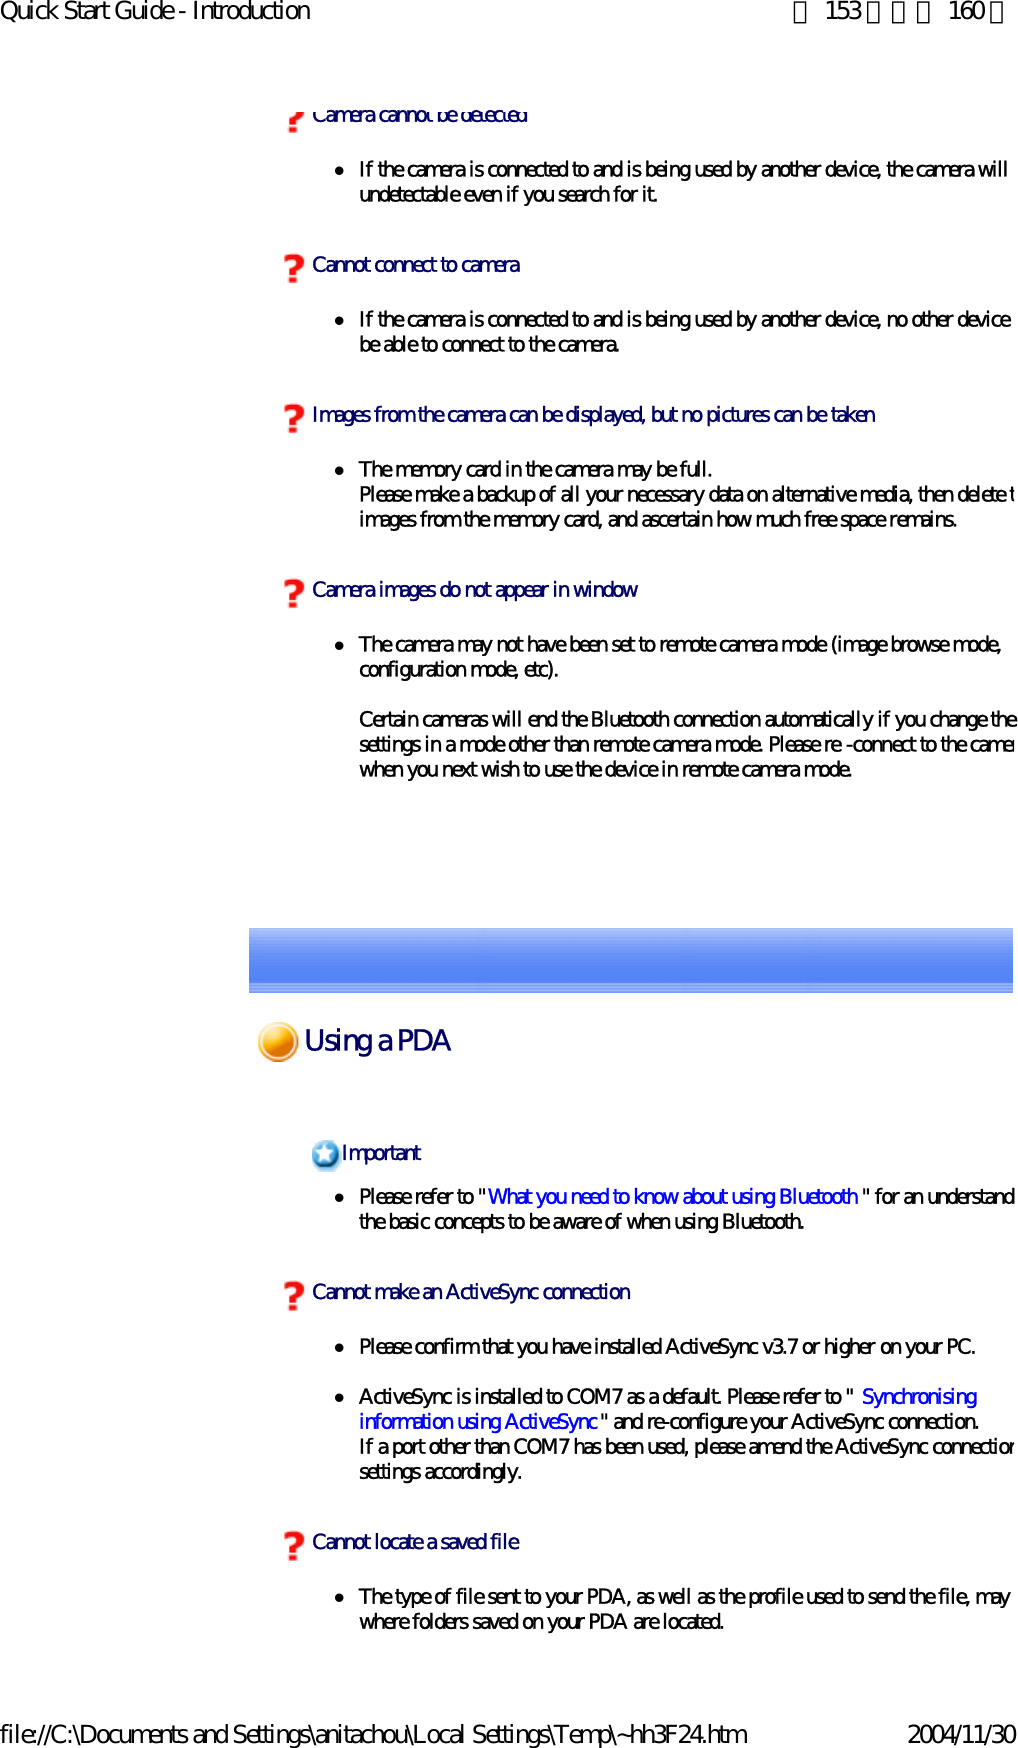
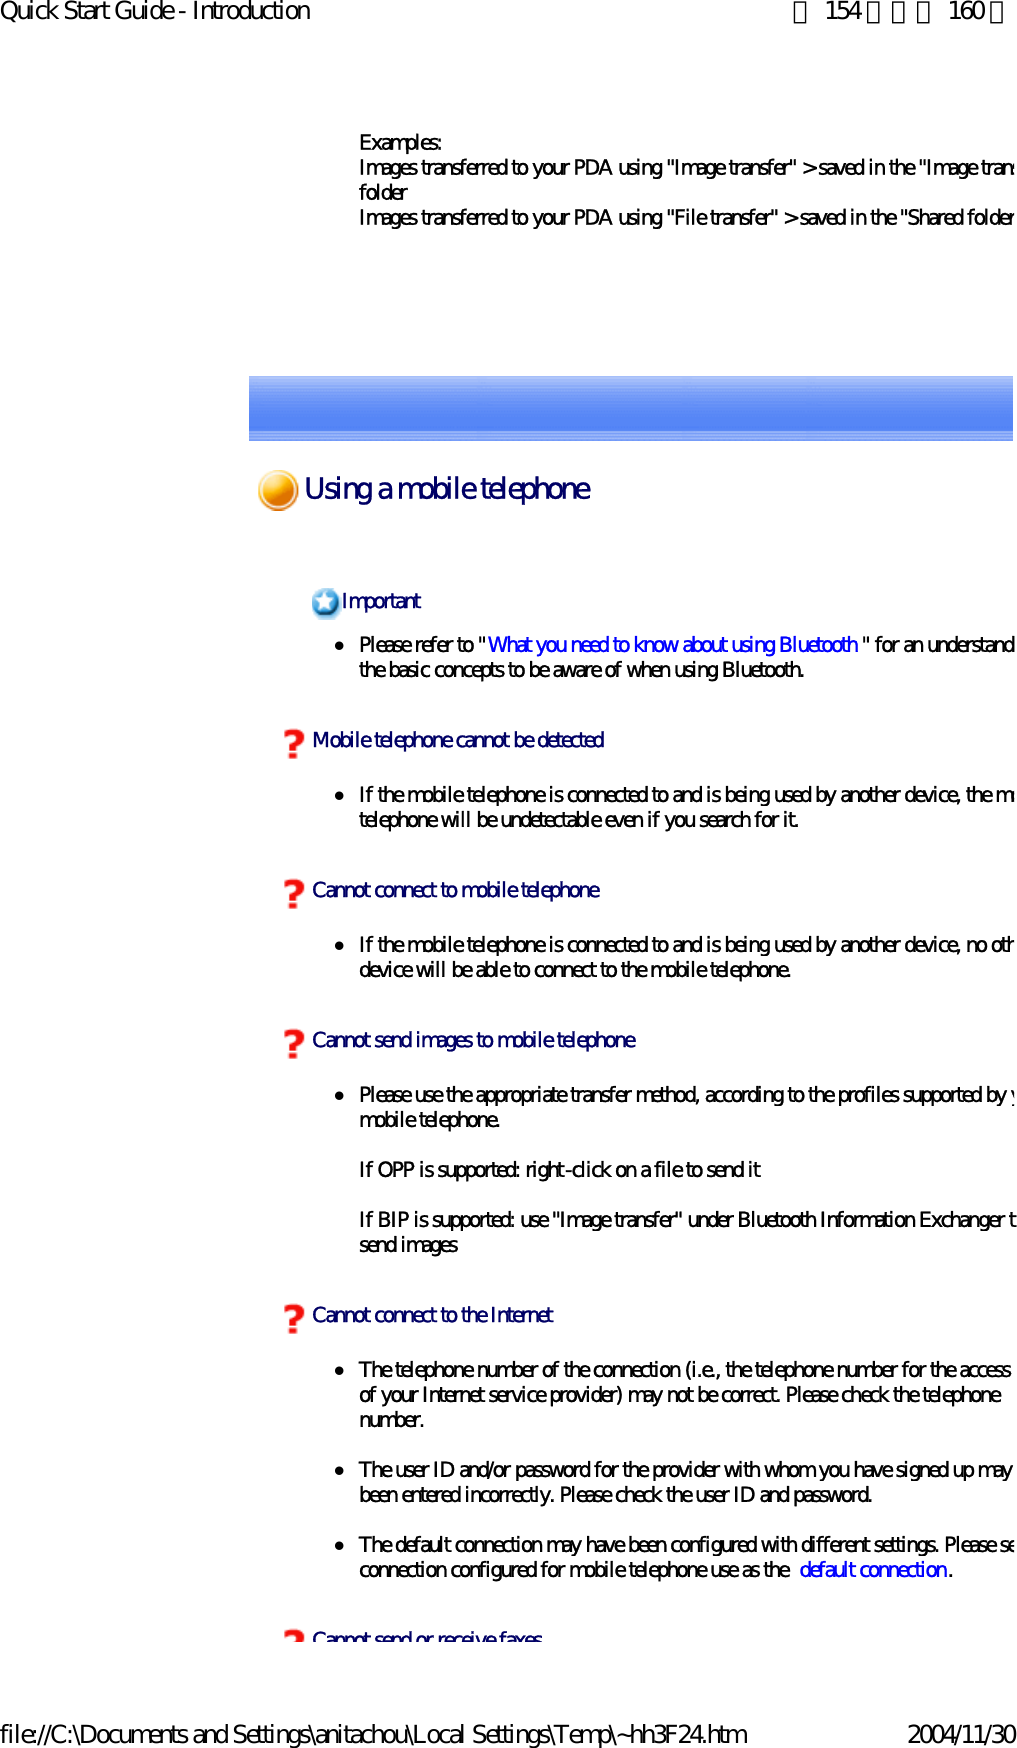
![Quick Start Guide - Introduction 第 155 頁,共 160 頁file://C:\Documents and Settings\anitachou\Local Settings\Temp\~hh3F24.htm 2004/11/30zOnce you have registered a mobile telephone as your fax server, you will need to ethe fax settings from the [Printer and Faxes] window in the Control Panel.Please refer to "Using a modem station for fax transmissions " for information on tconfiguration procedure.zThe telephone number of the fax destination may have been entered incorrectly. Plcheck the telephone number.zIf the setting under COM Auto Connect Settings has been set to "Off", a connectionot automatically be established with the modem. Please connect to the mobile telephone manually.zThe fax service may not have been enabled for sending (or receiving).Please check the settings by following the procedure below.1. Open [Printers and Faxes] from the Control Panel, right -click on the [Fax]and then click on [Properties]The [Fax properties] window will appear.2. Select the [Device] tab, right-click on the modem you wish to use, and theon [Properties] Cannot send or receive faxes](https://usermanual.wiki/ASUSTeK-Computer/W5G00UGPZ50.USERS-MANUAL-5/User-Guide-494444-Page-92.png)
![Quick Start Guide - Introduction 第 156 頁,共 160 頁file://C:\Documents and Settings\anitachou\Local Settings\Temp\~hh3F24.htm 2004/11/303. Select the [Send] tab, and then confirm that "Enable device to send" has bechecked.4. Select the [Receive] tab, and then confirm that "Enable device to receive" hbeen checked when you wish to receive faxes)5. Click on the [OK] button](https://usermanual.wiki/ASUSTeK-Computer/W5G00UGPZ50.USERS-MANUAL-5/User-Guide-494444-Page-93.png)