Delta Electronics orporated DN-715 NoteBook User Manual MANUAL CHAP 2
Delta Electronics Incorporated NoteBook MANUAL CHAP 2
Contents
MANUAL CHAP 2

C
Ch
ha
ap
pt
te
er
r
2
2
Using the Notebook
This chapter explains
the procedures that you
should follow the first
time that you use the
notebook
2-1
Keyboard
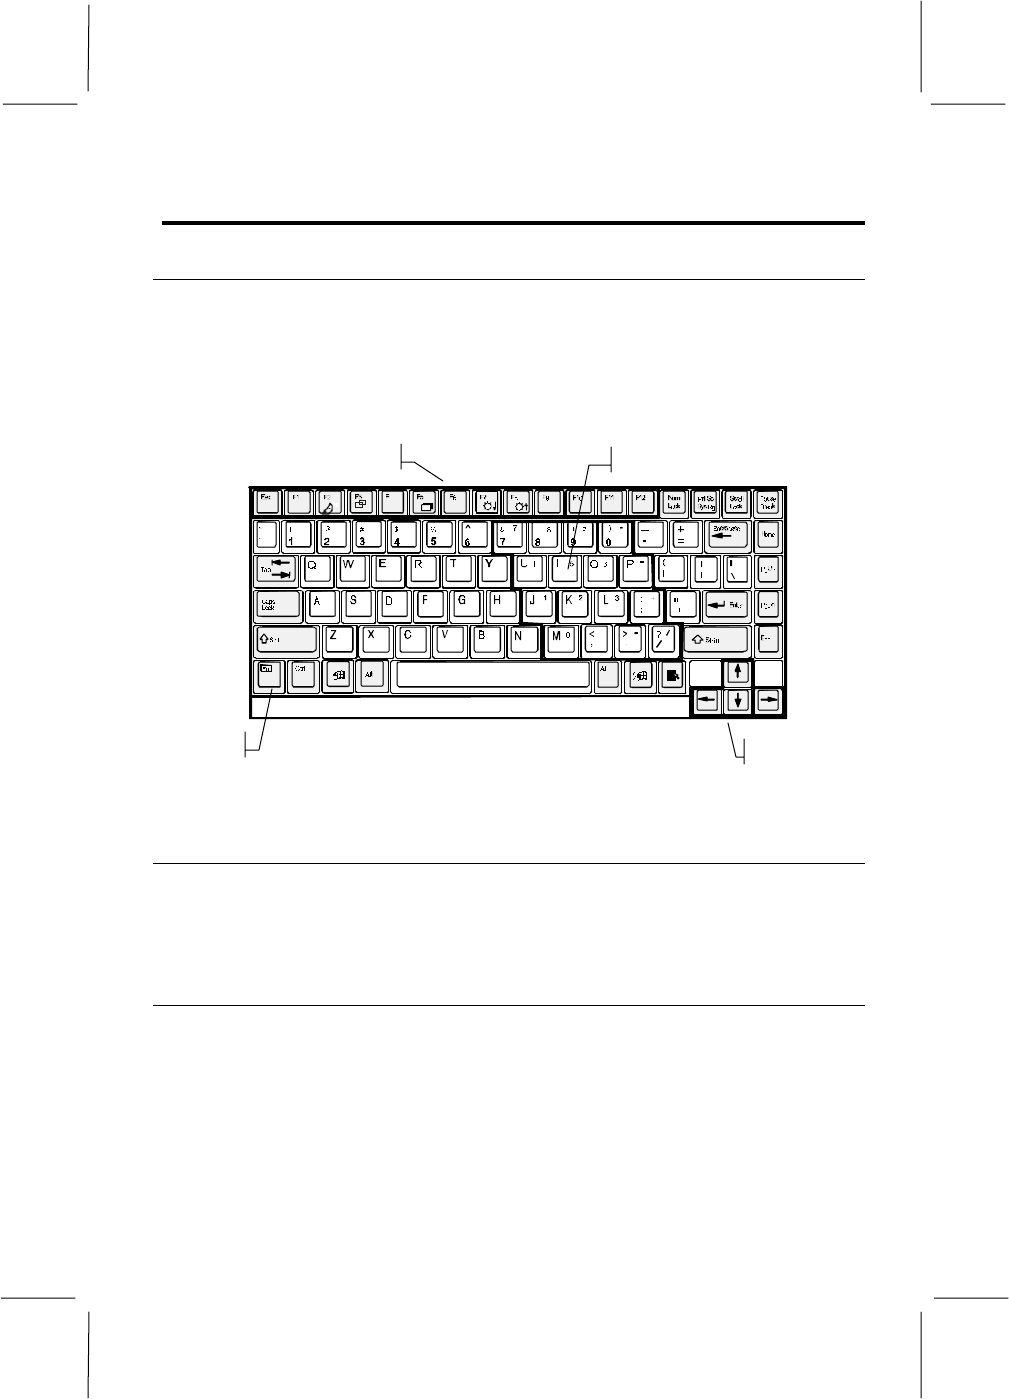
Keyboard Layout
The appearance of the notebook keyboard depends on the version of the
system that you are using, and the language version of your system. For some
languages, one or two extra keys are required, and extra keystrokes may be
embedded into the keys. The illustration below shows a picture of a typical
keyboard.
Fn key Cursor Keys
Numeric Keyboard
Function Keys
Figure 2-1: Standard Keyboard Layout
Key Legends
In the upper left corner, each keycap carries a large legend of the normal
keystroke. If there are two legends, the upper keystroke is selected by holding
down the Shift key.
Embedded Keypad
The alphabet keys on the right side have an embedded numeric keypad that
can be turned on by pressing the Num Lock key. The embedded keypad
legends are usually positioned in the upper right corner of the keycaps (in
some language versions, the keypad legends may be positioned on the front
edge of the keycap).
2-2
Function Keys
The function keys are from the top row of the keyboard. The software usually
determines the action of the function keys that the computer is running. Some
of the function keys have a second action embedded. This action is identified
as an icon on the keycap. This action is selected by holding down the FN
Function key (in the lower left corner of the keyboard) while pressing the
function key.
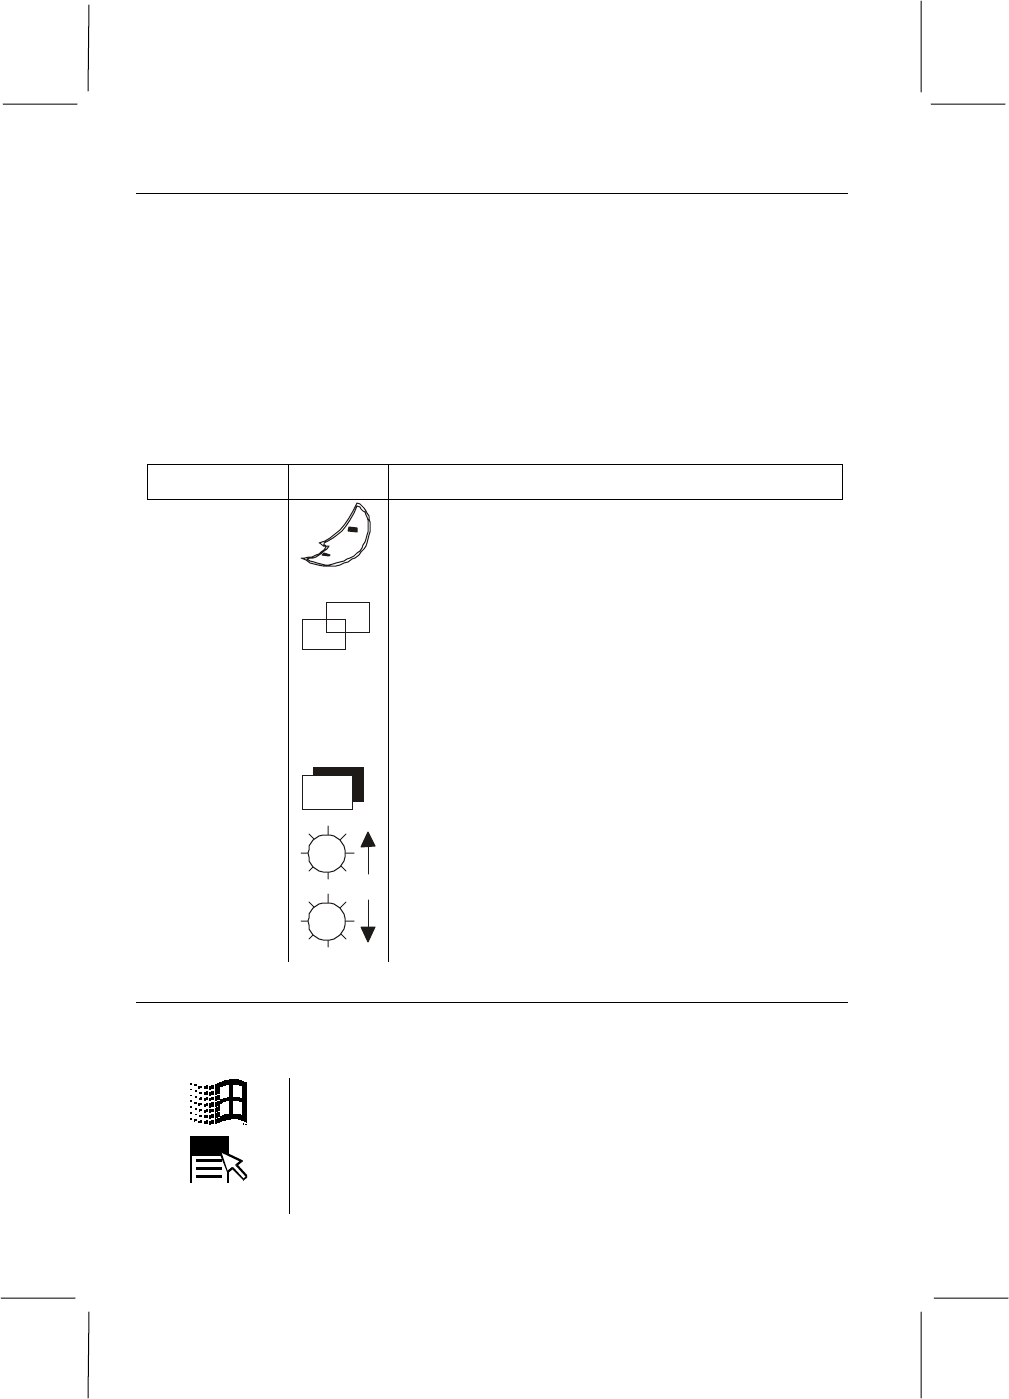
Function Key Reference
The table below shows the meaning of the function key icons, and other
embedded keyboard icons:
Keystrokes Icon Action
FN + F2 This key combination causes your notebook to
switch to suspend-to-disk mode. (See chapter 4,
for information on the suspend-to-disk mode option
on your notebook)
FN + F3 This key combination toggles the video display
between the built-in screen and an external
monitor. The first press switches the video to an
external monitor, the second press causes a
simultaneous display on the screen and monitor,
and the third press returns the video to the built-in
screen only.
FN + F5 This key combination toggles the video display on
the built-in screen on and off.
FN + F7 This key combination increases the brightness of
the built-in screen.
FN + F8 This key combination decreases the brightness of
the built-in screen.
Windows Keys
The Windows keys are located on either side of the Space bar. They are active
in Windows 95, Windows 98, or Windows NT.
This key activates the Start button Windows Task Bar.
This key opens the pull down menu of a selected icon or
object. Its action is the same as right-clicking an icon or object
with a mouse or touchpad.
2-3
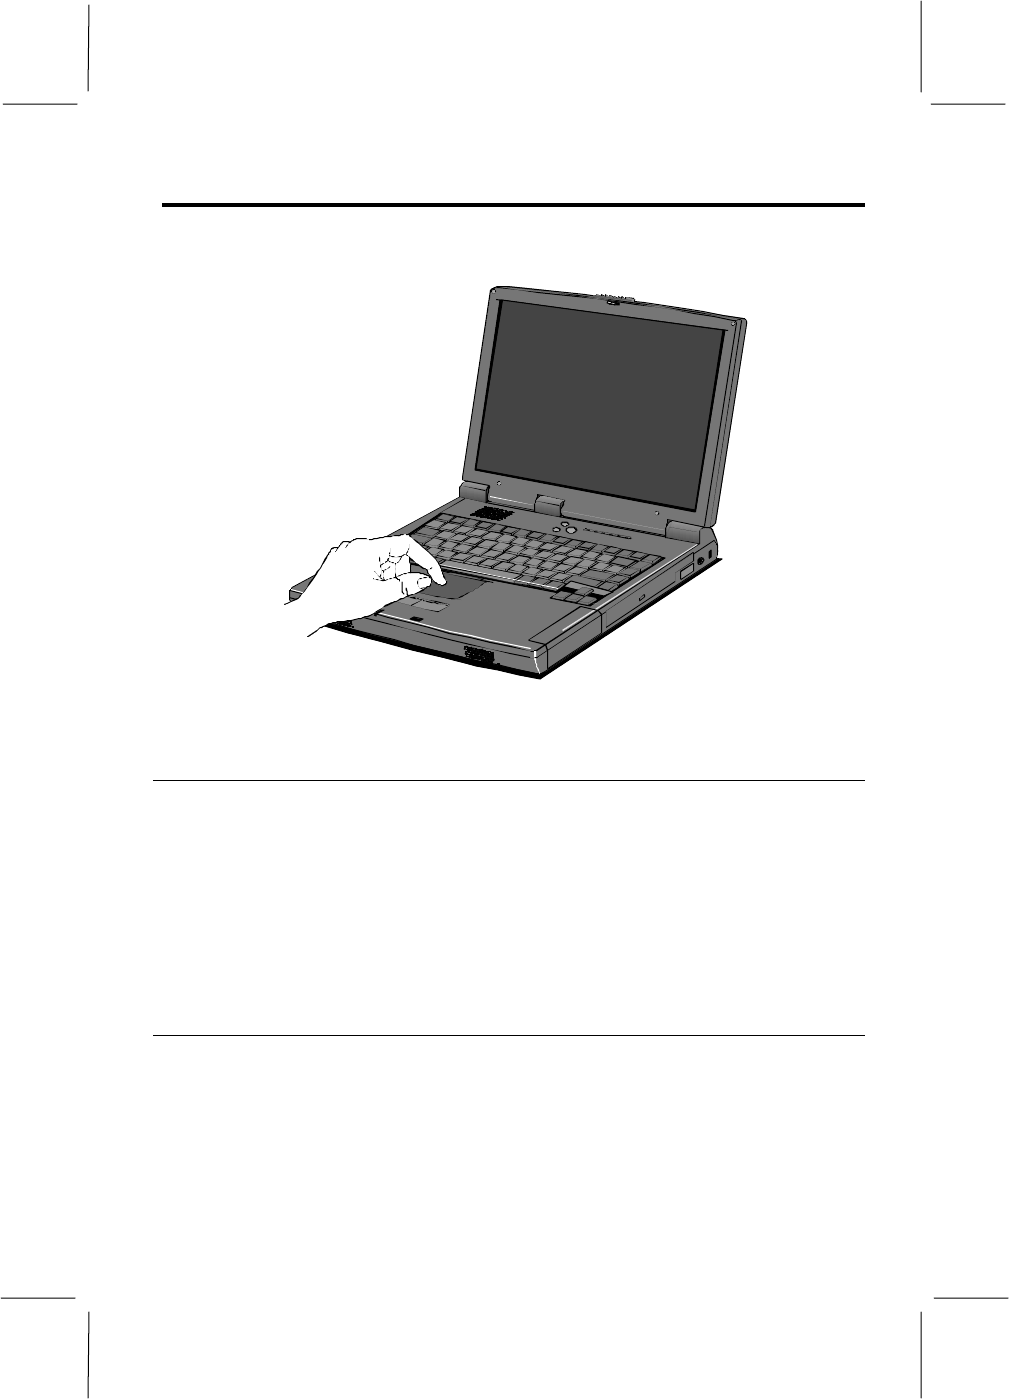
Using the Touchpad
The touch pad works like a standard computer mouser. Simply move your
fingertip over the touch pad to control the position of the cursor.
Figure 2-2: Using the Touchpad
Touchpad Buttons
Two buttons are located below the touchpad. The button on the left acts
exactly like the left button on a mouse. You can click it once to select an icon,
object, or file, and click or double-click to execute an action on a selected
icon, object, or file.
The button on the right acts exactly like the right button on a mouse. In the
Windows environment, a right click usually displays a pull-down properties
menu for whatever icon, object, or file is selected.
Tapping the Touchpad Surface
You can operate most of the touchpad functions with a single fingertip. When
you need to execute a left button mouse click, tap gently on the touchpad
surface with your fingertip. Tap twice quite rapidly to execute a double click.
For drag and drop operations, tap twice, but keep your fingertip in contact with
the touchpad surface after the second tap, you can then drag objects around the
screen. When your fingertip breaks contact with the touchpad surface, the
object is dropped.
2-4
Connecting Power to the System
Your notebook can operate through the AC adapter connected to a wall outlet,
or it can operate from the removable, rechargeable battery installed in the left
side of the unit.
When you are using your notebook for the first time, it is essential that you use
the AC adapter connected to a suitable power supply. The battery in a newly
purchased system is usually fully discharged or has just a little charge
remaining. When you first use the notebook, you must have sufficient power
to complete the Windows initialization process without running out of power.
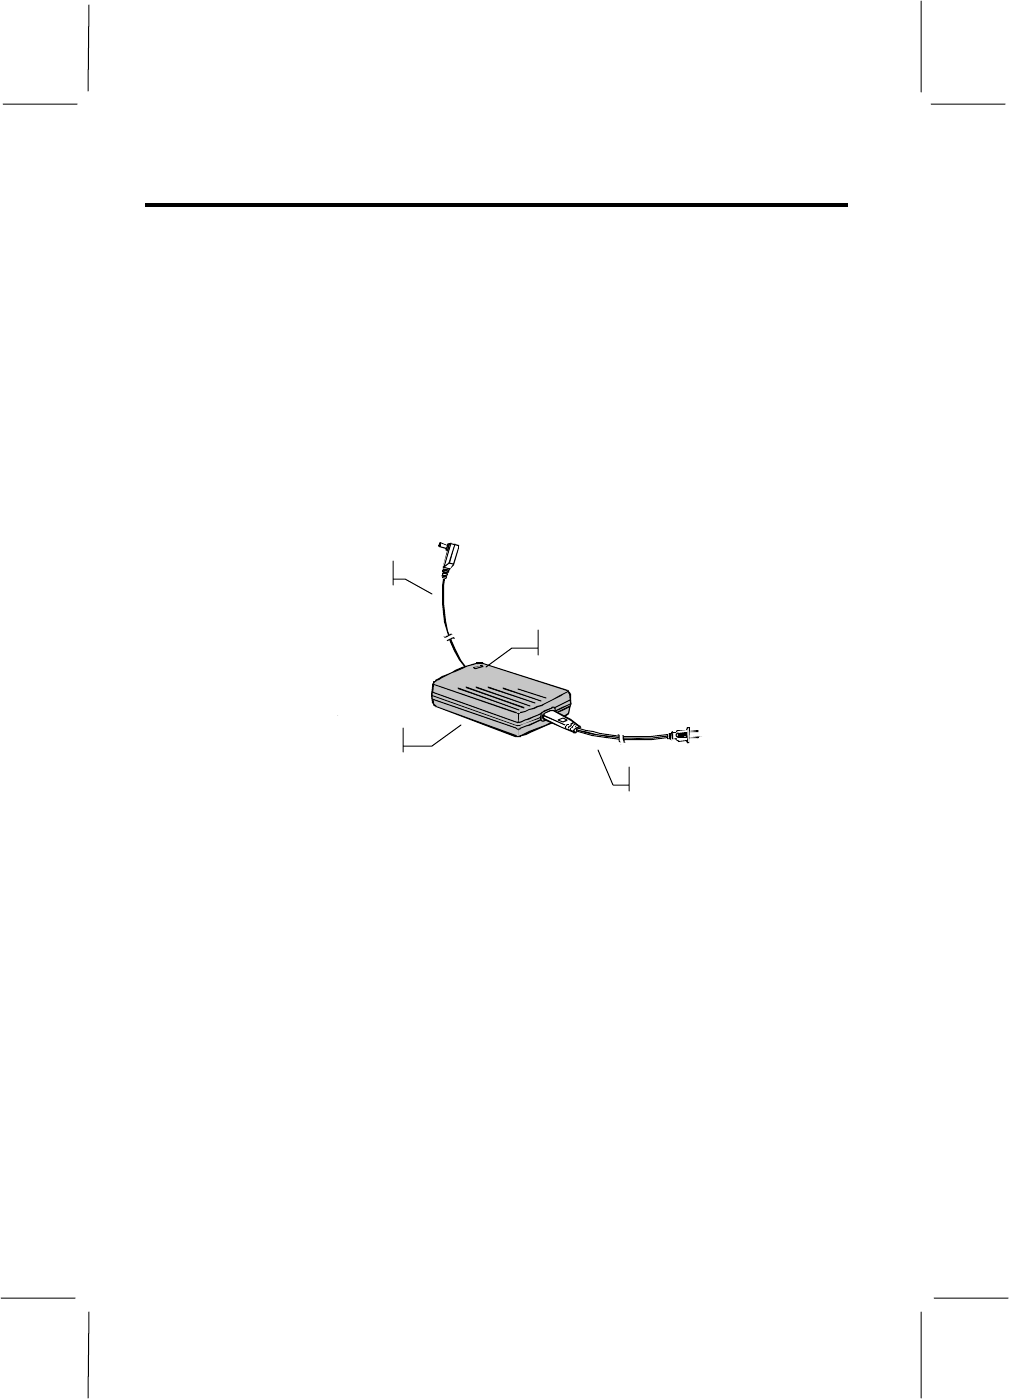
The AC adapter is auto-sensing so it can use any available power supply from
100 volts through to 240 volts (± 10%VAC) with a frequency ranging from 50
to 60 Hertz. The AC adapter is also used to recharge the rechargeable battery.
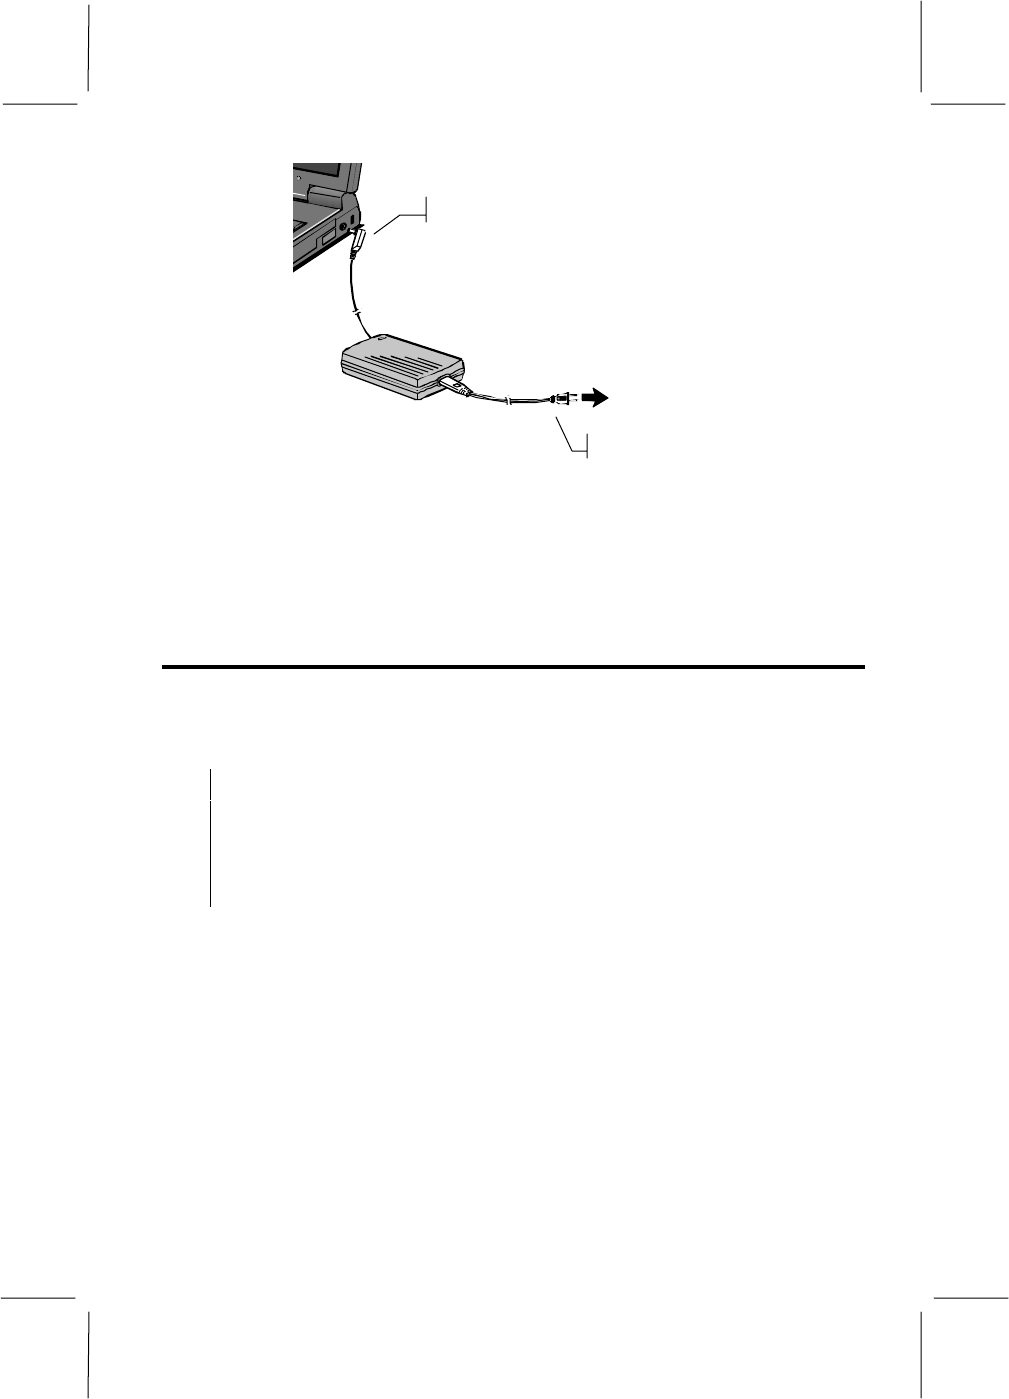
AC Power Cord
Direct Current Cable
AC Adapter
Power Indicator Light
Figure 2-3: AC Adapter
1. Plug the power cord into a regular AC power supply outlet.
2. The power indicator light on the AC adapter will turn on to show that it is
connected to AC power.
3. Plug the direct current cable from the AC adapter into the AC adapter jack
on the left side of the notebook.
2-5
To Wall Outlet
To AC Adapter Jack
Figure 2-4: Connecting the AC Adapter
4. The left side power indicator on the front edge of the notebook will turn
on with a green light. At the same time the right power indicator will turn
on or flash to indicate internal battery status.
First Time Start Up
When you have connected the notebook to a suitable power supply, and you
are familiar with the operation of the keyboard and touchpad, you are ready to
begin using your computer.
NOTE: It is particularly important that you give your battery a full
charge the first time that you use it. We recommend that you leave the
system connected to the AC adapter until the battery is fully charged.
The right power indicator lamp on the front edge of the notebook will
turn green when the internal notebook battery is fully charged.
The Windows operating system is partially installed on your system. The
installation is completed when you turn on the computer for the first time. At
that point, Windows will run a setup program which gathers important
information about you and your computer preferences, so that Windows
operates the way you want it to.
Throughout the setup procedure, Windows will present dialog boxes on the
screen. When you have read the dialog box and wish to proceed with the
installation, use the touchpad to point to the Next button and then click it. If
you wish to review a part of the installation procedure, click on the Back
button.

2-6
1. Turn on your notebook by pressing the power switch down and holding it
down for about two seconds. When you see activity on the power and
status indicator panels, you can release the power switch.
2. When Windows starts, you may see a Safe Recovery message. This means
that the notebook has been turned on at least once since the partial
installation of Windows, and Windows has registered the fact that the final
installation was not completed at that time. You can ignore the safe
recovery message and proceed.
3. The setup program will ask for the language and layout of your keyboard.
Select the appropriate items from the list provided and proceed.
4. Setup will then ask for your name and company name if applicable. Type
in the information and proceed.
5. Setup will then display the Windows license agreement. This document
details the terms and condition under which you are licensed to use the
Windows software. You must read this information and then click on the
“I accept the agreement” check box in order to proceed.
6. Setup will then ask you to type in the registration number on the
Certificate of Authenticity (COA). The COA is generally pasted on the
front cover of the Windows manual that is shipped with this system.
7. Setup will then begin to configure your computer. After some time, you
will be required to restart the computer.
8. When the notebook has restarted, setup will ask you to select a printer for
your system. You can select a printer at this time, or leave it till later if
you prefer.
9. Setup will then display a Time Zone window. Use the touchpad to select
the correct time zone for you location, and reset the time and date.
That completes the Windows setup program. Your notebook is now installed
with your own personal copy of Windows.
Using the Drives
You can learn a lot about your computer by using the windows My Computer
utility. If you click on this icon, it will show a graphical representation of the
media devices on your system. Depending on the configuration of your
system, your notebook will probably have the following devices:

2-7
Hard Disk Drive
The hard disk drive is an internal component and is identified by your system
as drive C:. The Windows operating system is stored on the hard disk drive,
and when you install new software applications on your system, they will
usually be stored on the hard disk drive. The hard disk drive provides very fast
access to your data and applications.
Floppy Disk
The drive bay on the left side of the notebook is installed with a floppy disk.
The floppy disk drive uses removable 3.5”, low capacity, (1.44 MB), and
inexpensive diskettes. Your system identifies this disk drive as drive A:.
Access to the floppy disk drive is quite slow but floppy diskettes are very
useful for storing and transferring files.
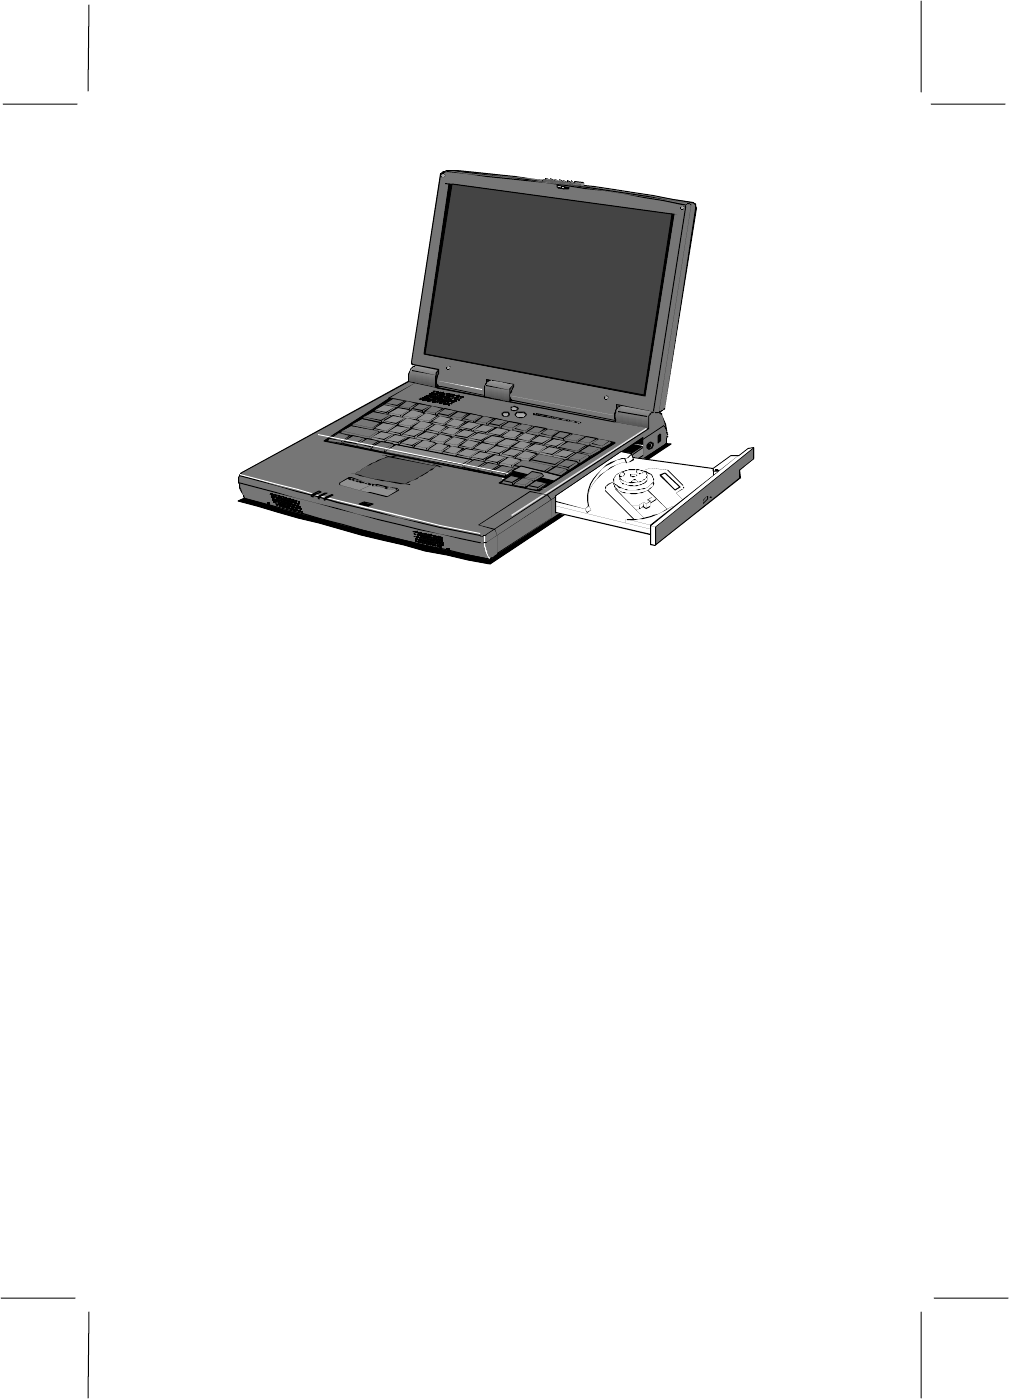
CD-ROM Drive
The drive bay on the right hand side is either installed with a CD-ROM drive.
This option is factory installed and cannot be easily switched. CD-ROM disks
can store over 600 MB of audio, video, or data. Usually your system identifies
the CD-ROM drive as drive D:. Access to a CD -ROM is quite fast. CD disks
are used to distribute large software applications, and audio and video files
that require a lot of capacity. You can play audio and video files using the
Windows media player.
2-8
Figure 2-5: CD-ROM Drive Tray