Delta Electronics orporated DN-715 NoteBook User Manual CHAP 5
Delta Electronics Incorporated NoteBook CHAP 5
Contents
USER MANUAL CHAP 5

C
Ch
ha
ap
pt
te
er
r
5
5
Exploring your Notebook
This chapter gives an
in-depth description of
some of the built-in
software and hardware
features of your
notebook
5-1
Introduction
The software drivers and utility programs are pre-installed on your notebook,
and are integrated into the Windows environment. If you ever have to rebuild
you hard disk drive, you can use the support software supplied with the
notebook to re-install the programs.
Video Display
The video system on your notebook comprises the flat-panel screen, the video
controller and video memory circuitry, the video ports, and the video software.
Flat-panel Screen
The flat-panel screen is a large, color liquid crystal display panel. The screen
uses a technology called TFT (Thin Film Transistor), which provides a very
high contrast display. You can adjust the brightness of the display by using the
video hot keys.
FN + F7 This key combination increases the
brightness of the built-in screen.
FN + F8 This key combination decreases the
brightness of the built-in screen.
Resolution and Color Depth
The screen is designed to display a video resolution of 1024 pixels by 768
pixels. This is called XGA resolution, and it is common to most high-end
computers. It displays a maximum of information without making the screen
fonts too small to read.
You cannot display a higher resolution than 1024 by 768. You might be able
to disable the stretching function by using the video software utility described
below.
5-2
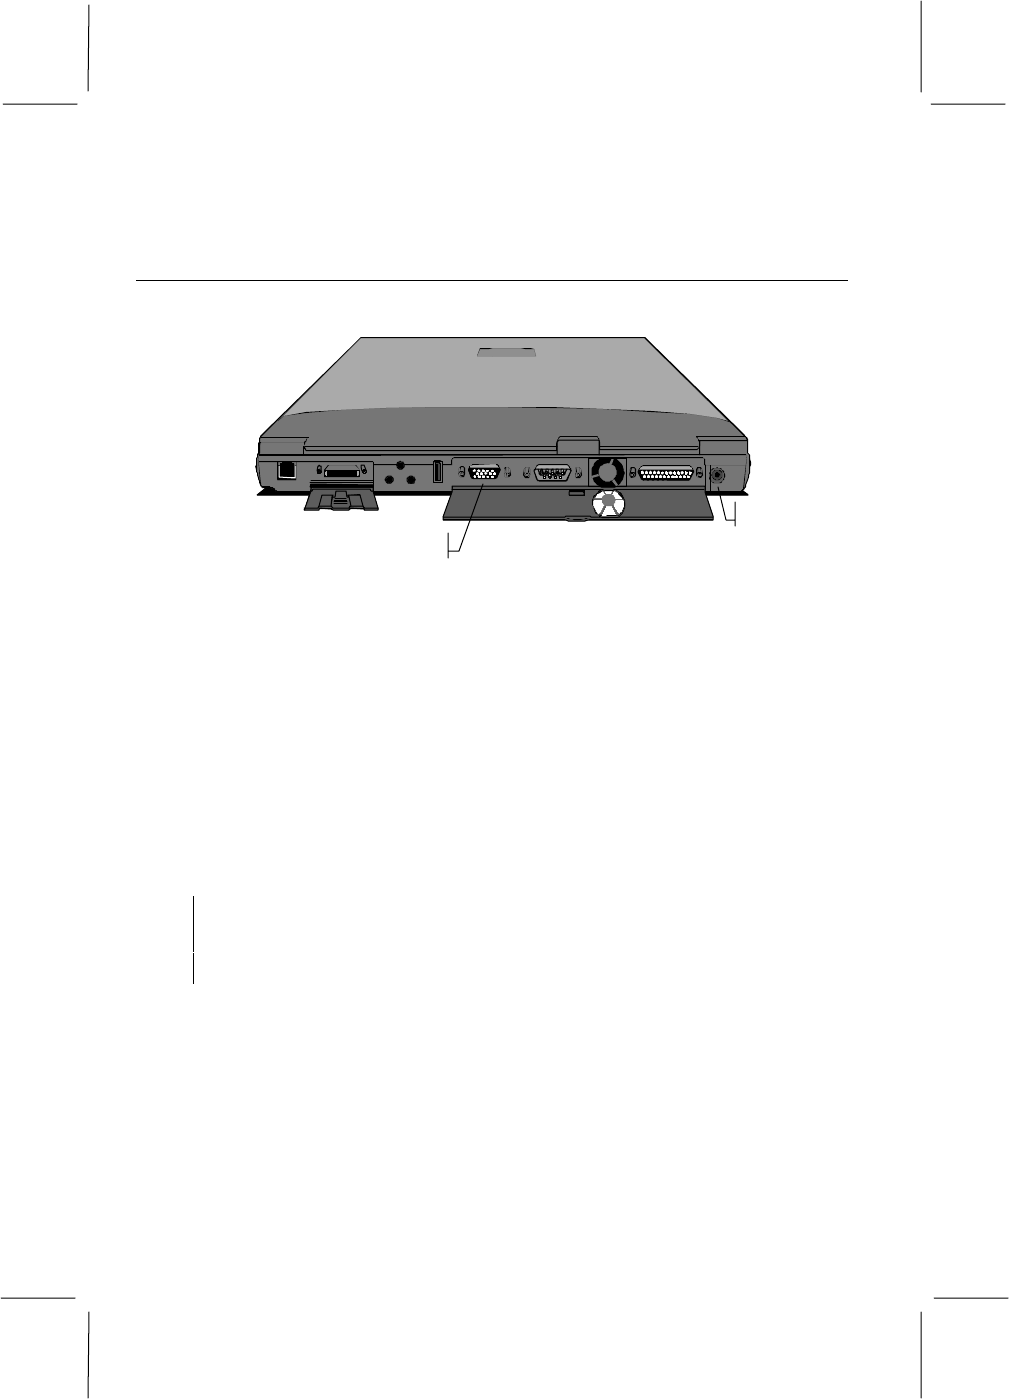
Video Ports
Your notebook is installed with two video ports:
TV-out Port
Monitor Port
Figure 5-1: Video Ports
Monitor Port
The 15-pin external monitor port allows you to connect an external computer
monitor to your notebook. You should ensure that the external monitor is
capable of supporting an XGA resolution of 1024 x 768. When the monitor is
connected to your system, you can select to display the notebook’s video
output on the built-in screen or on the external monitor. You can even generate
a simultaneous display on the screen and monitor.
NOTE: Some monitors are now shipping with a USB (universal serial
bus) interface. This notebook does not allow you to switch the display
to a monitor connected to a USB port.
To change the video output when an external monitor is connected, use the hot
keys [FN] + [F3]. Each press of the keys cycles the video output to the monitor
port, to both the built-in screen and the monitor port, and then back to the
built-in screen only.

5-3
FN + F3 Press Once: video to monitor port only
Press Again: Video to LCD & monitor port
Press Again: Video to LCD
NOTE: You can also assign additional keyboard hot key combinations,
for switching the display, using the video software described below.
TV-out Port
The TV-out port is a standard RCA-type jack. You can attach a standard A/V
(audio/visual) cable into this port to connect your notebook to a TV receiver, a
camcorder, or a videocassette recorder.
To send your notebook’s video signal to the TV-out port, you must first use
the video software utility to make sure everything is configured properly for
transfer of the video signal to the TV format. You particularly want to make
sure that you are using the right TV standard, i.e. either PAL or NTSC.
Before using the TV-out port, you must always change the resolution of your
computer’s display down to 800 x 600 (SVGA) or 640 x 480 (VGA). You
cannot export the video image to a TV receiver while you notebook is
displaying at the default resolution of 1024 x 768.
After you have made all the necessary changes required in order to send the
notebook video to the TV-out port, you can use the video software described
below to switch the video between the built-in screen and the TV-out port.
NOTE: You can also assign keyboard hot key combinations for
switching the display, using the video software described below.
5-4
Video Software
The video software has been integrated into the standard Windows video
utility. You can access the utility by moving the screen pointer over a clear
area of desktop on the Windows display and clicking the right touch pad
button. When the pull down menu appears, click the left button on the item
Properties. This will open the Display Properties window. You can also find
the Display Properties in the Control Panel folder. (Start/Control
Panel/Display).
You can use this Windows utility to make all kinds of changes to the video
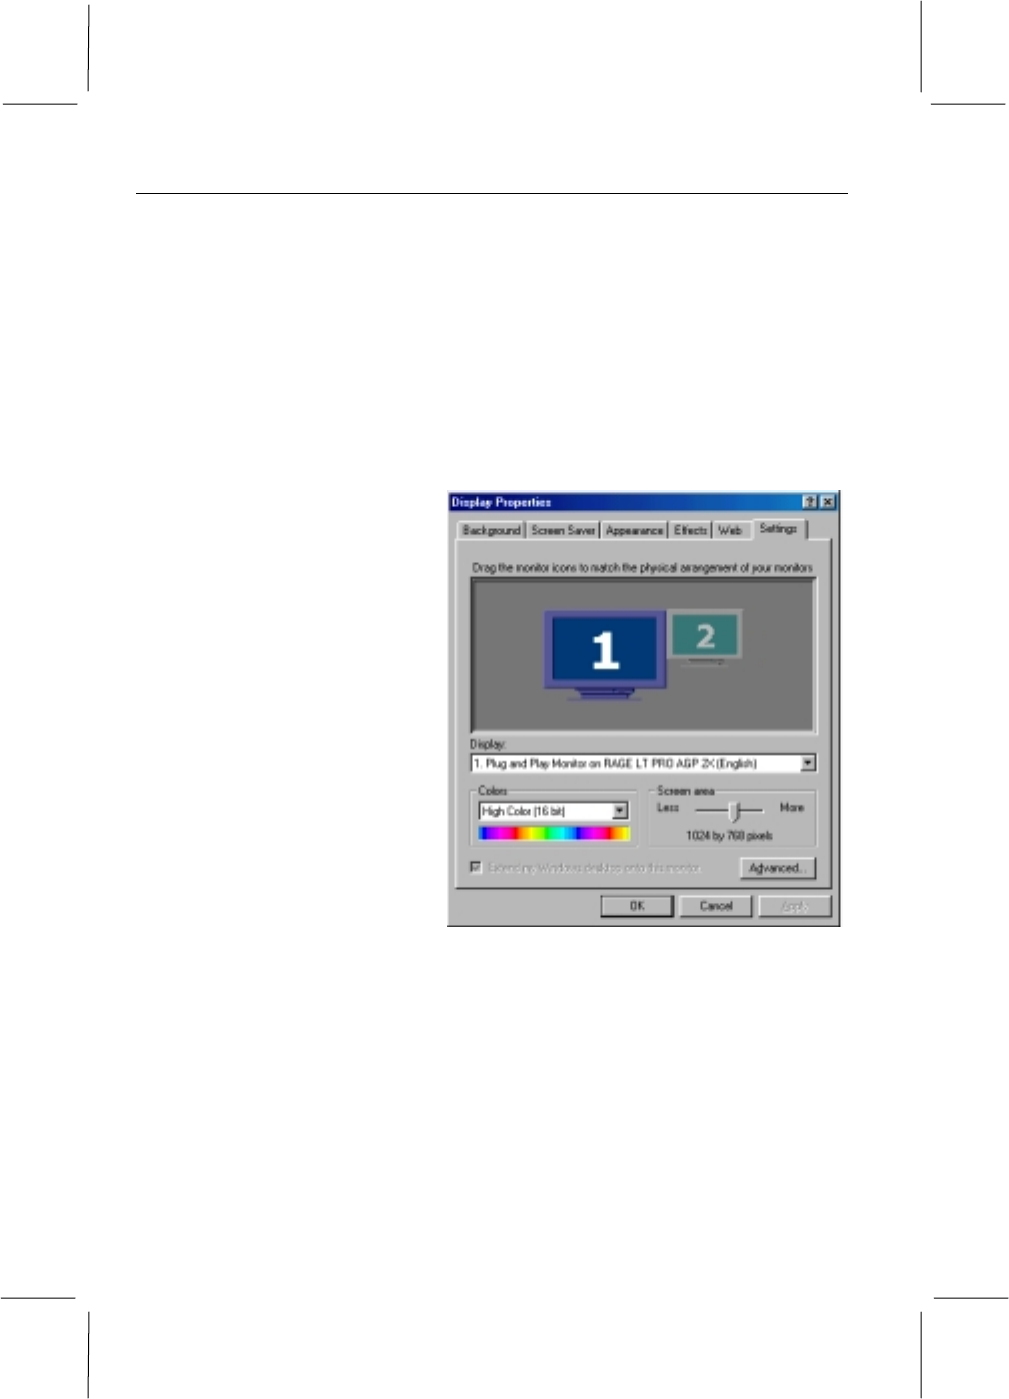
display. The major area of interest here is the Settings tab.
Settings
Left click on the Settings tab to
display the basic display
settings of your notebook
display. Here you can set the
color depth and screen
resolution.
The main area displays icons
that represent your monitors. If
more than one icon is
displayed, double-click each
one to enable or to set more
advanced properties. Also, if
more than one icon is
displayed, you can drag them
to the positions that represent
the way you want to move
items between monitors. With
two monitors, say the built-in
screen and an external monitor
attached to your notebook, you can bring the mouse cursor over to the other
screen by moving it over the edge of the screen. For example, if you are using
two monitors, and you want to move items from one monitor to the other by
dragging over the left and right screen border, position the icons side-by-side.
To move items between monitors by going over to top and bottom screen
border, position the icons one above the other. The icon positions don’t have
to correspond to the physical positions of your monitors.
The Advanced button allows access to the video graphics software driver,
monitor settings and performance.
Figure 5-2: Settings Tab
5-5
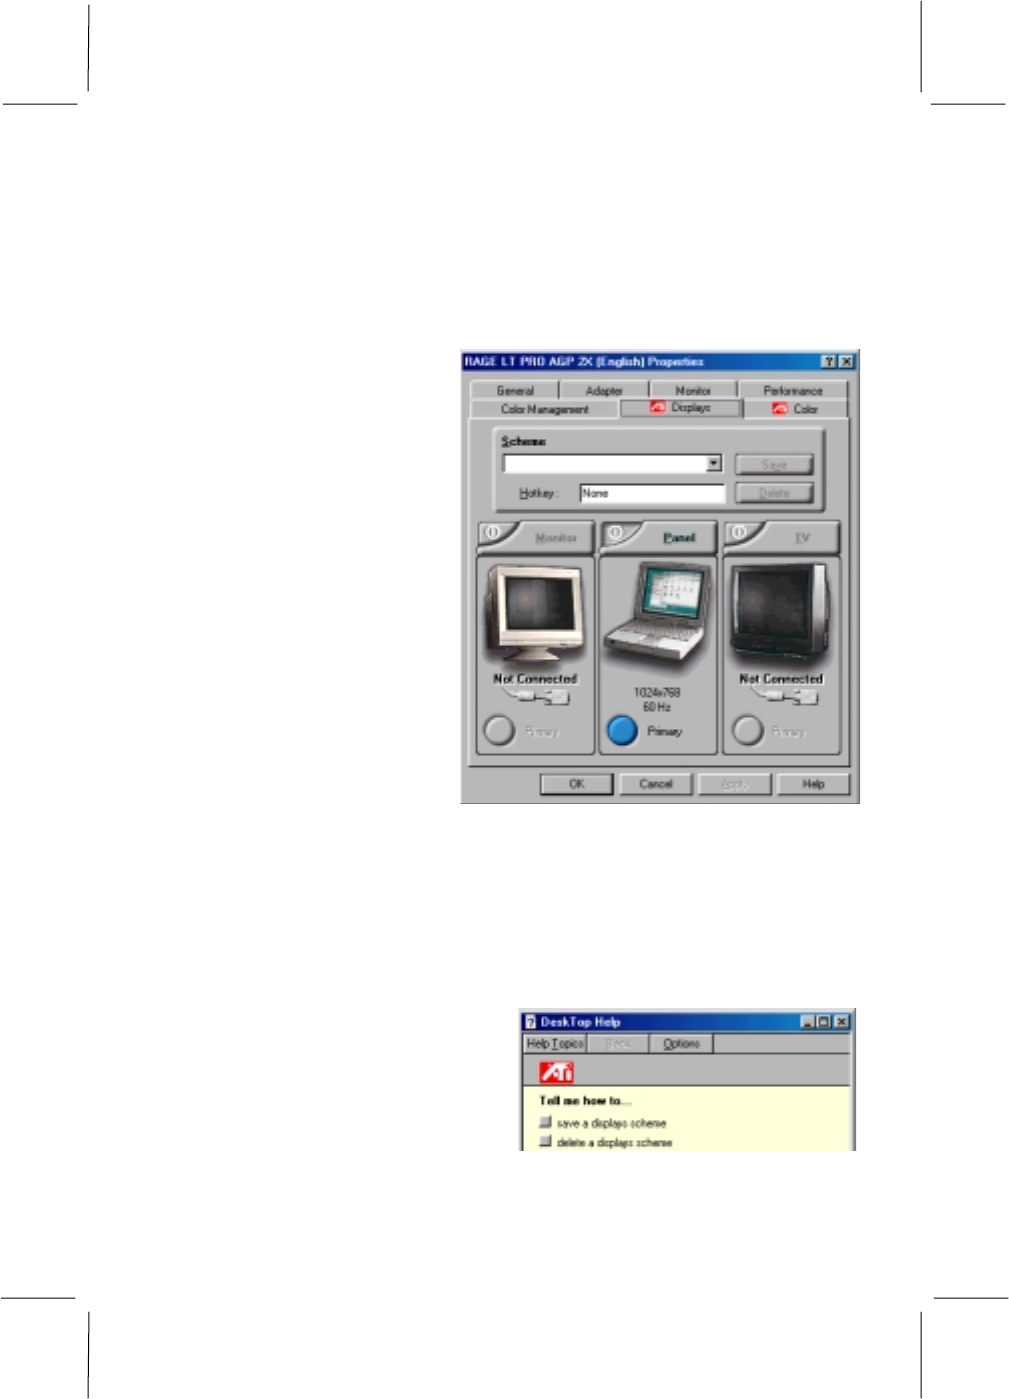
Advanced
Left click on the Advanced button to display the custom display features
embedded in the ATI RAGE graphics chipset used by your notebook. This
will bring up a new window with two rows of tabs at the top.
The two major areas of interest here are the Displays and Color tabs.
Displays
This area allows you to
customize some settings for
the video-switching feature.
You can choose which devices
are to be switched on and thus
available for possible video
display.
If you want to direct the video
to a TV, make sure the box is
marked. Also use the proper
check box to select the NTSC
or PAL/SECAM TV format.
When directing the video to
the TV-out ports, go to the
Settings tab and change the
screen resolution
Here you can also assign keyboard hot key combinations for display switching
and other video features mentioned above.
Color
This area allows you to customize the color settings of your display.
Help
Both of the pages mentioned above
have a Help button that brings up a
new window with information on
how to use the display properties on
these pages.
Figure 5-3: Displays Tab
Figure 5-4: Help window
5-6
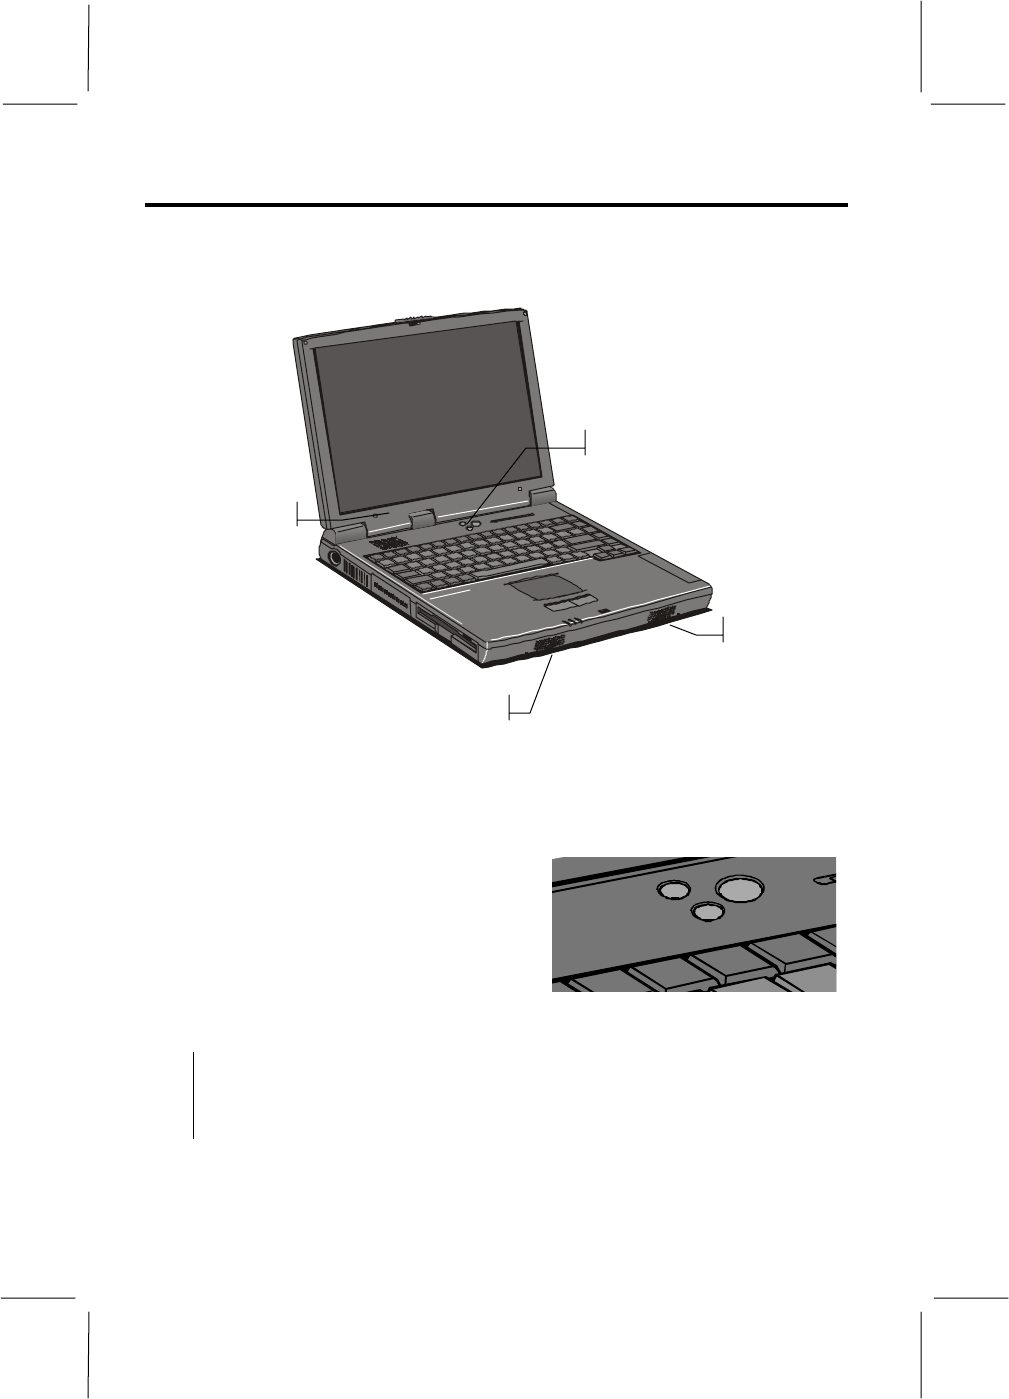
The Sound System
The sound system includes the built-in microphone and speakers, the audio
circuitry, the sound ports, and the audio software.
Speaker
Speaker
Microphone
Volume Buttons
Figure 5-5: Microphone, Speakers and Volume Buttons
When a sound file is playing, you can use the volume buttons to turn the raise
and lower the volume of the speakers.
The volume buttons are located just above
the keyboard, next to the power switch.
Pressing the top button increases the
volume of the internal sound system,
pressing the lower button decreases the
volume level.
NOTE: The audio volume buttons only affect the audio file currently
playing. If you want to change the notebook’s default sound volume,
use the Windows audio utilities described below.
Figure 5-6: volume Buttons
5-7
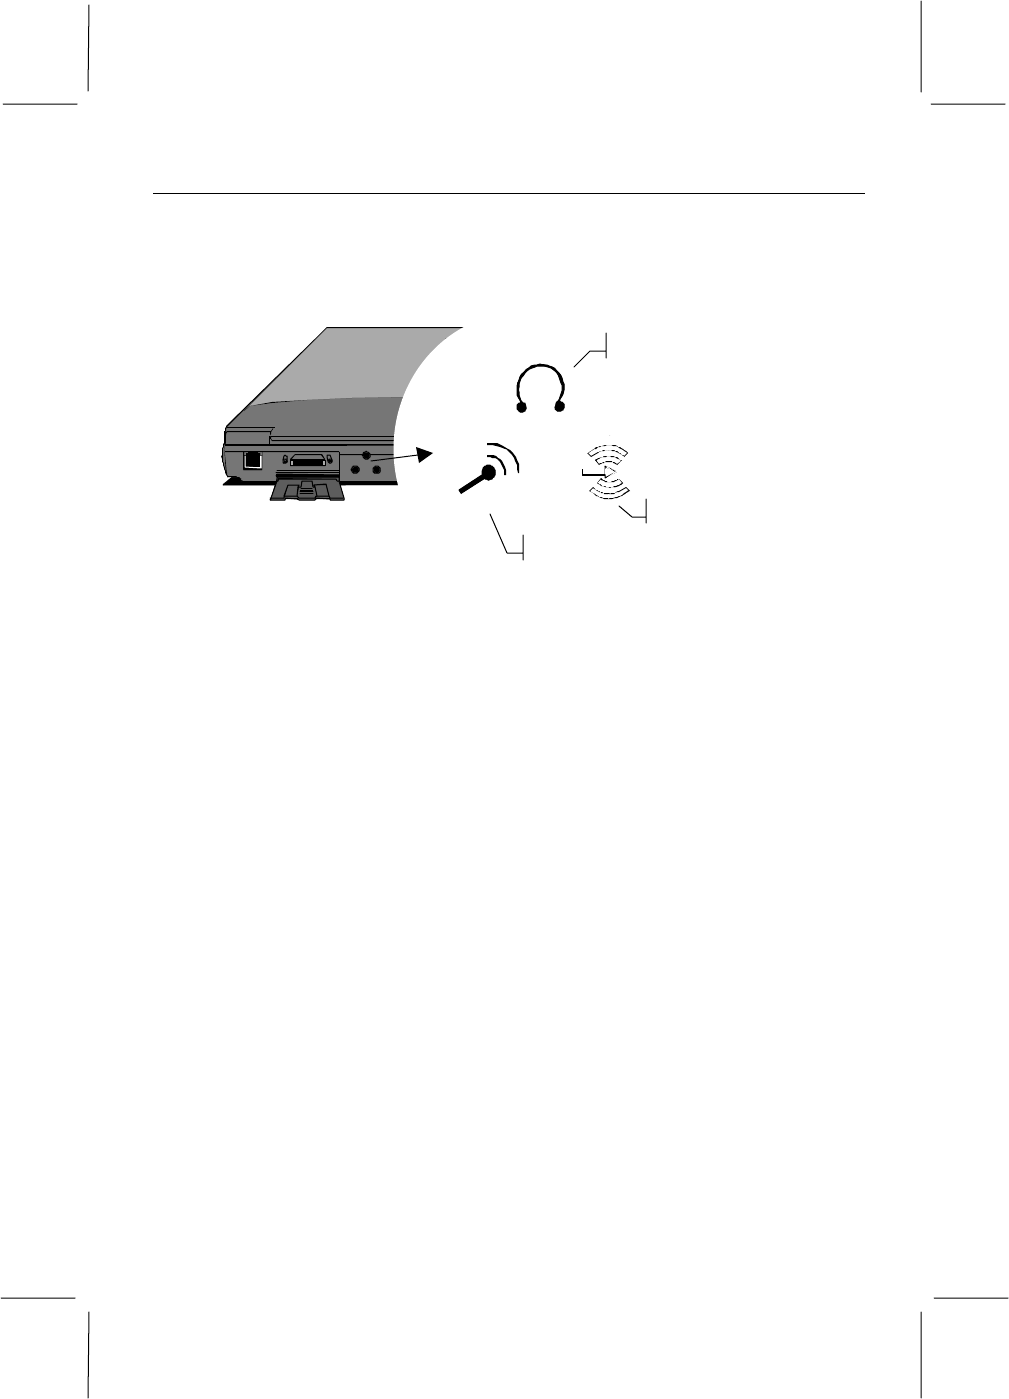
Audio Jacks
The built-in speakers and microphone ensure that you can record and play
sounds at any time. However, you can improve the sound quality by
connecting higher fidelity components to the sound ports on the rear side of
the computer.
Audio Input
Audio Output
External Microphone
Figure 5-7: Audio Jacks
Audio Input Jack
You can use this jack to input stereo sound from other devices, such as a radio
or tape recorder, into your notebook.
External Microphone Jack
You can use this jack to input sound from an external microphone into your
notebook. When an external microphone is connected to this jack, the built-in
microphone is automatically disabled.
Audio Output Jack
You can use this jack to output sound generated by your notebook to an
external device, such as stereo loudspeakers or headphones. When an external
device is connected, the built-in speakers are automatically disabled.
5-8
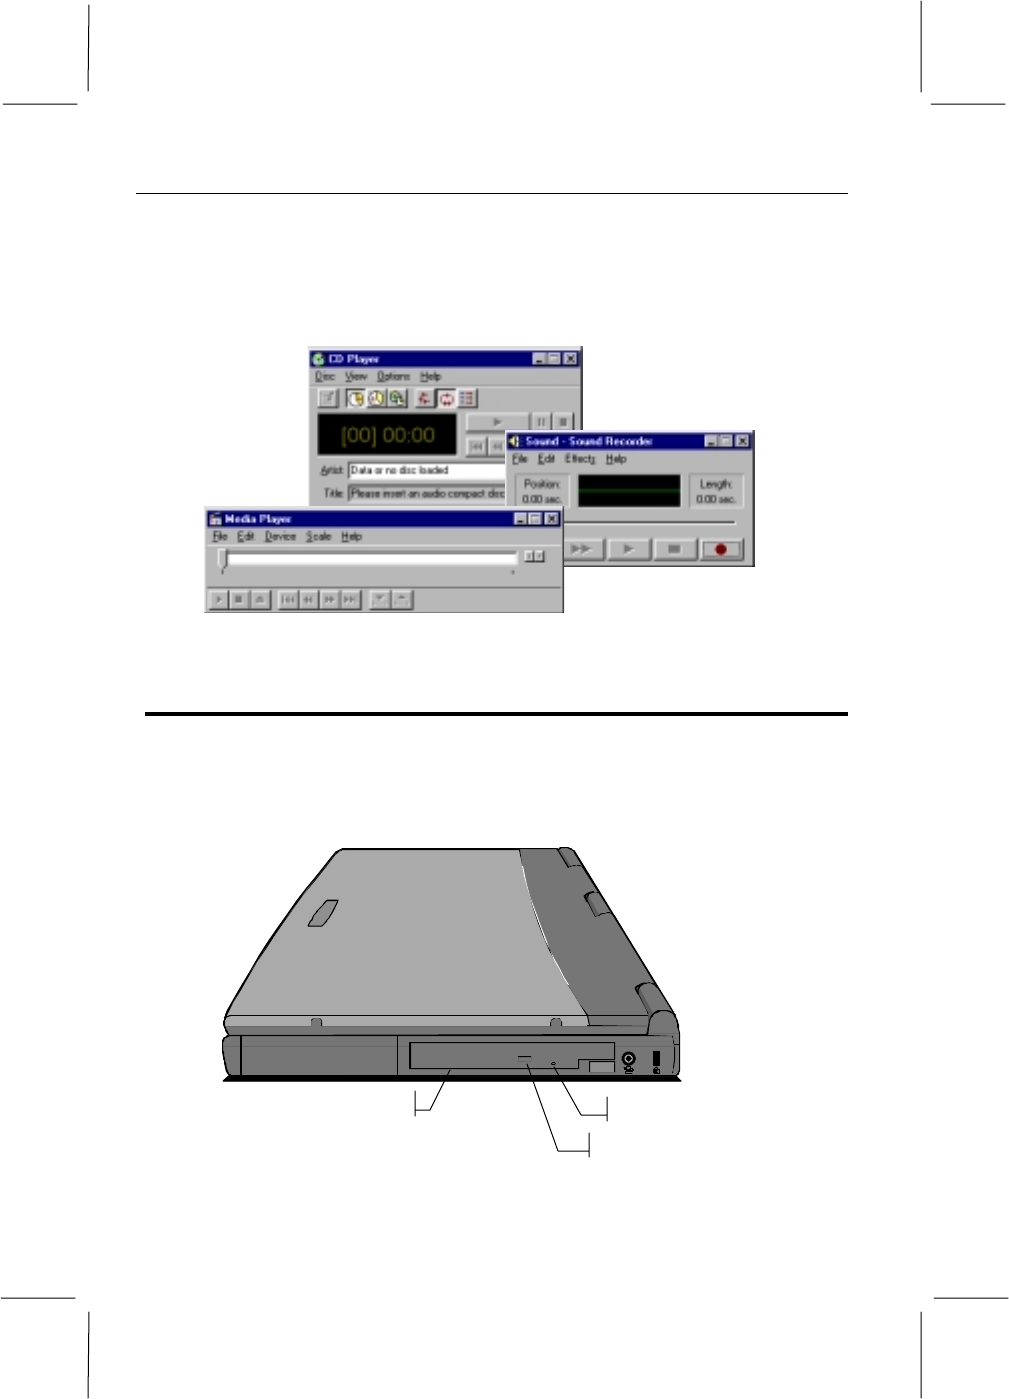
Audio Software
Windows is installed with a useful set of audio utilities. Click on the Start
button, point to Programs, then Accessories, then Multimedia, to display the
audio utilities. They include a CD player (for audio CDs), a media player (for
video CDs and audio/video files), a sound recorder, and a volume control.
Using the CD-ROM Drive
This notebook is installed with a CD-ROM drive. This option is factory
installed and cannot be easily switched. The CD-ROM drive is installed in the
right side of the notebook. This drive can read data discs, play audio CDs and
run video CDs.
CD-ROM Drive
Eject Button
Manual Eject Hole
Figure 5-9: CD-ROM Drive
Figure 5-8: Audio Software
5-9
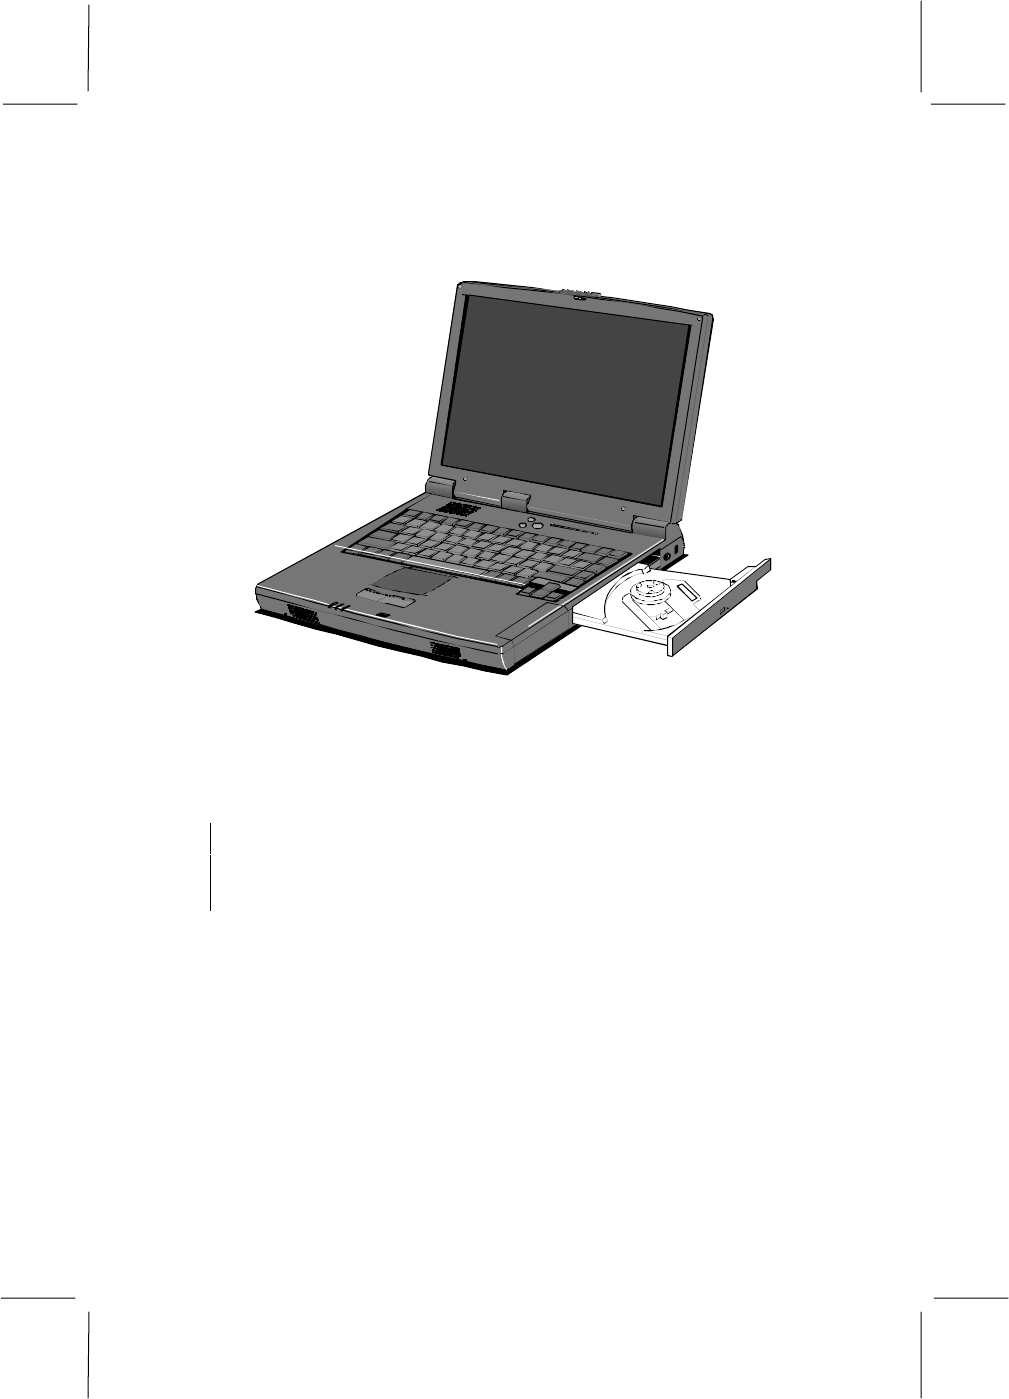
To play a disc:
1. Press the eject button on the front of the drive.
2. When the disc tray opens, carefully pull it all the way out of the drive.
Figure 5-10: CD-ROM Drive Tray
3. Place the disc in the drive tray with the label side up. Press the disc down
carefully so that the central spindle on the disc tray inserts into the hole in
the center of the disk
NOTE: If your system is turned off, you can still open the tray by
inserting a pointed object, such as a paperclip, in the manual eject hole.
This will unlock the tray and allow you to slide it out.
Windows can usually recognize an audio or videodisc and open the
appropriate player. If you are playing a data disc, use Windows Explorer to log
on to the CD-ROM drive. If you are playing an audio disc, go to
Start/Programs/Accessories/Multimedia and start the CD-player. If you are
playing a videodisc, go to Start/Programs/Accessories/Multimedia and start
the Active Movie Control program.

5-10
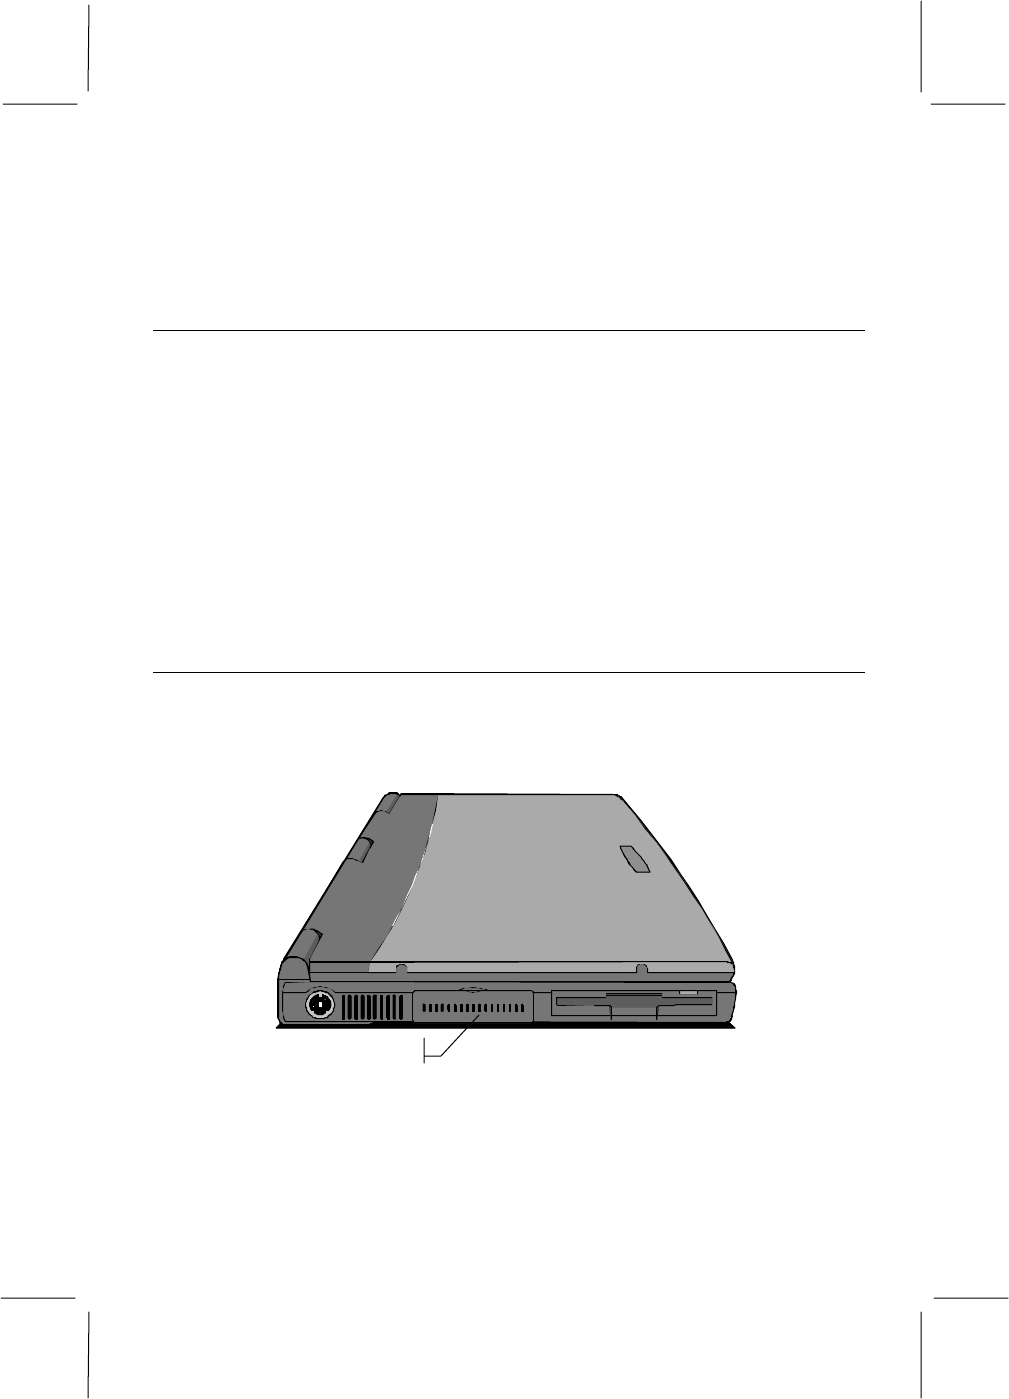
Using the Floppy Disk
The drive bay on the left side of the notebook is installed with a floppy disk.
The Floppy drive uses removable 3.5”, low capacity (1.44 MB), inexpensive,
diskettes. Your system identifies this disk drive as drive A:. Access to the
floppy disk drive is quite slow but floppy diskettes are very useful for storing
and transferring files.
Figure 5-11: Floppy Disk Drive
PC Card Slots
This notebook is installed with two PC card slots on the left side of the system.
PC cards are very similar to the expansion cards that you can install in full-size
desktop computers, except that they are no bigger than a credit card, and they
can be plugged into the notebook even when the notebook is turned on.
PC cards are usually used to provide new functions or features to your
notebook, such as a fax/modem card, a network adapter, or a SCSI host
5-11
adapter. They can also be used as storage devices using memory chips or
miniature hard disks. If you are using PC card storage devices, they will be
assigned drive letters (for example E: or F:).
PC Card Standards
This system supports type-I, type-II, and type-III PC cards. If you are using
type-1 or type-II cards (which are usually about 2.5mm high), you can install
one or two cards at the same time. If you use a type-III card (which is usually
about 10mm high), you must install it in the lower card slot, and you will not
be able to use the upper slot.
Using PC Cards
1. You can install or change PC cards while your notebook is turned on.
2. Locate the PC card slot compartment on the left side of the notebook, and
open the compartment door.
PC Card Slot Compartment
Figure 5-12: PC Card Slot Compartment
3. Orient the card correctly. The label side of the card faces up. One of the
narrow edges has a double row of pinholes. This edge inserts into the slot.
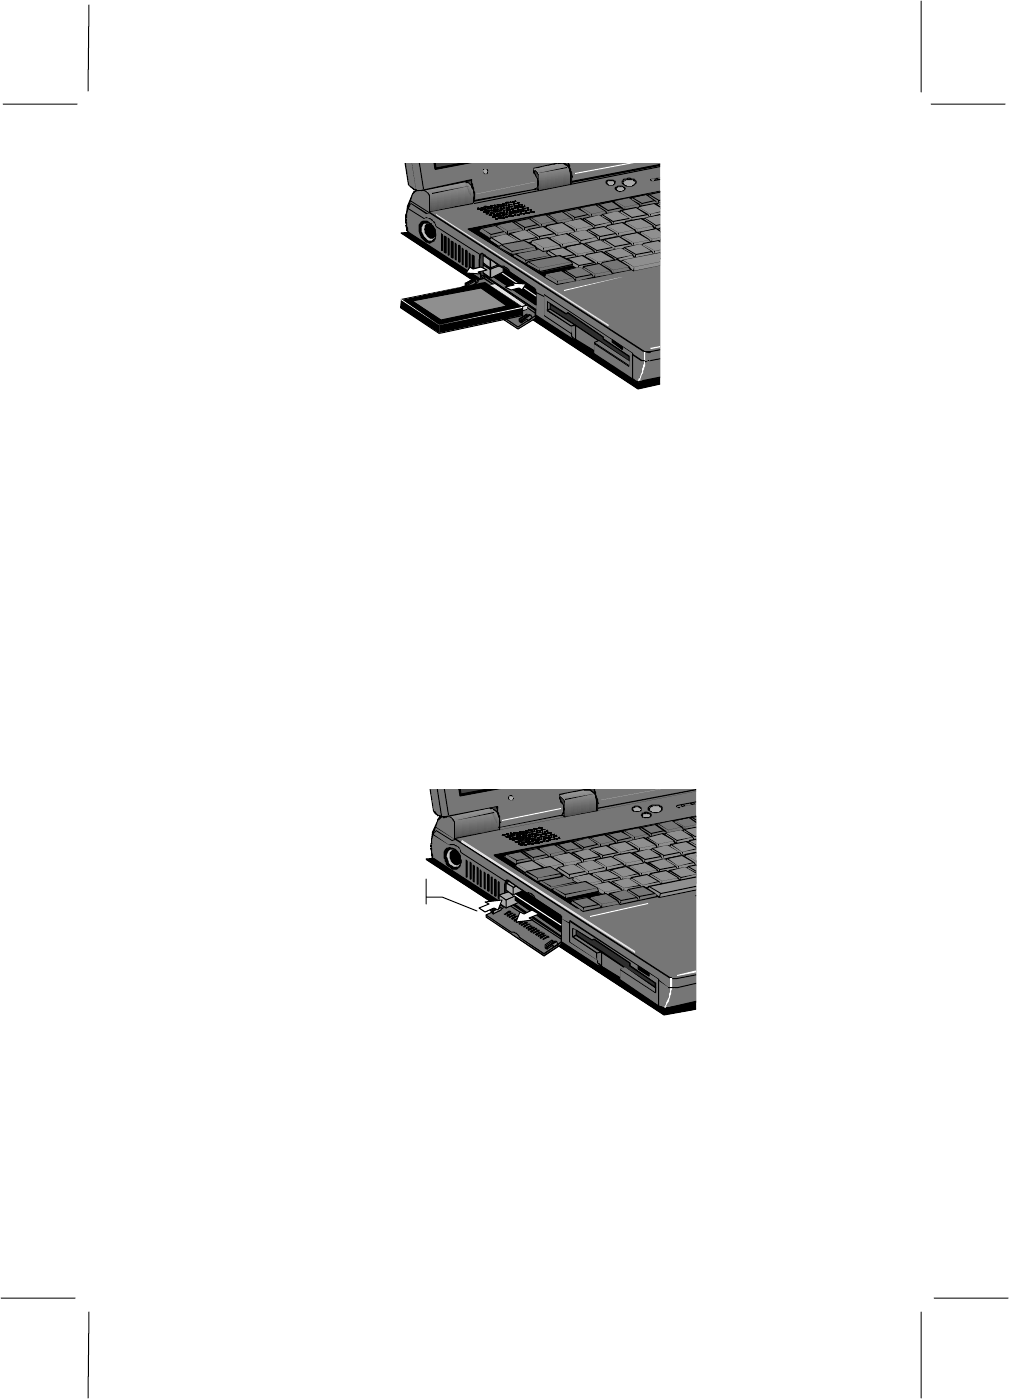
5-12
Figure 5-13: Inserting a PC Card
4. Insert the card into the slot. When the card is nearly all the way inserted,
press quite firmly to ensure that the card mates properly with the
connector inside the slot.
5. Your notebook will emit two beeps (in rising tones) to let you know that
the card has been recognized by the system. If Windows has the
appropriate drivers to use the card, they will be loaded automatically. For
some cards, you may have to install drivers or software, supplied by the
card manufacturer.
6. Before ejecting a CardBus card, it is important that you tell Windows to
stop using the card. Click on the card icon on the right side of the
Windows task bar. When the stop button appears, click on it. Windows
will display a message that the card can now be safely removed.
Eject button
s
Figure 5-14: Removing a PC Card
7. When you insert a card, the card eject button will be forced outward. To
eject a card from the slot, press the eject button back into the notebook.
The card will disconnect from the internal connector and you can remove
it from the slot. The notebook will emit two beeps (in falling tones) to let
you know that the card has ejected.
5-13
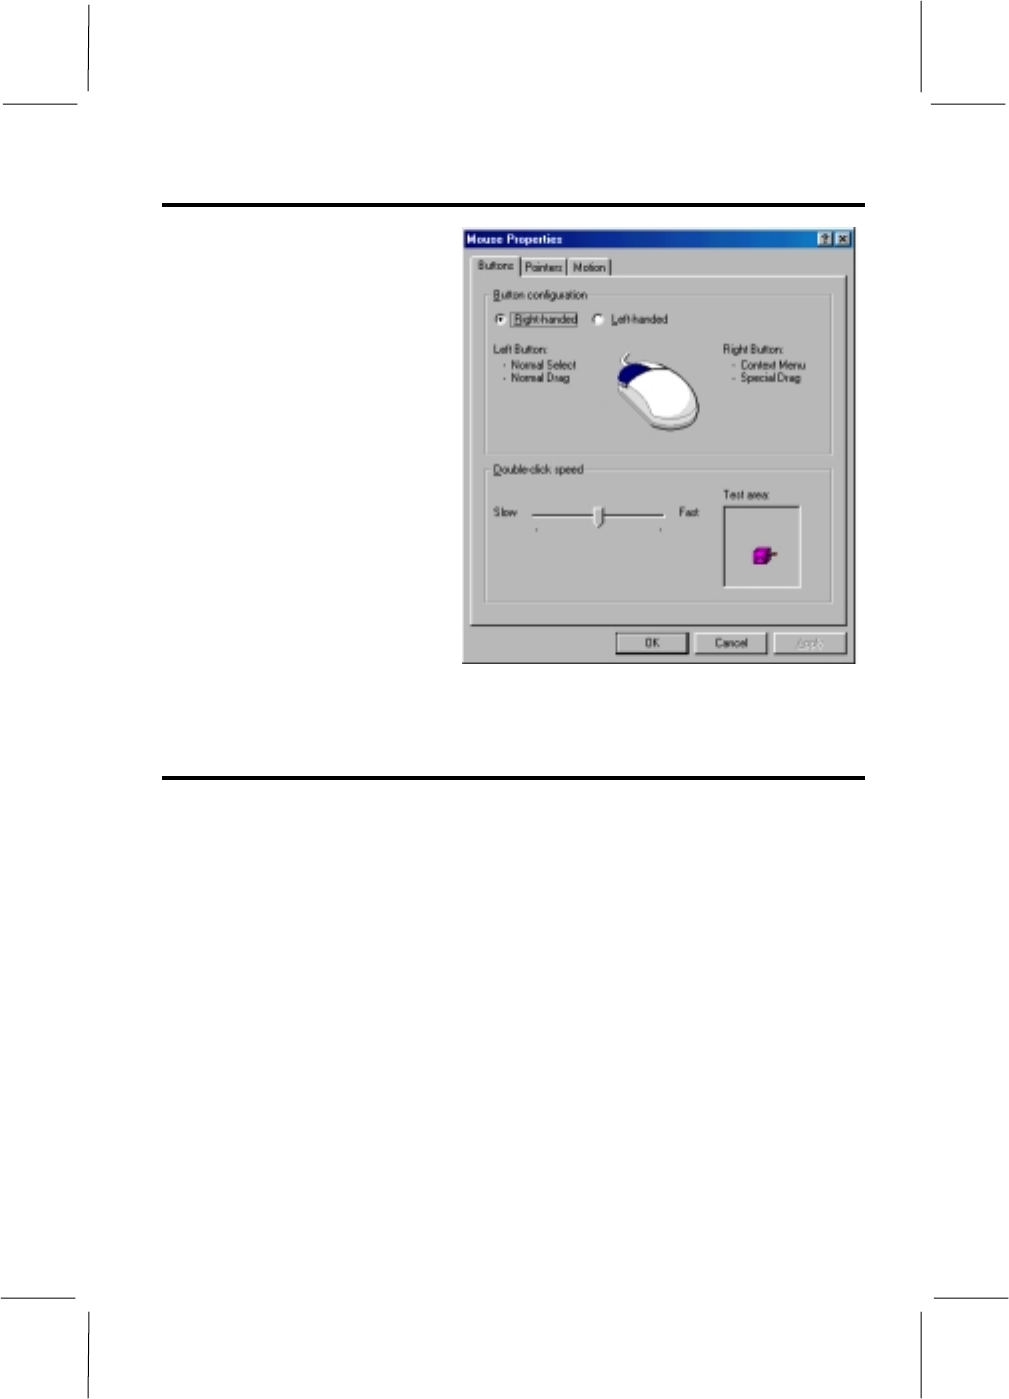
Touch pad/Mouse Utility
The notebook’s touch pad can
be customized using the
Windows mouse driver utility
program. This program can be
found in the Control Panel
folder (Start/Settings/Control
Panel).
Double click the Mouse icon.
This will start the Mouse
Properties window. Here you
can see different tabs that
allow you to set up your
touchpad/mouse features.
You can change the button
configuration and adjust it for
right-hand and left-hand use,
and also change the double-
click speed.
Infrared
The infrared (IR) feature of your notebook provides a powerful tool for
connecting to other computers, networks, or peripherals via a high-speed
wireless connection. This port is sometimes referred to as a serial infrared port
(SIR), but it is also capable of functioning as a second parallel port for
printing. This port allows you to send information between machines without
having to attach cables or transfer information to a diskette or other removable
disk. With the high speed of data transmission and the ease of connection of
the IR port, it is a quick and easy connection to establish.
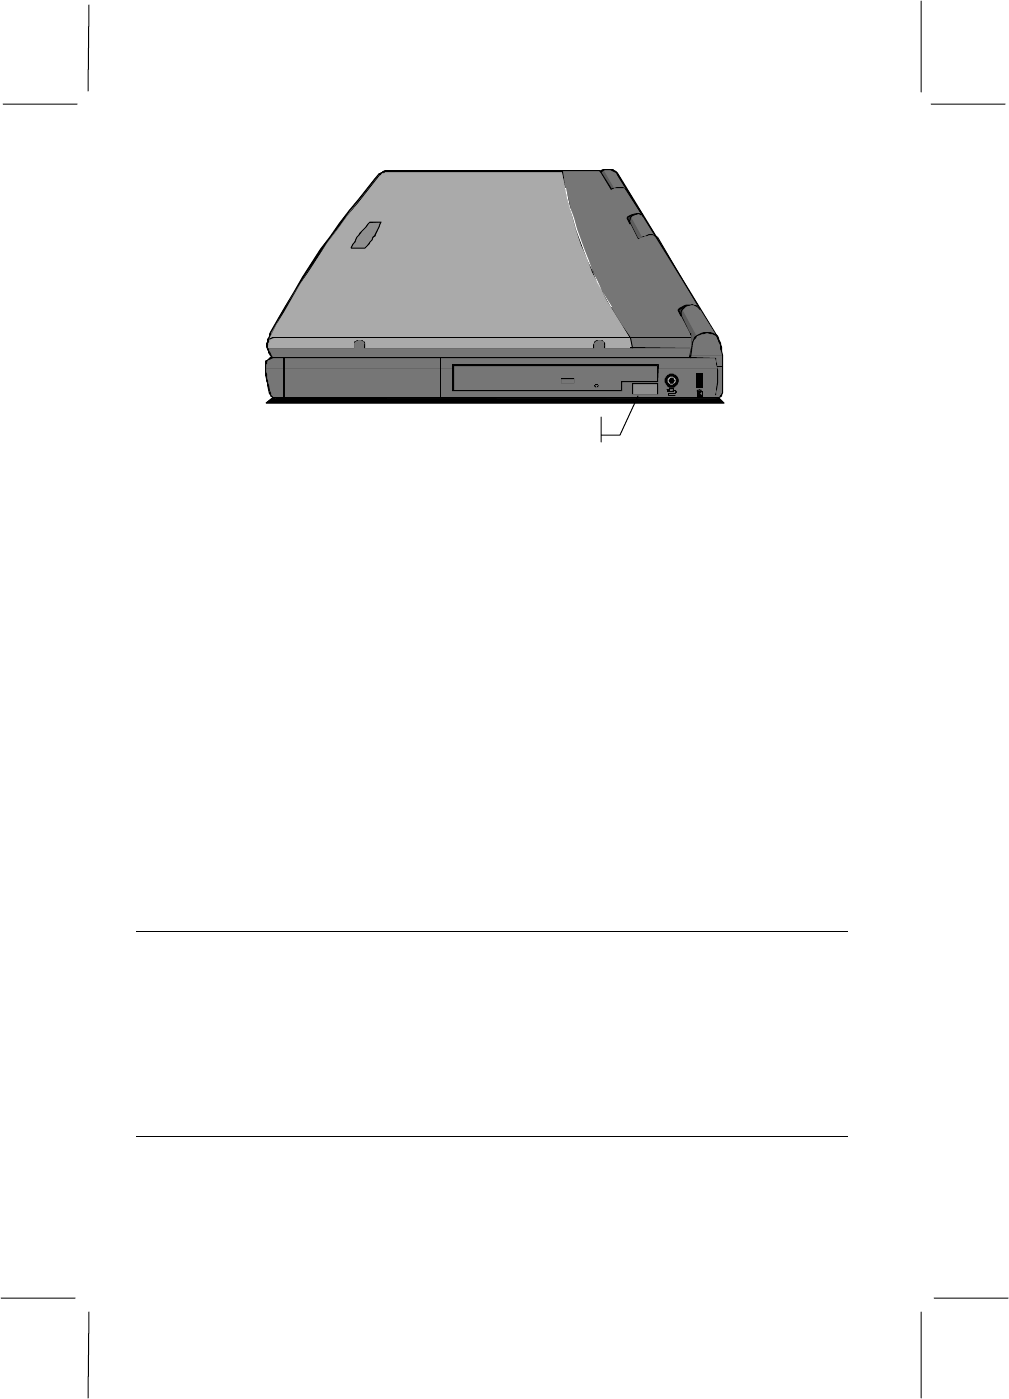
The IR port is located behind the dark plastic square on the right-hand side of
your notebook.
Figure 5-15: Mouse Properties
5-14
Infrared Port
Figure 5-16: Infrared Port
To use you IR port, place the two IR ports within one meter, about four feet, of
each other and either directly in line or at an angle of less than 30 degrees.
Click on the Infrared icon in the Control Panel (Start/Settings/Control
Panel/Infrared).
This will bring up the IR software built into Windows. This software will
begin scanning for a present IR device. If one is found, it will complete the
connection. If a device is not found, try adjusting the distance and angle
between the two IR ports.
For proper operation of an IR connection, you might need to set up the
identification information in the IR software.
Once your connection is established, be careful not to obstruct the connection
between the machines. Maintain the distance and angle and do not place any
objects between the ports, as this can disrupt the connection.
IR Connections between Computers
If you are going to use the IR port to send information between you notebook
and another IR-capable computer, there are a couple of steps that you will
need to perform before your notebook is ready to be used in this way.
If you have not already set up your system for a Direct Cable Connection or
for file sharing, you will need to do this first.
Direct Cable Connection
In the Control Panel, select the Add/Remove Programs utility by double
clicking on it. When the Add/Remove Program Properties window opens,
click on the Windows Setup tab. Click on Communications and then the

5-15
Details button. Click on Direct Cable Connection. If you have not already set
up the Dial-up Networking option, you will be asked to establish this as well.
The Dial-up Networking activates certain network options of Windows that
are necessary for using the Direct Cable Connection. Click OK to activate the
new option(s). Windows will load installation files that are stored on your hard
drive. If you did not already have network functions established, you will be
asked to select computer and workgroup names that will be used to identity
your machine when it is part of a network. Windows will configure your files
and then ask you to restart your system so that the effects can take effect.
You have now established the Direct Cable Connection for your system. A
machine that shares files is a host; a machine that accesses files is a guest. In a
Direct Cable Connection session, one machine will serve as the host and one
as a guest. If you want the connection to work both ways, you will have to
establish a separate connection for file transfer in each direction. If you do not
want to allow sharing of your files or printer via your notebook, you can
continue on to the section on making the Connection. You will still be able to
access files and printers that are set up for sharing.
Sharing
If you want to make files on your notebook available to another computer, or
if you want to allow another system to print to a printer attached to your
notebook, you will need to set up your system for sharing. You can set this up
by double-clicking on the Network icon in the Control Panel. This will bring
up the Networking window. Click on the File and Print Sharing button.
You will be asked to decided if you want to allow file sharing, print sharing, or
both, click on the appropriate checkboxes. You have now established the file
and print sharing for your notebook. You can click OK to exit the Network
utility, you might be asked to reboot. If you want to allow access to certain
files on your system, you will need to designate those files for sharing. Open
the Windows Explorer program (Start/Programs/Windows Explorer) and
the drive containing the folders that you want to share. Find the folders that
you want to share. Right click on the folder and click on the Sharing option of
the pop-up menu.
You will now be asked to establish the kind of access you want to allow to this
folder. You should consider who will be using the access and why and
establish he necessary password. Keep in mind that shared folders will be
accessible to any machine that establishes an IR connection.

5-16
Making the Connection
To establish the IR connection between your notebook and another system,
you will use the IR as if it were a direct cable connection between the systems.
The other machine will also need to have the software to support this
connection. If the other machine is not set for Direct Cable Connection, please
repeat the steps above with the other machine.
Start the IR software as described above. Once the machines alert you that
they have recognized the presence of another IR system, launch the Direct
Cable Connection program (Start/Programs/Accessories) and set up the
connection between the two machines.
If this is the first time you are suing this connection, you will be asked if the
machine will be serving as a host or guest. You will need to set the machine
that will be receiving files or sending information to the printer as the guest.
The machine that will be sending files or allowing printer access should be set
as the host.
When you have selected the status of the machine, you will be asked to
designate a port for the connection. For a connection between machines, you
should select Serial cable on COM2. When you select a machine as the host,
you will be asked to establish wherever or not a password should be required
of the guest machine before completing the connection.
When both machines have established a connection via the IR, you will
receive information on the connection.
In subsequent sessions, your notebook will default to the host/guest status that
it had in the last session. You can change this by clicking on the Change
button. You will then be asked to establish the port for the connection. If you
want to maintain the same status as the last session, just click the Listen
button, if your notebook is the host, or the Connect button, if your notebook is
the guest.
When the connection is in place, the guest machine will have an open window
showing the folders on the host machine that are available for sharing. You
can copy the files in those folders as you would any files in any drive window
on your notebook.
Printing
You can use your IR port to print by connecting to a printer with built-in IR, a
printer with an IR adapter connected to its parallel port, a network printer
available via an infrared network node, or printer connected to a computer
with an IR port.

5-17
Before proceeding, you must set up a connection for the printer via the IR port.
See Chapter 6 for information on setting up a printer, To test the printing
capability of an application over an IR link to an IrDA-compliant printer, click
on the Infrared icon in the Control Panel (Start/Settings/Control
Panel/Infrared). The IR software will detect the printer’s IR port. Now try the
Print option in an application.