Delta Electronics orporated DN-715 NoteBook User Manual MANUAL CHAP 3
Delta Electronics Incorporated NoteBook MANUAL CHAP 3
UserManual.wiki
>
Delta Electronics orporated
>
DN-715 User Manual
>
MANUAL CHAP 3
Contents
1.
USER MANUAL CHAP0
2.
MANUAL CHAP 1
3.
MANUAL CHAP 2
4.
MANUAL CHAP 3
5.
USER MANUAL CHAP 4
6.
USER MANUAL CHAP 5
7.
USER MANUAL CHAP 7
8.
USER MANUAL CHAP 8
9.
USER MANUAL CHAP 6
MANUAL CHAP 3
Navigation menu
Upload a User Manual
Namespaces
Wiki Guide
HTML
PDF
Info
Views
User Manual
Discussion / Help
Navigation

![3-1System Configuration UtilityThe System Configuration Utility lets you use the firmware installed on thenotebook to configure your system according to the kind of hardware that youinstall. Using setup, you can set timing parameters for the memory andprocessor, define drive specifications, control power management, and so on.Using the System Configuration UtilityYou can only display the setup utility by pressing the [Ctrl] + [Alt] + [s] keycombination shortly after the system is turned on. A prompt appears on thescreen that reads “<CTRL – ALT – S> to enter System Configuration Utility”.When you see this prompt, press the key combination and the setup utility willdisplay the main page of the System Configuration Utility program.NavigatingThe main screen of the utility program is divided in three major sections. Thetop section holds a menu bar, the middle section shows three windows, i.e.Devices, System and Memory. These windows provide a quick overview of thecurrent setup settings of your system. Some values are detected automatically;](https://usermanual.wiki/Delta-Electronics-orporated/DN-715.MANUAL-CHAP-3/User-Guide-90611-Page-3.png)
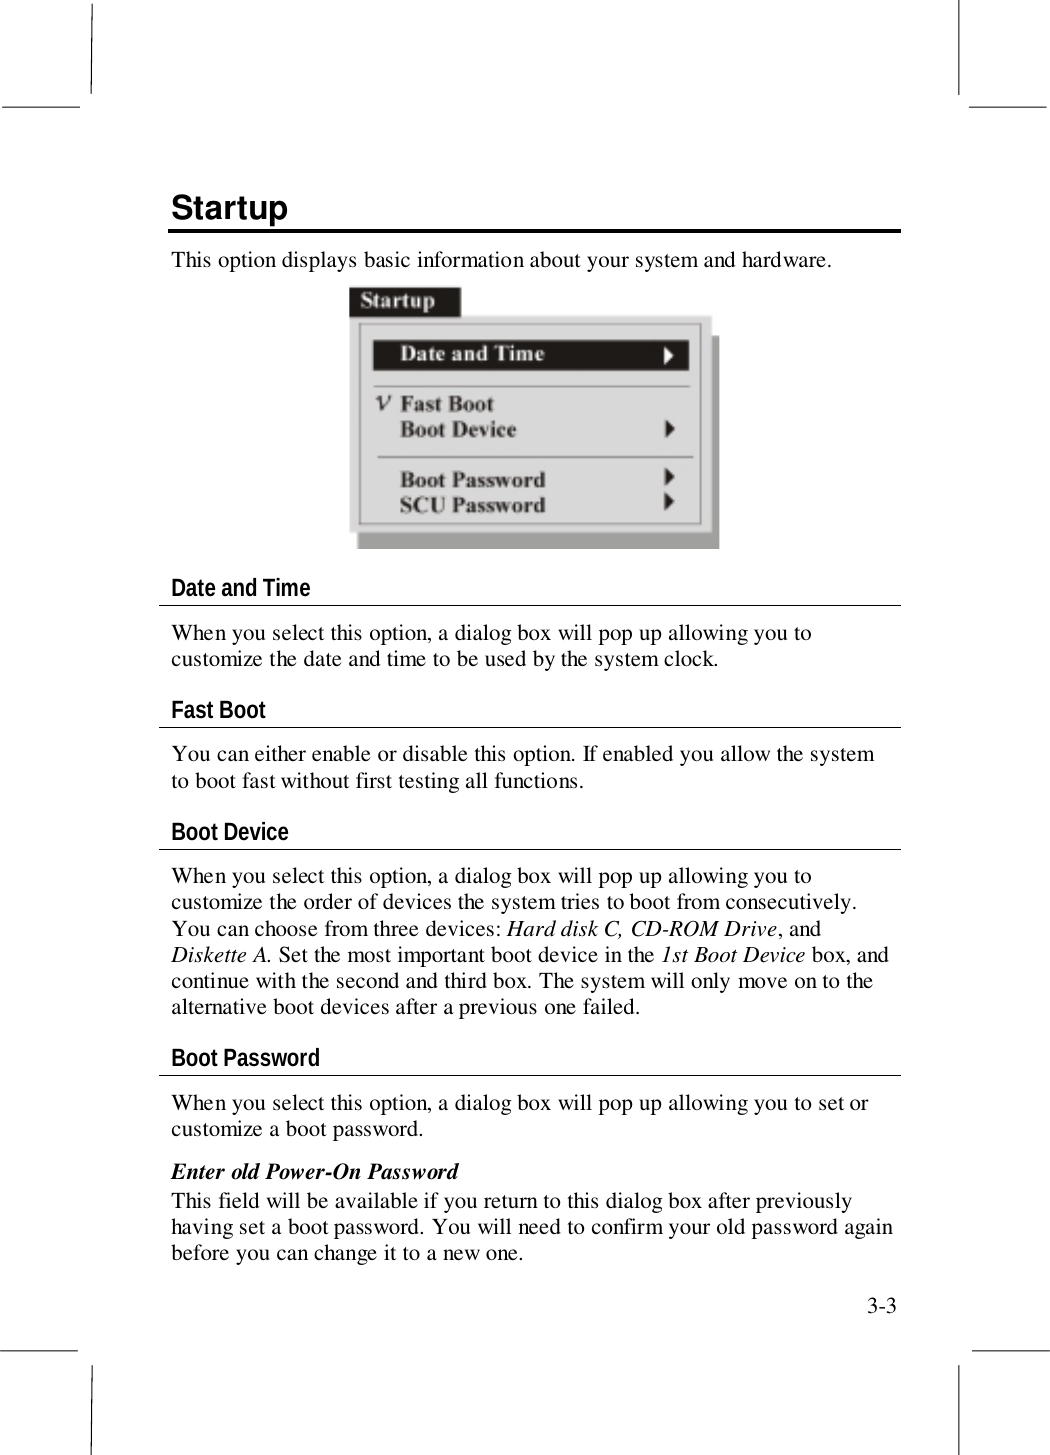
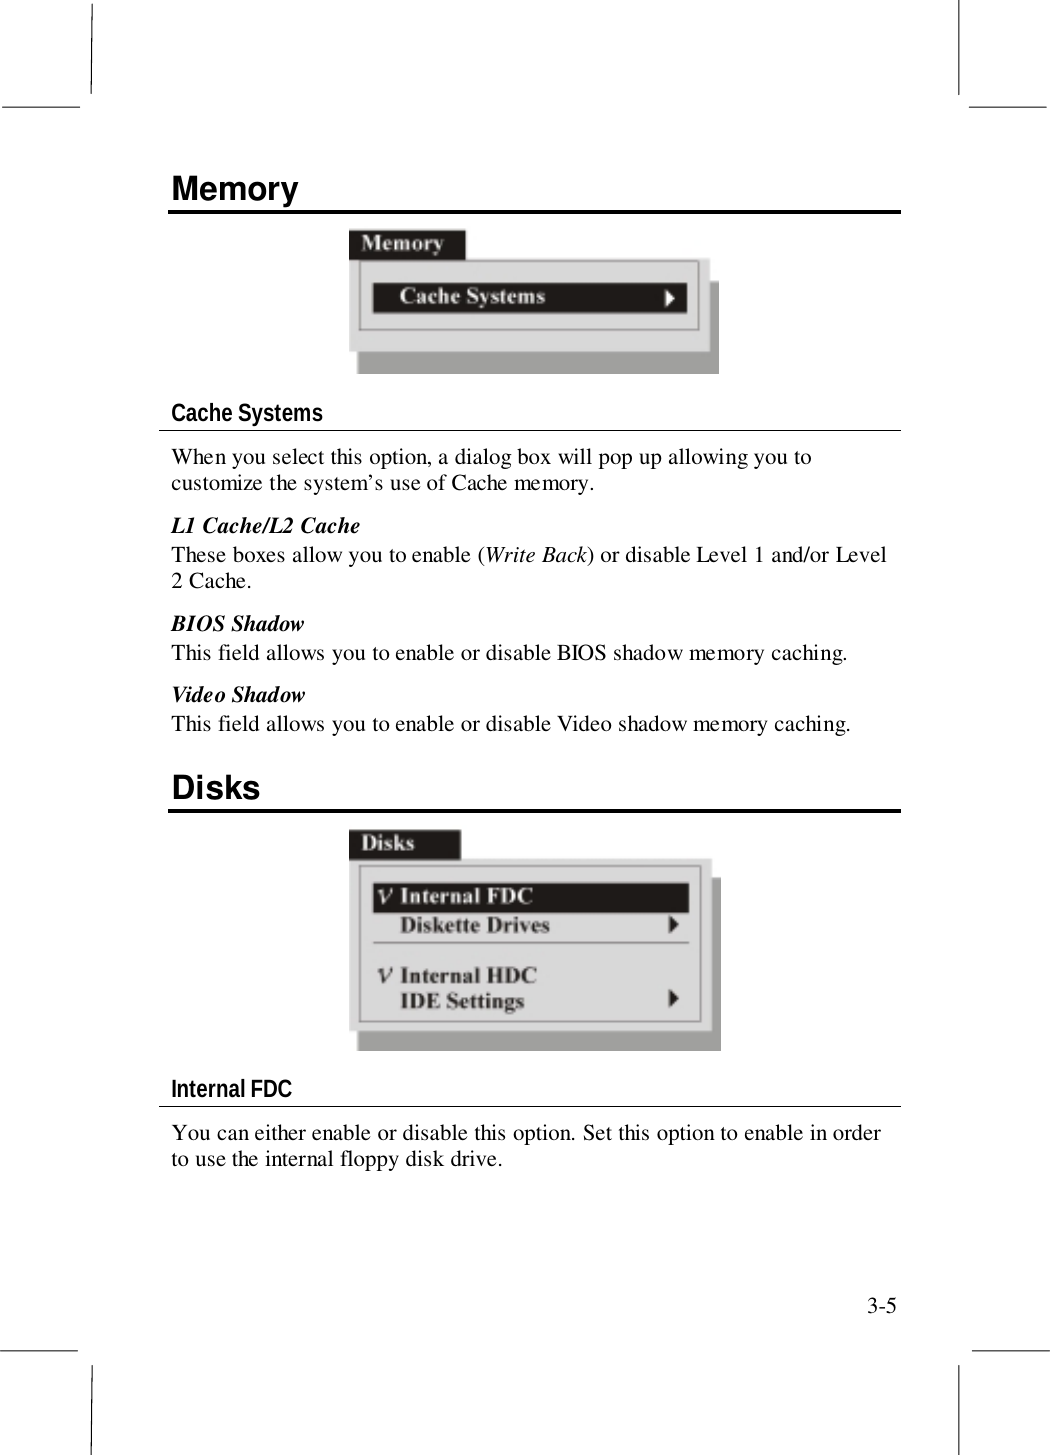
![3-2other values are set to a default value and can be changed through the menubar at the top of the screen. The third section, at the bottom of the screen,displays hints and help messages relevant to the topic highlighted at themoment.Press the [Alt] key to activate menus. Use the cursor arrow keys to move thehighlight through the header list of setup windows. When the option you needis highlighted, [Enter] key to select an option. Use the [Esc] key to cancel thecurrent action, to close a menu, to go back to the main menu, and/or to exit theSystem configuration Utility program.Startup, Memory, Disks, Components, Power, and Exit are the principaloptions in the main menu bar for system configuration. When you select oneof these options, the screen displays a list of items in a drop down menu. Someitems you can only enable or disable. Others bring up a separate dialog boxonce you select them.The items that can only be enabled or disabled will either have an _ or mark in front of them, marking that they are currently disabled or enabled.Items that hide a separate dialog box will have a ! symbol behind them.Within a dialog box you can use the [Tab] key to select a control. Use the[OK] button or the [Enter] key to confirm an entry, and the [Cancel] or [Esc]key to cancel an entry. To change a value of a field, use the cursor keys,spacebar, and/or numeric keys.At any given point, you can use the [Alt] key in combination with a letter,highlighted red, and use it as a shortcut to jump directly to that function.](https://usermanual.wiki/Delta-Electronics-orporated/DN-715.MANUAL-CHAP-3/User-Guide-90611-Page-4.png)
![3-13ExitWhen you have made changes to the setup utility, either press the [Esc] key, orhighlight the Exit option on the menu bar.Save and ExitWhen you select this item, a dialog box will pop up asking you to confirmyour choice to save the changes you just made and restart the computer. Thisdialog box will also appear if you press the [Esc] key in the main screen areaof the system configuration utility.Exit (No Save)When you select this option, a dialog box will pop up asking you to confirmyour choice to discard any changes you just made and restart the computer.The computer will then restart using the old values.Default SettingsWhen you select this option, a dialog box will pop up asking you to confirmyour choice to load the default values for all fields. The computer does notrestart. You must use the Save and Exit option above to restart the computerusing the default values.Restore SettingsWhen you select this option, a dialog box will pop up asking you to confirmyour choice to restore the current setup values to the original custom values.The computer does not restart. You must use the Save and Exit option aboveto restart the computer using the default values.](https://usermanual.wiki/Delta-Electronics-orporated/DN-715.MANUAL-CHAP-3/User-Guide-90611-Page-15.png)