Hanwha Techwin PRO815 Digital Camera User Manual H1 en 002 v03
Samsung Techwin Co Ltd Digital Camera H1 en 002 v03
Contents
Users Manual 6 of 7
《82》
28
100-0009
2005.07.01
13:00 PM
1/30
F2.2
100
④
⑤
⑥
⑦
⑧⑪
⑮
⑭
⑫
⑬
⑯
⑰
③ ② ① ⑱
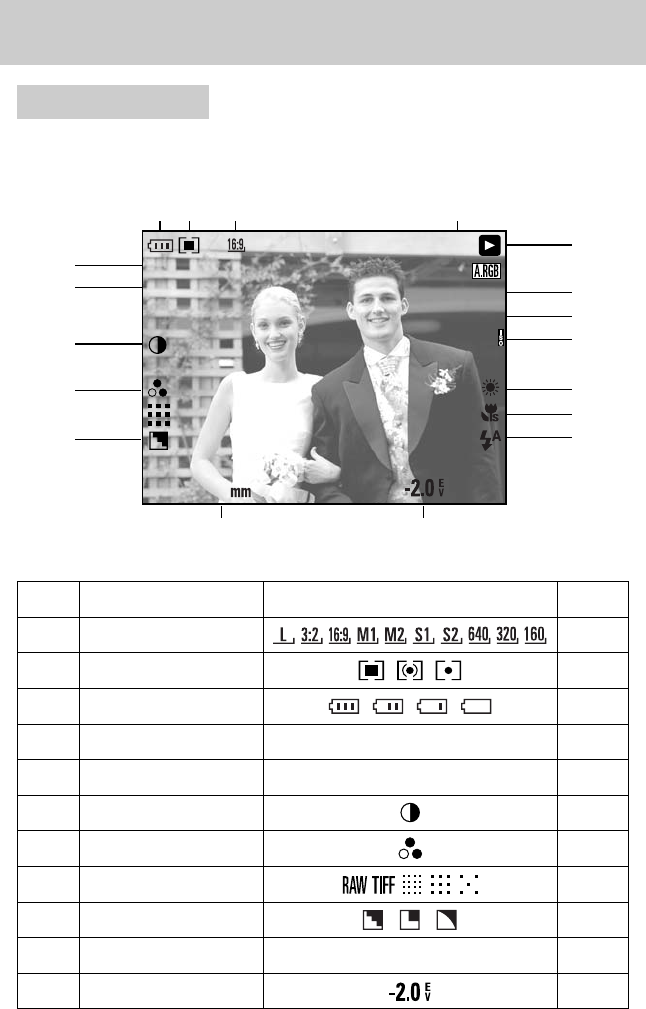
No. Description Icon Page
1Image size p.16
2Metering
3Battery status p.11~12
4Date 2005.07.01 p.52
5Time 13:00PM p.34
6Contrast
7Saturation
8Quality
9Sharpness p.37
10 F No. 28mmx4.0 p.32
11 Exposure compensation p.33
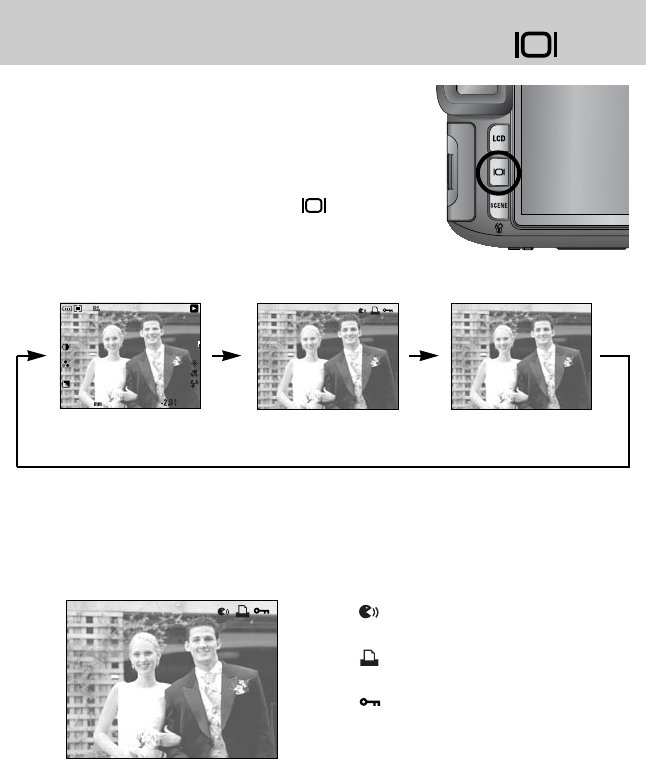
■The LCD displays shooting information about the displayed image.
■Refer to page 00 for more information about selecting an LCD.
Rear LCD/ Finder LCD
[ Image & Full information ]
⑨⑩
LCD monitor indicator
《83》
12 Flash p.51
13 Super Macro p.43
14 White balance p.51
15 ISO
16 Aperture value F2.2
17 Shutter speed 1/30
18 Colour space
19 Play mode
20
Folder name and Stored image number
100-0009
No. Description Icon Page
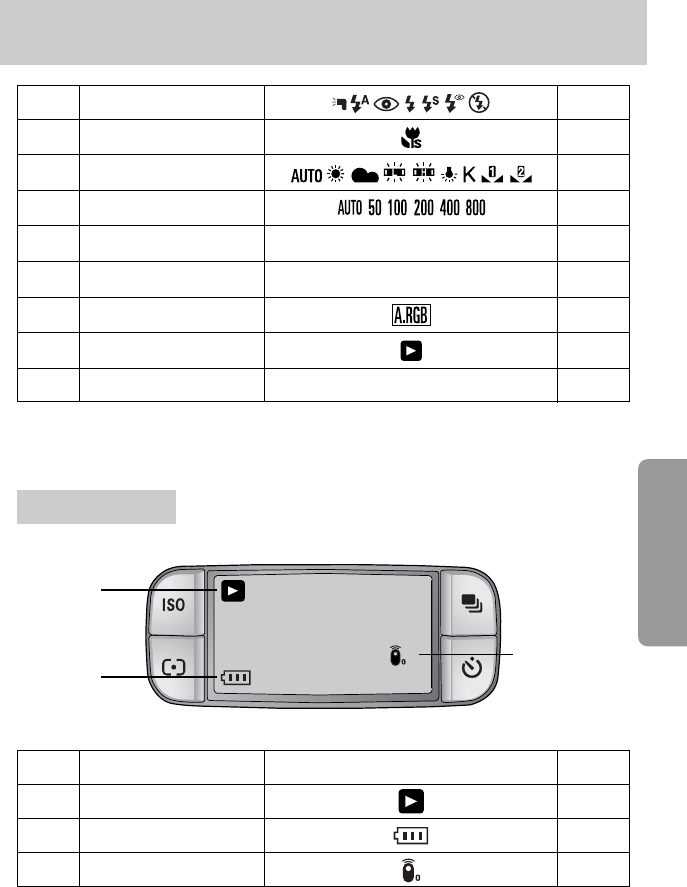
1Play mode p.51
2Battery status p.00
3Remote control
Top LCD
①
②
③
LCD monitor indicator
《84》
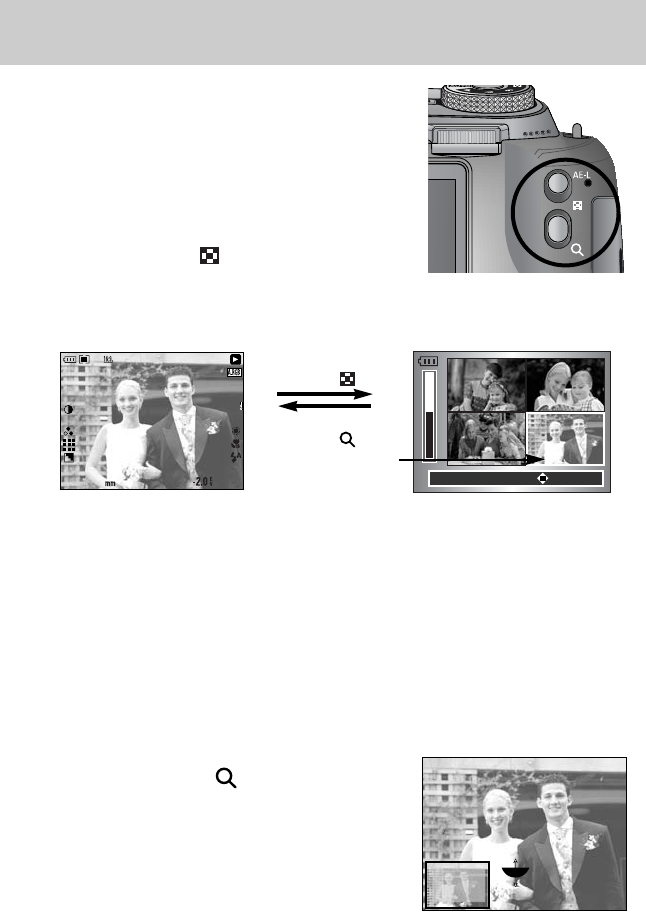
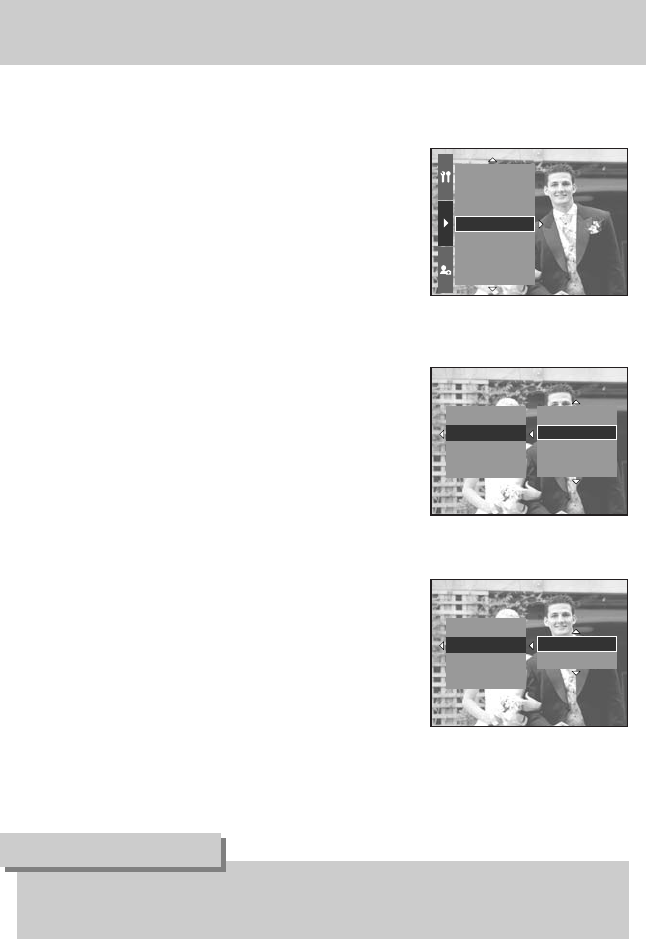
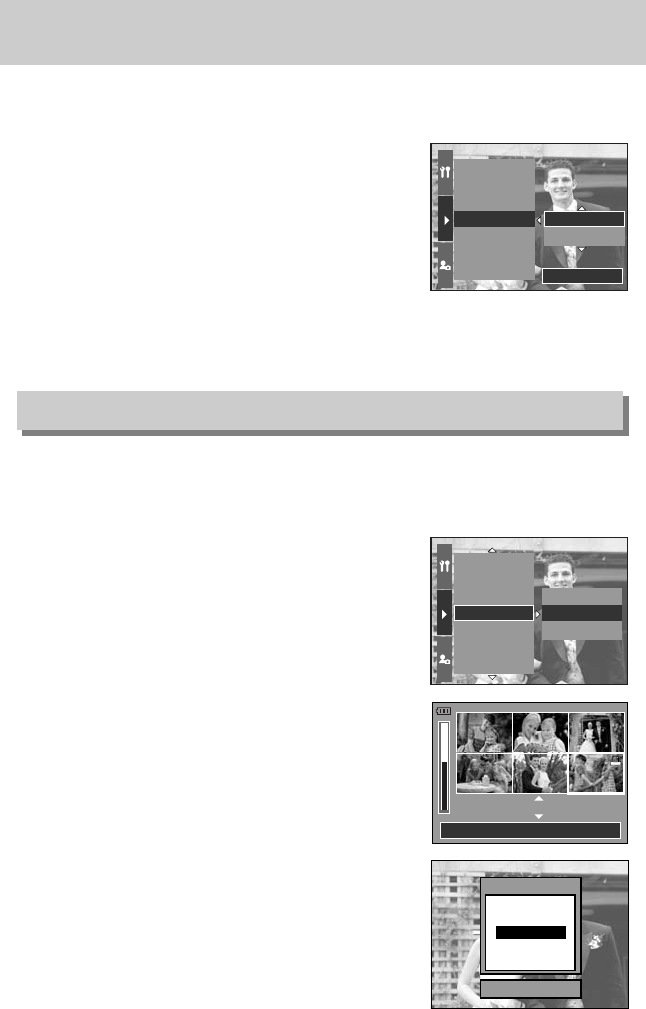
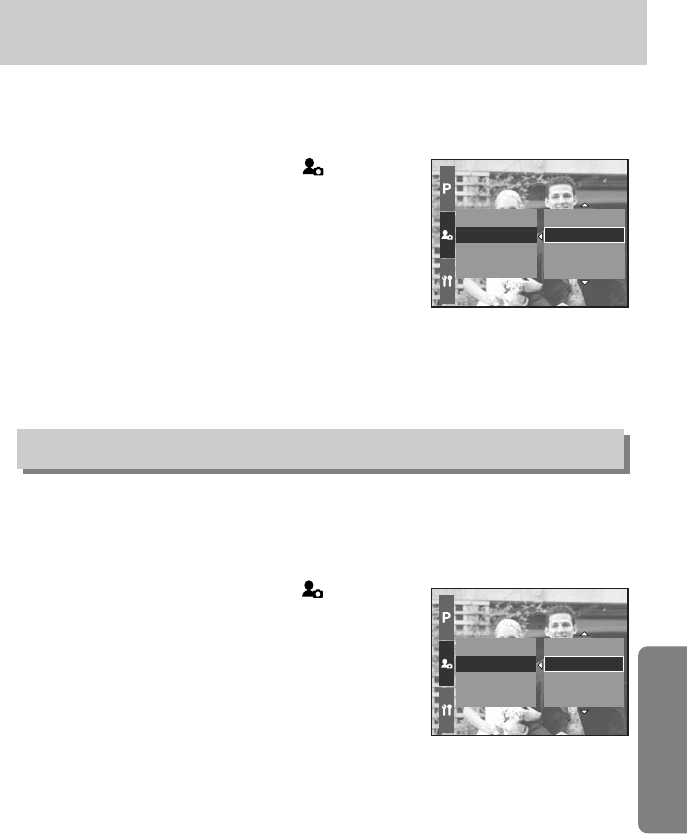
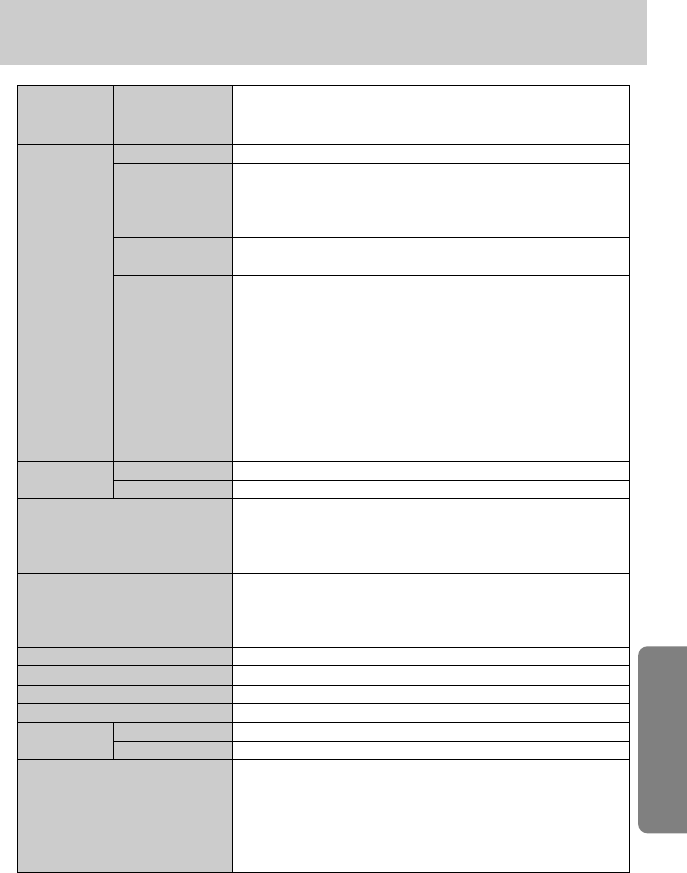
■In Play mode, you can use the buttons and the jog dial on
the camera to conveniently set up the Play mode functions.
■You can view multiple pictures, enlarge a selected picture,
and crop and save a selected area of an image.
●Thumbnail display
1. While an image is displayed full screen, press
the Thumbnail button( ).
2. The thumbnail display will highlight the image that had
been showing at the time the thumbnail mode was selected.
3. Change the number of thumbnail by rotating the Front jog dial (JOG1). You can select 4, 9,
16, 25 thumbnail.
- Rotating the Front jog dial to left will reduce the number of thumbnail.
- Rotating the Front jog dial to right will increase the number of thumbnail.
4. Rotate the Rear jog dial (JOG2) or press the Up/ Down/ Left/ Right button to move to a
desired image.
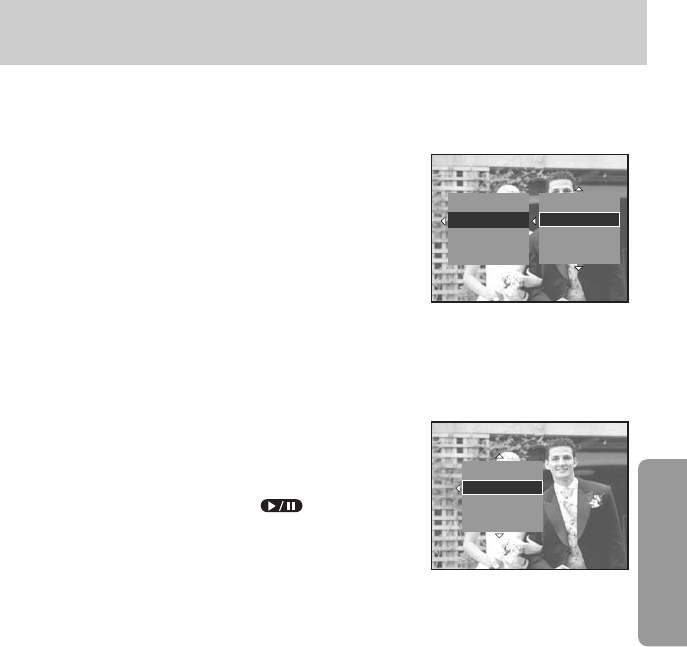
●Image enlargement
1. Select an image that you want to enlarge and press
the Enlargement button( ). Enlarge the image
by rotating the Rear jog dial (JOG2).
2. You can change the enlargement rate by rotating the
Rear jog dial (JOG2).
- Rotating the Rear jog dial to right will increase the
enlargement rate.
- Rotating the Rear jog dial to left will reduce the
enlargement rate.
3. Different parts of the image can be viewed by pressing the Up/ Down/ Left/ Right button.
JOG2
X1.43
28
100-0009
2005.07.01
13:00 PM
1/30
F2.2
100
Pressing the Thumbnail
button ( )
Pressing the Enlargement
button ( )
Highlighted image
[ Normal display mode ] [ Thumbnail display mode ]
Exit:AEL
Move:JOG2/
Change:JOG
Thumbnail button/ Enlarge button
《85》
●
You can tell whether the image displayed is an enlarged view by checking the image
enlargement indicator shown at the bottom left of the LCD. (If the image is not an enlarged
view, the indicator will not be displayed.) You can also check the area of enlargement.
●RAW, TIFF and Movie clip files can’t be enlarged.
●If an image is enlarged, a loss of quality may occur.
●During the image enlargement, you can delete the image by pressing the delete button.
INFORMATION
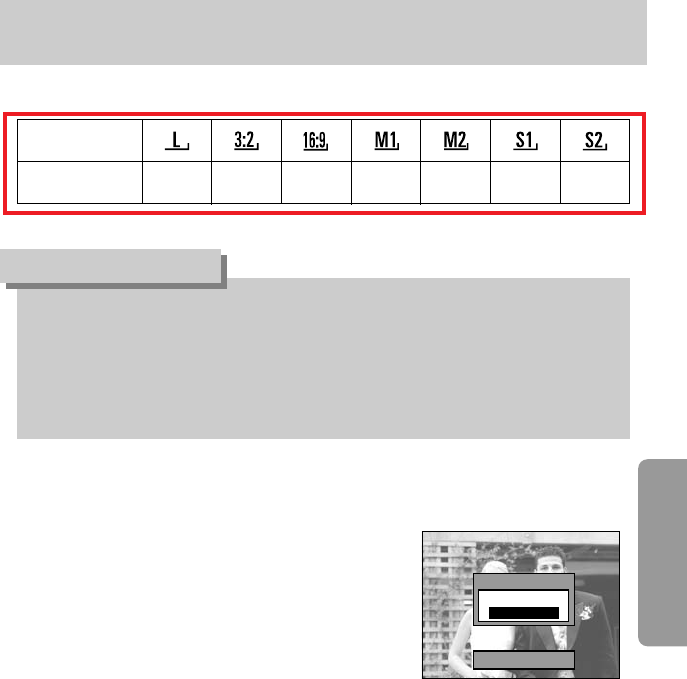
●Trimming : You can extract part of the image that you
want and save it separately.
1. Enlarge an image by rotating the Rear jog dial
(JOG2) and press the Menu button.
2. Press the Menu button and a message will display
to crop the image.
3. Select a desired sub menu by pressing the Up/
Down button and press the OK button.
- [Yes] : The trimmed image will save as a new file
name, and display on the LCD.
- [No] : The trimming menu will disappear.
※If there is little memory space to save the trimmed image, the image can’t be trimmed.
●The maximum enlargement rate in proportion to the image size.
Trimming?
Yes
No
Trimming:OK
Image size
Maximum enlargement rate
×10.20 ×10.20 ×10.20 ×6.82 ×4.64 ×4.00 ×3.33
Thumbnail button/ Enlarge button
《86》
■The shooting and playing back information will be
displayed on the LCD. The last image stored in the
memory is displayed on the LCD by pressing the play
mode button.
■Pressing the Display/ Information button( ) in the
PLAY mode will change the display as shown below.
■Refer to page 00 for more information about the shooting information.
■The followings are playing back information.
28
100-0009
2005.07.01
13:00 PM
1/30
F2.2
100
[ Shooting information ] [ Playing back information ] [ Image only ]
- [ ] : Voice memo
- [ ] : DPOF indicator
- [ ] : Protect indicator
Display/ Information button ( )
《87》
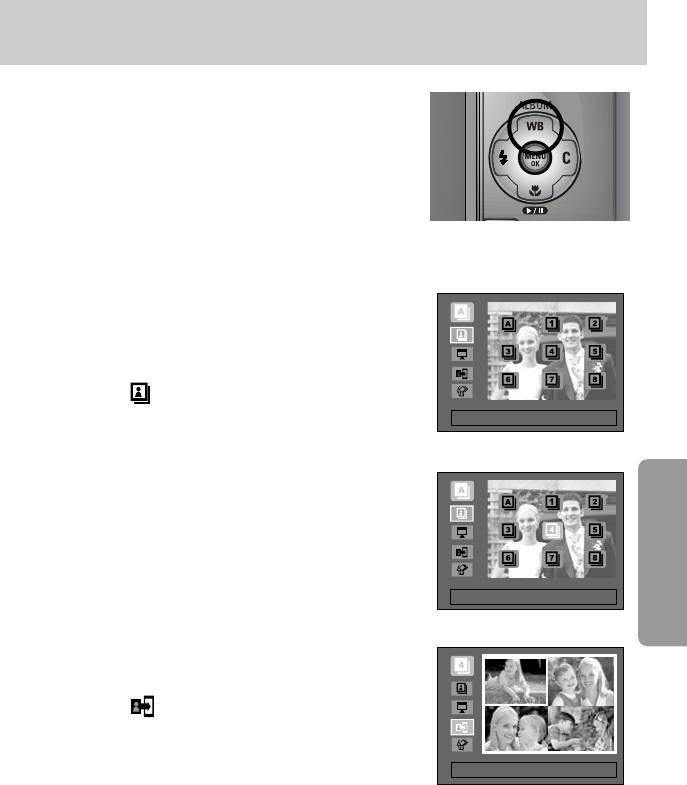
Album mode
■You can organise the captured still images into albums.
■This camera has 8 albums and each album can take up
to 100 images.
■The album menu loading time depends on the memory
card type.
■How to use the album
●Selecting the album
1. In the play mode, press the Album (Up) button.
2. Select the [ ] menu by pressing the Up/ Down button
and press the Right button.
3. Select a desired album by pressing the Up/ Down/ Left/
Right buttons and press the OK button.
●Inserting still images into the album
1. Select an album.
2. Select the [ ] menu by pressing the Up/ Down
button and press the Right button.
Exit:OK Move:
Exit:OK Move:
Set:OK
Select:JOG1 Set:OK
《88》
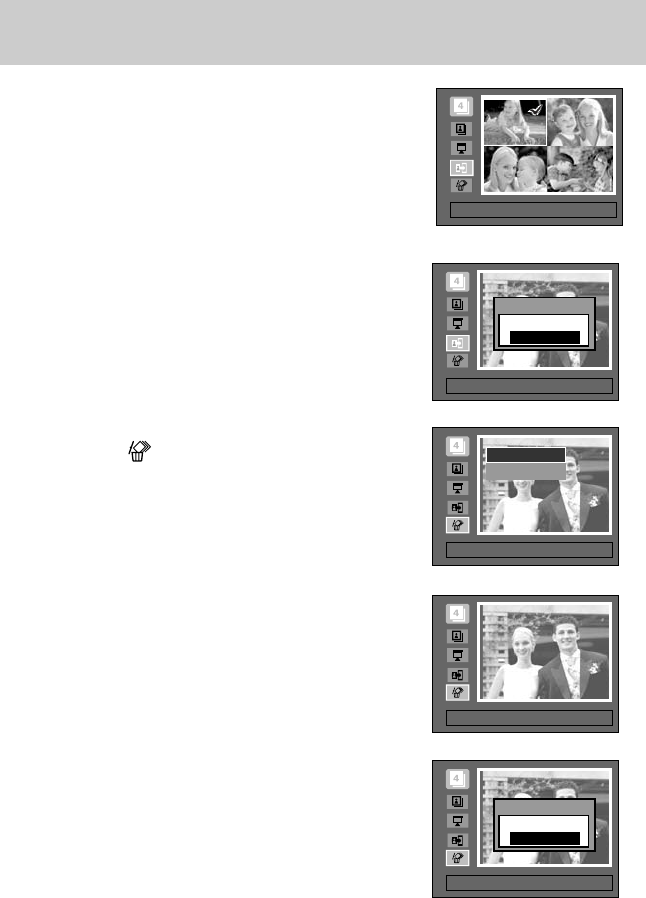
3. Select the still images you wish to add by pressing the
Up/Down/Left/Right buttons and rotate the Front jog dial
(JOG1).
V marks are displayed on the selected images.
* To cancel the selection, rotate the Front jog dial (JOG1)
again.
4. Press the OK button and a confirmation window will
display. Select a desired sub menu by pressing the Up/
Down button and press the OK button.
[Yes] : Inserts the selected images into the album.
[No] : Cancels the inserting images.
●Removing still images from the album
1. Select an album.
2. Select the [ ] menu by pressing the Up/ Down button
and press the Right button.
3. Select a desired sub menu and press the OK button.
- [Select] : Specific still images in the album can be
removed.
- [All] : All of the still images in the album will be removed.
※If [Select] is selected :
- Select images that you want to remove by pressing
the Left/ Right buttons and rotate the Front jog dial
(JOG1). V marks are displayed on the selected
images.
4.
Press the OK button and a confirmation window will display.
Select a desired sub menu by pressing the Up/ Down
button and press the OK button.
[Yes] : Removes the selected images from the album.
[No] : Cancels the removing images.
* The removed images are not deleted from the memory,
but just removed from the album.
Select:JOG1 Set:OK
Confirm:OK
Add?
Yes
No
Set:OK
Select
All
Set:JOG1 Set:OK
Confirm:OK
Remove?
Yes
No
Album mode
《89》
●If an image is deleted from the memory, the image doesn’t display on an album.
●An image can’t be added twice into the same album.
●An image can be added into the different albums.
INFORMATION
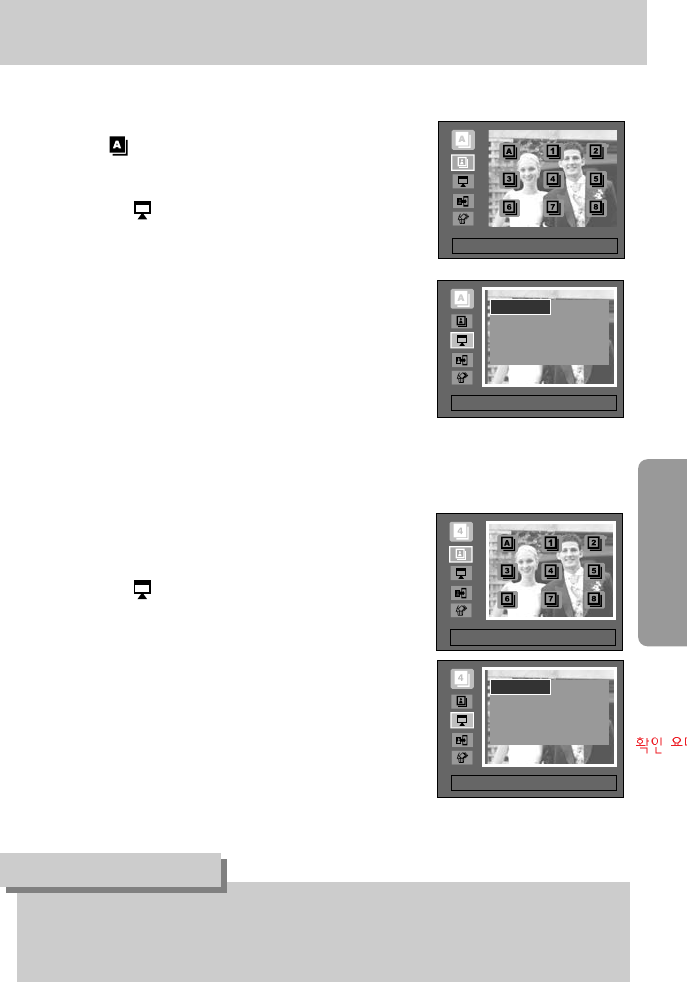
●Playing back the albums
◎Playing back all of the albums
1. Select [ ] menu and press the OK button.
All of the albums will be selected.
2. Select the [ ] menu by pressing the Up/ Down button
and press the Right button.
※You can select [Start], [Interval], [Repeat] and [Effect]
menus.
- [Start] : Start the slide show
- [Interval] : Set the slide show play interval
- [Repeat] : Choose to repeat the slide show after finishing
the first cycle.
- [Effect] : Unique screen effects can be used for the
slide show.
3. Select the [Start] menu by pressing the Up/ Down button
and press the OK button to start the slide show.
4. To stop the slide show, Press the Play & Pause button
and MENU/OK button.
◎Playing a desired album
1. Select a desired album and press the OK button.
2. Select the [ ] menu by pressing the Up/ Down
button and press the Right button.
※You can Select the [Start], [Interval], [Repeat] and
[Effect] menu.
3. Select the [Start] menu and press the OK button to
start the slide show.
4. To stop the slide show, press the Play & Pause button
and MENU/ OK button.
Exit:OK Move:
Exit:OK Move:
Back:◀Set:OK
Start
Interval
Repeat
Effect
Back:◀Set:OK
Start
Interval
Repeat
Effect
1 Sec
Off
Off
1 Sec
Off
Off
Album mode

《90》
■5-function button activate the following.
- Up button : While the menu is showing, press the Up button to move up the menu cursor.
When the menu is not displayed on the LCD, the Up button operates as
the Album button.
- Down button : While the menu is showing, press the Down button to move down the menu
cursor. If a still image with a voice memo or a movie clip is playing, pressing
the Down button make the files play back or pause.
- Left button : While the menu is showing, press the Left button to select the menu tab to the
left of the cursor. When the menu is not displayed, press the Left button
to select the previous image.
- RIGHT button : While the menu is showing, press the Right button to select the menu tab
to the right of the cursor. When the menu is not displayed, press the Right
button to select the next image.
- Menu/OK button : When the menu is displayed on the LCD, the Menu/ OK button is used
for confirming data that is changed by using the 5 function button.
When you press the MENU button, the play mode menu will be displayed
on the LCD monitor. Pressing it again will return the LCD to the initial
display.
5-function button
《91》
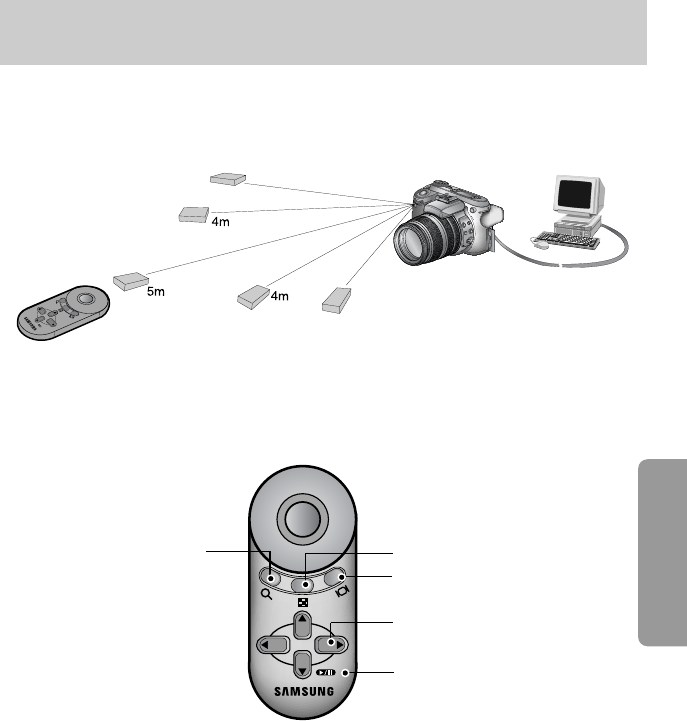
■After connecting the camera with a external monitor or computer, you can see the captured
image by using the remote control.
■In play mode, you can use the remote control to set up the play mode functions.
■See below for operation of buttons
- Enlargement button : In play mode, this button enlarges the selected image.
In the thumbnail mode, the number of thumbnails are increased by
pressing this button (Selectable number of thumbnail : 4, 9, 16, 25).
- Thumbnail button : If an image is enlarged, pressing this button will reduce the enlargement
rate. In play mode, you can view multiple pictures by pressing this
button. In the thumbnail mode, the number of thumbnails are reduced by
pressing this button (Selectable number of thumbnail : 4, 9, 16, 25).
- Display/ Information button : In play mode, you can view the information of the selected
image by pressing this button.
Enlargement button Thumbnail button
Display/ Information button
Up/ Down/ Left/ Right button
Play & Pause button
Remote control
《92》
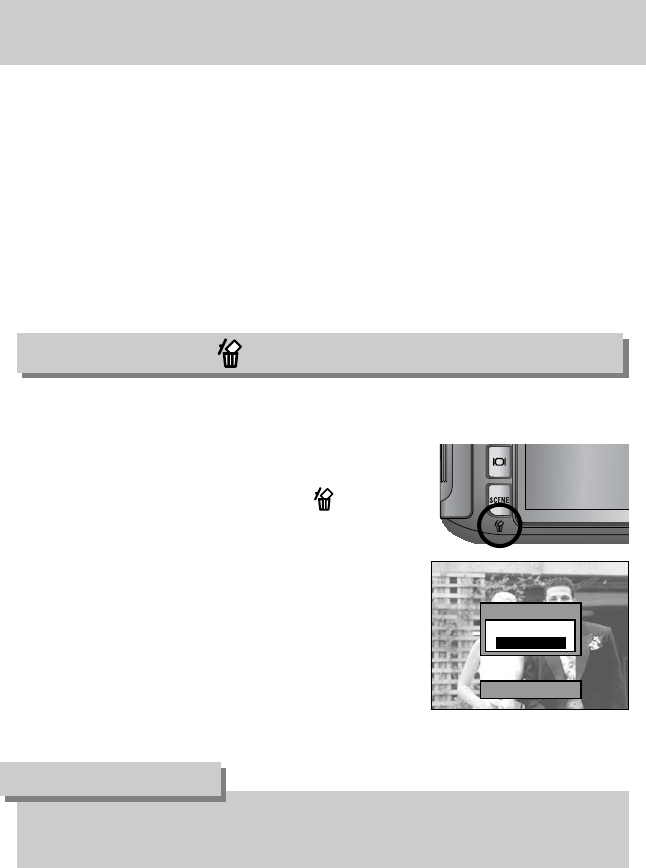
■This deletes images stored on the memory.
●Before deleting images from the camera, you should protect (p.77) or download images
(p.121) to your computer that you wish to keep.
INFORMATION
●Deleting Images in Play Mode
1. Select an image that you want to delete by pressing the
Left/ Right button and press the Delete ( ) button.
2. A message will display as shown alongside on the LCD.
3. Select the [Delete] menu and press the OK button to
delete the selected image. Delete?
Yes
No
Delete:OK
Remote control
- Up/ Down/ Left/ Right button : In play mode, different parts of the enlarged image can be
viewed by pressing these buttons. In the thumbnail mode,
you can move to a desired image by pressing these buttons.
- Play & Pause button : If a still image with a voice memo or a movie clip is playing, pressing
this button make the files play back or pause.
Delete button ( )

《93》
■PLAY mode functions can be changed by using the LCD monitor.
Press the Menu button and select the [▶] menu tab. The play back menu will display.
The menus you can set up in Play mode are as follows. To capture an image after setting up
the play menu, press the Play mode button or shutter button.
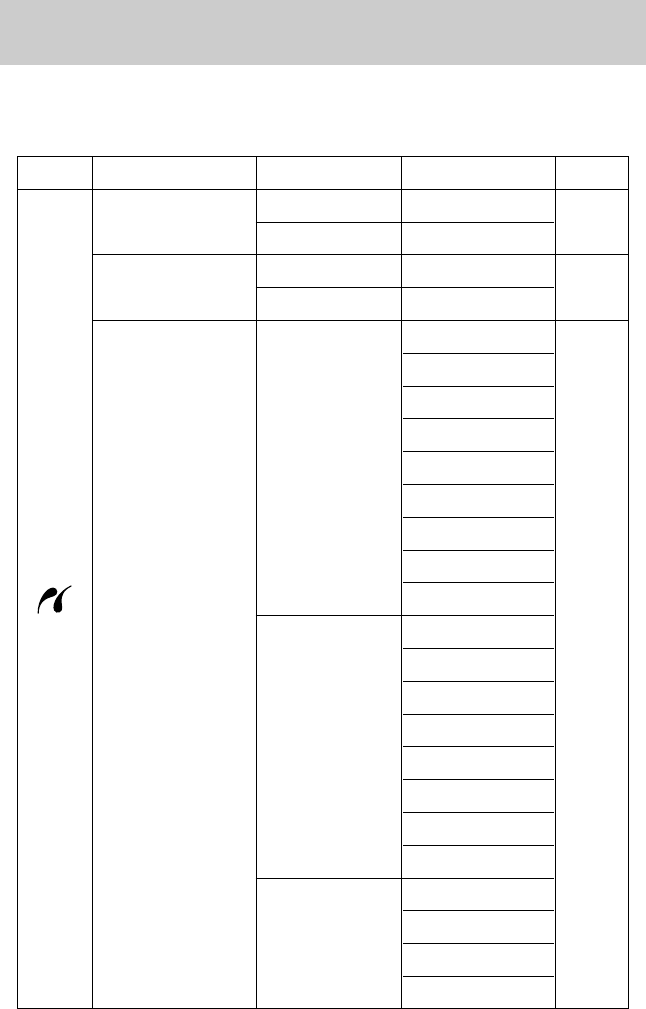
Menu tab Main menu Sub menu Secondary menu Page
-
-
Off
On
-
-
-
-
-
-
-
-
-
Slide Show
p. 77
p. 78
p. 76
1, 3, 5, 10 sec
Off,On
Cancel
Effect1,2,3
-
Right 90°
Left 90°
180°
Interval
Repeat
Start
DPOF/ Standard
DPOF/ Index
DPOF/ Size
Select/ All Pics/ Cancel
No/ Yes
Select/ All Pics/ Cancel
Protect
Delete
Voice Memo
Effect
Select
All Pics
Select
All Pics
Unlock/Lock
Resize
Rotate
p. 79
p. 80
p. 81
7M
6M
5M
4M
3M
2M
1M
640X480
User Image
▶
Setting up the play back function using the LCD monitor
《94》
■This menu is available while the camera is connected to a PictBridge supporting printer
(direct connection to the camera, sold separately) with a USB cable.
Menu tab Main menu Sub menu Secondary menu Page
-
-
-
-
Auto
Postcard
Card
4X6
L
2L
Letter
A4
A3
Auto
Full
1
2
4
8
9
16
Auto
Plain
Photo
Fastphoto
Auto Set
Custom Set
Images
p. 85
p. 85
p. 84
No
Yes
Paper Size
Layout
Paper Type
One Pic
All Pics
Setting up the play back function using the LCD monitor
《95》
※Menus are subject to change without prior notice.
Quality
Menu tab Main menu Sub menu Secondary menu Page
Auto
Draft
Normal
Fine
Auto
Off
On
Auto
Off
On
Standard -
Index -
No -
Yes -
No -
Yes -
Print
Custom Set
p. 86
p. 86
p. 87
p. 85
File Name
Date Print
DPOF Print
Reset
Setting up the play back function using the LCD monitor
《96》
■Images can be displayed continuously at pre-set intervals. You can view the slide show by
connecting the camera to an external monitor.
1. In play mode, press the Menu button and select the [▶]
menu tab.
2. Press the Right button and select the [Slide Show] menu
by pressing the Up/ Down button.
3. Press the Right button and select a desired sub menu by
pressing the Up/ Down button.
●Setting play interval : Set the slide show play interval.
1. Select the [Interval] menu by pressing the Up/ Down
button and press the Right button.
2. Press the Up/ Down button to select the desired interval.
3. Press the OK button to set the setting.
●Repeat setting : setting the slide show to repeat after the
first cycle.
1. Select the [Repeat] menu by pressing the Up/ Down
button and press the Right button.
2. Select a desired sub menu by pressing the Up/ Down
button.
[On] selected : The slide show is repeated until cancelled.
[Off] Selected : The slide show is closed after one cycle.
3. Press the OK button to set the setting.
●The loading time depends on the image size and quality.
●While the slide show is playing, only the first frame of a movie clip file is displayed.
INFORMATION
Start
Interval
Repeat
Effect
10 sec
1 sec
3 sec
5 sec
Interval
Repeat
Effect
Start
Off
On
DPOF/Standard
DPOF/Index
DPOF/Size
Slide Show
Protect
Delete
Voice Memo
Starting the slide show
《97》
●Configure slide show effects : Unique screen effects can be used for the slide show.
1. Select the [Effect] sub menu by pressing the Up/ Down button and press the Right button.
2. Use the Up/ Down button to select the type of effect.
[Off] : Normal display.
[Effect 1] : Image moves from the top left.
[Effect 2] : The image slides diagonally from top left
to bottom right.
[Effect 3] : Image is displayed slowly from the centre
outwards.
3. Press the OK button to set the setting.
●Start the slide show : The slide show can start only in the [Start] menu.
1. Select the [Start] menu by pressing the Up/ Down
button.
2. Press the OK button to start the slide show.
- Press the Play & Pause button to pause the slide show.
- Press the Play & Pause button ( ) again to
resume the slide show.
- To stop the slide show, press the Play & Pause button,
and then press the Left or Right button.
Repeat
Effect
Start
Interval
off
Effect 1
Effect 2
Effect 3
Effect
Start
Interval
Repeat
Starting the slide show
《98》
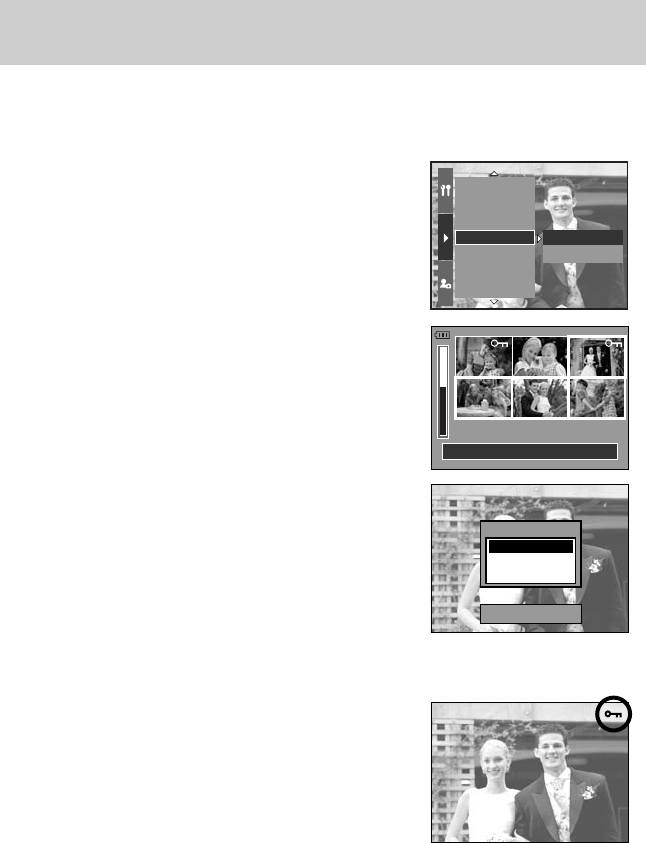
■This is used to protect specific shots from being accidentally erased (Lock). It also unprotects
images that have been previously protected (Unlock).
●How to protect images
1. In play mode, press the Menu button.
2. Select the [▶] menu tab and press the Right button.
3. Select the [Protect] menu by pressing the Up/ Down
button and press the Right button.
4. Select a desired sub menu by pressing the Up/ Down
button and press the Right button.
[Select] : Selection window for an image to be protected/
released is displayed.
- Rear jog dial (JOG2) : Select an image
- Front jog dial (JOG1) : Protect/ release the image
- OK Button : Your changes will be saved and the menu
will disappear.
[All Pics] : Protect/ release all saved images
- [Lock] : Protect all saved images
- [Unlock] : Unprotect all save images
- [Cancel] : The confirmation window will disappear.
- OK button : The changed settinga are saved and menu
will disappear.
Set:OKSelect:JOG1MovePic:JOG2
- If you protect an image, the protect icon will be displayed
by pressing the Display/ Information button on the LCD.
(An unprotected image has no indicator)
- An image in LOCK mode will be protected from the
delete function, but will NOT be protected from the
Format function.
DPOF/Index
DPOF/Size
Slide Show
Protect
Delete
Voice Memo
Resize
Select
All Pics
Set:OK
Protect?
Lock
Unlock
Cancel
Protecting images
《99》
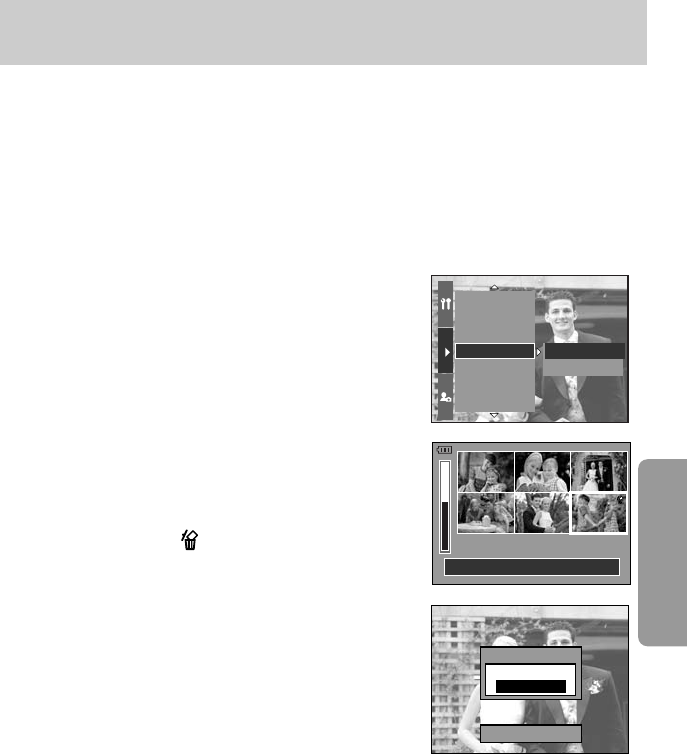
■Of all the files stored in the memory card, the unprotected files in the DCIM subfolder will be
deleted. Remember that this will permanently delete unprotected images. Important shots
should be stored on a computer before deletion takes place.
The startup image is stored in the camera's internal memory (i.e., not on the memory card)
and it will not be deleted even if you delete all files on the memory card.
●How to delete images
1. In play mode, press the Menu button.
2. Select the [▶] menu tab and press the Right button.
3. Select the [Delete] menu and press the Right button.
4. Select a desired sub menu by pressing the Up/ Down
button and press the Right button.
[Select] : Selection window for an image to delete is
displayed.
- Rear jog dial (JOG2) : Select an image.
- Front jog dial (JOG1) : Select the image for deletion.
- OK button : Press the OK Button to display the
confirmation message. Select the [Yes]
menu and press the OK Button again to
delete [ ] marked images.
[All Pics] : Displays confirmation window. Select the [Yes]
menu and press the OK button to delete all
unprotected images. If there are no protected
images, a [No Image!] message will display.
5. After deletion, the screen will be changed to the play
mode screen.
DPOF/Size
Slide Show
Protect
Delete
Resize
DPOF/Standard
DPOF/Index
Select
All Pics
Set:OKSelect:JOG1MovePic:JOG2
Delete?
Yes
No
Delete:OK
Deleting images
《100》
●How to add a voice to a still image
1. Select an image that you wish to add sound to by
pressing the Left/ Right button.
2. Select the [▶] menu by pressing the Menu button and
press the Right button.
3. Select the [Voice Memo] menu by pressing the Up/
Down button and press the Right button.
4. Select the [On] menu by pressing the Up/ Down button
and press the OK button.
5. The camera is now ready to record a voice memo.
6. Press the shutter button to start recording and voice will
be recorded to the still image for 10 seconds. While the
voice is recording, the recording status window will be
displayed as shown alongside.
7. The recording can be stopped by pressing the shutter
button again.
8. The ( ) icon will be displayed on the LCD by
pressing the Display/ Information button after voice
memo recording has finished.
- Voice memos can’t be recorded onto movie clip files.
- A distance of 40cm between you and the camera
(microphone) is the best distance to record sound.
- The voice memo will be saved in *.wav format, but has
the same file name as the still image to which it
corresponds.
- If you add a new voice memo to the still image that already has a voice memo, the existing
voice memo will be erased.
Slide Show
Protect
Delete
Voice Memo
Resize
Rotate
DPOF/Standard
On
Off
Set:OK
Start:SHUTTER
Stop:SHUTTER
■You can add your voice to a stored still image.
Voice memo
《101》
■Change the resolution (size) of pictures taken. Select the [User Image] to save an image to
be the start-up image. The resized image will have a new file name.
1. In play mode, press the Menu button and select the [▶] menu tab.
2. Press the Right button and select the [Resize] menu by
pressing the Up/ Down button.
3. Press the Right button and select a desired sub menu by
pressing the Up/ Down button.
4. Press the OK button and a confirmation window will
display.
5. Select the [Yes] menu and press OK button to save the
resized image.
●A large sized image can be resized to a smaller sized image, but not vice versa.
●3264X2176(3:2) and 3264X1840(16:9) image size files, TIFF, Movie clip (AVI) files can’t
be resized.
●You can change the resolution of only those files compressed in the JPEG 4:2:2 format.
●The resized image will have a new file name. The [User Image] image is stored not on the
memory card but on the internal memory.
●If the memory capacity is insufficient to store the resized image, a [Card Full!] message
will display on the LCD and the resized image will not be stored.
INFORMATION
●Image Resize Types
3264X2448 O O O O O O O O O
3264X2176 X X X X X X X X X
3264X1840 X X X X X X X X X
2400X1800 X X X O O O O O O
1632X1224 X X X X X O O O O
1024X768 X X X X X X X O O
640X480 X X X X X X X X O
Size
4M7M 6M 5M 3M 2M 1M 640
X480
사용자
이미지
Protect
Delete
Voice Memo
Resize
Rotate
DPOF/Standard
DPOF/Index
640×480
User Image
7M
6M
5M
Set:OK
Resize
《102》
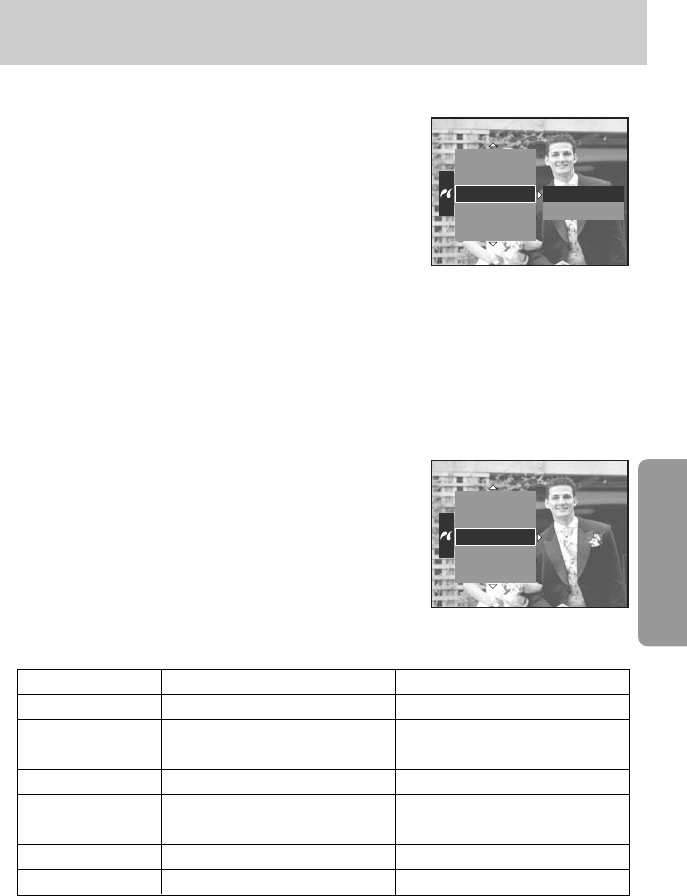
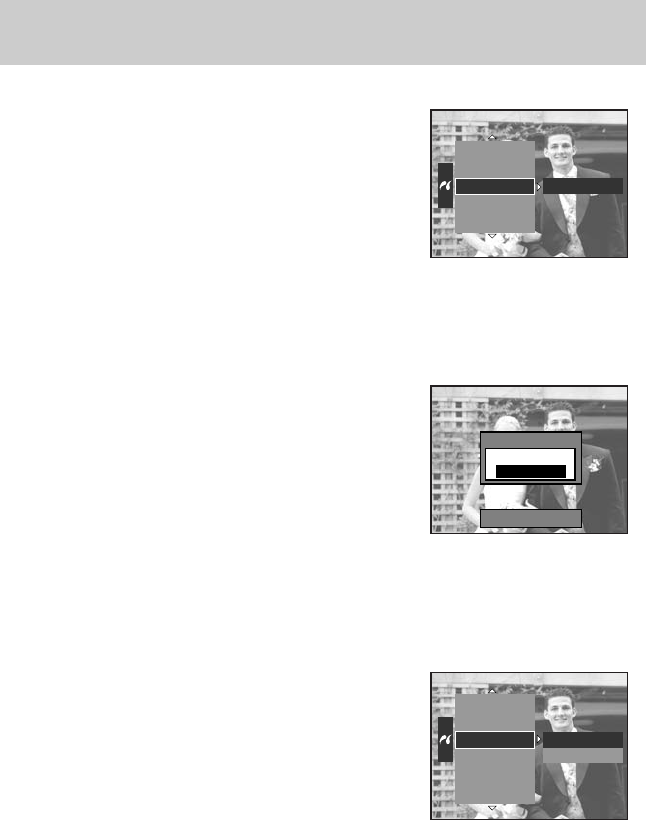
■You can rotate the stored images by various degrees.
1. In play mode, press the Menu button and select the [▶]
menu.
2. Press the Right button and select the [Rotate] menu by
pressing the Up/ Down button.
3. Press the Right button and select a desired sub menu by
pressing the Up/ Down button.
[Right 90°] : Rotate picture in a clockwise direction
[Left 90°] : Rotate picture in a counter clock-wise direction
[180°] : Rotate picture 180 degrees
[ Right 90° ] [ 180° ][ Left 90° ]
4. Press the OK button and a confirmation window will display.
5. Select the [Yes] menu and press the OK button. A rotated image will display on the LCD
and the menu will disappear. There will be empty space to the left and right of the rotated
image.
Delete
Voice Memo
Resize
Rotate
DPOF/Standard
DPOF/Index
DPOF/Size
180。
Right 90。
Left 90。
●The rotated image can’t be enlarged or trimmed.
●RAW, TIFF and movie clip can’t be rotated.
INFORMATION
Rotating an image
《103》
■DPOF(Digital Print Order Format) allows you to embed printing information on your memory
card’s MISC folder. Select the pictures to be printed and how many prints to make.
■
The DPOF indicator will display on the LCD when an image that has DPOF information plays
back. Images can then be printed on DPOF printers, or at an increasing number of photo labs.
■This function is not available for Movie clips and Voice recording files.
DPOF : STANDARD
■This function allows you to embed print quantity information on a stored image.
1. In play mode, press the Menu button.
2. Select [▶] menu tab and press the Right button.
3. Select the [DPOF/Standard] menu by pressing the
Up/Down button and press the Right button.
4. Select a desired sub menu by pressing the Up/Down
button and press the Right button.
[Select] : Selection window for an image to print is
displayed.
- Rear jog dial (JOG2) : Select an image to print.
- Front jog dial (JOG1) : Select the number of prints.
[All Pics] : Configure number of prints for all pictures except
movie and voice files.
- Front jog dial (JOG1) : Select the number of prints.
[Cancel] : Cancel the print setup.
5. Press the OK button to confirm the setting. If an image
carries DPOF instructions, the DPOF indicator ( )
will show.
Voice Memo
Resize
Rotate
DPOF/Standard
DPOF/Index
DPOF/Size
Slide Show
Cancel
Select
All Pics
Select:JOG1 Set:OKMovePic:JOG2
0Prints
DPOF?
OPrints
Set:OK
DPOF
《104》
■Images (except for movie clips and voice file) are printed as index type.
1. In play mode, press the Menu button and select the [▶] menu tab.
2. Press the Right button and select the [DPOF/Index] menu
by pressing the Up/ Down button.
3. Press the Right button and select a desired sub menu by
pressing the Up/Down button.
If [No] is selected : Cancel the index print setting.
If [Yes] is selected : The image will be printed in index
format.
4. Press the OK button to set the setting.
DPOF : PRINT SIZE
■You can specify the print size when printing images stored on the memory card.
The [DPOF/Size] menu is available only for DPOF 1.1 compatible printers.
●Setting the Print Size
1. In play mode, press the Menu button.
2. Select [▶] menu tab and press the Right button.
3. Select the [DPOF/Size] menu by pressing the Up/ Down
button and press the Right button.
4. Select a desired sub menu by pressing the Up/ Down
button and press the Right button.
[Select] : Selection window for an image to be changed
printed size is displayed.
- Rear jog dial (JOG2) : Select an image.
- Front jog dial (JOG1) : Change the print size.
- OK button : Your changes will be saved and the menu
will disappear.
[All Pics] : Change print size of all saved images
- Select a desired print size by pressing the Up/ Down
button.
*
DPOF Size secondary menu : Cancel, 3X5, 4X6, 5X7, 8X10
Resize
Rotate
DPOF/Standard
DPOF/Index
DPOF/Size
Slide Show
Protect
No
Yes
Set:OK
Rotate
DPOF/Standard
DPOF/Index
DPOF/Size
Slide Show
Protect
Delete
Cancel
Select
All Pics
Select:JOG1 Set:OK
Move Pic:JOG2
3 X 5
Set:OK
DPOF?
Cancel
3 X 5
4 X 6
5 X 7
8 X 10
DPOF : INDEX
《105》
※If you selected [Computer] in Step 4, when you connect the camera to your printer, the
[Connecting…] message will display and the connection will not be established. In this case,
disconnect the USB cable, and then follow the procedure from Step 2 and onward.
Video Out
Quick View
Auto Rotating
USB
Reset All
File
Power Off
Printer
Computer
■You can use the USB cable to connect this camera to a printer that supports PictBridge (sold
separately) and print the stored images directly. RAW, TIFF and Movie clip files cannot be
printed. You can set up the following settings from the PictBridge menu.
Images : Select the pictures to be printed.
Auto Set/Custom Set : Setting up printing
Print : Printing pictures
DPOF Print : Printing the DPOF files
Reset : Initialising the PictBridge functions Connecting the Camera to a Printer
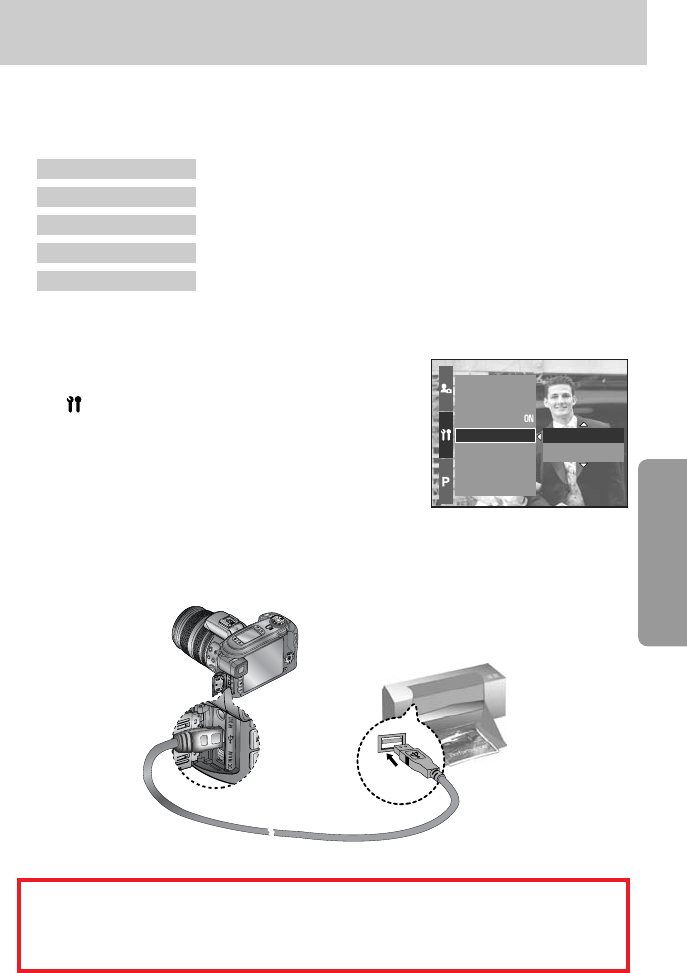
●Connecting the Camera to a Printer
1. Press the POWER button to turn on the camera.
2. Press the Menu button and select the set up menu tab
( ).
3. Press the Right button and select the [USB] menu by
pressing the Up/ Down button.
4. Press the Right button and select the [Printer] menu by
pressing the Up/ Down button.
5. Press the OK button to set the setting.
6. Use the supplied USB cable to connect the camera to the printer as shown below.
7. Turn on the printer and the camera will be connected to the printer.
PictBridge

《106》
■Select pictures to print
1. Connect the camera to your printer. The USB menu must
be set to [Printer] before you connect the camera to the
printer. (See p.83)
2. Press the Menu button and select the [ ] menu tab
by pressing the Up/ Down button.
3. Press the Right button and select the [Images] menu by
pressing the Up/ Down button.
4. Press the Right button and select a desired sub menu by
pressing the Up/ Down button.
When [One Pic] is selected : The PictBridge function will be applied only to the picture
currently displayed.
When [All Pics] is selected : The PictBridge function will be applied to all pictures, excluding
RAW, TIFF and movie clips files.
[ When [One Pic] is selected ] [ When [All Pics] is selected ]
- Press the Up/ Down button to select the number of prints.
- When you select [One Pic] menu, use the Left/ Right button to select another picture and
select the number of prints for another picture.
- After setting the number of prints, press the OK button to save.
사진 이동:◀▶ 설정:OK
●Setting the Number of Copies to Print
- Select [One Pic] or [All Pics]. A screen where you can set the number of copies to print will
appear as shown below.
■Easy printing
When you connect the camera to printer in the Play back
mode, you can print a picture easily.
- Pressing the shutter button : Currently displayed image
will be printed with the
printer’s default setting.
- Pressing the Left/ Right button: Selects a previous/ next
image.
100-0009
출력
초기화
이미지
자동 설정
사용자 설정
한장
전부
사진 이동:◀▶ SHUTER:출력
출력?
0 Prints
출력?
0 Prints
Set:OK
PictBridge : Picture Selection
《107》
Menu
Paper Size
Setting the size of the printing paper
Auto, Postcard, Card, 4X6, L, 2L, Letter, A4, A3
Setting the number of pictures
to be printed on a sheet of paper
Paper Type
Setting the quality of the printing paper
Auto, Plain, Photo, Fastphoto
Setting the quality of the picture
Auto, Draft, Normal, Fine
to be printed
Date Print Setting whether to print the date Auto, Off, On
File Name Setting whether to print the file name Auto, Off, On
■AUTO SET
1. Connect the camera to your printer. The USB menu
must be set to [Printer] before you connect the camera
to the printer. (See p.83)
2. Select the [Auto Set] menu by pressing the Left/ Right
button.
3. Press the Right button and select a desired sub menu
by pressing the Up/ Down button.
[No] : [Custom Set] values are kept.
[Yes] : Press the OK button and a confirmation window will display. Press the OK button
again and all values in the [Custom Set] are automatically changed.
※Some menu options are not supported in all manufacturer and printer models.
※If the setting values are not changed in the automatic/manual setting, the setting values are
automatically kept.
1. Connect the camera to your printer. The USB menu
must be set to [Printer] before you connect the camera to
the printer. (See p.83)
2. Select the [Auto Set] menu by pressing the Left/ Right
button.
3. Press the Right button and select a desired sub menu by
pressing the Up/ Down button.
4. Select a desired sub menu and press the OK button.
The menus you can set up are as follows :
■Custom Set : You can select the Paper Size, Print Format, Paper Type, Print Quality, Date,
Print, and File Name Print menus for printed pictures.
Function Sub menu
초기화
이미지
자동 설정
사용자 설정
출력
아니오
예
이미지
자동 설정
사용자 설정
출력
초기화
Layout Auto, Full, 1, 2, 4, 8, 9, 16
출력 화질
PictBridge : Print Setting
《108》
■Printing Pictures
1. Connect the camera to your printer. The USB menu
must be set to [Printer] before you connect the camera
to the printer. (See p.83)
2. Select the [Print] menu by pressing the Left/ Right
button.
3. Press the Right button and select a desired sub menu
by pressing the Up/ Down button.
[Standard] : Print the pictures stored in the memory card
in set numbers. One picture is printed on one piece of paper.
[Index] : Print multiple images on one sheet of paper.
1. Connect the camera to your printer. The USB menu
must be set to [Printer] before you connect the camera to
the printer. (See p.83)
2. Select the [DPOF Print] menu by pressing the Left/ Right
button.
3. Select a desired sub menu by pressing the Up/Down
button and press the OK button.
[No] : Cancel the printing
[Yes] : Directly print the file with the DPOF information
※With a printer without supporting the DPOF, the menu is still displayed but not available.
4. The screen shown on the right will appear and the
picture will be printed. If no picture is selected,
the [No image!] message will be displayed. Press the
Menu/ OK button while printing to cancel the printing
and the [Print] menu is displayed.
※Depending on the manufacturer and printer model,
some menus may not be available.
■DPOF Print : This allows you to directly print the files with DPOF information.
자동 설정
사용자 설정
출력
초기화
이미지
표준
사용자 설정
출력
DPOF
출력
초기화
이미지
자동 설정
출력?
예
아니오
출력:OK
아니오
예
PictBridge : Printing

《109》
■Initialises user-changed configurations.
1. Connect the camera to your printer. The USB menu
must be set to [Printer] before you connect the camera
to the printer. (See p.83)
2. Select the [Reset] menu by pressing the Left/ Right
button.
3. Press the Right button and select a desired sub menu
by pressing the Up/ Down button.
If [No] is selected : Settings will not be reset.
If [Yes] is selected : Press the OK button and a confirmation window will display.
Press the OK button again and all print and image settings will be reset.
※Default print setting varies depending on the printer manufacturer.
For your printer’s default setting, refer to the user’s guide that came with your printer.
사용자 설정
출력
초기화
이미지
자동 설정
아니오
예
PictBridge : RESET
《110》
■In this mode, you can set up basic settings.
The items indicated by are default settings.
Menu tab Main menu Sub menu Secondary menu Page
Series -
Reset -
Power Off Off, 1, 3, 5 10 min - p.90
LCD Off
Off, 10, 20, 30, 60 sec
-p.90
ENGLISH 한국어 FRANÇAIS
DEUTSCH ESPAÑOL ITALIANO
日本語
P”CCK»… PORTUGUÊS DUTCH
DANSK SVENSKA SUOMI
BAHASA
POLSKI Magyar
No -
Yes -
Date & Time 00/00/00 00:00 -
yy/mm/dd -
Date Type mm/dd/yy -
dd/mm/yy -
Cape Verde Tashkent
London Almaty
Rome, Paris, Berlin Bangkok, Jakarta
Athens, Helsinki Beijing , Hong Kong
Moscow Seoul, Tokyo
Abu Dhabi Guam, Sydney
File
Language
Format
World Time
p.89
p.91
p.91
p.92
p.92
Type A
Type B
Setup menu
《111》
Menu tab Main menu Sub menu Secondary menu Page
Okhotsk Denver, Phoenix
Wellington, Auckland Chicago, Dallas
Samoa, Midway New York, Miami
Honolulu, Hawaii Caracas, La Paz
Alaska Buenos Aires
LA, San Francisco Mid-Atlantic
Off
Date -
Date & Time
Off Low
Mediuml High
Main LCD
EVF
Top LCD
NTSC
PAL
Quick View Off, o.5, 1, 3, 5 sec -
Off
On
Computer
Printer
No
Yes
World Time
Video Out
Imprint
Sound
Brightness
Reset
Auto Rotating
USB
p.93
p.93
p.94
p.94
p.94
p.95
p.96
p.96
p.96
Bright, Normal, Dark
-
-
-
-
* Menus are subject to change without prior notice.
Setup menu
《112》
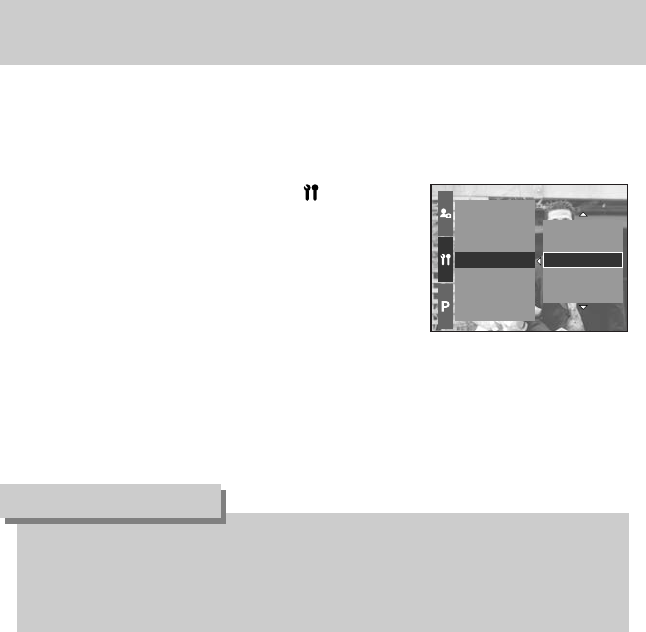
■This function allows the user to select the file naming format.
●How to set the file names
1. Press the Menu button and select the [ ] menu tab by
pressing the Up/ Down button.
2. Press the Right button and select the [File] menu by
pressing the Up/ Down button.
3. Press the Right button and select a desired sub menu by
pressing the Up/ Down button.
[Series] : New files are named using numbers that follow
the previous sequence, even when a new memory card is used, or after formatting,
or after deleting all pictures.
[Reset] : After using the reset function, the next file name will be set from 0001 even after
formatting, deleting all or inserting a new memory card.
4. Press the OK button to set the setting.
●The first stored folder name is 100SSCAM, and the first file name is SH100001.
●File names are assigned sequentially from SH100001→→SH100002 →~ →SH100099.
But, files that was saved as the Adobe RGB type are assigned as _H1xxxxx.
●The folder number is assigned sequentially from 100 to 999 as follows :
100SSCAM →101SSCAM →~ →999SSCAM.
●The files used with the memory card conform to the DCF(Design rule for Camera File
systems) format.
INFORMATION
Auto Rotating
USB
Reset All
File
Power Off
LCD Off
Language
Series
Reset
File name
《113》
●Even if the battery or AC adapter are removed and inserted again, the power off setting
will be preserved.
●Note that the automatic power off function will not operate if the camera is in PC mode,
slide show, playing back a movie clip.
INFORMATION
●How to set the Auto power Off
1. Press the Menu button and select the [ ] menu tab by
pressing the Up/ Down button.
2. Press the Right button and select the [Power Off] menu by
pressing the Up/ Down button.
3. Press the Right button and select a desired sub menu by
pressing the Up/ Down button.
[Off] : The power off function will not operate.
[1, 3, 5, 10 min] : The power will turn off automatically if not used for the period of time
specified.
4. Press the OK button to set the setting.
■
This function switches the camera off after a set amount of time in order to prevent unnecessary battery
drainage.
USB
Reset All
File
Power Off
LCD Off
Language
Format
5 min
10 min
Off
1 min
3 min
Auto power off
《114》
●Even if the battery or AC adapter are removed and inserted again, the auto LCD turning
off setting will be preserved.
●Note that the automatic power off function will not operate if the camera is in PC mode,
slide show, playing back a movie clip.
INFORMATION
●How to set the auto turning off time
1. Press the Menu button and select the [ ] menu tab by
pressing the Up/ Down button.
2. Press the Right button and select the [LCD Off] menu by
pressing the Up/ Down button.
3. Press the Right button and select a desired sub menu by
pressing the Up/ button.
[Off] : The LCD will not turn off.
[10, 20, 30, 60 sec] : The LCD will turn off automatically
if not used for the period of time specified.
4. Press the OK button to set the setting.
■This function switches the LCD off after a set amount of time in order to prevent unnecessary
battery drainage.
Reset All
File
Power Off
LCD Off
Language
Format
Date & Time
30 sec
60 sec
Off
10 sec
20 sec
Auto turning off the LCD
《115》
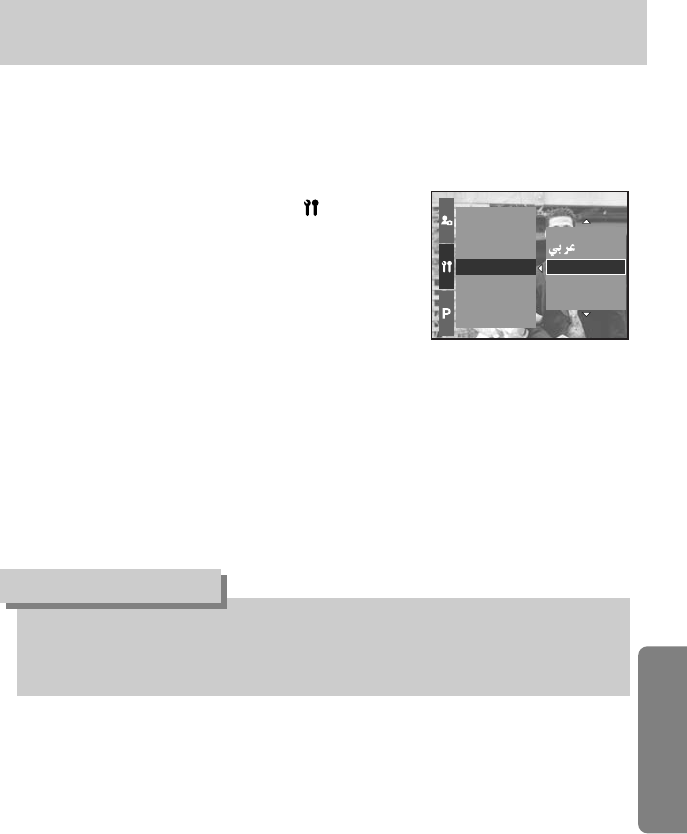
●How to set the language
1. Press the Menu button and select the [ ] menu tab by
pressing the Up/ Down button.
2. Press the Right button and select the [Language] menu by
pressing the Up/ Down button.
3. Press the Right button and select a desired sub menu by
pressing the Up/ Down button.
LANGUAGE sub menu : English, Korean, French, German,
Spanish, Italian, S. Chinese, T. Chinese, Japanese, Russian,
Portuguese, Dutch, Danish, Swedish, Finnish.
※The following languages are inserted depending on sales region.
- Type A : Thai, BAHASA(MALAY/ INDONESIAN), Arabic.
- Type B : Czech, Polish, Hungarian.
4. Press the OK button to set the setting.
■There is a choice of languages that can be displayed on the LCD. Even if the battery or AC
adapter are removed and inserted again, the language setting will be preserved.
File
Power Off
LCD Off
Language
Format
Date & Time
Date Type
BAHASA
ENGLISH
한국어
FRANÇAIS
Language
●ype A or B language can be inserted depending on sales region
- Type A : Thai, Bahasa, Arabic
- Type B : Hungarian, Polish, Czech
INFORMATION
《116》
●How to format the memory card
1. Press the Menu button and select the [ ] menu tab by
pressing the Up/ Down button.
2. Press the Right button and select the [Format] menu by
pressing the Up/ Down button.
3. Press the Right button and select a desired sub menu by
pressing the Up/ Down button.
If [No] is selected : The memory card will not be formatted.
If [Yes] is selected : A [Processing!] message appears and
the memory card will be formatted. If you ran FORMAT in Play mode,
a [No Image!] message will appear.
■This is used for formatting the memory card. If you run [Format] on the memory card, all
images, including the protected images, will be deleted. Be sure to download important
images to your PC before formatting the memory card.
●Be sure to run [Format] on the following types of memory card.
- A new memory card, or an unformatted memory card.
- A memory card that has a file this camera can't recognise or one that has been taken
from another camera.
●Always format the memory card using this camera. If you insert a memory card that has
been formatted using other cameras, memory card readers, or PCs, you will get a [Card
Error!] message.
INFORMATION
Power Oil
LCD Off
Language
Format
Date & Time
Date Type
World Time
No
Yes
Set:OK
Formatting a memory card
《117》
■You can change the date and time that will be displayed on
the captured images.
●How to set the Date & Time
1. Press the Menu button and select the [ ] menu tab by
pressing the Up/ Down button.
2. Press the Right button and select the [Date & Time]
menu by pressing the Up/ Down button.
3. Press the Right button and select a desired sub menu by
pressing the Up/ Down button.
- Left/ Right button : Selects the year/ month/ day/ hour/
minute item.
- Up/ Down button : Changes the setting value
4. Press the OK button to set the setting.
Setting up the date type
■You can change the date type that will be displayed on the
captured images.
●How to set the date type
1. Press the Menu button and select the [ ] menu tab by
pressing the Up/ Down button.
2. Press the Right button and select the [Date Type] menu
by pressing the Up/ Down button.
3. Press the Right button and select a desired sub menu by
pressing the Up/ Down button.
- Up/ Down : Changes the date type
4. Press the OK button to set the setting.
LCD Off
Language
Format
Date & Time
Date Type
World Time
Imprint
2005 / 07 / 01
13 : 00
Language
Format
Date & Time
Date Type
World Time
Imprint
Sound
dd/mm/yy
yy/mm/dd
mm/dd/yy
Set:OK
Date & Time
2005 / 07 / 01 13 : 00
Setting up the Date & Time
《118》
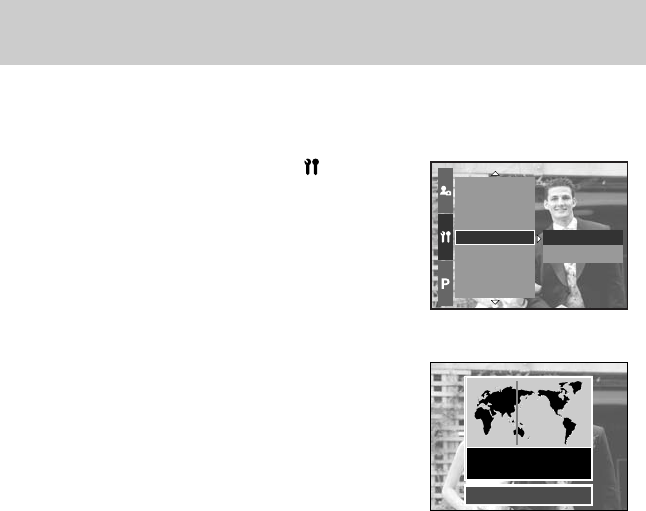
■You can check the time of cities of various nations.
●How to check the time
1. Press the Menu button and select the [ ] menu tab by
pressing the Up/ Down button.
2. Press the Right button and select the [World Time] menu
by pressing the Up/ Down button.
3. Press the Right button and a world map will display as
shown alongside.
- Left/ Right or Rear jog dial (JOG2) : moves the red line
to check the time
of various cities.
4. Press the OK button to set the setting.
Format
Date & Time
Date Type
World Time
Imprint
Sound
Brightness
Seoul
Tokyo
Set:OK
Seoul, Tokyo
2005/07/01 13:00 PM
World time
《119》
■There is an option to include Date/Time on still images.
●How to imprint the date & time
1. Press the Menu button and select the [ ] menu tab by
pressing the Up/ Down button.
2. Press the Right button and select the [Imprint] menu by
pressing the Up/ Down button.
3. Press the Right button and select a desired sub menu.
[Off] : The DATE & TIME will not be imprinted on
the image file.
[Date] : Only the DATE will be imprinted on the image file.
[Date&Time] : The DATE & TIME will be imprinted on the image file.
4. Press the OK button to set the setting.
●The Date & Time are imprinted at the bottom right side of the still image.
●The date will be imprinted as a DATE TYPE setting.
●TIME is imprinted in the following way : [Hour : Minute] and hours are shown using the 24
hour clock.
●The imprint function is applied only to still images except for the images taken in the [Text]
scene mode.
INFORMATION
Date & Time
Date Type
World Time
Imprint
Sound
Brightness
Video Out
Date & Time
Off
Date
Imprinting the recording date
《120》
■If you set the operation sound to ON, various sounds will be activated for camera startup,
when button are pressed, and if there is a card error, so that you can be aware of the camera
operation status.
●How to set the sound
1. Press the Menu button and select the [ ] menu tab by
pressing the Up/ Down button.
2. Press the Right button and select the [Sound] menu by
pressing the Up/ Down button.
3. Press the Right button and select a desired sub menu.
[Sound] sub menu : Off/ Low/ Medium/ High
4. Press the OK button to set the setting.
LCD brightness
■You can adjust the Rear, Finder and Top LCD brightness.
●How to set the brightness
1. Press the Menu button and select the [ ] menu tab by
pressing the Up/ Down button.
2. Press the Right button and select the [Brightness] menu
by pressing the Up/ Down button.
3. Press the Right button and select a desired LCD by
pressing the Up/ Down button.
4. Press the Right button and select a desired sub menu.
- [Brightness] sub menu : Dark, Normal, Bright
5. Press the OK button to set the setting.
Date Type
World Time
Imprint
Sound
Brightness
Video Out
Quick View
World Time
Imprint
Sound
Brightness
Video Out
Quick View
Auto Rotating
Top LCD
Main LCD
EVF
Dark
Normal
Bright
Low
Medium
High
Off
Sound
《121》
■The Movie output signal from the camera can be NTSC or PAL.
Your choice of output will be governed by the type of device (monitor or TV, etc.) to which the
camera is connected. PAL mode can support only BDGHI.
●How to set the video out type
1. Press the Menu button and select the [ ] menu tab
by pressing the Up/ Down button.
2. Press the Right button and select the [Video Out] menu
by pressing the Up/ Down button.
3. Press the Right button and select a desired LCD
by pressing the Up/ Down button.
- [Video Out] sub menu : NTSC, PAL
4. Press the OK button to set the setting.
●NTSC : U.S.A, Canada, Japan, South Korea, Taiwan, Mexico.
●PAL : Australia, Austria, Belgium, China, Denmark, Finland, Germany, U.K., Holland,
Italy, Kuwait, Malaysia, New Zealand, Singapore, Spain, Sweden, Switzerland,
Thailand, Norway.
●When using a TV as an external monitor, you will need to select the external or AV
channel of the TV.
●There will be a digital noise on the external monitor, but it is not a malfunction.
●If the image is not in the centre of the screen, use the TV controls to centre it.
●When the camera is connected to an external monitor, the menu will be visible on the
external monitor and the menu functions are the same as those indicated on the LCD
INFORMATION
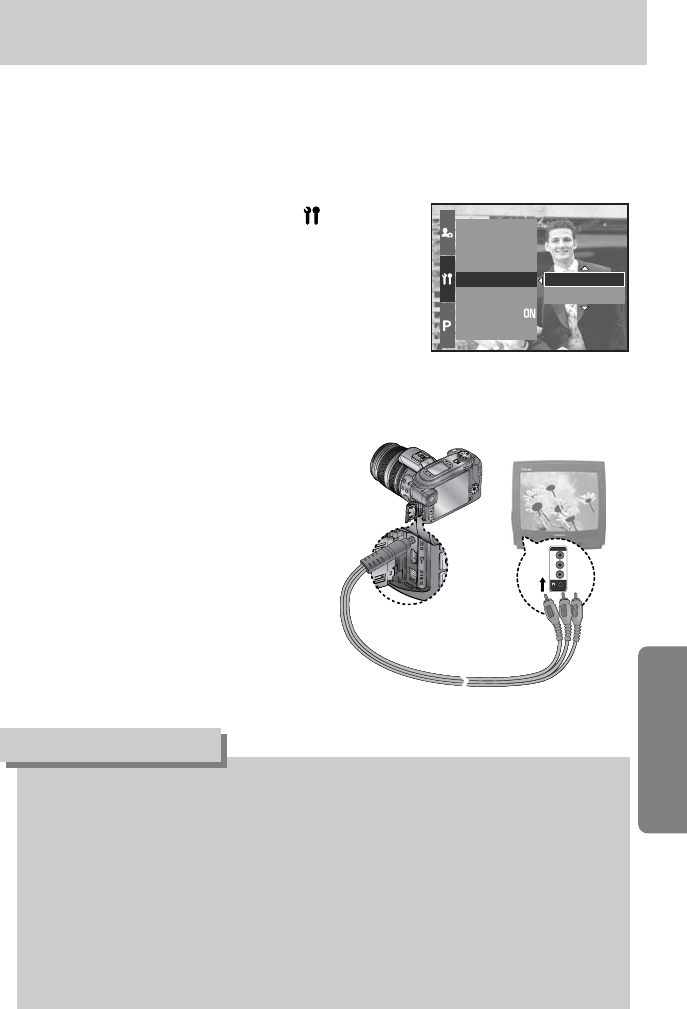
●Connecting to an external monitor
In RECORDING/ PLAY mode, you can
view the stored still images or movie clips
by connecting the camera to an external
monitor via the AV cable. When the
camera is connected to an external
monitor, the LCD monitor will be turned
off automatically.
Yellow Colour-Video
White Colour-Voice (Stereo)
Imprint
Sound
Brightness
Video Out
Quick View
Auto Rotating
USB
NTSC
PAL
Selecting Video out type

《122》
■If you enable Quick View before capturing an image, you can view the image you just
captured on the LCD for the duration set in the [Quick View] setup. Quick view is possible
only with still images.
●How to set the quick view
1. Press the Menu button and select the [ ] menu tab by
pressing the Up/ Down button.
2. Press the Right button and select the [Quick View] menu
by pressing the Up/ Down button.
3. Press the Right button and select a desired sub menu by
pressing the Up/ Down button.
[Off] : The quick view function can’t be activated.
[0.5, 1, 3 sec] : The captured image is briefly displayed during the selected time.
4. Press the OK button to set the setting.
Sound
Brightness
Video Out
Quick View
Rotating
USB
Reset All
Off
0.5 sec
1 sec
3 sec
5 sec
Quick view
《123》
■
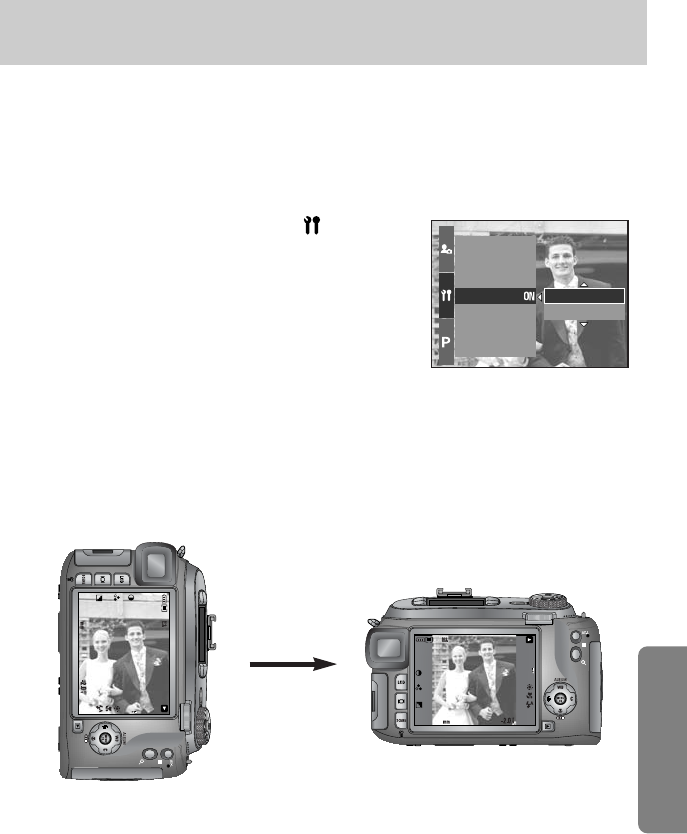
When an image taking vertically plays back, the auto rotating sensor will rotate the image correctly.
■You can view the reversed image correctly without rotating the image.
●How to set the auto rotating sensor
1. Press the Menu button and select the [ ] menu tab
by pressing the Up/ Down button.
2. Press the Right button and select the [Auto Rotating]
menu by pressing the Up/ Down button.
3. Press the Right button and select a desired sub menu
by pressing the Up/ Down button.
- [Off] : The image will not be rotated automatically.
- [On] : The image will be rotated automatically.
4. Press the OK button to set the setting.
Brightness
Video Out
Quick View
Auto Rotating
USB
Reset All
File
On
Off
※Selecting the [On] sub menu
28
100-0009
2005.07.01
13:00 PM
1/30
F2.2
100
28
1/30
F2.2
100
100-0009
2005.07.01
13:00 PM
[ Taking an image ] [ Playing back the image ]
Auto rotating sensor
《124》
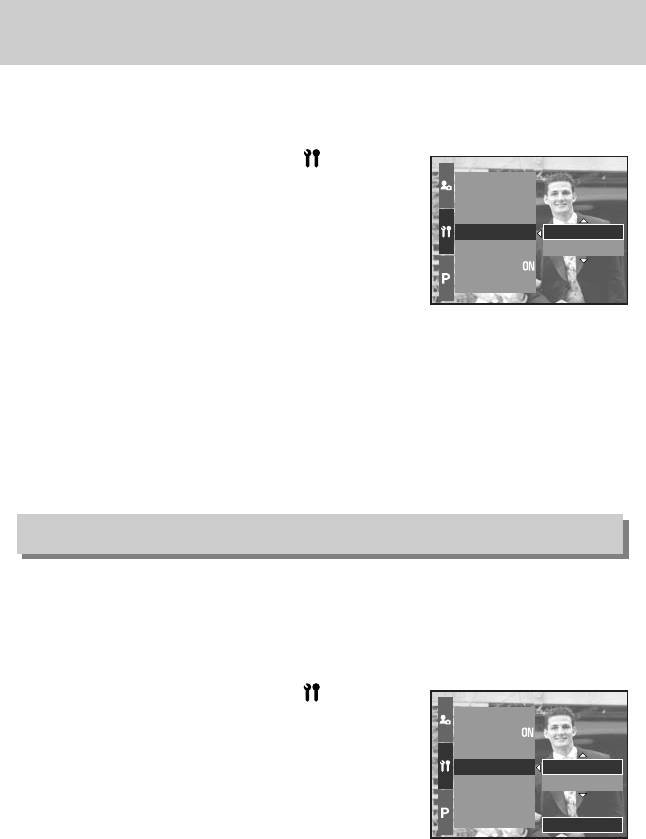
■
You can select an external device to which you want to connect the camera using the USB cable.
●How to set the external device
1. Press the Menu button and select the [ ] menu tab
by pressing the Up/ Down button.
2. Press the Right button and select the [USB] menu by
pressing the Up/ Down button.
3. Press the Right button and select a desired sub menu
by pressing the Up/ Down button.
- [Computer] : Select this if you want to connect the camera
to your PC.
Refer to page 120 for instructions on how to connect the camera to your PC.
- [Printer] :
Select this if you want to connect the camera to your printer.
Refer to page 83 for instructions on how to connect the camera to your printer.
4. Press the OK button to set the setting.
Initialisation
■All camera menu and function settings will be restored to their default values.
However, values for DATE/ TIME, LANGUAGE, and VIDEO OUT will not be changed.
●How to set the initialisation
1. Press the Menu button and select the [ ] menu tab
by pressing the Up/ Down button.
2. Press the Right button and select the [Reset All] menu
by pressing the Up/ Down button.
3. Press the Right button and select a desired sub menu
by pressing the Up/ Down button.
If [No] is selected : Settings will not be restored to their
defaults.
If [Yes] is selected : A confirmation window will display. Select the [Yes] menu by pressing
the Up/ Down button. All settings will be restored to their defaults.
Quick View
Auto Rotating
USB
Reset All
File
Power Off
LCD Off
No
Yes
Set:OK
Video Out
Quick View
Auto Rotating
USB
Reset All
File
Power Off
Computer
Printer
Connecting an External Device (USB)
《125》
■You can set up a start up image, start up sound, shutter sound and sound effect. The items
indicated by are default settings.
* Menus are subject to change without prior notice.
Menu tab Main menu Sub menu Page
Off Logo
User Image -
Off Sound 1
Sound 2 Sound 3
Off Shutter 1
Shutter 2 Shutter 3
Off Effect 1
Effect 2 Effect 3
Start Image
Start Sound
Shutter Sound
Sound Effect
p.97
p.98
p.98
p.98
Setting up the MYCAM menu
《126》
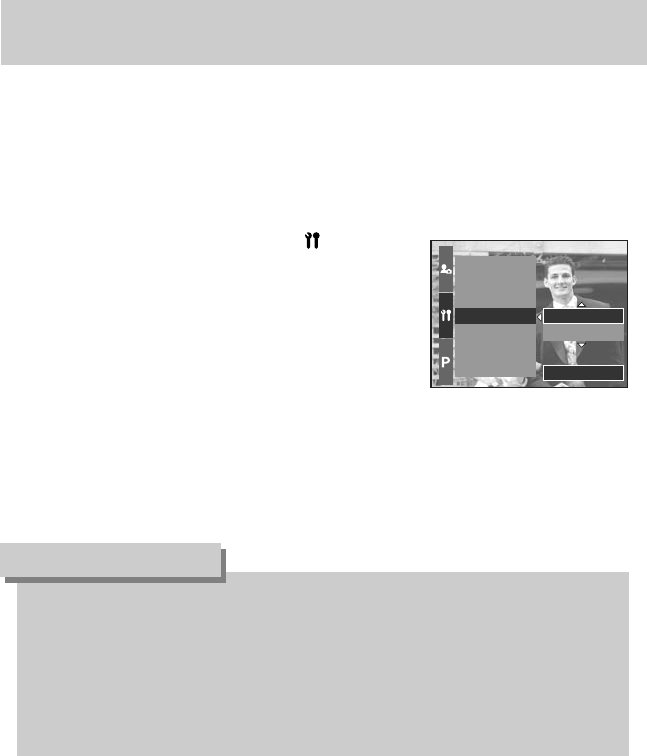
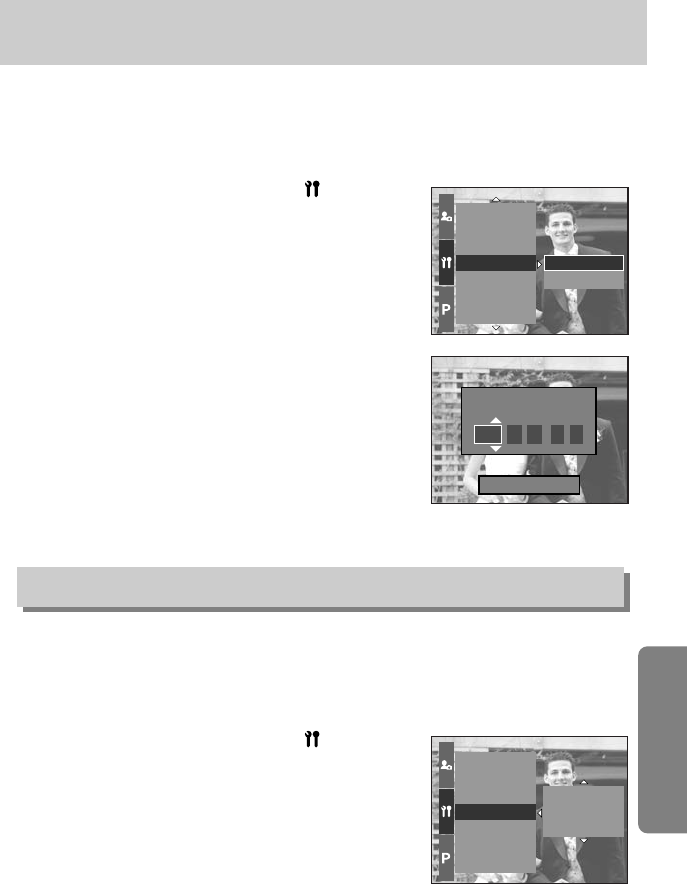
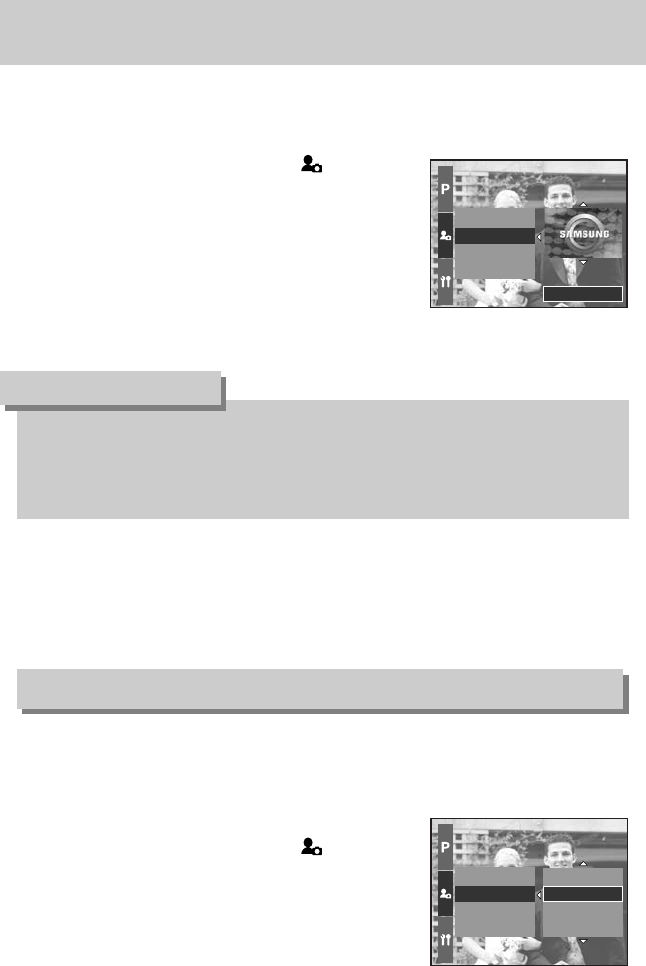
●How to set the start up image
1. Press the Menu button and select the [ ] menu tab
by pressing the Up/ Down button.
2. Press the Right button and select the [Start Image] menu
by pressing the Up/ Down button.
3. Press the Right button and select a desired sub menu
by pressing the Up/ Down button.
4. Press the OK button to set the setting.
■You can select the image that is first displayed on the LCD whenever the camera is turned on.
●Use a saved image for the start-up image with the [User Image] in the [Resize] menu in
the play mode.
●The start-up image will not be deleted by deleting all images or Format function.
●The User images will be deleted by [Reset] menu.
INFORMATION
Sound Effect
Start Image
Start Sound
Shutter Sound
Set:OK
■You can select the sound that is activated whenever the
camera is turned on.
●How to set the start up sound
1. Press the Menu button and select the [ ] menu tab
by pressing the Up/ Down button.
2. Press the Right button and select the [Start Sound] menu
by pressing the Up/ Down button.
3. Press the Right button and select a desired sub menu
by pressing the Up/ Down button.
4. Press the OK button to set the setting.
Start Image
Start Sound
Shutter Sound
Sound Effect
Off
Sound 1
Sound 2
Sound 3
Start up sound
Start up image
《127》
■You can select the shutter sound.
●How to select the shutter sound
1. Press the Menu button and select the [ ] menu tab
by pressing the Up/ Down button.
2. Press the Right button and select the [Shutter Sound]
menu by pressing the Up/ Down button.
3. Press the Right button and select a desired sub menu
by pressing the Up/ Down button.
4. Press the OK button to set the setting.
Start Sound
Shutter Sound
Sound Effect
Start Image
Off
Sound 1
Sound 2
Sound 3
Shutter Sound
Sound Effect
Start Image
Start Sound
Effect 3
Off
Effect 1
Effect 2
■You can select a type of sound when the sound is activated.
●How to set the type of sound
1. Press the Menu button and select the [ ] menu tab
by pressing the Up/ Down button.
2. Press the Right button and select the [Shutter Sound]
menu by pressing the Up/ Down button.
3. Press the Right button and select a desired sub menu
by pressing the Up/ Down button.
4. Press the OK button to set the setting.
Sound type
Shutter sound

《128》
Be sure to observe the following precautions!
■This unit contains precision electronic components. Do not use or store this unit in the
following locations.
- Areas exposed to severe changes in temperature and humidity.
- Areas exposed to dust and dirt.
- Areas exposed to direct sunlight or the inside of a vehicle in hot weather.
- Environments where there is high magnetism or excessive vibration.
- Areas with high explosives or highly flammable materials.
■Do not let the unit come into contact with dust, vinyl goods, or chemicals, such as
insecticides, for an extended period of time.
■Sand can be particularly troublesome to cameras.
- Do not let sand get inside the unit when using it on beaches, coastal dunes, or other areas
where there is lots of sand.
- Doing so may result in failure or may permanently render the unit unusable.
■Handling the camera
- Never drop the camera or subject it to severe shocks or vibrations.
- This camera is not waterproof. To avoid dangerous electrical shocks, never hold or operate
the camera with wet hands.
- If you use this camera in wet places, such as beach or pool, do not let water or sand get
inside the camera.
■Extremes in temperature may cause problems.
- If the camera is transferred from a cold to a warm and humid environment, condensation
can form on the delicate electronic circuitry. If this occurs, turn the camera off and wait for at
least 1 hour until all moisture is dispersed. Moisture build up can also occur in the memory
card. If this happens, turn off the camera and remove the memory card. Wait until the
moisture has dispersed.
Important notes

《129》
■Caution on Using the Lens
- If the lens is subjected to direct sunlight, it could result in discoloration and deterioration of
the image sensor.
- Pay attention not to get fingerprints or foreign substances on the surface of the lens.
■If the digital camera is not used for a long period, an electric discharge can occur.
It is a good idea to remove the batteries and the memory card if you do not intend using the
camera for an extended period of time.
■If the camera is exposed to an electronic interference, it will turn itself off to protect the
memory card.
■Camera Maintenance
- Use a soft brush (available from photo stores) to gently clean the lens and LCD assemblies.
If this does not work, lens-cleaning paper with lens cleaning fluid can be used.
Clean the camera body with a soft cloth. Do not allow this camera to come into contact with
solvent materials such as benzol, insecticide, thinners etc. This may damage the body shell
of the camera and also affect its performance. Rough handling can damage the LCD
monitor. Take care to avoid damage and keep the camera in its protective carry case at all
times when not in use.
■Do not attempt to disassemble or modify the camera.
■Under certain conditions, static electricity can cause the flash unit to fire. This is not harmful
to the camera and is not a malfunction.
■
When images are uploaded or downloaded, the data transfer may be affected by static electricity.
In this case, disconnect and re-connect the USB cable before trying the transfer again.
■Before an important event or going on a trip, you should check the camera condition.
- Take a picture for testing the camera condition and prepare extra batteries.
- Samsung cannot be held responsible for camera malfunctions.
Important notes

《130》
■There are several warnings that may appear on the LCD display.
Card Error !
ㆍMemory card error
→Turn off the camera power and turn it on again
→Insert the memory card again
→Insert the memory card and format the memory card (p.91)
No Card !
ㆍA memory card is not inserted
→Insert a memory card
ㆍThe camera can’t recognise the memory card
→Insert the memory card again
→Turn off the camera power and turn it on again
Card Full !
ㆍThere is insufficient memory capacity to take an image
→Insert a new memory card
→Delete unnecessary image files to free up some memory
No Image !
ㆍThere are no images stored on the memory card
→Take images
→Insert a memory card that is holding some images
File Error !
ㆍFile error
→Format the memory card
ㆍMemory card error
→Contact a camera service centre
Low Battery !
ㆍThere is low battery capacity
→Insert charged battery
Warning indicator

《131》
Set USB
ㆍ[USB] sub menu and connected device are not matched.
→Reconfigure [USB] in the [Setup] menu.
Out Of Number
ㆍWhen selecting too many printing pages in the PictBridge menu.
→Select printing page within the limitation.
■Please check the following
The camera doesn’t switch on
ㆍThere is low battery capacity.
→Insert charged battery.
ㆍBatteries are inserted incorrectly with the reverse polarities.
→Insert the batteries according to the polarity marks (+, -).
The camera power ceases while in use.
ㆍThe batteries are exhausted.
→Insert charged battery.
ㆍThe Camera is turned off automatically.
→Turn off the camera power and turn it on again.
Batteries drain quickly
ㆍThe Camera is being used in low temperatures.
→Keep the camera in warm conditions (i.e. inside a coat or jacket) and only remove it in
order to take images.
Before contacting a service centre
Warning indicator

《132》
Camera does not take images when pressing the Shutter button
ㆍThere is insufficient memory capacity.
→Delete unnecessary image files
ㆍThe memory card has not been formatted
→Format the memory card (p.91)
ㆍThe memory card is exhausted
→Insert a new memory card
ㆍThe memory card is locked
→Refer to [Card Locked !] error message (p.101)
ㆍThe camera’s power is off
→Turn the camera power on
ㆍThe batteries are exhausted
→Insert charged battery.
ㆍBatteries are inserted incorrectly with the reverse polarities.
→Insert the batteries according to the polarity marks (+, -).
The camera suddenly stops working while in use
ㆍThe camera was stopped due to a malfunction
→Remove/ re-insert batteries and switch the camera on
The images are unclear
ㆍA picture was taken within 0.8 m from the subject without setting an appropriate macro mode
→If the subject is closer than 0.8m, select macro shot mode
ㆍTaking a picture beyond the flash range
→Take a picture within the flash range
ㆍThe lens is smudged or dirty
→Clean the lens
The flash does not fire
ㆍFlash off mode has been selected
→Dis-engage flash off mode
ㆍThe camera mode can’t use the flash
→Refer to the FLASH instruction (p.34)
Incorrect date and time is displayed
ㆍThe date and time have been set incorrectly or the camera has adopted the default settings
→Reset the date and time correctly
Before contacting a service centre

《133》
The images don't play back
ㆍIncorrect file name (Violation of DCF format)
→Do not change the image file name
Colour of image is different to the original scene
ㆍWhite balance setting is incorrect
→Select appropriate White balance
Images are too bright
ㆍExposure is excessive
→Reset exposure compensation
No image on external monitor
ㆍThe external monitor has not been connected properly with the camera
→Check the connection cables
ㆍThere are incorrect files in the memory card
→Insert a memory card that has correct files
When using the PC’s explorer, the [Removable Disk] file does not show
ㆍCable connection is incorrect
→Check the connection
ㆍThe camera is off
→Turn the camera on
ㆍThe operating system is not Windows 98, 98SE, 2000, ME, XP/ Mac OS 9.2 ~ 10.3.
Alternatively the PC does not support USB
→Install Windows 98, 98SE, 2000, ME, XP/ Mac OS 9.2 ~ 10.3 to PC that supports USB
ㆍThe camera driver is not installed
→Install a [USB Storage Driver]
Before contacting a service centre
《134》
Type 2/3″CCD
Effective Pixel Approx. 8.0 Mega-pixel
Total Pixel Approx. 8.3 Mega-pixel
Schneider Lens f = 7.2 ~ 108.0mm (35mm film equivalent : 28~420 mm)
F No. F2.2 ~ F4.6
Still Image mode : 1.0X ~ 4.0X
Play mode : 1.0X ~ 10.0X (depends on image size)
Electronic Viewfinder
0.44” color TFT LCD (235,000 dot)
Main : 3.5" color TFT LCD (235,000 dot)
Top : 1.44” Wide color TFT LCD (115,000 dot, Status or
Preview selectable)
Type TTL auto focus (9 points multi-focusing)
Single AF, Continuous AF, Manual focus
AF lock, AF area select, Direct manual focus available
Normal : 50cm ~ infinity (Wide), 3.5m ~ infinity (Tele)
Macro : 10 ~ 70cm (Wide), 1.5 ~ 3.7m (Tele)
Super Macro : 3 ~ 70cm (focal length 50~100mm)
Type Mechanical and Electronic shutter
Speed 1 ~ 1/4,000 sec. (Manual mode : 30 ~ 1/4,000 sec.)
Program AE, Shutter Priority AE, Aperture Priority AE or Manual Exposure
Metering : Multi, Center-weighted, Spot
AE lock available
Compensation ±2EV (1/3EV steps)
ISO Equivalent Auto, 50, 100, 200, 400, 800
High Speed Mode Up to max ISO 800 automatically
Auto, Auto & Red-eye reduction, Fill-in, Slow sync, Slow sync &
Red-eye reduction, Flash off
Flash compensation : ±2EV (1/3EV steps)
Wide : 0.7 ~ 7.0m (ISO Auto), Tele : 1.5 ~ 4.0m (ISO Auto)
Recharging Time
Approx. 5 sec.
External Flash (optional)
SEF-42A : DC 6V, 4 x AA Alkaline
Sharpness Soft, Normal, Vivid
Normal, B&W, Sepia, Negative
Contrast adjust, Saturation adjust
Color Space sRGB, Adobe RGB
Auto, Daylight, Cloudy, Fluorescent_H, Fluorescent_L,
Tungsten, Custom 1, Custom 2, Color temperature adjust
Voice Recording Voice Memo in Still Image (max. 10 sec.)
Date Imprinting Date&Time, Date, Off (user selectable)
Modes : Auto, Program, A,S,M, Myset, Movie, Scene
* Scene : Night, Portrait, Children, Landscape,
Close-up, Text, Sunset, Dawn, Backlight,
Fireworks, Beach & Snow
Continuous :
Single, Continuous (1.0fps), Continuous HS
(2.5fps), Continuous UHS (10fps with 1 Mega-
pixel quality), Interval (1~60 mins up to 99 frames)
Self-timer : 2 sec., 10 sec., Double, Remote control 0 sec.,
Remote control 2 sec.
Bracketing : Exposure, Focusing, White Balance (3 frames or 5
frames selectable)
Image Sensor
Lens
Focal Length
Range
LCD Monitor
Control
Modes
Modes
Range
DigitalZoom
Focusing
Shutter
Exposure
Flash
Shooting
Effect
White Balance
Viewfinder
Still Image
Specifications
《135》
With stereo audio (recording time : memory capacity dependent)
Size : 640x480, 320x240, 160x120
Frame rate : 25 fps, 15 fps
CompactFlash Card Type I or Type II (Up to 4GB guaranteed)
Still Image : RAW(DNG), TIFF, JPEG (DCF), EXIF 2.2,
DPOF 1.1, PictBridge 1.0
Movie Clip : AVI (MJPEG)
Audio : WAV
L : 3264x2448, 3:2 : 3264x2176, 16: 9 : 3264x1840
M1 : 2400x1800 M2 : 1632x1224 , S1 : 1024x768, S2 : 640x480
L :
3:2 :
16:9 :
M1 :
M2 :
S1 :
S2 :
* These figures are measured under Samsung’s standard
conditions and may vary depending on shooting conditions
and camera settings.
Type
Single image, Thumbnails, Slide show, Movie Clip, Album Organization
Editing Trimming, Resizing, Rotating
Digital output connector : USB 2.0
Audio : Stereo
Video output : NTSC, PAL (user selectable)
DC power input connector : 7.4V
Rechargeable battery : 7.4V Li-ion battery(SLB-1974),
Charger : SBC-L4
AC Adaptor : DC 8.4V, 1.5A (optional)
* Included battery may vary depending on sales region.
Dimensions (WxHxD) 135.5x87x78.6mm (144.6mm, including lens protrusion)
Weight 약850g(전지및카드제외)
Operating Temperature 0 ~ 40 °C
Operating Humidity 5 ~ 85%
Camera Driver
Storage Driver (Windows98/98SE/2000/ME/XP Mac OS 10.0 higher )
Application Digimax Master, Digimax Reader
The world’s longest built in 15X zoom - 28mm wide-angle
and 15X ultra high zoom capability
The world’s largest digital camera LCD - 3.5”TFT with 230K Pixels
The world’s largest-capacity lithium-ion battery - 7.4V 1900mAh
The world’s first top TFT LCD for waist level shooting - 1.44” wide type
High Speed mode suppressing camera shaking
* Specifications are subject to change without prior notice.
* All trademarks are the property of their respective owners.
Capacity
(64MB)
Media
File Format
Image Size
Storage
Image Play
Power Source
Special Features
Software
Interface
Specifications
Movie Clip