Hisense Electric LCDC0008 Part15 Subpart B-LCD TV User Manual
Hisense Electric Co., Ltd. Part15 Subpart B-LCD TV
Contents
- 1. W9HLCDC0008_User Manual 1
- 2. W9HLCDC0008_User Manual 2
- 3. W9HLCDC0008_User Manual 3_Rev.1
- 4. W9HLCDC0008_User Manual 4
W9HLCDC0008_User Manual 2
6Using the remote control
Using the remote control
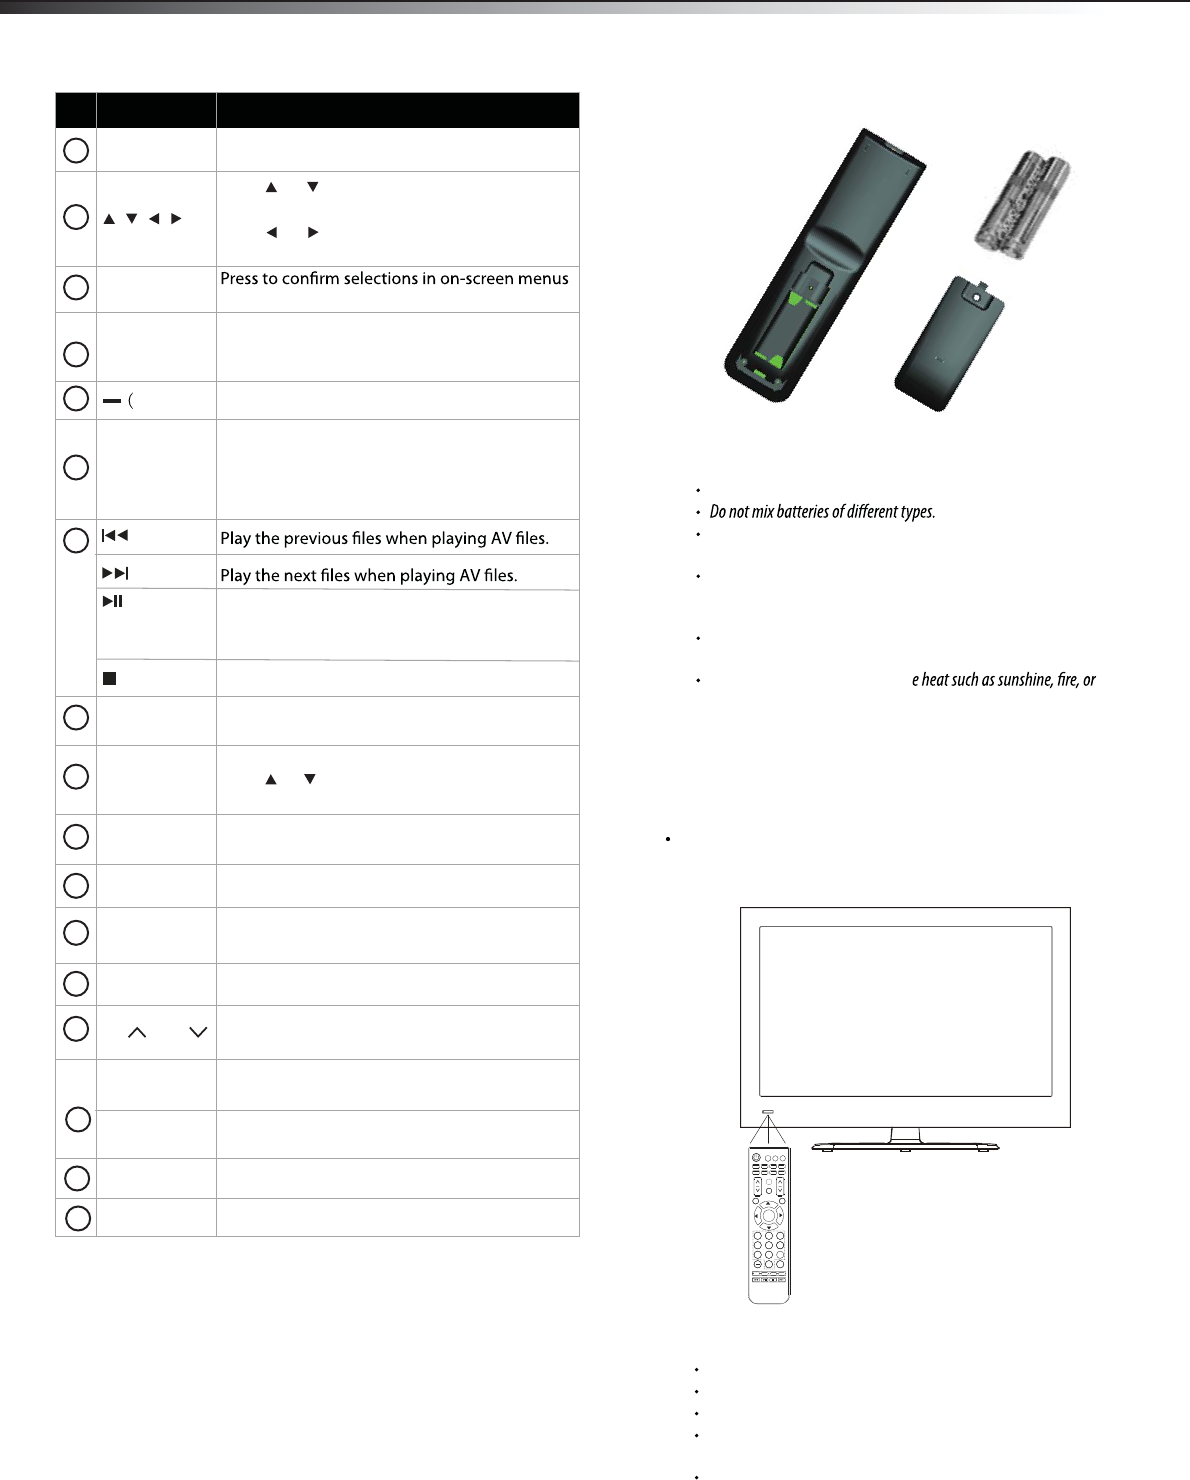
Installing remote control batteries
To install remote control batteries:
1Press down on the battery compartment cover lock, then remove
the remote control cover.
2Insert two AAA batteries into the battery compartment. Make
sure that the + and – symbols on the batteries match the +
and – symbols in the battery compartment.
3Replace the cover. Make sure that the lock snaps into place.
4 Install screw.
Battery precautions:
Dispose of batteries as hazardous waste.
Do not mix old and new batteries. Mixing old and new batteries can
shorten the life of new batteries and can cause old batteries to leak.
Remove batteries as soon as they become inoperable. Chemicals that
can leak from the batteries can cause a rash. If the batteries leak,
clean the battery compartment with a cloth.
If the remote control is not used for an extended period of time,
remove the batteries.
Do not expose batteries to excessiv
other heat sources.
MENU Display the main menu.Back menu display.
Press or to move up or down in on-screen
menus.
Press or to move left or right in on-screen
menus or to adjust menu settings.
ENTER or to open sub-menus.
Numbers
dash)
Press the number buttons to enter channel
numbers or the parental control password.
For more information.
Press to select a digital sub-channel.
Program guide
(EPG) function
buttons
After pressing the GUIDE button in the digital
TV channel option, the same color buttons will
appear with explanations in the on-screen
display (OSD). Follow the steps shown in the
OSD.
TV Press to select the TV as the video input source.
Select screen mode.
INPUT Press to open the INPUT SOURCE menu, then
press or to select the video input source
you want. For more information.
ASPECT
GUIDE
CH / CH Press to go to the next or previous channel in
the channel list. For more information.
Item Name Description
7
8
9
10
11
12
13
14
15
16
17
18
19
20
INFO Display the current channel number.
MUTE
DMP
Press to mute the sound. Press again to restore
Press to select the DMP as the video input source.
the sound.
EXIT Press to close the on-screen menu.
LAST Return to previous channel.
SLEEP Press to set the sleep timer.
Press to open the DTV program guide(if
available) .For more information.
21
22
23
Aiming the remote control
To aim the remote control:
Point the remote control towards the remote sensor on the front
of your TV.
Notes:
Do not expose the remote control to shock or liquids.
Do not use the remote control in an area with high humidity.
Do not place the remote control in direct sunlight.
Do not place objects, such as furniture, between the remote control
and the remote sensor.
The remote control may not work if direct sunlight or bright light
shines on the remote sensor. Either move your TV or change the angle
at which you use the remote control.
INPUT
ENTER
7 8
0
EN-31205
ASPECT
GUIDE
INFO
MENU
CH
VOL
DMP
CCD
MTS/SAP
SLEEP
SOUND
EXIT
TV
1 23
5 6 4
7 8 9
0
LAST
PICTURE
MUTE
LHD32V77MH
When you are listening to music and enjoy
pictures.You can switch between playing and
pause through this button.
Exit the current state.
7
Making connections
Make sure that you only use the type of power source indicated on the
marking label.
Always unplug the power cord when not using the TV for a long
period of time.
Selecting a location
You should select a location for the TV:
Where direct light does
That has indirect and soft lighting
Where the TV has access to an antenna or cable TV connection
Where the TV has access to a power outlet
Note:
may cause eye strain.
Connecting an HDMI device
Note: If your device has an HDMI connection, we recommend you use it to
get the best picture and sound quality possible.
To connect an HDMI device:
Connect one end of an HDMI cable (not included) to the HDMI 1
or HDMI 2 jack on the back of your TV, then connect the other end
of the cable to the HDMI OUT jack on the HDMI device.
Note: To connect a DVI device, use a DVI to HDMI adapter cable to connect
to the HDMI jack on the TV, then connect an audio cable to the
PC AUDIO jack on the back of the TV.
To play from the HDMI device:
1Turn on the TV, then press INPUT. The INPUT SOURCE menu
opens.
2Press or to select HDMI1,HDMI2,HDMI3, then press
ENTER.
3Turn on the HDMI device, then set it to the correct mode. Refer to
the instructions that came with the HDMI device.
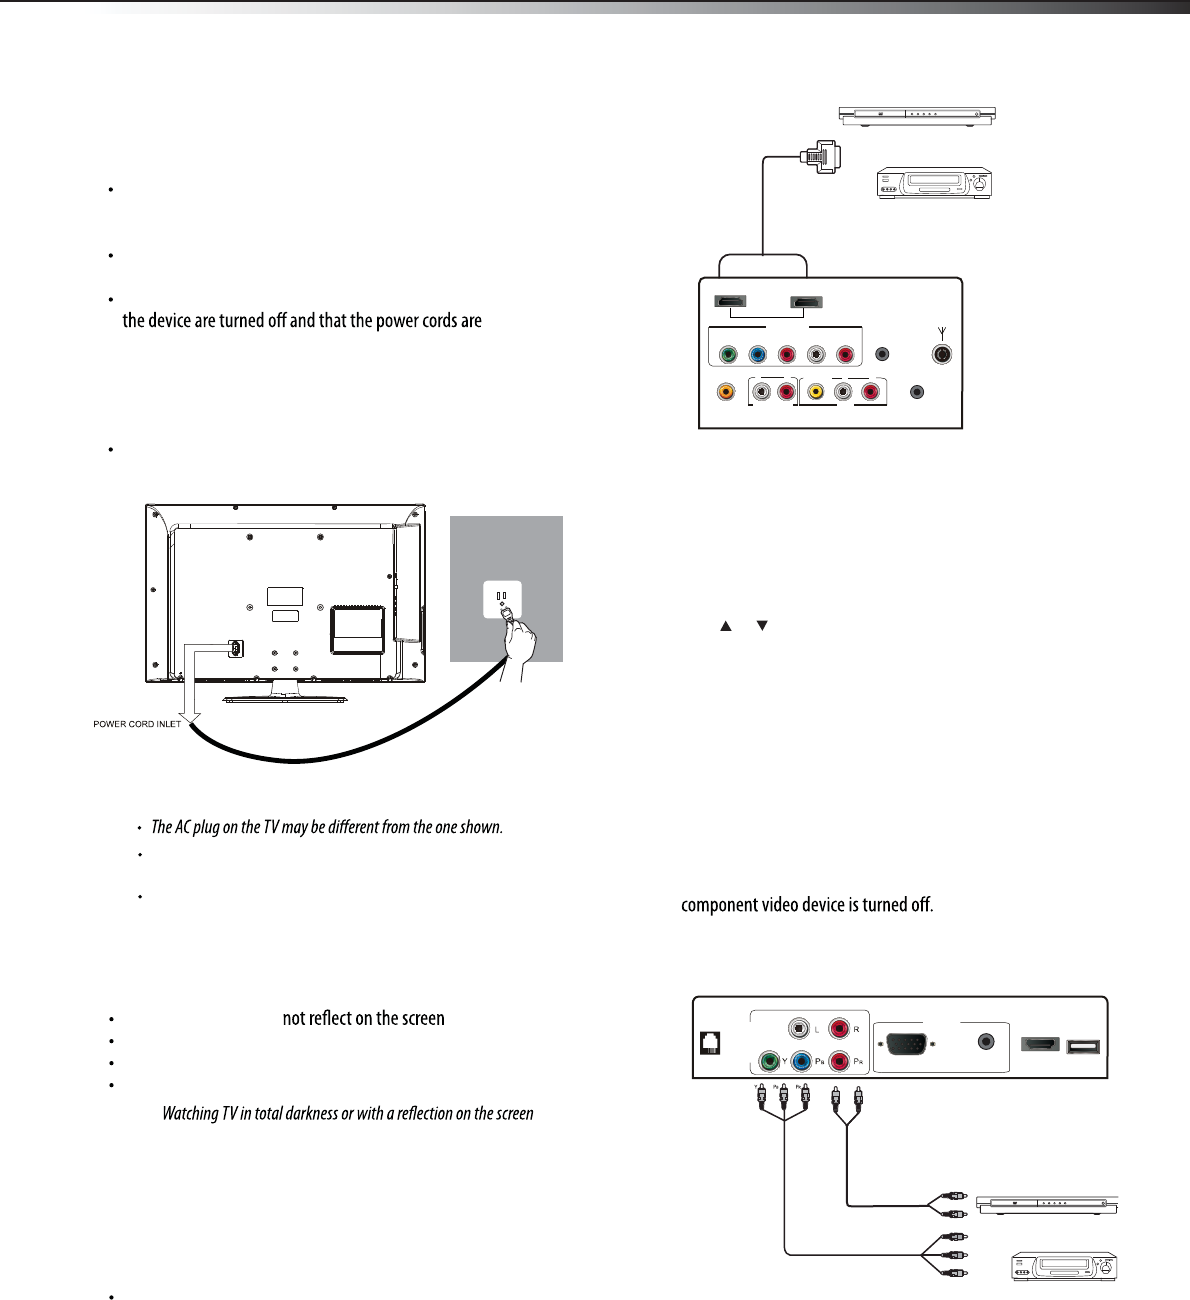
Connecting a component video device
Component cables often have red, green, and blue color-coded video
connectors and red and white audio connectors. Match the colors when
making connections.
To connect a component video device:
1Make sure that your TV’s power cord is unplugged and the
2Connect a component video cable to the COMPONENT OUT jacks
on the component video device.
3Connect the other end of the component video cable to the
COMPONENT jacks on the back/side of your TV.
4Connect an audio cable to the AUDIO OUT jacks (L/R) on the
component device.
5Connect the other end of the audio cable to the COMPONENT
AUDIO-R and AUDIO-L jacks on the back/side of your TV.
Y BR
L R
Component video device
Component video cable
Audio cable
Making connections
Before you make any connections:
Check the plugs on the ends of cables to make sure that they are
the correct type before you try plugging them into jacks on the
TV.
Make sure that all plugs are securely inserted into the jacks.
Loose connections can result in image or color problems.
When connecting devices to the TV, make sure that the TV and
unplugged.
Connecting the power
To connect the power cord:
Connect the power cable to the AC IN jack on the back of the TV,
then connect the other end to a power outlet.
Notes:
Power cord
Power outlet
HDMI device
HDMI cable
LHD32V77MH
HDMI2
COMP 2
HEADPHONE
AUDIO OUT
VIDEO L RL R
AV
DIGITAL
AUDIO OUT
Y PBPRL R
HDMI1
SERVICE
ANT IN
HDMI3
COMP1
PC AUDIO
RJ12
PC
USB
VGA
HDMI3
COMP1
PC AUDIO
RJ12
PC
USB
VGA
HDMI2
COMP 2
HEADPHONE
AUDIO OUT
VIDEO L RL R
AV
DIGITAL
AUDIO OUT
Y PBPRL R
HDMI1
SERVICE
ANT IN
HDMI2
COMP 2
HEADPHONE
AUDIO OUT
VIDEO L RL R
AV
DIGITAL
AUDIO OUT
Y PBPRL R
HDMI1
SERVICE
ANT IN
Making connections
8
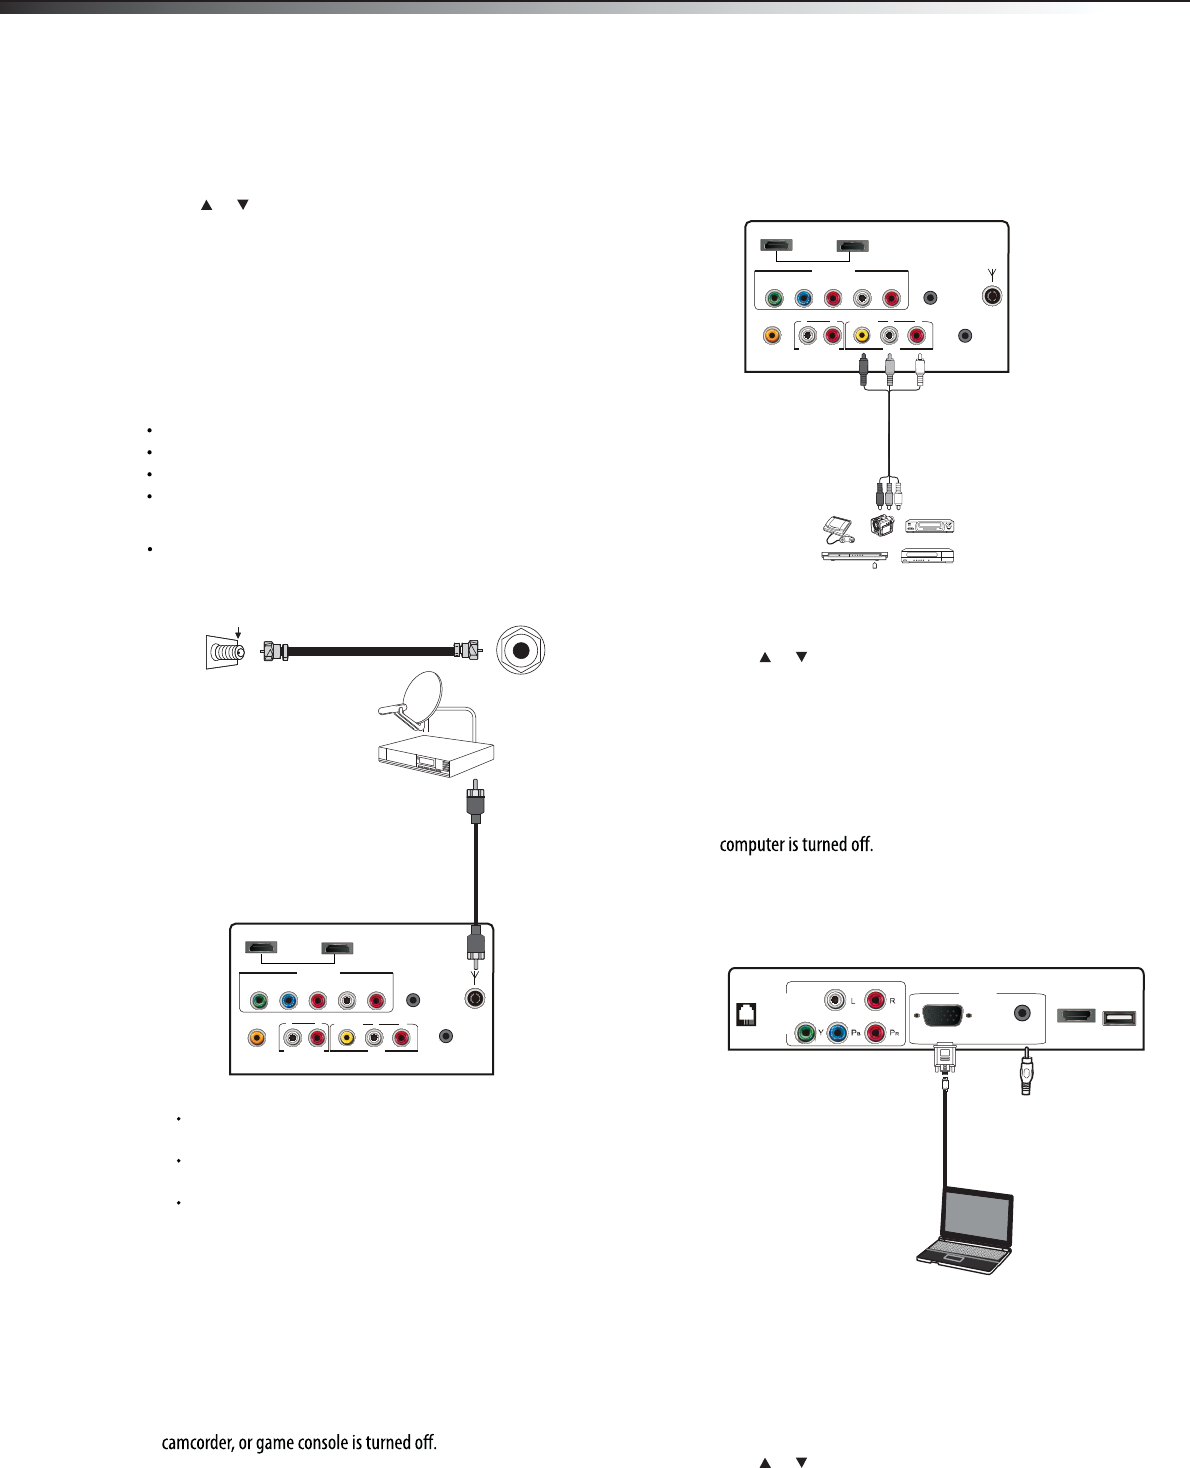
To connect an antenna, cable TV, or satellite TV box:
Connect one end of a 75-Ohm, coaxial cable to the jack ANT IN
on the back of the TV, then connect the other end of the cable to
the antenna or cable TV wall jack.
Notes:
We recommend using a 75-Ohm, coaxial cable to reduce interference
and noise that may be caused by radio wave transmissions.
Do not bundle the coaxial cable with the power cord or any other
cables.
If you are using an antenna and reception is not good, contact a
service technician to adjust the antenna.
Connecting a VCR, camcorder, or game
console
Note: If the VCR, camcorder, or game console has component jacks
(better), or an HDMI jack (best), connect them using the best available
connection.
To connect a VCR, camcorder, or game console:
1Make sure that your TV’s power cord is unplugged and the VCR,
2Connect one end of a standard AV cable (not included) into the
AV video jack on the back of the TV, then connect the other end
of the cable to the AV OUT VIDEO jack on the external device.
3Connect the audio connectors of the AV cable (the red and white
connectors) to the AV OUT AUDIO jacks of the external device,
then connect them to the AV L and R jacks on the back of your TV.
To play the external AV device:
1Turn on the TV, then press INPUT. The INPUT SOURCE menu
opens.
2Press or to select AV, then press ENTER.
3Turn on the device, then start playback on the device.
Connecting a computer
To connect a computer:
1Make sure that your TV’s power cord is unplugged and the
2Connect one end of a VGA cable (not included) to the VGA jack on
the side of the TV, then connect the other end of the cable to the
3Connect one end of an audio cable with a stereo mini-plug (not
included) to the PC AUDIO jack on the side of the TV, then
connect the other end of the cable to the AUDIO OUT jack on
the computer.
To play video from the computer:
1Turn on the TV, then press INPUT. The INPUT SOURCE menu
opens.
2Press or to select VGA, then press ENTER.
3Turn on the computer, then adjust the computer display
properties as needed.
ANT IN jack on
the side of the TV
Antenna, cable TV,
or satellite box
Home antenna terminal
(75 ohm)
To play from the component video device:
1Turn on the TV, then press INPUT. The INPUT SOURCE menu
opens.
2Press or to select YPbPr1 or YPbPr2, then press ENTER.
3Turn on the component video device and start playback. Refer to
the instructions that came with the component video device.
Connecting an antenna, cable TV, or
satellite TV box
If you are connecting a satellite TV or cable box, you can use one of the
following (if available):
Best - HDMI cable
Better - Video component cables
Good - Video composite cable
Acceptable - 75-ohm coaxial cable.
VCR, camcorder,
or game console
AV cable
Note: Cables are often
color-coded to connectors.
Connect yellow to yellow,
red to red, and white to
white.
75-Ohm coaxial cable
VGA
cable Audio cable
Computer
LHD32V77MH