Hisense Electric LCDD0008 Part15 Subpart B-LCD TV User Manual W9HLCDD0008 2
Hisense Electric Co., Ltd. Part15 Subpart B-LCD TV W9HLCDD0008 2
Contents
- 1. W9HLCDD0008_User Manual 1
- 2. W9HLCDD0008_User Manual 2
- 3. W9HLCDD0008_User Manual 3
W9HLCDD0008_User Manual 2
16
Basic Features
Channel Block - Lock Channels on the TV.
Program Block - Lock Program on the TV.
Rating Enable: Block or unblock TV ratings.
Open V-Chip: Display an advanced V-Chip ratings
table for digital channels.
Block Unrated TV: Block unrated TV programs.
Input Block - Lock Input source on the TV.
Change Password - If you want change the default
password, first enter the new password then enter the
same password again.
Clean All - You can reset all locks to factory mode.
U.S. TV Ratings: Restrict TV programs by USA
Ratings.
U.S. Movie Ratings: Restrict movie by USA
Ratings.
Canadian English/French Ratings: Restrict
movie and TV programs by Canadian Ratings.
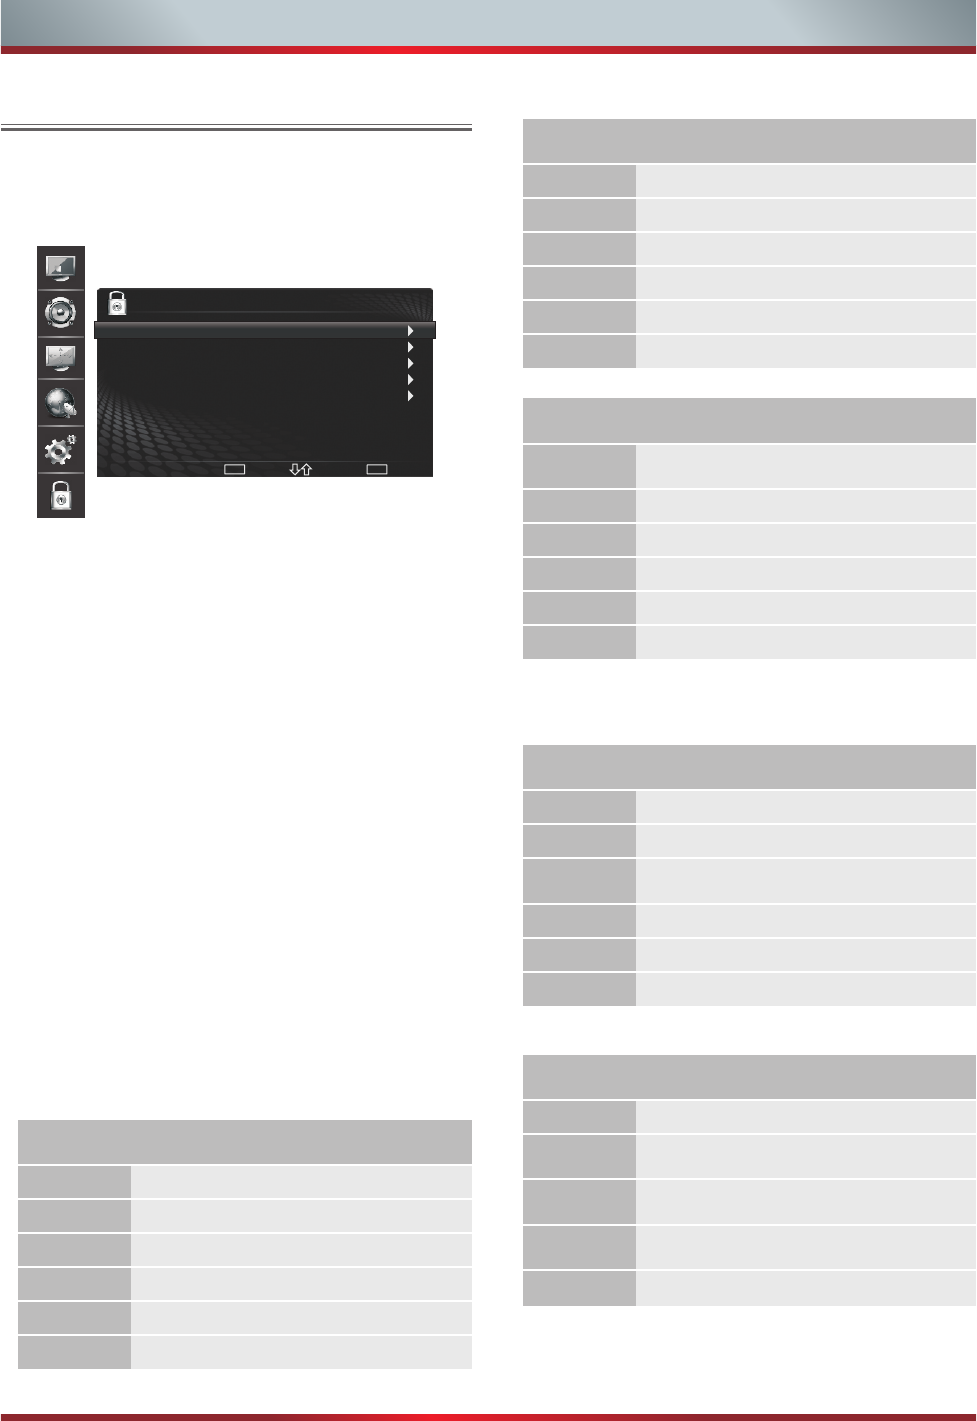
Using the Lock Menu
You can adjust:
When you first use this function, the default password
is [0000].Once you input this password, you can set
options.
Following is the description of these ratings.
Rating
G
PG
PG-13
R
NC-17
X
General audience
Parental Guidance suggested
Parents strongly cautioned
Restricted
No one 17 and under admitted
Adult audience only
Defined as
U.S. Movie Ratings
Age
TV-Y
TV-Y7
TV-G
TV-PG
TV-14
TV-MA
All children
Directed to older children
General audience
Parental Guidance suggested
Parents Strongly cautioned
Mature Audience only
Defined as
U.S. TV Ratings
Contents
A
FV Fantasy Violence
D
L
S
Suggestive dialogue
Strong language
Sexual situations
VViolence
Defined as
All of the ratings below that rating set
blocked automatically
Rating Description
G
8 ans+
13 ans+
16 ans+
18 ans+
General
Programming restricted to adults
8+General; Not recommended for young
children
Programming may not be suitable for
children under the age of 13
Programming is not be suitable for
children under the age of 16
Canadian French Ratings
Rating Description
14+ Viewers 14 years and older
18+ Adult Programming
C
C8+
G
PG
Children
Children 8 years and older
Parents Guidance
General Programming, suitable for all
audiences
Canadian English Ratings
Enter
ENTER
Lock
Channel Block
Program Block
Input Block
Change Password
Clean All
Select Back
MENU
17
Advanced Features
Network Connection
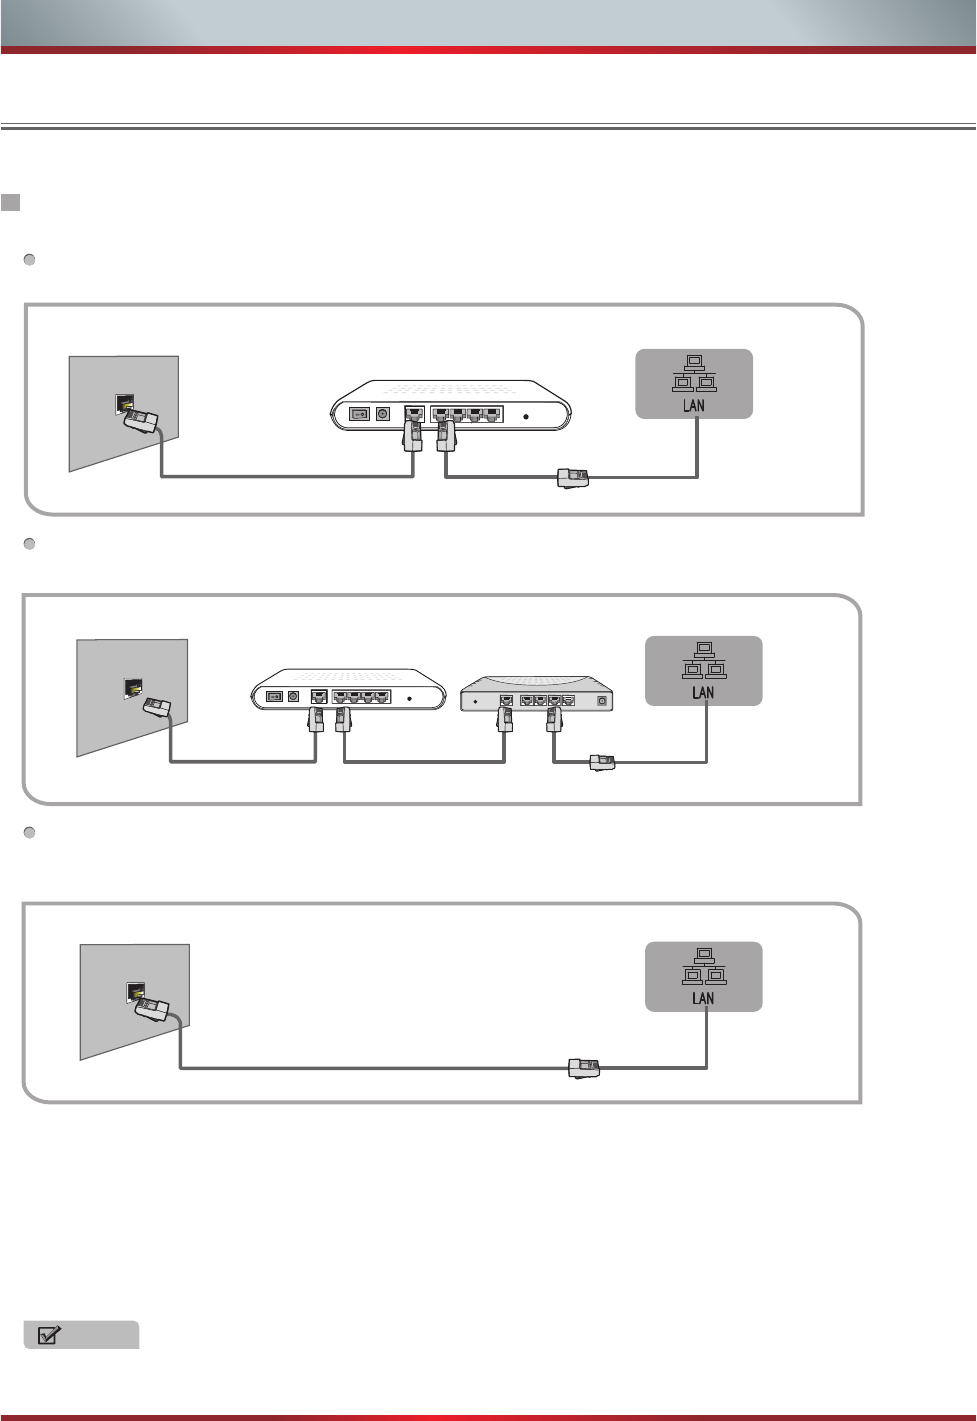
You can attach your TV to your LAN by using matchable cable in thr ee ways:
You can attach your TV to your LAN by connecting the LAN port on the back of your TV to an exter nal
modem using a Cat 5 cable. See the diagram below.
You can attach your TV to your LAN by connecting the LAN port on the back of your TV to an IP Sharer which is
connected to an external modem. Use LAN cable for the connection. See the diagram below.
Depending on how your network is configured, you may be able to attach your TV to your LAN by connecting
the LAN port on the back of your TV directly to a network wall outlet with a Cat 5 cable. See the diagram
below. Note that the wall outlet is attached to a modem or router elsewhere in your house.
Yo u can use ADSL modems that support DHCP if your network requires a Static IP address. ADSL modems
that support DHCP also let you use Static IP addresses.
The Modem Port on the Wall
Stand Rear Panel
Modem Cable
External Modem
(ADSL / VDSL / Cable TV)
LAN Cable
LAN Cable LAN Cable
Modem Cable
The Modem Port on the Wall Stand Rear Panel
External Modem
(ADSL / VDSL / Cable TV) IP Sharer
(having DHCP server)
If you have a Dynamic Network, you should use an ADSL modem or router that supports Dynamic Host
Configuration Protocol (DHCP). Modems and routers that support DHCP automatically provide the IP
address, subnet mask, gateway, and DNS, so you don’t have to enter them manually. Most home networks are
Dynamic Networks.
Some networks require a Static IP address. If your network requires a Static IP address, you must enter the IP
address, subnet mask, gateway, and DNS values manually on your TV’s Cable Setup Screen when you set up
the network connection. To get the IP address, subnet mask, gateway, and DNS values, contact your Internet
Service Provider (ISP).
If you have a Windows computer, you can also get these values through your computer.
The LAN Port on the Wall
LAN Cable
Stand Rear Panel
Connecting to a Wired Network
NOTE
You can set up your TV so that it can access the Internet through your local area network (LAN) with a ethernet or wireless
connection.

Network Setup (Auto) Network Setup (Manual)
18
Advanced Features
1. Connect your TV to your LAN as described in the
previous section.
2. Turn on your TV, operate according to the
description in the Settings menu until the Network
screen appears.
3. On the Network screen, select Configuration and
press [ENTER] button to enter the submenu.
4. Set Internet Connection to On and Interface to
Ethernet.
5. Select IP Setting and press [ENTER] button to
enter it.
6. Set Address Type to Auto.
7. Auto acquires and enters the needed internet
values automatically.
8. If the Network function has not acquired the
network connection values, go to the manual for
directions.
How to set up automatically
Use the Automatic Network Setup while your
connecting the TV to a network that supports DHCP.
To set up your TV’s cable network connection
automatically, follow these steps:
Use the Automatic Network Setup when connecting
your TV to a network that requires a Static IP address.
Getting the Network Connection Values
To get the network connection values on most
windows computers, follow these steps:
1. Right click the Network icon on the bottom right of
the screen.
2. In the pop-up menu that appears, click Status.
3. On the dialog that appears, click the Support tab.
4. On the Support tab, click the Details button. The
network connection values are displayed.
How to set up manually
To set up your TV’s cable network connection
manually, follow these steps:
1. Follow Steps 1 through 5 in the “How to set up
automatically” procedure.
2. Set Address Type to Manual.
3. Press [▲/▼] button to select IP Address and press
[◄/►] button to move the cursor to the entry field.
Then press 0~9 buttons to enter the numbers.
4. Press [Menu] button to exit IP Address and press
[▲/▼] button to select the next options to enter the
numbers.
5. When done, press [Menu] button to return to the
previous menu.
6. Select Connection Test to check the internet
connectivity.
Settings
Language English
Menu Settings
Time Setup
Caption
Demo Mode
Version Info
Network
Select Back
MENU
Enter
OK
Settings
Internet Connection On
Interface Ethernet
Wireless Setting
Information
IP Setting
Connection Test
Select Back
MENU
Settings
Back
MENU
Subnet Mask
Default Gateway
Primary DNS
Secondary DNS
Address Type
IP Address
Manual
0. 0. 0. 0
0. 0. 0. 0
0. 0. 0. 0
0. 0. 0. 0
0. 0. 0. 0
Select

19
Advanced Features
To connect your TV to your network wirelessly, you need a wireless router or modem. See the illustration below.
Connecting to a Wireless Network
The LAN Port on
the Wall
LAN Cable
Wireless IP Sharer
(AP having DHCP Server)
Wireless
built-in TV set
LAN Adapter
Hisense's built-in Wireless LAN Adapter supports the IEEE 802.11 B/G/N communication protocols. Hisense
recommends using IEEE 802.11N. When you play the video over a IEEE 802.11B/G connection, the video may
not play smoothly.
NOTE
Yo u must use the Hisense's built-in Wireless LAN Adapter to use a wireless network, the set doesn’t support
external USB network adapter.
To use a wireless network, your TV must be connected to a wireless IP sharer. If the wireless IP sharer
supports DHCP, your TV can use a DHCP or static IP address to connect to the wireless network.
Select a channel for the wireless IP sharer that is not currently being used. If the channel set for the wireless
IP sharer is currently being used by another device nearby, this will result in interference and communication
failure.
If you apply a security system other than the systems listed below, it will not work with the TV.
If Pure High-throughput (Greenfield) 802.11N mode is selected and the Encryption type is set to WEP, TKIP or
TKIP-AES (WPS2Mixed) for your AP, Hisense TVs will not support a connection in compliance with new
Wi-Fi certification specifications.
If your AP supports WPS (Wi-Fi Protected Setup), you can connect to the network via PBC (Push Button
Configuration) or PIN (Personal Identification Number). WPS will automatically configure the SSID and WPA
key in either mode.
If your router, modem, or device isn’t certified, it may not connect to the TV .
Connection Methods: You can setup the wireless network connection three ways.
-Scan
-Manual
-Auto
20
Advanced Features
Computer, TV and other digital devices can be connected
via DLNA and they can share files with each other. You
can use the TV set as a DLNA DMP device to enjoy
movies, pictures, musics and other multimedia materials in
your computer through DLNA connection.
DLNA Setting needs to be set on TV and computer
Respectively.
The Network setup on the TV ’s screen:
Network setup:
1. Turn on your TV, operate according to the description in
the Settings menu until the Network screen appears.
2. On the Network screen, select Configuration and
press [ENTER] button to enter the submenu.
3. Set Internet Connection to On and Interface to
Ethernet.
4. Select IP Setting and press [ENTER] button to enter it.
5. Set Address Type to Auto.
6. Auto acquires and enters the needed internet values
automatically.
7. If the Network function has not acquired the network
connection values, go to the manual for directions.
8. If set Address Type to Manual, enter IP Setting. Then
press [▲/▼] button to select IP Address and press
[◄/►] button to move the cursor to the entry field. Then
press 0~9 buttons to enter the numbers.
DLNA Settings
Settings
Interface
Address Type
IP Address
Subnet Mask
Default Gateway
Primary DNS
Secondary DNS
Ethernet MAC
Back
MENU
Ethernet
Auto
192.168.1.103
255.255.255.0
192.168.1.1
172.16.2.123
172.16.14.100
00:0C:E7:06:00:00
Set DLNA to On:
1. On the Network screen, select Applications and press
[ENTER] button to enter the submenu.
2. Press [◄/►] button to set DLNA to On.
Settings
Back
MENU
Subnet Mask
Default Gateway
Primary DNS
Secondary DNS
Address Type
IP Address
Manual
0. 0. 0. 0
0. 0. 0. 0
0. 0. 0. 0
0. 0. 0. 0
0. 0. 0. 0
Select
9. Press [Menu] button to exit IP Address and press [▲/▼]
button to select the next options to enter the numbers.
10. When done, press Menu to return to the previous menu.
11. Select Connection Test to check the internet
connectivity.
If the test is not successful, please check Whether the
configuration is correct. If the test is successful, operate
as the following instructions.
Settings
Back
MENU
Select
DLNA On
Netflix
VUDU
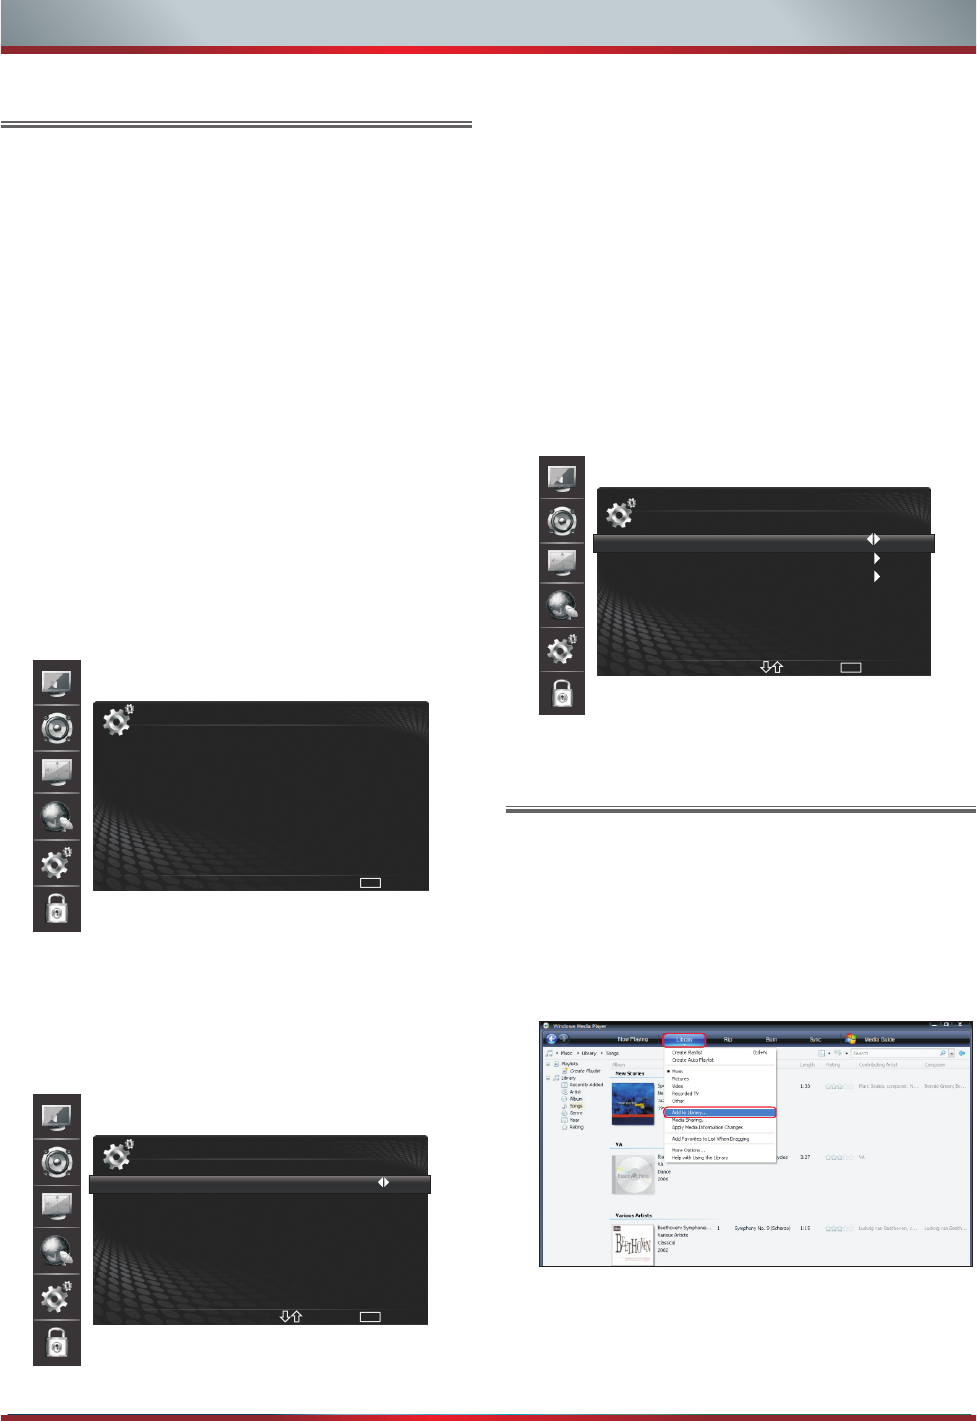
If your computer can not support DLNA, you need
install the software that supports DLNA such as
TVersity and Windows Media Player11. It is
recommended to select Windows Media Player11 to
set and its setup is more simple.
Media Share Settings in computer
1. Start the Windows Media Player11.
2. Click “Library” and then “Add to Library...”.
21
Advanced Features
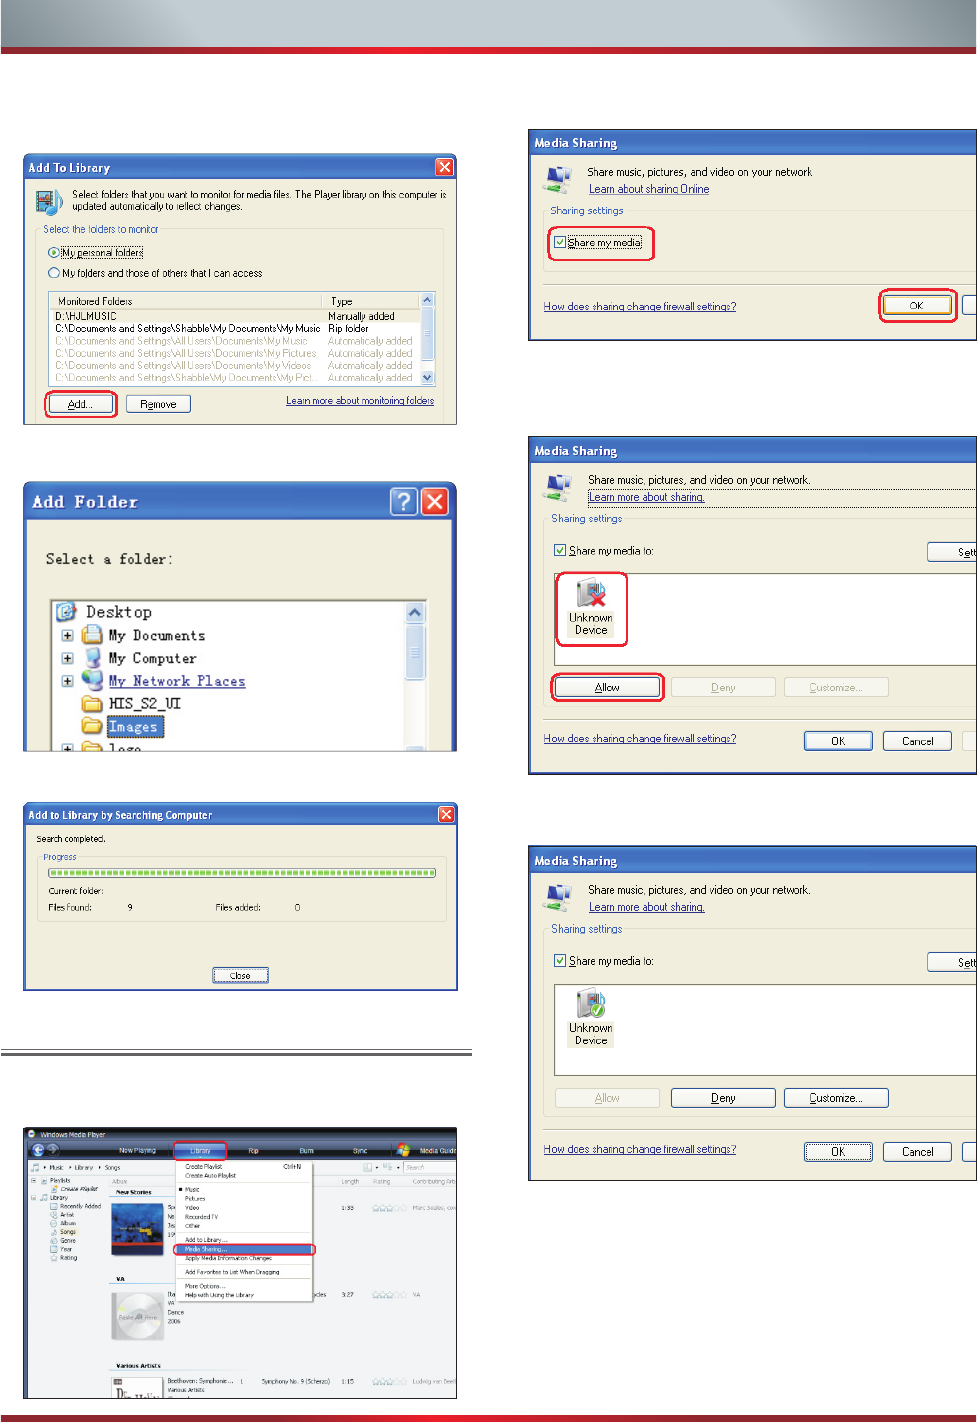
3. The “Add To Library” will pop up on the screen. Click
“Add”.
4. Select a folder and click OK button.
5. Click “Close” to close the dialog.
34
Setting to share files
1. Click “Library” and move the cursor to select
“Media Sharing...”
2. Click the box right before “Share my media” to select it.
3. An equipment icon will appear on the white area if the
DLNA Settings has been correctly set. Select the sign
and then click “Allow”.
4. Then the TV would directly access the shared files in the
computer.
22
Advanced Features
Network Function
VUDU HD Movies
VUDU is an on-demand service that offers high-
definition movies on the Web.
For enjoying more movies, please register and log in
to your account.
1. Press the [HICAST@] button to display network
main menu.
2. Press [◄/►] button to select the VUDU HD Movies
icon and press [ENTER] to enter it, or press [VUDU]
button to enter directly.
efer to “How to Input the Emai Address”
Press [▲/▼/◄/►] button to move the cursor to
select service items in the VUDU HD Movies
home page, and press [ENTER] button to confirm.
6. In the process of watching a movie, press [ENTER]
button to display/exit the tool bar, press [◄/►]
button to select the function icon, and press
[ENTER] button to confirm.
7. Press [RETURN] button to return the upper menu, or
press [EXIT] button to close the menu.
3. Select the Sign Up icon on the VUDU HD Movies
interface, and press [ENTER] to enter.
4. Enter your email address to begin enjoying VUDU.
( R )
5.
Press the [VUDU] button to enter the VUDU HD
Movies interface directly.
From the shortcut of the remote control:
1. Configure the network settings before using
network function. For more information, refer to
“Network Connection”.
2. Unsupported fonts within the provider’s content will
not display normally.
3. Slow responses and/or interruptions may occur,
depending on your network conditions.
4. Depending on the region, English may be the only
language supported for application services.
Press Enter to launch VUDU Movies.
Brief introduction
Operation instructions
You can access the VUDU HD Movies by the following
methods:
1. Use of internet services requires a working
broadband internet connection (1 to 2 Mbps for SD
video, 2.25 to 4.5 Mbps for HD video and 4.5 to 9
Mbps for HDX video).
2. VUDU and other internet-based services are not
provided by Hisense, may change or be
discontinued at any time and may be subject to
restrictions imposed by your internet service
provider. The quality, functionality, or availability of
such services may be affected by the capacity of
your Internet connection. Use of VUDU video-on-
demand and other internet services may require the
creation of a separate account through a computer
with internet access.
3. Not all VUDU services would be used on this model.
4. VUDU video-on-demand and other internet
services may require payment of one-time and/or
recurring charges.
5. You are solely responsible for any charges incurred
as a result of using internet-based content,
including, without limitation, communications
charges for the provision of internet or network
services and any charges incurred for third-party
internet content services, such as video on demand
or subscription services. All third-party services are
provided in accordance with whatever terms and
conditions are established between such third-party
providers and you.
6. HISENSE MAKES NO REPRESENTATIONS OR
WARRANTIES ABOUT THE CONTENT,
AVAILABILITY OR FUNCTIONALITY OF THE
VUDU SERVICE OR OTHER INTERNET
DELIVERED THIRD-PARTY SERVICES AND DOES
NOT WARRANT THAT ANY OF THEM WILL BE
UNINTERRUPTED, ERROR FREE OR
SATISFACTORY. ANY IMPLIED WARRANTY,
INCLUDING BUT NOT LIMITED TO ANY IMPLIED
WARRANTY OF MERCHANTABILITY OR FITNESS
FOR A PARTICULAR PURPOSE OF ANY THIRD
PARTY CONTENT OR SERVICE, IS EXPRESSLY
EXCLUDED AND DISCLAIMED. UNDER NO
CIRCUMSTANCES WILL HISENSE BE LIABLE IN
CONTRACT, TORT OR UNDER ANY OTHER
THEORY FOR ANY DAMAGES ARISING OUT OF
OR IN CONNECTION WITH YOUR USE OF ANY
CONTENT OR SERVICE PROVIDED BY ANY
THIRD PARTY, EVEN IF ADVISED OF THE
POSSIBILITY OF SUCH DAMAGES.
If you use VUDU services, see the following note
before using it.
NOTICE FOR USE
ENTER
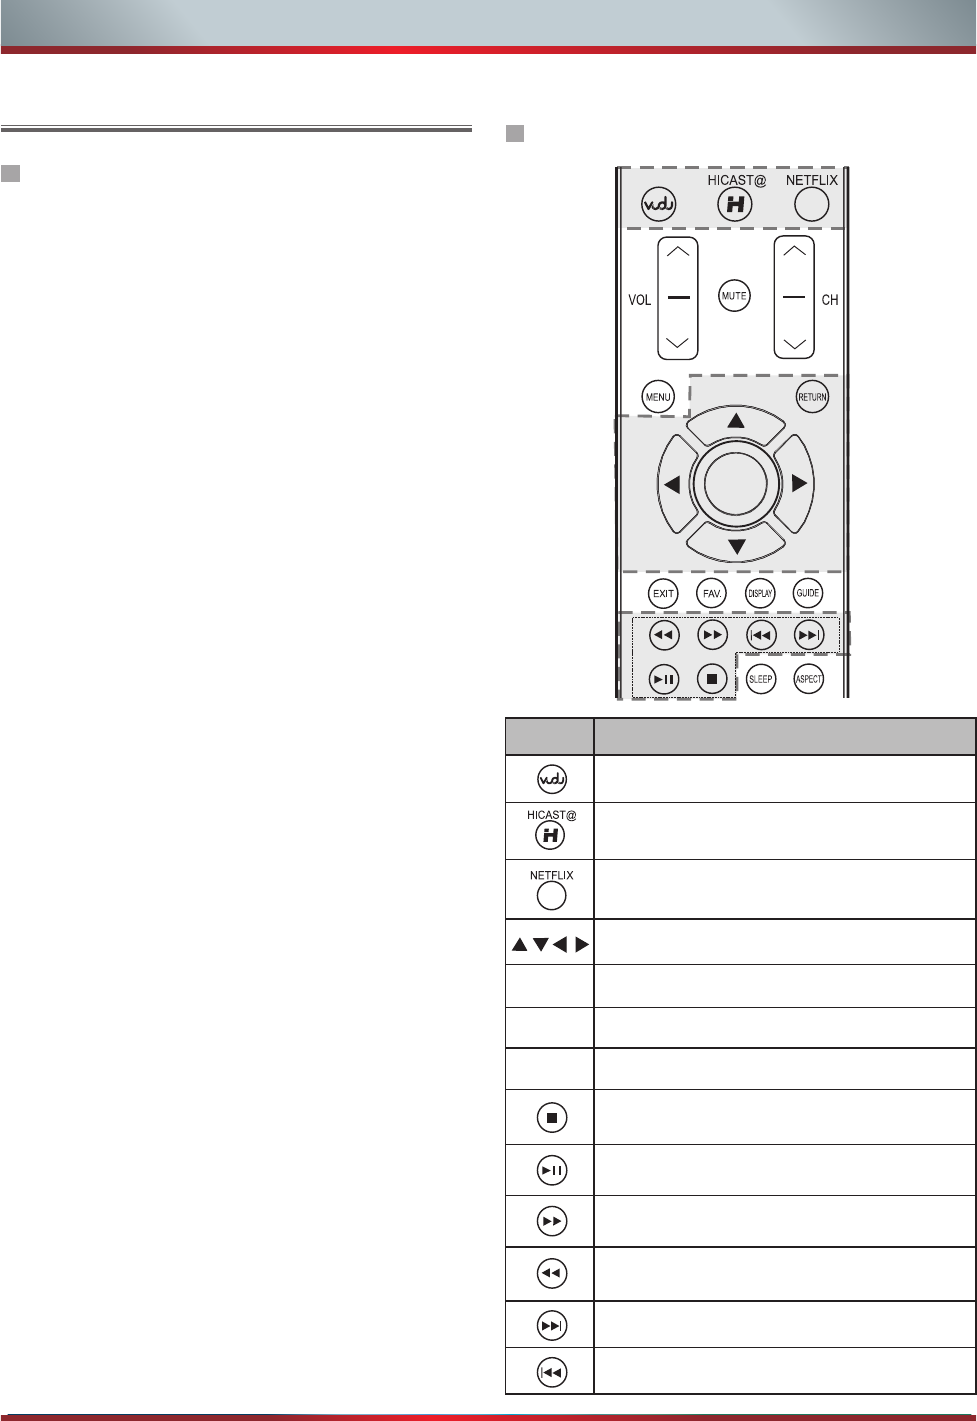
Operational buttons
Buttons Description
Stops playback and displays the movie
title screen.
Selects the on-screen menu items
Press to launch Netflix instant streaming
directly.
Press to enter VUDU HD Movies directly.
Sets pauses and still pictures. Press the
button to return to playback.
Displays the TrickPlay screen and fast
forwards playback.
Displays the TrickPlay screen and fast
reverses playback.
ENTER
EXIT
RETURN
Plays the next video.
Plays the previous video.
Returns to the previous menu.
Confirms selections
Closes the menu.
Links to various internet services.