Hyundai IBT HQP50AH000 50” PDP Monitor User Manual 1
Hyundai IBT Corp. 50” PDP Monitor 1
UserManual.wiki
>
Hyundai IBT
>
HQP50AH000 User Manual
>
Users Manual 2 of 3
Contents
1.
Users Manual 1 of 3
2.
Users Manual 2 of 3
3.
Users Manual 3 of 3
Users Manual 2 of 3
Navigation menu
Upload a User Manual
Namespaces
Wiki Guide
HTML
PDF
Info
Views
User Manual
Discussion / Help
Navigation


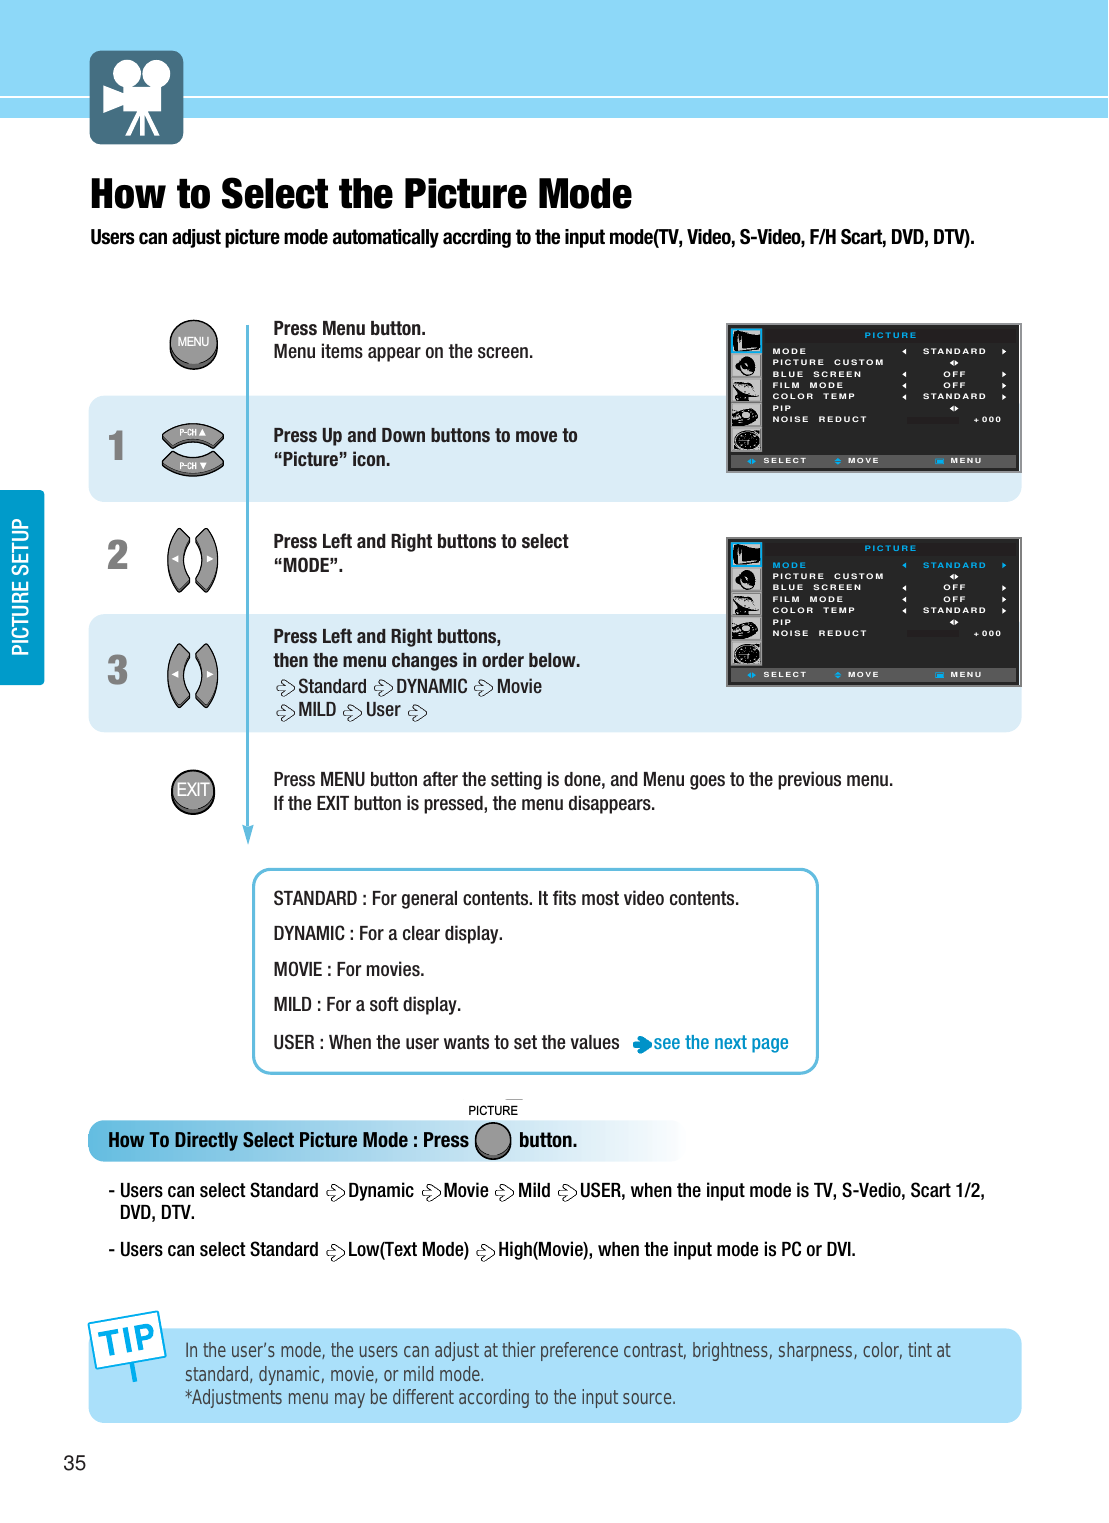
![How to Select the Picture Mode ..............................................35How to Set the Desired Picture ................................................36How to Set Blue Screen ...........................................................37How to Set Film Mode .............................................................38How to Select a Color Temperature .........................................39How to Set PIP [Mode] .............................................................40How to Set Multi-Screen [Input Source/Position/Size] ............41How to Set Noise Reduction ....................................................44Supported PIP Table .................................................................45Picture SetupHYUNDAI PLASMA DISPLAY](https://usermanual.wiki/Hyundai-IBT/HQP50AH000.Users-Manual-2-of-3/User-Guide-458197-Page-5.png)
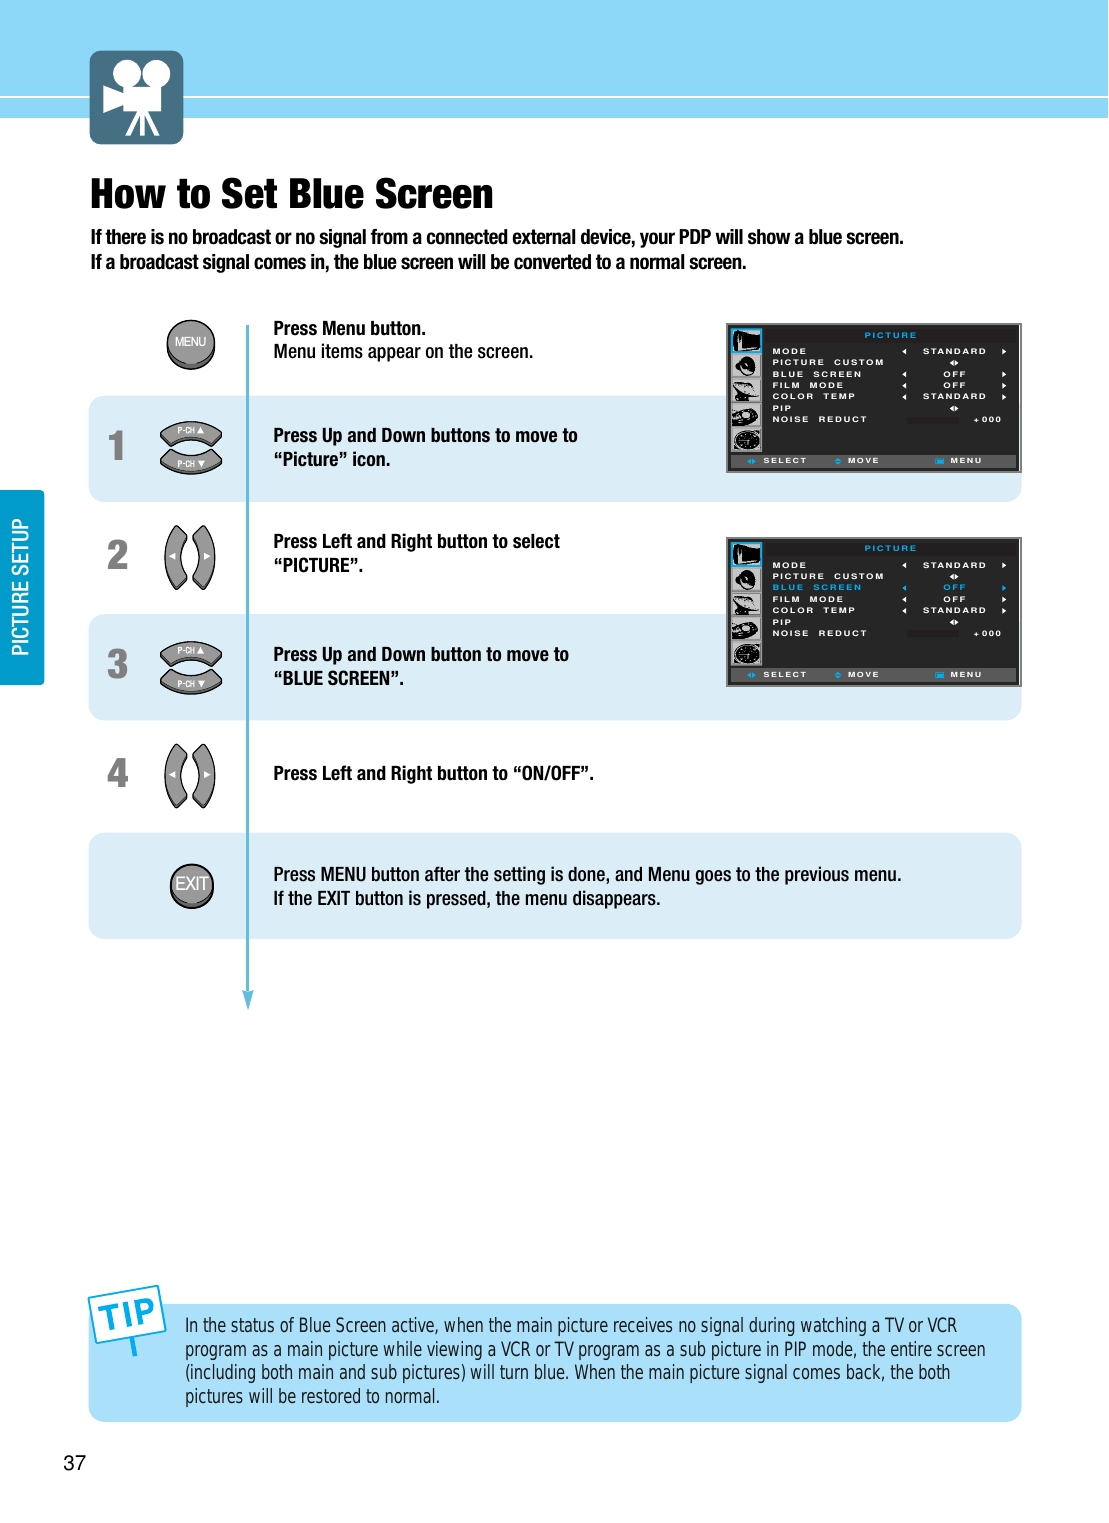
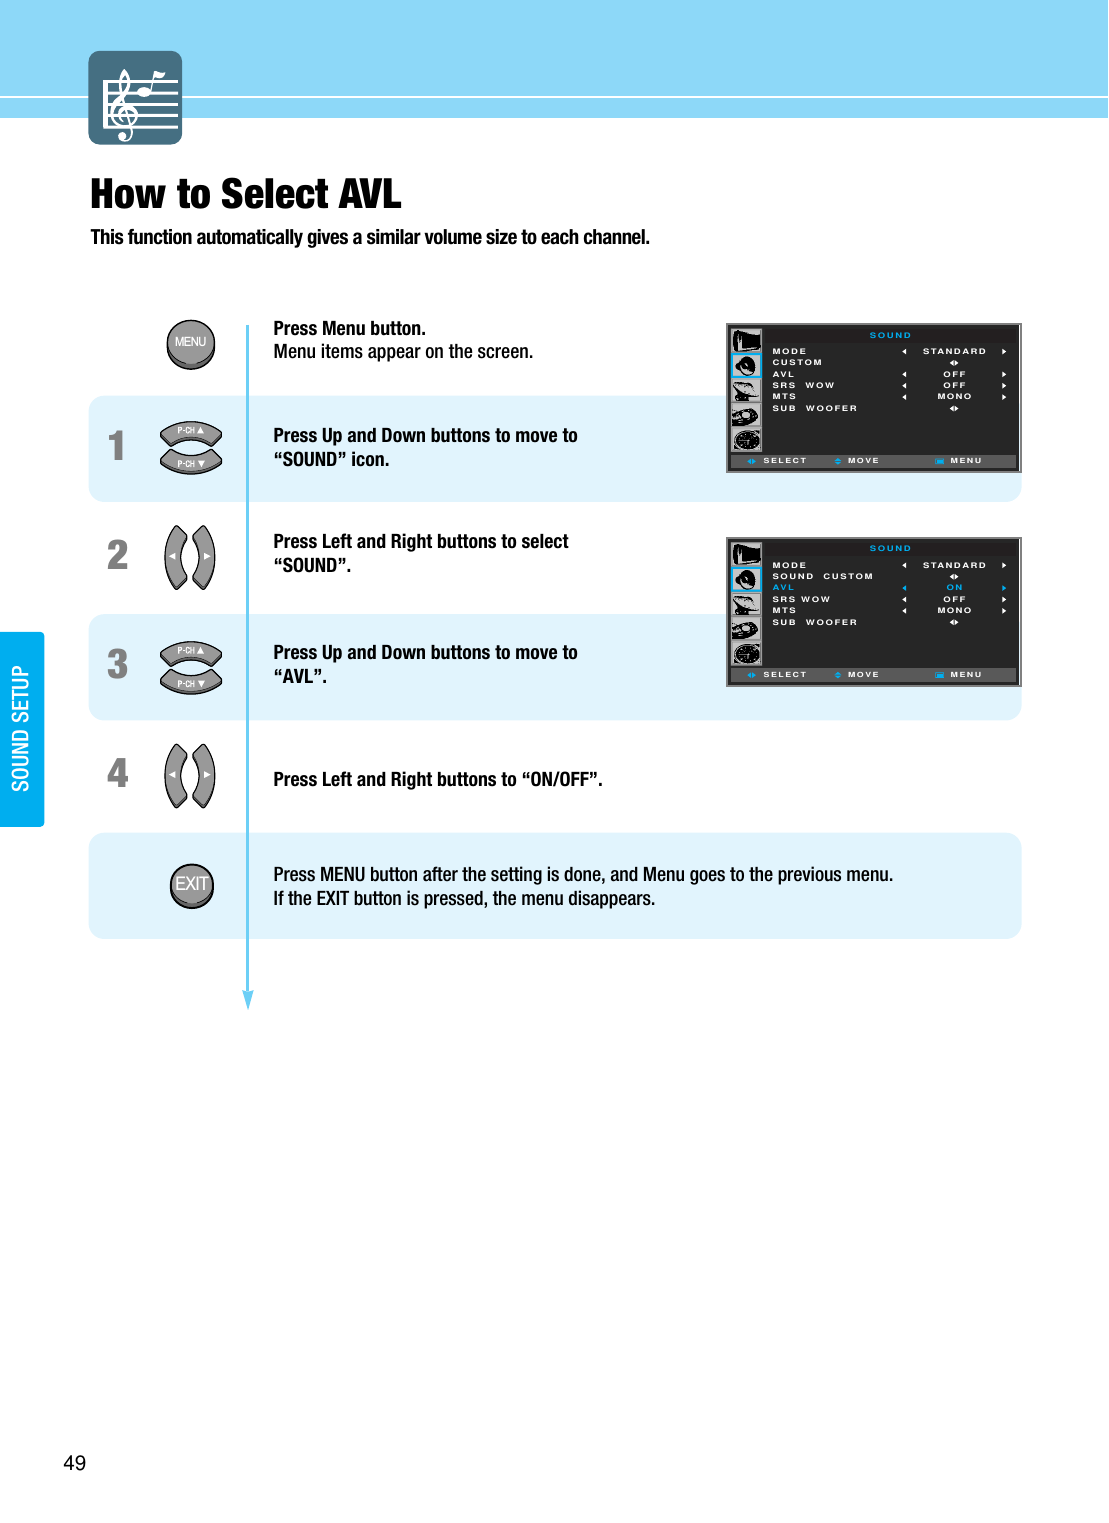
![How to Set PIP [Mode]This is to set PIP(Picture In Picture) mode or Twin mode.40PICTURE SETUPHYUNDAI Plasma DisplayPICTUREMODEPICTURE CUSTOMBLUE SCREENFILM MODECOLOR TEMPPIPNOISE REDUCTSTANDARD OFFOFFSTANDARDMOVE+ 000SELECT MENUMENU123456Press Menu button. Menu items appear on the screen. Press Up and Down buttons to move to “Picture” icon. Press Left and Right button to select “PICTURE” icon.Press Up and Down button to move to “PIP”. Press Left and Right button to select “PIP”.Menu items appear on the screen. Press Up and Down button to move to “MODE”. Press Left and Right button, then Mode changes in order below. PIP TWIN OFF After setting this, go to step 7 to set the SOURCE.TWIN : To watch two screens in half andhalf.PIP : To watch the Sub screen in the mainscreen at once.Main Main SubSubPICTUREMODEPICTURE CUSTOMBLUE SCREENFILM MODECOLOR TEMPPIPNOISE REDUCTSTANDARD OFFOFFSTANDARDMOVE+ 000SELECT MENUPIPMODESOURCESWAPSIZEPOSITIONCHANNELOFFTVSWAPLARGERIGHT DOWN037MOVESELECT MENU](https://usermanual.wiki/Hyundai-IBT/HQP50AH000.Users-Manual-2-of-3/User-Guide-458197-Page-11.png)
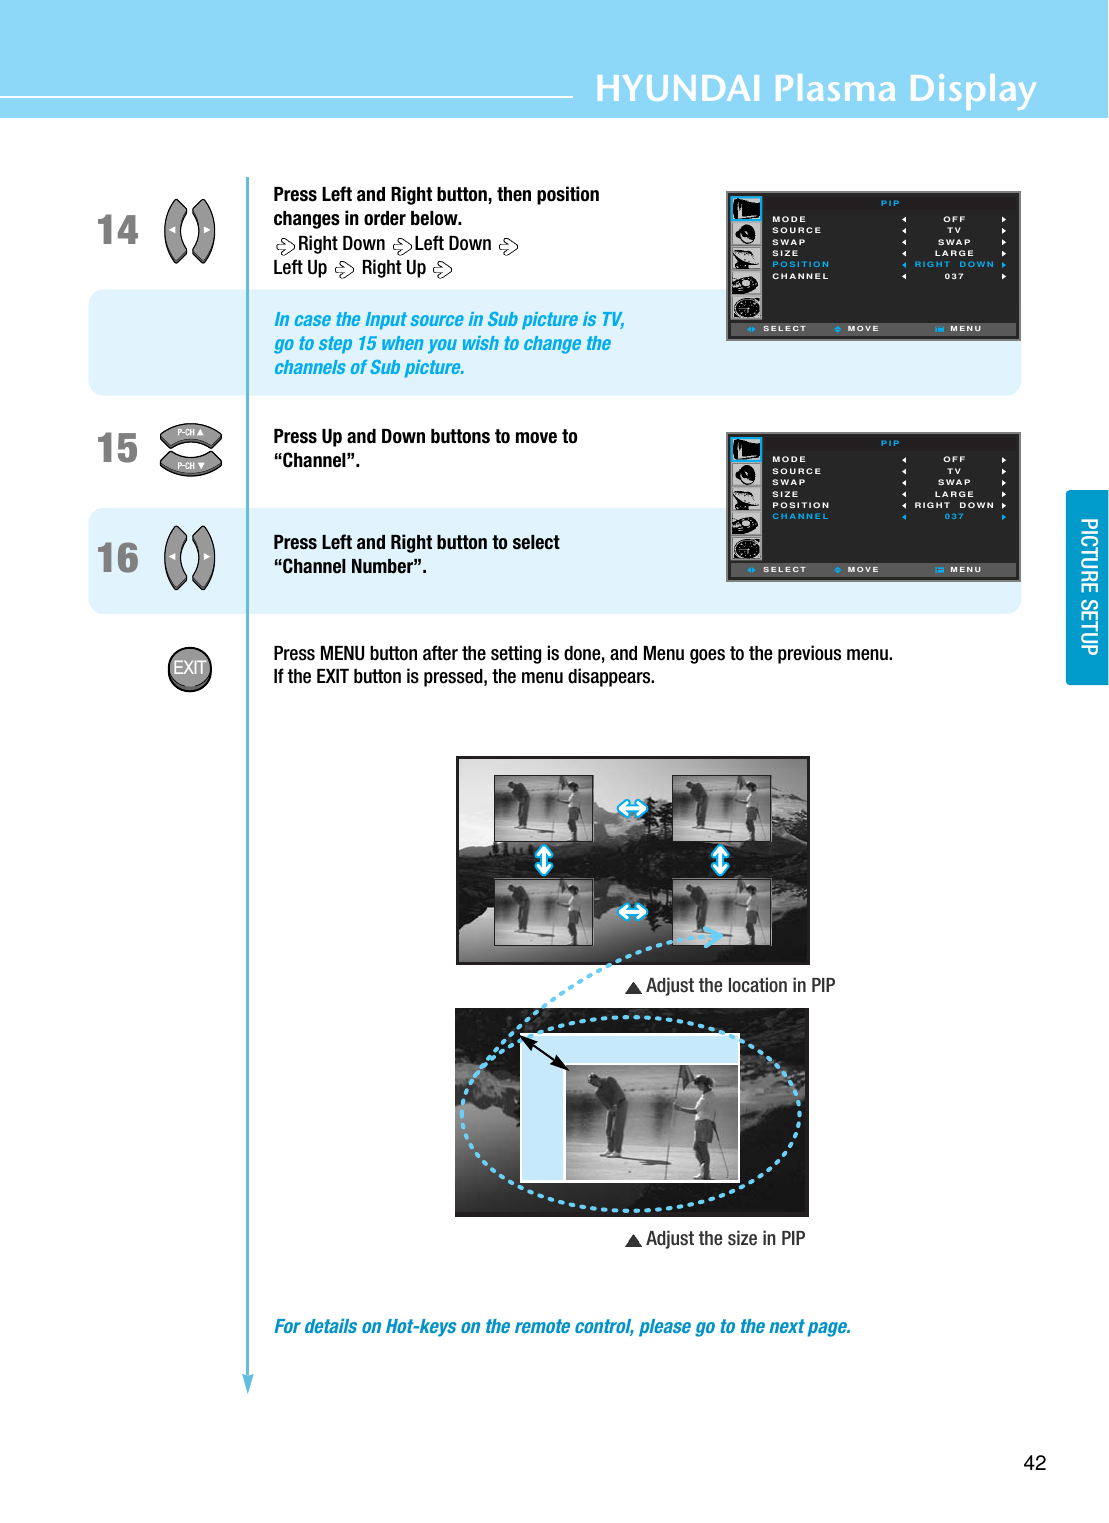
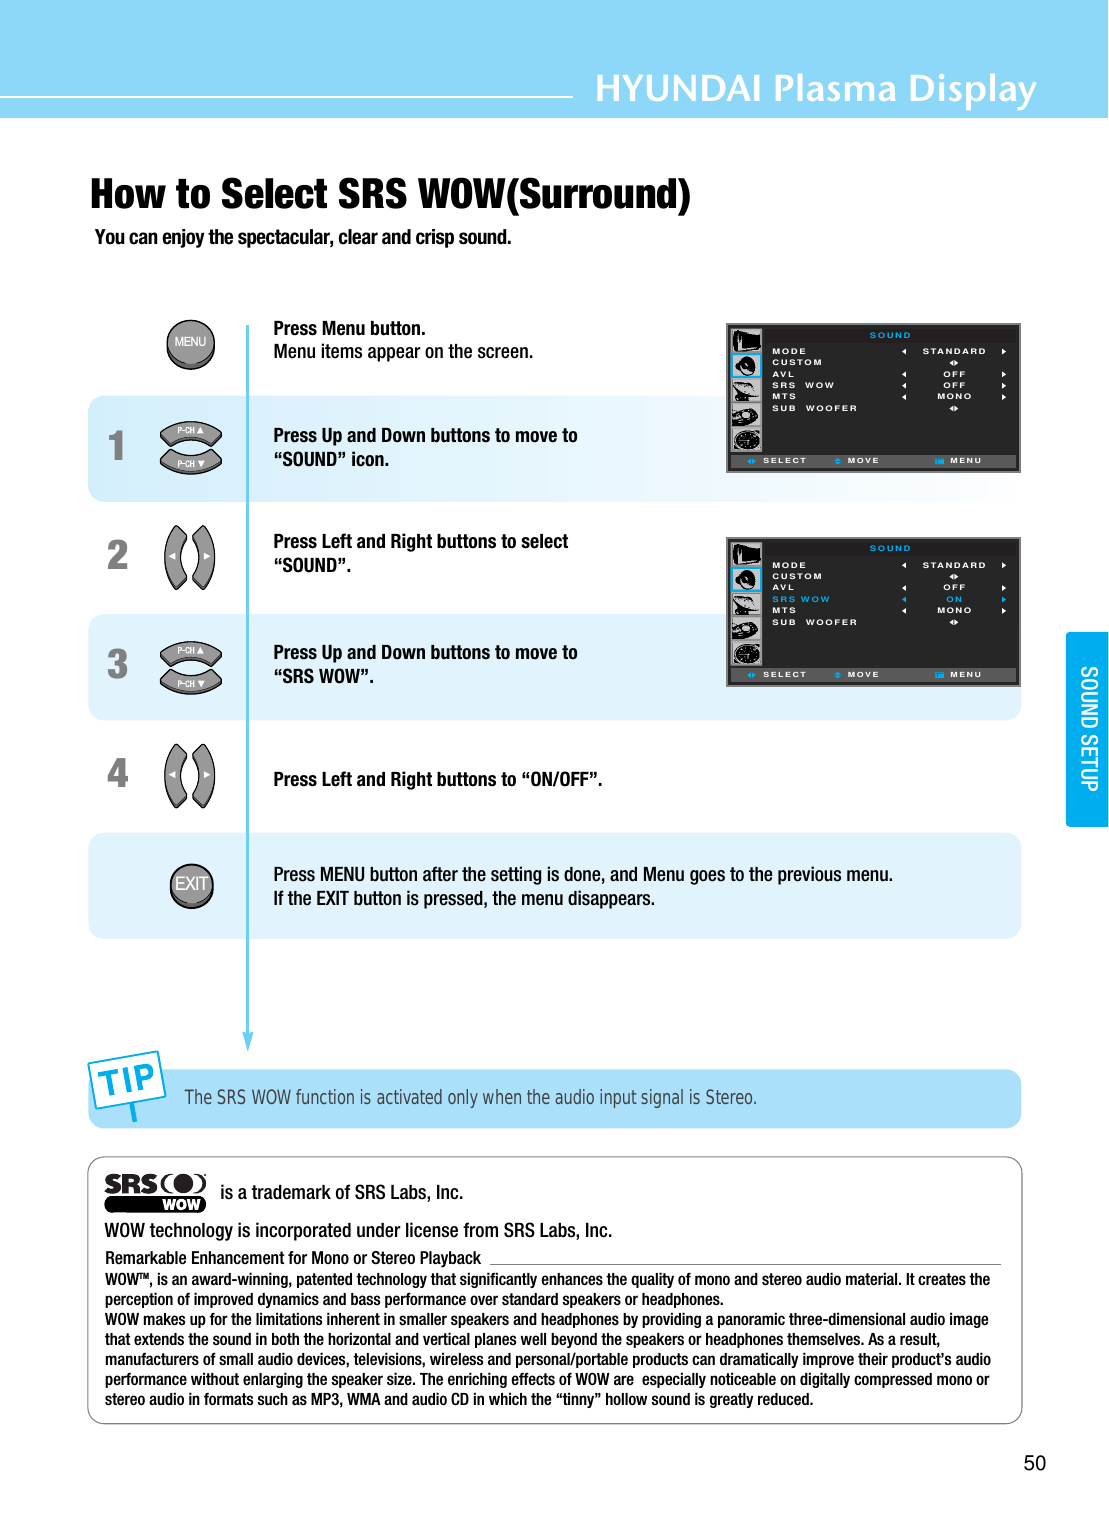
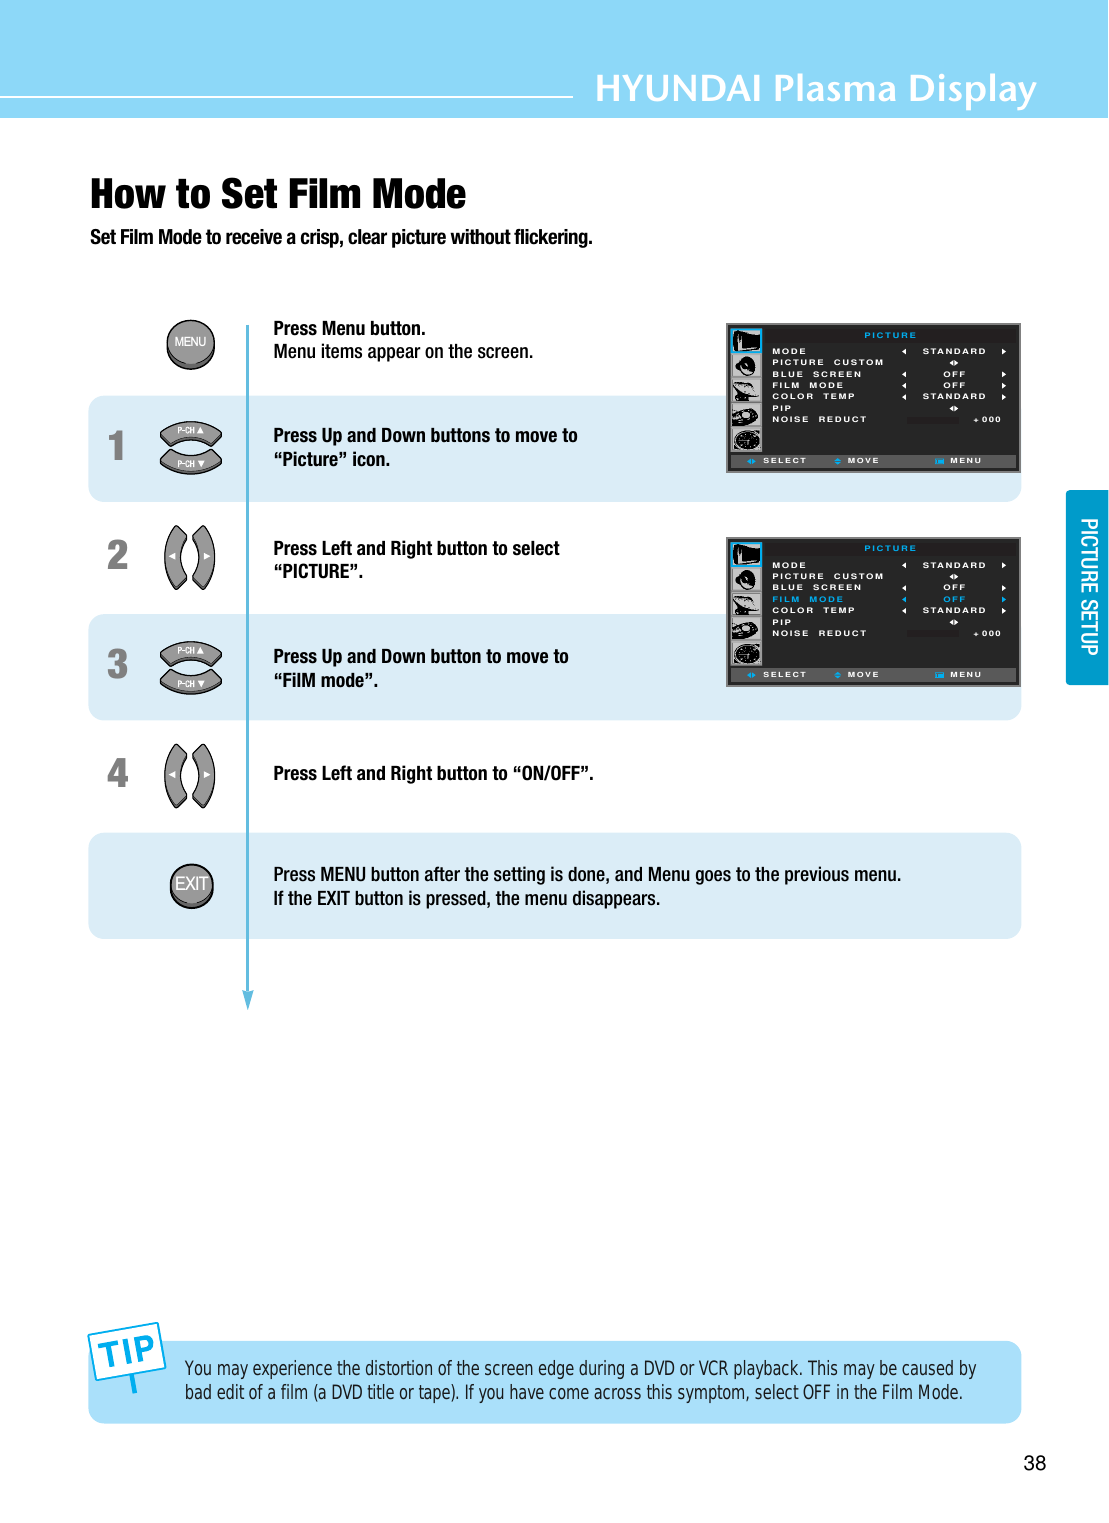
![How to Set Multi-Screen [Input Source/Position/Size]This is to set the Input Source, Position and Size of the Sub-picture. (This function is available only when PIPmode active.)41PICTURE SETUP87910111213Press Up and Down buttons to move to “SOURCE”. Press Left and Right button, then source changes in order below. DTV DVD S-VideoTV SCART 1 SCART 2 PC DVI In case of PIP mode, go to step 9if you need to set the “SWAP” of Main and sub pictures.Press Up and Down buttons to move to “SWAP”. Press Left and Right buttons.In case of PIP mode, go to step 11 if you need to set the “SIZE” of Sub picture. Press Up and Down buttons to move to “Size”. Press Left and Right buttons to set to “LARGE/SMALL”. In case of PIP mode, go to step 13if you need to set the “POSITION” of Sub picture.Press Up and Down buttons to move to “POSITION”. PIPMODESOURCESWAPSIZEPOSITIONCHANNELOFFTVSWAPLARGERIGHT DOWN037MOVESELECT MENUPIPMODESOURCESWAPSIZEPOSITIONCHANNELOFFTVSWAPLARGERIGHT DOWN037MOVESELECT MENUPIPMODESOURCESWAPSIZEPOSITIONCHANNELOFFTVSWAPLARGERIGHT DOWN037MOVESELECT MENU](https://usermanual.wiki/Hyundai-IBT/HQP50AH000.Users-Manual-2-of-3/User-Guide-458197-Page-12.png)