Leica Biosystems Nussloch SPECTRACV01 HistoCore SPECTRA CV User Manual Leica SPECTRA CV Instructions for Use V1 2 RevA
Leica Biosystems Nussloch GmbH HistoCore SPECTRA CV Leica SPECTRA CV Instructions for Use V1 2 RevA
Contents
User Manual V1.2 Part 1
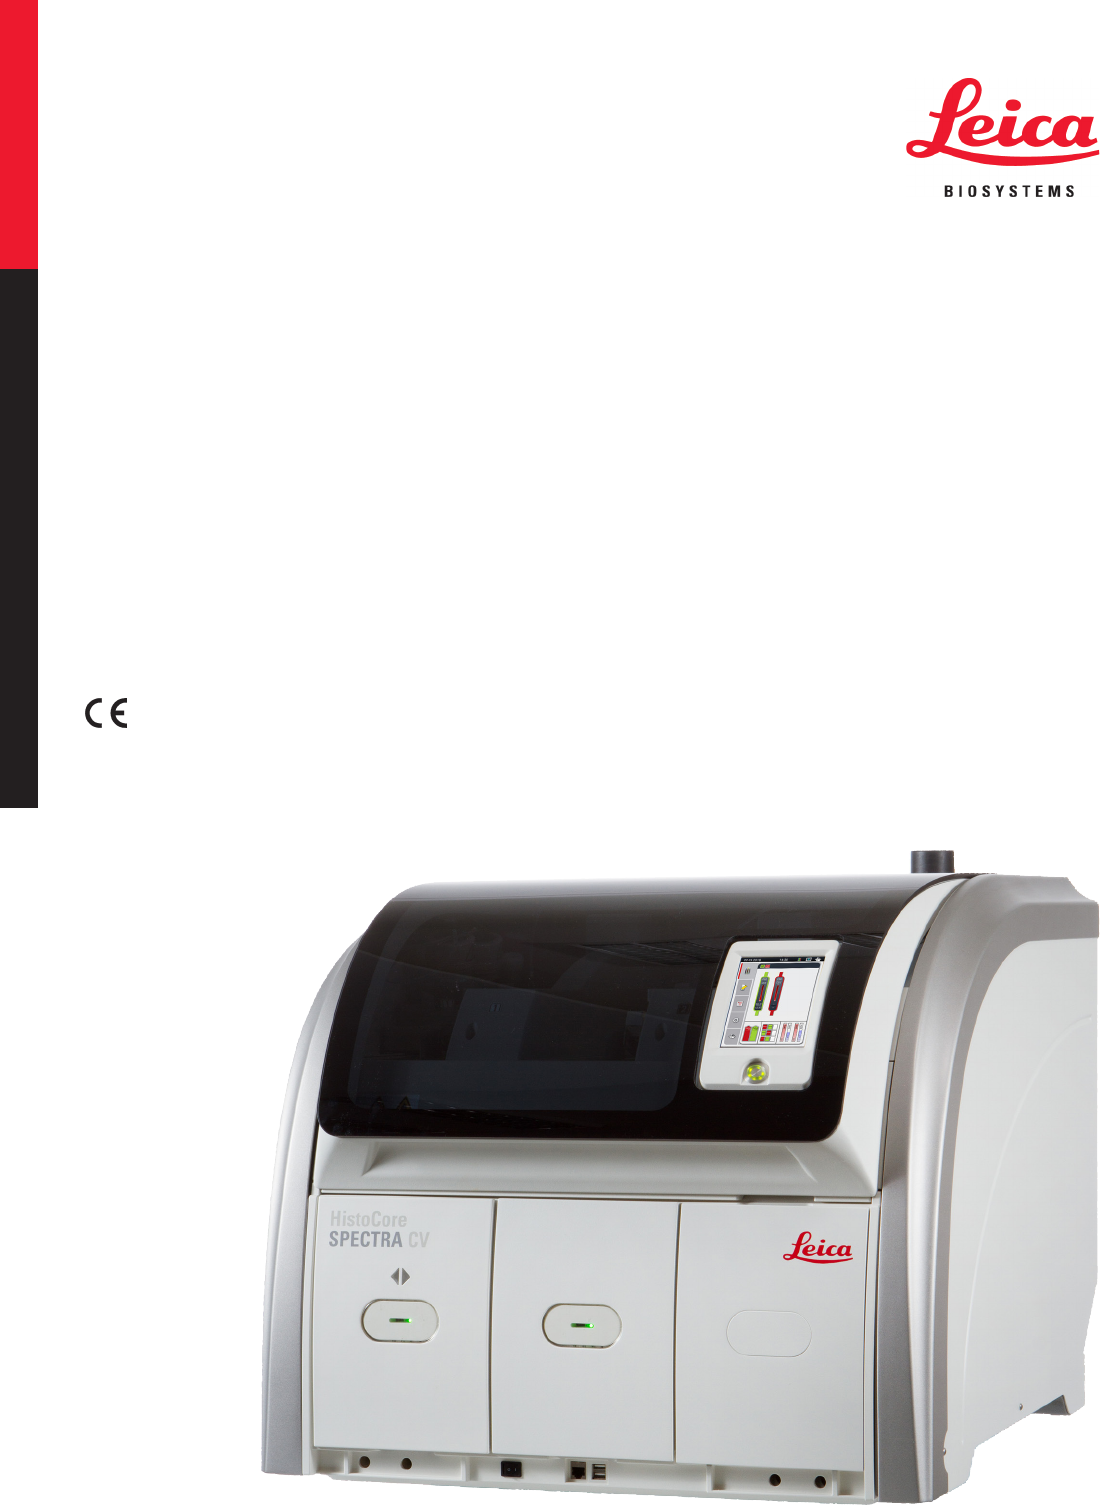
HistoCore SPECTRA CV
Coverslipper
Instructions for Use
English
Order No.: 14051480101 - Revision A
Always keep these instructions near the instrument.
Read carefully before working with the instrument.
Version 1.2, Revision A - 05.2018

3
HistoCore SPECTRA CV
The information, numerical data, notes and value judgments contained in this Instructions for Use
represent the current state of scientific knowledge and state-of-the-art technology as we understand
it following thorough investigation in this field.
We are under no obligation to update the present Instructions for Use periodically and on an ongoing
basis according to the latest technical developments, nor to provide our customers with additional
copies, updates etc. of this Instructions for Use.
To the extent permitted in accordance with the national legal system as applicable in each individual
case, we shall not be held liable for erroneous statements, drawings, technical illustrations etc.
contained in this Instructions for Use. In particular, no liability whatsoever is accepted for any financial
loss or consequential damage caused by or related to compliance with statements or other information
in this Instructions for use.
Statements, drawings, illustrations and other information regarding the contents or technical details of
the present Instructions for Use are not to be considered warranted characteristics of our products.
These are determined only by the contract provisions agreed between ourselves and our customers.
Leica reserves the right to change technical specifications as well as manufacturing processes without
prior notice. Only in this way is it possible to continuously improve the technology and manufacturing
techniques used in our products.
This document is protected under copyright laws. All copyrights to this documentation are held by
Leica Biosystems Nussloch GmbH.
Any reproduction of text and illustrations (or of any parts thereof) by means of print, photocopy,
microfiche, web cam or other methods – including any electronic systems and media – requires
express prior permission in writing by Leica Biosystems Nussloch GmbH.
For the instrument serial number and year of manufacture, please refer to the nameplate on the back
of the instrument.
Note
Leica Biosystems Nussloch GmbH
Heidelberger Str. 17 - 19
69226 Nussloch
Germany
Phone.: +49 6224 - 143 0
Fax: +49 6224 - 143 268
Web: www.LeicaBiosystems.com

4Version 1.2, Revision A
Table of Contents
1. Important Notes ........................................................................................................................................... 7
1.1 Symbols and their meanings.......................................................................................................................... 7
1.2 Instrument type .............................................................................................................................................. 12
1.3 User group ...................................................................................................................................................... 12
1.4 Intended use ................................................................................................................................................... 12
1.5 Copyright – Instrument software ................................................................................................................ 13
2. Safety .......................................................................................................................................................... 14
2.1 Safety notes .................................................................................................................................................... 14
2.2 Hazard warnings ............................................................................................................................................ 15
2.3 Safety features on the instrument .............................................................................................................. 18
3. Instrument Components and Specifications ........................................................................................ 19
3.1 Standard delivery – packing list .................................................................................................................. 19
3.2 Technical data ................................................................................................................................................ 20
3.3 General overview - front view ..................................................................................................................... 22
3.4 General overview - rear view ...................................................................................................................... 23
3.5 General overview - inside view ................................................................................................................... 24
4. Installation and Instrument Setup ......................................................................................................... 25
4.1 Installation site requirements ...................................................................................................................... 25
4.2 Electrical connection .................................................................................................................................... 26
4.2.1 Internal battery ............................................................................................................................................... 27
4.2.2 Using an external uninterruptible power supply (UPS) ........................................................................... 27
4.3 Exhaust air connection ................................................................................................................................. 28
4.4 Installing the accessories ............................................................................................................................ 28
4.4.1 Fit the drawer inserts into the unload drawer .......................................................................................... 28
4.4.2 Inserting the waste tray................................................................................................................................ 29
4.4.3 Filling and inserting the needle cleaning container ................................................................................ 30
4.5 Switching on and shutting down the instrument ..................................................................................... 31
4.6 Refilling consumables ................................................................................................................................... 33
4.6.1 Inserting a coverglass cartridge ................................................................................................................. 34
4.6.2 Inserting the mounting medium bottle and prime bottle ......................................................................... 35
4.6.3 Prepare the reagent vessel, fill it and insert it into the load drawer .................................................... 38
5. Operation .................................................................................................................................................... 40
5.1 User interface – overview ............................................................................................................................ 40
5.1.1 Grayed out function keys.............................................................................................................................. 41
5.2 Elements of the status display ..................................................................................................................... 42
5.3 Process status display .................................................................................................................................. 43
5.4 Consumables Management System (CMS) .............................................................................................. 44
5.5 Displaying the drawers ................................................................................................................................. 45
5.6 Main menu overview ..................................................................................................................................... 46
5.6.1 Entry keyboard ............................................................................................................................................... 46
5.7 User settings ................................................................................................................................................... 49
5.8 Basic settings ................................................................................................................................................. 51
5.8.1 Language settings ......................................................................................................................................... 52
5.8.2 Regional settings ........................................................................................................................................... 52
5.8.3 Date and time ................................................................................................................................................. 53
5.8.4 Menu for alarm sounds – Error and signal sounds .................................................................................. 54

5
HistoCore SPECTRA CV
Table of Contents
5.8.5 Oven settings .................................................................................................................................................. 56
5.8.6 Volume calibration ......................................................................................................................................... 60
5.8.7 Data management ......................................................................................................................................... 62
5.8.8 Event view ....................................................................................................................................................... 64
5.9 Parameter settings ........................................................................................................................................ 66
5.9.1 Creating a new parameter set ..................................................................................................................... 67
5.9.2 Assigning a parameter set to a rack handle color ................................................................................... 68
5.9.3 Properties of the mounting medium ........................................................................................................... 70
5.9.4 Properties of the coverglass........................................................................................................................ 71
5.9.5 Adjustment of the application volume........................................................................................................ 72
5.10 Reagent vessels in the load drawer ........................................................................................................... 73
5.11 Module status ................................................................................................................................................. 74
6. Daily Instrument Setup ............................................................................................................................ 76
6.1 Station overview ............................................................................................................................................ 76
6.2 Switching on and shutting down the instrument ..................................................................................... 77
6.3 Checking and refilling consumables .......................................................................................................... 78
6.3.1 Changing the mounting medium bottle ...................................................................................................... 79
6.3.2 Monitoring and refilling of the needle cleaning container ..................................................................... 82
6.3.3 Checking and replacing the coverglass cartridge ................................................................................... 83
6.3.4 Emptying the waste tray ............................................................................................................................... 87
6.3.5 Inspect Pick&Place module......................................................................................................................... 88
6.3.6 Load drawer .................................................................................................................................................... 88
6.3.7 Unload drawer ................................................................................................................................................ 90
6.4 Preparing the rack ......................................................................................................................................... 90
6.5 Brief inspection before starting the coverslipping operation ................................................................ 94
6.5.1 Procedure of the coverslipping operation................................................................................................. 94
6.6 Starting the coverslipping operation .......................................................................................................... 96
6.6.1 Monitoring the coverslipping operation .................................................................................................... 99
6.6.2 Coverslipping operation finished .............................................................................................................. 100
6.6.3 Pausing or canceling the coverslipping operation ................................................................................ 102
6.7 Workstation operation ............................................................................................................................... 105
6.7.1 Notes on workstation mode ....................................................................................................................... 105
6.7.2 Starting the coverslipping operation in workstation mode .................................................................. 108
7. Cleaning and Maintenance ...................................................................................................................109
7.1 Important notes about cleaning this instrument .................................................................................... 109
7.2 Description of cleaning individual instrument components and areas .............................................. 109
7.2.1 Exterior surfaces, varnished surfaces, instrument hood ...................................................................... 109
7.2.2 TFT touchscreen .......................................................................................................................................... 110
7.2.3 Input and unload drawers .......................................................................................................................... 110
7.2.4 Interior cleaning ........................................................................................................................................... 111
7.2.5 Cleaning the prime bottle ........................................................................................................................... 113
7.2.6 Cleaning the cannulas for the mounting medium bottle ....................................................................... 113
7.2.7 Cleaning the needle..................................................................................................................................... 113
7.2.8 Filling and changing the needle cleaning container ............................................................................. 114
7.2.9 Removing the complete unit of the needle cleaning container ........................................................... 115
7.2.10 Cleaning the Pick&Place module.............................................................................................................. 118
7.2.11 Exchange suction cups............................................................................................................................... 118
7.2.12 Cleaning the waste tray .............................................................................................................................. 119
7.2.13 Cleaning the reagent vessels .................................................................................................................... 119

6Version 1.2, Revision A
Table of Contents
7.2.14 Rack and handle .......................................................................................................................................... 120
7.2.15 Changing the active carbon filter.............................................................................................................. 121
7.2.16 Cleaning reagent vessels in the load drawer ......................................................................................... 121
7.3 Preparing the hose system for priming and cleaning ........................................................................... 122
7.3.1 Quick Prime ................................................................................................................................................... 125
7.3.2 Extended Prime ............................................................................................................................................ 126
7.3.3 Cleaning the hose system .......................................................................................................................... 127
7.3.4 Recommissioning after transport or storage .......................................................................................... 131
7.4 Recommended cleaning and maintenance intervals ............................................................................ 131
7.4.1 Daily cleaning and maintenance............................................................................................................... 131
7.4.2 Weekly cleaning and maintenance .......................................................................................................... 133
7.4.3 Quarterly cleaning and maintenance ....................................................................................................... 134
7.4.4 Cleaning and maintenance as necessary ............................................................................................... 134
8. Malfunctions and Troubleshooting .....................................................................................................135
8.1 Troubleshooting ........................................................................................................................................... 135
8.2 Power failure scenario and instrument failure ....................................................................................... 139
8.3 Manual removal of a rack in the event of instrument malfunctions ................................................... 141
8.3.1 Malfunction at the coverglass receptacle .............................................................................................. 144
8.3.2 Removing a rack from the elevator of the coverslip line ...................................................................... 146
8.3.3 Removing the rack from the lower area of the left elevator ................................................................ 149
8.3.4 Removing the rack from the oven or from behind the oven ................................................................. 150
8.3.5 Removal of the rack from the rotator ....................................................................................................... 151
8.3.6 Removal of the rack from the gripper above the rotator ...................................................................... 152
8.3.7 Removal of a rack from the transfer station of the HistoCore SPECTRA ST ..................................... 152
8.4 Replacing main fuses .................................................................................................................................. 153
9. Optional Accessories and Consumables ...........................................................................................155
9.1 Optional accessories .................................................................................................................................. 155
10. Warranty and Service ............................................................................................................................161
11. Decommissioning and Disposal ..........................................................................................................162
12. Decontamination Certificate ................................................................................................................163
7
HistoCore SPECTRA CV
Important Notes 1
1. Important Notes
1.1 Symbols and their meanings
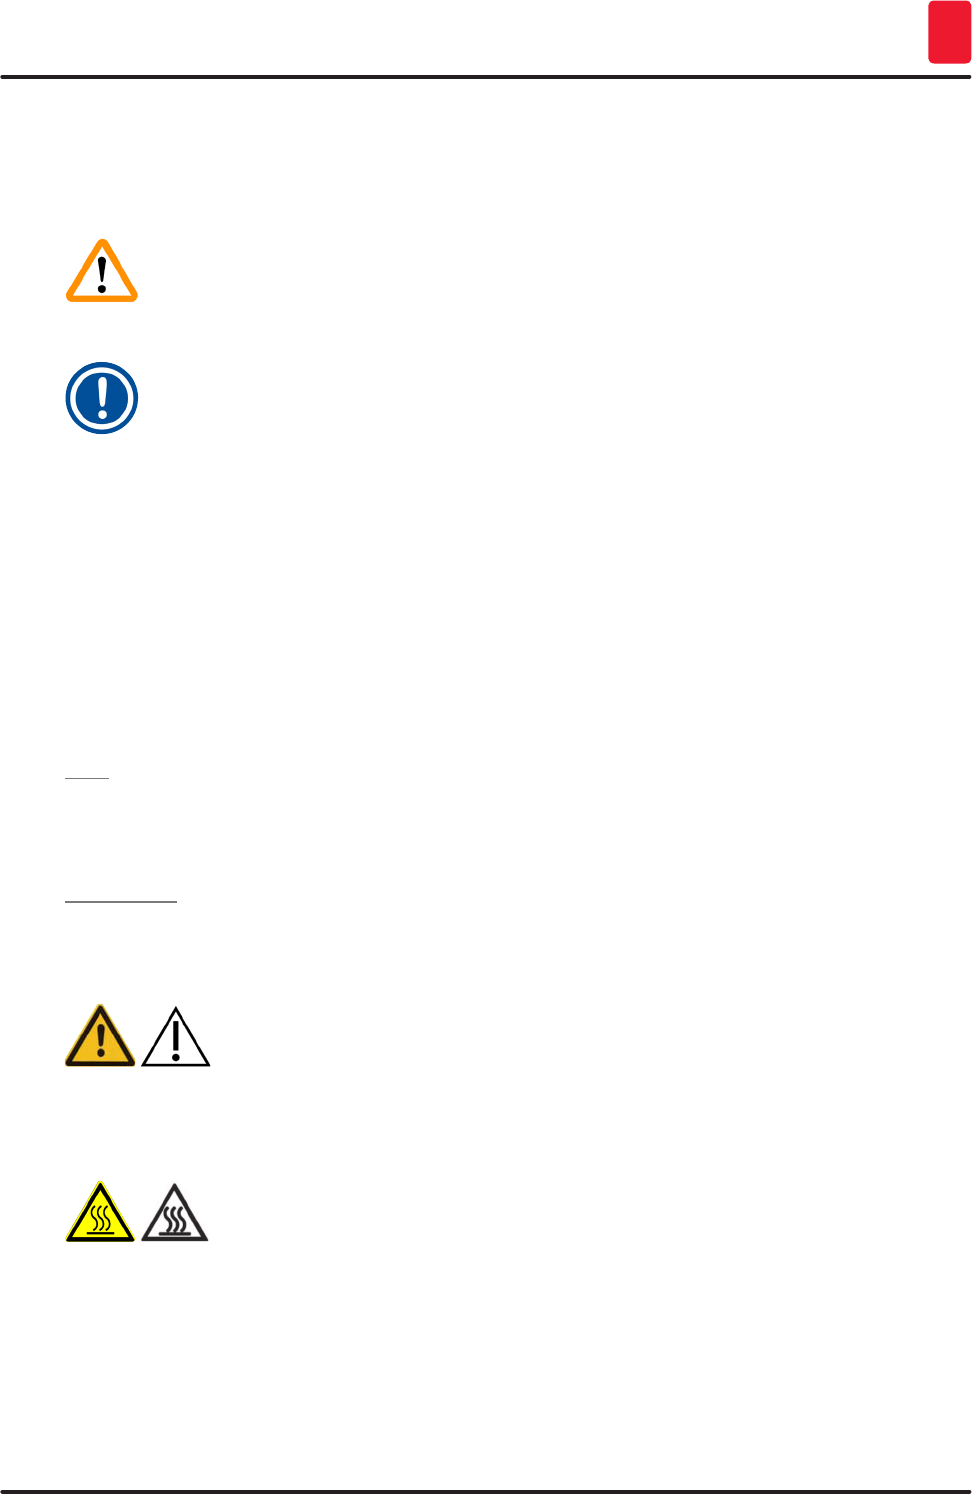
Symbol: Title of the symbol: Hazard warning
Description: Warnings are displayed in a white field with an
orange title bar. Warnings are identified by a
warning triangle.
Symbol: Title of the symbol: Note
Description: Notes, i.e. important information for the user,
are displayed in a white field with a blue title
bar. Notes are identified by a notification
symbol.
Symbol: Title of the symbol: Item number
→ "Fig. 7 – 1"Description: Item numbers for numbering illustrations.
Numbers in red refer to item numbers in
illustrations.
Symbol: Title of the symbol: Software designations
Supervisor Description: Software designations that have to be
displayed on the input screen are displayed as
bold, gray text.
Symbol: Title of the symbol: Function key
Save Description: Software symbols that have to be pressed on
the input screen are displayed as bold, gray
and underlined text.
Symbol: Title of the symbol: Keys and switches on the instrument
Main switch Description: Keys and switches on the instrument that are
supposed to be pressed by the user in various
situations are displayed as bold, gray text.
Symbol: Title of the symbol: Attention
Description: Indicates the need for the user to consult the
instructions for use for important cautionary
information such as warnings and precautions
that cannot, for a variety of reasons, be
presented on the medical device itself.
Symbol: Title of the symbol: Warning, hot surface
Description: Instrument surfaces which become hot during
operation are marked with this symbol. Avoid
direct contact to prevent risk of burning.
8Version 1.2, Revision A
Important Notes
1
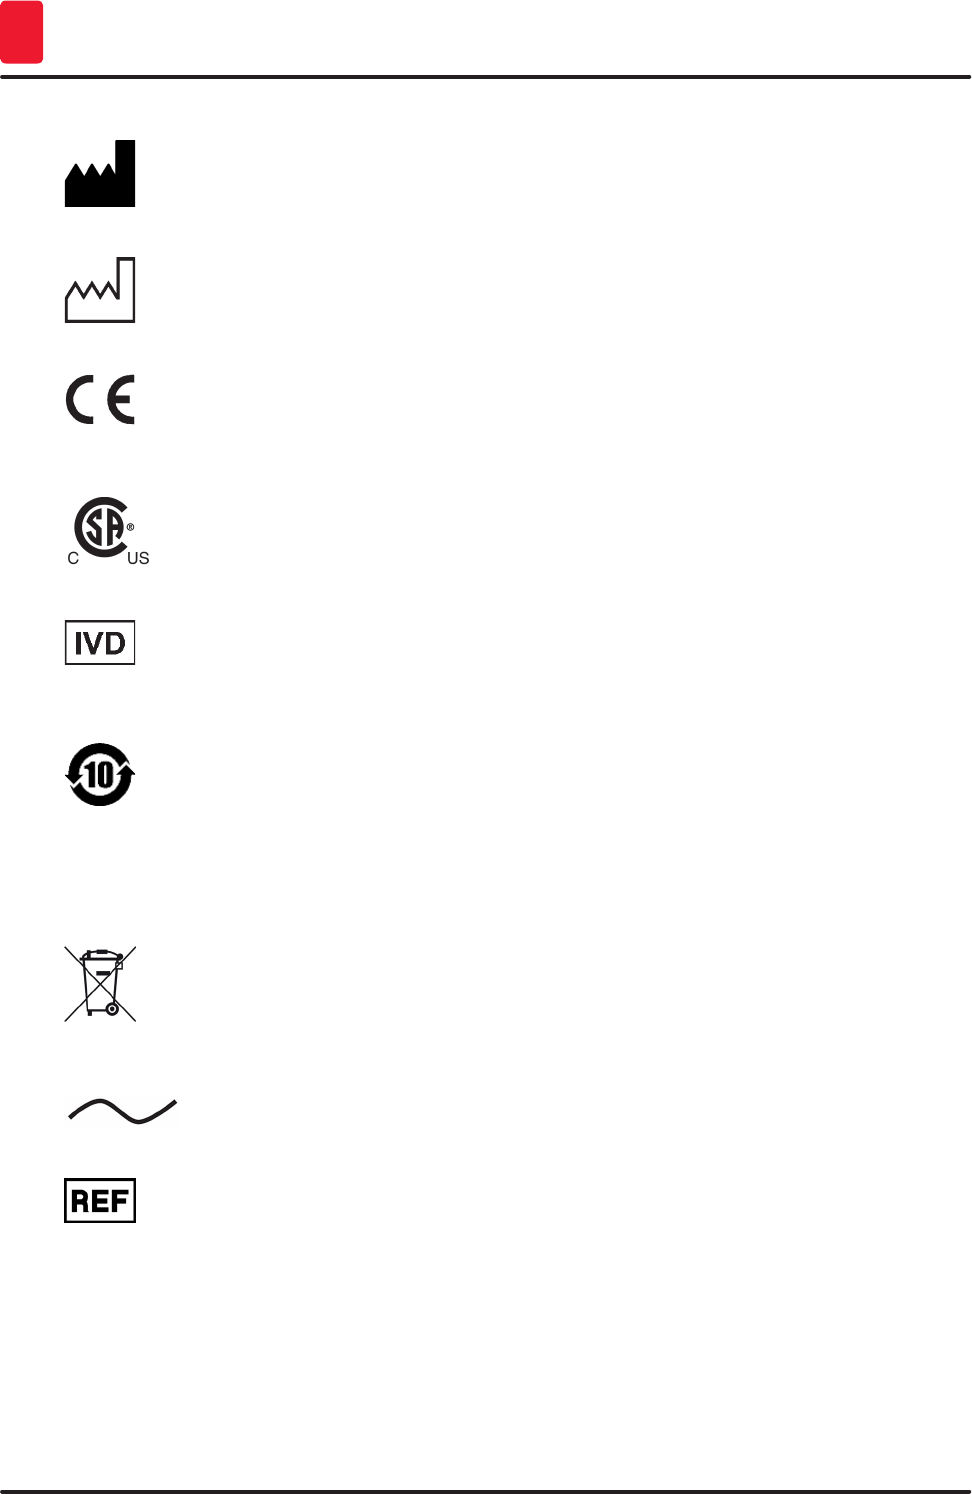
Symbol: Title of the symbol: Manufacturer
Description: Indicates the manufacturer of the medical
product.
Symbol: Title of the symbol: Date of manufacture
Description: Indicates the date when the medical device
was manufactured.
Symbol: Title of the symbol: CE Compliance
Description: The CE marking is the manufacturer's
declaration that the medical device meets the
requirements of the applicable EC directives.
Symbol: Title of the symbol: CSA Statement (Canada/USA)
Description: The CSA test mark means that a product has
been tested and fulfills the applicable safety
standards:
Symbol: Title of the symbol: In vitro diagnostic medical device
Description: Indicates a medical device that is intended
to be used as an in vitro diagnostic medical
device.
Symbol: Title of the symbol: China ROHS
Description: Environmental protection symbol of the China
RoHS directive. The number in the symbol
indicates the "Environment-friendly Use
Period" of the product in years. The symbol is
used if a substance restricted in China is used
in excess of the maximum permitted limit.
Symbol: Title of the symbol: WEEE symbol
Description: The WEEE symbol, indicating separate
collection for WEEE - Waste of electrical and
electronic equipment, consists of the crossed-
out wheeled bin (§ 7 ElektroG).
Symbol: Title of the symbol: Alternating current
Symbol: Title of the symbol: Article number
Description: Indicates the manufacturer's catalog number
so that the medical device can be identified.
9
HistoCore SPECTRA CV
Important Notes 1
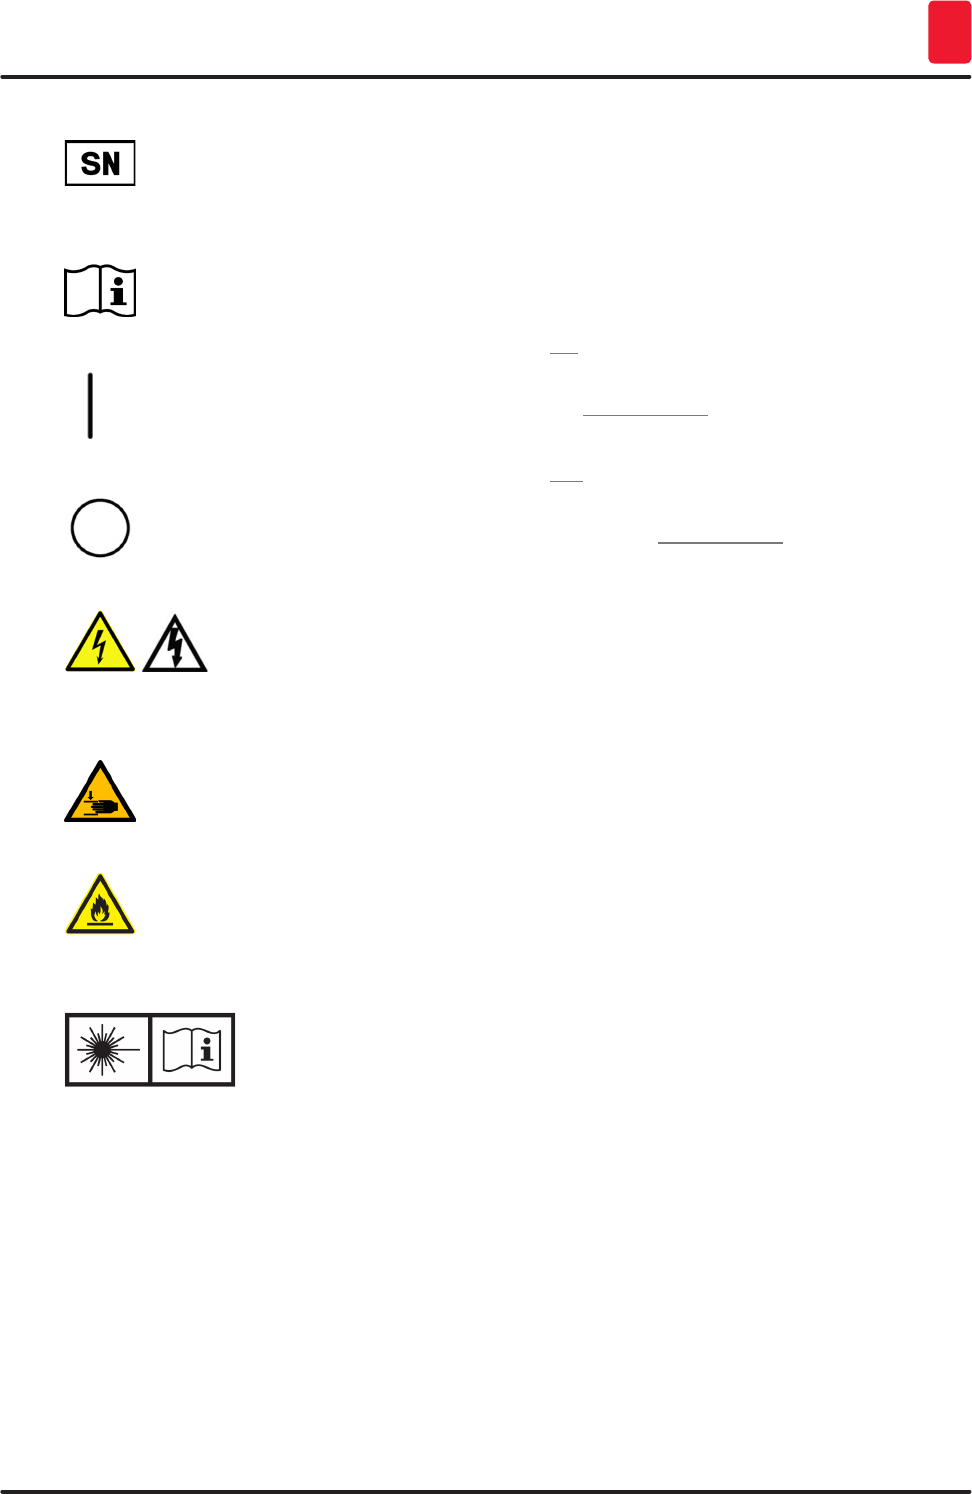
Symbol: Title of the symbol: Serial number
Description: Indicates the manufacturer's serial number
so that a specific medical device can be
identified.
Symbol: Title of the symbol: Consult instructions for use
Description: Indicates the need for the user to consult the
instructions for use.
Symbol: Title of the symbol: ON (Power)
Description: The power supply is connected upon pushing
the Power switch.
Symbol: Title of the symbol: OFF (Power)
Description: The power supply is disconnected upon
pushing the Power switch.
Symbol: Title of the symbol: Warning, risk of electric shock
Description: Instrument surfaces or areas which become
energized during operation are marked with
this symbol. Therefore, direct contact is to be
avoided.
Symbol: Title of the symbol: Caution: danger of crushing
Symbol: Title of the symbol: Flammable
Description: Inflammable reagents, solvents and cleaning
agents are marked with this symbol.
Symbol: Title of the symbol: Observe the laser beam warning and
Instructions for Use
Description: The product uses a class 1 laser source.
The safety notes for handling lasers and the
Instructions for Use must be observed.
10 Version 1.2, Revision A
Important Notes
1
Symbol: Title of the symbol: IPPC symbol
Description: The IPPC symbol includes:
• IPPC symbol
• Country code in accordance with ISO 3166,
e.g. DE for Germany
• Regional identifier, e.g. HE for Hesse
• Registration number, unique number
beginning with 49
• Treatment method, e.g. HT (heat treatment)
Symbol: Title of the symbol: Fragile, use with care
Description: Indicates a medical device that can be broken
or damaged if not handled carefully.
Symbol: Title of the symbol: Store dry
Description: Indicates a medical device that needs to be
protected from moisture.
Symbol: Title of the symbol: Do not stack
Description: Stacking of the transport package is not
allowed and no load should be placed on the
transport package.
Symbol: Title of the symbol: This way up
Description: Indicates correct upright position of the
transport package.
Symbol: Title of the symbol: Temperature limit for transport
Description: Indicates the temperature limits for transport
to which the medical device can be safely
exposed.
Symbol: Title of the symbol: Temperature limit for storage
Description: Indicates the temperature limits for storage
to which the medical device can be safely
exposed.
11
HistoCore SPECTRA CV
Important Notes 1
Symbol: Title of the symbol: Humidity limitation for transport and storage
Description: Indicates the range of humidity for transport
and storage to which the medical device can
be safely exposed.
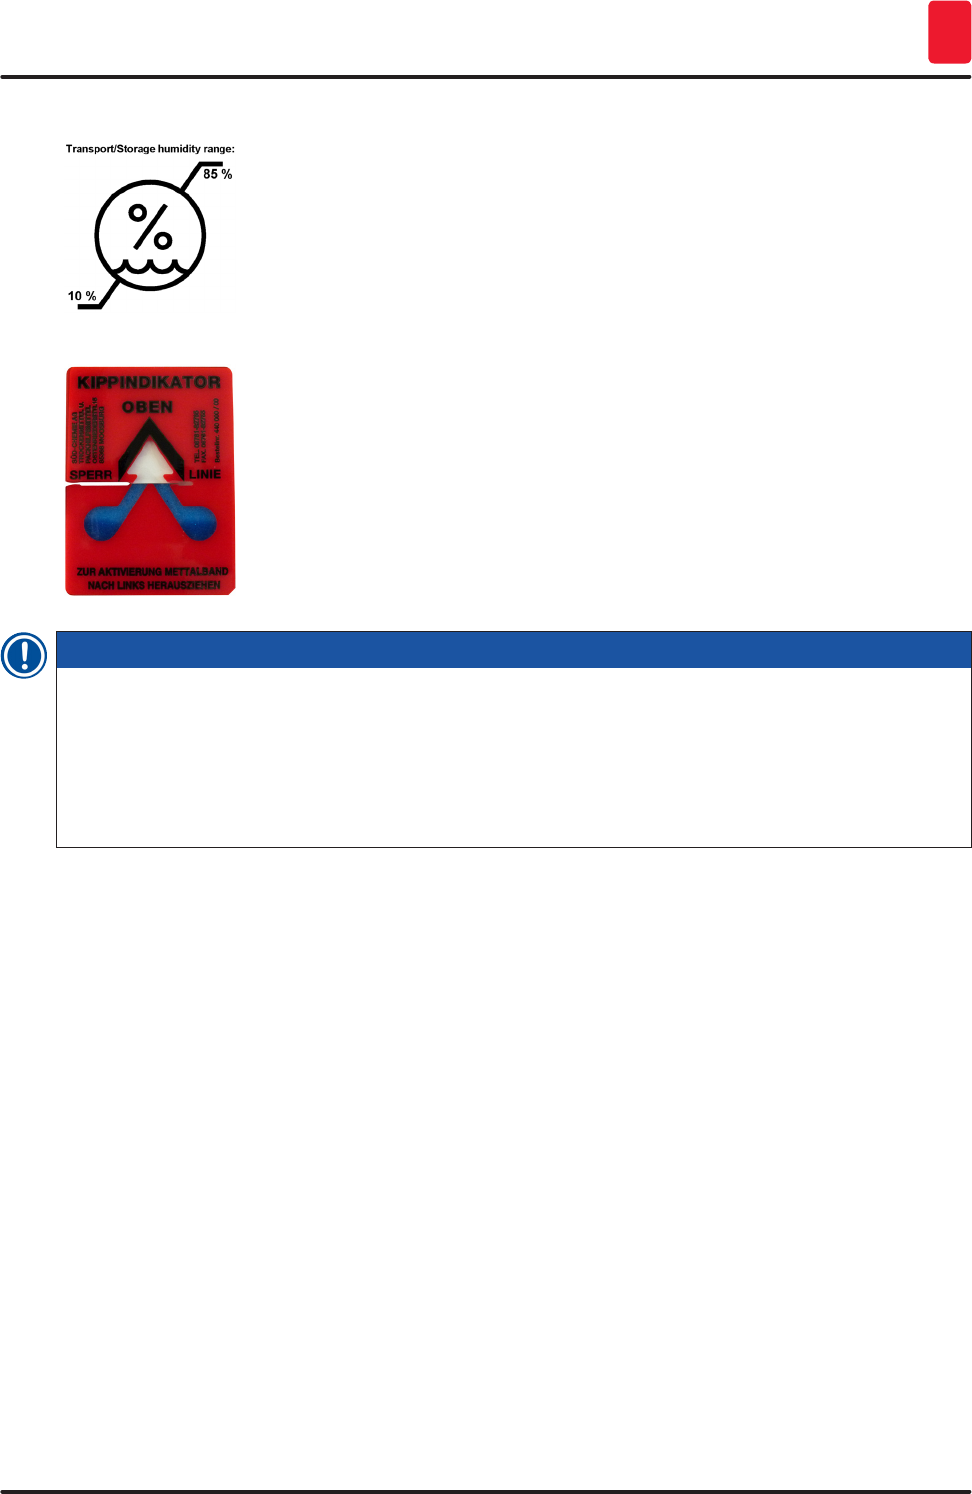
Appearance: Indication: Tilt indicator
Description: Indicator to monitor whether the shipment has
been transported and stored in upright position
according to your requirements. With a pitch
of 60° or more, the blue quartz sand flows into
the arrow-shaped indicator window and sticks
there permanently. Improper handling of the
shipment is immediately detectable and can be
proven definitively.
Note
• When delivering the instrument, the recipient must check that the tilt indicator is intact. The
responsible Leica representative must be notified if the indicator has been triggered.
• The Instructions for Use are accompanied by a bound "RFID Registration" supplemental sheet.
This supplemental sheet contains country-specific information for the user about the meaning of
the RFID symbols and registration numbers available on the packaging or the HistoCore SPECTRA
CV nameplate.
12 Version 1.2, Revision A
Important Notes
1
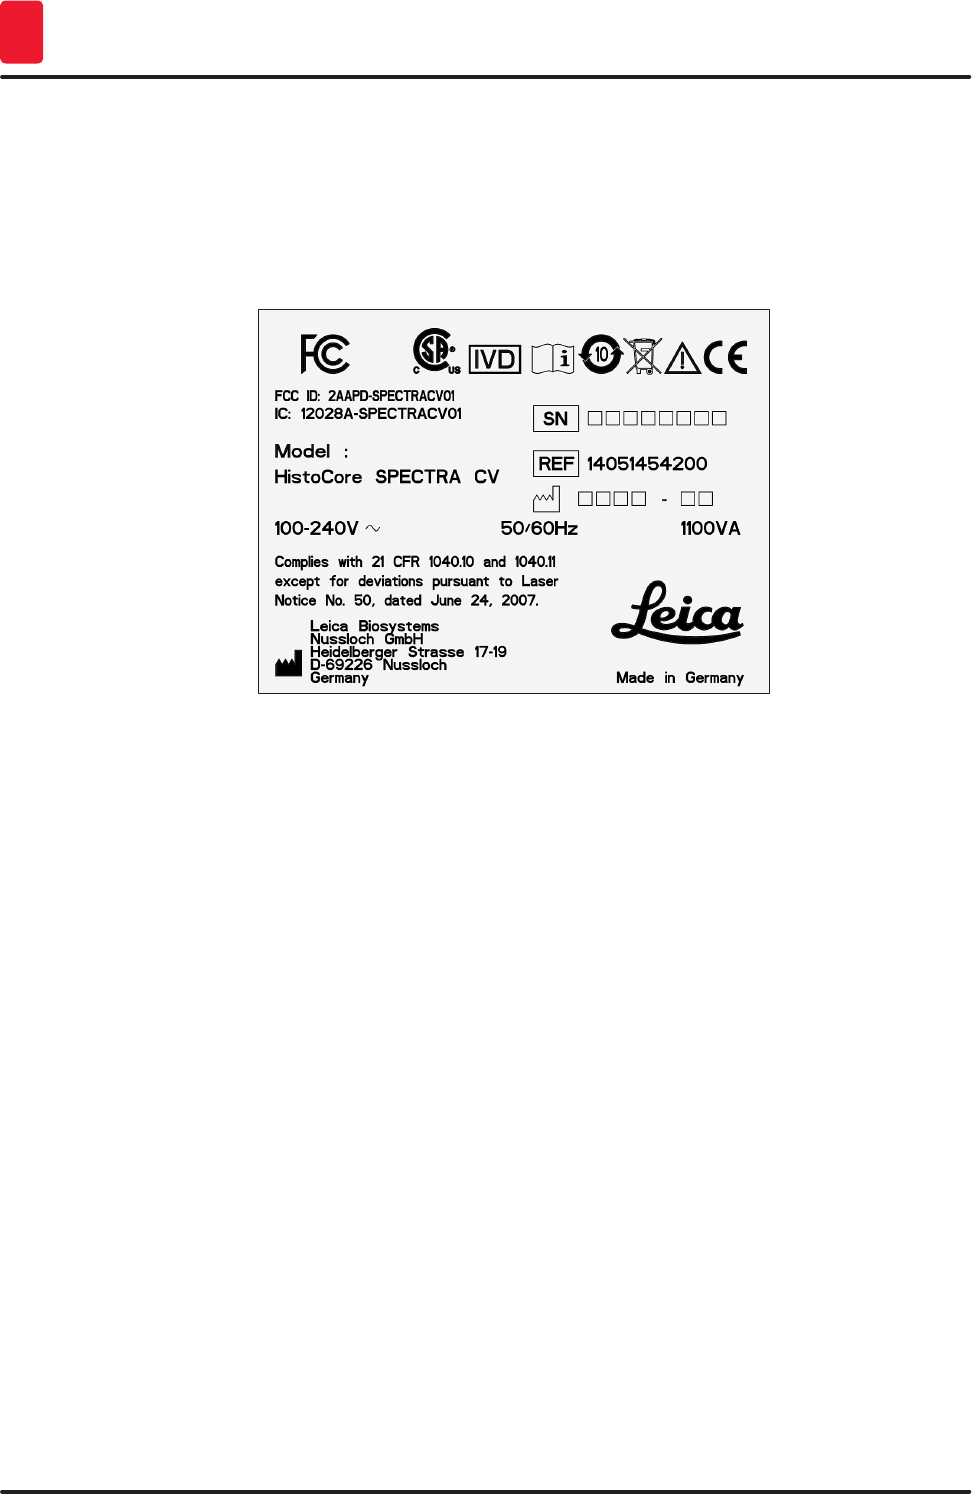
1.2 Instrument type
All information provided in these Instructions for Use applies only to the instrument type indicated on
the title page. A nameplate (→ Fig. 1) indicating the instrument serial number is attached to the rear
side of the instrument. The figure below (→ Fig. 1) is provided as an example only and shows a valid
nameplate for this instrument.
Fig. 1
1.3 User group
• The HistoCore SPECTRA CV must only be operated by authorized personnel comprehensively trained
in using lab reagents and their application in histology.
• All laboratory personnel designated to operate this instrument must read these Instructions for Use
carefully and must be familiar with all technical features of the instrument before attempting to
operate it.
1.4 Intended use
The HistoCore SPECTRA CV is a fully automated coverslipper that is used to apply mounting media
between the slide and coverglass. Then a coverglass is applied in order to preserve conserve the
specimen and to create a uniform visual surface for microscopic research on histological and
cytological tissue samples for medical diagnostics (e.g. cancer diagnostics).
This instrument may be operated only in conjunction with the coverglasses and mounting media
approved by Leica.

13
HistoCore SPECTRA CV
Important Notes 1
Warning
Any use of the instrument that deviates from the designated use is considered improper. Failure to
adhere to these instructions may result in an accident, personal injury, damage to the instrument
or accessory equipment. Proper and intended use includes compliance with all inspection and
maintenance instructions, along with the observance of all notes in the Instructions for Use as well
as the constant inspection of the media being used for storage life and quality.
1.5 Copyright – Instrument software
The software installed and used on the HistoCore SPECTRA CV is subject to the following license
agreements:
1. GNU General Public License Version 2.0, 3.0
2. GNU Lesser General Public License 2.1
3. additional software not licensed under the GPL/LGPL
The complete license agreements for the first and second items in the list can be found on the provided
language CD (→ P. 19 – 3.1 Standard delivery – packing list) in the Software Licenses directory.
Leica Biosystems provides a complete machine-readable copy of the source code to every third party
in compliance with the agreements of the GPL/LGPL applicable for the source code or of the other
applicable licenses. To contact us, go to www.leicabiosystems.com and use the corresponding contact
form.

14 Version 1.2, Revision A
Safety
2
2. Safety
2.1 Safety notes
Warning
• The safety and caution notes in this chapter must be observed at all times. Be sure to read these
notes even if you are already familiar with the operation and use of other Leica instruments.
• The protective devices located on the instrument and the accessories must not be removed or
modified.
• Only qualified service personnel authorized by Leica may repair the instrument and access its
internal components.
Residual risks:
• The instrument has been designed and constructed with the latest state-of-the-art technology and
according to recognized standards and regulations with regard to safety technology. Operating or
handling the instrument incorrectly can place the user or other personnel at risk of injury or death
or can cause damage to the instrument or property.
• The instrument may be used only as intended and only if all of its safety features are in proper
working condition.
• If malfunctions occur that can impede safety, the instrument must be put out of operation
immediately and the responsible Leica service technician must be notified.
• Only original spare parts and approved original Leica accessories may be used.
• Electromagnetic compatibility, emitted interference and immunity to interference are applicable,
as are the requirements in accordance with IEC 61326-2-6. The requirements in accordance
with IEC 61010-1, IEC 61010-2-101, IEC 62366 and ISO 14971 with regard to safety information are
applicable.
These Instructions for Use include important instructions and information related to the operating safety
and maintenance of the instrument. The Instructions for Use are an important part of the product, and
must be read carefully prior to startup and use and must always be kept near the instrument.
Note
These Instructions for Use must be appropriately supplemented as required by the existing
regulations on accident prevention and environmental safety in the operator‘s country.
The instrument's EC Declaration of Conformity can be found on the Internet at:
http://www.LeicaBiosystems.com
This instrument has been built and tested in accordance with the safety requirements for electrical
equipment for measurement, control, and laboratory use. To maintain this condition and ensure safe
operation, the user must observe all notes and warnings contained in these Instructions for Use.
15
HistoCore SPECTRA CV
Safety 2
Warning
• The presence of malware on the system can lead to uncontrolled system behavior. Ensuring that
the behavior of the instrument conforms to specifications is no longer possible in this case! If the
user suspects malware is on the system, the local IT department must be notified immediately.
• You must make sure that any data loaded onto the instrument is free of viruses. No anti-virus
software is provided.
• The instrument is only suited for integration in a firewall-protected network. Leica shall not
assume any liability for errors due to integration in an unprotected network.
• ONLY technicians trained and permitted by Leica can connect a USB input device (mouse/
keyboard, etc.). This also applies to the network connection, which is to be used only together
with Remote Care (service diagnostics).
In the interest of specimen safety, the HistoCore SPECTRA CV indicates when it is necessary
for the user to intervene using on-screen messages and audible signals. Therefore, the
HistoCore SPECTRA CV robotic coverslipper requires that the user is within hearing distance during
operation.
Warning
The product uses a class 1 laser source.
Attention, laser radiation! Do not look into the beam! This can cause injury to the retina of the eye.
Warning
LASER RADIATION - DO NOT
STARE INTO BEAM
ISO 60825-1: 2014
P<1 mW, λ = 630 to 670 nm
Pulse duration = 500 µs
Class 1 laser product
2.2 Hazard warnings
The safety devices installed in this instrument by the manufacturer only constitute the basis for accident
prevention. Operating the instrument safely is, above all, the responsibility of the owner, as well as the
designated personnel who operate, service or repair the instrument.
To ensure trouble-free operation of the instrument, make sure to comply with the following notes and
warnings.
Please note that electrostatic discharges can result due to direct or indirect contact with the
HistoCore SPECTRA CV.
Warning
Markings on the instrument surface showing the warning triangle indicate that the correct operating
instructions (as defined in these Instructions for Use) must be followed when operating or replacing
the item marked. Failure to adhere to these instructions may lead to accidents causing personal
injury and/or damage to the instrument or accessories or destroyed, unusable specimens.
16 Version 1.2, Revision A
Safety
2
Warning
Certain surfaces of the instrument are hot during operation under normal conditions. They are
marked with this warning sign. Touching these surfaces without suitable safety measures can cause
burns.
Warnings - Transport and installation
Warning
• The instrument must only be transported in an upright position.
• The empty weight of the instrument is 110 kg; therefore, four qualified persons are required to lift
or carry the instrument!
• Use non-skid gloves to lift the instrument!
• A Leica service technician must carry out any transport, installation or possible move of the
instrument.
• Retain the instrument packaging.
• Place the instrument on a sturdy laboratory bench (load capacity 150 kg/m2) and adjust it to a
horizontal position.
• A Leica service technician must re-level and recalibrate the instrument after any transport.
• Prevent the instrument from being exposed to direct sunlight.
• Only connect the instrument to a grounded power socket. Do not interfere with the grounding
function by using an extension cord without a ground wire.
• Exposure to extreme temperature changes between storage and installation locations and high air
humidity may cause condensation inside the instrument. If this is the case, wait at least two hours
before switching on the instrument.
• The installation of the instrument at the area of use and a possible transport to a new location can
only take place with the help of a Leica service technician.
• A Leica service technician must carry out the restart of the instrument.
Warnings – Handling reagents
Warning
• Caution when handling solvents and mounting media!
• Cover the reagent vessels during instrument pauses to avoid evaporation of the filled reagent.
Caution! Reagent vapors (e.g. xylene) can be irritating.
• Always wear protective clothing suitable for laboratory use, as well as rubber gloves and safety
goggles when handling the chemicals and mounting medium used in this instrument.
• The installation site must be well-ventilated. Alternatively, the instrument can be connected to an
external exhaust air extraction system. The chemicals to be used in the HistoCore SPECTRA CV
are flammable and hazardous to health.
• Do not operate the instrument in rooms with an explosion hazard.
• When disposing of spent reagents, observe the applicable local regulations and the waste
disposal regulations of the company/institution in which the instrument is being operated.
• Reagent vessels must always be filled outside of the instrument in compliance with the safety
information.
• Danger of explosion and potential respiratory tract irritation due to flammable, evaporative
reagents in the oven.
17
HistoCore SPECTRA CV
Safety 2
Warnings – Operating the instrument
Warning
• The instrument may be operated by trained laboratory personnel only. It must only be operated
for the purpose of its designated use and according to the instructions contained in these
Instructions for Use. Antistatic protective clothing made from natural fibers (e.g. cotton) should be
worn when working with the instrument.
• When working with the instrument, wear suitable protective clothing (lab coat, safety goggles and
gloves) for protection against reagents and potentially infectious micro-biological debris.
• In the event of an emergency, shut down the Main switch (→ Fig. 2-8) and unplug the instrument
from the Power supply (→ Fig. 3-2) (circuit breaker in accordance with EN ISO 61010-1).
• For severe instrument faults, the warning and error messages on the screen must be followed.
Samples located in the process must be removed from the instrument immediately. The user is
responsible for the safe further processing of the samples.
• There is a fire hazard if work with an exposed flame (e.g. Bunsen burner) is carried out in the
direct vicinity of the instrument (solvent vapors). Therefore, keep all ignition sources at least
2 meters away from the instrument!
• Be absolutely certain to operate the instrument with the active carbon filter, technical ventilation
system and an exhaust air hose, as using the instrument may result in the formation of solvent
vapors that are both flammable and hazardous to health, even when the instrument is used as
intended!
• The user must stay within earshot during the operation in order to react immediately during
instrument malfunctions.
Note
For instrument fume control, Leica recommends a delivery volume of 50 m3/h and an 8x air exchange
rate (25 m3/m2h) in the lab.
Warning
• Personal protective clothing in the form of a respirator must be worn when working directly with
reagent vessels that contain solvents.
• Opening the hood when one or more coverslipping process(es) are active causes delays, since no
transport movements take place during this time. Tissue samples might dry out.
• Make sure to keep the instrument cover closed while processing is active. Leica assumes no
liability for loss of quality caused by opening the instrument hood during processing.
• ATTENTION when closing the hood: Crushing hazard! Do not reach into the swivel range of the
hood!
• Liquid must not get behind covers or in gaps while operating or cleaning the instrument.

18 Version 1.2, Revision A
Safety
2
Warnings - Cleaning and Maintenance
Warning
• The instrument should always be cleaned after the end of work, but BEFORE the instrument is
shut down. An exception from this is cleaning the interior (→ P. 111 – 7.2.4 Interior cleaning).
We recommend cleaning while the instrument is shut down.
• When cleaning the instrument, wear suitable protective clothing (lab coat, cut-resistant gloves
and safety goggles) to protect from reagents and potentially infectious micro-biological debris.
• When using cleaners, please comply with the safety instructions of the manufacturer and the
laboratory safety regulations.
• Do not use any of the following for cleaning the outside surfaces of the instrument: alcohol,
detergents containing alcohol (glass cleaners), abrasive cleaning powders, solvents containing
acetone, ammonia, chlorine, or xylene!
• Clean the hood and housing using mild commercial, pH-neutral household cleaners. The finished
surfaces are not resistant to solvents and xylene substitutes!
• The plastic reagent vessels can be cleaned in a dishwasher at a maximum temperature of +65 °C.
Any standard cleaning agent for laboratory dishwashers may be used. Never clean the plastic
reagent vessels at higher temperatures since higher temperatures can cause the reagent vessels
to become deformed.
2.3 Safety features on the instrument
Warning
• Make sure to keep the hood closed whenever coverslipping processes are active. Leica assumes
no liability for loss of quality caused by opening the hood during processing.
• If the hood of the instrument is opened, the movements are stopped for safety reasons as soon as
the slide currently being coverslipped is finished being coverslipped in order to avoid any risk of
specimen damage due to collision with moving parts.
• Opening the hood when one or more coverslipping process(es) is/are active causes delays in the
respective processing steps since no transport movements take place for this time frame.

19
HistoCore SPECTRA CV
Instrument Components and Specifications 3
3. Instrument Components and Specifications
3.1 Standard delivery – packing list
Qty Designation Order No.
1 HistoCore SPECTRA CV basic instrument 14 0514 54200
4 Rack for 30 slides* (3 pcs. per package) 14 0512 52473
1 Handle for rack for 30 slides* (yellow, 3 pcs. per package) 14 0512 52476
1 Handle for rack for 30 slides* (light blue, 3 pcs. per package) 14 0512 52477
1 Handle for rack for 30 slides* (red, 3 pcs. per package) 14 0512 52480
1 Handle for rack for 30 slides* (white, 3 pcs. per package) 14 0512 52484
2 Label cover S 14 0512 53748
2 Label cover, blank 14 0512 47323
2 Reagent vessel, assembly, each consisting of 1 pc.: 14 0512 47086
Reagent vessel 14 0512 47081
Reagent vessel cover 14 0512 47085
Reagent vessel handle 14 0512 47084
1 Prime bottle, assembly, consisting of: 14 0514 53931
1 Lab bottle, 150 ml 14 0514 56202
1 Screw cap 14 0478 39993
1 Prime bottle insert 14 0514 57251
1 28x3 mm O-ring 14 0253 39635
1 Cleaning bottle 14 0514 57248
1 Needle cleaning container, kit (2 pcs., as reserve) 14 0514 54195
3 Rack storage rails for the unload drawer 14 0514 55967
1 Exhaust air hose set, consisting of: 14 0514 54815
1 Exhaust air hose, 2 m 14 0422 31974
1 Hose clamp 14 0422 31973
1 Pair of cut-resistant gloves, size M 14 0340 29011
1 Tool kit HistoCore SPECTRA CV, consisting of: 14 0514 54189
1 Screwdriver, 5.5x150 14 0170 10702
1 Leica brush 14 0183 30751
2 T16A fuse 14 6000 04696
1 Active carbon filter set, consisting of: 14 0512 53772
2 Active carbon filter 14 0512 47131
4 Suction cups (as reserve) 14 3000 00403
2 Waste trays 14 0514 49461
1 Instructions for Use, printed (German/English, with language CD 14
0514 80200)
14 0514 80001
*OT = slide

20 Version 1.2, Revision A
Instrument Components and Specifications
3
The country-specific power cable must be ordered separately. A list of all power cables that are
available for your instrument can be found on our website www.LeicaBiosystems.com in the Product
area.
Note
The delivered components must be carefully compared against the packing list, delivery note, and
your order. Should you find any discrepancies, please contact your Leica sales office without delay.
3.2 Technical data
Nominal supply voltages: 100–240 V AC +10 %
Nominal frequency: 50/60 Hz
Power draw: 1100 VA
Fuses: 2 x T16 A H 250 V AC
IEC 1010 classification: Protection class 1
Pollution degree in accordance with IEC61010-1: 2
Overvoltage category in accordance with IEC61010-1: II
Exhaust air: Hose length: 2000 mm
Inner diameter: 50 mm
Outer diameter: 60 mm
Exhaust performance: 30 m3/h
Exhaust extraction: Active carbon filter and exhaust hose for connecting with an external
exhaust system.
Heat emission: 1100 J/s
A-weighted noise level, measured at 1 m distance: < 60 dB (A)
Connections:
1 x RJ45 Ethernet (rear): RJ45 - LAN (external data management)
1 x RJ45 Ethernet (front): Only for service purposes
2 x USB 2.0 (front): 5 V/500 mA (service & data storage)
International protection class:
1st parameter = Protected against fixed foreign bodies with a
diameter≥12.5mm
2nd parameter = No protection against water
IP20
Ambient conditions:
Operation: Temperature: +18 °C to +30 °C
Relative humidity: 20 % to 80 %, non-condensing
Operating elevation: Up to a max. of 2000 m above sea
level
Storage: Temperature: +5 °C to +50 °C
Relative humidity: 10 % to 85 %, non-condensing
Transport: Temperature: -29 °C to +50 °C

21
HistoCore SPECTRA CV
Instrument Components and Specifications 3
Relative humidity: 10 % to 85 %, non-condensing
HistoCore SPECTRA CV
Dimensions and weights:
Dimensions
(length x depth x height):
Hood closed:
690 x 785 x 585 mm
Hood opened:
690 x 785 x 943 mm
Empty weight (without
reagents and accessories):
110 kg
Workstation dimensions
and weights
(HistoCore SPECTRA CV and
HistoCore SPECTRA ST):
Dimensions
(length x depth x height):
Hood closed:
2044 x 785 x 585 mm
Hood opened:
2044 x 785 x 943 mm
Empty weight (without
reagents and accessories):
295 kg
Performance: Usable slides: In accordance with DIN ISO 8037-1
(76 mm x 26 mm)
Coverglass cartridge
capacity:
Exclusively Leica consumables with
300 coverglasses per magazine
Coverglasses: Exclusively Leica consumables.
Available size:
50 mm x 24 mm, thickness: No. 1
In accordance with ISO 8255-1
Mounting medium application
quantity:
Preset value corresponding to
coverglass size. Fine adjustment by
users possible.
Types of mounting media: Exclusively Leica consumables:
X1 mounting medium
Capacity of mounting medium
bottle:
At least 1600 slides
Racks: Leica rack for 30 slides
Factory settings: Mounting medium application
volume:
0 (→ P. 60 – 5.8.6 Volume
calibration)
Oven temperature: 40 °C (not changeable)
Oven step: Enabled
Date format: International (DD.MM.YYYY)
Time format: 24 h
Language: English
Note
When using an external uninterruptible power supply (UPS), it should be designed for an output of at
least 1100 VA and ensure operation over a time frame of at least 10 minutes.
22 Version 1.2, Revision A
Instrument Components and Specifications
3
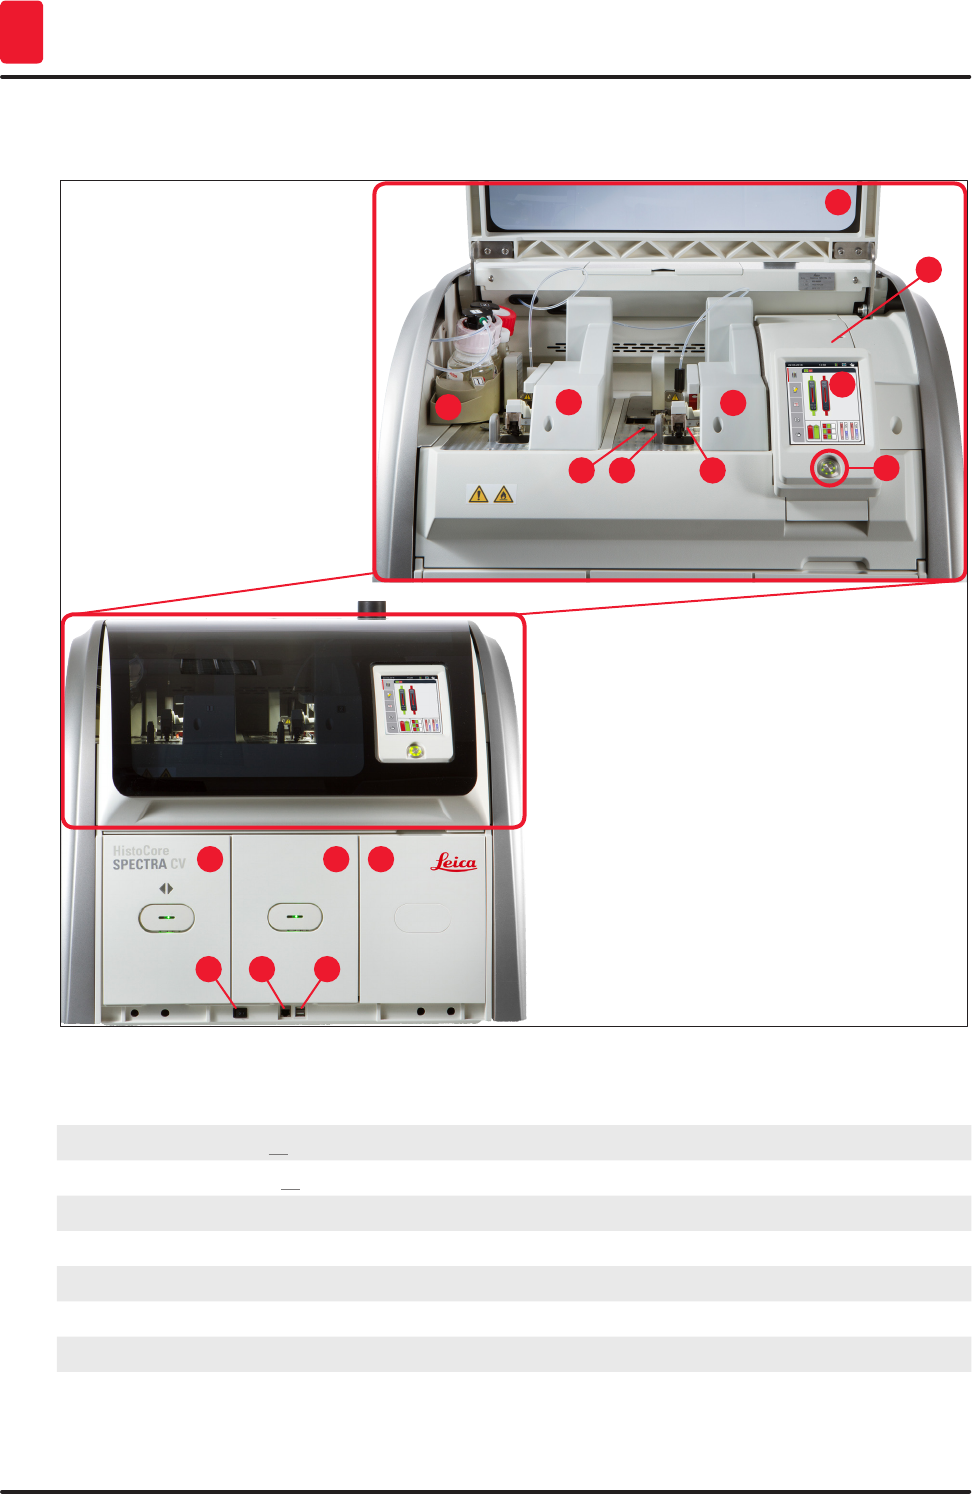
3.3 General overview - front view
Fig. 2
1
6
11
16 2
7
12
3
8
13
4 9
14
5
10
15
1Instrument cover 9Access to oven
2Left coverslip line L1 10 Operating switch
3Right coverslip line L2 11 Screen with user interface
4Load drawer 12 Fuses
5Unload drawer 13 Pick&Place module
6Service access 14 Waste tray
7USB slot 15 Coverglass cartridge
8Main switch 16 Bottle sledge
23
HistoCore SPECTRA CV
Instrument Components and Specifications 3
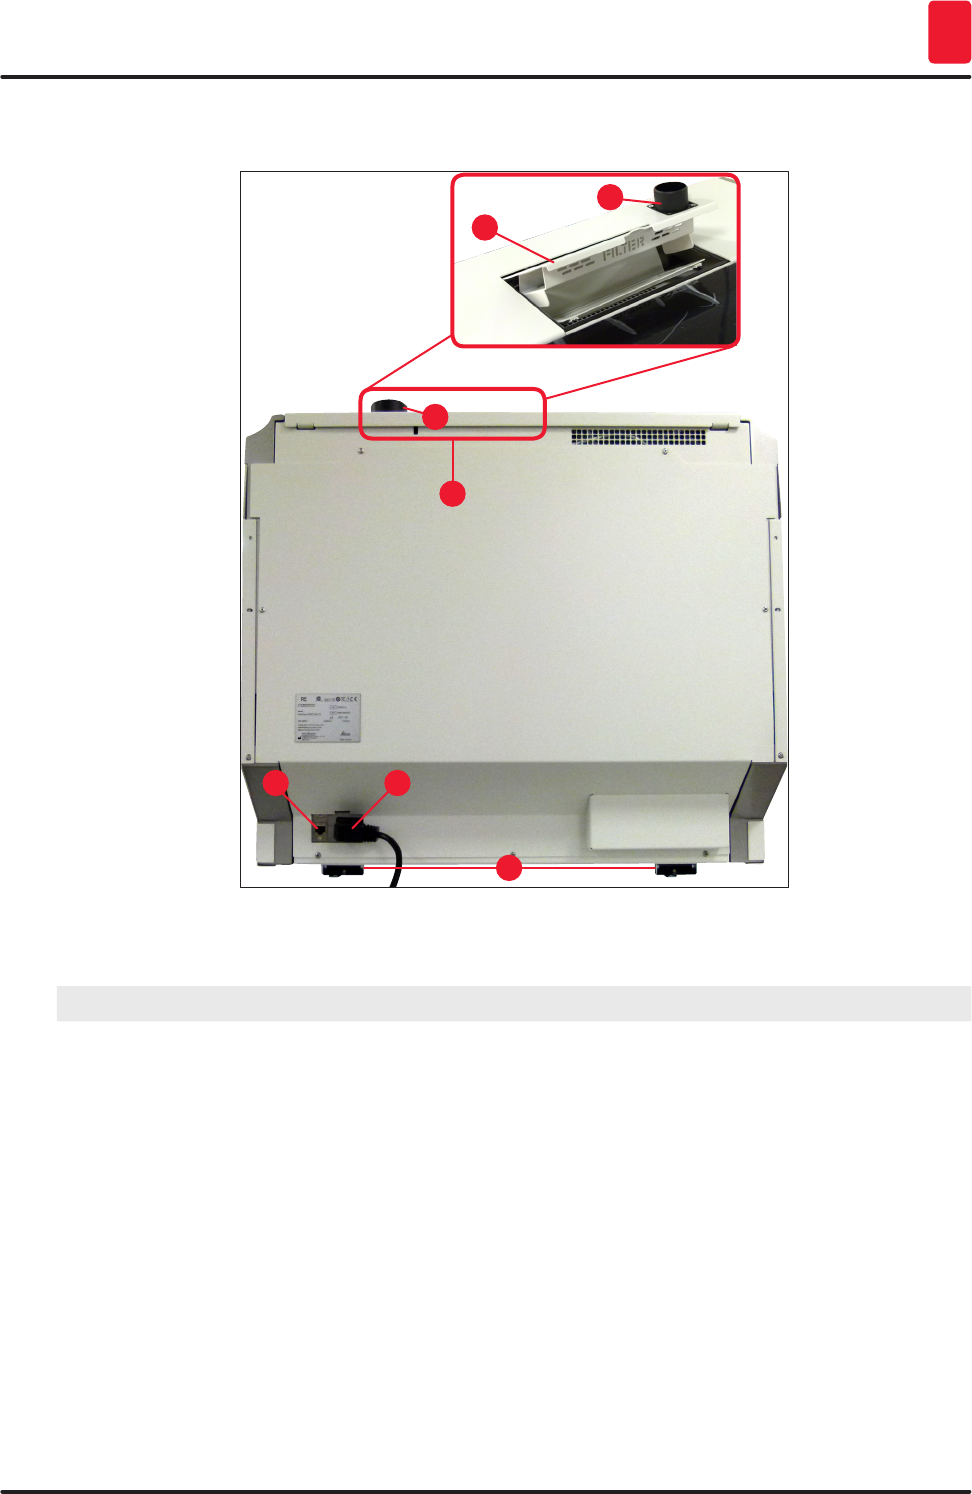
3.4 General overview - rear view
Fig. 3
4
4
3
3
1 2
5
1Network connection (Remote Care) 4Access to active carbon filter
2Power supply 5Height-adjustable instrument feet
3Exhaust air connection
24 Version 1.2, Revision A
Instrument Components and Specifications
3
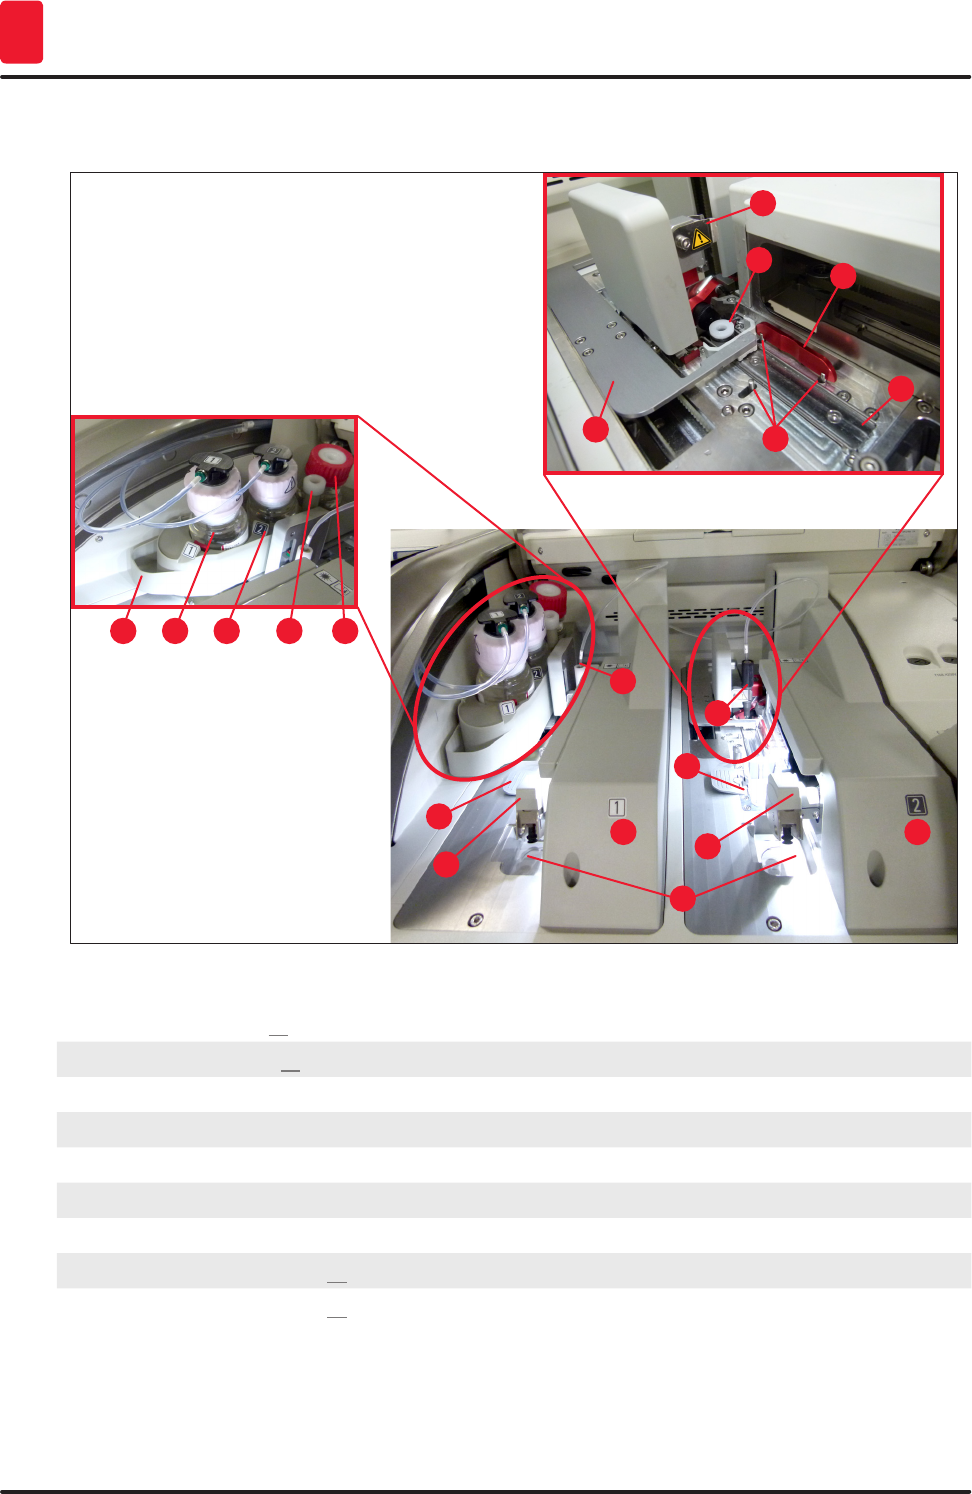
3.5 General overview - inside view
12
13
14
15
17
16
1
6
6
2
33
5
5
4
107 8 9 11
Fig. 4
1Left coverslip line L1 10 Parking location
2Right coverslip line L2 11 Prime bottle
3Pick&Place module 12 Alignment pins
4Waste tray 13 Red bar
5Coverglass cartridge 14 Shifter and shifter tongue
6Needle 15 Needle cleaning container
7Bottle sledge 16 Coverslipping position of the slide
8Mounting medium bottle L1 17 Needle holder
9Mounting medium bottle L2
25
HistoCore SPECTRA CV
Installation and Instrument Setup 4
4. Installation and Instrument Setup
4.1 Installation site requirements
Note
• Installation, adjustment and level alignment of the instrument are carried out as part of the
instrument installation by a service technician certified by Leica only.
• The level orientation is done using a level and by adjusting the height-adjustable instrument feet
(→ Fig. 3-5).
• Use 4 qualified persons when lifting the instrument. Grab under the frame at all corners and lift
evenly.
Warning
Failure to level the instrument correctly may result in instrument malfunctions. Slides may slide out of
the rack during the necessary transport movements.
• Ensure that there is a vibration-free floor and sufficient clear space (approx. 1.10 m) above the
laboratory bench to allow unobstructed opening of the hood.
• It is the user's responsibility to make sure that a compatible electromagnetic environment is
maintained so that the instrument can work as intended.
• Condensation water may form in the instrument if there is an extreme difference in temperature
between the storage location and the installation site and if air humidity is high at the same time.
A waiting time of at least two hours must be observed each time before switching on. Failure to
comply with this may cause damage to the instrument.
• Stable, exactly horizontal and level laboratory bench at least 1.00 m wide (2.20 m when operating as
a workstation) and 0.80 m deep.
• The counter area must be designed for handling loads of at least 150 kg/m2, vibration-free and level.
• Fume hood at a max. 2.0 m distance from the instrument.
• The instrument is suitable for operation in indoor areas only.
• The operating location must be well-ventilated and have an air exhaust.
• A grounded power supply socket must be available at a maximum distance of 3 m.
Warning
• A connection to an external exhaust system, a technical room ventilation system and an
integrated exhaust system with an active carbon filter reduce the concentration of solvent vapor
in the room air. The active carbon filter must be used for connecting to an external exhaust system
as well (→ P. 121 – 7.2.15 Changing the active carbon filter). Compliance with this is mandatory.
• The instrument operator bears responsibility for complying with workplace limits and the
measures necessary for this, including documentation.
26 Version 1.2, Revision A
Installation and Instrument Setup
4
4.2 Electrical connection
Warning
• Use only the power cable provided, which is intended for the local power supply.
• Before connecting the instrument to the power supply, make sure that the Main switch on the
bottom front of the instrument (→ Fig. 2-8) is in the OFF ("0") position.
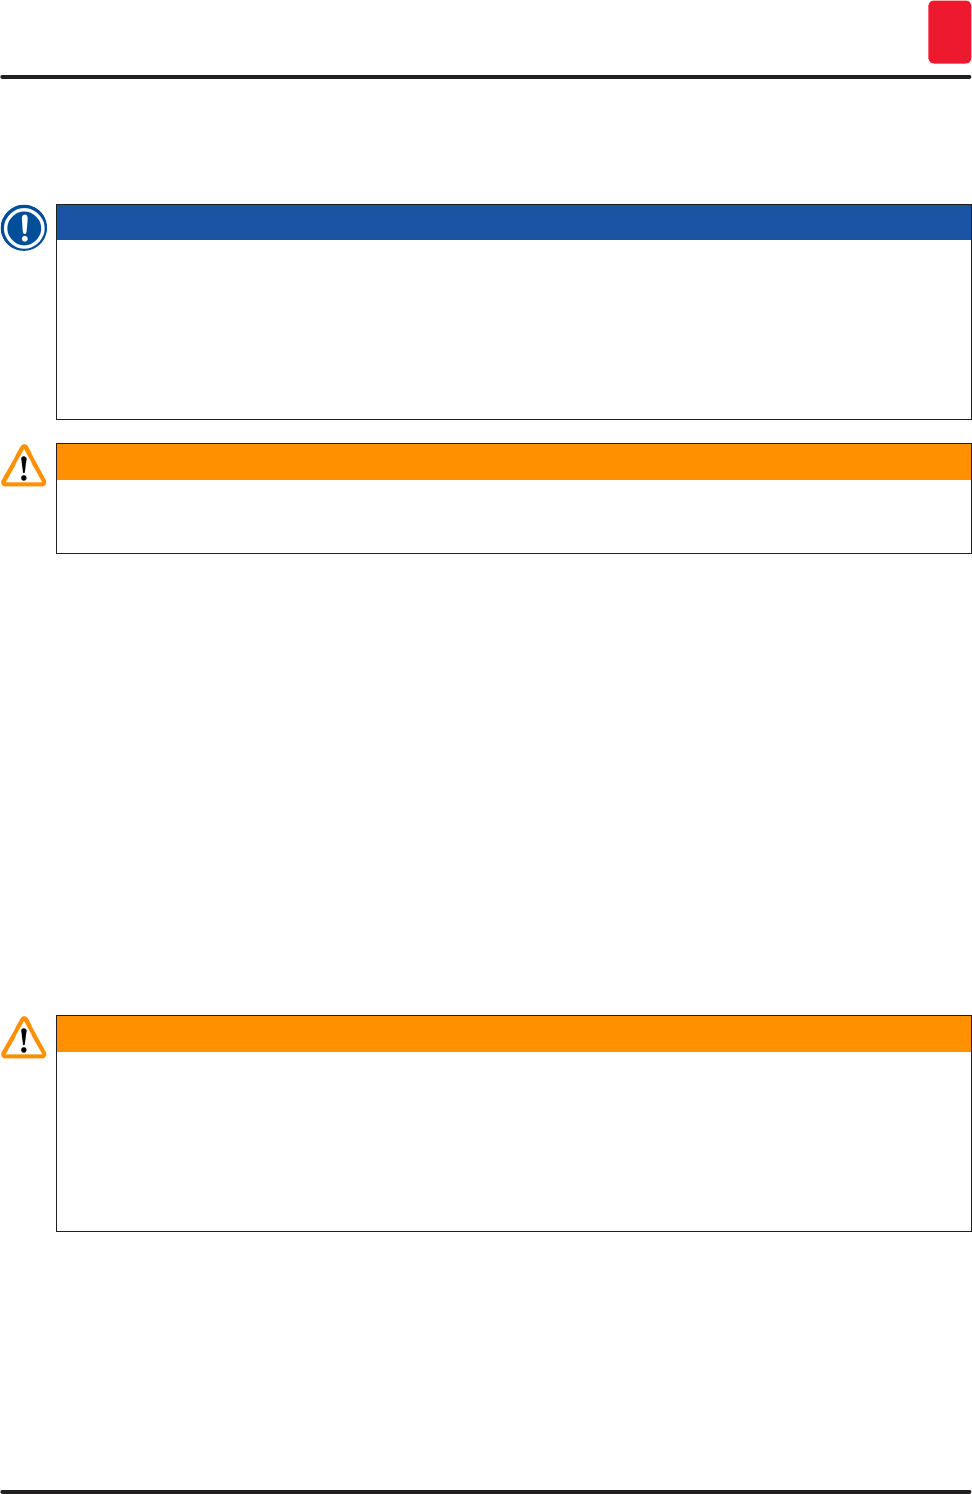
1. Connect the power cable to the power input socket on the rear panel of the instrument
(→ Fig. 5-1).
2. Plug the power plug into a grounded power socket.
3. Switch on the Main switch (→ Fig. 2-8).
1
Fig. 5
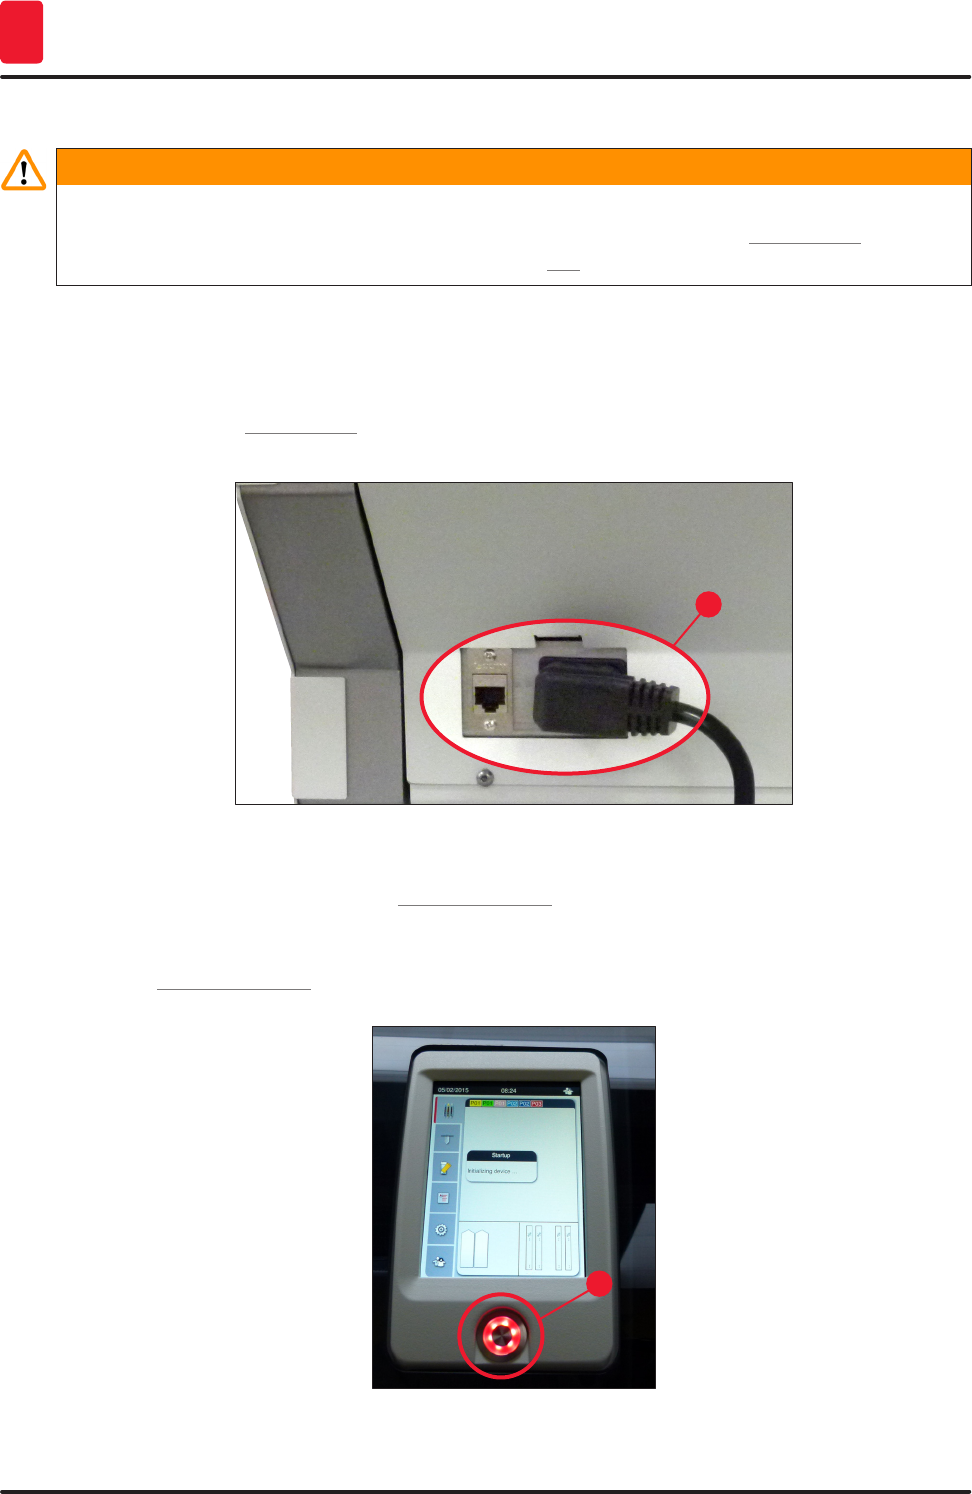
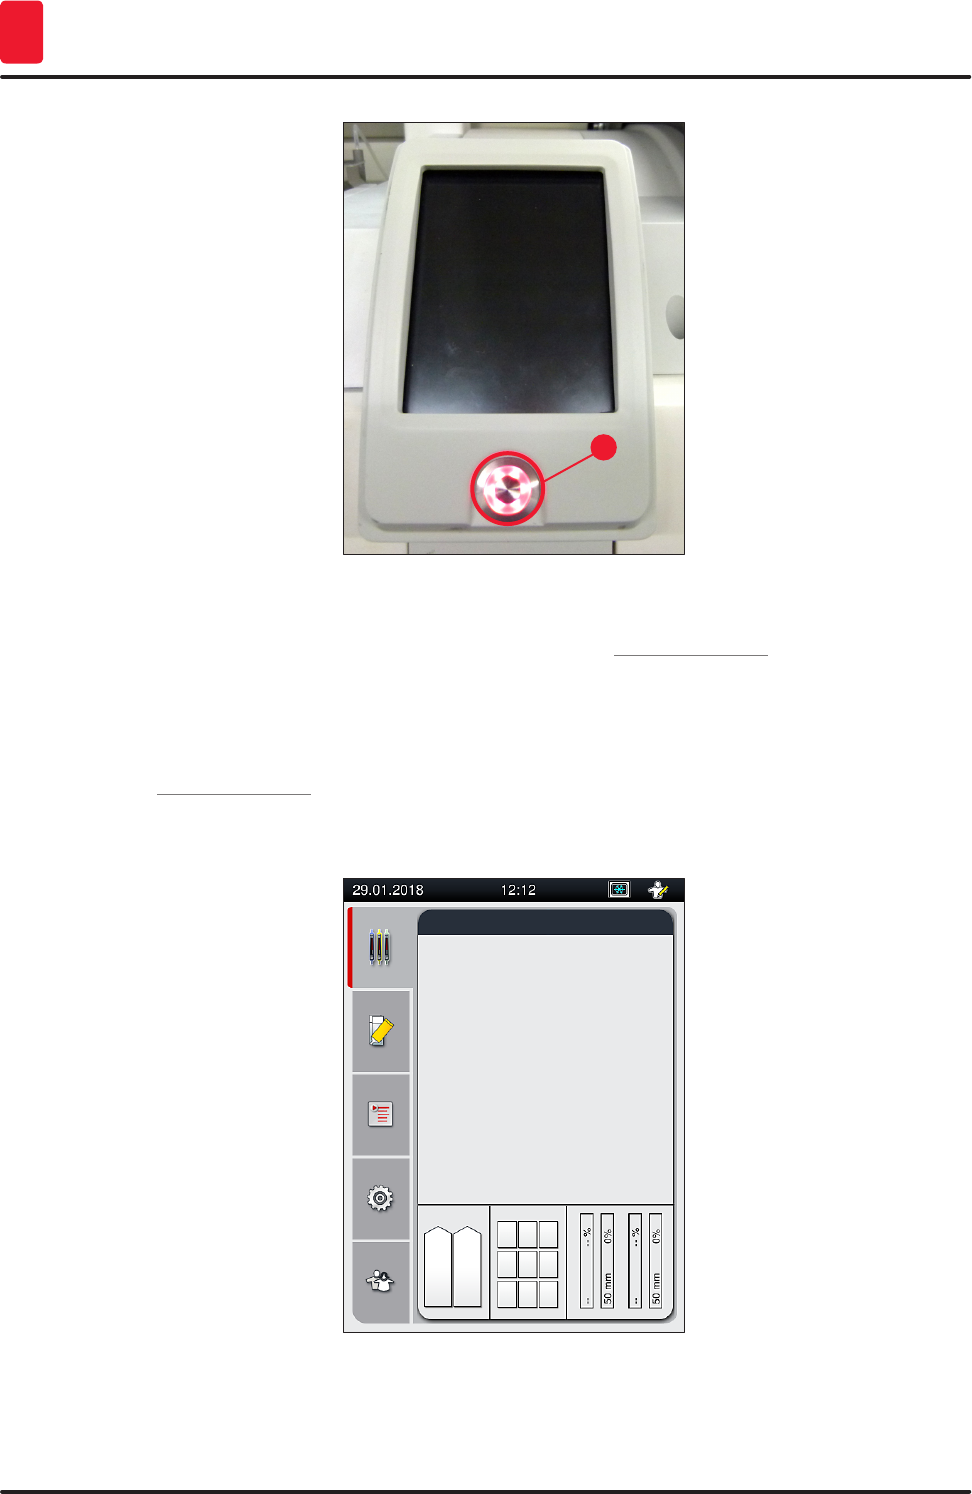
4. After a short period of time, the Operating switch lights up orange. Once the software has
finished starting up, the switch lights up red (→ Fig. 6-1) and the instrument is in standby
mode.
5. The Operating switch can then be operated.
1
Fig. 6

27
HistoCore SPECTRA CV
Installation and Instrument Setup 4
4.2.1 Internal battery
• The HistoCore SPECTRA CV has a high-performance internal battery to bridge short-term power
failures (< 3 s.). This enables processing to continue without interruption during a short-term power
failure.
• The software detects if the power failure lasts longer than 3 sec. and initiates a controlled shutdown
of the instrument (→ P. 139 – 8.2 Power failure scenario and instrument failure).
Note
• The internal battery has to be recharged when initializing the instrument after a power failure.
The user is notified of the charging process by a note on the screen. Once the charging process
has finished, the information message goes away automatically and the software prompts
the user to check if there are any racks still in the instrument and to remove them by hand
if necessary. The user confirms the removal of the rack by pressing the Ok button. Then the
instrument restarts.
• The internal battery has to be charged if the instrument has been disconnected from a power
supply for a prolonged time. For this purpose, connect the instrument to the socket and switch on
the Main switch (→ Fig. 2-8). The charging time is approx. 30 minutes.
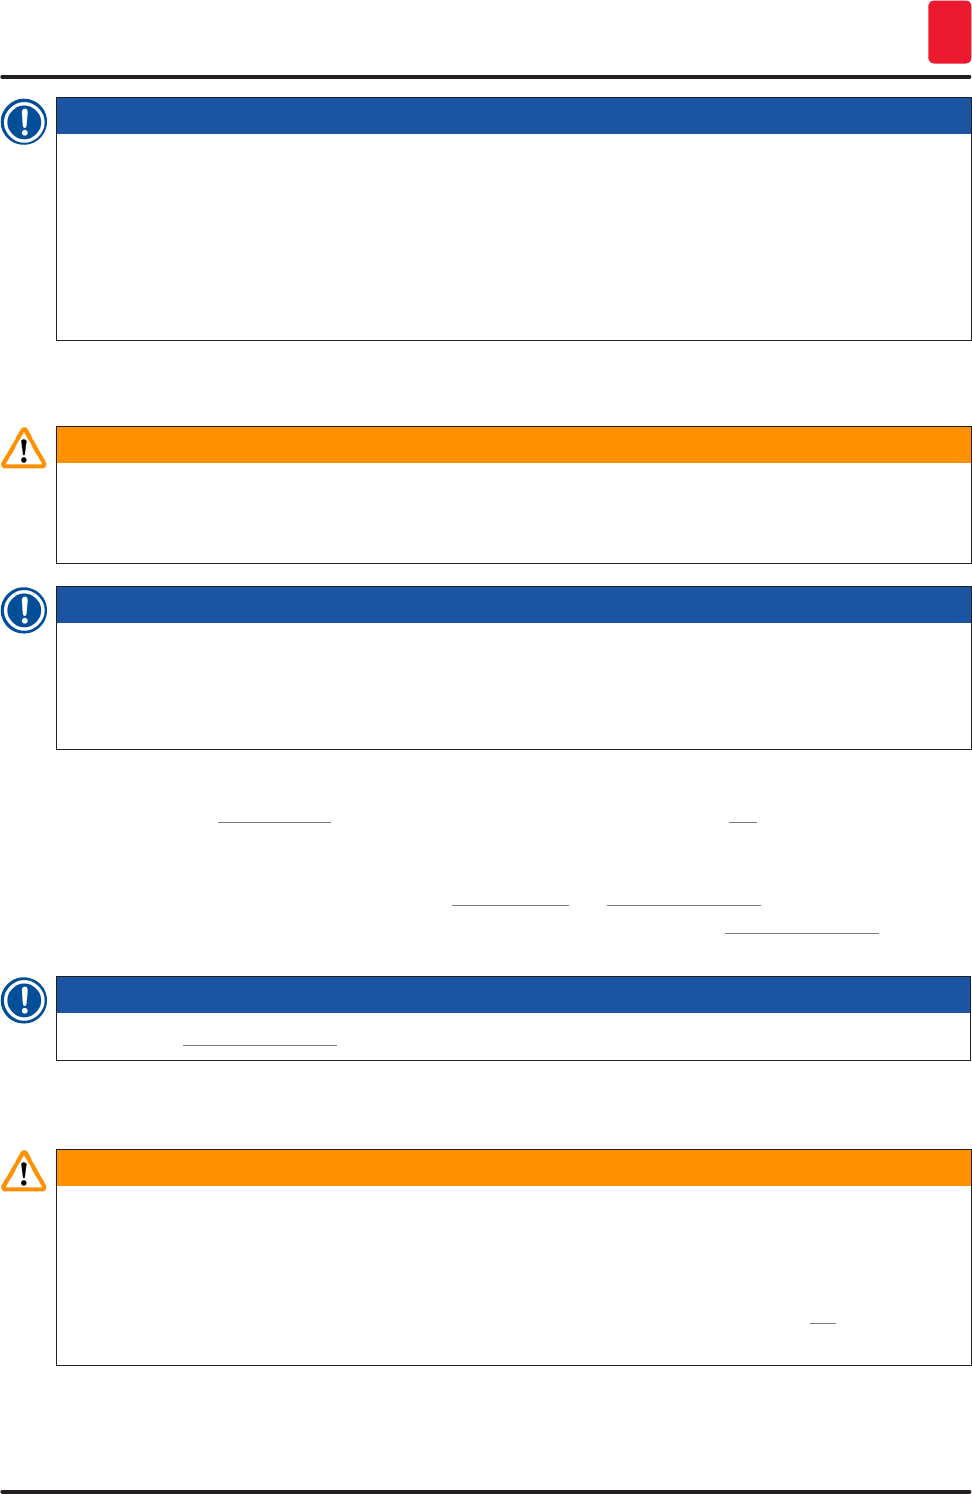
4.2.2 Using an external uninterruptible power supply (UPS)
An interruption of processing can be avoided in the event of a temporary power failure by connecting
a battery-buffered uninterruptible power supply (UPS) (→ Fig. 7-1).
The UPS should enable an output of at least 1100 VA for the duration of 10 minutes.
The UPS must be designed for operating voltage at the installation location. The connection is carried
out by connecting the HistoCore SPECTRA CV power cable to the UPS power output socket. The UPS is
connected to the power socket in the lab.
1
Fig. 7
Warning
The UPS power cable must always remain in the power socket in the lab, even in the event of a
power outage. Otherwise grounding of the instrument cannot be ensured!
28 Version 1.2, Revision A
Installation and Instrument Setup
4
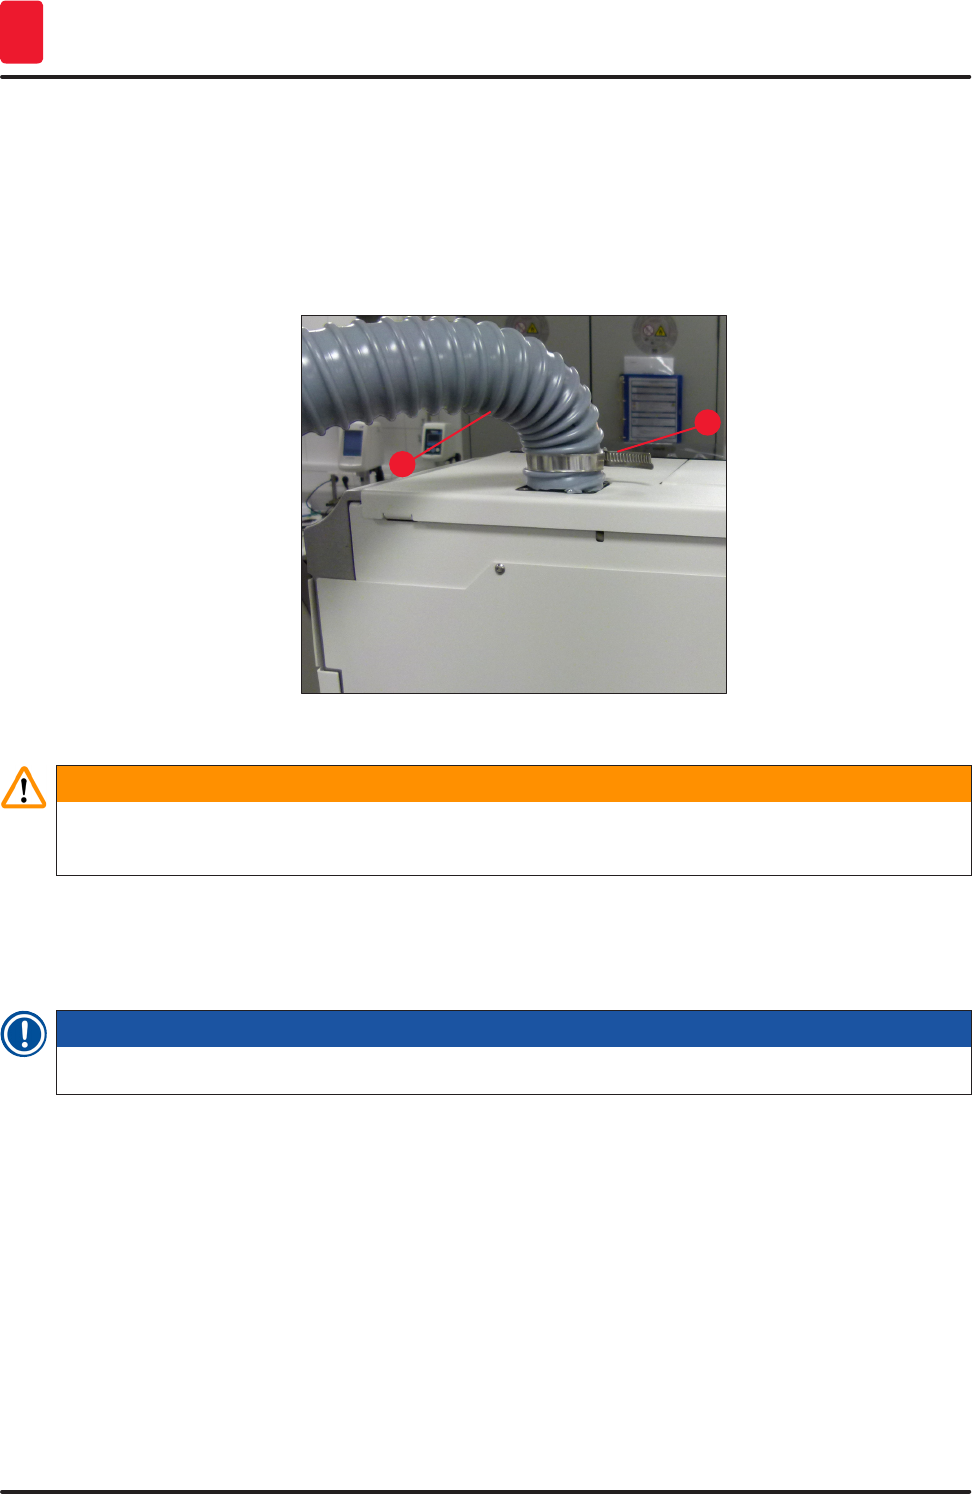
4.3 Exhaust air connection
» Connect one end of the exhaust air hose (→ Fig. 8-1) to the exhaust air connection (→ Fig. 3-3)
on the top side of the instrument using the hose clamp (→ P. 19 – 3.1 Standard delivery –
packing list) included in the standard scope of delivery (→ Fig. 8-2). Connect the other end to an
exhaust air device installed at the lab.
1
2
Fig. 8
Warning
The active carbon filter must be used for connecting to an external exhaust system as well
(→ P. 121 – 7.2.15 Changing the active carbon filter). Compliance with this is mandatory.
4.4 Installing the accessories
4.4.1 Fit the drawer inserts into the unload drawer
Note
The load and unload drawers can be manually opened while the system's power is turned off.
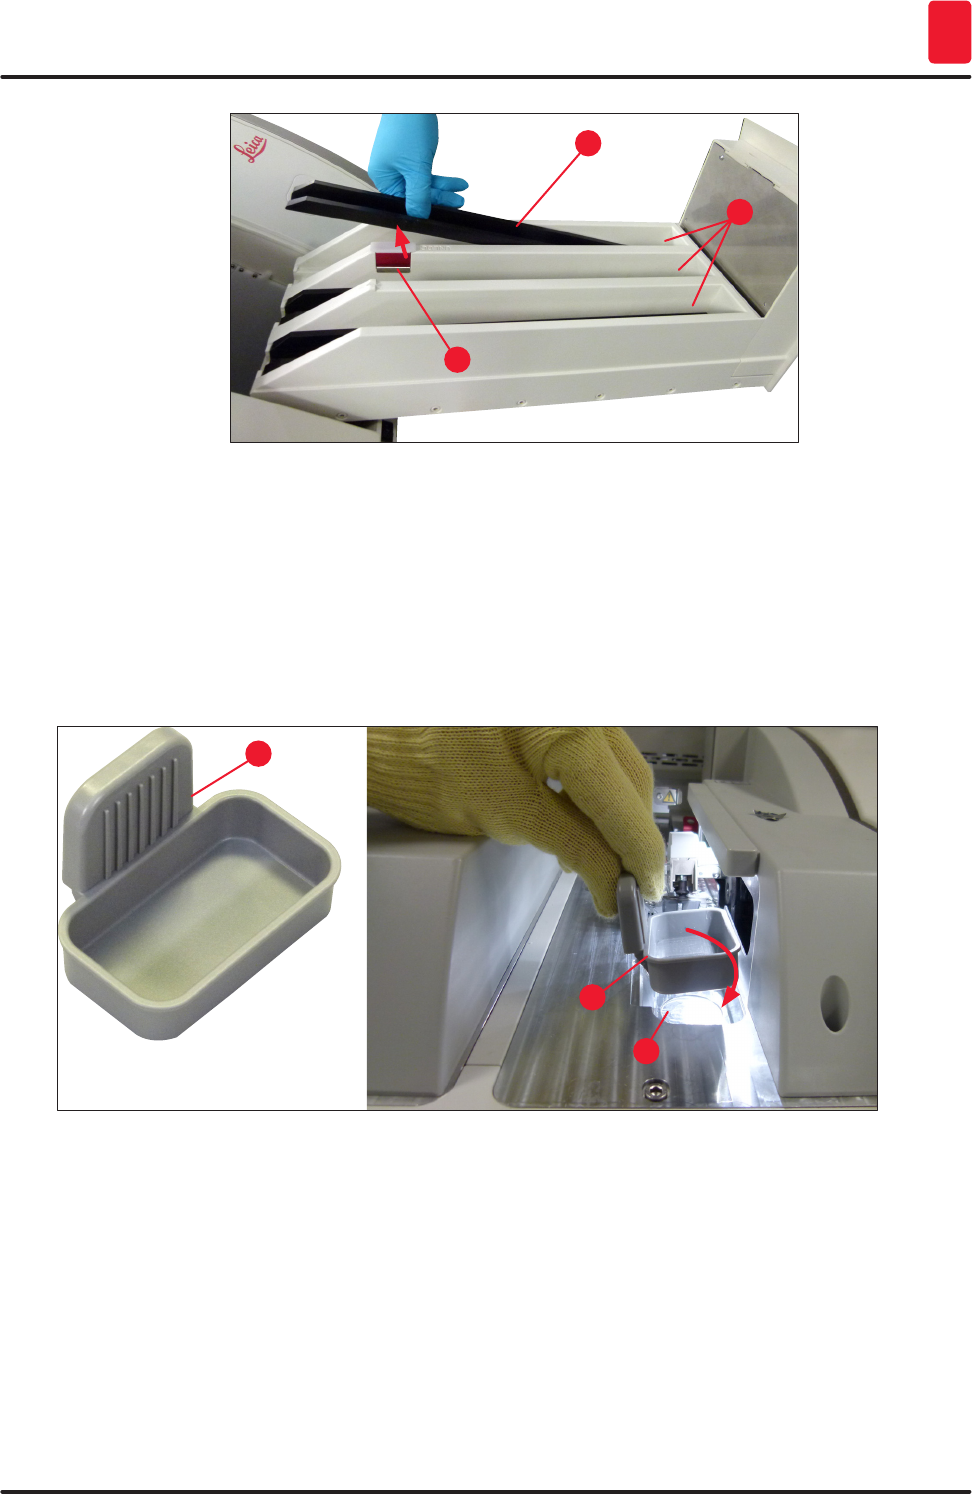
1. Manually pull the unload drawer until it stops.
2. For a simplified fitting of the inserts, the unload drawer can be further opened. For this purpose,
raise the red retaining lever (→ Fig. 9-3) that moves the unload drawer completely out of the
instrument and carefully fold it downwards.
3. Insert the three inserts (→ Fig. 9-1) into the compartments (→ Fig. 9-2) in the unload drawer.
29
HistoCore SPECTRA CV
Installation and Instrument Setup 4
Fig. 9
1
3
2
4. Finally, lift the unload drawer and slide it back in the instrument.
4.4.2 Inserting the waste tray
» Remove the waste tray (→ Fig. 10-1) from the packaging and insert it into the instrument at the
recess (→ Fig. 10-2) provided.
2
1
1
Fig. 10
30 Version 1.2, Revision A
Installation and Instrument Setup
4
4.4.3 Filling and inserting the needle cleaning container
Warning
The safety notes for reagent handling must be observed!
• Caution when handling solvents!
• Always wear suitable lab protective clothing, as well as gloves and safety goggles, when handling
reagents.
• Always fill or drain needle cleaning containers outside of the instrument in compliance with safety
information to avoid or reduce the risk of spilling reagents.
Note
• The needle cleaning container is used for holding the needle during instrument breaks. Immersing
the needle in the filled solvent prevents the needle from becoming stuck and allows it to remain
permeable.
• A filled needle cleaning container must be used in both coverslip line L1 and L2.
• Before inserting the needle cleaning container, make sure that the complete unit for the needle
cleaning container (→ P. 115 – 7.2.9 Removing the complete unit of the needle cleaning
container) has been fixed in both coverslip lines during initial installation.
• Do not leave the needle in the rest position for longer than necessary in order to prevent drying
out.
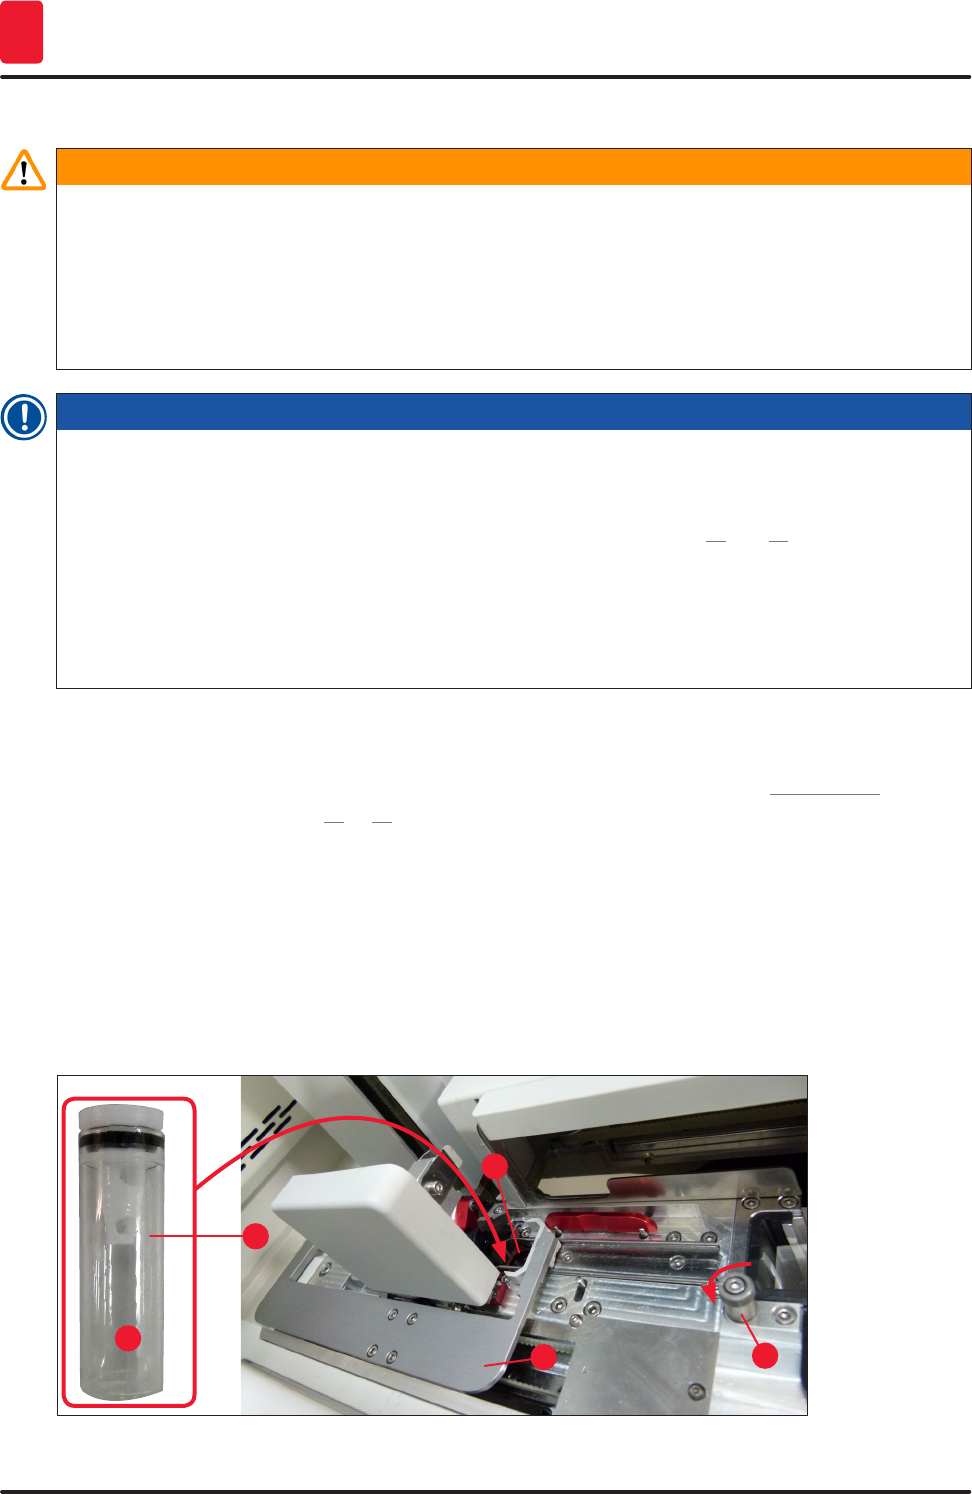
1. Switch on the instrument (→ P. 31 – 4.5 Switching on and shutting down the instrument).
2. Switch to the Module Status (→ P. 74 – 5.11 Module status) and press the Prime/Clean
button of coverslip line L1 or L2 in order to lift the respective needle holder.
3. Move the shifter (→ Fig. 11-1) into a position that enables access to the slot for the needle
cleaning container (→ Fig. 11-2).
4. Remove the needle from the holder and plug into the parking location (→ Fig. 4-10).
5. Remove the needle cleaning container (→ Fig. 11-3) from the packaging and fill with xylene
to the bottom edge of the cap, outside of the instrument (→ Fig. 11-5).
6. Following this, plug the needle cleaning container in the slot and press downwards until it
clicks into place.
7. Remove the needle from the parking location and plug it back into the holder (→ Fig. 88).
Fig. 11
1
2
4
3
5
31
HistoCore SPECTRA CV
Installation and Instrument Setup 4
Note
• If it is impossible to lift the needle cleaning container by rotating the knurled screw clockwise
(it might be clogged with residual mountant), it can be removed as described in (→ P. 115 – 7.2.9
Removing the complete unit of the needle cleaning container).
• The needle has a notch (→ Fig. 88-3) that fits exactly in the holder. The Attention symbol
(→ Fig. 88-4) on the holder (→ Fig. 88-2) indicates to the user that utmost care is required when
inserting the needle into the holder. The needle must be inserted straight and all the way in order
to make sure that no negative impact on the samples arises during processing.
4.5 Switching on and shutting down the instrument
Warning
The instrument must be connected to a grounded power socket. For additional electrical fuse
protection, connecting the HistoCore SPECTRA CV to a socket with a residual current circuit breaker
(RCCB) is recommended.
Note
• The needle cleaning container must be filled with solvent (→ P. 30 – 4.4.3 Filling and inserting
the needle cleaning container), since otherwise initialization cannot be successfully performed.
• During the instrument setup or if no consumables (mounting medium and coverglass) have been
added, the modules are displayed in the display as empty (→ Fig. 23).
1. Switch the Main switch on the front of the instrument (→ Fig. 2-8) to ON ("I").
2. Fill the needle cleaning container with a sufficient amount of solvent (→ P. 30 – 4.4.3 Filling
and inserting the needle cleaning container).
3. A few seconds after switching on the Main switch, the Operating switch is illuminated
in orange (→ Fig. 12-1). The software's start process ends when the Operating switch is
illuminated in red.
Note
Pressing the Operating switch in the orange phase does not start the instrument.
Switching on and shutting down the instrument in workstation mode
Warning
If the HistoCore SPECTRA CV is operated together with a HistoCore SPECTRA ST as workstation
(→ P. 105 – 6.7 Workstation operation), a message is always displayed upon switching on the
HistoCore SPECTRA CV. This information message instructs the user to ensure that the reagent
vessels in the load drawer are sufficiently filled (→ P. 39 – Correct fill level of the reagent vessels)
and the covers have been removed. Note the information message and confirm with OK. Failure to
observe this information message this may lead to a loss of specimen and instrument faults.
32 Version 1.2, Revision A
Installation and Instrument Setup
4
1
Fig. 12
4. To start the instrument, now press the illuminated in red Operating switch (→ Fig. 12-1); an
audible signal sounds.
5. During initialization, a verification of all stations (fill level scan) is carried out automatically.
Furthermore, the level of the needle cleaning containers is checked during operation
approximately every 4 hours.
6. The Operating switch is illuminated in green whenever the instrument is ready to start.
7. After completing the initialization phase, the Main menu (→ Fig. 13) appears on the screen.
Fig. 13
33
HistoCore SPECTRA CV
Installation and Instrument Setup 4
Shutting down the instrument
1. To switch the instrument into standby mode (e.g. overnight), remove all racks from the
instrument and then press the Operating switch (→ Fig. 12-1) twice. It then illuminates in red.
Note
If there is a rack in the instrument while the Operating switch is pressed, the user receives an
information message indicating that the instrument cannot be shut down until the rack is no longer in
the process or no longer present in the instrument. Any processing in progress is continued.
2. For cleaning and maintenance, switch off the instrument at the Main switch and also observe
the instructions in (→ P. 109 – 7.1 Important notes about cleaning this instrument).
4.6 Refilling consumables
Warning
• Only original consumables that have been verified by Leica may be used
(→ P. 160 – Consumables) in order to avoid instrument faults.
• Caution when handling solvents!
• Always wear protective clothing suitable for laboratory use, as well as rubber gloves and safety
goggles when handling the chemicals used in this instrument.
• Only clean reagent vessels should be used (→ P. 121 – 7.2.16 Cleaning reagent vessels in the
load drawer).
• Always fill or drain reagent vessels and the needle cleaning container outside of the instrument
in compliance with safety information to avoid or reduce the risk of spilling reagents into other
reagent vessels and onto interior instrument components.
• Proceed carefully and thoroughly when filling or draining and follow the respective applicable
laboratory specifications. Remove spilled reagents immediately. If a reagent vessel in the load
drawer has been contaminated, cleaning and refilling it is mandatory.
Note
• Validated coverglass (→ P. 71 – 5.9.4 Properties of the coverglass) and a validated
mounting medium (→ P. 70 – 5.9.3 Properties of the mounting medium) are available for the
HistoCore SPECTRA CV. Ordering information: (→ P. 160 – Consumables).
• If fewer than 300 slides are coverslipped per day on an ongoing basis, the HistoCore SPECTRA CV
can also be operated with just a single coverslip line. In this configuration, do not fill any
consumables (mounting medium, coverglass) in the unused coverslip line. Please note: Each time
a rack is inserted into the load drawer, the software indicates to the user that there are missing
consumables in the unused line. Confirm each of the respective information messages with OK.
• A check and a scan of the consumables is always performed after the hood has been closed.
34 Version 1.2, Revision A
Installation and Instrument Setup
4
4.6.1 Inserting a coverglass cartridge
Note
• Validated coverglass (→ P. 71 – 5.9.4 Properties of the coverglass) are available for the
HistoCore SPECTRA CV. The coverglasses are only available packaged in magazines. The
magazines are automatically read by the instrument when inserted and the data is sent to
the consumables management system (CMS) (e.g. number and size).
• Only original coverglass that has been verified by Leica may be used (→ P. 160 – Consumables)
in order to avoid instrument faults.
• The packaging should not be opened until immediately before inserting the coverglass cartridge
into the instrument. This prevents a possible sticking of the coverglass due to humidity.
• An RFID chip is integrated into the coverglass cartridge, which ensures that the consumables
management system (CMS) is given reliable information about the coverglass used (size and
remaining amount).
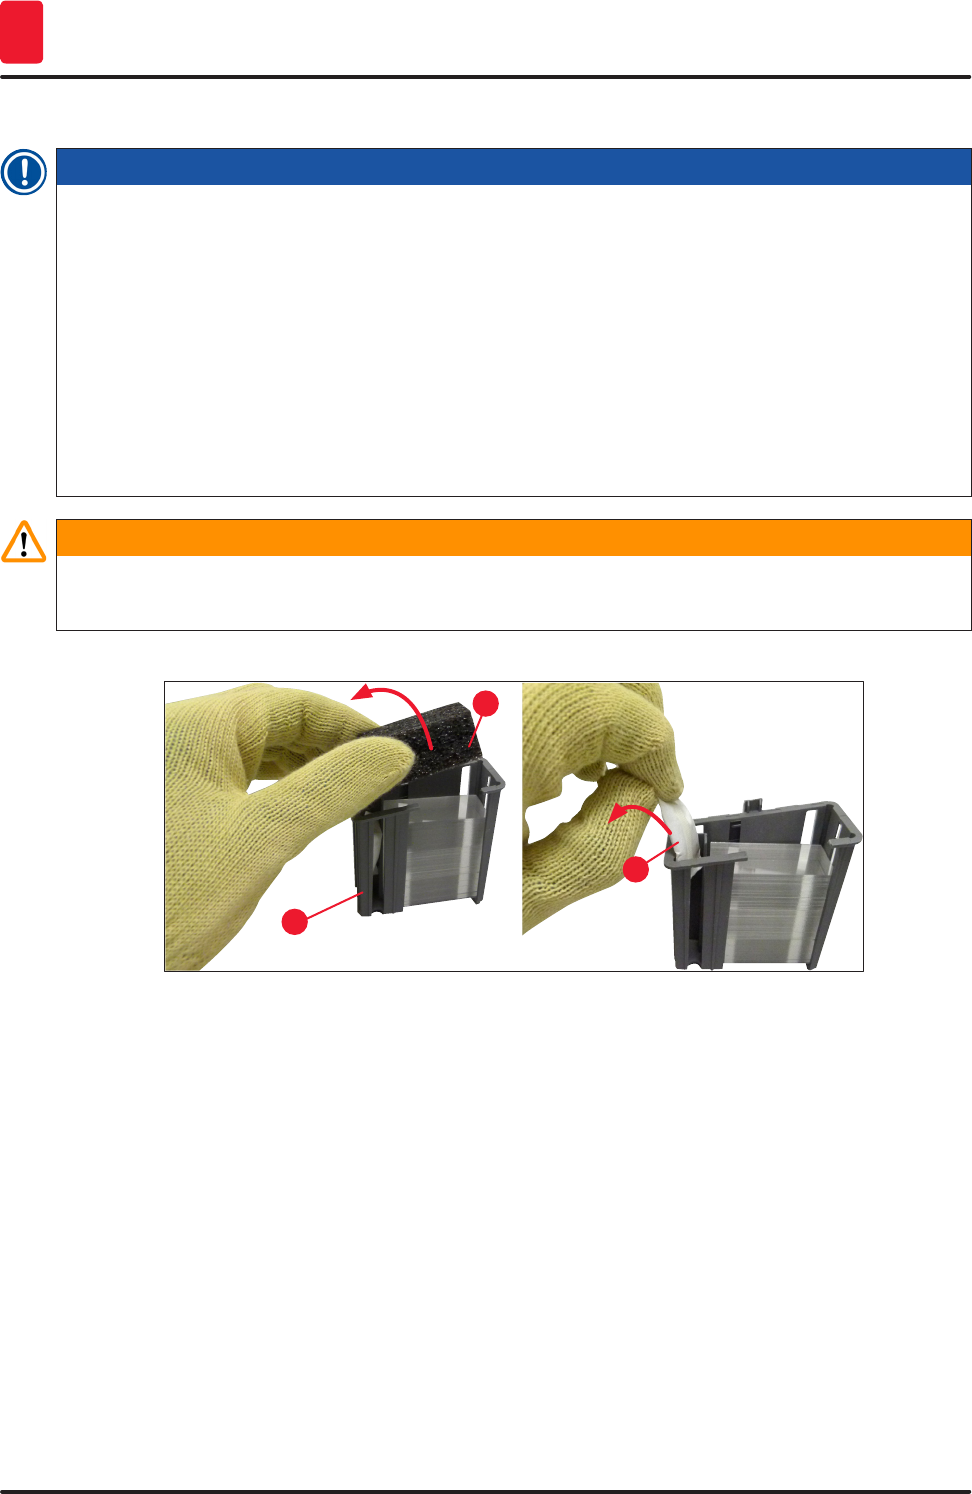
Warning
Before inserting the coverglass cartridge (→ Fig. 14-1), remove both the packaging foam
(→ Fig. 14-2) and the silica gel packet (→ Fig. 14-3).
Fig. 14
1
2
3
1. Open the hood.
2. The Pick&Place module is located above the waste tray.
3. Unpack the coverglass cartridge (→ Fig. 14-1) and remove the foam insert (→ Fig. 14-2) and
silica gel packet (→ Fig. 14-3).
4. Insert the coverglass cartridge (→ Fig. 15-1) into the slot of the coverglass cartridge
(→ Fig. 15-2).
5. Close the instrument hood.
6. The coverglass cartridge data is imported and the Module Status (→ Fig. 23) is updated.