Moxa WAPN008 Industrial 802.11n Access Point User Manual AWK 1131A UM 1e 2 0923
Moxa Inc. Industrial 802.11n Access Point AWK 1131A UM 1e 2 0923
Moxa >
Contents
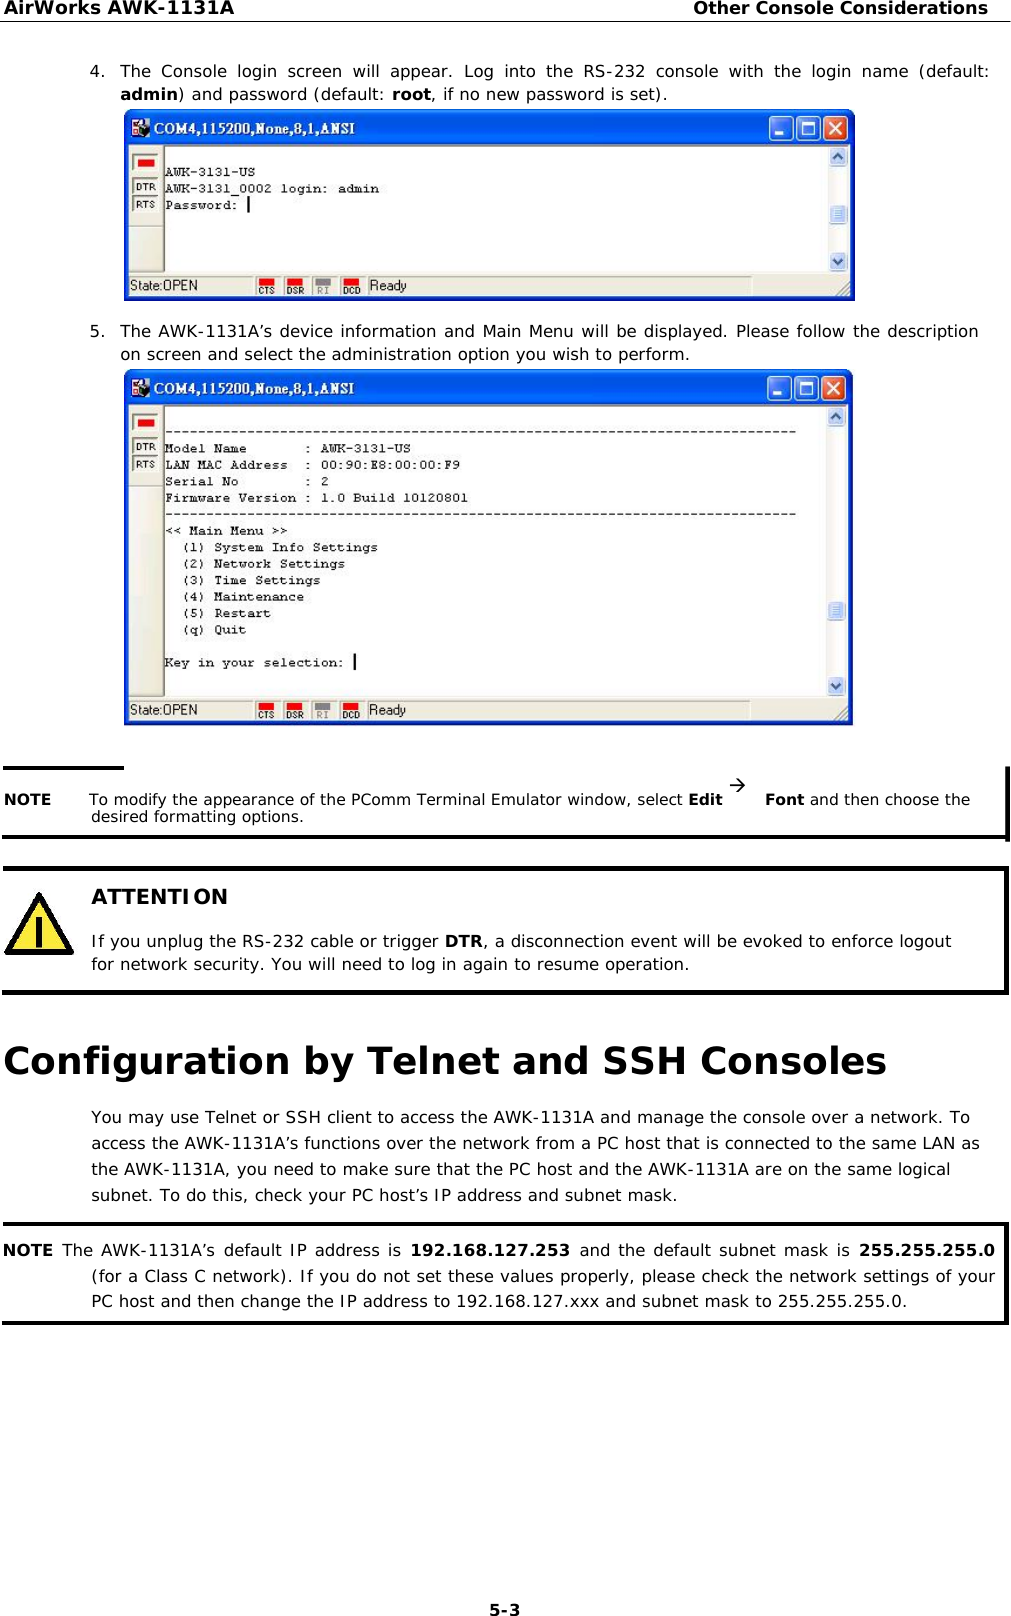
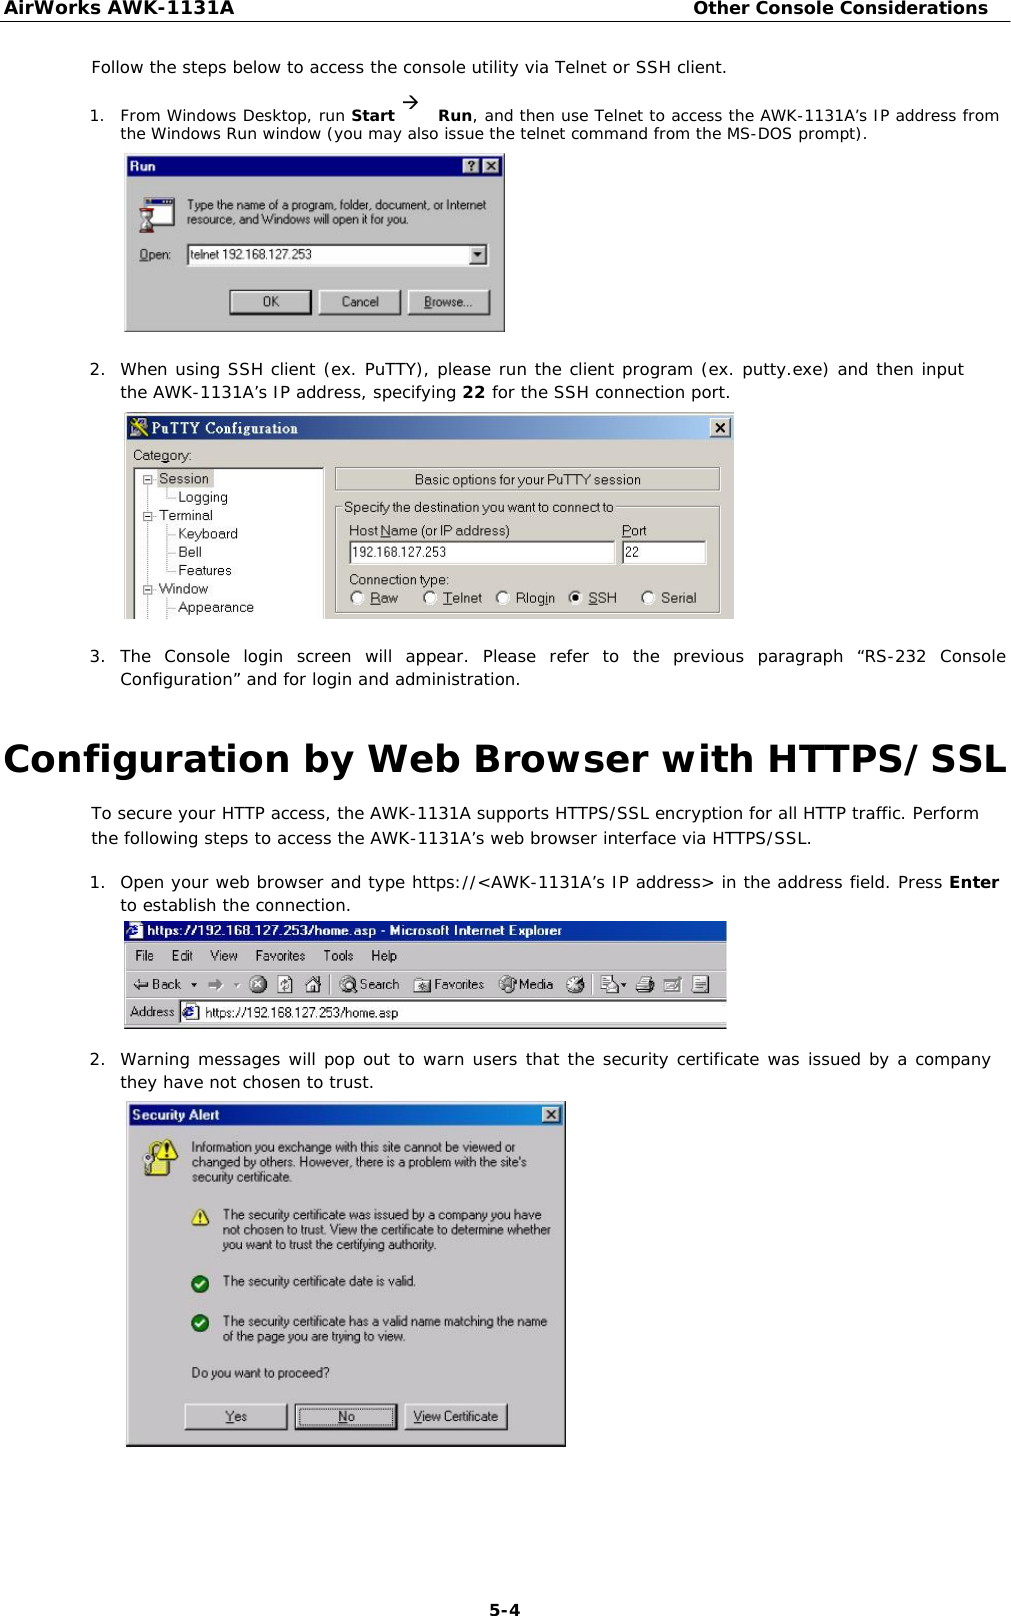
- 1. Users Manual
- 2. (AWK-4131A-XXXXX) UserMan
- 3. (AWK-11xyz-p-t) UserMan
- 4. (AWK-3131A) UserMan
- 5. (TAP-213-XX-CT-T) UserMan 12-29
- 6. TAP-213_UM_e1
- 7. WAPN008- UserMan_0816
- 8. WAPN008- UserMan_AWK-3131A-M12-RCC_20180820
- 9. WAPN008- UserMan_AWK-3131A-M12-RTG_20180820
- 10. WAPN008- UserMan_AWK-3131A-SSC-RTG_20180820
- 11. WAPN008- UserMan_20180911
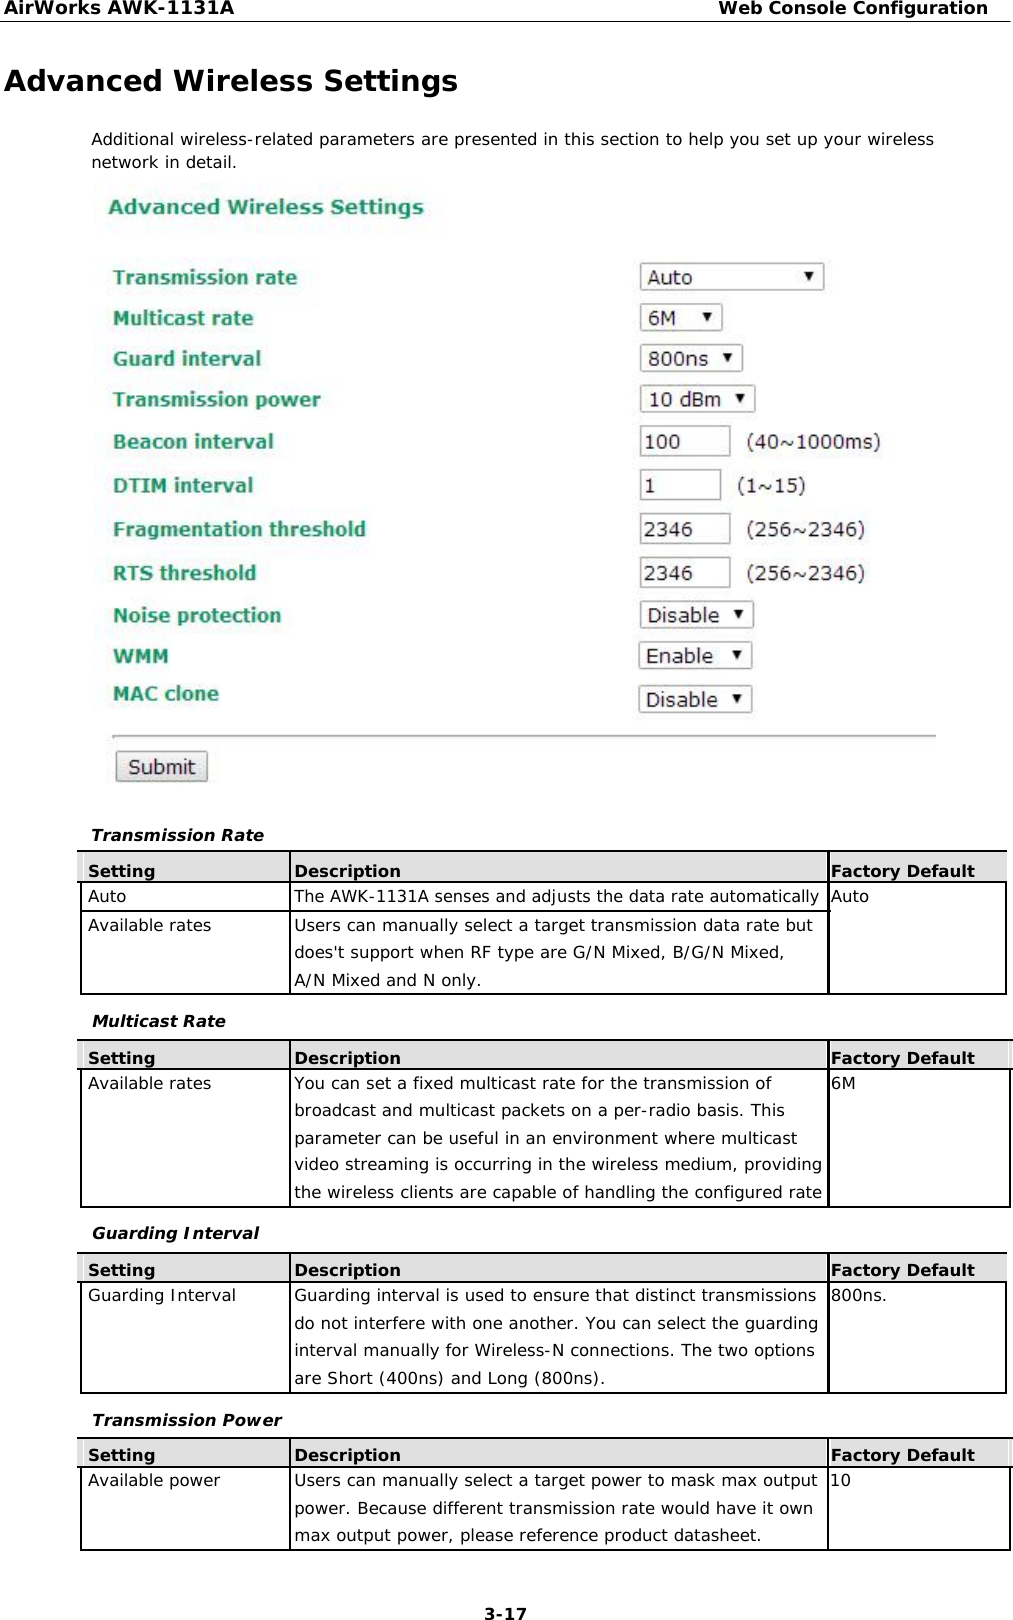
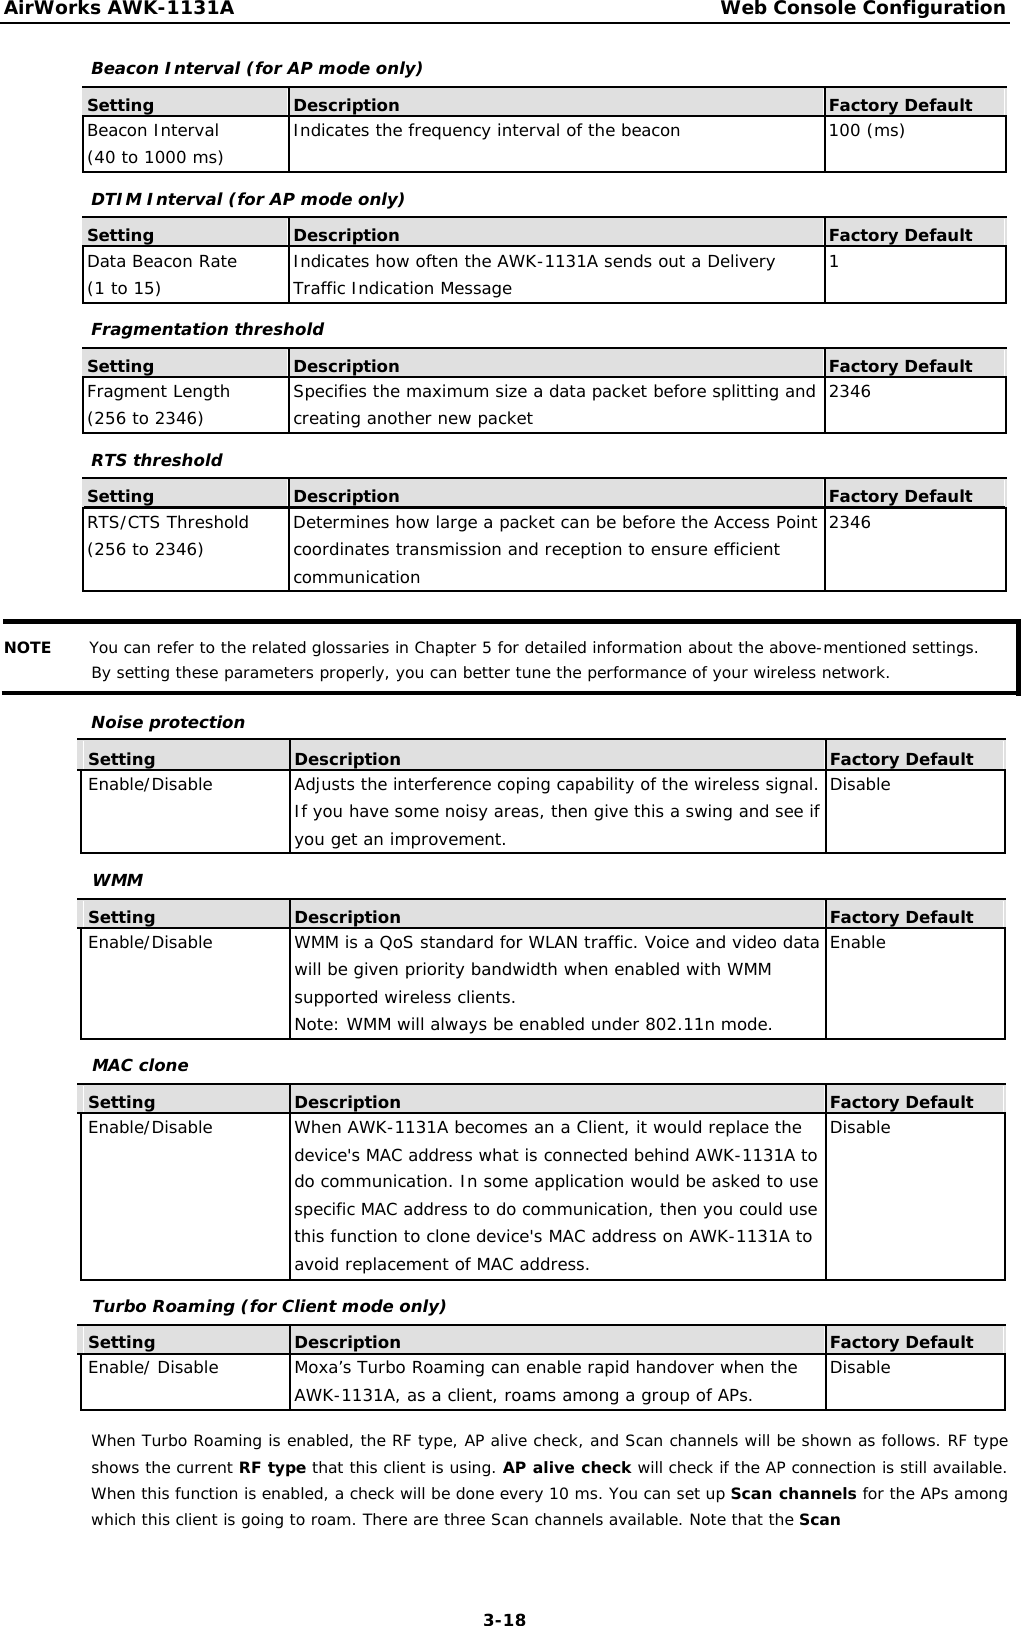
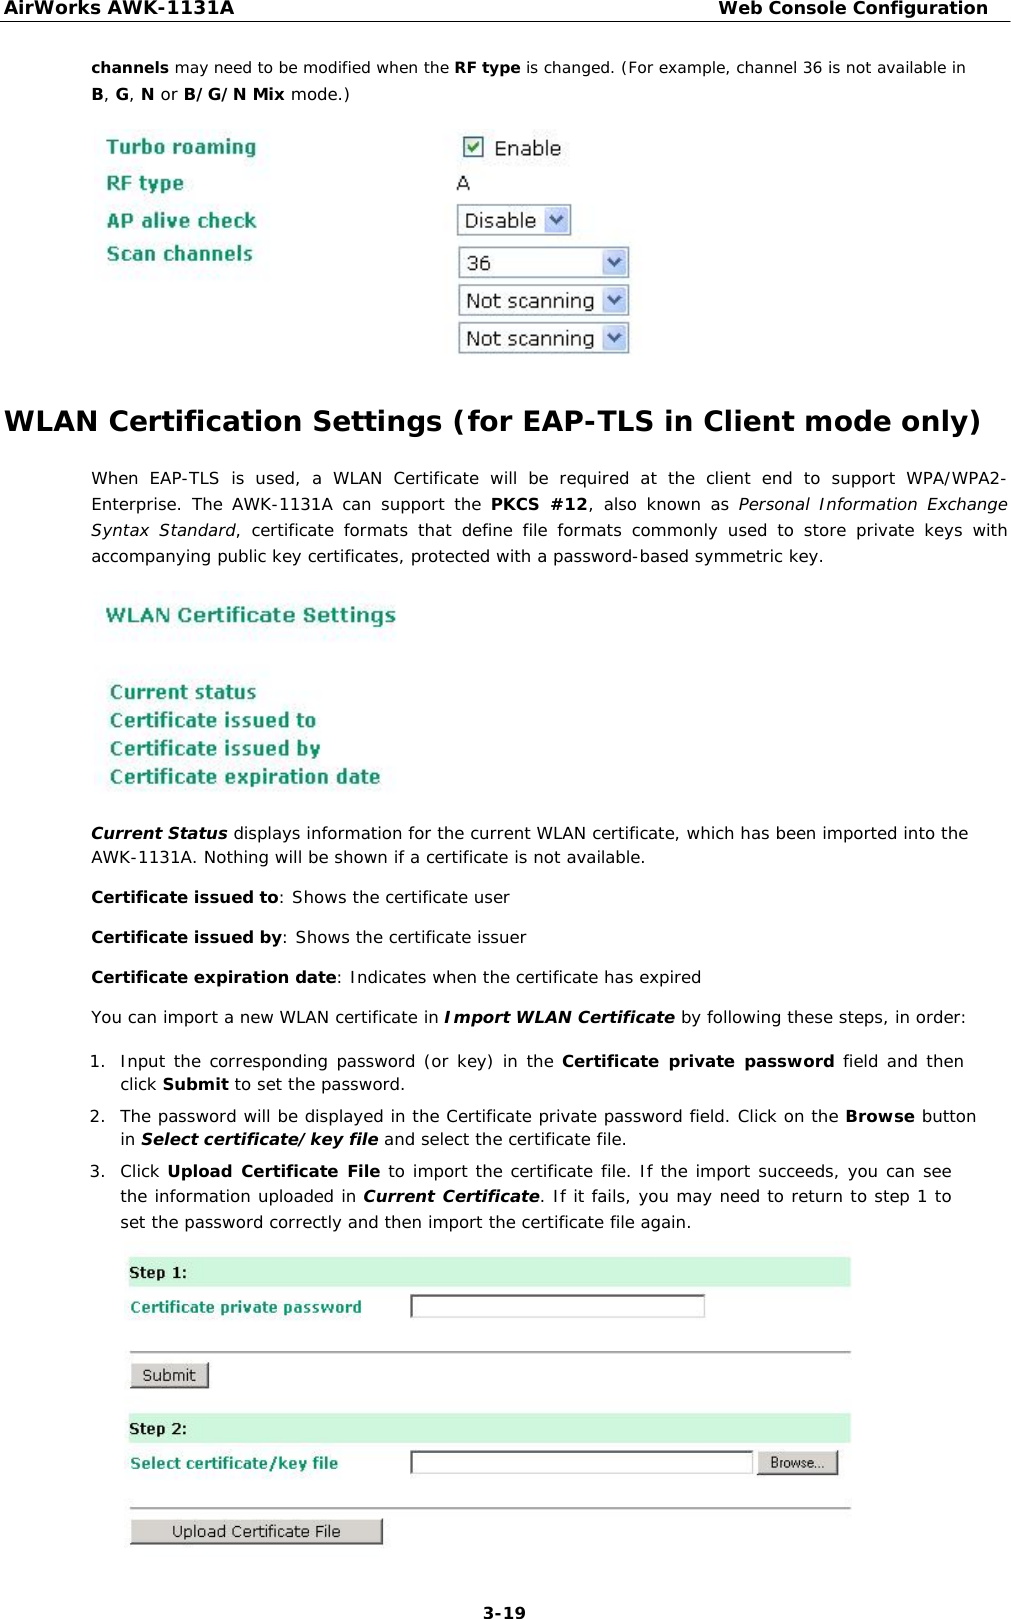
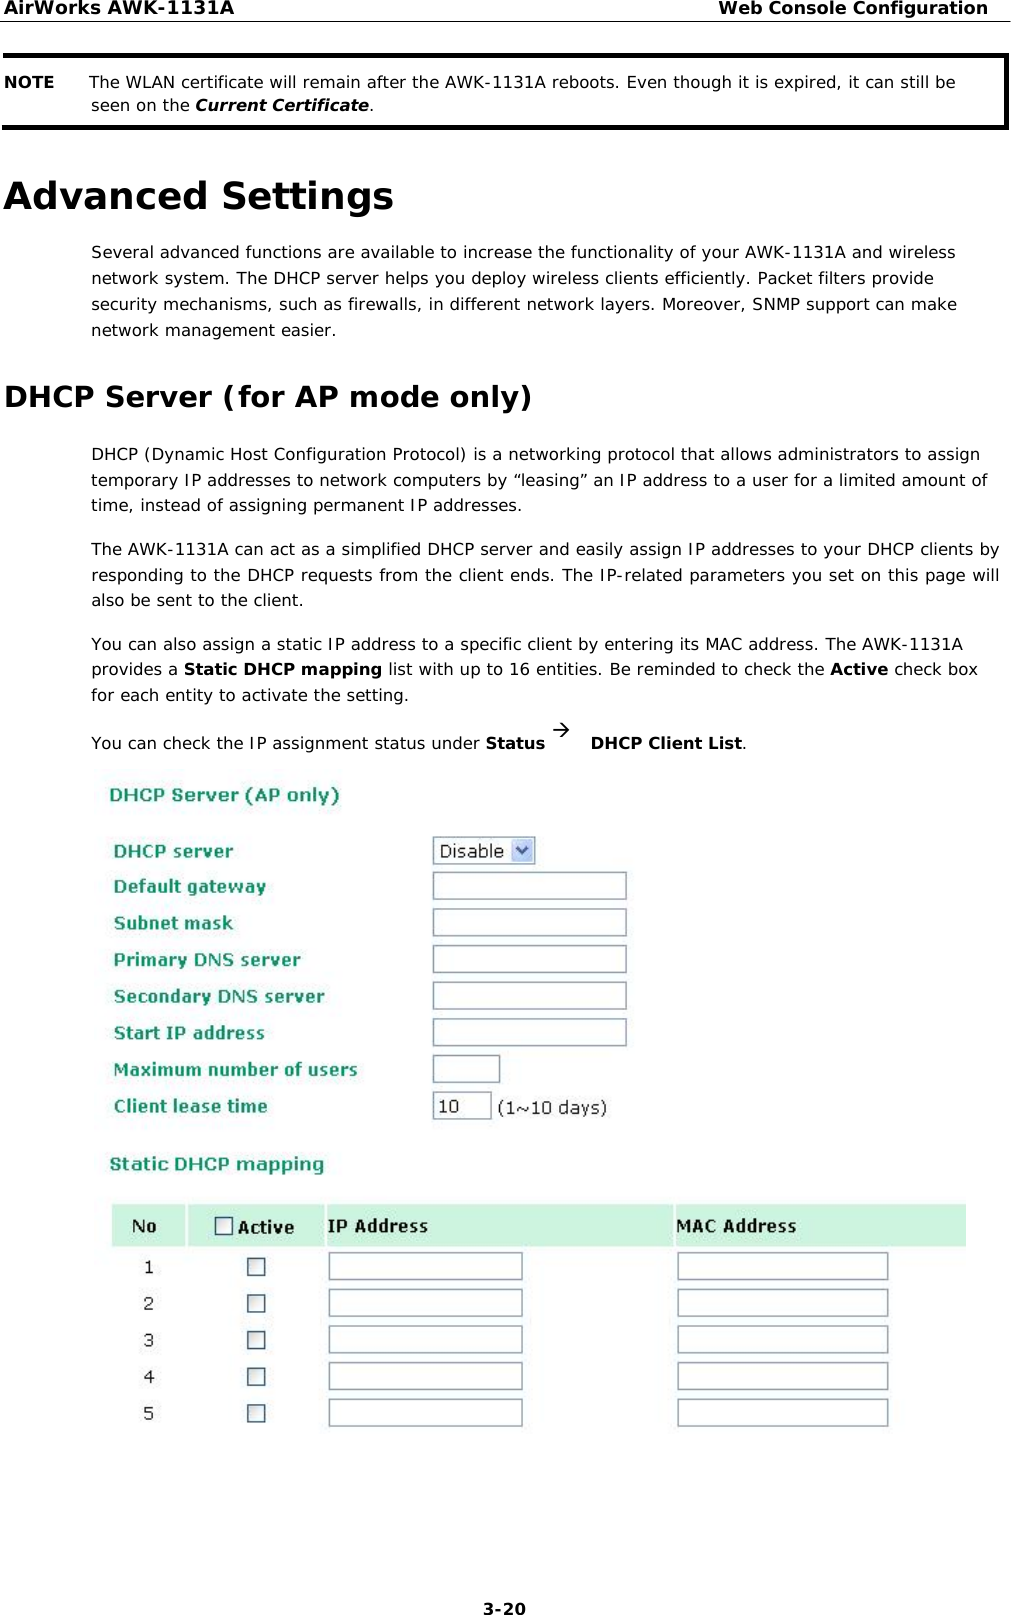
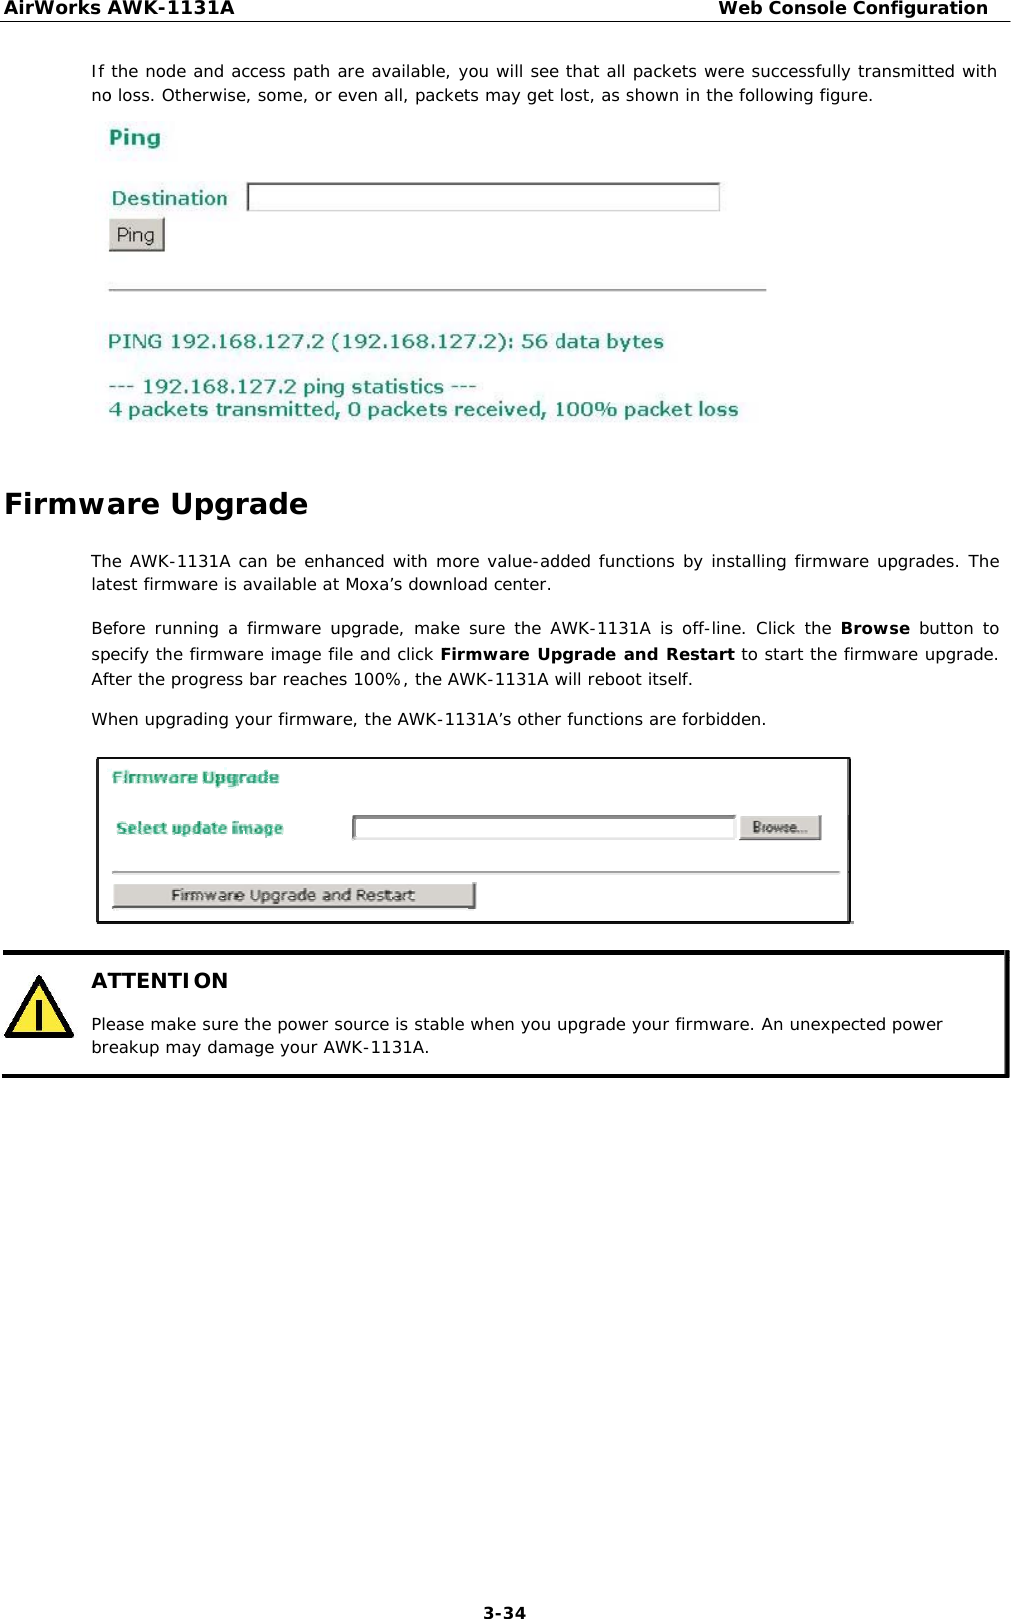
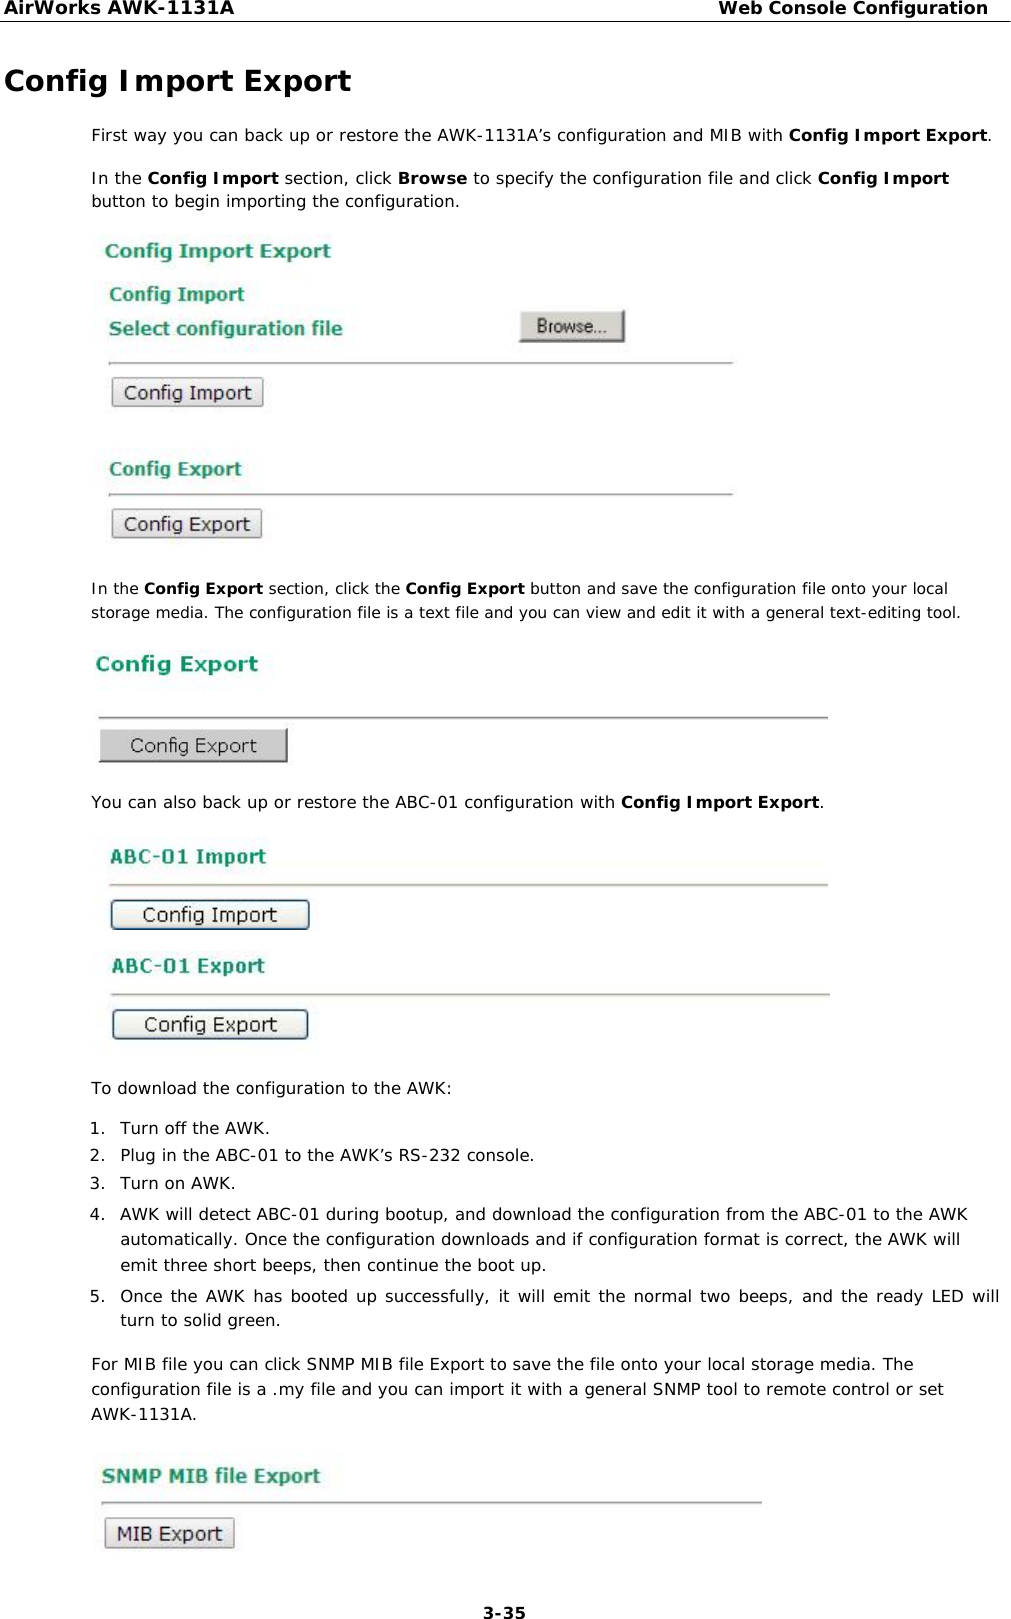
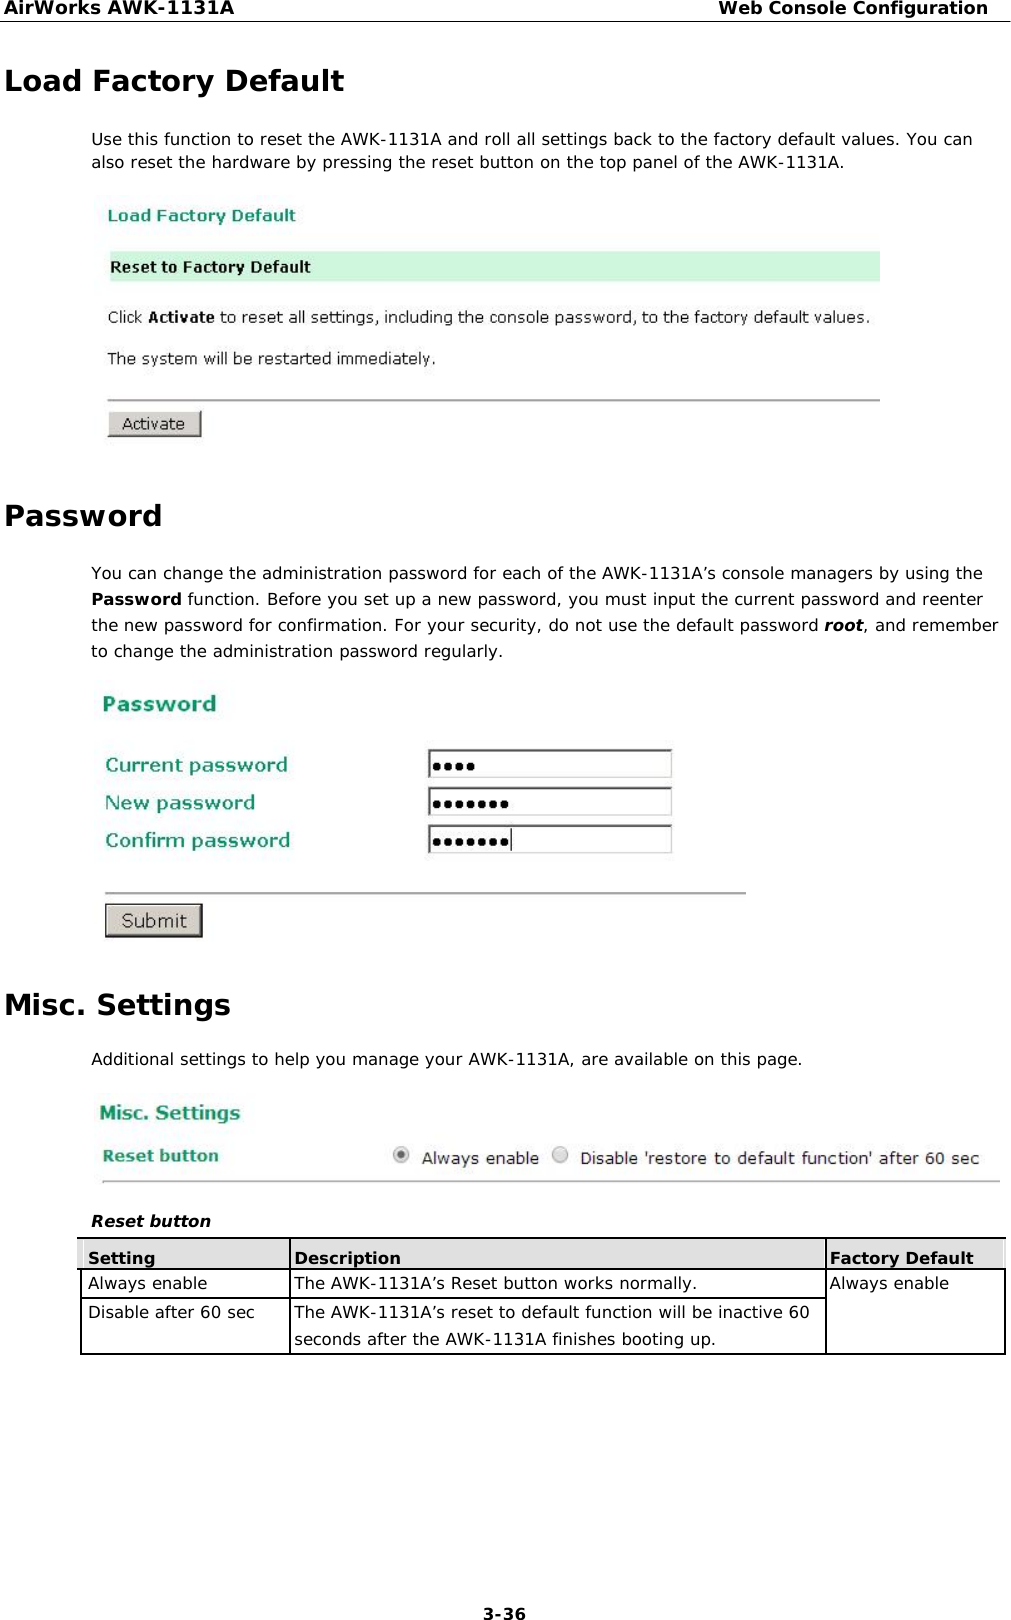
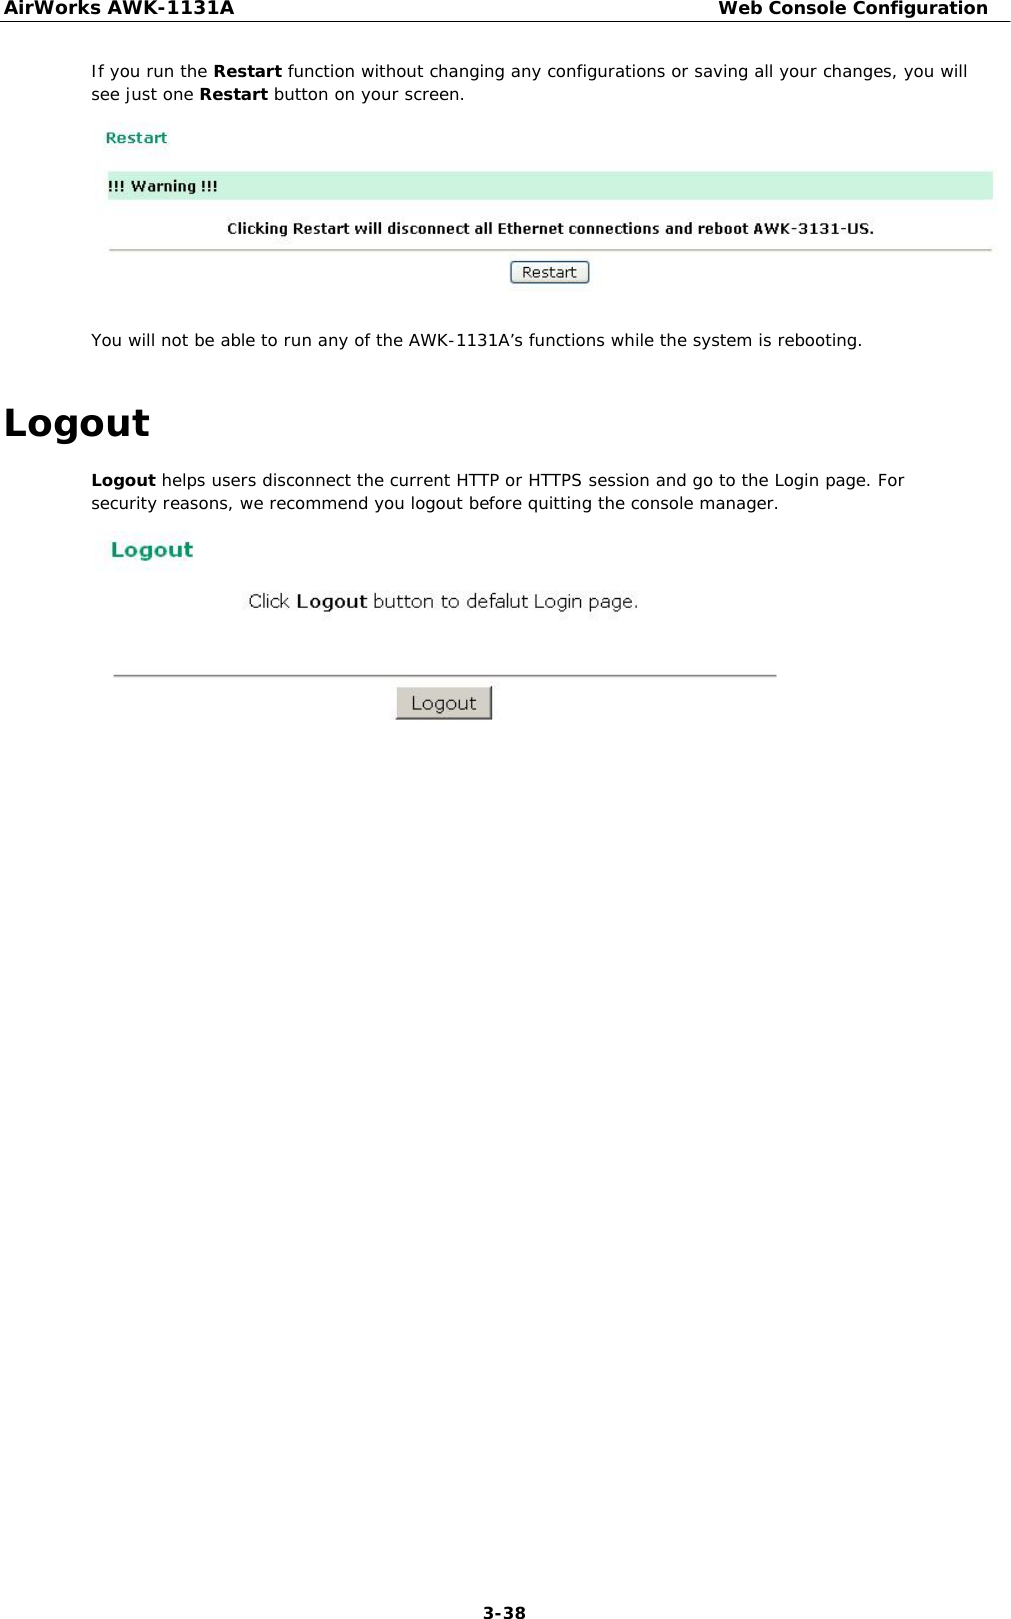
(AWK-11xyz-p-t) UserMan

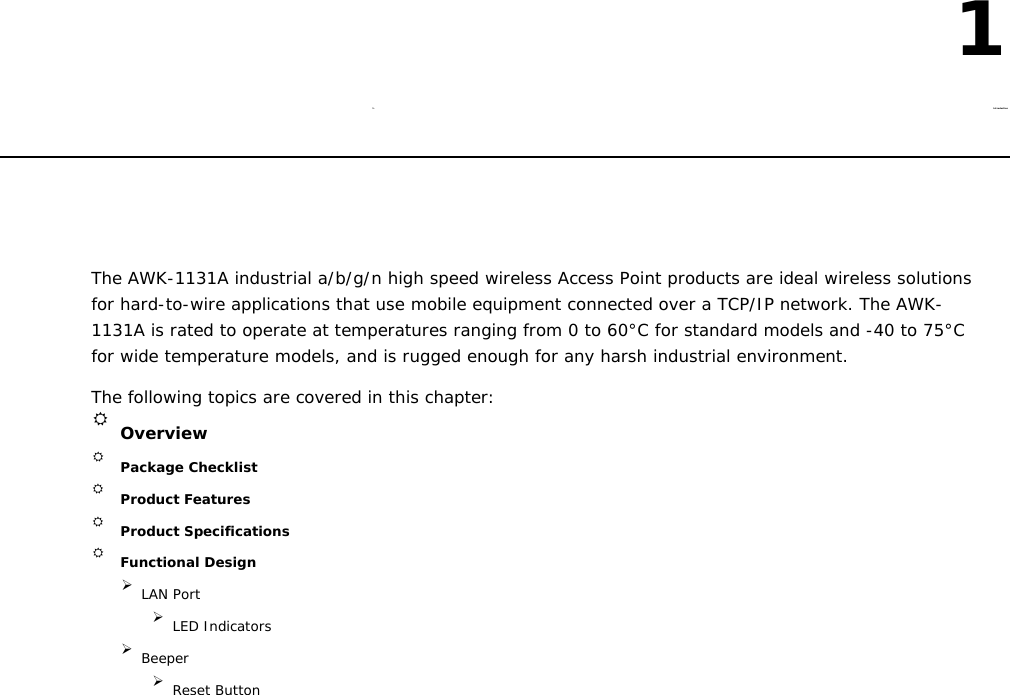

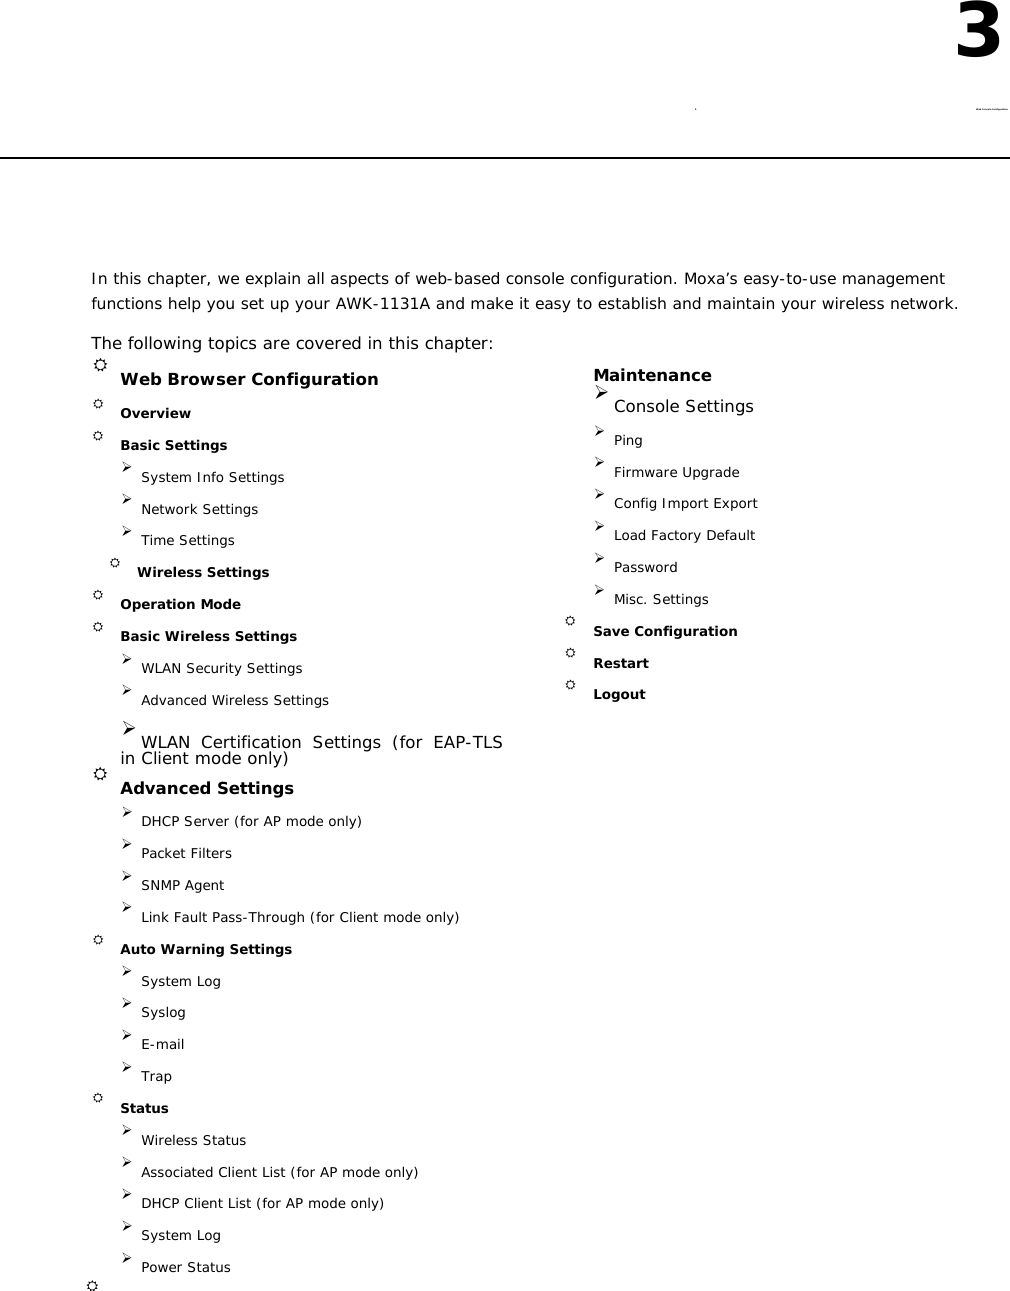
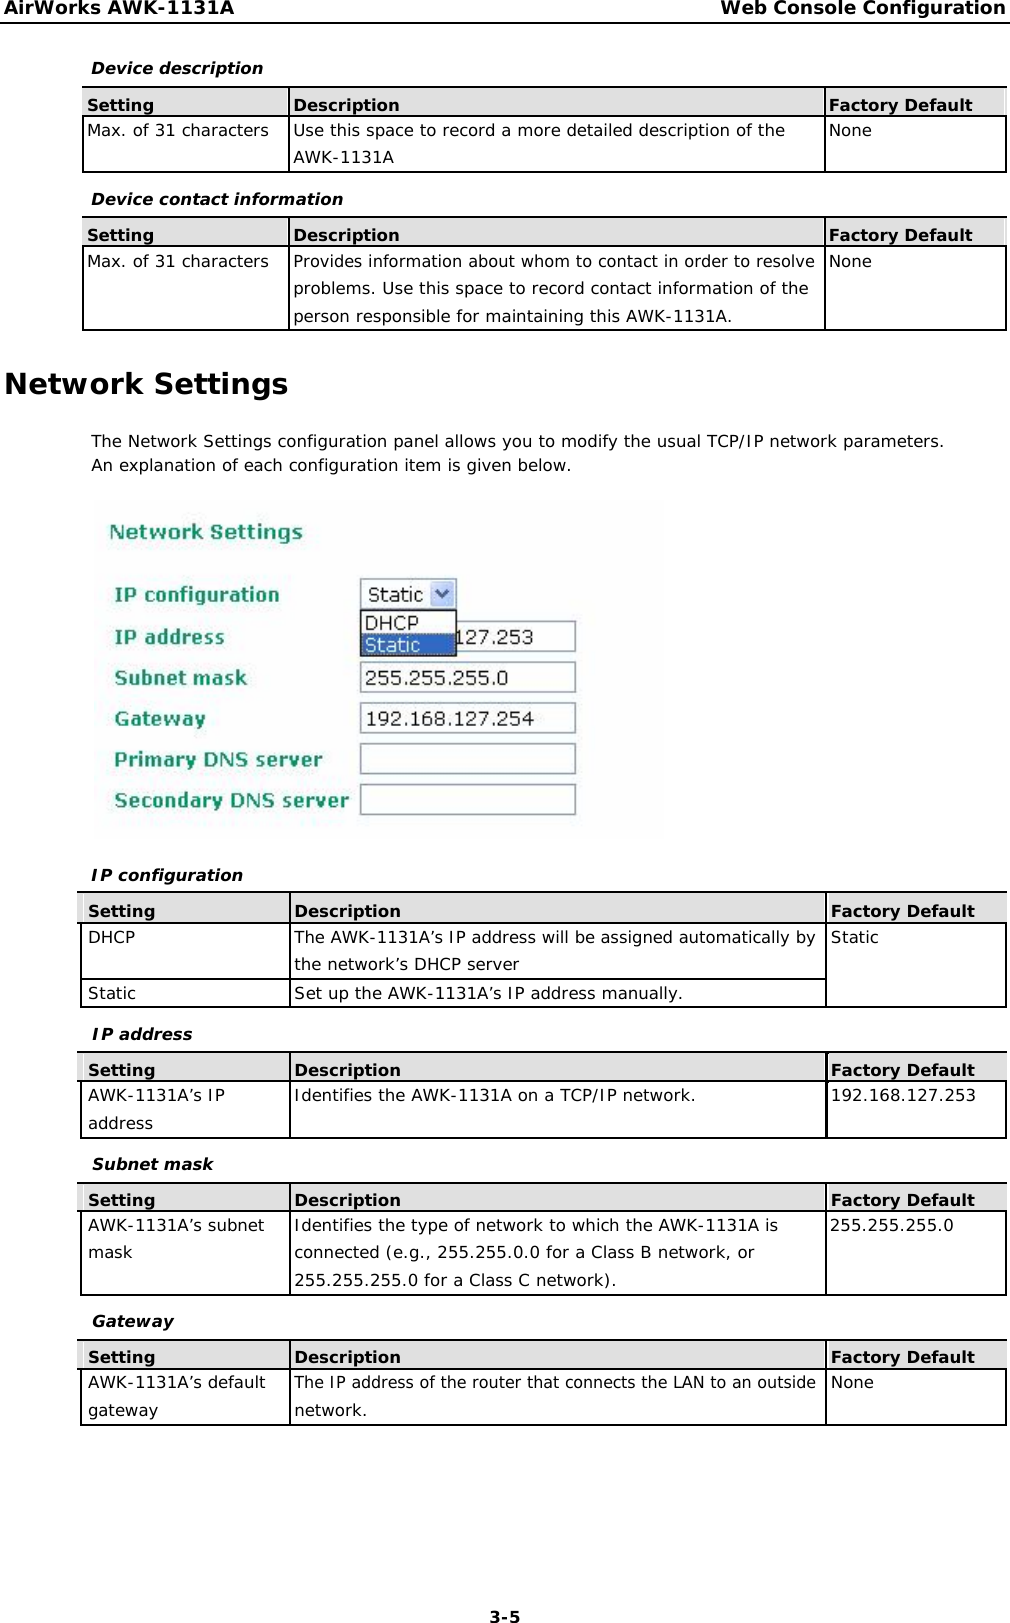
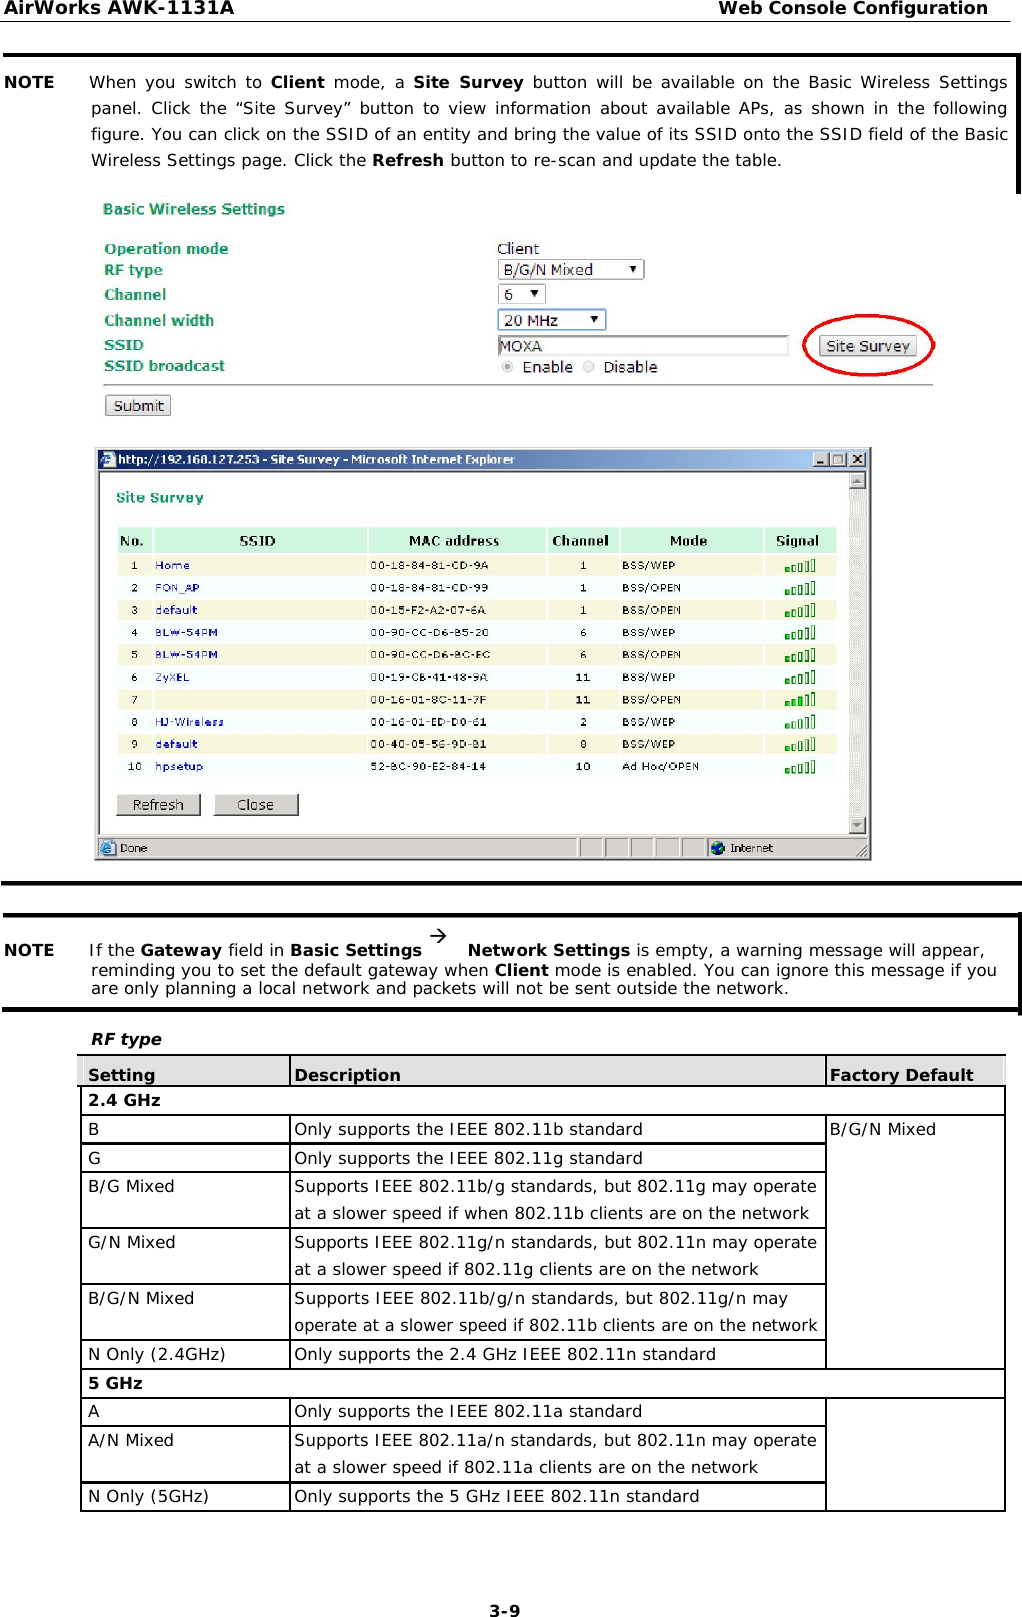
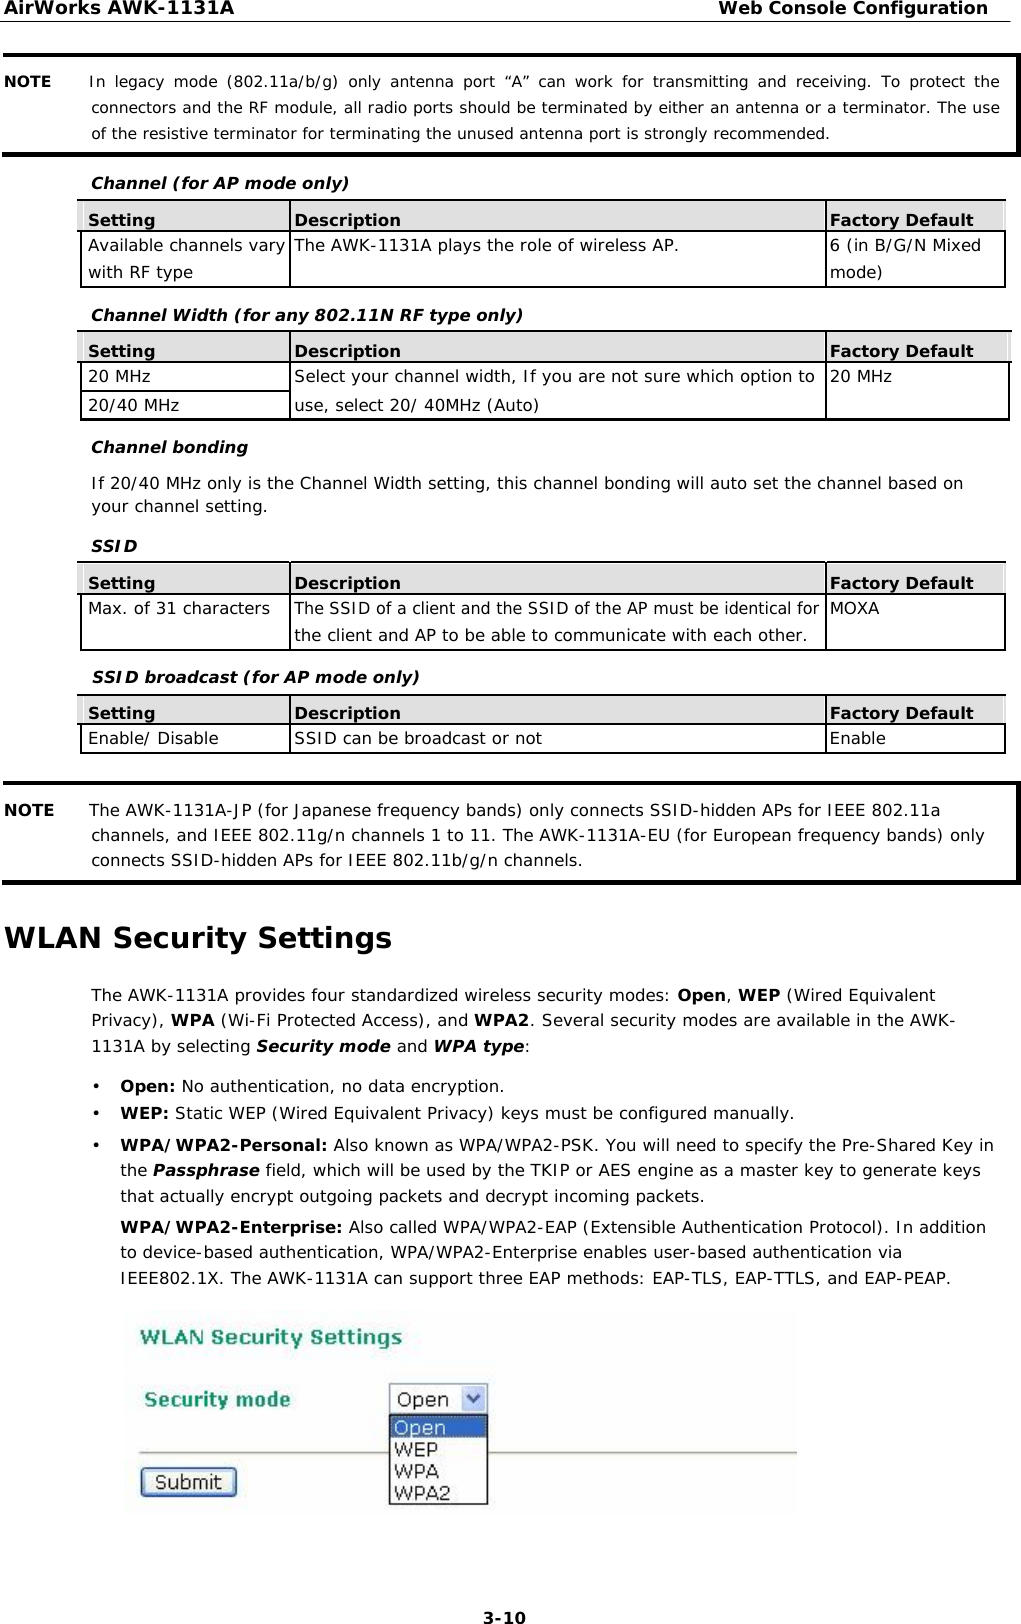
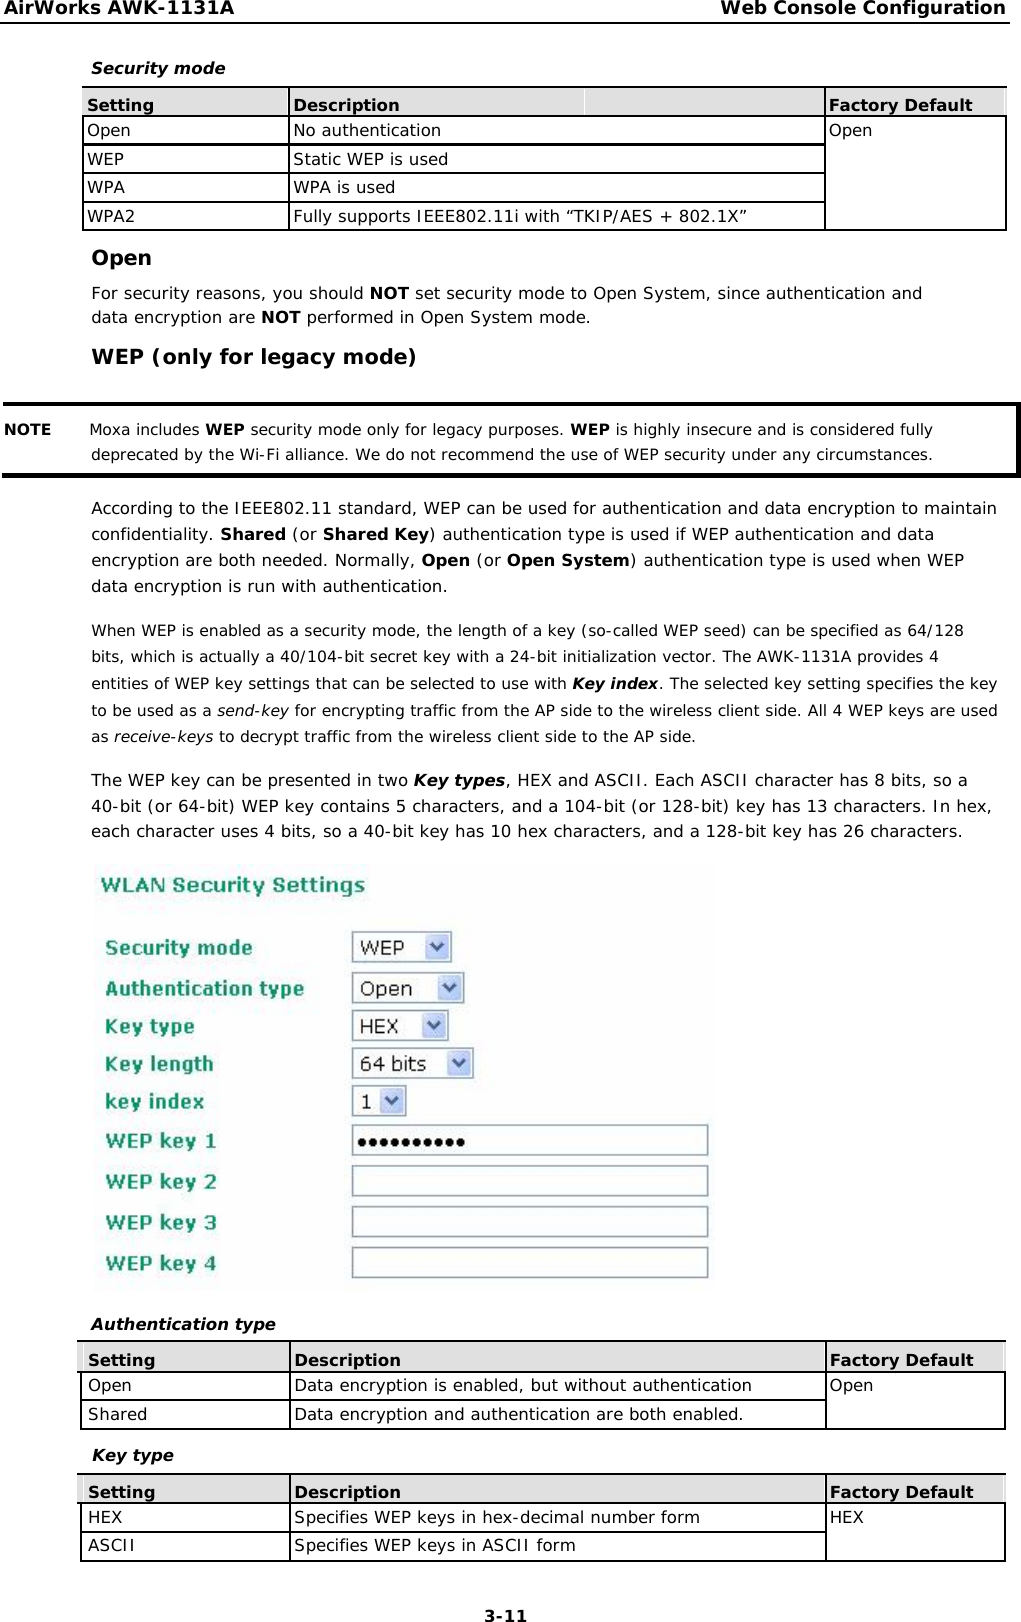
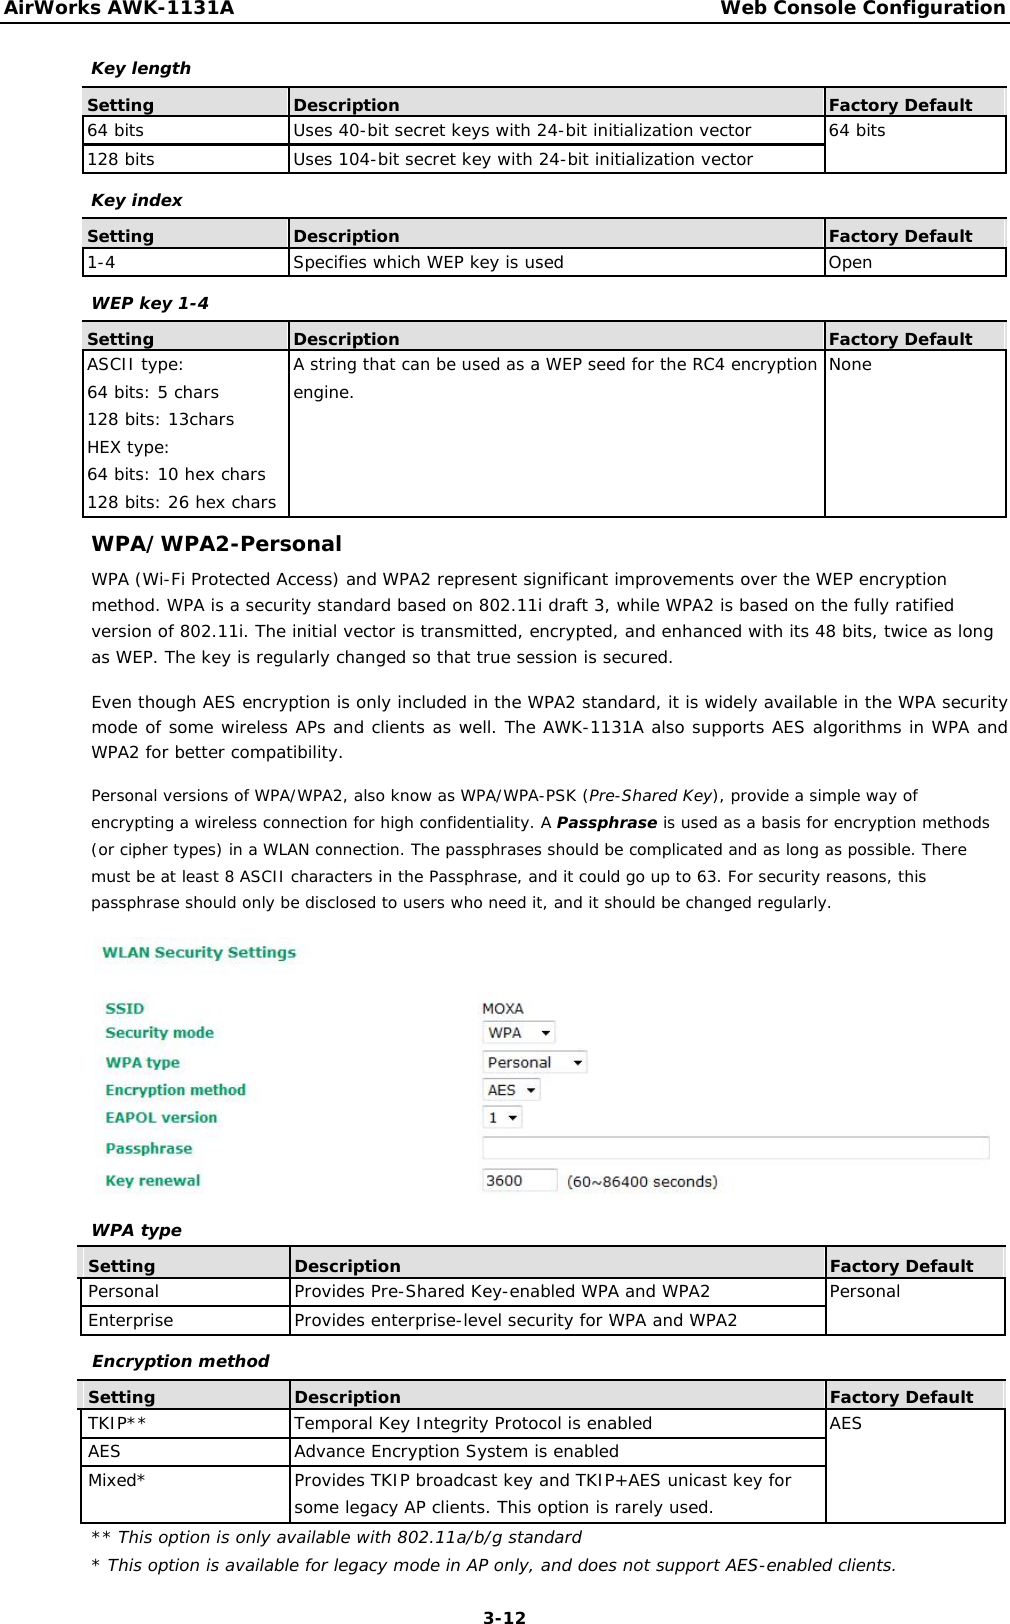


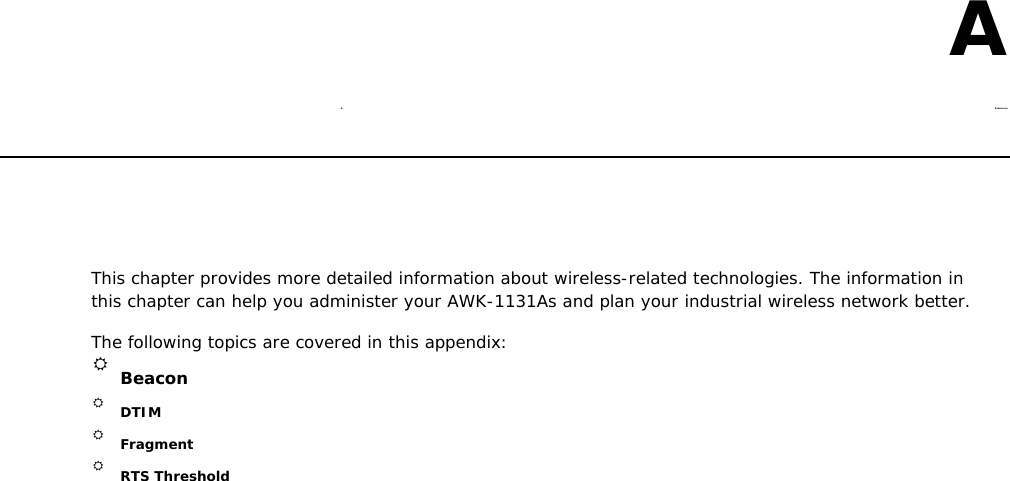
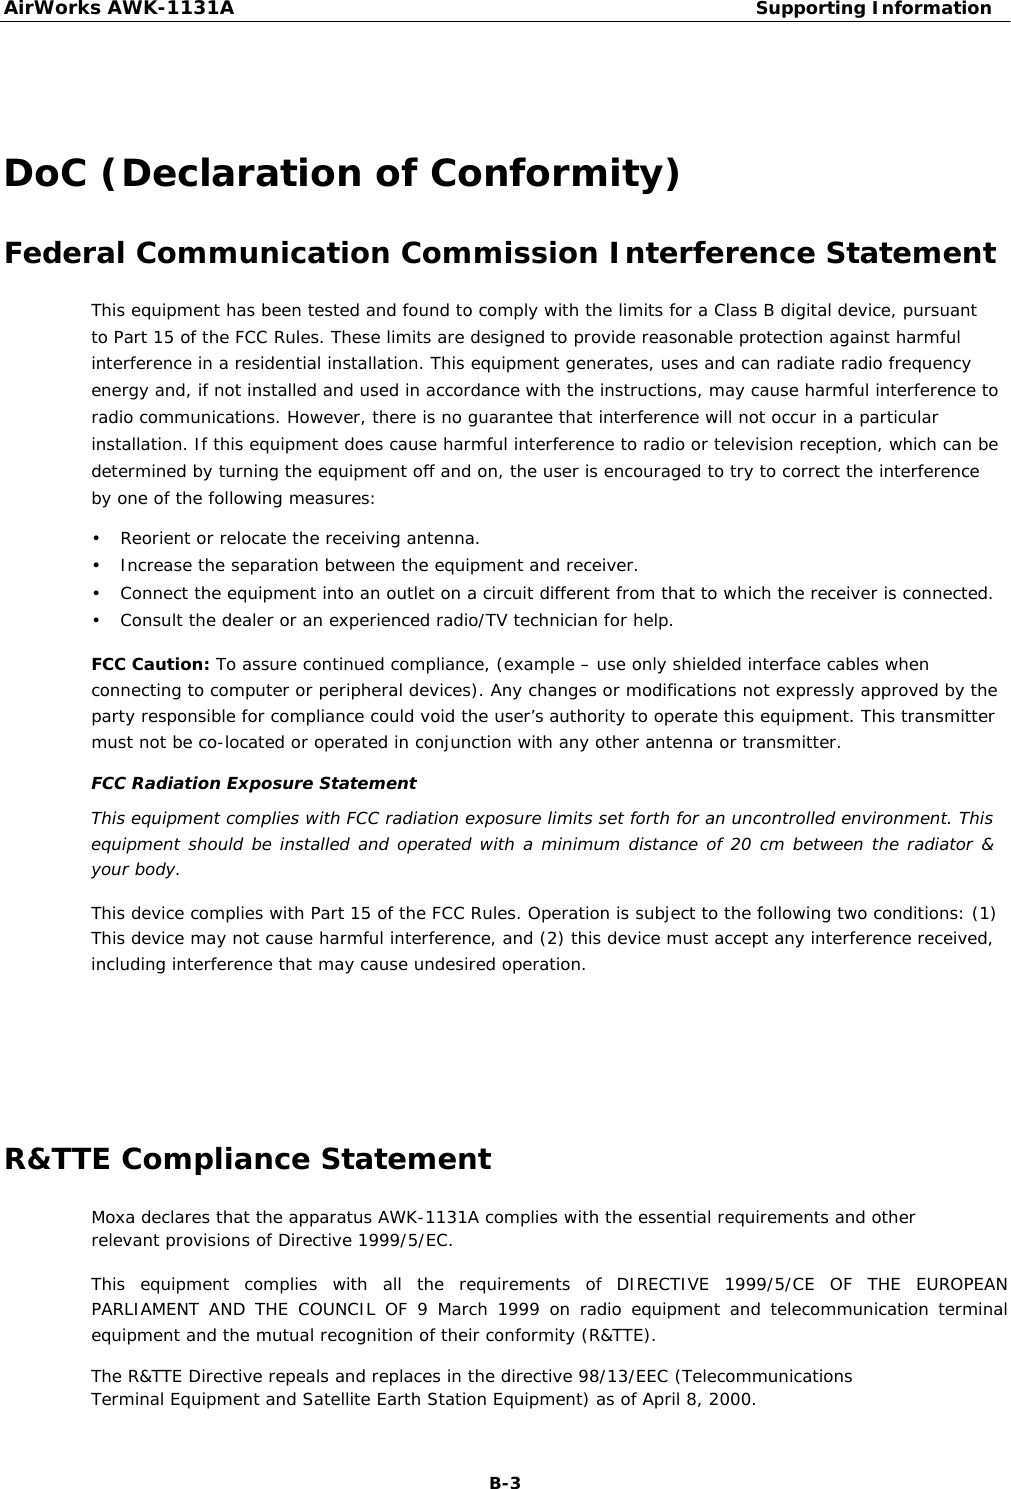
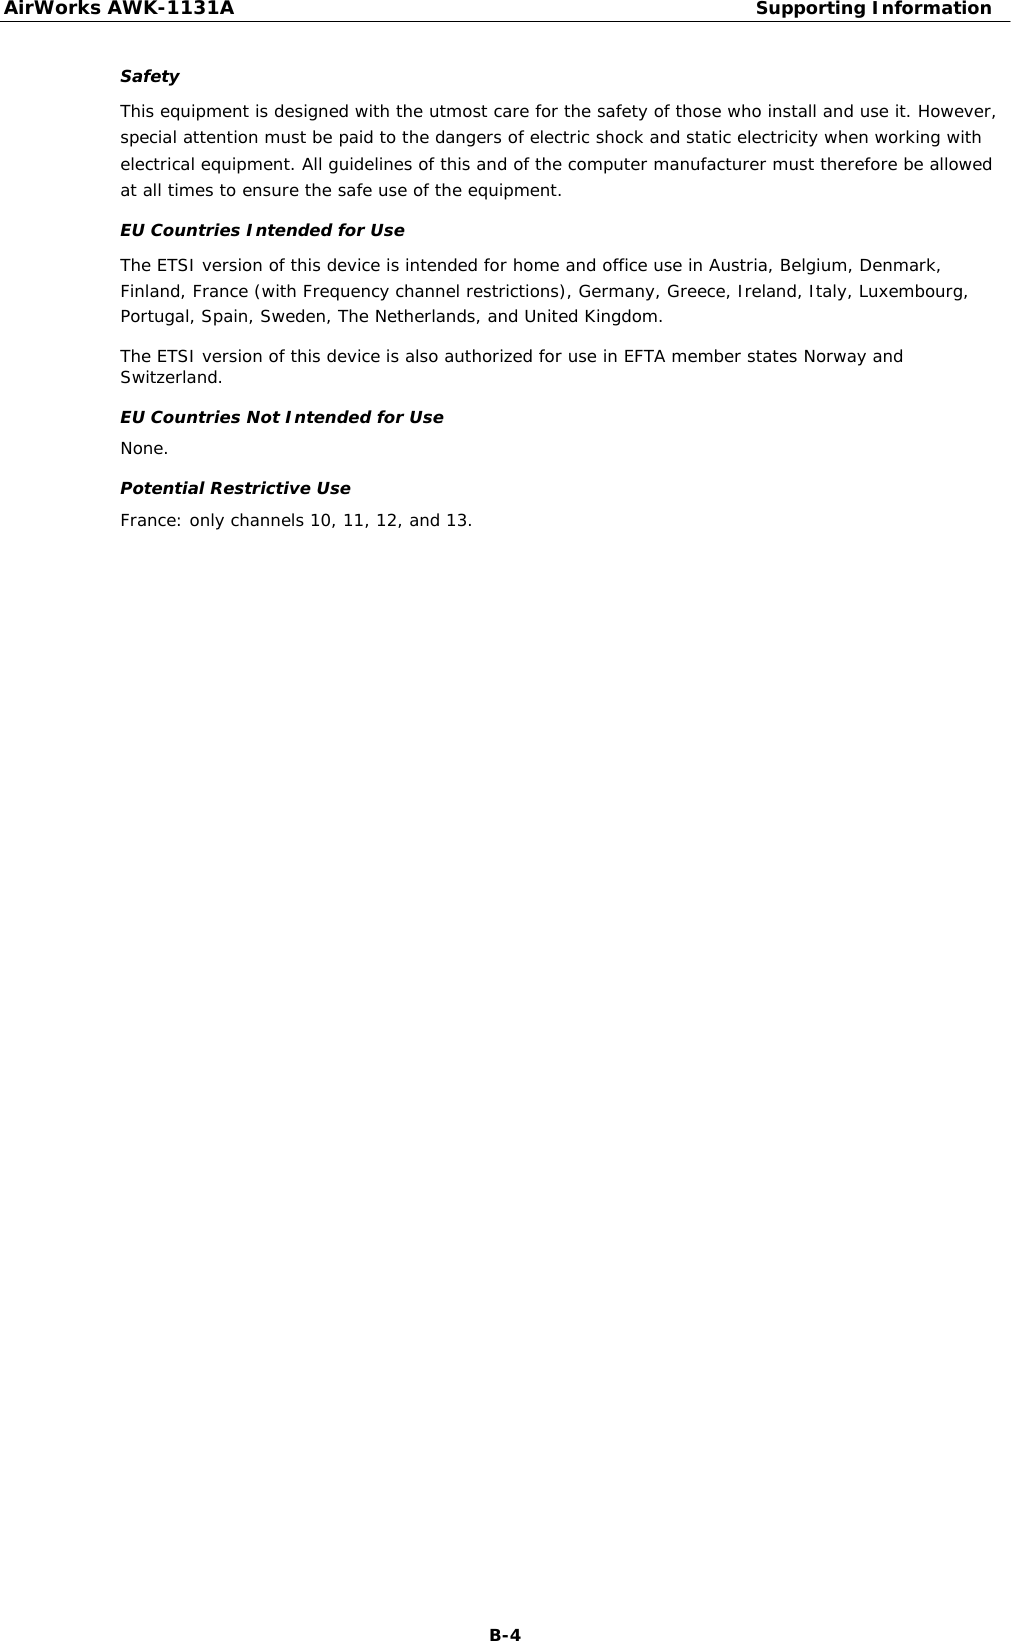
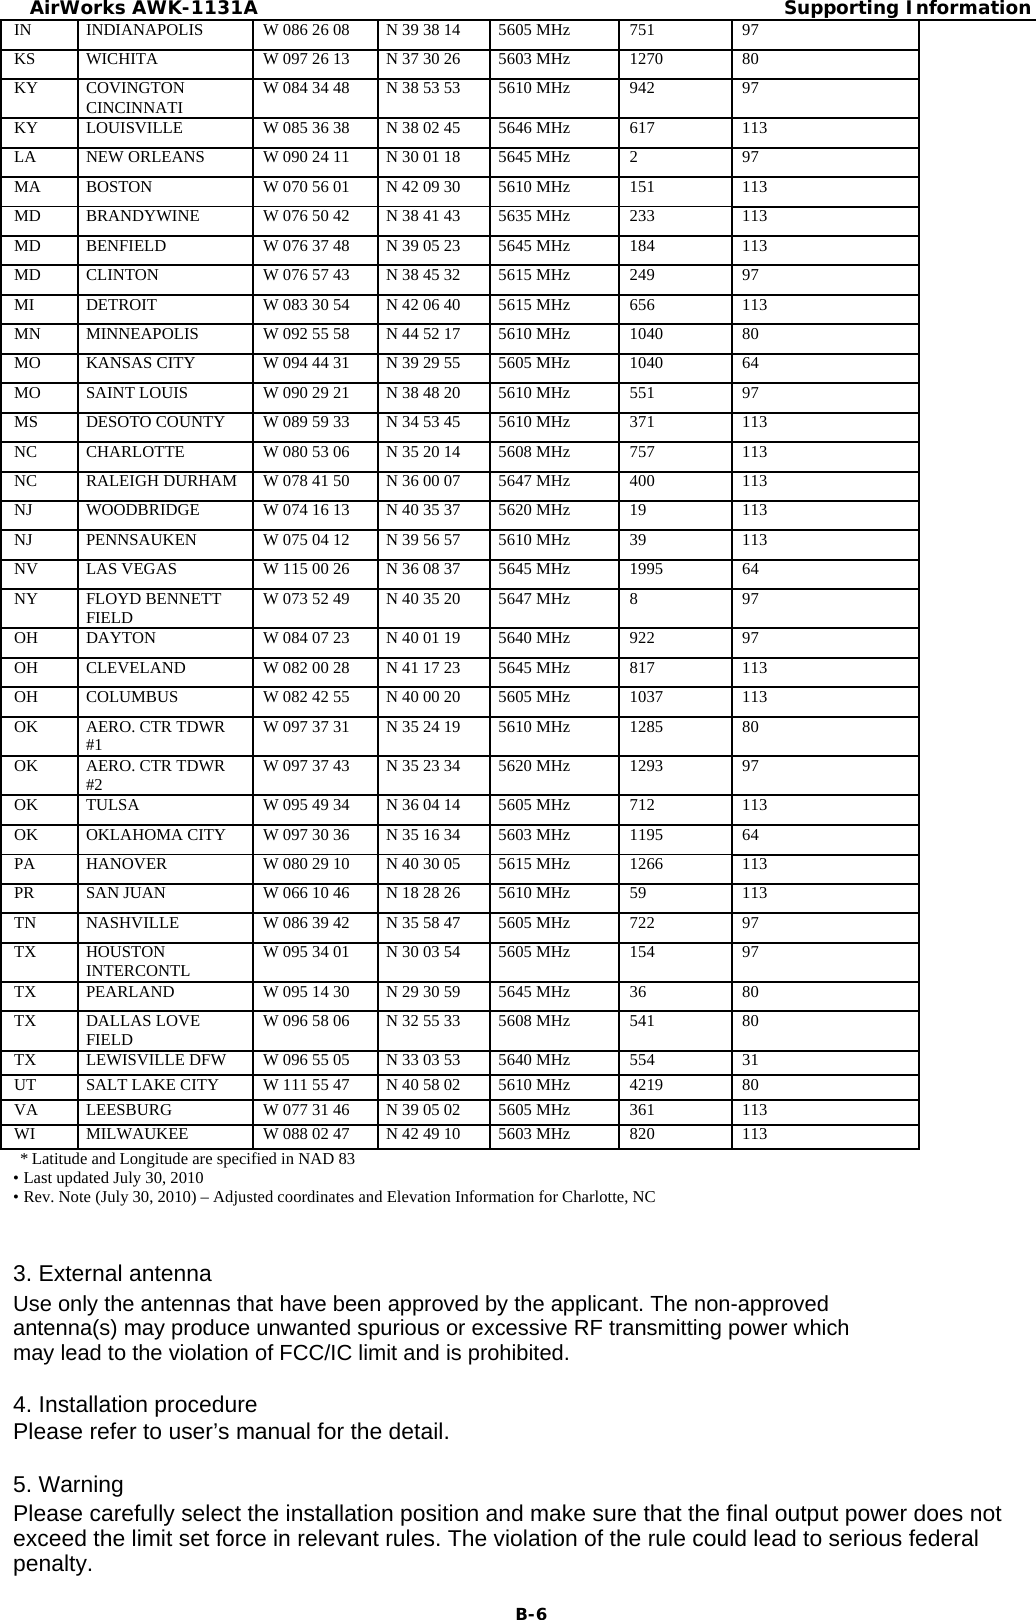
![AirWorks AWK-1131A Supporting Information Professional installation instruction 1. Installation personal This product is designed for specific application and needs to be installed by a qualified personal who has RF and related rule knowledge. The general user shall not attempt to install or change the setting. 2. Installation location A). The product shall be installed at a location where the radiating antenna can be kept 21cm from nearby person in normal operation condition to meet regulatory RF exposure requirement. B). Within the 5.15-5.25 GHz band, the devices will be restricted to indoor operations to reduce any potential for harmful interference to co-channel MSS operations. C). Any installation of either a master or a client device within 35 km of a TDWR location shall be separated by at least 30 MHz (center-to-center) 4 from the TDWR operating frequency (as shown in the below table) TERRAINANTENNA HEIGHT STATE CITY LONGITUDE LATITUDE FREQUENCYELEVATION ABOVE TERRAIN [ft] (MSL) [ft] AZ PHOENIX W 112 09 46 N 33 25 14 5610 MHz 1024 64 CO DENVER W 104 31 35 N 39 43 39 5615 MHz 5643 64 FL FT LAUDERDALE W 080 20 39 N 26 08 36 5645 MHz 7113 FL MIAMI W 080 29 28 N 25 45 27 5605 MHz 10 113 FL ORLANDO W 081 19 33 N 28 20 37 5640 MHz 72 97 FL TAMPA W 082 31 04 N 27 51 35 5620 MHz 14 80 FL WEST PALM W 080 16 23 N 26 41 17 5615 MHz 20 113 BEACH GA ATLANTA W 084 15 44 N 33 38 48 5615 MHz 962 113 IL MCCOOK W 087 51 31 N 41 47 50 5615 MHz 646 97 IL CRESTWOOD W 087 43 47 N 41 39 05 5645 MHz 663 113 B-5](https://usermanual.wiki/Moxa/WAPN008.AWK-11xyz-p-t-UserMan/User-Guide-3030224-Page-74.png)