Realtek Semiconductor RTL8191SE 802.11b/g/n RTL8191SE miniCard User Manual QW6 MANUAL OK
Realtek Semiconductor Corp. 802.11b/g/n RTL8191SE miniCard QW6 MANUAL OK
UserManual.wiki
>
Realtek Semiconductor
>
RTL8191SE User Manual
>
User Manual 1
Contents
1.
User Manual
2.
USERS MANUAL
3.
Users Manual
4.
(RTL8191SE) UserMan 0303
5.
User Manual 1
6.
User Manual 2
7.
User manual
User Manual 1
Navigation menu
Upload a User Manual
Namespaces
Wiki Guide
HTML
PDF
Info
Views
User Manual
Discussion / Help
Navigation

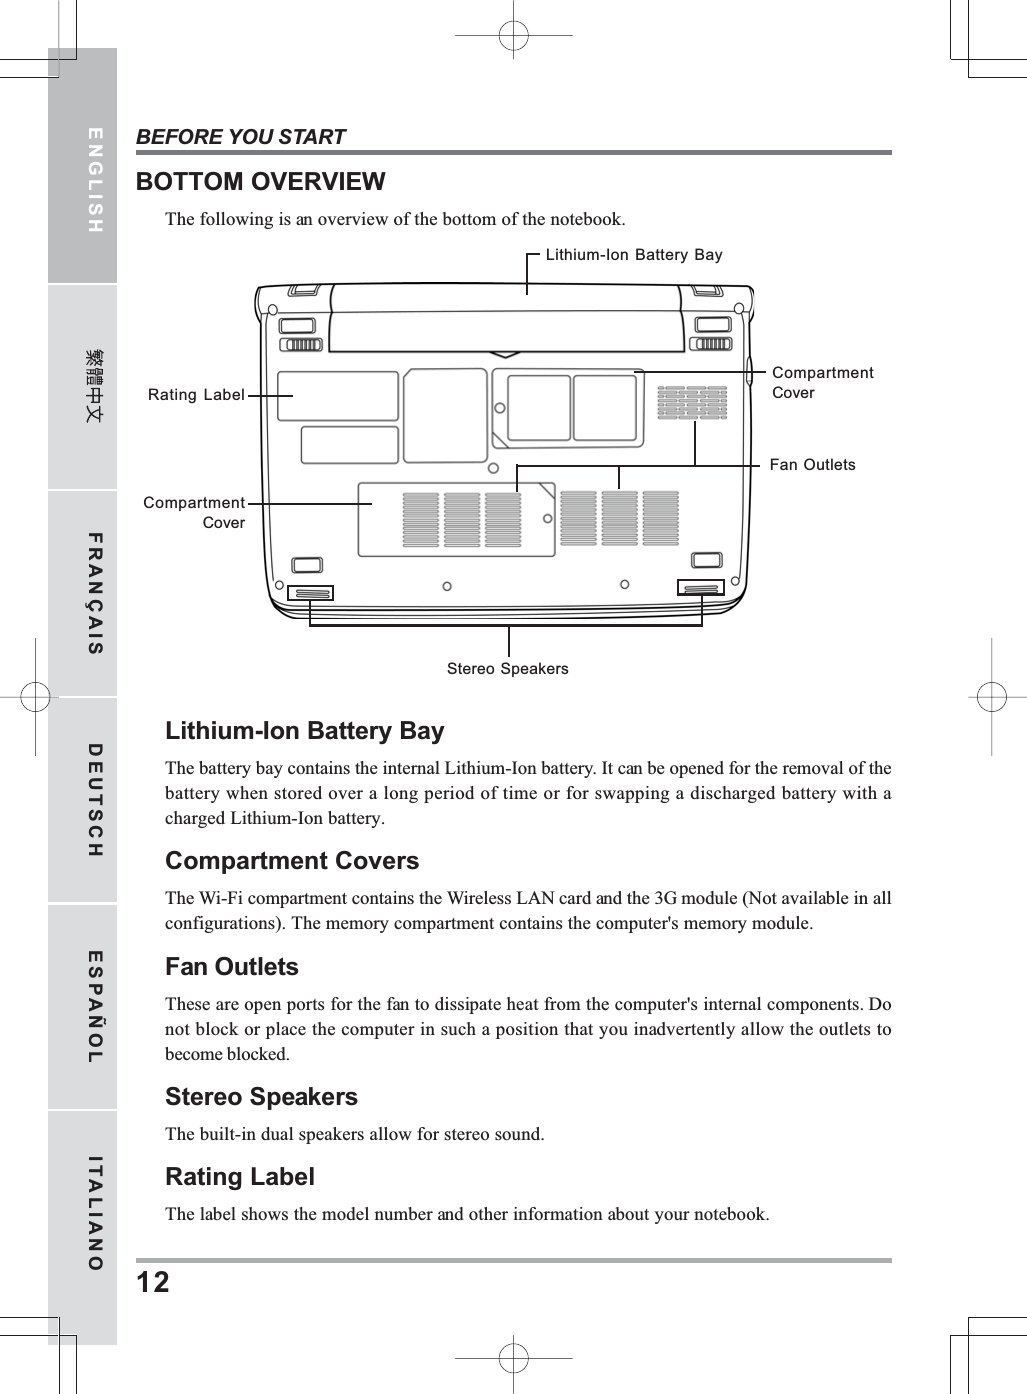
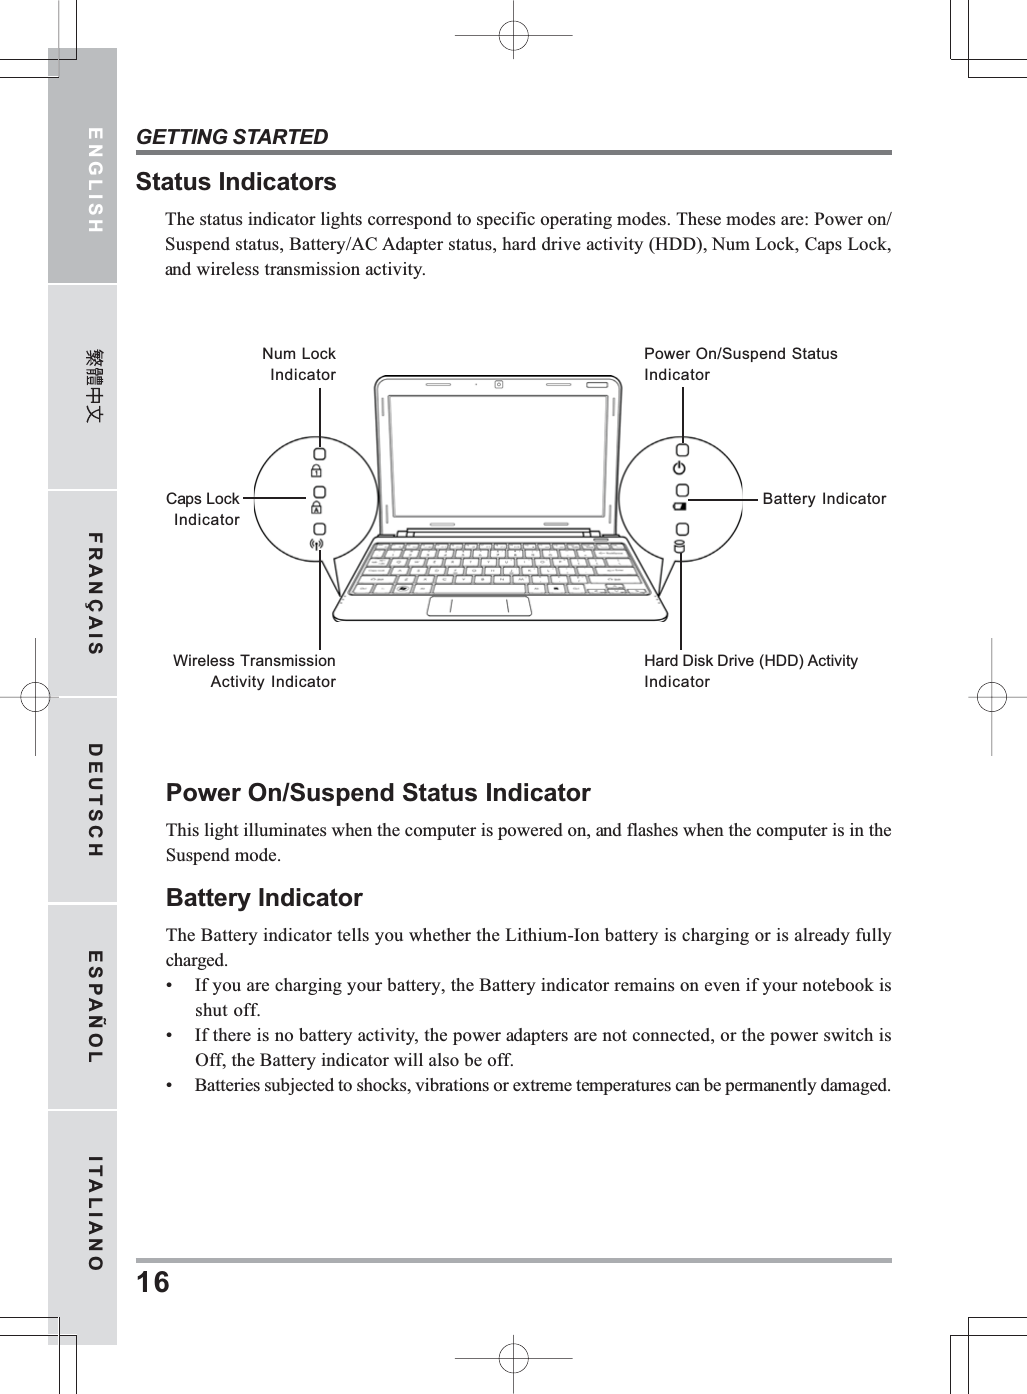
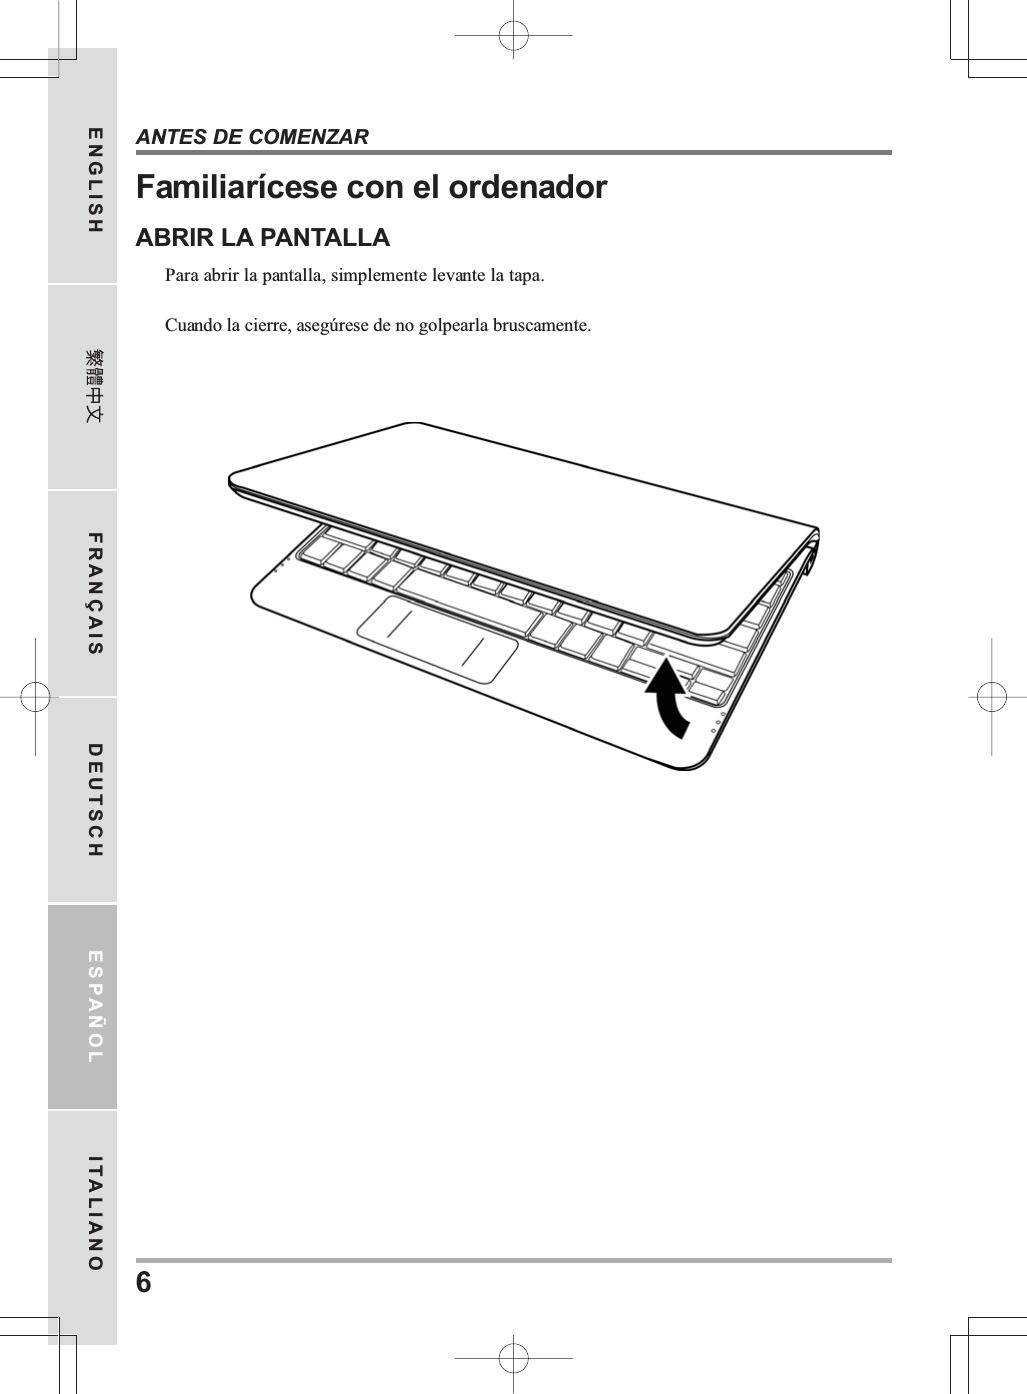
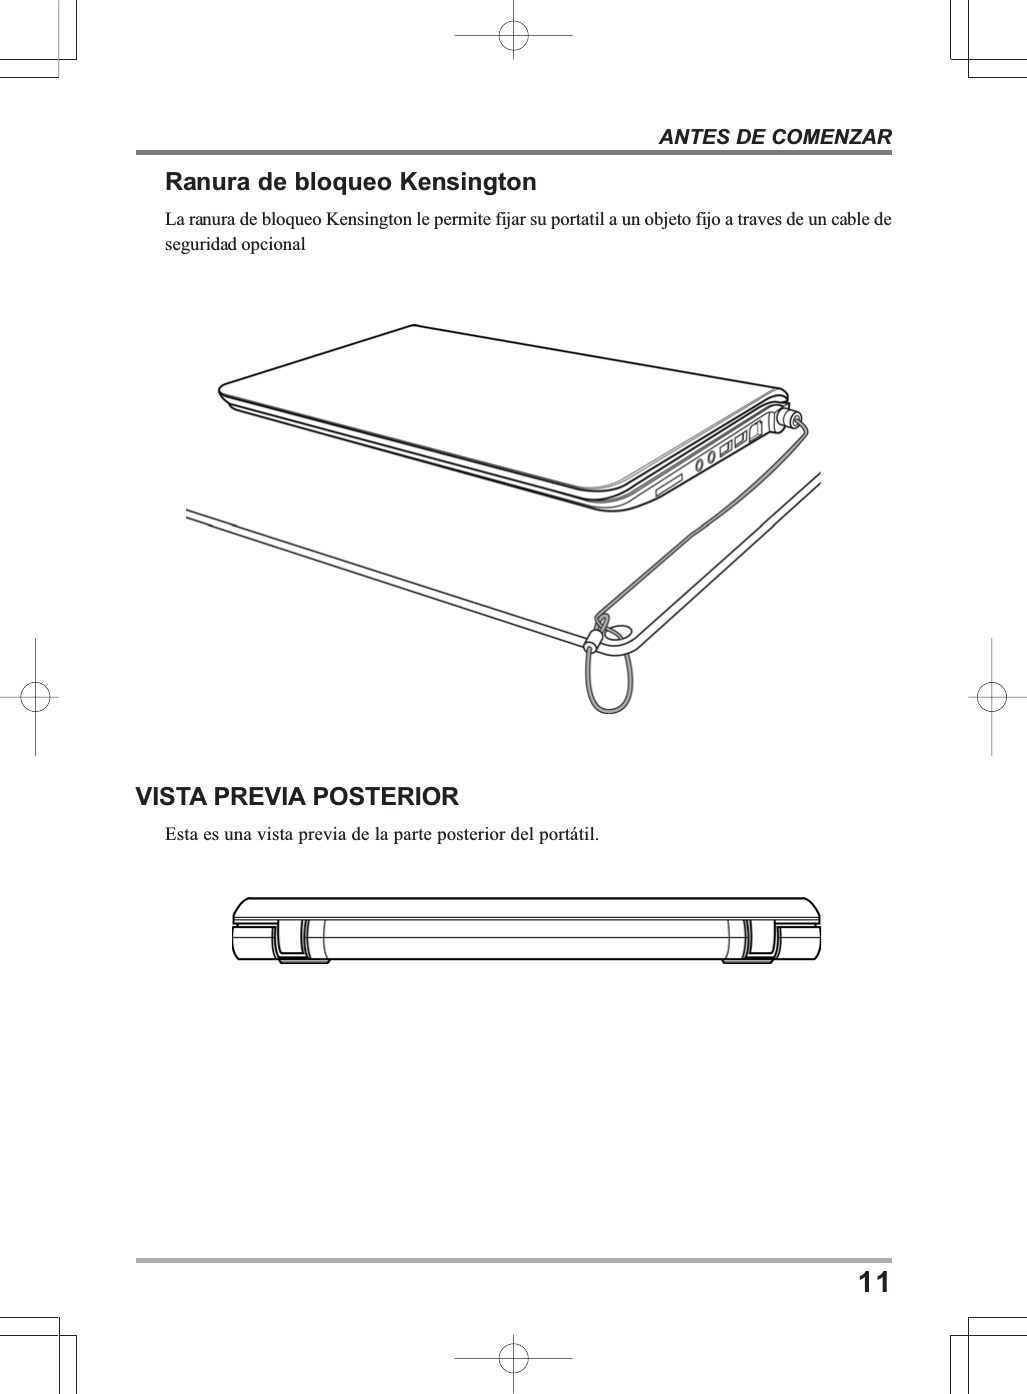
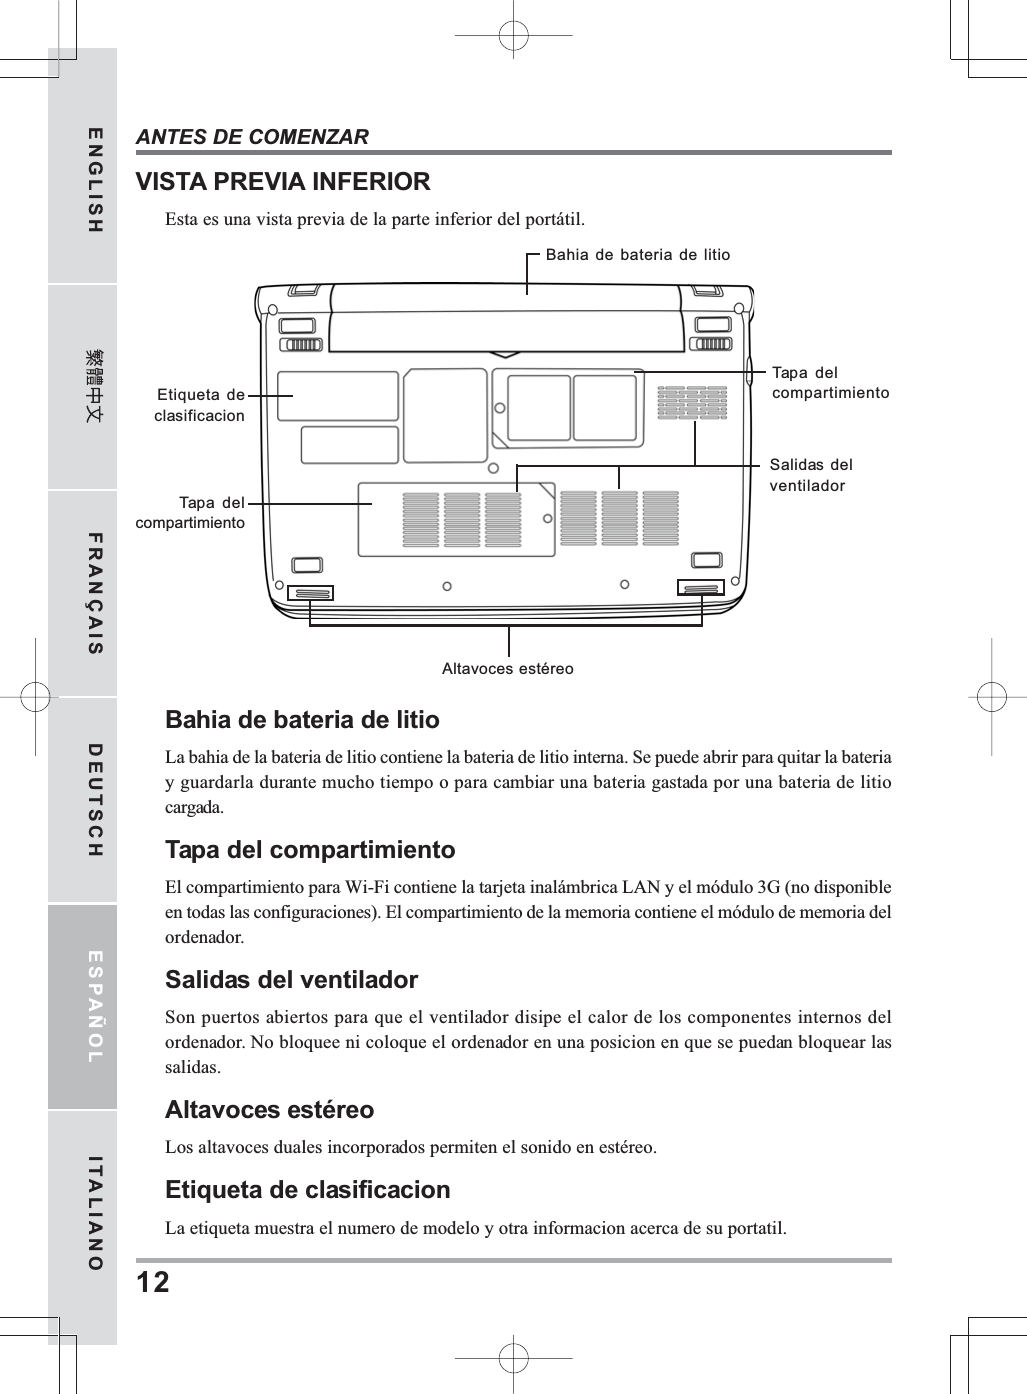
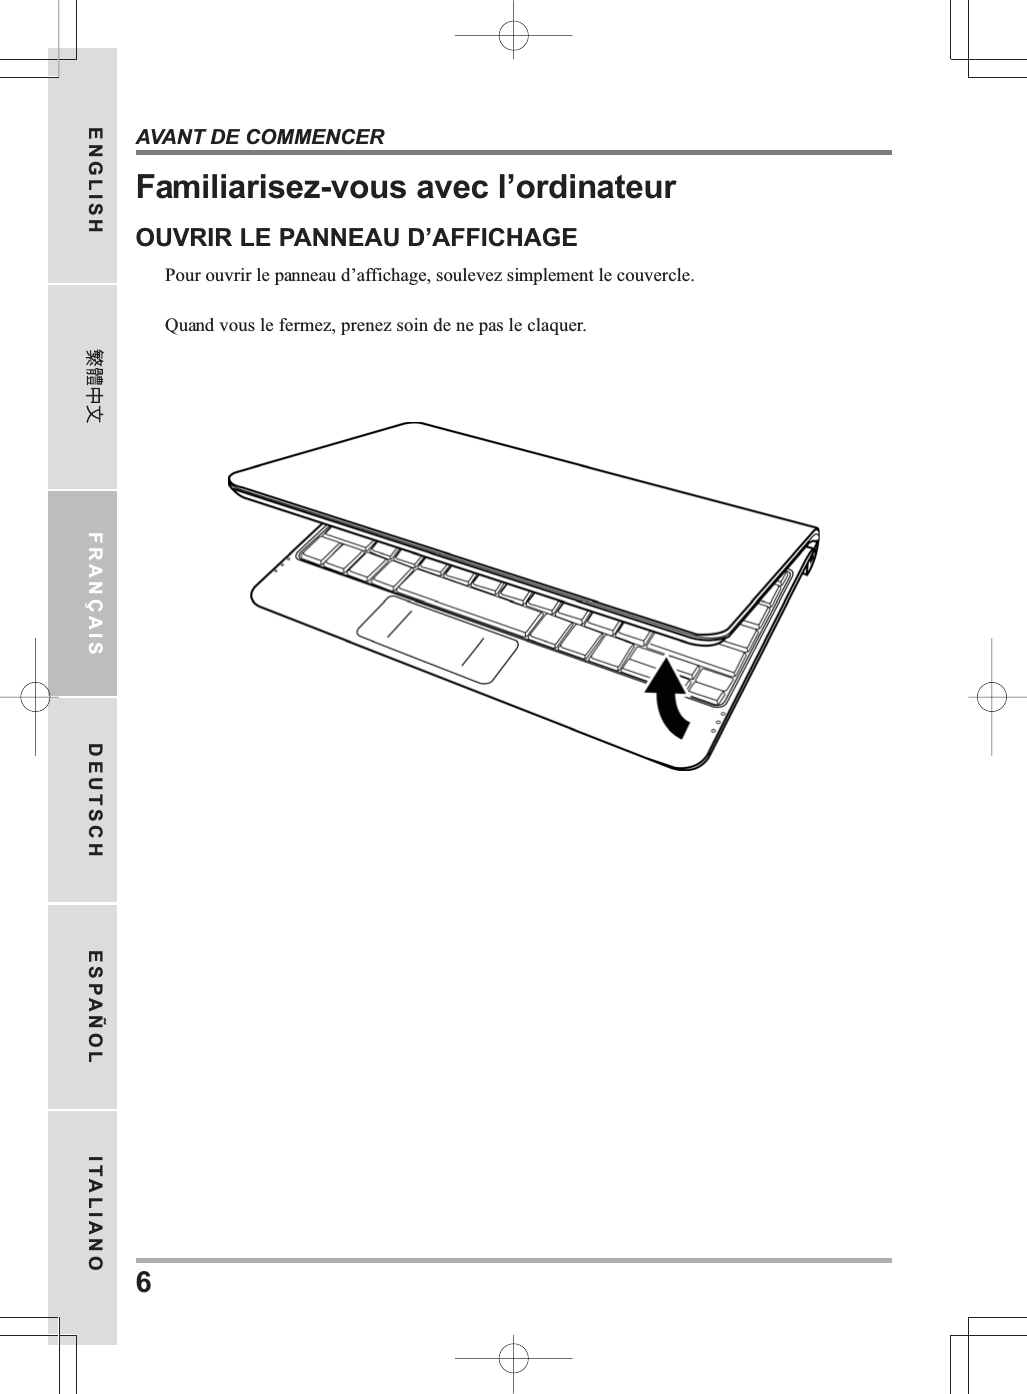
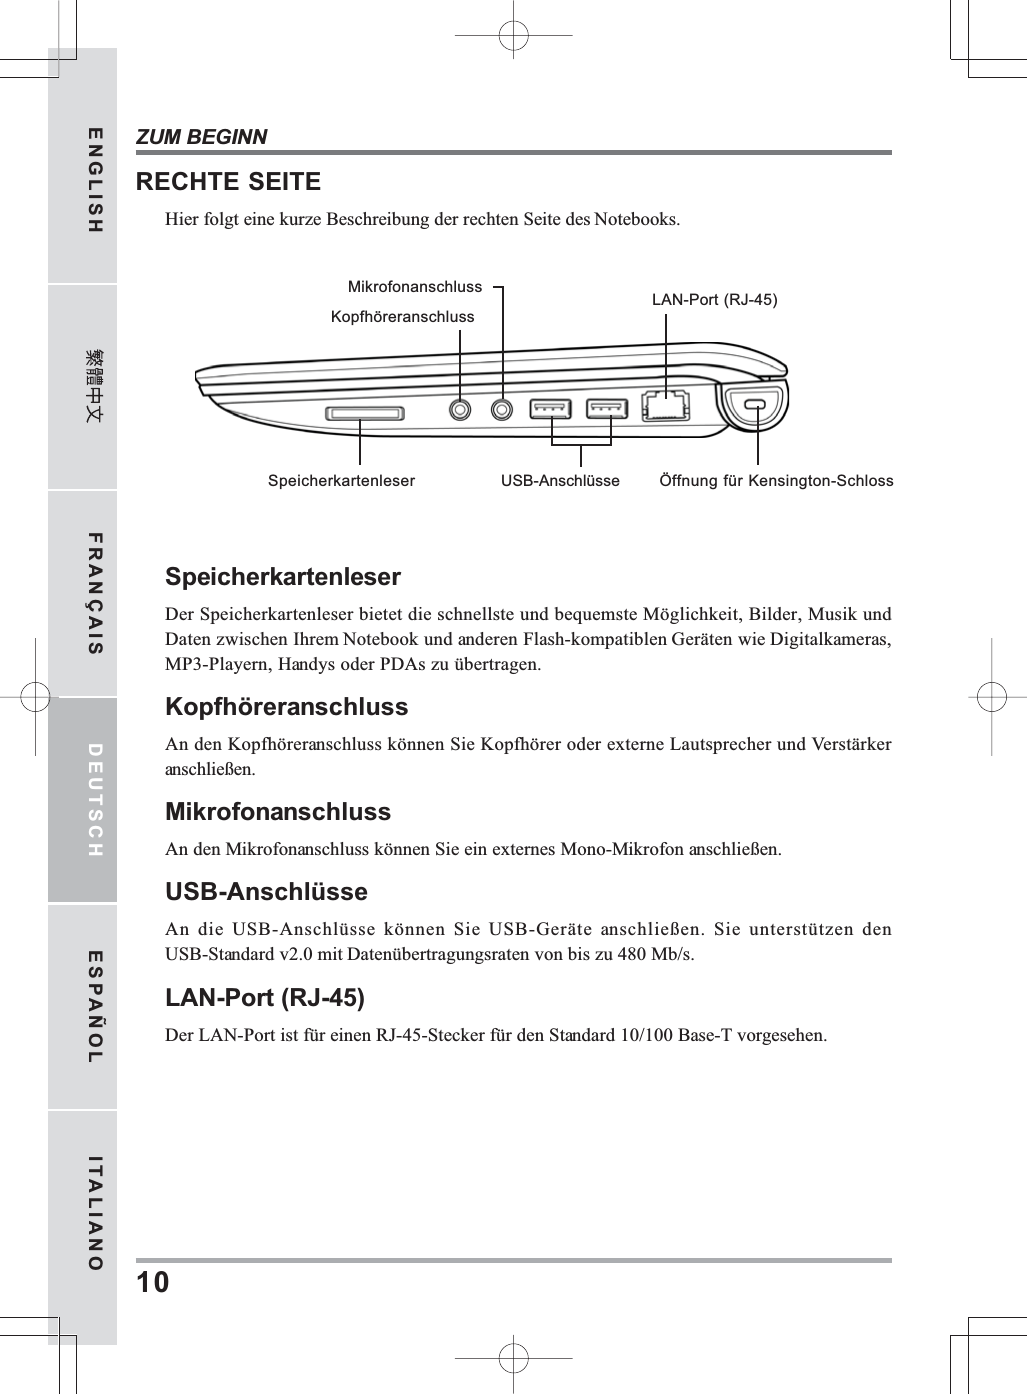
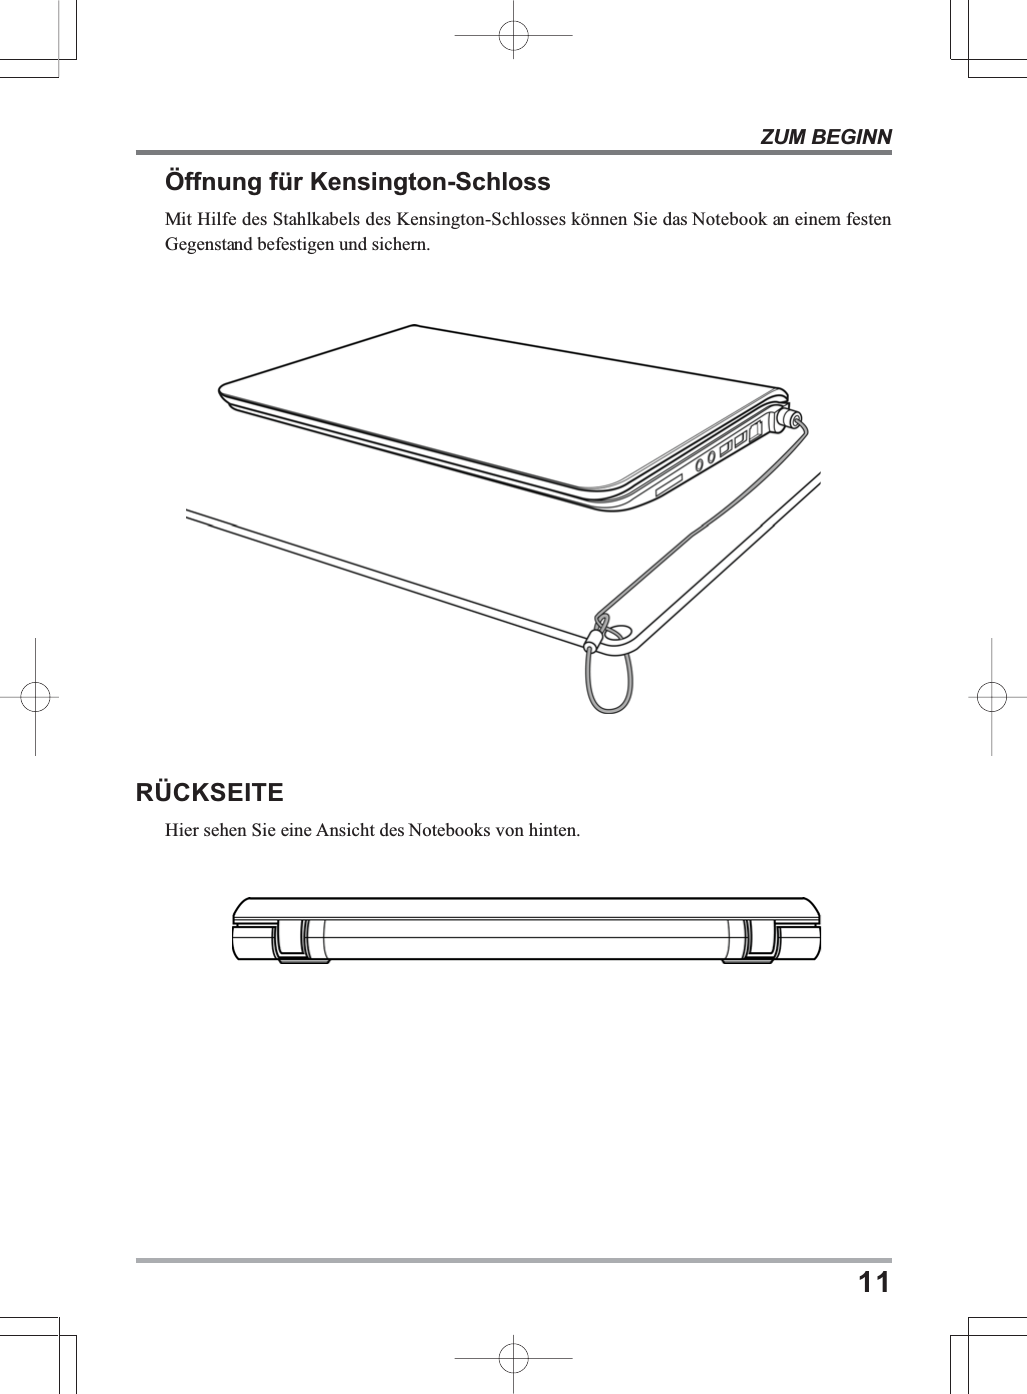
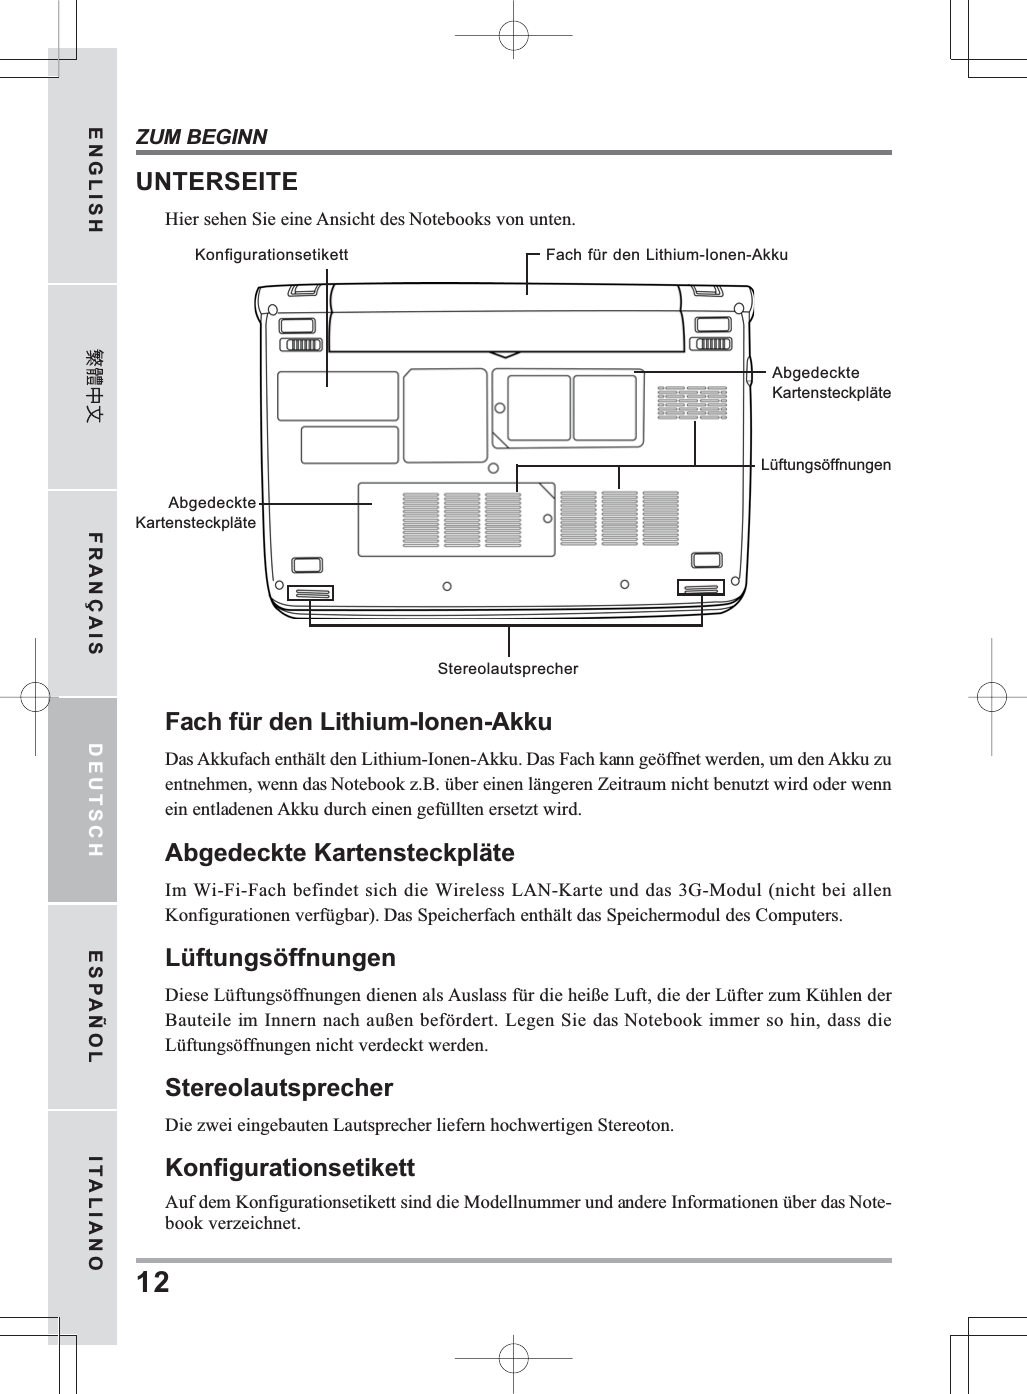
![ENGLISH FRANÇAIS DEUTSCH ESPAÑOL ITALIANOGETTING STARTED18Using Function KeysYour computer has 12 function keys, F1 through F12. The functions assigned to these keys differfor each application. You should refer to your software documentation to find out how these keysare used.The [FN] key provides extended functions for the notebook and is always used in conjunctionwith another key.• [FN+F1]: Places the notebook in Suspend mode. Pressing the Power button returns it toactive mode.• [FN+F2]: Enables or disables the wireless network connection. Press this key combinationto enable Wireless LAN connection. Press and hold this key combination to enable 3Gnetwork connection.• [FN+F3]: Allows you to change your selection of where to send your display video. Eachtime you press the combination of keys you will step to the next choice. The choices, inorder, are: built-in display panel only, both built-in display panel and external monitor, orexternal monitor only.• [FN+F4]: Decreases the screen Brightness.• [FN+F5]: Increases the screen Brightness.• [FN+F6]: Mutes the computer's volume.• [FN+F7]: Decreases the computer's volume.• [FN+F8]: Increases the computer's volume.• [FN+F9]: Plays or pauses the current multimedia track.• [FN+F10]: Stops the current multimedia track.• [FN+F11]: Goes to the previous multimedia track.• [FN+F12]: Goes to the next multimedia track.• [FN+Esc]: Enables or disables the Bluetooth function.](https://usermanual.wiki/Realtek-Semiconductor/RTL8191SE.User-Manual-1/User-Guide-1252583-Page-18.png)


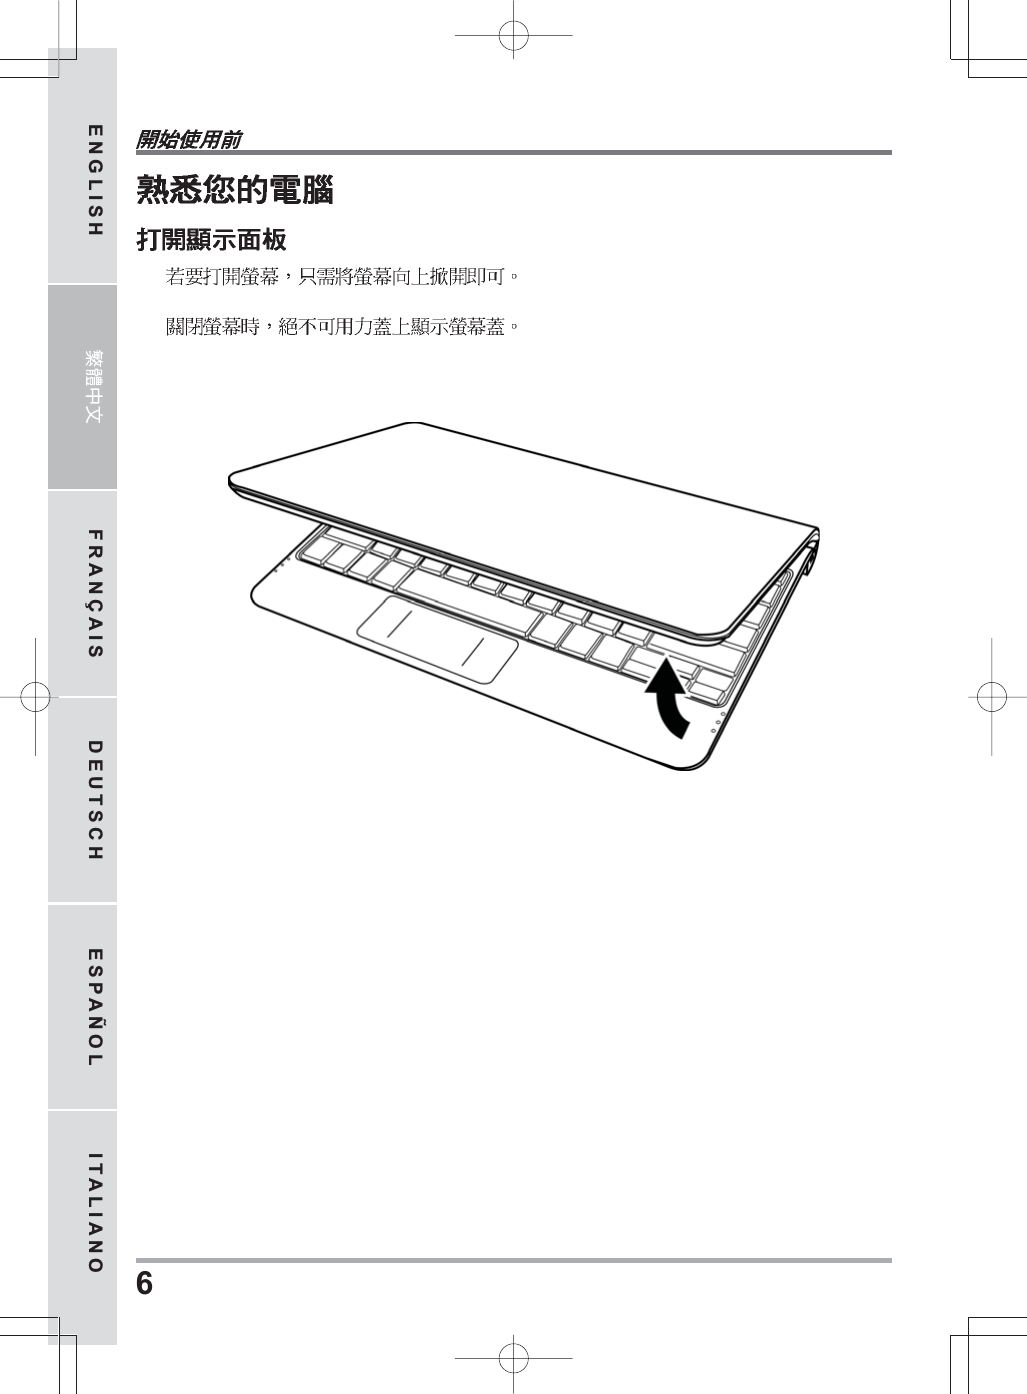
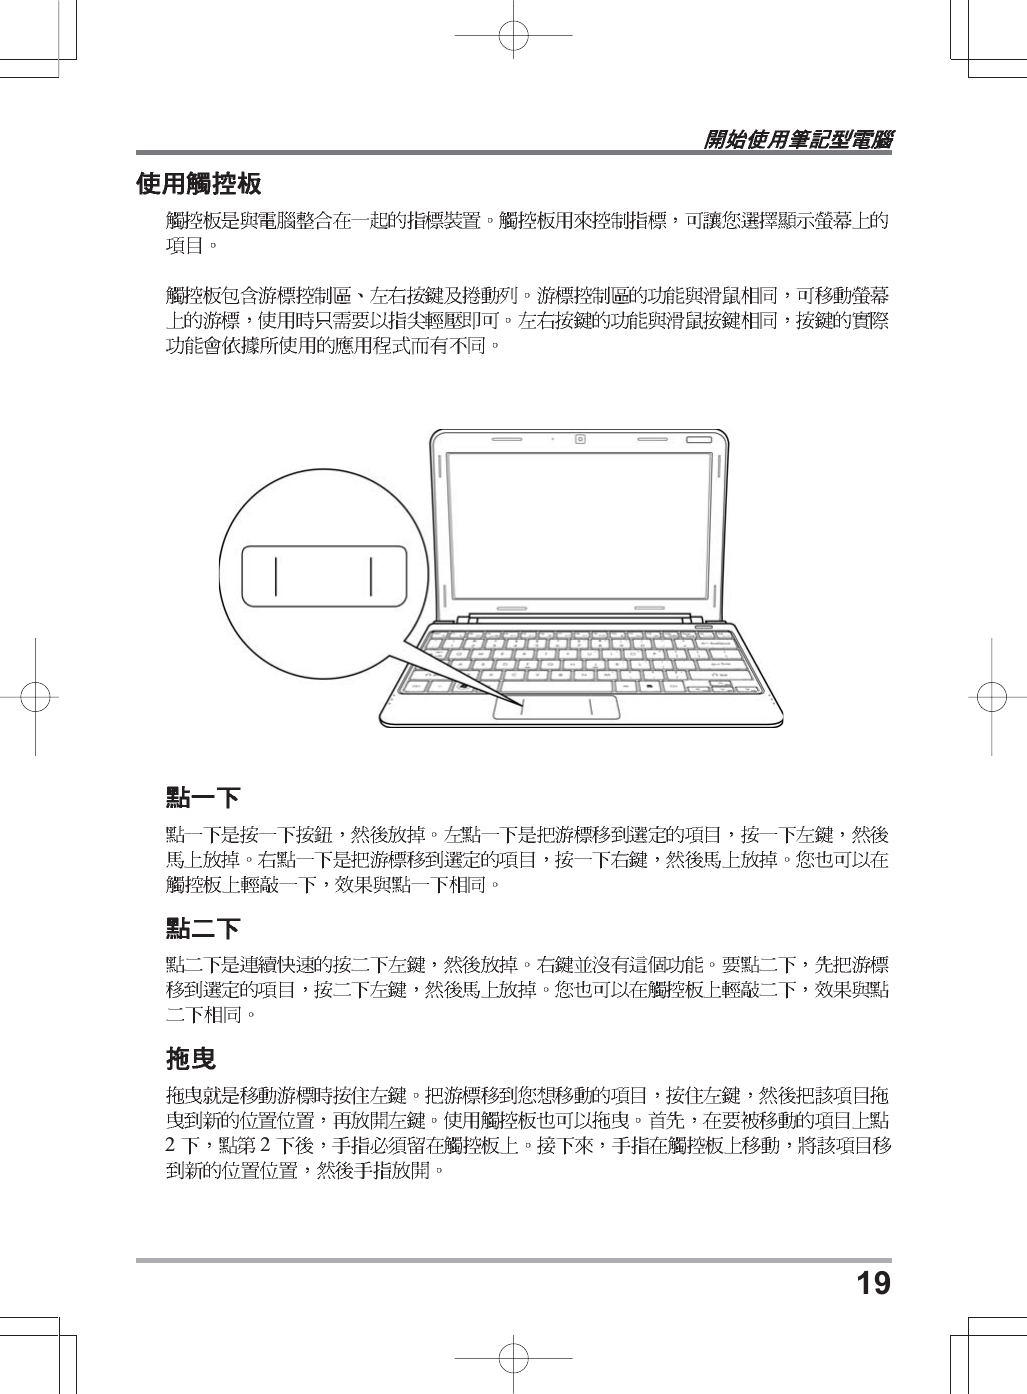
![18ENGLISH FRANÇAIS DEUTSCH ESPAÑOL ITALIANO 12 F1~F12[FN] [FN+F1][FN+F2] 3G [FN+F3][FN+F4][FN+F5][FN+F6][FN+F7][FN+F8][FN+F9][FN+F10][FN+F11][FN+F12][FN+Esc]](https://usermanual.wiki/Realtek-Semiconductor/RTL8191SE.User-Manual-1/User-Guide-1252583-Page-40.png)

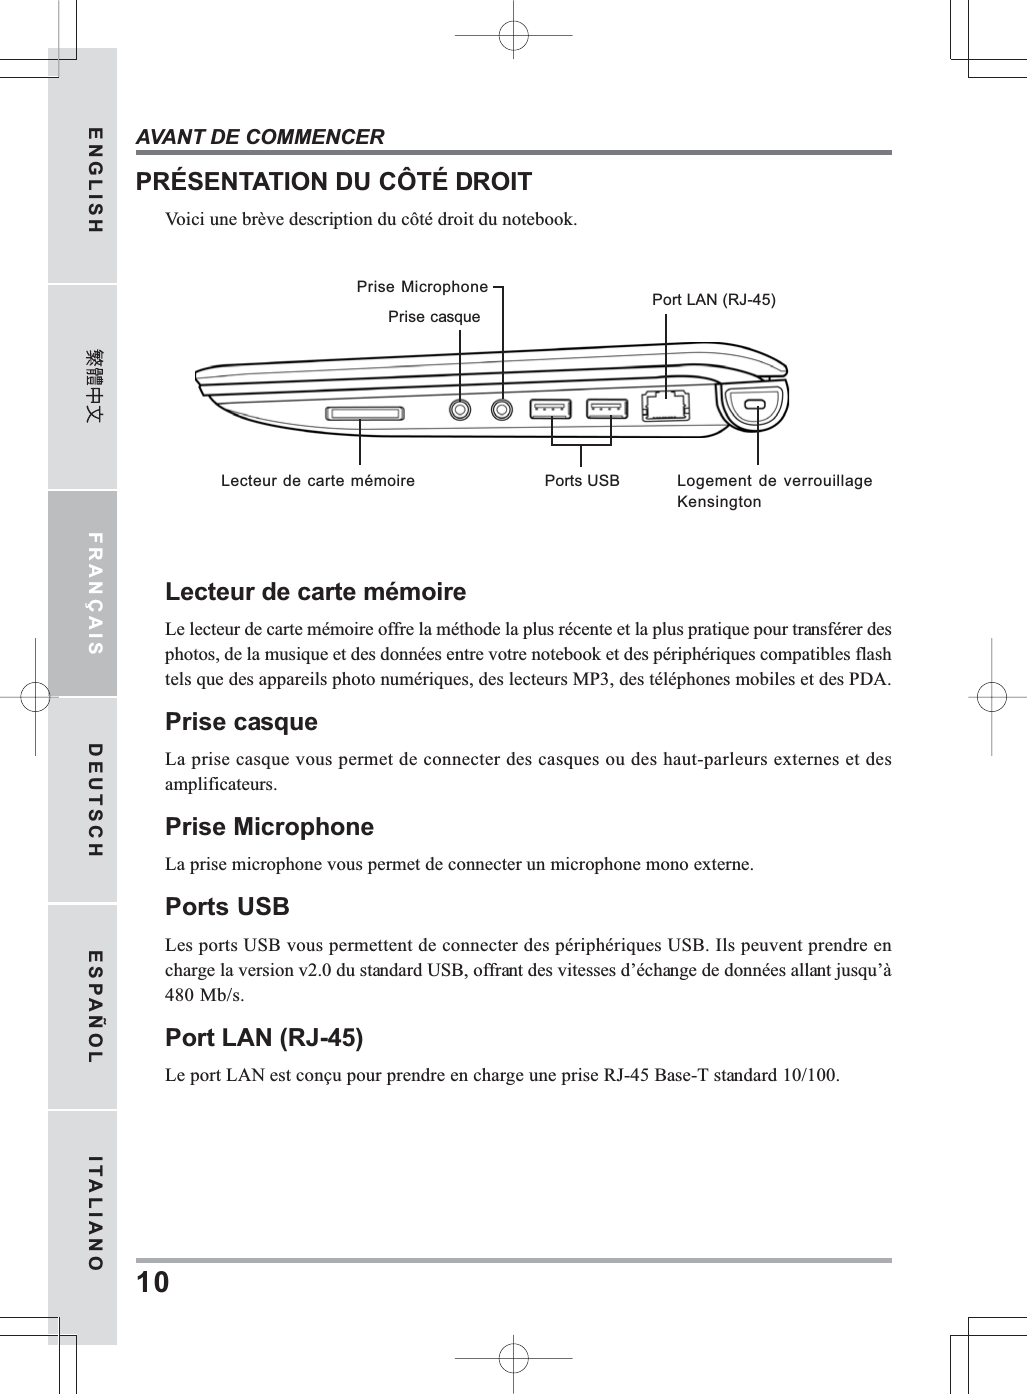
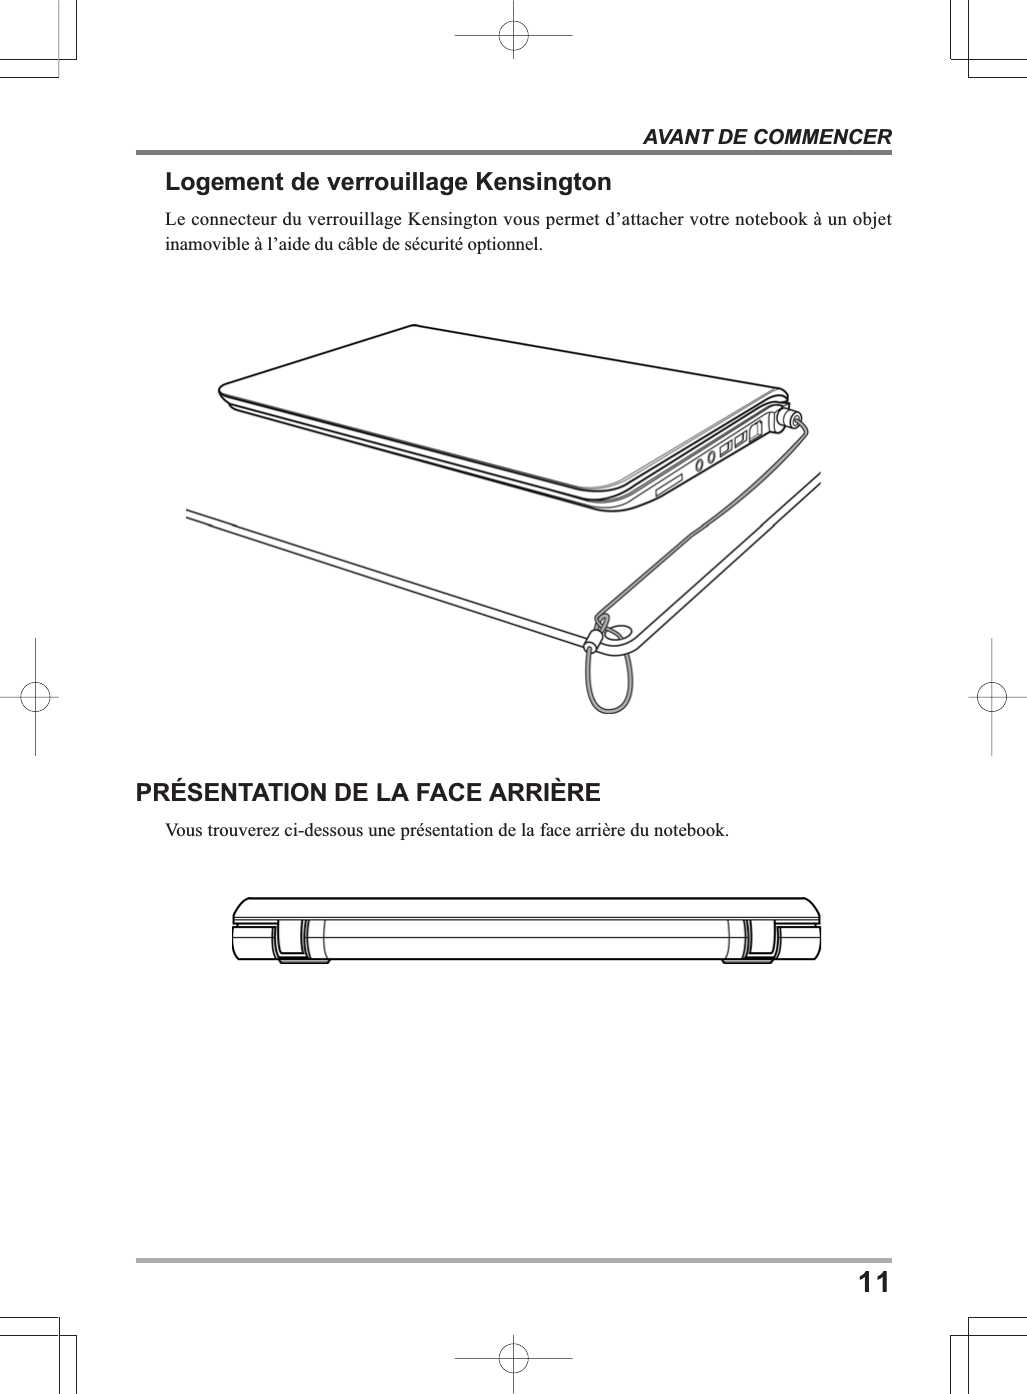
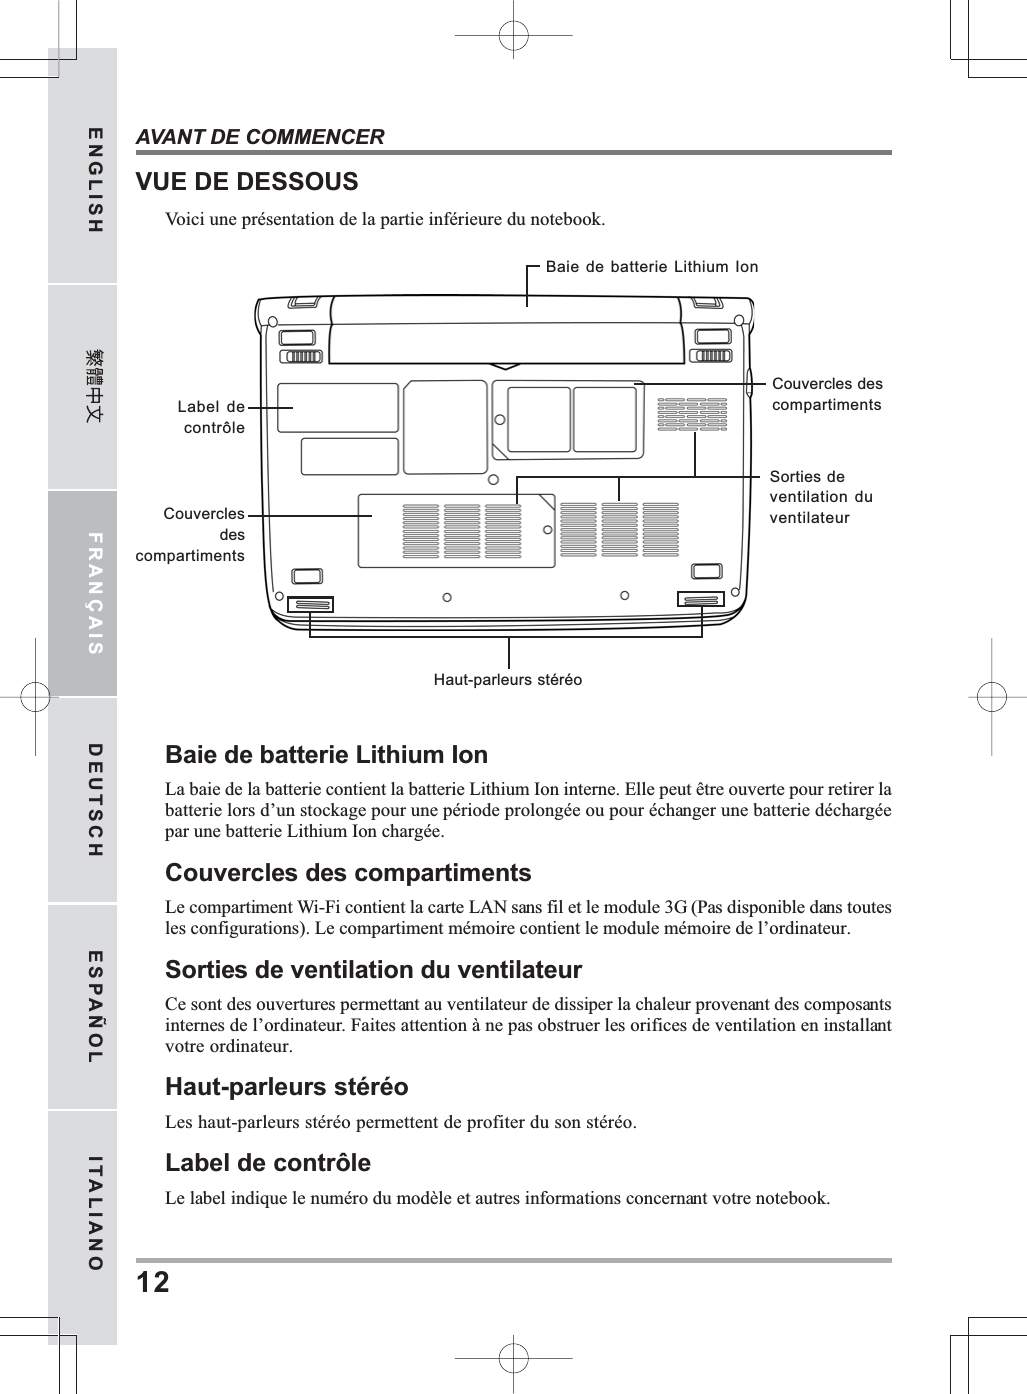

![MISE EN ROUTE18ENGLISH FRANÇAIS DEUTSCH ESPAÑOL ITALIANOUtilisation des touches de fonctionVotre ordinateur possède 12 touches de fonction, F1 à F12. Les fonctions attribuées à ces touchesdiffèrent pour chaque application. Vous devez vous reporter à la documentation de votre logicielpour découvrir comment ces touches sont utilisées.La touche [FN] offre des fonctions étendues pour le notebook et est toujours utiliséeconjointement avec une autre touche.• [FN+F1]: Met le notebook en mode Suspension. Appuyer sur le bouton d’alimentationpour le rétablir en mode actif.• [FN+F2]: Active ou désactive la connexion réseau sans fil. Appuyez sur cette combinaisonde touches pour activer la connexion LAN sans fil. Appuyez et maintenez cettecombinaison de touches enfoncée pour activer la connexion réseau 3G.• [FN+F3]: Vous permet de changer votre sélection de l’endroit où envoyer votre vidéod’affichage. Chaque fois que vous appuyez sur la combinaison de touches vous passez auchoix suivant. Les choix, dans l’ordre, sont : panneau d’affichage intégré seulement, à la foisle panneau d’affichage intégré et le moniteur externe, ou moniteur externe seulement.• [FN+F4]: Diminue la luminosité de l’écran.• [FN+F5]: Augmente la luminosité de l’écran.• [FN+F6]: Désactive le volume de l’ordinateur.• [FN+F7]: Diminue le volume de l’ordinateur.• [FN+F8]: Augmente le volume de l’ordinateur.• [FN+F9]: Lit ou met en pause la piste multimédia en cours.• [FN+F10]: Arrête la piste multimédia en cours.• [FN+F11]: Va à la piste multimédia précédente.• [FN+F12]: Va à la piste multimédia suivante.• [FN+Esc]: Active ou désactive la fonction Bluetooth.](https://usermanual.wiki/Realtek-Semiconductor/RTL8191SE.User-Manual-1/User-Guide-1252583-Page-62.png)
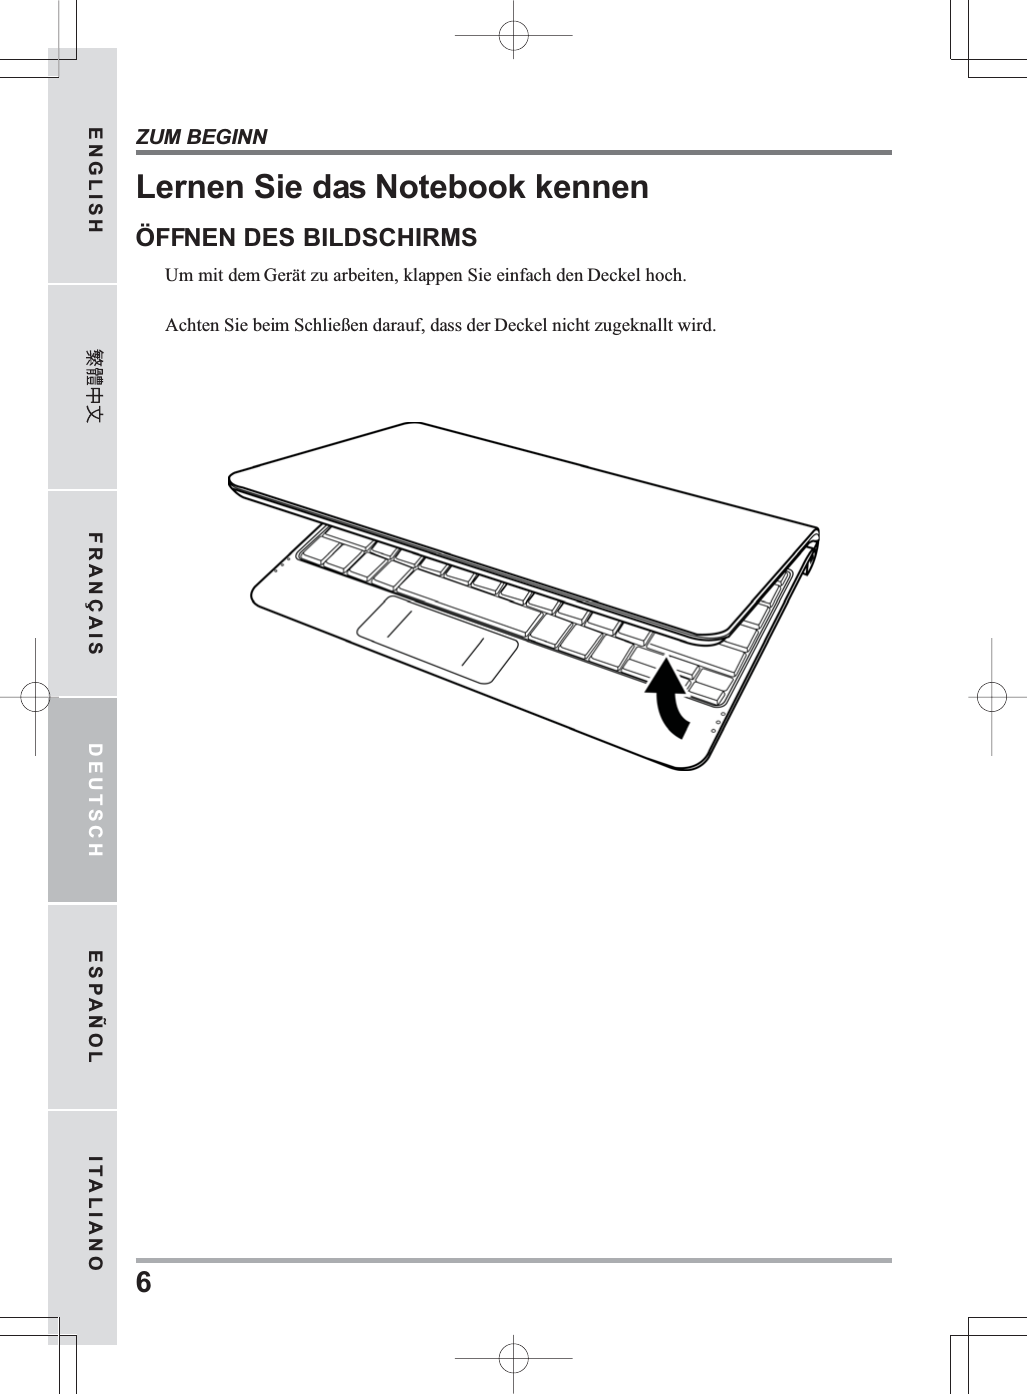
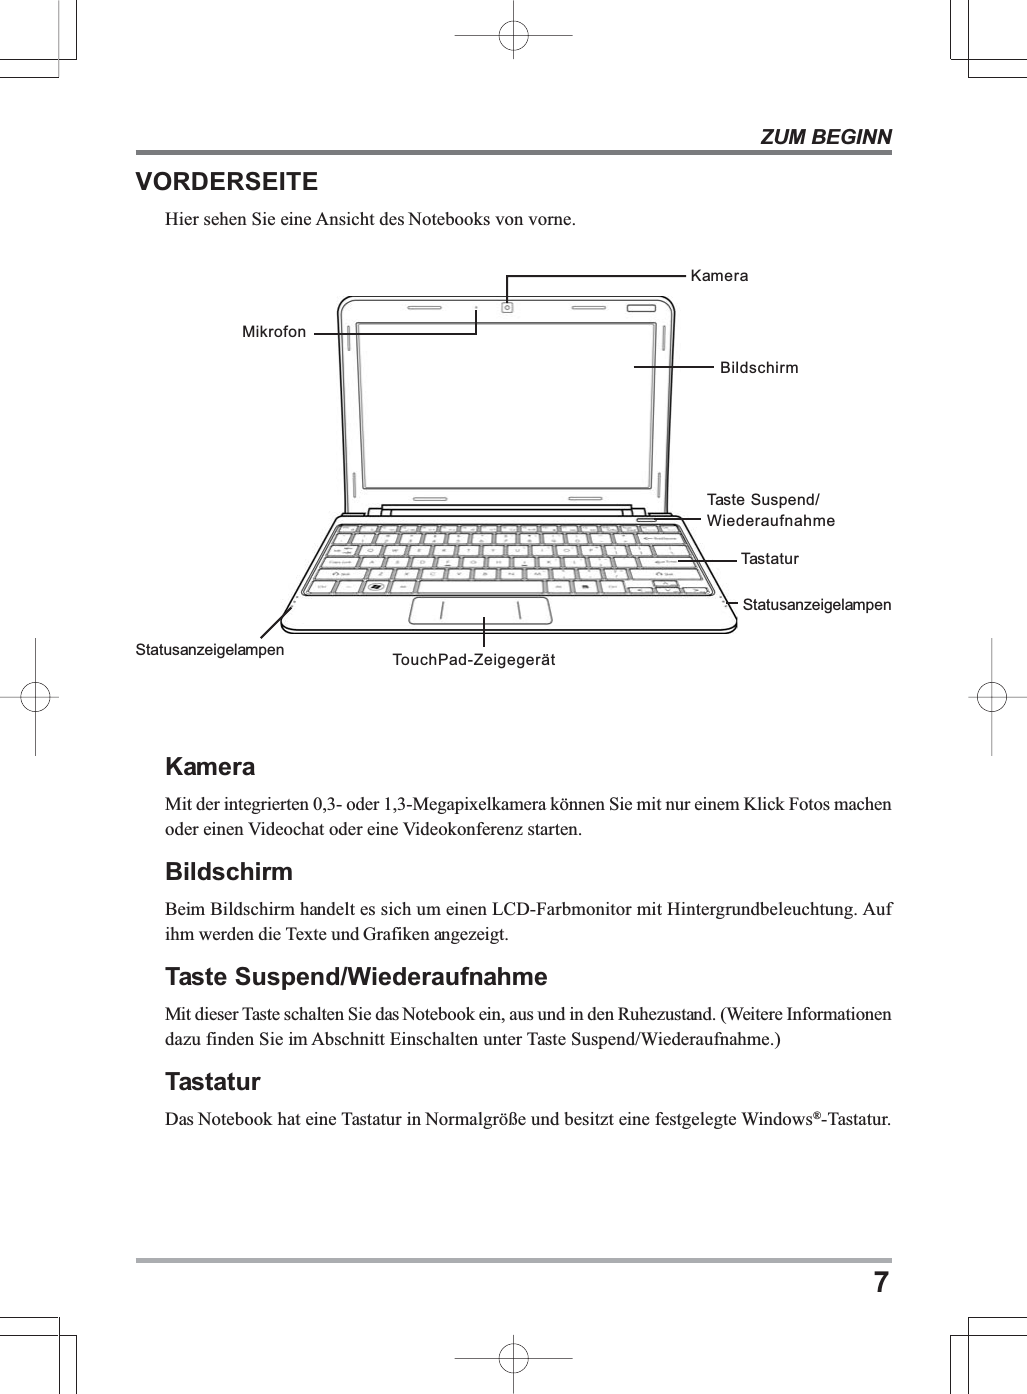
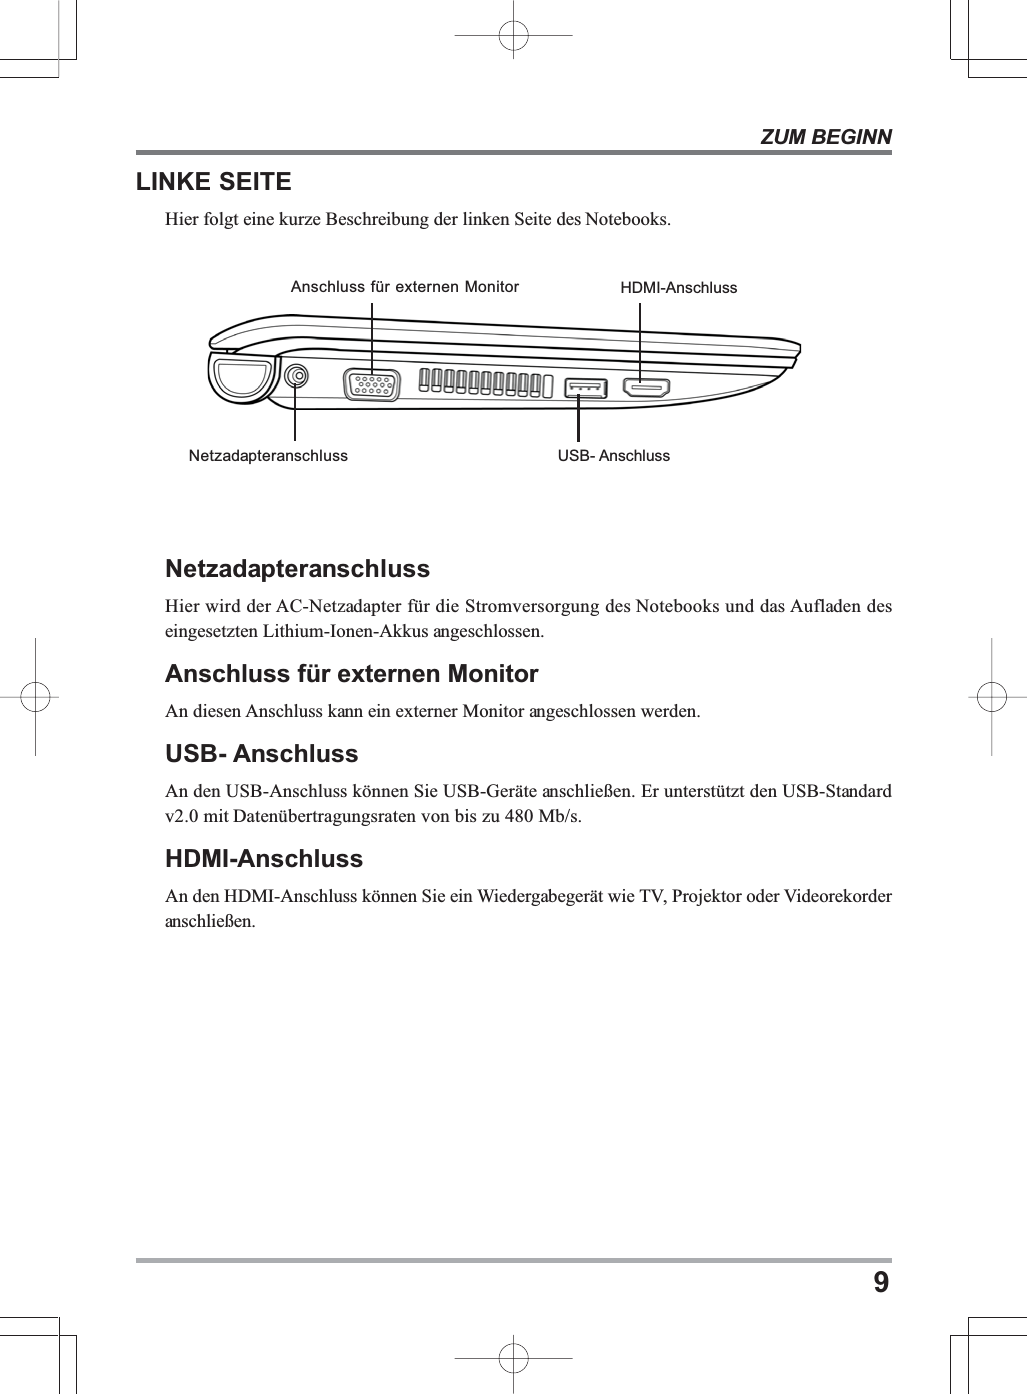


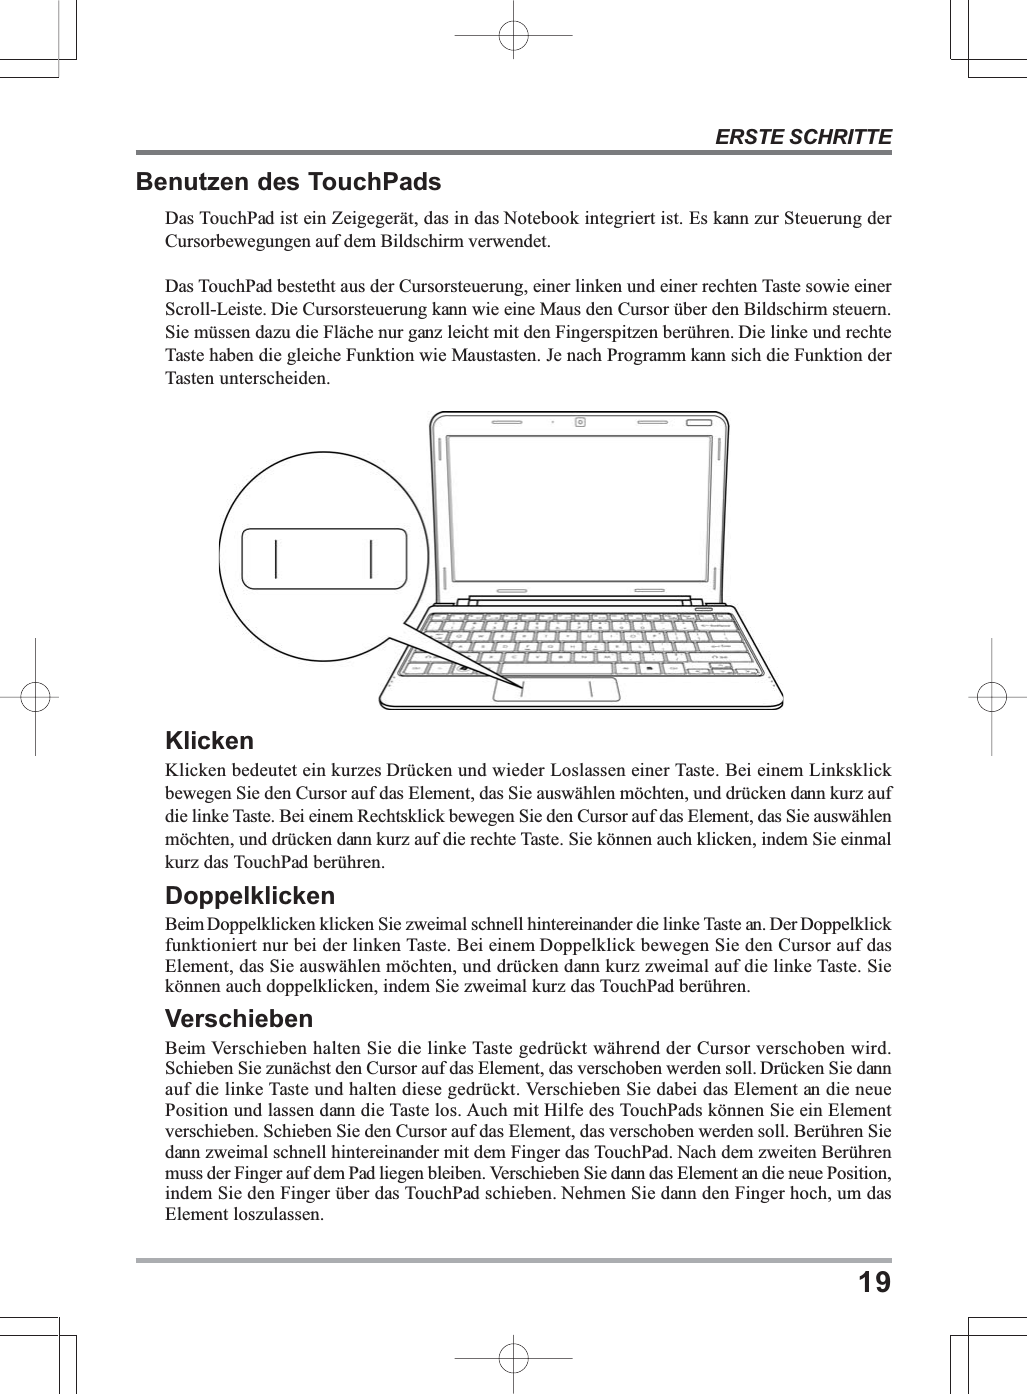
![ERSTE SCHRITTE18ENGLISH FRANÇAIS DEUTSCH ESPAÑOL ITALIANODie FunktionstastenDas Notebook verfügt über 12 Funktionstasten, Taste F1 bis F12. Je nach Programm sind dieFunktionen, die diesen Tasten zugewiesen sind, unterschiedlich. In der Software-Dokumentationfinden Sie die Funktionen der jeweiligen Tasten.Die Taste [FN] bietet dem Notebook zusätzliche Funktionen und wird immer zusammen mit eineranderen Taste gedrückt.• [FN+F1]: Versetzt das Notebook in den Suspend-Modus. Durch Drücken der Ein/Aus-Taste wird das Notebook wieder aktiviert.• [FN+F2]: Aktiviert bzw. deaktiviert die Drahtlosnetzwerkverbindung. Drücken Sie aufdiese Tastenkombination, um die Wireless LAN-Verbindung zu aktivieren. Drücken Sieetwas länger auf diese Tastenkombination, um die 3G-Netzwerkverbindung zu aktivieren.• [FN+F3]: Hier wird festgelegt, auf welchem Gerät das Bild angezeigt werden soll. Bei jedemDrücken dieser Tastenkombination wird die nächste Option angezeigt. Die Reihenfolge ist:nur eingebauter Monitor, eingebauter Monitor und externer Monitor, nur externer Monitor.• [FN+F4]: Verringert die Helligkeit des Bildschirms.• [FN+F5]: Erhöht die Helligkeit des Bildschirms.• [FN+F6]: Stellt den Ton des Computers aus.• [FN+F7]: Verringert die Lautstärke des Computers.• [FN+F8]: Erhöht die Lautstärke des Computers.• [FN+F9]: Startet die Wiedergabe bzw. unterbricht die Wiedergabe des aktuellen Multime-dia-Tracks.• [FN+F10]: Stoppt die Wiedergabe des aktuellen Multimedia-Tracks.• [FN+F11]: Wechselt zum vorhergehenden Multimedia-Track.• [FN+F12]: Wechselt zum nächsten Multimedia-Track.• [FN+Esc]: Aktiviert bzw. deaktiviert die Bluetooth-Funktion.](https://usermanual.wiki/Realtek-Semiconductor/RTL8191SE.User-Manual-1/User-Guide-1252583-Page-84.png)