Ricoh 500SEW1 Digital Camera with WLAN User Manual Manual 5
Ricoh Company, Ltd. Digital Camera with WLAN Manual 5
Ricoh >
Contents
Manual 5
91
Other Playback Functions
4
To protect all your files, follow the steps below.
1
Press the 6 (Playback) button.
2
Press the MENU/OK button.
• The Playback Setting menu appears.
3
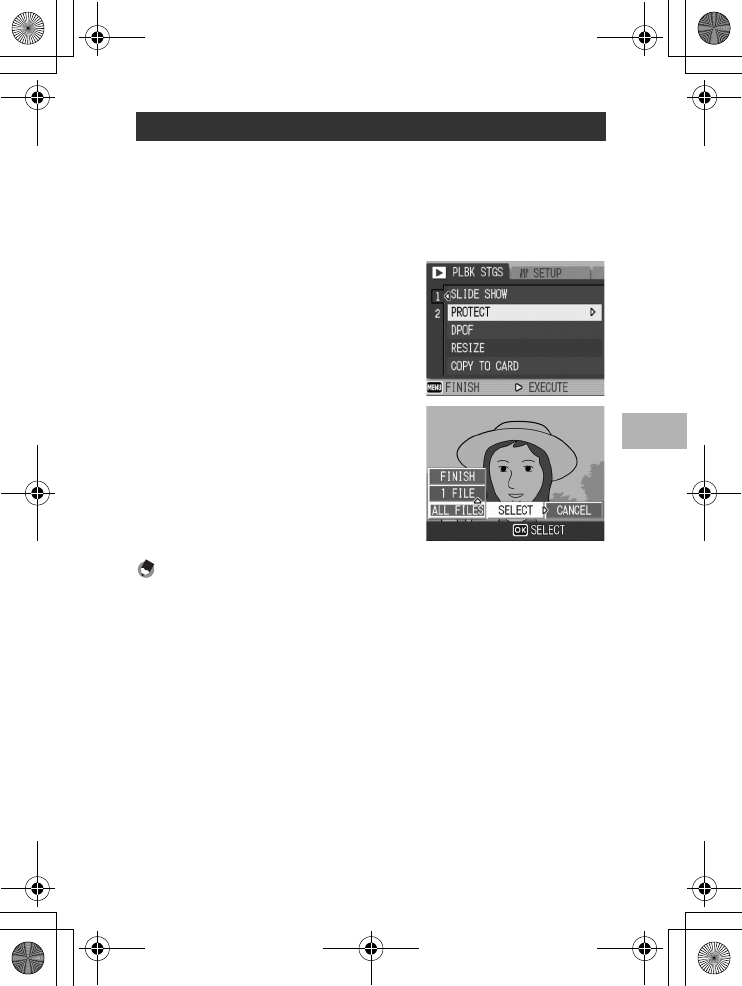
Press the " button to select
[PROTECT] and press the $
button.
4
Press the !" buttons to select
[ALL FILES].
5
Make sure that [SELECT] is
selected, and then press the
MENU/OK button.
• All files are protected and the symbol
appears on the screen.
Note ----------------------------------------------------------------------------------------------
To cancel protection for all protected files, select [CANCEL] in Step 5.
Protecting All Files
L7360874_En_00_0_bookfile.book Page 91 Friday, October 13, 2006 12:56 PM
92
Other Playback Functions
4
To protect selected files all at once, follow the steps below.
1
Press the 6 (Playback) button.
2
Press the 9 (Thumbnail Display) button twice.
• The screen is divided into 12 frames and thumbnails are displayed.
3
Press the !"#$ buttons to select the first file you
want to protect.
4
Press the MENU/OK button.
• The Playback Setting menu appears.
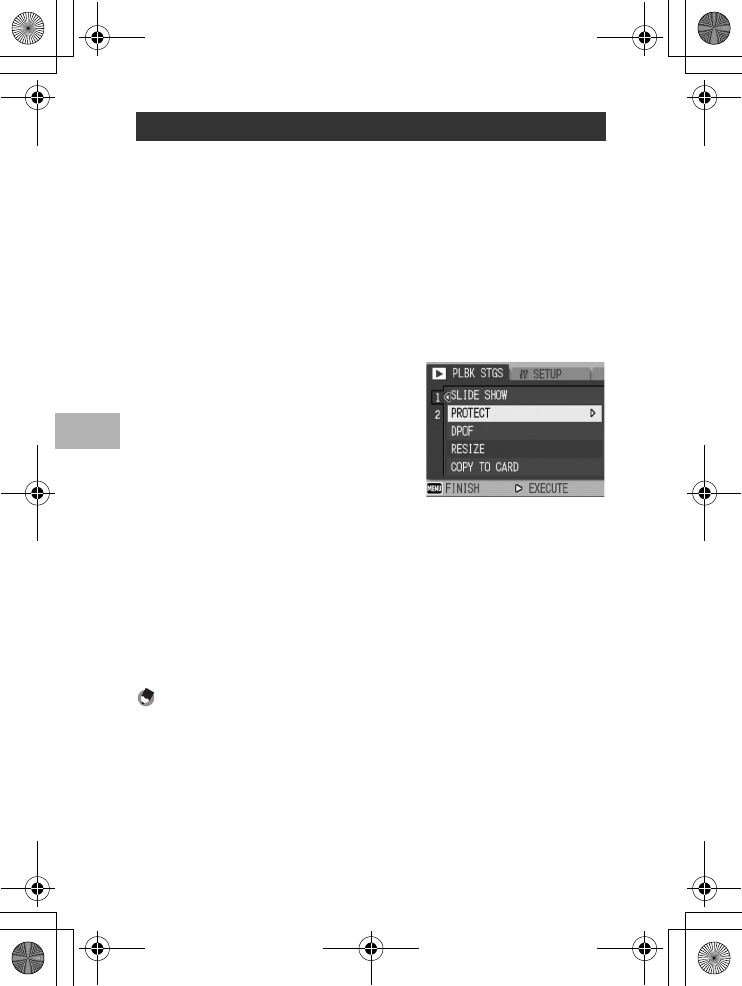
5
Press the " button to select
[PROTECT] and press the $
button.
• The Protect symbol appears in the
upper-right corner of the file.
6
Press the !"#$ buttons to
select the next file you want to
protect, and then press the
MENU/OK button.
7
Repeat Step 6 to select all the files you want to protect.
• If you selected a file by mistake, you can deselect by selecting the file
and pressing the MENU/OK button again.
8
Press the DISP. button.
• The display indicates that the selected images are being processed;
once finished, the display returns to the thumbnail display screen.
Note ----------------------------------------------------------------------------------------------
•To unprotect multiple files, follow the same steps described above to select the files
to unprotect, and then press the DISP. button.
•You can also unprotect all files at once. (GP.91)
•For information on thumbnail display, see P.48.
Protecting Multiple Files at Once
L7360874_En_00_0_bookfile.book Page 92 Friday, October 13, 2006 12:56 PM
93
Other Playback Functions
4
The still images recorded on an SD memory card can be printed out
if you take them to a store that offers a digital camera print service.
To use a print service, you must make print settings on your
camera. These settings are called Digital Print Order Format
(DPOF) settings.
The DPOF setting specifies one print per still image. When making
DPOF settings in list view, you can also specify the number of
copies to print. (GP.95)
1
Press the 6 (Playback) button.
2
Press the #$ buttons to display the still image for
which you want to make the DPOF setting.
3
Press the MENU/OK button.
• The Playback Setting menu appears.
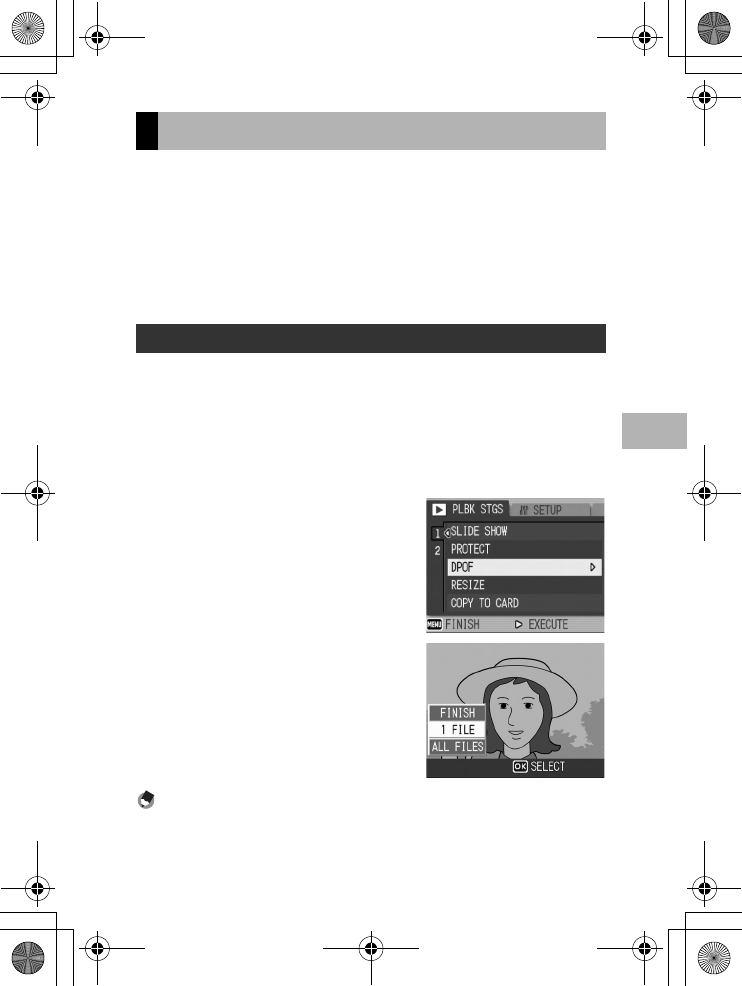
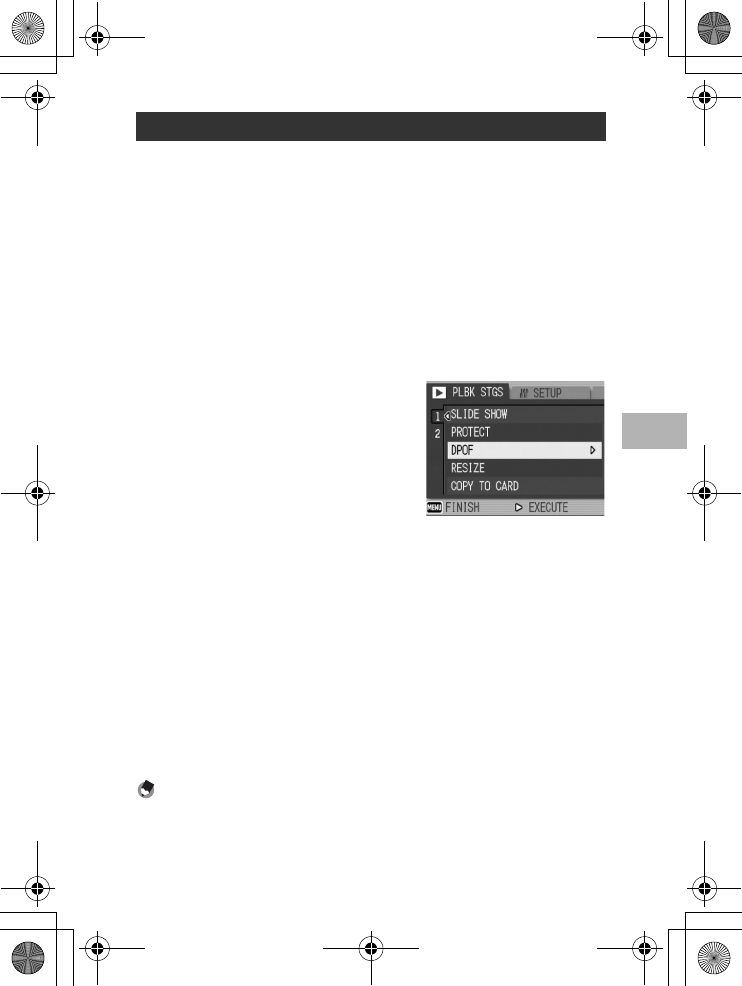
4
Press the " button to select
[DPOF] and press the $
button.
5
Make sure that [1 FILE] is
selected, and then press the
MENU/OK button.
• Once the DPOF setting is made, the
DPOF symbol appears on the screen.
Note ----------------------------------------------------------------------------------------------
To remove the DPOF setting, display the still image with the DPOF setting and perform
Steps 3 to 5.
Using a Printing Service (DPOF)
Setting DPOF for the Displayed Still Image
L7360874_En_00_0_bookfile.book Page 93 Friday, October 13, 2006 12:56 PM
94
Other Playback Functions
4
To apply DPOF settings to all your still images, follow the steps
below.
1
Press the 6 (Playback) button.
2
Press the MENU/OK button.
• The Playback Setting menu appears.
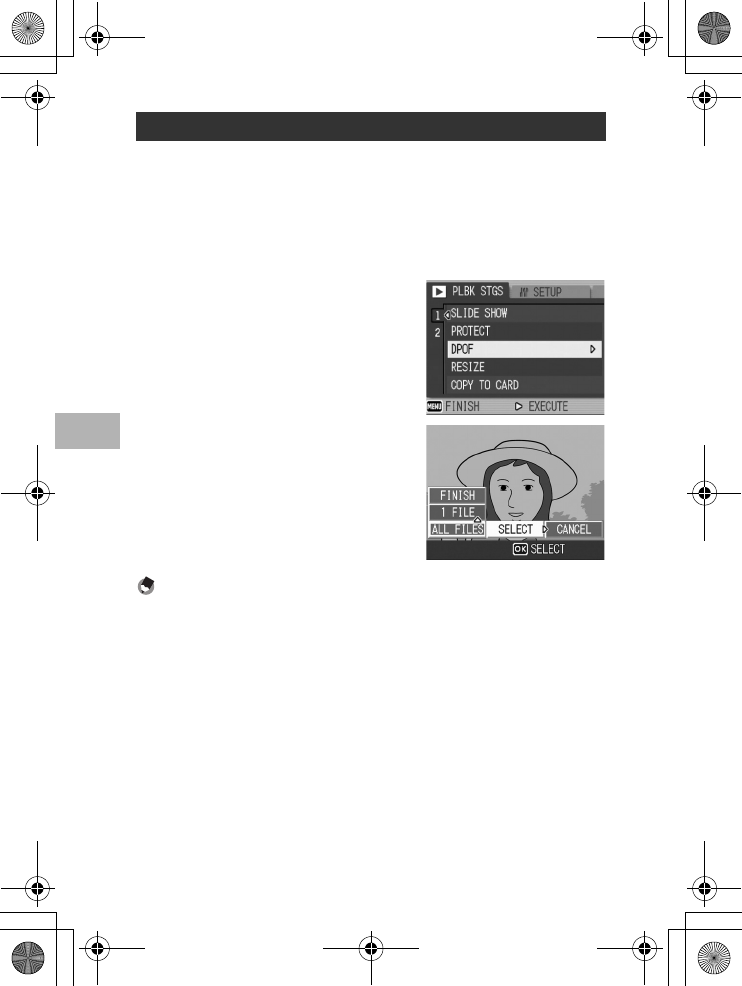
3
Press the " button to select
[DPOF] and press the $
button.
4
Press the !" buttons to select
[ALL FILES].
5
Make sure that [SELECT] is
selected, and then press the
MENU/OK button.
• Once the DPOF setting is made, the
DPOF symbol appears on the screen.
Note ----------------------------------------------------------------------------------------------
To cancel the DPOF settings for all still images with DPOF settings, select [CANCEL] in
Step 5.
Setting DPOF for All Still Images
L7360874_En_00_0_bookfile.book Page 94 Friday, October 13, 2006 12:56 PM
95
Other Playback Functions
4
To make the DPOF settings for selected still images all at once,
follow the steps below.
1
Press the 6 (Playback) button.
2
Press the 9 (Thumbnail Display) button twice.
• The screen is divided into 12 frames and thumbnails are displayed.
3
Press the !"#$ buttons to select the first still image
for which you want to make the DPOF setting.
4
Press the MENU/OK button.
• The Playback Setting menu appears.
5
Press the " button to select
[DPOF] and press the $ button.
6
Press the !" buttons to set
the number of copies to print.
• Press the ! button to increase the
number of copies, or press the "
button to decrease the number of
copies.
7
Press the #$ buttons to select the next still image for
which you want to make the DPOF setting.
8
Press the
!"
buttons to set the number of copies to print.
• Press the ! button to increase the number of copies, or press the "
button to decrease the number of copies.
9
Repeat Steps 7 and 8 to select all the still images for
which you want to make the DPOF setting.
10
Press the MENU/OK button.
• The display indicates that the selected images are being processed;
once finished, the display returns to the thumbnail display screen.
Note ----------------------------------------------------------------------------------------------
•To remove the DPOF settings for multiple still images, follow the same steps
described above to set the number of copies to print to [0] for each image, and then
press the MENU/OK button.
•You can also cancel the DPOF settings for all still images at once. (GP.94)
Setting DPOF for Multiple Still Images
L7360874_En_00_0_bookfile.book Page 95 Friday, October 13, 2006 12:56 PM

96
Other Playback Functions
4
You can reduce the image size of a shot still image to create a new
file with a different image size.
Caution------------------------------------------------------------------------------------------
You can resize only still images and still images with voice memos. Movies cannot be
resized.
To change the image size, follow the steps below.
1
Press the 6 (Playback) button.
2
Press the #$ buttons to display the file with the image
size you want to change.
3
Press the MENU/OK button.
• The Playback Setting menu appears.
4
Press the " button to select
[RESIZE] and press the $
button.
5
Press the !" buttons to select
[1280] or [640].
6
Press the MENU/OK button.
• The display indicates that the image is
being processed, and then the still
image with the changed image size is
displayed. The image before the
image size is changed is also
recorded.
Note ----------------------------------------------------------------------------------------------
You can also change the image size during shooting. (GP.61)
Changing the Image Size (RESIZE)
Original Resized
F3264/N3264/N2592/N2048 N1280 N640
F1280/N1280 N640
L7360874_En_00_0_bookfile.book Page 96 Friday, October 13, 2006 12:56 PM
97
Other Playback Functions
4
You can copy all movies, still images, and sound data stored in the
internal memory onto an SD memory card at once.
1
Turn the camera off.
2
Insert an SD memory card.
3
Turn the camera on.
4
Press the 6 (Playback) button.
5
Press the MENU/OK button.
• The Playback Setting menu appears.
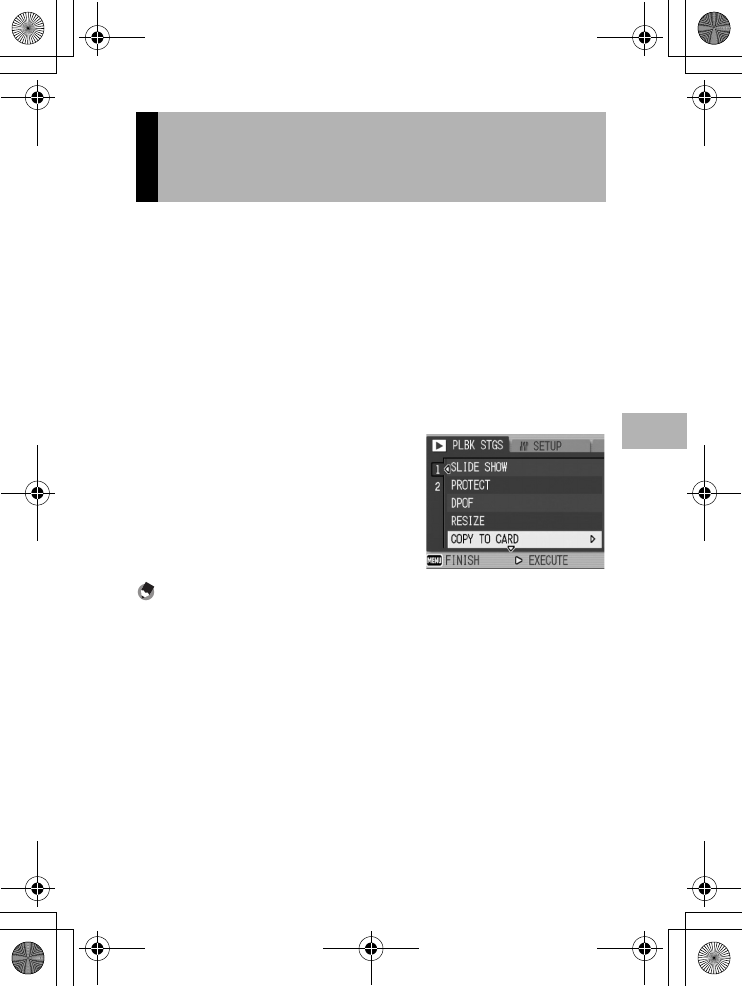
6
Press the " button to select
[COPY TO CARD] and press
the $ button.
• The display indicates copying is in
progress; once finished, the display
returns to the playback screen.
Note ----------------------------------------------------------------------------------------------
•If the capacity of the SD memory card to which you are copying is insufficient, a
message will be displayed indicating there is not enough capacity. To copy only the
number of shots that will fit into the available capacity, select [YES] and then press the
MENU/OK button. To cancel copying, select [NO] and then press the MENU/OK
button.
•It is not possible to copy the contents of an SD memory card to the internal memory.
Copying the Contents of the Internal
Memory to an SD Memory Card
(COPY TO CARD)
L7360874_En_00_0_bookfile.book Page 97 Friday, October 13, 2006 12:56 PM
98
Direct Printing
5
5 Direct Printing
The Direct Print standard enables direct printing from a camera to
a printer by connecting them via a USB cable. Photos can be
printed quickly and easily from your digital camera without using a
computer.
Caution------------------------------------------------------------------------------------------
•You cannot print movies (AVI files) with this function. For still images with sounds
(JPG files with WAV files), only the still images (JPG files) are printed.
•Some printers do not support images taken in text mode (TIFF files) (GP.40). Even
when TIFF images are printed, their printed contents cannot be guaranteed.
Note ----------------------------------------------------------------------------------------------
•This camera uses PictBridge, an industry standard for Direct Printing.
•Your printer must be compatible with PictBridge to use the Direct Print function. For
support information, see the documentation that came with the printer.
•For some printers, Direct Print may not be available when [MASS STR] is selected for
[USB CONNECTION] (GP.123) in the SETUP menu of the camera. In such cases,
select [ORIGINAL] instead.
Direct Print Function
L7360874_En_00_0_bookfile.book Page 98 Friday, October 13, 2006 12:56 PM
99
Direct Printing
5
Connect your camera to a printer using the USB cable provided.
1
Make sure that the camera is off.
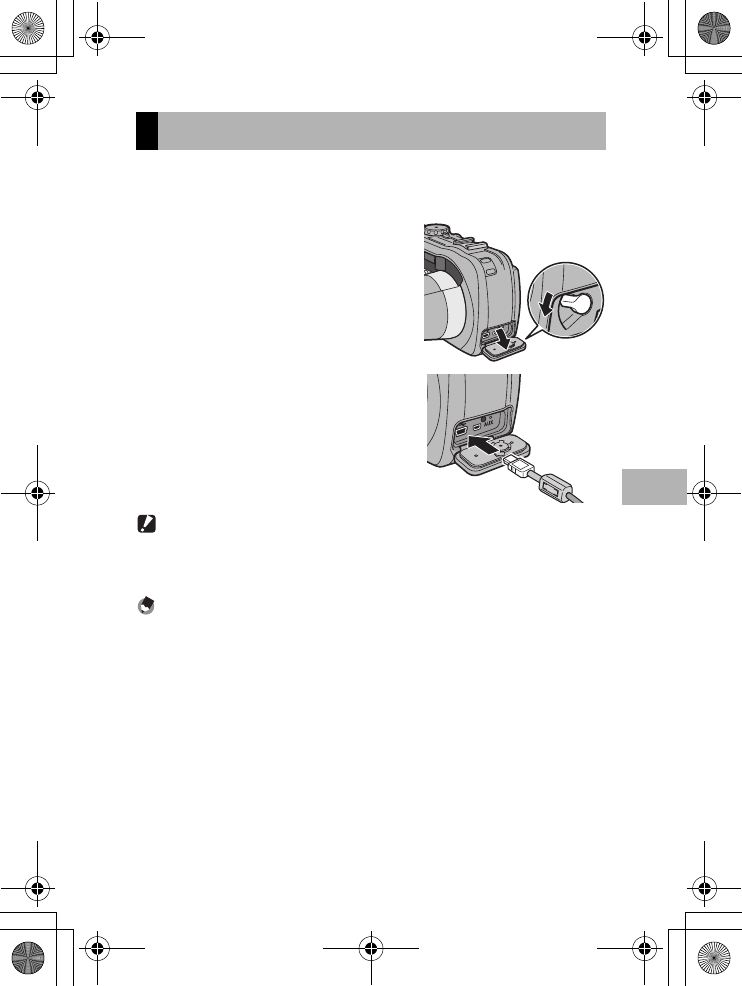
2
Turn the terminal cover knob
of the camera in the direction
of the arrow to open the cover.
3
Connect your camera to a
printer using the USB cable
provided.
• Turn on the printer if it is not already
on.
Caution------------------------------------------------------------------------------------------
Before opening or closing the battery/card cover or terminal cover, be sure to remove any
water, sand or mud adhering to the camera, and avoid opening and closing the cover in
places where such contaminants may get inside the camera.
Note ----------------------------------------------------------------------------------------------
To disconnect the camera from the printer, check that the power is off on both units
before disconnecting the USB cable between them.
Connecting the Camera to a Printer
L7360874_En_00_0_bookfile.book Page 99 Friday, October 13, 2006 12:56 PM
100
Direct Printing
5
You can print still images from the camera with a PictBridge-
compatible printer.
Still images are sent from the internal memory when no SD memory
card is loaded or from an SD memory card when one is loaded.
Caution------------------------------------------------------------------------------------------
Do not disconnect the USB cable during printing.
Note ----------------------------------------------------------------------------------------------
If a [PRINTER ERROR] message appears during image transfer, check the printer status
and take the appropriate action.
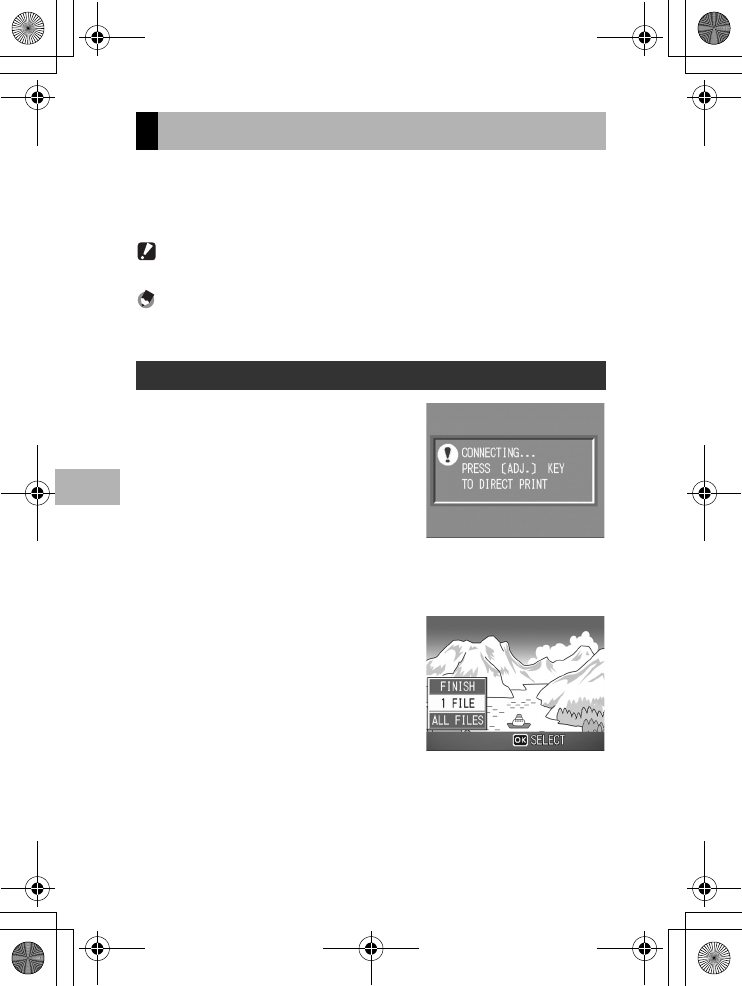
1
Check that the printer is ready
to print.
• The [CONNECTING...] screen
appears.
2
Press the ADJ. button.
• The Direct Print playback mode
screen appears.
3
Press the #$ buttons to select an image for printing.
4
Press the ADJ. button.
5
Press the !" buttons to select
[1 FILE] or [ALL FILES].
6
Press the MENU/OK button.
• The Direct Print menu appears.
Printing Still Images
Printing One or All Still Images
L7360874_En_00_0_bookfile.book Page 100 Friday, October 13, 2006 12:56 PM

101
Direct Printing
5
7
Press the !" buttons to select
an item, and then press the $
button to display the detailed
options screen.
• When [CONNECTING...] is displayed,
the connection to the printer is not yet
established. When a connection is
established, [CONNECTING...]
disappears and [DIRECT PRINT]
appears. Proceed with this step after the connection is established.
• The following items can be selected. Each item appears only when
supported by the printer connected to the camera.
The items marked with an asterisk (*) appear only when [REPORT
PRINT] is supported by a Ricoh printer connected to the camera.
8
Press the !" buttons to select the setting, and then
press the MENU/OK button.
• The display returns to the Direct Print menu.
9
Repeat Steps 7 and 8 to change other settings as
required.
Item Name Description
PAPER SIZE Sets the paper size.
PAPER TYPE Sets the paper type.
LAYOUT Sets the number of images printed on a sheet of paper. The number
of images that can be laid out on a sheet of paper varies depending
on the connected printer.
DATE PRINT Selects whether to print the date (shooting date). The date format can
be set using the date/time option in the SETUP menu.
FILE NAME PRINT Selects whether to print the file name.
OPTIMIZE IMAGE Selects whether to optimize the image data (still image) prior to
printing on the printer.
PRINT SIZE Sets the print image size.
PRINT QUALITY Sets the print quality.
REPORT PRINT* Prints on forms. (GP.104)
MEMO PRINT* When printing a report for an image with a camera memo, the contents
of the camera memo can be printed in the report. (GP.105)
Depending on the layout selected with [REPORT PRINT], the camera
memo may not be printed. In this case, delete some of the information
in the camera memo.
L7360874_En_00_0_bookfile.book Page 101 Friday, October 13, 2006 12:56 PM
102
Direct Printing
5
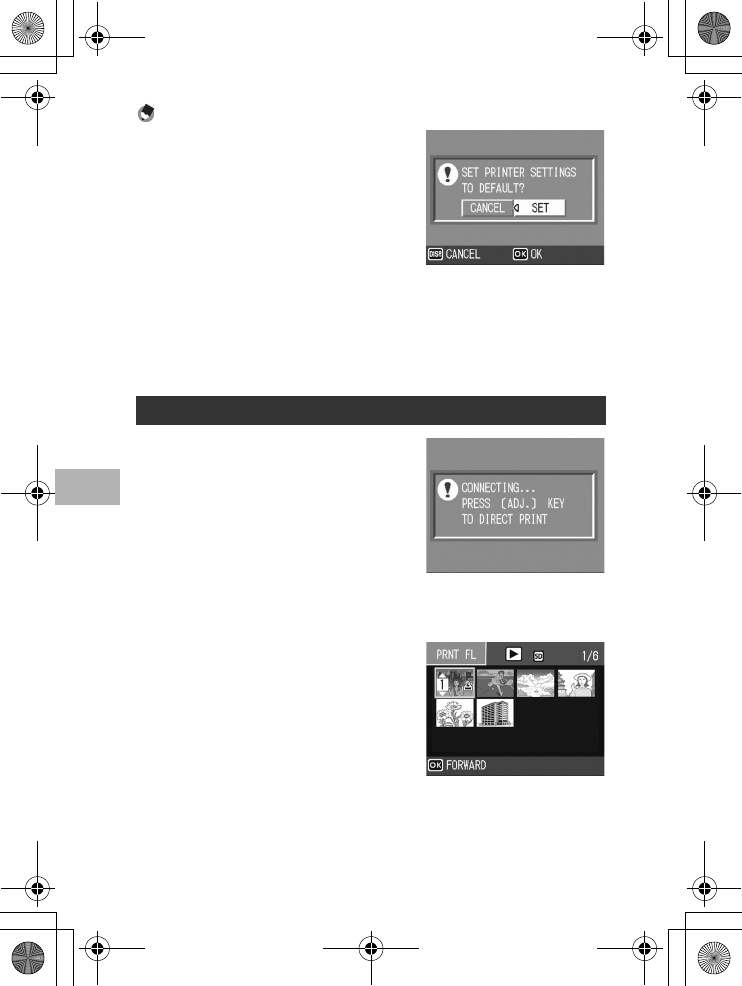
Note ----------------------------------------------------------------------------------------------
•To specify the settings as the default settings
next time the camera is connected to the
printer, press the ADJ. button when the screen
in Step 7 is displayed. When the screen at the
right appears, press the #$ buttons to select
[SET] and press the MENU/OK button.
•To use the settings last set the next time the
camera is connected to the printer, select
[CANCEL].
10
Press the MENU/OK button.
• The selected still images are sent to the printer and the [SENDING...]
screen appears.
• Pressing the DISP. button cancels the operation.
• When the images have been sent to the printer, the display returns to
the Direct Print playback mode screen and printing starts.
1
Check that the printer is ready
to print.
•
The [CONNECTING...] screen appears.
2
Press the ADJ. button.
• The Direct Print playback mode
screen appears.
3
Press the 9 (Thumbnail
Display) button.
• The screen is divided into 12 frames and thumbnails are displayed.
4
Press the !"#$ buttons to
select an image for printing.
5
Press the MENU/OK button.
6
Press the !" buttons to set
the number of copies to print.
• Press the ! button to increase the
number of copies, or press the "
button to decrease the number of copies.
7
Press the
#$
buttons to select the next image for printing.
8
Press the
!"
buttons to set the number of copies to print.
Printing Several Still Images
L7360874_En_00_0_bookfile.book Page 102 Friday, October 13, 2006 12:56 PM

103
Direct Printing
5
9
Repeat Steps 7 and 8 to select all the still images to be
printed and the number of copies for each.
10
Press the MENU/OK button.
• The Direct Print menu appears.
11
Press the !" buttons to select
an item, and then press the $
button to display the detailed
options screen.
• When [CONNECTING...] is displayed,
the connection to the printer is not yet
established. When a connection is
established, [CONNECTING...]
disappears and [DIRECT PRINT]
appears. Proceed with this step after the connection is established.
• For available settings, see P.101.
12
Press the !" buttons to select the setting, and then
press the MENU/OK button.
• The display returns to the Direct Print menu.
13
Repeat Steps 11 and 12 to change other settings as
required.
14
Press the MENU/OK button.
• The selected still images are sent to the printer and the [SENDING...]
screen appears.
• Pressing the DISP. button cancels the operation.
• When all the selected still images have been sent from the camera to
the printer, the camera display returns to the Direct Print playback
mode screen.
Note ----------------------------------------------------------------------------------------------
•Only images with a printer mark ( ) are printed. If you cancel printing and then try
to print again, make sure that the printer mark is on the images you want to print.
•The same still image can also be printed several times on a single sheet.
•The available items vary depending on the functions of the printer.
•To print images using the printer’s default settings, select [PRINTER SELECT] on the
detailed options screen.
L7360874_En_00_0_bookfile.book Page 103 Friday, October 13, 2006 12:56 PM
104
Direct Printing
5
Select [REPORT PRINT] on the Direct Print menu. [REPORT PRINT]
appears only when connected to a Ricoh printer that supports
PictBridge. For the latest information about Ricoh printers, visit the
Ricoh website at http://www.ricoh.com/.
The layout that can be selected depends on the connected printer.
For more details, see the documentation that came with the printer.
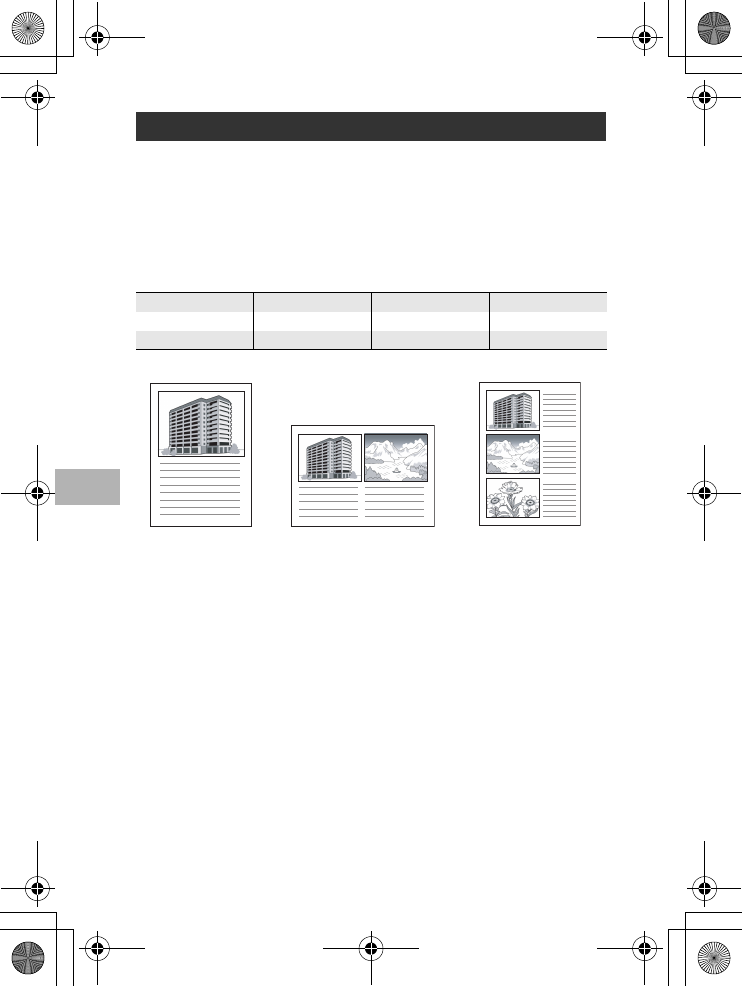
Available Layouts
Examples of Printed Reports
Printing Reports
1FRAME W/RULE 2FRAMES W/RULE 3FRAMES W/RULE 4FRAMES W/RULE
1FRAME W/O RULE 2FRAMES W/O RULE 3FRAMES W/O RULE 4FRAMES W/O RULE
CONST. PHOTO 1 W/REMARK SECTION
1FRAME W/RULE 2FRAMES W/RULE CONST. PHOTO 1
L7360874_En_00_0_bookfile.book Page 104 Friday, October 13, 2006 12:56 PM
105
Direct Printing
5
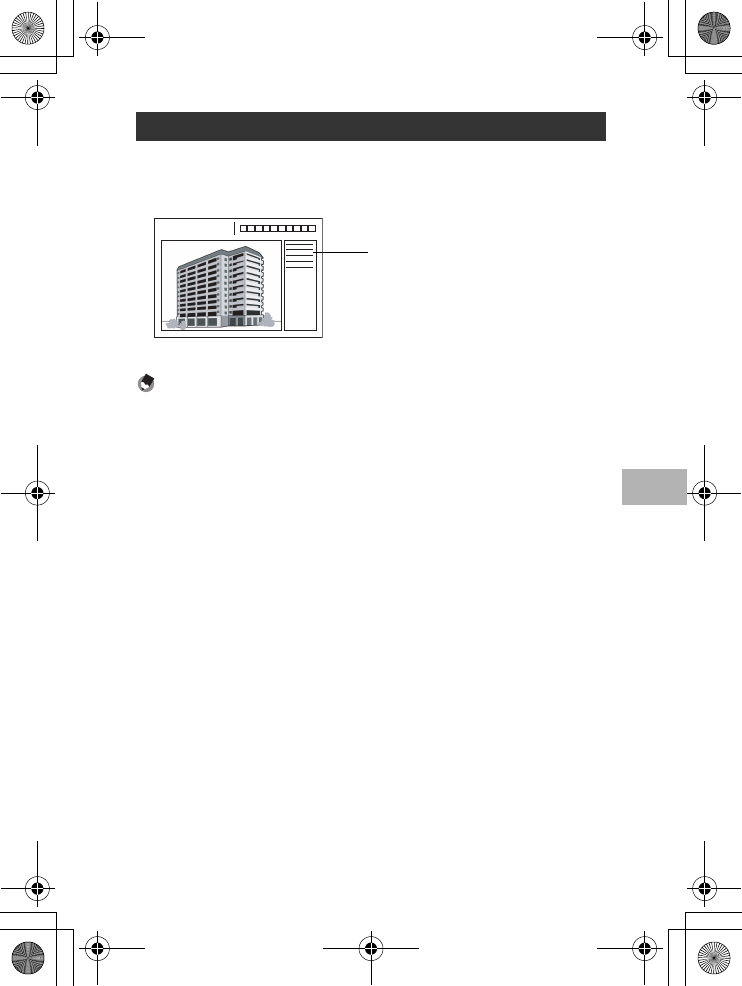
To print a camera memo on a report, select [REPORT PRINT] on
the Direct Print menu and set [MEMO PRINT] to [ON].
Example of Printed Report with Camera Memo
Note ----------------------------------------------------------------------------------------------
For details about the camera memo, refer to the “Software User Guide”.
Printing a Camera Memo on a Report
W/REMARK SECTION
The content of the camera memo is
printed. The position of the printed
camera memo depends on the
layout set in [REPORT PRINT].
L7360874_En_00_0_bookfile.book Page 105 Friday, October 13, 2006 12:56 PM
106
Changing Camera Settings
6
6 Changing Camera Settings
You can change the camera settings by displaying the SETUP
menu from the Shooting Setting menu (GP.59) or Playback
Setting menu (GP.88).
The SETUP menu enables you to set the items listed in the table
below.
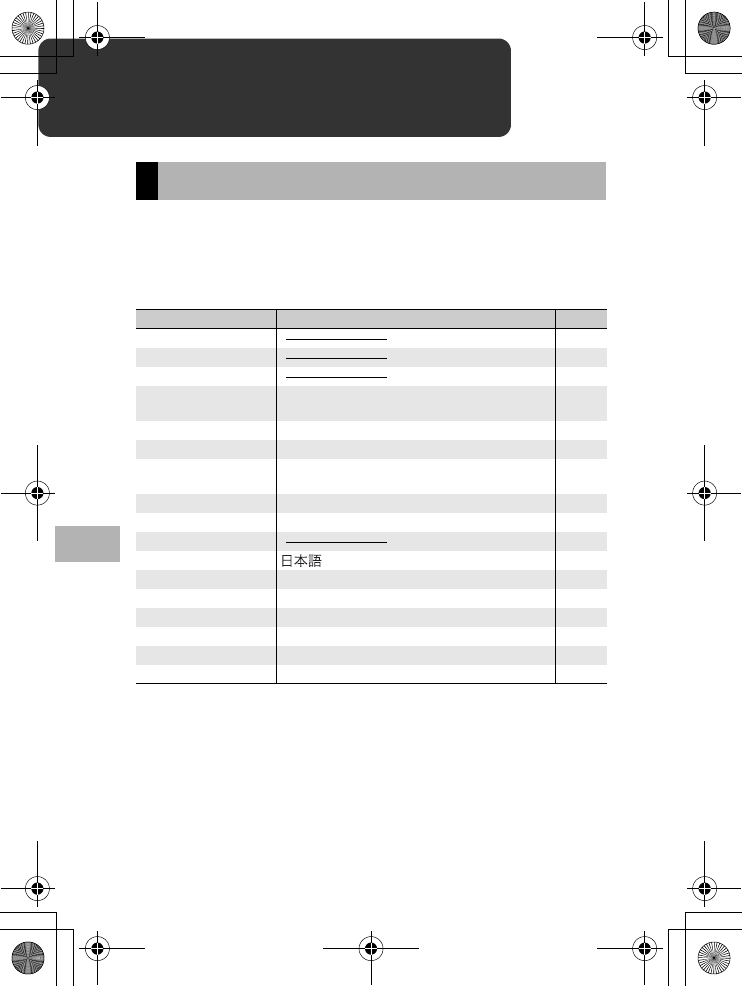
SETUP Menu
Setting Options [Default Settings] Refer to
FORMAT [CARD] P.109
FORMAT [INT. MEM.] P.110
LCD BRIGHTNESS P.111
ADJ BTN. SET.1*1
ADJ BTN. SET.2*2 [OFF]*2, ISO, QUALITY, FOCUS, SHARP,
METERING, CONT MDE, [ANTIBLUR]*1 P.112
AUTO POWER OFF OFF, [1 MIN.], 5 MIN., 30MIN. P.113
BEEP SOUND [ALL], SHUTTER P.114
VOL. SETTINGS (OFF), (Small), [ ] (Medium),
(Large)
P.115
LCD CONFIRM. OFF, 0.5SEC., [1 SEC.], 2 SEC., 3 SEC. P.116
SEQUENTIAL NO. ON, [OFF] P.117
DATE SETTINGS P.119
LANGUAGE/N, [ENGLISH] P.120
STEP ZOOM ON, [OFF] P.121
SHTG STGS WARNG. [ON], OFF P.122
USB CONNECTION MASS STR, [ORIGINAL] P.123
ENLGE PHOTO ICON ON, [OFF] P.125
REG. MY SETTINGS [SETTING1], SETTING2 P.126
START SETTINGS [OFF], SETTING1, SETTING2 P.127
L7360874_En_00_0_bookfile.book Page 106 Friday, October 13, 2006 12:56 PM
107
Changing Camera Settings
6
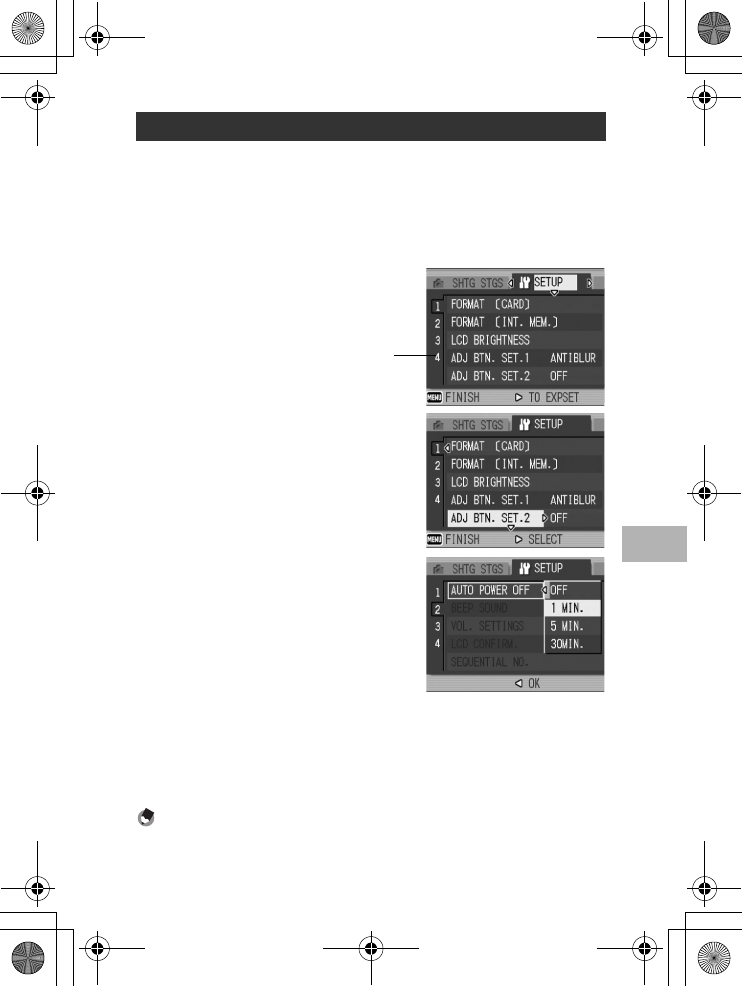
This explains how to make the settings.
Use the !"$ buttons and MENU/OK button to select and set an
item.
1
Press the MENU/OK button.
• The Shooting Setting menu (or the Playback Setting menu) appears.
2
Press the $ button.
• The SETUP menu appears.
3
Press the !" buttons to select
the desired item.
• Press the " button at the bottom item
to display the next screen.
4
Press the $ button.
• The menu item settings are displayed.
5
Press the !" buttons to select
the setting.
6
Press the MENU/OK button, or
# button and press the MENU/
OK button.
• The SETUP menu disappears and the camera is ready for shooting or
playback.
• The SETUP menu may appear depending on the setting. In this case,
press the MENU/OK button again to return to the shooting or playback
screen.
Note ----------------------------------------------------------------------------------------------
For some functions, the setting selection method may differ from what is explained here.
For detailed operation, see the explanation of each function.
Using the SETUP Menu
The menu items are
provided on four screens.
L7360874_En_00_0_bookfile.book Page 107 Friday, October 13, 2006 12:56 PM
108
Changing Camera Settings
6
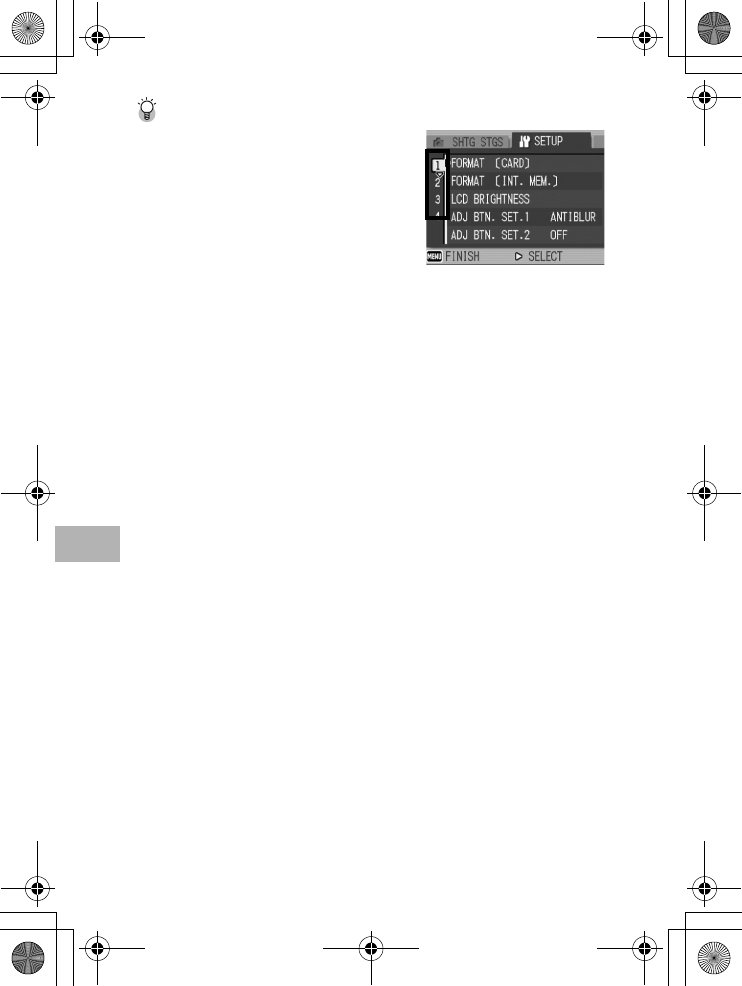
Changing the display ----------------------------------------------------------------------
•You can select a screen by the screen number:
1 Press the # button to select a screen
number on the left of the screen.
2 Press the !" buttons to change
screens.
3Press the $ button to return to menu item
selection.
L7360874_En_00_0_bookfile.book Page 108 Friday, October 13, 2006 12:56 PM
109
Changing Camera Settings
6
If the error message [CARD ERROR] is displayed when an SD
memory card is loaded into the camera or the card has been used
with a computer or other device, you must format the card prior to
use with this camera.
Formatting is the process of preparing a card so image data can be
written on it.
Caution------------------------------------------------------------------------------------------
If you format a card that still has images stored on it, the images will be lost.
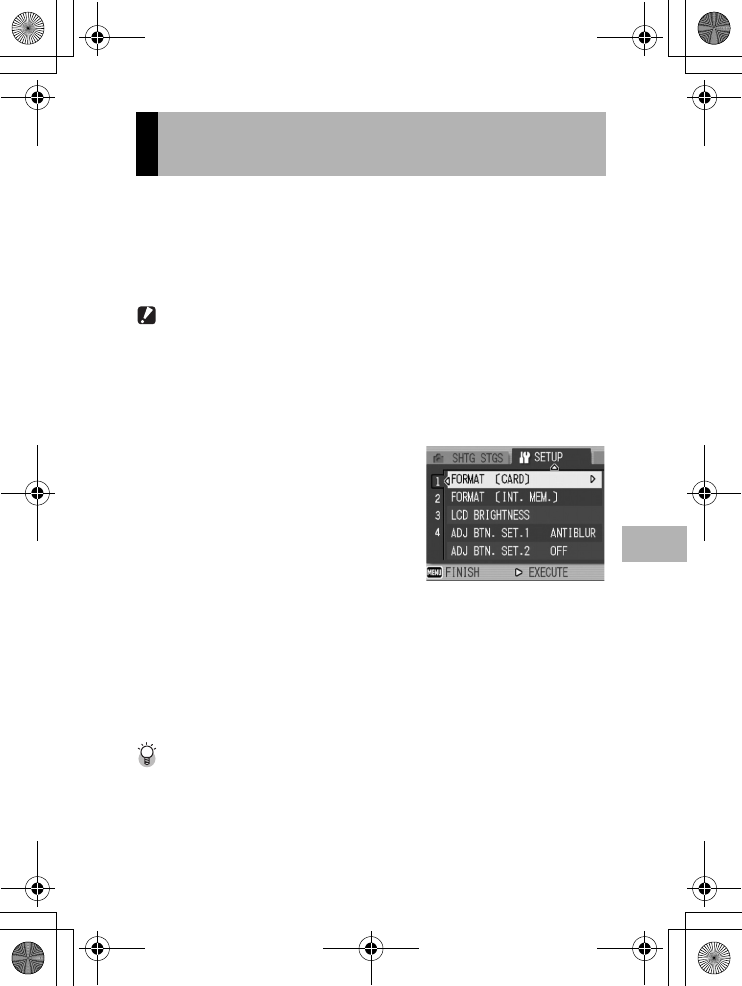
To format a card, follow the steps below.
1
Display the SETUP menu.
• For the operating procedure, see P.107.
2
Press the " button to select
[FORMAT [CARD]] and press
the $ button.
• A screen appears to confirm
formatting.
3
Press the #$ buttons to select
[YES] and then press the
MENU/OK button.
• Formatting starts. When it is done, the display returns to the SETUP
menu.
• If no SD memory card is loaded, a message will be displayed. After
turning the power off, load an SD memory card and repeat the
formatting process again.
4
Press the MENU/OK button.
Protecting your images from being deleted----------------------------------------
•Move the write-protection switch on the SD memory card to “LOCK” to prevent your
still images from being accidentally erased or the card from being formatted.
(GP.22)
•If you unlock the card (by returning the switch to its original position), it is once again
possible to erase images and format the card.
Preparing the SD Memory Card
(FORMAT [CARD])
L7360874_En_00_0_bookfile.book Page 109 Friday, October 13, 2006 12:56 PM
110
Changing Camera Settings
6
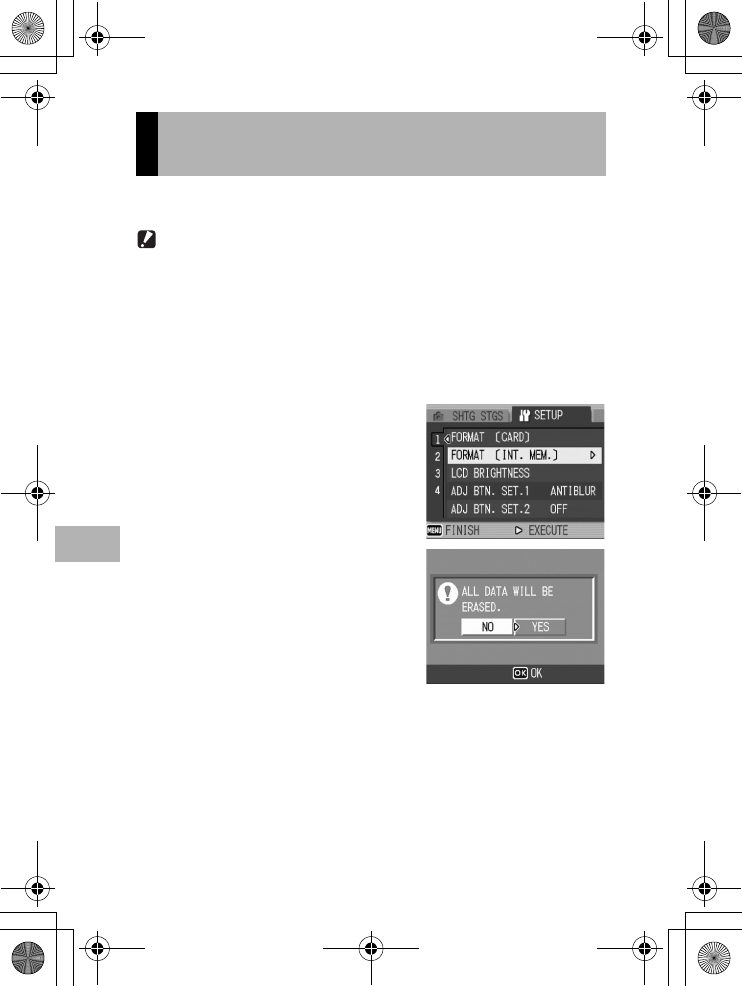
If the error message [FORMAT INTERNAL MEMORY] is displayed,
you must format the internal memory prior to use.
Caution------------------------------------------------------------------------------------------
Formatting the internal memory deletes all of the images recorded in the memory. If you
have images in the internal memory that you do not want to delete, copy the images to
the SD memory card before formatting the internal memory. (GP.97)
To format the internal memory, follow the steps below.
1
Display the SETUP menu.
• For the operating procedure, see P.107.
2
Press the " button to select
[FORMAT [INT. MEM.]] and
press the $ button.
• A screen appears to confirm
formatting.
3
Press the #$ buttons to select
[YES] and then press the
MENU/OK button.
• Formatting starts. When it is done, the
display returns to the SETUP menu.
4
Press the MENU/OK button.
Formatting the Internal Memory
(FORMAT [INT. MEM.])
L7360874_En_00_0_bookfile.book Page 110 Friday, October 13, 2006 12:56 PM
111
Changing Camera Settings
6
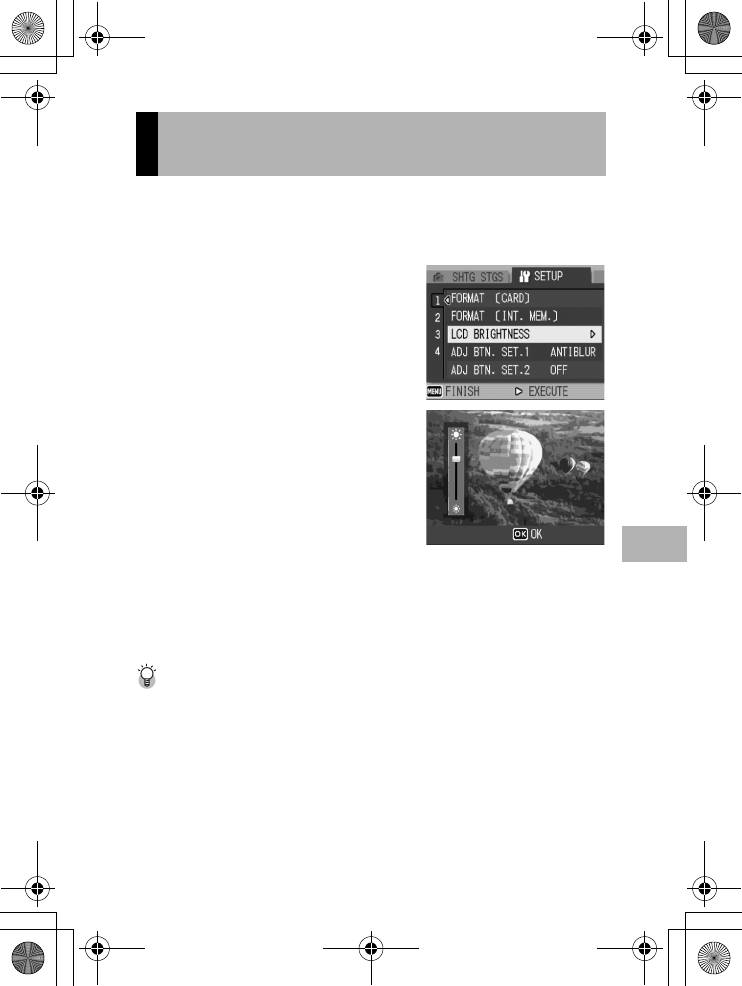
To adjust the brightness of the LCD monitor, follow the steps below.
1
Display the SETUP menu.
• For the operating procedure, see P.107.
2
Press the " button to select
[LCD BRIGHTNESS] and press
the $ button.
• The screen for setting the brightness
appears.
3
Press the !" buttons to
adjust the brightness.
• Move the slider on the LCD brightness
adjustment bar down to make the LCD
monitor darker and up to make it
brighter. The brightness of the LCD
monitor changes as the slider is
moved along the bar.
4
When you reach the desired
brightness, press the MENU/OK button.
• The display returns to the SETUP menu.
5
Press the MENU/OK button.
Using the DISP. button to adjust the brightness ---------------------------------
When shooting, press and hold down the DISP. button to maximize the LCD brightness.
When the brightness is at the maximum setting, holding the DISP. button down returns
the brightness to the level set in [LCD BRIGHTNESS].
Adjusting the Brightness of the LCD
Monitor (LCD BRIGHTNESS)
L7360874_En_00_0_bookfile.book Page 111 Friday, October 13, 2006 12:56 PM
112
Changing Camera Settings
6
You can use the ADJ. button to display the screens for setting the
exposure compensation and white balance with fewer button
operations and without displaying the Shooting Setting menu.
You can also use [ADJ BTN. SET.1] and [ADJ BTN. SET.2] to add
a camera function that can be activated by pressing the ADJ.
button.
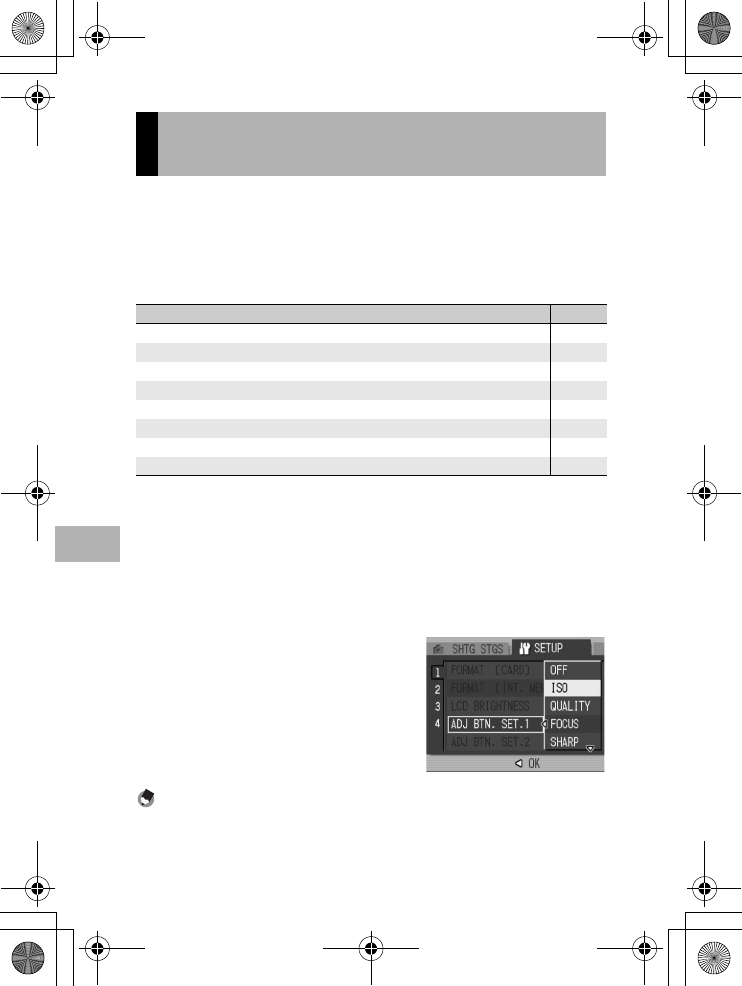
To assign a function to either [ADJ BTN. SET.1] or [ADJ BTN.
SET.2], follow the steps below.
1
Display the SETUP menu.
• For the operating procedure, see P.107.
2
Press the " button to select [ADJ BTN. SET.1] or [ADJ
BTN. SET.2], and then press the $ button.
3
Press the !" buttons to select
the desired setting.
4
Press the MENU/OK button, or
# button and press the MENU/
OK button.
Note ----------------------------------------------------------------------------------------------
For information on how to use the ADJ. button, see P.56.
Assigning a Function to the ADJ.
Button (ADJ BTN. SET.)
Available Settings Refer to
OFF *Default setting for [ADJ BTN. SET.2] -
ISO (ISO SETTING) P.81
QUALITY (PIC QUALITY/SIZE) P.61
FOCUS P.64
SHARP (SHARPNESS) P.68
METERING (PHOTOMETRY) P.67
CONT MDE (CONT. MODE) P.69
ANTIBLUR *Default setting for [ADJ BTN. SET.1] P.63
L7360874_En_00_0_bookfile.book Page 112 Friday, October 13, 2006 12:56 PM
113
Changing Camera Settings
6
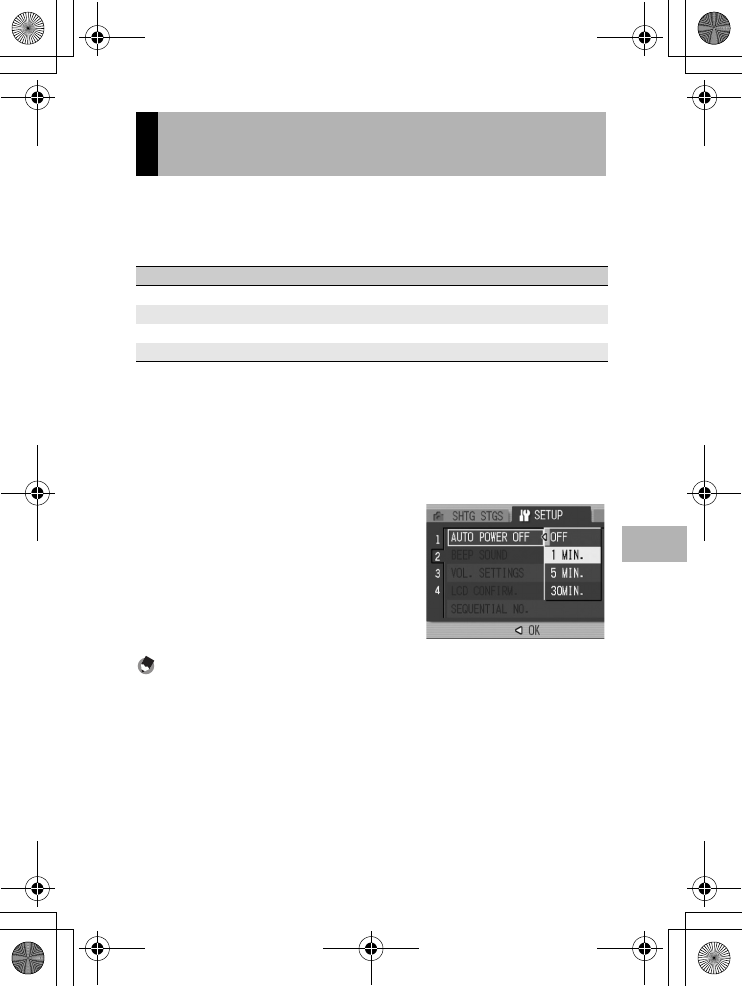
If you do not operate the camera for a set period of time, it will shut
off automatically to conserve battery power (Auto Power Off).
By default, auto power off is set to one minute, but you can change
this setting.
To change the auto power off setting, follow the steps below.
1
Display the SETUP menu.
• For the operating procedure, see P.107.
2
Press the " button to select [AUTO POWER OFF] and
press the $ button.
3
Press the !" buttons to select
the desired setting.
4
Press the MENU/OK button, or
# button and press the MENU/
OK button.
Note ----------------------------------------------------------------------------------------------
•To continue using the camera after auto power off turned the camera off, press the
power button to turn the camera on again. You can also press and hold the 6
(Playback) button for more than one second to turn on the camera in playback mode.
•Auto power off does not work when the camera is connected to a computer or printer.
•When using interval shooting, the [AUTO POWER OFF] setting is not valid and auto
power off does not work.
Changing the Auto Power Off Setting
(AUTO POWER OFF)
Available Settings
OFF (Auto Power Off is turned off)
1 MIN. *Default setting
5 MIN.
30MIN.
L7360874_En_00_0_bookfile.book Page 113 Friday, October 13, 2006 12:56 PM
114
Changing Camera Settings
6
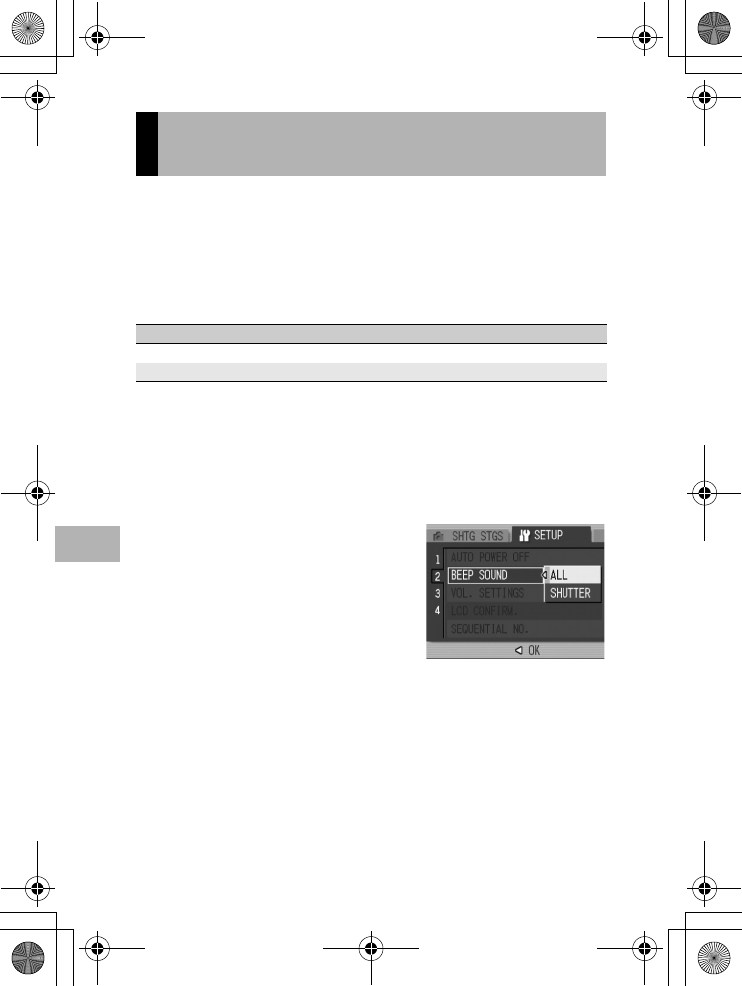
During operation, the camera generates four types of sounds: start
sound, shutter release sound, focus sound, and beep sound.
To change the beep sound settings, follow the steps below.
1
Display the SETUP menu.
• For the operating procedure, see P.107.
2
Press the " button to select [BEEP SOUND] and press
the $ button.
3
Press the !" buttons to select
the desired setting.
4
Press the MENU/OK button, or
# button and press the MENU/
OK button.
Changing the Beep Sound Setting
(BEEP SOUND)
Start sound : Sound when the camera is turned on.
Shutter release sound : Sound when the shutter release button is pressed.
Focus sound : Sound when the shutter release button is half-pressed and the
camera focuses on the subject.
Beep sound : Error sound indicating an operation that cannot be performed.
Available Settings
ALL (All sounds on) *Default setting
SHUTTER (Shutter release sound and beep sound only)
L7360874_En_00_0_bookfile.book Page 114 Friday, October 13, 2006 12:56 PM
115
Changing Camera Settings
6
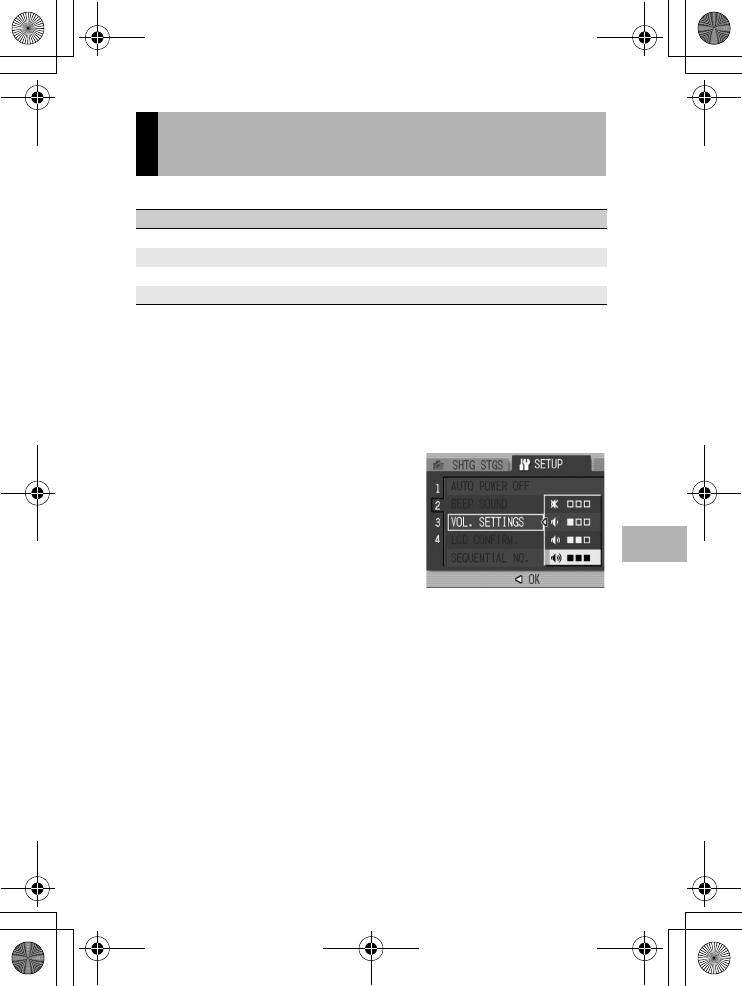
The beep sound volume can be changed.
To change the beep sound volume, follow the steps below.
1
Display the SETUP menu.
• For the operating procedure, see P.107.
2
Press the " button to select [VOL. SETTINGS] and
press the $ button.
3
Press the !" buttons to select
the desired setting.
4
Press the MENU/OK button, or
# button and press the MENU/
OK button.
Changing the Beep Sound Volume
(VOL. SETTINGS)
Available Settings
(Mute)
(Small)
(Medium) *Default setting
(Large)
L7360874_En_00_0_bookfile.book Page 115 Friday, October 13, 2006 12:56 PM
116
Changing Camera Settings
6
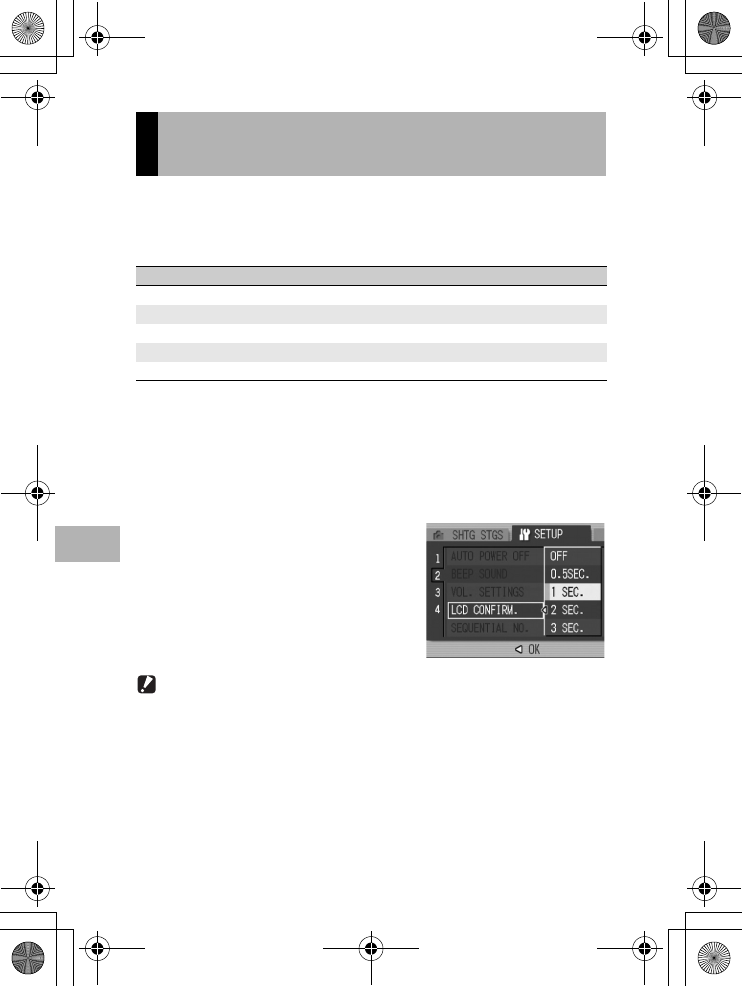
Immediately after you press the shutter release button, the still
image taken is displayed on the screen for a moment so you can
check it. By default, the image confirmation time is set to 1 second,
but this can be changed.
To change the image confirmation time, follow the steps below.
1
Display the SETUP menu.
• For the operating procedure, see P.107.
2
Press the " button to select [LCD CONFIRM.] and
press the $ button.
3
Press the !" buttons to select
the desired setting.
4
Press the MENU/OK button, or
# button and press the MENU/
OK button.
Caution------------------------------------------------------------------------------------------
When [LCD CONFIRM.] is set to 0.5 seconds, symbols such as the zoom bar may
remain on the monitor while the image is displayed.
Changing Image Confirmation Time
(LCD CONFIRM.)
Available Settings
OFF (Image not displayed for confirmation)
0.5SEC.
1 SEC. *Default setting
2 SEC.
3 SEC.
L7360874_En_00_0_bookfile.book Page 116 Friday, October 13, 2006 12:56 PM
117
Changing Camera Settings
6
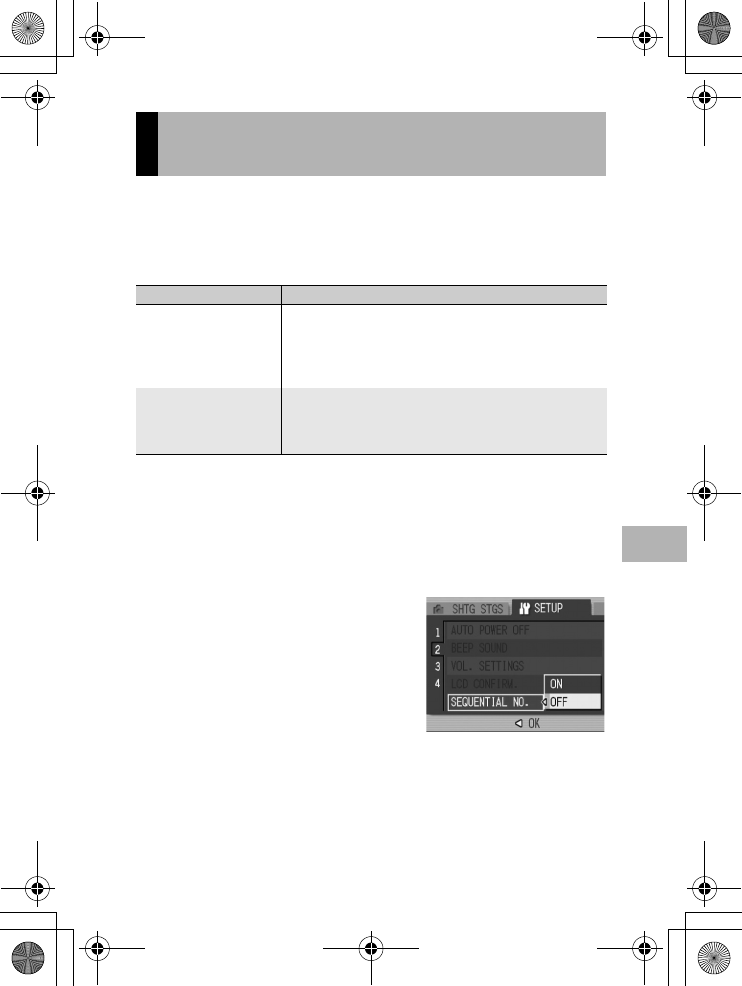
When you shoot a still image, it is stored on an SD memory card or
in the internal memory with a consecutively numbered file name
that is automatically assigned.
When you switch SD memory cards, you can set your camera to
continue consecutive numbering from the previously loaded card.
To change the file name setting, follow the steps below.
1
Display the SETUP menu.
• For the operating procedure, see P.107.
2
Press the " button to select [SEQUENTIAL NO.] and
press the $ button.
3
Press the !" buttons to select
the desired setting.
4
Press the MENU/OK button, or
# button and press the MENU/
OK button.
Changing File Name Settings
(SEQUENTIAL NO.)
Available Settings
ON (Continue numbering) File names are automatically assigned to still images you take,
in the format of “R” followed by seven digits, from R0010001.jpg
to R9999999.jpg.
With this setting, file numbering is continued from one card to
the next.
OFF (Do not continue
numbering) *Default setting
File numbering is assigned, from RIMG0001.jpg to
RIMG9999.jpg, for each SD memory card.
When file name RIMG9999 is reached, no more data can be
recorded to that card.
L7360874_En_00_0_bookfile.book Page 117 Friday, October 13, 2006 12:56 PM
118
Changing Camera Settings
6
Note ----------------------------------------------------------------------------------------------
•When recording data to the internal memory, files are assigned consecutively
numbered file names, just as if [SEQUENTIAL NO.] is set to [OFF].
•When transferring images to a computer using RICOH Gate La (GP.150), the file
being transferred is renamed and saved. The file is saved with the name
“RIMG****.jpg” (where **** indicates a number) even if [SEQUENTIAL NO.] is set to
[ON].
•When RIMG9999 is reached, no more files can be saved. In this case, move image
data from the SD memory card to the memory of the computer or a storage medium,
and then format the SD memory card.
L7360874_En_00_0_bookfile.book Page 118 Friday, October 13, 2006 12:56 PM
119
Changing Camera Settings
6
You can take still images with the time or date stamped onto the
picture.
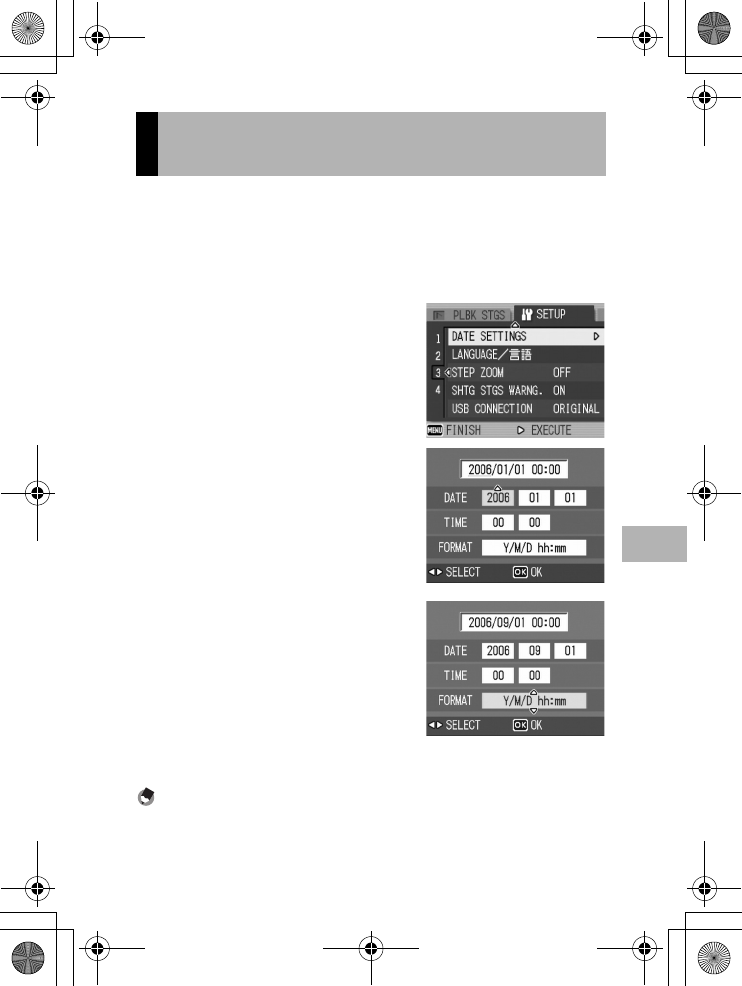
The date/time setting on the SETUP menu is explained here.
1
Display the SETUP menu.
• For the operating procedure, see P.107.
2
Press the " button to select
[DATE SETTINGS] and press
the $ button.
3
Press the !"#$ buttons to
set the year, month, date and
time.
• You can press and hold down the !"
buttons to quickly raise or lower the
setting.
• Press the #$ buttons to move to the
next item.
4
In [FORMAT], choose the date
and time format.
5
Check the information on the
screen and then press the
MENU/OK button.
•
Once you have set the date and time,
the display returns to the SETUP menu.
6
Press the MENU/OK button.
Note ----------------------------------------------------------------------------------------------
•If the battery is removed for more than one week, the date and time settings will be
lost. These settings must be made again.
•To retain the date and time settings, load a battery with adequate remaining power for
more than two hours.
Setting the Date and Time
(DATE SETTINGS)
L7360874_En_00_0_bookfile.book Page 119 Friday, October 13, 2006 12:56 PM
120
Changing Camera Settings
6
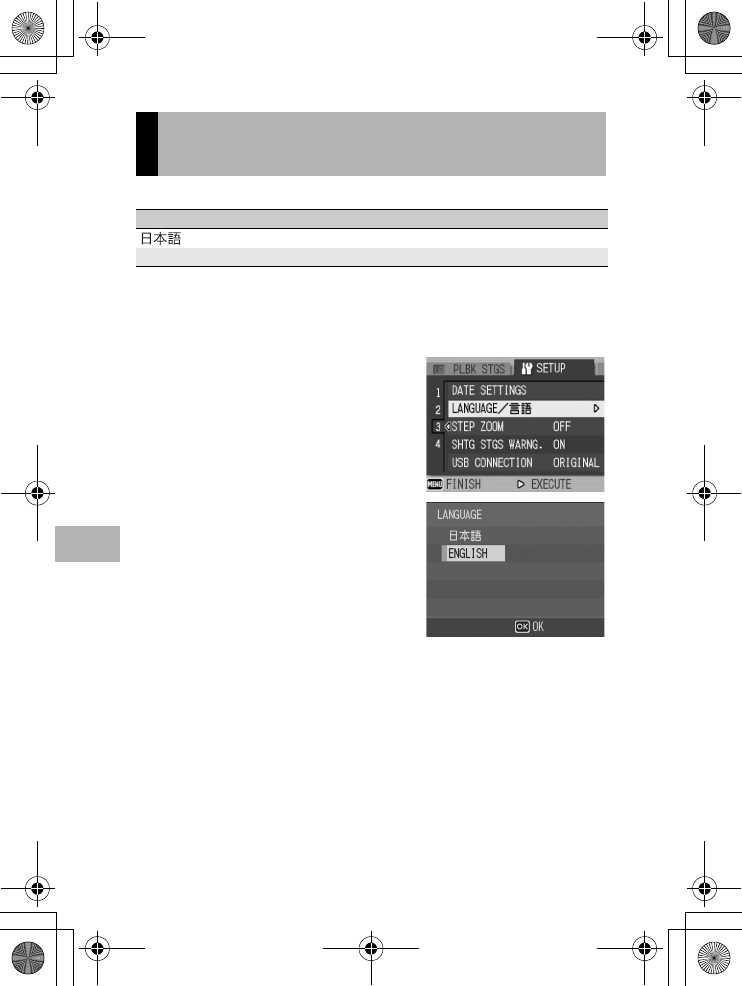
You can change the language displayed on the screen.
To change the display language, follow the steps below.
1
Display the SETUP menu.
• For the operating procedure, see P.107.
2
Press the " button to select
[LANGUAGE/N] and press
the $ button.
• The language selection screen
appears.
3
Press the !" buttons to select
the desired setting.
4
Press the MENU/OK button.
• Once you have set the language, the
display returns to the SETUP menu.
5
Press the MENU/OK button.
Changing the Display Language
(LANGUAGE/N)
Available Settings
(Japanese)
ENGLISH *Default setting
L7360874_En_00_0_bookfile.book Page 120 Friday, October 13, 2006 12:56 PM