Samsung Electronics Co CLP415NW Laser Multi-funtion Printer User Manual Rousseau Klimt english1

Samsung Electronics Co Ltd Laser Multi-funtion Printer Rousseau Klimt english1

Users Manual 2

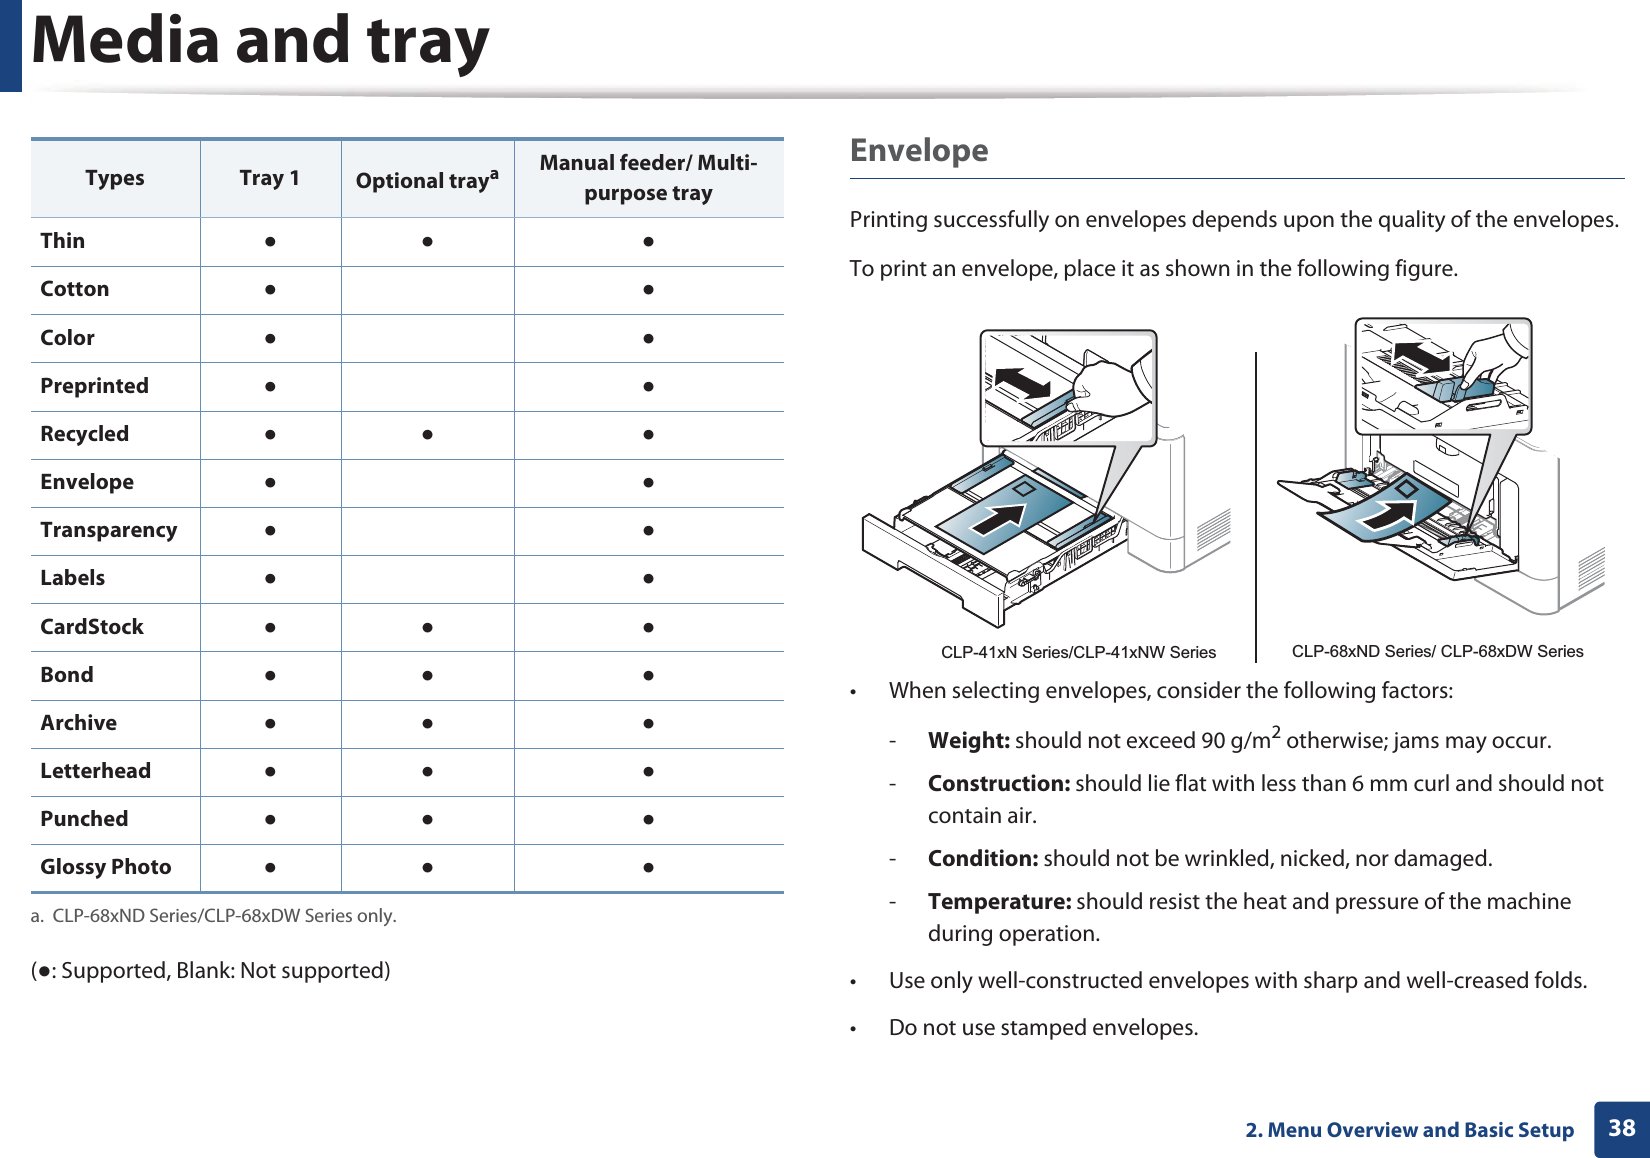
Media and tray382. Menu Overview and Basic Setup(Ɣ: Supported, Blank: Not supported) EnvelopePrinting successfully on envelopes depends upon the quality of the envelopes. To print an envelope, place it as shown in the following figure.• When selecting envelopes, consider the following factors:-Weight: should not exceed 90 g/m2 otherwise; jams may occur.-Construction: should lie flat with less than 6 mm curl and should not contain air.-Condition: should not be wrinkled, nicked, nor damaged.-Temperature: should resist the heat and pressure of the machine during operation.• Use only well-constructed envelopes with sharp and well-creased folds.• Do not use stamped envelopes.Thin ƔƔ ƔCotton  ƔƔColor ƔƔPreprinted ƔƔRecycled ƔƔ ƔEnvelope ƔƔTransparency ƔƔLabels ƔƔCardStock ƔƔ ƔBond ƔƔ ƔArchive ƔƔ ƔLetterhead ƔƔ ƔPunched ƔƔ ƔGlossy Photo ƔƔ Ɣa. CLP-68xND Series/CLP-68xDW Series only.Types Tray 1 Optional trayaManual feeder/ Multi-purpose trayCLP-41xN Series/CLP-41xNW Series CLP-68xND Series/ CLP-68xDW Series
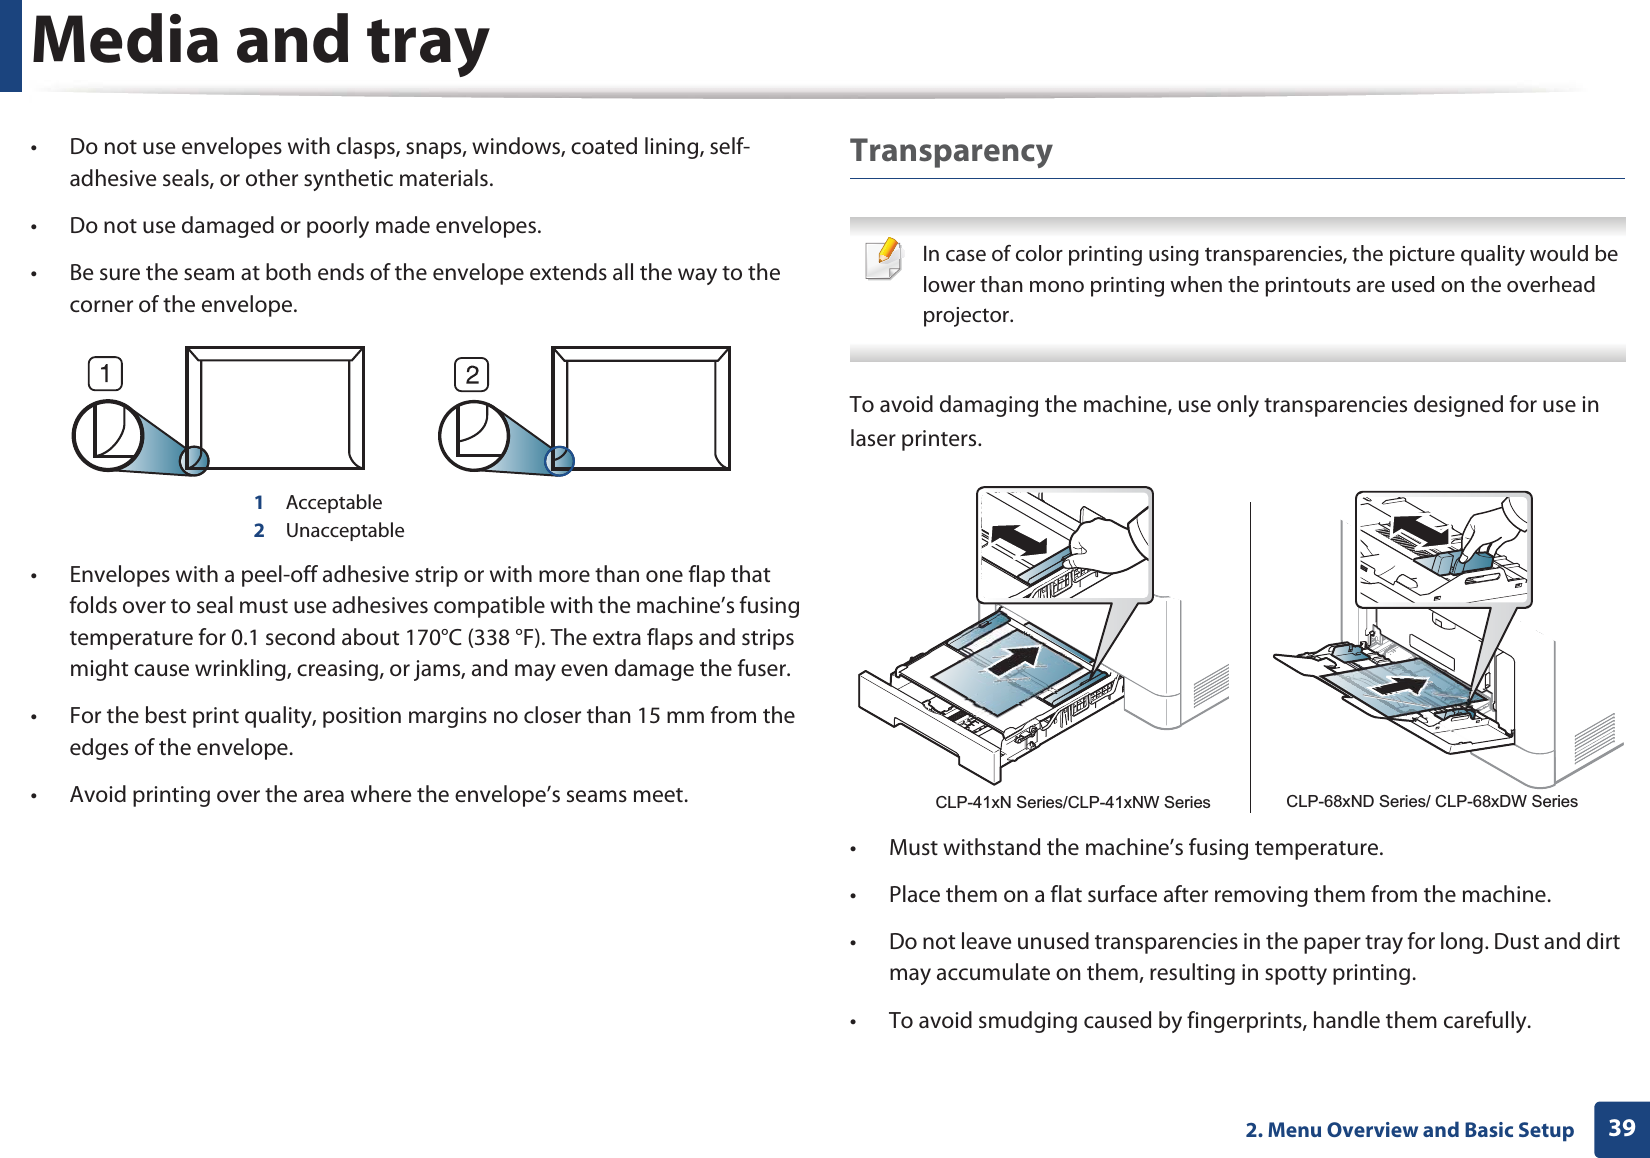
Media and tray392. Menu Overview and Basic Setup• Do not use envelopes with clasps, snaps, windows, coated lining, self-adhesive seals, or other synthetic materials.• Do not use damaged or poorly made envelopes.• Be sure the seam at both ends of the envelope extends all the way to the corner of the envelope.1 Acceptable2 Unacceptable• Envelopes with a peel-off adhesive strip or with more than one flap that folds over to seal must use adhesives compatible with the machine’s fusing temperature for 0.1 second about 170°C (338 °F). The extra flaps and strips might cause wrinkling, creasing, or jams, and may even damage the fuser.• For the best print quality, position margins no closer than 15 mm from the edges of the envelope.• Avoid printing over the area where the envelope’s seams meet.Transparency In case of color printing using transparencies, the picture quality would be lower than mono printing when the printouts are used on the overhead projector. To avoid damaging the machine, use only transparencies designed for use in laser printers.• Must withstand the machine’s fusing temperature.• Place them on a flat surface after removing them from the machine.• Do not leave unused transparencies in the paper tray for long. Dust and dirt may accumulate on them, resulting in spotty printing.• To avoid smudging caused by fingerprints, handle them carefully.CLP-41xN Series/CLP-41xNW Series CLP-68xND Series/ CLP-68xDW Series
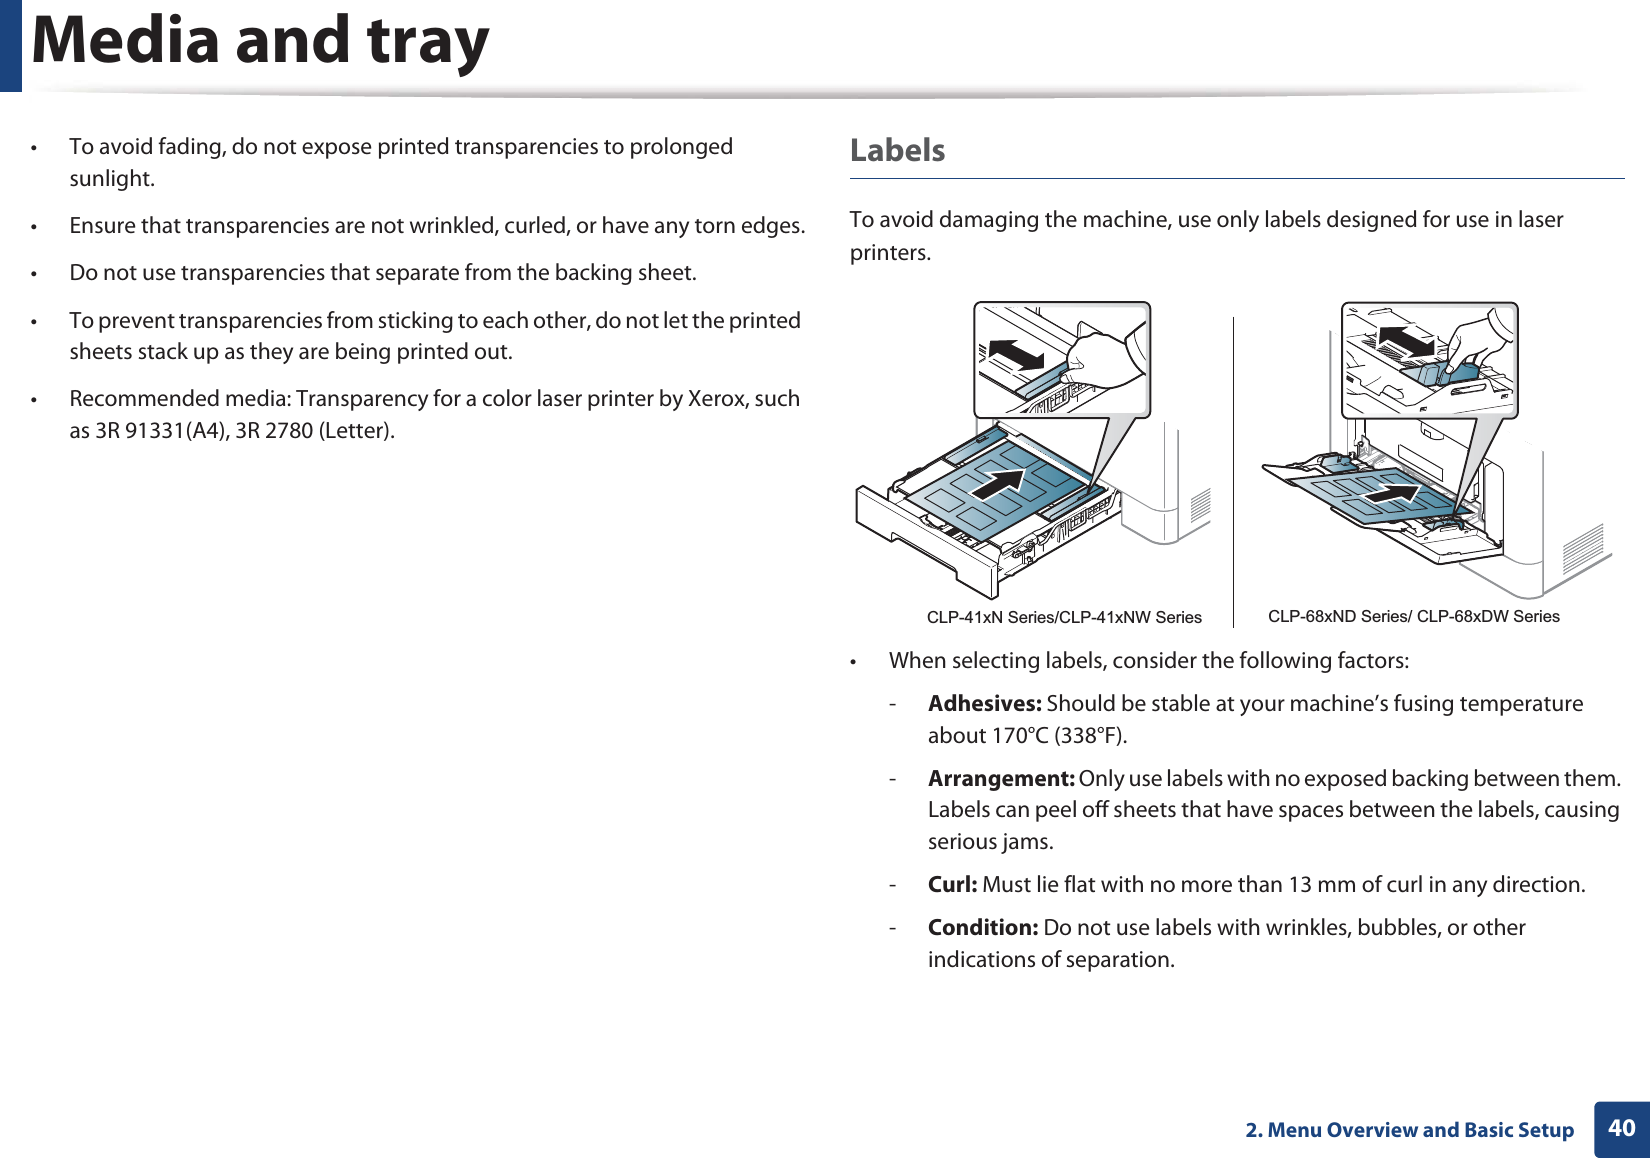
Media and tray402. Menu Overview and Basic Setup• To avoid fading, do not expose printed transparencies to prolonged sunlight.• Ensure that transparencies are not wrinkled, curled, or have any torn edges.• Do not use transparencies that separate from the backing sheet.• To prevent transparencies from sticking to each other, do not let the printed sheets stack up as they are being printed out.• Recommended media: Transparency for a color laser printer by Xerox, such as 3R 91331(A4), 3R 2780 (Letter).LabelsTo avoid damaging the machine, use only labels designed for use in laser printers.• When selecting labels, consider the following factors:-Adhesives: Should be stable at your machine’s fusing temperature about 170°C (338°F).-Arrangement: Only use labels with no exposed backing between them. Labels can peel off sheets that have spaces between the labels, causing serious jams.-Curl: Must lie flat with no more than 13 mm of curl in any direction.-Condition: Do not use labels with wrinkles, bubbles, or other indications of separation.CLP-41xN Series/CLP-41xNW Series CLP-68xND Series/ CLP-68xDW Series
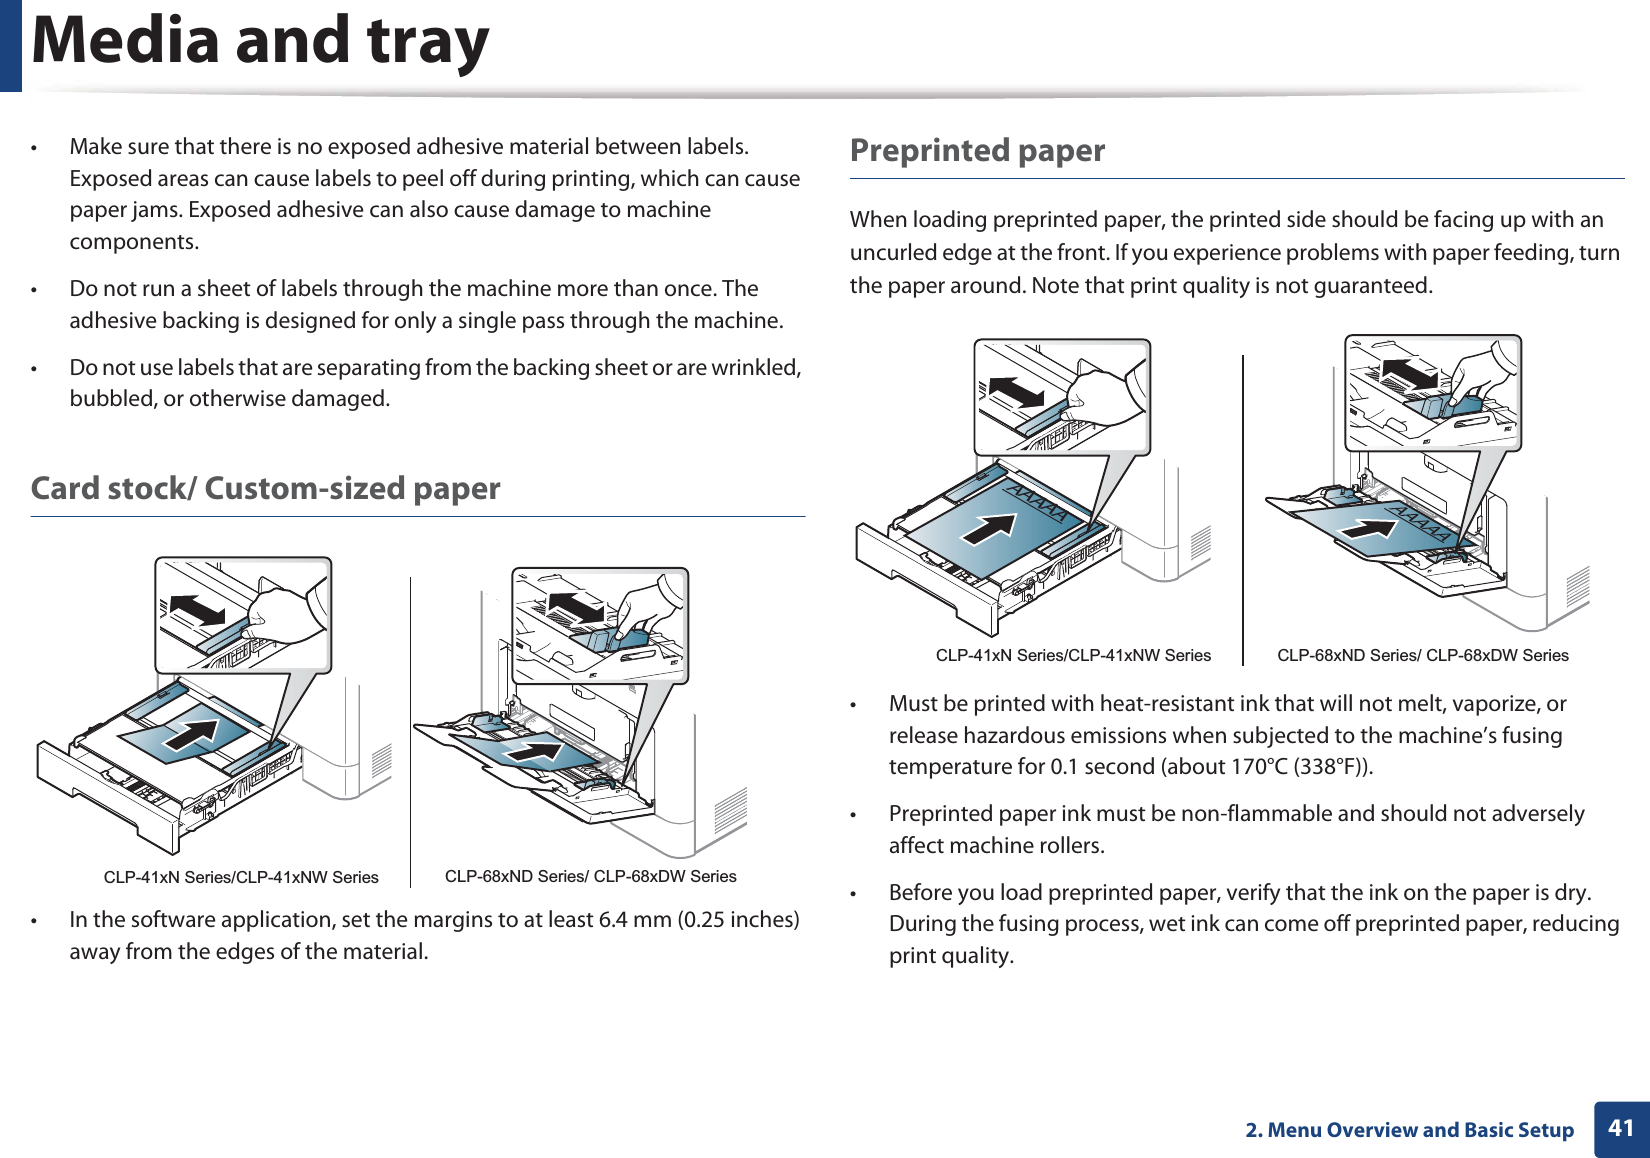
Media and tray412. Menu Overview and Basic Setup• Make sure that there is no exposed adhesive material between labels. Exposed areas can cause labels to peel off during printing, which can cause paper jams. Exposed adhesive can also cause damage to machine components.• Do not run a sheet of labels through the machine more than once. The adhesive backing is designed for only a single pass through the machine.• Do not use labels that are separating from the backing sheet or are wrinkled, bubbled, or otherwise damaged.Card stock/ Custom-sized paper• In the software application, set the margins to at least 6.4 mm (0.25 inches) away from the edges of the material.Preprinted paperWhen loading preprinted paper, the printed side should be facing up with an uncurled edge at the front. If you experience problems with paper feeding, turn the paper around. Note that print quality is not guaranteed.• Must be printed with heat-resistant ink that will not melt, vaporize, or release hazardous emissions when subjected to the machine’s fusing temperature for 0.1 second (about 170°C (338°F)).• Preprinted paper ink must be non-flammable and should not adversely affect machine rollers.• Before you load preprinted paper, verify that the ink on the paper is dry. During the fusing process, wet ink can come off preprinted paper, reducing print quality.CLP-41xN Series/CLP-41xNW Series CLP-68xND Series/ CLP-68xDW SeriesAAAAACLP-41xN Series/CLP-41xNW Series CLP-68xND Series/ CLP-68xDW Series
Media and tray422. Menu Overview and Basic SetupGlossy Photo• Recommended media: Glossy paper (Letter) for this machine by HP Brochure Paper (Product: Q6611A) only.• Recommended media: Glossy paper (A4) for this machine by HP Superior Paper 160 glossy (Product: Q6616A).5 Setting the paper size and typeAfter loading paper in the paper tray, set the paper size and type using the control panel buttons.  • You can set the machine’s settings by using the Device Settings in 6DPVXQJ(DV\3ULQWHU0DQDJHUprogram.- For Windows and Macintosh users, you set from Samsung Easy Printer Manager! (Switch to advanced mode)!Device Settings, see "Device Settings" on page 234.• It may be necessary to press OK to navigate to lower-level menus for some models. 1Select (Menu) button on the control panel.2  Press Paper and select the tray you want.3  Press Paper Size or Paper Type.4  Select the option you want.5  Press OK to save the selection.6  Press (Cancel) to return to ready mode. • The settings set from the machine driver override the settings on the control panel.a  To print from an application, open an application and start the print menu.b  Open Printing Preferences (see "Opening printing preferences" on page 46).c  Press the Paper tabGand select an appropriate paper. • If you want to use special-sized paper such as billing paper, select the Paper tab > Size > Edit... and set CustomGPaper Size Settings in the Printing Preferences (see "Opening printing preferences" on page 46).
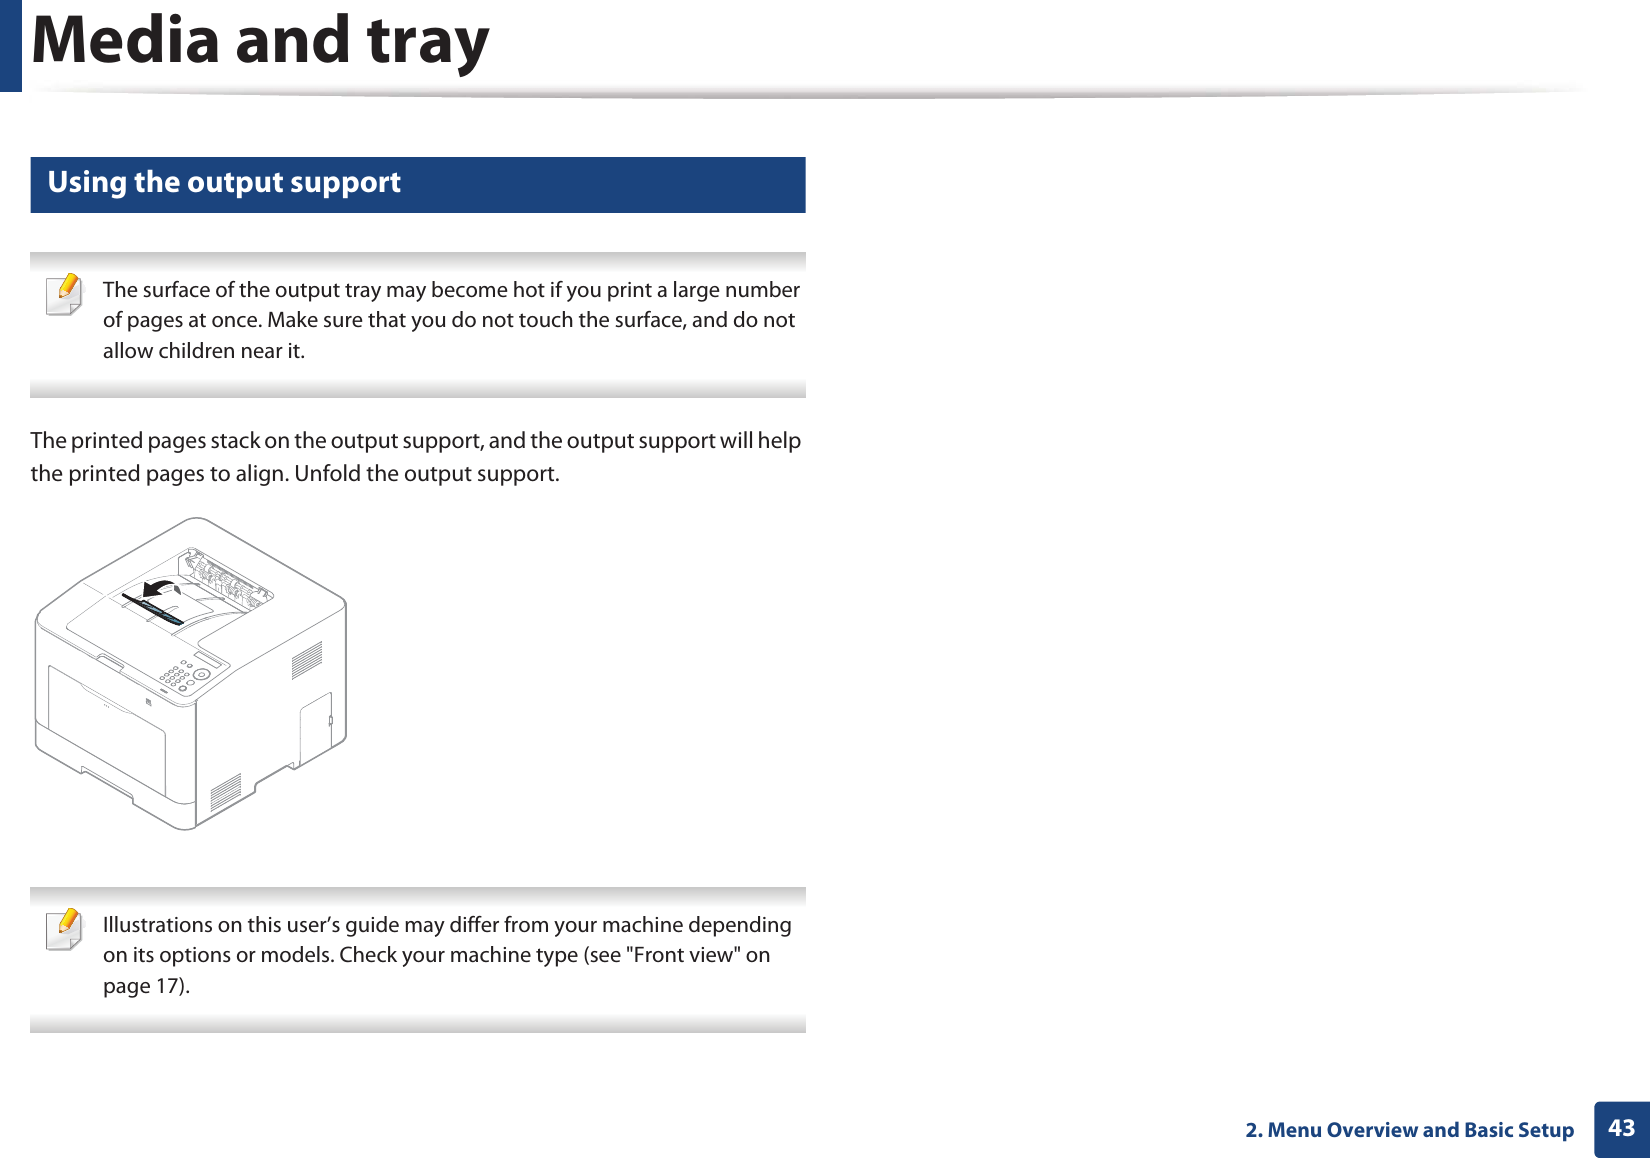
Media and tray432. Menu Overview and Basic Setup6 Using the output support The surface of the output tray may become hot if you print a large number of pages at once. Make sure that you do not touch the surface, and do not allow children near it. The printed pages stack on the output support, and the output support will help the printed pages to align. Unfold the output support.  Illustrations on this user’s guide may differ from your machine depending on its options or models. Check your machine type (see "Front view" on page 17).
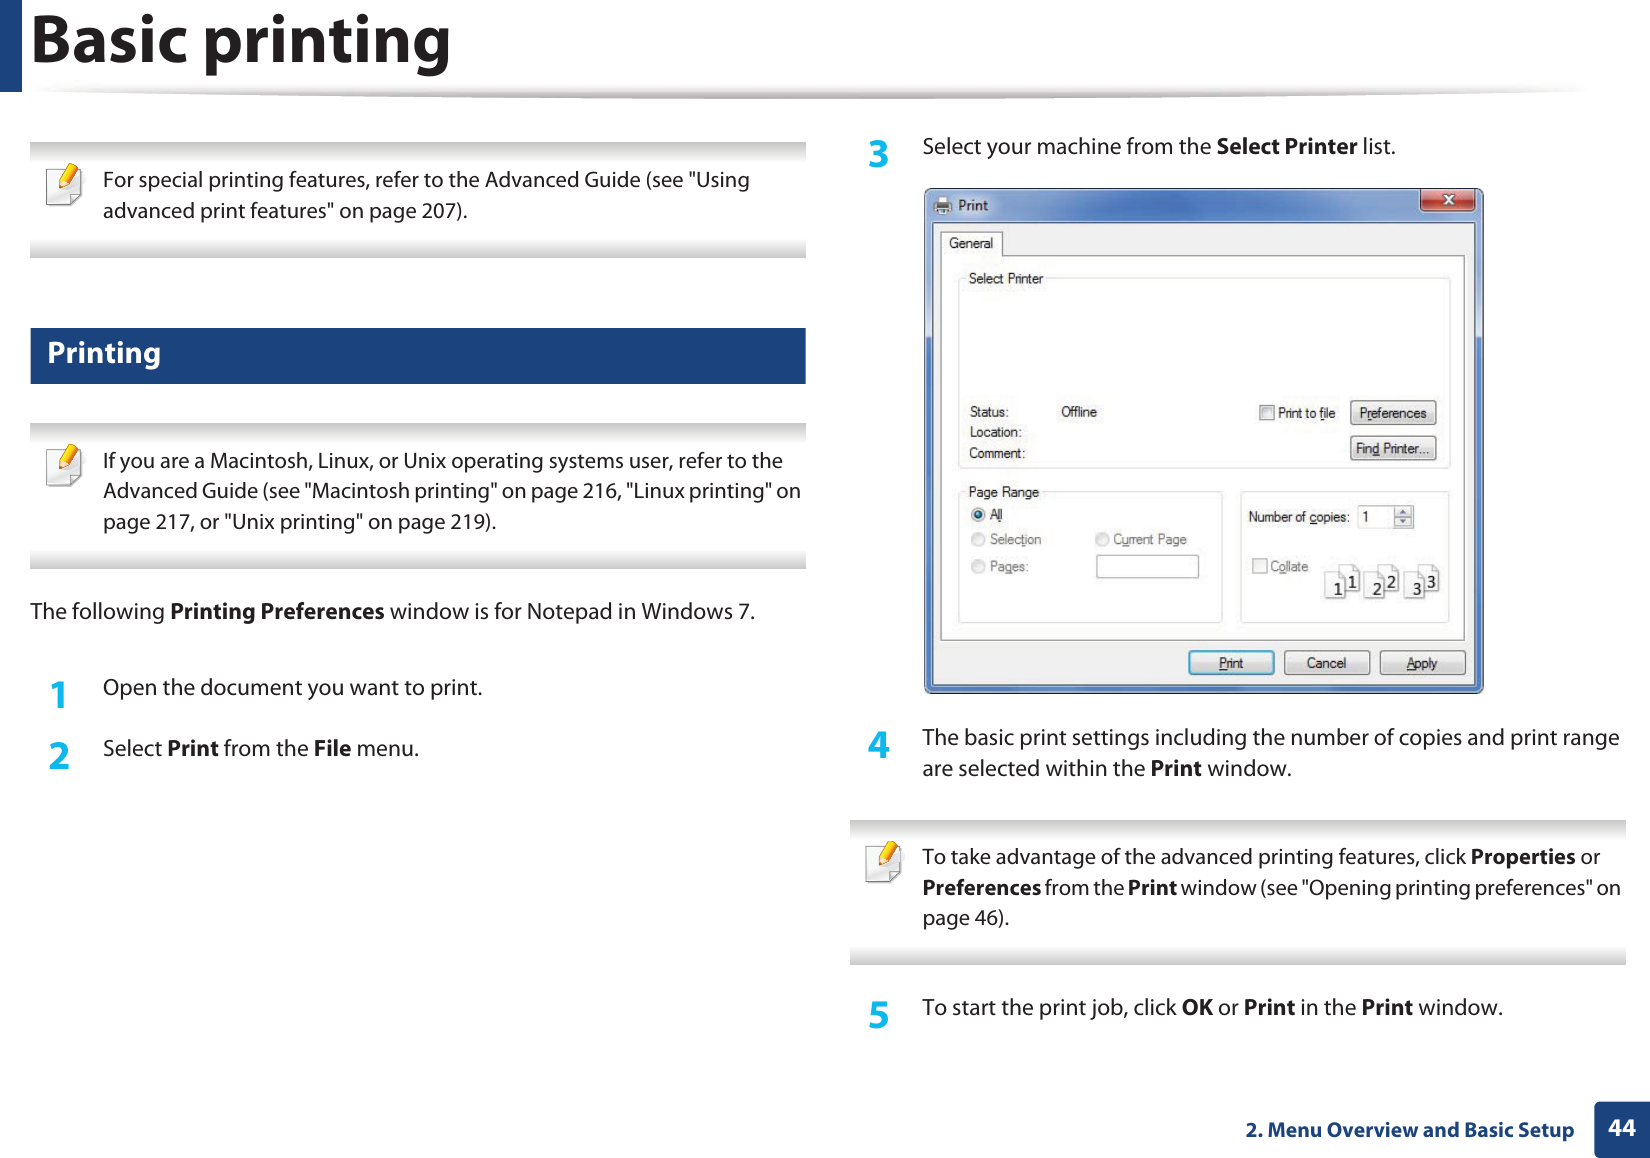
442. Menu Overview and Basic SetupBasic printing  For special printing features, refer to the Advanced Guide (see "Using advanced print features" on page 207). 7 Printing If you are a Macintosh, Linux, or Unix operating systems user, refer to the Advanced Guide (see "Macintosh printing" on page 216, "Linux printing" on page 217, or "Unix printing" on page 219). The following Printing Preferences window is for Notepad in Windows 7.1Open the document you want to print.2  Select Print from the File menu.3  Select your machine from the Select Printer list.4  The basic print settings including the number of copies and print range are selected within the Print window.  To take advantage of the advanced printing features, click Properties or Preferences from the Print window (see "Opening printing preferences" on page 46). 5  To start the print job, click OK or Print in the Print window.
Basic printing452. Menu Overview and Basic Setup8 Canceling a print jobIf the print job is waiting in the print queue or print spooler, cancel the job as follows:• You can access this window by simply double-clicking the machine icon ( ) in the Windows task bar. • You can also cancel the current job by pressing  (Cancel) on the control panel.
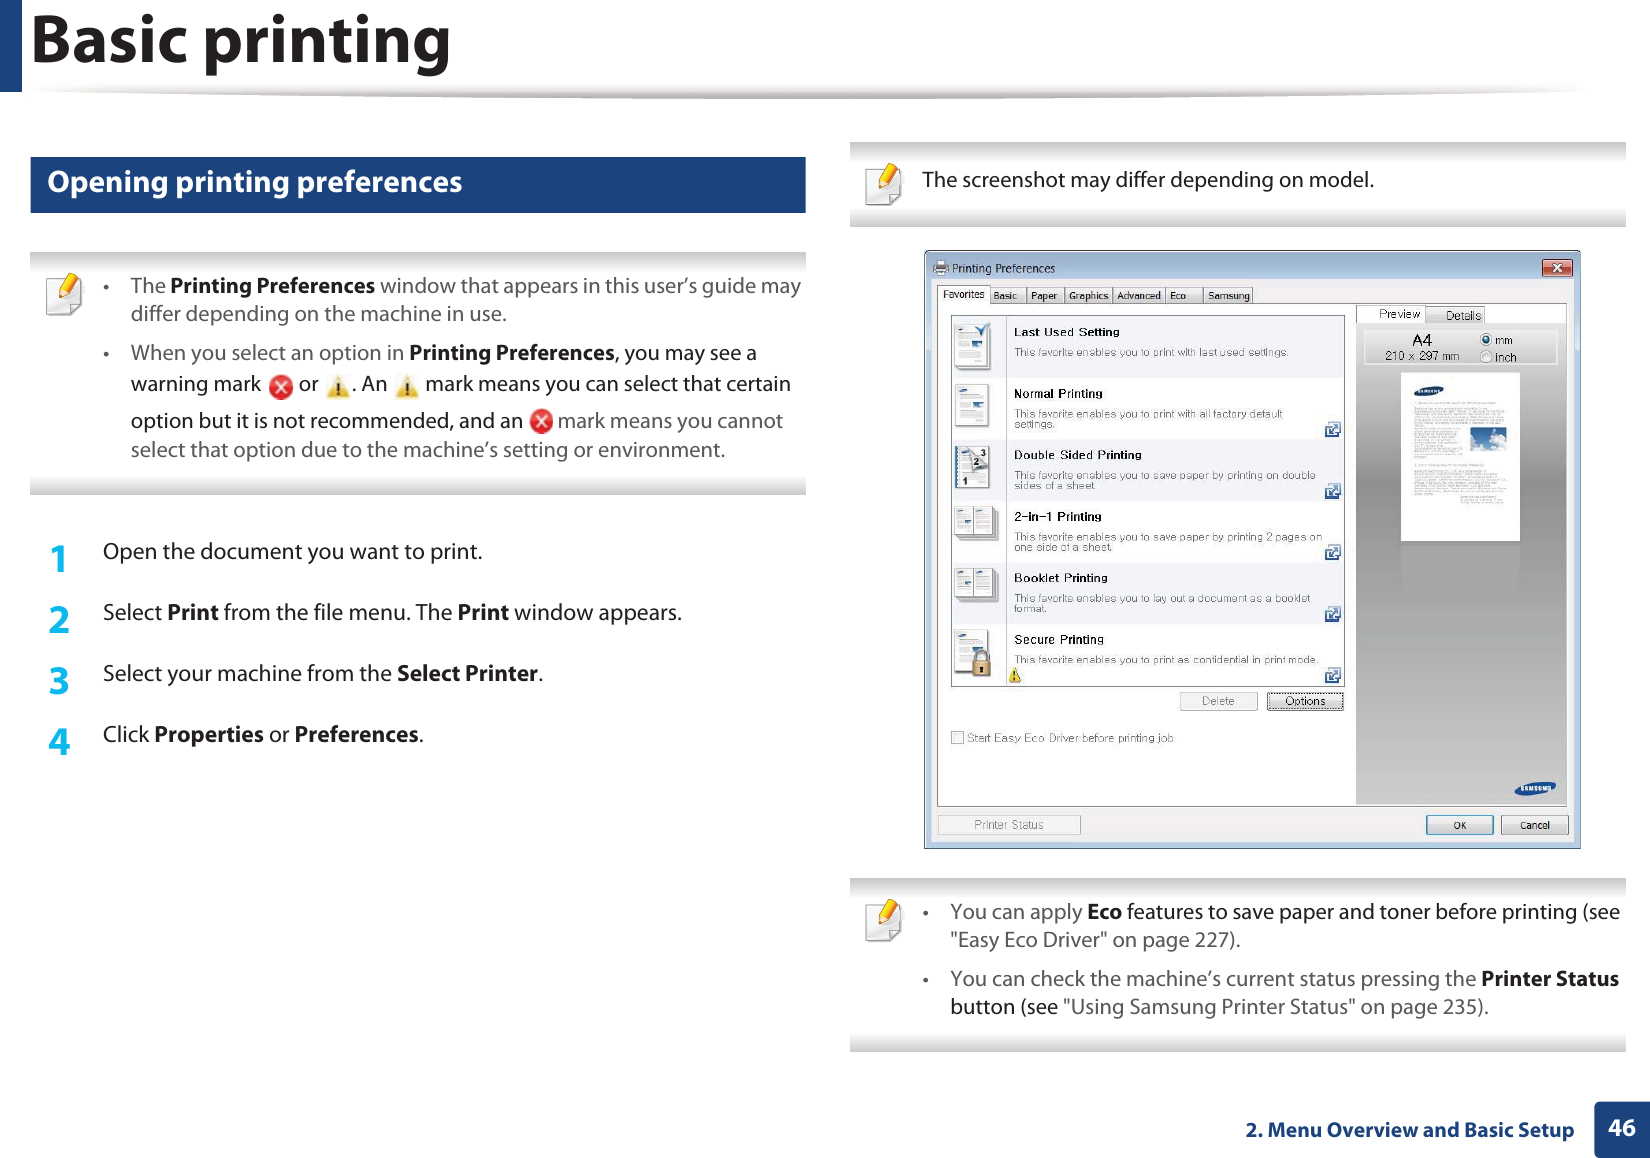
Basic printing462. Menu Overview and Basic Setup9 Opening printing preferences • The Printing Preferences window that appears in this user’s guide may differ depending on the machine in use. • When you select an option in Printing Preferences, you may see a warning mark   or  . An   mark means you can select that certain option but it is not recommended, and an   mark means you cannot select that option due to the machine’s setting or environment. 1Open the document you want to print.2  Select Print from the file menu. The Print window appears. 3  Select your machine from the Select Printer. 4  Click Properties or Preferences.  The screenshot may differ depending on model.  • You can apply Eco features to save paper and toner before printing (see "Easy Eco Driver" on page 227).• You can check the machine’s current status pressing the Printer Status button (see "Using Samsung Printer Status" on page 235).
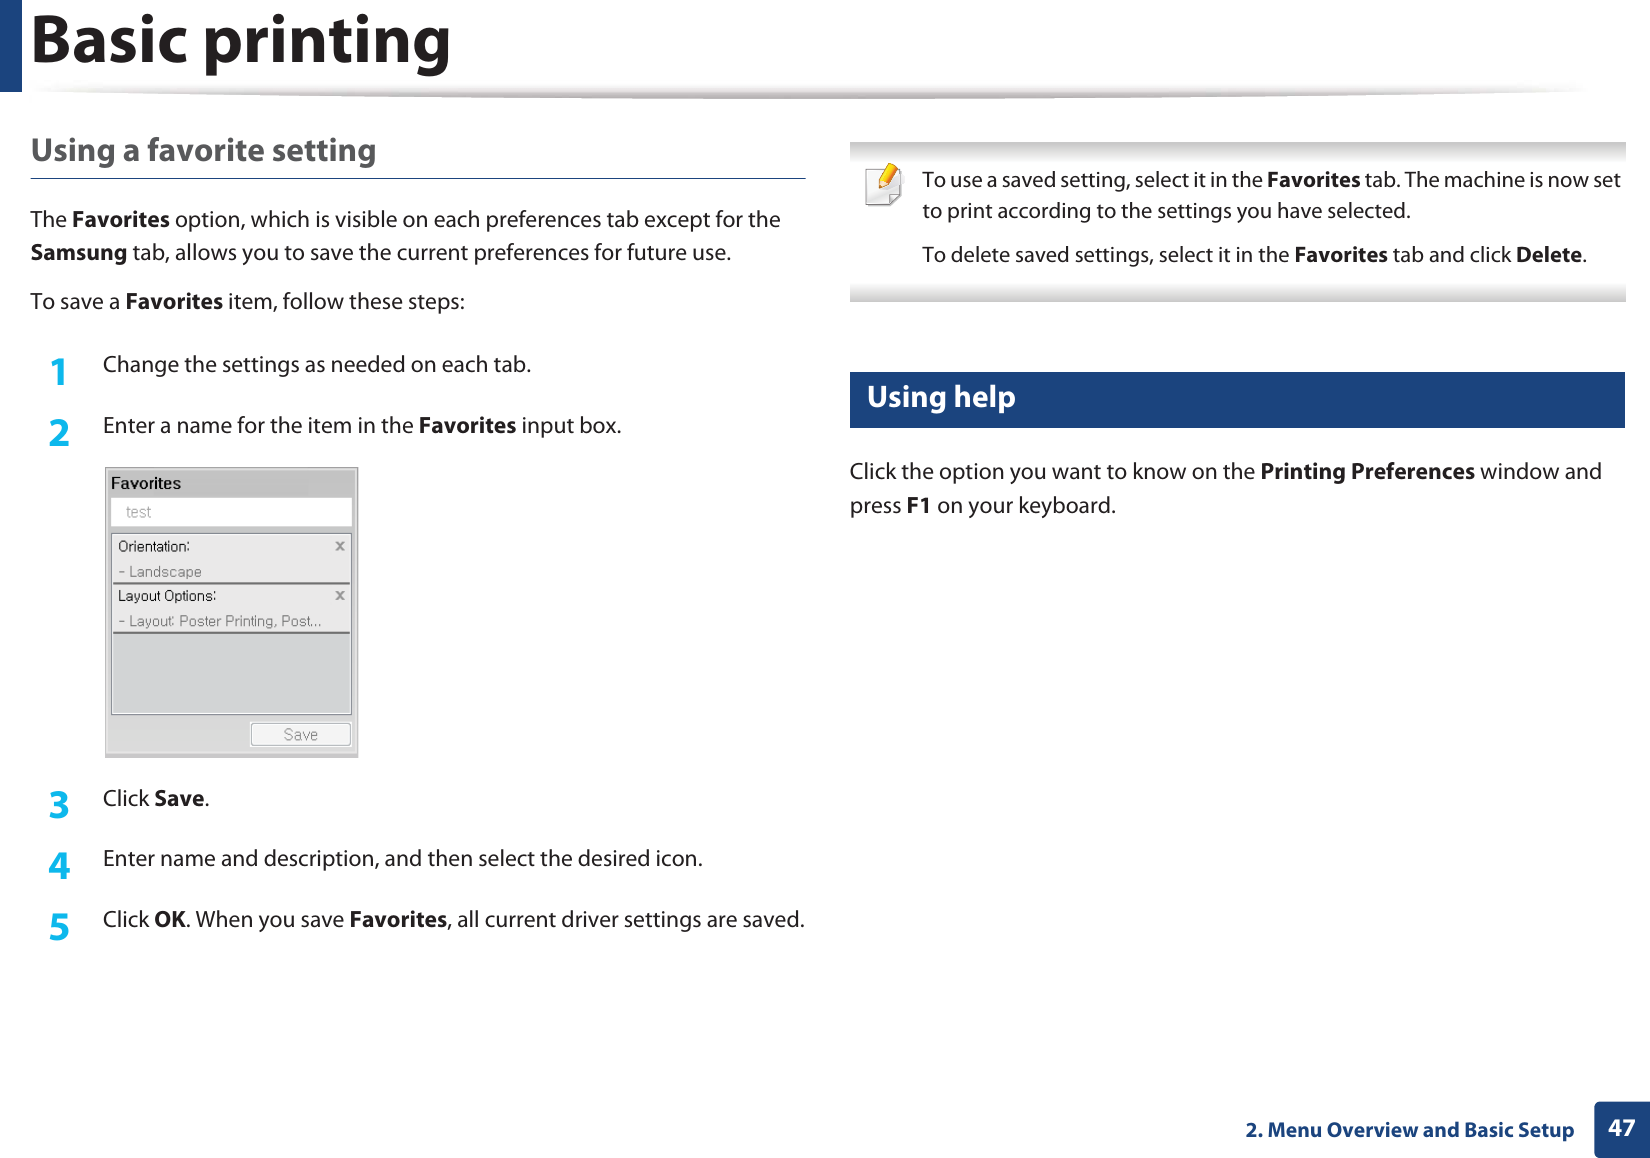
Basic printing472. Menu Overview and Basic SetupUsing a favorite settingThe Favorites option, which is visible on each preferences tab except for the Samsung tab, allows you to save the current preferences for future use.To save a Favorites item, follow these steps:1Change the settings as needed on each tab. 2  Enter a name for the item in the Favorites input box.3  Click Save. 4  Enter name and description, and then select the desired icon.5  Click OK. When you save Favorites, all current driver settings are saved. To use a saved setting, select it in the Favorites tab. The machine is now set to print according to the settings you have selected.To delete saved settings, select it in the Favorites tab and click Delete.  10 Using helpClick the option you want to know on the Printing Preferences window and press F1 on your keyboard.
Basic printing482. Menu Overview and Basic Setup11 Eco printingThe Eco function cuts toner consumption and paper usage. The Eco function allows you to save print resources and lead you to eco-friendly printing.If you press the Eco button from the control panel, eco mode is enabled. The default setting of Eco mode is duplex (CLP-68xND Series/CLP-68xDW Series only), Multiple Pages per Side (2-up), skip blank pages. You can set the machine’s settings by using the Device Settings in 6DPVXQJ(DV\3ULQWHU0DQDJHUprogram.• For Windows and Macintosh users, you set from Samsung Easy Printer Manager! (Switch to advanced mode)!Device Settings, see "Device Settings" on page 234. Setting Eco mode on the control panel • The settings set from the machine’s driver override the settings on the control panel.• It may be necessary to press OK to navigate to lower-level menus for some models. 1Select (Menu) > System Setup > Eco Setup on the control panel.2  Select the option you want and press OK.•Default Mode: Select this to turn on or off the eco mode.-Off: Set the eco mode off.-On: Set the eco mode on. If you set the eco mode on with a password from the SyncThru™ Web Service (Settings tab > Machine Settings > System > Eco > Settings) or 6DPVXQJ(DV\3ULQWHU0DQDJHU(Device Settings > Eco), the On force message appears. You have to enter the password to change the eco mode status. •Change Temp.: Follow the settings from Syncthru™ Web Service or 6DPVXQJ(DV\3ULQWHU0DQDJHU. Before you select this item, you must set the eco function in SyncThru™ Web Service (Settings tab > Machine Settings > System > Eco > Settings) or 6DPVXQJ(DV\3ULQWHU0DQDJHU(Device Settings > Eco). -Default Eco: The machine is set to Default Eco mode.-Custom Eco: Change any necessary values.3  Press OK to save the selection.
Basic printing492. Menu Overview and Basic SetupSetting eco mode on the driverOpen the Eco tab to set Eco mode. When you see the eco image ( ), that means the eco mode is currently enabled.Eco options•Printer Default: Follows the settings from the machine's control panel.•None: Disables Eco mode.•Eco Printing: Enables eco mode. Activate the various Eco items you want to use.•Password: If the administrator fixed to enable the Eco mode, you have to enter the password to change the status.Result simulatorResult Simulator shows the results of reduced emission of carbon dioxide, used electricity, and the amount of saved paper in accordance with the settings you selected.• The results are calculated on the basis that the total number of printed paper is one hundred without a blank page when the Eco mode is disabled.• Refers to the calculation coefficient about CO2, energy, and paper from IEA, the index of Ministry of Internal Affairs and Communication of Japan and www.remanufacturing.org.uk. Each model has a different index. • The power consumption in printing mode refers to the average printing power consumption of this machine. • The actual amount displayed is only an estimate as the actual amount may differ depending on the operating system used, computing performance, application software, connection method, media type [thickness], media size, job complexity, etc.
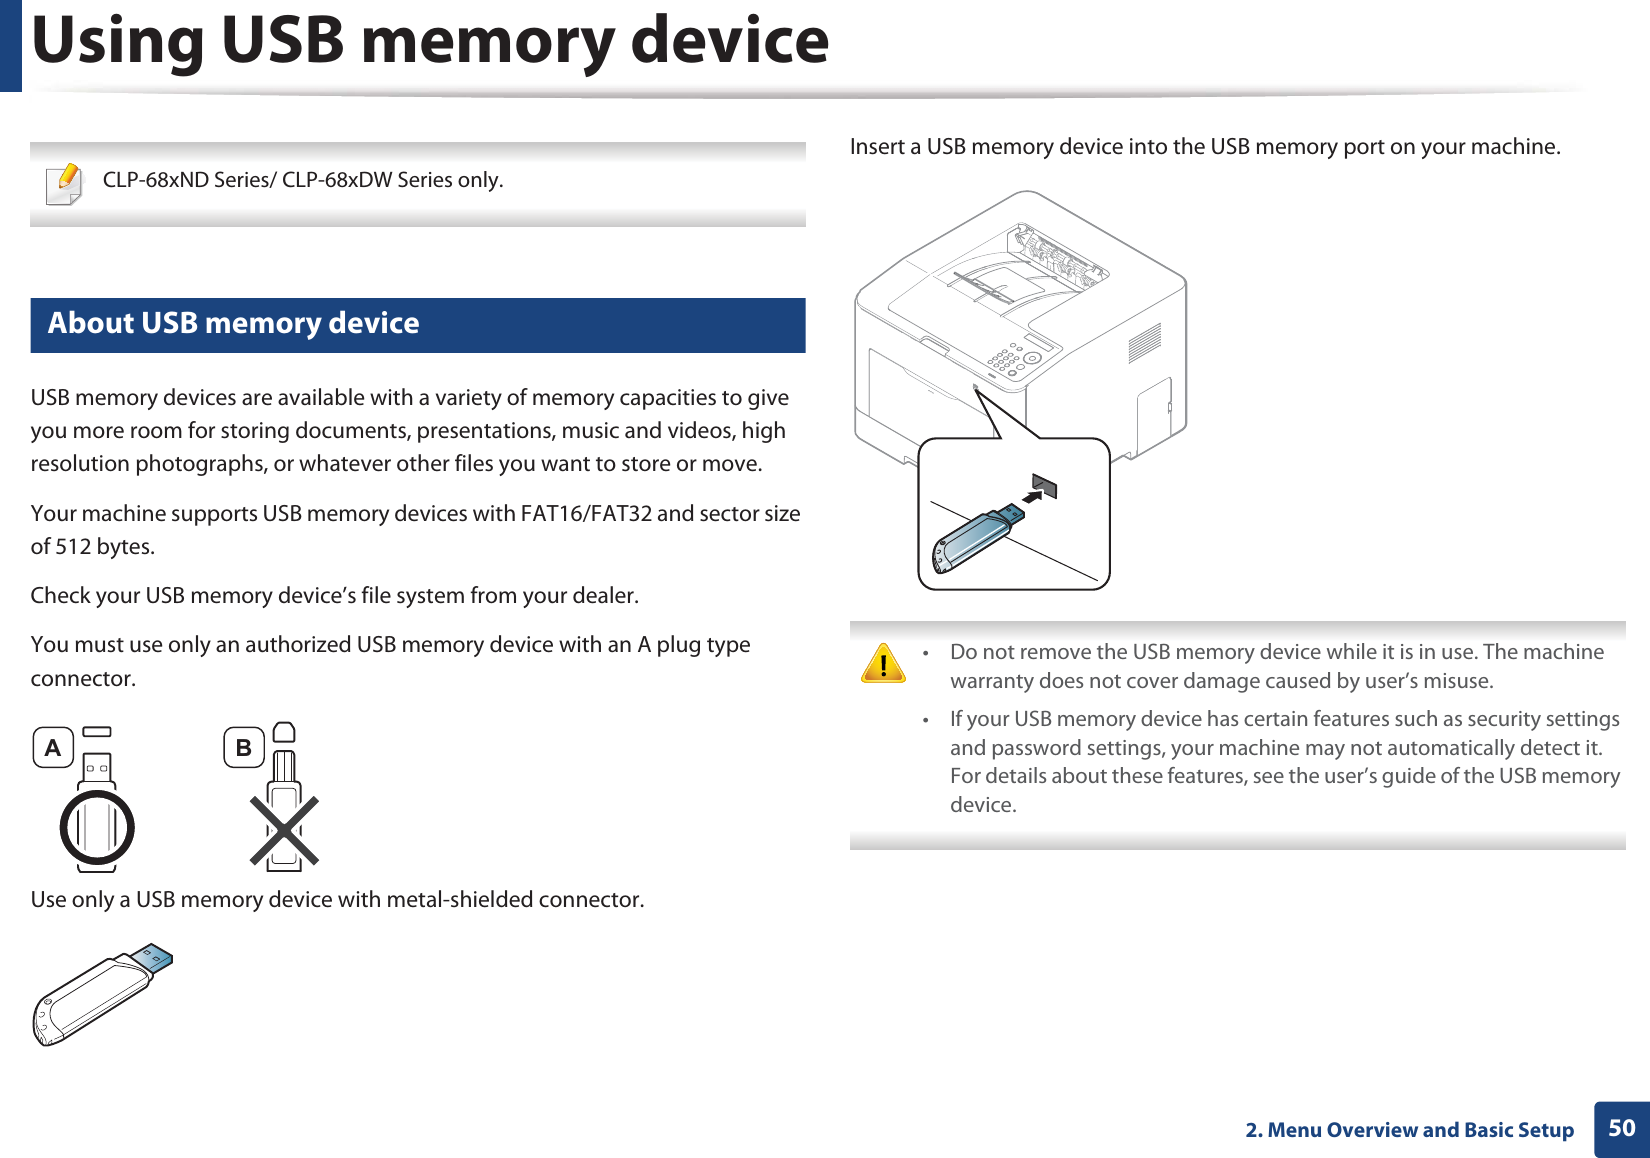
502. Menu Overview and Basic SetupUsing USB memory device CLP-68xND Series/ CLP-68xDW Series only. 12 About USB memory deviceUSB memory devices are available with a variety of memory capacities to give you more room for storing documents, presentations, music and videos, high resolution photographs, or whatever other files you want to store or move.Your machine supports USB memory devices with FAT16/FAT32 and sector size of 512 bytes.Check your USB memory device’s file system from your dealer.You must use only an authorized USB memory device with an A plug type connector.Use only a USB memory device with metal-shielded connector.Insert a USB memory device into the USB memory port on your machine. • Do not remove the USB memory device while it is in use. The machine warranty does not cover damage caused by user’s misuse.• If your USB memory device has certain features such as security settings and password settings, your machine may not automatically detect it. For details about these features, see the user’s guide of the USB memory device. A B
Using USB memory device512. Menu Overview and Basic Setup13 Printing from a USB memory deviceYou can directly print files stored on a USB memory device.Direct Print option supported file types:•PRN: Only files created by provided driver with your machine are compatible. If you print PRN files created from other machine, the printout would be different. •BMP: BMP Uncompressed•TIFF: TIFF 6.0 Baseline•JPEG: JPEG Baseline•PDF: PDF 1.4 and below•XPSTo print a document from a USB memory device:1Insert a USB memory device into the USB memory port on your machine. 2  Select (Menu) button on the control panel.3  Press Direct USB > USB Print.4  Press the arrow until the folder or file you want and press OK. If you see [+] or [D] in the front of a folder name, there are one or more files or folders in the selected folder. 5  Press the number of copies to be printed or enter the number.6  Press OK.14 Managing USB memoryYou can delete image files stored on a USB memory device one by one or all at once by reformatting the device.1Insert a USB memory device into the USB memory port on your machine. 2  Select (Menu) button on the control panel.3  Press Direct USB > File Manage.4  Press the arrow until Delete or Format you want and press OK.5  Press the folder or file you want and press OK.
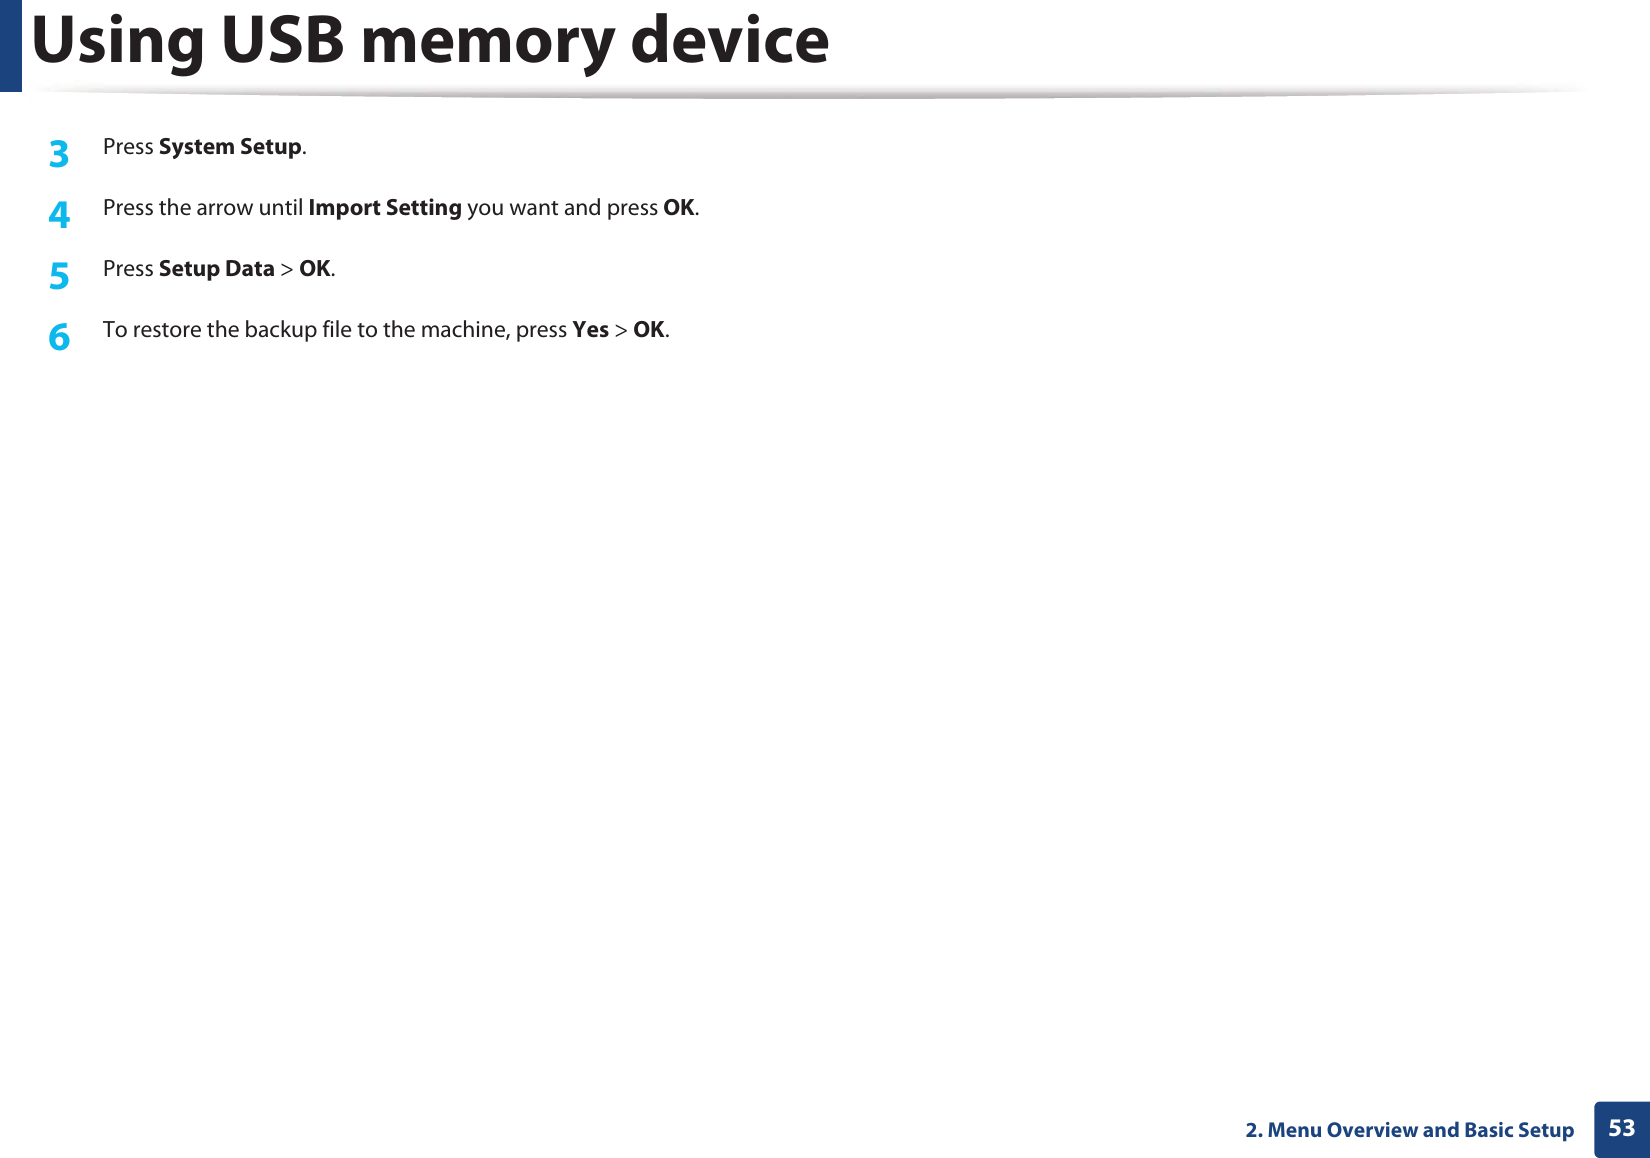
Using USB memory device522. Menu Overview and Basic Setup If you see [+] or [D] in the front of a folder name, there are one or more files or folders in the selected folder. 6  To delete or format, press Yes > OK. After deleting files or reformatting a USB memory device, files cannot be restored. Therefore, confirm that you no longer need the data before deleting it. 15 Viewing the USB Memory StatusYou can check the amount of memory space available for saving documents.1Insert a USB memory device into the USB memory port on your machine. 2  Select (Menu) button on the control panel.3  Press Direct USB > Check Space.The available memory space appears on the display.16 Backing up dataData in the machine’s memory can be accidentally erased due to power failure or storage failureUGBackup helps you protect your the system settings by storing them as backup files on a USB memory device.Backing up data1Insert a USB memory device into the USB memory port on your machine. 2  Select (Menu) button on the control panel.3  Press System Setup.4  Press the arrow until Export Setting you want and press OK.5  Press Setup Data > OK.The data is backed up to the USB memory device.Restoring data1Insert a USB memory device into the USB memory port on your machine. 2  Select (Menu) button on the control panel.
Using USB memory device532. Menu Overview and Basic Setup3  Press System Setup.4  Press the arrow until Import Setting you want and press OK.5  Press Setup Data > OK.6  To restore the backup file to the machine, press Yes > OK.
3. MaintenanceThis chapter provides information about purchasing supplies, accessories and maintenance parts available for your machine.• Ordering supplies and accessories 55• Available consumables 56• Available maintenance parts 59• Storing the toner cartridge 60• Redistributing toner 62• Replacing the toner cartridge 64• Replacing the waste toner container 68• Installing accessories 69• Monitoring the supplies life 73• Setting the toner low alert 74• Cleaning the machine 75• Tips for moving & storing your machine 79
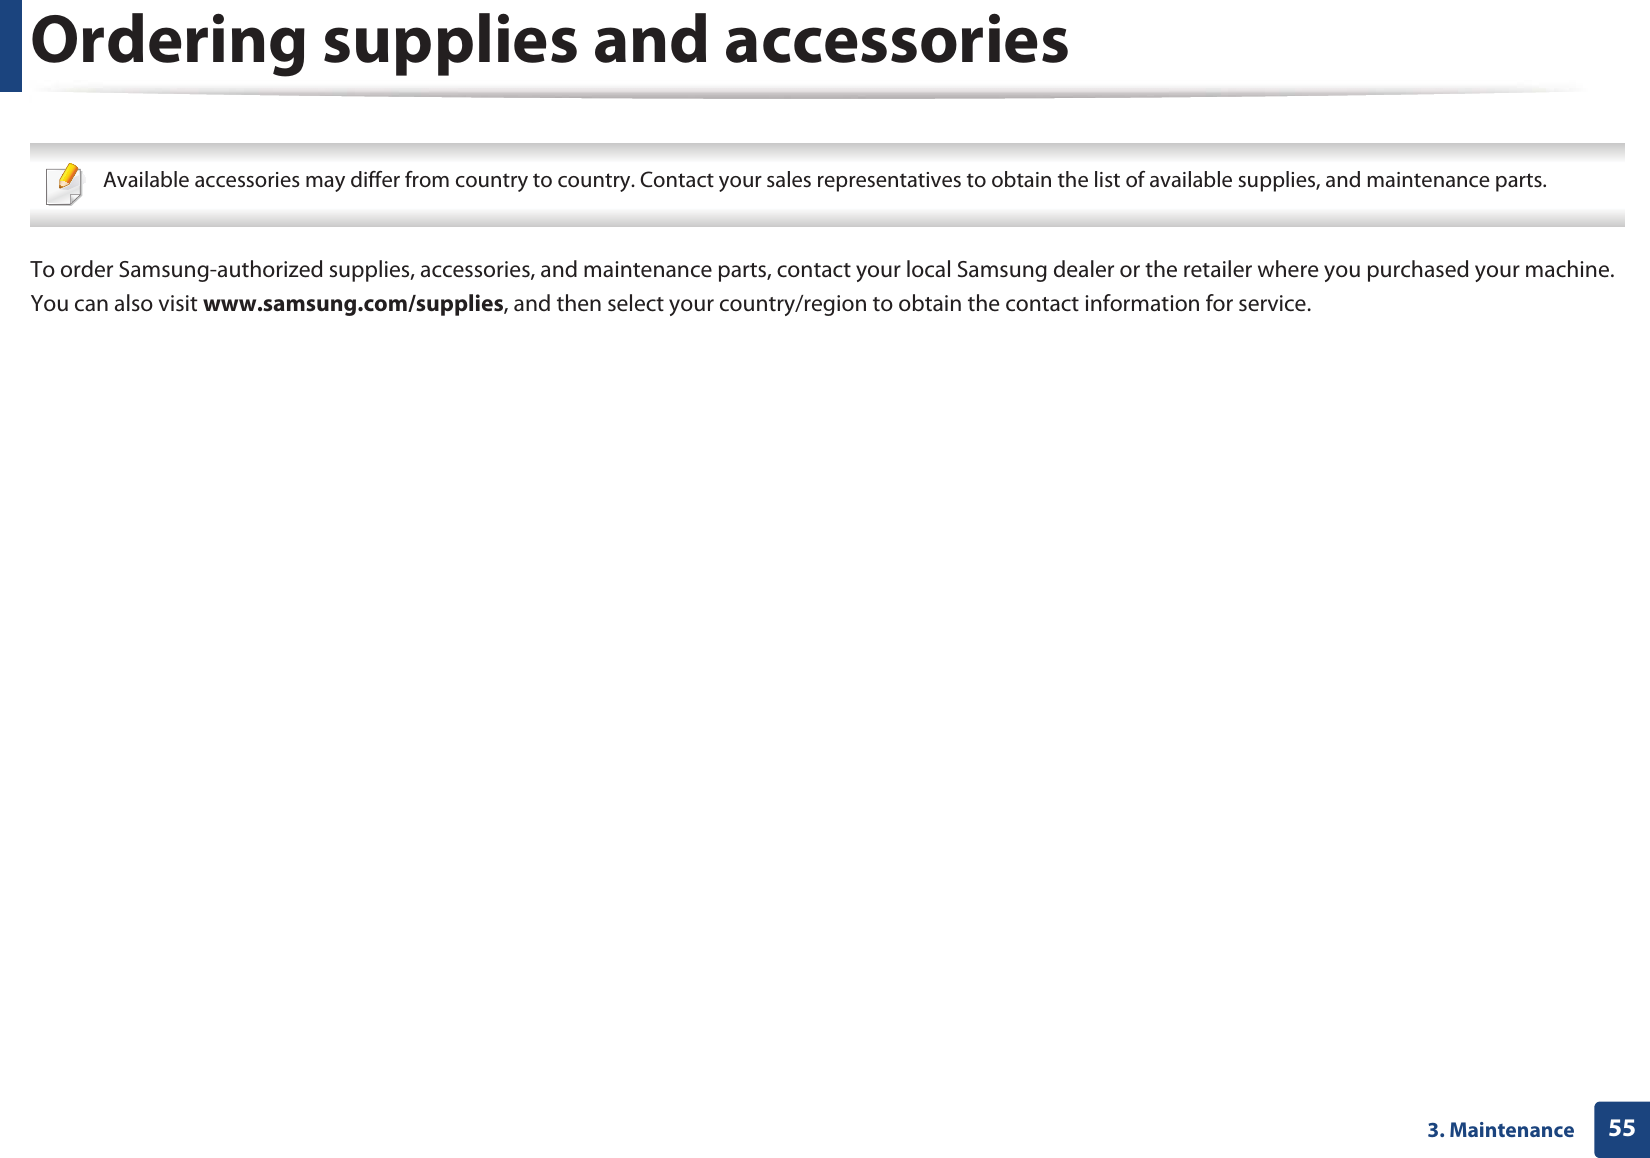
553. MaintenanceOrdering supplies and accessories Available accessories may differ from country to country. Contact your sales representatives to obtain the list of available supplies, and maintenance parts. To order Samsung-authorized supplies, accessories, and maintenance parts, contact your local Samsung dealer or the retailer where you purchased your machine. You can also visit www.samsung.com/supplies, and then select your country/region to obtain the contact information for service.
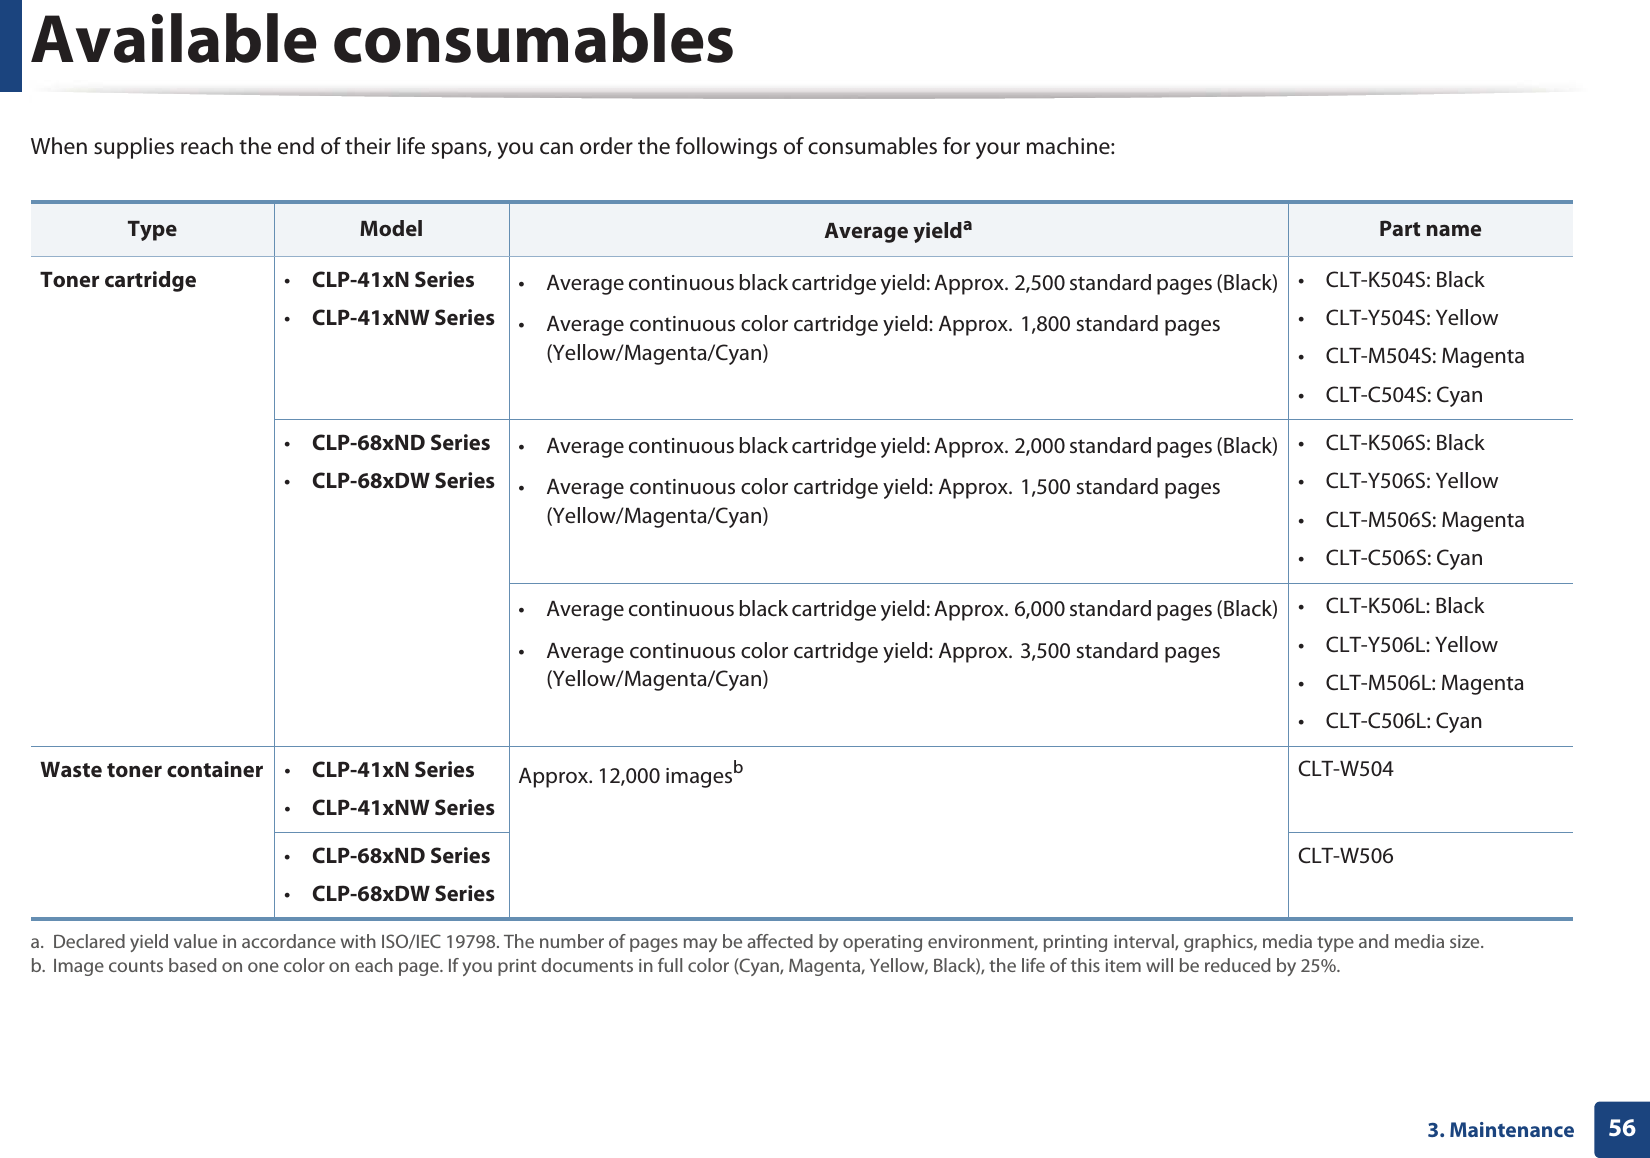
563. MaintenanceAvailable consumablesWhen supplies reach the end of their life spans, you can order the followings of consumables for your machine:  Type Model Average yieldaa. Declared yield value in accordance with ISO/IEC 19798. The number of pages may be affected by operating environment, printing interval, graphics, media type and media size.Part nameToner cartridge  •CLP-41xN Series•CLP-41xNW Series• Average continuous black cartridge yield: Approx.G2,500 standard pages (Black)• Average continuous color cartridge yield: Approx.G1,800 standard pages (Yellow/Magenta/Cyan)• CLT-K504S: Black• CLT-Y504S: Yellow• CLT-M504S: Magenta• CLT-C504S: Cyan•CLP-68xND Series•CLP-68xDW Series• Average continuous black cartridge yield: Approx.G2,000 standard pages (Black)• Average continuous color cartridge yield: Approx.G1,500 standard pages (Yellow/Magenta/Cyan)• CLT-K506S: Black• CLT-Y506S: Yellow• CLT-M506S: Magenta• CLT-C506S: Cyan• Average continuous black cartridge yield: Approx.G6,000 standard pages (Black)• Average continuous color cartridge yield: Approx.G3,500 standard pages (Yellow/Magenta/Cyan)• CLT-K506L: Black• CLT-Y506L: Yellow• CLT-M506L: Magenta• CLT-C506L: CyanWaste toner container •CLP-41xN Series•CLP-41xNW SeriesApprox. 12,000 imagesbb. Image counts based on one color on each page. If you print documents in full color (Cyan, Magenta, Yellow, Black), the life of this item will be reduced by 25%.CLT-W504•CLP-68xND Series•CLP-68xDW SeriesCLT-W506
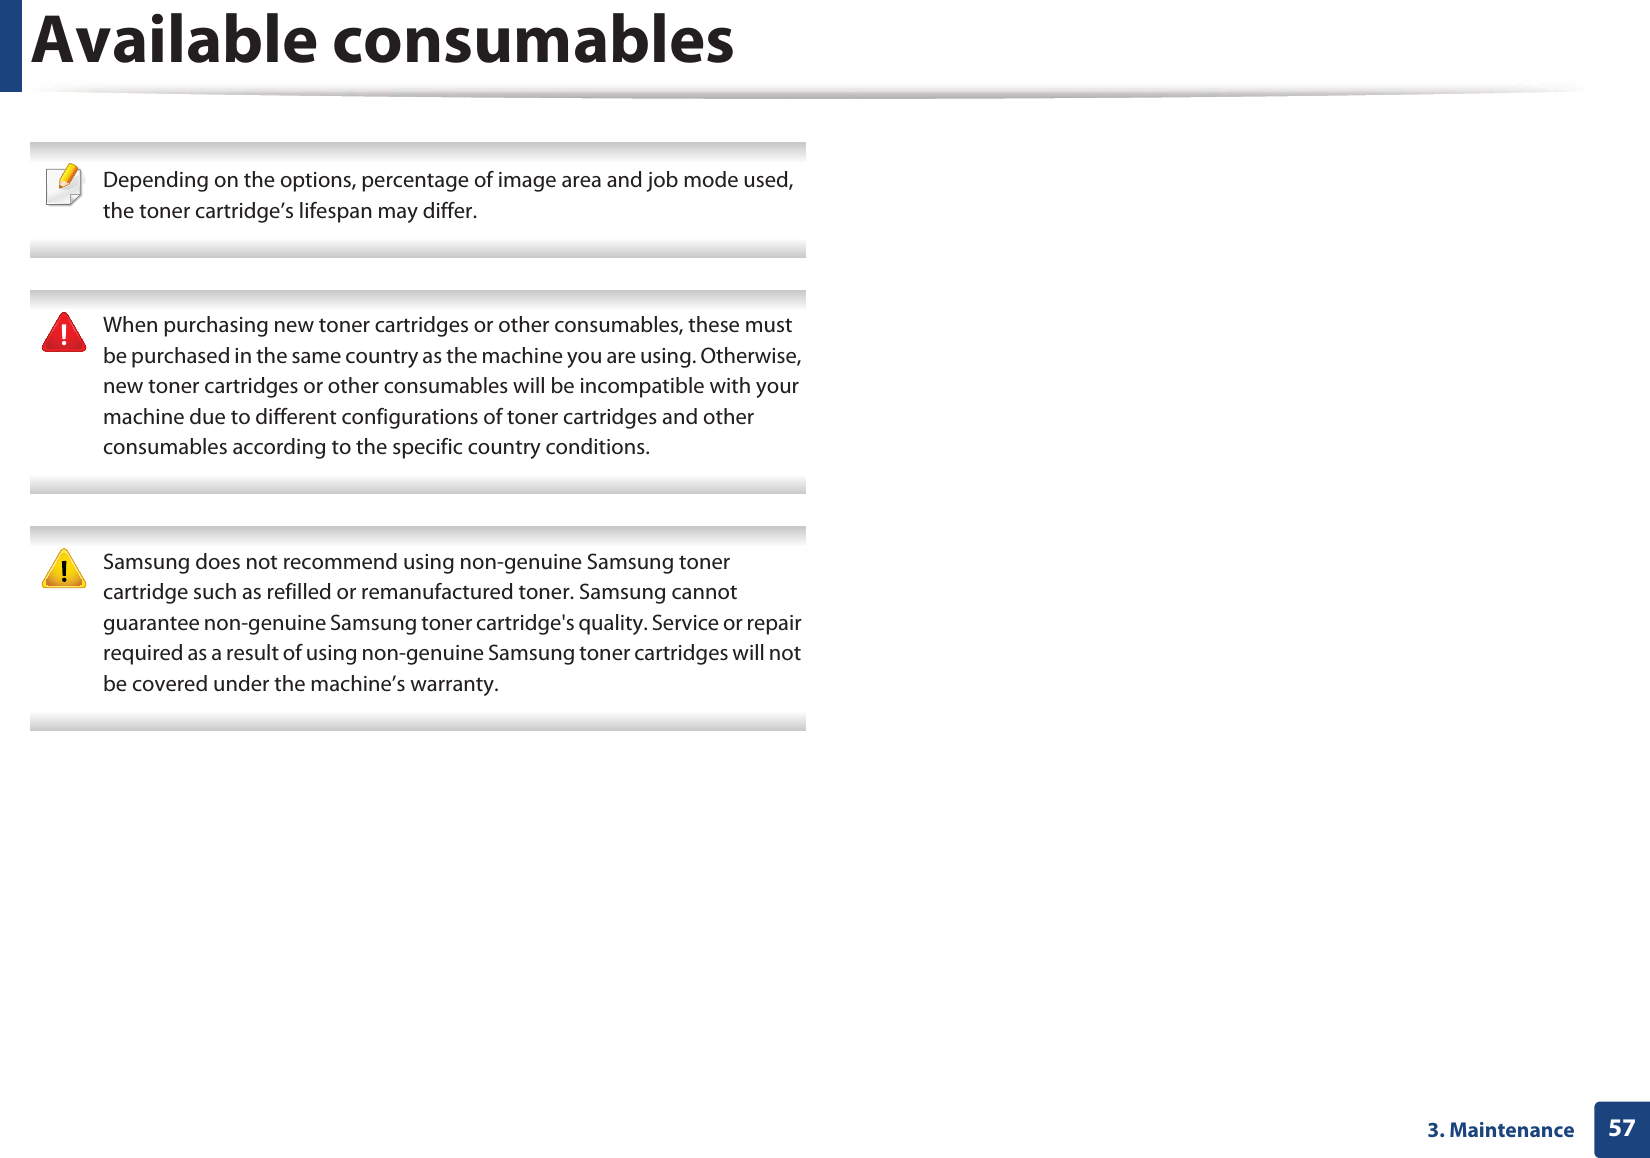
Available consumables573. Maintenance Depending on the options, percentage of image area and job mode used, the toner cartridge’s lifespan may differ.  When purchasing new toner cartridges or other consumables, these must be purchased in the same country as the machine you are using. Otherwise, new toner cartridges or other consumables will be incompatible with your machine due to different configurations of toner cartridges and other consumables according to the specific country conditions.  Samsung does not recommend using non-genuine Samsung toner cartridge such as refilled or remanufactured toner. Samsung cannot guarantee non-genuine Samsung toner cartridge's quality. Service or repair required as a result of using non-genuine Samsung toner cartridges will not be covered under the machine’s warranty.
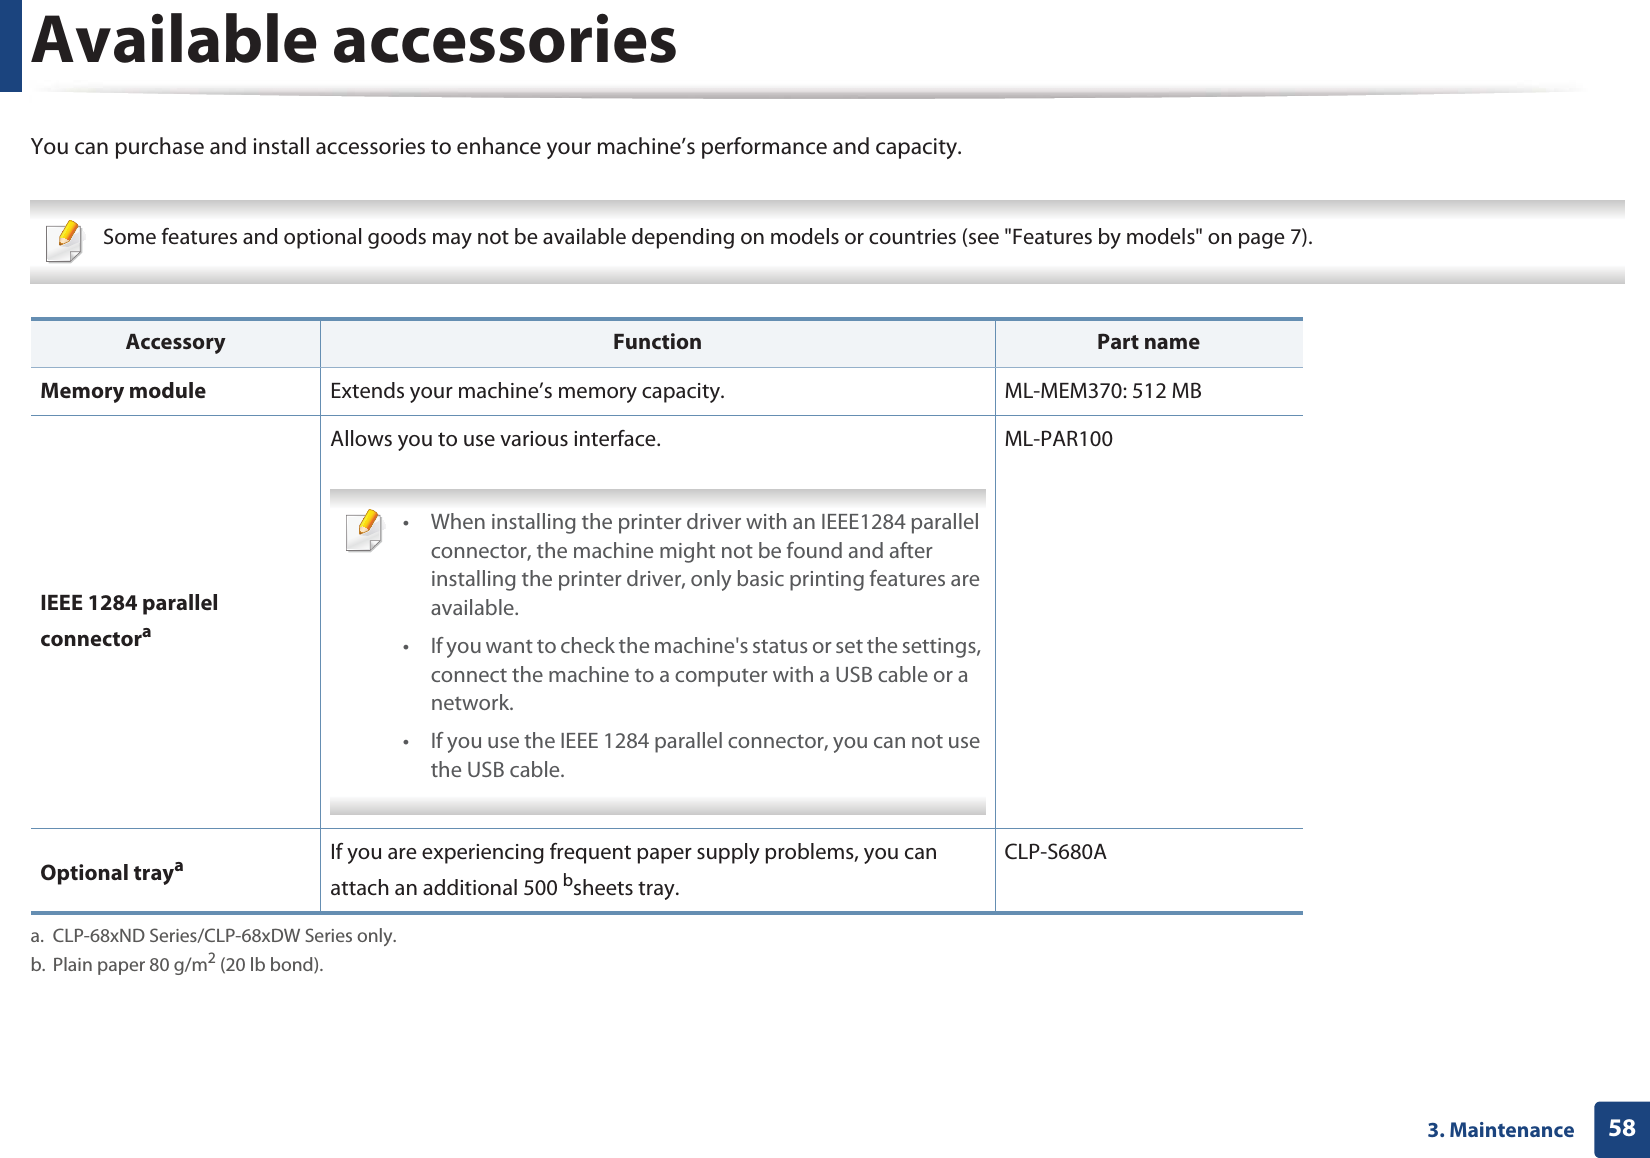
583. MaintenanceAvailable accessoriesYou can purchase and install accessories to enhance your machine’s performance and capacity. Some features and optional goods may not be available depending on models or countries (see "Features by models" on page 7).   Accessory Function Part nameMemory module Extends your machine’s memory capacity. ML-MEM370: 512 MBIEEE 1284 parallel connectoraa. CLP-68xND Series/CLP-68xDW Series only.Allows you to use various interface. • When installing the printer driver with an IEEE1284 parallel connector, the machine might not be found and after installing the printer driver, only basic printing features are available.• If you want to check the machine's status or set the settings, connect the machine to a computer with a USB cable or a network.• If you use the IEEE 1284 parallel connector, you can not use the USB cable. ML-PAR100Optional trayaIf you are experiencing frequent paper supply problems, you can attach an additional 500 bsheets tray. b. Plain paper 80 g/m2 (20 lb bond).CLP-S680A
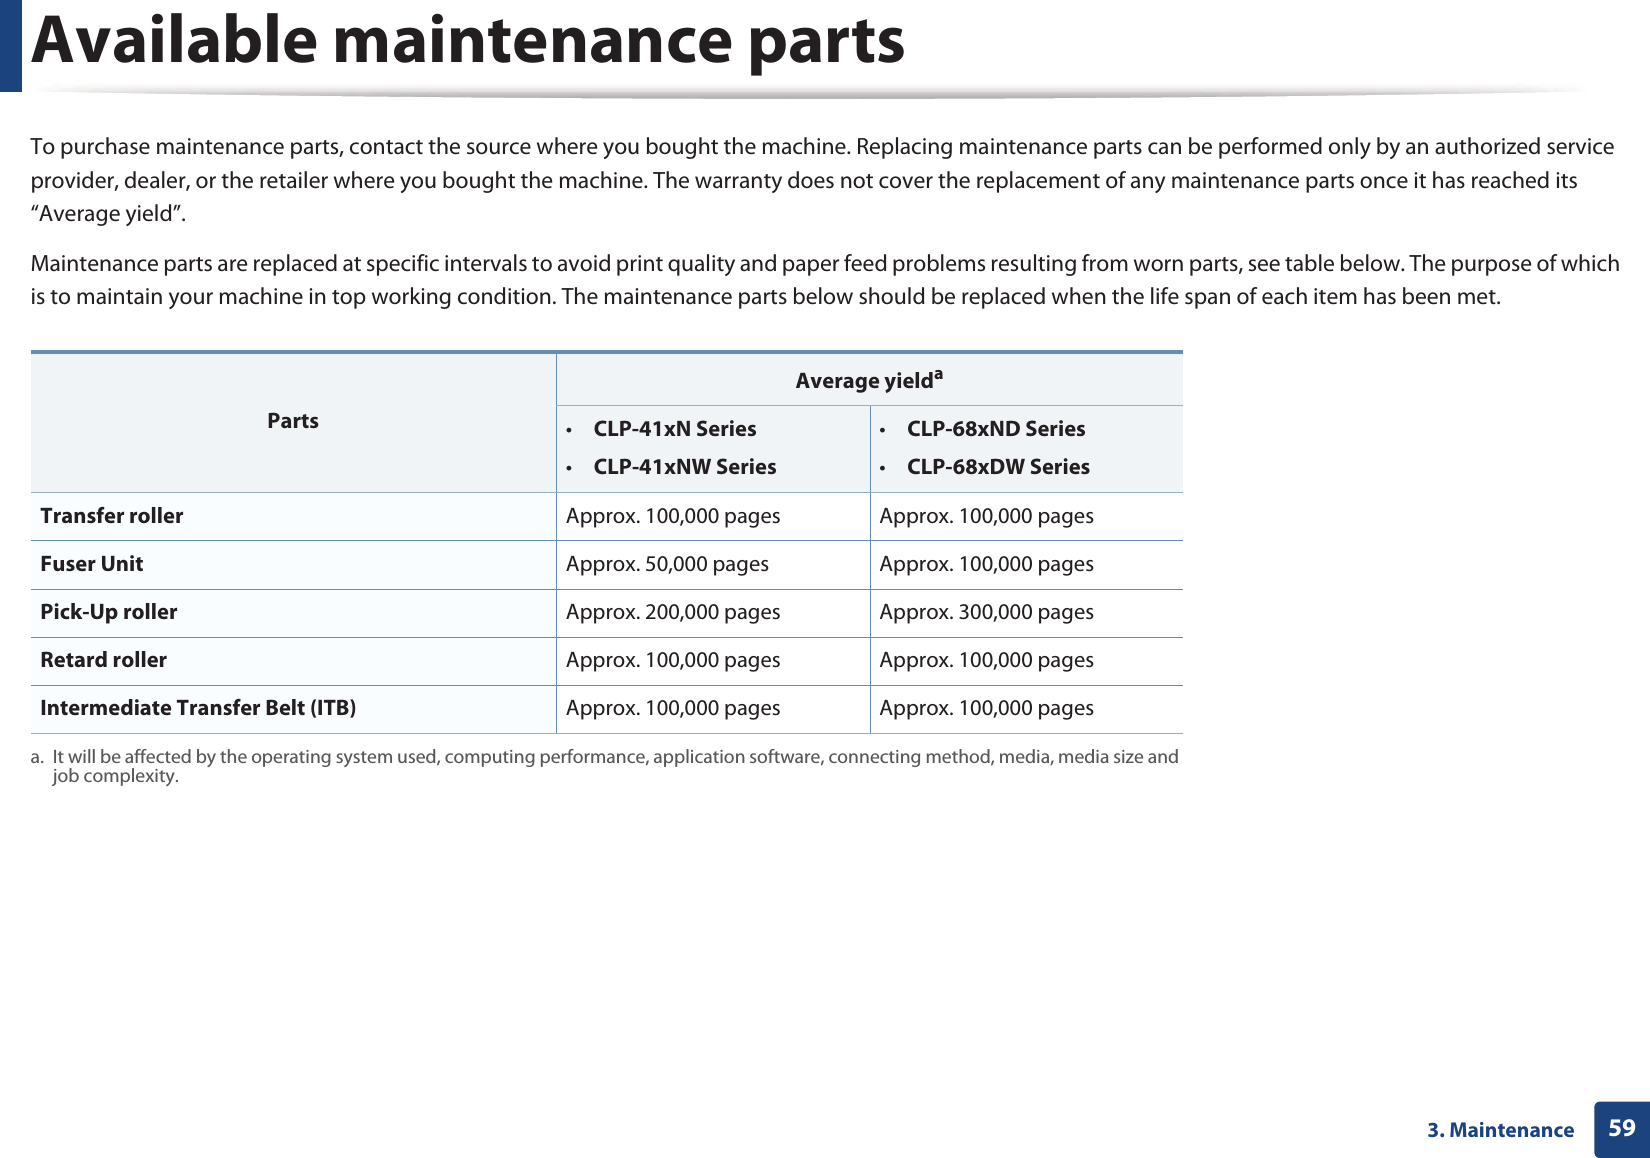
593. MaintenanceAvailable maintenance partsTo purchase maintenance parts, contact the source where you bought the machine. Replacing maintenance parts can be performed only by an authorized service provider, dealer, or the retailer where you bought the machine. The warranty does not cover the replacement of any maintenance parts once it has reached its “Average yield”.Maintenance parts are replaced at specific intervals to avoid print quality and paper feed problems resulting from worn parts, see table below. The purpose of which is to maintain your machine in top working condition. The maintenance parts below should be replaced when the life span of each item has been met.PartsAverage yieldaa. It will be affected by the operating system used, computing performance, application software, connecting method, media, media size and job complexity.•CLP-41xN Series•CLP-41xNW Series•CLP-68xND Series•CLP-68xDW SeriesTransfer roller Approx. 100,000 pages  Approx. 100,000 pages Fuser Unit Approx. 50,000 pages Approx. 100,000 pagesPick-Up roller Approx. 200,000 pages Approx. 300,000 pagesRetard roller Approx. 100,000 pages Approx. 100,000 pagesIntermediate Transfer Belt (ITB) Approx. 100,000 pages Approx. 100,000 pages
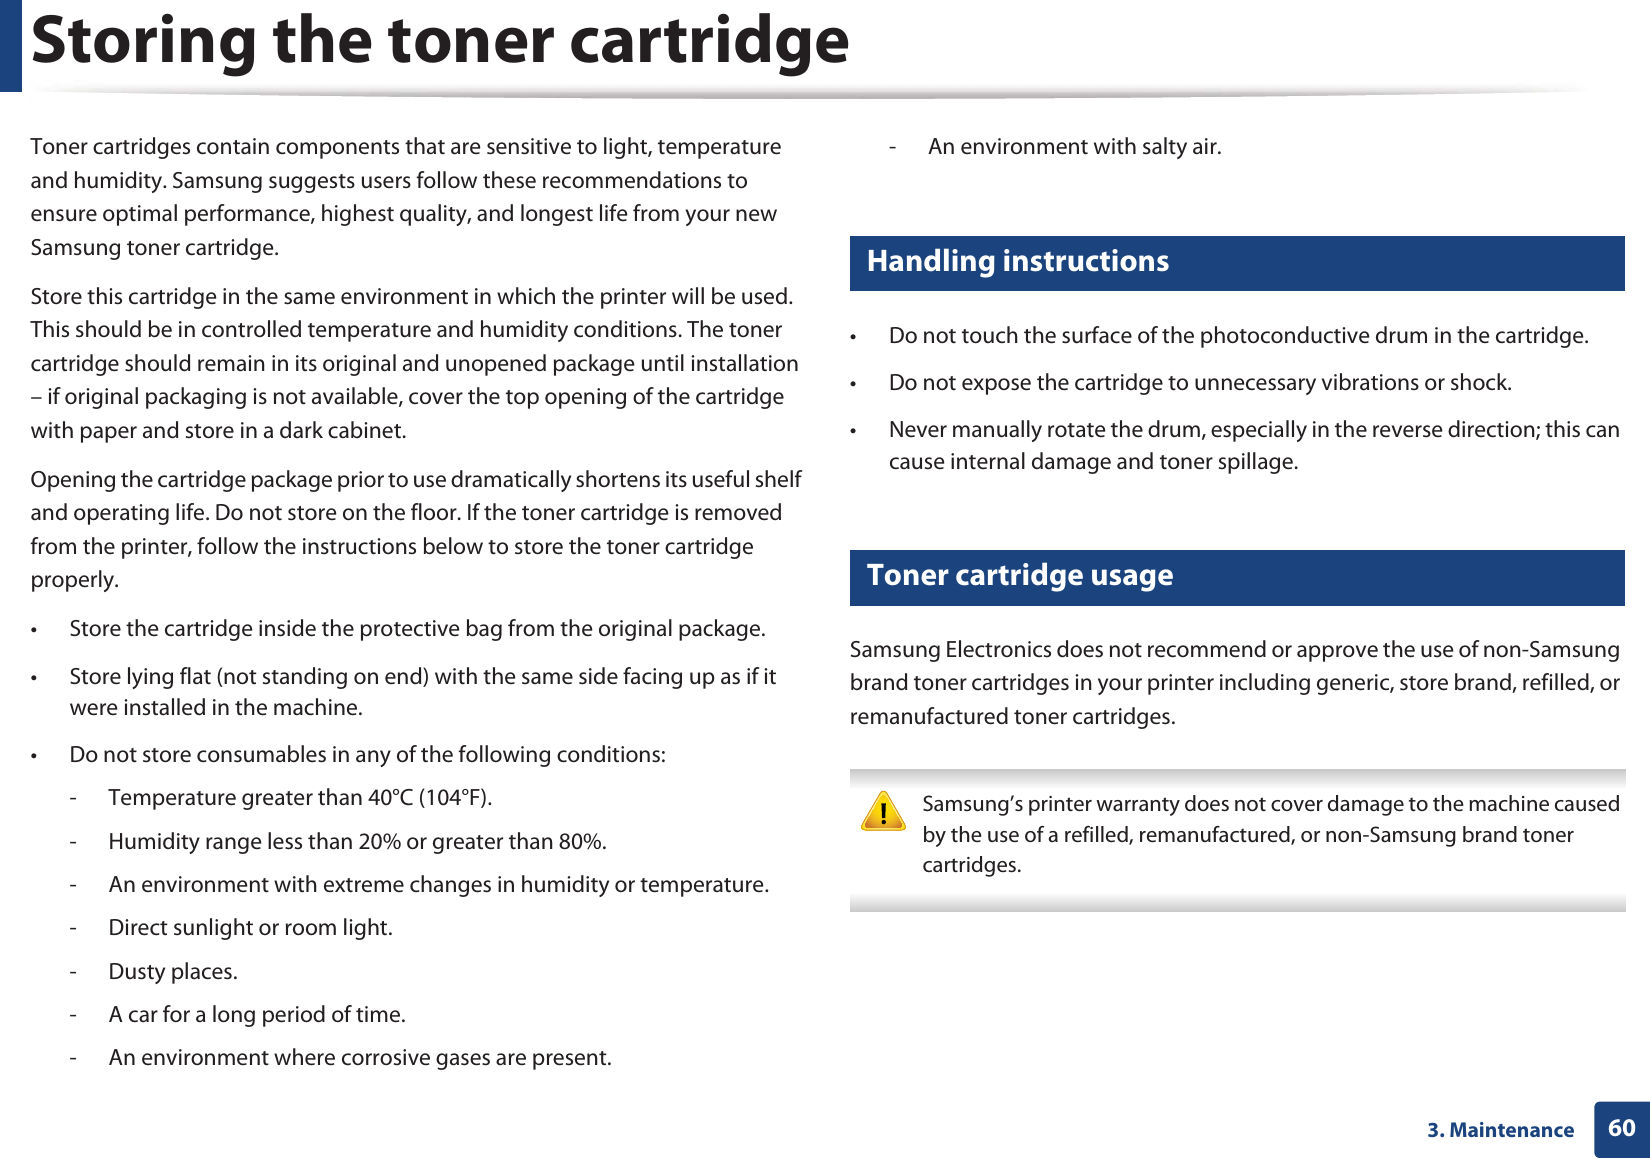
603. MaintenanceStoring the toner cartridgeToner cartridges contain components that are sensitive to light, temperature and humidity. Samsung suggests users follow these recommendations to ensure optimal performance, highest quality, and longest life from your new Samsung toner cartridge.Store this cartridge in the same environment in which the printer will be used. This should be in controlled temperature and humidity conditions. The toner cartridge should remain in its original and unopened package until installation – if original packaging is not available, cover the top opening of the cartridge with paper and store in a dark cabinet.Opening the cartridge package prior to use dramatically shortens its useful shelf and operating life. Do not store on the floor. If the toner cartridge is removed from the printer, follow the instructions below to store the toner cartridge properly.• Store the cartridge inside the protective bag from the original package. • Store lying flat (not standing on end) with the same side facing up as if it were installed in the machine.• Do not store consumables in any of the following conditions:- Temperature greater than 40°C (104°F).- Humidity range less than 20% or greater than 80%.- An environment with extreme changes in humidity or temperature.- Direct sunlight or room light.- Dusty places.- A car for a long period of time.- An environment where corrosive gases are present.- An environment with salty air.1 Handling instructions• Do not touch the surface of the photoconductive drum in the cartridge.• Do not expose the cartridge to unnecessary vibrations or shock.• Never manually rotate the drum, especially in the reverse direction; this can cause internal damage and toner spillage.2 Toner cartridge usageSamsung Electronics does not recommend or approve the use of non-Samsung brand toner cartridges in your printer including generic, store brand, refilled, or remanufactured toner cartridges. Samsung’s printer warranty does not cover damage to the machine caused by the use of a refilled, remanufactured, or non-Samsung brand toner cartridges.
Storing the toner cartridge613. Maintenance3 Estimated cartridge lifeEstimated cartridge life (the life of the toner cartridge yield) depends on the amount of toner that print jobs require. The actual print yield may vary depending on the print density of the pages you print on, operating environment, percentage of image area, printing interval, media type and/or media size. For example, if you print a lot of graphics, the consumption of the toner is higher and you may need to change the cartridge more often.
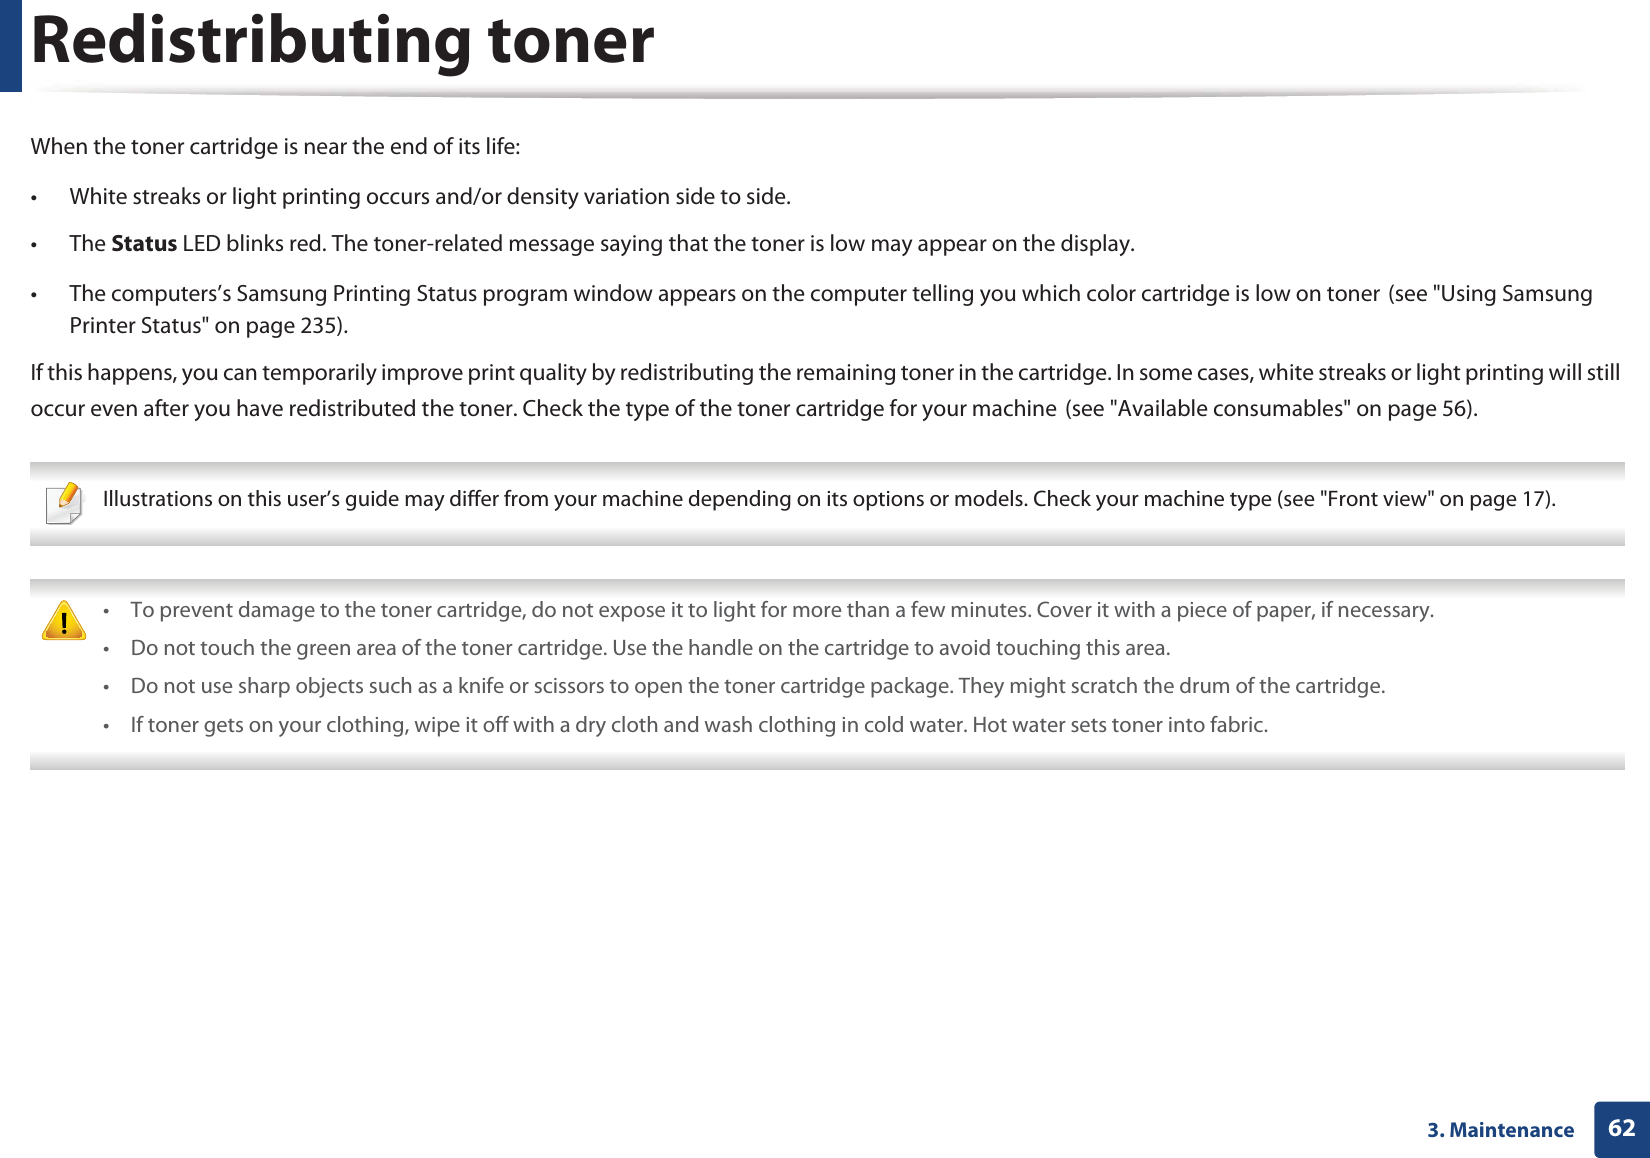
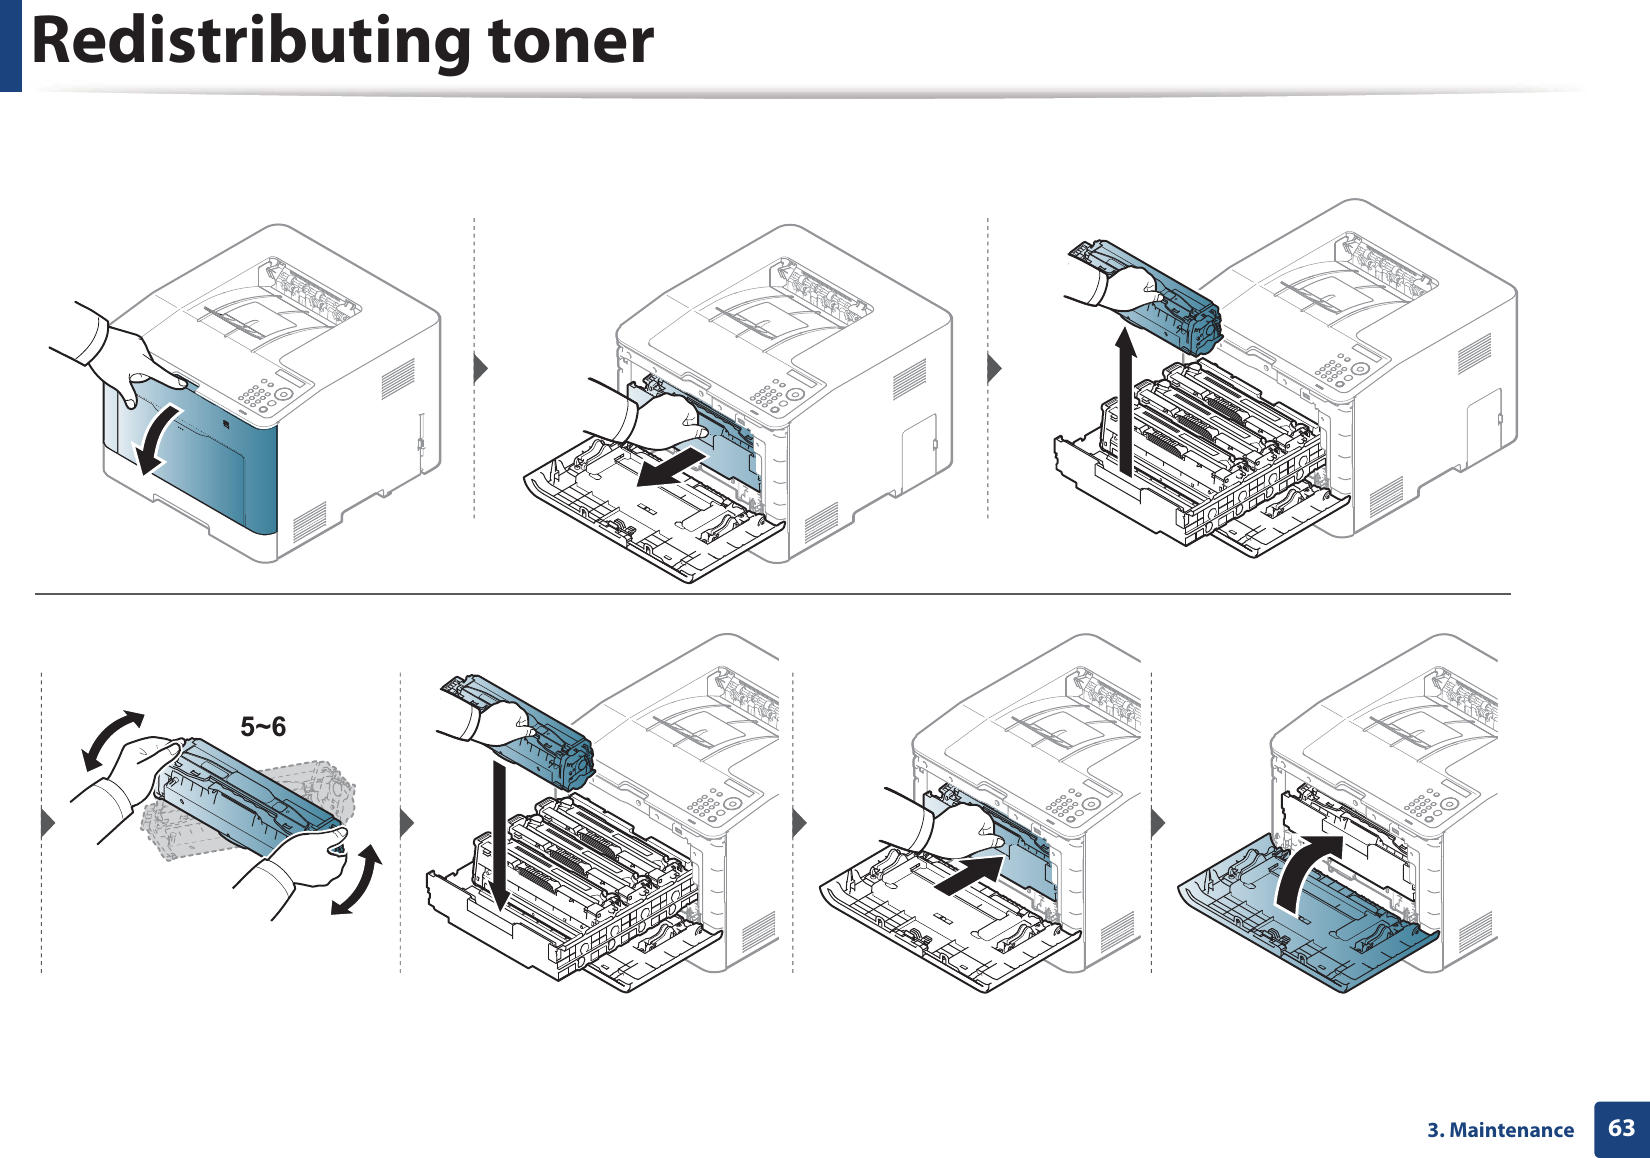
623. MaintenanceRedistributing tonerWhen the toner cartridge is near the end of its life:• White streaks or light printing occurs and/or density variation side to side. • The Status LED blinks red. The toner-related message saying that the toner is low may appear on the display.• The computers’s Samsung Printing Status program window appears on the computer telling you which color cartridge is low on tonerG(see "Using Samsung Printer Status" on page 235).If this happens, you can temporarily improve print quality by redistributing the remaining toner in the cartridge. In some cases, white streaks or light printing will still occur even after you have redistributed the toner. Check the type of the toner cartridge for your machineG(see "Available consumables" on page 56). Illustrations on this user’s guide may differ from your machine depending on its options or models. Check your machine type (see "Front view" on page 17).  • To prevent damage to the toner cartridge, do not expose it to light for more than a few minutes. Cover it with a piece of paper, if necessary. • Do not touch the green area of the toner cartridge. Use the handle on the cartridge to avoid touching this area. • Do not use sharp objects such as a knife or scissors to open the toner cartridge package. They might scratch the drum of the cartridge.• If toner gets on your clothing, wipe it off with a dry cloth and wash clothing in cold water. Hot water sets toner into fabric.
Redistributing toner633. Maintenance5~6
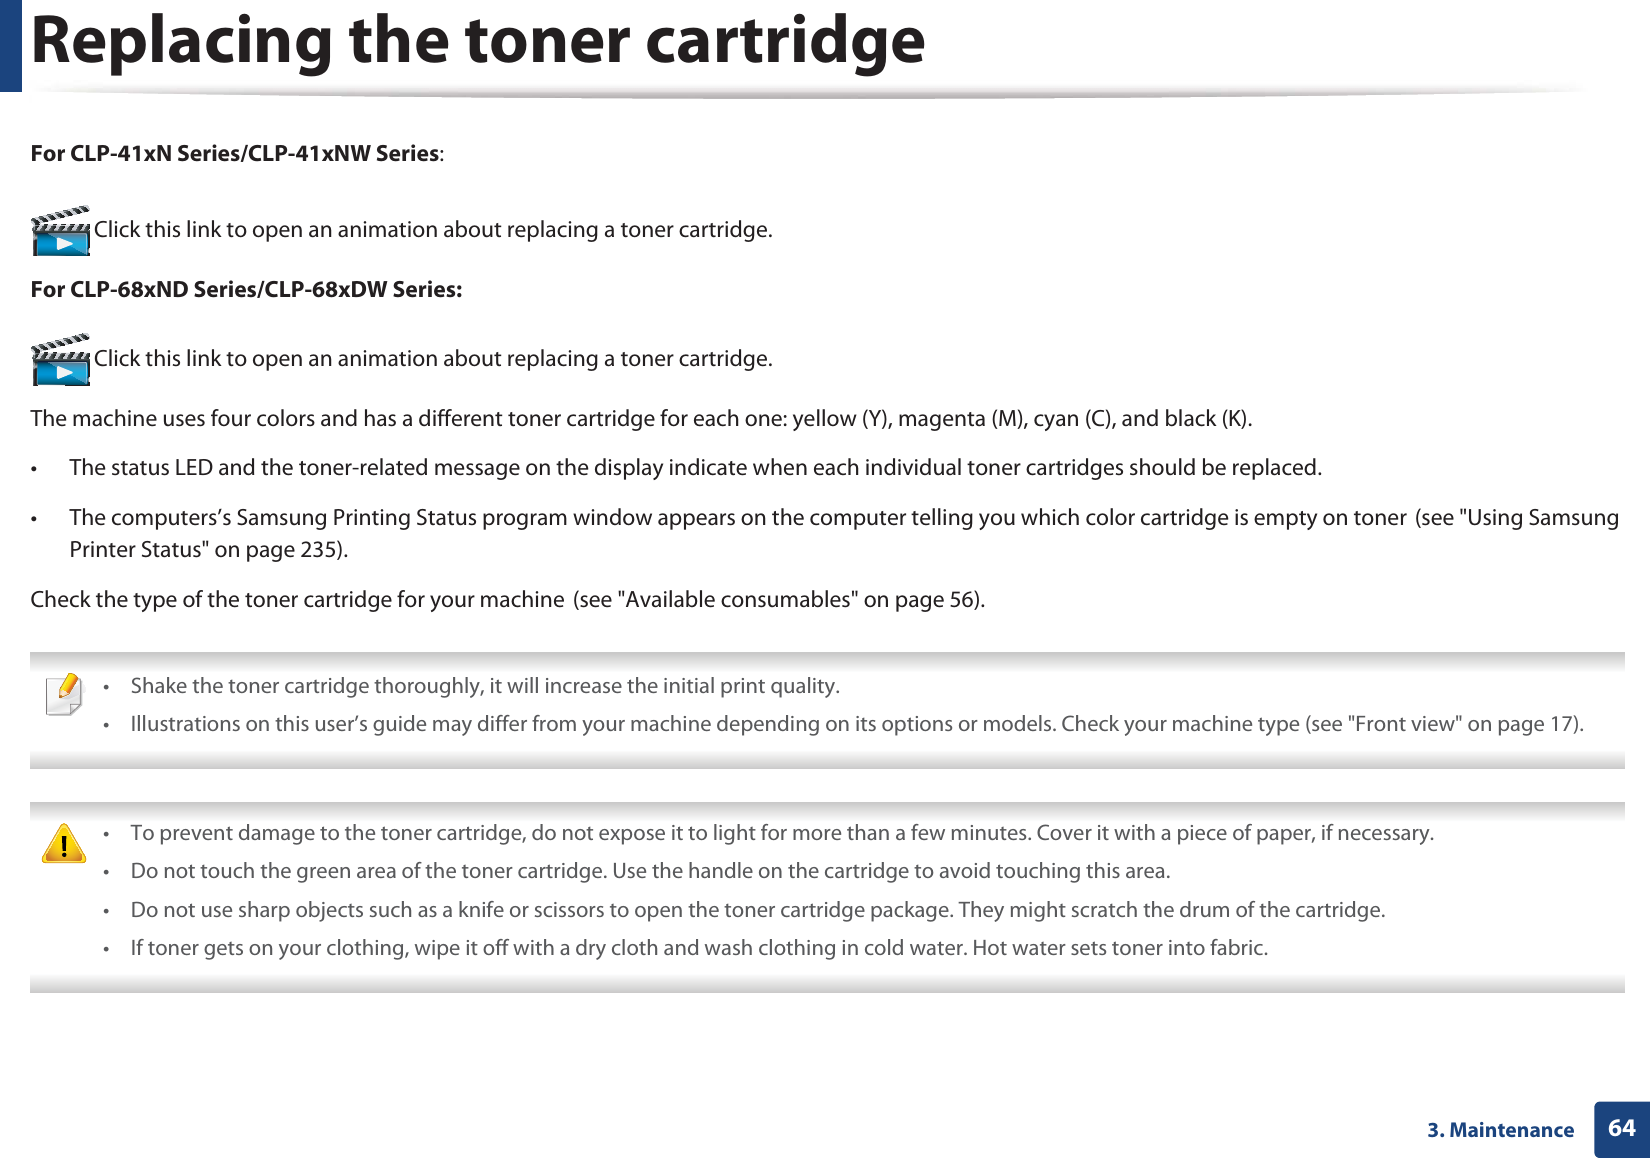
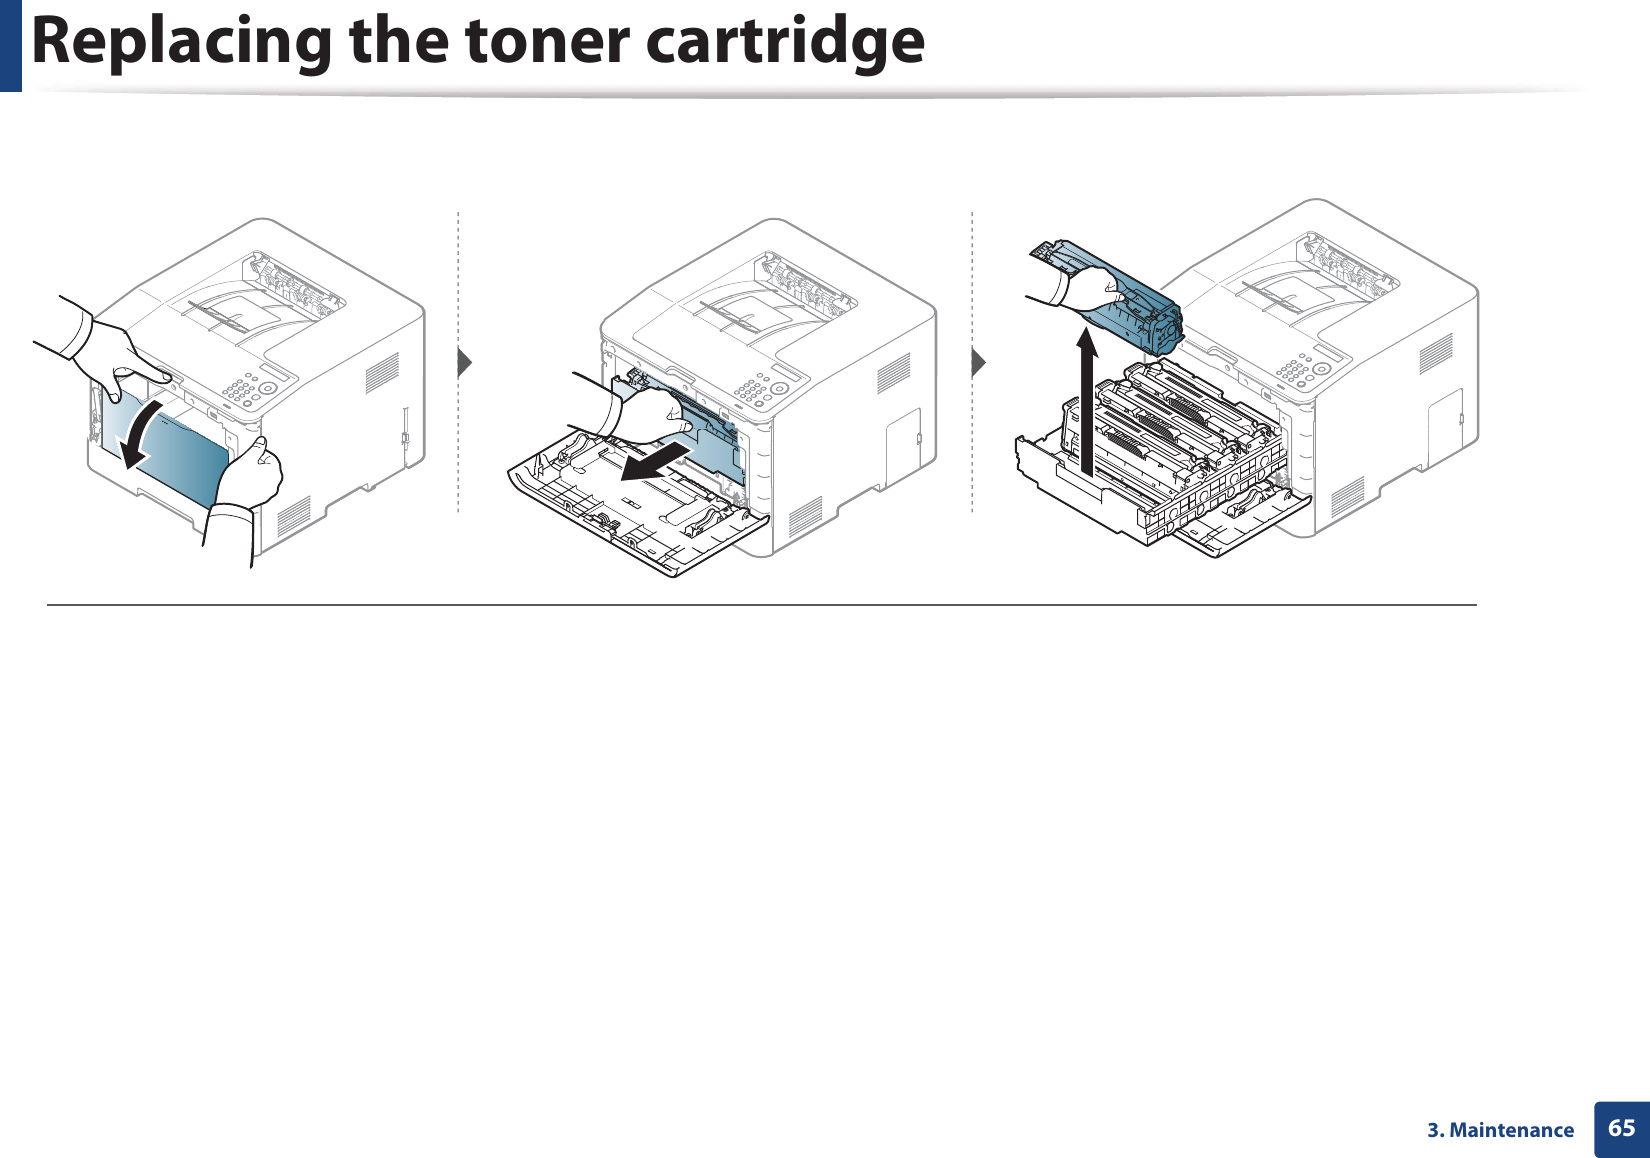
643. MaintenanceReplacing the toner cartridgeFor CLP-41xN Series/CLP-41xNW Series: Click this link to open an animation about replacing a toner cartridge.For CLP-68xND Series/CLP-68xDW Series:  Click this link to open an animation about replacing a toner cartridge.The machine uses four colors and has a different toner cartridge for each one: yellow (Y), magenta (M), cyan (C), and black (K).• The status LED and the toner-related message on the display indicate when each individual toner cartridges should be replaced. • The computers’s Samsung Printing Status program window appears on the computer telling you which color cartridge is empty on tonerG(see "Using Samsung Printer Status" on page 235).Check the type of the toner cartridge for your machineG(see "Available consumables" on page 56). • Shake the toner cartridge thoroughly, it will increase the initial print quality.• Illustrations on this user’s guide may differ from your machine depending on its options or models. Check your machine type (see "Front view" on page 17).  • To prevent damage to the toner cartridge, do not expose it to light for more than a few minutes. Cover it with a piece of paper, if necessary. • Do not touch the green area of the toner cartridge. Use the handle on the cartridge to avoid touching this area. • Do not use sharp objects such as a knife or scissors to open the toner cartridge package. They might scratch the drum of the cartridge.• If toner gets on your clothing, wipe it off with a dry cloth and wash clothing in cold water. Hot water sets toner into fabric.
Replacing the toner cartridge653. Maintenance

Navigation menu