Samsung Electronics Co CLP415NW Laser Multi-funtion Printer User Manual Rousseau Klimt english1
Samsung Electronics Co Ltd Laser Multi-funtion Printer Rousseau Klimt english1
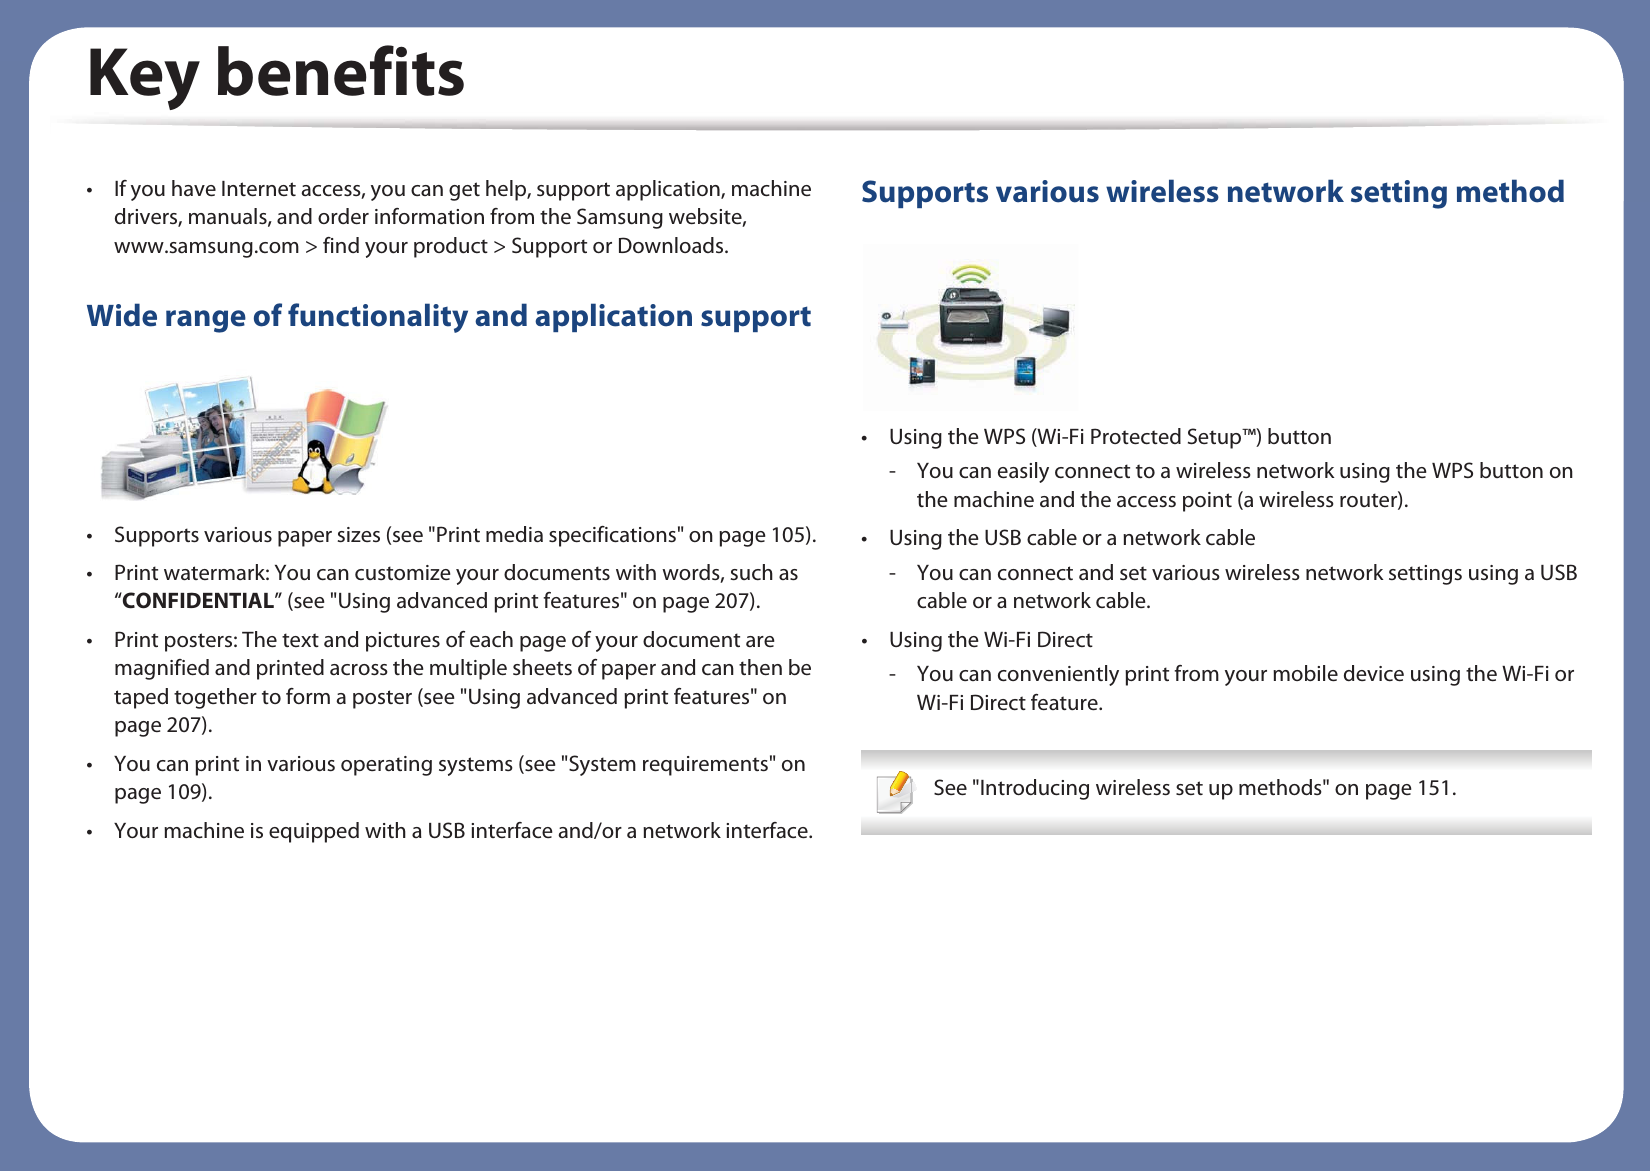
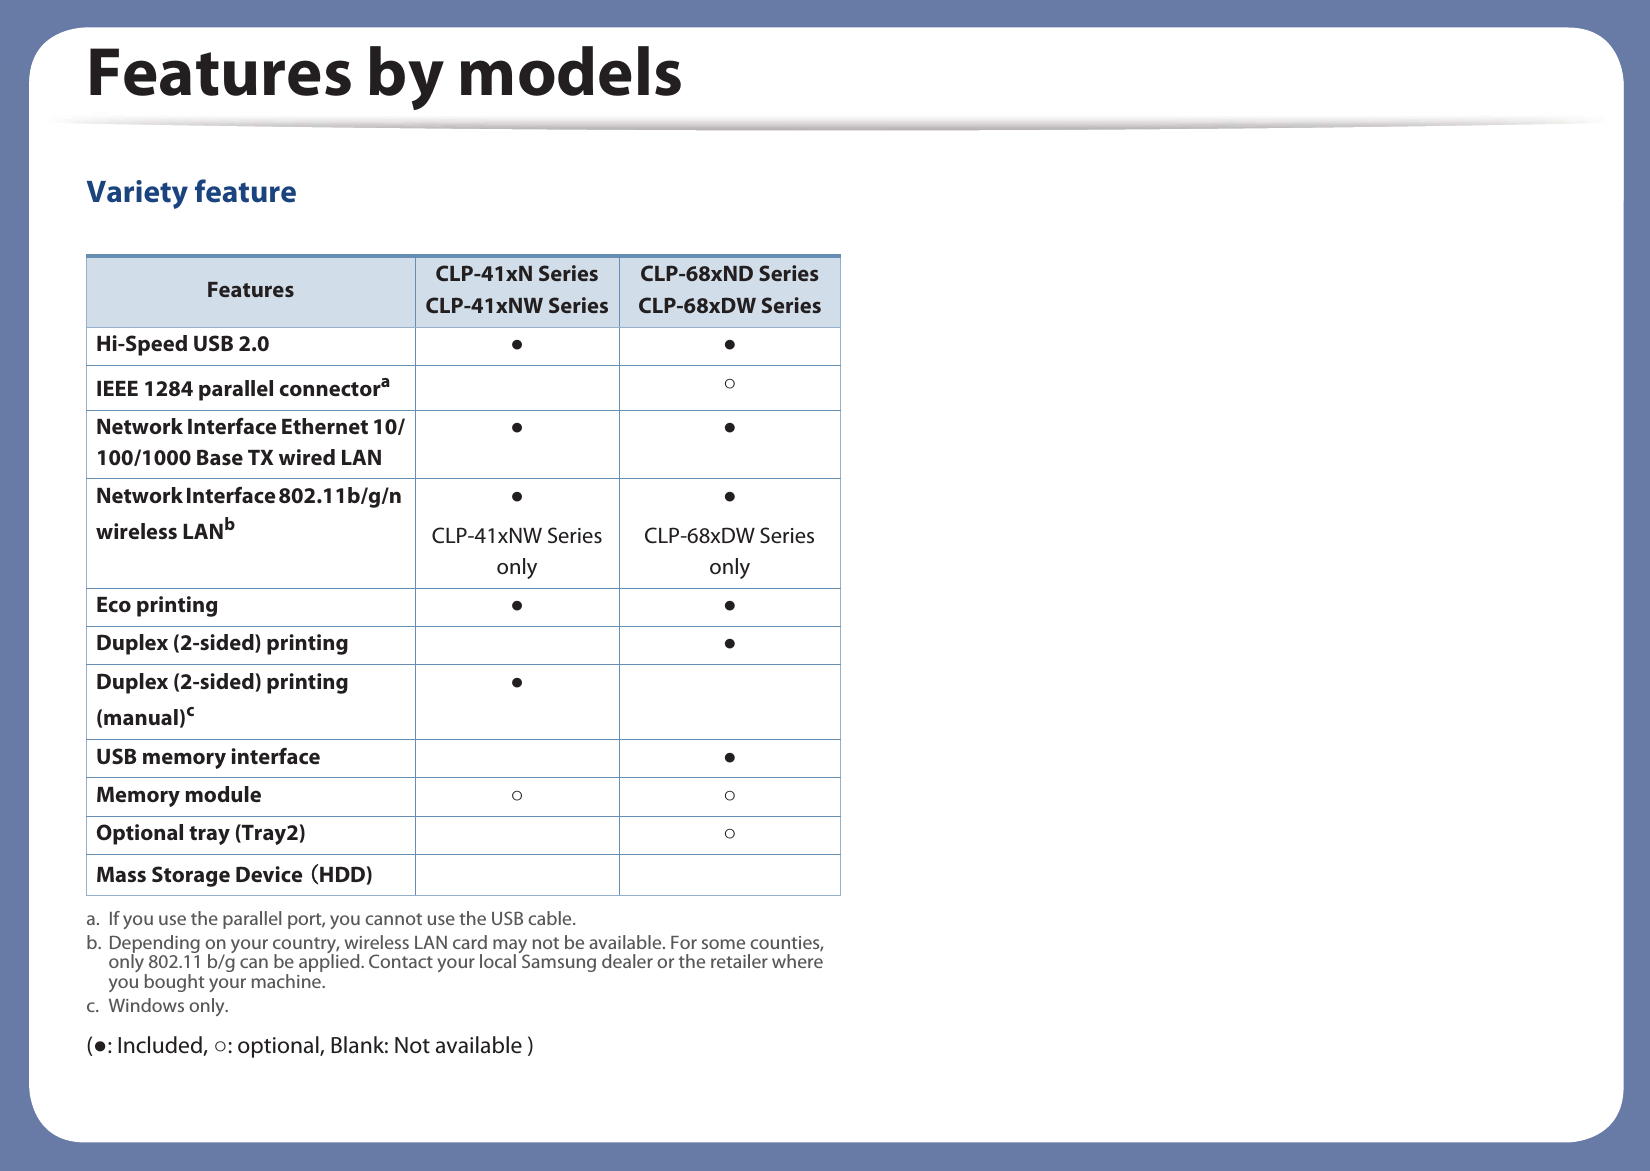
Contents
- 1. Users Manual 1
- 2. Users Manual 2
- 3. Users Manual 3
- 4. Users Manual 4
- 5. Users Manual 5
Users Manual 1


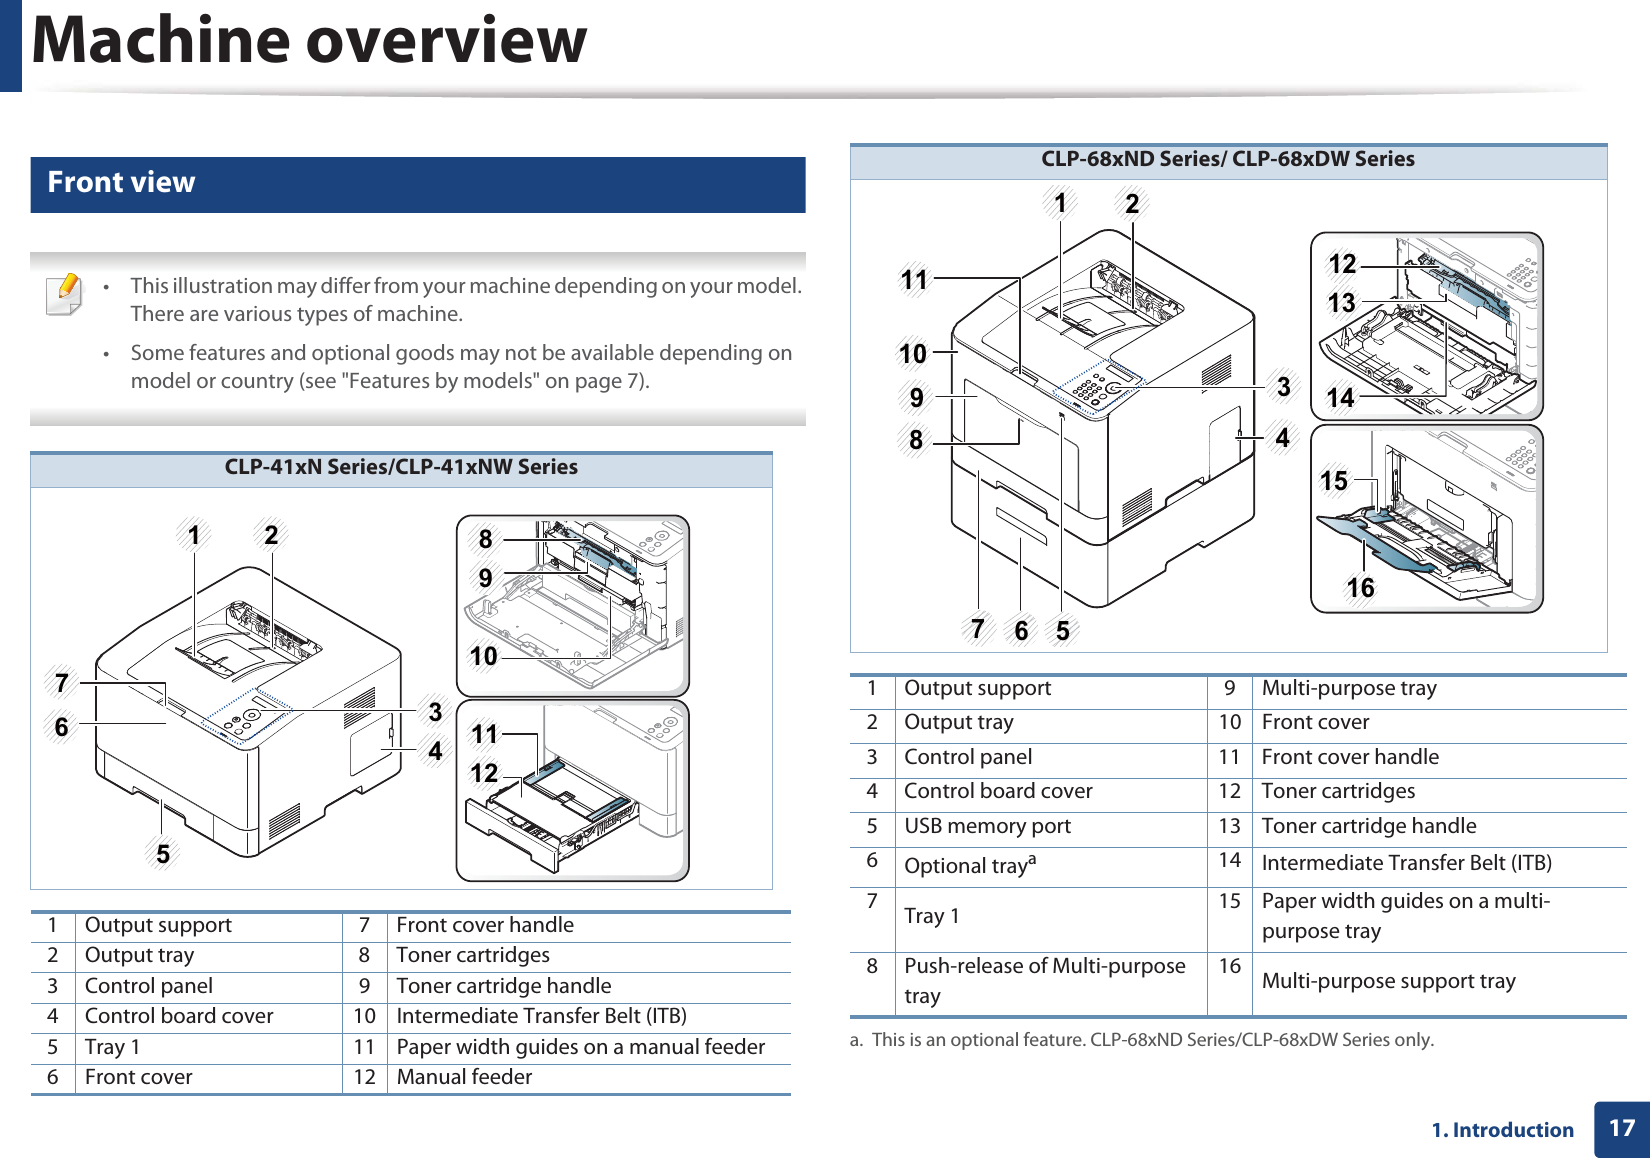
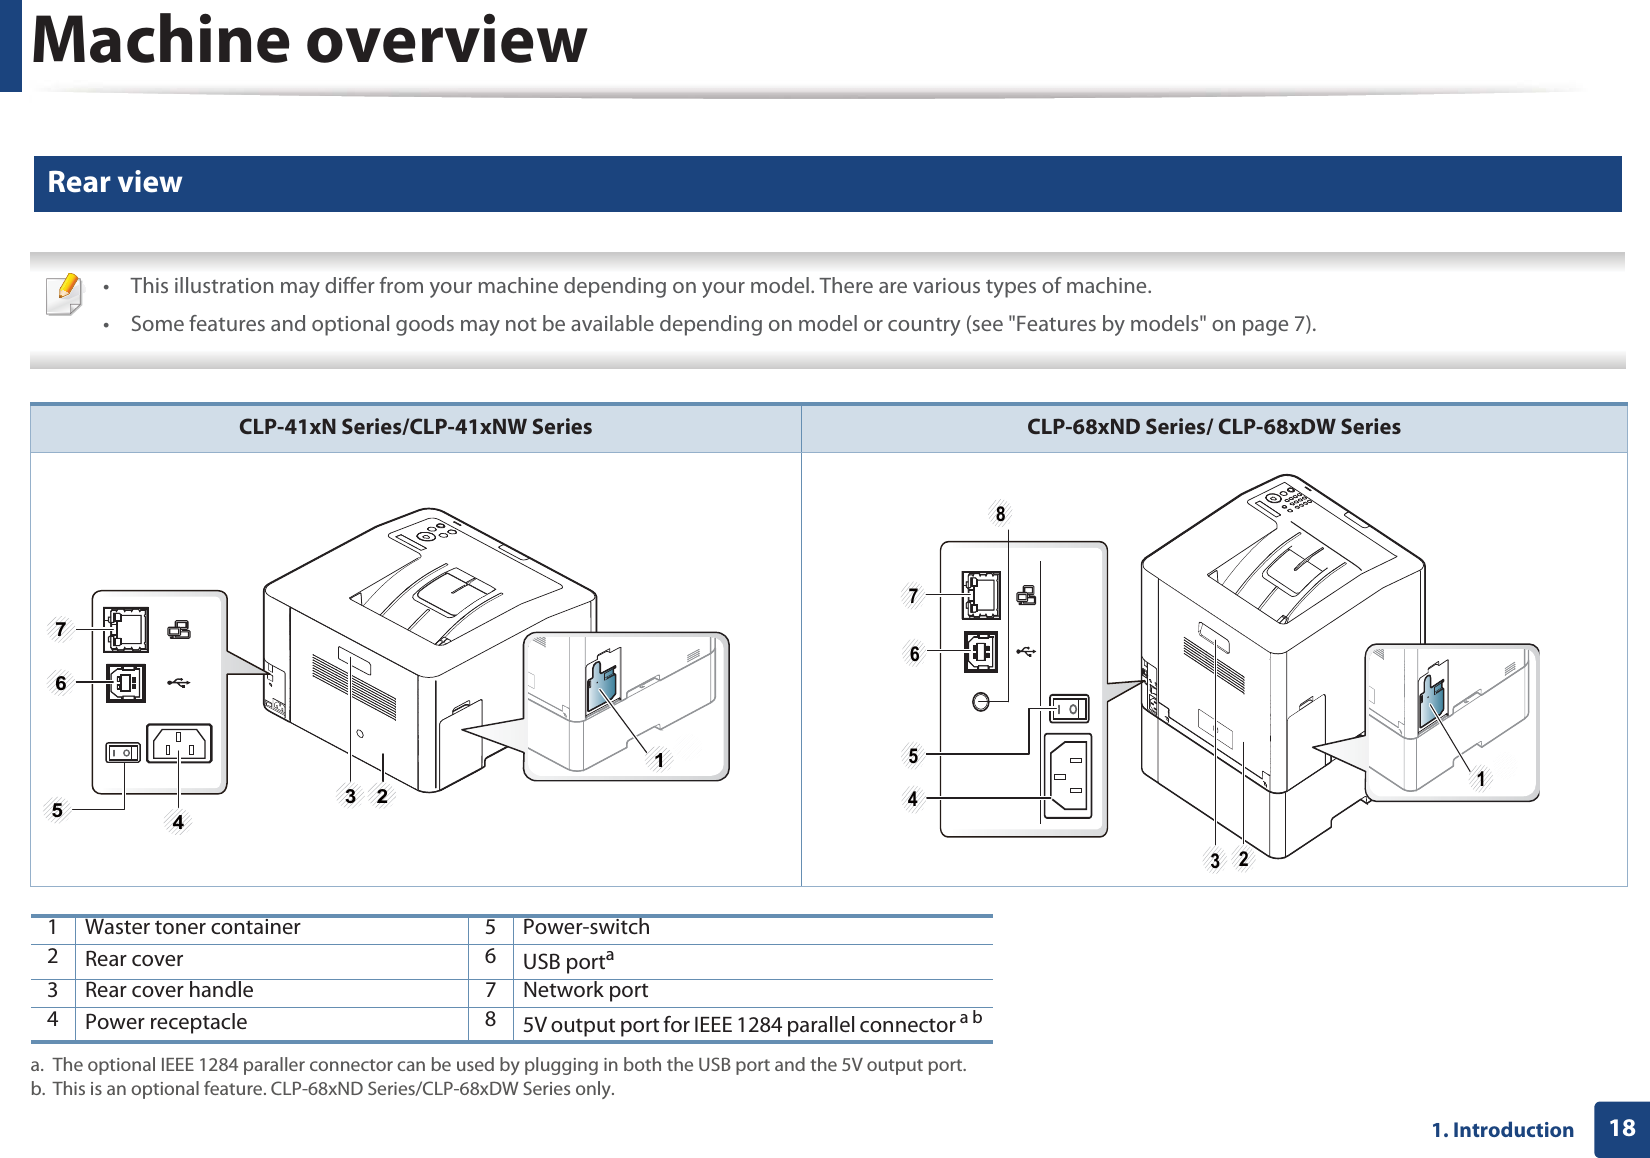


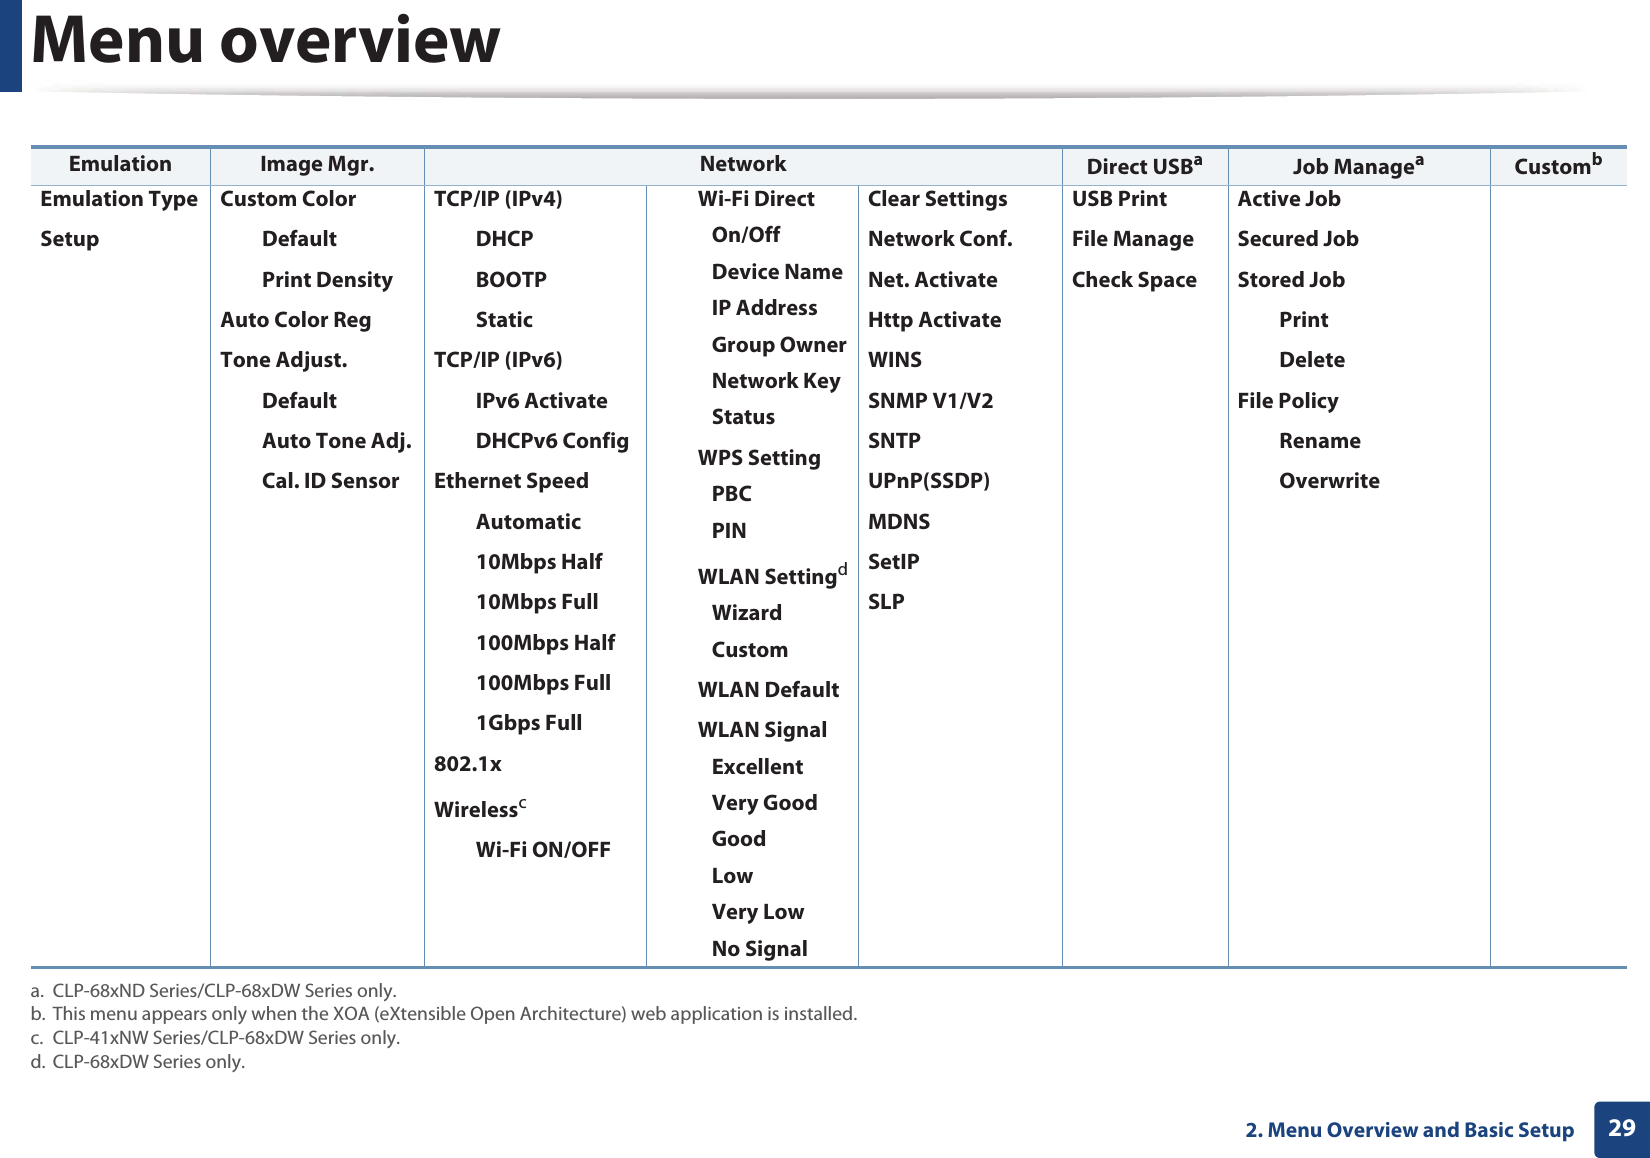
![Menu overview282. Menu Overview and Basic Setup Information Layout Paper Graphic System SetupMenu MapConfigurationSupplies Info.Demo PagePCL FontPS FontUsage CounterAccountOrientationPortraitLandscapeMarginaCommon MarginMP Tray<Tray X>Emulation Mar.MarginbCommon MarginManual FeederEmulation Mar.DuplexaOffLong EdgeShort Edgea. CLP-68xND Series/CLP-68xDW Series only.b. CLP-41xN Series/CLP-41xNW Series only.CopiesMP Tray/ [Tray <x>]Paper SizePaper TypePaper SourceTray 1Tray 2aMP TrayaManual FeederbAutoResolutionNormalBestClear TextOffMinimumNormalMaximumEdge EnhanceOffNormalMaximumTrappingOffNormalMaximumScreenNormalEnhancedDetailedDate & TimeaClock ModeaLanguagePower SaveWakeup EventButton PressPrinterUSB HostaJob TimeoutImport SettingaExport SettingaAltitude Adj.NormalHigh 1High 2High 3Auto ContinueAuto CRAuto Tray Swi.aPaper SubstitUTray ProtectaSkip BlankPageMaintenanceCLR Empty Msg.cSupplies LifeTonerLow AlertEco SetupDefault ModeChange Temp.Clear Settingc. This option only appears when small amount of toner is left in the cartridge.](https://usermanual.wiki/Samsung-Electronics-Co/CLP415NW.Users-Manual-1/User-Guide-1682217-Page-28.png)