Samsung Electronics Co HMX-S16BN DIGITAL CAMCORDER User Manual HMX S10N ENG IB indb
Samsung Electronics Co Ltd DIGITAL CAMCORDER HMX S10N ENG IB indb
Contents
- 1. User manual 1 of 5
- 2. User manual 2 of 5
- 3. User manual 3 of 5
- 4. User manual 4 of 5
- 5. User manual 5 of 5
User manual 4 of 5
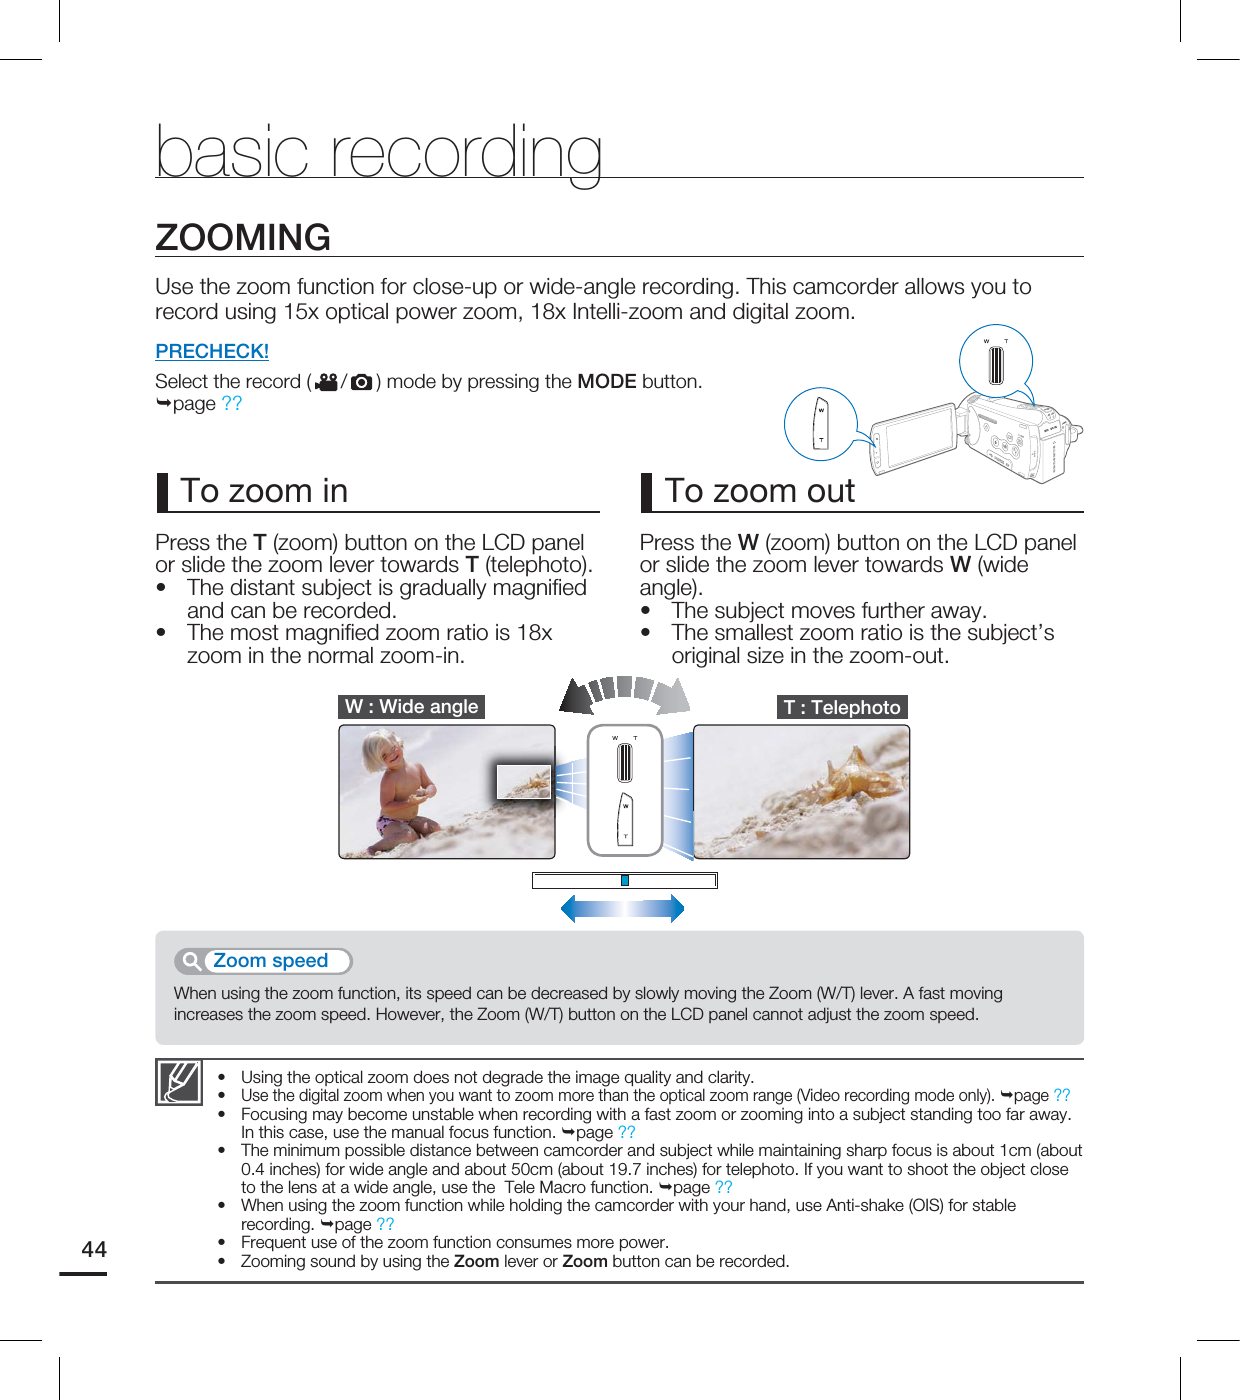
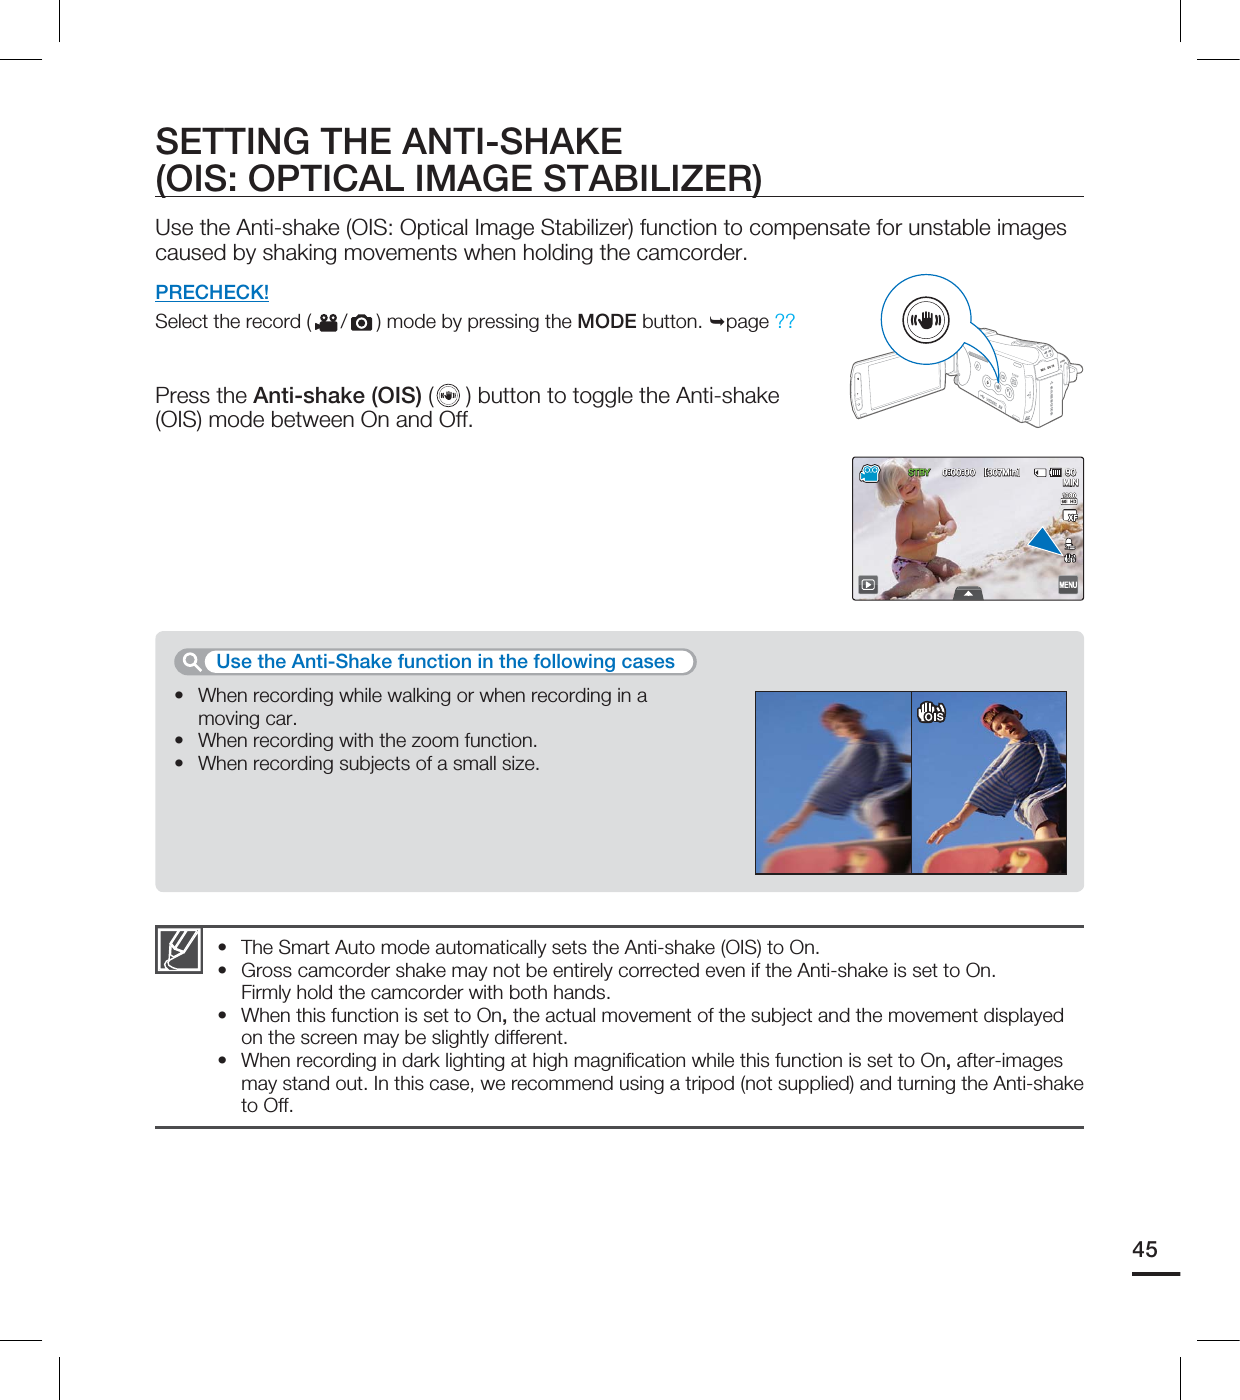

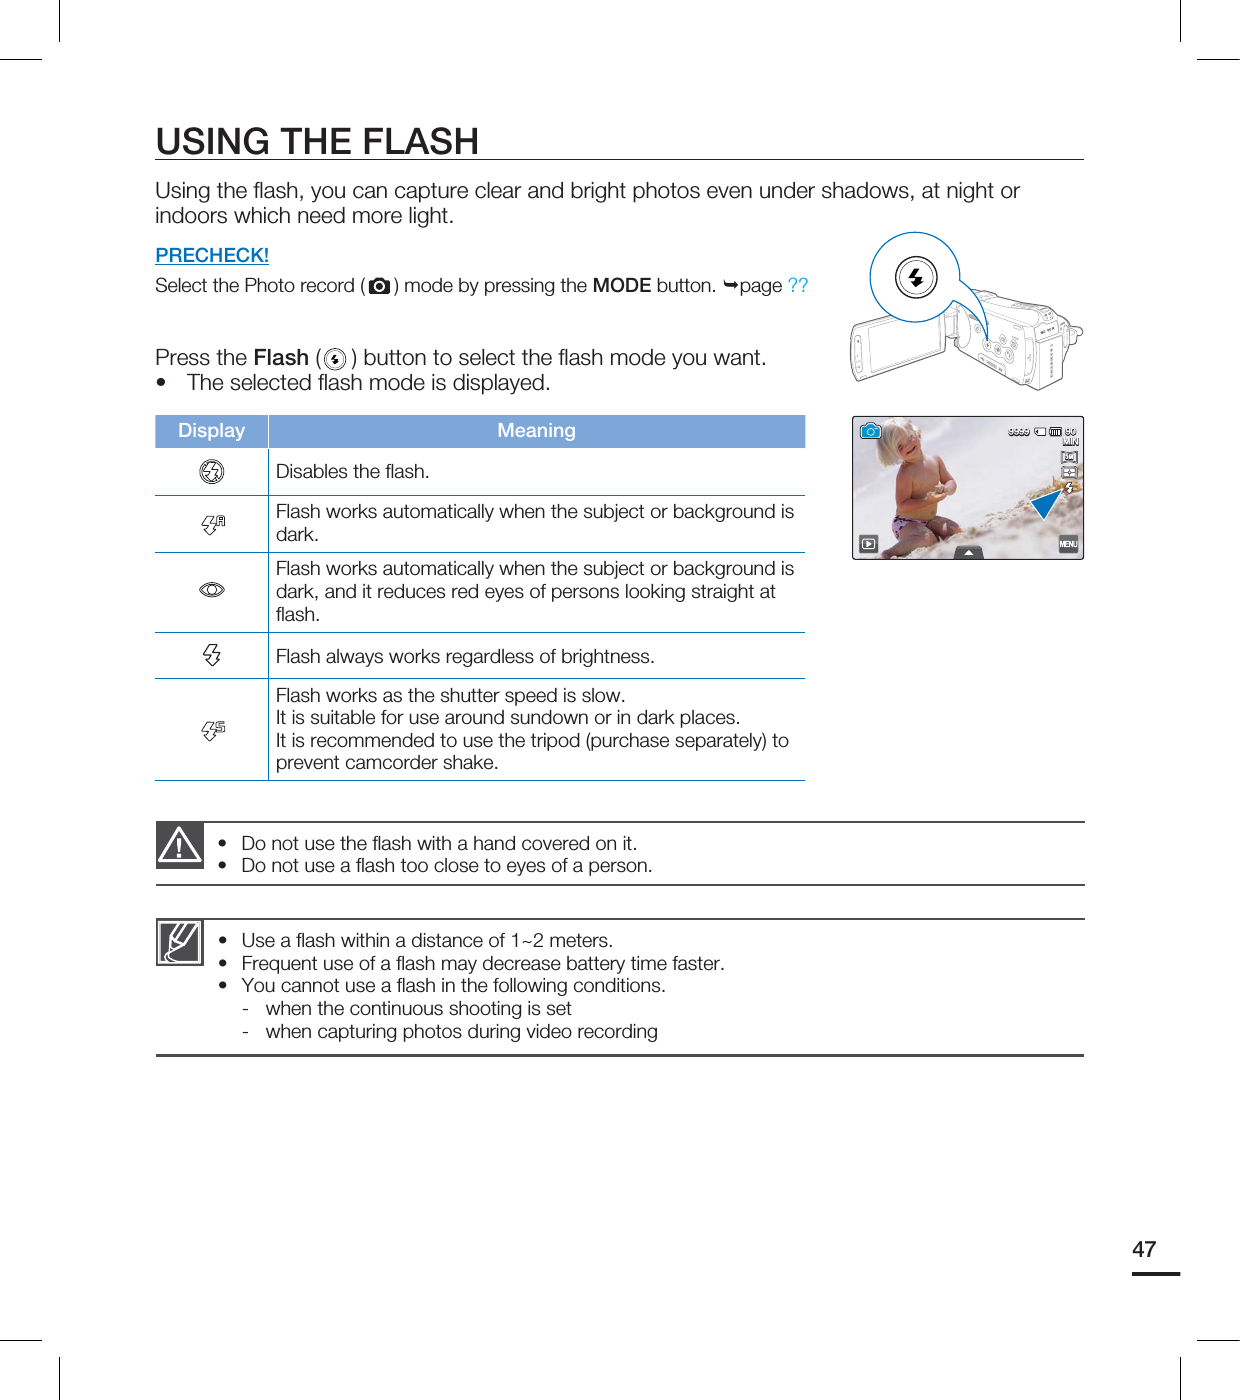
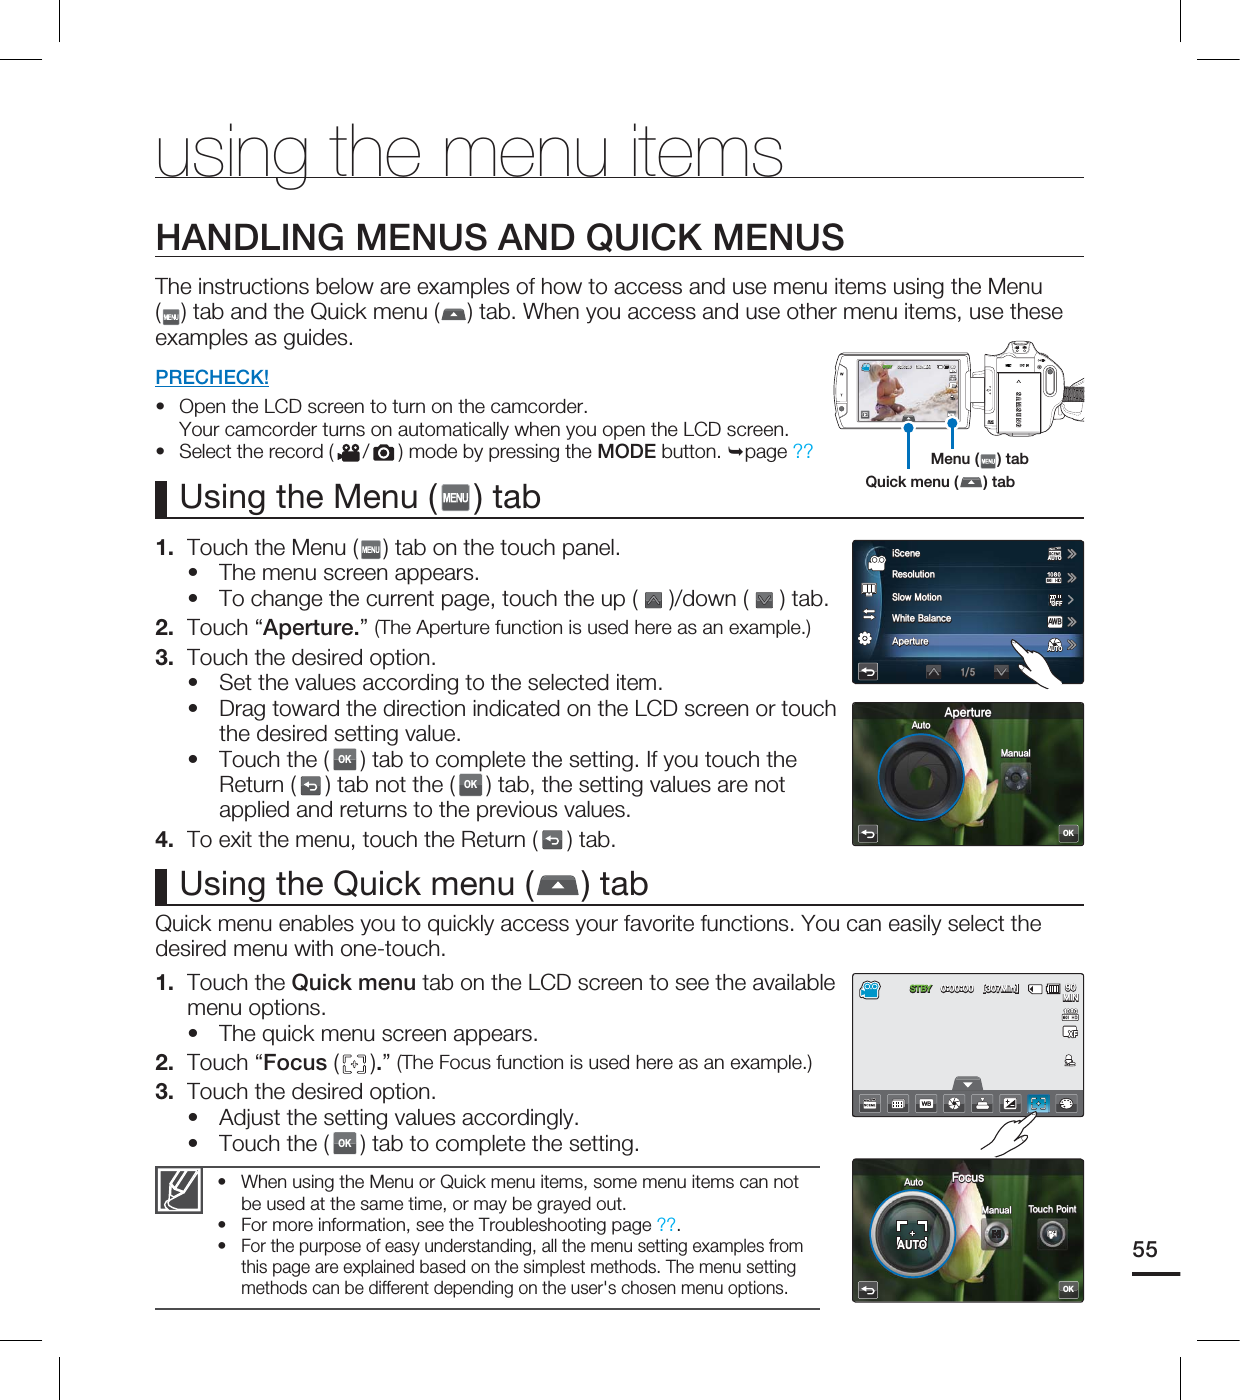
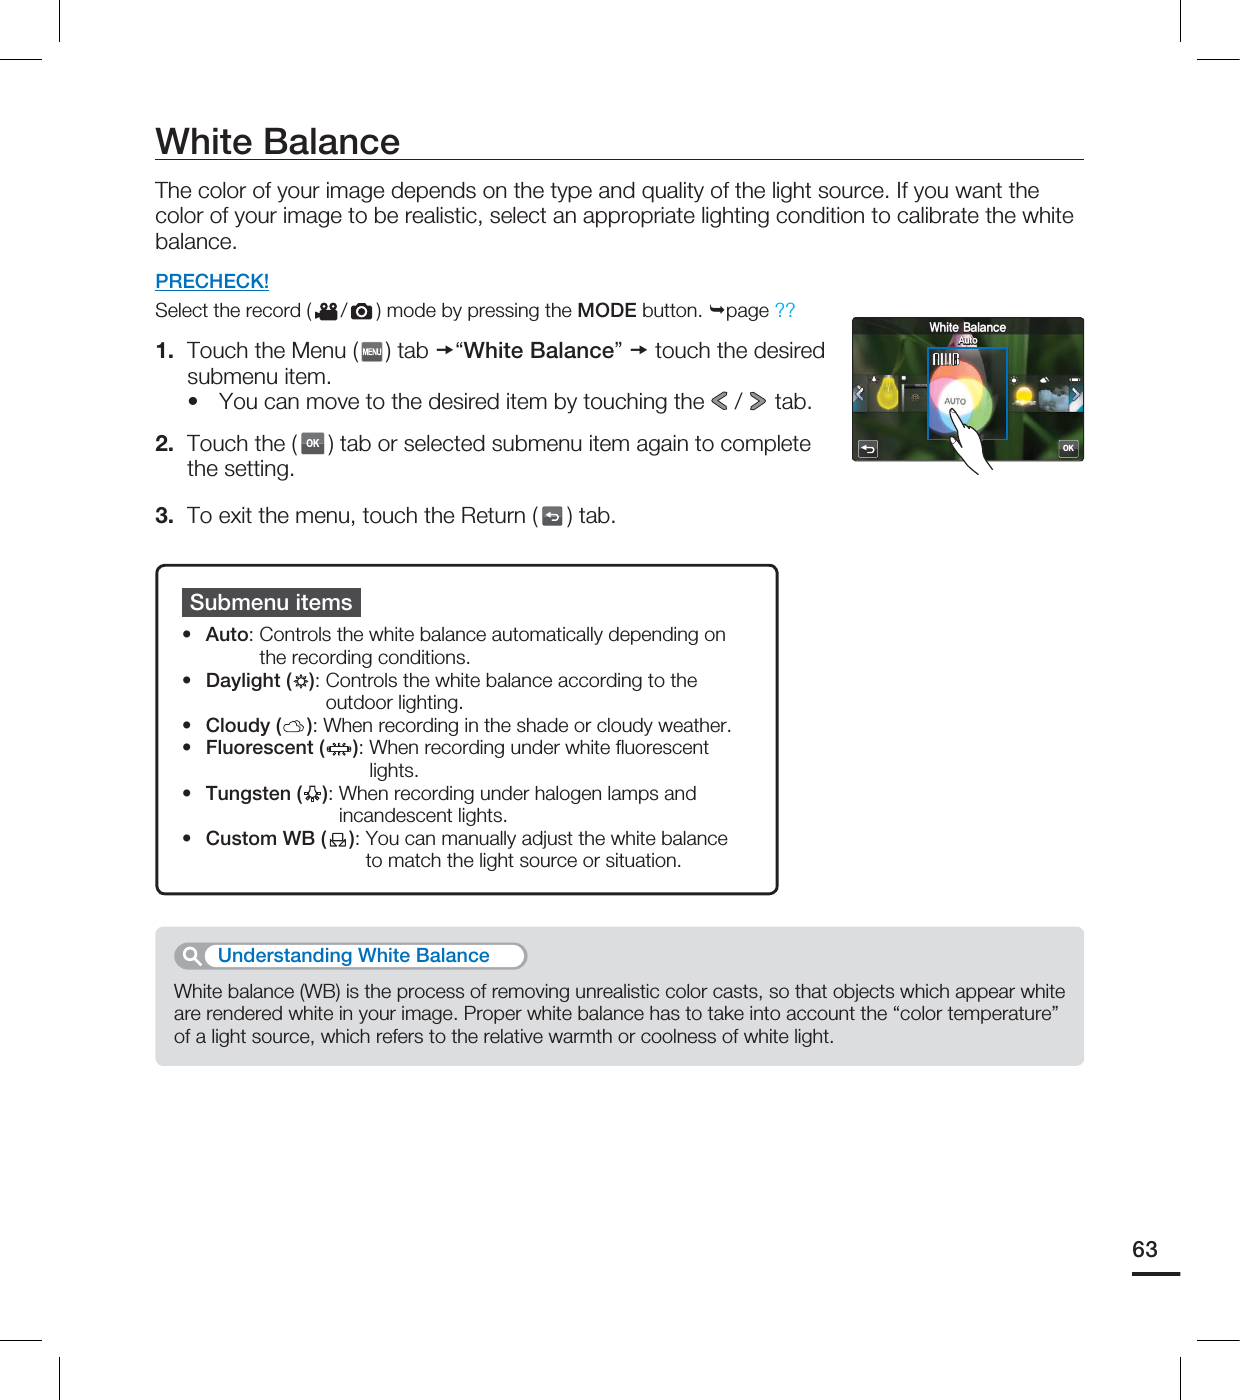
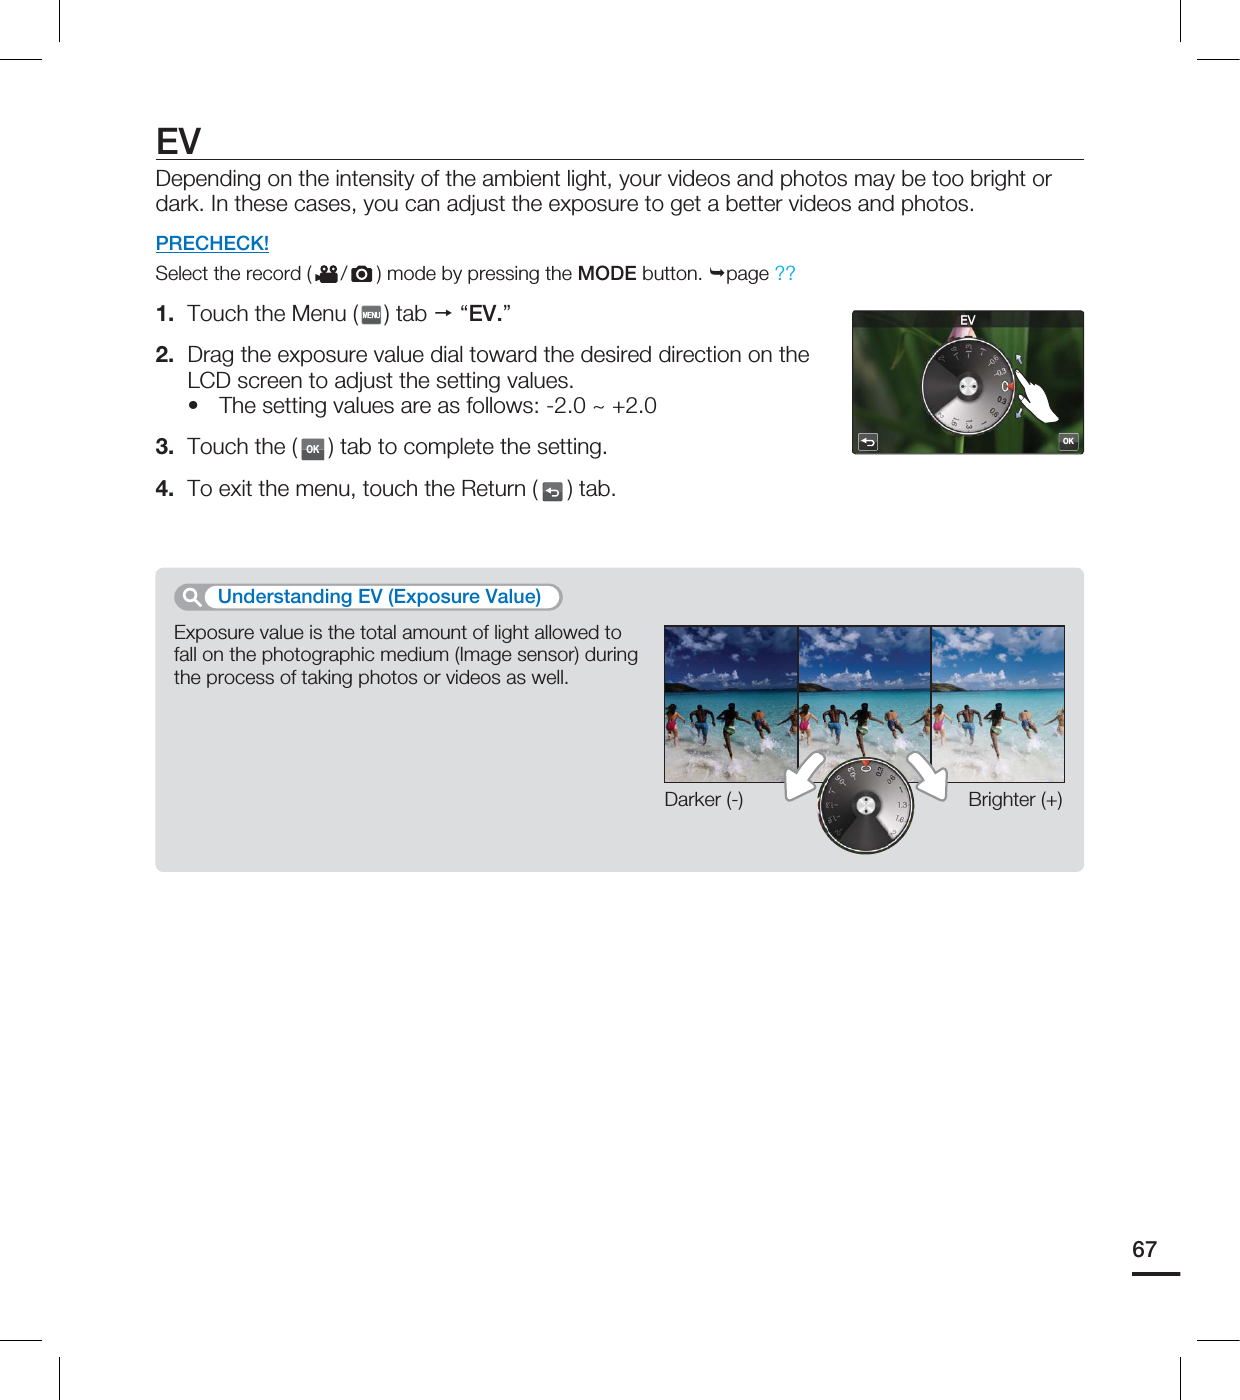
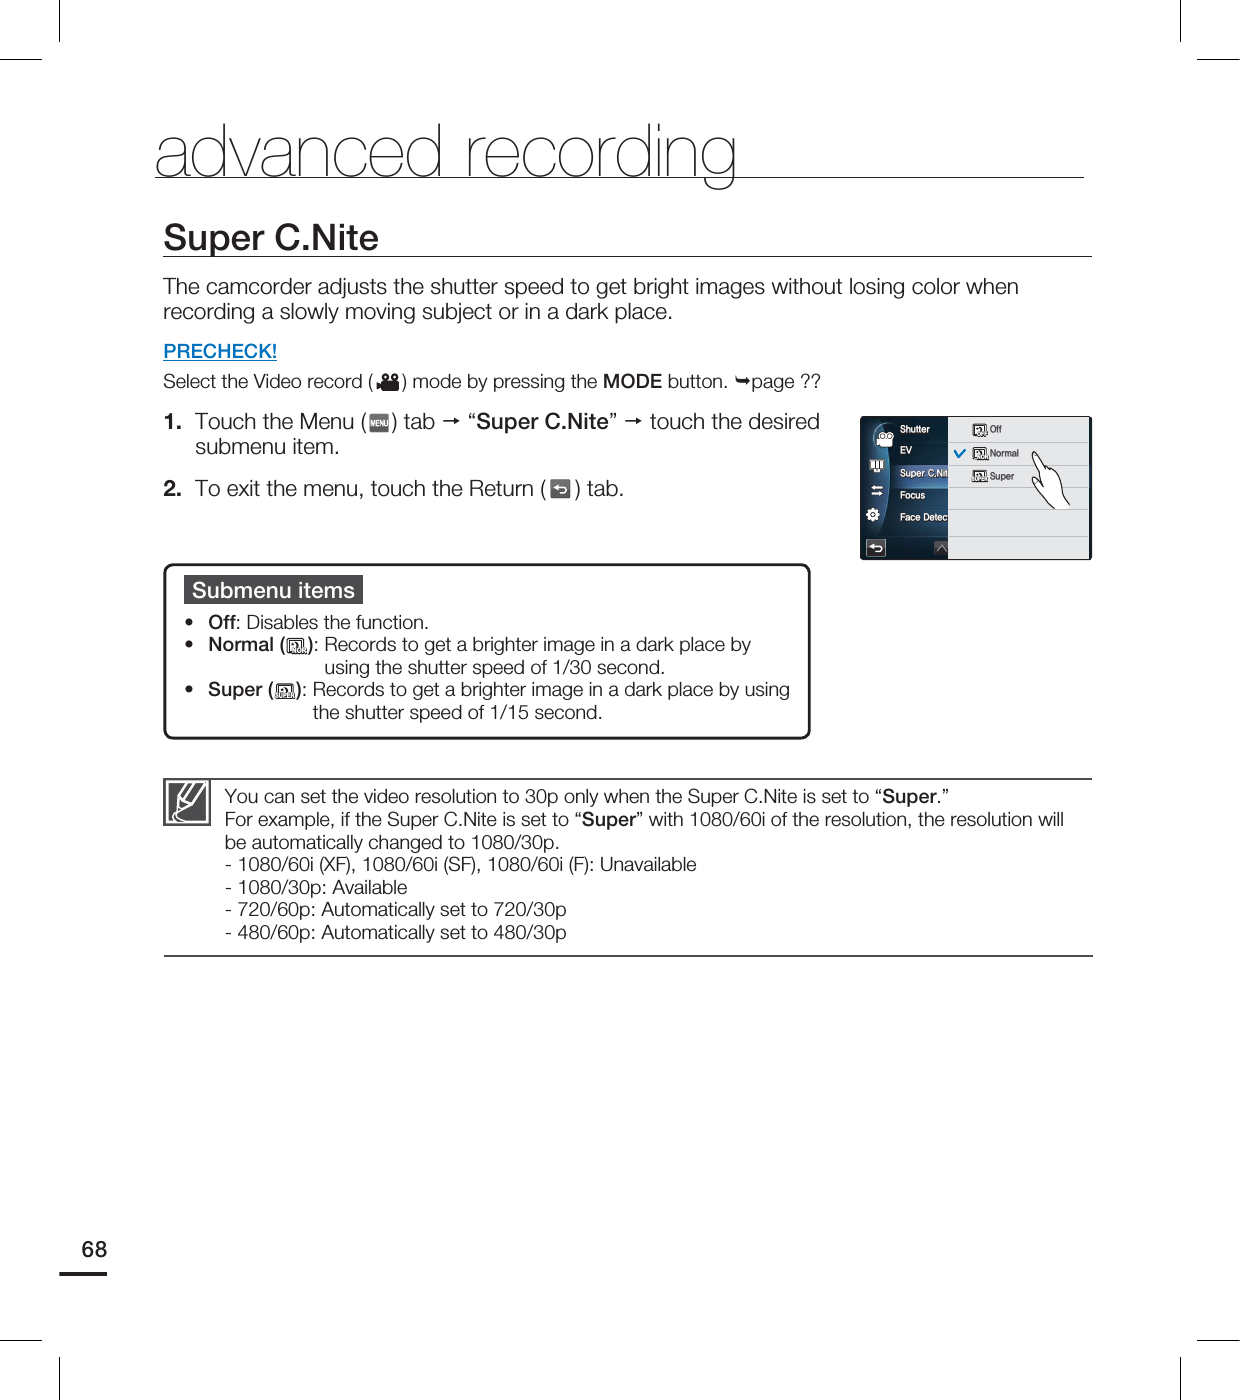
![using the menu itemsMENU ITEMSAccessible items in menu vary depending on the operating mode.For operation details, see the corresponding page.••Video/photo record menu items : available, X : not availableOperation modeItemsVideo Photo Default value PageiSCENE Auto ??Resolution 1080/60i (XF)[5M] 2960x1664 (16:9) ??Slow Motion X Off ??White Balance Auto ??ISO X Auto ??Aperture Auto ??Shutter Auto ??EV 0??Super C.Nite X Normal ??Focus Auto ??Face Detection Off ??Magic Touch X Off ??Metering X Multi ??xvYCC X Off ??Digital Effect Off ??Fader X Off ??Tele Macro Off ??Wind Cut X Off ??Zoom MIC X Off ??Voice Reduction X Off ??MIC Level X Medium ??Digital Zoom X Off ??Cont. Shot X Off ??Self Timer Off ??Time Lapse REC X Off ??56](https://usermanual.wiki/Samsung-Electronics-Co/HMX-S16BN.User-manual-4-of-5/User-Guide-1247350-Page-13.png)
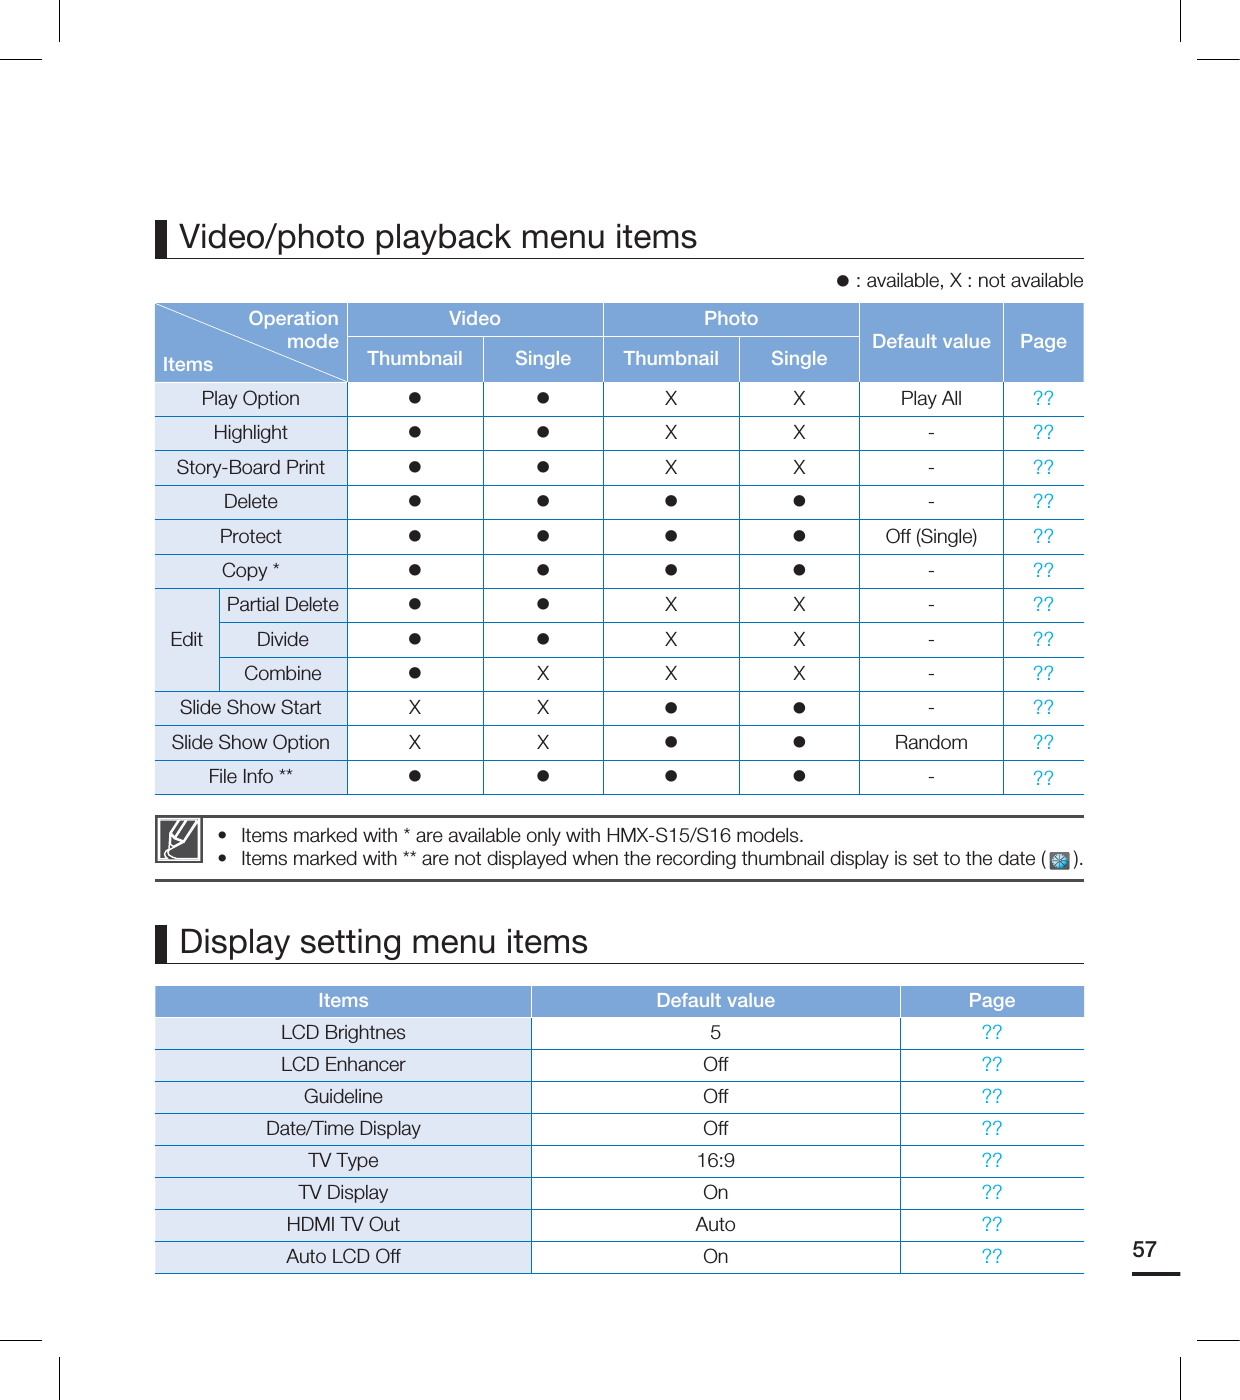
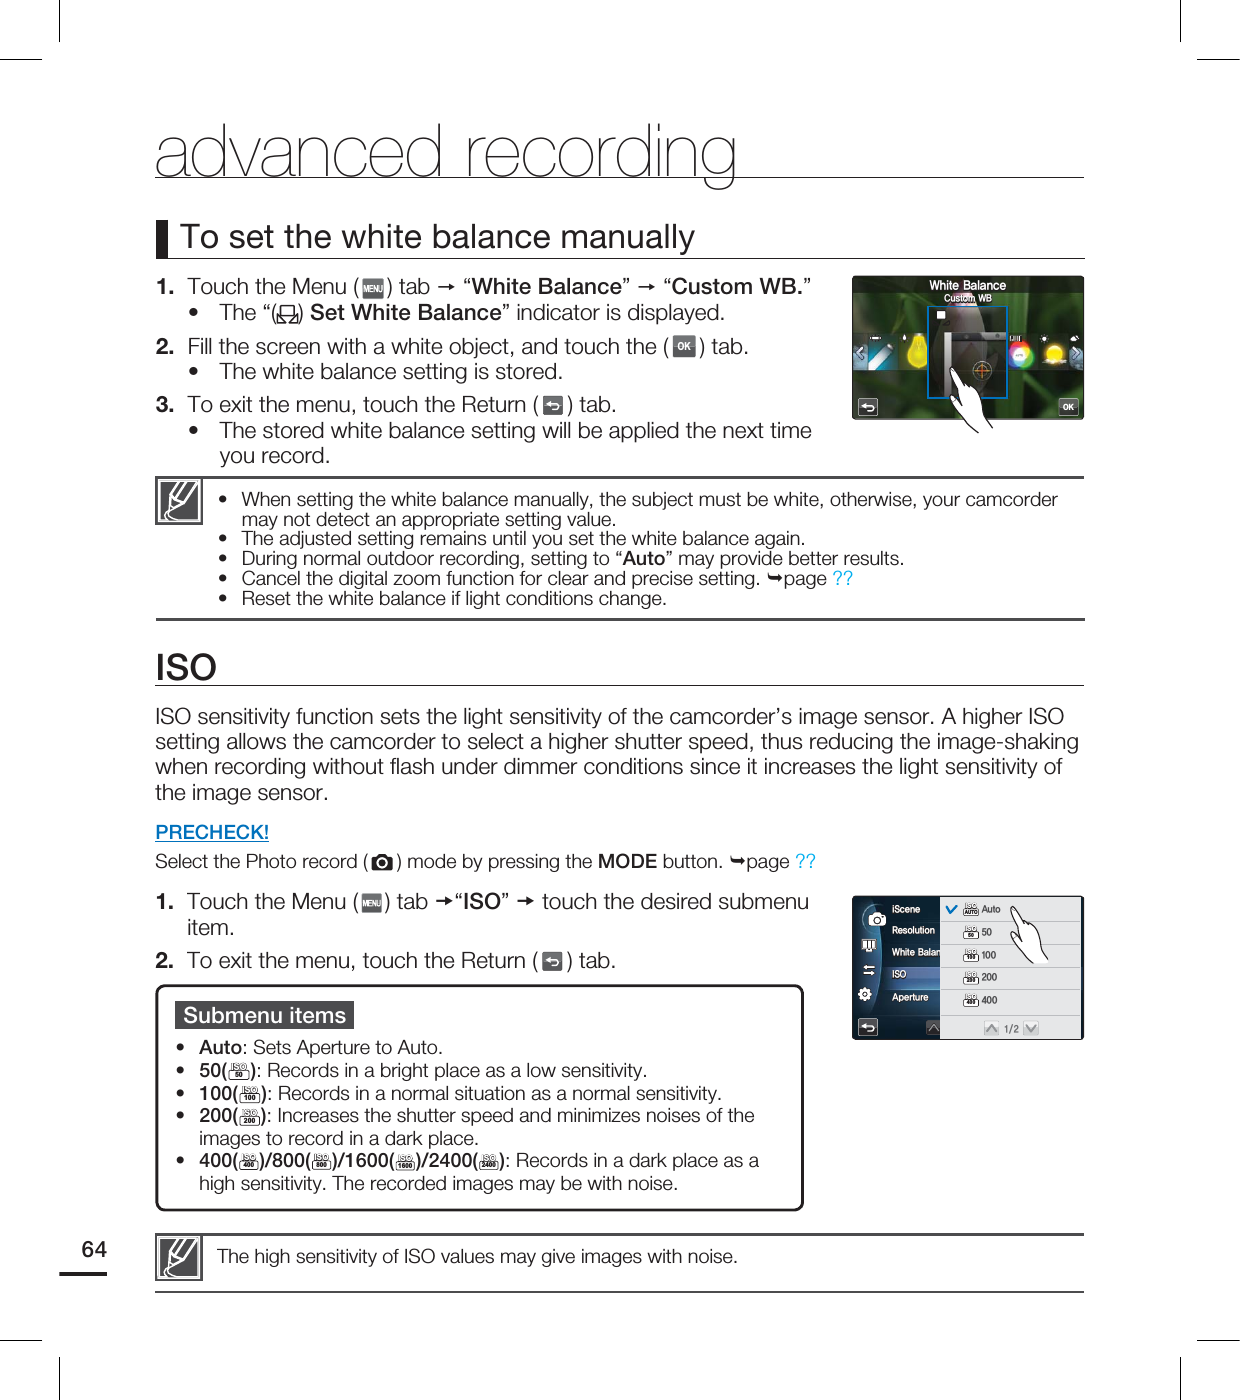
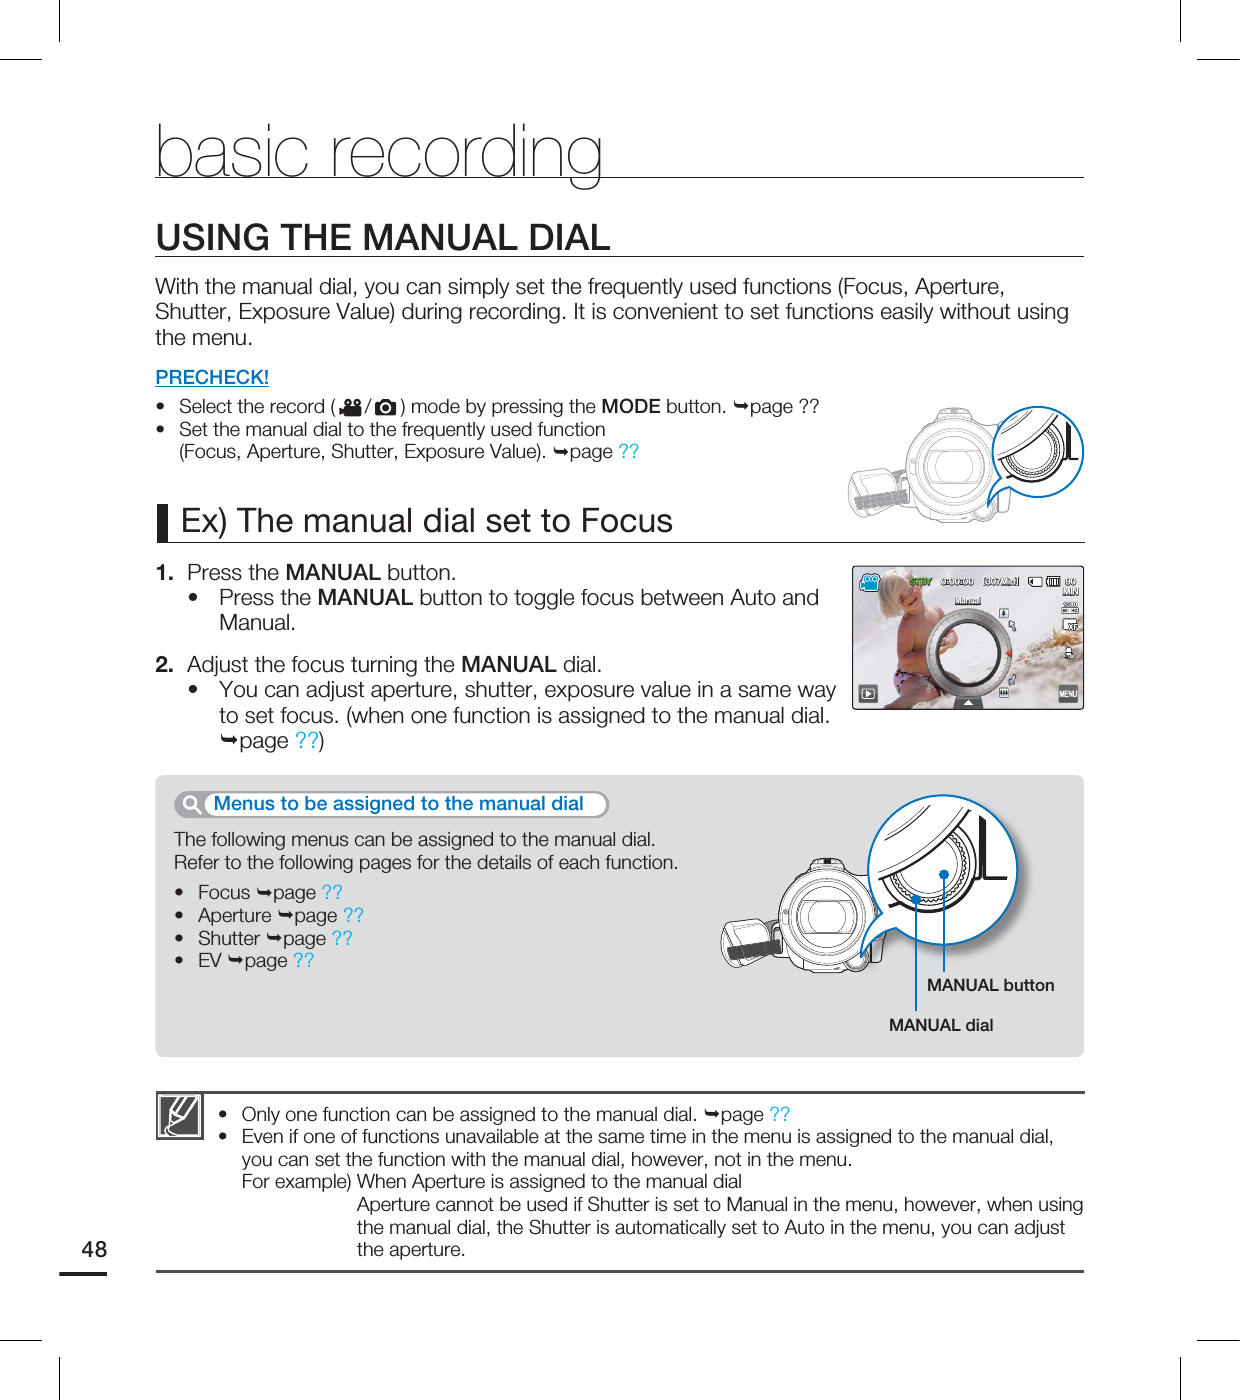
![ : available, X : not availableItems Video Photo Default value PageiSCENE Auto ??Resolution [HD]1080/60i (XF)[5M] 2960x1664 (16:9) ??White Balance Auto ??Aperture Auto ??Shutter Auto ??EV 0??Focus Auto ??Digital Effect Off ??Video/photo recording menu items QUICK MENU ITEMSQuick menu is available only in the video and photo record mode. Available menu items may depend on the selected operation mode. For operation details, see the corresponding page. •••59](https://usermanual.wiki/Samsung-Electronics-Co/HMX-S16BN.User-manual-4-of-5/User-Guide-1247350-Page-16.png)
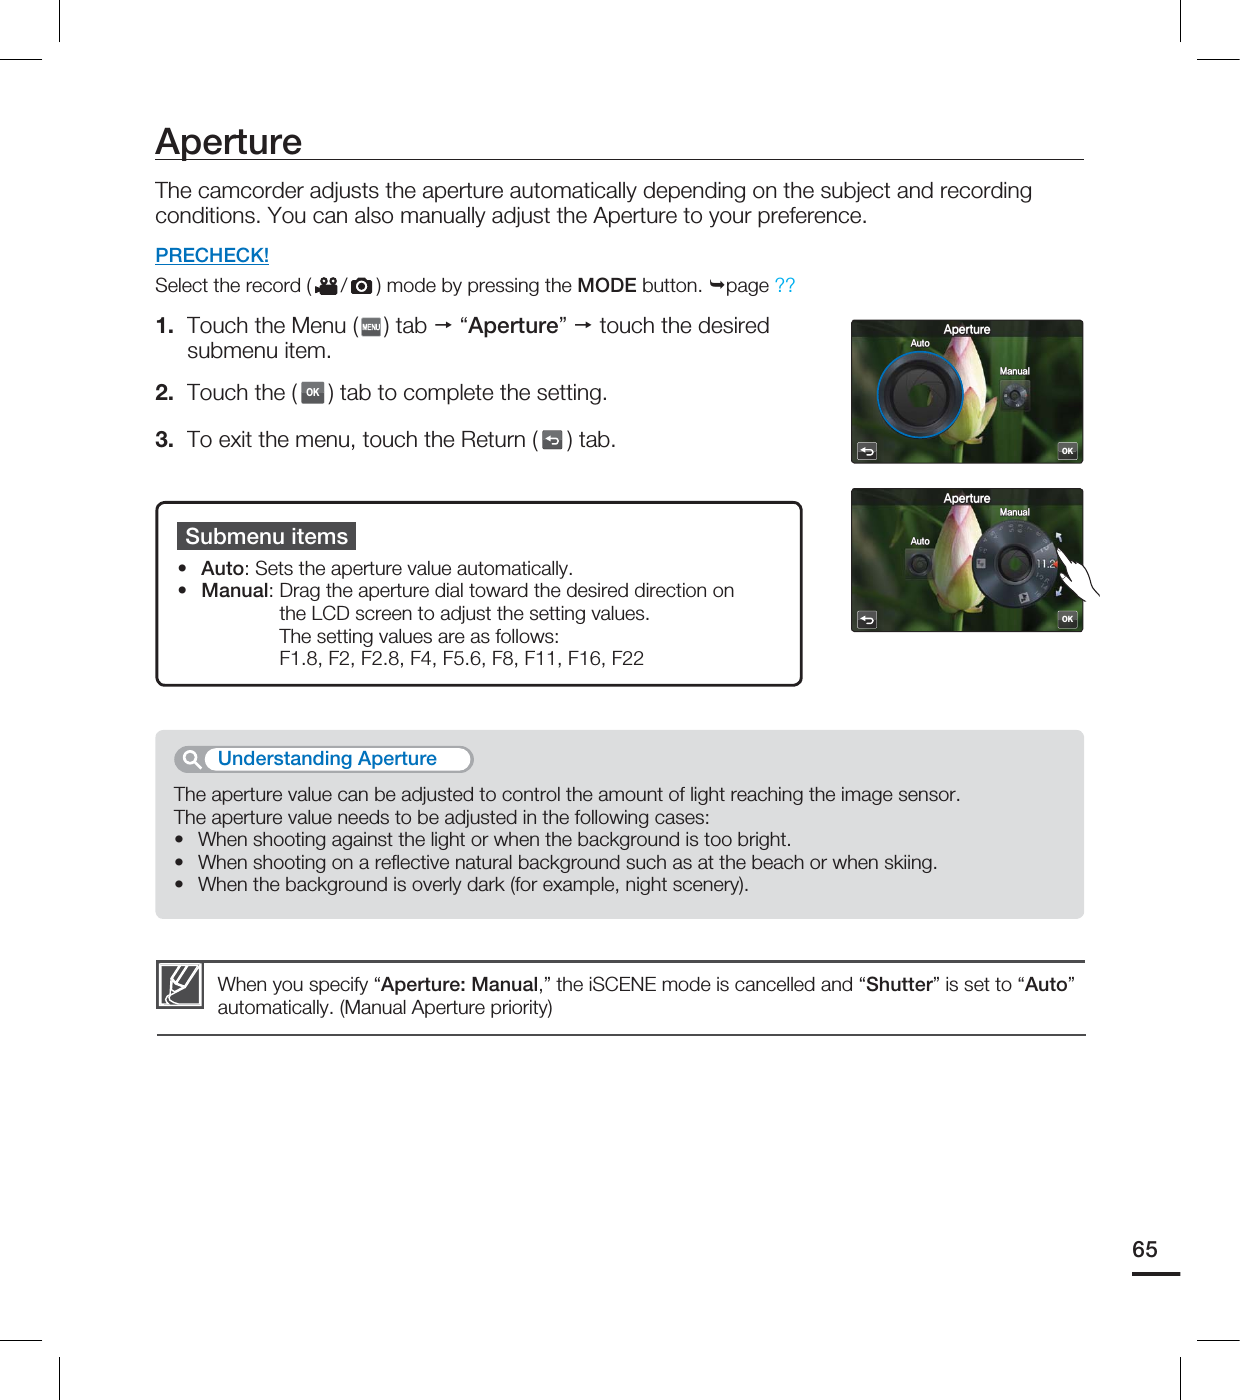
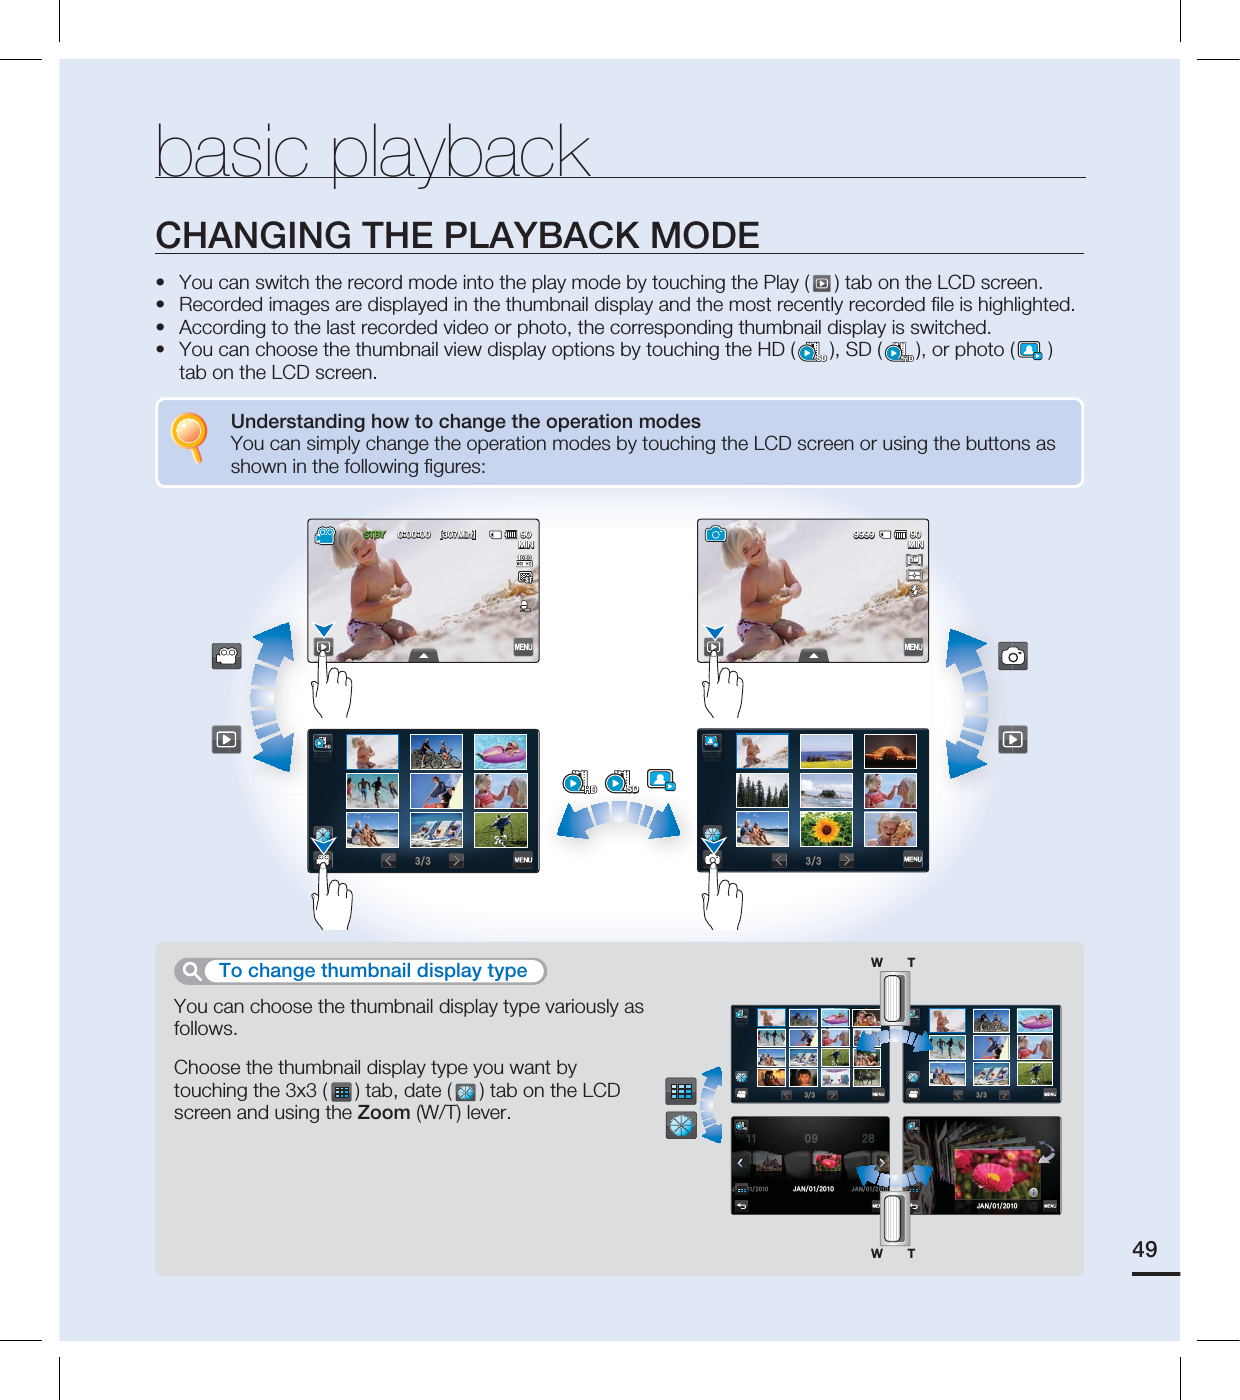
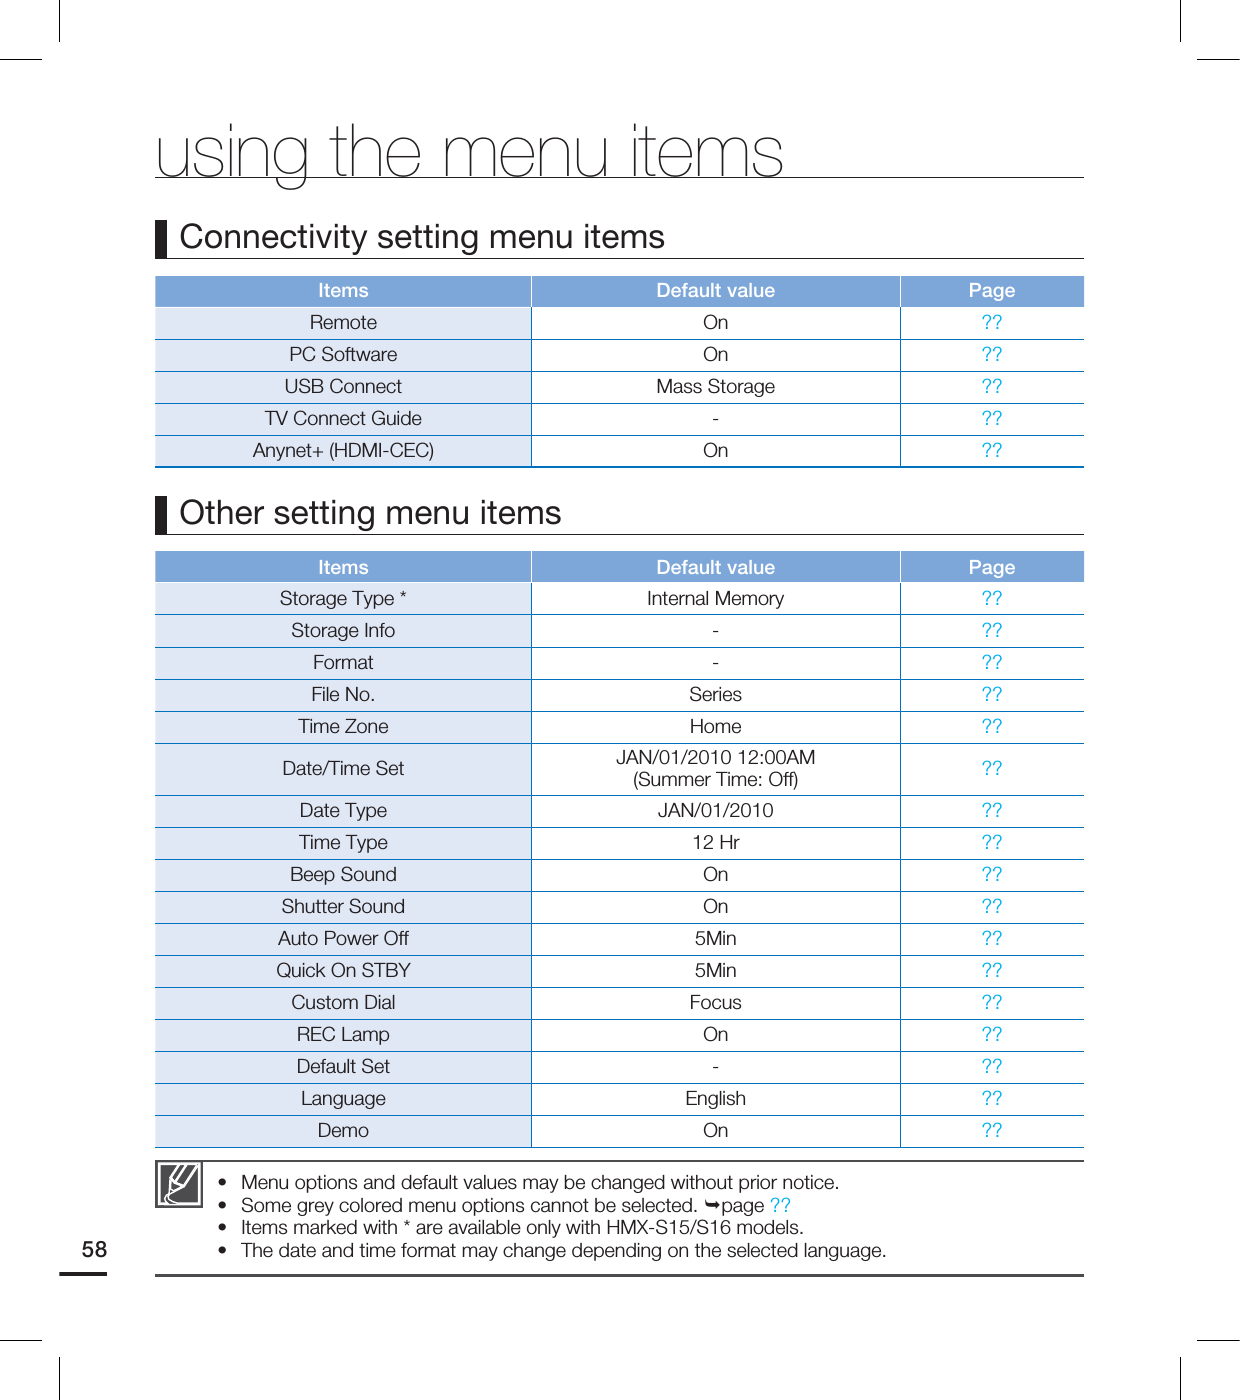
![ResolutionYou can select the resolution of video to be recorded on storage media.PRECHECK!Select the record ( / ) mode by pressing the MODE button. page ??1. Touch the Menu ( ) tab “Resolution” touch the desired submenu item.You can move to the desired item by touching the / tab. 2. Touch the (OK) tab or selected submenu item again to complete the setting.3. To exit the menu, touch the Return ( ) tab.•Submenu items1080/60i (XF) ( / ): Records in the HD (1920x1080/60i) format and at the extreme fi ne image quality. 1080/60i(SF) ( / ): Records in the HD (1920x1080/60i) format and at the super fi ne image quality. 1080/60i(F) ( / ): Records in the HD (1920x1080/60i) format and at the fi ne image quality. 1080/30p ( / ): Records in the HD (1920x1080/30p) format and at the super fi ne image quality.720/60p (60 HD/ ): Records in the HD (1280x820/60p) format and at the super fi ne image quality.480/60p (60 HD/ ): Records in the SD (720x480/60p) format and at the super fi ne image quality. [10M] 4224x2376 (16:9) (10M10M): Records in 16:9 aspect ratio and the 4224x2376 resolution. [5M] 2960x1664 (16:9) (5M5M): Records in 16:9 aspect ratio and the 2960x1664 resolution. [3M] 2224x1664 (4:3) (3M3M): Records in 4:3 aspect ratio and the 2224x1664 resolution. [2M] 1920x1080 (16:9) (2M2M): Records in 16:9 aspect ratio and the 1920x1080 resolution. [VGA] 640x480 (VGAVGA): Records in the VGA 640x480 format. •••••••••••“60i” indicates the camcorder will record in interlaced scan mode at 60 fi elds per second.“30/60p” indicates the camcorder will record in progressive scan mode at 30/60 frames per second.Recorded fi les are encoded with Variable Bit Rate (VBR). VBR is an encoding system that automatically adjusts the bit rate according to the recording image.The recordable time for video and the recordable number of photos depend on the selected resolution. page ??Photos that are recorded on your camcorder may not playback properly on other digital devices that do not support these resolution.•••••61OK7JEFP3FTPMVUJPOJ9'9'60 HD 60 HD4' '<Setting video resolution>OK1IPUP3FTPMVUJPO<.>Y5M5MVGAVGA3M3M10M10M2M2M<Setting photo resolution>](https://usermanual.wiki/Samsung-Electronics-Co/HMX-S16BN.User-manual-4-of-5/User-Guide-1247350-Page-18.png)
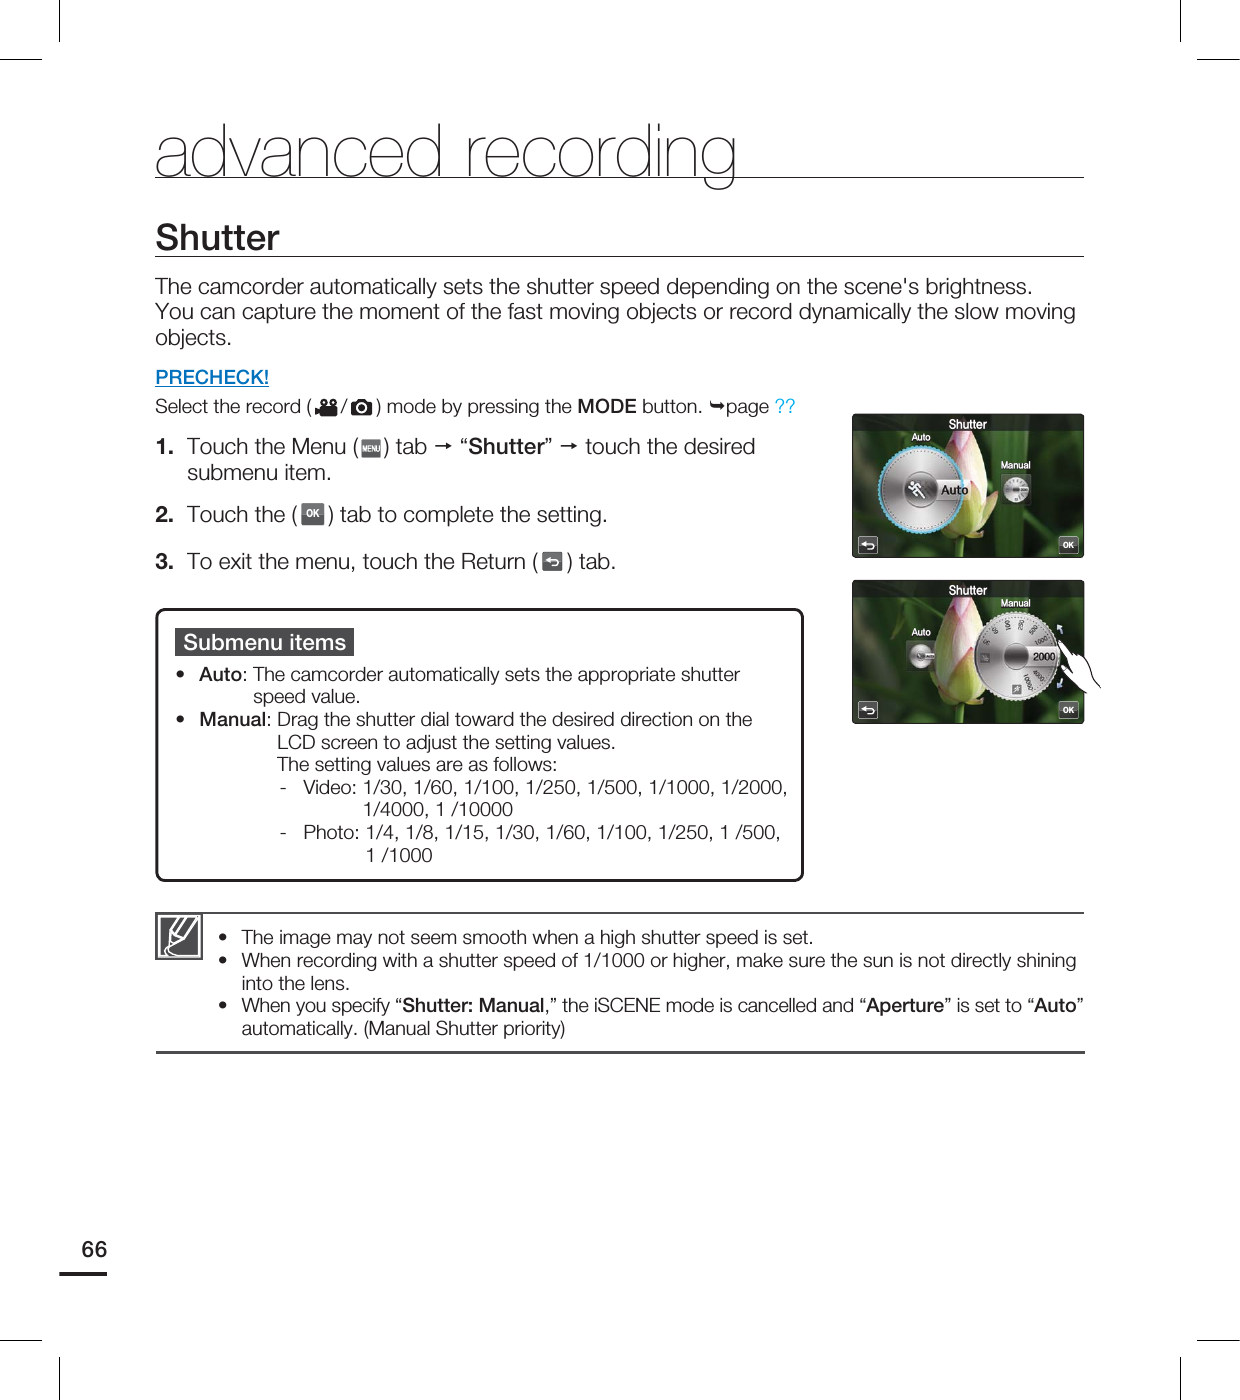
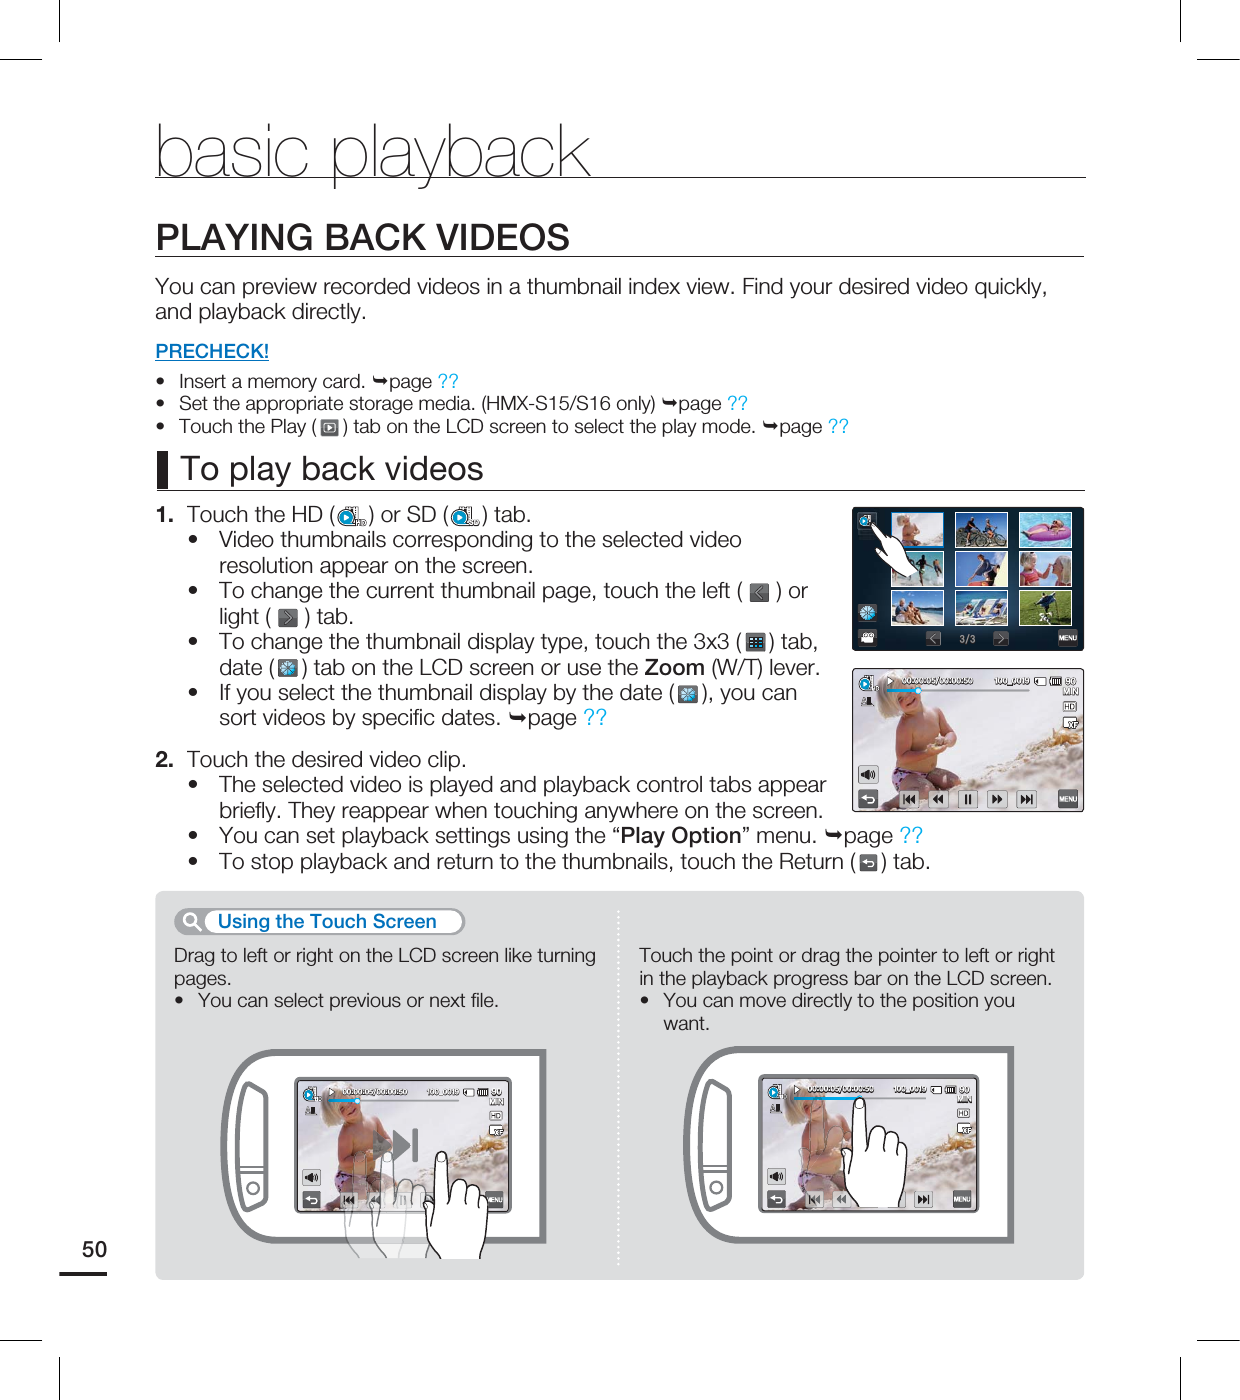
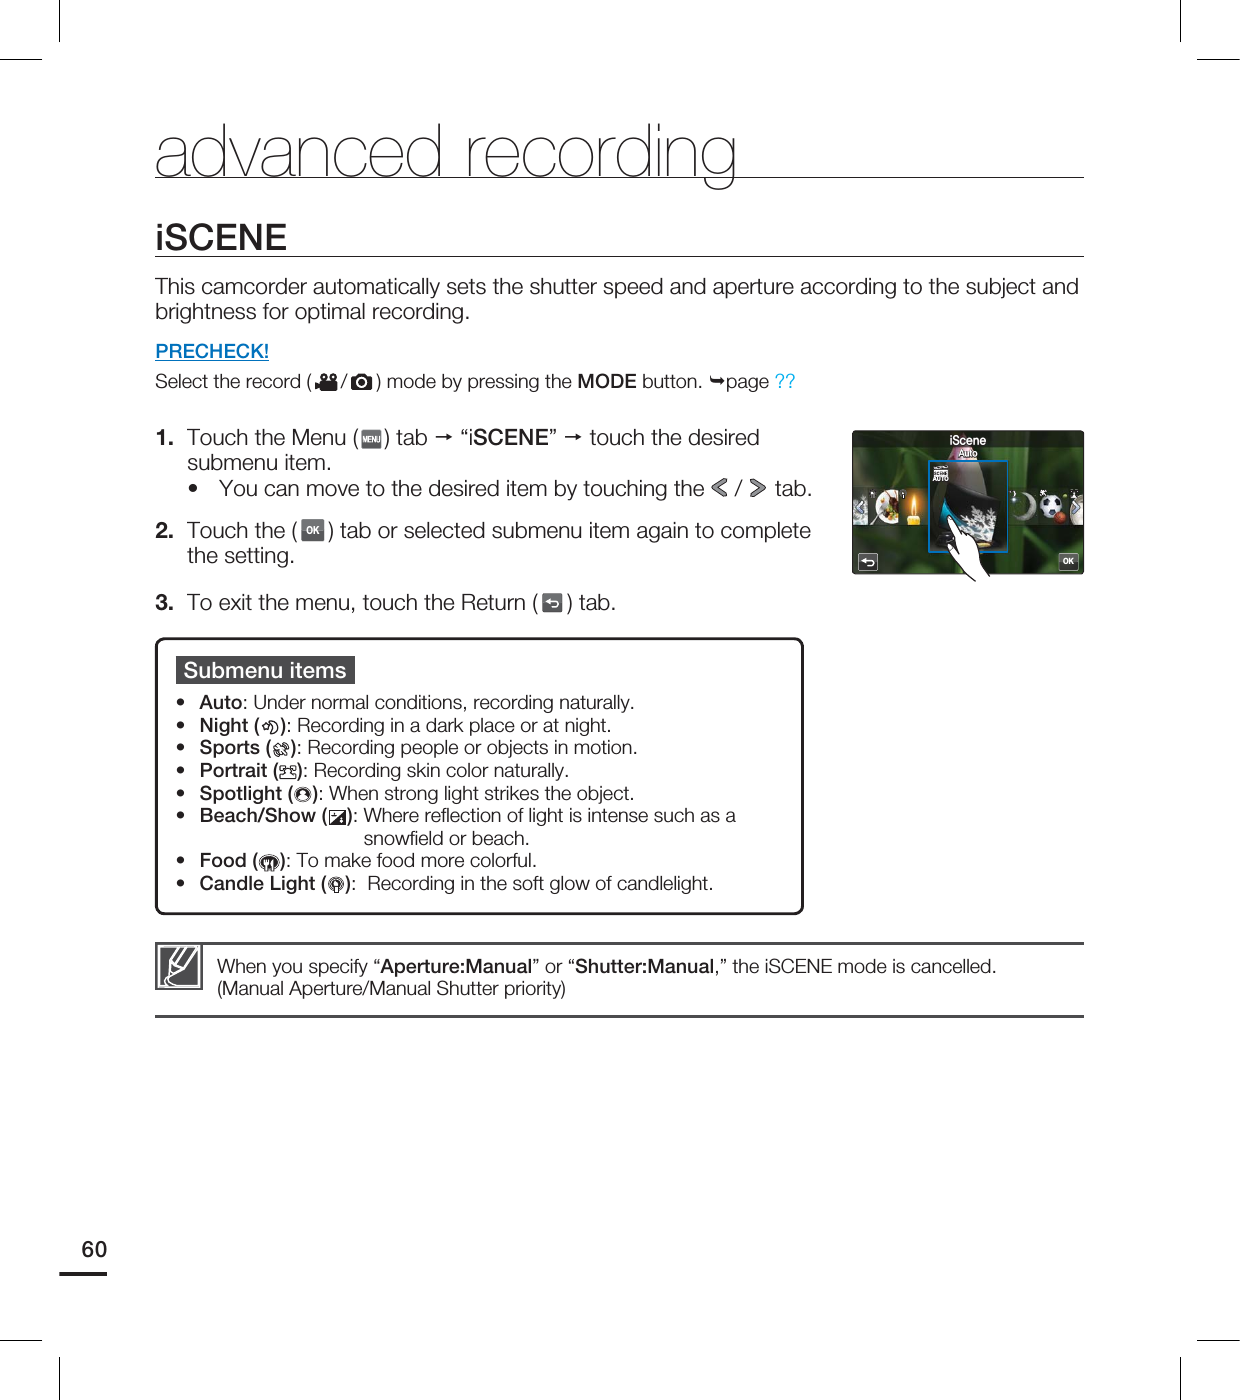
![advanced recordingSlow MotionYou can record a video in slow motion. It is useful to record a fast moving subject such as a bird fl ying in the sky or golf swing and so on to analyze the detailed movement. PRECHECK!Select the Video record ( ) mode by pressing the MODE button. page ??1. Touch the Menu ( ) tab “Slow Motion” touch the desired submenu item.2. To exit the menu, touch the Return ( ) tab.You can record a video in slow motion for maximum one minute. When recording in slow motion, the recording stops after 1 minute but when you playback the same recording it play back for the following time.- 300 Frame/Sec: 5 minutes- 600 Frame/Sec: 10 minutesRecording does not stop for 10 seconds even if the Recording start/stop button is pressed to stop.Sound cannot be recorded while recording in slow motion.Photos cannot be taken when Slow Motion is in use. Menu or Quick Menu are not available while recording in slow motion. The image quality of slow motion video may be lower than the normal speed video’s.••••••Submenu itemsOff: Disables the function. [SD] 300Frames/Sec (300300): Records 300 frames per seconds in the 368x208 resolution. [SD] 600Frames/Sec (600600): Records 600 frames per seconds in the 192x112 resolution. •••The number of frames needed to record video is as follows. When Slow Motion is not set to On: 60 frames per second are recorded.When Slow Motion is not set to [SD] 300Frame/Sec: 300 frames per second are recorded.You can record video of maximum 600 frames per second compared to the normal speed video.Comparison of normal speed video and slow motion videoVideo recording time (Per second)62 3FTPMVUJPO4MPX.PUJPO8IJUF#BMBODF"QFSUVSFJ4DFOFAUTOAUTOAUTOAUTOOFFOFFOFFOFF0GG300300<4%>'SBNF4FD600600<4%>'SBNF4FD](https://usermanual.wiki/Samsung-Electronics-Co/HMX-S16BN.User-manual-4-of-5/User-Guide-1247350-Page-19.png)