Samsung Electronics Co HMX-S16BN DIGITAL CAMCORDER User Manual HMX S10N ENG IB indb
Samsung Electronics Co Ltd DIGITAL CAMCORDER HMX S10N ENG IB indb
Contents
- 1. User manual 1 of 5
- 2. User manual 2 of 5
- 3. User manual 3 of 5
- 4. User manual 4 of 5
- 5. User manual 5 of 5
User manual 4 of 5
44
Using the optical zoom does not degrade the image quality and clarity.
Use the digital zoom when you want to zoom more than the optical zoom range (Video recording mode only). page ??
Focusing may become unstable when recording with a fast zoom or zooming into a subject standing too far away.
In this case, use the manual focus function. page ??
The minimum possible distance between camcorder and subject while maintaining sharp focus is about 1cm (about
0.4 inches) for wide angle and about 50cm (about 19.7 inches) for telephoto. If you want to shoot the object close
to the lens at a wide angle, use the Tele Macro function. page ??
When using the zoom function while holding the camcorder with your hand, use Anti-shake (OIS) for stable
recording. page ??
Frequent use of the zoom function consumes more power.
Zooming sound by using the Zoom lever or Zoom button can be recorded.
•
•
•
•
•
•
•
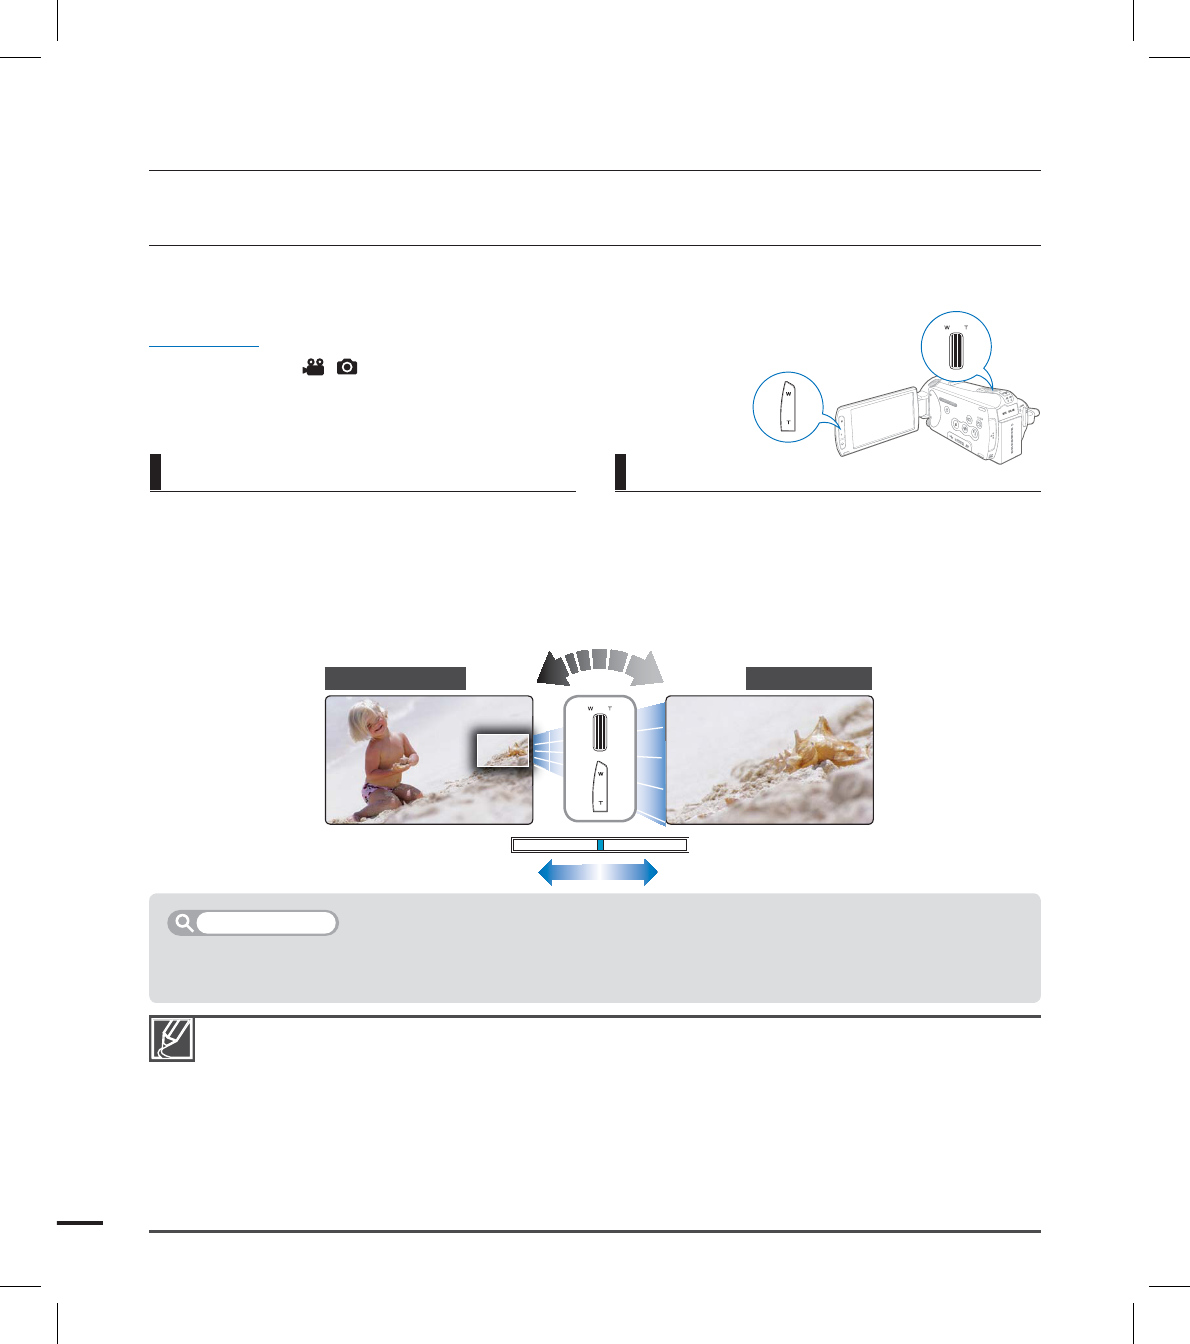
ZOOMING
Use the zoom function for close-up or wide-angle recording. This camcorder allows you to
record using 15x optical power zoom, 18x Intelli-zoom and digital zoom.
PRECHECK!
Select the record ( / ) mode by pressing the MODE button.
page ??
Press the T (zoom) button on the LCD panel
or slide the zoom lever towards T (telephoto).
The distant subject is gradually magnifi ed
and can be recorded.
The most magnifi ed zoom ratio is 18x
zoom in the normal zoom-in.
•
•
Press the W (zoom) button on the LCD panel
or slide the zoom lever towards W (wide
angle).
The subject moves further away.
The smallest zoom ratio is the subject’s
original size in the zoom-out.
•
•
When using the zoom function, its speed can be decreased by slowly moving the Zoom (W/T) lever. A fast moving
increases the zoom speed. However, the Zoom (W/T) button on the LCD panel cannot adjust the zoom speed.
Zoom speed
To zoom in To zoom out
basic recording
W : Wide angle T : Telephoto
45
The Smart Auto mode automatically sets the Anti-shake (OIS) to On.
Gross camcorder shake may not be entirely corrected even if the Anti-shake is set to On.
Firmly hold the camcorder with both hands.
When this function is set to On, the actual movement of the subject and the movement displayed
on the screen may be slightly different.
When recording in dark lighting at high magnifi cation while this function is set to On, after-images
may stand out. In this case, we recommend using a tripod (not supplied) and turning the Anti-shake
to Off.
•
•
•
•
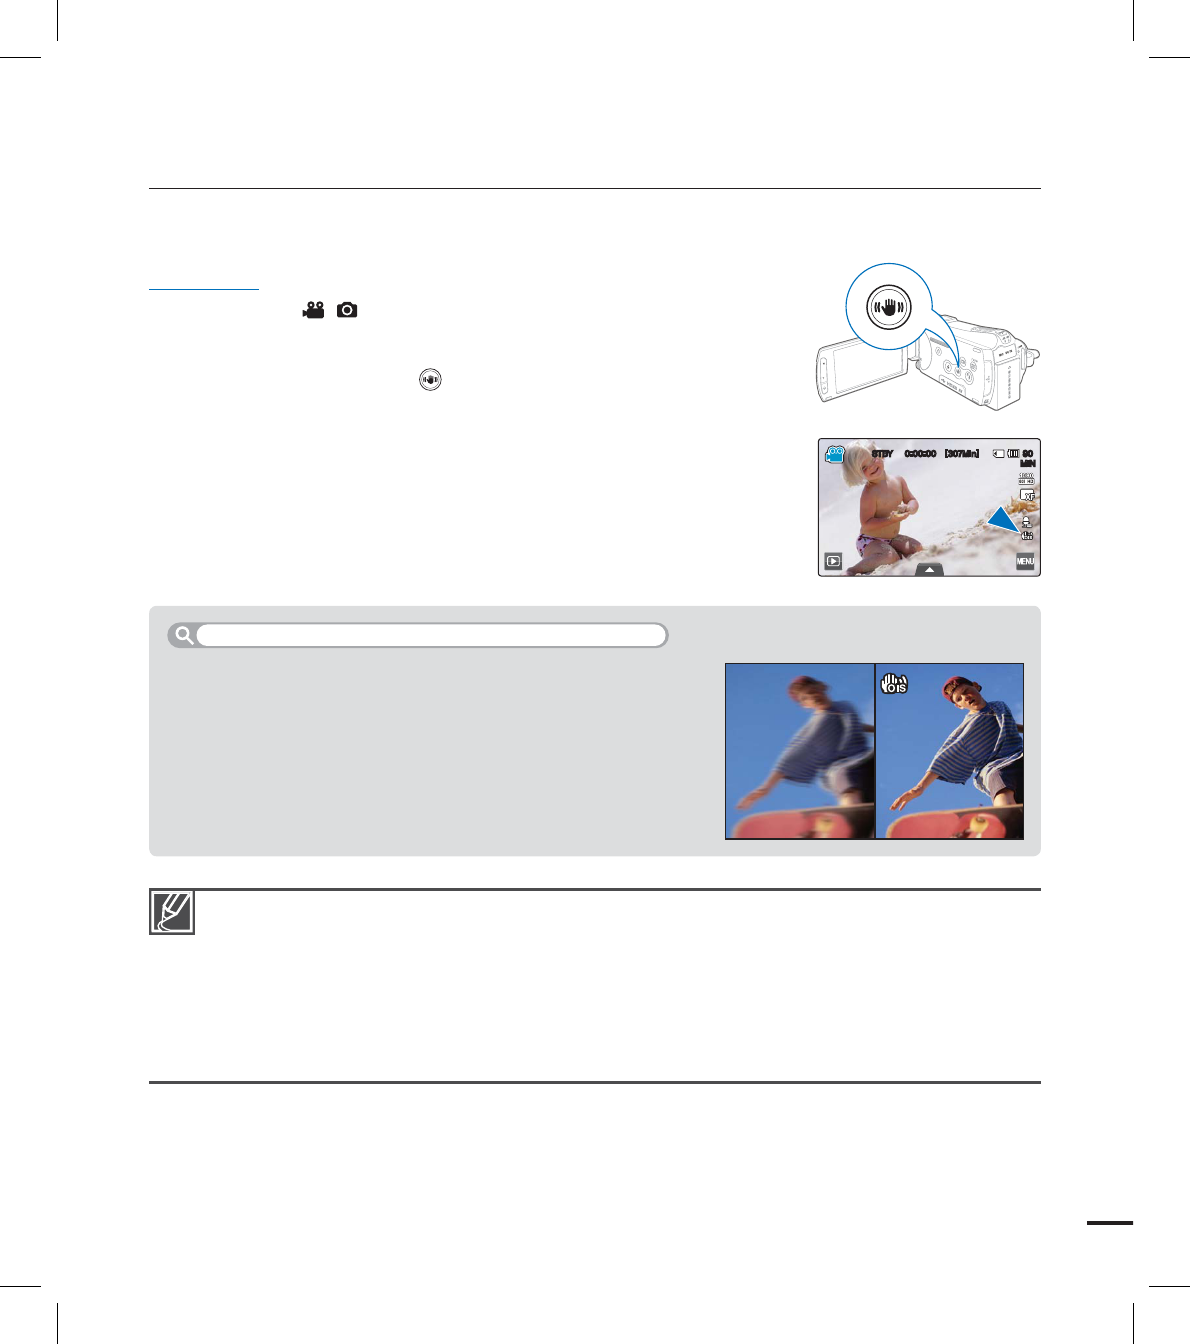
SETTING THE ANTI-SHAKE
(OIS: OPTICAL IMAGE STABILIZER)
Use the Anti-shake (OIS: Optical Image Stabilizer) function to compensate for unstable images
caused by shaking movements when holding the camcorder.
PRECHECK!
Select the record ( / ) mode by pressing the MODE button. page ??
Press the Anti-shake (OIS) ( ) button to toggle the Anti-shake
(OIS) mode between On and Off.
When recording while walking or when recording in a
moving car.
When recording with the zoom function.
When recording subjects of a small size.
•
•
•
Use the Anti-Shake function in the following cases
45#: <.JO>
.*/
46
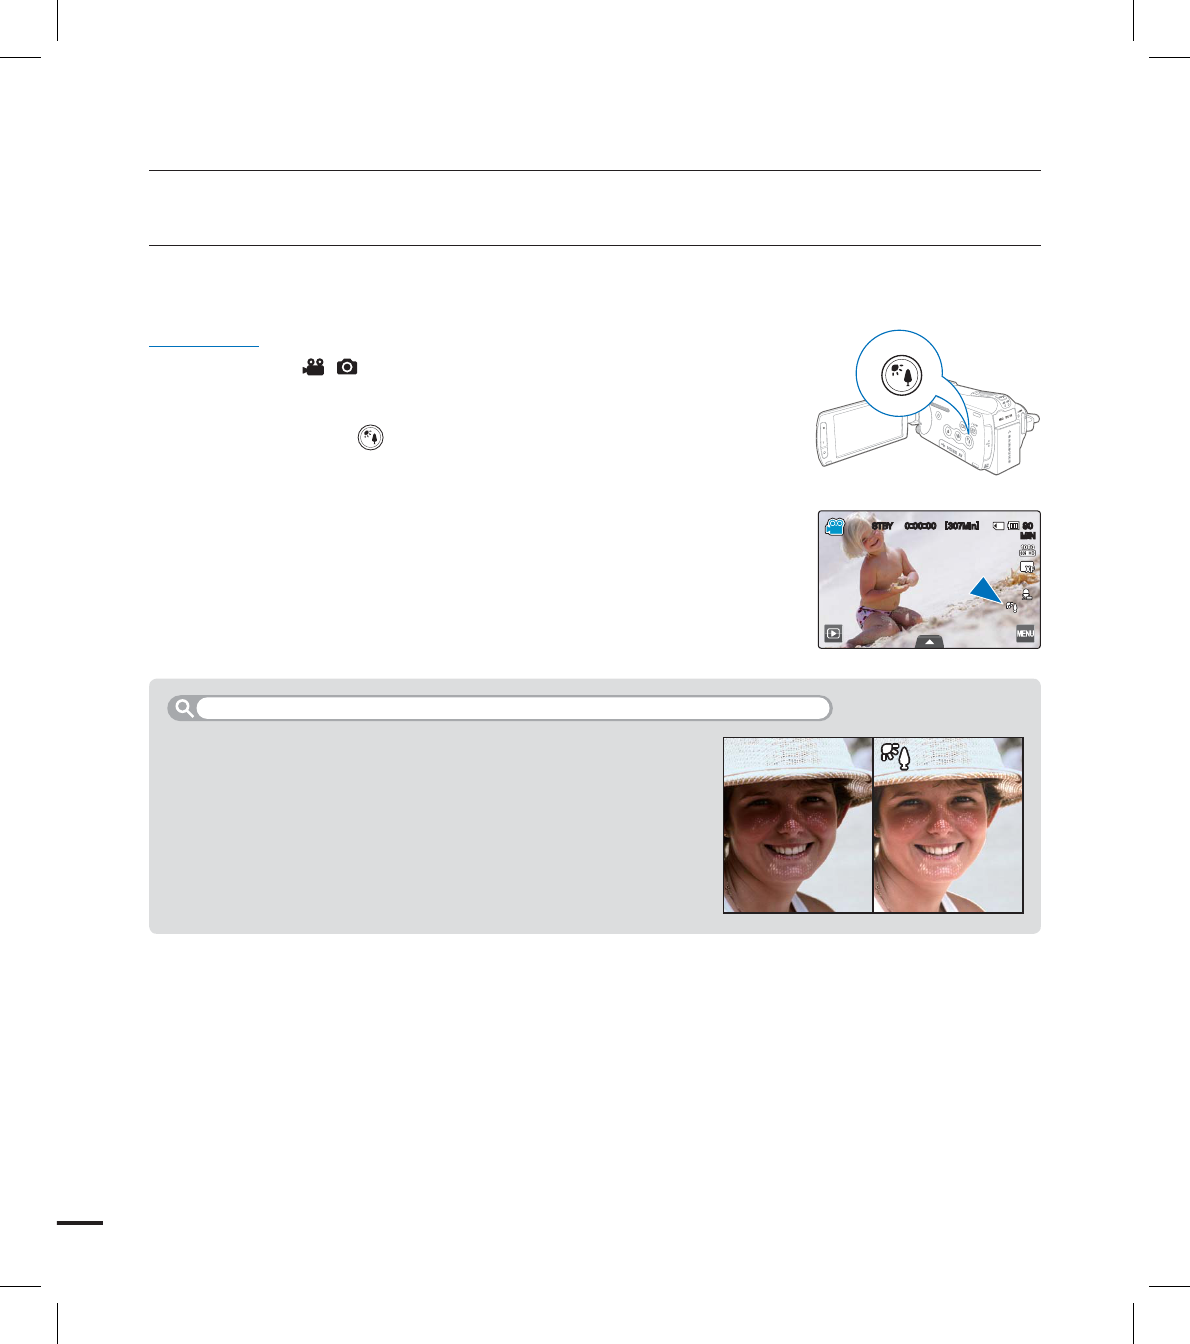
USING BACK LIGHT COMPENSATION MODE
When a subject is lit from behind, this function will compensate for lighting so that the subject is
not too dark.
PRECHECK!
Select the record ( / ) mode by pressing the MODE button. page ??
Press the Back light ( ) button to toggle the back light mode
between On and Off.
The subject is in front of a window.
The person to be recorded is wearing white or shiny clothes
and is placed against a bright background; the person’s
face is too dark to distinguish his/her features.
The subject is outdoors and the background is overcast.
The light sources are too bright.
The subject is against a snowy background.
•
•
•
•
•
Back lighting exists when the subject is darker than the background
basic recording
45#: <.JO>
.*/

47
USING THE FLASH
Using the fl ash, you can capture clear and bright photos even under shadows, at night or
indoors which need more light.
PRECHECK!
Select the Photo record ( ) mode by pressing the MODE button. page ??
Press the Flash ( ) button to select the fl ash mode you want.
The selected fl ash mode is displayed.
Display Meaning
Disables the fl ash.
Flash works automatically when the subject or background is
dark.
Flash works automatically when the subject or background is
dark, and it reduces red eyes of persons looking straight at
fl ash.
Flash always works regardless of brightness.
Flash works as the shutter speed is slow.
It is suitable for use around sundown or in dark places.
It is recommended to use the tripod (purchase separately) to
prevent camcorder shake.
•
Do not use the fl ash with a hand covered on it.
Do not use a fl ash too close to eyes of a person.
•
•
Use a fl ash within a distance of 1~2 meters.
Frequent use of a fl ash may decrease battery time faster.
You cannot use a fl ash in the following conditions.
- when the continuous shooting is set
- when capturing photos during video recording
•
•
•
.*/
5
M
5
M
48
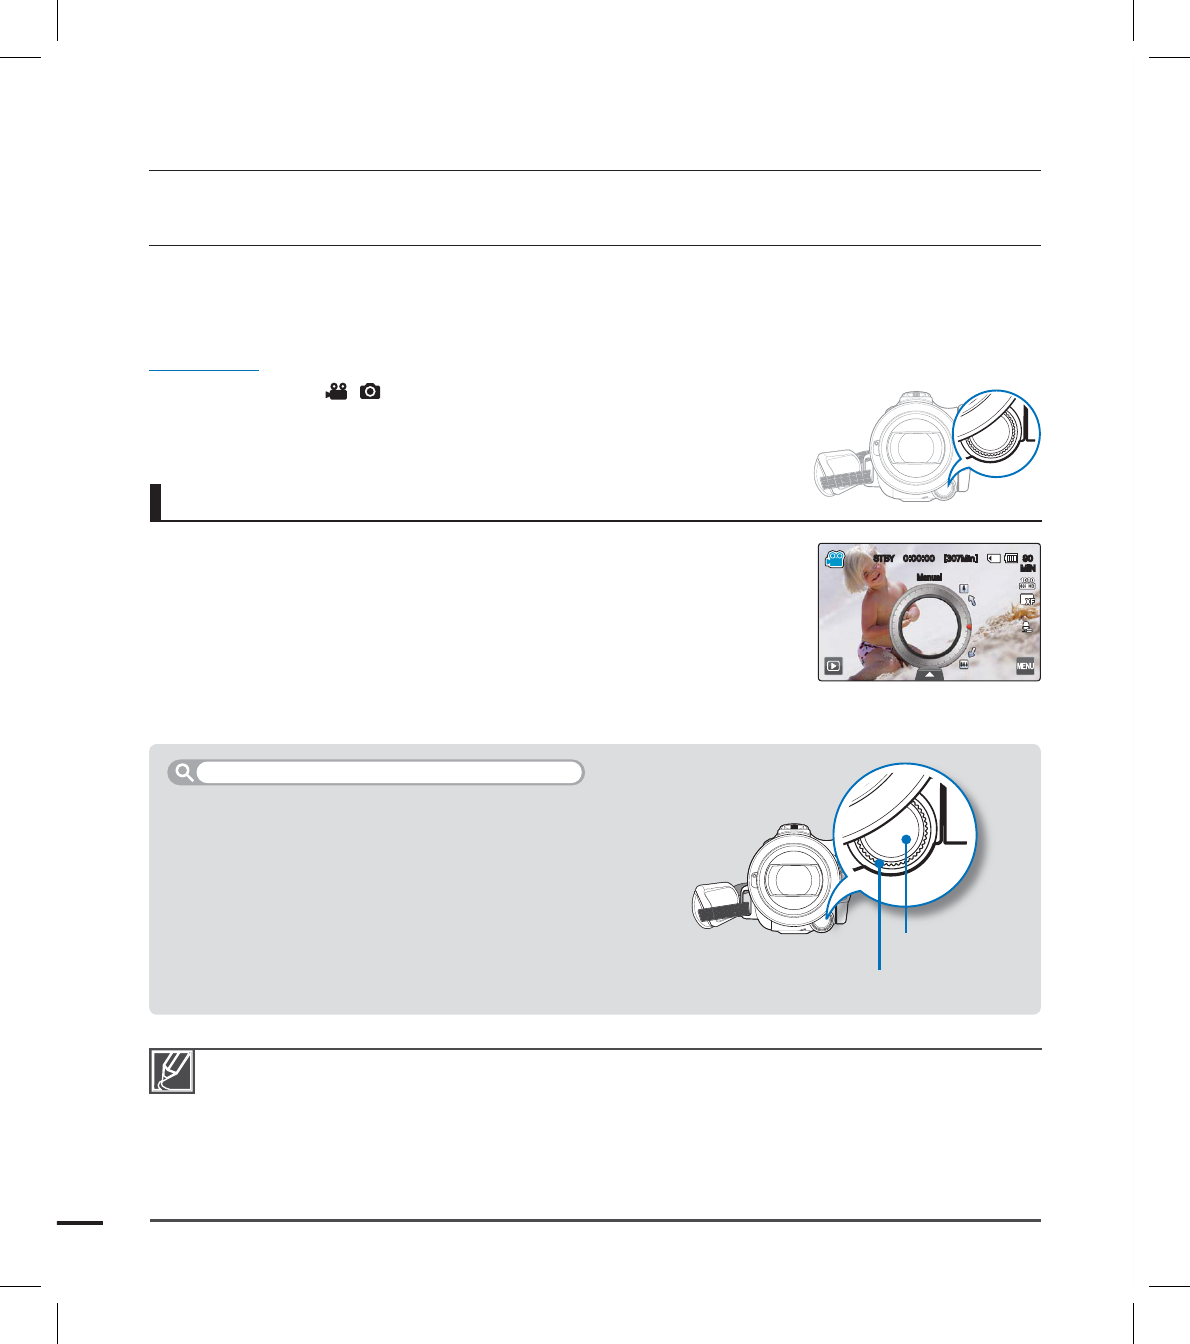
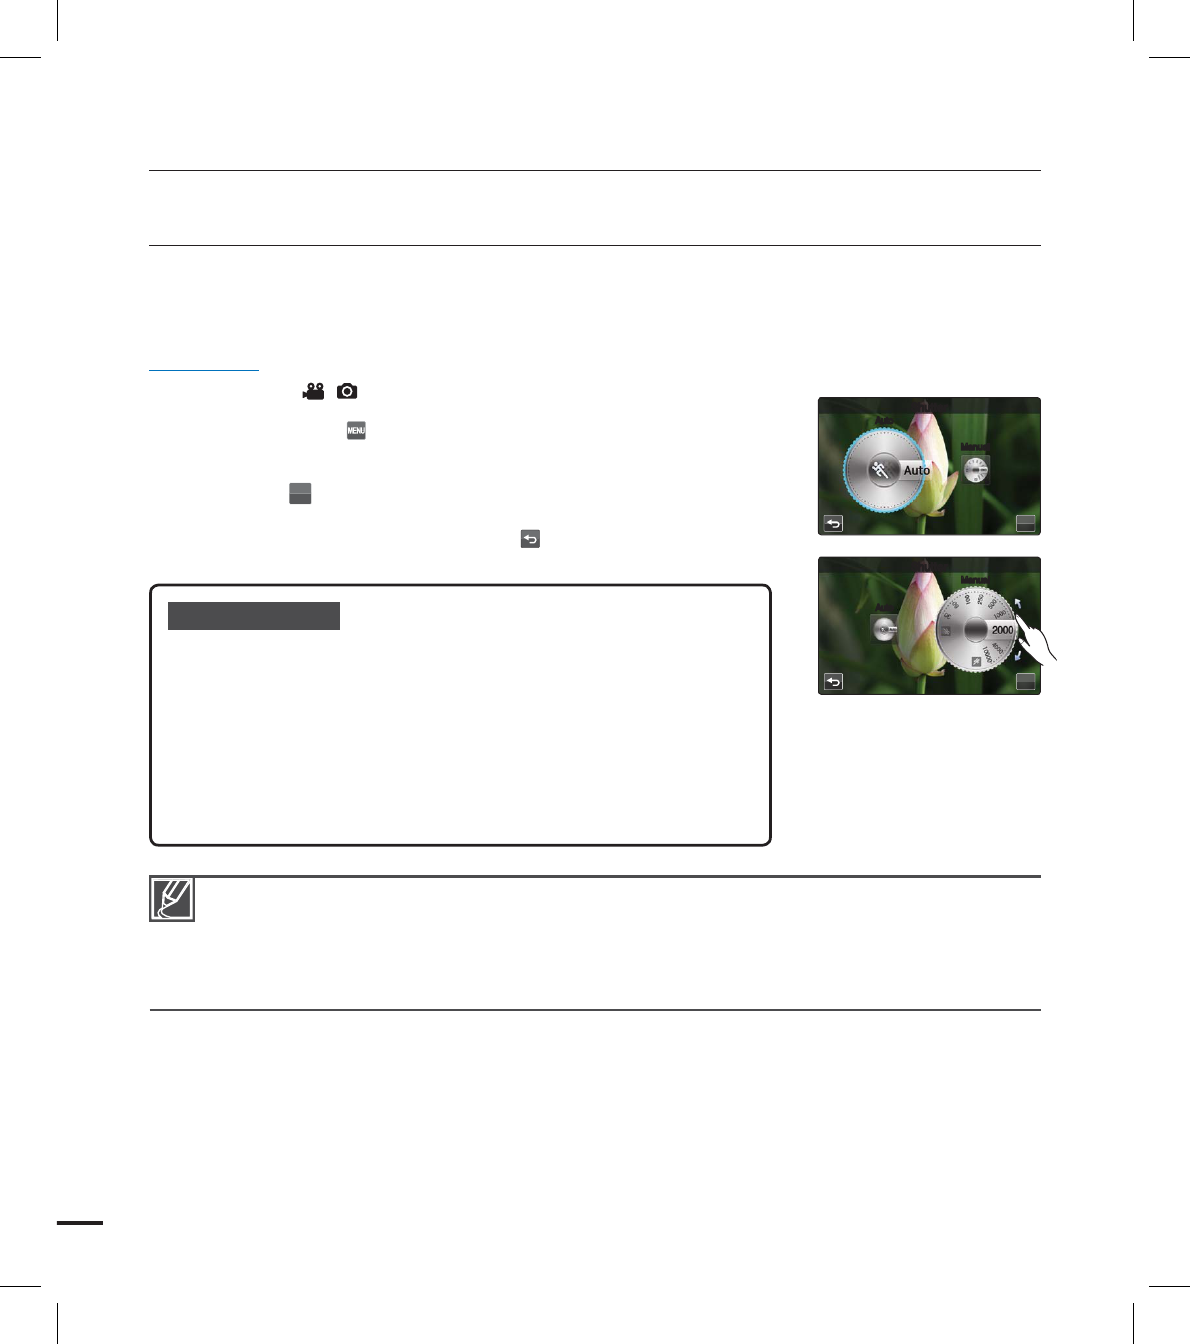
USING THE MANUAL DIAL
With the manual dial, you can simply set the frequently used functions (Focus, Aperture,
Shutter, Exposure Value) during recording. It is convenient to set functions easily without using
the menu.
PRECHECK!
Select the record ( / ) mode by pressing the MODE button. page ??
Set the manual dial to the frequently used function
(Focus, Aperture, Shutter, Exposure Value). page ??
1. Press the MANUAL button.
Press the MANUAL button to toggle focus between Auto and
Manual.
2. Adjust the focus turning the MANUAL dial.
You can adjust aperture, shutter, exposure value in a same way
to set focus. (when one function is assigned to the manual dial.
page ??)
•
•
•
•
Only one function can be assigned to the manual dial. page ??
Even if one of functions unavailable at the same time in the menu is assigned to the manual dial,
you can set the function with the manual dial, however, not in the menu.
For example) When Aperture is assigned to the manual dial
Aperture cannot be used if Shutter is set to Manual in the menu, however, when using
the manual dial, the Shutter is automatically set to Auto in the menu, you can adjust
the aperture.
•
•
Ex) The manual dial set to Focus
The following menus can be assigned to the manual dial.
Refer to the following pages for the details of each function.
Focus page ??
Aperture page ??
Shutter page ??
EV page ??
•
•
•
•
Menus to be assigned to the manual dial
MANUAL button
MANUAL dial
basic recording
45#: <.JO>
.*/
.BOVBM
49
SD
.*/
5
M
5
M
45#: <.JO>
.*/
basic playback
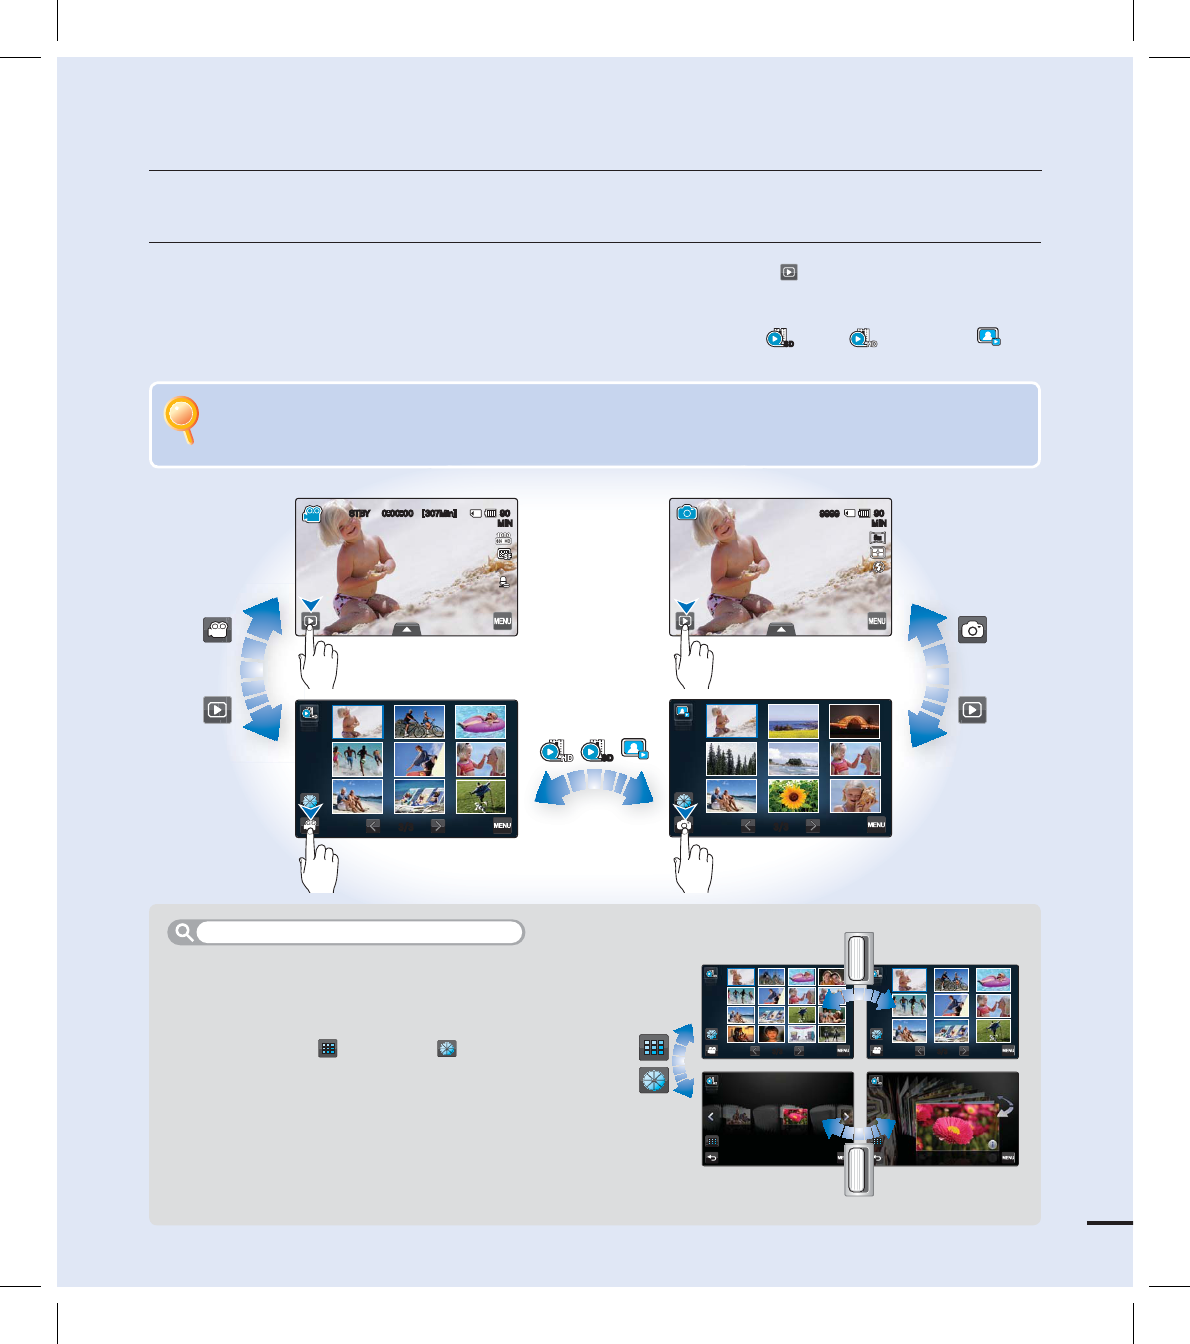
CHANGING THE PLAYBACK MODE
You can switch the record mode into the play mode by touching the Play ( ) tab on the LCD screen.
Recorded images are displayed in the thumbnail display and the most recently recorded fi le is highlighted.
According to the last recorded video or photo, the corresponding thumbnail display is switched.
You can choose the thumbnail view display options by touching the HD (
SD
), SD ( ), or photo ( )
tab on the LCD screen.
•
•
•
•
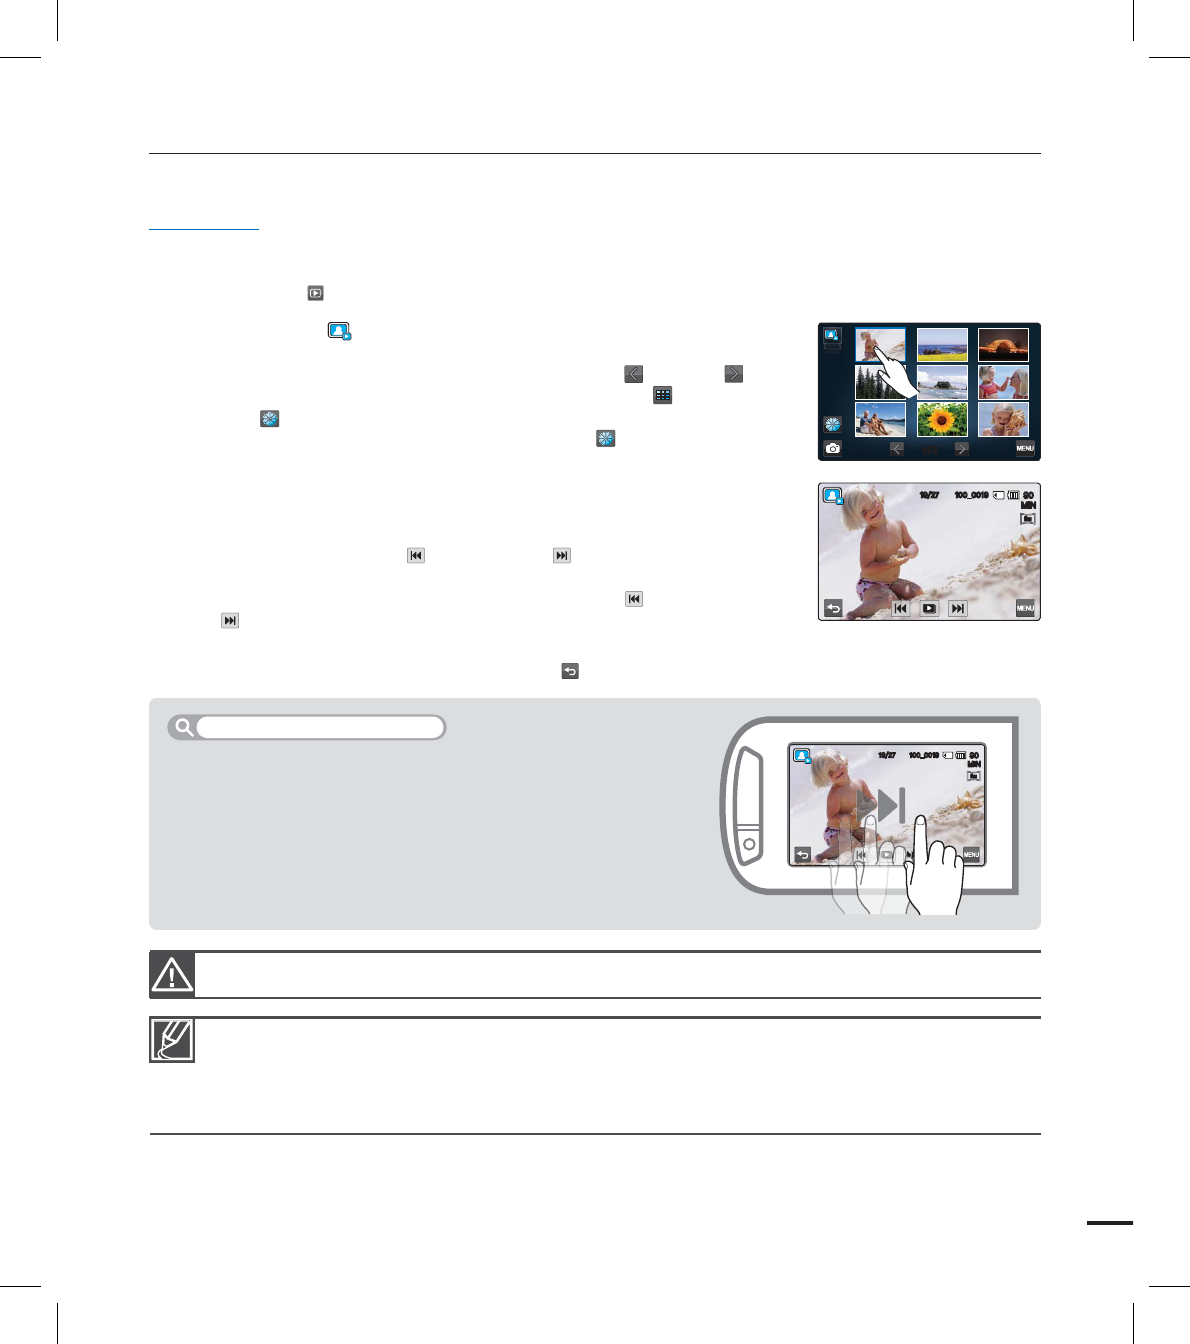
You can choose the thumbnail display type variously as
follows.
Choose the thumbnail display type you want by
touching the 3x3 ( ) tab, date ( ) tab on the LCD
screen and using the Zoom (W/T) lever.
To change thumbnail display type
Understanding how to change the operation modes
You can simply change the operation modes by touching the LCD screen or using the buttons as
shown in the following fi gures:
+"/
+"/
+"/
+"/
WT
WT
50
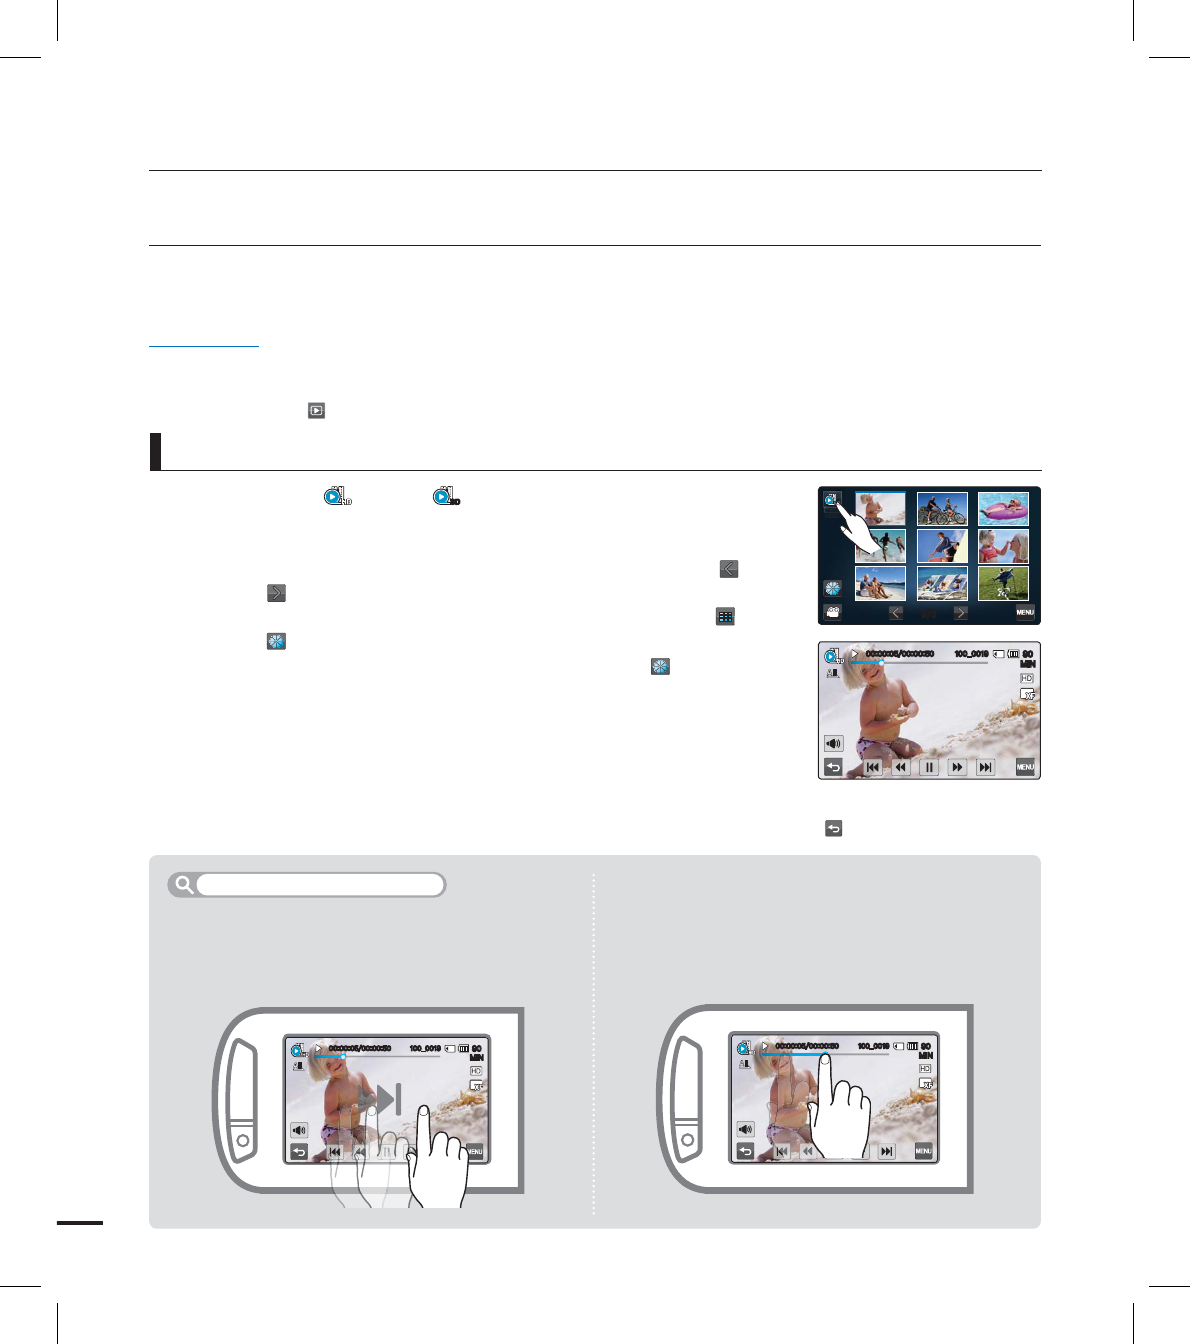
PLAYING BACK VIDEOS
You can preview recorded videos in a thumbnail index view. Find your desired video quickly,
and playback directly.
PRECHECK!
Insert a memory card. page ??
Set the appropriate storage media. (HMX-S15/S16 only) page ??
Touch the Play ( ) tab on the LCD screen to select the play mode. page ??
1. Touch the HD ( ) or SD (
SD
) tab.
Video thumbnails corresponding to the selected video
resolution appear on the screen.
To change the current thumbnail page, touch the left ( ) or
light ( ) tab.
To change the thumbnail display type, touch the 3x3 ( ) tab,
date ( ) tab on the LCD screen or use the Zoom (W/T) lever.
If you select the thumbnail display by the date (), you can
sort videos by specifi c dates. page ??
2. Touch the desired video clip.
The selected video is played and playback control tabs appear
briefl y. They reappear when touching anywhere on the screen.
You can set playback settings using the “Play Option” menu. page ??
To stop playback and return to the thumbnails, touch the Return ( ) tab.
•
•
•
•
•
•
•
•
•
•
To play back videos
Drag to left or right on the LCD screen like turning
pages.
You can select previous or next fi le.•
Touch the point or drag the pointer to left or right
in the playback progress bar on the LCD screen.
You can move directly to the position you
want.
•
Using the Touch Screen
basic playback
.*/
@
.*/
@
.*/
@
51
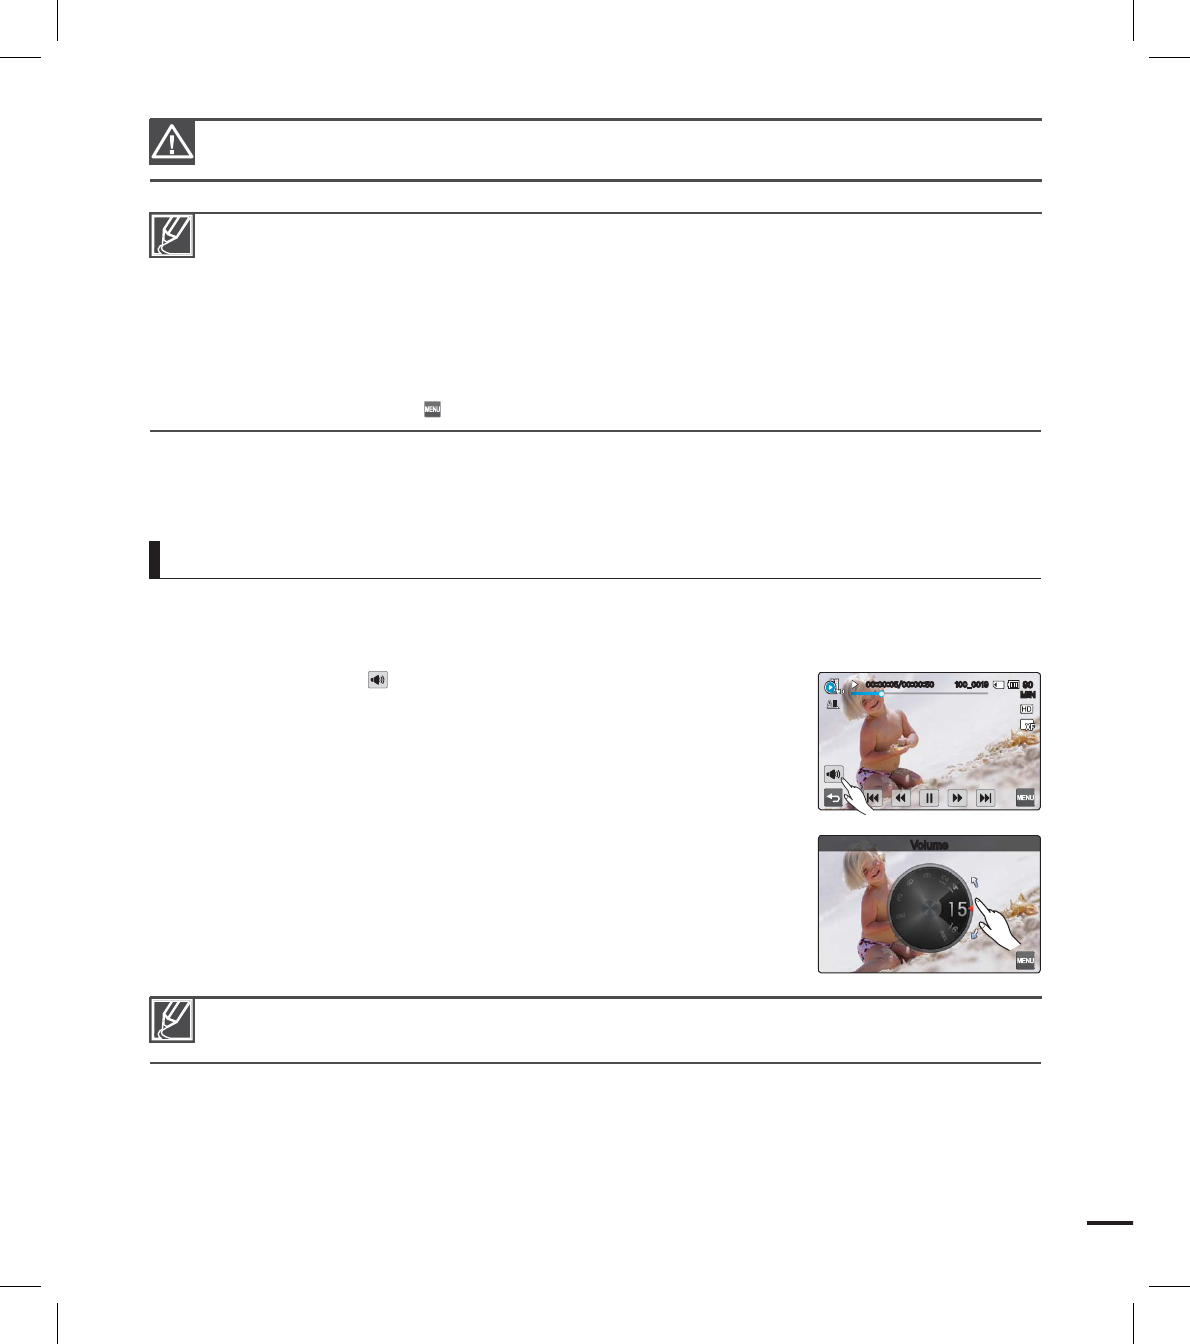
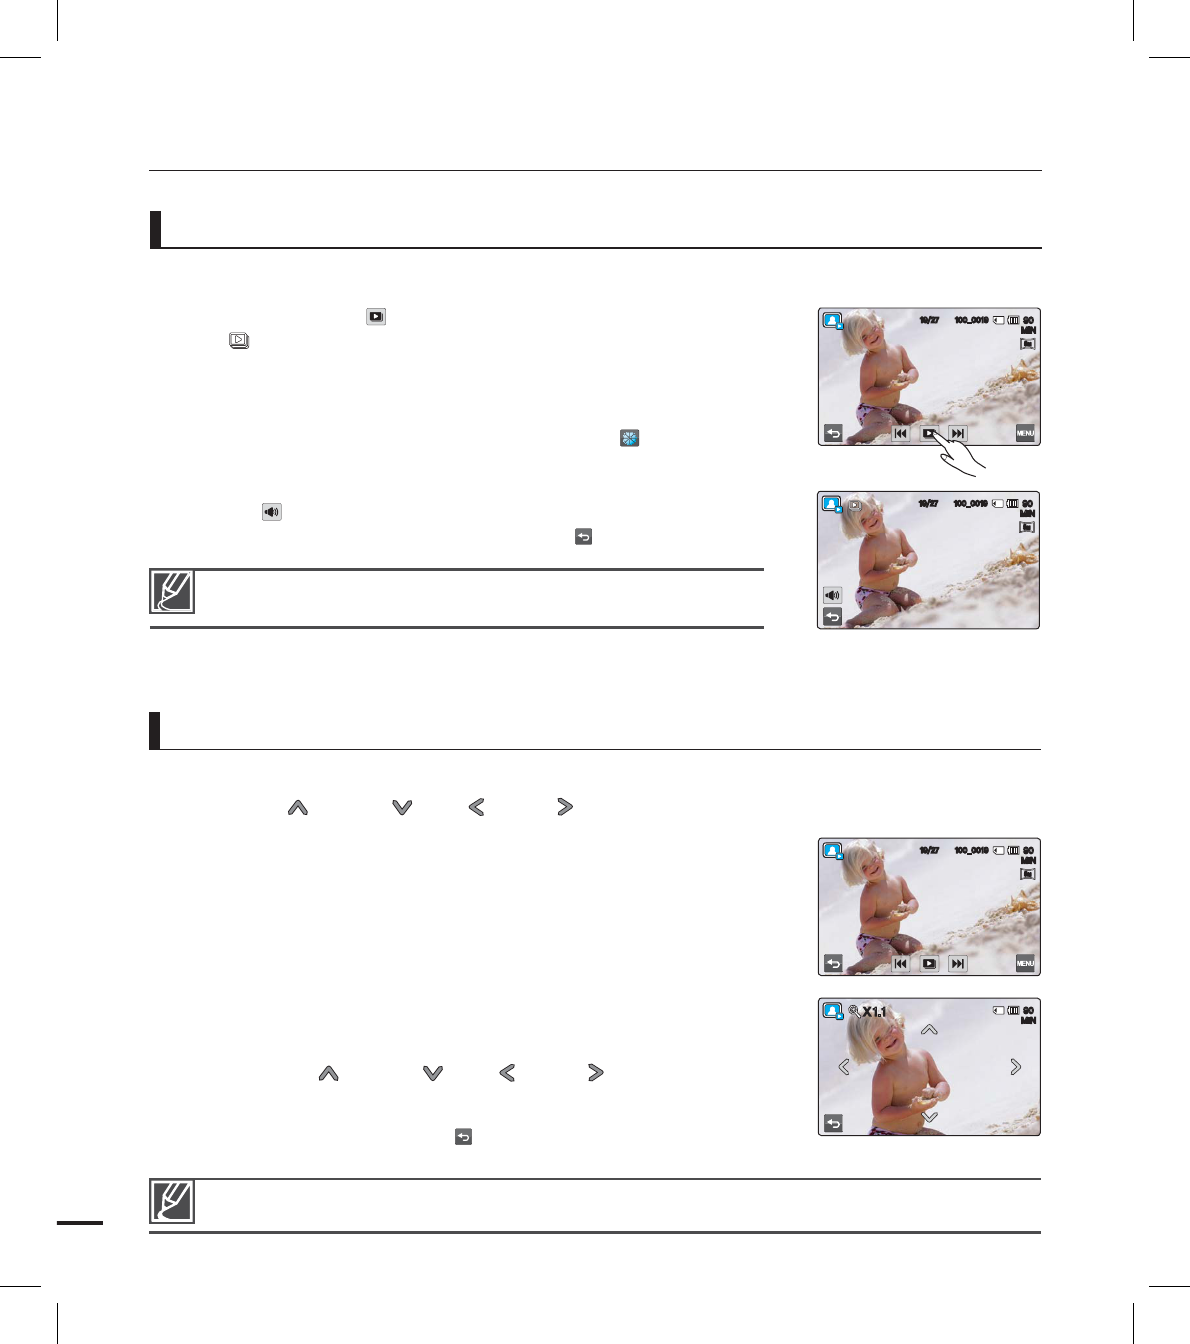
To adjust the volume during video playback
You can hear the sound through the built-in speaker of the camcorder while the video is playing
back on the LCD screen.
1. Touch the Volume ( ) tab on the LCD screen.
2. Adjust the volume by dragging the volume control dial toward the
desired direction on the LCD screen.
Do not power off or eject the memory card during photo playback. Doing so may damage the
recorded data.
It may take some time to start playback, depending on the size and quality of the selected video.
The camcorder may not play the following video fi les:
- A video edited by using the different software that was not built-in your camcorder, or whose fi le
name is changed on a PC
- A video recorded on other devices
- A video whose fi le format is not supported on the camcorder
You can use various play options during the video playback. page ??
The recorded videos can be played on a TV or PC. pages ??, ??
If you touch the Menu ( ) tab during playback, play is paused and the menu screen appears.
•
•
•
•
•
The sound level is adjusted between “0~19.” When the level is at “0,” you cannot hear sound.
.*/
@
7PMVNF
52
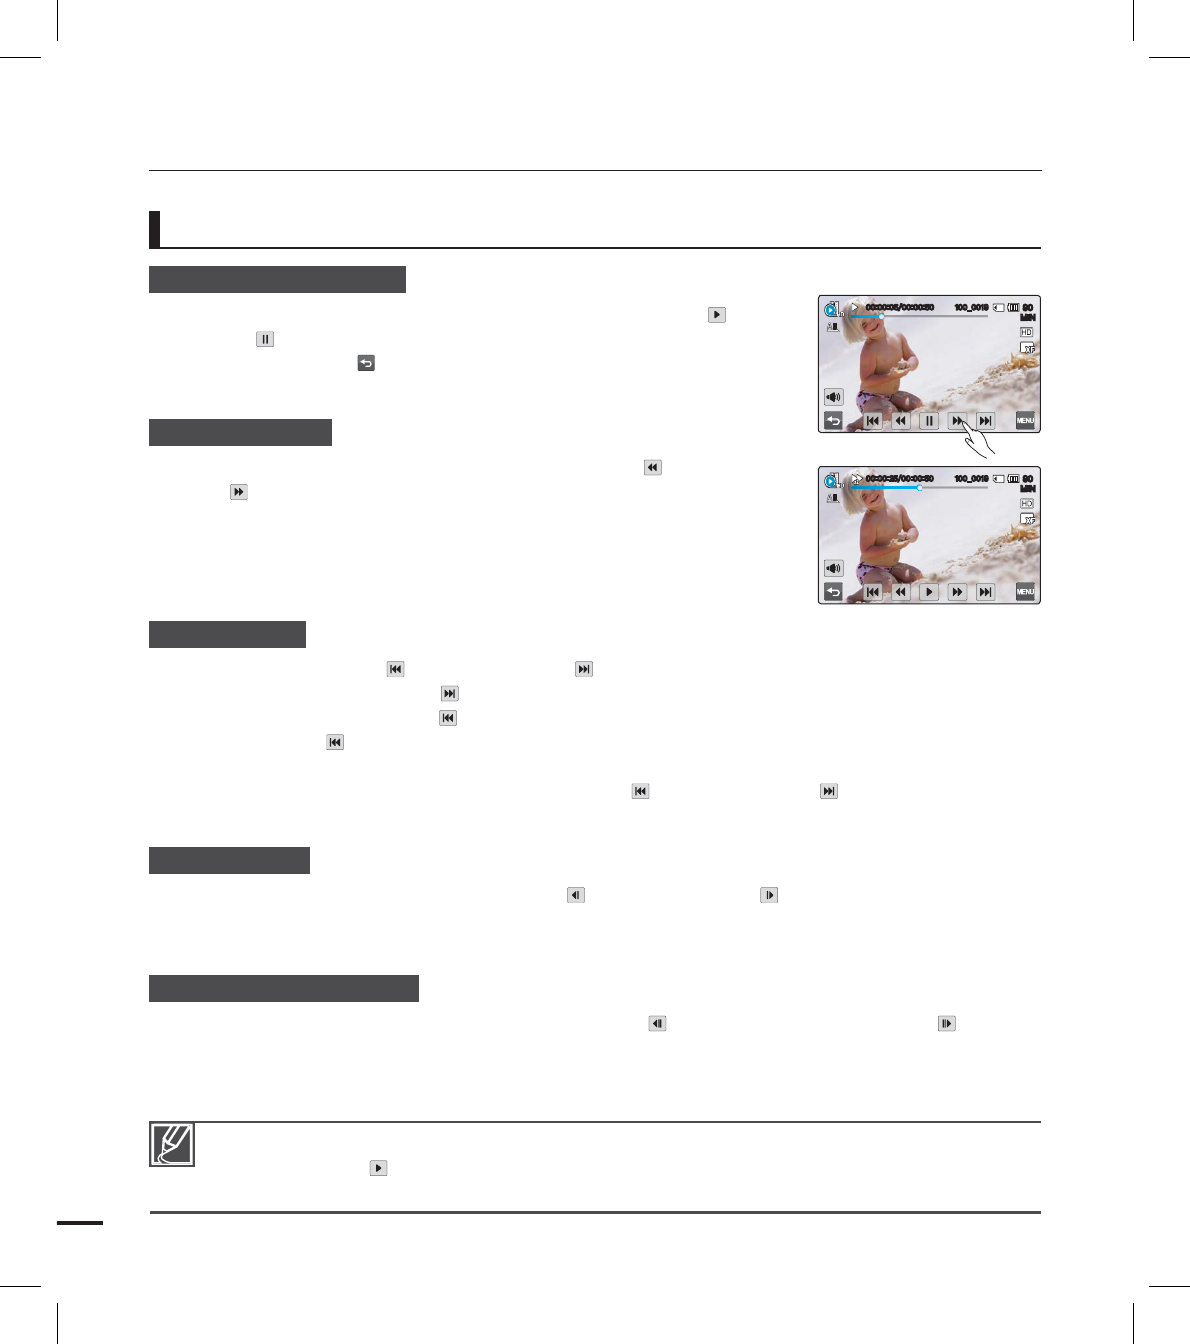
Playback / Pause / Stop
Playback and pause alternates when touching the Play ( ) /
Pause ( ) tab during playback.
Touch the Return ( ) tab to stop playback and return to the
thumbnail.
Search playback
During playback, each touch of the Reverse search ( ) / Forward
search ( ) tab increases the play speed:
RPS (Reverse Playback Search) rate:
x2 x4 x8 x16 x32 x2
FPS (Forward Playback Search) rate:
x2 x4 x8 x16 x32 x2
Skip playback
Touch the Reverse skip ( ) / Forward skip ( ) tab during playback.
Touching the Forward skip( ) tab plays the next video.
Touching the Reverse skip( ) plays the beginning of the scene.
If reverse skip ( ) is touched within 3 seconds from the start of the fi le, the previous video
is played.
Place and hold your fi nger on the Reverse skip ( ) / Forward skip ( ) tab to search the
desired video number quickly. When you lift off your fi nger, the selected video is played.
Slow playback
During a pause, touching the Reverse slow ( ) / Forward slow ( ) tab reduces the playback
speed:
Reverse/forward playback slow rate: x1/2 x1/4 x1/8 x1/2
Frame by frame playback
During pause, touch the Reverse frame advance ( ) / Forward frame advance ( ) tab
makes play go reverse or forward one frame at a time.
•
•
•
•
•
•
•
•
•
Various playback operations
Various playback operations are available with same buttons on the remote control.
Touch the Play ( ) tab to play back in normal speed.
You can hear the sound only when the playback is in normal speed.
•
•
•
basic playback
.*/
@
.*/
@
53
VIEWING PHOTOS
You can view recorded photos by using various playback functions.
PRECHECK!
Insert a memory card. page ??
Set the appropriate storage media. (HMX-S15/S16 only) page ??
Touch the Play ( ) tab on the LCD screen to select the play mode. page ??
1. Touch the Photo ( ) tab.
The thumbnail view appears.
To change the current thumbnail page, touch the left ( ) or light ( ) tab.
To change the thumbnail display type, touch the 3x3 ( ) tab,
date ( ) tab on the LCD screen or use the Zoom (W/T) lever.
If you select the thumbnail display by the date (), you can sort
photos by specifi c dates. page ??
2. Touch your desired photo to play back.
The selected photo is displayed in full screen and playback control tabs
appear briefl y. They reappear when touching anywhere on the screen.
Touch previous image ( )/ next image ( ) tab to view the previous
and next photo.
Place and hold your fi nger on the previous image ( )/next image
( ) tab to search the desired photo number quickly. When you lift off
your fi nger, the selected photo is displayed.
3. To return to the thumbnails, touch the Return ( ) tab.
•
•
•
•
•
•
•
•
•
•
Do not power off or eject the memory card during photo playback. Doing so may damage the recorded data.
Your camcorder may not playback the following photo fi les normally:
- A photo with its fi le name changed on a PC.
- A photo recorded on other devices.
- A photo with a fi le format not supported on this camcorder (does not conform to DCF standards).
Loading time may vary depending on the size and quality of the selected photo.
•
•
Drag to left or right on the LCD screen like turning pages.
You can select previous or next fi le.•
Using the Touch Screen
.*/
@
5
M
5
M
.*/
@
5
M
5
M
54
You can view a photo slide show with background music.
Touch the Slide Show ( ) tab during photo playback.
The ( ) indicator is displayed. The slide show starts from the
current selected photo.
All photos are played back continuously in the set slide show
option (“Music, Interval, Effect.”) page ??
If you select the thumbnail display by the date ( ), photos only
taken on the corresponding date play back in a slide show.
You can adjust the background music’s volume level using the
Volume ( ) tab while playing back the slide show with music.
To stop the slide show, touch the Return ( ) tab.
•
•
•
•
•
VIEWING A SLIDE SHOW
A slide show is available also in the menu. page ??
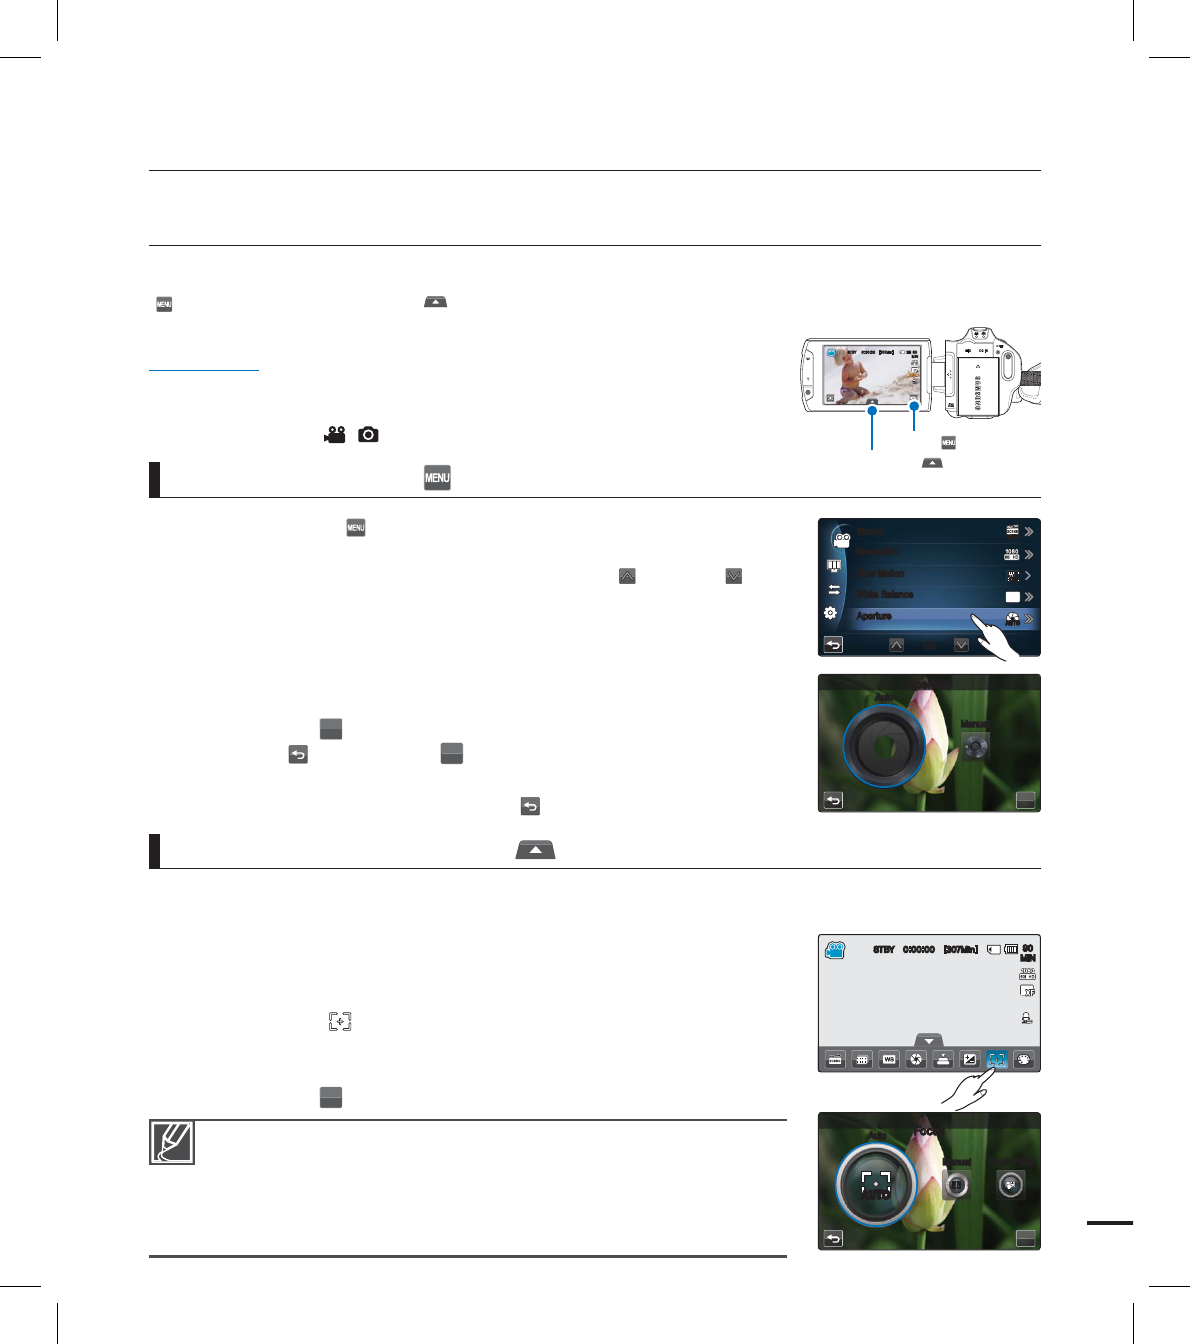
You can magnify a playback image.
Touch the up ( )/down ( )/left ( )/right ( ) to select the desired area to magnify.
1. Touch the desired photo.
The selected photo is displayed on the full screen.
2. Adjust the magnifi cation with the Zoom (W/T) button or
Zoom (W/T) lever.
Magnifi cation starts from the center of the photo.
You can zoom in from x1.1 to x8.0.
While the playback zoom is in use, other images cannot be
selected.
3. Touch the up ( )/down ( )/left ( )/right ( ) tab to view the
area you want on the magnifi ed photo.
4. To cancel, touch the Return ( ) tab.
•
•
•
•
Photos recorded on other devices or those edited on a PC cannot be magnifi ed.
ZOOMING DURING PHOTO PLAYBACK
basic playback
.*/
@
5
M
5
M
.*/
@
5
M
5
M
.*/
9
.*/
@
5
M
5
M
using the menu items
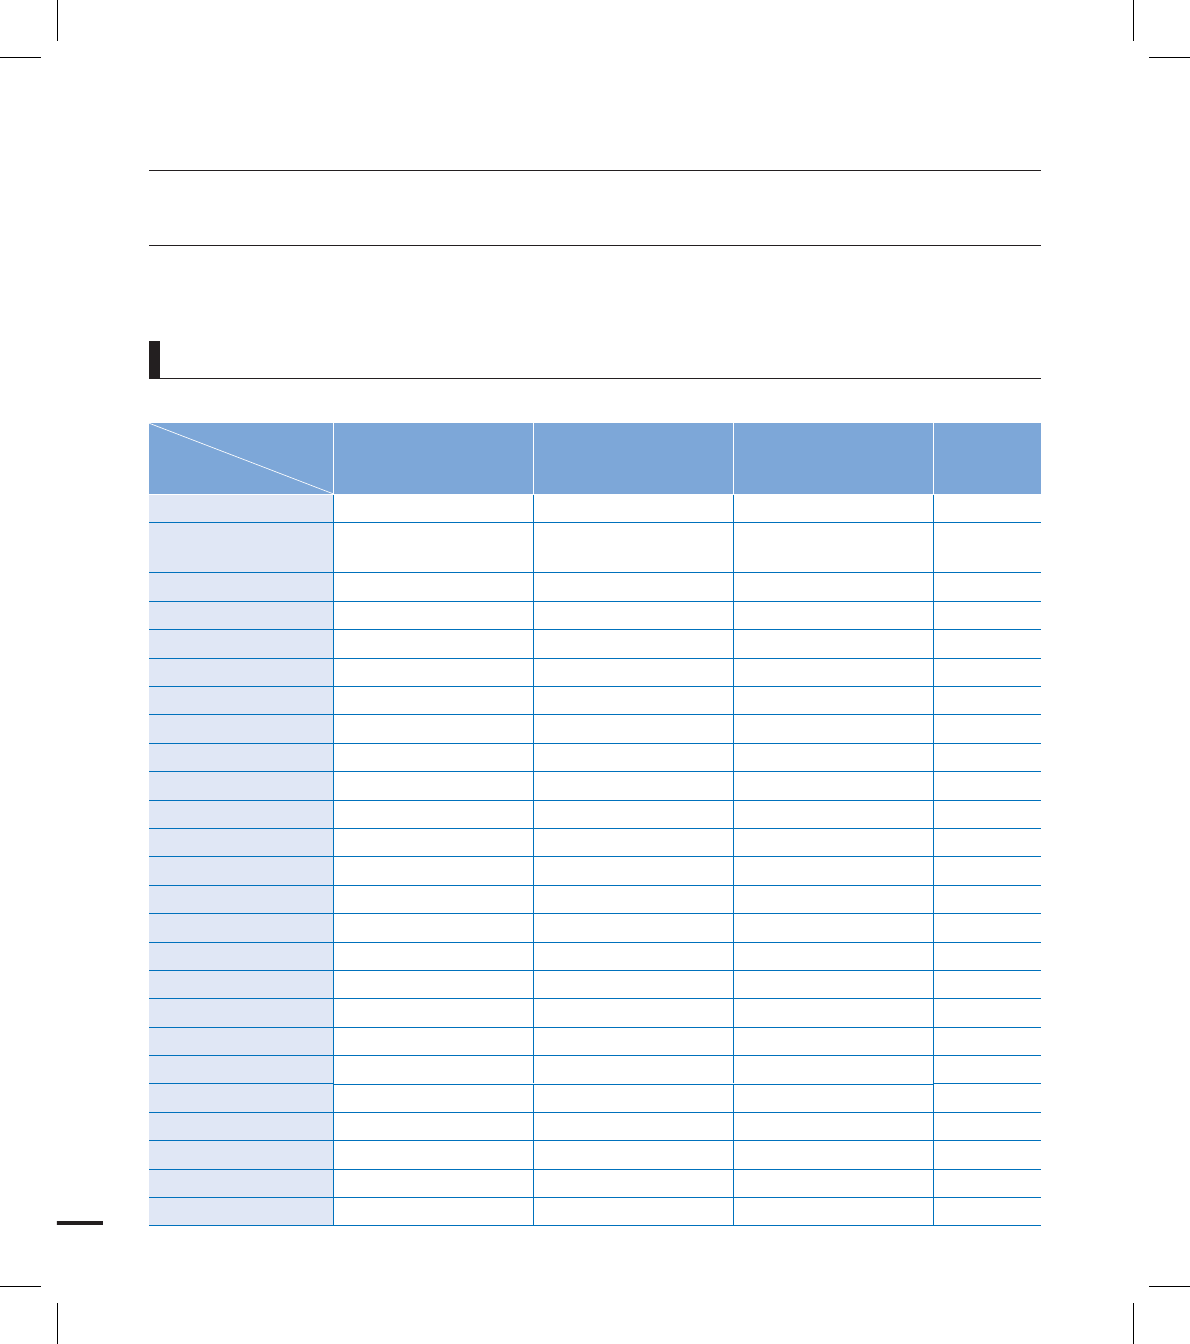
HANDLING MENUS AND QUICK MENUS
The instructions below are examples of how to access and use menu items using the Menu
() tab and the Quick menu ( ) tab. When you access and use other menu items, use these
examples as guides.
PRECHECK!
Open the LCD screen to turn on the camcorder.
Your camcorder turns on automatically when you open the LCD screen.
Select the record ( /) mode by pressing the MODE button. page ??
•
•
1. Touch the Menu ( ) tab on the touch panel.
The menu screen appears.
To change the current page, touch the up ( )/down ( ) tab.
2. Touch “Aperture.” (The Aperture function is used here as an example.)
3. Touch the desired option.
Set the values according to the selected item.
Drag toward the direction indicated on the LCD screen or touch
the desired setting value.
Touch the (
OK
) tab to complete the setting. If you touch the
Return ( ) tab not the (
OK
) tab, the setting values are not
applied and returns to the previous values.
4. To exit the menu, touch the Return ( ) tab.
•
•
•
•
•
Using the Menu ( ) tab
Quick menu enables you to quickly access your favorite functions. You can easily select the
desired menu with one-touch.
1. Touch the Quick menu tab on the LCD screen to see the available
menu options.
The quick menu screen appears.
2. Touch “Focus ( ).” (The Focus function is used here as an example.)
3. Touch the desired option.
Adjust the setting values accordingly.
Touch the (
OK
) tab to complete the setting.
•
•
•
Using the Quick menu ( ) tab
When using the Menu or Quick menu items, some menu items can not
be used at the same time, or may be grayed out.
For more information, see the Troubleshooting page ??.
For the purpose of easy understanding, all the menu setting examples from
this page are explained based on the simplest methods. The menu setting
methods can be different depending on the user's chosen menu options.
•
•
•55
Quick menu ( ) tab
Menu ( ) tab
45#: <.JO>
.*/
OK
"QFSUVSF
"VUP
.BOVBM
3FTPMVUJPO
4MPX.PUJPO
8IJUF#BMBODF
"QFSUVSF
"8#
J4DFOF
AUTOAUTO
AUTOAUTO
OFFOFF
45#: <.JO>
.*/
OK
'PDVT
"VUP
.BOVBM 5PVDI1PJOU
AUTOAUTO
using the menu items
MENU ITEMS
Accessible items in menu vary depending on the operating mode.
For operation details, see the corresponding page.
•
•
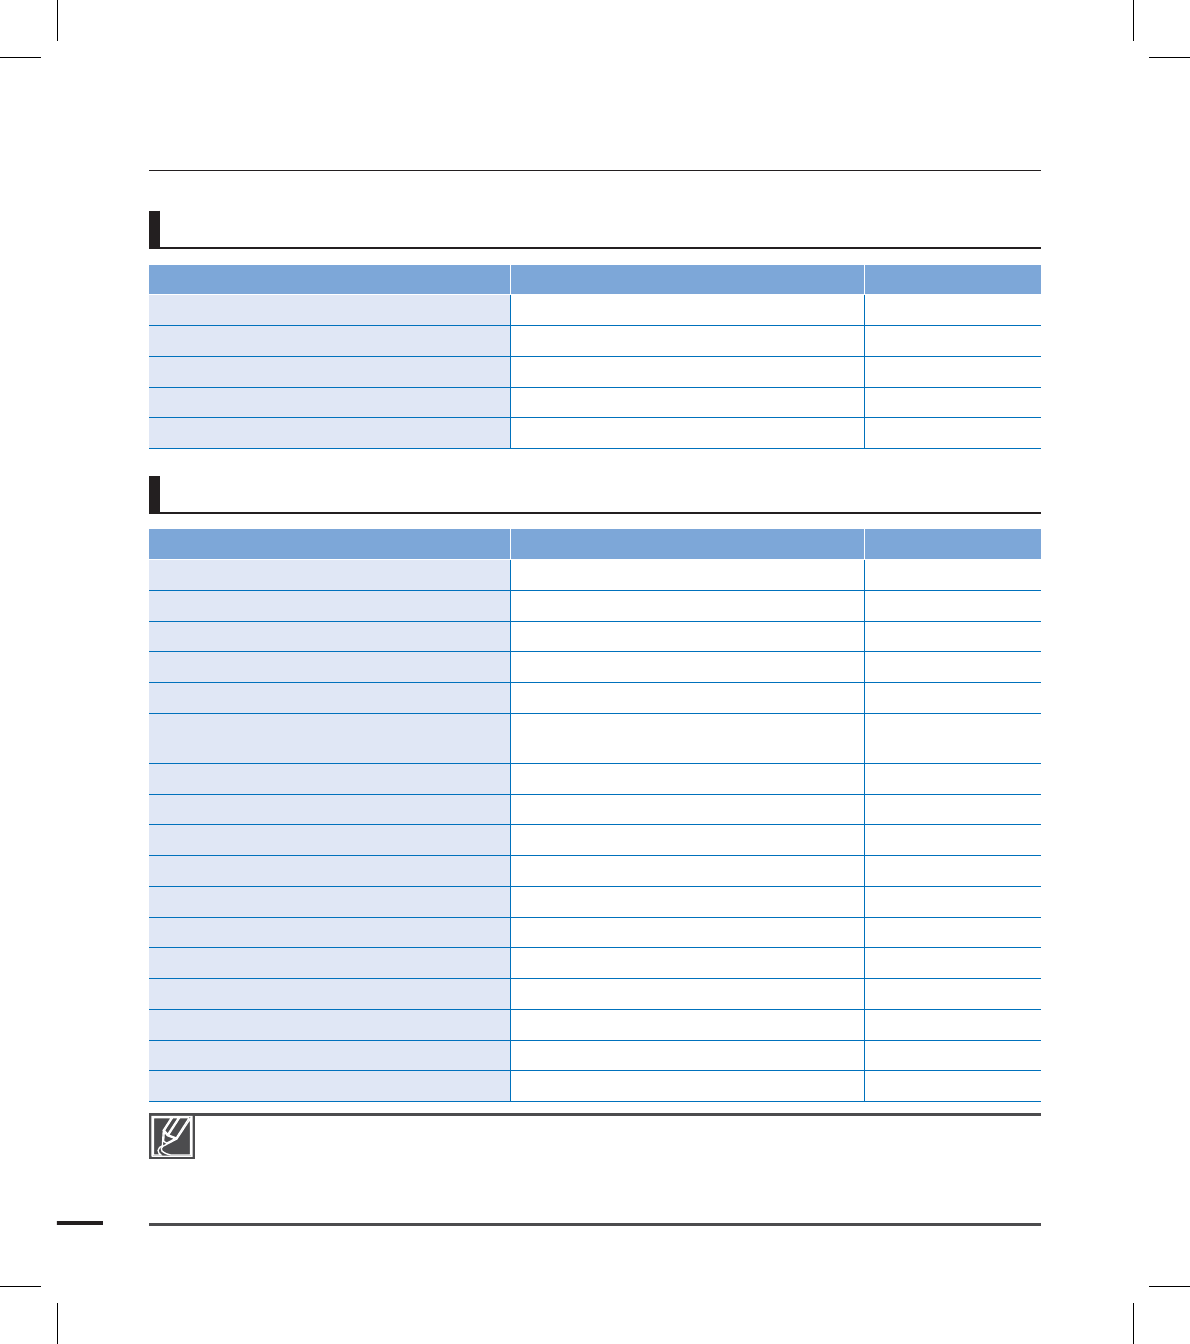
Video/photo record menu items
: available, X : not available
Operation
mode
Items
Video Photo Default value Page
iSCENE
Auto ??
Resolution
1080/60i (XF)
[5M] 2960x1664 (16:9) ??
Slow Motion X Off ??
White Balance
Auto ??
ISO X Auto ??
Aperture
Auto ??
Shutter
Auto ??
EV 0??
Super C.Nite X Normal ??
Focus
Auto ??
Face Detection
Off ??
Magic Touch X Off ??
Metering X Multi ??
xvYCC X Off ??
Digital Effect
Off ??
Fader X Off ??
Tele Macro
Off ??
Wind Cut X Off ??
Zoom MIC X Off ??
Voice Reduction X Off ??
MIC Level X Medium ??
Digital Zoom X Off ??
Cont. Shot X Off ??
Self Timer
Off ??
Time Lapse REC X Off ??
56

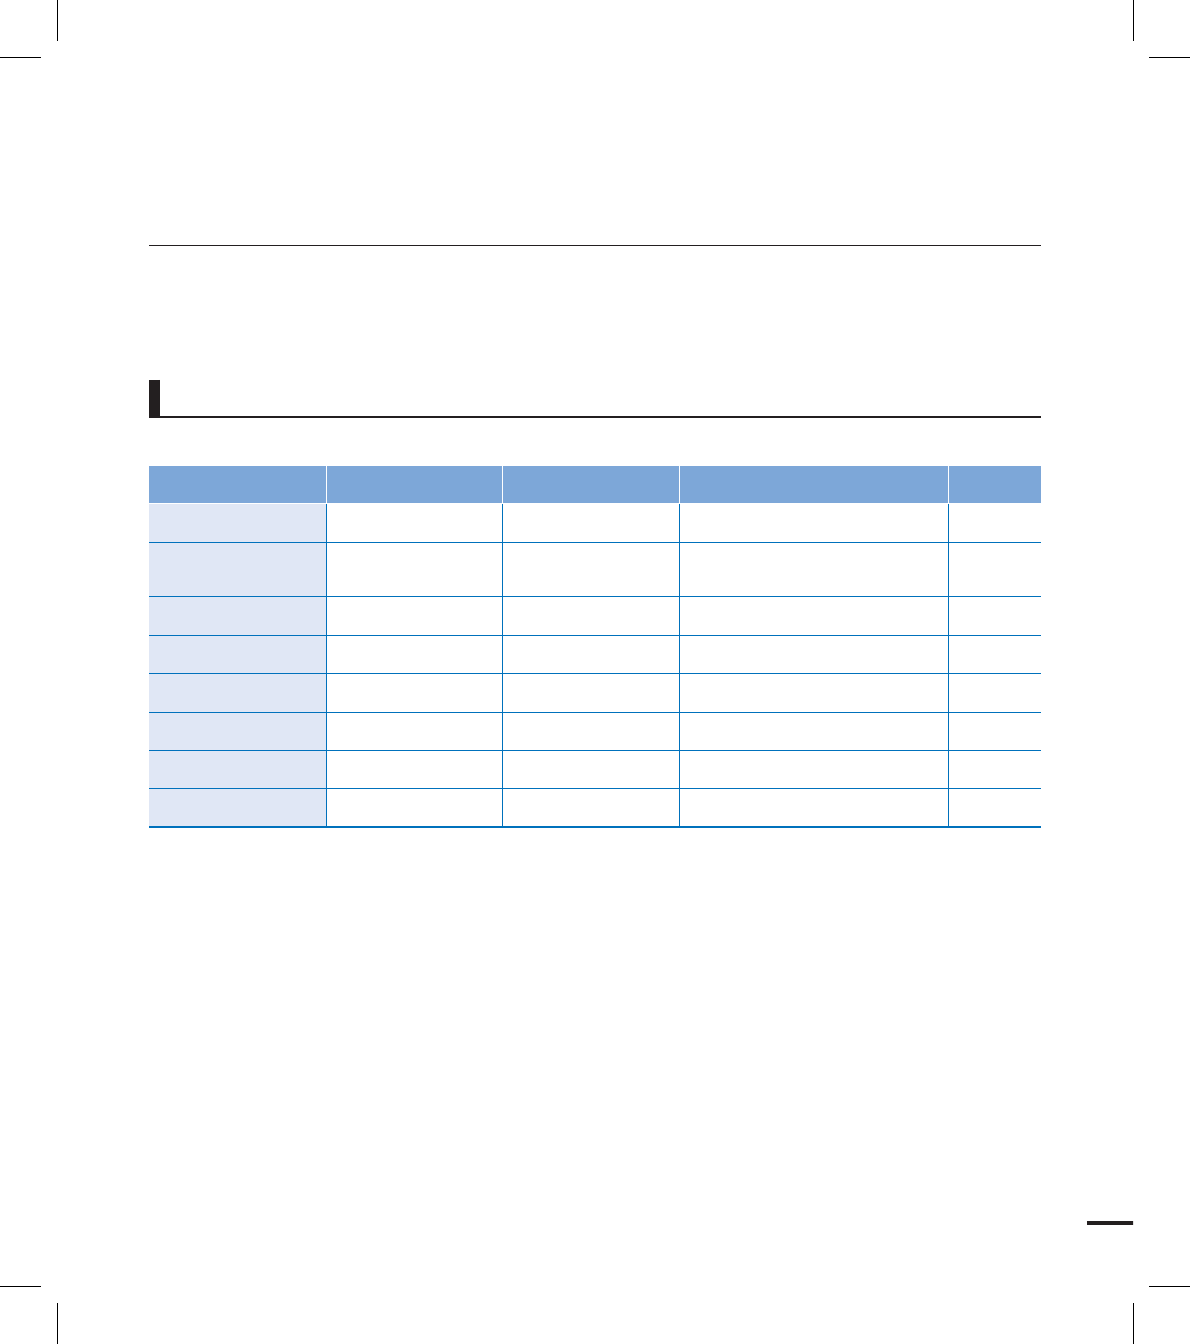
: available, X : not available
Operation
mode
Items
Video Photo
Default value Page
Thumbnail Single Thumbnail Single
Play Option X X Play All ??
Highlight XX -??
Story-Board Print XX -??
Delete -??
Protect
Off (Single) ??
Copy * -??
Edit
Partial Delete XX -
??
Divide XX -??
Combine XXX -??
Slide Show Start X X -??
Slide Show Option X X
Random ??
File Info ** -??
Video/photo playback menu items
Items marked with * are available only with HMX-S15/S16 models.
Items marked with ** are not displayed when the recording thumbnail display is set to the date ( ).
•
•
Items Default value Page
LCD Brightnes 5 ??
LCD Enhancer Off ??
Guideline Off ??
Date/Time Display Off ??
TV Type 16:9 ??
TV Display On ??
HDMI TV Out Auto ??
Auto LCD Off On ??
Display setting menu items
57
using the menu items
Connectivity setting menu items
Other setting menu items
Menu options and default values may be changed without prior notice.
Some grey colored menu options cannot be selected. page ??
Items marked with * are available only with HMX-S15/S16 models.
The date and time format may change depending on the selected language.
•
•
•
•
Items Default value Page
Remote On ??
PC Software On ??
USB Connect Mass Storage ??
TV Connect Guide - ??
Anynet+ (HDMI-CEC) On ??
Items Default value Page
Storage Type * Internal Memory ??
Storage Info - ??
Format - ??
File No. Series ??
Time Zone Home ??
Date/Time Set JAN/01/2010 12:00AM
(Summer Time: Off) ??
Date Type JAN/01/2010 ??
Time Type 12 Hr ??
Beep Sound On ??
Shutter Sound On ??
Auto Power Off 5Min ??
Quick On STBY 5Min ??
Custom Dial Focus ??
REC Lamp On ??
Default Set - ??
Language English ??
Demo On ??
58
: available, X : not available
Items Video Photo Default value Page
iSCENE Auto ??
Resolution
[HD]1080/60i (XF)
[5M] 2960x1664 (16:9) ??
White Balance Auto ??
Aperture Auto ??
Shutter Auto ??
EV 0??
Focus Auto ??
Digital Effect Off ??
Video/photo recording menu items
QUICK MENU ITEMS
Quick menu is available only in the video and photo record mode.
Available menu items may depend on the selected operation mode.
For operation details, see the corresponding page.
•
•
•
59
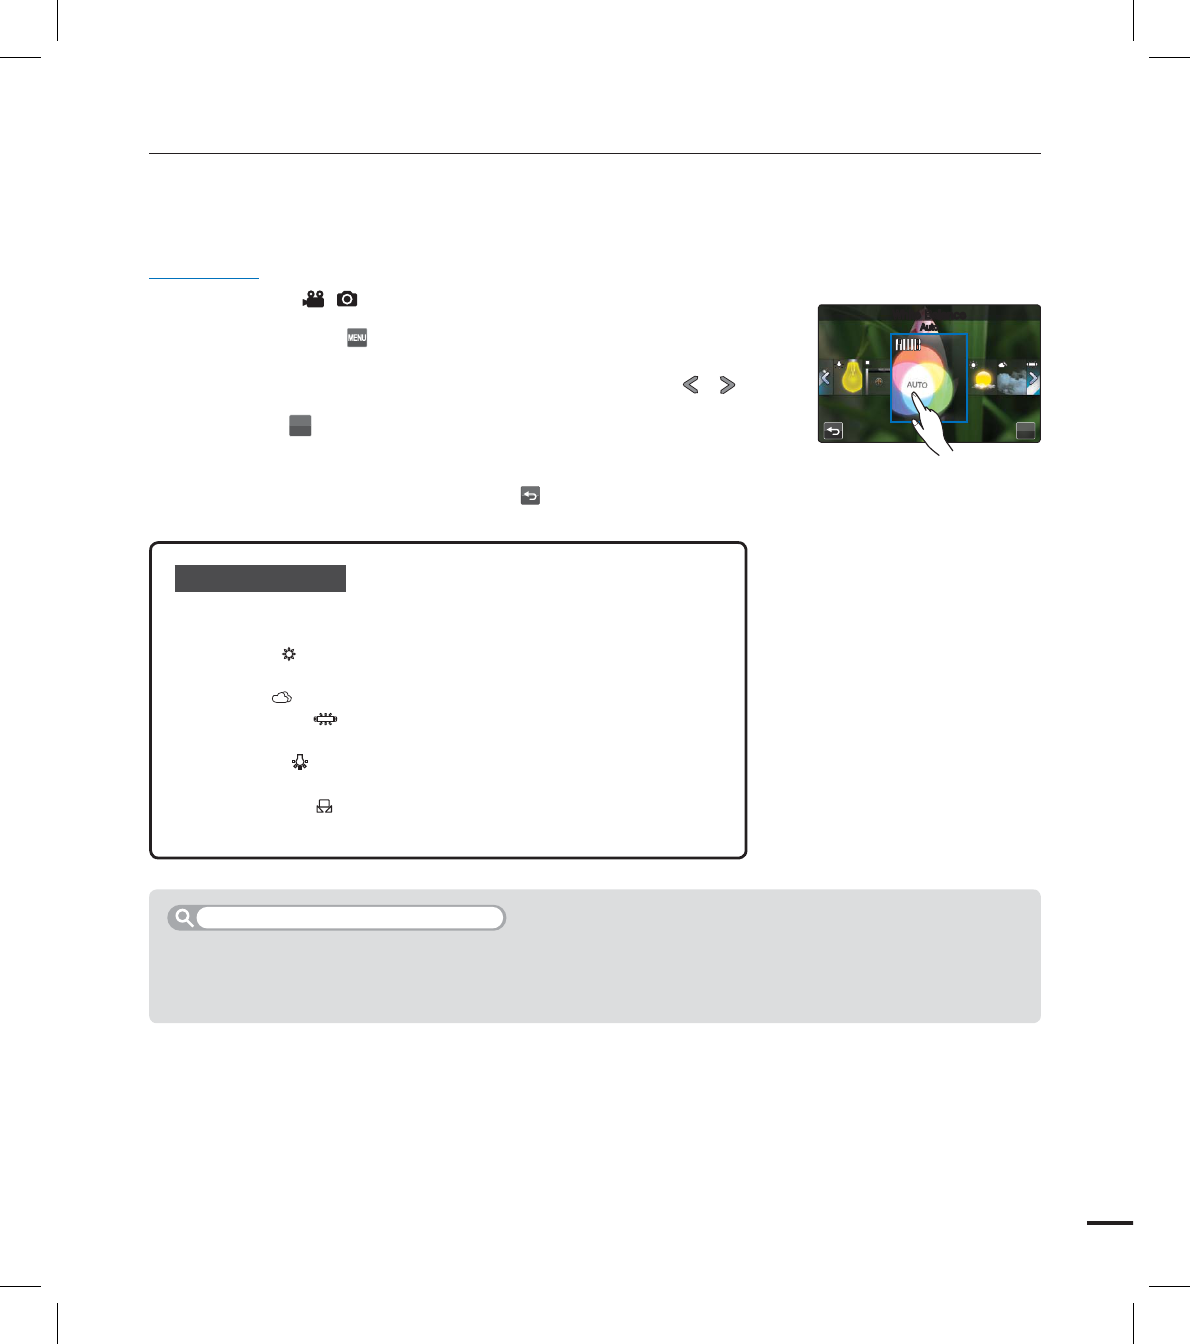
Submenu items
• Auto: Under normal conditions, recording naturally.
• Night ( ): Recording in a dark place or at night.
• Sports ( ): Recording people or objects in motion.
• Portrait ( ): Recording skin color naturally.
• Spotlight ( ): When strong light strikes the object.
• Beach/Show ( ): Where reflection of light is intense such as a
snowfield or beach.
• Food ( ): To make food more colorful.
• Candle Light ( ): Recording in the soft glow of candlelight.
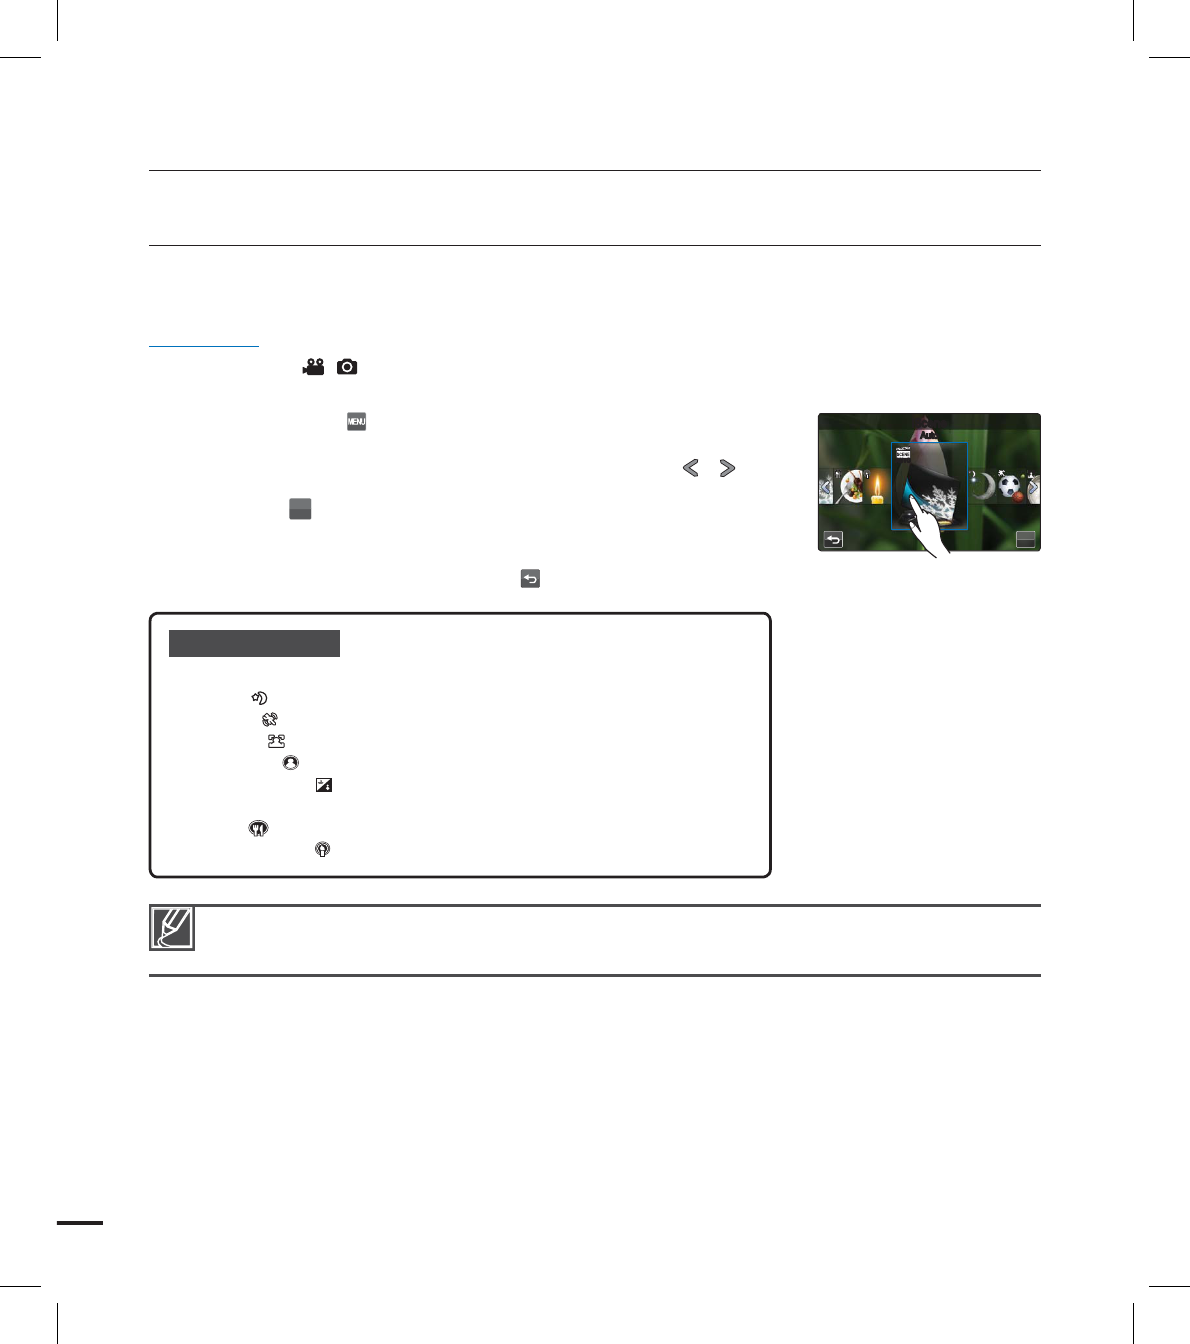
iSCENE
This camcorder automatically sets the shutter speed and aperture according to the subject and
brightness for optimal recording.
PRECHECK!
Select the record ( / ) mode by pressing the MODE button. page ??
1. Touch the Menu ( ) tab “iSCENE” touch the desired
submenu item.
You can move to the desired item by touching the / tab.
2. Touch the (
OK
) tab or selected submenu item again to complete
the setting.
3. To exit the menu, touch the Return ( ) tab.
•
When you specify “Aperture:Manual” or “Shutter:Manual,” the iSCENE mode is cancelled.
(Manual Aperture/Manual Shutter priority)
advanced recording
60
OK
J4DFOF
"VUP
AUTOAUTO
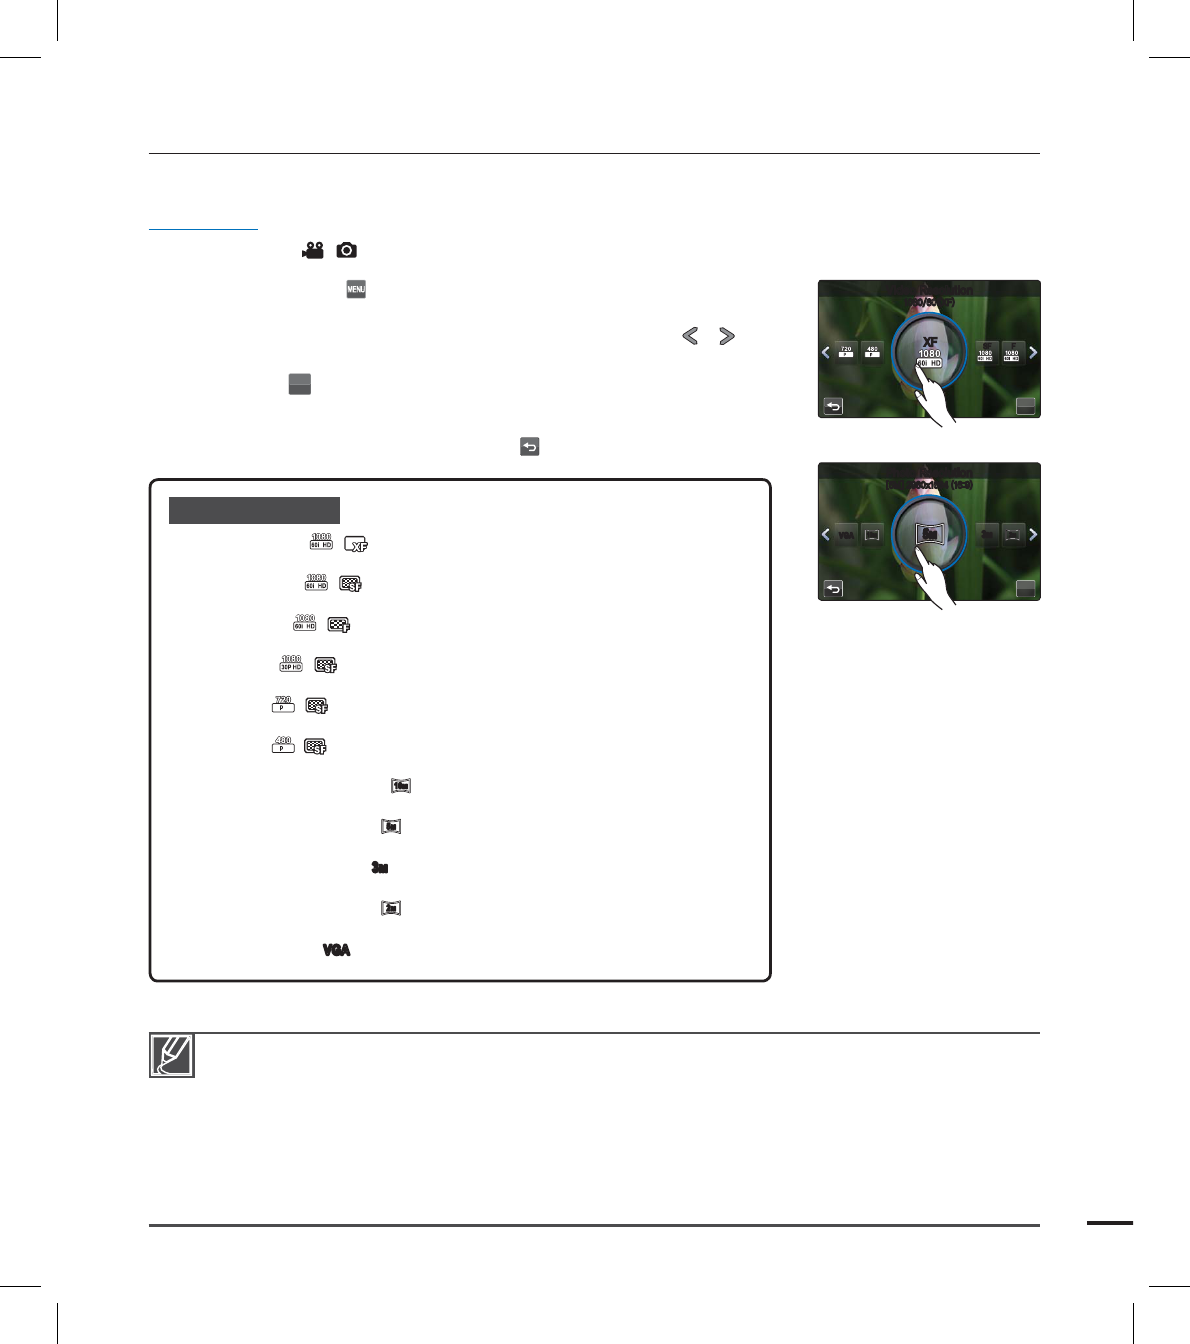
Resolution
You can select the resolution of video to be recorded on storage media.
PRECHECK!
Select the record ( / ) mode by pressing the MODE button. page ??
1. Touch the Menu ( ) tab “Resolution” touch the desired
submenu item.
You can move to the desired item by touching the / tab.
2. Touch the (
OK
) tab or selected submenu item again to complete
the setting.
3. To exit the menu, touch the Return ( ) tab.
•
Submenu items
1080/60i (XF) ( / ): Records in the HD (1920x1080/60i) format and
at the extreme fi ne image quality.
1080/60i(SF) ( / ): Records in the HD (1920x1080/60i) format and at
the super fi ne image quality.
1080/60i(F) ( / ): Records in the HD (1920x1080/60i) format and at
the fi ne image quality.
1080/30p ( / ): Records in the HD (1920x1080/30p) format and at
the super fi ne image quality.
720/60p (
60 HD
/ ): Records in the HD (1280x820/60p) format and at the
super fi ne image quality.
480/60p (
60 HD
/ ): Records in the SD (720x480/60p) format and at the
super fi ne image quality.
[10M] 4224x2376 (16:9) (
10
M
10
M
): Records in 16:9 aspect ratio and the
4224x2376 resolution.
[5M] 2960x1664 (16:9) (
5
M
5
M
): Records in 16:9 aspect ratio and the
2960x1664 resolution.
[3M] 2224x1664 (4:3) (
3
M
3
M
): Records in 4:3 aspect ratio and the
2224x1664 resolution.
[2M] 1920x1080 (16:9) (
2
M
2
M
): Records in 16:9 aspect ratio and the
1920x1080 resolution.
[VGA] 640x480 (
VGAVGA
): Records in the VGA 640x480 format.
•
•
•
•
•
•
•
•
•
•
•
“60i” indicates the camcorder will record in interlaced scan mode at 60 fi elds per second.
“30/60p” indicates the camcorder will record in progressive scan mode at 30/60 frames per second.
Recorded fi les are encoded with Variable Bit Rate (VBR). VBR is an encoding system that
automatically adjusts the bit rate according to the recording image.
The recordable time for video and the recordable number of photos depend on the selected
resolution. page ??
Photos that are recorded on your camcorder may not playback properly on other digital devices
that do not support these resolution.
•
•
•
•
•61
OK
7JEFP3FTPMVUJPO
J9'
9'
60 HD 60 HD
4' '
<Setting video resolution>
OK
1IPUP3FTPMVUJPO
<.>Y
5
M
5
M
VGAVGA
3
M
3
M
10
M
10
M
2
M
2
M
<Setting photo resolution>
advanced recording
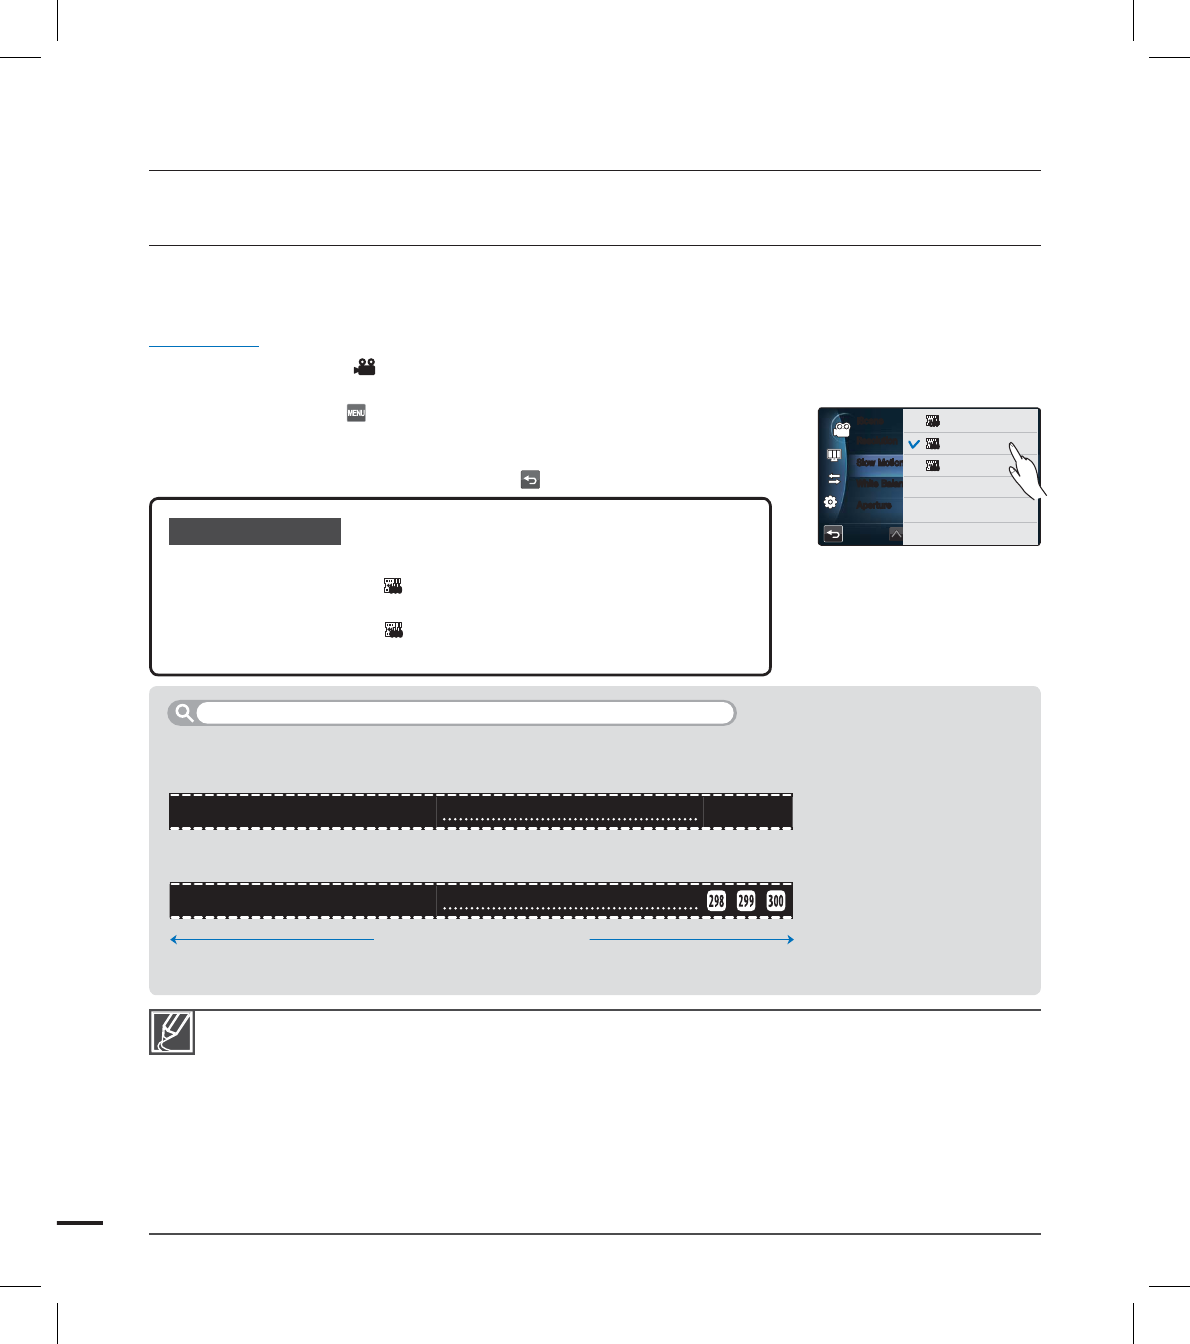
Slow Motion
You can record a video in slow motion. It is useful to record a fast moving subject such as a
bird fl ying in the sky or golf swing and so on to analyze the detailed movement.
PRECHECK!
Select the Video record ( ) mode by pressing the MODE button. page ??
1. Touch the Menu ( ) tab “Slow Motion” touch the desired
submenu item.
2. To exit the menu, touch the Return ( ) tab.
You can record a video in slow motion for maximum one minute. When recording in slow motion,
the recording stops after 1 minute but when you playback the same recording it play back for the
following time.
- 300 Frame/Sec: 5 minutes
- 600 Frame/Sec: 10 minutes
Recording does not stop for 10 seconds even if the Recording start/stop button is pressed to stop.
Sound cannot be recorded while recording in slow motion.
Photos cannot be taken when Slow Motion is in use.
Menu or Quick Menu are not available while recording in slow motion.
The image quality of slow motion video may be lower than the normal speed video’s.
•
•
•
•
•
•
Submenu items
Off: Disables the function.
[SD] 300Frames/Sec (
300300
): Records 300 frames per seconds in the
368x208 resolution.
[SD] 600Frames/Sec (
600600
): Records 600 frames per seconds in the
192x112 resolution.
•
•
•
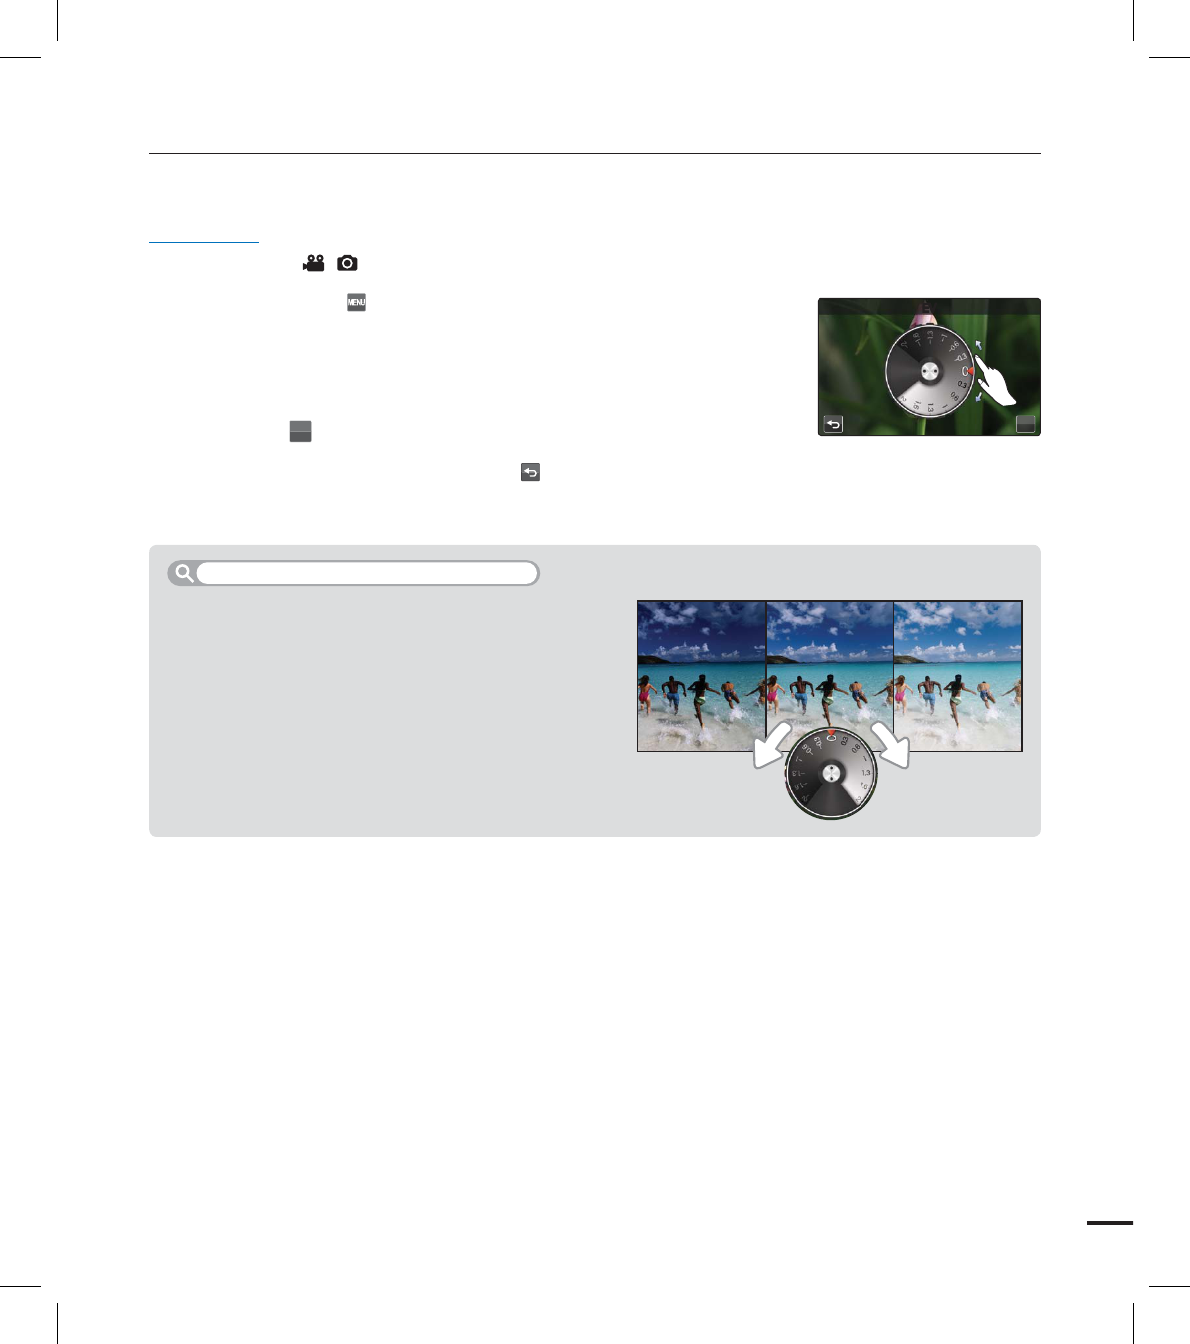
The number of frames needed to record video is as follows.
When Slow Motion is not set to On: 60 frames per second are recorded.
When Slow Motion is not set to [SD] 300Frame/Sec: 300 frames per second are recorded.
You can record video of maximum 600 frames per second compared to the normal speed video.
Comparison of normal speed video and slow motion video
Video recording time (Per second)
62
3FTPMVUJPO
4MPX.PUJPO
8IJUF#BMBODF
"QFSUVSF
J4DFOF
AUTOAUTO
AUTOAUTO
OFFOFF
OFFOFF
0GG
300300
<4%>'SBNF4FD
600600
<4%>'SBNF4FD
White Balance
The color of your image depends on the type and quality of the light source. If you want the
color of your image to be realistic, select an appropriate lighting condition to calibrate the white
balance.
PRECHECK!
Select the record ( / ) mode by pressing the MODE button. page ??
1. Touch the Menu ( ) tab “White Balance” touch the desired
submenu item.
You can move to the desired item by touching the / tab.
2. Touch the (
OK
) tab or selected submenu item again to complete
the setting.
3. To exit the menu, touch the Return ( ) tab.
•
Submenu items
Auto: Controls the white balance automatically depending on
the recording conditions.
Daylight ( ): Controls the white balance according to the
outdoor lighting.
Cloudy ( ): When recording in the shade or cloudy weather.
Fluorescent ( ): When recording under white fl uorescent
lights.
Tungsten ( ): When recording under halogen lamps and
incandescent lights.
Custom WB ( ):
You can manually adjust the white balance
to match the light source or situation.
•
•
•
•
•
•
White balance (WB) is the process of removing unrealistic color casts, so that objects which appear white
are rendered white in your image. Proper white balance has to take into account the “color temperature”
of a light source, which refers to the relative warmth or coolness of white light.
Understanding White Balance
63
OK
8IJUF#BMBODF
"VUP
advanced recording
1. Touch the Menu ( ) tab “White Balance” “Custom WB.”
The “( ) Set White Balance” indicator is displayed.
2. Fill the screen with a white object, and touch the (
OK
) tab.
The white balance setting is stored.
3. To exit the menu, touch the Return ( ) tab.
The stored white balance setting will be applied the next time
you record.
•
•
•
To set the white balance manually
When setting the white balance manually, the subject must be white, otherwise, your camcorder
may not detect an appropriate setting value.
The adjusted setting remains until you set the white balance again.
During normal outdoor recording, setting to “Auto” may provide better results.
Cancel the digital zoom function for clear and precise setting. page ??
Reset the white balance if light conditions change.
•
•
•
•
•
Submenu items
Auto: Sets Aperture to Auto.
50(
50
ISOISO
): Records in a bright place as a low sensitivity.
100(
100
ISOISO
): Records in a normal situation as a normal sensitivity.
200(
200
ISOISO
): Increases the shutter speed and minimizes noises of the
images to record in a dark place.
400(
400
ISOISO
)/800(
800
ISOISO
)/1600(
1600
ISOISO
)/2400(
2400
ISOISO
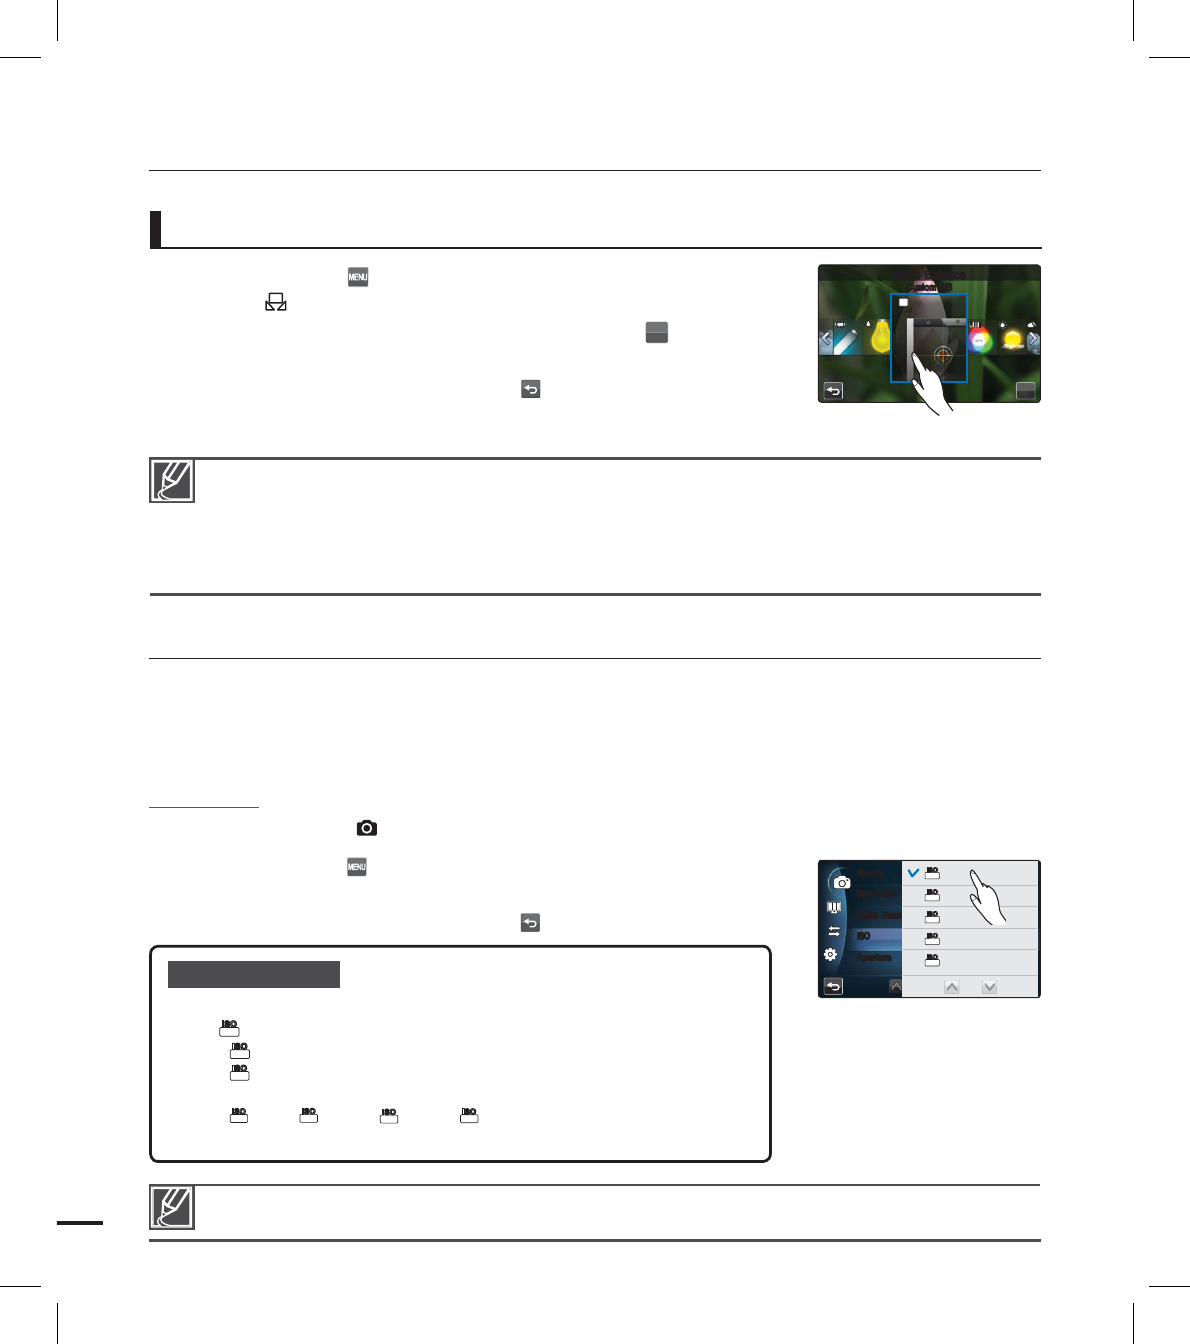
): Records in a dark place as a
high sensitivity. The recorded images may be with noise.
•
•
•
•
•
The high sensitivity of ISO values may give images with noise.
ISO
ISO sensitivity function sets the light sensitivity of the camcorder’s image sensor. A higher ISO
setting allows the camcorder to select a higher shutter speed, thus reducing the image-shaking
when recording without fl ash under dimmer conditions since it increases the light sensitivity of
the image sensor.
PRECHECK!
Select the Photo record ( ) mode by pressing the MODE button. page ??
1. Touch the Menu ( ) tab “ISO” touch the desired submenu
item.
2. To exit the menu, touch the Return ( ) tab.
64
OK
8IJUF#BMBODF
$VTUPN8#
3FTPMVUJPO
8IJUF#BMBODF
*40
"QFSUVSF
J4DFOF
AUTOAUTO
AUTOAUTO
5
M
5
M
AUTO
ISOISO
AUTO
ISOISO
"VUP
50
ISOISO
100
ISOISO
200
ISOISO
400
ISOISO
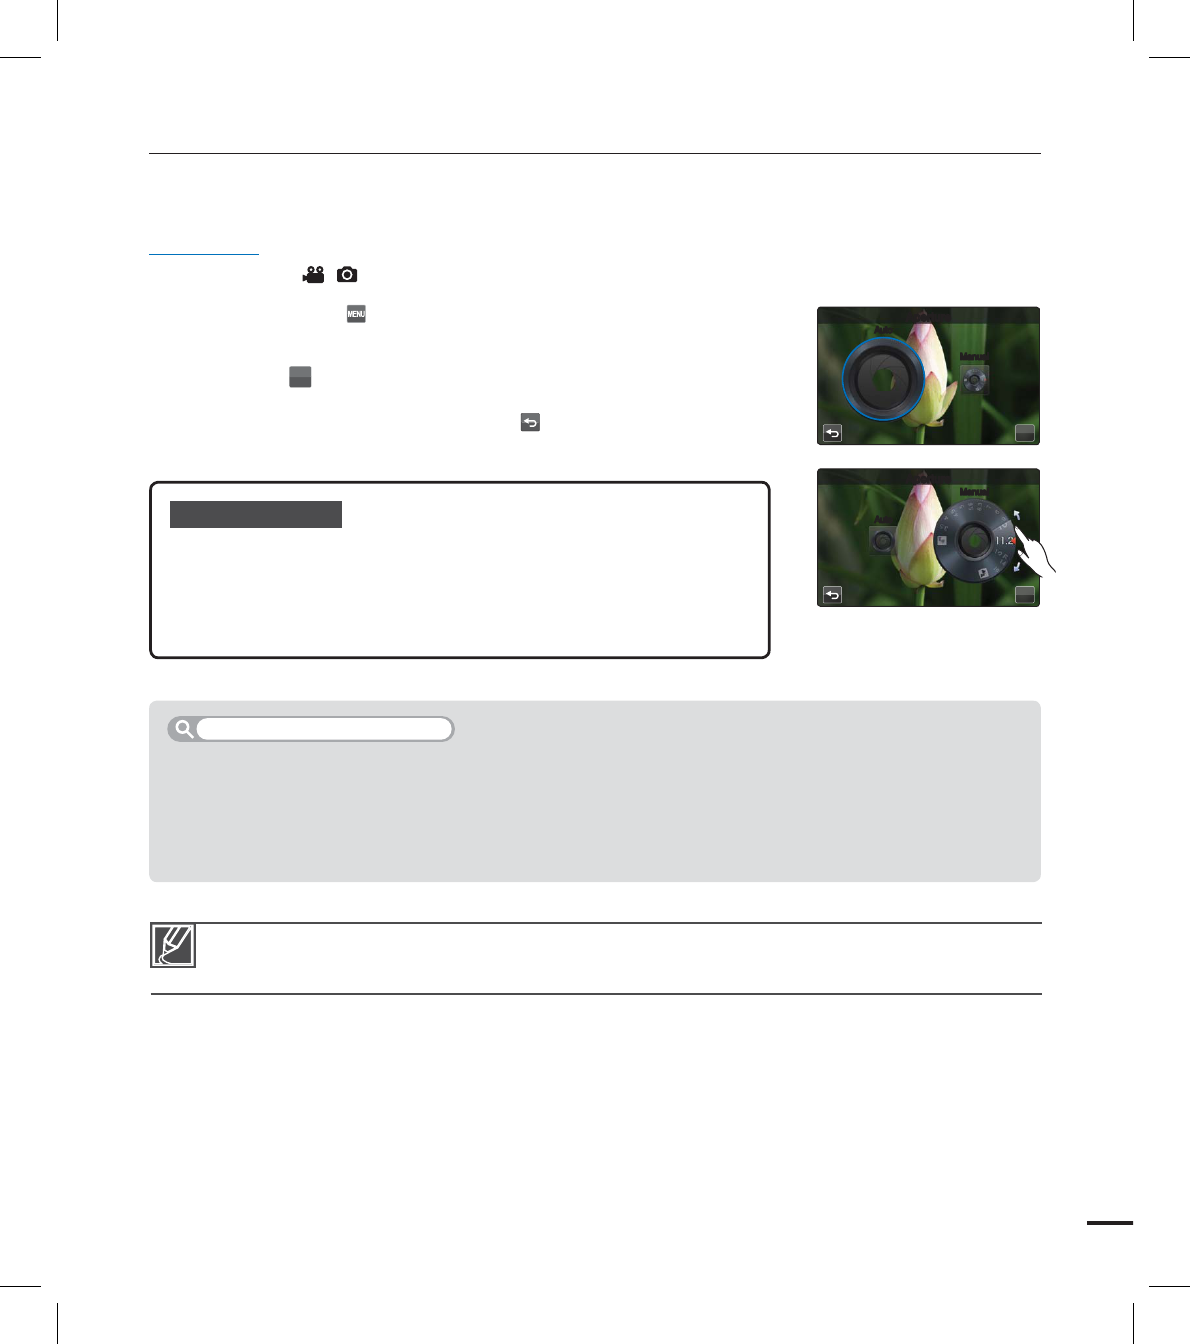
Aperture
The camcorder adjusts the aperture automatically depending on the subject and recording
conditions. You can also manually adjust the Aperture to your preference.
PRECHECK!
Select the record ( / ) mode by pressing the MODE button. page ??
1. Touch the Menu ( ) tab “Aperture” touch the desired
submenu item.
2. Touch the (
OK
) tab to complete the setting.
3. To exit the menu, touch the Return ( ) tab.
Submenu items
Auto: Sets the aperture value automatically.
Manual: Drag the aperture dial toward the desired direction on
the LCD screen to adjust the setting values.
The setting values are as follows:
F1.8, F2, F2.8, F4, F5.6, F8, F11, F16, F22
•
•
When you specify “Aperture: Manual,” the iSCENE mode is cancelled and “Shutter” is set to “Auto”
automatically. (Manual Aperture priority)
The aperture value can be adjusted to control the amount of light reaching the image sensor.
The aperture value needs to be adjusted in the following cases:
When shooting against the light or when the background is too bright.
When shooting on a refl ective natural background such as at the beach or when skiing.
When the background is overly dark (for example, night scenery).
•
•
•
Understanding Aperture
65
OK
"QFSUVSF
"VUP
.BOVBM
OK
"QFSUVSF
"VUP
.BOVBM
advanced recording
Submenu items
• Auto: The camcorder automatically sets the appropriate shutter
speed value.
• Manual: Drag the shutter dial toward the desired direction on the
LCD screen to adjust the setting values.
The setting values are as follows:
- Video: 1/30, 1/60, 1/100, 1/250, 1/500, 1/1000, 1/2000,
1/4000, 1 /10000
- Photo: 1/4, 1/8, 1/15, 1/30, 1/60, 1/100, 1/250, 1 /500,
1 /1000
The image may not seem smooth when a high shutter speed is set.
When recording with a shutter speed of 1/1000 or higher, make sure the sun is not directly shining
into the lens.
When you specify “Shutter: Manual,” the iSCENE mode is cancelled and “Aperture” is set to “Auto”
automatically. (Manual Shutter priority)
•
•
•
Shutter
The camcorder automatically sets the shutter speed depending on the scene's brightness.
You can capture the moment of the fast moving objects or record dynamically the slow moving
objects.
PRECHECK!
Select the record ( / ) mode by pressing the MODE button. page ??
1. Touch the Menu ( ) tab “Shutter” touch the desired
submenu item.
2. Touch the (
OK
) tab to complete the setting.
3. To exit the menu, touch the Return ( ) tab.
66
OK
4IVUUFS
"VUP
.BOVBM
OK
4IVUUFS
"VUP
.BOVBM
EV
Depending on the intensity of the ambient light, your videos and photos may be too bright or
dark. In these cases, you can adjust the exposure to get a better videos and photos.
PRECHECK!
Select the record ( / ) mode by pressing the MODE button. page ??
1. Touch the Menu ( ) tab “EV.”
2. Drag the exposure value dial toward the desired direction on the
LCD screen to adjust the setting values.
The setting values are as follows: -2.0 ~ +2.0
3. Touch the (
OK
) tab to complete the setting.
4. To exit the menu, touch the Return ( ) tab.
•
Exposure value is the total amount of light allowed to
fall on the photographic medium (Image sensor) during
the process of taking photos or videos as well.
Understanding EV (Exposure Value)
Darker (-) Brighter (+)
67
OK
&7
You can set the video resolution to 30p only when the Super C.Nite is set to “Super.”
For example, if the Super C.Nite is set to “Super” with 1080/60i of the resolution, the resolution will
be automatically changed to 1080/30p.
- 1080/60i (XF), 1080/60i (SF), 1080/60i (F): Unavailable
- 1080/30p: Available
- 720/60p: Automatically set to 720/30p
- 480/60p: Automatically set to 480/30p
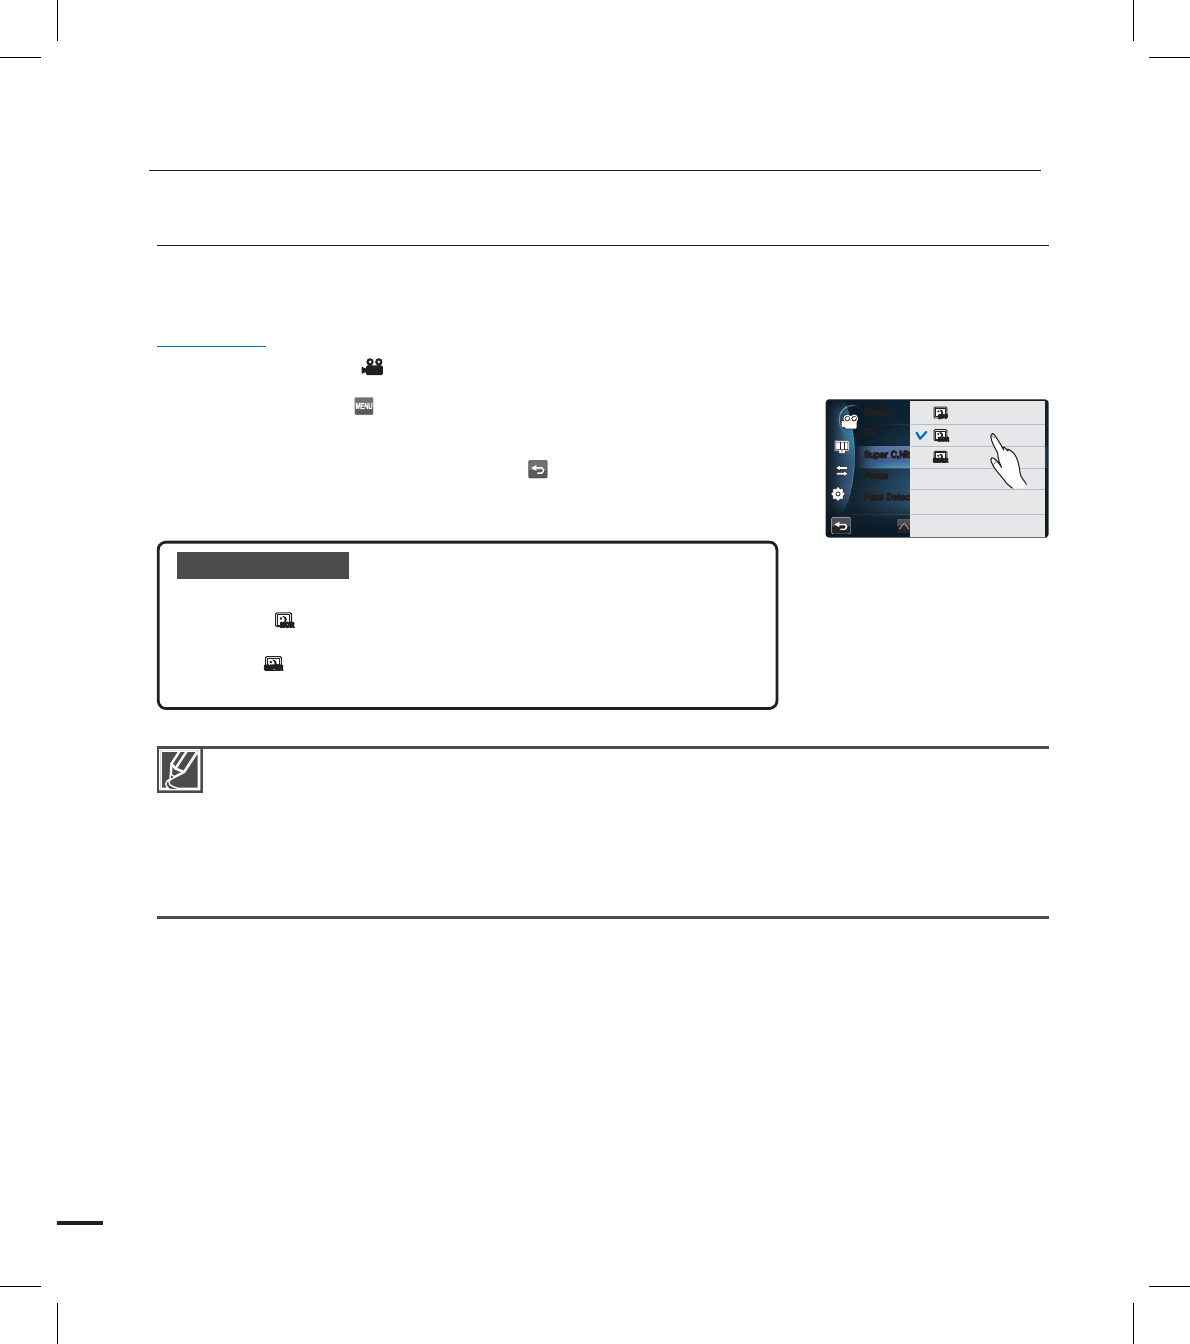
Super C.Nite
The camcorder adjusts the shutter speed to get bright images without losing color when
recording a slowly moving subject or in a dark place.
PRECHECK!
Select the Video record ( ) mode by pressing the MODE button. page ??
1. Touch the Menu ( ) tab “Super C.Nite” touch the desired
submenu item.
2. To exit the menu, touch the Return ( ) tab.
Submenu items
Off: Disables the function.
Normal (
NORNOR
): Records to get a brighter image in a dark place by
using the shutter speed of 1/30 second.
Super (
SUPERSUPER
): Records to get a brighter image in a dark place by using
the shutter speed of 1/15 second.
•
•
•
advanced recording
68
&7
4VQFS$/JUF
'PDVT
'BDF%FUFDUJPO
4IVUUFS
AUTOAUTO
OFFOFF
NORNOR
AUTOAUTO
OFFOFF
0GG
/PSNBM
4VQFS
NORNOR
SUPERSUPER