Samsung Electronics Co HTZ320 DIGITAL HOME CINEMA SYSTEM User Manual 3
Samsung Electronics Co Ltd DIGITAL HOME CINEMA SYSTEM Users Manual 3
Contents
- 1. Users Manual 1
- 2. Users Manual 2
- 3. Users Manual 3
- 4. Users Manual 4
- 5. Users Manual 5
Users Manual 3
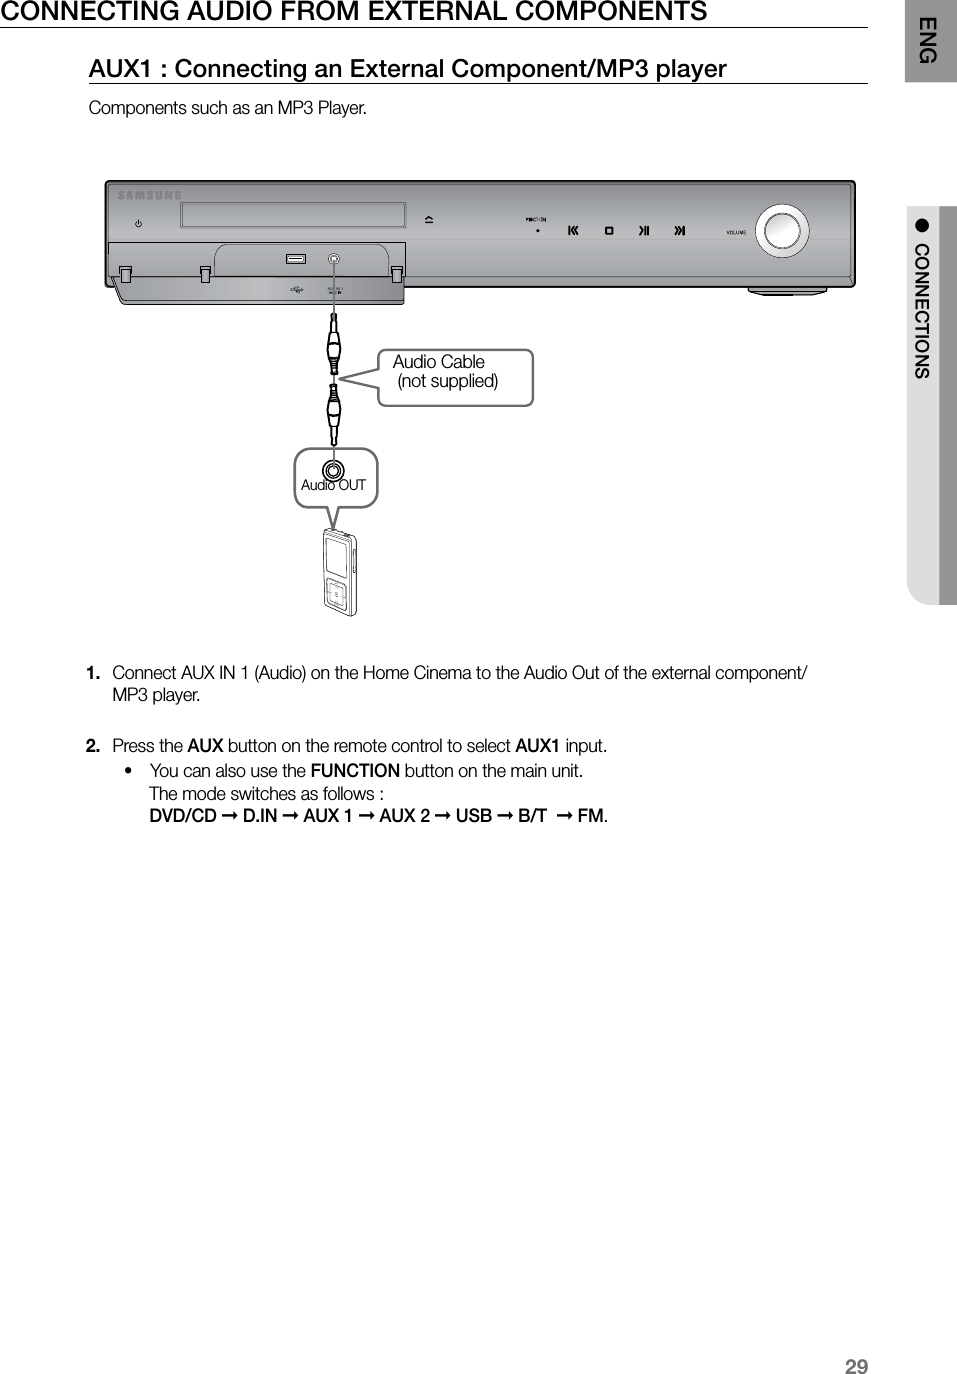
![35ENG ● PLAYBACKJPEG FILE PLAYBACKImages captured with a digital camera or camcorder, or JPEG files on a PC can be stored on a CD and then played back with this Home Cinema.Slide Mode GPlace the JPEG disc on the disc tray. Playback starts automatically. •Each image is displayed for 5 seconds and then the next image is displayed.Press the [,] button to skip to the next slide. Each time the button is pressed, the slide moves backward or forward.•Rotate/Flip Function GPress the Cursor ,,, button during playback. MThe maximum resolutions supported by this product are 5120 x 3480 (or 19.0 MPixel) for `standard JPEG files and 2048 x 1536 (or 3.0 MPixel) for progressive image files. If a JPEG file is played when the HDMI output resolution is 720p/1080i/1080p, the mode is `automatically converted to 576p/480p mode.button: Rotate 90° Clockwisebutton: Rotate 90° Counterclockwisebutton: Flip Verticallybutton: Flip HorizontallyOriginal Image ASCCD RIPPING](https://usermanual.wiki/Samsung-Electronics-Co/HTZ320.Users-Manual-3/User-Guide-1061182-Page-10.png)
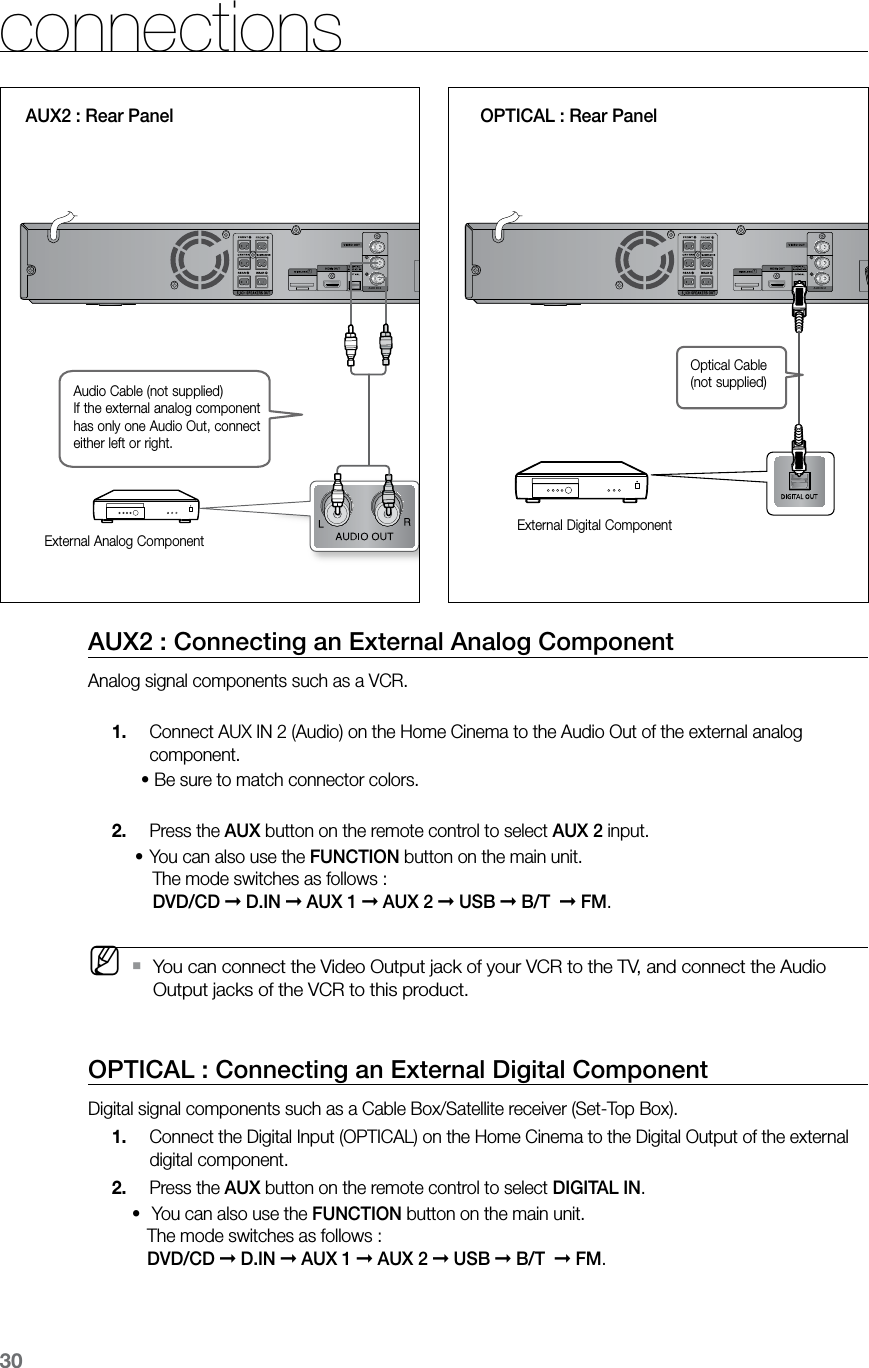
![playback36DIVX PLAYBACKThe functions on this page apply to DivX disc playback.Skip Forward/Back DDuring playback, press the [,] button. Goes to the next file whenever you press the •] button, if there are 2 files or more on the disc.Goes to the previous file whenever you press the •[ button, if there are 2 files or more on the disc.Fast Playback DTo play back the disc at a faster speed, press the ( or ) button during playback. Each time you press either button, the playback speed will •change as follows: 2x ➞ 4x ➞ 8x ➞ 32x ➞ Normal.5 Minute Skip function DDuring playback, press the Cursor , button.Playback skips 5 minutes forward whenever you press the • Cursor button.Playback skips 5 minutes back whenever you press the • Cursor button. Audio Display DPress the AUDIO button.If there are multiple audio • languages on a disc, you can toggle between them.Each time you press the button, your selection will toggle • between AUDIO (1/N, 2/N ...) and . M ` is displayed when there is one supported language in the disc.Subtitle Display D Press the SUBTITLE button.Each time you press the button, your selection will toggle •between SUBTITLE (1/N, 2/N ...) and SUBTITLE OFF.If the disc has only one subtitle file, it will be played •automatically.See number 2 (Caption Function) on the next page for more •details concerning Subtitle usage with DivX discs. ASCCD RIPPING ASCCD RIPPING ASCCD RIPPING ASCCD RIPPING](https://usermanual.wiki/Samsung-Electronics-Co/HTZ320.Users-Manual-3/User-Guide-1061182-Page-11.png)
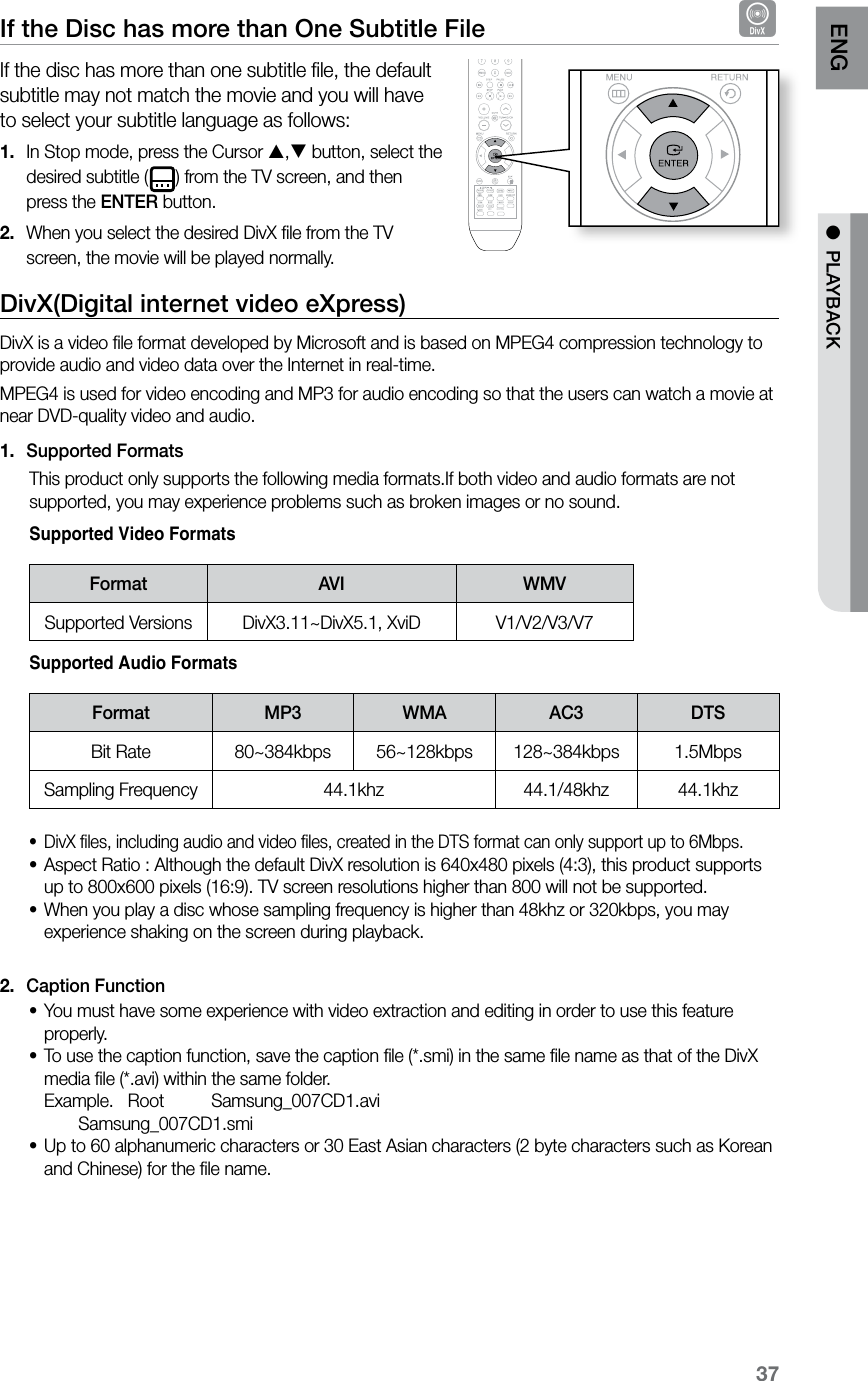

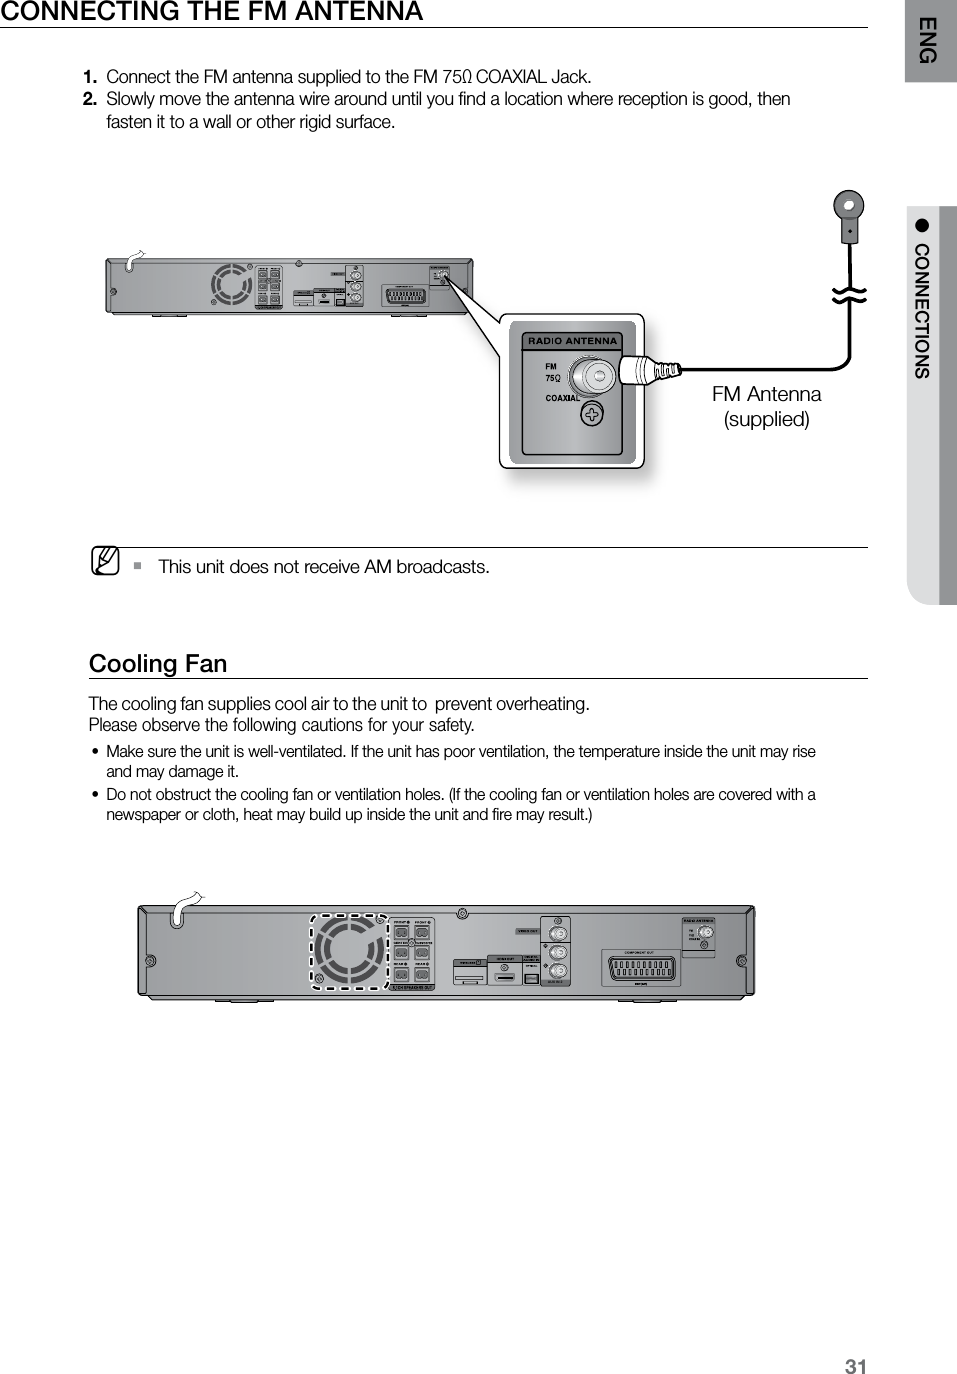
![39ENG ● PLAYBACKFast Playback dBADPress the (,) button.Each time the button is pressed during playback, the •playback speed changes as follows: ( 2X ➞ ( 4X ➞ ( 8X ➞ ( 32X ➞ PLAY ) 2X ➞ ) 4X ➞ ) 8X ➞ ) 32X ➞ PLAY M During fast playback of a CD or MP3-CD, sound is heard only at 2x speed, and not at 4x, `8x, and 32x speeds.Slow Playback dDPress the SLOW button.Each time the button is pressed during playback, the •playback speed changes as follows: d*1/2 ➞*1/4 ➞*1/8 ➞&1/2 ➞&1/4 ➞&1/8 ➞ PLAY D *1/2 ➞*1/4 ➞*1/8 ➞ PLAY M No sound is heard during slow playback. `Reverse slow playback does not work with CD. `Skipping Scenes/Songs dAPress the [,] button.Each time the button is pressed during playback, the previous •or next chapter, track or directory (file) will be played.You cannot skip chapters consecutively.• ASCCD RIPPING](https://usermanual.wiki/Samsung-Electronics-Co/HTZ320.Users-Manual-3/User-Guide-1061182-Page-14.png)