Samsung Electronics Co SGHM919 Multi-band WCDMA/GSM/EDGE/LTE Phone with WLAN, Bluetooth and RFID User Manual T Mobile SGH M919 Samsung Galaxy S 4
Samsung Electronics Co Ltd Multi-band WCDMA/GSM/EDGE/LTE Phone with WLAN, Bluetooth and RFID T Mobile SGH M919 Samsung Galaxy S 4
Contents
Users Manual 2
DRAFT
Internal Use
O
nl
y
Contacts 109
Section 6: Contacts
This section explains how to use and manage your Contacts
List. You can save phone numbers to your phone’s memory.
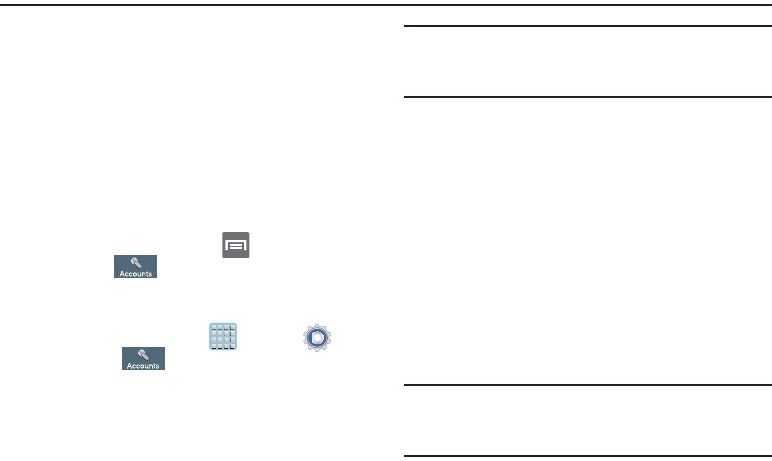
Accounts
From the Accounts menu you decide if you want applications
to synchronize, send, and receive data at any given time, or if
you want the applications to synchronize automatically. After
determining how you want the accounts to synchronize,
indicate which account to synchronize with your Contacts
list.
1. Sign in to your Google account.
2. From the Home screen, press and then tap
Settings
➔ (
Accounts
tab) and then navigate
to the
My accounts
area.
– or –
From the Home screen, tap (
Apps
) ➔
(
Settings
)
➔ (
Accounts
tab) and then navigate
to the
My accounts
area.
Note:
The Accounts area lists those accounts that have been
added to the device and provides an
Add account
button
to quickly and easily add new ones.
Contacts List
Creating a Contact
The default storage location for saving phone numbers to
your Contacts List is your device’s built-in memory.
If existing Google and Corporate email accounts have been
synchronized to your phone, these will be made available to
your device during the creation of new entries. These new
Contacts entries can be assigned or saved to synced
accounts such as Phone, SIM, Google, or Corporate.
Your device automatically sorts the Contacts entries
alphabetically. You can create either a
Phone
,
SIM
,
Samsung
account
,
Google
, or
Microsoft Exchange ActiveSync
contact.
Important!
The Google and Microsoft Exchange ActiveSync
account types are only visible after creating an
email account of those types on your phone.
DRAFT
Internal Use
O
nl
y
110
•
Phone
contacts are stored locally on the device.
Note:
If the phone is ever reset to its factory default
parameters, contacts stored on the phone can be lost.
•
SIM
contacts are stored within the micro SIM Card.
Note:
SIM contacts only store the Name and Phone number for
an entry.
•
Samsung account
contacts are shared with your existing
Samsung account.
•
Google
contacts are shared with your existing Google account
and can also be imported to your phone after you have created a
Google Mail account.
•
Microsoft Exchange ActiveSync
(also known as Work or
Outlook) contacts are those contacts that are intended to be
shared with either an Exchange Server or from within Microsoft
®
Outlook
®
.
•
Add new account
lets you create a new account type. Choose
from Samsung account, Google, or Microsoft Exchange
ActiveSync.
Note:
When storing an entry into your micro SIM card, note
that only the Name, and Number are saved. To save
additional information for a particular contact, such as
notes, email, dates, etc., it is important to save that
Contact into your phone’s onboard memory.
1. From the Home screen, tap (
Contacts
).
2. Tap
to create a contact.
Note:
You can also add a new contact by entering a number
from the keypad and pressing and then tap
Add to Contacts
➔
Create contact
. Continue with step 3.
3. Tap a destination type (
Phone
,
SIM
,
Samsung account
,
Google
, or
Microsoft Exchange ActiveSync
) (depending
on where you want to save the new contact
information).
DRAFT
Internal Use
O
nl
y
Contacts 111
4. Tap the
Name
field and enter a name for this contact
using the displayed keypad.
•
Tap to access additional name entries such as: Name
prefix, First name, Middle name, Last name, and Name suffix.
5. Tap the image icon and select a photo for this contact.
Selections are:
Image
,
Pictures by people
,
Take picture
,
or
S Memo
.
Note:
The label entries below can change and are dependant
on the selected destination type (ex: the Other and
Custom might not appear with an Exchange ActiveSync
account destination type).
6. Tap the label button (to the left of the
Phone
field) and
scroll through the list to select a category such as
Mobile
,
Home
,
Work
,
Work Fax
,
Home Fax
,
Pager
,
Other
,
Custom
, or
Callback
.
7. Tap a phone number field and enter a phone number.
•
Tap on the QWERTY keyboard to remove a previously
entered phone number.
•
Tap to enter an additional phone number
•
Tap to remove a previously entered phone number.
8. Enter additional information such as:
Email
,
Address
,
Events
,
Groups
,
Ringtone
,
Message alert
,
Vibration
pattern
or tap
Add another field
to input additional
category information.
•Add another field
contains the following options: Phonetic
name, Organization, Email, IM, Address, Notes, Nickname,
Website, Internet call, Events, or Relationship.
•
Use your finger to slide the page up or down to see additional
fields and categories.
9. Tap
Save
to complete and store the new entry.
– or –
Tap
Cancel
to delete the current entry.
To save a Number from your Keypad:
1. From the Home screen, tap (
Phone
).
2. Enter a phone number using the on-screen dialpad.
3. Tap
Add to Contacts
➔
Create contact
or select the
Contact entry from the on-screen list.
– or –
Press and then tap
Add to Contacts
➔
Create
contact
or select the Contact entry from the on-screen
list.
DRAFT
Internal Use
O
nl
y
112
•
If you're updating an existing contact, tap the entry from the list
and proceed to step 5.
4. Tap a destination type (
Phone
,
SIM
,
Samsung account
,
Google
, or
Microsoft Exchange ActiveSync
) (depending
on where you want to save the new contact
information).
5. Tap the
Name
and enter a name for this contact using
the displayed keypad.
•
Tap to access additional name entries such as: Name
prefix, First name, Middle name, Last name, and Name suffix.
6. Tap the image icon and select a photo for this contact.
Selections are:
Image
or
Take picture
.
Note:
The label entries below can change and are dependant
on the selected destination type (ex: the Other and
Custom might not appear with an Exchange ActiveSync
account destination type).
7. Tap the label button (to the left of the
Phone
field) and
scroll through the list to select a category such as
Mobile
,
Home
,
Work
,
Work Fax
,
Home Fax
,
Pager
,
Other
,
Custom
, or
Callback
.
8. Enter additional fields as desired.
9. Tap
Save
to complete and store the new entry.
– or –
Tap
Cancel
to delete the current entry.
Note:
For further details about how to enter characters, see
“Text Input Methods” on page 95
DRAFT
Internal Use
O
nl
y
Contacts 113
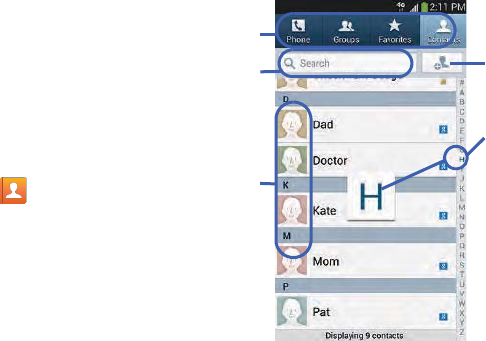
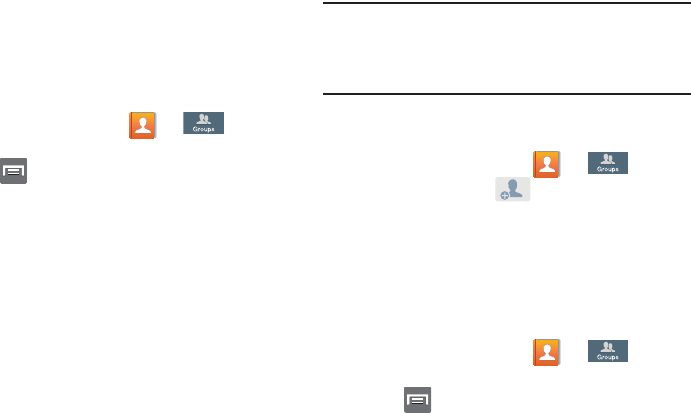
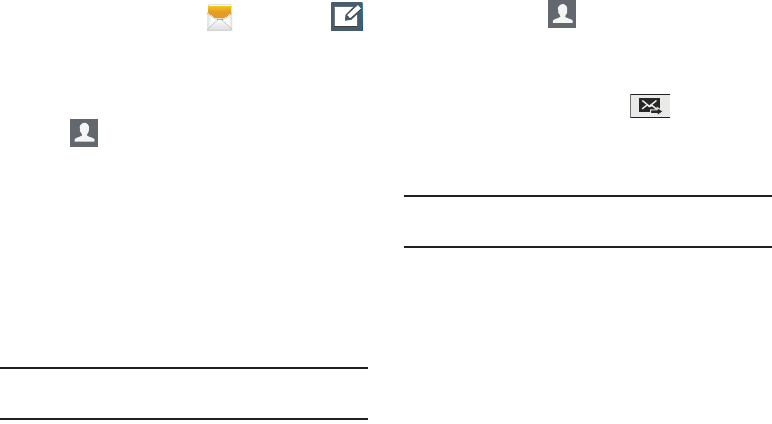
Finding a Contact
You can store phone numbers and their corresponding
names onto either your SIM card, your phone’s built-in
memory, or an external location (such as Google, Exchange,
or T-Mobile Backup). They are all physically separate but are
used as a single entity, called Contacts.
Depending on the storage size of the particular SIM card, the
maximum number of phone numbers the card can store may
differ.
1. From the Home screen, tap (
Contacts
).
2. Swipe up or down until you see the contact displayed.
– or –
Tap the
Search
field and begin entering the entry’s
name. Matching entries are then displayed. This
process filters through all of your current account
Contact entries to only show you the matching entries.
– or –
In a single motion, touch and hold the letter tab area
(on the right) until on-screen letters appear, then scroll
through the list. You are then taken to that section of
the Contacts list. Touch the contact entry.
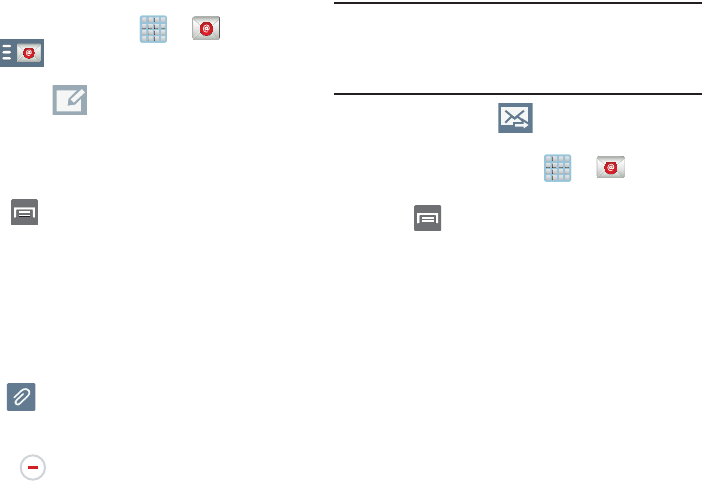
Create
Contacts
Tabs
Tabbed
Navigation
Search
Contacts Contacts
field
DRAFT
Internal Use
O
nl
y
114
Editing Contact Information
1. From the Home screen, tap .
2. Tap a contact name from the list and tap (
Edit
).
– or –
Select a contact name and press and then tap
Edit
.
– or –
Touch and hold a Contacts entry from the main
Contacts list and then tap
Edit
.
3. Edit the contact information then:
•
Tap
Save
to complete and store the new entry or
•
Tap
Cancel
to delete the current entry.
Adding a Number to an Existing Contact
1. From the Home screen, tap .
2. Touch and hold an entry
and select
Edit
to reveal
the Contact entry’s
details screen.
3. Tap a phone number
field and enter a phone
number.
•
Tap on the
QWERTY keyboard to
remove a previously
entered phone number.
•
Tap to enter an
additional phone number
•
Tap to remove a
previously entered phone number.
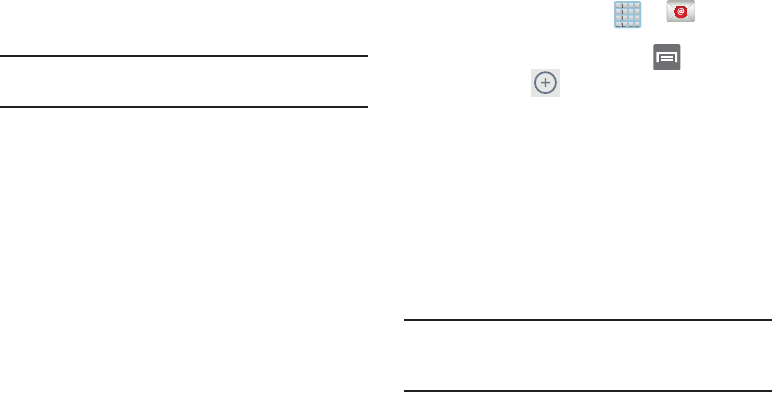
Context
Menu
Contact Details Screen
DRAFT
Internal Use
O
nl
y
Contacts 115
4. Enter additional information such as:
Email
,
Address
,
Events
,
Groups
,
Ringtone
,
Message alert
,
Vibration
pattern
or tap
Add another field
to input additional
category information.
•Add another field
contains the following options: Phonetic
name, Organization, Email, IM, Address, Notes, Nickname,
Website, Internet call, Events, or Relationship.
•
Use your finger to slide the page up or down to see additional
fields and categories.
5. Tap
Save
to complete and store the new entry.
– or –
Tap
Cancel
to delete the current entry.
Adding a Pause or Wait to an Existing Contact
1. From the Home screen, tap and use the
on-screen keypad to enter a new phone number.
2. Press and then tap
Add 2-sec pause
. This feature
adds an automatic two-second pause.
– or –
Press and then tap
Add wait
. This feature causes
the phone to require your acceptance before sending
the next set of entered digits.
3. Tap
Add to Contacts
➔
Update existing
.
4. Scroll through the available list of existing entries and
select the desired target.
Note:
This new phone number is then added as a new number
to the selected entry.
5. Tap the label button (to the left of the new phone
number) and scroll through the list to select a category
type.
6. Tap
Save
to store and update the entry.
Deleting Contacts
Important!
Once Contacts list entries are deleted, they cannot
be recovered.
1. From the Home screen, tap .
2. Touch and hold a contact name from the list and select
Delete ➔
OK
.

DRAFT
Internal Use
O
nl
y
116
Contact List Options
1. From the Home screen, tap .
2. Press . The following options display:
•Delete
: allows you to delete 1 or more of your contacts.
•Import/Export
: imports or exports contacts to or from the USB
storage location, SIM card or SD card, you can also send
namecards via methods such as Bluetooth, ChatON, Email,
Gmail, Messaging, or Wi-Fi Direct.
•Merge accounts
: allows you to merge all of your current
Contact entries with either your active Google or Samsung
account. If several of your contacts are from other external
sources, this allows you to “back them up” or copy them to
your Samsung account. Tap
OK
to continue or
Cancel
to exit.
•Accounts
: allows you to add and manage mobile accounts on
Samsung account, ChatON, Dropbox, Google, LDAP, or
Microsoft Exchange ActiveSync. This option also allows you to
manually synchronize all of your current contacts with their
respective accounts.
• Speed dial setting
: allows you to set up speed-dialing.
• Send message/email
: allows you to send a text /picture
message or an email using your Google account.
• Contacts to display
: allows you to choose to display All
contacts, those on your Phone, SIM card, Samsung account,
Gmail, or only display contacts that are part of a Customized
list.
• Settings
: allows you to configure where you save new contacts
to, or view your service numbers, or send contact information.
Options include: Only contacts with phones, List by, Display
contacts by, Service numbers, and Contact sharing settings.
•Help
: provides an on-screen Help file that covers most high
level topics for Contacts.

DRAFT
Internal Use
O
nl
y
Contacts 117
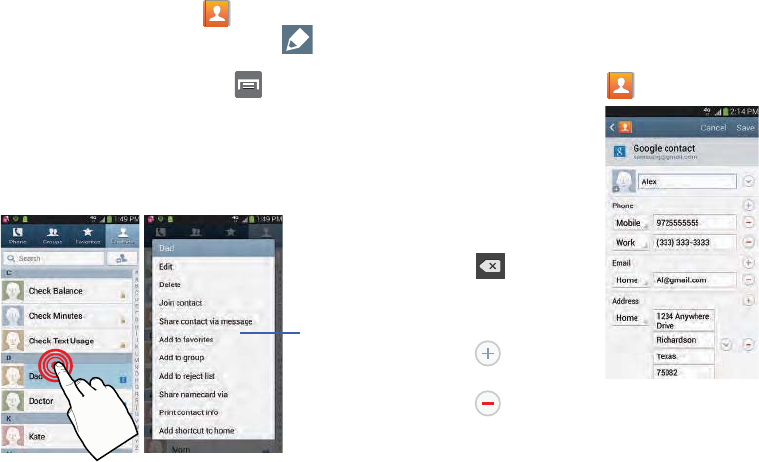
Contact Menu Options
1. From the Home screen, tap .
2. Touch and hold an entry to reveal the context menu.
The following options display:
•Edit
: allows you to edit the currently selected Contacts entry.
•Delete
: allows you to delete the currently selected Contacts
entry.
• Join contact
: allows you to link the current contact to another
current contact. Similar to a “see also” feature. If you can’t
remember a contact’s information, linking entries can help you
find the person you are looking for.
• Share contact information
: allows you to send the current
entry info via text message.
• Add to favorites
: allows you to copy the current Contacts entry
to the list within the Favorites tab.
• Remove from favorites
: allows you to remove the current
Contacts entry from the Favorites tab.
•Add to group
: allows you to add the current Contacts entry to
an existing group.
• Add to reject list/ Remove from reject list
: allows you to add
or remove the current Contacts entry to a list of automatically
rejected incoming phone numbers.
Note:
If an entry does not have a phone number, the reject list
option will not appear.
• Share namecard via
: allows you to send the current Contact
entry’s information to an external recipient via either
Bluetooth
,
ChatON
,
Dropbox
(if enabled),
Email
(Exchange or Internet),
Gmail
,
Messaging
, or
Wi-Fi Direct
.
• Print contact info
: allows you to print selected information on
a compatible Samsung printer.
• Add shortcut to home
: adds a shortcut to the current Contacts
entry to an available screen location.
DRAFT
Internal Use
O
nl
y
118
Contact Entry Options
1. From the Home screen,
tap .
2. Tap an entry to reveal the
Contact entry’s Overview
Screen
. This screen
contains Name, contact
numbers, email, and
linked contact
information.
3. Press to reveal the
context menu specific to
this entry.
4. Tap an available option.
Joining Contact Information
Most people now maintain multiple email accounts, social
networking logins, and other similar account information. For
example, a Facebook account login name might differ from a
corporate email account login because they are maintained
separately and for different groups of people.
This device can synchronize with multiple accounts. When
you synchronize your phone with those accounts, each
account creates a separate contact entry in the Contacts list.
If one of your contacts (Amy Smith) has a regular email
account that you maintain in Gmail, but also has a Facebook
account under her maiden and married name, as well as a
Video! chat account, when you merge those accounts into
your Contacts list you can join all of her entries and view the
information in one record.
Joining contact information makes sending messages easy.
You can select any account email address or information all
from one screen, versus searching multiple, individual
screens to locate the desired account information.
Next time you synchronize your phone with your accounts,
any updates contacts make to email account names, email
addresses, etc. automatically update in your contacts list.
Contact Overview Screen
DRAFT
Internal Use
O
nl
y
Contacts 119
1. From the Home screen, tap .
2. Tap a contact name (the name you want to link to
another entry) to reveal the
Contact entry’s Overview
Screen
.
Note:
Typically this is the same contact with a different name
or account information.
3. Press and then tap
Join contact
.
4. Tap the second contact entry (the entry in which to
link). The second contact is now linked with the first
and the account information is merged into one screen.
Note:
The information is still maintained in both entries, but
displays in one record for easier viewing when you link
the contacts.
Important!
It is the first contact image that is displayed for
both, and the first contact’s name that is used.
For example: If Amy (original entry) is joined with
Julie (second entry). Julie seems to disappear and
only Amy remains. Tap the Amy entry (showing the
Amy image) to view both.
5. Tap the main linked contact to view the contact
information you linked. The contacts and information
displays with an icon next to the contact name to
indicate what type of account information is contained
in the entry.
DRAFT
Internal Use
O
nl
y
120
Unjoining a Contact
1. From the Home screen, tap .
2. Tap a contact name (the account name from which you
want to unjoin an entry). This reveals the details for
entry.
Note:
Typically this is the same contact with a different name
or account information.
3. Tap the
Connection
area.
– or –
Press and then tap
Separate contact
.
4. Tap next to the entry you want to unjoin and
select
OK
. The contacts are “unjoined” or separated
and no longer display in the merged record screen.
Both contacts now go back to being separately
displayed.
Marking a Contact as Default
When you use applications such as the Voice Dialer or other
messaging type applications, the application needs to know
which information is primary (default) in a contact entry list.
For example, when you say “Call John Smith”, if you have
three phone records for John Smith, the Voice dialer is
looking for the “default” number or entry.
The
Mark as default
option marks one entry in a contact
record to use as the default. This comes in handy when you
have multiple entries for the same person.
1. From the Home screen, tap .
2. Tap a Contact entry.
3. Press and then tap
Mark as default
. The Mark as
default screen displays radio buttons next to the
contact name, phone number, or other contact
information.
4. Tap the radio button next to the entry information you
want to be the primary information (such as name,
phone number, or email) and select
Done
.
DRAFT
Internal Use
O
nl
y
Contacts 121
Note:
If there are multiple phone numbers assigned to an
entry, assigning one as the default will automatically dial
that number when the contact is selected for dialing.
Sending a Namecard
A Namecard contains contact information, and can be sent to
recipients as a Virtual Business Card (V-card) attachment
using Bluetooth, Google Mail, or as a message.
1. From the Home screen, tap .
2. Tap a Contact entry.
3. Press and then tap
Share namecard via
and select
a delivery method:
Bluetooth
,
ChatON
,
Dropbox
(if enabled),
Email
(Exchange or Internet),
Gmail
,
Messaging
, or
Wi-Fi
Direct
.
The Namecard attaches to the selected message type
and is delivered when you send the message.
Note:
Email appears as an option only after an Internet or
Exchange email account has been created.
Sending All Current Namecards
Rather than selecting once Contact entry at a time, you can
send all of your current entries at once.
1. From the Home screen, tap .
2. Press and then tap
Import/Export
➔
Send
namecard via
.
3. Tap
Select all
to place a check mark alongside all
currently displayed Contact entries.
4. Tap
Done
and select a delivery method:
• Bluetooth
to transmit the contacts to another bluetooth-
compatible device.
•ChatON
to send the contacts to selected buddies.
•Dropbox
to upload the entries to your remote Dropbox Web
storage location.
Note:
The Web storage Upload feature requires that you be
logged into your Samsung account prior to upload.
•Email
to attach the contact cards to a new outgoing email
(Exchange or Internet).
•Gmail
to attach the contact cards to a new outgoing Internet-
based email.
DRAFT
Internal Use
O
nl
y
122
• Messaging
to attach the contact cards to a new outgoing text
message.
• Wi-Fi Direct
to transmit the entries to another Wi-Fi Direct
enabled device.
Sending a namecard using Bluetooth
You must create a Contact prior to sending a namecard to a
recipient. For more information, refer to “Creating a Contact”
on page 109.
1. From the Home screen, tap .
2. Touch and hold the entry to reveal the on-screen
context menu.
3. Tap
Share namecard via
➔
Bluetooth
.
Important!
You must activate Bluetooth to use this feature.
4. Tap the Bluetooth device in which to send this name
card. Bluetooth forwards the namecard to the recipient.
Copying Contact Information
Copying Contact Information to the SIM Card
The default storage location for saving phone numbers to
your Contacts list is your phone’s built-in memory. This
procedure allows you to copy numbers saved to the phone’s
memory, onto the SIM card.
1. From the Home screen, tap .
2. From the Contacts List, press and then tap
Import/Export
➔
Export to SIM card
.
3. Tap
Select all
to choose all current phone contact
entries.
– or –
Select a specific entry by touching an entry. A check
mark indicates a selection.
4. Tap
Done
. The name and phone number for the
selected contact is then copied to the SIM.
DRAFT
Internal Use
O
nl
y
Contacts 123
Copying Contact Information to the microSD
Card
This procedure allows you to copy entry information saved
on the phone’s memory, onto the SIM card.
1. From the Home screen, tap .
2. From the Contacts List, press and then tap
Import/Export
➔
Export to SD card
.
3. Tap
OK
to choose all current phone contact entries.
Synchronizing Contacts
Syncing data from your managed accounts allows you to add
and manage a new or existing contact from your online or
remote accounts to your phone. Prior to syncing, you must
first have an active Google or Microsoft Exchange account
with current Contact entries, and be signed into your account
via the phone.
With syncing, any Contacts entries (with phone numbers,
email addresses, pictures, etc.) are updated and synced with
your device.
1. From the Home screen, press and then tap
Settings
➔ (
Accounts
tab) and then navigate
to the
My accounts
area.
2. Select the email account containing the contacts you
wish to synchronize.
3. Tap within the adjacent account field to reveal the
account’s synchronization settings screen.
4. To synchronize only Contacts, toggle the active state of
the
Sync Contacts
field. A green check mark indicates
the feature is enabled.
DRAFT
Internal Use
O
nl
y
124
Note:
The process of updating your Contacts tab can take
several minutes. If after 10-20 minutes, your list has not
been updated, repeat step 2-3.
5. Your
Contacts
tab then reflects any updated Contact
information.
Note:
Syncing of contacts requires you are logged into your
Gmail and Corporate accounts via the device.
Display Options
The Display options menu allows you to allows you to choose
which contacts to display. You can also choose to display
only contacts that have phone numbers.
Note:
Once a display filter has been selected, only those
Contact entries are shown until the
All contacts
option is
re-selected.
1. From the Home screen, tap .
2. Press and then tap
Contacts to display
. Select any
of the following to filter according to the selection:
• All contacts
allows you to display all available Contacts.
• Phone
lists those Contacts currently found only on your Phone.
•SIM
lists those Contacts currently found only on your SIM card.
• Samsung account
lists those Contacts currently found and
sync’d within the Samsung account.
•Google
lists those Contacts currently found within the Google
account.
• Microsoft Exchange ActiveSync
lists those Contacts currently
found within the Exchange account.
• Customized list
allows you to enable which account
categories are displayed. For example, on Google contacts, you
can filter which Contact categories are shown (Friends, Family,
etc..)
DRAFT
Internal Use
O
nl
y
Contacts 125
Adding more Contacts via Accounts
and Sync
When you synchronize applications such as Facebook,
Twitter, MySpace, a corporate email account, or Google,
using the Accounts and sync option synchronizes the data
from the selected account type with your Contacts list.
1. From the Home screen, press and then tap
Settings
➔ (
Accounts
tab) and then navigate
to the
My accounts
area.
2. Tap
Add account
.
3. Determine which type of account information you want
to synchronize with your Contact list. Selections are:
Samsung account, ChatON, Dropbox, Email, Facebook,
Google, LDAP,
or
Microsoft Exchange ActiveSync
.
4. Tap an account type to add.
5. Follow the prompts. The selected account type
synchronizes with your Contacts list.
6. After synchronizing accounts you may want to link
contact information. For more information, refer to
“Joining Contact Information” on page 118.
To add Facebook content to your Contacts list:
You can now add your Facebook contact information, such as
pictures, email, and phone numbers directly to your Contacts
list. All of their current contact information is then migrated
over to your phone. If a Contacts entry already exists with a
slightly different name, separate entries are created and can
later be linked (joined) together into a single entry.
Important!
This process not only synchronizes your contact
information but also your status, events, and more.
1. From the Home screen, press and then tap
Settings
➔ (
Accounts
tab) and then navigate
to the
My accounts
area.
2. Tap
Add account
➔
Facebook.
3. When you are prompted to download the Facebook
application from the Play Store.
•
Tap
Install
➔
Accept & download
to complete the process.
•
Tap
Open
to launch the application.
4. Log into your Facebook account:
•
Enter your account’s access
Email
and
Password
information
and tap
Log in
.
DRAFT
Internal Use
O
nl
y
126
5. If prompted, configure any requested optional
permissions and tap
Log in
.
6. Tap those contact settings you wish to synchronize (all
are enabled by default). A green check mark indicates
the feature is enabled.
•
Choose from:
Sync interval settings
,
Sync Calendar
, or
Sync
Gallery
.
7. Tap
Done
to complete the login and sync process.
8. If prompted, select a Contacts Sync option. Choose
from: Sync all, Sync with existing contacts, or Don’t
sync. Tap
Sync
to complete the process.
9. Return to the Accounts and sync screen and resync
this new Social Network account.
To resync Social Network Contacts:
1. From the Home screen, press and then tap
Settings
and then navigate to the
Accounts
area.
2. Tap
Facebook
➔ within the adjacent SNS account
field to reveal the account’s synchronization settings
screen.
3. Choose the parameters to sync (ex: Sync Calendar,
Sync Contacts, or Sync Gallery) and tap
Sync now
.
Note:
From the main Accounts and sync page you can also tap
Sync all
to resync all accounts.
Additional Contact Options
Sending an Email to a Contact
Note:
Contacts must contain and email account and address
before you can use the Send email feature.
1. From the Home screen, tap .
2. Press and then tap
Send email
. Contacts that
contain an email address display.
3. Tap the contact(s) to which you want to send an email.
A check mark displays next to the selection.
Note:
The select contact must have an email as part of their
details screen.
4. Tap
Done
.
5. Select an email account type.
6. Compose the email and tap
Send
.

DRAFT
Internal Use
O
nl
y
Contacts 127
Export/Import
For more information, refer to “Copying Contact Information”
on page 122.
Contact List Settings
From this menu you can determine the default storage
location for Contacts, display your phone’s primary number,
and view service numbers listed in your Contact list.
1. From the Home screen, tap .
2. Press and then tap
Settings
. Configure any of the
following options:
• Only contacts with phones
allows you to display only those
contacts containing phone numbers.
•List by
defines how the current list of Contacts are sorted:
First name
or
Last name
.
• Display contacts by
defines how the current list of Contacts
are listed:
First name
(ex: Steve Smith) or
Last name first
(Smith, Steve).
• Service numbers
lists the currently available service numbers.
• Contact sharing settings
allows you configure how your
Contacts entries are sent: individually or as a single file
containing all available entries.
Tap
Settings
to select a share setting.
–
Send all namecards
allows you to set your Contact sharing
option to all so that your entire Contacts entries are sent as a
group and not as multiple single files. If all your entries are
selected only a single file is sent.
Note:
Your destination device must support this feature or no
entries will be received by the external device.
–
Send individual namecards
allows you to set your default to
send individual contacts one at a time. Even if you select all your
entries, each is sent individually.
DRAFT
Internal Use
O
nl
y
128
Groups
This feature allows you to add a new or existing contact to a
call group. This group can be one of the already present
groups (Family, Friends, or Work) or a user-created group.
Creating a New Caller Group
1. From the Home screen, tap ➔ (
Groups
tab).
2. Press and then tap
Create
.
3. Tap the
Group name
field and use the on-screen
keypad to enter a new group name. For more
information, refer to “Text Input Methods” on page 95.
4. Tap
Group ringtone
and select a ringtone for the group.
Selections are:
Default, Ringtones
, or
Add
(to select an
existing audio file).
5. Tap
Message alert
and select a message alert ringtone
to be associated with this group.
6. Tap
Vibration pattern
and select a unique vibration
pattern either from an available list or Create your own.
This pattern is then associated with this group.
7. Tap
Save
to store the newly created group.
Note:
Some externally maintained group types (such as
Google) can only be managed or updated remotely
online vs via the device. These external types will not
allow editing or deleting members locally via the phone.
Adding an Existing Entry to a Current Caller
Group
1. From the Home screen, tap ➔ .
2. Tap a group entry ➔ (
Add group member
).
3. From the available list of contacts, tap the contact(s)
you want to add. A check mark displays next to contact
entry.
4. Tap
Done
. The selected contacts are added to the
group.
Removing an Entry From a Caller Group
1. From the Home screen, tap ➔ .
2. Tap a group entry.
3. Press and then tap
Remove member
.
4. Tap all of the contacts you want to remove from this
group. A check mark displays next to contact entry.
5. Tap
Done
.The contacts are removed from the group.
DRAFT
Internal Use
O
nl
y
Contacts 129
Editing a Caller Group
To edit a Group entry, there must be at least one member as
part of the selected group.
1. From the Home screen, tap ➔ .
2. Touch and hold a group entry then select
Edit group
.
3. Make modifications to the
Group name
,
Group ringtone
,
Message alert
,
Vibration pattern
fields, or
Add member
.
4. Tap
Save
.
Deleting a Caller Group
1. From the Home screen, tap ➔ .
2. Press and then tap
Delete groups
.
3. Select either
Select all
or tap the desired group.
4. Tap
Delete
.
5. Select either the
Group only
or
Group and group
members
.
6. Tap
OK
.
Sending a Message to a Group
1. From the Home screen, tap ➔ .
2. Tap an existing group, and press and then tap
Send message
.
– or –
Touch and hold a group entry and select
Send message
.
3. Select the recipients of the new message (indicated by
a green check mark). If an entry contains multiple
phone numbers, each must be selected individually.
4. Tap
Done
.
5. Type your message, and tap (
Send
).
DRAFT
Internal Use
O
nl
y
130
The Favorites Tab
The Favorites tab is a list of the phone numbers that have
been designated as favorite contacts. For more information,
refer to “Logs Tab” on page 91.
1. From the Home screen, tap .
2. Tap (
Favorites
tab).
Adding a contact to your favorites list:
1. From within the Favorites tab, press and select
Add to Favorites
.
2. Place a check mark alongside those current Contacts
entries you wish to assign as favorites.
3. Tap
Done
to complete the process.
DRAFT
Internal Use
O
nl
y
Messages 131
Section 7: Messages
This section describes how to send or receive different types
of messages. It also explains the features and functionality
associated with messaging.
Types of Messages
Your phone provides the following message types:
•
Text Messages
•
Multimedia (Picture, Video, and Audio) Messages
•
Email and Gmail Messages
•
Google Talk
•
Messenger
•
ChatON
The Short Message Service (SMS) lets you send and receive
text messages to and from other mobile phones or email
addresses. To use this feature, you may need to subscribe to
your service provider’s message service.
The Multimedia Messaging Service (MMS) lets you send and
receive multimedia messages (such as picture, video, and
audio messages) to and from other mobile phones or email
addresses. To use this feature, you may need to subscribe to
your service provider’s multimedia message service.
Important!
During the creation of a text message, adding an
image, sound file, or video clip automatically
changes it from a text message (SMS) to a
multimedia message (MMS).
Message Icons on the Status Bar
Messaging icons are displayed on the Status Bar at the top of
the display when new messages are received. For more
information, refer to “Status Bar” on page 32.
Note:
The Messaging application can also be accessed by
pressing and then tapping (
Apps
) ➔
(
Messaging
).
DRAFT
Internal Use
O
nl
y
132
Creating and Sending Messages
1. From the Home screen, tap
(
Messaging
) ➔
(
Compose
).
2. Tap the
Enter recipient
field to manually enter a
recipient.
– or –
Tap to select from one of the following:
•Groups
: to select a recipient from the Group list.
• Favorites
: to select a recipient from the Favorites list.
•Contacts
: to select a recipient from your Contacts list (valid
entries must have a wireless phone number or email address).
•Logs
: to select a recipient from a list of recently sent
messages.
3. If adding a recipient from either Logs, Contacts, or
Group, tap the contact to place a check mark then tap
Done
. The contact displays in the recipient field.
Note:
Delete any unnecessary members by tapping their
name/number in the recipient area and selecting
Delete
.
4. Add more recipients by tapping either the
Enter
recipient
field or and selecting recipients.
5. Tap the
Enter message
field and use the on-screen
keypad to enter a message. For more information, refer
to “Text Input Methods” on page 95.
6. Review your message and tap (
Send
).
7. If you have more than one recipient, the same text
message is sent to all recipients in the Enter Recipients
field.
Note:
If you exit a message before you send it, it will be
automatically saved as a draft.
DRAFT
Internal Use
O
nl
y
Messages 133
Quick Messaging a Number from the Contacts
List
1. From the Home screen, tap (
Contacts
).
2. Locate an entry from the Contacts list.
3. In a single motion, touch and drag your finger over the
number by going to the left. This action addresses a
new text message to the selected recipient.
Message Options
Options before composing a message
1. From the Home screen, tap
(
Messaging
).
2. Before composing a message, press from the
main Messaging screen to display additional
messaging options:
•Search
: allows you to search through all of your messages for
a certain word or string of words. Use the on-screen keypad to
enter a word or phrase in which to search, then tap .
For more information, refer to
“Message Search”
on page
139.
• Delete threads
: allows you to delete any message thread.
Select the messages to delete and a green check mark will
appear next to the message. Tap Delete. For more information,
refer to
“Deleting a single message thread”
on page
138.
• Draft messages
: displays the draft messages folder and its
contents.
• Locked messages
: displays the locked messages folder and
its contents.
• Scheduled messages
: displays the scheduled messages
folder and its contents.
• Spam messages
: displays the spam messages folder and its
contents.
• Text templates
: displays your available text message reply
templates. For more information, refer to
“Text Templates”
on page 144.
•Settings
: allows you to access Messaging settings. For more
information, refer to
“Messaging Settings”
on page 139.

DRAFT
Internal Use
O
nl
y
134
3. From the Messaging screen list, touch and hold an
on-screen message and select an option:
• Add to Contacts
: allows you to add the sender to either a new
or existing Contacts entry.
• View contact
: allows you to view the current entry information
for the sender.
• Delete thread
: deletes the entire message and its bubbles.
Deleting a single message threadFor more information, refer to
“Deleting a single message bubble”
on page 139.
• Add to spam numbers
: allows you to tag a number as spam
so that these messages can be directly delivered to your spam
folder.
Options while composing a message
1. From the Home screen, tap
(
Messaging
).
2. From within an open message, press to display
additional messaging options:
•Call
: places an outgoing call to the sender.
• Insert smiley
: allows you to add insert smiley icons
images (emoticons).
•Preview
(only in MMS): allows you to add preview the
MMS message prior to delivery.
• Add text
: allows you to add text items from sources
such as: S Memo, Calendar, Location, Contacts, and
Text templates.
• Add to Contacts
: allows you to add the sender to either a new
or existing Contacts entry.
• View contact
: reveals the current Contact’s overview screen.
• Add slide
: converts an SMS message into an MMS
(Multimedia) message and allows you to attach an existing
slideshow.
• Delete slide
: allows you to remove a previously attached
slideshow.
• Add subject
: allows you to enter a subject.

DRAFT
Internal Use
O
nl
y
Messages 135
• Duration (5 sec)
(only in MMS): allows you to change the
duration of the image slideshow.
• Layout (bottom)
(only in MMS): allows you to change the
layout.
• Add recipients
: allows you to enter additional recipients to the
message.
• Delete message
: allows you to erase either select specific
message bubbles or all current messages bubbles.
• Schedule message
: allows you to schedule a time for the
current message to be delivered.
•
• Add to spam numbers
: allows you to tag a number as spam
so that these messages can be directly delivered to your spam
folder.
•Discard
: closes the current open message.
•Translate
: launches a Translate popup menu. Here you can
both assign the sender’s original language and assign a target
language for the recipient (they will receive your message in the
designated language).
–
Select
Translate ony for sender
to keep your original text in
your selected language.
Adding attachments to a message
To add an attachment to your message, tap (
Attach
)
and select one of the following options:
•
Images
: allows you to tap an existing image from your Pictures
list to add it to your message.
•
Take a picture
: allows you to temporarily exit the message, take
a photo with phone’s camera, and then add it to your message by
tapping
Save
.
•
Video
: allows you to choose an existing video from the Videos list,
then add it to your message
.
•
Record video
: allows you to temporarily exit the message,
record a video clip using the phone’s camera, and then add it
to your message by tapping
Save
.
•
Audio
: allows you to choose an existing audio file from the
Audio list, then add it to your message by tapping the circle to
the right of the audio so that it turns green, then tapping
Done
.
•
Record audio
: allows you to temporarily exit the message and
record an audio clip using the phone’s microphone. It is then
automatically attached to the message.
•
S Memo
: allows you to add an S Memo that you have created.
•
Calendar
: allows you to add an event from your calendar.
DRAFT
Internal Use
O
nl
y
136
•
Location
: allows you to attach a thumbnail of a map showing
your location.
•
Contacts
: allows you to tap on an existing Address Book entry,
then add it to your message by tapping
Done
.
Adding Additional Text
You can copy text such as names, phone numbers, and
events from your Contacts, Calendar, or a Memo.
1. While composing a message, press ➔
Add text
.
2. At the Add text screen, select one of the following:
•S Memo
: allows you to insert text from an existing S Memo.
•Calendar
: allows you to add the name, date, and time of a
calendar event to your message.
• Location
: allows you to add an address and the link to the
location on Google Maps.
•Contacts
: allows you to add the name and phone number of
any of your contacts to your message.
• Text templates
: allows you to add pre-defined phrases and
sentences. For more information, refer to
“Text Templates”
on page 144.
The information is added to your message.
Viewing Newly Received Messages
When you receive a message, your phone notifies you by
displaying within the Notification area at the top left of
your Home screen.
To read a message:
1. Open the Notification Bar and select the message. For
more information, refer to “Notification Bar” on page
37.
– or –
From the Home screen, tap
then tap the new
message to view its contents. The selected message
displays on the screen.
2. Tap to play a multimedia message.
•
To pause playback of the multimedia message, tap .
3. In a single motion, touch and drag up or down the page
to scroll through the message (if additional pages were
added).
DRAFT
Internal Use
O
nl
y
Messages 137
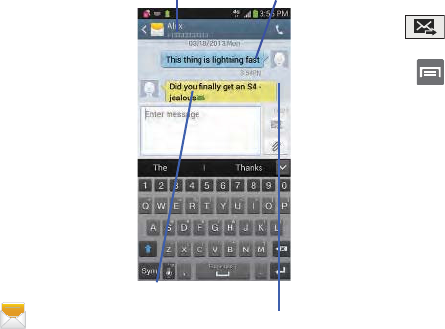
Message Threads
Sent and received text and
picture messages are
grouped into message
threads. Threaded messages
allow you to see all the
messages exchanged (similar
to a chat program) and
displays a contact on the
screen.
Message threads are listed in
the order in which they were
received, with the latest
message displayed at the
top.
To reply to a text message:
1. From the Home screen,
tap .
2. While the message is
open, tap the
Enter message
field and then type your
reply message.
3. Compose your reply.
Your texts are colored Blue and your caller’s replies are
Yellow.
4. Tap (
Send
) to deliver your reply.
– or –
Press and then select one of the available
message options (page 133).
To access message thread options:
䡲
From the main Messaging screen, touch and hold the
message to display the following options:
• View contact
: displays the Contact’s Overview page.
•Add to contact
: begins the process of adding the new number
to your Contacts list.
• Delete thread
: deletes the currently selected message thread.
• Add to spam numbers
: adds the current sender to a spam list.
ny new texts from this sender are automatically blocked.
Current Recipient My Text
Reply Bubble
Text Message Thread
DRAFT
Internal Use
O
nl
y
138
To access additional Bubble options:
䡲
Touch and hold the message bubble within an active
message conversation to display the following options:
• Delete message
: deletes the currently selected message
bubble from the thread.
• Copy message text
: copies the currently selected message
bubble from the thread.
• Lock/Unlock message
: locks or unlocks the currently selected
message bubble from being accidentally deleted.
• Forward
: allows you to forward the currently selected message
bubble to an external recipient.
• Copy to SIM
: copies the currently selected message bubble as
a single text message within the SIM card.
• View message details
: displays details for the currently
selected message bubble.
•Translate
: translates the text from the currently selected
bubble into a desired language.
Deleting Messages
Deleting a single message thread
1. From the Home screen, tap .
2. Touch and hold a message from the Messages list,
then select
Delete thread
.
3. At the prompt, tap
OK
to delete or
Cancel
to exit.
Deleting multiple message threads
1. From the Home screen, tap .
2. Press and then tap
Delete threads
.
3. Tap each message thread you want to delete. A check
mark displays beside each selected message.
4. Tap
Delete
.
5. At the prompt, tap
OK
to delete or
Cancel
to end the
process.
DRAFT
Internal Use
O
nl
y
Messages 139
Deleting a single message bubble
1. From the Home screen, tap .
2. Open a message to reveal the message string.
3. Touch and hold a message bubble, then select
Delete
message
.
4. At the prompt, tap
OK
to delete or
Cancel
to exit.
Deleting multiple message bubbles
1. From the Home screen, tap .
2. Open a message to reveal the message string.
3. Press and then tap
Delete messages
.
4. Place a check mark on the individual bubbles targeted
for deletion or choose
Select all
.
5. Tap
Delete
to erase or
Cancel
to exit.
Message Search
You can search through your messages by using the
Message Search feature.
1. From the Home screen, tap .
2. Press and then tap
Search
.
3. Use the on-screen keypad to enter a word or phrase in
which to search, then tap .
4. All messages that contain the entered search string
display.
Messaging Settings
To configure the settings for text messages, multimedia
messages, Voice mails, and Push messages.
1. From the Home screen, tap .
2. Press and then tap
Settings
.
The following Messaging settings are available:
Display
• Bubble style
: allows you to choose from several bubble styles
for your messages. Bubbles are the rounded boxes that
surround each message.
• Background style
: allows you to choose from several
background styles for your messages.
DRAFT
Internal Use
O
nl
y
140
• Use the volume key
: allows you to change the text size by
using the up or down volume keys.
General settings
• Delete old messages
: deletes old messages when the limit is
reached, rather than overwriting them.
• Text message limit
: allows you to set a limit on how many text
messages are allowed in one conversation.
• Multimedia message limit
: allows you to set a limit on how
many multimedia messages are allowed in one conversation.
Text message (SMS) settings
• Delivery reports
: when this option is activated, the network
informs you whether or not your message was delivered.
• Manage SIM card messages
: allows you to manage the
messages stored on the SIM card.
• Message center
: allows you to enter the number of your
message center where your messages reside while the system
is attempting to deliver them.
• Input mode
: allows you to set the input mode for your text
messages. Choose from: GSM Alphabet, Unicode, or
Automatic.
Multimedia message (MMS) settings
• Delivery reports
: when this option is activated, the network
informs you whether or not your message was delivered.
•Read reports
: when this option is activated, your phone
receives a request for a read reply along with your message to
the recipient.
•Auto-retrieve
: allows the message system to automatically
retrieve messages.
• Roaming auto-retrieve
: allows the message system to
automatically retrieve while roaming.
•Creation mode
: allows you to select the creation mode: Free,
Restricted, or Warning.
–
Restricted
: you can only create and submit messages with
content belonging to the Core MM Content Domain.
–
Warning
: the phone will warn you via pop up messages that
you are creating a multimedia message which does not fit the
Core MM Content Domain.
–
Free
: you may add any content to the message.
•MMS alert
: alerts you when the messaging modes changes
from an SMS (text) to MMS (multimedia) mode.

DRAFT
Internal Use
O
nl
y
Messages 141
Push message settings
• Push messages
: allows you to receive push messages from
the network.
• Service loading
: allows you to set the type of service loading
notification. Choose from: Always, Prompt, or Never.
Notification settings
• Notifications
: allows you to see message notifications on your
status bar.
• Select ringtone
: allows you to set the ringtone for your
message notifications.
•Vibrate
: allows you to configure the vibration mode associated
with message alerts.
• Message alert repetition
: allows you to set the interval for new
message alerts. Choose from: Once, Every 2 minutes, or
Every 10 minutes.
• Preview message
: when enabled, allows you to view a brief
preview of new message text on the Status bar.
Emergency message settings
• Emergency alerts
: allows you to configure emergency alert
settings. You can enable/disable those alert categories you
wish to receive. Choose from: Imminent extreme alert,
Imminent severe alert, and AMBER alerts.
Note:
The Presidential alert can not be disabled.
• Emergency notification preview
: allows you to play a sample
emergency alert tone. Tap
Stop
to cancel the playback.
Signature settings
• Add signature
: when enabled, this feature allows you to create
a signature at the end of your outgoing text messages.
• Signature text
: allows you to enter a desired signature for your
message.
Spam message settings
• Spam settings
: when enabled, allows you to configure
available spam settings such as:
–
Add to spam numbers
: allows you to manually enter and
assign a phone number as being sent from a spam source.
–
Add to spam phrases
: allows you to assign a specific text
phrase as belonging to a spam message. Ex: Dear friend.
DRAFT
Internal Use
O
nl
y
142
–
Block unknown senders
: when active, automatically blocks
incoming messages from unknown sources or blocked
numbers.
Emergency Alert Configuration
This device is designed to receive wireless emergency alerts
from the Commercial Mobile Alerting System (CMAS); which
may also be known as the Personal Localized Alerting
Network (PLAN). If your wireless provider has chosen to
participate in CMAS/PLAN, alerts are available while in the
provider's coverage area. If you travel outside your provider's
coverage area, wireless emergency alerts may not be
available. For more information, please contact your wireless
provider.
Emergency Alerts allows customers to receive
geographically-targeted messages. Alert messages are
provided by the US Department of Homeland Security and
will alert customers of imminent threats to their safety within
their area. There is no charge for receiving an Emergency
Alert message.
There are three types of Emergency Alerts:
•
Alerts issued by the President
•
Alerts involving imminent threats to safety of life
•
AMBER Alerts (missing child alert)
Customers may choose not to receive Extreme Alerts, Severe
Alerts, and AMBER Alerts.
Important!
Alerts issued by the President can not be disabled.
To disable Extreme, Severe, and AMBER Alerts:
1. From the Home screen, tap .
2. Press and then tap
Settings
.
3. Scroll to the bottom and select
Emergency alerts
. All
alerts are enabled by default (check mark showing).
4. Tap on an alert option to disable the alert and remove
the check mark.
DRAFT
Internal Use
O
nl
y
Messages 143
Assigning Messages as Spam
You can now assign either a phone number as spam or use a
key term or phrase. Any message assigned as spam is
automatically placed with your Spam messages folder.
To assign a phone number from Messages list as spam:
1. From the Home screen, tap .
2. Touch and hold a message from a phone number.
3. Select
Add to spam numbers
and tap
OK
.
To assign a phone number manually as spam:
1. From the Home screen, tap .
2. Press and then tap
Settings
.
3. Locate and activate the
Spam settings
option.
• Spam settings
: when enabled, allows you to configure
available spam settings such as:
4. Tap
Add to spam numbers
➔ (
Add new
).
•
This function allows you to manually enter and assign a phone
number as being sent from a spam source.
5. Tap the
Number
field to manually enter phone number.
– or –
Tap to select from either your existing Logs or
Contacts.
– or –
Tap
Match criteria
and select a parameter that must
match for the spam action to take effect. Choose from:
Same as, Starts with (ex: 800 or 888), Ends with, or
includes.
6. Tap
Save
.
To register text phrases as spam:
Some incoming messages might not be associated with a
phone number but rather an email address. In these cases,
the only way to block those messages, would be assign a
key used term or phrase to activate the Spam block. Ex:
“Dear friend”, “Stock Alert”, or “Act Now”.
1. From the Home screen, tap .
2. Press and then tap
Settings
.
3. Locate and activate the
Spam settings
option.
DRAFT
Internal Use
O
nl
y
144
4. Tap
Add to spam phrases
➔ (
Add new
).
•
This function allows you to assign a specific text phrase as
belonging to a spam message. Ex: Dear friend.
5. Enter a term or word into the field.
Note:
The term is case sensitive. Ex: “Act Now” is not the
same as “act now”.
6. Tap
Save
.
To register unknown numbers as spam:
Some incoming messages might not be associated with
either a phone number or email address. These incoming
messages contain no information as their info is blocked by
the sender.
1. From the Home screen, tap .
2. Press and then tap
Settings
.
3. Locate and activate the
Spam settings
option.
4. Tap
Block unknown senders
. A green check mark
indicates the feature is active.
• Block unknown senders
: when active, automatically blocks
incoming messages from unknown sources or blocked
numbers.
If an incoming message is designated in coming from an
unknown sender, it is automatically assigned as spam and is
now located in your Spam folder.
Accessing Your Spam Folder
Any message assigned as spam is automatically placed with
your Spam messages folder.
1. From the Home screen, tap .
2. Press and then tap
Spam messages
.
Text Templates
This screen displays your available text message reply
templates. This is a readily accessible list of both default and
user-defined text snippets that can be used to quickly reply
to incoming messages.
1. From the Home screen, tap .
2. From the Messaging list, press and then tap
Text templates
.
3. Tap a message to immediately insert it into your
current message conversation.
DRAFT
Internal Use
O
nl
y
Messages 145
To create your own text template:
1. From the Home screen, tap .
2. From the Messaging list, press and then tap
Text templates
.
3. Tap (
Create text template
).
4. Enter a new text string and tap
Save
.
Using Email
Email (or Internet Email) enables you to review and create
email using several email services. You can also receive text
message alerts when you receive an important email. Your
phone’s Email application lets you access and manage
multiple email accounts simultaneously in one convenient
location.
There are currently three main types of email accounts on
your phone: Gmail, Internet-based email (Gmail, Yahoo, etc..),
and Microsoft Exchange (Corporate email or Outlook®).
To send and receive email messages through an ISP (Internet
Service Provider) account, or if you wish to use your device
to access your corporate email through a VPN (Virtual Private
Network), you will first need to set up an IMAP or POP
account.
•
IMAP
(Internet Message Access Protocol) - This protocol is
frequently used in large networks and commercial settings.
IMAP4 is the current standard.
•
POP3
(Post Office Protocol) - This protocol is supported by most
ISPs (Internet service providers) and common among consumer
applications. POP3 is the current standard.
•
Microsoft Exchange ActiveSync
- This protocol is frequently
used with a large corporate email server system and provides
access to email, contact, and calendar synchronization.
DRAFT
Internal Use
O
nl
y
146
Creating an Internet Email Account
1. From the Home screen, tap (
Apps
)➔
(
Email
).
2. If you already have other email account setup:
•
Open an existing email account, press and then tap
Settings
➔
(
Add account
).
– or –
Enter your
Email address
and
Password
information.
• Email address
: your Internet email address.
• Password
: typically your network access password
(case-sensitive).
3. Tap
Show password
to display the password as you
enter it in the associated field.
•
Tap
Manual setup
to configure your connection settings
manually (POP3 or IMAP). Follow the on-screen prompts and
enter the information specific to your email provider.
•
Tap
Send email from this account by default
to assign this
email account as your default account for all outgoing emails.
4. Tap
Next
.
5. At the
Account options
screen, select the frequency
which the device should check for new email on the
server and tap
Next
.
Important!
The
Sync Email
feature must be enabled to allow
synching between your device and the remote
server.
•
Tap the
Notify me when email arrives
field to receive new
email notifications.
•
Tap the
Automatically download attachments when
connected to Wi-Fi
field to assist with faster access to large
email attachments when using Wi-Fi.
Account name
Access available
accounts and
folders
DRAFT
Internal Use
O
nl
y
Messages 147
6. At the
Set up email
screen, name the account and enter
a screen name to identify yourself on this account.
•
The unique account name is used to differentiate this account
from other email accounts accessed by your device.
7. Tap
Done
to store the new account.
Messages for this account display on the Inbox tab. You can
also view Personal information for this account, Receipts (if
you setup the account to return receipts), Travel information,
and more (if available).
Opening an Email
1. From the Home screen, tap ➔ (
Email
).
2. Tap (account name field upper-left) to open
the complete email account list page.
•
Selecting
Combined view
allows you to view all the emails for
your current accounts, managed by the application, to be listed
on a single screen.
3. Select an email account and tap an email message.
Refreshing Email messages
1. From the Home screen, tap ➔ (
Email
).
2. Select an email account.
•
If you are already in an email account, tap the account name
field (upper-left) to open the complete email account list page.
•
Select an available email account.
3. Tap (
Refresh
).
DRAFT
Internal Use
O
nl
y
148
Composing Email
1. From the Home screen, tap ➔ (
Email
).
2. Tap (account name field upper-left) to open
the complete email account list page.
3. Tap
Inbox
➔ (
Compose
).
4. Enter the recipient’s email address in the
To
field.
•
If you are sending the email message to several recipients,
separate the email addresses with a comma. You can add as
many message recipients as you want.
5. Press and then tap
Add Cc/Bcc
to add additional
carbon copy recipients.
•
Use the
Cc
field to carbon copy additional recipients.
•
Use the
Bcc
field to blind copy additional recipients.
6. Tap the
Subject
field and enter the email subject.
7. Tap the email text field and compose your email
message.
•
To add an attachment (such as image, video, audio, etc..),
tap
Attach
(from the top of the screen) and make a
category selection.
–
Tap the file you wish to attach.
–
Tap
to delete the attached file.
Note:
If you attach an image to your email, you have the option
to resize it prior to delivery. Choose from: Original,
Large (70%), Medium (30%), or Small (10%). Once
chosen, tap
OK
.
8. Once complete, tap (
Send
).
Configuring Email Settings
1. From the Home screen, tap ➔ (
Email
).
2. Select an account.
3. Press and then tap
Settings
➔
<Account>
.
4. Alter any of the following settings:
• Email notifications
: Activates the email notification icon to
appear within the Notifications area of the status bar when a
new email (Gmail, etc..) is received.
• Select ringtone
: Plays a selected ringtone when a new email
message is received.
•Vibrate
: Activates a vibration when a new email message is
received.
• Sync Email
: enables automatic email synching between your
device and the remote server.

DRAFT
Internal Use
O
nl
y
Messages 149
• Sync schedule
: allows you to control the email sync schedule
on both Peak and Off-Peak times.
• Size to retrieve emails
: configures the incoming email size
allowed to pass through to your phone automatically without
user interaction. Emails with attachments larger than
configured will have to be retrieved manually.
•Signature
: Lets you attach a customized signature to the
bottom of all outgoing emails.
–
In a single motion touch and slide the
Signature
slider to the
right to turn it on .
–
Tap the
Signature
field, change the current text, and tap
OK
to
save the new signature.
• Default account
: Assign this account as the default email
account used for outgoing messages.
5. Tap the
More settings
field to access additional options:
• Account name
: displays your uniquely created account display
name.
•Your name
: displays the name used in the From field of your
outgoing email messages.
• Always Cc/Bcc myself
allows you to include your own email
address in either the CC, Bcc, or None fields. Lets you always
receive a copy of outgoing emails.
• Forward with attachments
: Lets you include attachments
when forwarding an email.
• Recent messages
: adjusts the number of on-screen
messages shown in the current category list at any one time.
• Show images
: allows you to view embedded images located
within the body of the currently displayed email.
• Auto download attachments
: allows the device to
automatically download email attachments when an active
Wi-Fi connection is detected. This process speeds up the
process of downloading an emails attachments for offline
review by not using a 3G or 4G network connection.
• Auto resend times
: enables the device to resend an outgoing
email a specified number of times if delivery fails.
• Incoming settings
: Lets you specify incoming email settings,
such as User name, Password, IMAP server, Security type,
Port, and IMAP path prefix.
ON
ON
DRAFT
Internal Use
O
nl
y
150
• Outgoing settings
: Lets you specify outgoing email settings,
such as SMTP server, Security type, Port, Require sign-in, User
name, or Password.
Note:
Some the above options may not be displayed when
using some Internet account types.
Microsoft Exchange Email (Outlook)
Your phone also provides access to your company’s Outlook
Exchange server. If your company uses either Microsoft
Exchange Server 2003 or 2007, you can use this email
application to wirelessly synchronize your email, Contacts,
and Calendar information directly with your company’s
Exchange server.
Setting Up a Microsoft Exchange Email account
1. From the Home screen, tap ➔ (
Email
).
2. If you already have other email account setup:
•
Open an existing email account, press and then tap
Settings
➔
(
Add account
).
– or –
Enter your
Email address
and
Password
information.
• Email address
: your Outlook work email address.
• Password
: typically your network access password
(case-sensitive).
3. Tap
Show password
to display the password as you
enter it in the associated field.
4. Tap
Send email from this account by default
, to make
this your default email account for outbound emails.
Note:
If selected, the
Manual setup
button changes to read
Microsoft Exchange ActiveSync
. If activated, skip to
step 6.
5. Tap
Next
. Consult your Network or IT Administrator for
further details and support.
DRAFT
Internal Use
O
nl
y
Messages 151
6. Tap
Microsoft Exchange ActiveSync
(from the add new
email account screen).
Note:
If prompted with an on-screen notification that the
connection that the “Setup could not finish”, tap
Edit details
to continue with a manual update of
necessary information.
7. When prompted to provide additional detailed
information within the Exchange server settings
screen, enter an updated
Domain
, and confirm your
user name
and
Password
information.
Important!
Remember to manually place the cursor in the
correct spot and enter a Domain name before the
“
[Domain]\[user name]
” entry. Most servers only
provide a username.
8. Update or re-enter your
Exchange server
information
within the appropriate field. This field can often be
populated with incorrect or out of date information
provided by your server.
• Exchange Server
: your exchange server remote email
address. Typically starts with
mail.XXX.com
. Obtain this
information from your company network administrator.
Important!
Do not accept the default entry as this is a guess
based on returned information.
•
If your network requires SSL encryption, tap the
Use secure
connection (SSL)
field to place a check mark in the box and
activate this additional level. Most often, this option should be
enabled.
Important!
If your Exchange server requires this feature,
leaving this field unchecked can prevent
connection.
9. Consult your IT Administrator if it is necessary to
enable the
Use client certification
option.
10. With the new server information entered, tap
Next
.
11. Read the on-screen
Activation
disclaimer and, when
prompted, tap
OK
. The device then verifies your
incoming server settings.
DRAFT
Internal Use
O
nl
y
152
12. If prompted, read the
Remote security administration
information and tap
OK
to accept the service and
continue.
13. Adjust the various on-screen configuration fields and
tap
Next
. It may take a few seconds for the next screen
to load.
•
Enabling the
Automatically download attachments when
connected to Wi-Fi
option decreases the wait time to access
large email attachments.
14. If prompted, read the
Activate device administrator?
screen and tap
Activate
to complete the email setup
process.
Note:
This process can take a few minutes. If the previous
setup screen re-appears,
ignore it and do not alter any
fields
during this process.
15. Identify your new work email account with a unique
name (Ex: Work), then tap
Done
.
Opening an Exchange Email
1. From the Home screen, tap ➔ (
Email
).
2. Tap the account name field (upper-left) to open the
complete email account list page.
3. Select an exchange email account and tap an email
message.
Refreshing Exchange Email
1. From the Home screen, tap ➔ (
Email
).
2. Select an email account.
•
If you are already in an email account, tap the account name
field (upper-left) to open the complete email account list page.
•
Select an available email account.
3. Tap (
Refresh
).
Composing Exchange Email
䡲
For more information, refer to “Composing Email” on
page 148.
DRAFT
Internal Use
O
nl
y
Messages 153
Deleting an Exchange Email Message
䡲
Touch and hold an email (from your inbox list) and
select
Delete
from the on-screen context menu.
– or –
With the email message displayed, tap (
Delete
).
Configuring Microsoft Exchange Email Settings
1. From the Home screen, press and then tap
Settings
and then navigate to the
Accounts
area.
2. Tap the Microsoft Exchange account and
Settings
➔
<
Exchange email account>
.
– or –
From the Home screen, tap ➔ (
Email
),
select an account, and press and then tap
Settings
➔
<Account>
.
3. Alter any of the following settings:
• Email notifications
: Activates the email notification icon to
appear within the Notifications area of the status bar when a
new email is received.
• Select ringtone
: Plays a selected ringtone when a new email
message is received.
•Vibrate
: Activates a vibration when a new email message is
received.
•Sync Email
: enables automatic email synching between your
device and the remote server.
• Sync schedule
: allows you to control the email sync schedule
on both Peak and Off-Peak times.
• Period to sync email
to assign the sync range for your
incoming and outgoing email messages between your phone
and your external exchange server. How many days worth of
email messages should the phone and server synchronize.
Choose from:
Automatic, All, 1 day
,
3 days
,
1 week
,
2 weeks
, or
1 month
.
• Size to retrieve emails
configures the incoming email size
allowed to pass through to your phone automatically without
user interaction. Emails with attachments larger than
configured will have to be retrieved manually.
•Signature
: Lets you attach a customized signature to the
bottom of all outgoing emails.
–
In a single motion touch and slide to the right to turn it on
.
ON
ON
DRAFT
Internal Use
O
nl
y
154
–
Tap the
Signature
field, change the current text, and tap
Done
to save the new signature.
• Default account
: Assign this account as the default email
account used for outgoing messages.
• Out of office settings
allows you to both activate/deactivate
your email’s out of office settings, and configure both the start/
end dates and your outgoing message.
4. Tap the
More settings
field to access additional options:
• Account name
displays the name used by the device to track
the account.
• Always Cc/Bcc myself
allows you to include your own email
address in either the CC, Bcc, or None fields. Lets you always
receive a copy of outgoing emails.
• Forward with attachments
: Lets you include attachments
when forwarding an email.
• Show images
: allows you to view embedded images located
within the body of the currently displayed email.
• Auto download attachments
: allows the device to
automatically download email attachments when an active
Wi-Fi connection is detected. This process speeds up the
process of downloading an emails attachments for offline
review by not using a 3G or 4G/LTE network connection.
• Auto resend times
enables the phone to resend an outgoing
email a specified number of times if delivery fails.
The default is 3 auto resends.
• Folder sync settings
allows you to configure the sync settings
for various folders such as Inbox, Drafts, Outbox, etc..
• Period to sync Calendar
assigns a period for your phone to
sync calendar events. Choose from:
2 weeks, 1 month
,
3 months
,
6 months
, or
All calendar
.
• Empty server trash
: allows you to delete your email account’s
trash bin remotely.
• Sync Contacts
synchronizes the contacts between your device
and the remote exchange server.
• Sync Calendar
synchronizes your exchange calendar entries
between your device and the remote exchange server.
• Sync Task
synchronizes your exchange tasks entries between
your device and the remote exchange server.
DRAFT
Internal Use
O
nl
y
Messages 155
• In case of sync conflict
allows you to assign the master
source on emails. If there is a conflict with the current email
sync you can assign the server as the main source for all
emails (
Server has priority
) or assign the phone to be the main
source and update the server accordingly (
Device has
priority
).
• Security options
: allows you to enable several security options
such as: Encryption, Encryption algorithm, Sign, Sign
algorithms, Email certificates, and Security policy list. These
security policies could restrict some functions from corporate
servers.
–
Security policy list
: lists the current email’s security policy.
These policies could restrict some functions from corporate
servers.
• Exchange server settings
provides access to the
Domain\user name, Password, and Exchange server settings.
5. Press to return to the previous page.
Using Google Mail
Google Mail (Gmail) is Google’s web-based email. When you
first setup the phone, Gmail is configured. Depending on the
synchronization settings, Gmail is automatically synchronized
with your Gmail account.
Signing into Google Mail
1. From the Home screen, tap ➔ (
Gmail
).
Note:
You must sign in to your Gmail account in order to
access features such as Google Mail and Play Store.
2. Tap
New
if you do not have a Google account.
– or –
Tap
Existing
if you have a Google account.
The Inbox loads conversations and email.
Opening Gmail
1. From the Home screen, tap ➔ (
Gmail
).
2. Tap an existing email message.
DRAFT
Internal Use
O
nl
y
156
Refreshing Gmail Mail
䡲
From within the Gmail message list, tap (
Refresh
)
at the bottom of the screen to refresh the screen, send
and receive new emails, and synchronize your email
with the Gmail account.
Other Gmail Options
1. From the main Gmail screen, tap (
Labels
) at the
bottom of the screen to set up and manage Labels for
your Gmail messages.
2. From the main Gmail screen, tap (
Search
) at the
bottom of the screen to search through your Gmail
messages.
Composing a Gmail Message
1. From the Home screen, tap ➔ (
Gmail
).
2. From the Gmail Inbox, tap (
Compose
) at the
bottom of the screen to create a new message.
3. Enter the recipients Email address in the
To
field.
Tip:
Separate multiple recipient email addresses with a
comma.
4. Press and select
Add Cc/Bcc
to add a carbon or
blind copy.
5. Enter the subject of this message in the
Subject
field.
6. Tap the
Compose email
field and begin composing your
message.
7. Once complete tap (
Send
).
Viewing a Gmail Message
1. From the Gmail Inbox, tap a message to view the
following options located at the bottom of the screen:
•Archive
: archives the selected Email.
• Delete
: deletes the currently selected Email.
•Labels
: assigns a label to the current Email.
• Mark as Unread
: tags the current message as unread
and returns you to the Google Mail Inbox.
•Newer
: swiping to the right displays newer Emails.
•Older
: swiping to the left displays older Emails.
2. Press to select one of the following additional
options:
• Mark important/Mark not important
: assigns the current
email an important status.
DRAFT
Internal Use
O
nl
y
Messages 157
•Mute
: mutes the conversation.
• Report spam
: reports the Email message as spam.
• Report phishing
: reports the Email message as a phishing
email attempt.
• Settings
: allows you to configure the General, or Notification
settings.
• Send feedback
: sends feedback to Google.
•Help
: launches the browser and displays Google Mobile Help
information.
Creating an Additional Gmail Account
1. From the Home screen, tap ➔ (
Gmail
).
2. Press and then tap
Settings
➔
ADD ACCOUNT
and
follow the same steps as referenced in the previous
section. For more information, refer to “Signing into
Google Mail” on page 155.
Google Talk
Google Talk™ is a free Windows and web-based application
for instant messaging offered by Google. Conversation logs
are automatically saved to a Chats area in your Gmail
account. This allows you to search a chat log and store them
in your Gmail accounts.
Note:
Before using this application, you must first have an
active Gmail account available and be currently logged
in.
1. From the Home screen, tap ➔ (
Talk
).
Note:
If you are not already logged into Google, refer to the
instructions for signing in on page 155.
2. Begin using Google Talk.
Note:
The Network confirms your login and processes. This
could take up to 5 minutes to complete.
DRAFT
Internal Use
O
nl
y
158
ChatON
Provides a global mobile communication service where you
can chat with more than 2 buddies via a group chat. Share
things such as pictures, videos, animation messages
(Scribbles), audio, Contacts, Calendar entries, and Location
information.
Important!
The Samsung account manages the access
information (username/password) to several
applications, such as AllShare Play, ChatON, and
Media Hub.
For more information, visit:
https://web.samsungchaton.com
.
Registering with the Service
1. Confirm you have already logged in to your Samsung
account.
2. From the Home screen, tap (
Apps
) ➔
(
ChatON
).
3. Tap
Sign in
to log into your Samsung account
– or –
Tap
Skip
to continue without logging in.
4. Read the on-screen notification about data charges
and tap
OK
.
5. Select a country code, enter your current phone
number to register with the service, and tap
Done
.
6. Select either the
Terms and conditions
or
Privacy policy
and read the on-screen information. Tap
Accept
to
continue.
7. Choose to receive the verification code via either
SMS
(text message) or
Voice
(answering machine call) to
your device.
DRAFT
Internal Use
O
nl
y
Messages 159
Note:
If you opt to receive the verification code via SMS, this
information is sent directly to your device. Once
received, the
Verification
field is automatically filled in.
8. Enter your real name and tap (
OK
).
Adding Your First Chat On Buddy
1. From the Home screen, tap (
Apps
) ➔
(
ChatON
).
2. Tap
Add buddy
and choose a search method.
•Address
: to search by Country code and phone number.
• Search by ID
: to search by using a known samsung
account ID.
3. Select a country code if it differs from yours.
4. Enter the information and tap (
Search
). Once the
recipient is matched, their entry appears in the
Results
area.
5. Tap (
Add buddy
) and confirm your new buddy
appears in the Buddies tab.
Note:
For more information, press (
Settings
) and tap
General
➔
Help
.
Using ChatON for Chatting
1. From the Home screen, tap (
Apps
) ➔
(
ChatON
).
2. Tap the Buddies tab and select a buddy to initiate your
chat.
3. Enter your message using the on-screen text entry
method.
4. Tap
Send
.
To reply to a ChatON message:
1. While the chat session is active, tap the
Enter message
field and then type your reply message.
2. Compose your reply.
Your texts are colored Blue and your buddy’s messages
are white.
3. Tap
Send
to deliver your reply.

DRAFT
Internal Use
O
nl
y
160
Deleting a single message bubble
1. From the Home screen, tap (
Apps
) ➔
(
ChatON
).
2. Launch a chat session to reveal the message string.
3. Touch and hold a message bubble, then select
Delete
.
DRAFT
Internal Use
O
nl
y
Multimedia 161
Section 8: Multimedia
This section explains how to use the multimedia features of
your device, including the Camera/Camcorder, Music Player,
Samsung Link, and how to manage your photos, images and
sounds.
You can take photographs and shoot video by using the
built-in camera functionality. Your camera produces photos in
JPEG format.
Important!
Do not take photos of people without their
permission.
Do not take photos in places where cameras are
not allowed.
Do not take photos in places where you may
interfere with another person’s privacy.
Note:
An SD card is no longer needed to take pictures or shoot
video since there is already built-in storage.
Assigning the Default Storage
Location
Important!
Too many users can overlook this storage location
until something goes wrong. It is recommended
that you verify this location or change it before
initiating the use of the camera or camcorder
features.
1. From the Home screen, tap (
Apps
)
➔
(
Camera
).
2. Press and then tap
Settings
➔ (
Settings
)
and scroll down to the
Storage
entry.
3. Tap this entry and select the desired default storage
location for newly taken pictures or videos. Choose
from:
Phone
or
Memory card
.
Note:
It is recommended that you set the option to
Memory
card
.
4. Press to return to the Home screen.

DRAFT
Internal Use
O
nl
y
162
Using the Camera
Taking Photos
Taking pictures with your device’s built-in camera is as
simple as choosing a subject, pointing the camera, then
pressing the camera key.
Note:
When taking a photo in direct sunlight or in bright
conditions, shadows may appear on the photo.
1. From the Home screen, tap
(
Camera
).
2. Using the device’s main display screen as a viewfinder,
adjust the image by aiming the camera at the subject.
Note:
Use either the Up and Down volume keys or spread/
pinch the screen to zoom in or out. For more
information, refer to “Navigating Through the Screens”
on page 53.
3. Before you take a picture, use the
Up
and
Down
Volume
keys to zoom in or out. You can magnify the picture up
to x4 (400 percent).
– or –
Pinch the screen to zoom out or pinch outwards to
zoom in.
4. If desired, before taking the photo, you can tap
on-screen icons to access various camera options and
settings.
5. You can also tap the screen to move the focus to a
desired area of interest.
6. Press (
Camera
) until the shutter sounds. (The
picture is automatically stored within your designated
storage location (page 161). If no microSD is installed,
all pictures are stored on the Phone.) For more
information, refer to “Camera Options” on page 163.
Note:
Touch and hold to take a burst shot. These are
saved using a Fine image quality.
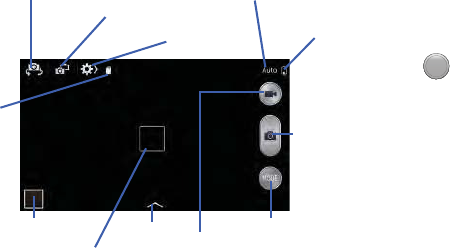
DRAFT
Internal Use
O
nl
y
Multimedia 163
Camera Options
Options are represented by icons across both sides of the
screen.
1. From the camera viewfinder, tap the Mode button
to change the mode to one of the following:
–
Beauty face
: Use this to take photos with lightened faces for
gentler images.
–
Best photo
: Use this to take multiple photos in a short time,
and then choose the best photos among them. Press the
Shutter button to take multiple photos. When Gallery opens, tap
and hold thumbnails of photos to save, and then tap Done.
–
Best face
: Use this to take multiple group shots at the same
time and combine them to create the best possible image. Press
the Shutter button to take multiple photos. When Gallery opens,
tap the yellow frame on each face, and choose the best
individual face for the subject. After choosing a pose for each
individual, tap Done to merge the images into a single photo,
and tap Save.
–
Sound & shot
: Use this mode to enrich pictures by adding
background sounds for a few seconds. The background sound
is receorded for up to 9 seconds after taking the photo.
Display Front
Self-portrait
Effects
Record video
button
Camera mode
Quick Settings
Facing Camera Battery
Charge
Image viewer
Take
Picture
Mode (Change)
Viewfinder
Storage
MODE

DRAFT
Internal Use
O
nl
y
164
–
Drama
: Use this to take a series of photos of a moving object
and then merge them together into one image.
–
Cinema photo
: Use this to create a picture in which a few
selected static objects move by animating objects detected by
the device.
–
Rich tone (HDR)
: Use this to take photos with richer colors and
contrasts by merging images taken at different exposure levels.
–
Eraser
: Saves the best of 5 taken pictures and removes any
passers by.
–
Panorama
: Use this to take wide panoramic photos. Press the
Shutter button to take a photo, and then move the camera in
any direction. When the blue frame aligns with the preview
screen, the camera automatically takes another shot in the
panoramic sequence. To stop shooting, press the Shutter button
again.
–
360 photo
: Use this to create a 360-degree image of your
surroundings by taking multiple pictures and then merging them
together.
–
Sports
: Use this to take fast action photos.
–
Night
: Use this to take brighter, clearer pictures in low light
settings without the use of the flash.
2. From the top of the camera, the following shortcuts are
available for the camera:
Focus area
: displays the area of the image used as the
main focus area. If the image is too close, the square
will turn red.
Self portrait
: allows you to set the front camera so
you can take pictures of yourself.
Front Camera
: allows you to activate both the front and
rear cameras.
Quick Settings
: activates the Quick Settings menu
bar from where you can select several additional
settings.For more information, refer to “Quick
Settings” on page 165.
Image viewer
: allows you to access the Image
viewer and the various viewing options for a
selected picture. The last picture you took, will be
displayed as a thumbnail in the Image viewer icon.
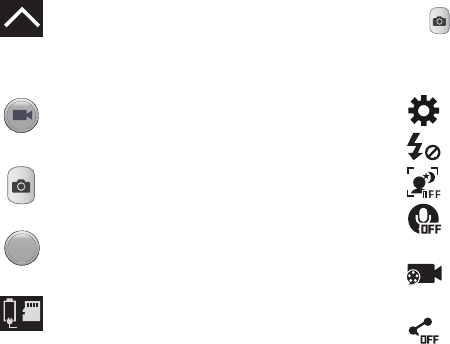
DRAFT
Internal Use
O
nl
y
Multimedia 165
Quick Settings
Tap at the top of the display to quickly change Camera
settings. Not all of the following options are available in both
still camera and video camera modes. The available options
vary by mode.
Effects/Downloads
: provides access to pre-installed
and downloaded effects. Default effects include:
No effect, Vignette, Grey-scale, Sepia, Vintage,
Turquoise, Rainbow, Comic, Gothic noir, and Fisheye.
Camcorder button
: shoots a video when pressed.
Camera button
: takes a photo when pressed in
Camera mode.
Mode button
: allows you to select from different
camera modes.
Storage location/Connection Status
: indicates the
device is connected to an adapter and the current
storage location for images (Phone or Memory card)
on the device.
MODE
Configure Camera settings.
Activate or deactivate the flash.
Use this activate/deactivate night detection.
Activate or deactivate the voice control to take
photos.
Select a resolution for videos. Choose from: Normal,
Limit for MMS, Slow motion, or Fast motion.
Activate or deactivate the sharing options.
Choose from Off, Share Shot, Buddy photo share,
ChatON phot share, or Remote viewfinder.
DRAFT
Internal Use
O
nl
y
166
Camera and Camcorder Settings
This section describes the different settings that you can
configure on your camera. Not all of the following options are
available in both still camera and video camera modes. The
available options vary by mode.
1. From the viewfinder, tap (
Quick Settings
) ➔
(
Camera Settings
).
2. The follow settings are located under the Camera,
Camcorder, Share, and General tabs. The settings that
are displayed will depend on what camera mode you
are in.
Camera
:
•Photo size
: Select a resolution for photos. Use higher
resolution for higher quality. Higher resolution photos take up
more memory.
• Burst shot
: allows several photographs to be captured in quick
succession by touching and holding the Camera button.
• Face detection
: allows you to adjust the camera focus based
on face detection technology.
• Metering
: allows you to set how the camera measures or
meters the light source: Center-weighted, Matrix, or Spot.
•ISO
: determines how sensitive the light meter is on your digital
camera. Choose from Auto, 100, 200, 400, or 800. Use a
lower ISO number to make your camera less sensitive to light, a
higher ISO number to take photos with less light, or Auto to let
the camera automatically adjust the ISO for each of your shots.
•Anti-Shake
: compensates for camera movement.
• Auto night detection
: activates or deactivates the night
detection feature.
• Save as rich tone
: allows you to assign rich tone usage to an
image.
Camcorder
:
•Movie size
: Select a resolution for videos. Use higher resolution
for higher quality. Higher resolution videos take up more
memory.
Share shot - Shooting mode
: lists the current
shooting modes available from with the Share
Shot mode. Choose from Easy connect, Wi-Fi
Direct, or Cancel.
Hide Quick settings.
DRAFT
Internal Use
O
nl
y
Multimedia 167
• Video stabilization
: Activate or deactivate Optical Image
Stabilization.
Settings
:
•GPS tag
: attach a GPS location tag to the photo. To improve
GPS signals, avoid shooting in locations where the signal may
be obstructed, such as between buildings or in low-lying areas,
or in poor weather conditions. Your location may appear on
your photos when you upload them to the Internet. To avoid
this, deactivate the GPS tag setting.
•Review
: set this option if you want to view each picture after
you take it. Select a time value.
•Volume key
: assigns a function to the volume key. Choose
from The zoon key, The camera key, or The record key..
•Timer
: Use this for delayed-time shots. You can set the timer to
Off, 2 sec, 5 sec, or 10 sec.
• White balance
: Select an appropriate white balance, so
images have a true-to-life colour range. The settings are
designed for specific lighting situations. These settings are
similar to the heat range for white-balance exposure in
professional cameras.
•Exposure value
: allows you to adjust the brightness level by
moving the slider.
• Guidelines
: Display viewfinder guides to help composition
when selecting subjects.
•Flash
: activate or deactivate the flash.
• Voice control
: activates/deactivates voice control feature that
allows you to verbally take a photo.
• Contextual filename
: allows you to have your location added
as part of the filename. You must first activate GPS tag
described above.
• Save as flipped
: when set to On, this option allows you to take
and save a mirror-image video when using self-recording
mode.
•Storage
: Select the memory location for storage.
•Shutter sound
: Turn the shutter sound on or off.
• Reset
: Reset the camera settings.
DRAFT
Internal Use
O
nl
y
168
Pictures and Videos Image Viewer Options
After you take a photo or record a video, you can access
various options.
Photo viewing options
1. Tap a thumbnail to view the picture.
Note:
If no control icons are displayed on the screen in
addition to the picture, tap anywhere on the screen to
display them.
2. The following options are available at the top of the
screen:
•Share via
: allows you to share the picture via Bluetooth,
ChatON, Dropbox, Email, Flipboard, Gmail, Group Play,
Messaging, Picasa, S Memo, and Wi-Fi Direct.
•Edit
: allows you to edit the current image. Launches the
Photo Editor application
• Delete
: allows you to delete the current picture.
3. Press for additional options such as:
–
Favorite
: allows you to assign the current image as a favorite.
–
Slideshow
: allows you to see your photos in a slideshow.
–
Photo frame
: takes the current nt image and creates a
surrounding photo frame that can be edited with edited text or
drawn object, then saved.
–
Photo note
:
allows you
to write notes on your current image
and then save it.
–
Copy to clipboard
allows you to copy one or more pictures to a
different folder.
–
Print
: allows you to print the current image on a compatible
Samsung printer.
–
Rename
: allows you to rename the current file.
–
Set as
: allows you to assign the current image as a Contact
photo, Home screen, Lock screen, or Home and lock screens.
–
Buddy photo share
: allows you to share the current image
with active ChatON buddies.
–
Rotate left
: allows you to rotate the view of the current image in
a counterclockwise direction.
–
Rotate right
: allows you to rotate the view of the current image
in a clockwise direction.

DRAFT
Internal Use
O
nl
y
Multimedia 169
–
Crop
: provides an on-screen box that allows you to crop the
current picture. Tap
Done
to update the image with the new
dimensions or tap
Discard
to ignore any changes.
–
Detect text
: launches the Photo Reader application that can
then detect text within the new photo.
–
Scan for nearby devices
: scans for nearby DLNA-compliant
devices that can receive or display the current image.
–
Details
: files details such as Title, Time, Width, Height,
Orientation, File Size, and Path.
–
Settings
: fprovides access to the Gallery options menu. Choose
from SNS data management, Cloud sync, and Tags.
Video viewing options
Note:
If no control icons are displayed on the screen in
addition to the picture, tap anywhere on the screen to
display them.
1. Tap a video to select it.
2. Tap to play the video.
3. Press for additional options.
Using the Camcorder
In addition to taking photos, the camera also doubles as a
camcorder that also allows you to record, view, and send
high definition videos.
Shooting Video
Tip:
When shooting video in direct sunlight or in bright
conditions, it is recommended that you provide your
subject with sufficient light by having the light source
behind you.
Note:
The camera may not be able to properly record videos to
a memory card with a slow transfer speed.
1. From the Home screen, tap (
Apps
)
➔
(
Camera
) to activate the camera mode.
2. Using the camera’s main display screen as a
viewfinder, adjust the image by aiming the camcorder
at the subject.
3. Before you take a video, use the Volume control
buttons to zoom in or out. You can magnify the video up
to x4 (400 percent).
DRAFT
Internal Use
O
nl
y
170
Note:
Use either the Up and Down volume keys or spread/
pinch the screen to zoom in or out. For more
information, refer to “Navigating Through the Screens”
on page 53.
4. Tap the Video key ( ) to begin shooting video. The
red light will blink while recording.
5. Tap anywhere on the screen to re-focus the camera on
that object. The camcorder auto-focuses on the new
target area.
6. To capture an image from the video while recording,
tap . This feature is not available while the
anti-shake feature is activated.
7. Tap the Stop key ( ) to stop the recording and save
the video file to your Camera folder.
– or –
Tap the Pause key ( ) to pause the recording.
8. Once the file has been saved, tap the image viewer,
then tap (
Play
) to playback your video for review.
9. Press to return to the viewer.
Accessing Videos
When you shoot a video, the file is saved in the Camera
folder. You can view your videos immediately or view them
anytime in the Camera folder.
1. From the Home screen, tap (
Apps
)
➔
(
Gallery
).
2. Select a folder location and tap a video icon to begin
video playback.
– or –
Touch and hold the video icon from the main Gallery to
select the video (indicated by a colored border) and
display the following video menu context options:
•Share via
: allows you to share the video via Bluetooth,
ChatON, Dropbox, Email, Gmail, Messaging, Picassa, Wi-Fi
Direct, or YouTube.
• Bluetooth
: sends the currently selected file to an
external source via Bluetooth.
• Delete
: allows you to delete the current video. Choose
either OK or Cancel.

DRAFT
Internal Use
O
nl
y
Multimedia 171
3. Press for additional options:
–
Slideshow
: (shown in Portrait mode)
allows you to see your
files in a slideshow or access the slideshow settings.
–
Copy
: allows you to create a dupliate of the currently selected
file.
–
Move
: allows you to move a selected file to a new location.
–
Details
: displays video file information.
Sharing Pictures XXXXX
Pictures are the best way of remembering the moment, but
an even better treat is to share them with others.
Two new features allow you to either instantly share a series
of pictures as they are taken or quickly share a picture
without using email or messaging.
•
Share Shot
is a great way to instantly share a series of pictures
among a group of users. The best example for this feature is
having multiple users instantly sharing each others pictures at a
company or family gathering. As each person takes a separate
picture with their own device, they are all pooled together and
instantly appear in each user’s Gallery.
No more “Email your pictures to me later”. Each person walks out
of the event with all the pictures taken by everyone.
This method of image transfer requires that both devices have
Wi-Fi Direct active and be paired prior to use.
Note:
You can only share a shot with other external users who
also have their Wi-Fi Direct feature active.
DRAFT
Internal Use
O
nl
y
172
•
S Beam Transfer
uses the NFC (near Field Communication)
feature found on your device to transmit large files directly to
another compatible device by
direct touch
.
This method of image transfer requires NFC and S Beam to be
enabled prior to use.
For more information, refer to
“Using S Beam to Share
Pictures XXXXX”
on page 174.
Enabling Share Shot XXXX
Share shot is a Wi-Fi Direct group sharing feature where
multiple users can Wi-Fi connect their devices and then all
share each others pictures in real-time. This is really useful
in group events (ex: family gathering or company party)
where you don’t want to have to email everyone later and
make sure you all can share your pics at a later date.
For more information, refer to “Wi-Fi Direct Setup and
Settings” on page 281.
The general process is:
•
Enable Wi-Fi Direct communication
•
Pair your device with other users
•
Enable Share shot
To enable Wi-Fi Direct:
1. From the Home screen, press and then tap
Settings
.
2. In a single motion touch and slide the
Wi-Fi
slider to the
right to turn it on. The slider color indicates the
activation status.
3. Tap
Wi-Fi Direct
.
4. Tap
Scan
and select the single device name to begin
the connection process to another Wi-Fi Direct
compatible device.
– or –
Tap
Multi-connect
➔
Scan
and select all the device
names to begin the connection process to these Wi-Fi
Direct compatible devices.
Note:
The target device must also have Wi-Fi Direct service
active and running before it can be detected by your
device.
5. Tap
Done
. The direct connection is then established.
Confirm appears in the Status bar.
DRAFT
Internal Use
O
nl
y
Multimedia 173
6. When prompted to complete the connection, the
recipient should tap
OK
. Your status field now reads
“Connected” and your connected device is listed within
the Wi-Fi Direct devices listing.
7. Each partner (including yourself) must then tap
Accept
to consent to the new Wi-Fi Direct pairing.
To enable Share shot on Camera:
1. From the Home screen, tap
(
Camera
) ➔
(
Shooting Mode
) ➔
Share shot
.
2. If you are prompted to activate your Wi-Fi Direct
connection, tap
OK
and follow the activation
procedures for Wi-Fi Direct.
To configure your Share Shot options:
1. Confirm the Share Shot viewfinder is active (see
below).
2. Confirm the Wi-Fi is actively sharing icon ( )
appears at the top of the viewfinder window.
3. Tap (
Devices for sharing with
) to display list of
current participants.
•
Stop sharing images with select participants by tapping their
entry and removing the green check mark.
4. Tap (
Shooting modes
) to display list of currently
available shooting modes from within Share Shot.
5. Tap (
Settings
) to disable share shot while
maintaining a Wi-Fi Direct connection.
To take share shot images:
1. Press (
Camera
key) until the shutter sounds.
2. From the Home screen, tap (
Apps
)
➔
(
Gallery
) to locate your newly shot images located in
their default storage location.
•
External users will be able to locate their images in either a
downloaded or
RECV
(received) folder.
3. Confirm (
Share shot images delivered/received
)
appears in the Notifications area of the screen.
DRAFT
Internal Use
O
nl
y
174
Using S Beam to Share Pictures XXXXX
This feature (when activated via NFC) allows you to beam
large files directly to another compatible device that is in
direct contact. These files can be larger, such as Videos, HD
pictures, and other large files.You can beam images and
videos from your gallery, music files from your music player,
and more.
1. From the Home screen, press and then tap
Settings
➔
More settings
.
2. If not already active, in a single motion touch and slide
the
NFC
slider to the right to turn it on.
3. Tap
S Beam
and make sure the feature is turned on.
4. If not already active, in a single motion touch and slide
the
S Beam
slider to the right to turn it on.
5. On the source device (containing the desired image or
video), tap (
Apps
)
➔ (
Gallery
).
6. Locate and tap the selected image to open it in the
preview window.
Important!
Neither device must be in Lock mode or displaying
the Lock screen. They must both be active and
unlocked. It is recommended that the target device
be on the Home screen.
7. Place the two active NFC-enabled devices back to back
to begin (1).
Note:
If the
Touch to beam
screen does not appear on the
source device:
- Pull them apart
- Verify the image is visible in the preview window on
the source device (providing the file)
- Place them together again
8. From the
Touch to beam
screen, tap the reduced image
preview to begin the transfer (2). After a few seconds
(depending on file size) the recipient with then see the
transferred file displayed on their screen.

DRAFT
Internal Use
O
nl
y
Multimedia 175
To share multiple pictures via S Beam:
1. On the source device (containing the desired image or
video), tap (
Apps
)
➔ (
Gallery
).
2. Locate the selected folder.
3. Touch and hold the first image and place a check mark
on it and all desired images.
4. Place the two active NFC-enabled devices back to back
to begin.
5. From the
Touch to beam
screen, tap the reduced image
preview to begin the transfer (2).
6. When prompted, separate the two devices.
Place device atop each other
Tap the source image

DRAFT
Internal Use
O
nl
y
176
Camera Gallery Options
The Gallery is where you can access the Gallery of stored
camera images.
1. From the Home screen, tap (
Apps
)
➔
(
Gallery
).
2. Select a folder location (ex:
Camera
) and tap an image
to open it.
– or –
Touch and hold an image to place a box around the file
and select multiple files.
– or –
Tap the upper-right camera to begin taking pictures
that are placed in this folder.
– or –
3. Tap the on-screen image to use additional image menu
options. For more information, refer to “Pictures and
Videos Image Viewer Options” on page 168.
Sharing a Gallery Image to a Target Device
Important!
Make sure all communicating devices are
connected to the same Wi-Fi.
1. Launch Samsung Link on the target device (such as an
Internet TV, Samsung Tablet, etc..).
2. From the Home screen, tap (
Apps
)
➔
(
Gallery
).
Note:
You must be signed in to your Samsung Account before
you can use this feature.
3. Open a selected image.
4. Tap (
Stream to connected devices
) and select an
available target device to begin streaming.
5. On a target device (ex: Internet TV) select the
on-screen
Allow
button to continue.
Note:
At this stage your device is requesting access to share
media with the external source.
DRAFT
Internal Use
O
nl
y
Multimedia 177
6. Confirm (
AllShare Controller enabled
) appears in
the Notification area at the top of the device to indicate
you are using your device as the media source.
Taking a Screen Shot
Also known as a screen capture, this feature allows you to
mimic the print screen function on most computers.
1. From the Home screen,
press and then
tap
Settings
➔
(
My device
tab) ➔
Motions and gestures
.
2. In a single motion
touch and slide the
Palm motion
slider to
the right to turn it on.
3. Read the on-screen
notification and tap
OK
.
Note:
At least one feature must be activated before Palm
motion can be activated.
4. In a single motion, slide a feature’s activation slider to
the on position ( ).
5. With the current screen showing the desired image, in
a single motion, place the side of your palm along the
one side of the device and then slowly swipe it in the
opposite direction over the screen.
Assigning an Image as a Contact Photo
1. From the Home screen, tap (
Apps
)
➔
(
Gallery
).
2. Select a folder location and tap a file to open it.
3. With the image displayed, press and then tap
Set as
➔
Contact photo
.
4. Tap a contact to make a selection.
5. Use the on-screen crop the image by dragging it
around or out from its corners.
6. Tap
Done
to store the new image.
My device
ON
ON
DRAFT
Internal Use
O
nl
y
178
Assigning an Image as a Wallpaper
1. From the Home screen, tap (
Apps
)
➔
(
Gallery
).
2. Select a folder location and tap a file to open it.
3. With the image displayed, press and then tap
Set as
.
4. Select one of the these options:
• Home screen
assigns the current image to the home screen
background. This image is spread across all available screens.
• Lock screen
assigns the selected image to the background for
the lock screen.
• Home and lock screens
assigns the current image to both the
Home screen and Lock screens.
5. Touch and drag the crop box anywhere on the picture.
Touch and drag the sides of the crop box to zoom in or
out to create a cropped area.
6. Tap
Done
to assign the wallpaper image.
– or –
Tap
Cancel
to stop without updating the wallpaper
image.
Editing a Photo XXXXX
You can edit your photos using the built-in Photo editor
application on your device.
The Gallery
The Gallery is where you view photos and play back videos.
For photos, you can also perform basic editing tasks, view a
slideshow, set photos as wallpaper or caller image, and
share as a picture message.
Note:
If the phone displays a memory full message when
accessing the Gallery, access
Files
and remove some of
the media files from the folders, and then open the
Gallery.
Opening the Gallery
䡲
From the Home screen, tap (
Apps
)
➔
(
Gallery
). For more information, refer to “Camera
Gallery Options” on page 176.

DRAFT
Internal Use
O
nl
y
Multimedia 179
Note:
If you stored your files in folders (directories) on the
storage card, Gallery displays these folders as separate
albums. The top left album contains all the pictures in
the storage card.
Viewing a Video within the Gallery
1. From the Home screen, tap (
Apps
)
➔
(
Gallery
).
2. Locate your folder and video.
3. Tap (
Play
) to playback your video.
For more information on using the Picture-in-Picture feature
for video playback, see “Using Picture-In-Picture” on
page 180.
Using Samsung Video
The Video Player application plays video files stored on the SD
card. This device is able to playback DivX videos.
1. From the Home screen, tap (
Apps
)
➔
(
Samsung Video
). A list of available videos
displays in the Video list.
2. Tap a video file to begin viewing.
Sharing Videos
1. From the Home screen, tap (
Apps
)
➔
(
Samsung Video
). After a few seconds, each
on-screen video begins to cycle through a preview of
the first five seconds of the clip.
2. Press and then tap
Share via
.
3. Select either individual videos or tap
Select all
.
4. Click
Done
to complete the process or
Cancel
to quit.
5. Select a sharing option. Choose from: Bluetooth,
ChatON, Dropbox, Email, Gmail, Messaging, Picassa,
Wi-Fi Direct, or YouTube.
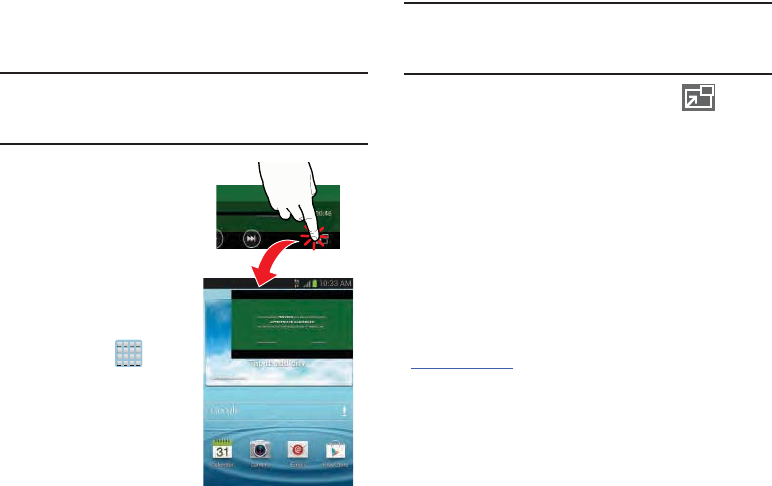
DRAFT
Internal Use
O
nl
y
180
Using Picture-In-Picture
This feature can be used during playback of supported video
types via either the Gallery, Play Videos, or Video player.
Note:
Some applications might not allow this video to remain
active in the foreground (ex: Camera/Camcorder
screen).
This feature allows you to
continue to view your video
as a background operation
while you multi-task and do
other things, such as surf the
Internet, access your
Contacts list, look for a
picture, etc..
1. From the Home
screen, tap
(
Apps
).
2. Tap the desired video
playback application.
3. Tap the desired video
to begin playback.
Note:
The Picture-In-Picture feature only works when using
the Video player application. Other video players (ex:
YouTube), do not support this feature.
4. As playback is initiated, locate and tap
(
Picture-in-Picture
) from the bottom-right of the
playback screen. Your current video is then sent to
foreground of any new page and most application
screens.
5. The video disappears from the screen once it ends.
DivX Overview
This device is able to playback DivX videos. DivX Certified®
to play DivX® video up to HD 720p, including premium
content. If you try to play DivX VOD content not authorized for
your device, the message “Authorization Error” will be
displayed and your content will not play. Learn more at
www.divx.com/vod
.
Your device must first be registered to playback protected or
purchased DivX content. DRM-free or unprotected content
does not required DivX VOD registration.
DRAFT
Internal Use
O
nl
y
Multimedia 181
Locating Your VOD Registration Number
1. From the Home screen, press and then tap
Settings
➔ (
More
tab) ➔
About device
➔
Legal information
➔
License settings
➔
DivX® VOD >
Register
.
2. Write down your Registration code.
3. Tap
OK
.
Register Your DivX Device for VOD Playback of
Purchased Movies
To play purchased DivX movies on your device, you will first
need to complete a one-time registration using both your
device and your computer.
1. Write down the DivX registration code that appears
on-screen. Copy this 8 or 10-digit number down.
2. Verify you have the latest DivX software running on
your computer. Download the free player (for your
computer) from
www.divx.com
.
3. Open the DivX Player on your computer and from
within the
VOD
menu, select
Register a DivX Certified
Device.
.
4. You are prompted to log in or create a DivX account if
your account information has not already been saved in
DivX Player.
5. Follow the instructions in DivX Player to enter the
registration code from step 2 and create a device
nickname (ex: “Pat or Pat’s Device”).
6. Select a location on your computer to download the
DivX registration video with the same title as your
device nickname (ex: Pat.divx).
7. Follow the on-screen instructions to download the file
and initiate the transfer process. You will need to place
this video file onto your device and play it back.
8. Connect your device to the computer via USB and
transfer this video. For more information, refer to
“Communicating with the SD card” on page 68.
DRAFT
Internal Use
O
nl
y
182
9. From the
Registration
screen (Transfer), click Transfer
Video now and select the location of the microSD card
or
USB
(the device) as the target destination for the
registration video (created in step 6) and click
Start
.
– or –
Locate the created file, copy and paste it into the new
drive letter corresponding to your device’s storage
location.
10. From the Home screen, tap (
Apps
)
➔
(
My files
).
11. Locate your registration DivX video file and tap the file
to play it. Once you play the registration file on your
device, your registration is complete.
12. Return to the DivX VOD Manager screen (from within
your computer’s DivX Player) and confirm both your
computer and your new device appears in the list of
registered DivX devices.
Important!
There is no special registration or configuration
necessary to playback DRM-free DivX movies.
Registration of your device is only required for
playback of protected DivX material.
Samsung HubXXX
This is your one stop for the hottest movie and TV content.
With hundreds of titles available, entertaining your family on
the go was never easier. You can rent or purchase your
favorite content and watch from any location. Featuring the
stunning viewing quality Samsung is known for, Samsung
Hub is your gateway to mobile video like you've never
experienced it before.
You must have the Samsung Account application installed and
registered prior to using Samsung Hub.
Note:
Samsung Hub usage is based on service availability.
Important!
You must be using an active Wi-Fi/4G/LTE
connection to preview and download a media file.
The internal memory acts as a storage location for
your downloaded rental or purchase.
DRAFT
Internal Use
O
nl
y
Multimedia 183
Important!
The Samsung account manages the access
information (username/password) to several
applications, such as Samsung Link, Chat On, and
Samsung Hub.
Creating a New Samsung Hub Account
Before you can rent or buy media, you must first create an
account. Enter the required information.
1. Confirm you have already logged in to your Samsung
account.
2. From the Home screen, tap (
Apps
)
➔
(
Samsung Hub
).
3. Read the
Terms and Conditions
screen and tap the
I
agree to the Terms and Conditions
check box.
4. Tap
Accept
to continue or
Decline
to exit. The Media
Hub screen displays.
Tip:
In some cases it might be necessary to sign in via the
application. Press ➔
Sign in
.
5. From the main page, press and then tap
My page
.
Note:
Your Media Hub account is managed by the Samsung
account application. This application manages your user
profile information.
6. If not already signed in, use the keypad to enter the
required information, then tap
Create new account
.
Follow the on-screen instructions to complete your
registration for a new Samsung account.
Using Samsung Hub
1. From the Home screen, tap (
Apps
)
➔
(
Samsung Hub
).
2. At the Media Hub screen,
What’s New
is displayed with
recently added media that you can rent or purchase.
3. The following tabs are displayed at the top of the
screen:
•Home
: displays the Media Hub main screen.
•Movies
: displays movies that are available for rent or purchase.
Scroll through the top navigation bar and select a movie
category. The movies of that type will be displayed below.
DRAFT
Internal Use
O
nl
y
184
• TV Shows
: displays TV shows that are available for purchase.
Scroll through the top navigation bar and select a TV category.
The TV shows of that type will be displayed below.
•My Media
: allows you to view all of the media that you have
purchased or rented. Tap a media entry to view it.
4. Scroll through the media listings and tap on an item
you would like to purchase or rent.
5. Tap tap
Buy
or
Rent
.
6. Choose a payment method and then follow the
on-screen instructions. The media stores to the
My
Media
folder.
Samsung Hub Notices
•
Any media item (Media Content) may be rented or purchased after
you create an account in Media Hub.
•
Media Content that is downloaded may be viewed concurrently on
up to five (5) devices with Media Hub that are also registered to
the same account.
•
You may choose to remove a device from your account no more
than once every 90 days.
•
You may remove Media Content from a device as many times as
you’d like. You will have the ability to re-download the Media
Content at a later point in time subject to content re-download
availability and studio permissions.
•
You MUST be in network coverage to license Media Content you
have acquired through the Service.
•
You can use 3G, 4G, or Wi-Fi connectivity in order to download
Media Content.
•
Unlike purchased Media Content, rented Media Content will be
viewable on only 1 device in your account.
•
Media Content is downloaded and saved to internal memory.
No SD Card included out of box.
•
Your Media Content may pause/stop or not download in networks
where there is a weak signal.
•
You may begin watching downloaded Media Content as soon as a)
license acquisition has occurred and b) sufficient amount of the
Media Content has been buffered.
•
You must finish watching rented Media Content within 24
consecutive hours of start of playback.
•
Stopping, pausing or restarting rented Media Content does not
extend the available viewing time.
DRAFT
Internal Use
O
nl
y
Multimedia 185
•
In no event will rented Media Content be available for a period
of more than thirty (30) days (or shorter on a title-by-title basis)
after the Media Content has been rented (e.g., if you begin
viewing rented Media Content on the 29th day after the rental
transaction, but do not finish viewing the entire title, that rented
Media Content may not be available for the entire twenty-four
(24) consecutive hour period if such period would extend the
viewable time beyond the thirty (30) day rental window).
•
You cannot play any media content downloaded from Media Hub
through any output on your mobile phone, including All Share.
Play Movies & TV
This application allows you to connect to the Play Store,
download a movie and then watch it instantly.
Choose from thousands of movies, including new releases and
HD titles in the Play Store and stream them instantly on your
Android device.
Movies, previously rented via the Play Store are automatically
added to your My Movies library across your devices.
Learn more about Google Play Movies at:
http://play.google.com/about/movies
.
1. From the Home screen, tap (
Apps
)
➔
(
Play Movies & TV
).
2. Log on to your Google account if you have not already
done so. A list of videos sorted on the SD card displays
in the Video list.
3. Following the on-screen instructions for renting and
viewing movies.
4. Tap the
MOVIES
tab to view movies you have rented.
5. Tap the
TV SHOWS
tab to view shows you have rented.
6. Tap the
PERSONAL VIDEOS
tab to view movies you have
on your device or memory card.

DRAFT
Internal Use
O
nl
y
186
For more information on using the Picture-in-Picture feature
for video playback, see “Using Picture-In-Picture” on
page 180.
Play Music XXX
Also known as Google Music, allows you to browse, shop,
and playback songs purchased from the Play Store. The
music you choose is automatically stored in your Google
Music library and instantly ready to play or download.
䡲
Access the new music tab from within your Play Store
application.
The Music application contains a music player that plays
music and other audio files that you copy from your computer.
1. From the Home screen, tap (
Apps
)
➔
(
Play Music
).
The Music app searches both your online library and
your device’s internal storage for music and playlists;
this can take from a few seconds to several minutes,
depending on the amount of new music added since
you last opened the application. It then displays a
carousel view of your new and recent music, organized
by album.
2. If prompted, follow the on-screen instructions to link
your current account to Google Play Music.
3. Tap an on-screen account to add it or select
Add
account
to use a new account.
4. At the free songs screen, select either
Get free songs
or
Skip
.
•
Get free songs are downloaded via either the Internet or Play
Store.
•
Follow the on-screen download and installation instructions.
5. Swipe left or right to browse through your new and
available music. Music, albums, and artists are
grouped into categories.
6. Tap an on-screen album to open it and begin playback.
7. Return to the Library screen from most other screens
in the Music application by tapping the Music
application icon (
Music notification icon
) at the
top-left of the Application bar.
DRAFT
Internal Use
O
nl
y
Multimedia 187
Changing Library View
You can change the way you view the contents of your
library.
1. From the Home screen, tap (
Apps
)
➔
(
Play Music
).
2. While in a selection or screen, tap (near the
top-left of the Application bar) and then scroll left or
right to access the various tabs.
3. Available tabs include:
PLAYLISTS
,
RECENT, ARTISTS
,
ALBUMS
,
SONGS
, or
GENRES
.
Note:
The contents of your library display in a scrolling grid or
list view, depending on the view.
Searching for Music in Your Library
1. From the Home screen, tap (
Apps
)
➔
(
Play Music
).
2. Tap (
Search
) to search through your available
songs.
3. Type the name of an artist, album, song, or playlist.
Matching songs are displayed in a list below the search
box.
4. Tap a matching song to play it, tap a matching album,
artist or playlist to view a list of its’ songs.
Changing Music Settings
1. From the Home screen, tap (
Apps
)
➔
(
Play Music
).
2. Press and then make a selection.
•Shuffle all
: Play all songs in a random order.
•Settings
: Provides access to the Play Music settings.
•Help
: Displays application help information.
DRAFT
Internal Use
O
nl
y
188
Listening to Music
You can listen to music by using your device’s built-in
speakers, through a wired headset, or through a wireless
Bluetooth stereo headset.
Press the volume keys on the side of the device to activate
on-screen volume control, then touch and drag on the scale
to set volume.
Playing Music
1. From the Home screen, tap (
Apps
)
➔
(
Play Music
).
2. Tap a song in your library to listen to it.
– or –
While viewing a list of songs, tap (
Options
) next to
a song and tap
Play
.
– or –
While viewing a list of albums, artists, playlists, or
genres, tap (
Options
) adjacent to the label and tap
Play
.
The
Now playing
screen opens and the song you
touched or the first song in the album or playlist starts
to play. The tracks in the current list play in order until
you reach the end of the list (unless you choose a
repeat option). Otherwise, playback stops only if you
stop it, even when you switch applications.
Note:
If you navigate away from the
Now playing
screen in the
Music application, the Now Playing bar appears at the
bottom of the screen.
DRAFT
Internal Use
O
nl
y
Multimedia 189
Displaying the Now Playing Screen
If you navigate away from the
Now playing
screen, to return
to the
Now playing
screen from other Music screens:
䡲
Tap the name of the current song in the Now Playing
bar.
– or –
In a single motion, touch and drag (
Music
notification icon
) down from the Status bar and tap the
song title from the Notifications area. You can also
pause and resume playback and skip to the next song
in the panel. For more information, refer to
“Notification Bar” on page 37.
Tab Options
There are various options available from the various tabs:
1. From the Home screen, tap (
Apps
)
➔
(
Play Music
).
2. Select one of the following tabs and tap to access
an available option.
•PLAYLISTS:
Play, Add to queue, Rename, or Delete.
• RECENT:
to display the most recently played songs and albums
•ARTISTS:
Play, Add to queue, Add to playlist, or Shop for artist.
• ALBUMS:
Play, Add to queue, Add to playlist, More by artist, or
Shop for artist.
•SONGS:
Play, Add to queue, Add to playlist, Shop for artist, or
Delete.
• GENRES:
Play, Add to queue, Add to playlist, More by artist, or
Shop for artist.
Options While Playing a Song
When you play a song, the
Now playing
screen displays.
There are various options and controls available while a song
is playing:
1. From the Home screen, tap (
Apps
)
➔
(
Play Music
).
2. Tap an album or song.
3. From the Now playing screen, press (
Menu
) to
display the following options:
•Equalizer
: applies selected equalizer features such as:
FX booster, Bass boost, and 3D effect.
• Clear queue
: clears the current queue.
• Save queue
: stores the current queue.
•Settings
: Allows you to view and assign various music settings,
and view different application-specific information.
DRAFT
Internal Use
O
nl
y
190
•Help
: Provides an on-screen series of related help topics.
4. Tap ➔
Add to playlist
to add the song to a playlist.
– or –
Tap ➔ ➔
Add to playlist
to add the song to
a playlist.
The
Now playing
screen contains several buttons that you
can tap to control the playback of songs, albums, and
playlists:
Creating a Playlist
1. From the Home screen, tap (
Apps
)
➔
(
Play Music
).
2. Tap an album or song list and play a song.
3. Tap ➔ adjacent to the song name and
select
Add to playlist
.
4. Tap
New playlist
➔
Playlist name
field to enter a name
for the playlist.
5. Tap
OK
to save the new playlist.
Tap to go back to the previous song. Touch and
hold to scan backward through the current song.
Tap to resume playback.
Tap to pause playback.
Tap to advance to the next song. Touch and hold to
scan forward through the current song.
When Shuffle mode is enabled via
Show Options
,
songs play in random order. When disabled
(as shown), songs play in the order they appear
in List view. Also visible when is tapped.
When Shuffle mode is enabled via
Show Options
,
songs play in random order. When enabled,
songs play in random order. Also visible when
is tapped.
Tap to repeat the current song,
repeat all songs, or disable repeat mode.
Also visible when is tapped.