Samsung Electronics Co SLM2070W Mono Laser Multi-Function Printer User Manual Egmont F english
Samsung Electronics Co Ltd Mono Laser Multi-Function Printer Egmont F english
UserManual.wiki
>
Samsung Electronics Co
>
SLM2070W User Manual
>
Users Manaul 2
Contents
1.
Users Manual 1
2.
Users Manaul 2
3.
Users Manual 3
4.
Users Manual 4
5.
Users Manual 5
6.
Users Manual 6
7.
Users Manual 7
Users Manaul 2
Navigation menu
Upload a User Manual
Namespaces
Wiki Guide
HTML
PDF
Info
Views
User Manual
Discussion / Help
Navigation
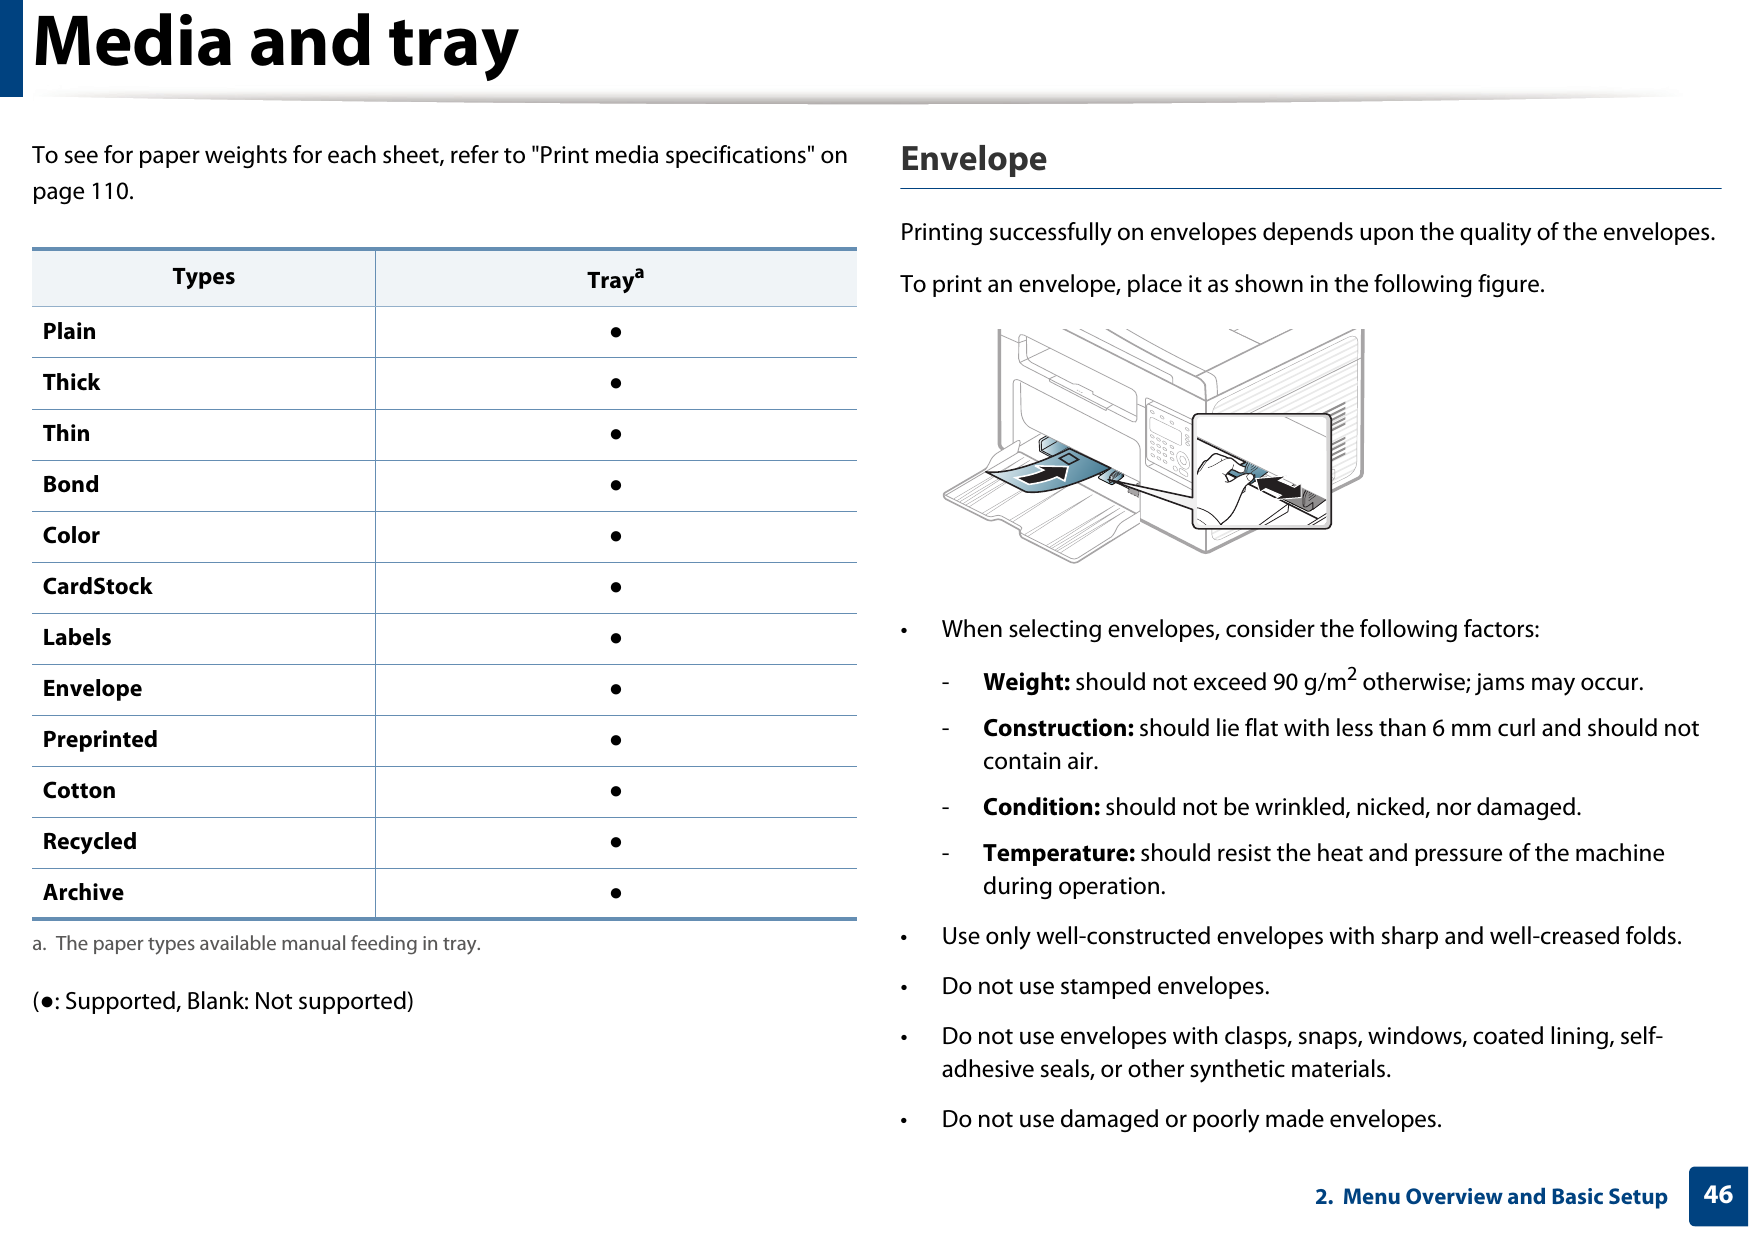
![Basic printing592. Menu Overview and Basic SetupSetting eco mode on the driverOpen the Eco tab to set Eco mode. When you see the eco image ( ), that means the eco mode is currently enabled.Eco options•Printer Default: Follows the settings from the machine's control panel.•None: Disables Eco mode.•Eco Printing: Enables eco mode. Activate the various Eco items you want to use.•Password: If the administrator fixed to enable the Eco mode, you have to enter the password to change the status.Result simulatorResult Simulator shows the results of reduced emission of carbon dioxide, used electricity, and the amount of saved paper in accordance with the settings you selected.• The results are calculated on the basis that the total number of printed paper is one hundred without a blank page when the Eco mode is disabled.• Refers to the calculation coefficient about CO2, energy, and paper from IEA, the index of Ministry of Internal Affairs and Communication of Japan and www.remanufacturing.org.uk. Each model has a different index. • The power consumption in printing mode refers to the average printing power consumption of this machine. • The actual amount displayed is only an estimate as the actual amount may differ depending on the operating system used, computing performance, application software, connection method, media type [thickness], media size, job complexity, etc.](https://usermanual.wiki/Samsung-Electronics-Co/SLM2070W.Users-Manaul-2/User-Guide-2066548-Page-19.png)
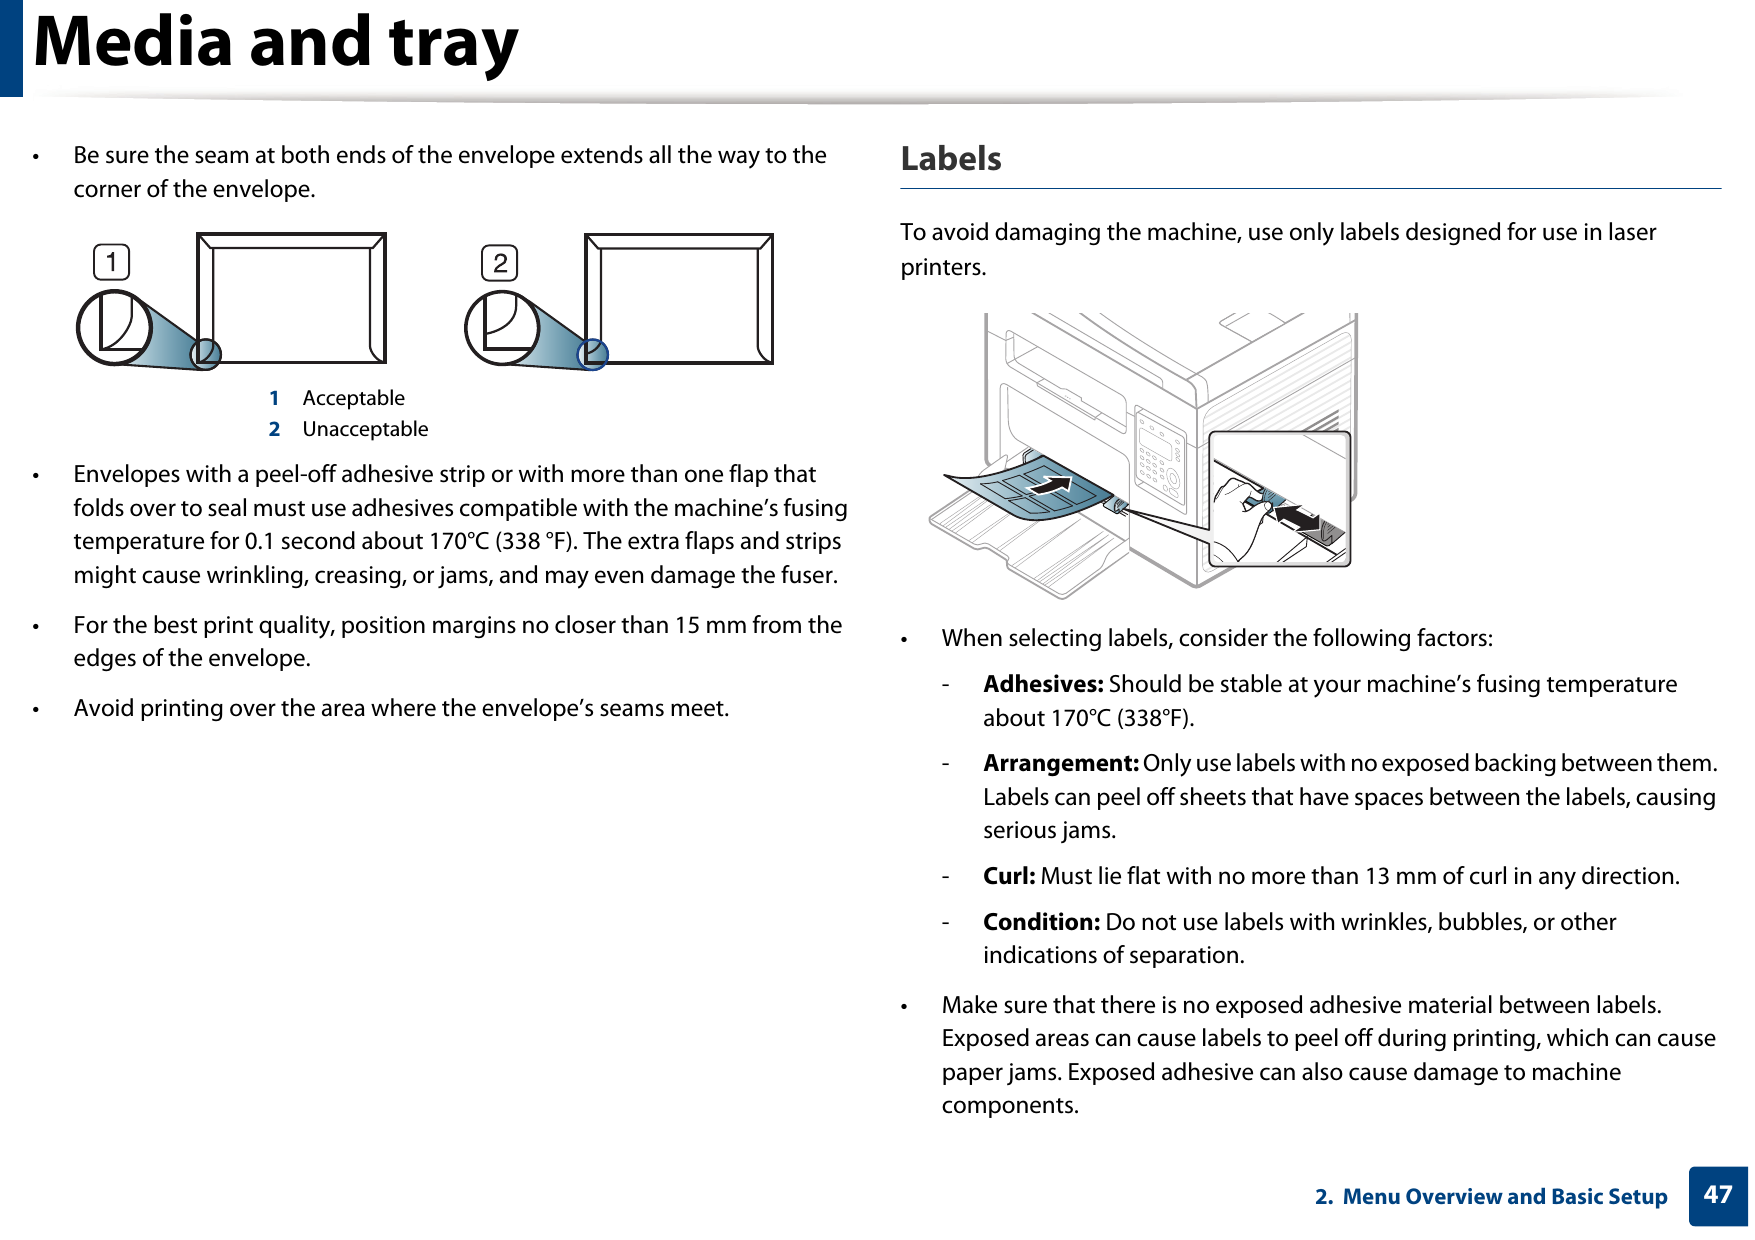
![Basic copying632. Menu Overview and Basic Setup When you make a reduced copy, black lines may appear at the bottom of your copy. 17 ID card copyingYour machine can print 2-sided originals on one sheet.The machine prints one side of the original on the upper half of the paper and the other side on the lower half without reducing the size of the original. This feature is helpful for copying a small-sized item such as business card. • The original must be placed on the scanner glass to use this feature.• If the machine set to Eco mode, this feature is not available. Depending on the model, the operating procedure may differ.1Press ID Copy on the control panel.2 Place the front side of an original facing down on the scanner glass where arrows indicate as shown. Then, close the scanner lid.3 Place Front Side and Press [Start] appears on the display.If your machine has +/- buttons on the control panel, the Front LED on the control panel lights on.4 Press (Start).Your machine begins scanning the front side and shows Place Back Side and Press [Start].If your machine has +/- buttons on the control panel, the Back LED on the control panel lights on.](https://usermanual.wiki/Samsung-Electronics-Co/SLM2070W.Users-Manaul-2/User-Guide-2066548-Page-23.png)