Samsung Electronics Co SLM4530NX Printer User Manual english
Samsung Electronics Co Ltd Printer english
UserManual.wiki
>
Samsung Electronics Co
>
SLM4530NX User Manual
>
User Manual Part 1
Contents
1.
User Manual Part 2
2.
User Manual Part 3
3.
User Manual Part 4
4.
User Manual Part 1
User Manual Part 1
Navigation menu
Upload a User Manual
Namespaces
Wiki Guide
HTML
PDF
Info
Views
User Manual
Discussion / Help
Navigation
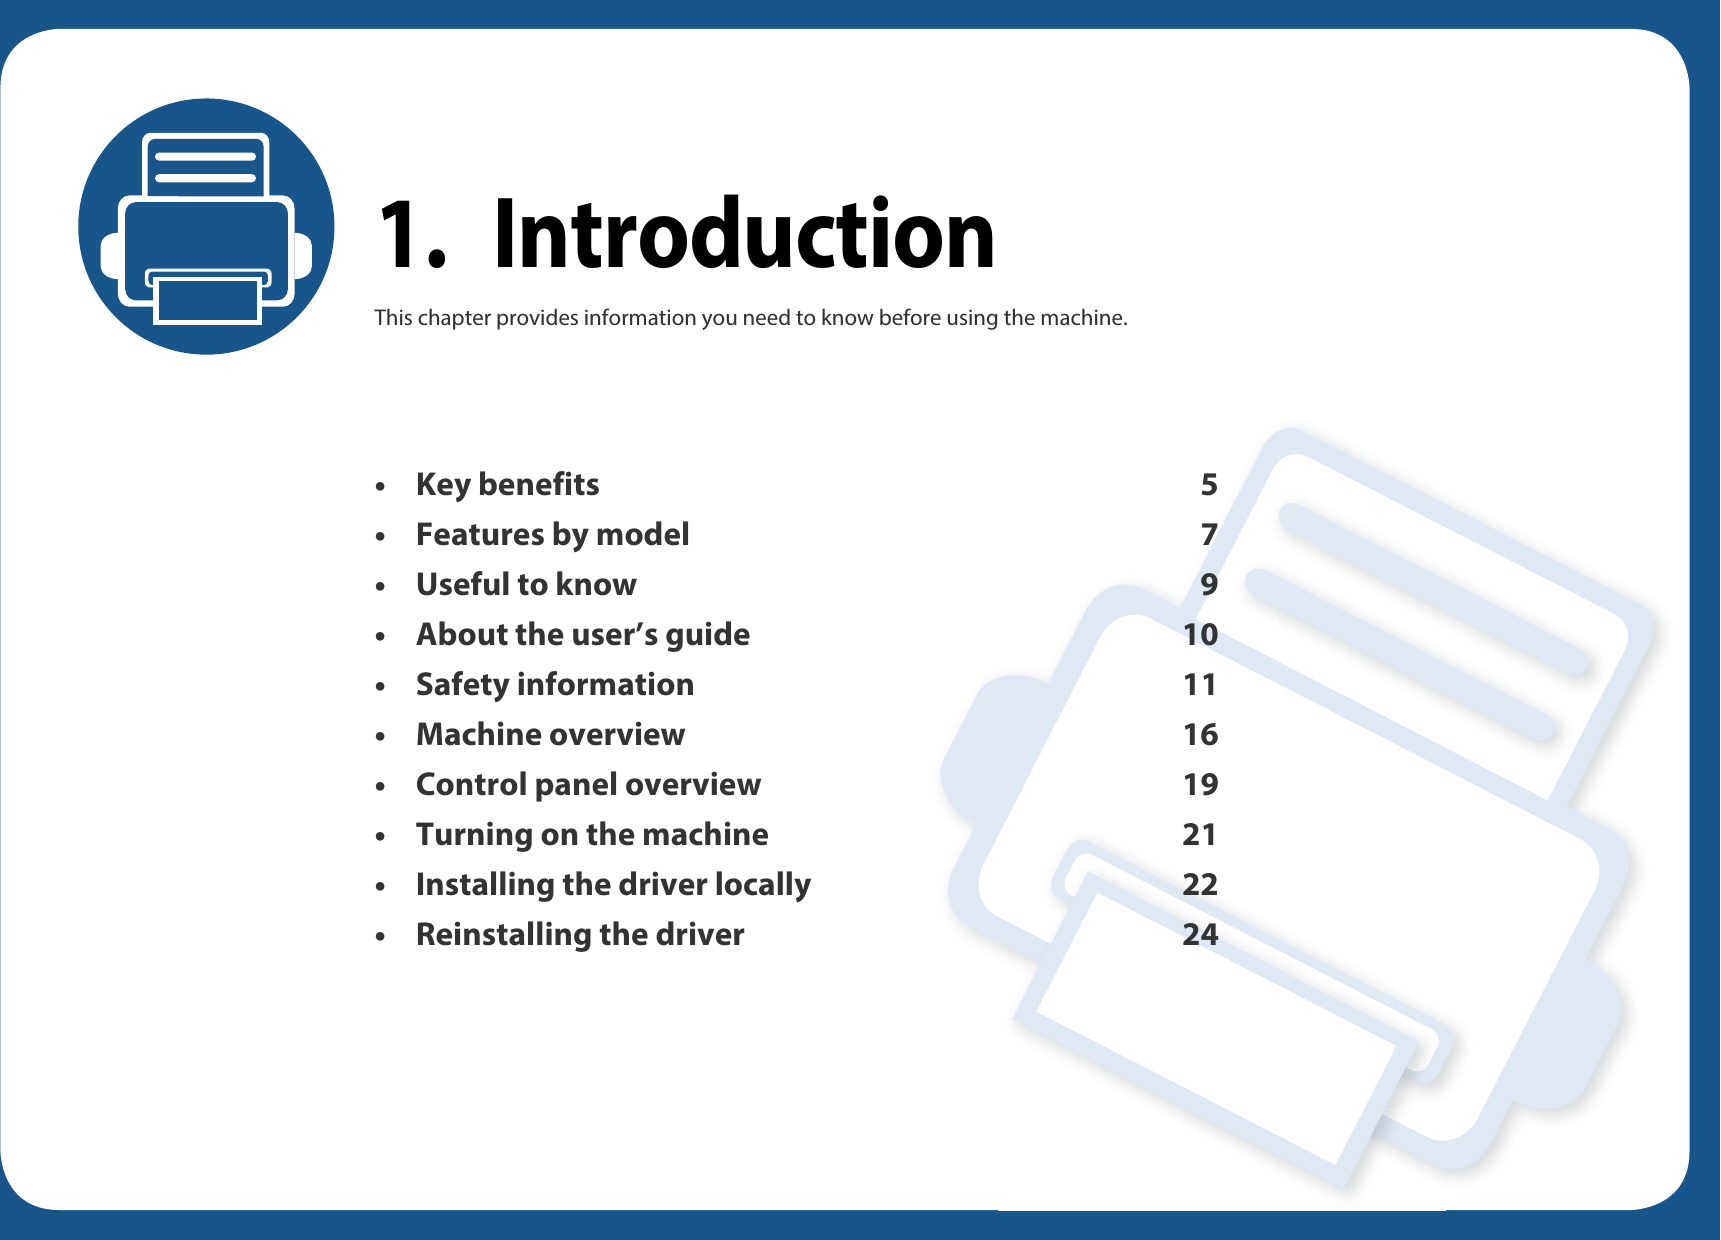

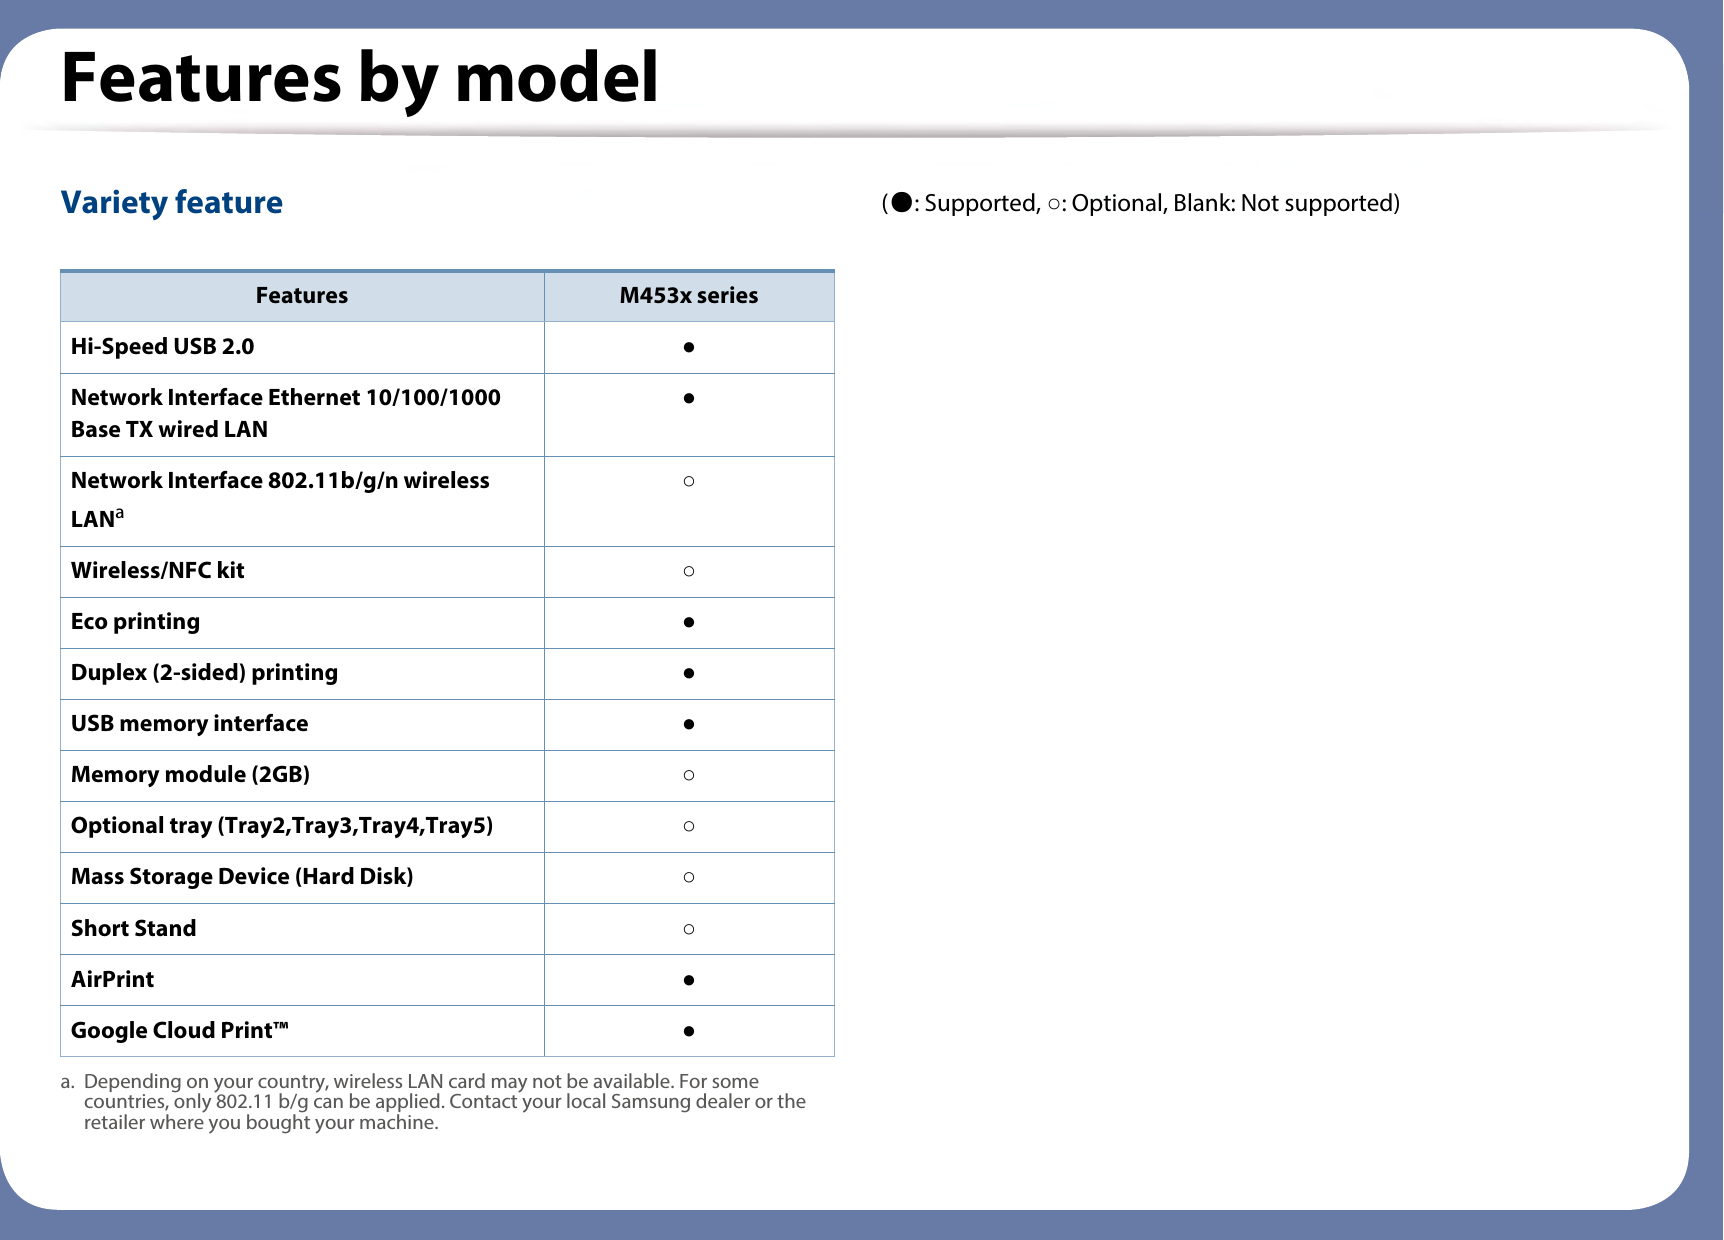
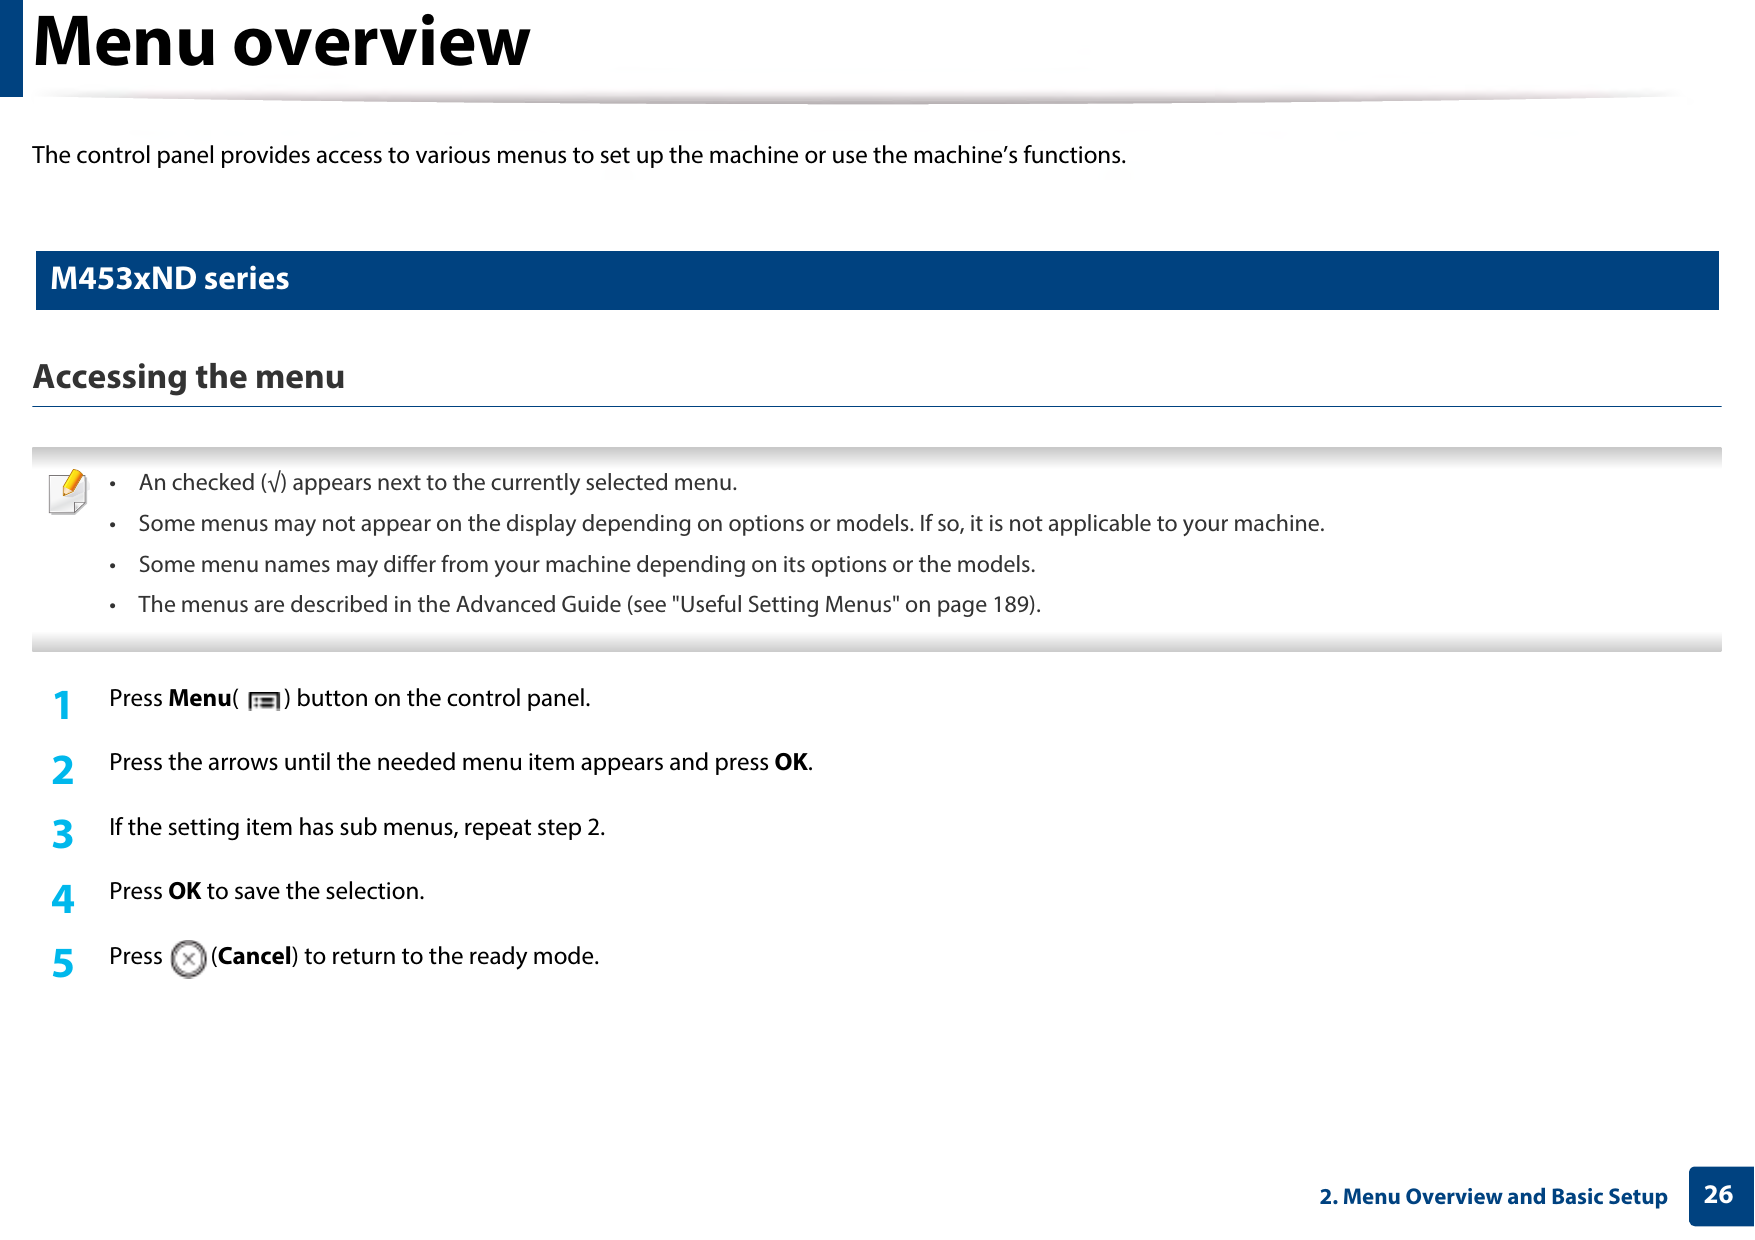
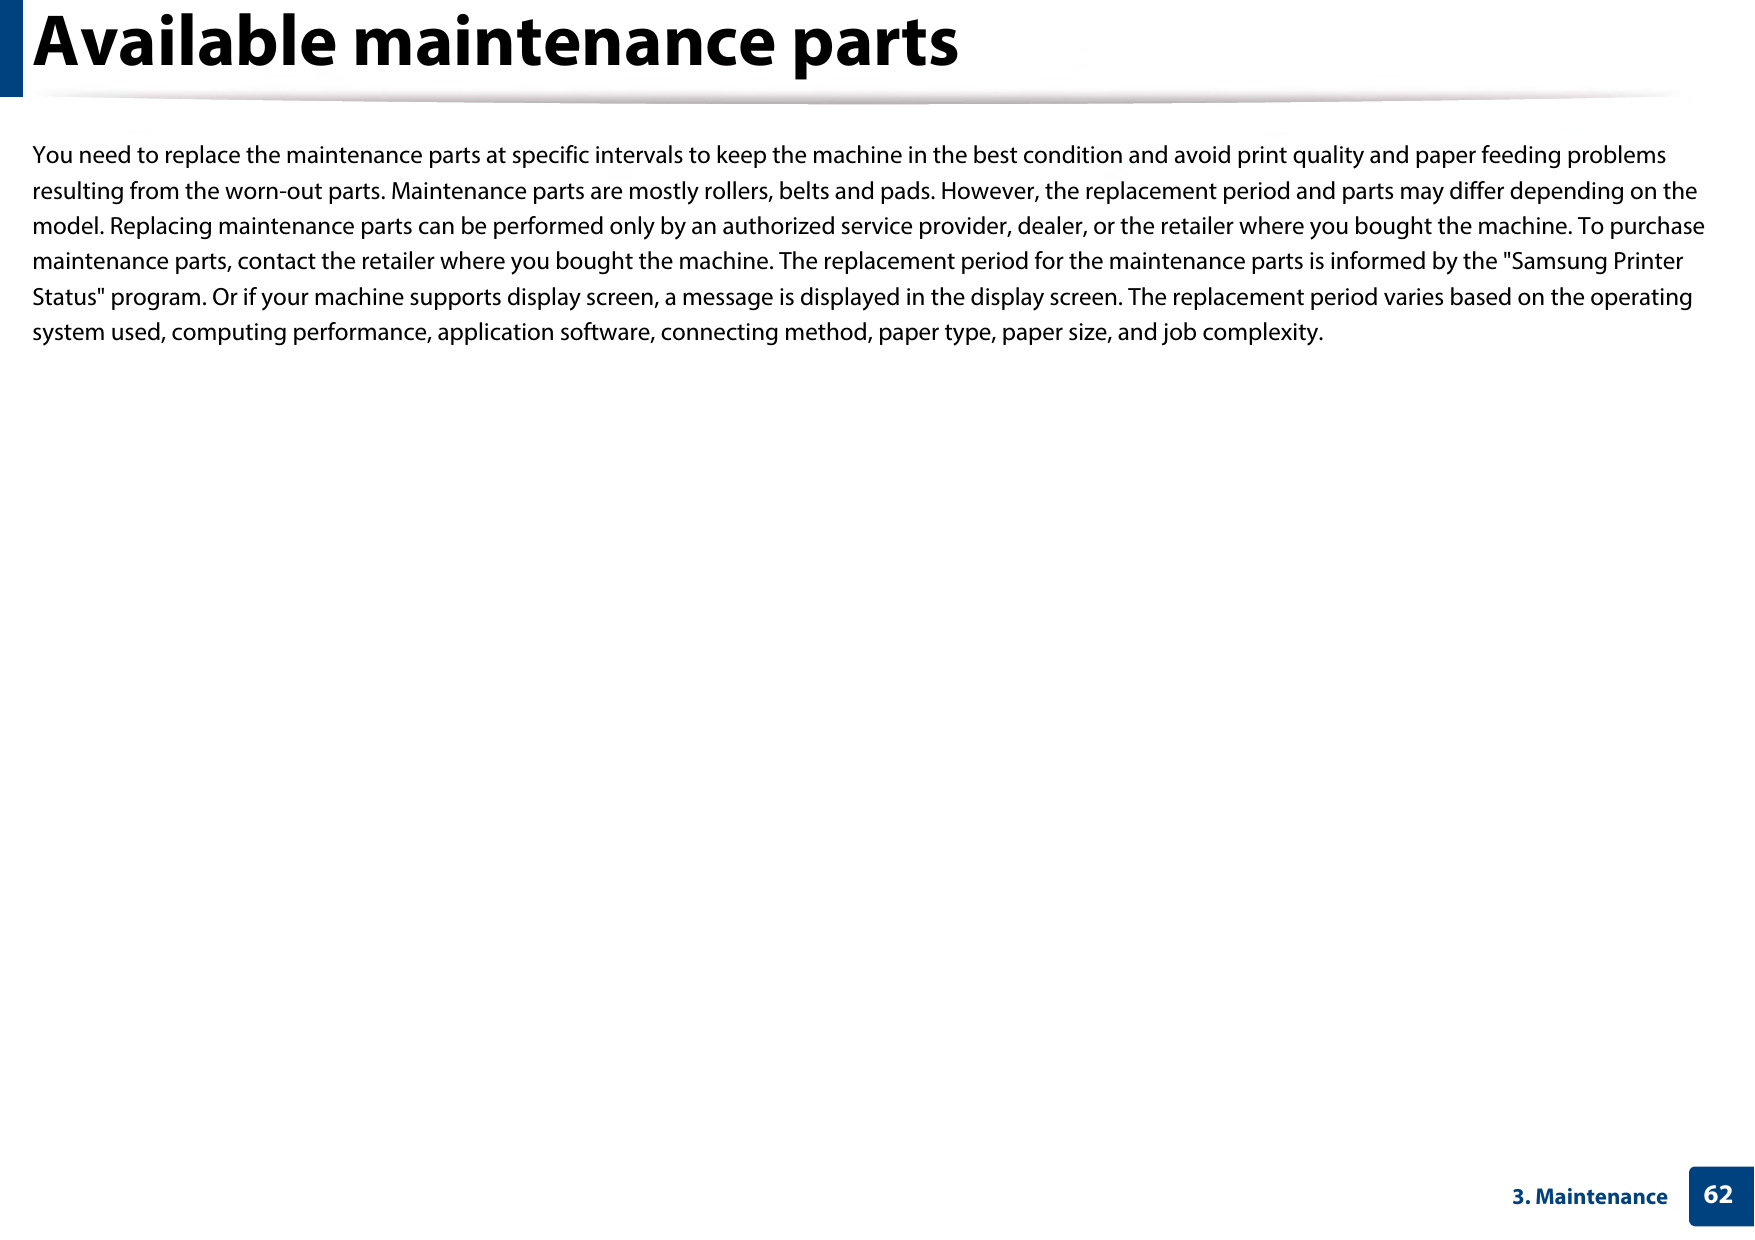
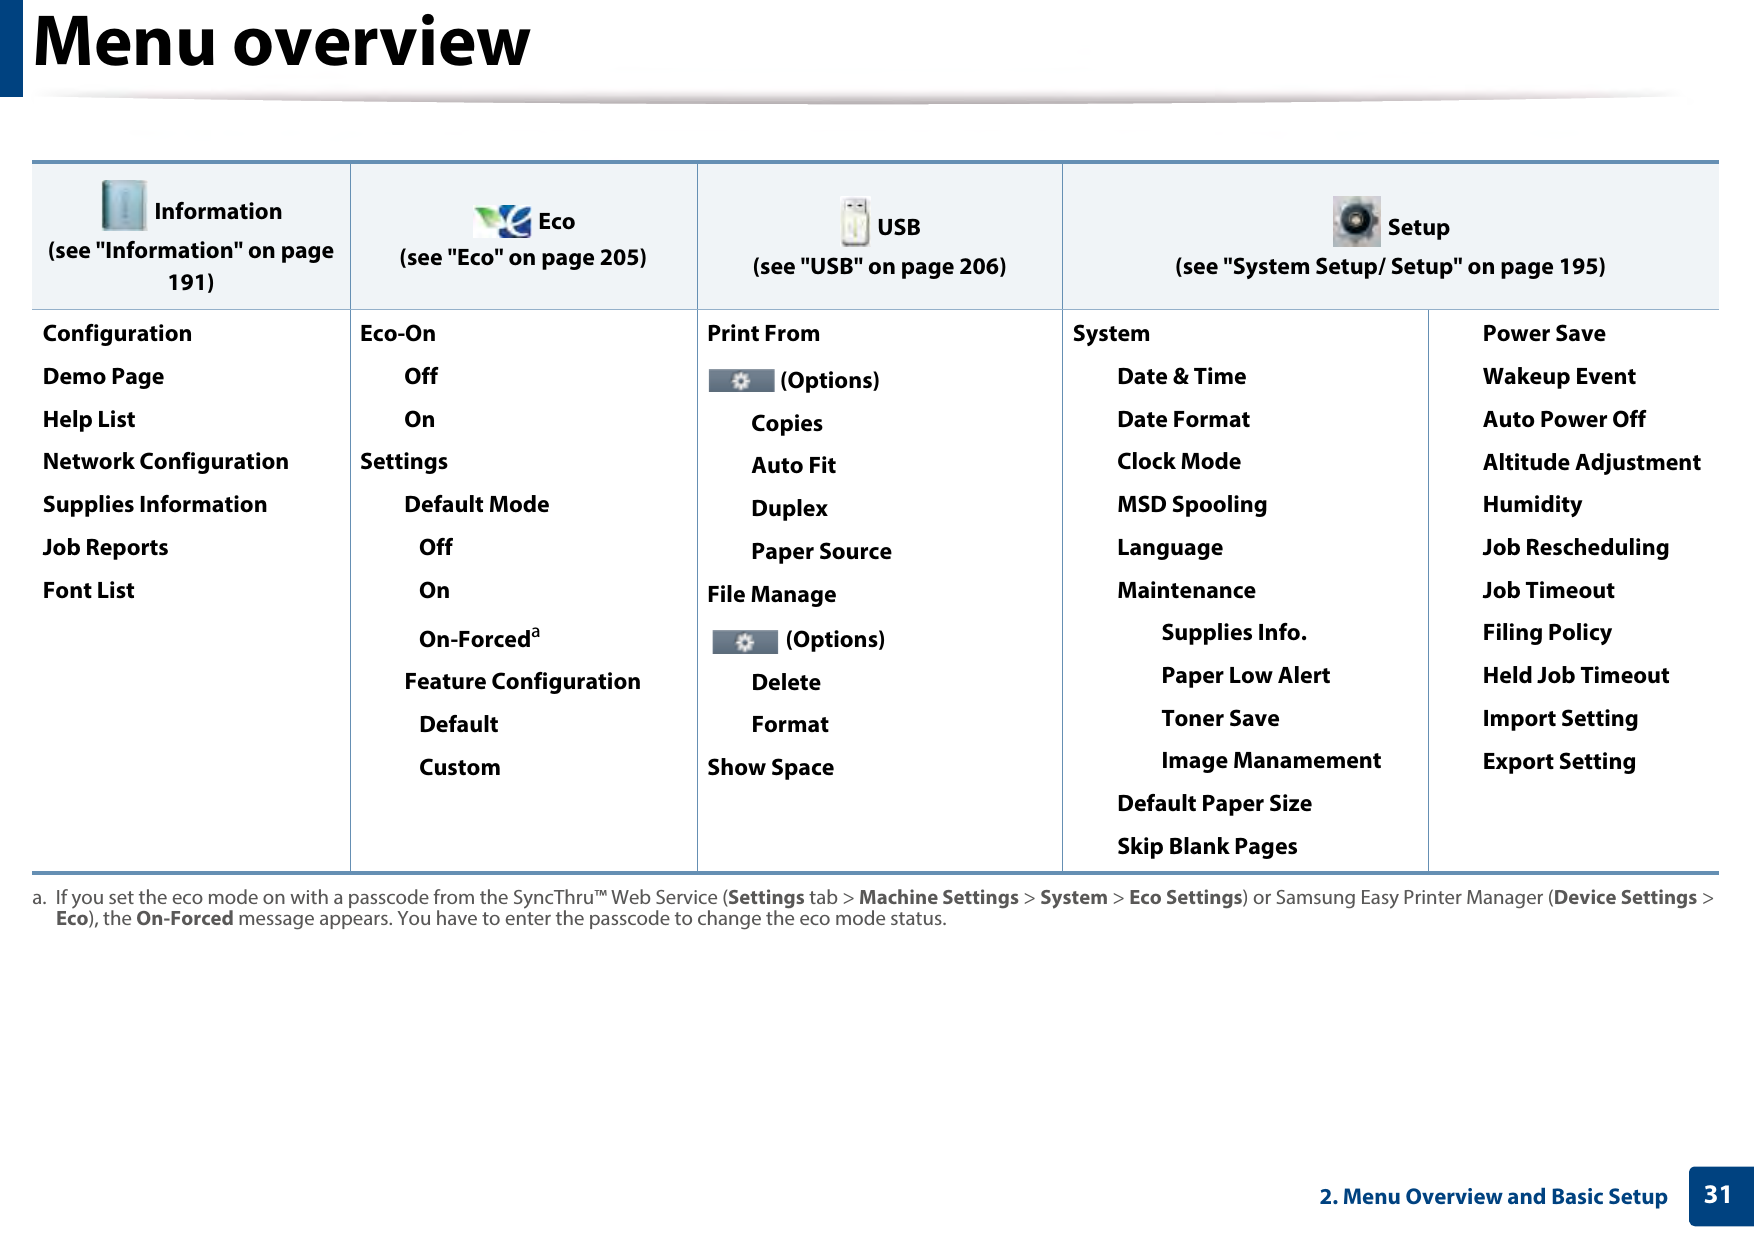
![Menu overview272. Menu Overview and Basic Setup Information(see "Information" on page 191)Layout(see "Layout" on page 192)Paper(see "Paper" on page 193)Graphic(see "Graphic" on page 194)ConfigurationDemo PageNetwork ConfigurationSupplies InformationUsage CounterAccountaMenu MapPCL FontPS Fonta. This is used only available when Job Accounting is enabled from the SyncThru™ Web Admin Service.OrientationPortraitLandscapeMarginCommon MarginMP TrayTray [x]bEmulation MarginDuplexOffLong EdgeShort Edgeb. [tray type] indicates the tray number.CopiesTray [x]bPaper SizePaper TypeMP TrayPaper SizePaper TypePaper SourceAutoTray [x]bMP TrayTray ConfirmTray [x]bMP TrayResolutionStandardHigh ResolutionClear TextOffMinimumNormalMaximumEdge EnhanceOffNormalMaximumAuto CR](https://usermanual.wiki/Samsung-Electronics-Co/SLM4530NX.User-Manual-Part-1/User-Guide-2436786-Page-27.png)
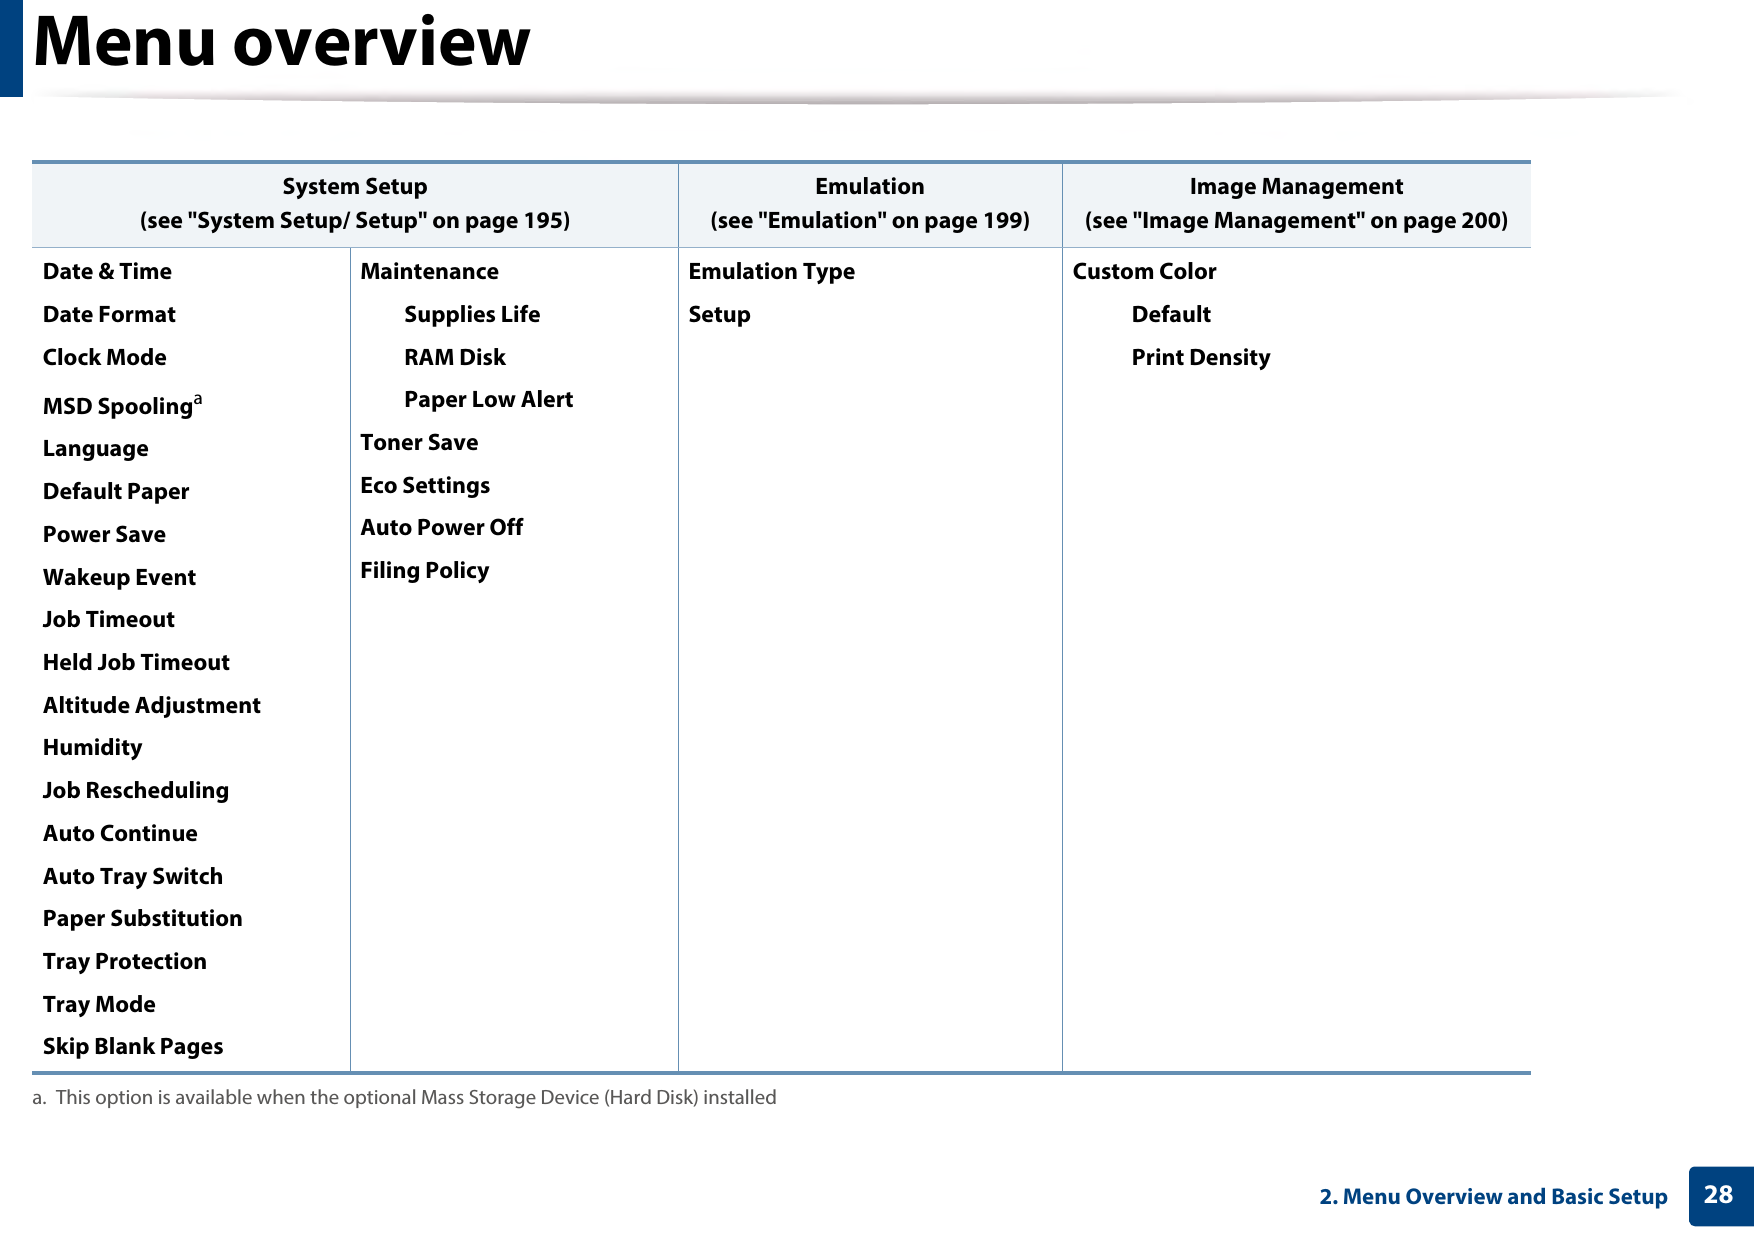
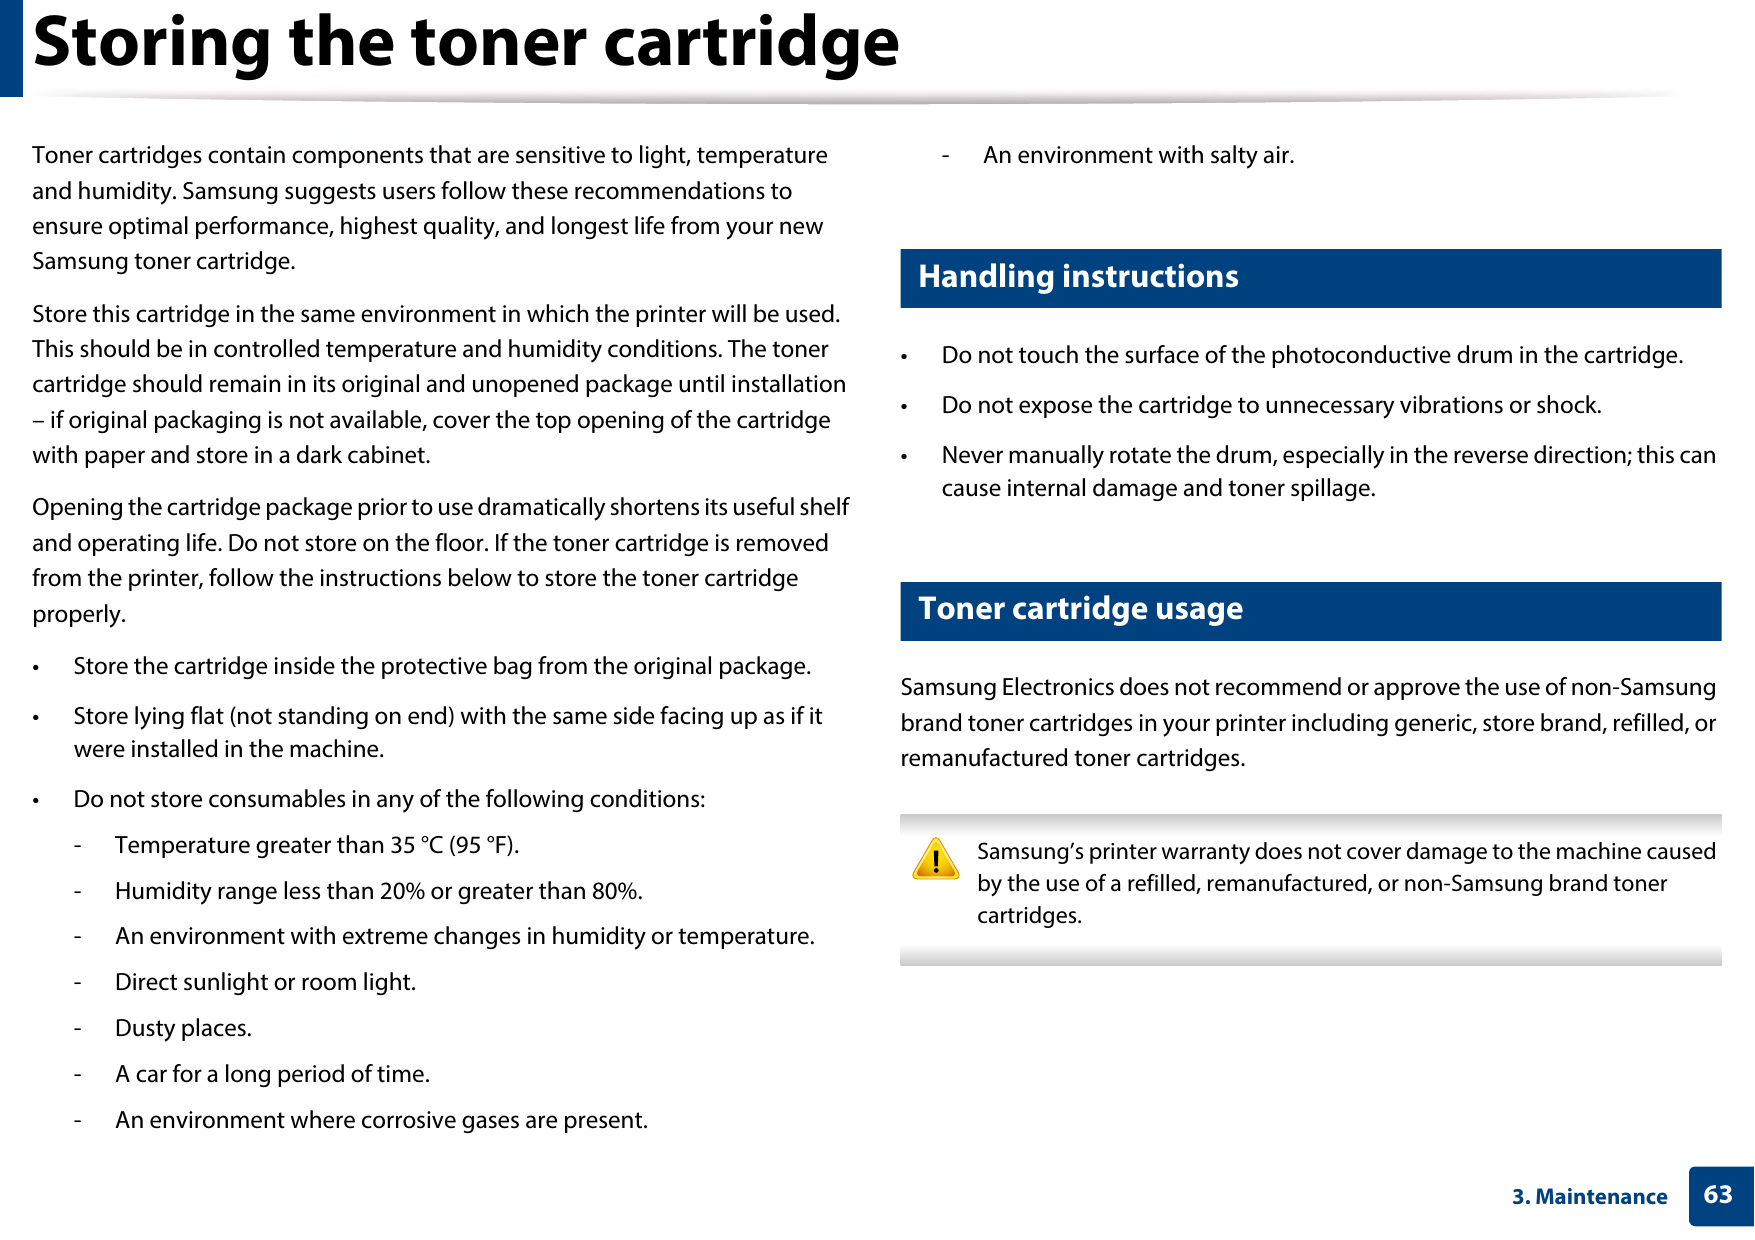
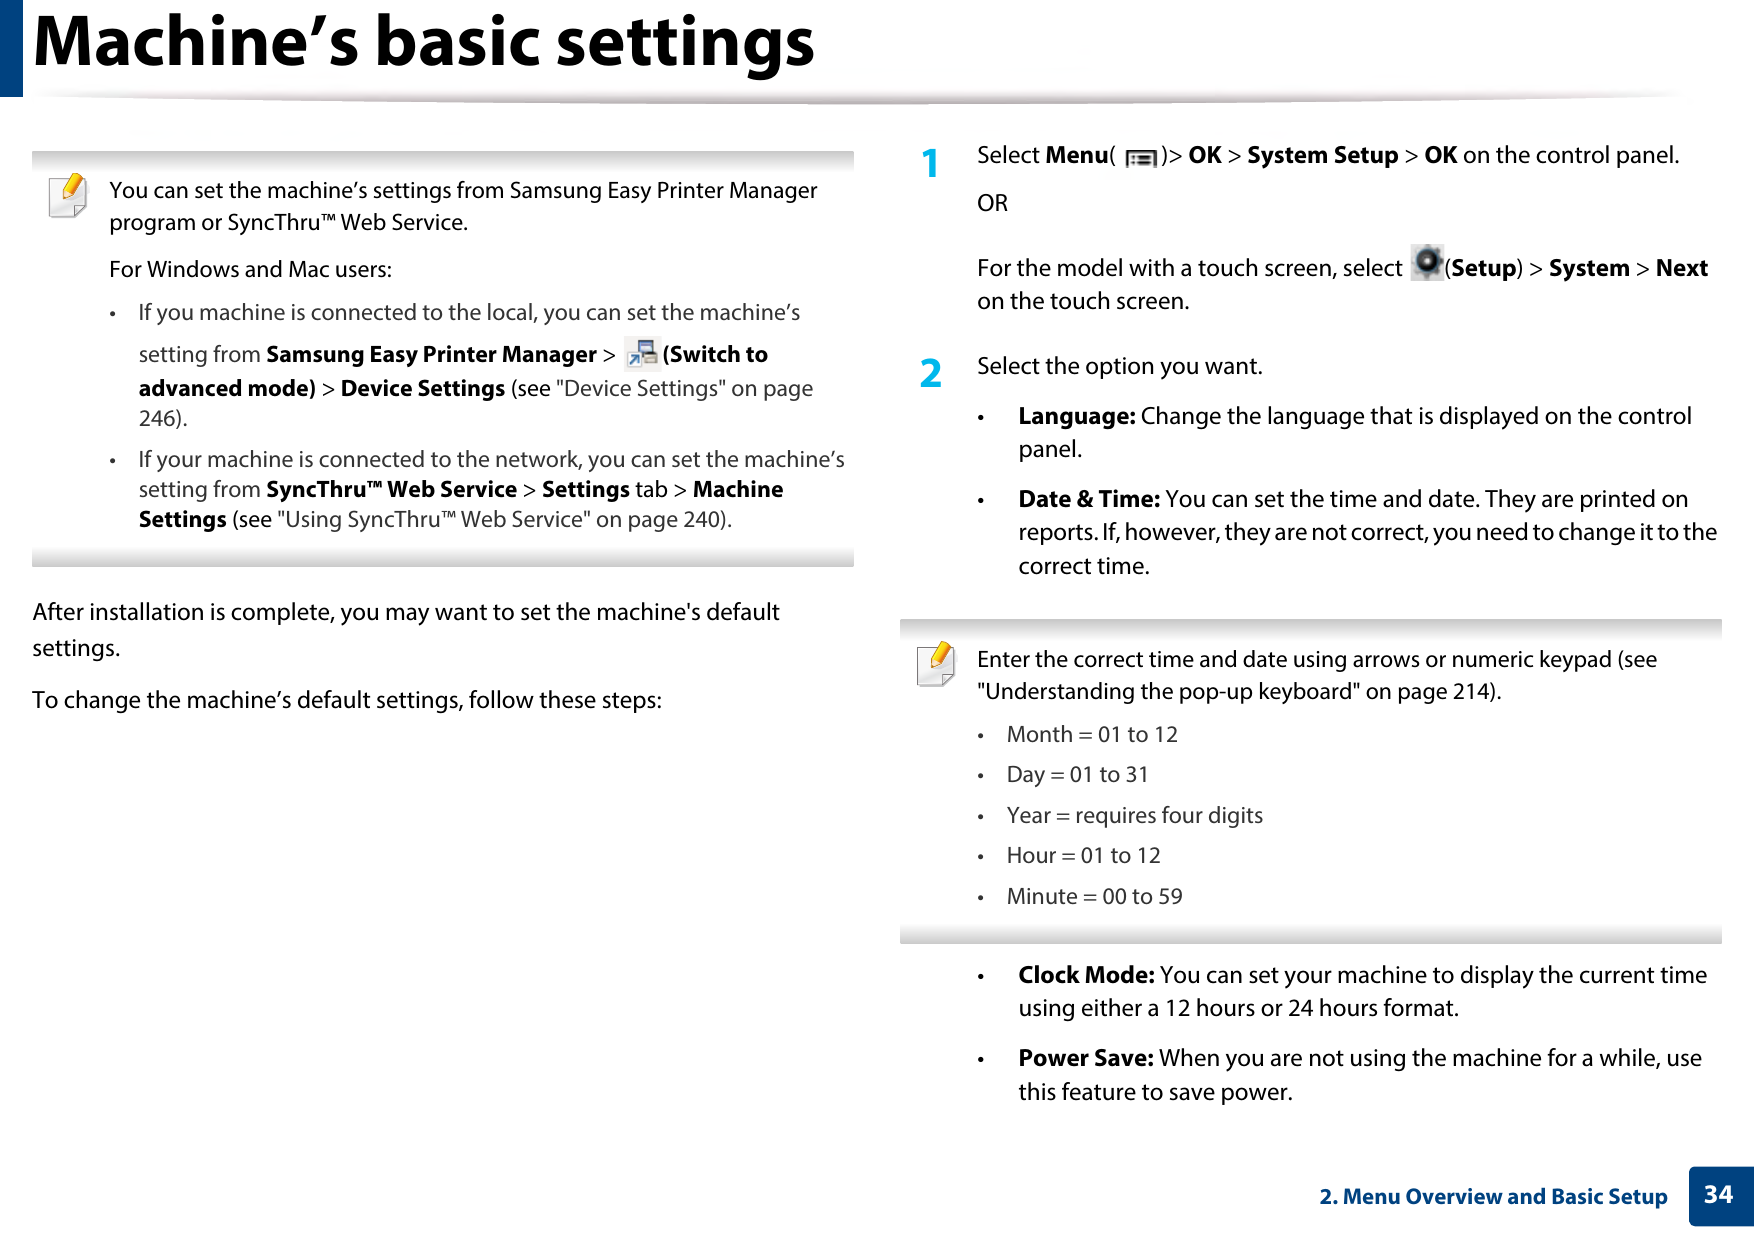
![Menu overview322. Menu Overview and Basic Setup Setup(see "System Setup/ Setup" on page 195)Admin SetupaUser Access ControlAuthenticationStampStamp ActivateItemText SizeOpacityPositionChange Admin PasswordFirmware UpgradeImage OverwriteAutomatic Image OverwriteManual Image OverwriteOverwrite MethodOverwrite Timesa. You need to enter a password to enter this menu. The default password is sec00000.ApplicationApplication ManagementInstall New ApplicationSecure PrintSupplies ManagementToner Low AlertImaging Unit Low AlertNetworkTCP/IP (IPv4)TCP/IP (IPv6)Ethernet802.1xWi-FibWi-Fi On/OffWi-Fi SettingsWPSWi-Fi DirectWi-Fi SignalClear Wi-Fi SettingsProtocol ManagementNFCNetwork ConfigurationClear SettingsLayoutOrientationMarginDuplexPaperCopiesMP TrayTray [x]cPaper SourceTray ConfirmationTray BehaviorAuto ContinueAuto Tray SwitchPaper SubstitutionTray ProtectionTray ModeGraphicResolutionClear TextEdge EnhanceAuto CREmulationEmulation TypeSetup](https://usermanual.wiki/Samsung-Electronics-Co/SLM4530NX.User-Manual-Part-1/User-Guide-2436786-Page-32.png)
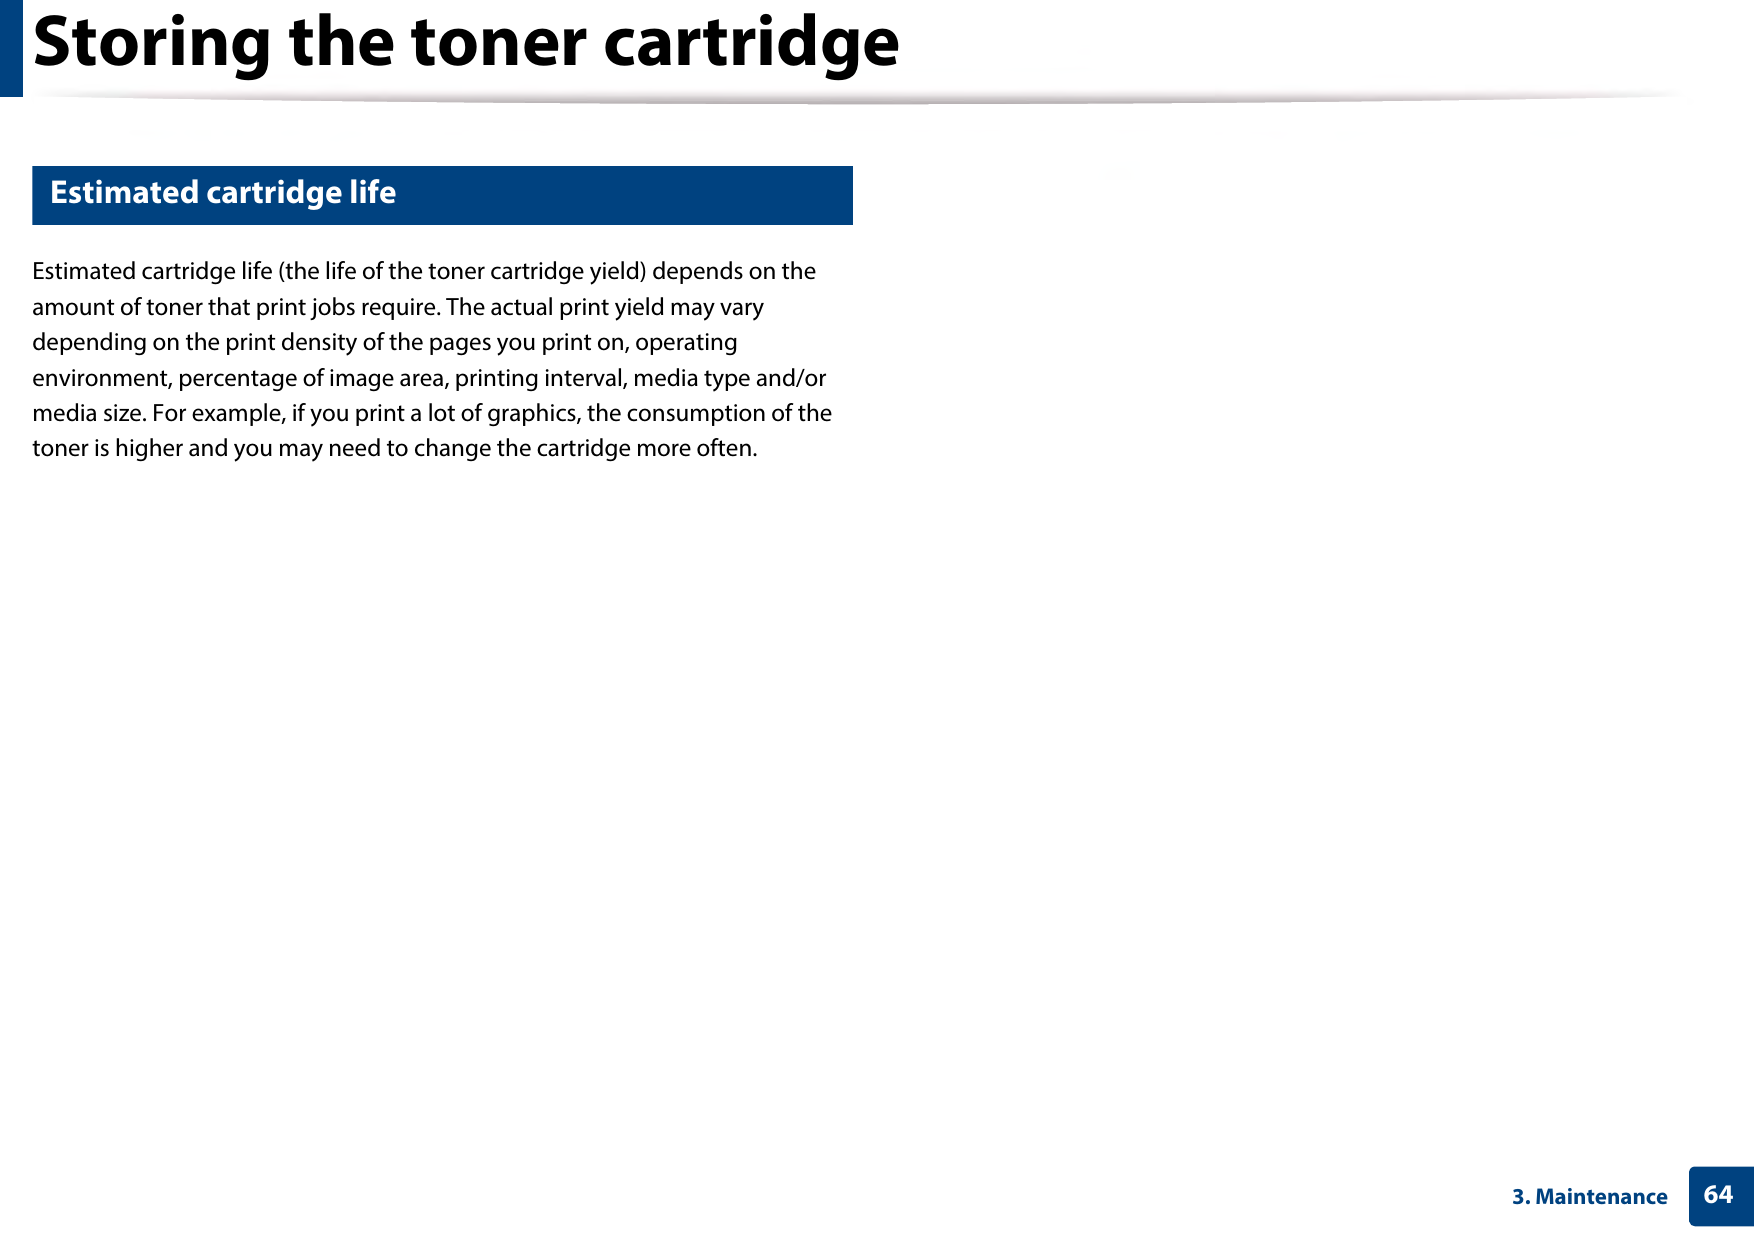
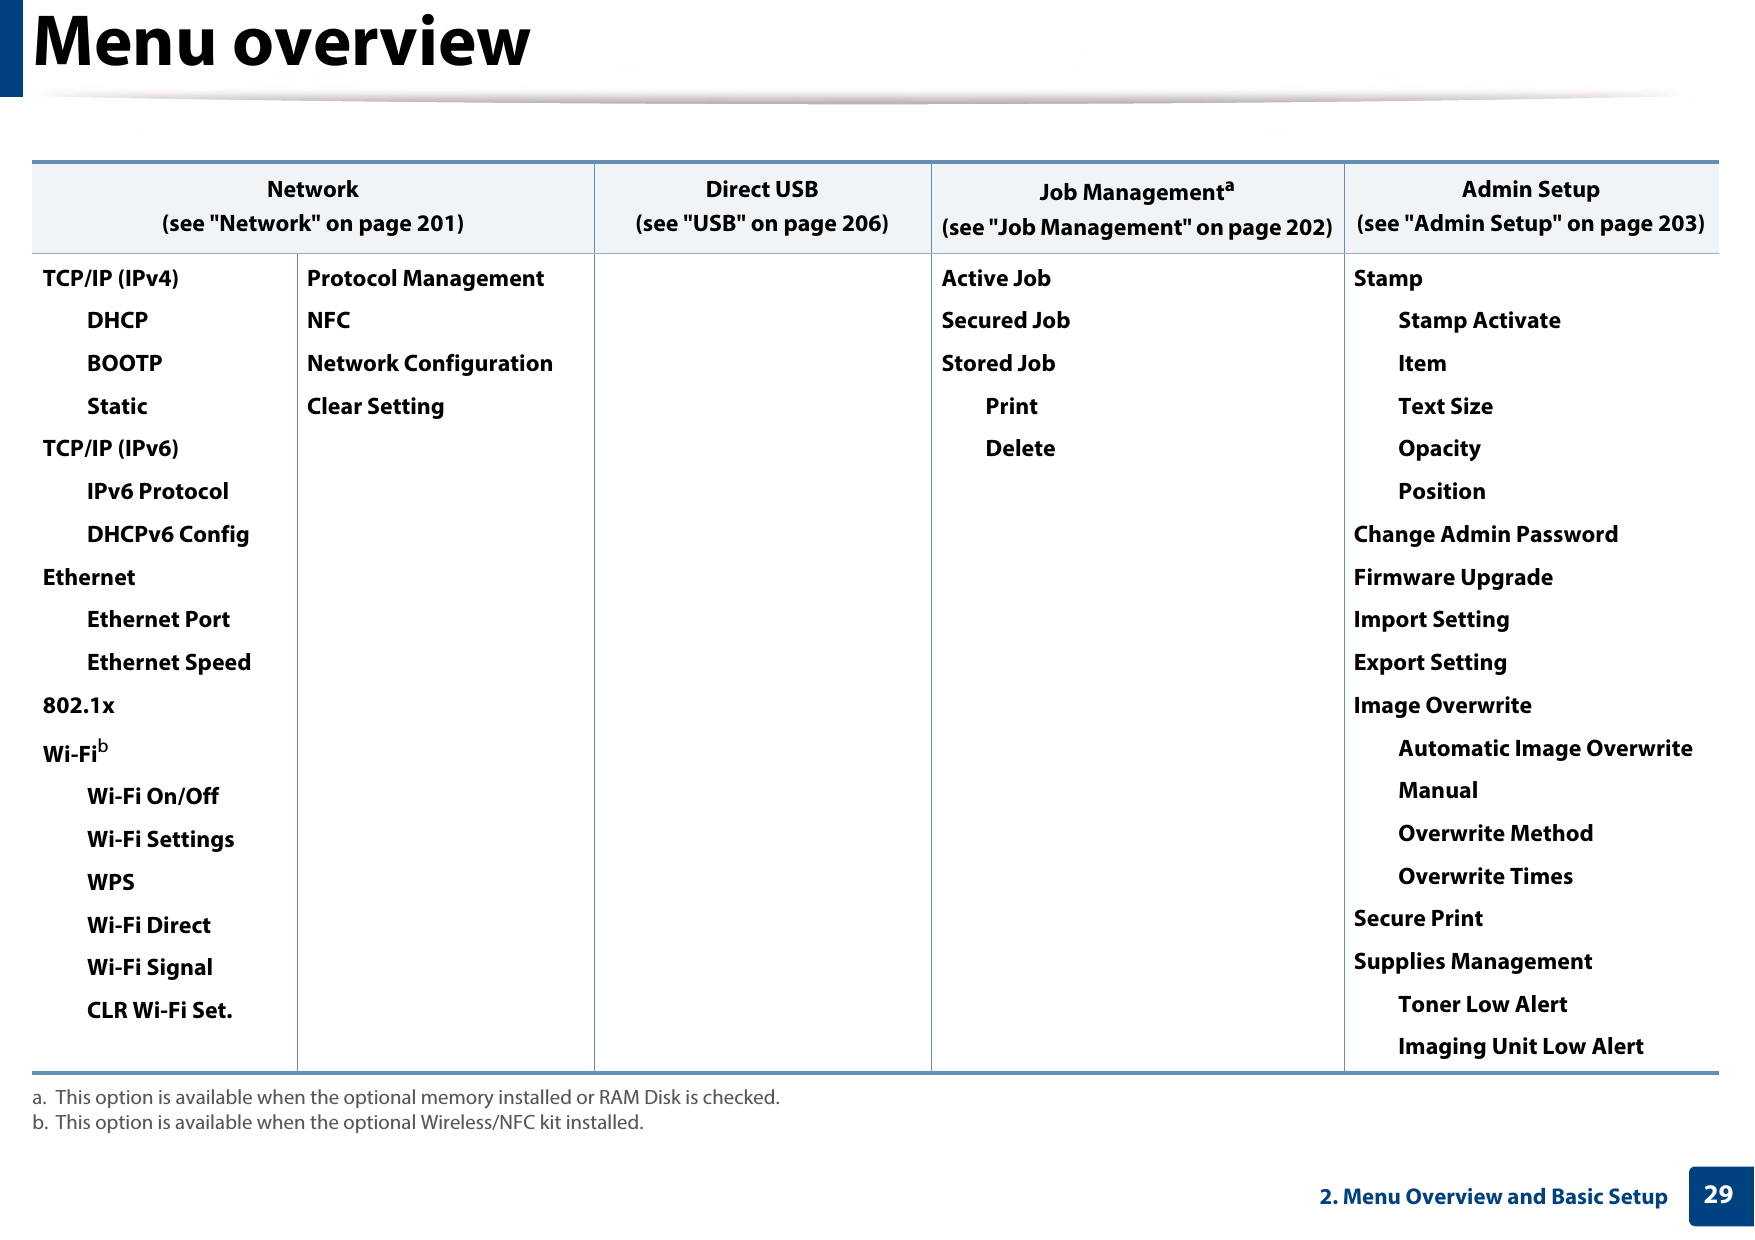
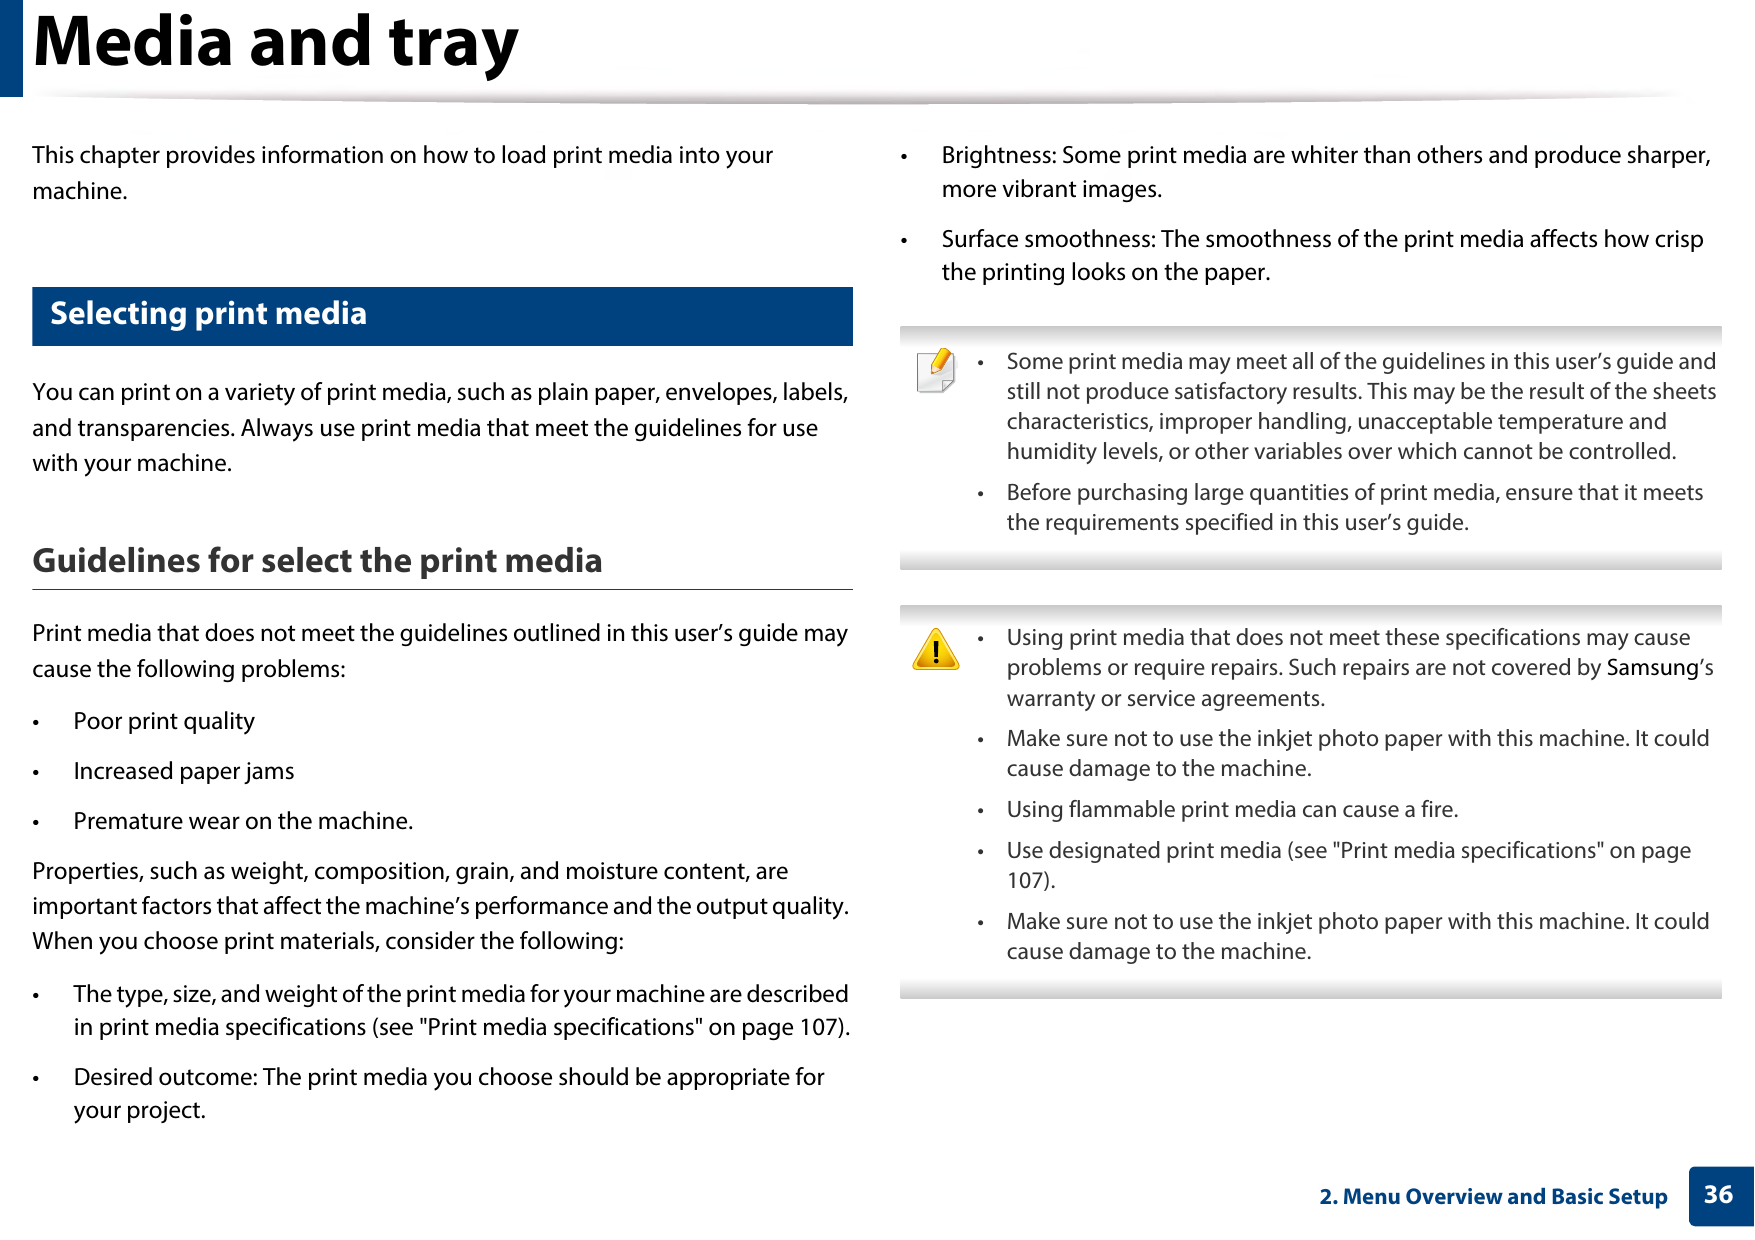
![Menu overview332. Menu Overview and Basic Setup b. This option is available when the optional Wireless/NFC kit installed.c. [tray type] indicates the tray number. Job Status(see "Job Status" on page 207) Counter(see "Counter" on page 208) Help(see "Help" on page 209)Current JobSecure JobStored JobComplete JobTotal Printed Basic TaskflowInformationEcoDirect USBSetupTroubleshootingPaper jam in MP TrayPaper jam in Tray 1Paper jam in Tray 2Paper jam in Tray 3Paper jam in Tray 4Paper jam in Tray 5Jam inside machineJam in exit areaJam inside of duplex](https://usermanual.wiki/Samsung-Electronics-Co/SLM4530NX.User-Manual-Part-1/User-Guide-2436786-Page-33.png)

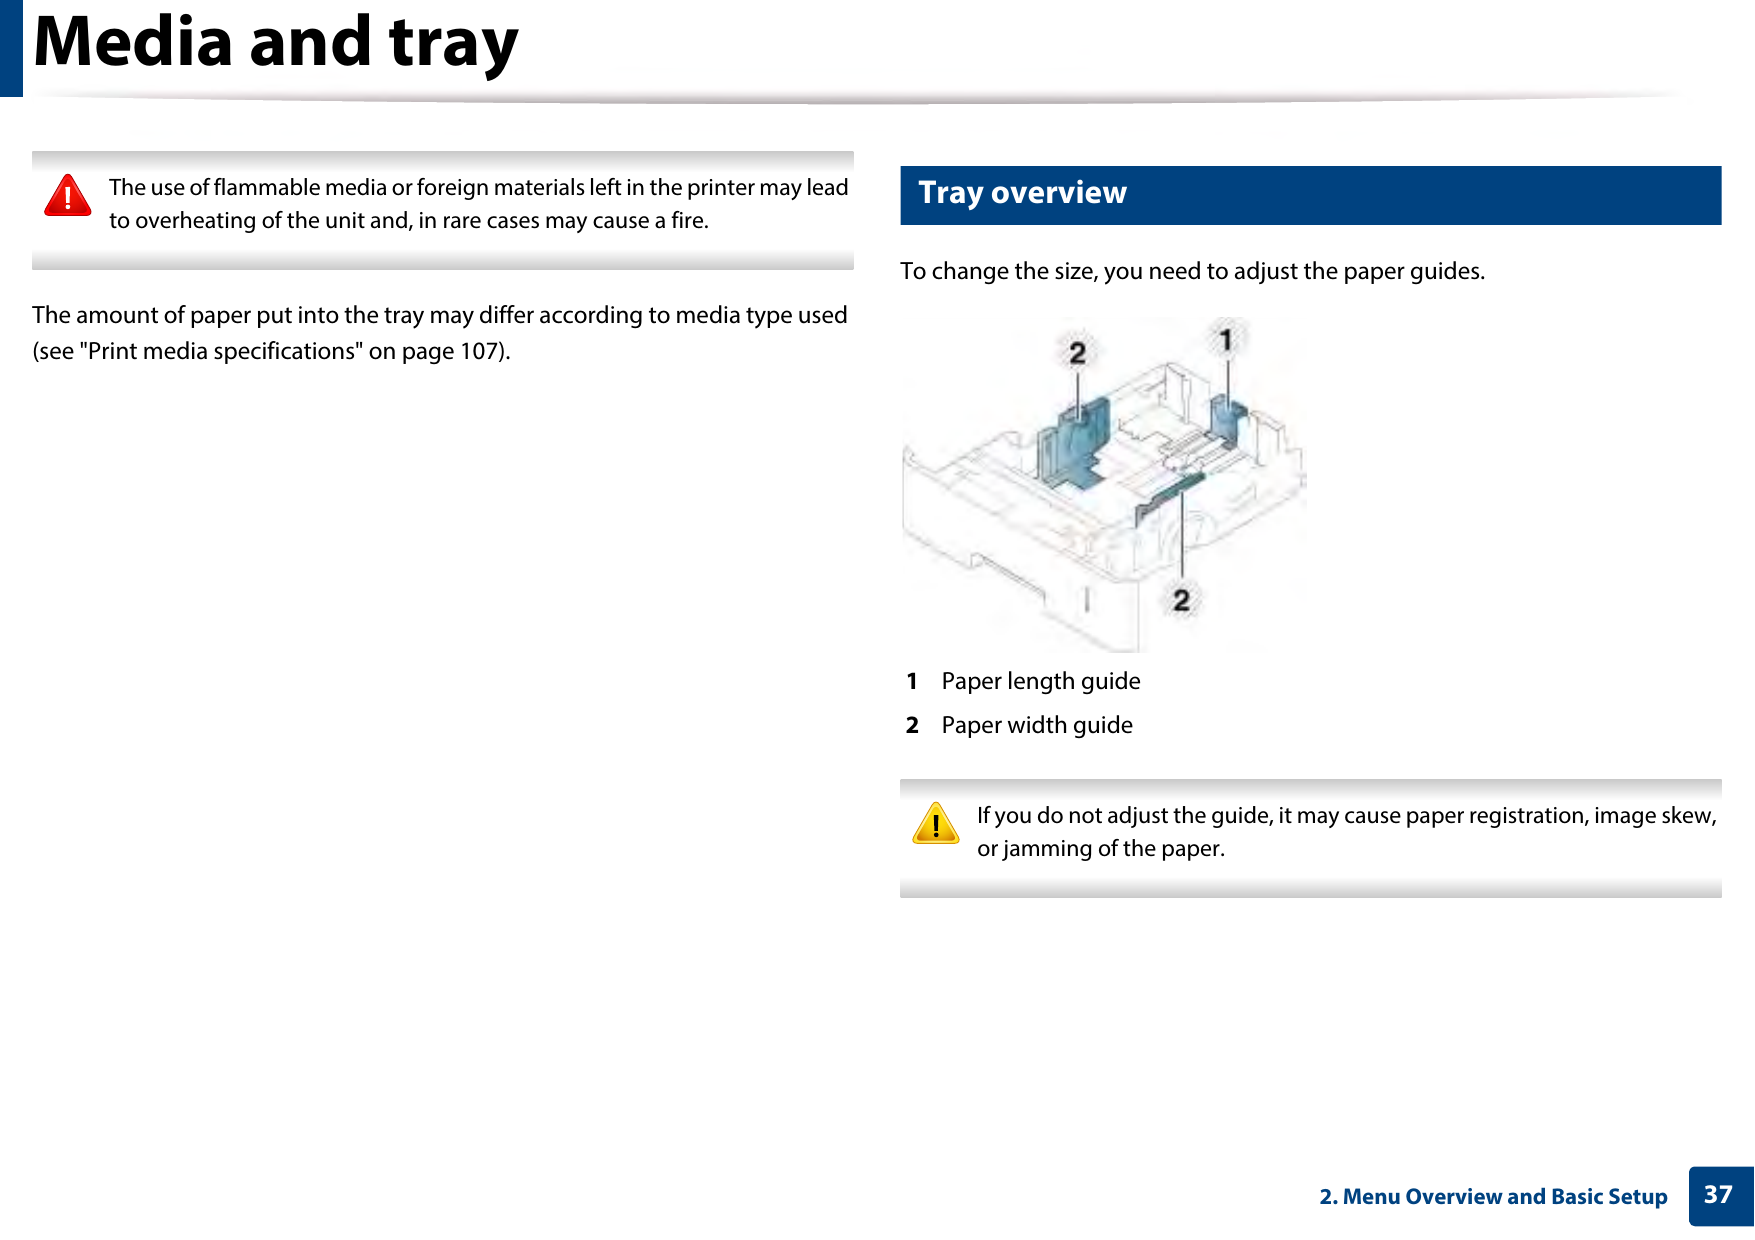
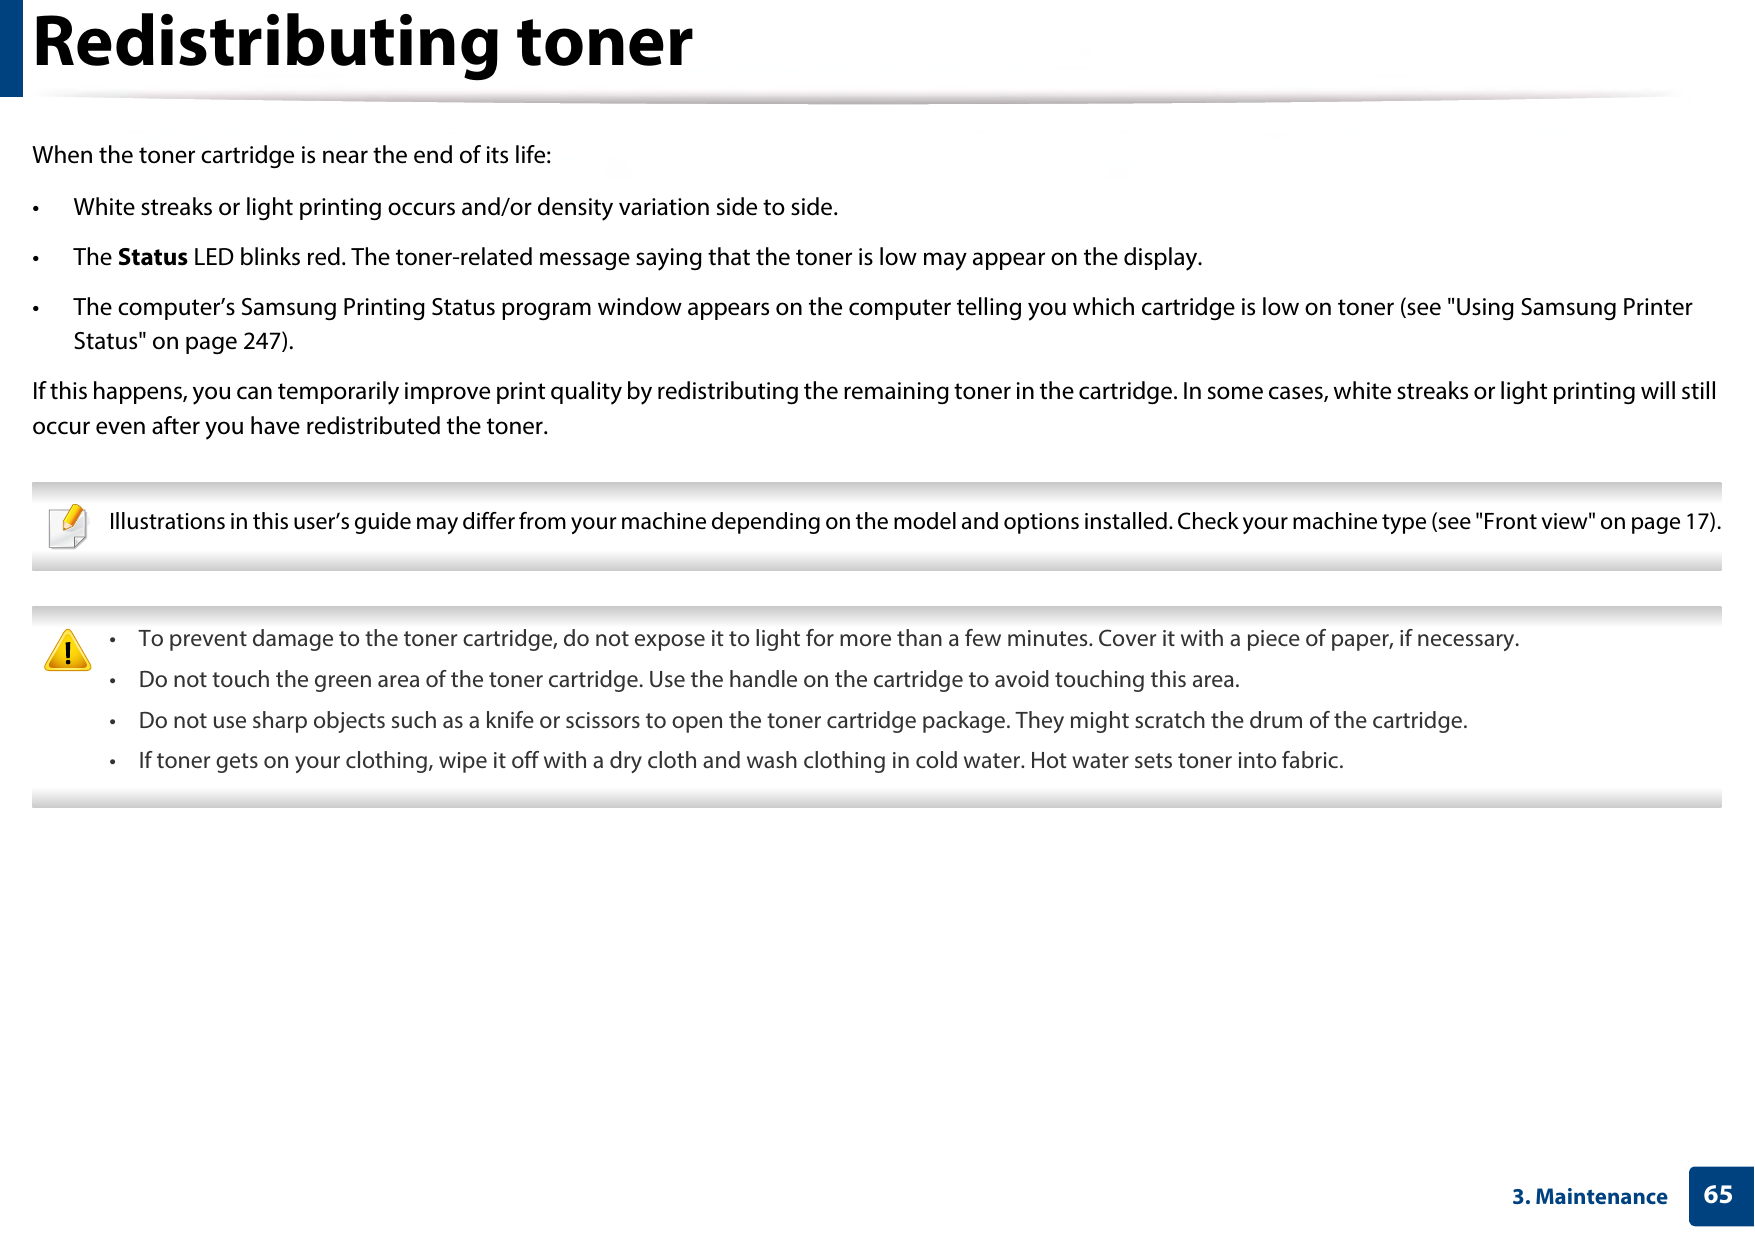
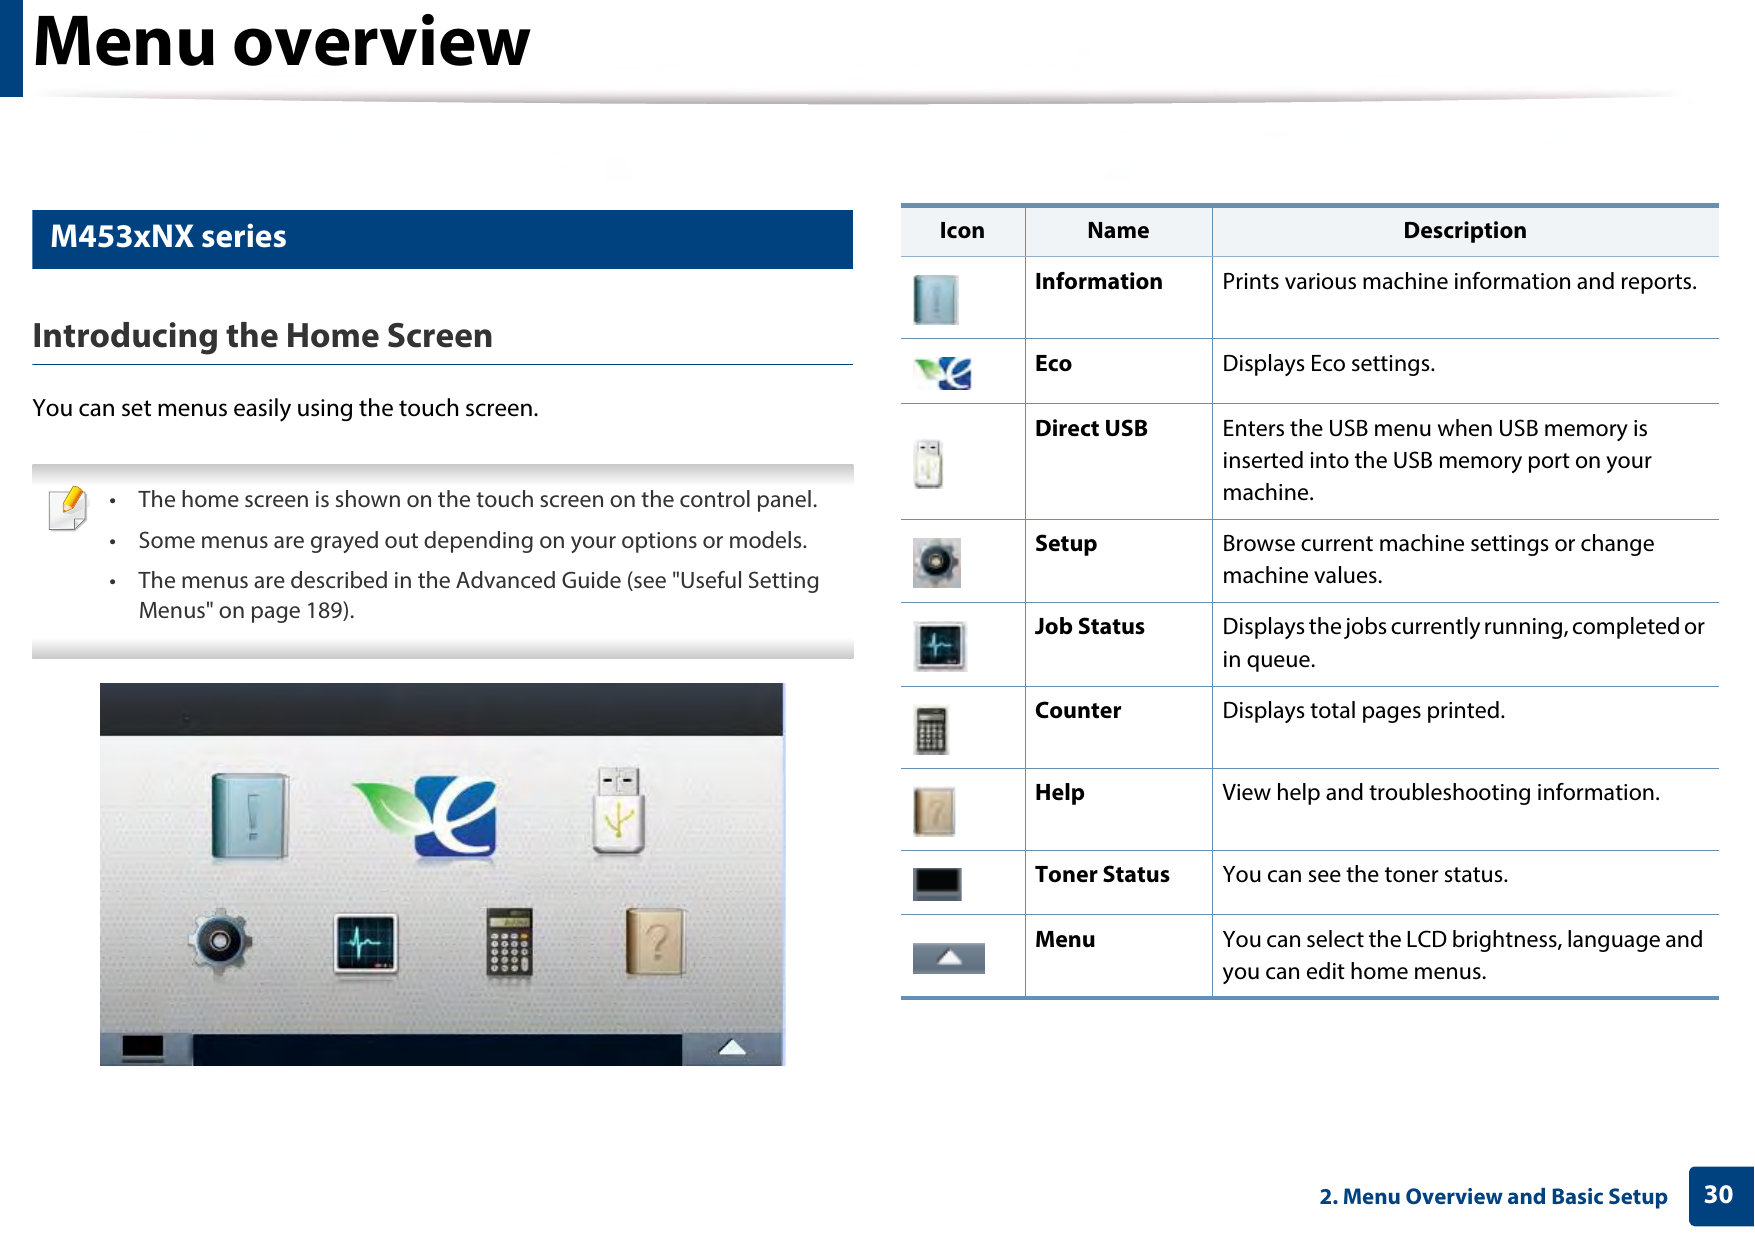
![Basic printing532. Menu Overview and Basic Setup4 Press (Stop/Clear) or home( ) icon to return to ready mode.Setting eco mode on the driver To take advantage of the advanced printing features, click Properties or Preferences from the Print window(see "Opening printing preferences" on page 50). Open the Eco tab to set Eco mode. When you see the eco image ( ), that means the eco mode is currently enabled.Eco options•Printer Default: Follows the settings from the machine's control panel.•None: Disables Eco mode.•Eco Printing: Enables eco mode. Activate the various Eco items you want to use.•Passcode: If the administrator fixed to enable the Eco mode, you have to enter the password to change the status. Passcode button: You can set from SyncThru™ Web Service (Settings tab > Machine Settings > System > Eco Settings) or Samsung Easy Printer Manager (Device Settings > Eco), the password button is activated. To change the print settings, click on this button, enter the password or need to contact the administrator. Result simulatorResult Simulator shows the results of reduced emission of carbon dioxide, used electricity, and the amount of saved paper in accordance with the settings you selected.• The results are calculated on the basis that the total number of printed paper is one hundred without a blank page when the Eco mode is disabled.• Refers to the calculation coefficient about CO2, energy, and paper from IEA, the index of Ministry of Internal Affairs and Communication of Japan and www.remanufacturing.org.uk. Each model has a different index. • The power consumption in printing mode refers to the average printing power consumption of this machine. • The actual amount displayed is only an estimate as the actual amount may differ depending on the operating system used, computing performance, application software, connection method, media type [thickness], media size, job complexity, etc.](https://usermanual.wiki/Samsung-Electronics-Co/SLM4530NX.User-Manual-Part-1/User-Guide-2436786-Page-53.png)