Thomson Broadcast and Multimedia ULT-1K10K2 UHF Digital transmitter, for use with MediaFlo User Manual PREIMPAP
Thomson Broadcast & Multimedia, Inc. UHF Digital transmitter, for use with MediaFlo PREIMPAP
UserManual.wiki
>
Thomson Broadcast and Multimedia
>
ULT-1K10K2 User Manual
>
User Manual part 1
Contents
1.
User Manual part 1
2.
User Manual part 2
3.
User Manual part 3
4.
User Manual part 4
5.
User Manual part 5
6.
Operation manual part 1
7.
Operation manual part 2
8.
Operation manual part 3
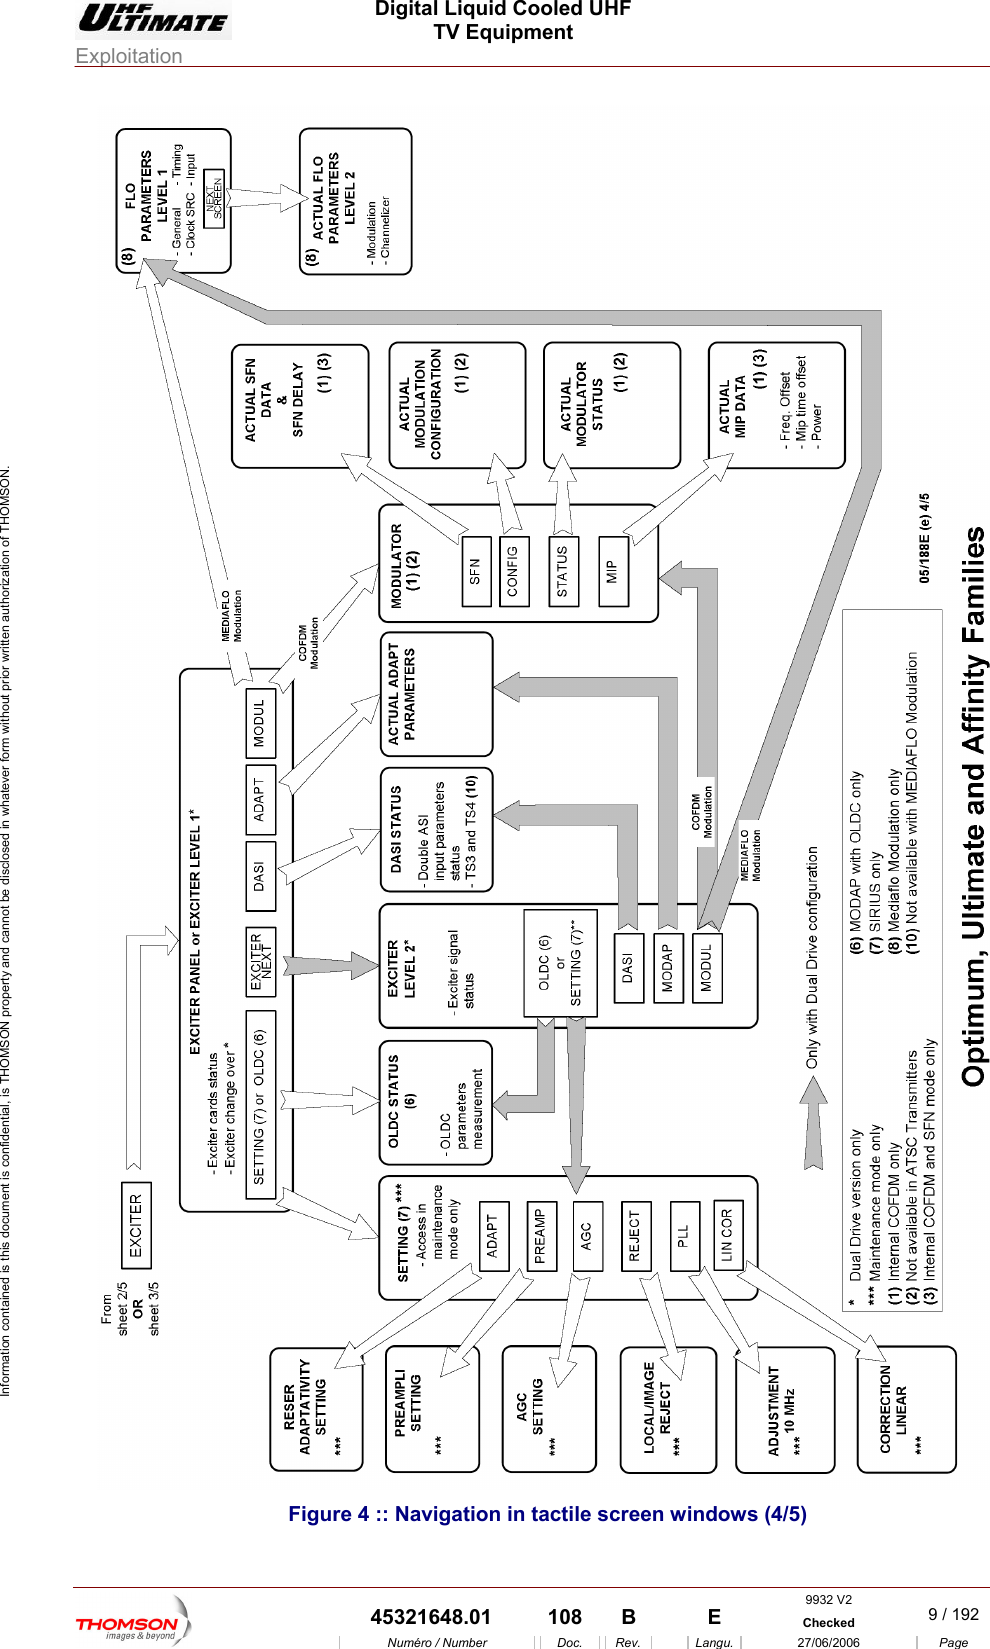
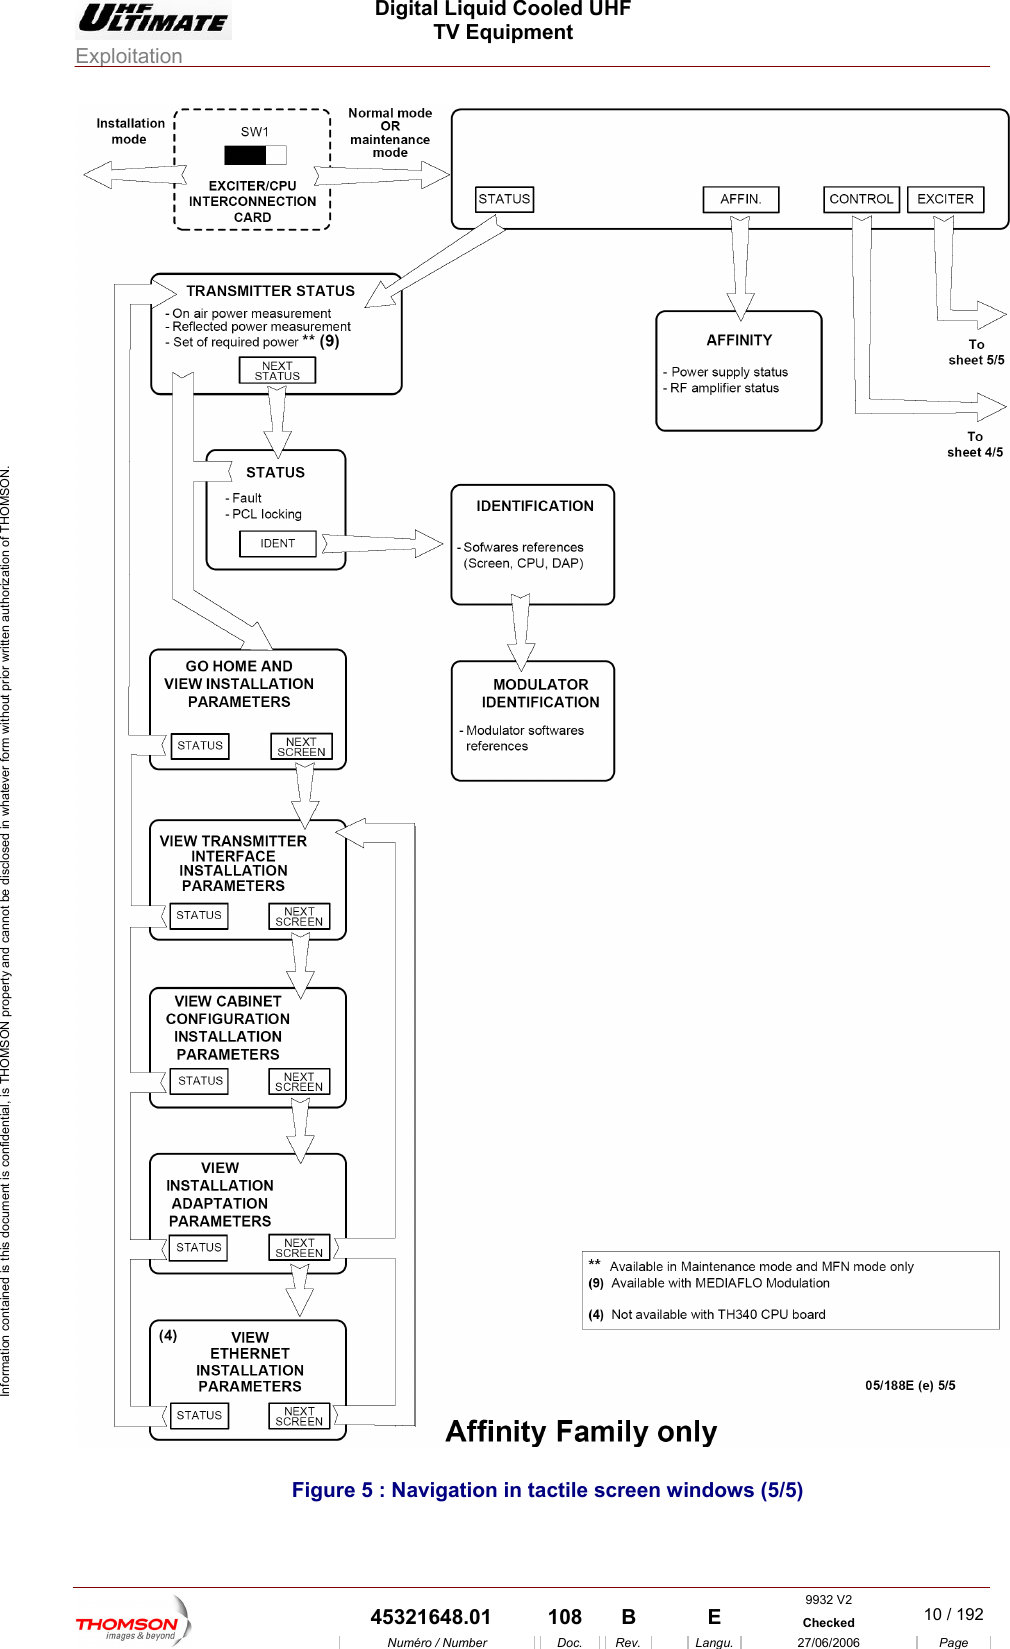
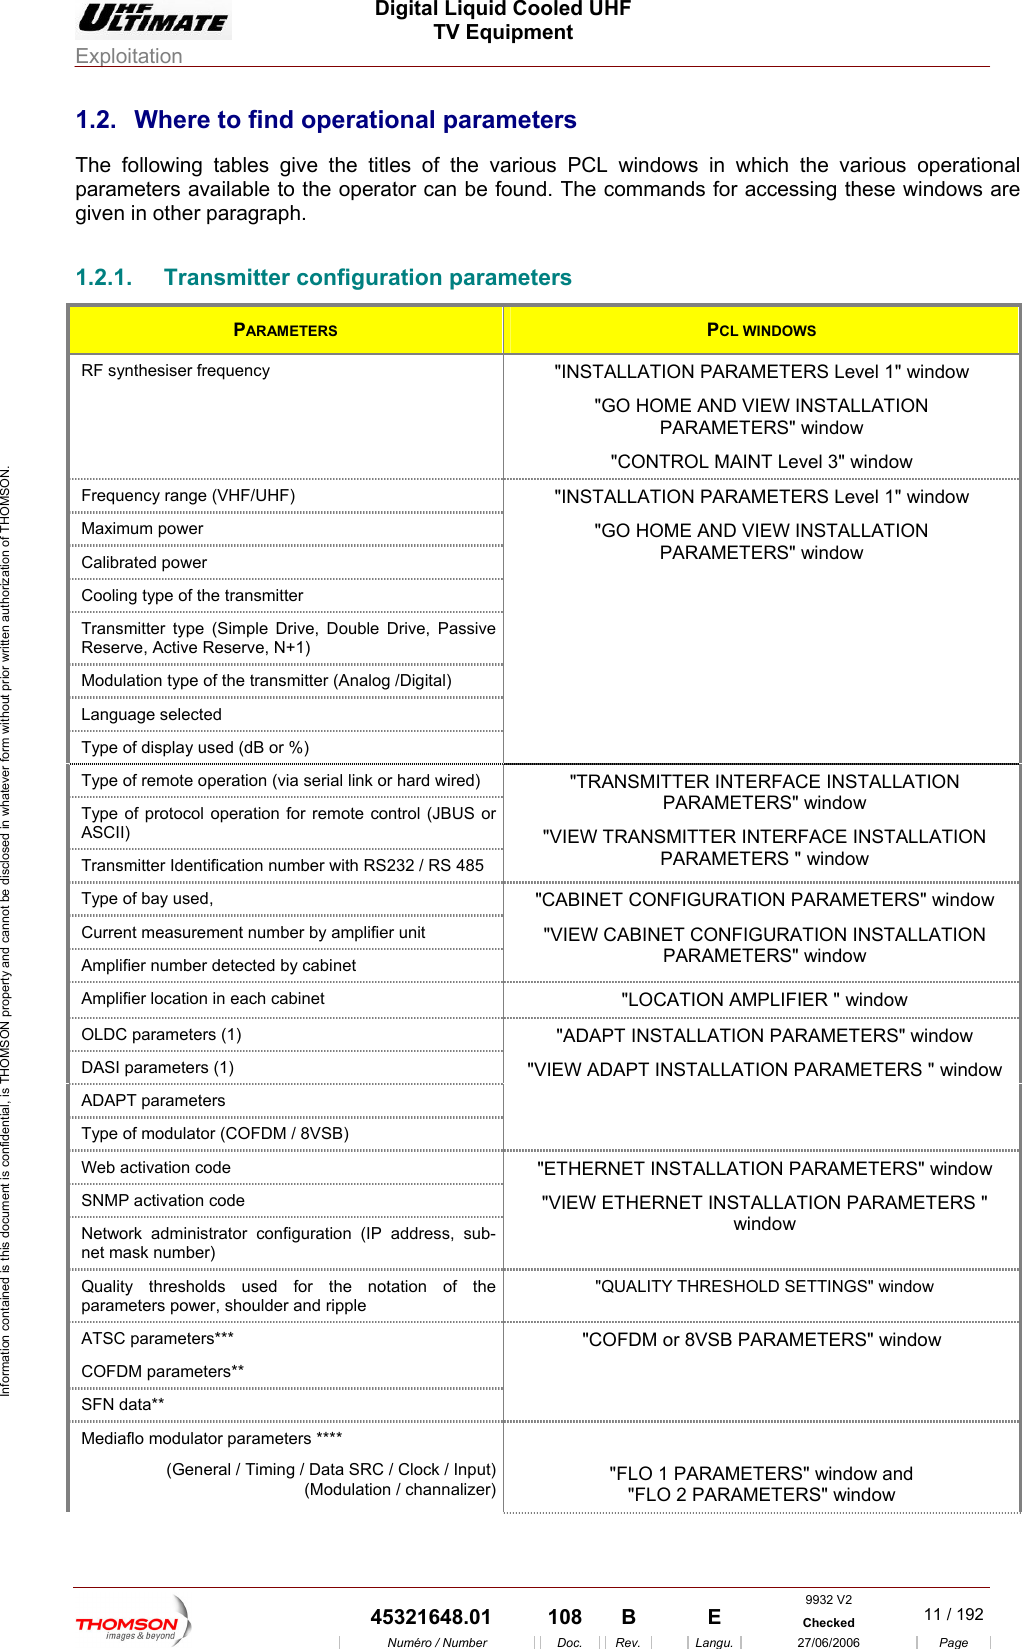
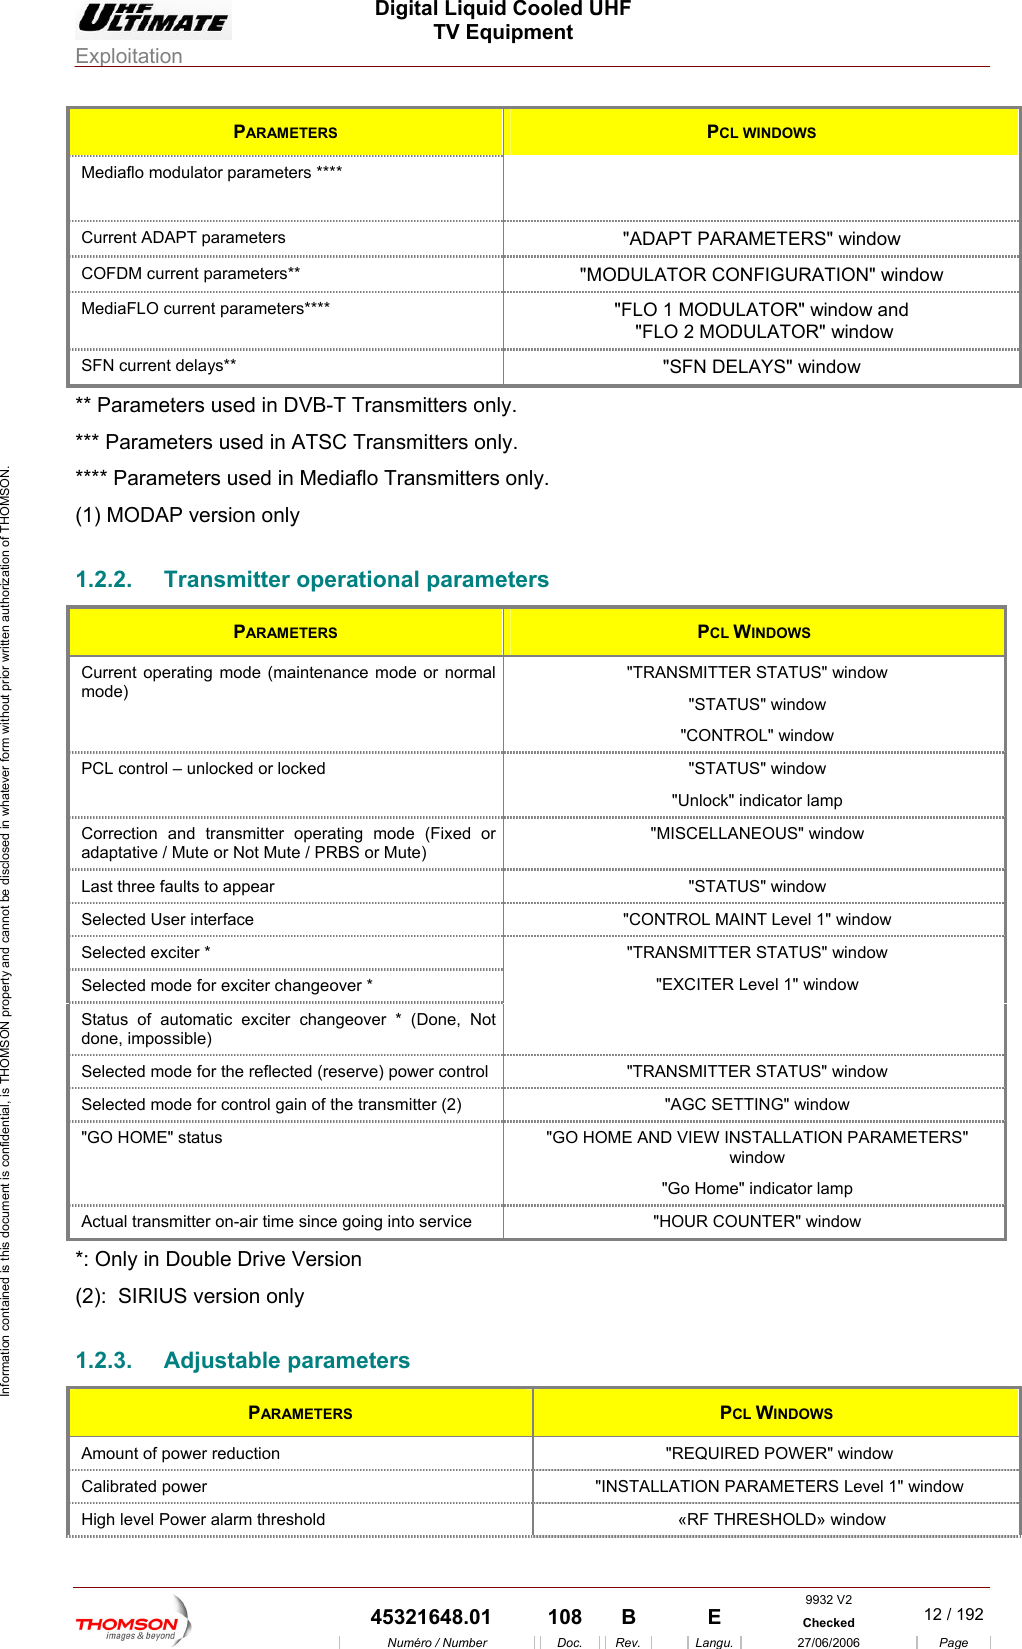
User Manual part 1
Navigation menu
Upload a User Manual
Namespaces
Wiki Guide
HTML
PDF
Info
Views
User Manual
Discussion / Help
Navigation