Zultys Technologies ZIP4X5 Bluetooth FHSS transceiver in VOIP Phone User Manual ZIP 4x4 User s Manual 1 0 2 20 April 2003
Zultys Technologies Bluetooth FHSS transceiver in VOIP Phone ZIP 4x4 User s Manual 1 0 2 20 April 2003
Contents
- 1. Manual 1
- 2. Manual 2
- 3. Manual 3
- 4. Manual 4
Manual 2
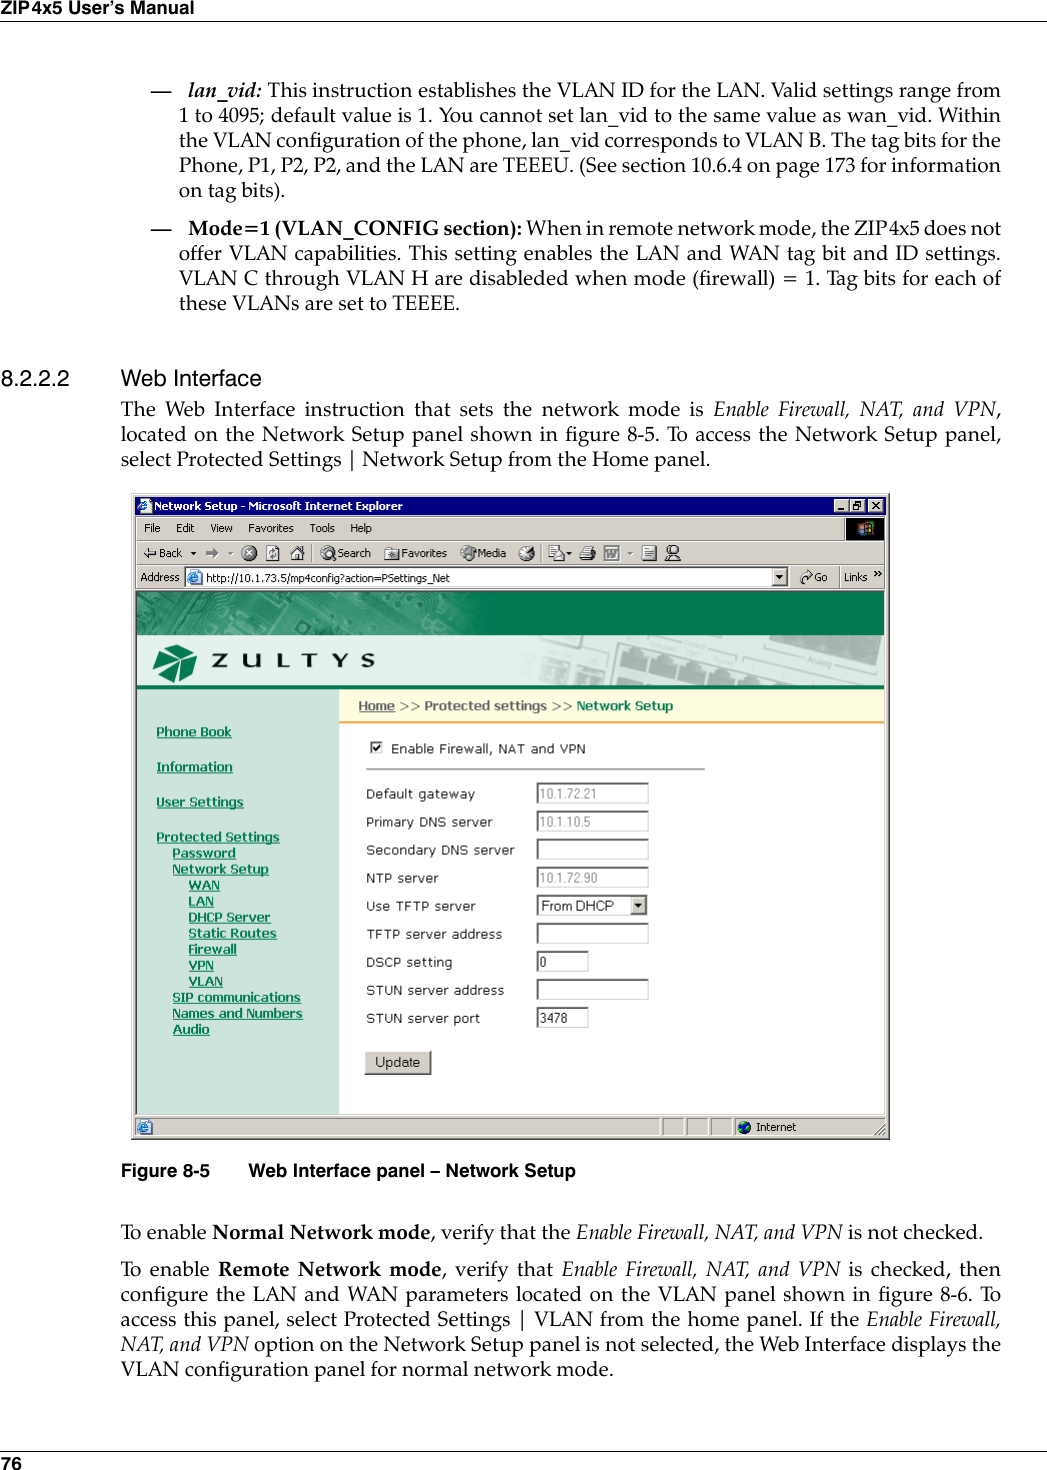
![8. Firewalls, NATs, and VPNs 758.2.1.1 Normal Network ModeWhen the ZIP4x5 is in normal network mode, it functions as a SIP device within a LAN. You cangenerate and accept calls with the phone, but it is not configured to act as remote network router.When booting the ZIP4x5 in normal network mode, the phone’s network can be configuredthrough the DHCP server or you can set a static IP address. Normal network mode supports amaximum of eight VLANs. 8.2.1.2 Remote Network ModeWhen the ZIP4x5 is in remote mode, it performs router services between your LAN and a WAN,such as the internet. You can configure the phone to establish a VPN tunnel through the WANwith the corporate network and then provide corporate resources to the devices connected to thephone through its LAN. Remote network mode allows you to provide firewall services and act asa DHCP server for your LAN. Remote network mode supports two VLANs: one VLAN connectsthe ZIP4x5 to your LAN while the other VLAN connects the phone to the WAN.8.2.2 Setting the Network ModeYou can set the network mode through the configuration file or the Web Interface8.2.2.1 Configuration FileMode and Remote Network VLAN instructions are firewall configuration commands. Firewallconfiguration commands must be listed in the file section that is headed by [FW]. The commandsthat configure the mode and the VLAN include:.mode: This instruction determines the network mode of the phone. Valid settings are 0 and 1:•To enable Normal Network Mode, set mode = 0. All remote settings are disabled and thephone behaves as a normal SIP device.•To enable Remote Network Mode, set mode = 1. All remote settings are enabled, includingfirewall, VPN, and router support between the WAN and your LAN. When mode=1, the following parameters must also be set:—wan_vid: This instruction establishes the VLAN ID for the WAN. Valid settings range from1 to 4095; default value is 2. Within the VLAN configuration of the phone, wan_vidcorresponds to VLAN A. The tag bits for the Phone, P1, P2, P2, and the LAN are TUUUE.(See section 10.6.4 on page 173 for information on tag bits).[FW]mode=1wan_vid=2lan_vid=1[VLAN_CONFIG]mode=1Figure 8-4 Configuration File Instructions that sets the Network mode.](https://usermanual.wiki/Zultys-Technologies/ZIP4X5.Manual-2/User-Guide-458734-Page-12.png)
![78ZIP4x5 User’s ManualFigure 8-7 displays configuration file code that enables DHCP mode.8.3.1.2 Setting DHCP Mode through the Web InterfaceThe Web Interface instruction that sets the WAN connection for DHCP mode is located on theWAN panel shown in figure 8-8. To access the WAN panel, select Protected Settings | NetworkSetup | WAN from the Home panel. The Enable Firewall, NAT, and VPN option on the NetworkSetup panel must be selected to view this panel. To set the ZIP4x5 as a DHCP client, set Connection type to DHCP, enter dummy values for the WANIP address and subnet mask, then press the Update button.[NET_CONFIG]use_dhcp=yes[FW]pppoe_mode=0wan_ip=1.1.1.1wan_mask=255.255.255.255Figure 8-7 Configuration File Instructions to configure the ZIP4x5 as a DHCP client.Figure 8-8 Web Interface WAN panel](https://usermanual.wiki/Zultys-Technologies/ZIP4X5.Manual-2/User-Guide-458734-Page-15.png)
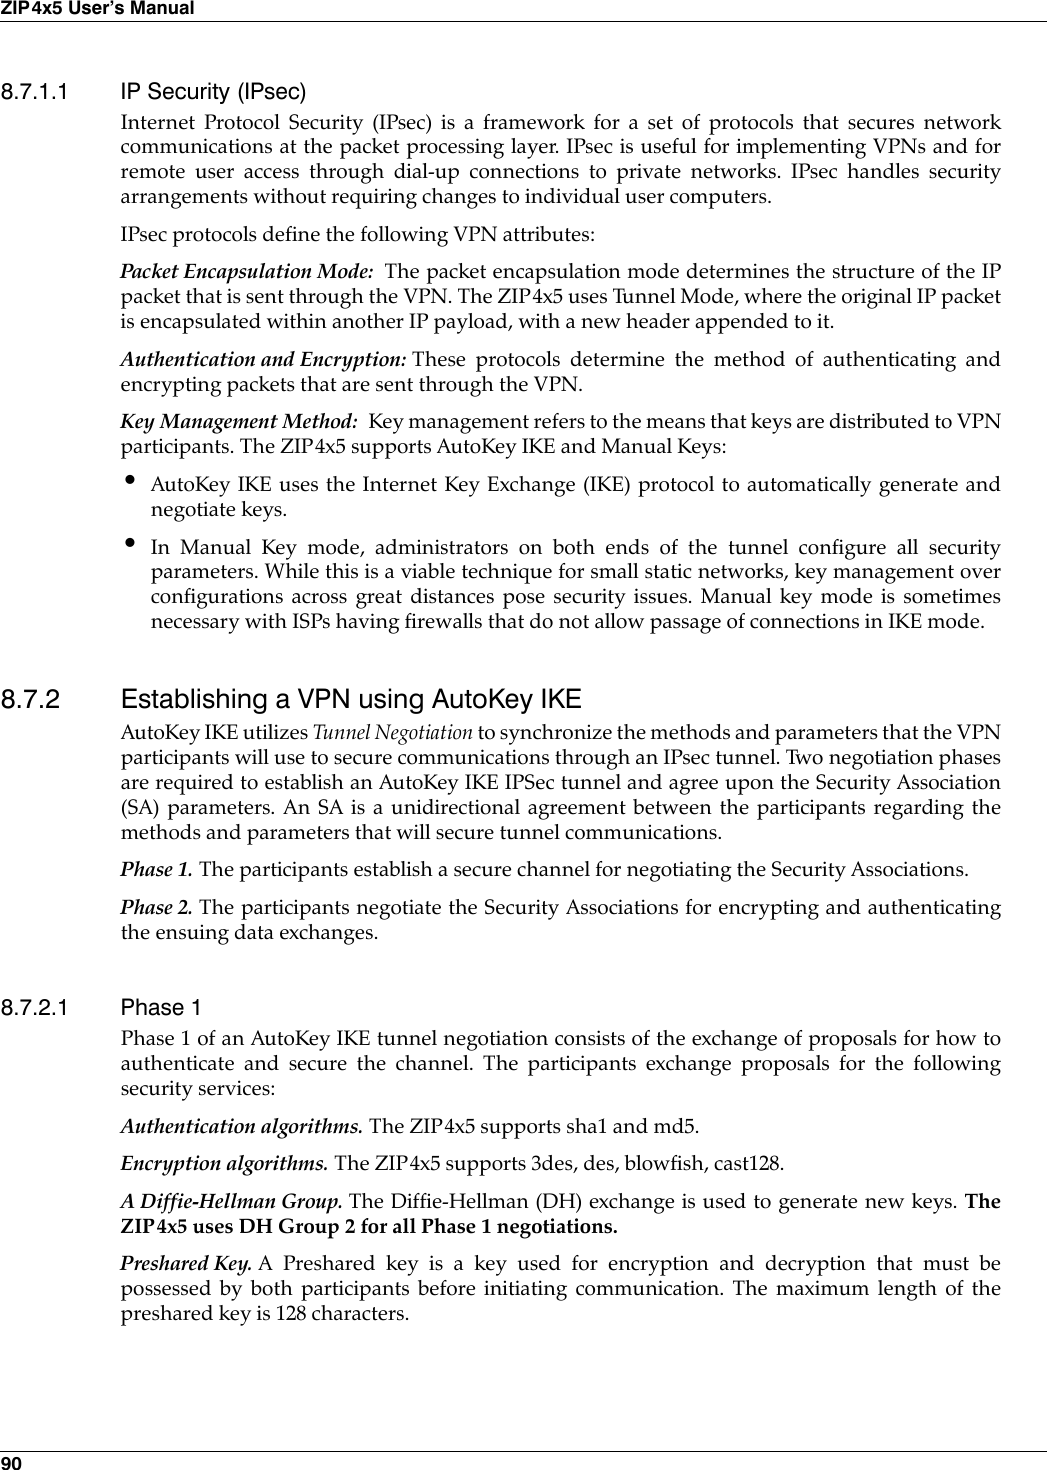
![8. Firewalls, NATs, and VPNs 798.3.2 PPPoE ModePPPoE is used by security conscious DSL service providers that require a username and passwordto establish a connection. A basic network diagram is shown in figure 8-9. The ZIP4x5 replaces theRouter with PPPoE and supplies a username and password to the PPPoE server at the ISP. TheZIP4x5 discovers the PPPoE server through a broadcast mechanism and learns its IP address andother network settings from the ISP.8.3.2.1 Setting Up PPPoE through a Configuration FileSetting PPPoE Mode with the configuration file requires the following commands:•In the NET_CONFIG file section, set use_dhcp to no•In the FW file section, turn on PPPoE by setting pppoe_mode to 1, specify a user name(pppoe_user) and password (pppoe_pwd), then set wan_ip and wan_mask to dummy values.The ZIP4x5 replaces these values when it receives them from the PPPoE server.Figure 8-10 displays an example of code that enables PPPoE mode.8.3.2.2 Setting PPPoE Mode through Web InterfaceThe Web Interface instruction that sets the WAN connection for PPPoE mode is located on theWAN panel shown in figure 8-8. To access the WAN panel, select Protected Settings | NetworkSetup | WAN from the Home panel. The Enable Firewall, NAT, and VPN option on the NetworkSetup panel must be selected to view this panel. Set Connection type to PPPoE and specify the User Name and User Password in the PPPoEsection of the panel. Enter dummy values for the WAN IP address and subnet mask, then pressthe Update button.Figure 8-9 Using the ZIP4x5 with PPPoE[NET_CONFIG]use_dhcp=no[FW]pppoe=1pppoe_user=dana_thomas_remotepppoe_pwd=rdds43wawan_ip=1.1.1.1wan_mask=255.255.255.255Figure 8-10 Configuration File Instructions that enables PPPoE mode.](https://usermanual.wiki/Zultys-Technologies/ZIP4X5.Manual-2/User-Guide-458734-Page-16.png)
![80ZIP4x5 User’s Manual8.3.3 Fixed Address ModeWhen you specify fixed IP address mode, you must configure the static WAN IP address, subnetmask, default gateway address, and primary DNS server address. You can also specify secondaryand tertiary DNS server addresses along with NTP and TFTP server addresses. Your ISP providesthese addresses to you.8.3.3.1 Setting Up Fixed IP Addressing through a Configuration FileSetting Fixed IP Address Mode with the configuration file requires the following commands:1. In the NET_CONFIG file section:•set use_dhcp to 0•set default_gateway to the IP address provided by your ISP•set primary_dns to the IP address provided by your ISP•set secondary_dns to the IP address provided by your ISP (optional)2. In the FW file section:•set pppoe_mode to 0•set wan_IP to the fixed public IP address provided by the ISP•set wan_mask to the subnet mask for the WAN interface; this is also provided by the ISP.Figure 8-11 displays an example of code that sets Fixed IP Address mode.8.3.3.2 Setting Fixed IP Addressing through the Web InterfaceThe Web Interface instruction that sets the WAN connection for Fixed Address mode is locatedon the WAN panel shown in figure 8-9. To access the WAN panel, select Protected Settings |Network Setup | WAN from the Home panel. The Enable Firewall, NAT, and VPN option on theNetwork Setup panel must be selected to view this panel. Set Connection type to Fixed IP and specify the User Name and User Password. Then press theUpdate button. Then return to the Network Setup panel (figure 8-5) and enter the IP address forthe default gateway, and the DNS servers.[NET_CONFIG]use_dhcp=nodefault_gateway=147.139.10.3primary_dns=147.139.15.0[FW]pppoe_mode=0wan_ip=147.139.20.5wan_mask=255.255.255.0Figure 8-11 Configuration File Instructions that sets the Network mode.](https://usermanual.wiki/Zultys-Technologies/ZIP4X5.Manual-2/User-Guide-458734-Page-17.png)
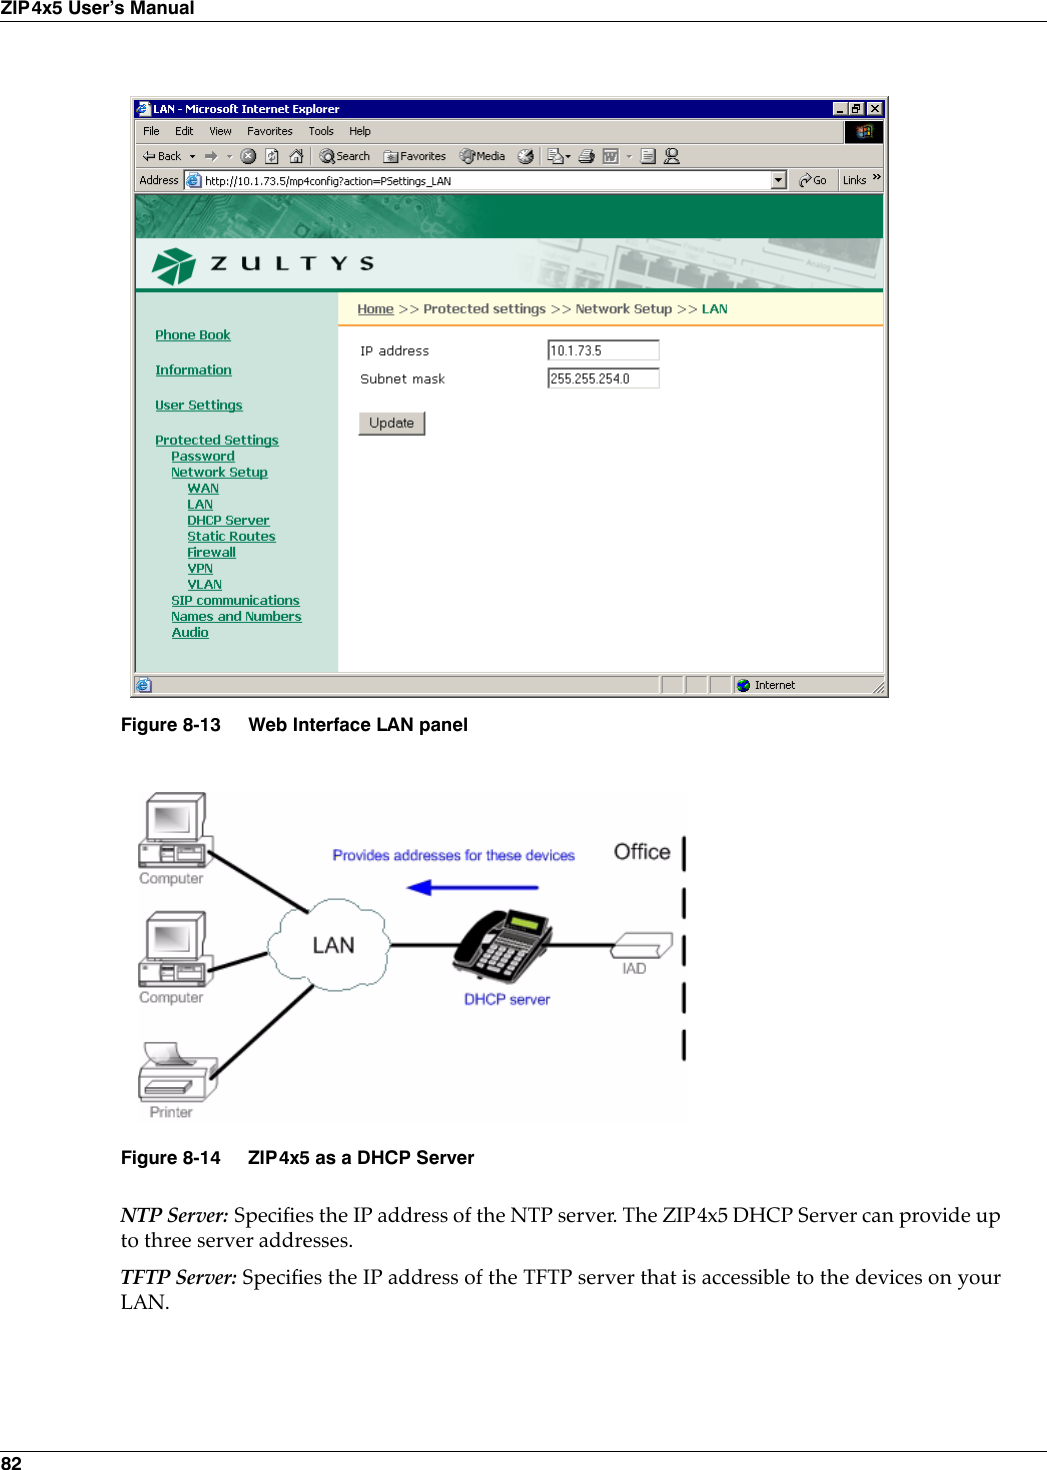
![8. Firewalls, NATs, and VPNs 818.4 LAN ConfigurationConfiguring the LAN connection to your ZIP4x5 requires the assignment of a static IP address tothe LAN network. You can also configure the ZIP4x5 as a DHCP server for the devices located onyour LAN.8.4.1 Setting the IP AddressSetting the IP Address requires the valid IP Address and subnet mask that accesses your LAN.8.4.1.1 Setting the IP Address through the Configuration FileSetting the IP Address for the LAN requires the following commands in the NET_CONFIG filesection:•set IP_addr to the IP address for the LAN•set subnet_mask to the subnet mask of the LANFigure 8-12 displays an example of code that sets Fixed IP Address mode.8.4.1.2 Setting the IP Address through the Web InterfaceThe Web Interface instructions that sets the LAN IP address and subnet mask is located on theLAN panel shown in figure 8-13. To access the LAN panel, select Protected Settings | NetworkSetup | LAN from the Home panel. The Enable Firewall, NAT, and VPN option on the NetworkSetup panel must be selected to view this panel.8.4.2 Configuring the ZIP4x5 as a DHCP ServerSetting up the ZIP4x5 as a DHCP server provides a resource for devices on your LAN to obtaindynamic IP addresses and network configuration parameters, as shown in figure 8-14. Thefollowing data is provided by the ZIP4x5 DHCP server:Dynamic IP Addresses: The dynamic addresses that the ZIP4x5 DHCP server provides shouldbelong to the private address spaces defined in RFC 1918:—10.0.0.0 - 10.255.255.255 (10/8 prefix)—172.16.0.0 - 172.31.255.255 (172.16/12 prefix)—192.168.0.0 - 192.168.255.255 (192.168/16 prefix)Lease Duration. This specifies the period that client PCs can maintain their dynamic IP addresswithout renewing their lease.DNS Server: Specifies the address of the DNS server accessible to the LAN. The ZIP4x5 DHCPServer can provide up to three server addresses.Domain Name: Specifies the domain name of the LAN.[NET_CONFIG]ip_addr=172.16.16.1subnet_mask=255.255.128.0Figure 8-12 Configuration File Instructions that sets the Network mode.](https://usermanual.wiki/Zultys-Technologies/ZIP4X5.Manual-2/User-Guide-458734-Page-18.png)
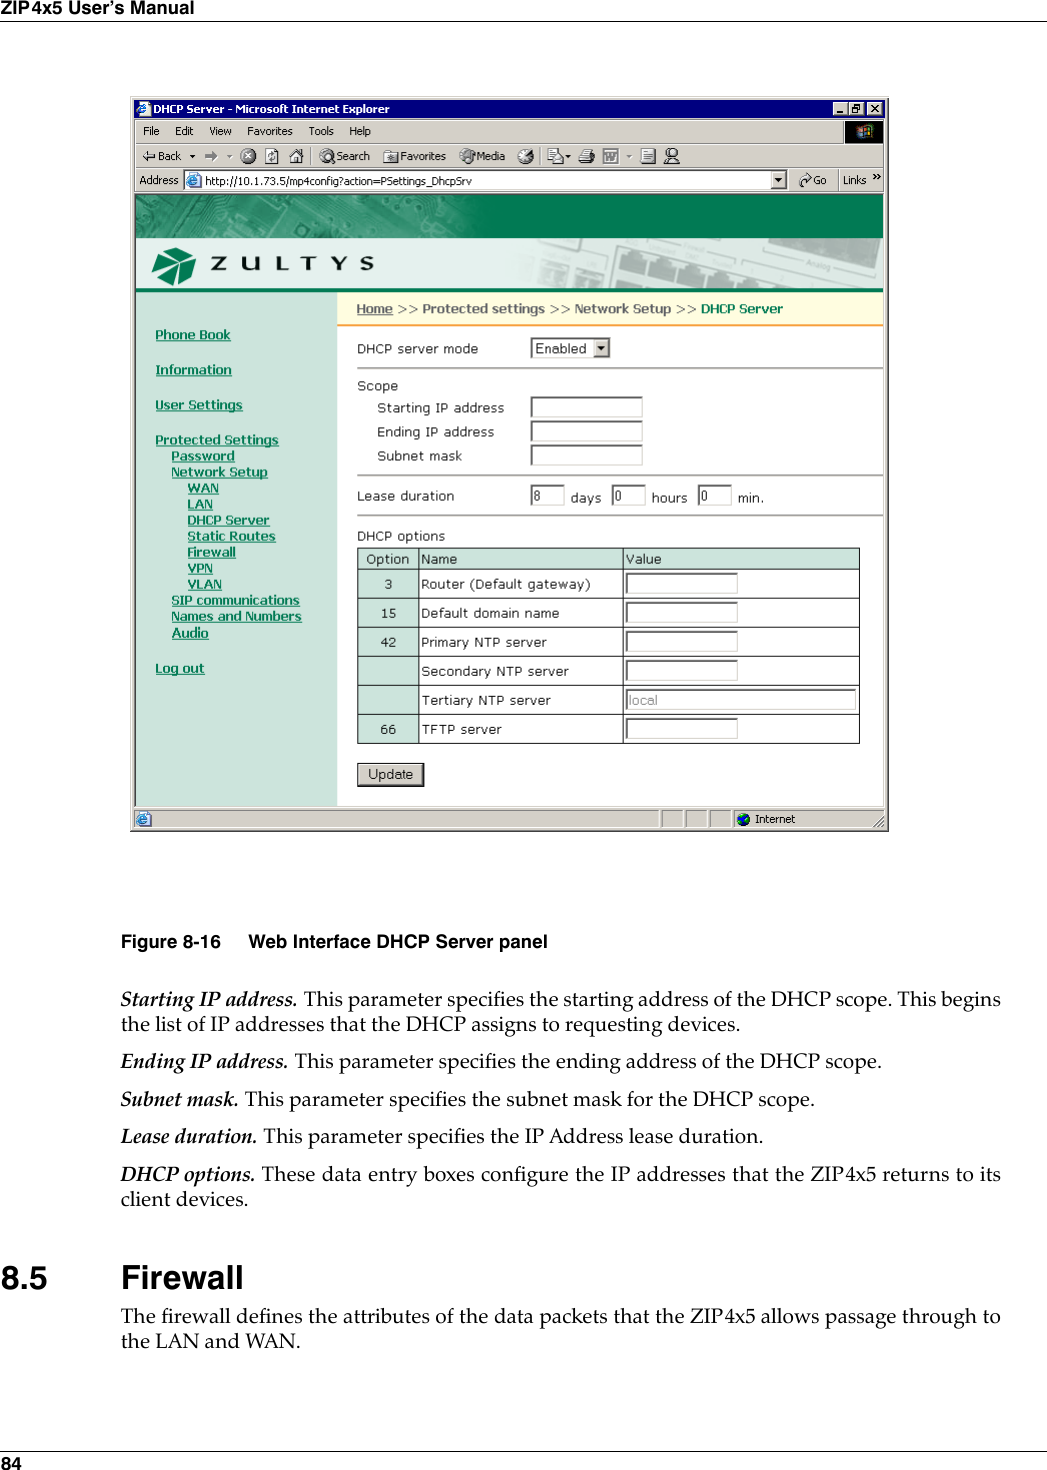
![8. Firewalls, NATs, and VPNs 838.4.2.1 Configuring the ZIP4x5 as a DHCP Server from the Configuration FileSetting up the ZIP4x5 as a DHCP server requires that the phone is not configured as a DHCPclient in the WAN Configuration, as explained in section 8.3.1. DHCP configuration requires thefollowing commands in the DHCP_SRV file section:•mode: Set mode to 1 to enable DHCP server functions. Set mode to 0 to disable DHCP serverfunctions.•start_ip: specifies the starting address of the DHCP scope. This begins the list of IP addressesthat the DHCP assigns to requesting devices.•end_ip: specifies the ending address of the DHCP scope.•o_mask: specifies the subnet mask for the DHCP scope.•lease_secs: specifies the IP Address lease duration, in seconds•o_router: specifies the IP address of the default gateway•o_dns1: specifies the IP address of the primary DNS server•o_dns2: specifies the IP address of the secondary DNS server•o_dns3: specifies the IP address of the tertiary DNS server•o_domain: specifies the default domain name•o_ntp1: specifies the IP address of the primary NTP server•o_ntp2: specifies the IP address of the secondary NTP server•o_ntp3: specifies the IP address of the tertiary NTP server•o_tftp: specifies the IP address of the TFTP serverFigure 8-15 displays an example of code that configures the ZIP4x5 as a DHCP server.8.4.2.2 Configuring the ZIP4x5 as a DHCP Server from the Web InterfaceTo access the DHCP Web Interface panel, shown in figure 8-16, select Protected Settings |Network Setup | DHCP Server from the Home panel. The Enable Firewall, NAT, and VPN optionon the Network Setup panel must be selected to view this panel. Parameter descriptions are listedin the order that they appear on the web interface panel.DHCP server mode. Set this parameter to Enabled to configure the ZIP4x5 as a DHCP server. Setthis parameter to Disabled to disable server functions.[DHCP_SRV]mode=1start_ip=10.0.0.0end_ip=10.0.0.255o_mask=255.255.255.0lease_secs=3600o_router=10.1.32.5o_dns1=10.1.15.4o_domain=zultys.como_ntp1=10.1.18.2o_tftp=10.1.11.224Figure 8-15 Configuration File Instructions that configures the ZIP4x5 as a DHCP server.](https://usermanual.wiki/Zultys-Technologies/ZIP4X5.Manual-2/User-Guide-458734-Page-20.png)
![8. Firewalls, NATs, and VPNs 878.5.3 Setting the Firewalls through the Web InterfaceThe Web Interface instructions that configure the firewall is located on the Firewall panel shownin figure 8-19. To access the Firewall panel, select Protected Settings | Network Setup | Firewallfrom the Home panel. The Enable Firewall, NAT, and VPN option on the Network Setup panelmust be selected to view this panel.8.6 Static RoutesStatic routes allow you to specify a gateway for communicating with a device at a given IPaddress.[FW]lan_filters=NoWebAccessForBill#tcp#172.16.16.20#80:82#1wan_filters=AcceptFTP#tcp#172.16.16.54#21#1|AcceptSomeTelnet#172.16.16.45#23#1Figure 8-18 Configuration File Instructions that configures a FirewallFigure 8-19 Web Interface Firewall panel](https://usermanual.wiki/Zultys-Technologies/ZIP4X5.Manual-2/User-Guide-458734-Page-24.png)
![88ZIP4x5 User’s Manual8.6.1 Setting Up Static Routes through a Configuration FileThe FW section of the configuration file provides a static route statement that allows you toestablish multiple static routes:static_route = route1 | route2 | route3 |... |routen where:routex specifies an individual static route with the following syntax:routex = addressx#subnetx#gatewayxaddressx is the IP address of the remote networksubnetx is subnet mask of the remote networkgatewayx is the IP address that must be used to reach the target.8.6.2 Setting the Firewalls through the Web InterfaceThe Web Interface instruction that sets the static routes is located on the Static Routes panelshown in figure 8-21. To access this panel, select Protected Settings | Network Setup | StaticRoutes from the Home panel. The Enable Firewall, NAT, and VPN option on the Network Setuppanel must be selected to view this panel.[FW]static_routes=210.1.0.0#255.255.252.0#172.3.1.8|10.5.0.0#255.255.240.0#172.16.16.20Figure 8-20 Configuration File Instructions that configures Static RoutesFigure 8-21 Web Interface Static Route panel](https://usermanual.wiki/Zultys-Technologies/ZIP4X5.Manual-2/User-Guide-458734-Page-25.png)

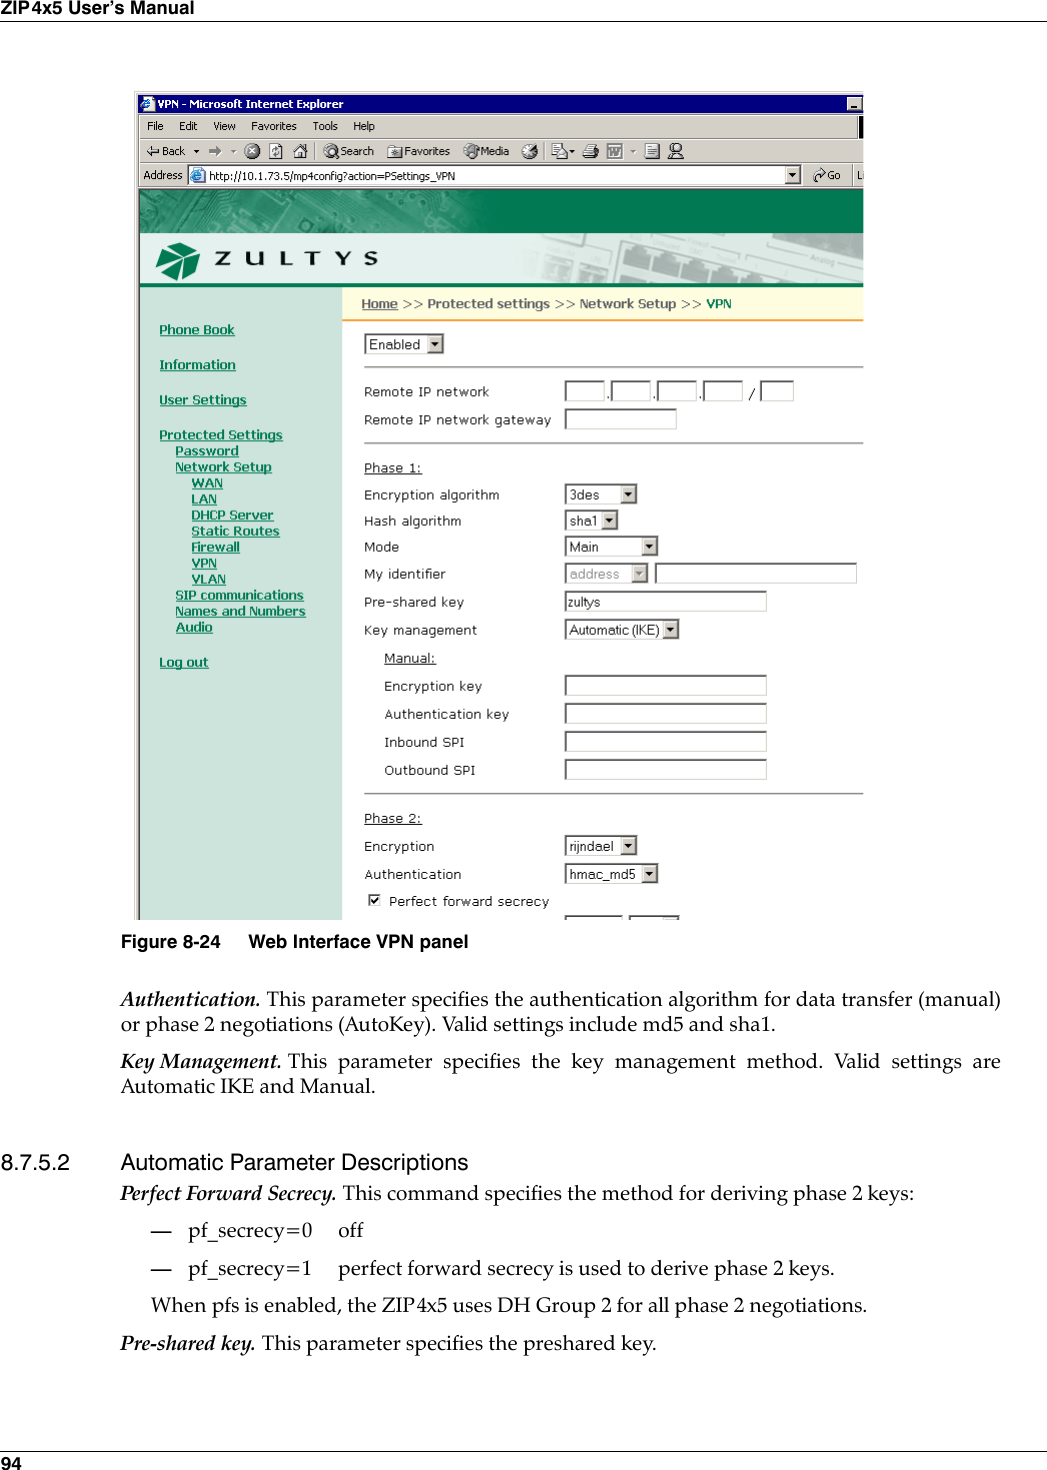
![8. Firewalls, NATs, and VPNs 938.7.4.3 Commands for Manual Keys Modeencrypt_key. The parameter specifies the encryption key used in manual key mode. Valid settingmust be double-quoted character string or a series of hexadecimal digits preceded by ‘0x’. Thisparameter is valid only if ipsec_ mode=2.authkey. This parameter specifies the authorization key when in manual key mode. Valid settingmust be double-quoted character string or a series of hexadecimal digits preceded by ‘0x’. Thisparameter is valid only if ipsec_ mode=2.inbound_spi. This specifies the Security Parameter Index which is a field used to identify theSecurity Association. It must be exactly 8 hex digits. The inbound SPI at the local end must matchthe outgoing SPI at the remote end. Valid only if ipsec_mode=2.outbound_spi. This specifies the Security Parameter Index which is a field used to identify theSecurity Association. It must be exactly 8 hex digits. The inbound SPI at the remote end mustmatch the outbound SPI at the local end. Valid only if ipsec_mode=2.Figure 8-23 displays an example of code that establishes a VPN tunnel.8.7.5 Establishing a VPN through the Web InterfaceThe Web Interface instruction that sets the Virtual Private Network is located on the VPN panelshown in figure 8-24. To access the VPN panel, select Protected Settings | Network Setup | VPNfrom the Home panel. The Enable Firewall, NAT, and VPN option on the Network Setup panelmust be selected to view this panel.Parameter descriptions are listed in order of appearance on the panel.8.7.5.1 General Parameter DescriptionsEnabled / Disabled: Select Enabled to establish a VPN from your ZIP4x5.Remote IP network. This command specifies the IP address of the remote LAN. Address format isnet/prefix.Remote IP network gateway. This command specifies the IP address of the remote VPN gateway.Encryption. This parameter specifies the encryption algorithm for data transfer (manual) or phase2 negotiations (AutoKey). Valid settings include aes and 3des.[FW]ipsec_mode=1remote_lan_net=172.16.0.0/20remote_wan_ip=180.1.0.50p1_encrypt_algo=rijndaelp1_hash_algo=sha1p1_mode=aggressivepsk=JUNKpf_secrecy=0key_lifetime=1 hourencrypt_algo=3desauth_algo=hmac_md5my_indent=“user_name@zultys.com”Figure 8-23 Configuration File Instructions that establishes and AutoKey IKE VPN.](https://usermanual.wiki/Zultys-Technologies/ZIP4X5.Manual-2/User-Guide-458734-Page-30.png)