ZyXEL Communications USG20W-VPN VPN Firewall User Manual Book
ZyXEL Communications Corporation VPN Firewall Book
Contents
- 1. Users Manual Part 1
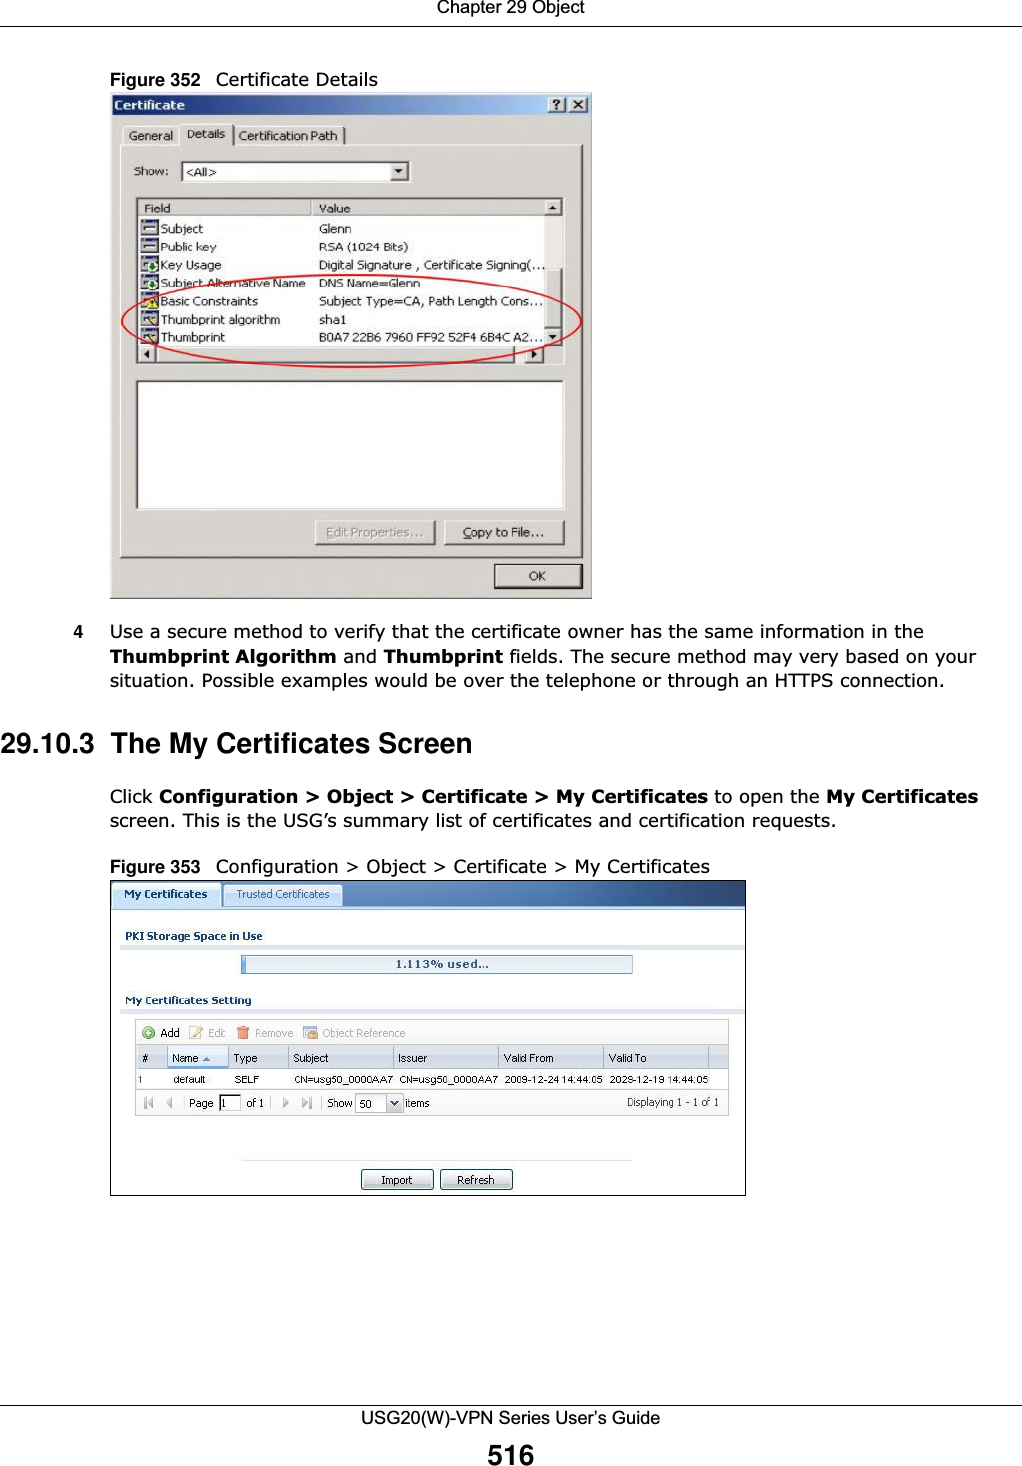
- 2. Users Manual Part 2
- 3. Users Manual Part 3
- 4. Users Manual Part 4
- 5. Users Manual Part 5
Users Manual Part 4
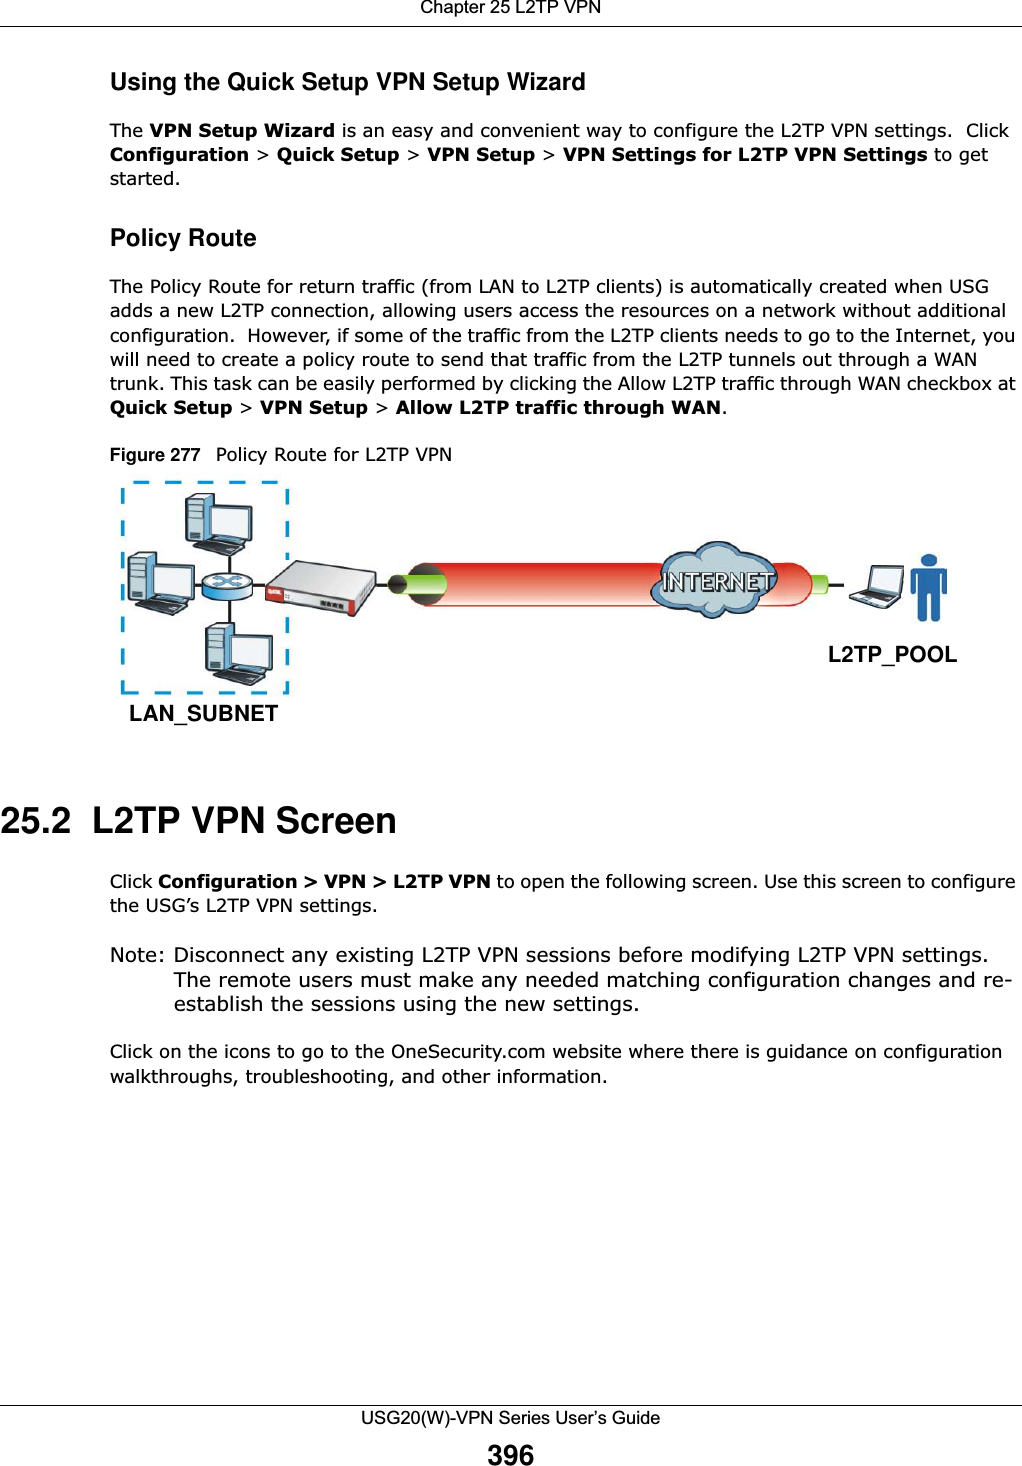
![Chapter 24 USG SecuExtender (Windows)USG20(W)-VPN Series User’s Guide393Figure 273 USG SecuExtender Log Example 24.4 Suspend and Resume the ConnectionWhen the USG SecuExtender icon in the system tray is green, you can right-click the icon and select Suspend Connection to keep the SSL VPN tunnel connected but not send any traffic through it until you right-click the icon and resume the connection.24.5 Stop the ConnectionRight-click the icon and select Stop Connection to disconnect the SSL VPN tunnel. 24.6 Uninstalling the USG SecuExtenderDo the following if you need to remove the USG SecuExtender.1Click start > All Programs > ZyXEL > USG SecuExtender > Uninstall ZyWALL SecuExtender.2In the confirmation screen, click Yes.################################################################################################[ 2009/03/12 13:35:50 ][SecuExtender Agent][DETAIL] Build Datetime: Feb 24 2009/10:25:07[ 2009/03/12 13:35:50 ][SecuExtender Agent][DEBUG] rasphone.pbk: C:\Documents and Settings\11746\rasphone.pbk[ 2009/03/12 13:35:50 ][SecuExtender Agent][DEBUG] SecuExtender.log: C:\Documents and Settings\11746\SecuExtender.log[ 2009/03/12 13:35:50 ][SecuExtender Agent][DETAIL] Check Parameters[ 2009/03/12 13:35:50 ][SecuExtender Agent][DETAIL] Connect to 172.23.31.19:443/10444[ 2009/03/12 13:35:50 ][SecuExtender Agent][DETAIL] Parameter is OK[ 2009/03/12 13:35:50 ][SecuExtender Agent][DETAIL] Checking System status...[ 2009/03/12 13:35:50 ][SecuExtender Agent][DETAIL] Checking service (first) ...[ 2009/03/12 13:35:50 ][SecuExtender Agent][DETAIL] SecuExtender Helper is running[ 2009/03/12 13:35:50 ][SecuExtender Agent][DETAIL] System is OK[ 2009/03/12 13:35:50 ][SecuExtender Agent][DEBUG] Connect to 2887196435/443[ 2009/03/12 13:35:50 ][SecuExtender Agent][DETAIL] Handshake LoopCounter: 0[ 2009/03/12 13:35:50 ][SecuExtender Agent][DETAIL] 611 bytes of handshake data received](https://usermanual.wiki/ZyXEL-Communications/USG20W-VPN.Users-Manual-Part-4/User-Guide-2904716-Page-3.png)

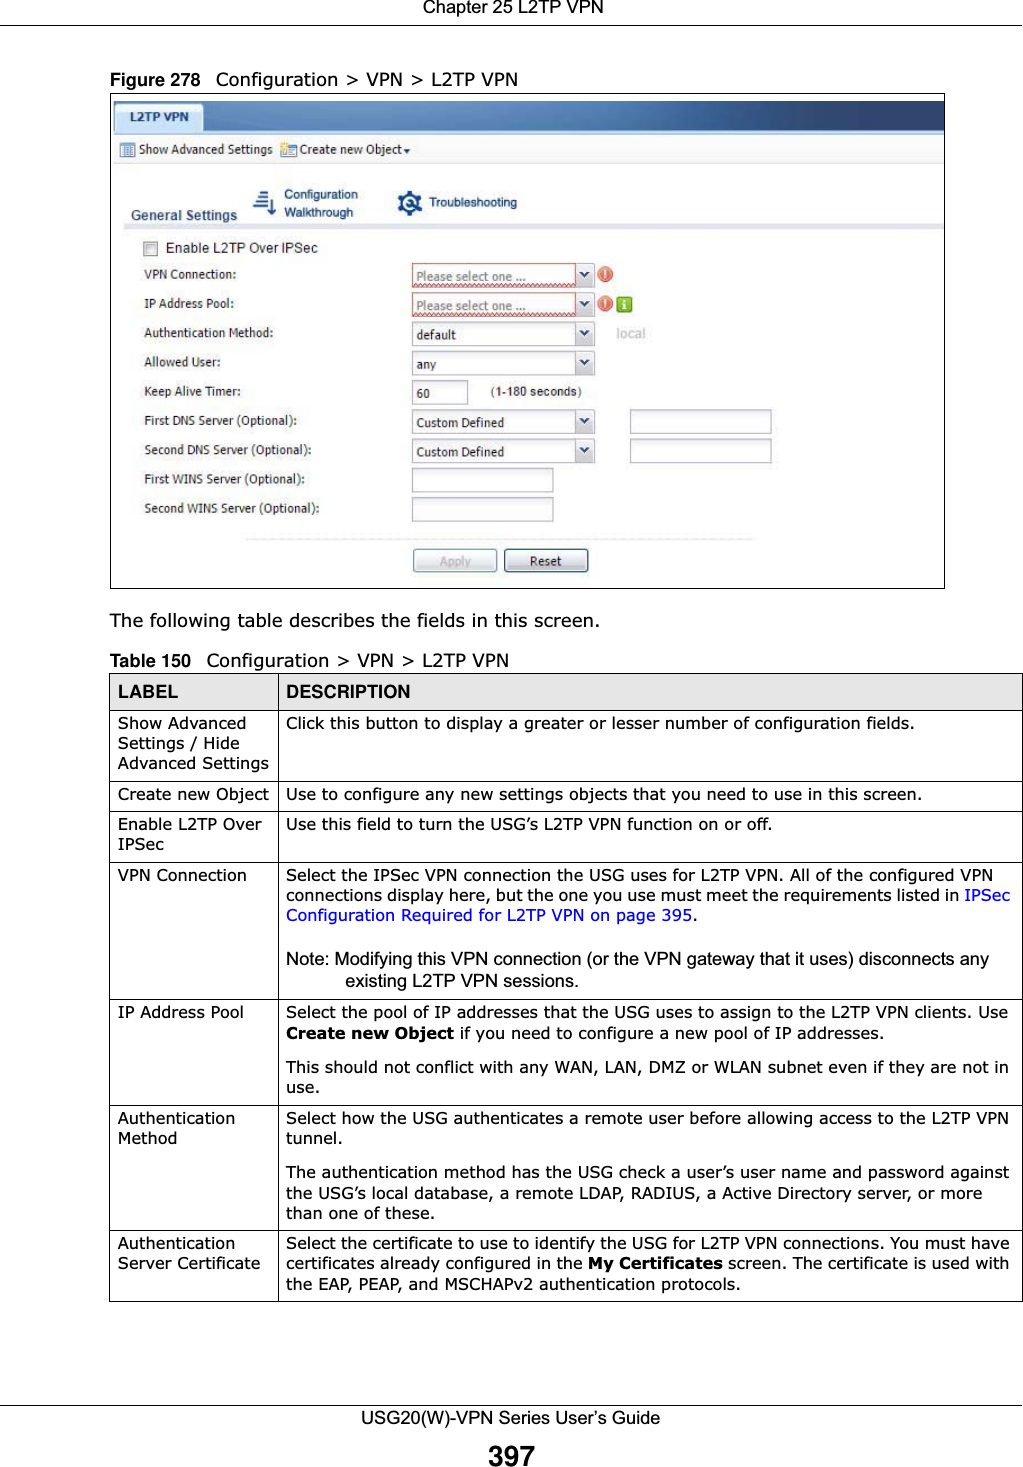

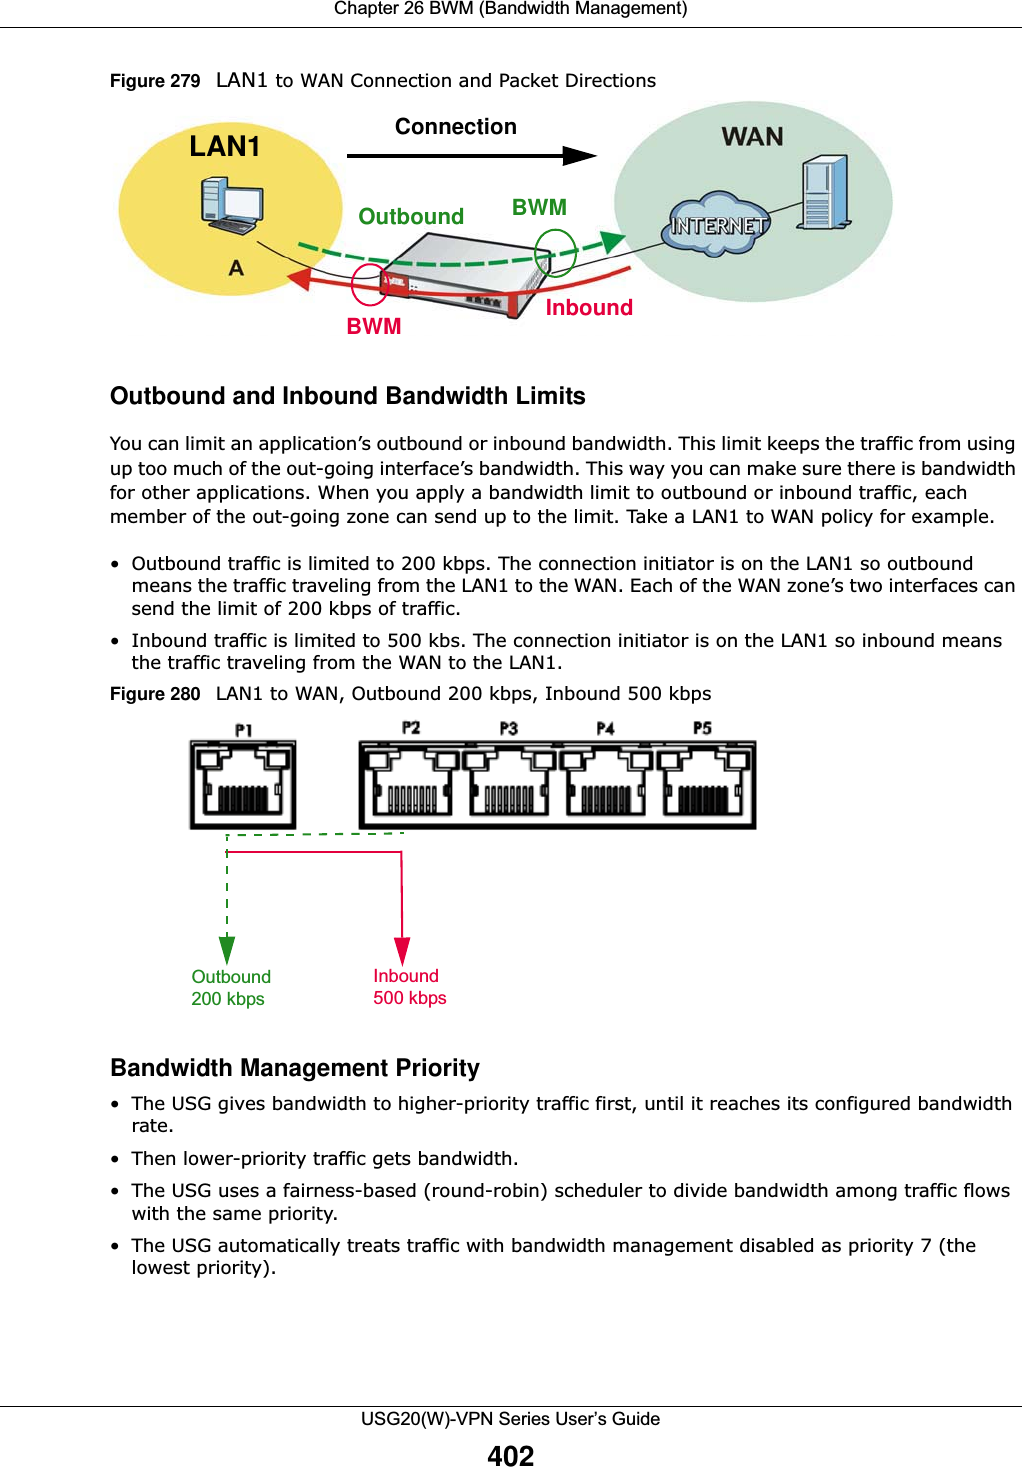
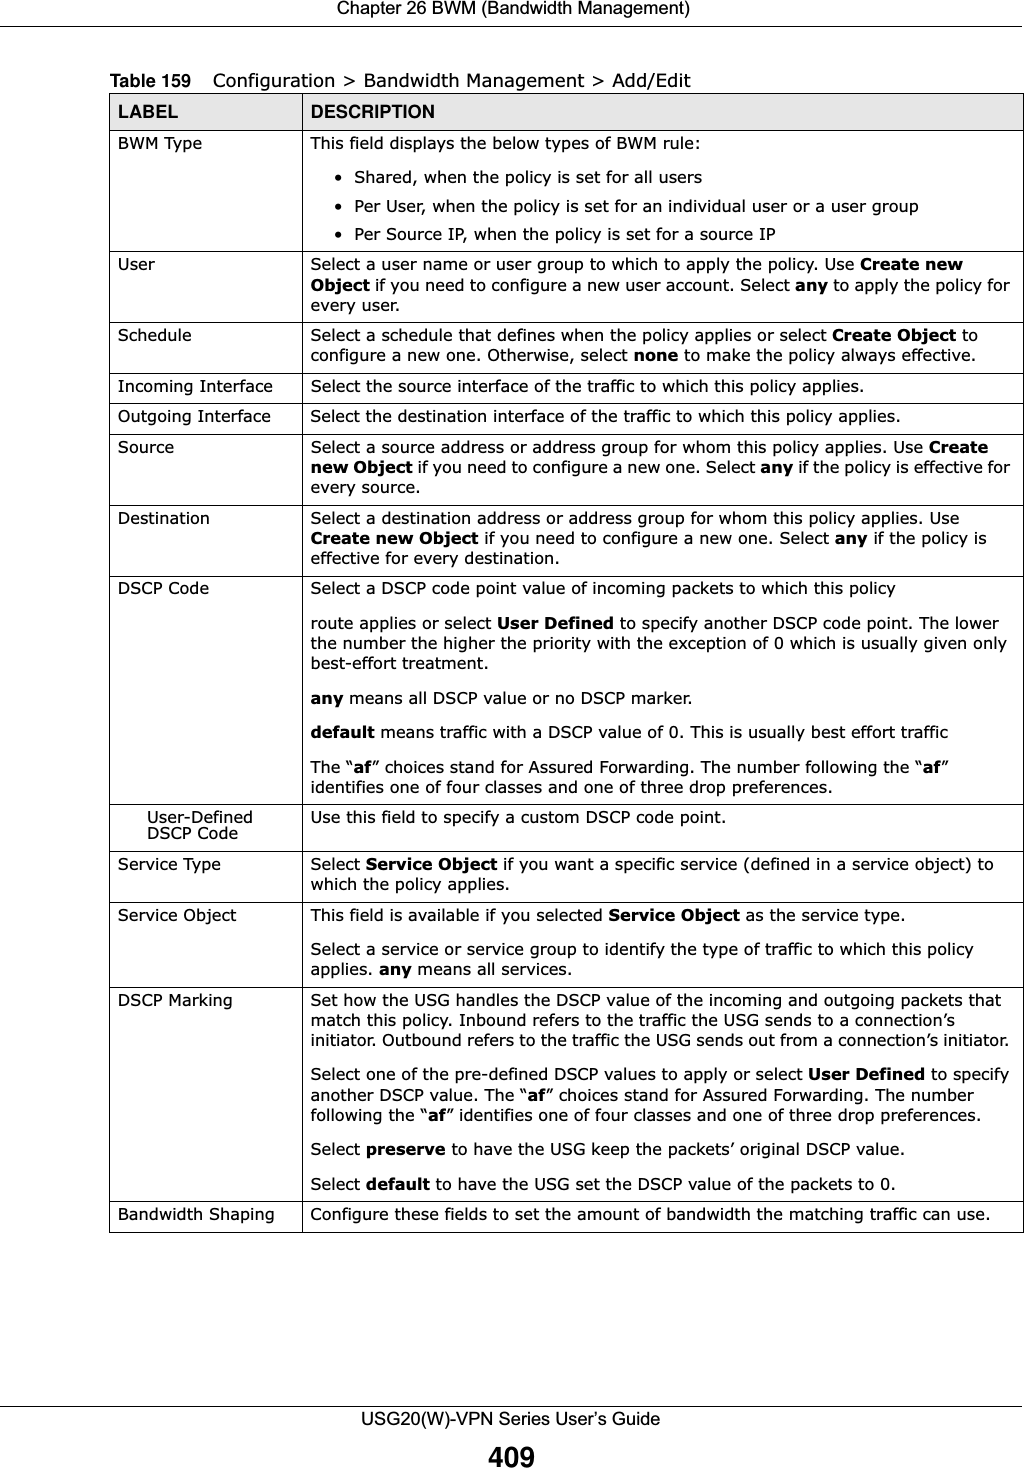
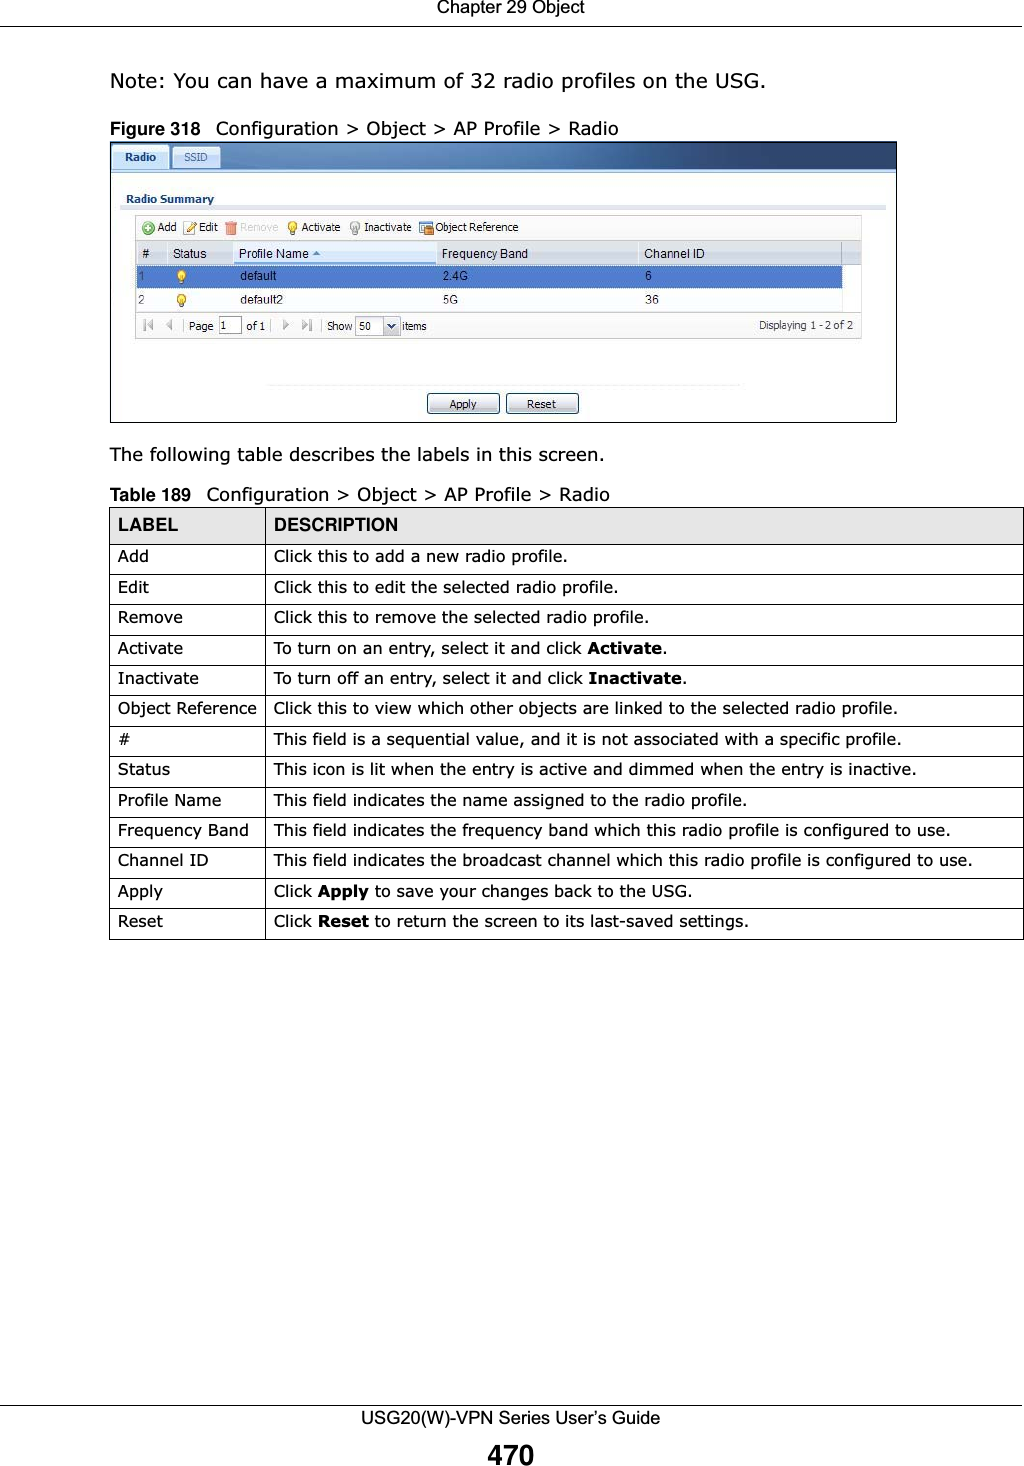
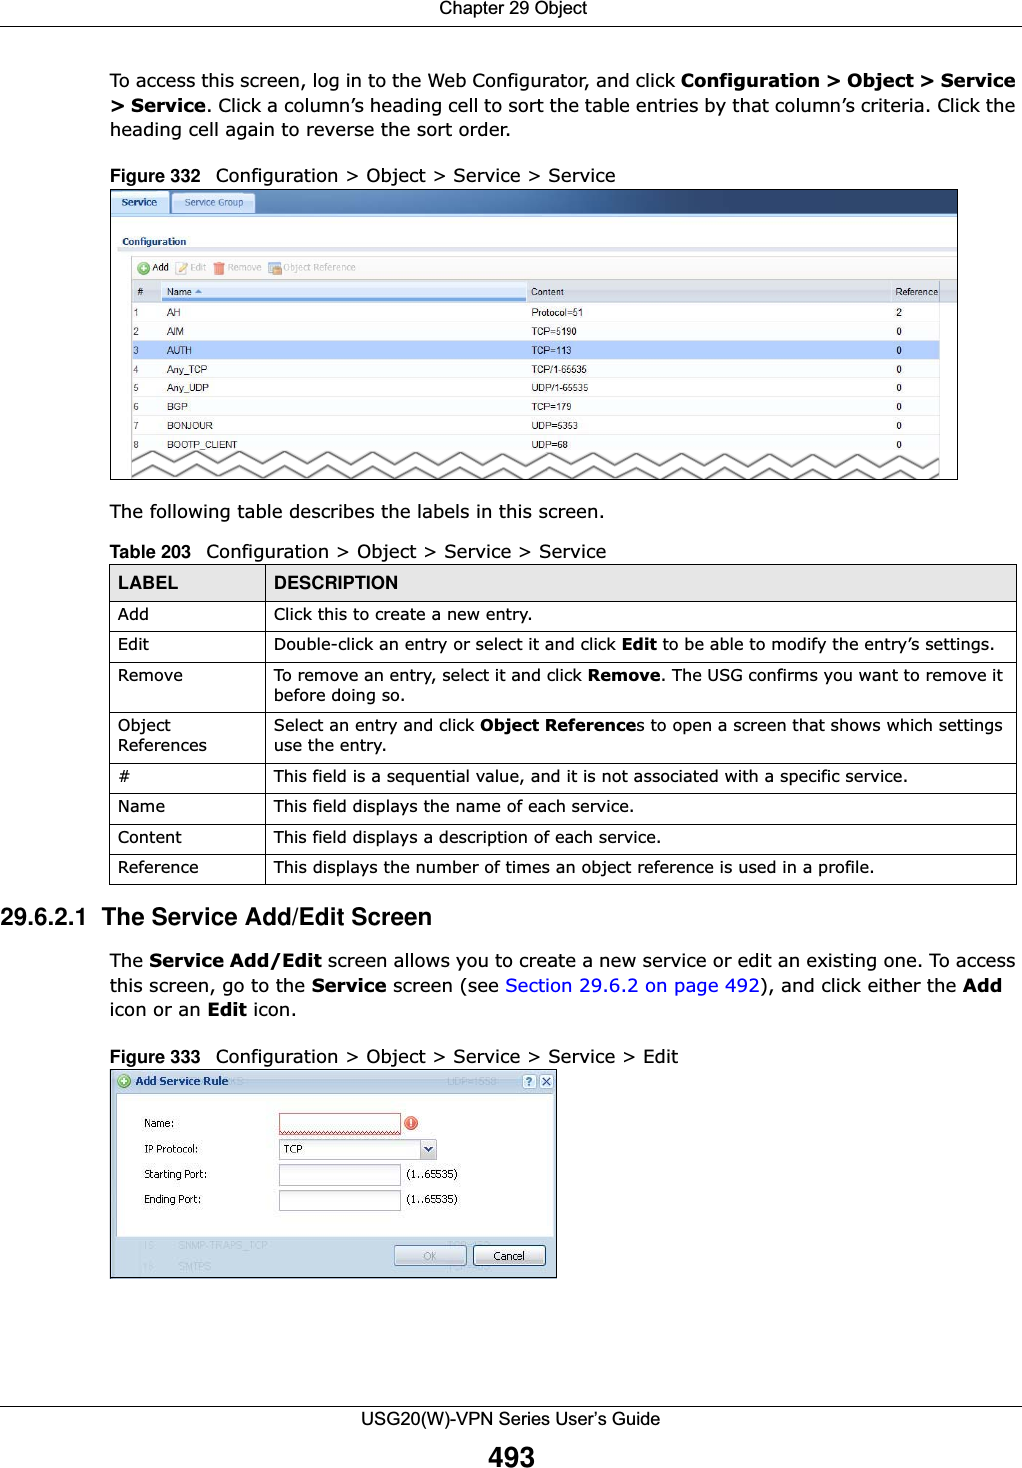
![Chapter 26 BWM (Bandwidth Management)USG20(W)-VPN Series User’s Guide405Figure 282 Configuration > Bandwidth ManagementThe following table describes the labels in this screen. See Section 26.2.1 on page 406 for more information as well. Table 155 Configuration > Bandwidth ManagementLABEL DESCRIPTIONEnable BWM Select this check box to activate management bandwidth. Add Click this to create a new entry. Select an entry and click Add to create a new entry after the selected entry.Edit Select an entry and click this to be able to modify it. Remove Select an entry and click this to delete it.Activate To turn on an entry, select it and click Activate.Inactivate To turn off an entry, select it and click Inactivate.Move To change an entry’s position in the numbered list, select it and click Move to display a field to type a number for where you want to put that entry and press [ENTER] to move the entry to the number that you typed.Status The activate (light bulb) icon is lit when the entry is active and dimmed when the entry is inactive. The status icon is not available for the default bandwidth management policy.Priority This field displays a sequential value for each bandwidth management policy and it is not associated with a specific setting.This field displays default for the default bandwidth management policy.Description This field displays additional information about this policy.BWM Type This field displays the below types of BWM:•Shared, when the policy is set for all matched traffic•Per User, when the policy is set for an individual user or a user group•Per-Source-IP, when the policy is set for a source IPUser This is the type of user account to which the policy applies. If any displays, the policy applies to all user accounts.Schedule This is the schedule that defines when the policy applies. none means the policy always applies.Incoming Interface This is the source interface of the traffic to which this policy applies.Outgoing Interface This is the destination interface of the traffic to which this policy applies.Source This is the source address or address group for whom this policy applies. If any displays, the policy is effective for every source.Destination This is the destination address or address group for whom this policy applies. If any displays, the policy is effective for every destination.](https://usermanual.wiki/ZyXEL-Communications/USG20W-VPN.Users-Manual-Part-4/User-Guide-2904716-Page-15.png)


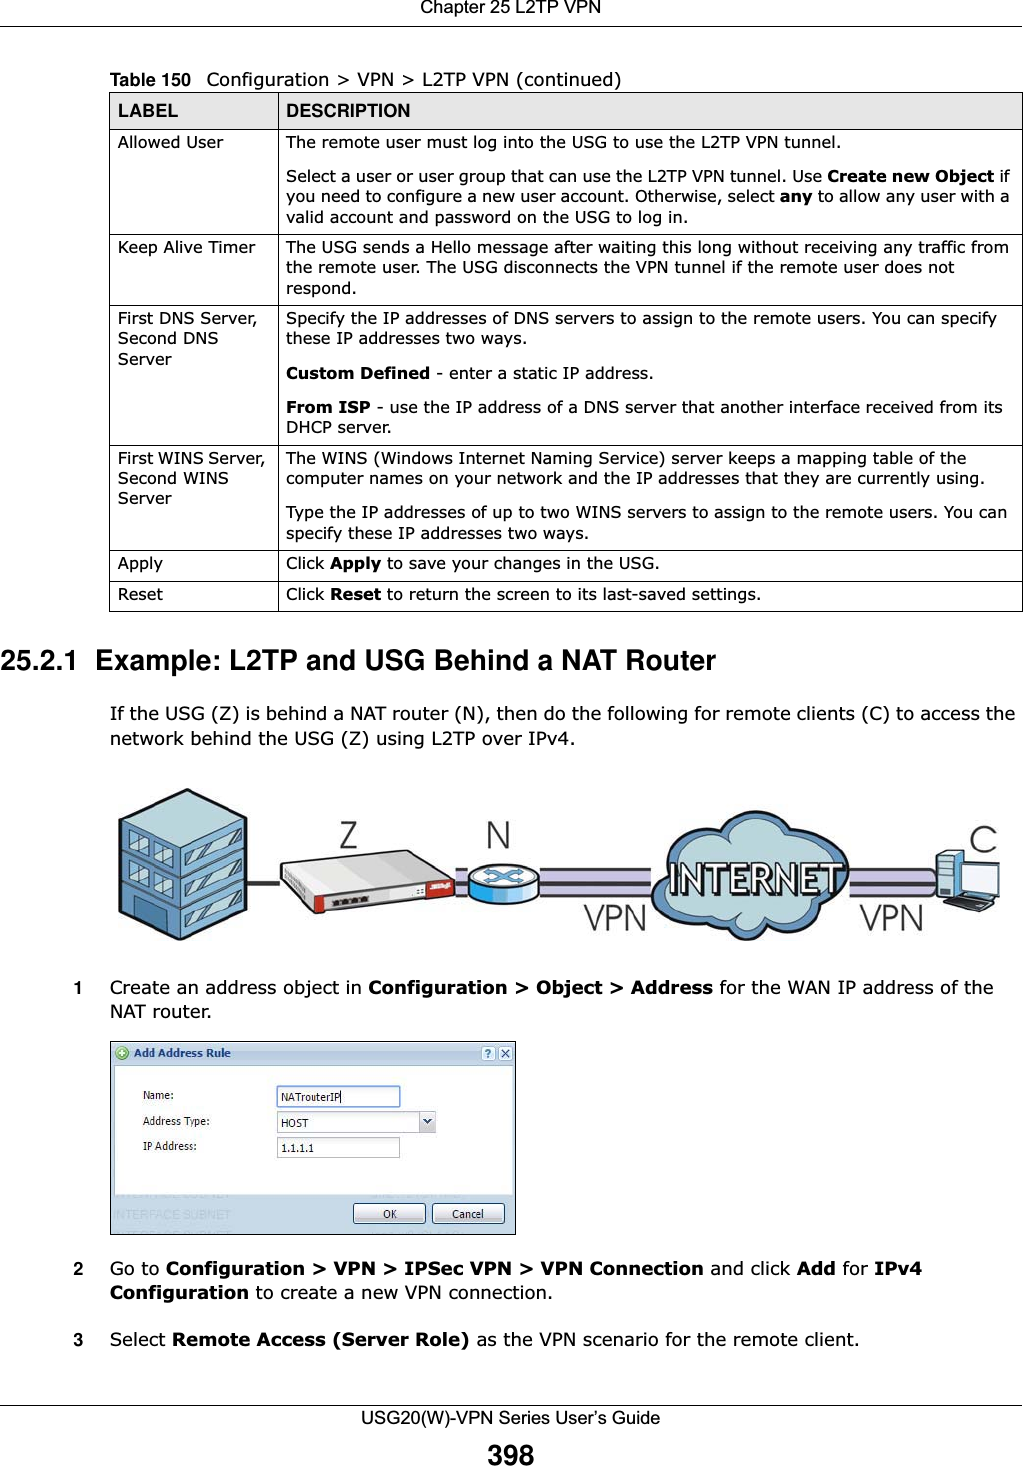
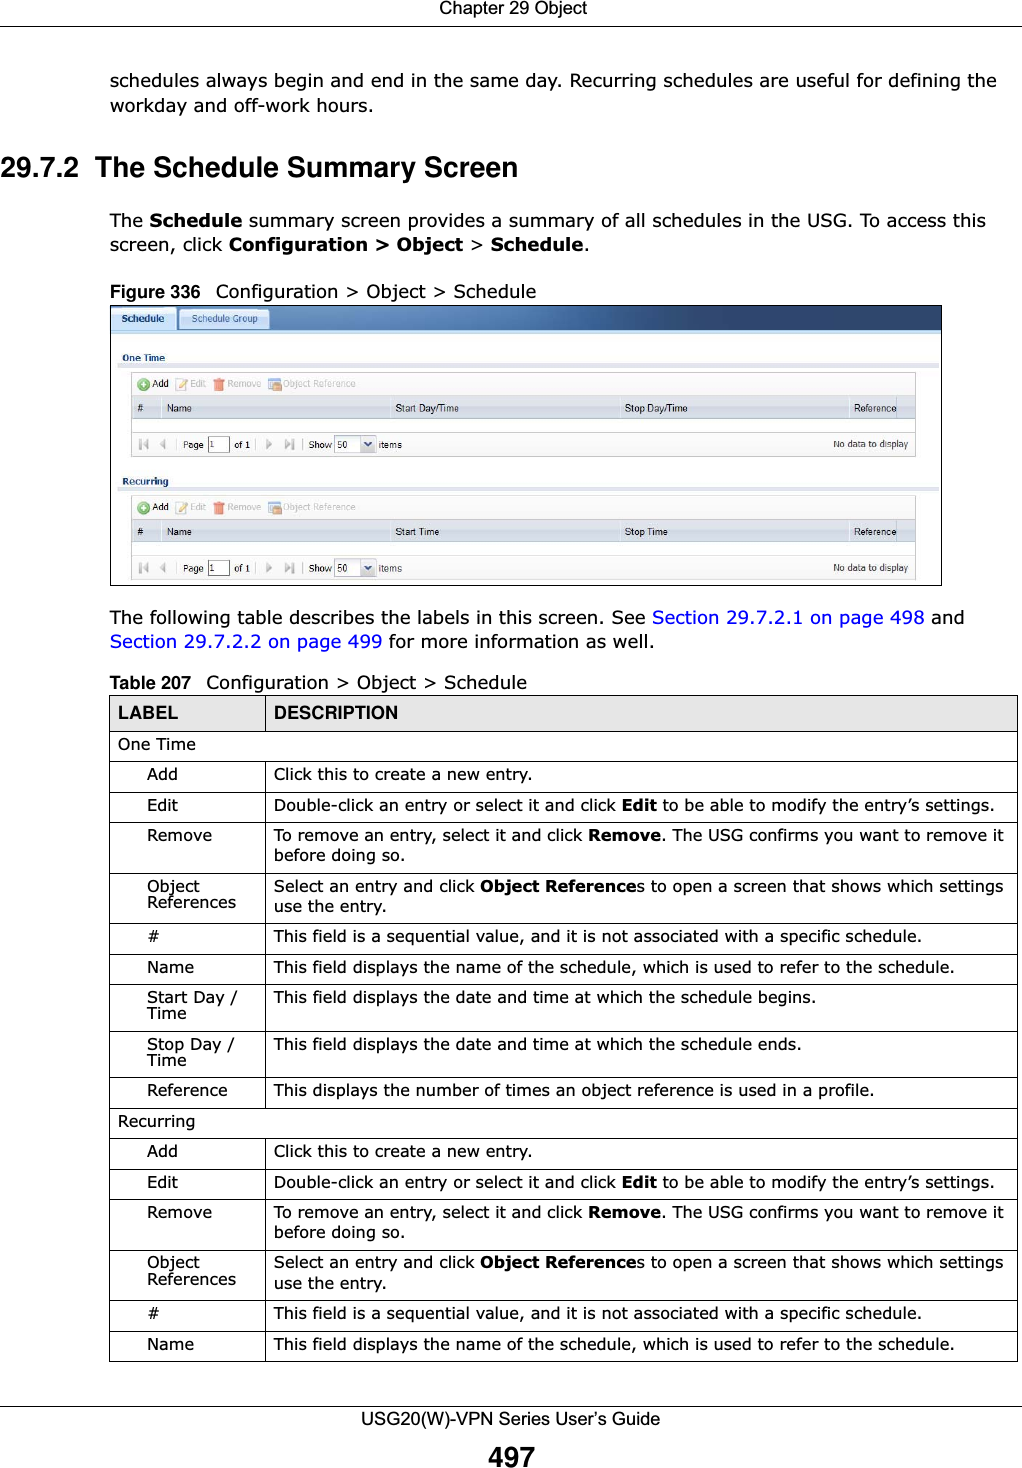
![Chapter 29 ObjectUSG20(W)-VPN Series User’s Guide458The user name can only contain the following characters:• Alphanumeric A-z 0-9 (there is no unicode support)• _ [underscores] •- [dashes]The first character must be alphabetical (A-Z a-z), an underscore (_), or a dash (-). Other limitations on user names are:• User names are case-sensitive. If you enter a user 'bob' but use 'BOB' when connecting via CIFS or FTP, it will use the account settings used for 'BOB' not ‘bob’.• User names have to be different than user group names.• Here are the reserved user names:To access this screen, go to the User screen (see Section 29.2.2 on page 457), and click either the Add icon or an Edit icon.Figure 308 Configuration > Object > User/Group > User > Add•adm •admin •any •bin •daemon•debug •devicehaecived•ftp •games •halt•ldap-users •lp •mail •news •nobody•operator •radius-users •root •shutdown •sshd•sync •uucp •zyxel](https://usermanual.wiki/ZyXEL-Communications/USG20W-VPN.Users-Manual-Part-4/User-Guide-2904716-Page-68.png)
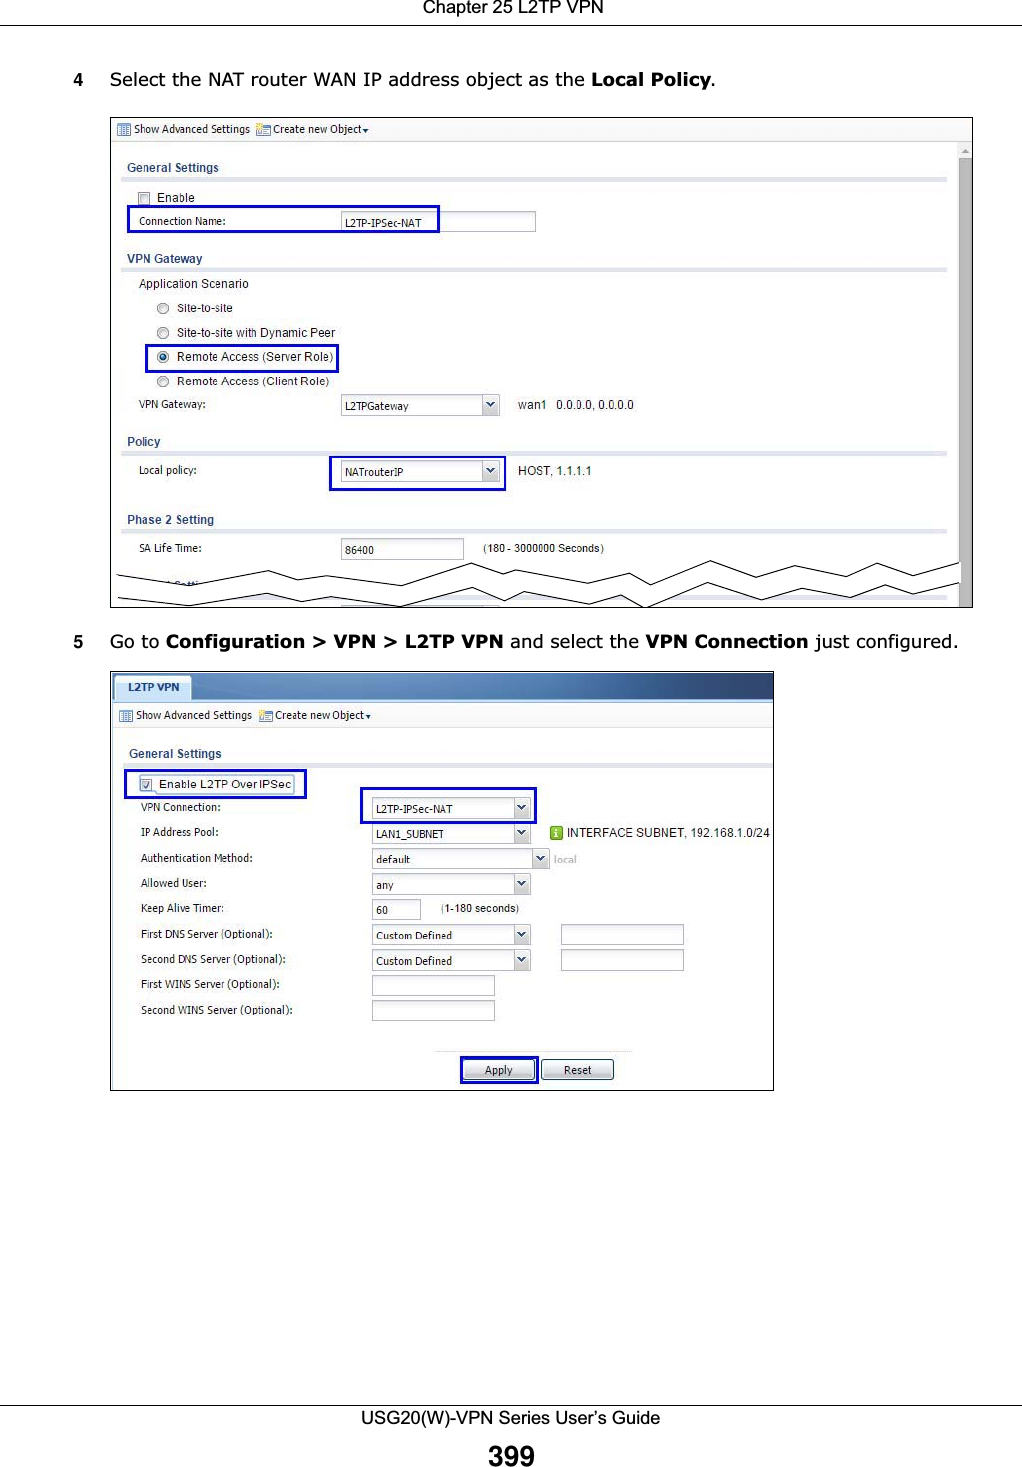
![Chapter 29 ObjectUSG20(W)-VPN Series User’s Guide461Figure 310 Configuration > Object > User/Group > Group > AddThe following table describes the labels in this screen. 29.2.4 User/Group Setting Screen The Setting screen controls default settings, login settings, lockout settings, and other user settings for the USG. You can also use this screen to specify when users must log in to the USG before it routes traffic for them.To access this screen, login to the Web Configurator, and click Configuration > Object > User/Group > Setting.Table 182 Configuration > Object > User/Group > Group > AddLABEL DESCRIPTIONName Type the name for this user group. You may use 1-31 alphanumeric characters, underscores(_), or dashes (-), but the first character cannot be a number. This value is case-sensitive. User group names have to be different than user names.Description Enter the description of the user group, if any. You can use up to 60 characters, punctuation marks, and spaces.Member List The Member list displays the names of the users and user groups that have been added to the user group. The order of members is not important. Select users and groups from the Available list that you want to be members of this group and move them to the Member list. You can double-click a single entry to move it or use the [Shift] or [Ctrl] key to select multiple entries and use the arrow button to move them. Move any members you do not want included to the Available list. OK Click OK to save your changes back to the USG.Cancel Click Cancel to exit this screen without saving your changes.](https://usermanual.wiki/ZyXEL-Communications/USG20W-VPN.Users-Manual-Part-4/User-Guide-2904716-Page-71.png)

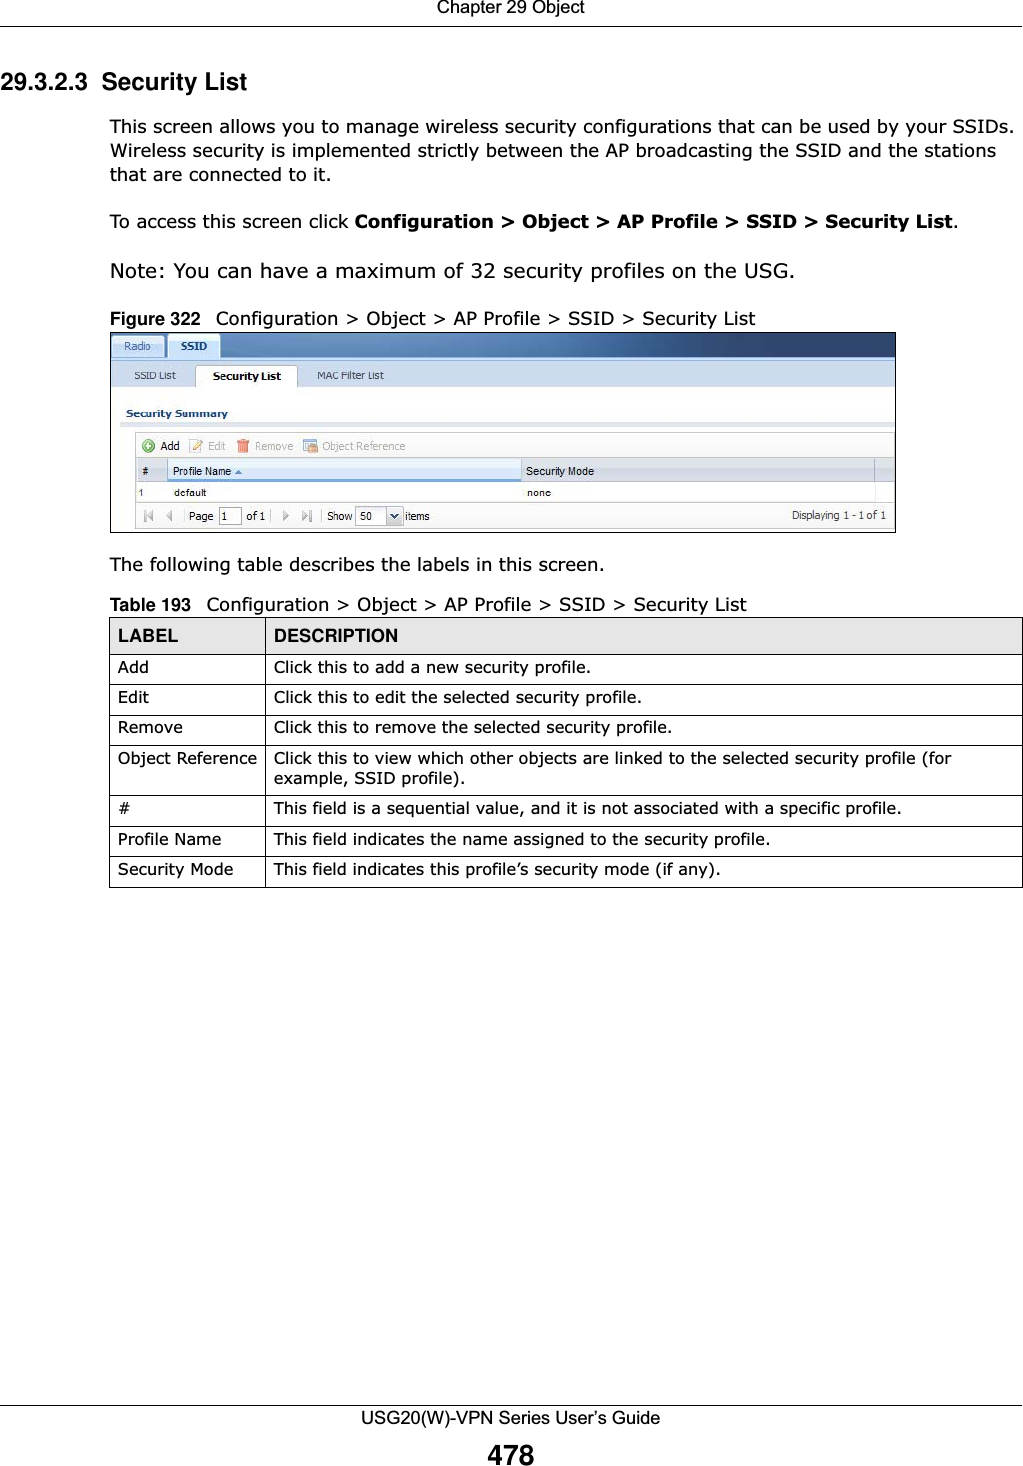

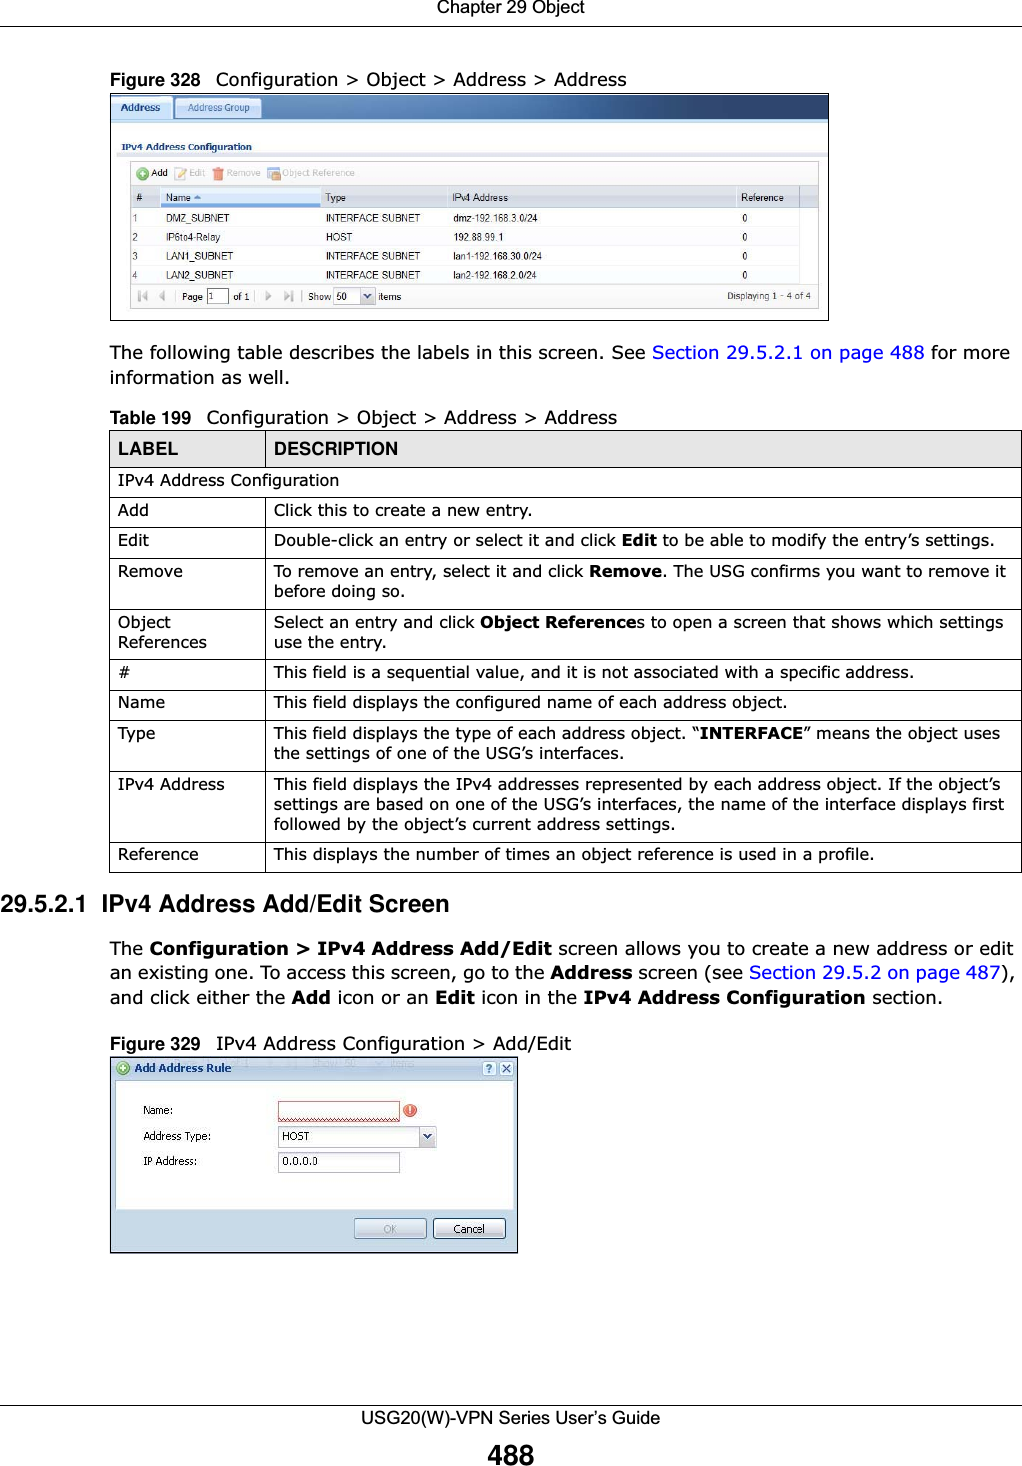
![Chapter 29 ObjectUSG20(W)-VPN Series User’s Guide491Figure 331 IPv4/IPv6 Address Group Configuration > Add The following table describes the labels in this screen. 29.6 Service OverviewUse service objects to define TCP applications, UDP applications, and ICMP messages. You can also create service groups to refer to multiple service objects in other features. •Use the Service screens (Section 29.6.2 on page 492) to view and configure the USG’s list of services and their definitions. •Use the Service Group screens (Section 29.6.2 on page 492) to view and configure the USG’s list of service groups. Table 202 IPv4/IPv6 Address Group Configuration > AddLABEL DESCRIPTIONName Enter a name for the address group. You may use 1-31 alphanumeric characters, underscores(_), or dashes (-), but the first character cannot be a number. This value is case-sensitive.Description This field displays the description of each address group, if any. You can use up to 60 characters, punctuation marks, and spaces.Member List The Member list displays the names of the address and address group objects that have been added to the address group. The order of members is not important. Select items from the Available list that you want to be members and move them to the Member list. You can double-click a single entry to move it or use the [Shift] or [Ctrl] key to select multiple entries and use the arrow button to move them. Move any members you do not want included to the Available list. OK Click OK to save your changes back to the USG.Cancel Click Cancel to exit this screen without saving your changes.](https://usermanual.wiki/ZyXEL-Communications/USG20W-VPN.Users-Manual-Part-4/User-Guide-2904716-Page-101.png)
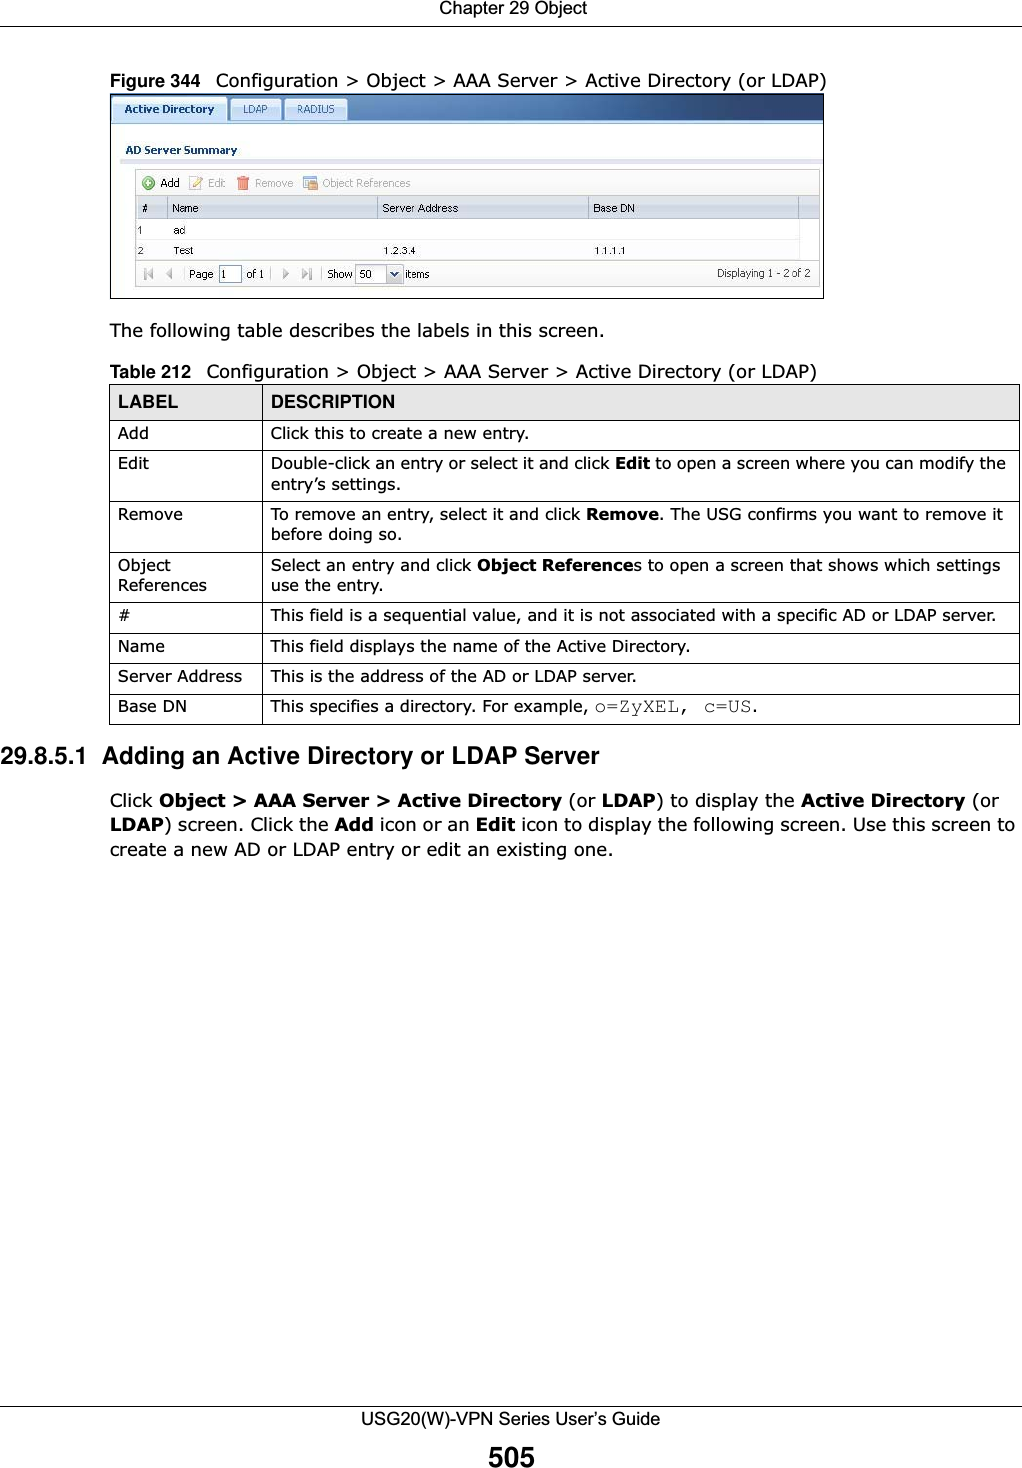
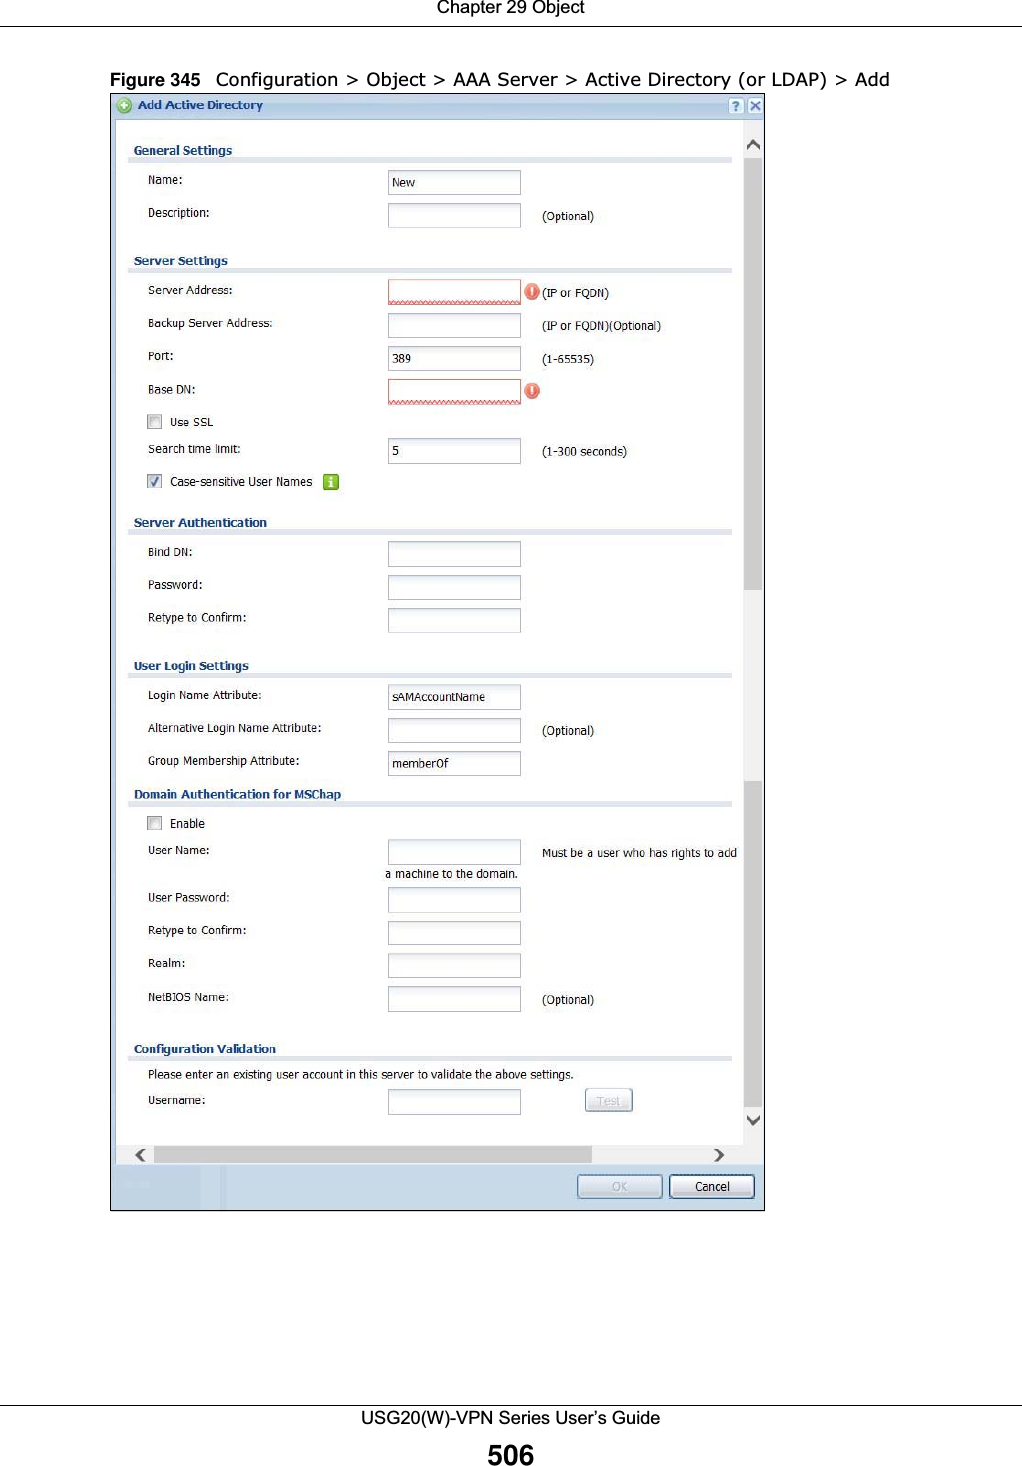
![Chapter 29 ObjectUSG20(W)-VPN Series User’s Guide496The following table describes the labels in this screen. 29.7 Schedule Overview Use schedules to set up one-time and recurring schedules for policy routes, security policies, and content filtering. The USG supports one-time and recurring schedules. One-time schedules are effective only once, while recurring schedules usually repeat. Both types of schedules are based on the current date and time in the USG. Note: Schedules are based on the USG’s current date and time.•Use the Schedule summary screen (Section 29.7.2 on page 497) to see a list of all schedules in the USG. •Use the One-Time Schedule Add/Edit screen (Section 29.7.2.1 on page 498) to create or edit a one-time schedule.•Use the Recurring Schedule Add/Edit screen (Section 29.7.2.2 on page 499) to create or edit a recurring schedule.• Use the Schedule Group screen (Section 29.7.3 on page 500) to merge individual schedule objects as one object.29.7.1 What You Need to KnowOne-time SchedulesOne-time schedules begin on a specific start date and time and end on a specific stop date and time. One-time schedules are useful for long holidays and vacation periods.Recurring SchedulesRecurring schedules begin at a specific start time and end at a specific stop time on selected days of the week (Sunday, Monday, Tuesday, Wednesday, Thursday, Friday, and Saturday). Recurring Table 206 Configuration > Object > Service > Service Group > EditLABEL DESCRIPTIONName Enter the name of the service group. You may use 1-31 alphanumeric characters, underscores(_), or dashes (-), but the first character cannot be a number. This value is case-sensitive.Description Enter a description of the service group, if any. You can use up to 60 printable ASCII characters.Member List The Member list displays the names of the service and service group objects that have been added to the service group. The order of members is not important. Select items from the Available list that you want to be members and move them to the Member list. You can double-click a single entry to move it or use the [Shift] or [Ctrl] key to select multiple entries and use the arrow button to move them. Move any members you do not want included to the Available list. OK Click OK to save your changes back to the USG.Cancel Click Cancel to exit this screen without saving your changes.](https://usermanual.wiki/ZyXEL-Communications/USG20W-VPN.Users-Manual-Part-4/User-Guide-2904716-Page-106.png)
![Chapter 29 ObjectUSG20(W)-VPN Series User’s Guide501Figure 340 Configuration > Schedule > Schedule Group > AddThe following table describes the fields in the above screen.29.8 AAA Server Overview You can use a AAA (Authentication, Authorization, Accounting) server to provide access control to your network. The AAA server can be a Active Directory, LDAP, or RADIUS server. Use the AAA Server screens to create and manage objects that contain settings for using AAA servers. You use Table 211 Configuration > Schedule > Schedule Group > AddLABEL DESCRIPTIONGroup MembersName Type the name used to refer to the recurring schedule. You may use 1-31 alphanumeric characters, underscores(_), or dashes (-), but the first character cannot be a number. This value is case-sensitive.Description Enter a description of the service group, if any. You can use up to 60 printable ASCII characters.Member List The Member list displays the names of the service and service group objects that have been added to the service group. The order of members is not important. Select items from the Available list that you want to be members and move them to the Member list. You can double-click a single entry to move it or use the [Shift] or [Ctrl] key to select multiple entries and use the arrow button to move them. Move any members you do not want included to the Available list. OK Click OK to save your changes back to the USG.Cancel Click Cancel to exit this screen without saving your changes.](https://usermanual.wiki/ZyXEL-Communications/USG20W-VPN.Users-Manual-Part-4/User-Guide-2904716-Page-111.png)

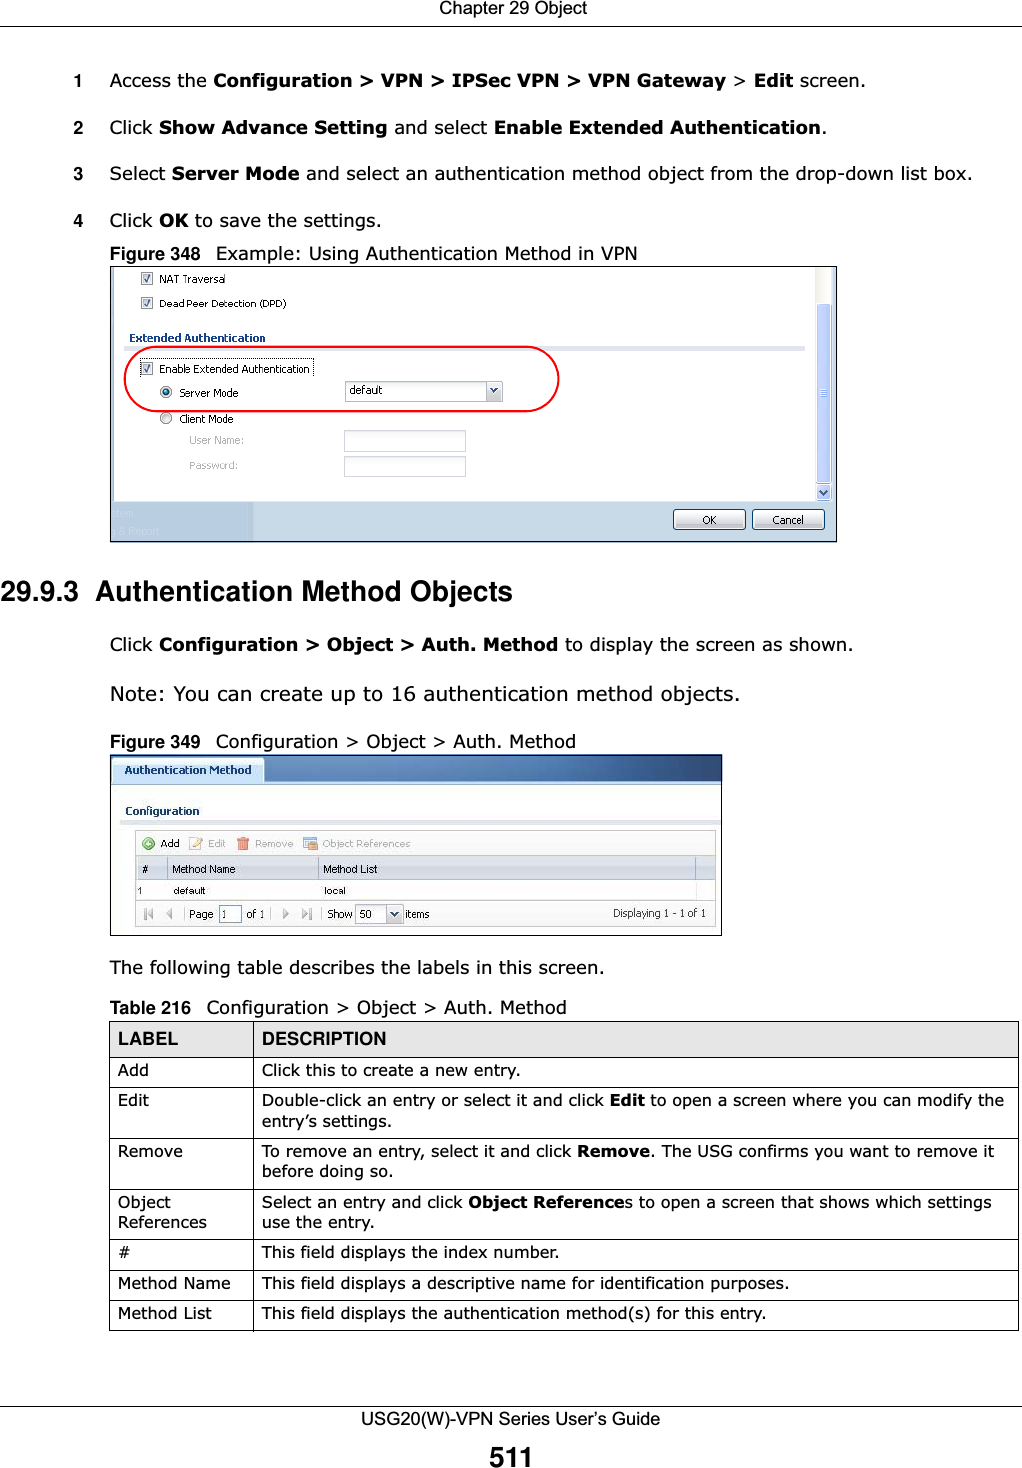
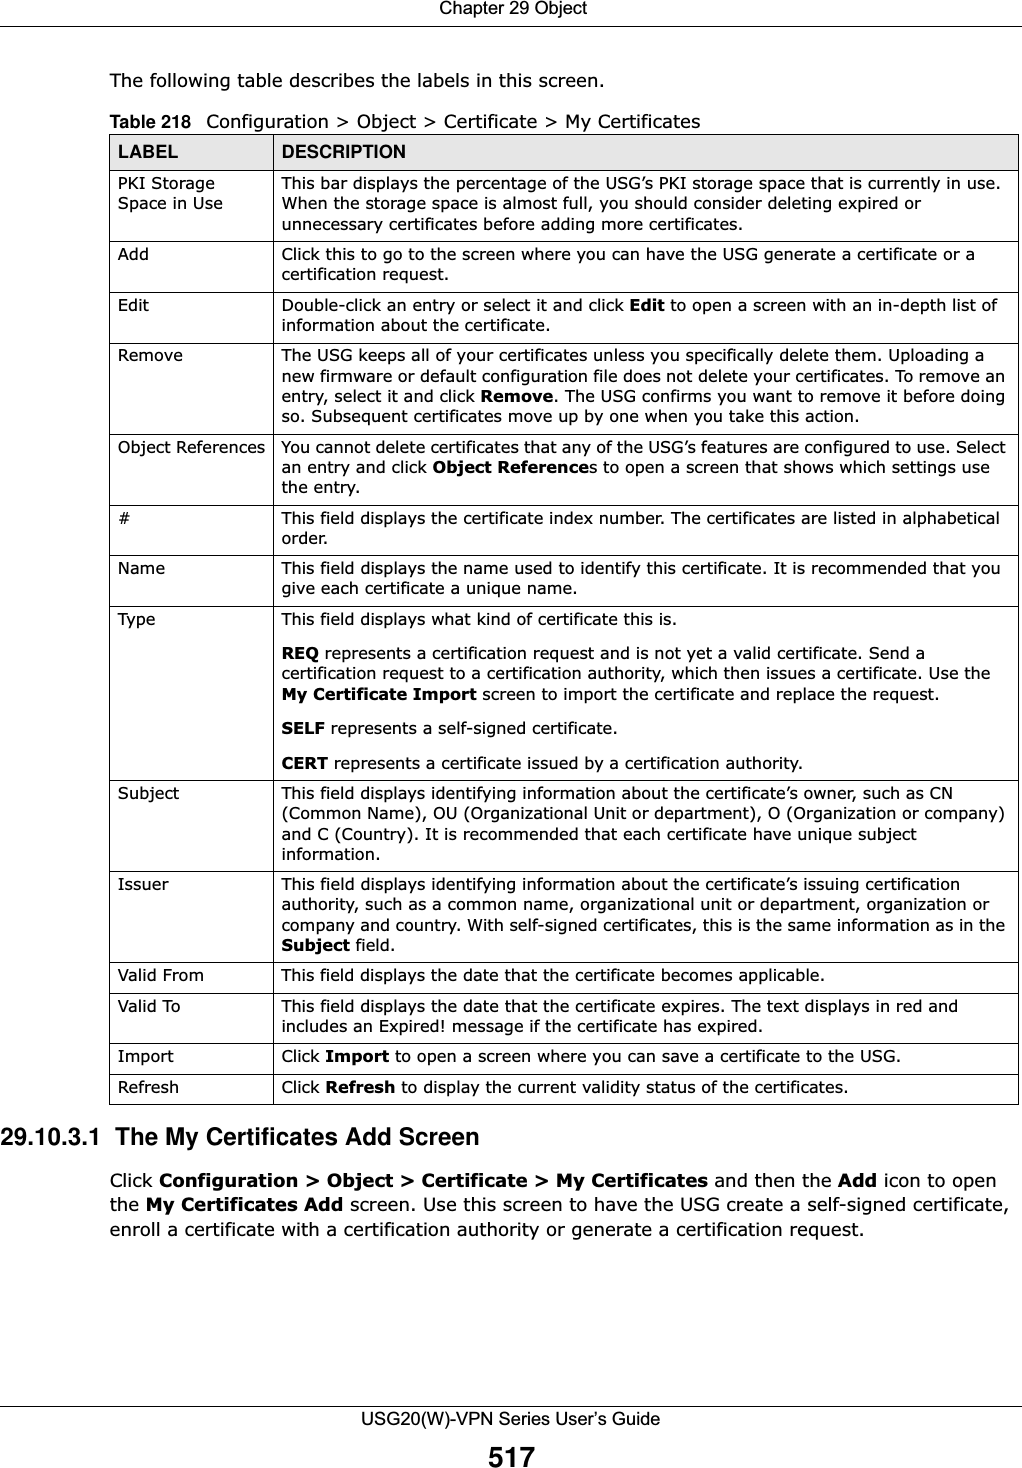
![Chapter 29 ObjectUSG20(W)-VPN Series User’s Guide51329.10 Certificate OverviewThe USG can use certificates (also called digital IDs) to authenticate users. Certificates are based on public-private key pairs. A certificate contains the certificate owner’s identity and public key. Certificates provide a way to exchange public keys for use in authentication. •Use the My Certificates screens (see Section 29.10.3 on page 516 to Section 29.10.3.3 on page 522) to generate and export self-signed certificates or certification requests and import the CA-signed certificates.•Use the Trusted Certificates screens (see Section 29.10.4 on page 523 to Section 29.10.4.2 on page 527) to save CA certificates and trusted remote host certificates to the USG. The USG trusts any valid certificate that you have imported as a trusted certificate. It also trusts any valid certificate signed by any of the certificates that you have imported as a trusted certificate. 29.10.1 What You Need to KnowWhen using public-key cryptology for authentication, each host has two keys. One key is public and can be made openly available. The other key is private and must be kept secure. These keys work like a handwritten signature (in fact, certificates are often referred to as “digital signatures”). Only you can write your signature exactly as it should look. When people know what your signature looks like, they can verify whether something was signed by you, or by someone else. In the same way, your private key “writes” your digital signature and your public key allows people to verify whether data was signed by you, or by someone else. This process works as follows.Remove To remove an entry, select it and click Remove. The USG confirms you want to remove it before doing so.Move To change a method’s position in the numbered list, select the method and click Move to display a field to type a number for where you want to put it and press [ENTER] to move the rule to the number that you typed.The ordering of your methods is important as USG authenticates the users using the authentication methods in the order they appear in this screen.# This field displays the index number.Method List Select a server object from the drop-down list box. You can create a server object in the AAA Server screen. The USG authenticates the users using the databases (in the local user database or the external authentication server) in the order they appear in this screen. If two accounts with the same username exist on two authentication servers you specify, the USG does not continue the search on the second authentication server when you enter the username and password that doesn’t match the one on the first authentication server. OK Click OK to save the changes. Cancel Click Cancel to discard the changes. Table 217 Configuration > Object > Auth. Method > Add (continued)LABEL DESCRIPTION](https://usermanual.wiki/ZyXEL-Communications/USG20W-VPN.Users-Manual-Part-4/User-Guide-2904716-Page-123.png)
![Chapter 29 ObjectUSG20(W)-VPN Series User’s Guide518Figure 354 Configuration > Object > Certificate > My Certificates > AddThe following table describes the labels in this screen. Table 219 Configuration > Object > Certificate > My Certificates > AddLABEL DESCRIPTIONName Type a name to identify this certificate. You can use up to 31 alphanumeric and ;‘~!@#$%^&()_+[]{}’,.=- characters.Subject Information Use these fields to record information that identifies the owner of the certificate. You do not have to fill in every field, although you must specify a Host IP Address, Host IPv6 Address, Host Domain Name, or E-Mail. The certification authority may add fields (such as a serial number) to the subject information when it issues a certificate. It is recommended that each certificate have unique subject information.Select a radio button to identify the certificate’s owner by IP address, domain name or e-mail address. Type the IP address (in dotted decimal notation), domain name or e-mail address in the field provided. The domain name or e-mail address is for identification purposes only and can be any string.A domain name can be up to 255 characters. You can use alphanumeric characters, the hyphen and periods.An e-mail address can be up to 63 characters. You can use alphanumeric characters, the hyphen, the @ symbol, periods and the underscore.Organizational Unit Identify the organizational unit or department to which the certificate owner belongs. You can use up to 31 characters. You can use alphanumeric characters, the hyphen and the underscore.](https://usermanual.wiki/ZyXEL-Communications/USG20W-VPN.Users-Manual-Part-4/User-Guide-2904716-Page-128.png)
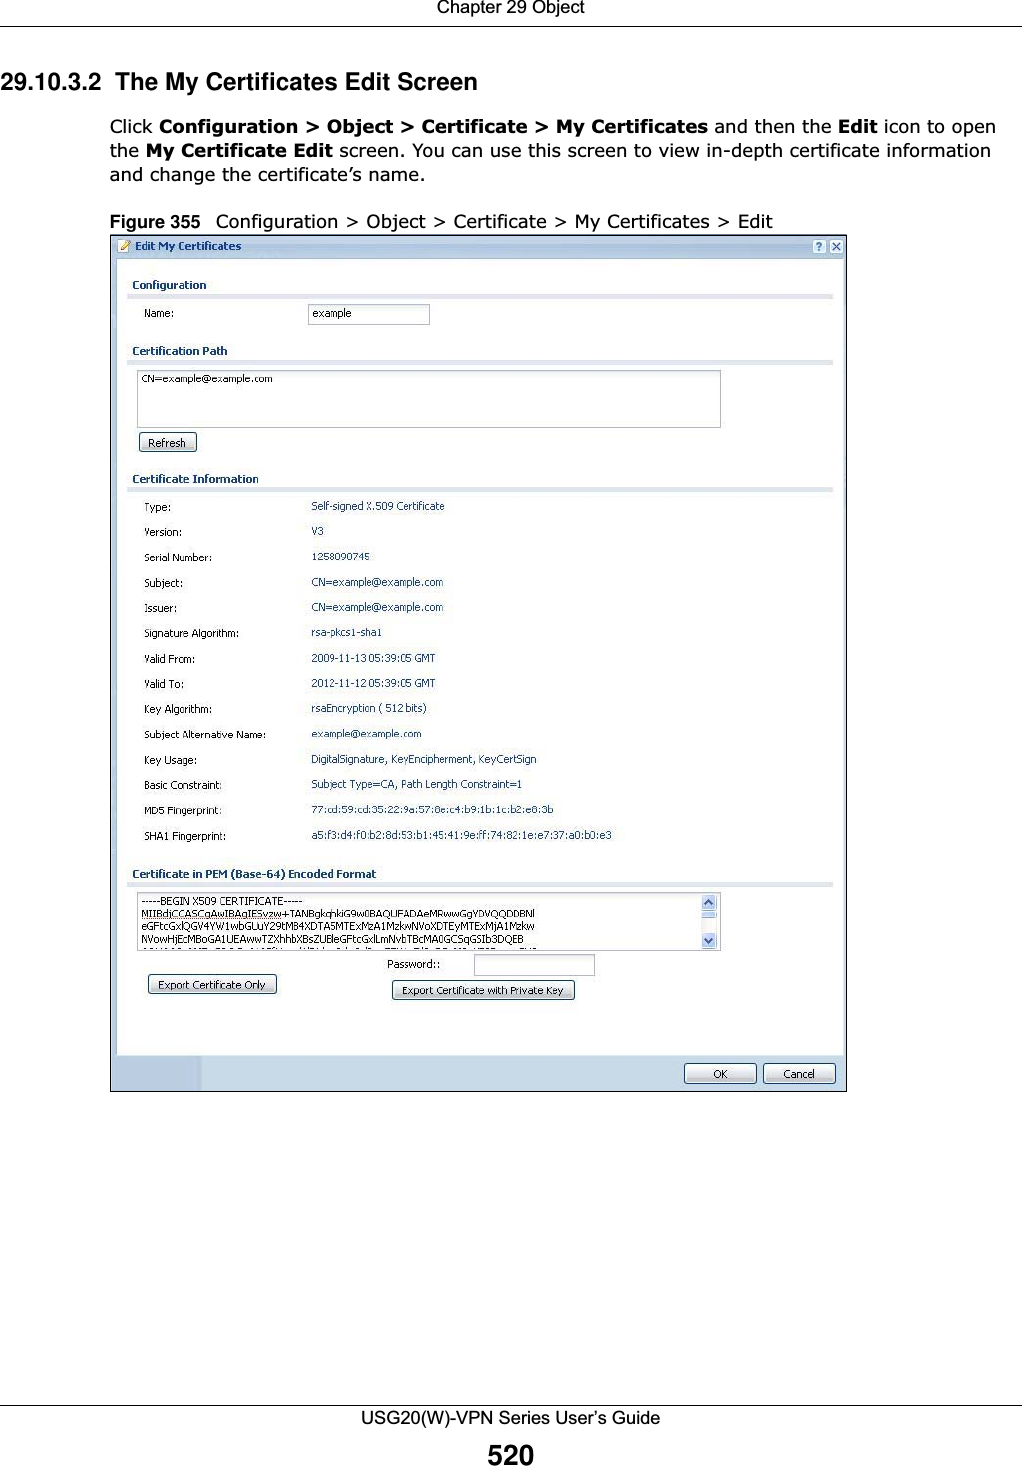
![Chapter 29 ObjectUSG20(W)-VPN Series User’s Guide521The following table describes the labels in this screen. Table 220 Configuration > Object > Certificate > My Certificates > EditLABEL DESCRIPTIONName This field displays the identifying name of this certificate. You can use up to 31 alphanumeric and ;‘~!@#$%^&()_+[]{}’,.=- characters.Certification Path This field displays for a certificate, not a certification request.Click the Refresh button to have this read-only text box display the hierarchy of certification authorities that validate the certificate (and the certificate itself).If the issuing certification authority is one that you have imported as a trusted certification authority, it may be the only certification authority in the list (along with the certificate itself). If the certificate is a self-signed certificate, the certificate itself is the only one in the list. The USG does not trust the certificate and displays “Not trusted” in this field if any certificate on the path has expired or been revoked.Refresh Click Refresh to display the certification path.Certificate InformationThese read-only fields display detailed information about the certificate. Type This field displays general information about the certificate. CA-signed means that a Certification Authority signed the certificate. Self-signed means that the certificate’s owner signed the certificate (not a certification authority). “X.509” means that this certificate was created and signed according to the ITU-T X.509 recommendation that defines the formats for public-key certificates.Version This field displays the X.509 version number. Serial Number This field displays the certificate’s identification number given by the certification authority or generated by the USG.Subject This field displays information that identifies the owner of the certificate, such as Common Name (CN), Organizational Unit (OU), Organization (O), State (ST), and Country (C).Issuer This field displays identifying information about the certificate’s issuing certification authority, such as Common Name, Organizational Unit, Organization and Country. With self-signed certificates, this is the same as the Subject Name field.“none” displays for a certification request. Signature Algorithm This field displays the type of algorithm that was used to sign the certificate. The USG uses rsa-pkcs1-sha1 (RSA public-private key encryption algorithm and the SHA1 hash algorithm). Some certification authorities may use rsa-pkcs1-md5 (RSA public-private key encryption algorithm and the MD5 hash algorithm).Valid From This field displays the date that the certificate becomes applicable. “none” displays for a certification request. Valid To This field displays the date that the certificate expires. The text displays in red and includes an Expired! message if the certificate has expired. “none” displays for a certification request. Key Algorithm This field displays the type of algorithm that was used to generate the certificate’s key pair (the USG uses RSA encryption) and the length of the key set in bits (1024 bits for example).Subject Alternative NameThis field displays the certificate owner‘s IP address (IP), domain name (DNS) or e-mail address (EMAIL). Key Usage This field displays for what functions the certificate’s key can be used. For example, “DigitalSignature” means that the key can be used to sign certificates and “KeyEncipherment” means that the key can be used to encrypt text.Basic Constraint This field displays general information about the certificate. For example, Subject Type=CA means that this is a certification authority’s certificate and “Path Length Constraint=1” means that there can only be one certification authority in the certificate’s path. This field does not display for a certification request.](https://usermanual.wiki/ZyXEL-Communications/USG20W-VPN.Users-Manual-Part-4/User-Guide-2904716-Page-131.png)

![Chapter 29 ObjectUSG20(W)-VPN Series User’s Guide526The following table describes the labels in this screen. Table 223 Configuration > Object > Certificate > Trusted Certificates > EditLABEL DESCRIPTIONName This field displays the identifying name of this certificate. You can change the name. You can use up to 31 alphanumeric and ;‘~!@#$%^&()_+[]{}’,.=- characters.Certification Path Click the Refresh button to have this read-only text box display the end entity’s certificate and a list of certification authority certificates that shows the hierarchy of certification authorities that validate the end entity’s certificate. If the issuing certification authority is one that you have imported as a trusted certificate, it may be the only certification authority in the list (along with the end entity’s own certificate). The USG does not trust the end entity’s certificate and displays “Not trusted” in this field if any certificate on the path has expired or been revoked.Refresh Click Refresh to display the certification path.Enable X.509v3 CRL Distribution Points and OCSP checking Select this check box to turn on/off certificate revocation. When it is turned on, the USG validates a certificate by getting Certificate Revocation List (CRL) through HTTP or LDAP (can be configured after selecting the LDAP Server check box) and online responder (can be configured after selecting the OCSP Server check box).OCSP Server Select this check box if the directory server uses OCSP (Online Certificate Status Protocol).URL Type the protocol, IP address and path name of the OCSP server. ID The USG may need to authenticate itself in order to assess the OCSP server. Type the login name (up to 31 ASCII characters) from the entity maintaining the server (usually a certification authority).Password Type the password (up to 31 ASCII characters) from the entity maintaining the OCSP server (usually a certification authority).LDAP Server Select this check box if the directory server uses LDAP (Lightweight Directory Access Protocol). LDAP is a protocol over TCP that specifies how clients access directories of certificates and lists of revoked certificates.Address Type the IP address (in dotted decimal notation) of the directory server. Port Use this field to specify the LDAP server port number. You must use the same server port number that the directory server uses. 389 is the default server port number for LDAP.ID The USG may need to authenticate itself in order to assess the CRL directory server. Type the login name (up to 31 ASCII characters) from the entity maintaining the server (usually a certification authority).Password Type the password (up to 31 ASCII characters) from the entity maintaining the CRL directory server (usually a certification authority).Certificate InformationThese read-only fields display detailed information about the certificate. Type This field displays general information about the certificate. CA-signed means that a Certification Authority signed the certificate. Self-signed means that the certificate’s owner signed the certificate (not a certification authority). X.509 means that this certificate was created and signed according to the ITU-T X.509 recommendation that defines the formats for public-key certificates.Version This field displays the X.509 version number. Serial Number This field displays the certificate’s identification number given by the certification authority.Subject This field displays information that identifies the owner of the certificate, such as Common Name (CN), Organizational Unit (OU), Organization (O) and Country (C).](https://usermanual.wiki/ZyXEL-Communications/USG20W-VPN.Users-Manual-Part-4/User-Guide-2904716-Page-136.png)