BERG Division of DEC ABID1 All-Bottle ID System (Liquid Dispensing Unit) User Manual Infititl4
BERG COMPANY Division of DEC International, Inc. All-Bottle ID System (Liquid Dispensing Unit) Infititl4
Contents
User Manual Part 5

SECTION
17
The sales data generated by Infinity can be used to ring up drinks at a sales
terminal using Berg's Interface program. This ensures zero variance between
Infinity's data and that of the sales terminal. However, if you're not using
Interface, you can check for variances between Infinity's sales data and the
sales data from a sales terminal using either the Variance or Reconciliation
report.
lThe Variance report starts with Infinity's sales totals for each product
and compares them with the sales collected at the sales terminal for each
Infinity product (including cocktails). You enter the sales terminal's
collected sales for each Infinity product when you run the report. The
report lists Infinity products and shows the sales comparisons, any
variance, and the percent of variance.
lThe Reconciliation report starts with PLU information (from a sales
terminal data file) and compares that data with Infinity's data using
either volume amounts or sales amounts. The report lists Infinity brands
(no cocktails), shows any difference in the sales terminal's sales or
implied volume and Infinity's sales or monitored volume and computes
any variance. This report requires previous setup tasks (entering PLUs,
entering a price per unit, defining a sales terminal data file), but does not
require input when you run the report. It can also be included in a
schedule.
This section provides help with the following tasks:
Run a Variance Report .................................................................. 17-2
Before You Run a Reconciliation Report ......................................17-4
About PLU Recipes ...................................................................... 17-6
Create and Assign a PLU Recipe ..................................................17-8
Sales Terminal Data File .............................................................17-10
Run a Reconciliation Report ....................................................... 17-12
Reconciliation and
Variance Reports
17-2 Infinity Installation/Service and User Manual
Run a Variance Report
To run this report you must enter the sales collected at the sales terminal for each brand in the
report. The software then calculates the difference between the sales recorded at the ECU and the
sales recorded at the sales terminal. Any difference in the two amounts is shown and also figured
as a percentage. See Variance Report in the Sample Reports section for a complete description of
this report.
nTo run a Variance report:
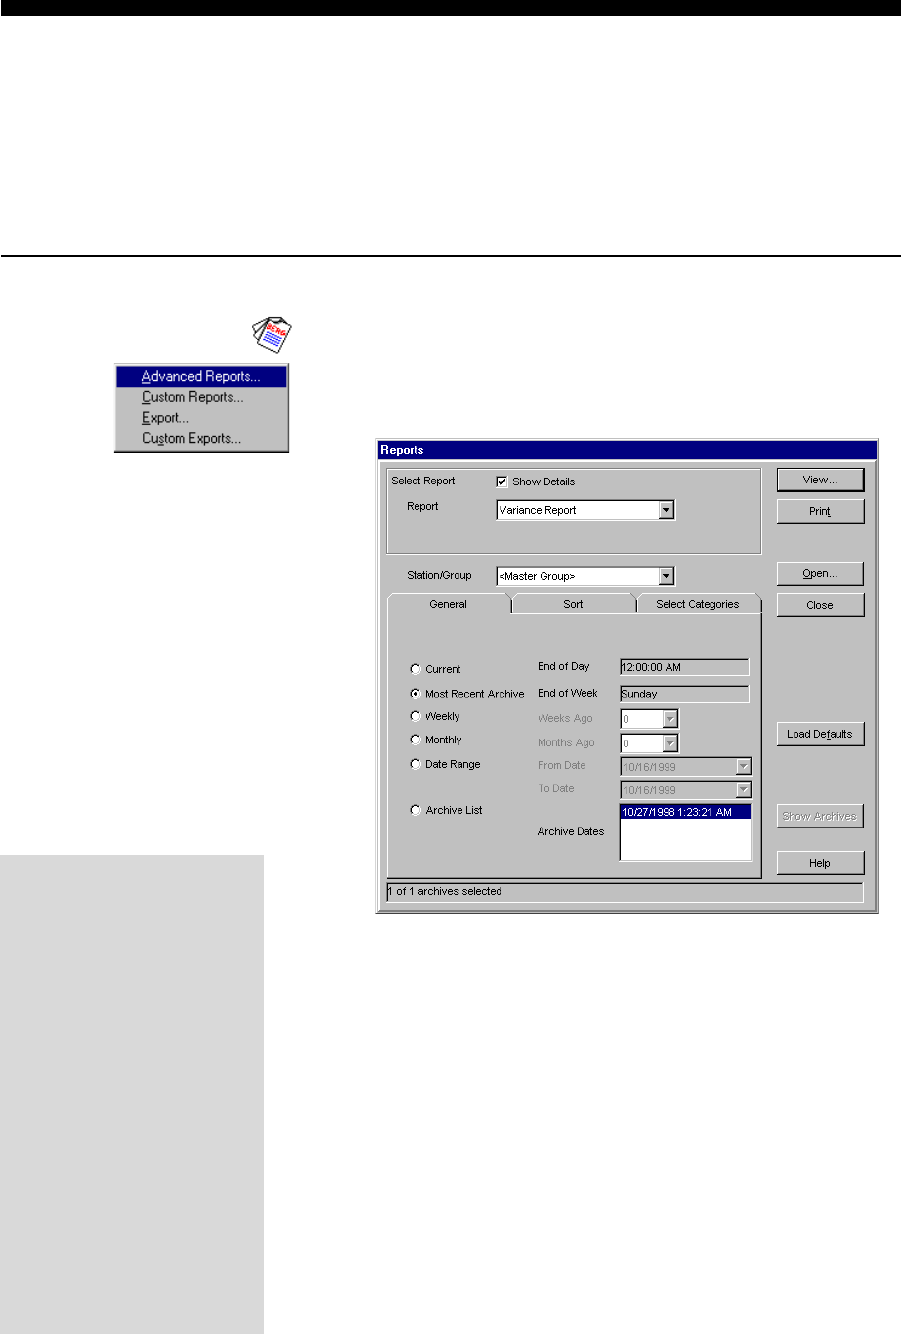
1. Run Report.
2. Pull down the Advanced Reporting menu. Click Advanced
Reports....
3. Select Variance Report.
4. Select Show Details if you want to see additional options
available for the report.
5. Select the Station/Group for which you want to run the
report.
6. Click Show Archives to see a list of archive dates.
7. Select options on the General, Sort and Select Categories
tabs if you want to change options for this report only.
8. Click View to run the report and view it on the screen OR
Click Print to run the report and send it to the printer
without viewing.
See Set Report Options in
the Reports section for a
description of all options. If
you don't change any
options, the default report
options set up for your
system are used to run the
report.
If you want to load your
system defaults on all tabs
click Load Defaults. Some
options are not available for
all reports.
Date Range (when set in
the Reports screen)
reports on archive data
from a specified date to a
specified date.
Reconciliation and Variance Reports 17-3
Wait while the report is run. The time it takes to run the
report is determined by the amount of sales activity and the
number of ECUs in the station or group. Never turn off or
restart your computer while the report is running or sales
data may be lost.
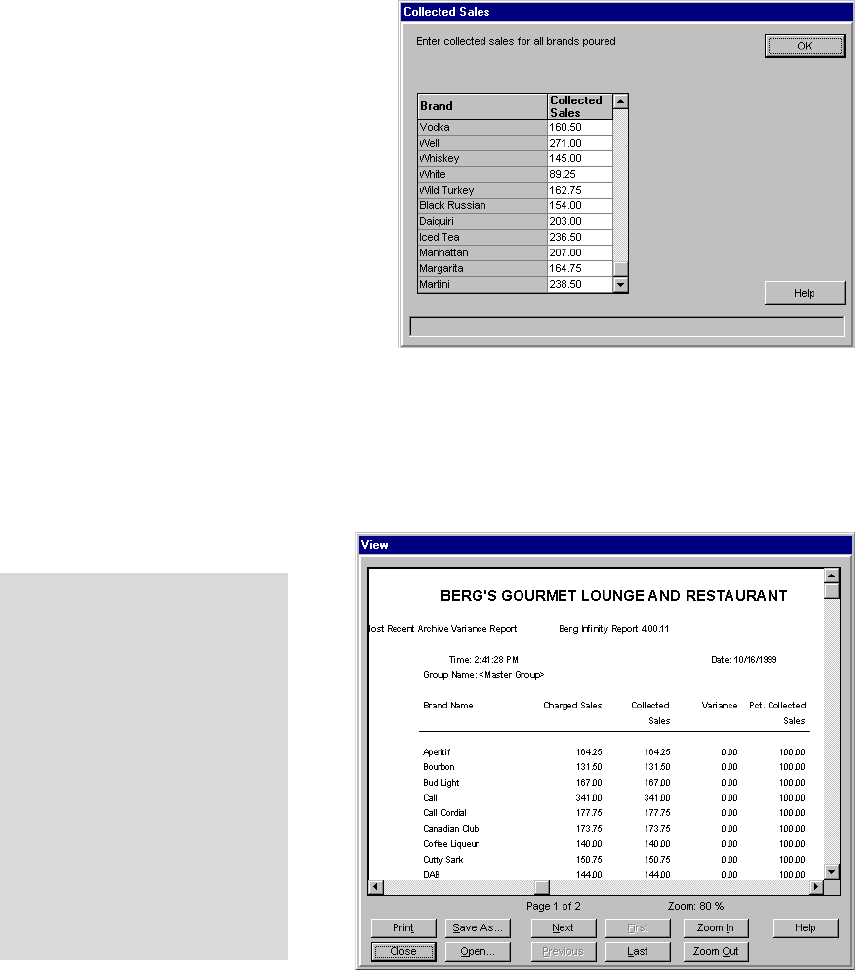
9. Type the Collected sales for each product assigned to
dispensers in the station or group. "Collected sales" means
the actual money taken in for the product as shown on a
sales terminal report.
10. Click OK.
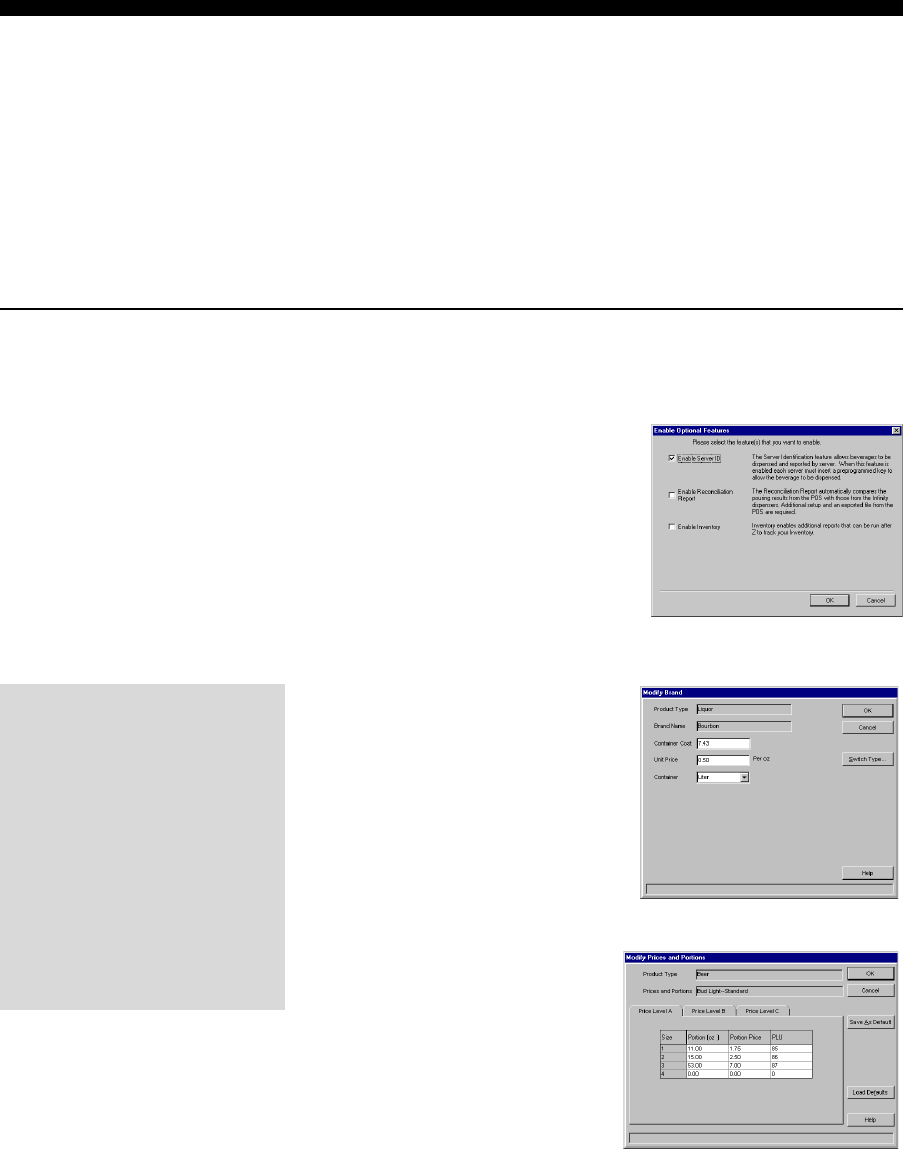
11. If you view the report on the screen click Print if you want
to print a copy. Click Close to exit the View screen.
12. Click Close to exit the Reports screen.
lYou can resize the View window
and Infinity remembers the
size you set.
lThe Page Up and Page Down
keys and the up and down
arrow keys on your keyboard
can be used to move around
the report.
lIf the report is longer than
one page, use the four page
navigation buttons on the
screen to select the Next,
First, Previous or Last page of
the report.
17-4 Infinity Installation/Service and User Manual
Before You Run a Reconciliation Report
The Reconciliation report starts with PLU information (from a sales terminal data file) and
compares that data with Infinity's data using either volume amounts or sales amounts. Once you
perform one-time setup tasks, you can run the Reconciliation report as you would any other
report. You must get a data file from the sales terminal and define its parameters in Infinity. You
need to enter PLUs in Infinity for all brands and cocktails and you may need to create PLU
"recipes". You also need to enter a price per unit for each of your brands. After setup, you can run
the Reconciliation report any time or include it in a Schedule.
nBefore you run a Reconciliation report:
1. Enable the report feature when
you install the software or by
accessing Configuration
options. See Enable
Reconciliation Report in the
Configuration Options section.
2. Enter a price per unit for each
of your brands. This is the
retail price the customers pay.
See Add A Brand in the
Brands, Cocktails, Prices and
Portions section.
3. Enter PLUs for all your
prices and portions. See
Assign PLUs to Brands and
Cocktails in the Advanced
Brand Operations section.
lEnter the retail price per unit
as accurately as you can
since the Reconciliation report
uses this number to compute
the retail value lost.
lIf your prices and portions for
a specific brand do not have
the same unit price (e.g., 8 oz
sells for $2 or .25 per oz while
12 oz sells for $3.50 or .29
per oz) enter an average price
per unit (e.g., .27).
Reconciliation and Variance Reports 17-5
4. If necessary, create PLU
"recipes" and list them
on the ECU's "PLU
Recipe" tab for the sole
purpose of determining
volume on the
Reconciliation report.
See About PLU Recipes
and Create and Assign
a PLU Recipe in this
section.
5. Learn the parameters of the
sales data file generated by
the sales terminal. Establish
where Infinity will find the
file. Enter these
Reconciliation options in
Infinity. See Sales Terminal
Data File in this section.
6. Run the report or include the
report in a schedule. See Run
a Reconciliation Report in
this section or Define
Schedule Actions in the
Schedules section.

17-6 Infinity Installation/Service and User Manual
About PLU Recipes
Review these topics if you have questions about PLU recipes.
What is a PLU Recipe? A PLU recipe defines the PLU of a particular product and
specifies the portion amounts of the ingredients in the product.
Infinity doesnt use a PLU recipe to pour the product. A PLU
recipes sole purpose is to provide PLU and portion information
to compute volume on a Reconciliation report. PLU recipes are
never sent to the ECUs.
Why do I need
a PLU Recipe?
You only need to create PLU recipes if:
l you want to run a Reconciliation report AND
lyour sales terminal uses PLUs you can't define in Infinity
without a PLU recipe.
lFor example, if you've assigned names such as "Well",
"Call", "Premium", etc. to your All-Bottle codes in Infinity,
each Well drink (of the same size and price level) has the
same PLU in Infinity. However, your sales terminal may use
separate PLUs for each brand of All-Bottle Well liquor. You
need to create a different PLU recipe for each Well brand that
defines the PLU used for that brand by the sales terminal and
specifies "Well" as the ingredient.
lOther examples include TAP 1 cocktails, All-Bottle cocktails
and cross-cocktails. You may have a PLU for a "Black &
Tan" beer cocktail at the sales terminal, but you can't define
beer cocktails in Infinity. So you create a PLU recipe in
Infinity for "Black & Tan" that defines the PLU used by the
sales terminal and specifies the portion amounts of the
ingredients in the drink. You haven't created a new cocktail
for Infinity to pour, you've just told Infinity which brands
(and how much of each) to include in the Reconciliation
report.
How do I create
a PLU Recipe?
You create a PLU recipe the same way you create a cocktail
recipe. You then list the recipe on a PLU Recipe tab for the
ECU. For step-by-step instructions, see Create and Assign a
PLU Recipe in this section.
Cross-Cocktails
Cross-cocktails combine
ingredients from All-Bottle-7
and Laser dispensers. All brands
for a cross-cocktail must
appear on the same ECU.
Reconciliation and Variance Reports 17-7
What is the difference
between a PLU Recipe
and a Cocktail Recipe?
A cocktail recipe is sent to the ECU and used to pour cocktails.
PLU recipes are never sent to the ECU and are never used to
pour drinks. Cocktail recipe names appear on system reports.
PLU recipe names never appear on system reports.
How many PLU recipes
can I assign to an ECU?
The default number of PLU recipes that can be assigned to an
ECU is 50. If you assign 50, the number available becomes 100
(for all ECUs). The number continues to increase as you need it
depending on your system's capacity to process and store the
recipes.
How is a PLU
Recipe used?
lWhen you run a Reconciliation report, Infinity uses the
PLUs and PLU recipes you've entered to compare the
volume rung at the sales terminal with the volume monitored
by Infinity.
lThe names of any PLU recipes you've created do not appear
in the report. Infinity only uses the PLU recipe to determine
a drink's ingredients and then computes volumes for the
ingredients.
lYou won't see the individual names of your All-Bottle
"Well" brands on the report. You'll see "Well" with the total
volume of all "Well" pours.
lYou won't see the names of beer cocktails, All-Bottle
cocktails or cross-cocktails, but the volume of the brands
poured in those cocktails will be included in the total volume
listed for the brands.
17-8 Infinity Installation/Service and User Manual
Create and Assign a PLU Recipe
PLU recipes are similar to cocktail recipes; you create them the same way and then list them on a
PLU Recipe assignment tab for each ECU. However, PLU recipes are not sent to the ECU. The
recipe is only used to determine the total volume of the recipe's ingredients on a Reconciliation
report. See also Before You Run a Reconciliation Report and About PLU Recipes in this section.
nTo create and assign a PLU recipe:
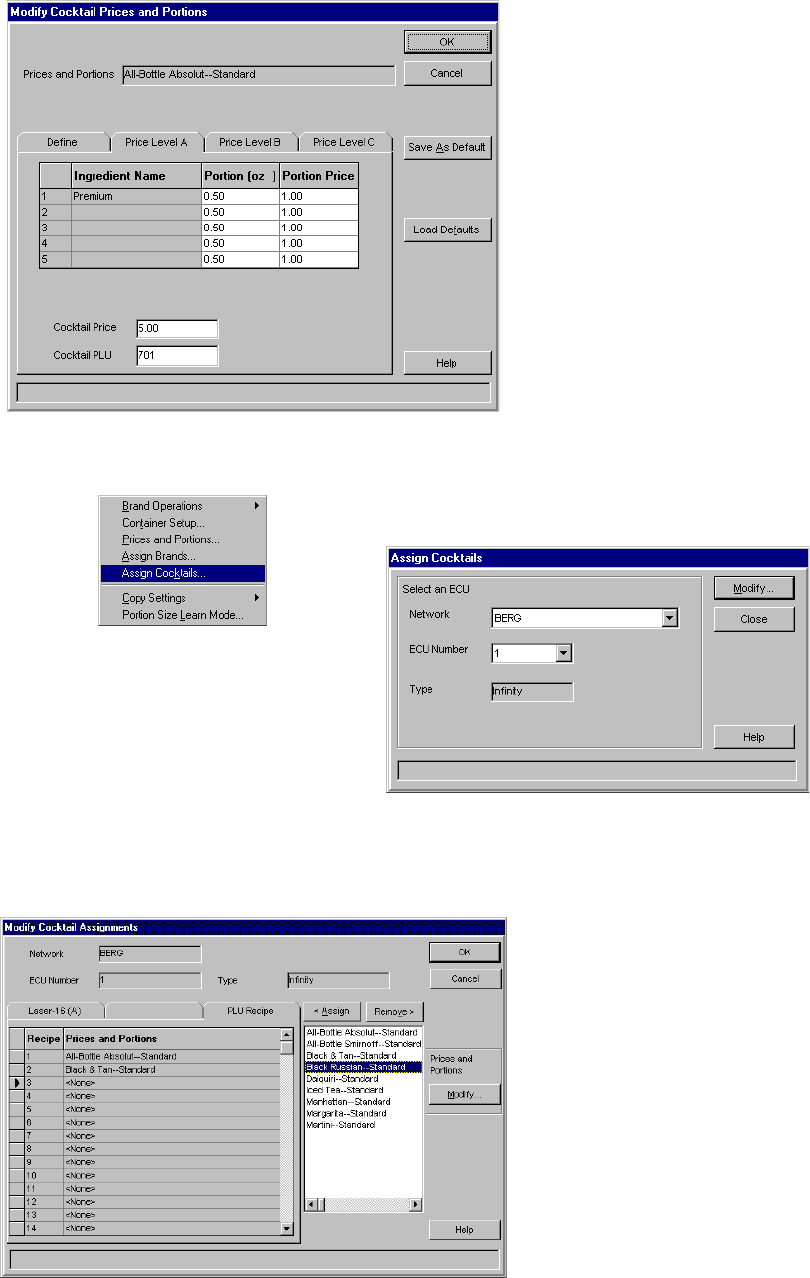
1. Run Manager.
2. Pull down the Pouring menu and click Prices and
Portions....
3. Select Cocktail as the Product Type and click New
Brand....
4. Type in the name of your PLU recipe and
click OK.
5. Click Modify....
6. On the Define tab, select a brand in the
Brand List that is an ingredient in the PLU
recipe and click <Replace (or drag and drop
the brand to the list).
7. Repeat step 6 for the remaining brands in
the PLU recipe.
8. Click a Price Level tab. Perform steps 9-10
for each tab.
Reconciliation and Variance Reports 17-9
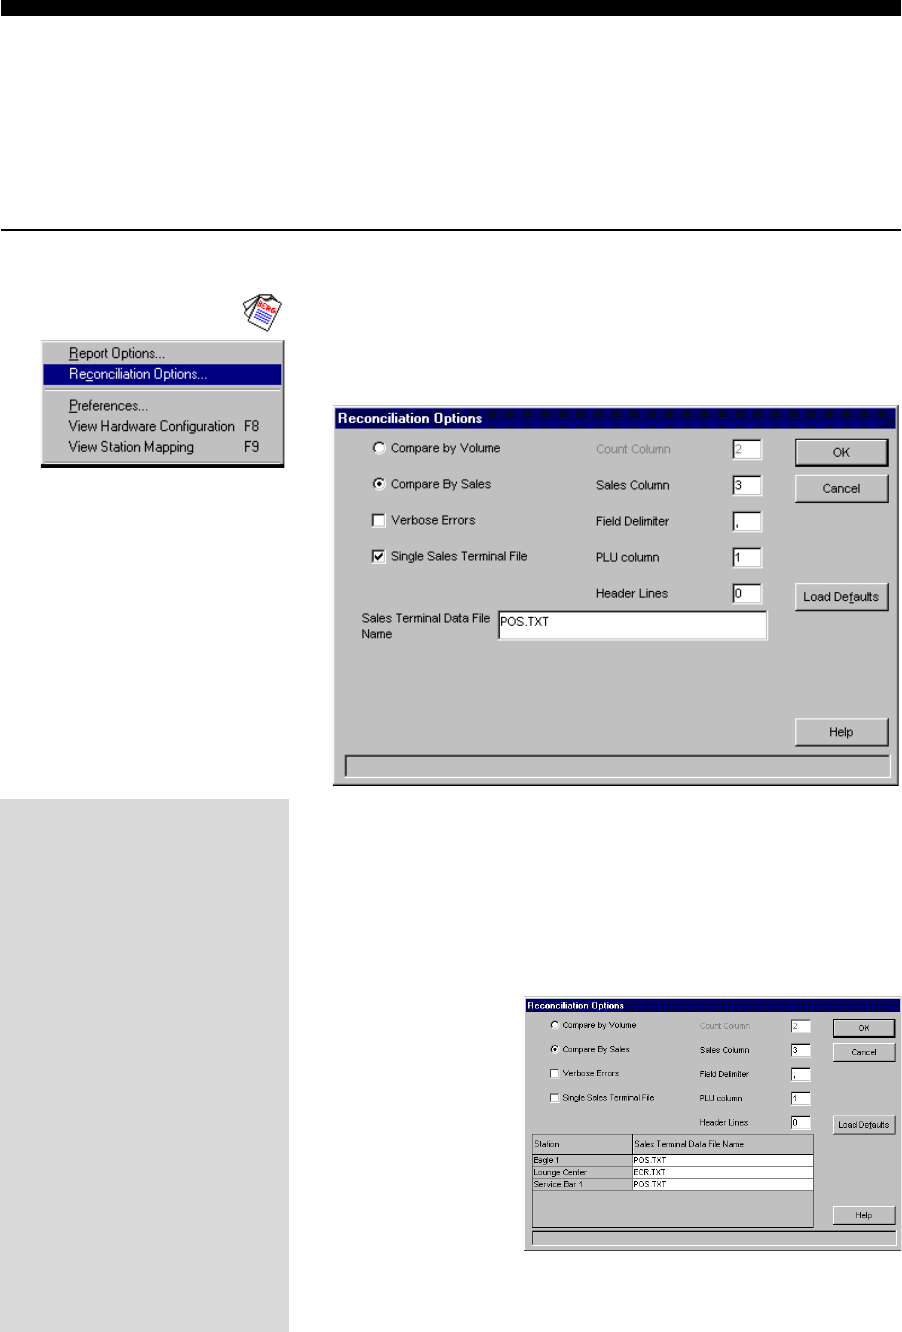
9. Type the correct Portion for each
Ingredient Name.
You must enter a Portion size so the
Reconciliation report can determine
the correct volume for each brand.
Ingredient Prices and Cocktail
Prices are optional entries and are
not currently used by the
Reconciliation report.
10. Type the correct PLU for the
displayed price level. (Get the
correct PLU from the sales
terminal.)
11. Click OK to save your entries on all
tabs. Repeat steps 4-10 for each
PLU recipe. Click Close to exit the
Prices and Portions Setup screen.
12. Pull down the Pouring menu and click Assign Cocktails....
13. Select a Network and ECU Number and click Modify....
14. Click the PLU Recipe tab.
15. Select a PLU recipe you pour at this
ECU.
16. Click <Assign (or drag and drop the
selected recipe in place). (The
numbers on the Prices & Portions
list do not correspond to any
dispensers.)
17. Repeat steps 15-16 for each PLU
recipe at this ECU.
18. Click OK to save all cocktail and
PLU recipes.
19. Repeat steps 12-18 for each ECU.
17-10 Infinity Installation/Service and User Manual
Sales Terminal Data File
To run an Infinity Reconciliation report, you must first determine how you will generate a sales
data file at the sales terminal (see your sales terminal representative for help with this). Once
you've learned the format of the data file, its name and location, you need to enter these
parameters in Infinity. The sales terminal data file must be an ASCII text file.
nTo enter Reconciliation options:
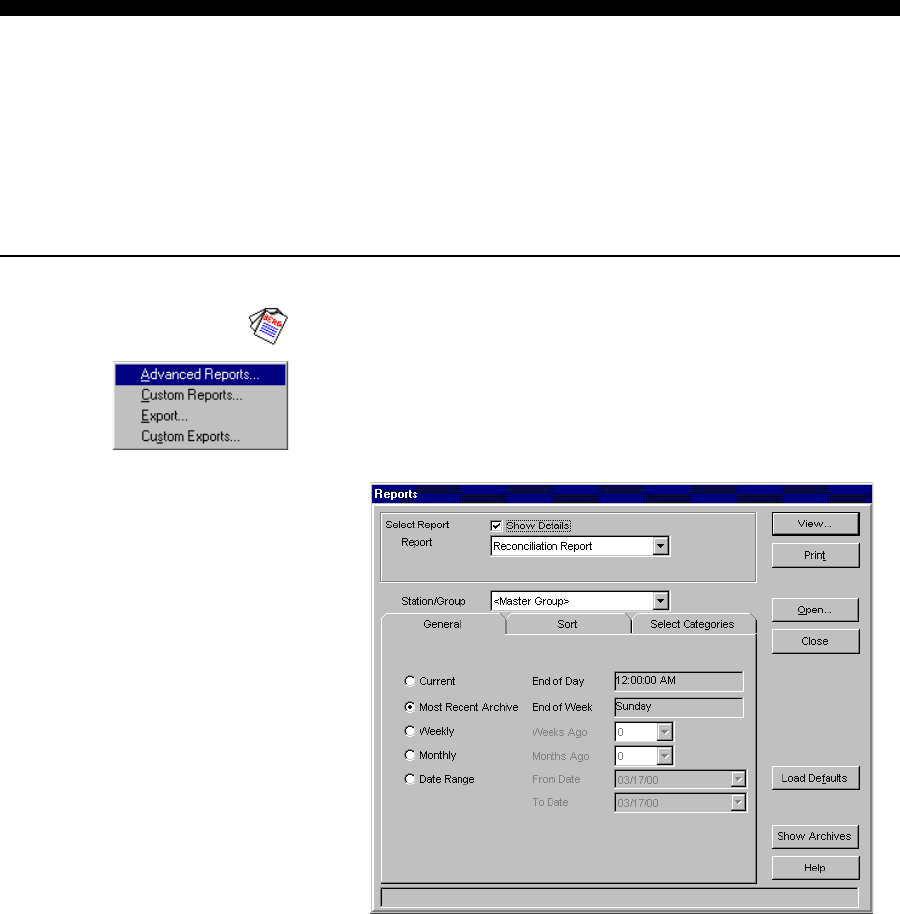
1. Run Report.
2. Pull down the Options menu. Click Reconciliation
Options....
3. Select Compare by Volume or Compare by Sales.
4. Check Verbose Errors to see all PLU discrepancies listed
on the Reconciliation report. Discrepancies may include
duplicate PLUs in Infinity, unrecognized PLUs from the
sales terminal, etc. (There may be expected unknown PLUs
from the sales terminal such as those for food orders.)
5. Check Single
Sales Terminal
File if one file
contains data for
all your ECUs.
Uncheck this
option to list
multiple sales
terminal data
files.
6. Type the Count Column number if you're comparing by
volume. This identifies which column in the file lists a count
for each PLU. The default is 2.
Compare by Volume
lThe PLU count (from the sales
terminal data file) is multiplied
by the volume units associated
with that PLU in Infinity (small
portion, large portion, PLU
recipe, etc.). This gives an
implied volume of the drinks
rung up at the sales terminal.
The implied volume is then
compared with the volume
recorded by the ECU.
Compare by Sales
lInfinity gets a sales amount
for each brand from the sales
terminal data file. This amount
is compared with the sales
computed by Infinity.
Additional fields may be
present in the sales
terminal data file. They
will be ignored.
Reconciliation and Variance Reports 17-11
Variable File Names You can use the following strings to substitute for the sales
terminal data file name. These strings are not used by the sales
terminal to generate the file. They are used by Infinity to search
for a sales terminal data file name that matches the date the
Reconciliation report is run.
{dd} - day of the month, e.g., 13
{ddd} - day of the week, short format, e.g., Tue
{dddd} - day of the week, full name, e.g., Tuesday
{mm} - two digit month number, e.g., 10
{mmm} - name of the month short format, e.g., Oct
{mmmm} - name of the month, full name, e.g., October
{y} - day of the year, e.g., 355
{yy} - two digit year, e.g., 00
{yyyy} - four digit year, e.g., 2000
{#} - match the highest number in an existing file
If brackets do not match up or do not contain the strings above,
they are left intact (as part of the file name).
Examples:
rec{ddd}.txt = rectue.txt (if Reconciliation is done on Tuesday
{dd}{mmm}{yy}.txt = 13oct00.txt
{dd{xxx}.txt = {dd{xxx}.txt (brackets don't match up)
7. Type the Sales Column number if you're comparing by
sales. This identifies which column in the file lists a sales
amount for each PLU. The default is 3.
8. Type in the Field Delimiter. This is a character used to
separate fields of information in the sales terminal data file.
The default is a comma (,).
9. Type the PLU Column number. This identifies which
column in the file lists the PLUs. The default is 1.
10. Type the Header Lines number. This is the number of
header/comment lines at the beginning of the sales terminal
data file. These lines are skipped by Infinity.
11. Type the Sales Terminal Data File Name. Include the path.
You can list a variable name using curly brackets (see
below).
12. Click OK to save all your entries. Unless something
changes, you only need to set up these options once.
17-12 Infinity Installation/Service and User Manual
Run a Reconciliation Report
To run this report you must perform required set up tasks in Infinity. (See Before You Run a
Reconciliation Report in this section.) Each time you run a Reconciliation report, a current sales
terminal data file must be present at the computer and available for Infinity . Once you're ready,
you can run the report the same way you run any other advanced report. See Reconciliation
Report in the Sample Reports section for a complete description of this report.
nTo run a Reconciliation report:
1. Run Report.
2. Pull down the Advanced Reporting menu. Click Advanced
Reports....
3. Select Reconciliation Report.
4. Select the Station/Group.
5. Select the dates of the data used in the report. See Set Report
Options in the Reports section for a description of all
options.
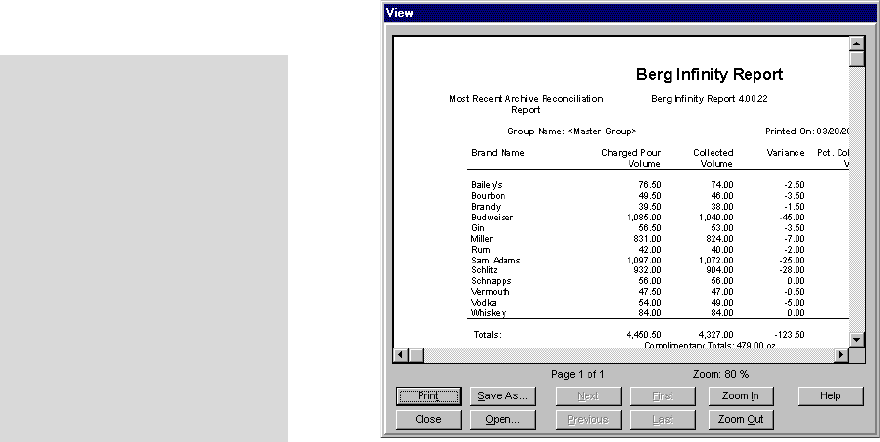
6. Click View to run the report and view it on the screen OR
Click Print to run the report and send it to the printer
without viewing.
Wait while the report is run. The time it takes to run the
report is determined by the amount of sales activity and the
number of ECUs in the station or group. Never turn off or
restart your computer while the report is running or sales
data may be lost.
Reconciliation and Variance Reports 17-13
7. If you view the report on the screen click Print if you want
to print a copy. Click Close to exit the View screen.
8. Click Close to exit the Reports screen.
Note
qIf you run the Reconciliation report on a schedule, you may
also need to schedule the export of the sales terminal data
file on the sales terminal side. (The export of the sales
terminal file should precede the scheduled Reconciliation
report.)
lYou can resize the View window
and Infinity remembers the
size you set.
lThe Page Up and Page Down
keys and the up and down
arrow keys on your keyboard
can be used to move around
the report.
lIf the report is longer than
one page, use the four page
navigation buttons on the
screen to select the Next,
First, Previous or Last page of
the report.

SECTION
18
This section provides an example of each report Infinity offers. For help with
running a report see the Reports section.
Glossary of Report Terms ............................................................. 18-2
Current Sales Totals/Clear Sales (Z) Report ................................. 18-4
Sales Totals (X1) Report ............................................................... 18-6
Sales by Price Levels (X2) Report ................................................ 18-8
Detailed Sales (X3) Report .........................................................18-10
Hourly Sales (X4) Report ...........................................................18-12
Sales Summary Report ................................................................18-14
Usage Report............................................................................... 18-16
Retail Usage Report ....................................................................18-18
Price Level Changes Report........................................................ 18-20
Price Portion Report.................................................................... 18-22
PLU Report ................................................................................ 18-24
Cost Per Unit Report ...................................................................18-26
Configuration Report .................................................................. 18-28
Variance Report...........................................................................18-30
Reconciliation Report ................................................................. 18-32
Server Summary/Clear Server Sales (Z) Report .........................18-34
Server Summary Report ..............................................................18-36
Server Sales by Price Level Report ............................................ 18-38
Container Stock Report ............................................................... 18-40
Cost Analysis Report...................................................................18-42
Brand Information Report ...........................................................18-44
Sample Reports

18-2 Infinity Installation/Service and User Manual
Glossary of Report Terms
The following terms are used throughout Infinity reports. Check these definitions if you have
questions about how the terms are used.
General Terms
Cancel An item that is not completed and
not charged (using the TAP 1 cancel button).
Charged An accountable item. This is the
normal pouring mode and does not include
comps or cancels. Exception: If you've set
Charge Cancels for a TAP 1 ECU, Charged
includes any canceled drinks.
Comp Complimentary drinks poured in
comp mode or using the comp button.
Drink A shot or cocktail. Shots used in
cocktails but not defined in an Infinity
cocktail recipe are identified as individual
drinks. Ingredients in a cocktail recipe are
not listed as individual drinks.
Pour The number of times poured. Includes
shots and Infinity-defined cocktail
ingredients. Includes comps but not cancels.
Sales A money amount, calculated using
drink pricing.
Total Never used in a column heading.
Shows total values in a column.
Report Column Headings
Archive Num(ber) Archive or Z number
Brand Name Infinity-defined brand names.
Cal/Meter The cal value or meter count.
Cancel Pour Sales The full sales value of
any canceled pours. (Calculated using drink
prices.)
Cancel Volume The number of volume
units of canceled drinks.
Canceled Drinks Drinks not completed and
not charged.
Canceled Pours Pours not completed and
not charged.
Canceled Sales The full sales value of any
canceled drinks. (Calculated using drink
prices.)
Category Name The name of a price/
portion category.
Charged Drinks Shots or Infinity-defined
cocktails. Does not include comps or
cancels.
Charged + Comp. Drinks The combination
of charged drinks and comp drinks.
Charged Pour Volume Volume amount--
does not include comps or cancels, but does
include cocktail ingredients.
Charged Pours The number of times
poured as a charged pour. Includes shots and
Infinity-defined cocktail ingredients.
Charged Sales The sales of drinks (shots
and Infinity-defined cocktails). Calculated
using drink prices you entered in Manager.
Does not include comps or cancels.
Charged Sales/Drink Volume Charged
sales divided by drink volume.
Charged Volume Volume amount--does not
include comps, cancels or cocktail
ingredients.
Cocktail Sales The sales of Infinity-
defined cocktails. (Calculated using cocktail
prices.)
Cocktails Infinity-defined cocktails
Sample Reports 18-3
Collected Sales The sales record at the sales
terminal as entered by the user.
Collected Volume A volume amount
derived from the pour count in the sales
terminal data file and the portion size entered
in Infinity.
Comp Drinks Shots or Infinity-defined
cocktails poured using the comp button. Not
charged.
Comp Pours The number of times poured
as a comp pour. Includes shots and Infinity-
defined cocktail ingredients.
Comp Pour Sales The sales value of comp
pours. (Calculated using drink prices and
cocktail ingredient prices.)
Comp Sales The sales value of comp drinks
(shots and Infinity-defined cocktails).
(Calculated using drink prices.)
Comp Volume The number of volume units
for comp drinks.
Container(s) The container name.
Count The number of containers.
Delay/Timer The delay or timer value.
Drink Volume Volume units poured for a
brand, not including pours as cocktail
ingredients.
Ingredient Name The brand name of a
cocktail ingredient.
Lost Retail Value The implied sales value
of the variance.
Pct Collected Volume The percentage of
the charged pour volume that was rung at the
sales terminal.
Pct Collected Sales Collected sales divided
by charged sales.
Pct of Total Volume This brand's volume
compared to entire report volume.
Percent/Pct of Total Sales This station or
this hour's sales compared to the total report.
Pour Sales The sales of pours. (Calculated
using drink prices and cocktail ingredient
prices you entered in Manager.) Only
includes charged pours, not comps or
cancels.
Pour Sales/Pour Volume Pour sales
divided by pour volume.
Pour Value The volume units poured
multiplied by the volume unit price.
Pour Volume The number of volume units
poured. Includes Infinity-defined cocktail
ingredients, comp pours and canceled pours.
Pours The number of times poured.
Includes shots and Infinity-defined cocktail
ingredients. Includes comps but not cancels.
Portion/Ptn The portion size entered in
Manager.
PPC Potential pouring cost. Calculated by
multiplying cost per volume unit by volume
by 100 and dividing the product by sales.
Price Level/Prc Lvl The price level name.
Ptn Price The portion price entered in
Manager.
Server Name Name of server (entered in
Manager).
Size The number of this portion size.
Variance The difference between charged
sales and collected sales or charged volume
and collected volume.
Volume Unit Cost The cost (to you) of
each volume unit. Derived from the
container cost and container size entered
when you set up a brand and set up
containers.
Volume Unit Price The retail price per unit
entered when you set up a brand.

18-4 Infinity Installation/Service and User Manual
Current Sales Totals/Clear Sales (Z) Report
When you archive and clear sales, Infinity generates a Current Sales Totals/Clear Sales report
showing data for the selected station or group. (If you run this report on the Master Group, youll
only see combined totals for the entire group.) The sales data is also sent to the computer to be
stored in archive records. Only run this report when you want to set all totals at the ECU to zero.
For help with running the report see Archive and Clear Sales (Z) in the Reports section.
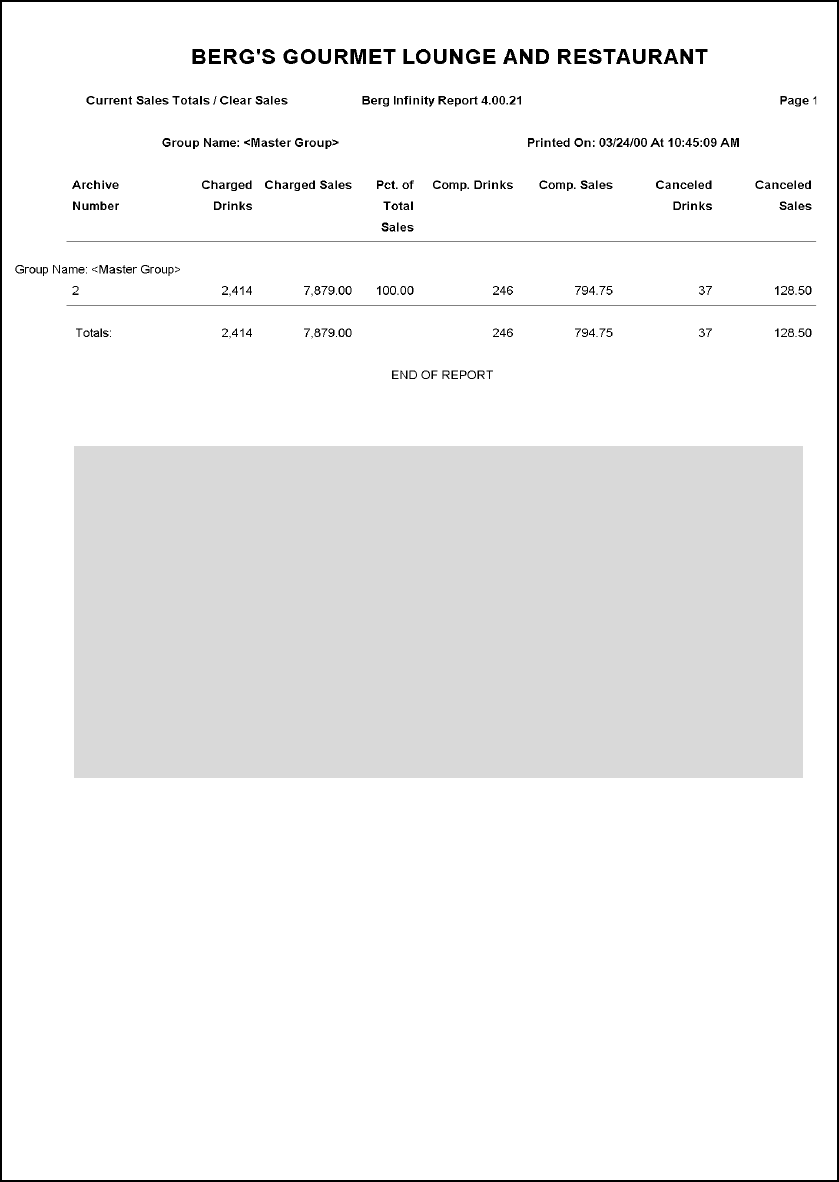
Current Sales Totals/
Clear Sales
This report shows the total number of Charged Drinks and total
Charged Sales for the selected station or group as well as the
sales percentage that each station contributes to the report. (All
the numbers in the Pct. of Total Sales column should total
100%.)
The report also shows the total number of Comp Drinks and
Comp Sales, as well as Canceled Drinks and Canceled Sales.
These complimentary and canceled totals are not included in the
Charged Drinks and Charged Sales totals in the first two
columns.
Archive Number Archive Num (formerly Z number) is the number of times a
Clear Sales report has been run at the station including this time.
If the ECUs in the station have not been cleared the same number
of times, the highest number is listed.
Printed On The Time and Date on the report are the time and date the report
was runnot necessarily the time and date of the last station
activity.
Type of Data To run this report the computer must communicate with the
selected ECU(s). The data reported on is all data currently
stored at the ECU(s) or in other words, all data since the last
time you cleared sales at the selected ECU(s).
Glossary of Report Terms
See the Glossary of Report
Terms in this section for further
clarification of terms.
Sample Reports 18-5
lYou may see a message on this report indicating the ECU's Archive Number is
different from the PC's archive number.
lThis message is normal for every ECU the very first time its sales are cleared
(ECU Archive Number = 0, Computer's Archive Number = 1).
lThe message may also be due to performing a Restore Memory at the ECU. The
first time you clear sales at an ECU after performing a Restore Memory this
report will always show 0 as the Archive Number so that it's clear that the ECU
has been reset since the last time its sales were cleared.
lIf there is a mismatch in the Archive Number, the number in the ECU will be set to
match the computer's archive number and eliminate the mismatch message in
subsequent Sales Totals/Clear Sales reports.

18-6 Infinity Installation/Service and User Manual
Sales Totals (X1) Report
The Sales Totals report provides the total sales for the selected station or group. If you select a
group other than the Master Group, each station in the group is listed separately. The following is
a description of this report. For help with running the report see Run a Current Sales Report or
Run an Advanced Report in the Reports section.
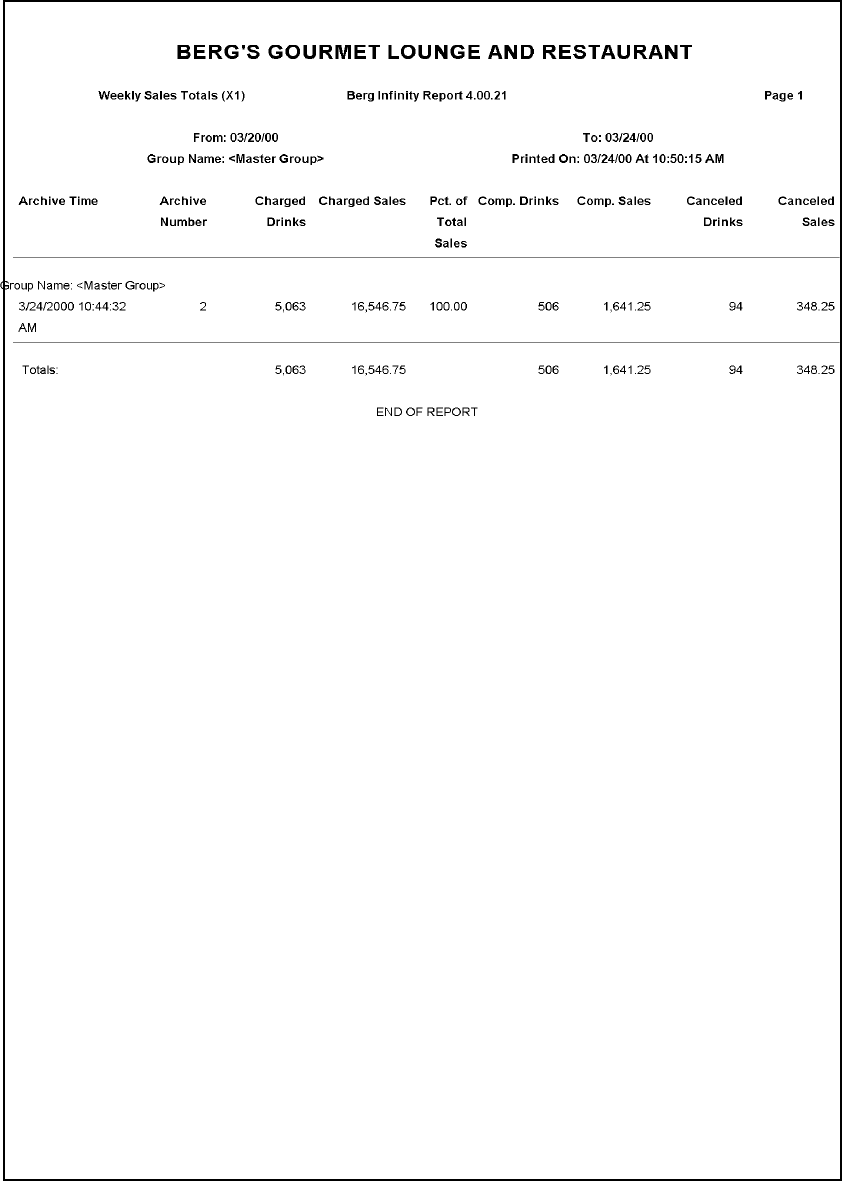
Sales Totals This report shows the total number of Charged Drinks and total
Charged Sales for the selected station or group as well as the
sales percentage that each station contributes to the report. (All
the numbers in the Pct. of Total Sales column should total
100%.)
The report also shows the total number of Comp Drinks and
Comp Sales, as well as Canceled Drinks and Canceled Sales.
These complimentary and canceled totals are not included in the
Charged Drinks and Charged Sales totals in the first two
columns.
Archive Number Archive Num (formerly Z number) is the number of times a
Clear Sales report has been run at the station. If the ECUs in the
station have not been cleared the same number of times, the
highest number is listed. If you run this report on current sales
data the archive number is not shown.
Archive Time Archive Time is the last date a Clear Sales report was run at the
station. If you run this report on current sales data the archive
time is not shown.
Printed On The Time and Date on the report are the time and date the report
was runnot necessarily the time and date of the last station
activity.
Type of Data If you run this report as a Current report, the computer must
communicate with the selected ECU(s). The data reported on is
all data currently stored at the ECU(s) or in other words, all data
since the last time you cleared sales at the selected ECU(s).
To run this report as a Most Recent Archive report, the
computer uses the sales data stored at the computer the last time
you cleared sales at the ECU.
To run this report as a Weekly, Monthly or Date Range report,
the computer uses archive data stored at the computer. The data
reported on is determined by the number of times you cleared
sales at the ECU during the specified time.
Glossary of Report Terms
See the Glossary of Report
Terms in this section for further
clarification of terms.
Sample Reports 18-7

18-8 Infinity Installation/Service and User Manual
Sales By Price Levels (X2) Report
This report shows the total sales for each brand at each price level. The following is a description
of this report. For help with running the report see Run a Current Sales Report or Run an
Advanced Report in the Reports section.
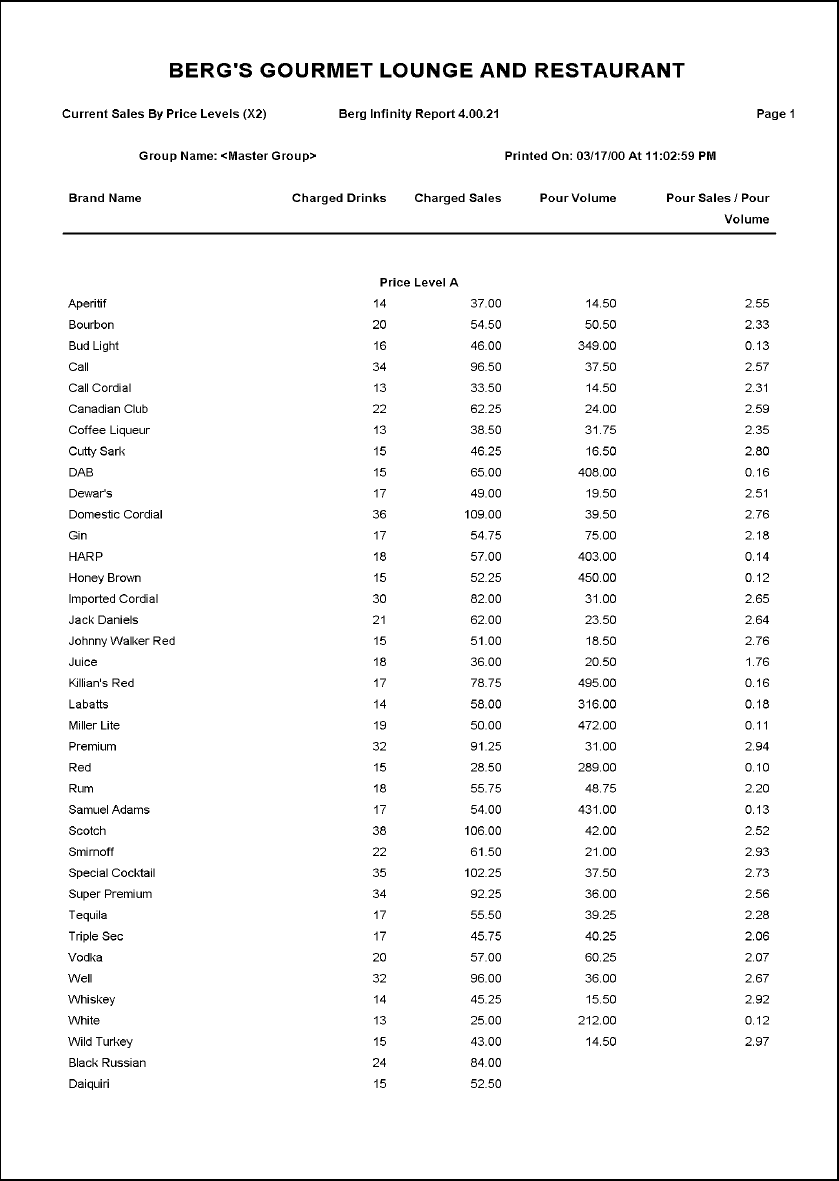
Current Sales By
Price Levels This report shows the Charged Drinks, Charged Sales and the
Pour Volume for each Brand at each Price Level of the
selected station(s). The final column lists the Pour Sales/Pour
Volume.
The total Charged Drinks and Charged Sales for the price
level are computed along with the total number of
Complimentary and Canceled drinks and the total sales value
of the comp and cancel drinks per price level. (These
complimentary and canceled totals are not included in the
Charged Drinks and Charged Sales totals for the price level.)
The end of the report shows the total Charged Drinks and
Charged Sales for all price levels and the total Complimentary
and Canceled drinks for all price levels.
Printed On The Time and Date on the report are the time and date the report
was runnot necessarily the time and date of the last station
activity.
Type of Data If you run this report as a Current report the computer must
communicate with the selected ECU(s). The data reported on is
all data currently stored at the ECU(s) or in other words, all data
since the last time you cleared sales at the selected ECU(s).
To run this report as a Most Recent Archive report the
computer uses the sales data stored at the computer the last time
you cleared sales at the ECU.
To run this report as a Weekly, Monthly or Date Range report
the computer uses archive data stored at the computer. The data
reported on is determined by the number of times you cleared
sales at the ECU during the specified time.
Glossary of Report Terms
See the Glossary of Report
Terms in this section for further
clarification of terms.
Sample Reports 18-9
(This example is page 1 of a multiple page report.)

18-10 Infinity Installation/Service and User Manual
Detailed Sales (X3) Report
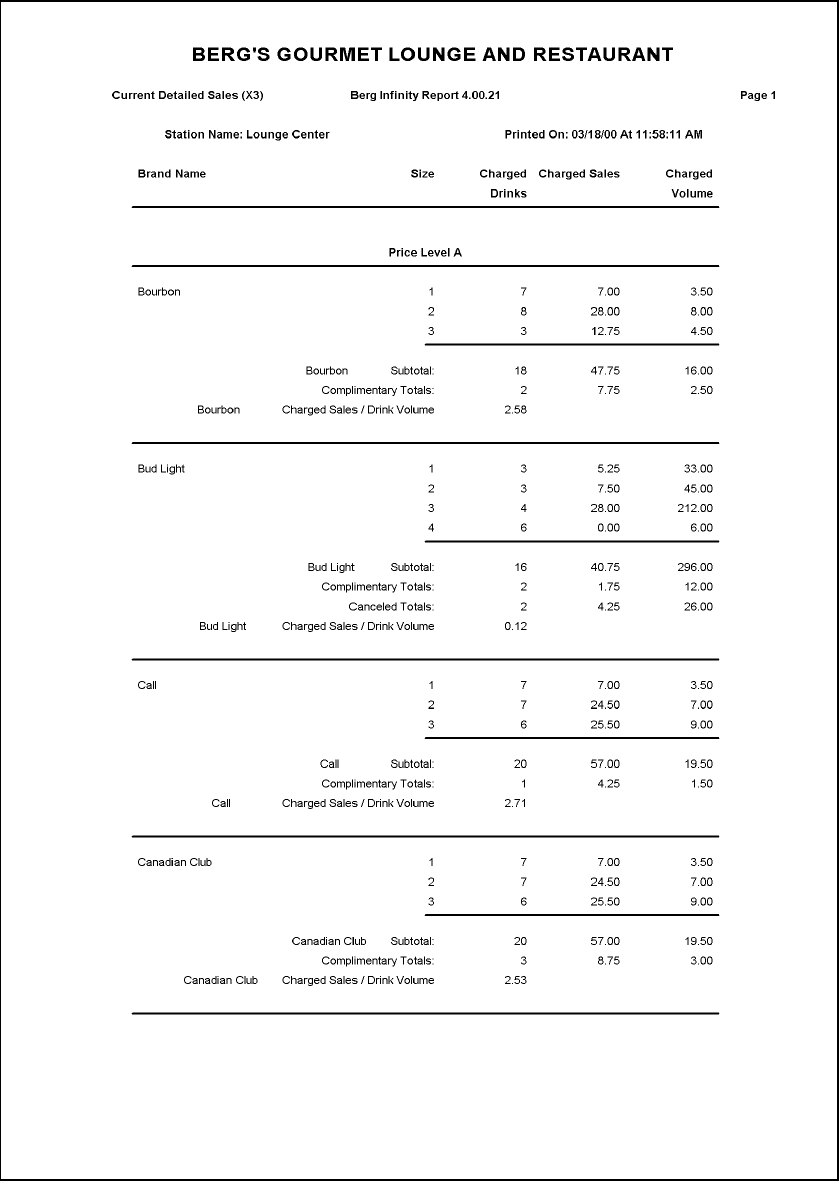
This is the most detailed sales report provided by Infinity. In addition to listing sales and volume
by brands and price levels, it show sales and volume for each portion size. The following is a
description of this report. For help with running the report see Run a Current Sales Report or
Run an Advanced Report in the Reports section.
Current Detailed Sales This report shows the Charged Drinks, Charged Sales and
Charged Volume for every portion Size of each Brand Name at
each Price Level of the selected station.
The total Charged Drinks and Charged Sales for the Brand at
each price level are computed along with the total number of
Complimentary and Canceled drinks and the total sales value
of these drinks. These complimentary and canceled totals are not
included in the Charged Drinks and Charged Sales totals for
the brand. The Charged Sales/Drink Volume is given for each
brand at each price level.
After each brand's totals are shown at price level A, B, C or D,
the totals for all brands at that price level are listed.
The end of the report shows the totals for all price levels.
Printed On The Time and Date on the report are the time and date the report
was runnot necessarily the time and date of the last station
activity.
Type of Data If you run this report as a Current report the computer must
communicate with the selected ECU(s). The data reported on is
all data currently stored at the ECU(s) or in other words, all data
since the last time you cleared sales at the selected ECU(s).
To run this report as a Most Recent Archive report the computer
uses the sales data stored at the computer the last time you
cleared sales at the ECU.
To run this report as a Weekly, Monthly or Date Range report
you must have selected Detailed Info when you entered your
Data Storage and Display Options. See Enter Data Storage and
Display Options in the Configuration Options section.
TAP 1 Manual Drinks Any manual pours from a TAP 1 ECU are displayed on this
report separately from regular pours and labeled "Manual". Any
manual pours are included in the brand subtotal for both
Charged Drinks and Sales. The portion size number and
associated price assigned to a manual pour is the portion size
closest to the actual volume poured.
Glossary of Report Terms
See the Glossary of Report
Terms in this section for further
clarification of terms.
Pre-3.0 Infinity ECU
If you're using a pre-3.0 Infinity
ECU, the Charged Volume is
zero for that ECU (although the
total is correct).
Sample Reports 18-11
(This example is page 1 of a multiple page report.)

18-12 Infinity Installation/Service and User Manual
Hourly Sales (X4) Report
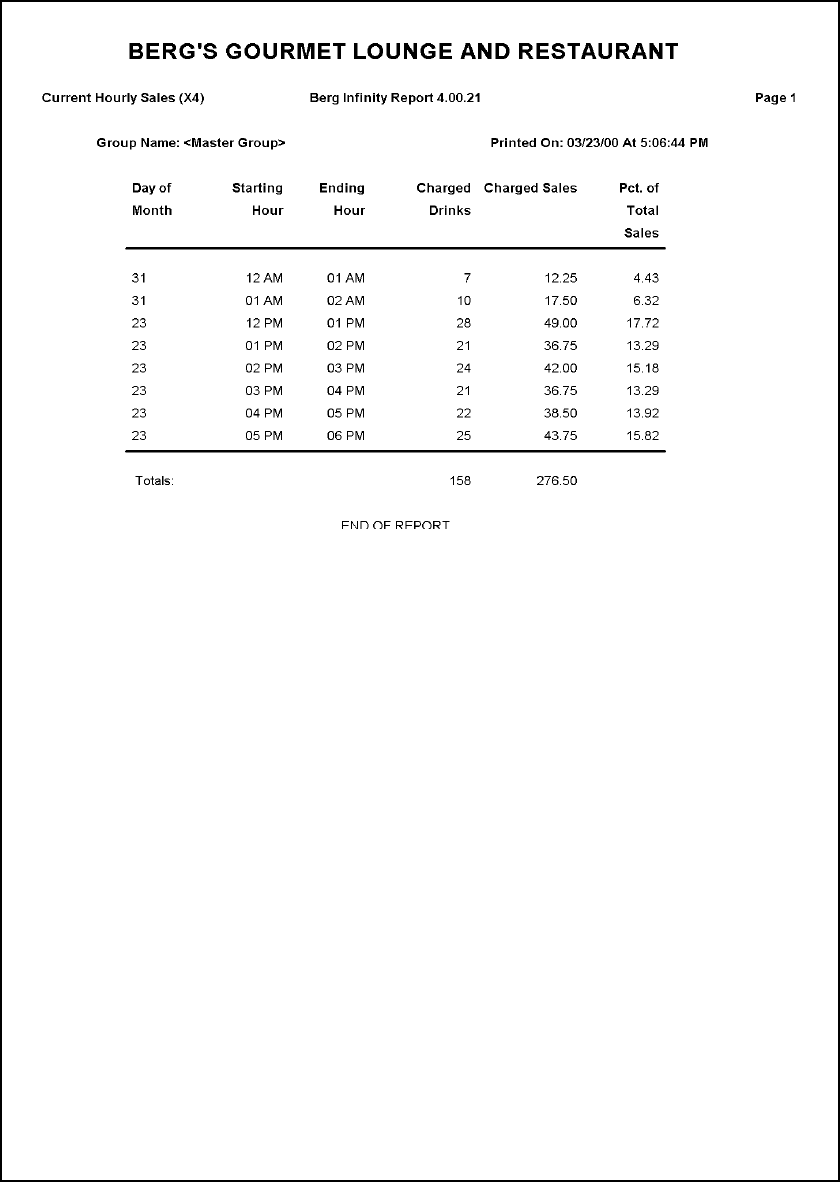
The Hourly Sales report is a summary of sales for the past 48 hours of sales activity at the
selected station or group. This report is only run as a current report because it uses data stored in
the ECUs (the data is stored separately from sales data used for other reports). The following is a
description of this report. For help with running the report see Run a Current Sales Report or Run
an Advanced Report in the Reports section.
Hourly Sales This report shows data for the past 48 hours at the station or
group. The type of data reported is determined by your selection
in Data Storage and Display Options (see the Configuration
Options section). The default data is Charged Drinks and
Charged Sales as well as the Percent of Total Sales that each
hour contributes to the report. (The numbers in the final column
should total 100%.). Hours with no sales activity at the station or
group are not listed on the report. A 1544 Infinity ECU reports
sales for the past 48 hours with any sales activity.
For each hour listed in the report the Day of Month, Starting
Hour and Ending Hour are shown.
Shifts If you defined the hours of your shifts when you selected Report
Options, all sales from an entire shift are reported on one line in
the report (rather than sales being reported for each hour).
Printed On The Time and Date on the report are the time and date the report
was runnot necessarily the time and date of the last station
activity.
Type of Data To run this report the computer must communicate with the
selected ECU(s). The data reported on is determined by which
Clear/Dont Clear option you selected on the Data Storage and
Display Options screen. (Clear clears all hourly sales data each
time you clear sales. Dont Clear leaves hourly sales data intact
when you clear sales.) This report can only be run as a Current
report.
Glossary of Report Terms
See the Glossary of Report
Terms in this section for further
clarification of terms.
Sample Reports 18-13

18-14 Infinity Installation/Service and User Manual
Sales Summary Report
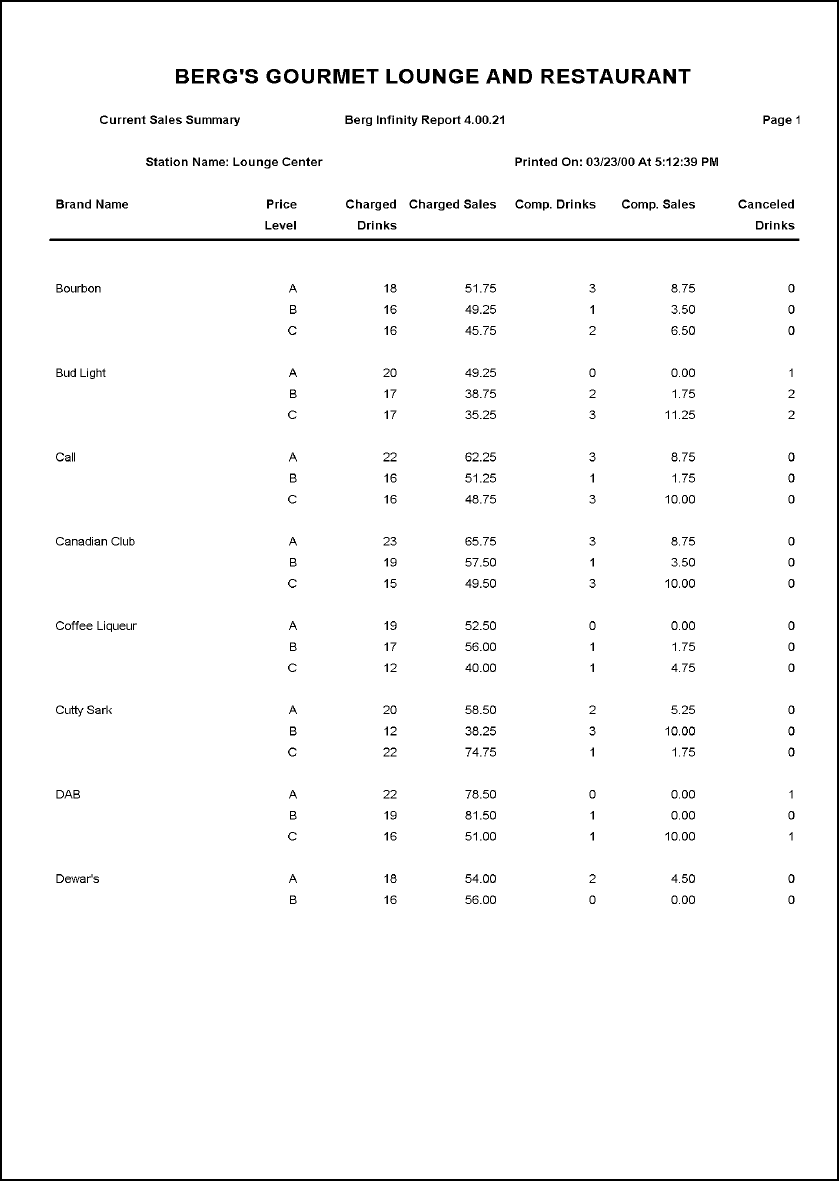
The Sales Summary report provides a summary of sales for each brand in the selected station or
group. The following is a description of this report. For help with running the report see Run an
Advanced Report in the Reports section.
Sales Summary This report shows the number of Charged Drinks and
Charged Sales, the number of Comp Drinks and Comp Sales
and the number of Canceled Drinks for every Price Level of
each Brand of the selected station or group.
The end of the report shows the Charged Drinks and Charged
Sales totals for all price levels in addition to the Comp Drinks,
Comp Sales and Cancel Drinks totals.
Printed On The Time and Date on the report are the time and date the report
was runnot necessarily the time and date of the last station
activity.
Type of Data If you run this report as a Current report the computer must
communicate with the selected ECU(s). The data reported on is
all data currently stored at the ECU(s) or in other words, all data
since the last time you cleared sales at the selected ECU(s).
To run this report as a Most Recent Archive report the
computer uses the sales data stored at the computer the last time
you cleared sales at the ECU.
To run this report as a Weekly, Monthly or Date Range report
the computer uses archive data stored at the computer. The data
reported on is determined by the number of times you cleared
sales at the ECU during the specified time.
Glossary of Report Terms
See the Glossary of Report
Terms in this section for further
clarification of terms.
Sample Reports 18-15
(This example is page 1 of a multiple page report.)

18-16 Infinity Installation/Service and User Manual
Usage Report
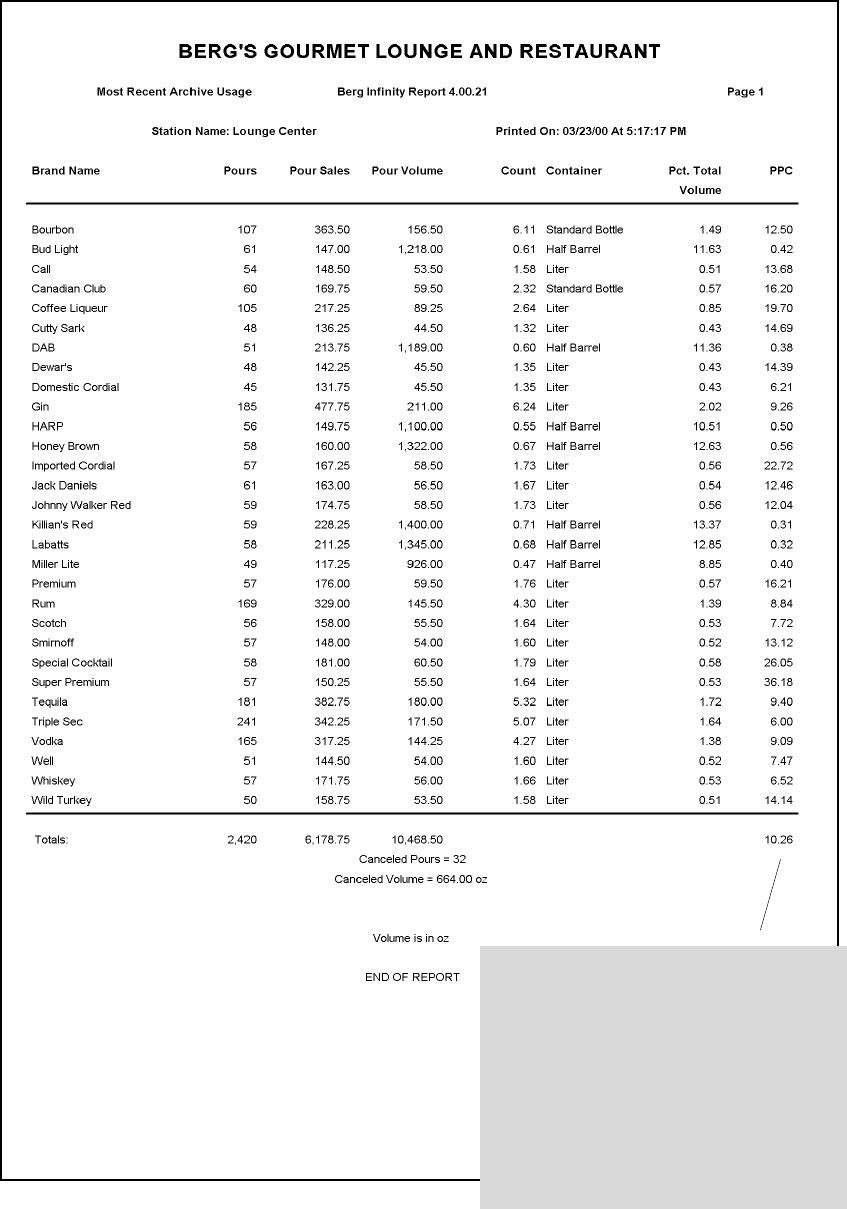
The Usage report provides a brand summary for the selected station or group in addition to the
volume poured and potential pouring cost of each brand. The following is a description of this
report. For help with running the report see Run an Advanced Report in the Reports section.
Usage This report shows the Pours, Pour Sales, Pour Volume, and
Container Count for each Brand. It also lists the Percent of
Total Volume that each brand contributes to the report. If a
brand is used in cocktails, the ingredient price you entered for the
brand (when defining the cocktail) is multiplied by the number of
cocktails poured and added to the Pour Sales total for the brand.
(See Add a Cocktail in the Brands, Cocktails, Prices and
Portions section.) The container count is calculated using the
container size you entered for the brand. (See Container Setup in
the Brands, Cocktails, Prices and Portions section.)
PPC is the owner's potential pouring cost, which is calculated by
multiplying the number of containers poured for each brand by
the container cost for the brand. The total is then divided by the
sales for the brand and multiplied by 100 to determine a
percentage. This percentage is potentially the pouring cost for the
brand. This figure is only a "potential" pouring cost because
Infinity has no way of computing losses due to overpouring,
spillage, etc. A potential pouring cost is only computed if a
container cost has been entered for the brand. (See Brand List
Setup in the Brands, Cocktails, Prices and Portions section.
The end of the report shows the total Pours, Pour Sales, and
Pour Volume for all brands in the station or group and the
average potential pouring cost (PPC) for all brands combined.
Printed On The Time and Date on the report are the time and date the
report was runnot necessarily the time and date of the last
station activity.
Type of Data If you run this report as a Current report the computer must
communicate with the selected ECU(s). The data reported on is
all data currently stored at the ECU(s) or in other words, all data
since the last time you cleared sales at the selected ECU(s).
To run this report as a Most Recent Archive report the computer
uses the sales data stored at the computer the last time you
cleared sales at the ECU.
To run this report as a Weekly, Monthly or Date Range report
the computer uses archive data stored at the computer. The data
reported on is determined by the number of times you cleared
sales at the ECU during the specified time.
Glossary of Report Terms
See the Glossary of Report
Terms in this section for further
clarification of terms.
Sample Reports 18-17
Potential Pouring Cost
lBerg labels this column "potential"
pouring cost because only the cost of
each unit of liquor sold and the total
sales are used to figure the percentage.
Losses due to overpouring, spillage,
and/or non-recorded cash can all affect
your actual pouring cost.

18-18 Infinity Installation/Service and User Manual
Retail Usage Report
The Retail Usage report provides the "retail value" of the volume poured for each brand in the
selected station or group. This report does not show any actual sales data, but a projected value of
the volume poured based on a retail price per volume unit. This is especially useful if you're using
a TAP 1 ECU in monitor mode (flow meters only). You must enter a unit price for each of your
brands if you want the retail value to be computed in this report. See Brand List Setup in the
Brands, Cocktails, Prices and Portions section. The following is a description of this report. For
help with running the report see Run an Advanced Report in the Reports section.
Retail Usage This report shows the Volume Unit Price, Pour Volume and
Pour Value for each Brand. The pour value is figured by
multiplying the pour volume by the retail price per unit. This
report does not distinguish types of pours or number of pours. It
does not show any actual sales dataonly the retail value of the
volume poured if the price per unit is collected for each volume
unit poured.
The end of the report shows the total Pour Volume and the total
Pour Value for all brands in the station or group.
Printed On The Time and Date on the report are the time and date the report
was runnot necessarily the time and date of the last station
activity.
Type of Data If you run this report as a Current report the computer must
communicate with the selected ECU(s). The data reported on is
all data currently stored at the ECU(s) or in other words, all data
since the last time you cleared sales at the selected ECU(s).
To run this report as a Most Recent Archive report the computer
uses the sales data stored at the computer the last time you
cleared sales at the ECU.
To run this report as a Weekly, Monthly or Date Range report
the computer uses archive data stored at the computer. The data
reported on is determined by the number of times you cleared
sales at the ECU during the specified time.
Glossary of Report Terms
See the Glossary of Report
Terms in this section for further
clarification of terms.

Sample Reports 18-19
Most Recent Archive Retail Usage Berg Infinity Report 4.11.19 Page 1
The most recent archive was run on 2/28/2001 at 2:13:31 PM
Station Name: Top Hat Club Printed On: 3/1/2001 At 9:46:27 AM
Brand Name Retail Price
per oz
Pour Volume Pour Value
Absolut 3.00 48.00 144.00
Bacardi 3.00 52.00 156.00
Bacardi 151 3.50 54.00 189.00
Beefeater 2.50 45.50 113.75
Bombay 2.50 48.00 120.00
Bourbon 2.50 161.00 402.50
Brandy 2.50 47.50 118.75
Captain Morgan 3.00 39.00 117.00
Chivas Regal 4.00 52.00 208.00
Coffee Liqueur 2.00 81.50 163.00
Courvoisier 3.50 48.50 169.75
Finlandia 2.50 47.50 118.75
Flavored Brandy 1.50 59.00 88.50
Gilbey’s Gin 2.00 61.50 123.00
Gin 2.00 202.00 404.00
Grand Marnier 3.50 51.00 178.50
Peach Schnapps 2.00 52.00 104.00
Peppermint Schnapps 2.00 44.50 89.00
Ron Rico 2.50 51.00 127.50
Rum 2.50 133.75 334.38
Rye 2.50 44.00 110.00
Scotch 2.50 49.00 122.50
Skyy 2.50 46.50 116.25
Sloe Gin 2.00 51.00 102.00
Smirnoff 2.50 41.50 103.75
Stolichnaya 3.00 48.50 145.50
Tanqueray 3.00 55.00 165.00
Tequila 2.00 148.75 297.50
Triple Sec 1.50 142.25 213.38
Vermouth 1.50 44.50 66.75
Vodka 2.00 140.00 280.00
Whiskey 2.00 47.00 94.00
Totals: 2,237.25 5,286.00
Volume is in oz
BERG’S GOURMET LOUNGE AND RESTAURANT
(This example is page 1 of a multiple page report.)

18-20 Infinity Installation/Service and User Manual
Price Level Changes Report
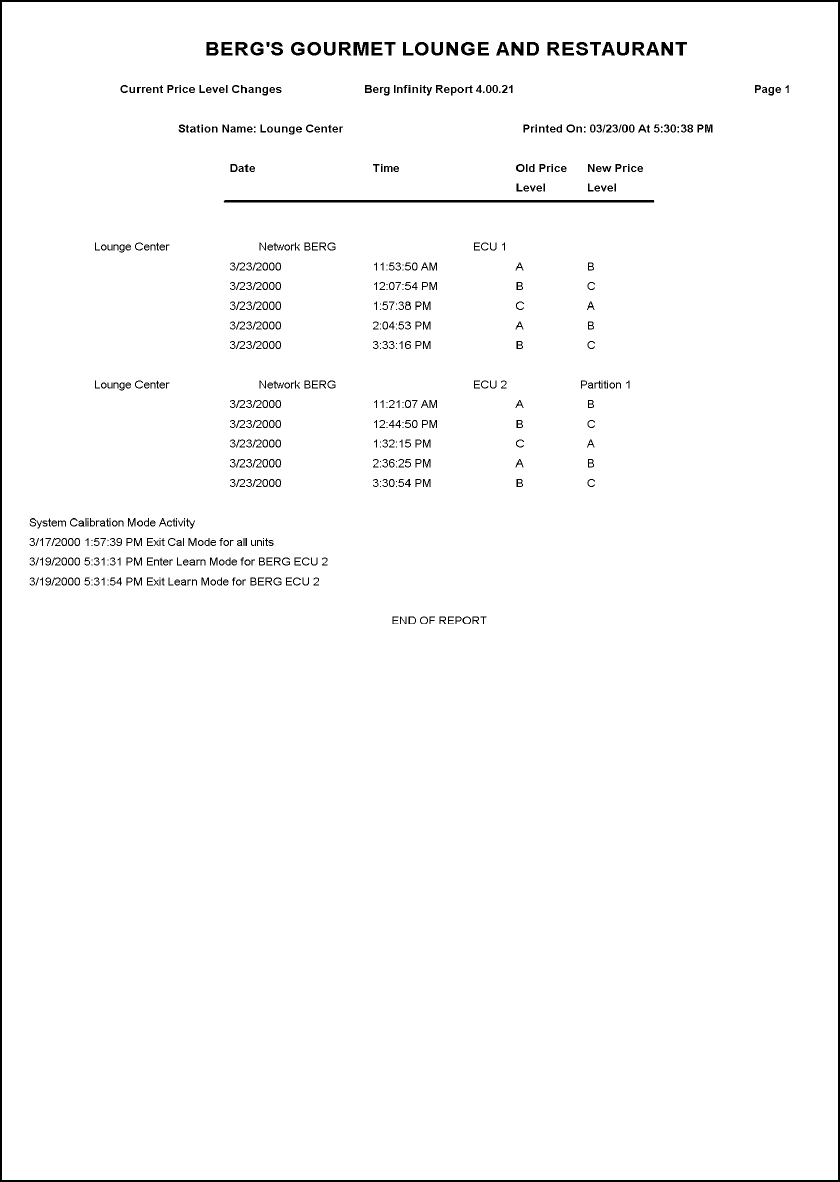
This report shows the date and time of price level changes at the selected station or group. It lists
the original and new price level for each change. The following is a description of this report. For
help with running the report see Run an Advanced Report in the Reports section.
Price Level Changes This report shows the Date, Time, Old Price Level, and New
Price Level for each price level change at each ECU in the
selected station or group. The 19 most recent price level
changes are listed. If you have a TAP 1 ECU with many
partitions, there may be fewer than 19 changes listed. Also if
there are several price level changes listed for one partition,
there may be fewer changes listed for the other partitions. Price
level changes are not cleared when you run an Archive and
Clear Sales (Z) report.
Calibration Mode This report also shows the Date and Time when dispensers in
the selected station or group were in calibration mode.
Switch Category This report shows the Date, Time, Old Category, and New
Category for each category switch at each ECU in the selected
station or group.
Printed On The Time and Date at the top of the report are the time and date
the report was runnot necessarily the time and date of the last
station activity.
Type of Data
Glossary of Report Terms
See the Glossary of Report
Terms in this section for further
clarification of terms.
To run this report the computer must communicate with the
selected ECU(s). The data reported on is all data currently
stored at the ECU(s) or in other words, all data since the last
time you cleared sales at the selected ECU(s). This report can
only be run as a Current report.
Sample Reports 18-21

18-22 Infinity Installation/Service and User Manual
Price Portion Report
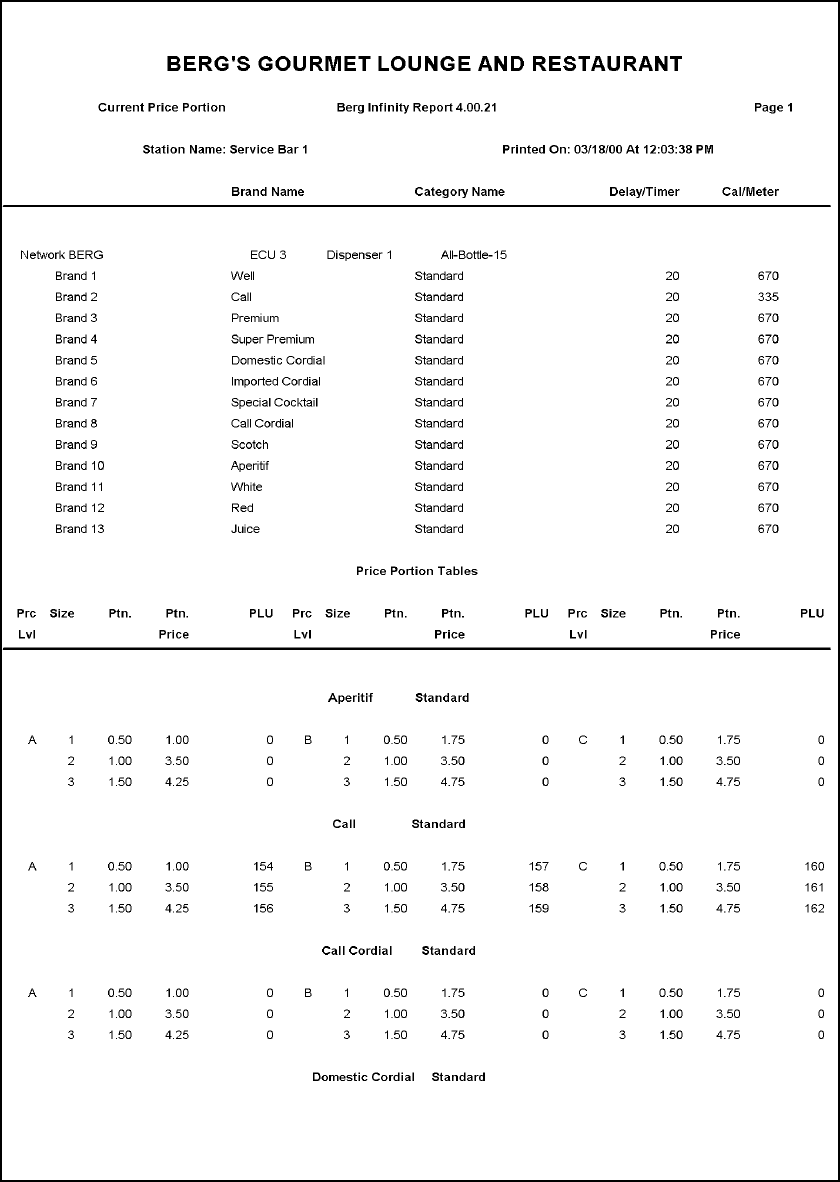
The Price Portion report lists the brands that have been assigned to each dispenser in the selected
station or group. It also lists the prices and portions for each brand and cocktail that have been
assigned. The following is a description of this report. For help with running the report see Run
an Advanced Report in the Reports section.
Price Portion For every dispenser (Laser, All-Bottle, Tap) at the selected
station/group this report lists a Brand Name, Category Name,
Delay/Timer and Cal/Meter column.
Brand Name is the brand or cocktail assigned to the button,
coded pourer or tap.
Category Name is the name of the brand or cocktail's prices
and portions.
Delay/Timer is either the delay value of an All-Bottle or
Laser dispenser or the flow rate of a TAP 1 dispenser.
Cal/Meter is either the cal value of an All-Bottle or Laser
dispenser or the meter count of a TAP 1 dispenser.
The report then lists the Price Portion Tables for each brand or
cocktail.
Prc Lvl is the price level (A, B, C, D).
Size is the portion size (1-4 for Liquor, Wine and Mixers, 1-
8 for Beer)
Ptn. is the portion amount (listed in the unit of measure for
your system).
Ptn. Price is the price of the portion size.
PLU is the PLU assigned to the portion size.
Printed On The Time and Date on the report are the time and date the report
was run.
Type of Data This report can only be run as a Current report. However, the
computer does not communicate with the selected ECU(s)
because all the data comes from the computer's database.
Glossary of Report Terms
See the Glossary of Report
Terms in this section for further
clarification of terms.
Sample Reports 18-23
(This example is page 1 of a multiple page report.)
18-24 Infinity Installation/Service and User Manual
PLU Report
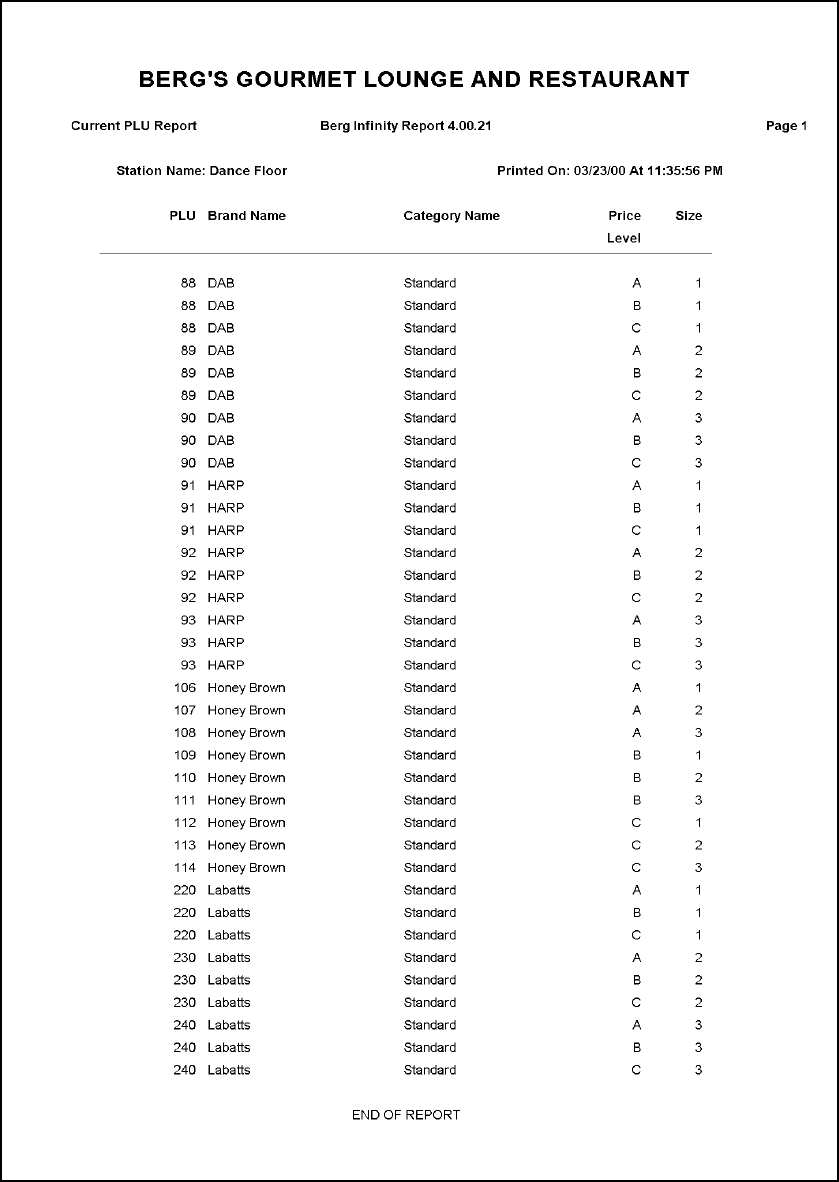
The PLU report lists the PLUs that have been assigned to each brand in the selected station or
group. This report is helpful in diagnosing problems with Interface or a Reconciliation report. It
helps locate duplicate PLUs and brands without any PLU (shown with a zero). The following is a
description of this report. For help with running the report see Run an Advanced Report in the
Reports section.
PLU
Glossary of Report Terms
See the Glossary of Report
Terms in this section for further
clarification of terms.
This report lists the PLU for every brand in the selected station
or group and shows the Brand Name, price/portion Category
Name, Price Level and portion Size assigned to the PLU. The
list is ordered by PLU number.
Printed On The Time and Date on the report are the time and date the report
was run.
Type of Data This report can only be run as a Current report. However, the
computer does not communicate with the selected ECU(s)
because all the data comes from the computer's database.
Sample Reports 18-25
18-26 Infinity Installation/Service and User Manual
Cost Per Unit Report
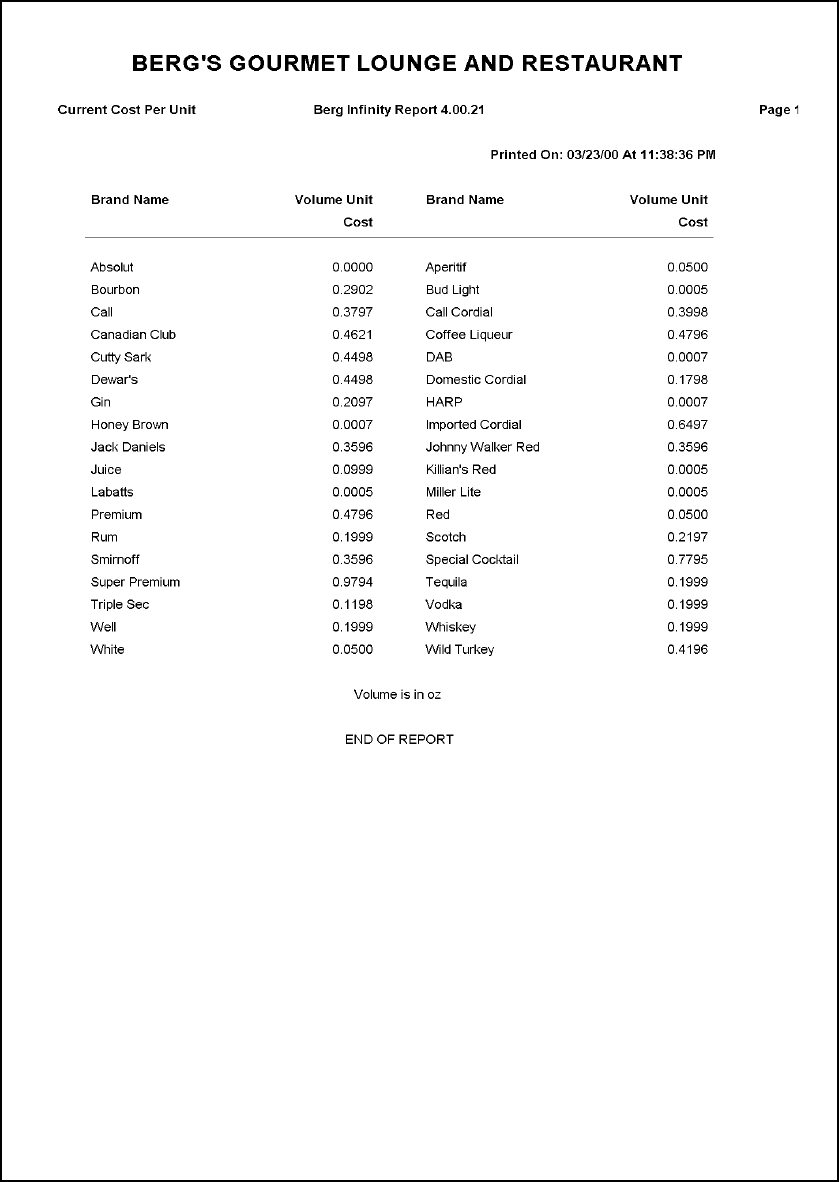
The Cost Per Unit report lists the cost (to you) of each volume unit of each brand. This report
only shows cost information if you enter a cost when setting up the brand. The unit is the unit of
measure for your system. The following is a description of this report. For help with running the
report see Run an Advanced Report in the Reports section.
Cost Per Unit This report shows each Brand Name in your brand list with its
Volume Unit Cost. The cost per unit is derived from the
container cost you entered when setting up the brand. To enter
cost information see Brand List Setup or Modify a Brand in the
Brands, Cocktails, Prices and Portions section.
Printed On The Time and Date on the report are the time and date the report
was run.
Type of Data This report can only be run as a Current report. However, the
computer does not communicate with the selected ECU(s)
because all the data comes from the computer's database.
Glossary of Report Terms
See the Glossary of Report
Terms in this section for further
clarification of terms.
Sample Reports 18-27

18-28 Infinity Installation/Service and User Manual
Configuration Report
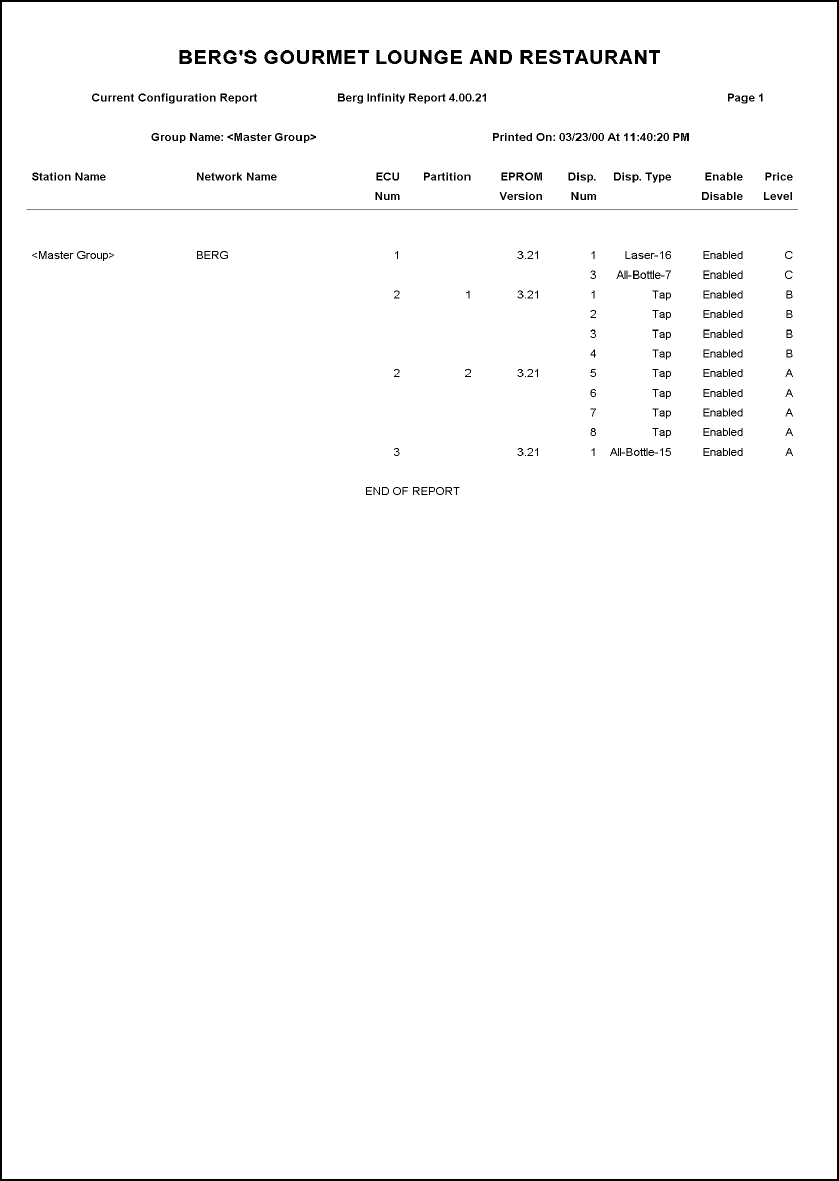
The Configuration report shows the current setup of ECUs and dispensers. The following is a
description of this report. For help with running the report see Run an Advanced Report in the
Reports section.
Configuration This report displays the Station Name, Network Name, ECU
Number, Partition, EPROM Version, Dispenser Number,
Dispenser Type, Enable/Disable, and Price Level for each
ECU or partition in the selected station or group.
Station Name is the station or group selected for the report.
Network Name is the name of the station or group's network.
ECU Num. is the number assigned to the ECU.
Partition is the number of the ECU partition (if it is a TAP 1
ECU).
EPROM Version is the version number of the EPROM in the
ECU.
Disp Num is the number of the Infinity ECU dispenser (1-3) or
TAP 1 tap (1-8). Dispensers 1 and 2 on Infinity ECUs are Laser
dispensers; dispenser 3 is All-Bottle.
Disp Type is the type of dispenser: Laser-6, Laser-12, Laser-16,
All-Bottle-7, All-Bottle-15, All-Bottle ID or Tap.
Enable/Disable is the current state of the dispenserspecifying
whether it is enabled for pouring or disabled.
Prc Lvl is the price level currently set at the ECU.
Printed On The Time and Date on the report are the time and date the report
was runnot necessarily the time and date of the last station
activity.
Type of Data To run this report the computer must communicate with the
selected ECU(s). This report can only be run as a Current
report.
Glossary of Report Terms
See the Glossary of Report
Terms in this section for further
clarification of terms.
Sample Reports 18-29

18-30 Infinity Installation/Service and User Manual
Variance Report
To run the Variance report you must enter the sales collected at the sales terminal for each brand
in the report. The software then calculates the difference between the sales recorded at the ECU
and the sales recorded at the sales terminal. Any difference in the two amounts is shown and also
figured as a percentage. For help with running this report see Run a Variance Report in the
Reconciliation and Variance Reports section.
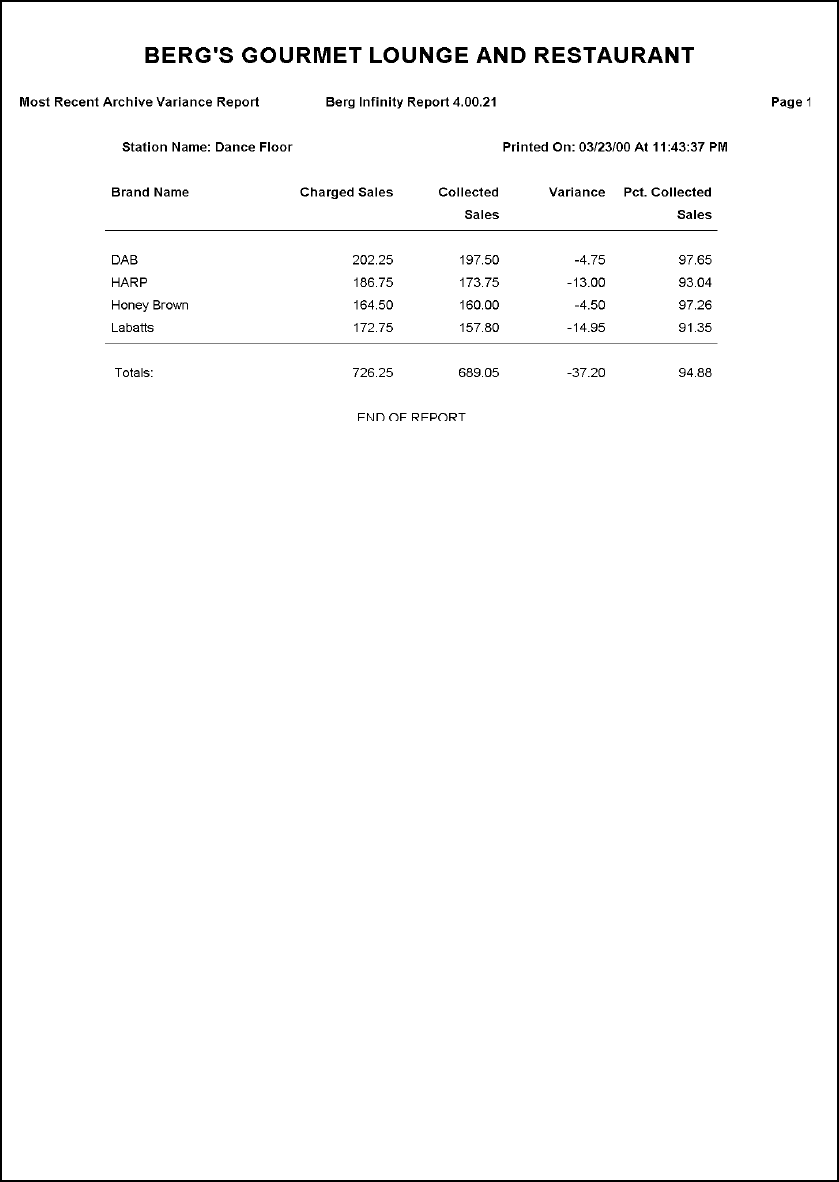
Variance This report displays the Charged Sales, Collected Sales,
Variance and the Percent Collected Sales for each Brand
Name in the selected station or group.
Brand Name is the name of each brand assigned to dispensers in
the station or group.
Charged Sales is the sales amount recorded at the ECU for each
brand.
Collected Sales is the sales amount recorded by the sales
terminal for the brand. (This is the amount you enter when you
run the report.)
Variance is the discrepancy between the charged sales and
collected sales for each brand.
Pct Collected Sales is the collected sales divided by the charged
sales. (It shows the percentage of the charged sales recorded by
the ECU you actually collected at the sales terminal.)
The end of the report shows the Totals for Charged Sales,
Collected Sales, Variance, and Pct Collected Sales for all
brands in the station or group.
Printed On The Time and Date on the report are the time and date the report
was runnot necessarily the time and date of the last station
activity.
Type of Data If you run this report as a Current report the computer must
communicate with the selected ECU(s). The data reported on is
all data currently stored at the ECU(s) or in other words, all data
since the last time you cleared sales at the selected ECU(s).
To run this report as a Most Recent Archive report the computer
uses the sales data stored at the computer the last time you
cleared sales at the ECU.
To run this report as a Weekly, Monthly or Date Range report
the computer uses archive data stored at the computer. The data
reported on is determined by the number of times you cleared
sales at the ECU during the specified time.
Glossary of Report Terms
See the Glossary of Report
Terms in this section for further
clarification of terms.
Sample Reports 18-31

18-32 Infinity Installation/Service and User Manual
Reconciliation Report
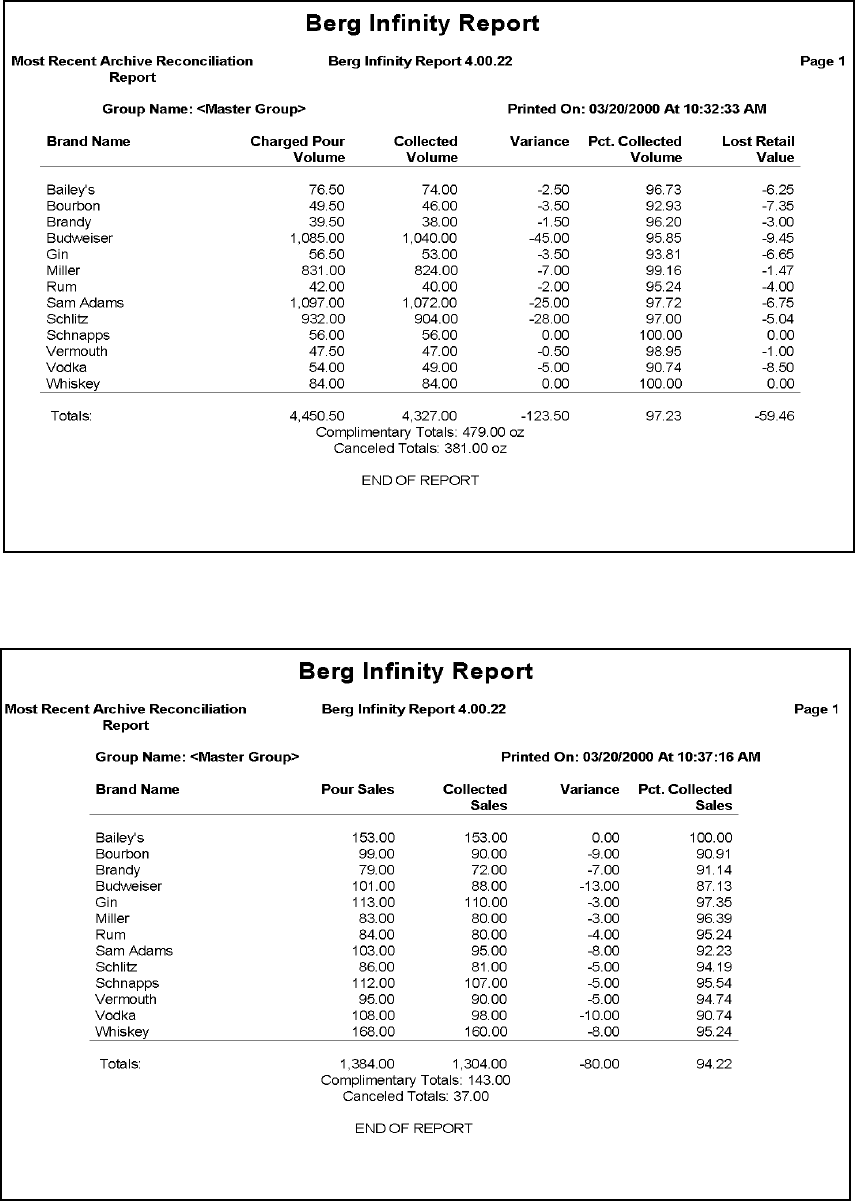
A Reconciliation report compares data from a sales terminal data file with data generated by
Infinity. You can choose to compare by volume or by sales. To run this report you must perform
required set up tasks. (See Before You Run a Reconciliation Report and Run a Reconciliation
Report in the Reconciliation and Variance Reports section.) Each time you run a Reconciliation
report, a current sales terminal data file must be present at the computer.
Reconciliation If you choose to compare by Volume, this report displays the
Charged Pour Volume, Collected Volume, Variance, Percent
Collected Volume and Lost Retail Value for each Brand
Name in the selected station or group.
If you choose to compare by Sales, this report displays the Pour
Sales, Collected Sales, Variance and the Percent Collected
Sales for each Brand Name in the selected station or group.
The end of the report shows Totals for all brands in the station
or group.
Printed On The Time and Date on the report are the time and date the report
was runnot necessarily the time and date of the last station
activity.
Type of Data
Glossary of Report Terms
See the Glossary of Report
Terms in this section for further
clarification of terms.
If you run this report as a Current report the computer must
communicate with the selected ECU(s). The data reported on is
all data currently stored at the ECU(s) or in other words, all data
since the last time you cleared sales at the selected ECU(s).
To run this report as a Most Recent Archive report the
computer uses the sales data stored at the computer the last time
you cleared sales at the ECU.
To run this report as a Weekly, Monthly or Date Range report
the computer uses archive data stored at the computer. The data
reported on is determined by the number of times you cleared
sales at the ECU during the specified time.
Sample Reports 18-33

18-34 Infinity Installation/Service and User Manual
Server Summary/Clear Server Sales (Z) Report
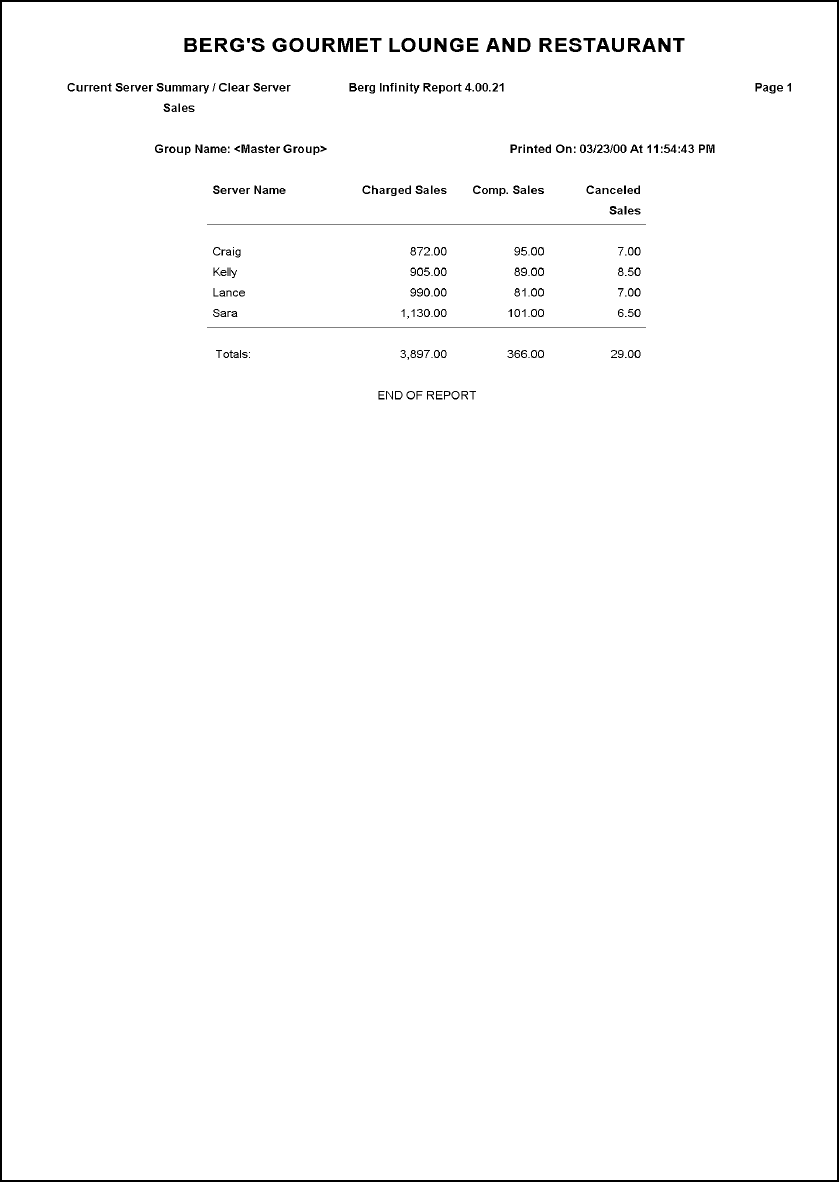
When you clear server sales at selected ECUs, Infinity generates a Current Server Summary/
Clear Server Sales report showing data for each server selected. Only run this report when you
want to set sales totals at the ECU(s) to zero for the selected server(s). The following is a
description of this report. For help with running the report see Clear Server Sales at the ECU in
the Reports section.
Server Summary/
Clear Server Sales
This report shows the total Charged Sales, Comp. Sales and
Canceled Sales for the selected Server Name(s).
The complimentary and canceled totals are not included in the
Charged Sales totals for the server(s).
Printed On The Time and Date on the report are the time and date the
report was runnot necessarily the time and date of the last
station activity.
Type of Data To run this report the computer must communicate with the
selected ECU(s). The data reported on is all data currently stored
at the ECU(s) or in other words, all data since the last time you
cleared sales at the selected ECU(s).
The ECUs have 20 slots for individual server sales data. If you
have more than 20 servers, you should clear server sales as
servers finish their shifts if you want the server sales data at the
ECU to be accurate. (If all twenty slots are filled, the 21st
server's sales overwrite the sales that have been stored at the
ECU the longest and that server's sales are erased.) The total
sales data at the ECU remains accurate and complete even if
server sales data is erased.
(If you have a TAP 1 ECU divided into more than 4 partitions,
each partition has 10 slots for individual server sales data.)
Glossary of Report Terms
See the Glossary of Report
Terms in this section for further
clarification of terms.
Sample Reports 18-35

18-36 Infinity Installation/Service and User Manual
Server Summary Report
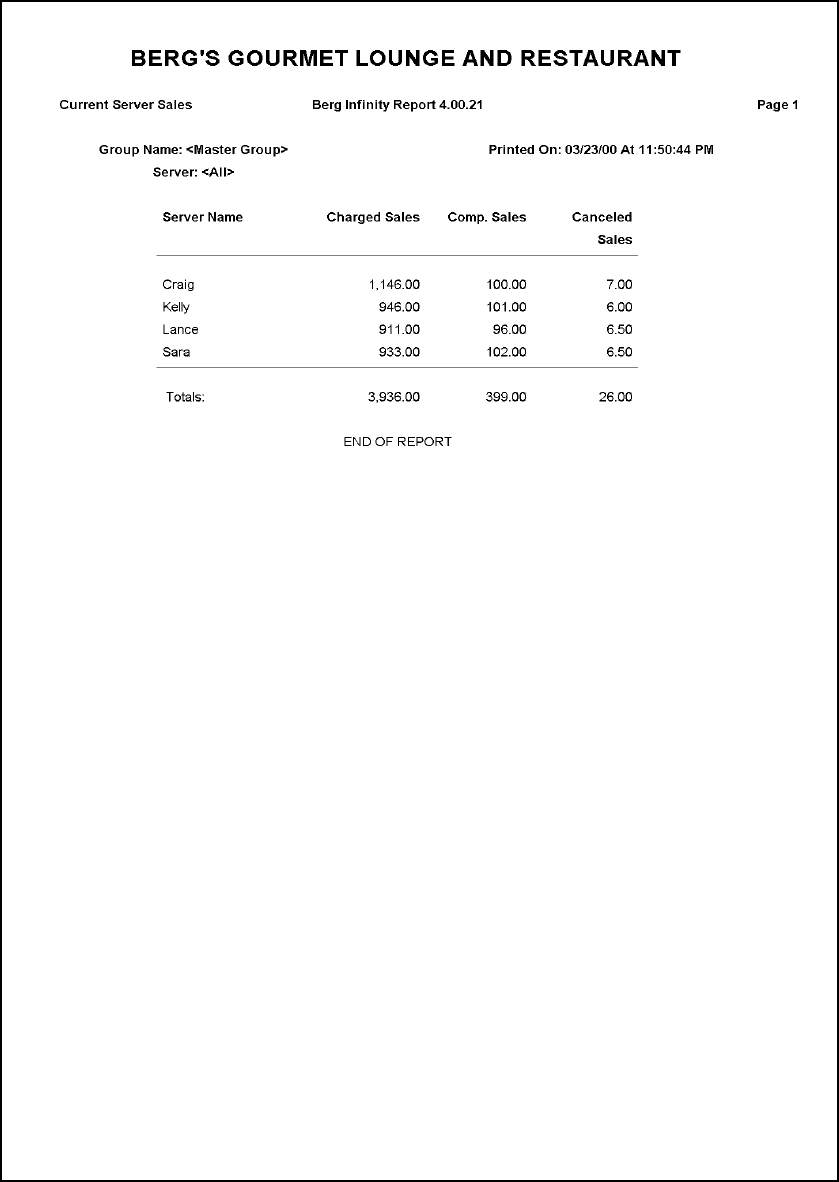
The server summary report shows a summary of sales by server(s). This report provides the same
information as the Clear Server Sales (Z) report, but the server sales data is not cleared at the
ECU. The following is a description of this report. For help with running the report see Run an
Advanced Report in the Reports section.
Server Summary This report shows the total Charged Sales, Comp. Sales and
Canceled Sales for the selected Server Name(s).
The complimentary and canceled totals are not included in the
Charged Sales totals for the server(s).
Printed On The Time and Date on the report are the time and date the report
was runnot necessarily the time and date of the last station
activity.
Type of Data To run this report the computer must communicate with the
selected ECU(s). The data reported on is all data currently stored
at the ECU(s) or in other words, all data since the last time you
cleared sales at the selected ECU(s). This report can only be run
as a Current report.
The ECUs have 20 slots for individual server sales data. If you
have more than 20 servers, you should clear server sales as
servers finish their shifts if you want the server sales data at the
ECU to be accurate. (If all twenty slots are filled, the 21st
server's sales overwrite the sales that have been stored at the
ECU the longest and that server's sales are erased.) The total
sales data at the ECU remains accurate and complete even if
server sales data is erased.
(If you have a TAP 1 ECU divided into more than 4 partitions,
each partition has 10 slots for individual server sales data.)
Glossary of Report Terms
See the Glossary of Report
Terms in this section for further
clarification of terms.
Sample Reports 18-37
18-38 Infinity Installation/Service and User Manual
Server Sales By Price Level Report
This report shows the total sales for selected servers by price levels. The following is a
description of this report. For help with running the report see Run an Advanced Report in the
Reports section.
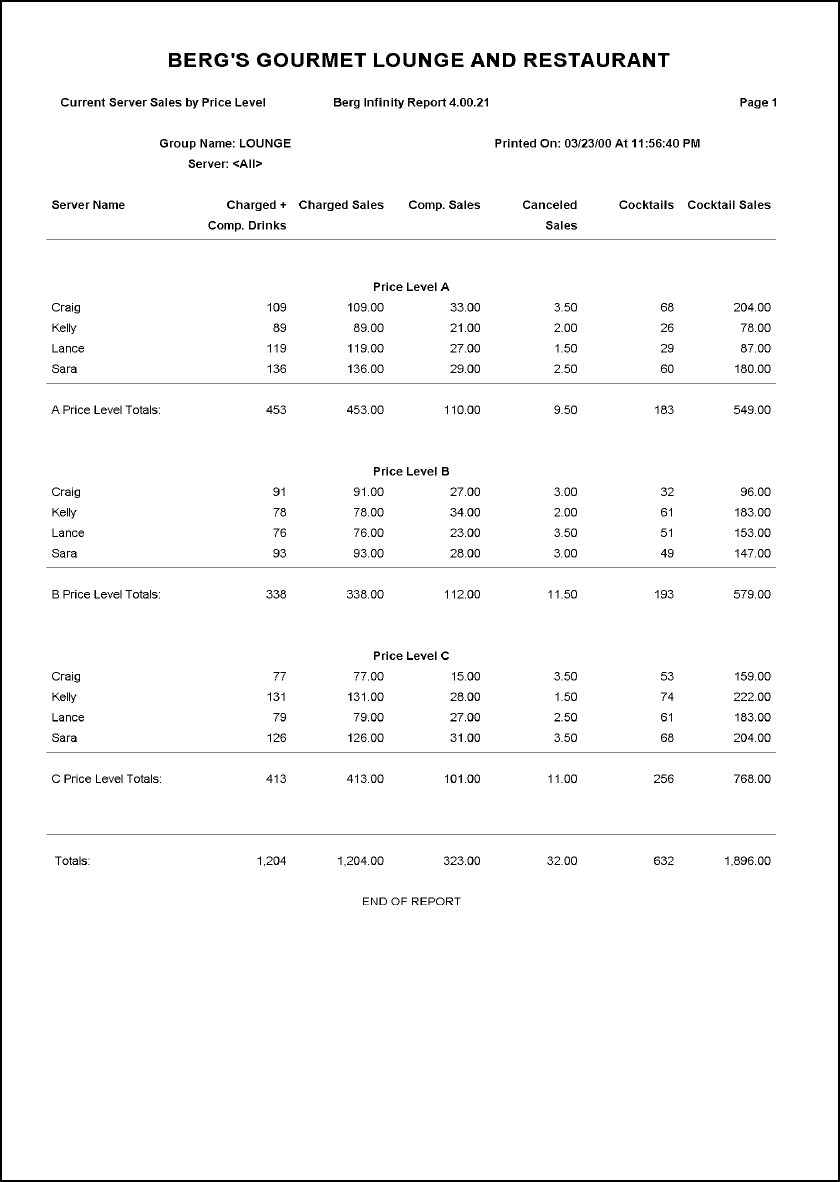
Server Sales
By Price Level
This report shows the number of Charged + Comp Drinks,
Charged Sales, Comp. Sales and Canceled Sales for each
Server Name at each Price Level of the selected station or
group. It also list the number of Cocktails poured and the
Cocktail Sales.
The totals are computed for each price level and for all price
levels combined.
Printed On The Time and Date on the report are the time and date the report
was runnot necessarily the time and date of the last station
activity.
Type of Data To run this report the computer must communicate with the
selected ECU(s). The data reported on is all data currently
stored at the ECU(s) or in other words, all data since the last
time you cleared sales at the selected ECU(s). This report can
only be run as a Current report.
Glossary of Report Terms
See the Glossary of Report
Terms in this section for further
clarification of terms.
Sample Reports 18-39

18-40 Infinity Installation/Service and User Manual
Container Stock Report
This report shows the stock status of all brands included in Inventory. The information in the
report is based on the most recent Inventory Check. The following is a description of this report.
For help with running the report see Reports in the Inventory section.
Brand Name The name of each brand included in Inventory.
Count The number of containers of the brand in stock.
Container The type of container used for the brand.
Status The ordering status of the brand.
Stock Cost The total cost to you of all containers of the brand on hand. This
is the container cost multiplied by the number of containers.
Stock Value The total retail value of all containers of the brand on hand. This
is the retail price per volume unit multiplied by the number of
units in the brand's container size multiplied by the number of
containers in stock.
Type of Data The data in Inventory reports reflects the results of the most
recent Inventory Check. The computer does not communicate
with the selected ECU(s) because all the data comes from the
computer's database.

Sample Reports 18-41
(This example is page 1 of a multiple page report.)
Container Stock Berg Infinity Report 4.11.19 Page 1
Group Name: <Master Group> Printed On: 3/1/2001 At 10:41:56 AM
Brand Name Count Container Status Stock Cost Stock Value
Absolut 2.78 Liter 27.80 282.04
Aperitif 4.00 Liter 24.00 270.54
Bacardi 4.70 Liter 47.00 476.83
Bacardi 151 2.67 Liter 32.04 316.03
Beefeater 3.62 Liter 28.96 306.05
Bombay 4.72 Liter 37.76 399.05
Bourbon 1.95 Liter **ORDER NOW** 15.60 164.86
Brandy 3.31 Liter 26.48 279.84
Bud Light 4.88 Half Barrel 122.00 387.28
Call 3.00 Liter 30.00 304.36
Call Cordial 4.00 Liter 44.00 405.82
Captain Morgan 4.70 Liter 51.70 476.83
Castillo 1.00 Liter **ORDER NOW** 11.00 101.45
Chivas Regal 2.67 Liter 40.05 361.18
Coffee Liqueur 3.16 Liter 18.96 213.73
Courvoisier 4.72 Liter 56.64 558.67
DAB 2.91 Half Barrel 87.30 288.67
Domestic Cordial 4.00 Liter 32.00 338.18
Finlandia 4.66 Liter 37.28 393.98
Flavored Brandy 2.20 Liter 8.80 111.60
Gilbey’s Gin 3.57 Liter 21.42 241.46
Gin 3.58 Liter 17.90 242.14
Grand Marnier 2.67 Liter 32.04 316.03
HARP 3.89 Half Barrel 136.15 463.07
Honey Brown 4.91 Half Barrel 147.30 487.07
Imported Cordial 3.00 Liter 33.00 304.36
Juice 4.00 Liter 8.00 135.27
Killian’s Red 4.83 Half Barrel 120.75 383.31
Labatts 2.87 Half Barrel 86.10 284.70
Miller Lite 3.91 Half Barrel 97.75 310.30
Peach Schnapps 4.32 Liter 21.60 292.19
Peppermint Schnapps 2.33 Liter 11.65 157.59
Premium 4.00 Liter 32.00 338.18
Red 5.00 Liter 20.00 253.64
Ron Rico 2.75 Liter 22.00 232.50
Rum 2.79 Liter 19.53 235.88
Rye 4.42 Liter 30.94 373.69
Samuel Adams 2.87 Half Barrel 86.10 284.70
Scotch 3.39 Liter 23.73 286.61
Skyy 4.65 Liter 37.20 393.13
BERG’S GOURMET LOUNGE AND RESTAURANT

18-42 Infinity Installation/Service and User Manual
Cost Analysis Report
This report shows volume poured and volume lost for each brand. The lost volume data is only
available if you've entered container amounts from your physical inventory. For help with running
the report see Reports in the Inventory section.
Brand Name The name of each brand included in Inventory.
Poured The number of containers of the brand poured in the time
between the two most recent Inventory Checks.
Container The container type assigned to the brand.
Containers Lost The number of containers of the brand unaccounted for in the
time between the two most recent Inventory Checks. (This
number is only available if you perform a physical inventory and
enter the current stock amount when you run the Inventory
Check.)
Lost Value The retail value of the containers of the brand that are
unaccounted for.
Type of Data The data in Inventory reports reflects the results of the most
recent Inventory Check. The computer does not communicate
with the selected ECU(s) because all the data comes from the
computer's database.

Sample Reports 18-43
Cost Analysis Berg Infinity Report 4.11.12 Page 1
Group Name: <Master Group> Printed On: 10/23/2000 At 2:42:27 PM
Brand Name Poured Container Containers
Lost
Lost Value
From 10/20/2000 5:09:42 PM To 10/23/2000 2:31:45 PM
Bailey’s 4.58 Liter 0.00 0.00
Brandy 1.40 Liter 0.00 0.00
Bud Light 0.66 Half Barrel 0.00 0.00
Burgundy 23.86 Liter 0.00 0.00
Cabernet 17.92 Liter 0.00 0.00
Call 1.69 Liter 0.00 0.00
Chablis 22.59 Liter 0.00 0.00
Chardonnay 21.50 Liter 0.00 0.00
Club Soda 1.09 Liter 0.00 0.00
Cocktail Mix 1.42 Liter 0.00 0.00
Cognac 1.40 Liter 1.60 135.27
Cointreau 1.42 Liter 0.58 49.04
Coors 0.42 Half Barrel 0.00 0.00
Corona 0.57 Half Barrel 0.43 34.12
Creme de Menthe 1.24 Liter 0.00 0.00
Cuervo Gold 1.43 Liter 0.57 48.19
Domestic Cordial 1.30 Liter 0.00 0.00
Gin 4.95 Liter 0.00 0.00
Guinness 0.54 Half Barrel 0.00 0.00
Heineken 0.48 Half Barrel 0.00 0.00
Kahlua 1.23 Liter 0.00 0.00
Killian’s Red 0.55 Half Barrel 0.00 0.00
Merlot 22.83 Liter 0.00 0.00
MGD 0.51 Half Barrel 0.00 0.00
Orange Juice 1.42 Liter 0.00 0.00
Premium 1.48 Liter 0.00 0.00
Premium Cordial 1.24 Liter 0.00 0.00
Riesling 22.38 Liter 0.00 0.00
Rum 2.22 Liter 0.00 0.00
Rye 1.42 Liter 0.00 0.00
Samuel Adams 0.57 Half Barrel 0.00 0.00
Scotch 1.54 Liter 0.00 0.00
Southern Comfort 1.40 Liter 0.00 0.00
Special Cocktail 1.54 Liter 0.89 45.15
Super Call Cordial 1.51 Liter 0.00 0.00
Tequila 2.20 Liter 2.60 175.85
Tonic Water 1.45 Liter 0.00 0.00
Triple Sec 2.25 Liter 0.00 0.00
BERG’S GOURMET LOUNGE AND RESTAURANT
(This example is page 1 of a multiple page report.)

18-44 Infinity Installation/Service and User Manual
Brand Information Report
This report shows the brand setup and ordering information you've entered at the computer. The
following is a description of this report. For help with running the report see Reports in the
Inventory section.
Brand Name The name of each brand in your brand list.
Count The number of containers of the brand in stock.
Container The type of container used for the brand.
Container Cost The cost you pay for each container of the brand (entered in
Brand List Setup).
Container Value The retail value of each container of the brand (derived from the
retail price per volume unit).
Order Point The minimum number of containers you want on hand before
re-ordering the brand (entered in Brand Wizard or Brand List
Setup).
Order Quantity The number of containers of the brand to be ordered.
Supplier The name of the supplier of the brand.
Type of Data The data in Inventory reports reflects the results of the most
recent Inventory Check. The computer does not communicate
with the selected ECU(s) because all the data comes from the
computer's database.
Warnings You may see one or more messages at the end of the report.
These messages help you see how your brands are set up and
whether you need to make some changes.
The messages include: the number of brands without suppliers
(these are not part of inventory), the number of brands with an
invalid stock count, the number of brands with an invalid order
point, the number of brands with an invalid order quantity, and
the number of brands not assigned.

Sample Reports 18-45
Brand Information Berg Infinity Report 4.11.15 Page 1
Group Name: Master Group Printed On: 11/30/2000 At 11:11:46 AM
Brand Name Count Container Container
Cost
Container
Value
Order
Point
Order
Qty.
Supplier
Absolut 6.36 Liter 15.00 101.45 2.00 6 Spirit Supply
Aperitif 0.00 Liter 17.00 67.64 0.00 0
Bacardi 7.90 Liter 18.00 101.45 2.00 6 Spirit Supply
Bacardi 151 1.85 Liter 20.00 118.36 2.00 6 Spirit Supply
Beefeater 9.54 Liter 19.00 84.55 2.00 6 Spirit Supply
Bombay 4.87 Liter 20.00 84.55 2.00 6 Spirit Supply
Bourbon 2.00 Liter 15.00 84.55 2.00 6 Spirit Supply
Brandy 3.00 Liter 13.00 84.55 2.00 6 Spirit Supply
Bud Light 12.71 Half Barrel 25.00 79.36 2.00 6 Beer Man, Inc.
Call 0.00 Liter 10.00 101.45 0.00 0
Call Cordial 0.00 Liter 15.00 101.45 0.00 0
Captain Morgan 0.76 Liter 11.00 101.45 2.00 6 Spirit Supply
Castillo 7.00 Liter 11.00 101.45 2.00 6 Spirit Supply
Chivas Regal 2.00 Liter 15.00 135.27 2.00 6 Spirit Supply
Coffee Liqueur 3.00 Liter 18.00 67.64 2.00 6 Spirit Supply
Courvoisier 0.50 Liter 19.00 118.36 2.00 6 Spirit Supply
DAB 10.40 Half Barrel 30.00 2,976.00 2.00 6 Beer Man, Inc.
Domestic Cordial 0.00 Liter 8.00 84.55 0.00 0
Finlandia 2.00 Liter 8.00 84.55 2.00 6 Spirit Supply
Flavored Brandy 3.00 Liter 17.00 50.73 2.00 6 Spirit Supply
Gilbey’s Gin 3.00 Liter 17.00 67.64 2.00 6 Spirit Supply
Gin 4.00 Liter 16.00 67.64 2.00 6 Spirit Supply
Grand Marnier 2.00 Liter 12.00 118.36 2.00 6 Spirit Supply
HARP 5.63 Half Barrel 35.00 119.04 2.00 6 Beer Man, Inc.
Honey Brown 6.85 Half Barrel 30.00 99.20 2.00 6 Beer Man, Inc.
Imported Cordial 0.00 Liter 11.00 101.45 0.00 0
Juice 0.00 Liter 15.00 33.82 0.00 0
Killian’s Red 12.81 Half Barrel 25.00 79.36 2.00 6 Beer Man, Inc.
Labatts 4.56 Half Barrel 30.00 99.20 2.00 6 Beer Man, Inc.
Miller Lite 5.87 Half Barrel 25.00 79.36 2.00 6 Beer Man, Inc.
Peach Schnapps 2.00 Liter 15.00 67.64 2.00 6 Spirit Supply
Peppermint Schnapps 3.00 Liter 16.00 67.64 2.00 6 Spirit Supply
Premium 0.00 Liter 18.00 84.55 0.00 0
Red 0.00 Liter 14.00 50.73 0.00 0
Ron Rico 4.73 Liter 12.00 84.55 2.00 6 Spirit Supply
Rum 2.00 Liter 13.00 84.55 2.00 6 Spirit Supply
Rye 5.00 Liter 17.00 84.55 2.00 6 Spirit Supply
Samuel Adams 10.58 Half Barrel 30.00 99.20 2.00 6 Beer Man, Inc.
Scotch 0.00 Liter 18.00 84.55 0.00 0
BERG’S GOURMET LOUNGE AND RESTAURANT
(This example is page 1 of a multiple page report.)

SECTION
19
A schedule lets you automate daily and weekly Infinity operations. Various tasks
you repeat at the same time every day or week are perfect candidates for a
schedule. For example, enabling Infinity stations in the morning, changing price
levels at happy hour, running daily reports and disabling stations at closing are
tasks that can be included in a schedule and performed without you at the
computer. Or maybe you perform a series of tasks in a row when you run weekly
reports. You can define these tasks in a schedule without a specific time and just
run the schedule whenever you want to perform that series of tasks. This section
provides help with the following tasks:
Schedule Options ..........................................................................19-2
Create a Time Schedule ................................................................19-4
Create a Run Now Schedule ......................................................... 19-8
Define Schedule Actions .............................................................19-10
Run a Schedule ........................................................................... 19-14
Modify a Schedule ......................................................................19-16
Print a Schedule ..........................................................................19-18
Delete a Schedule........................................................................ 19-20
Schedule Log .............................................................................. 19-22
Error Log .....................................................................................19-24
Schedules
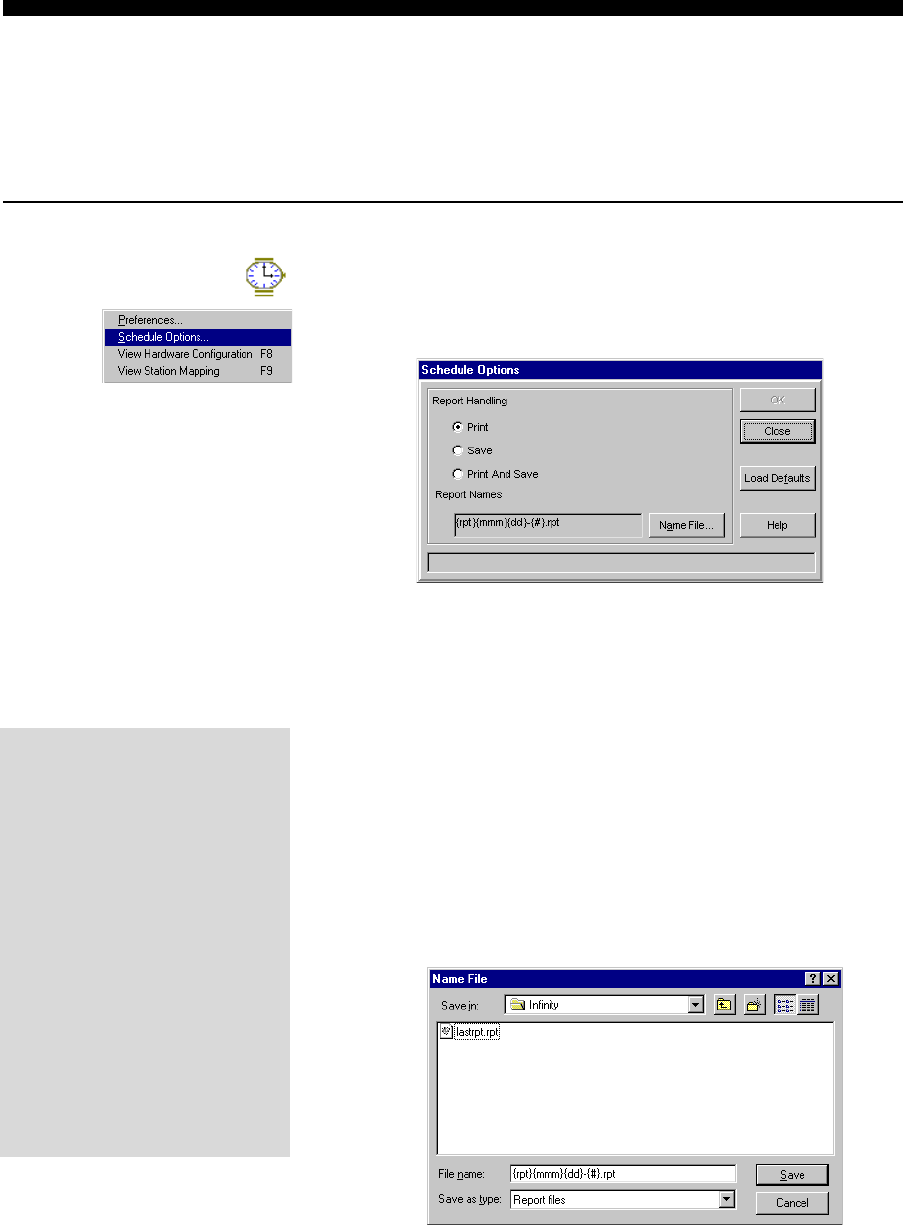
19-2 Infinity Installation/Service and User Manual
Schedule Options
Schedule options specify how report output is generated in a schedule. Perform this task to set up
default schedule options used for all new schedules. Defining default options does not affect any
existing schedules.
nTo set up schedule options:
1. Run Schedule.
2. Pull down the Options menu and click Schedule Options....
3. Select a Report Handling method.
Print means all scheduled reports are sent to the printer. (Be
sure the printer is on when the schedule is running and the
paper tray is full.)
Save means a scheduled report is saved to a file (with a
name you can specify).
Print And Save means scheduled reports are both sent to the
printer and saved to a file.
4. To specify a file name for all reports saved to a file, click
Name File....
5. Select the folder, type the file name used for all scheduled
reports and click Save.
Saved Report Files
lIf you select Save, reports
are saved to a file using the
format of the current default
printer.
lThe file names are listed in
the schedule log and error log
(e.g., "report written to file
ZNov02.rpt").
lSaved report files can only be
opened using the Report
program. (Go to Advanced
Reports, click Open... on the
Reports screen and select
the file name.)
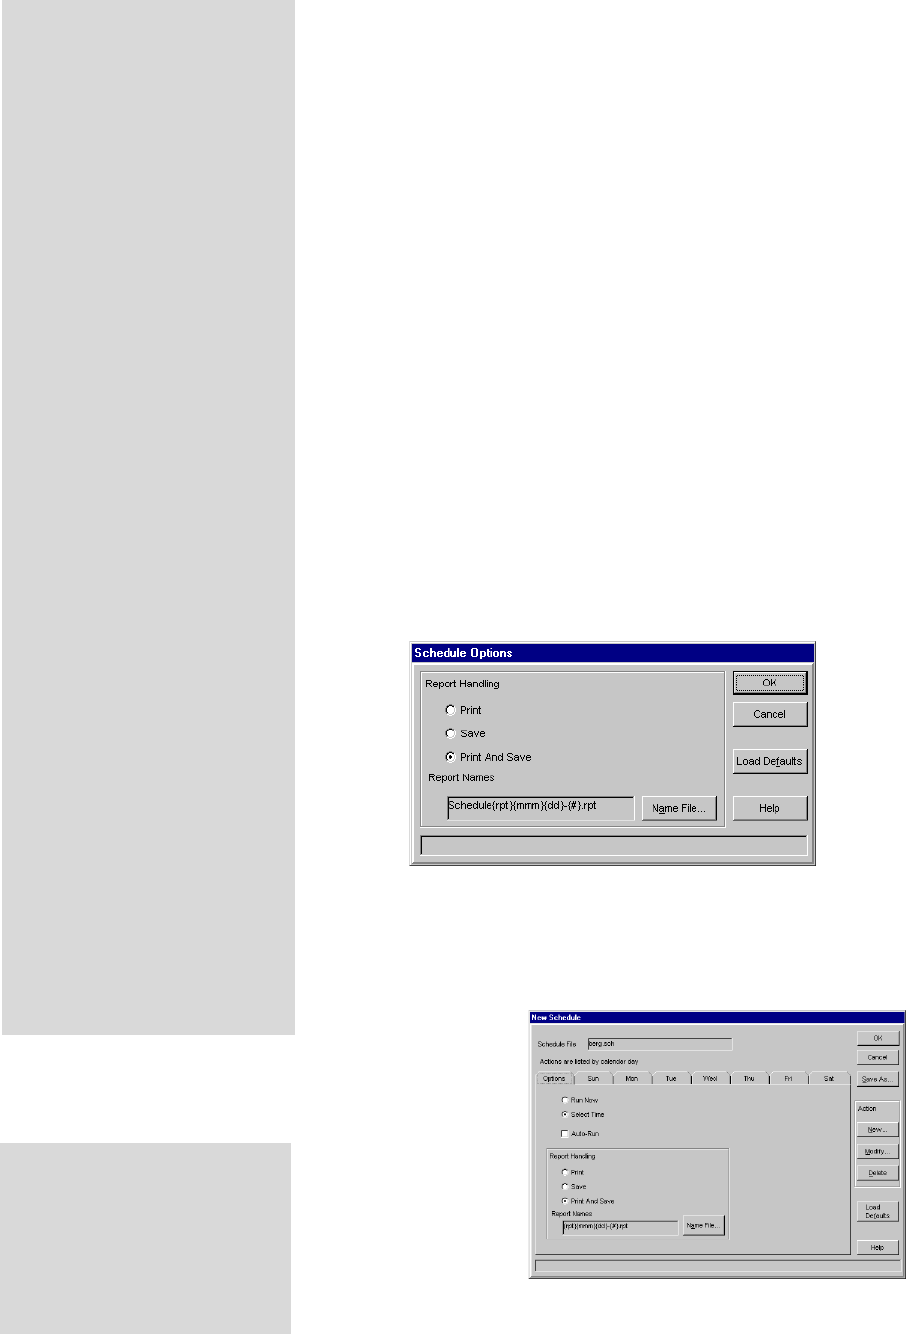
Schedules 19-3
The default report name for all scheduled reports is
{rpt}{mmm}{dd}-{#}.rpt. With this name, the first
scheduled Usage report run on June 17 is "USJun17-1.rpt".
A second Usage report run the same day is "USJun17-2.rpt".
If you don't want to use the default file name, you can
combine any text with the following strings to create your
own file name.
{rpt} - the 1-3 character abbreviation for the report, e.g., Z
{dd} - day of the month, e.g., 13
{ddd} - day of the week, short format, e.g., Tue
{dddd} - day of the week, full name, e.g., Tuesday
{mm} - two digit month number, e.g., 10 (for October)
{mmm} - name of the month short format, e.g., Oct
{mmmm} - name of the month, full name, e.g., October
{y} - day of the year, e.g., 355 for Dec. 21
{yy} - two digit year, e.g., 00
{yyyy} - four digit year, e.g., 2000
{#} - first number to make the file name unique
6. Click OK to save the options.
Note
qIf you select new
schedule options
on the Options
tab of the the
New Schedule
or Modify
Schedule screen,
those options
apply ONLY to
the specific
schedule being
created or
modified.
File Names
lThe {rpt} abbreviations are:
Z (Archive & Clear Sales)
X1 (Sales Totals)
X2 (Sales by Price Level)
X3 (Detailed Sales)
X4 (Hourly Sales)
SS (Sales Summary)
US (Usage)
*S1 (Server X1)
*S2 (Server X2)
PL (Price Level Changes)
*PP (Price and Portion)
*CFG (Config)
*RU (Retail Usage)
*CPU (Cost Per Unit)
*PLU (PLU)
REC (Reconciliation)
*CS (Container Stock)
*CA (Cost Analysis)
*BI (Brand Information)
Report names with (*) can
only be run as custom reports
under Schedule.
lIf you schedule a custom
report, the {rpt} abbreviation
used is the "based on" report.
lIf brackets don't match up or
don't contain one of the
defined strings, they are left
intact (as part of the file
name).
lExamples:
Z{ddd}.rpt = Ztue.rpt
{dd}{mmm}{yy}.rpt =
13oct01.rpt
{dd{xxx}.rpt = {dd{xxx}.rpt
(brackets don't match up)
Load Defaults
If you click Load Defaults on
the Modify Schedule screen
(for an existing schedule), your
options are used for the
schedule.
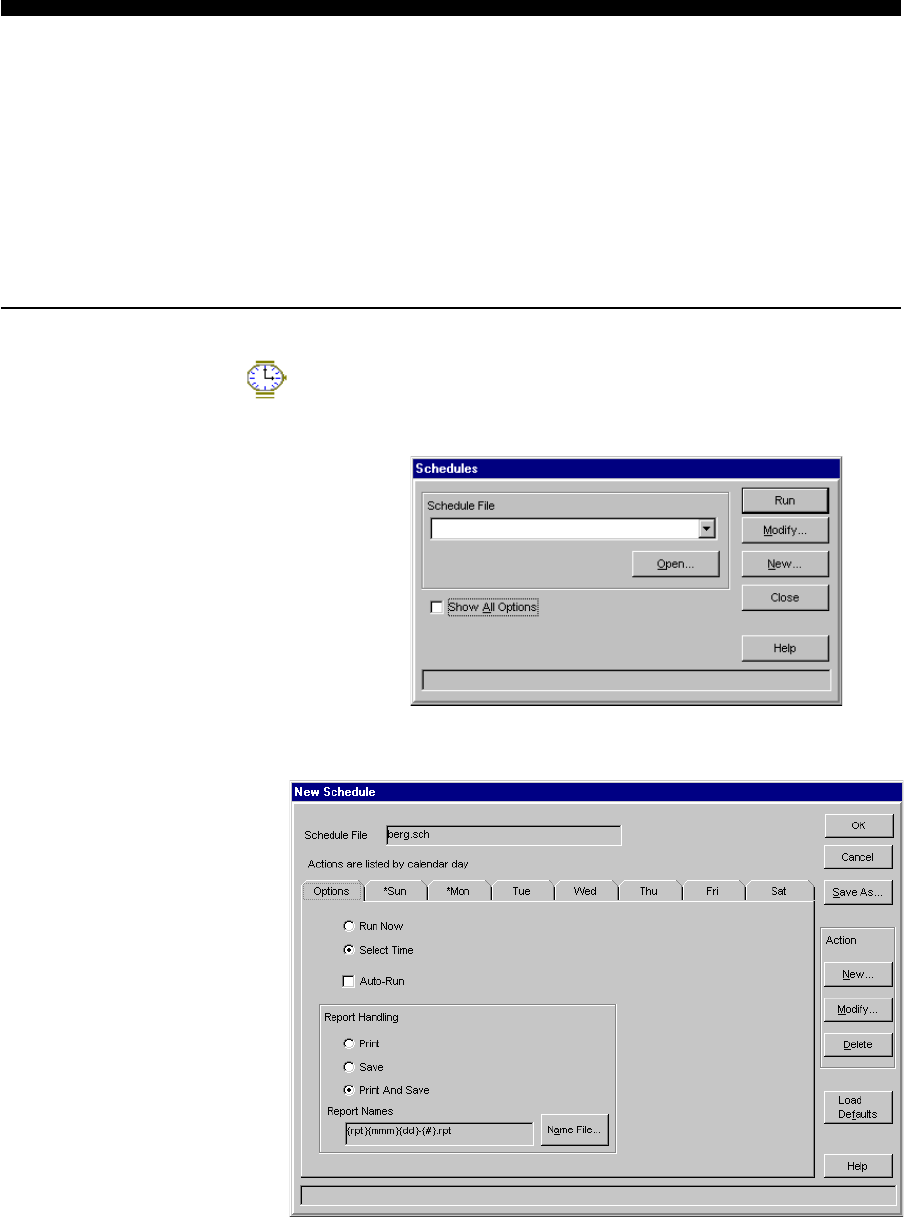
19-4 Infinity Installation/Service and User Manual
Create a Time Schedule
Creating a Time schedule defines which tasks or actions you want Infinity to perform
automatically and at what time(s). The actions you can schedule include running reports, clearing
ECU sales, enabling and disabling stations, changing price levels and exporting. The way you use
your Infinity system determines what type of schedules work best for you. You may want a
master schedule running constantly that handles all Infinity operations. Or you may want
schedules that you run at specific times of the week or month. If you don't want to define specific
times for the actions in your schedule see Create a Run Now Schedule in this section.
nTo create a Time schedule:
1. Run Schedule.
2. Click Schedules....
3. Click New....
A schedule appears with the name berg.sch.
4. Click Select Time (if necessary).
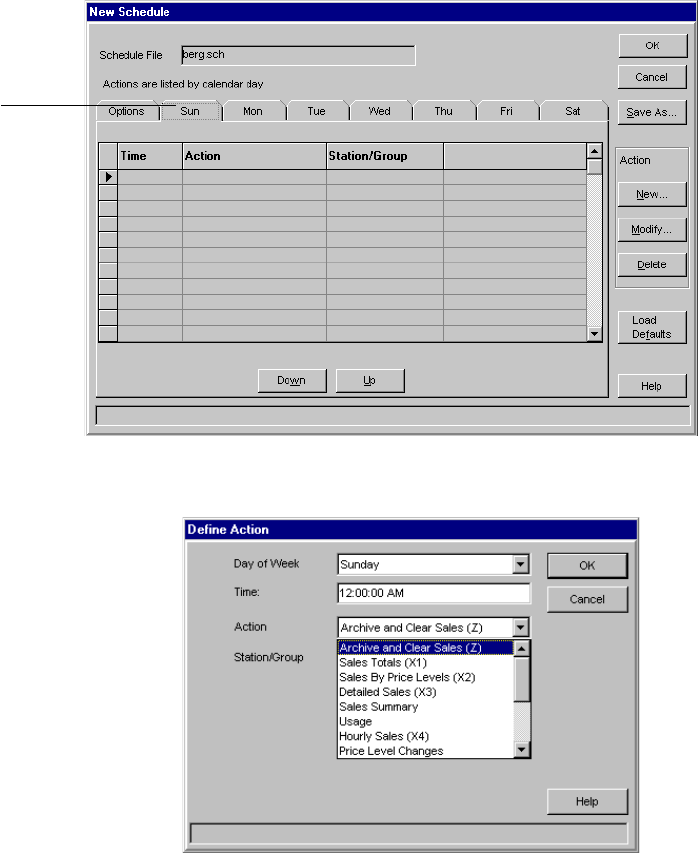
Schedules 19-5
5. Click Auto-Run if you want the schedule to automatically
run whenever Windows is started.
6. Select a report handling method (if you don't want to use
your default method). For a description of the methods, see
Schedule Options in this section.
7. Click one of the tabs to define actions for that day.
8. Click New... to add an Action (or double-click on an empty
row).
9. Type the Time you want the action to occur.
Use the time format of your Windows operating system. You
can specify any hour, minute and second of the day or night.
(12:00AM is midnight, 12:00PM is noon.)
10. Select an Action and the Station/Group to receive the
action. Provide additional information about the action if
necessary. See Schedule Actions in this section.
11. Click OK to save the action on the specified day.
The days of the week are
arranged as tabs on the
screen. On each tab you
specify Actions which are
performed for a selected
Station/Group.
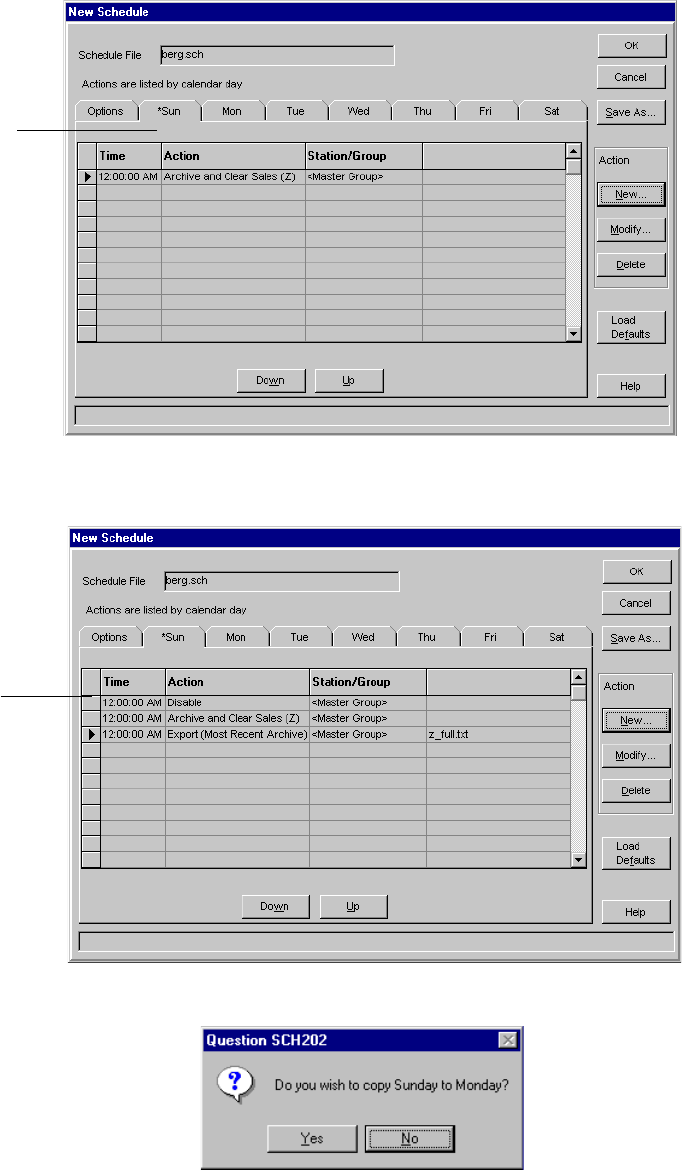
19-6 Infinity Installation/Service and User Manual
12. Repeat steps 8-11 to add new actions to the same day.
13. Click a new day tab when you've completed your first day.
14. Click Yes if you want to copy the actions of one day to
another. Or click No to assign different actions to the new
day.
Actions with identical
times are scheduled in
the order you list them,
so be sure you have the
correct sequence. You can
select an action with the
mouse and drag it to a
different position.
Days with defined actions
are denoted by an
asterisk on the tab.
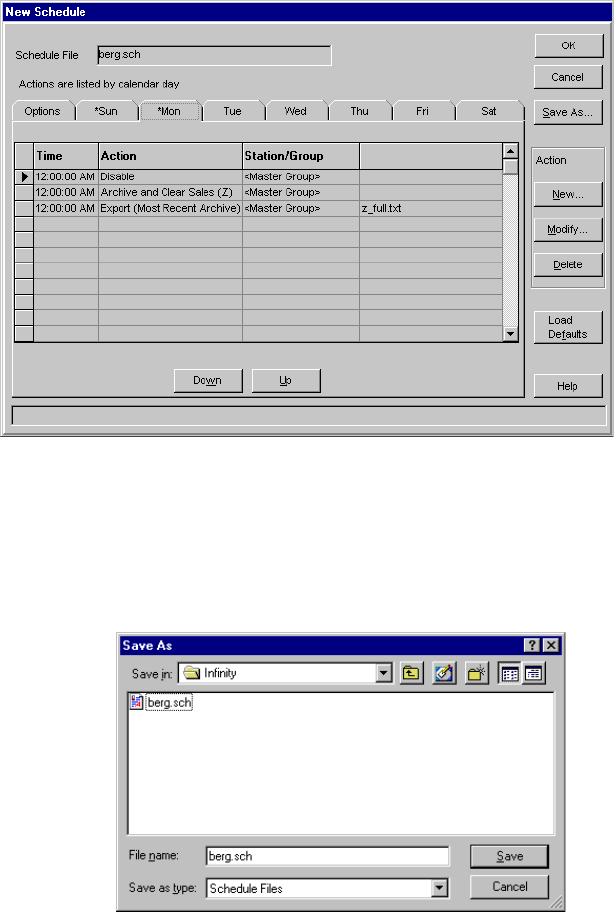
Schedules 19-7
15. Continue by defining new actions for each day or copying
one day's actions to another.
16. Click OK to save the schedule with the displayed name. To
save the schedule with a different name, click Save As... and
type in a new file name.
17. Choose the folder to save in and click Save.
18. Click Close to exit the Schedules screen.
Note
qYou can only define one Auto-Run schedule. (If you select
Auto-Run on a second schedule, it's de-selected on the first
schedule.)
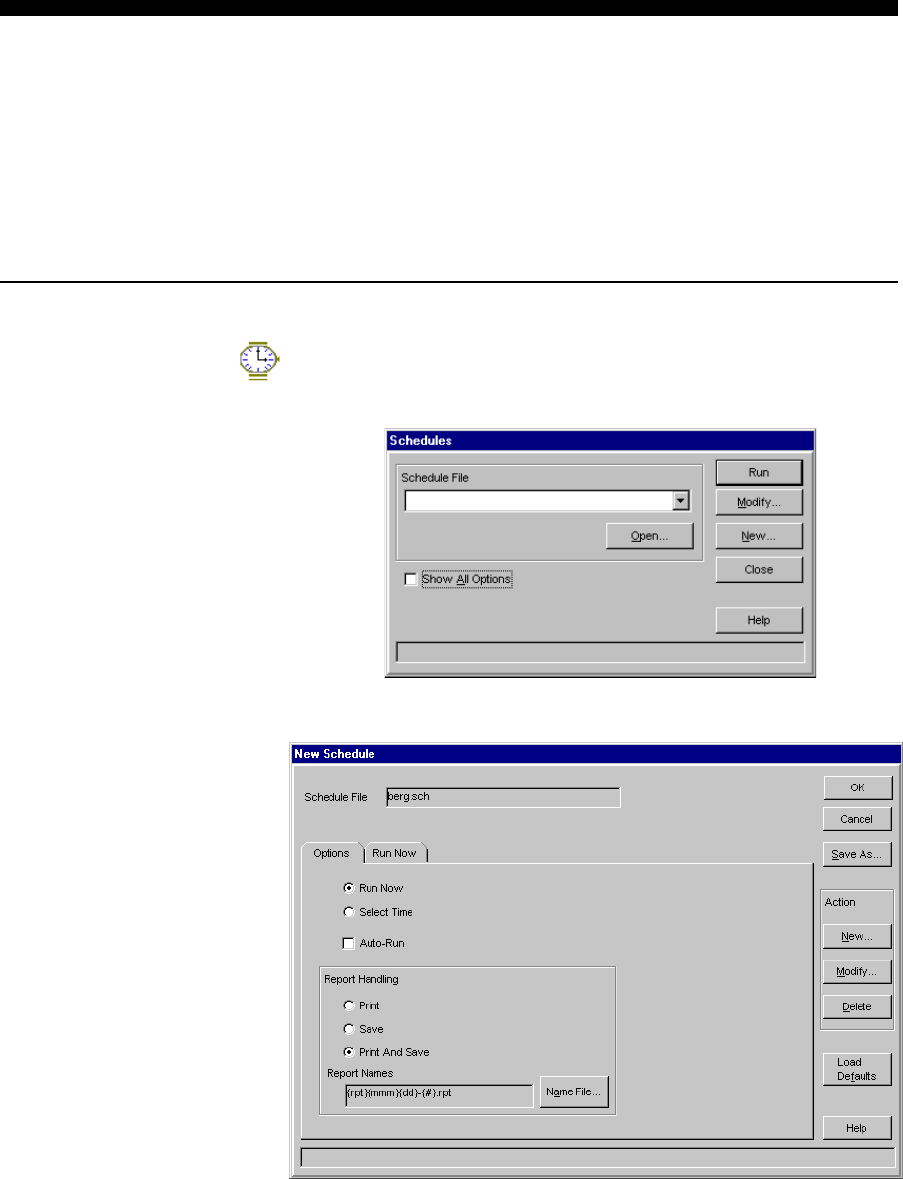
19-8 Infinity Installation/Service and User Manual
Create a Run Now Schedule
A Run Now schedule does not perform actions at specific times. Instead, it performs a series of
actions one after another whenever you run the schedule. This is useful if you want to automate a
series of tasks but you don't want to specify an exact time for the tasks. The actions you can
schedule include running reports, clearing ECU sales, enabling and disabling stations, changing
price levels, exporting and running another program. A Run Now schedule automatically stops
running after all actions are performed.
nTo create a Run Now schedule:
1. Run Schedule.
2. Click Schedules....
3. Click New... .
4. Click Run Now. A Run Now tab appears.
5. Click Auto-Run if you want the schedule to automatically
run whenever Windows is started.
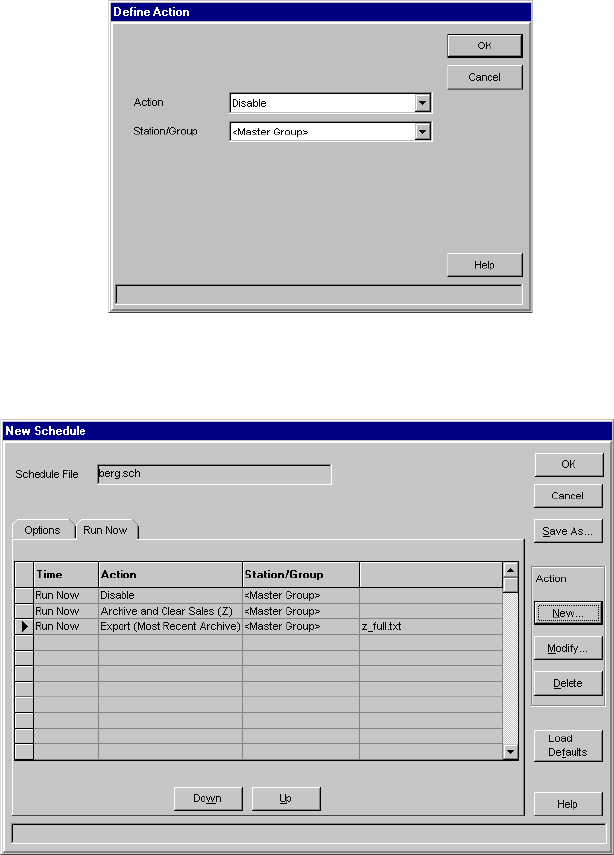
Schedules 19-9
Run Now Example
This type of schedule could
be helpful at closing.
lPerhaps you always
disable stations, clear
ECU sales and export
data to your
spreadsheet when you
close at night, but the
time varies from day to
day.
lPut those events in a
schedule called 'Closing'.
The schedule won't run
until you start it.
lWhenever you're ready,
run the schedule and
the tasks will be
completed in order while
you're busy with
something else.
6. Select a report handling method (if you don't want to use
your default method). For a description of the methods, see
Schedule Options in this section.
7. Click the Run Now tab.
8. Define the Actions you want to occur in the schedule. See
Create a Time Schedule or Schedule Actions in this section.
You won't be specifying any times for the actions. The
actions will be performed as they're listed on the schedule.
9. Click OK to save the schedule with the displayed name. To
save the schedule with a different name, click Save As... and
type in a new file name.
10. Choose the folder to save in and click Save.
11. Click Close to exit the Schedules screen.
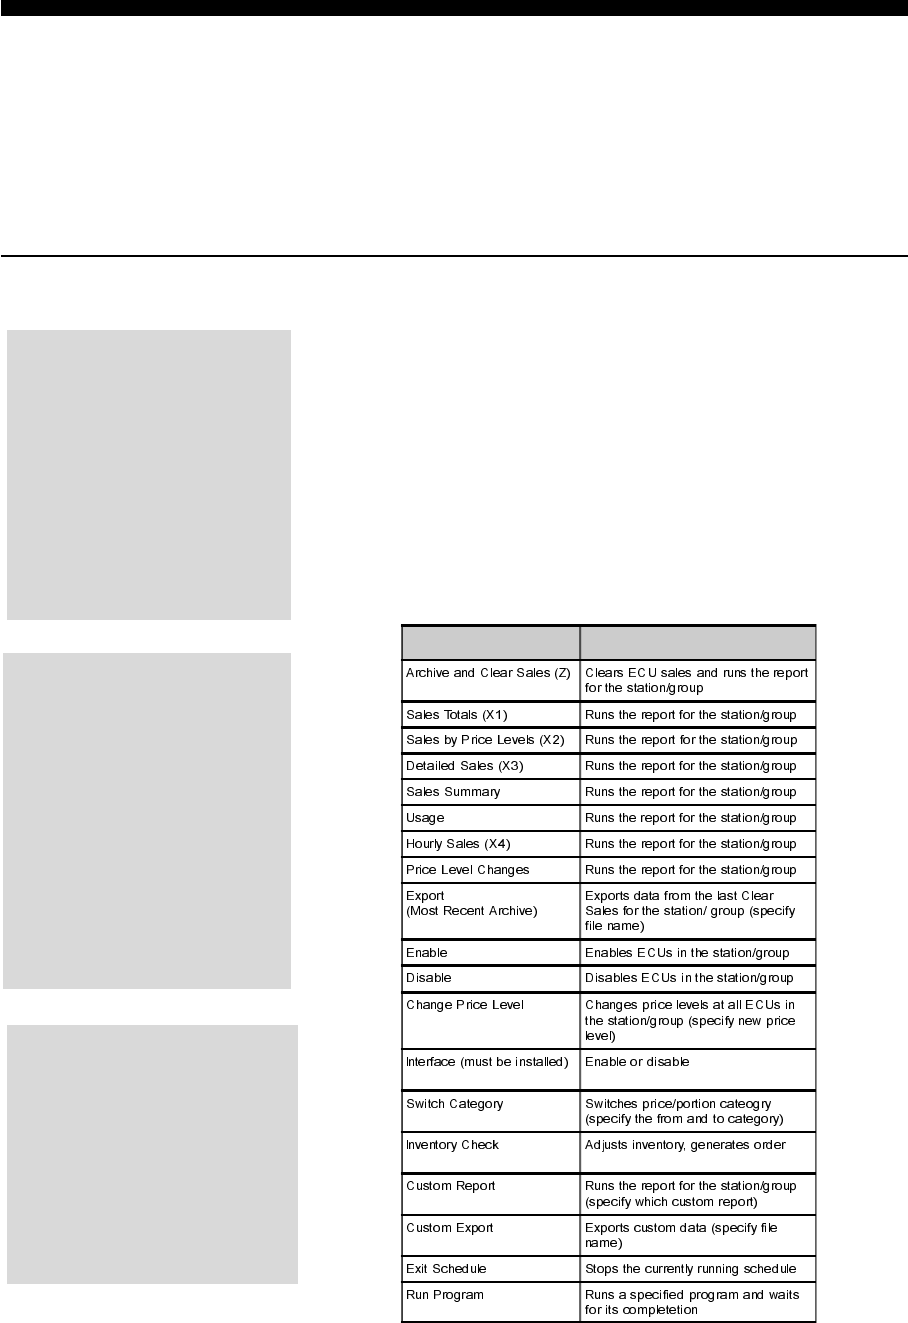
19-10 Infinity Installation/Service and User Manual
Report Options
lAll standard reports in the
list use the options set in
the Options menu of the
Report program except for
options for the type of data.
Some reports in the list let
you select Current or Most
Recent Archive; export is
Most Recent Archive only.
Schedule Actions
Schedule actions are the tasks you want Infinity to automatically perform. You can define a
specific time to perform the actions by creating a Time schedule. Or, you can simply define a
series of actions without a scheduled time by creating a Run Now schedule. When you create
either type of schedule, you must define the specific actions, the order of the actions and the
station(s) or group(s) to receive the action.
nTo add a new schedule action:
1. Access the New Schedule or Modify Schedule screen. See
Create a Time Schedule, Create a Run Now Schedule or
Modify a Schedule in this section.
2. Click New... to add an Action.
3. Select an Action and the Station/Group to receive the action.
Provide additional information and specify a time if
necessary.
4. Click OK. The selected Action and Station/Group are added
to the tab on the line with the arrow cursor.
Custom Reports & Exports
lTo use different report
options in a scheduled report
or export or schedule a non-
listed report, create a
custom report or custom
export in either the Schedule
program or the Report
program. See Create a
Custom Report and Create a
Custom Export in the
Reports section.
Exit Schedule
lInclude Exit Schedule to
automatically stop the
schedule at a specific time.
The schedule won't exit until
the previous action is
complete. The schedule does
not automatically start again
after it exits.
$FWLRQ 7DVN3HUIRUPHG
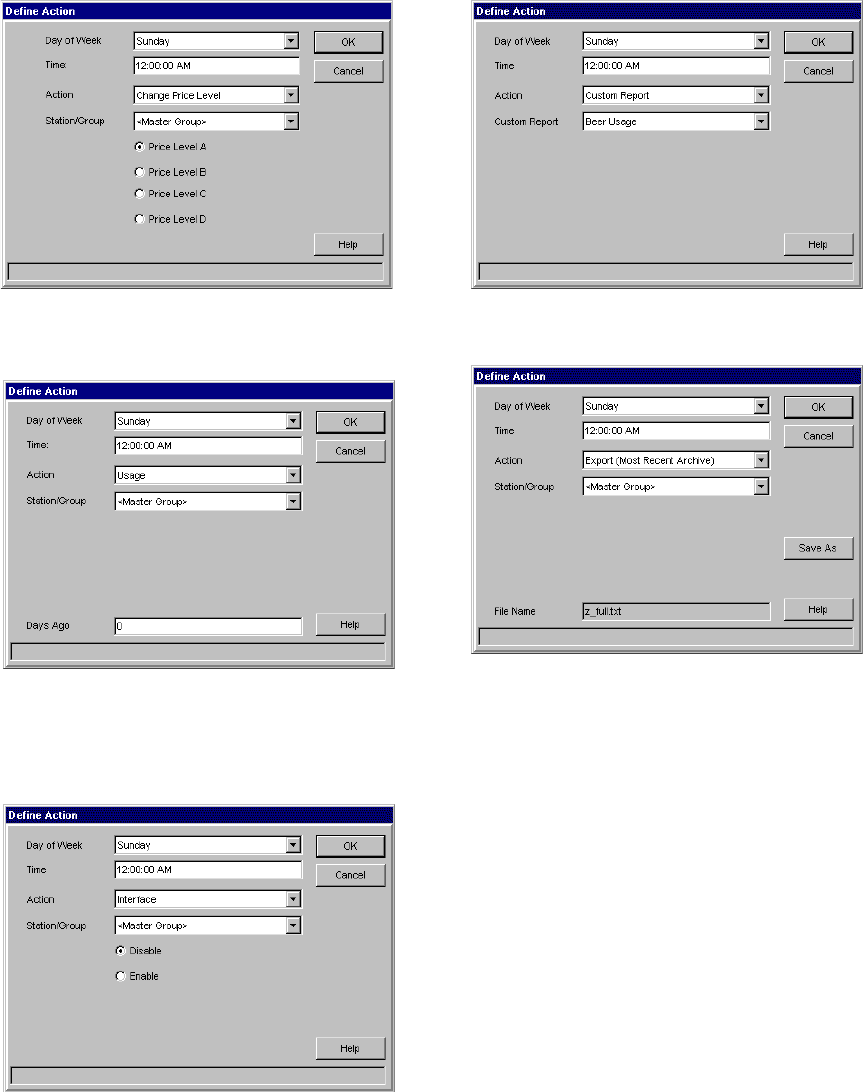
Schedules 19-11
lIf you select Custom Report or Custom
Export, select the custom name.
lIf you select Change Price Level,
select the price level.
lIf you select Export, click Save As to
change the name of the export file.
lIf you select Usage or Summary
Report, enter the Days Ago. The
report includes archive records from
the number of days ago until today.
(continued on next page)
lIf you select Interface, choose Enable
or Disable.
lIf you select Inventory Check, you
should precede it with an Archive
and Clear Sales (Z). Make sure
order point, order quantity and
order cost are accurate. Orders will
be printed and a Container Stock
report run.
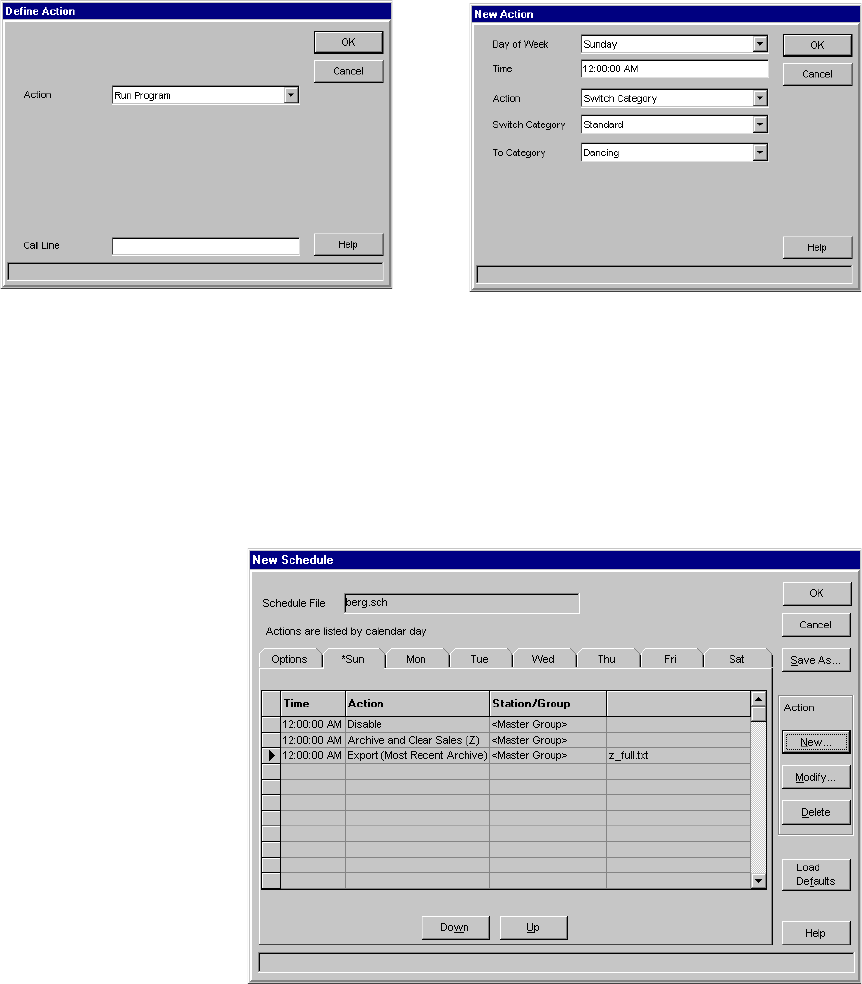
19-12 Infinity Installation/Service and User Manual
Actions are
performed in the
order you list them
on the tab so be
sure you have the
correct sequence.
nTo replace a schedule action:
1. Access the New Schedule or Modify Schedule screen.
2. Point the arrow cursor at the Action you want to replace.
3. Click Modify....
lIf you select Switch Category, select
the "from" category and the "to"
category.
lIf you select Run Program, enter the
call line of the program.
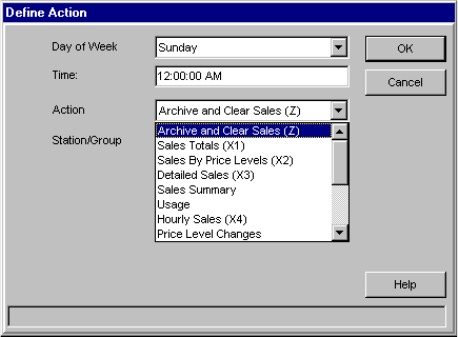
Schedules 19-13
4. Select a new Day of Week or type a new Time if necessary.
5. Select a new Action and Station/Group. Provide additional
information if necessary.
6. Click OK. The new Action and Station/Group are added to
the list, replacing the old ones.
nTo delete a schedule action:
1. Access the New Schedule or Modify Schedule screen.
2. Point the arrow cursor at the Action you want to remove.
3. Click Delete. The Action is removed from the list.
nTo rearrange schedule actions:
1. Access the New Schedule or Modify Schedule screen.
2. Point and click the arrow cursor at an Action.
3. Drag and drop the Action to the desired position or use the
Up and Down buttons to move the selected Action.
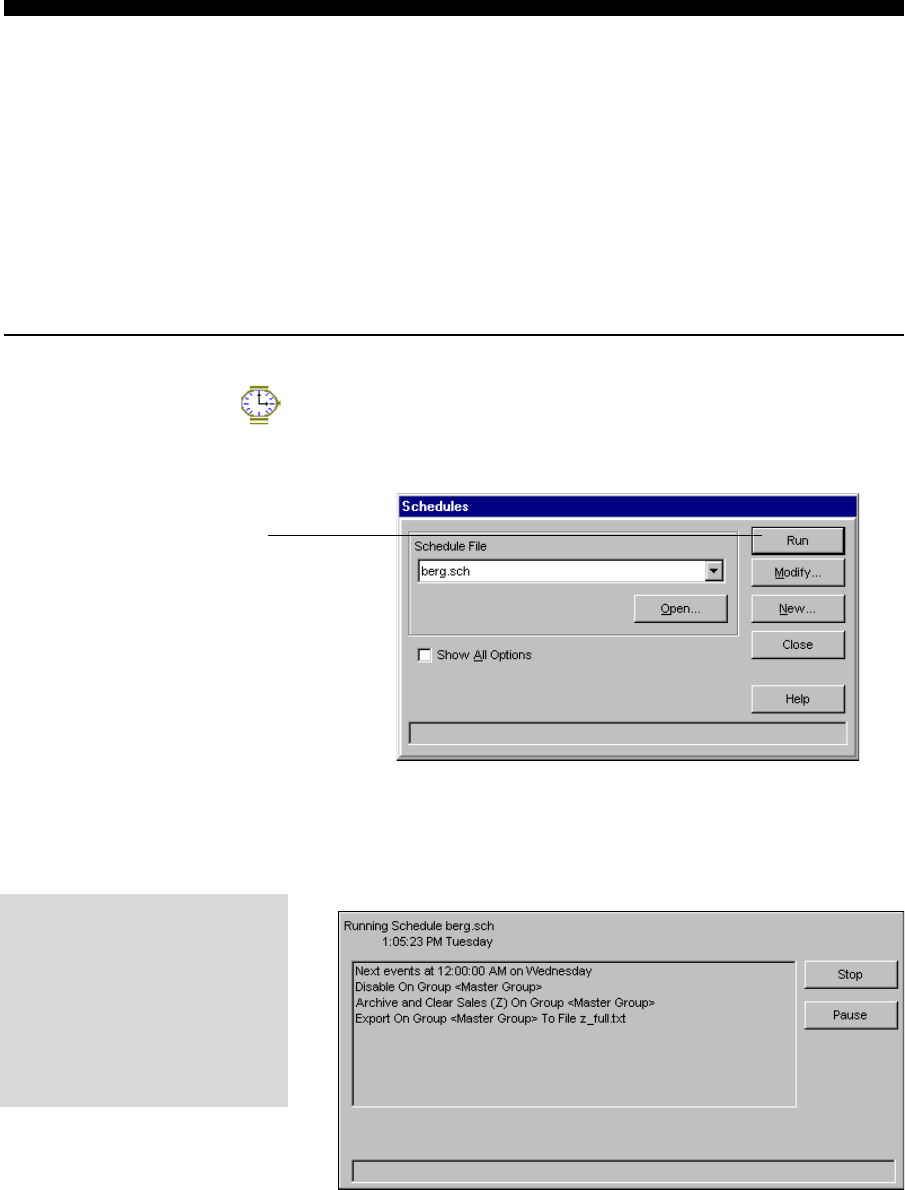
19-14 Infinity Installation/Service and User Manual
Run a Schedule
A schedule you've created (Time or Run Now) does not run until you tell the Schedule program
to run it. You must start the Schedule program, select the schedule file you want and click Run.
(If you want a schedule to run automatically, see the Auto-Run feature in the Notes of this task.)
If you start a Run Now schedule, scheduled actions run as soon as you click Run on the
Schedules screen. A Run Now schedule stops after performing its actions. Time schedules run
continuously until you stop or pause them (unless youve included an Exit Schedule action). You
cant perform tasks in other Infinity programs while a schedule is running unless you pause the
schedule. You can always use other Windows applications.
nTo run a schedule:
1. Run Schedule.
2. Click Schedules....
3. Select the schedule you want to run. (If the schedule is not in
the drop-down menu, click Open... to find it.)
4. Click Run.
A Time schedule displays the schedule name, the current
time and day and the time of the next event in the schedule.
A Run Now schedule displays a list of the events in the
schedule and begins performing the first action. A Run Now
schedule stops automatically when all actions are completed.
The schedule does
not start until you
click Run.
Screen Savers
lScreen savers are stopped
whenever a schedule action is
started. This prevents the
possibility of the screen
saver interfering with the
scheduled actions.
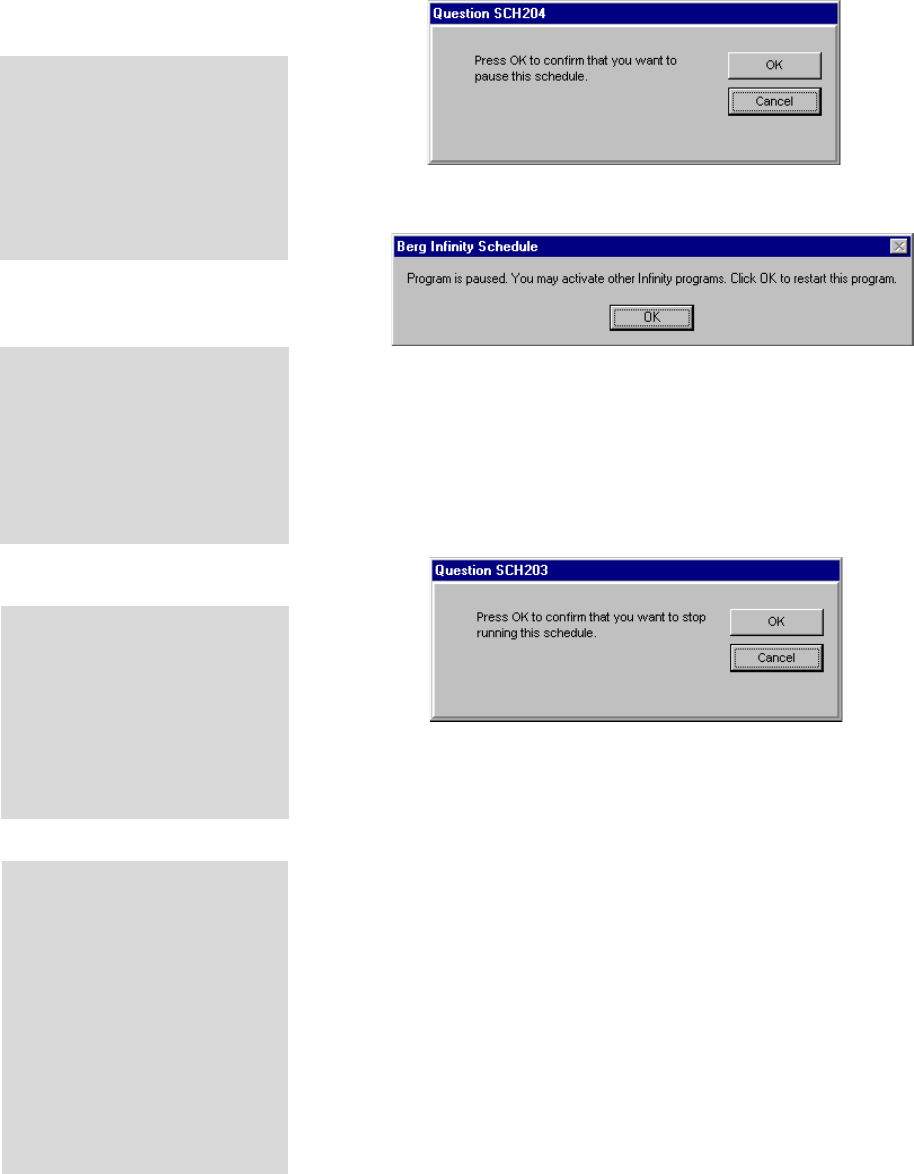
Schedules 19-15
5. To pause a Time schedule, click Pause. (If you use password
protection, a user name and password with a valid security
level must be entered to stop a schedule.)
Click OK to confirm the pause.
You must click OK to restart the schedule. When the
schedule is resumed, all actions that should have taken place
during the paused time will be performed.
6. To stop a time schedule click Stop. (If you use password
protection, a user name and password with a valid security
level must be entered to stop a schedule.)
7. Click OK to confirm the stop.
Notes
qAuto-Run
If you plan to run a schedule continuously, select Auto-Run
when you create the schedule. The schedule automatically
runs whenever Windows is running. (For Windows NT, a
user must log on before the schedule will run.)
qAuto-Recovery
If a running schedule is stopped due to a computer crash,
power failure, etc., the schedule automatically recovers when
the computer re-boots. Any events scheduled for times
during the power outage are lost.
Schedule Window
lYou can minimize the Schedule
window to do other work in
WindowsSchedule pops back
up when it runs the next set
of actions.
Printer
lThe selected schedule must
be running and the printer
must be on at any times
scheduled for reports (unless
you selected Save).
Modem
lIf the schedule includes
events that require remote
network communications, the
telephone line must be
available during the scheduled
communication.
Save Reports
lIf you don't want the schedule
to send reports to the
printer, select Save when
creating the schedule. The
schedule will run the report at
the specified time and print
the report to a file. You can
view and print the file by
opening it in the Report
program.
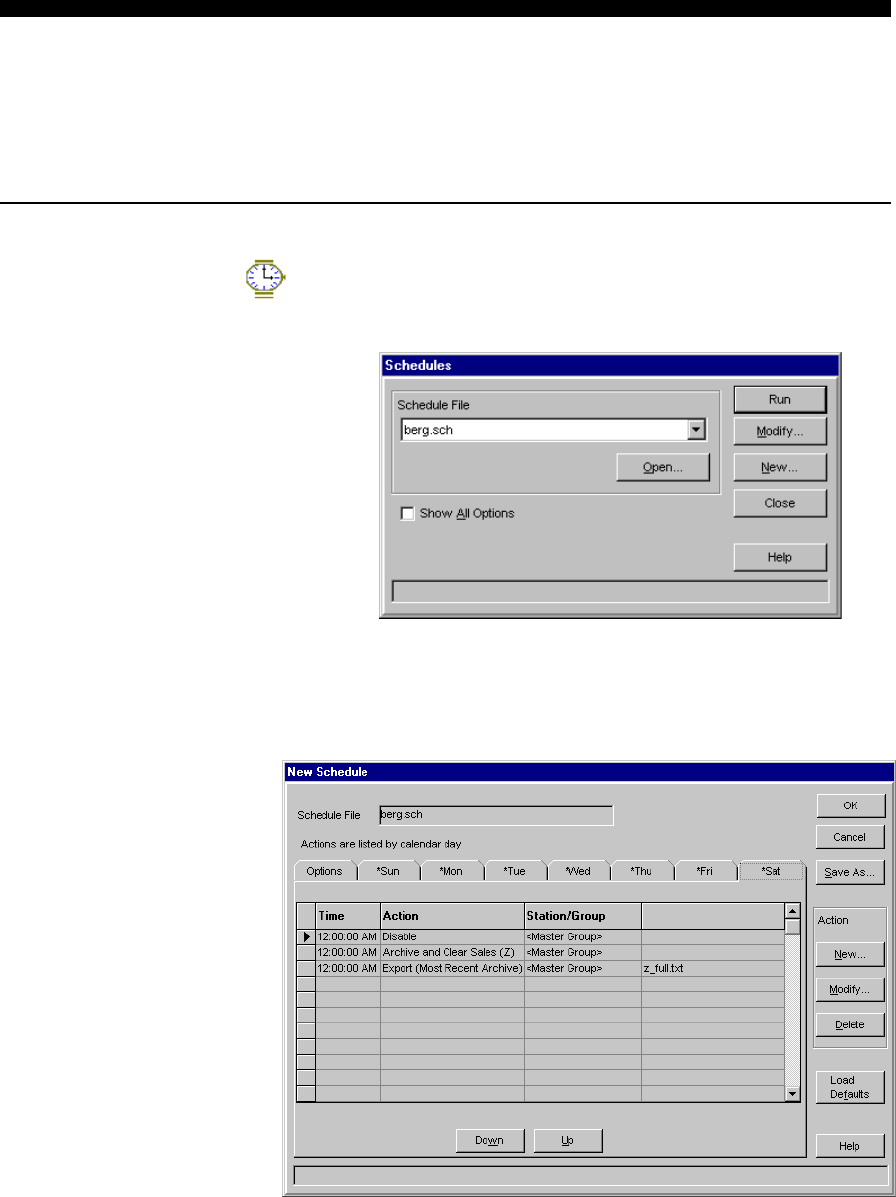
19-16 Infinity Installation/Service and User Manual
Modify a Schedule
You can easily change the times or actions in a schedule if you need to modify it. You can also
modify a schedule and save it with a new name if you want to keep both the original and
modified schedules.
nTo modify a schedule:
1. Run Schedule.
2. Click Schedules....
3. Select the schedule you want to modify. (If the schedule is
not in the drop-down menu, click Open... to find it.)
4. Click Modify....
5. Make modifications to any actions youve defined for the
schedule. See Create a Time Schedule, Create a Run Now
Schedule or Schedule Actions in this section if you need
help.
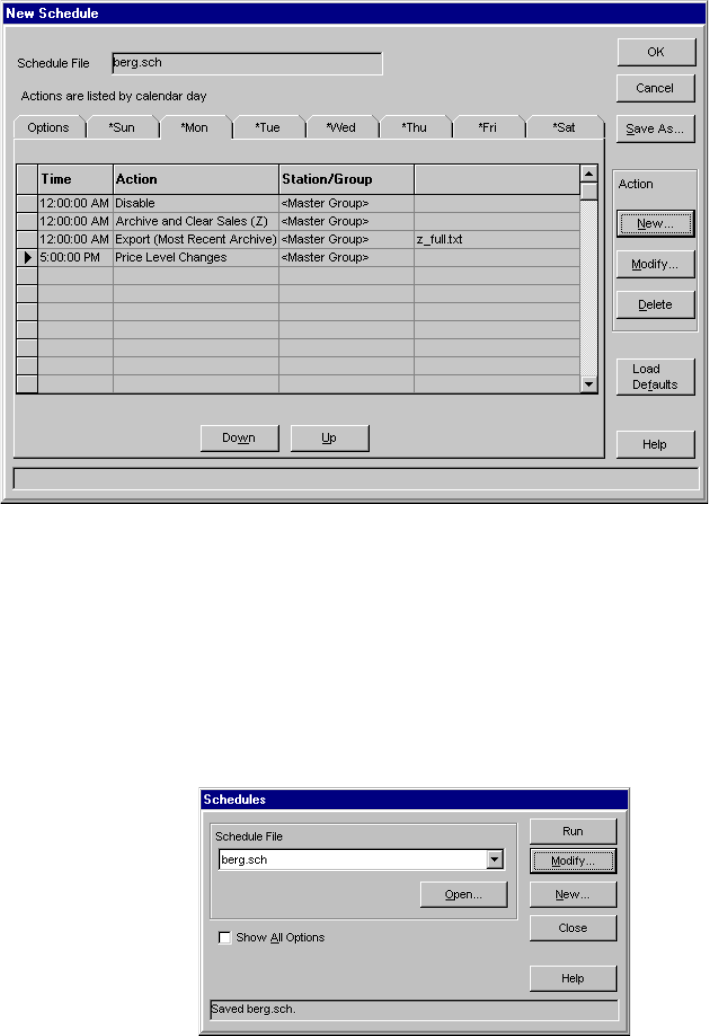
Schedules 19-17
7. Click OK to save your changes or click Cancel to exit
without saving.
OR
Click Save As... to give the modified schedule a new name.
Type the new File Name and click Save. This leaves the
original schedule intact if you haven't saved any
modifications under the old name.
8. Click Close to exit the Schedules screen.
19-18 Infinity Installation/Service and User Manual
Print a Schedule
When you print a schedule you get a copy of all the times and actions included in the schedule.
nTo print a schedule:
1. Run Schedule.
2. Click Schedules....
3. Select the schedule you want to print. (If the schedule is not
in the drop-down menu, click Open... to find it.)
4. Select Show All Options.
5. Click Print. You'll be prompted to select a printer. The
printer you select becomes your default printer for all
programs running under Windows.
6. Click Close to exit the Schedules screen.
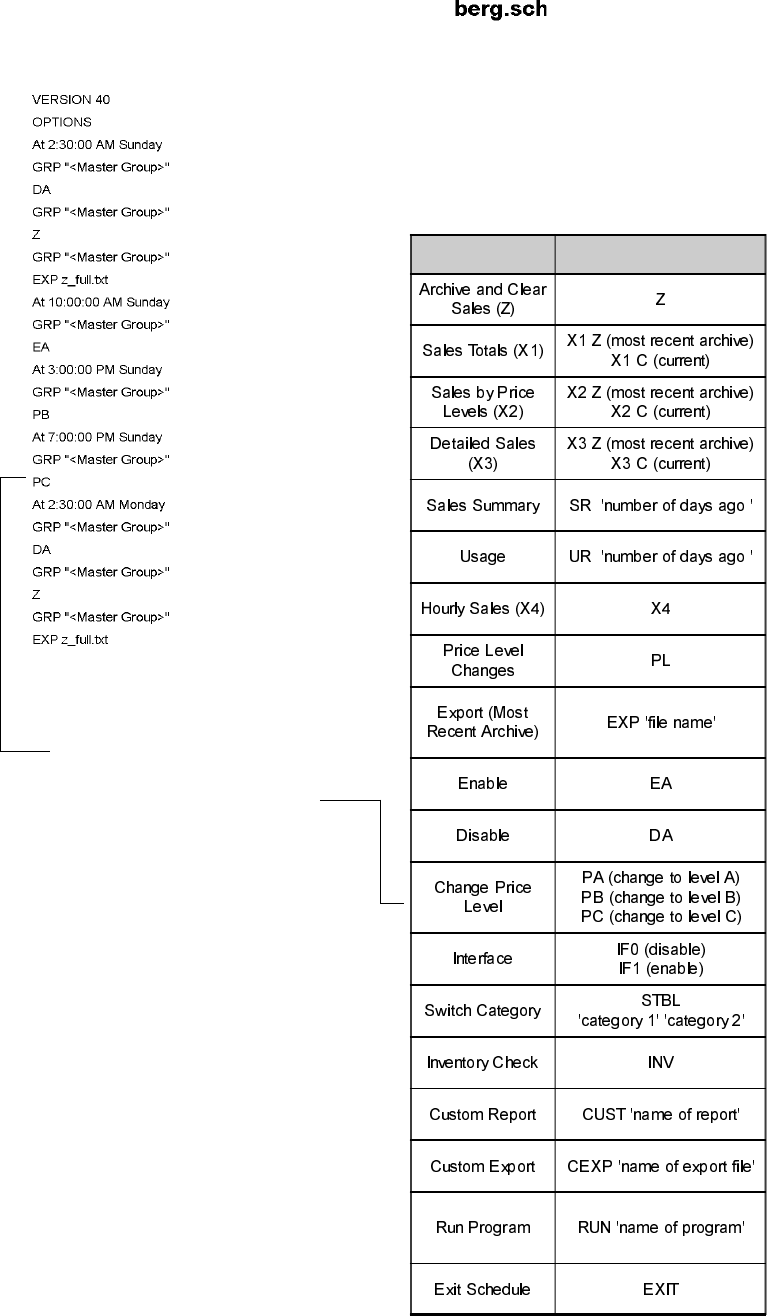
Schedules 19-19
The abbreviations used in the
schedule are listed in the table
with their associated actions.
$FWLRQ $EEUHYLDWLRQ
19-20 Infinity Installation/Service and User Manual
Delete a Schedule
You can delete schedules you have created. You may want to do this if you have old, unused
schedules taking up disk space.
nTo delete a schedule:
1. Run Schedule.
2. Click Schedules....
3. Select the schedule you want to delete. (If the schedule is not
in the drop-down menu, click Open... to find it.)
4. Select Show All Options.
6. Click Delete.
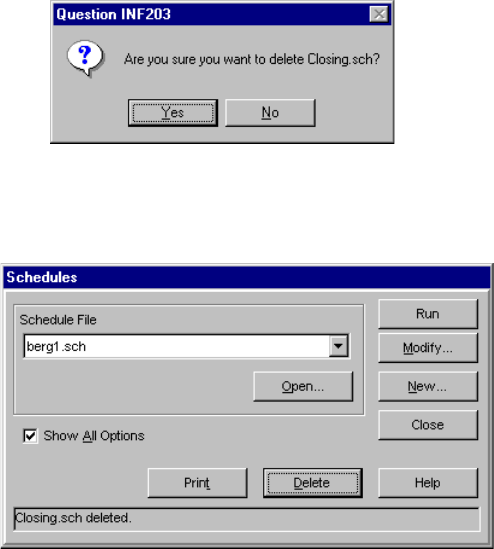
Schedules 19-21
7. Click Yes to confirm the deletion or click No to cancel the
deletion.
8. Click Close to exit the Schedules screen.
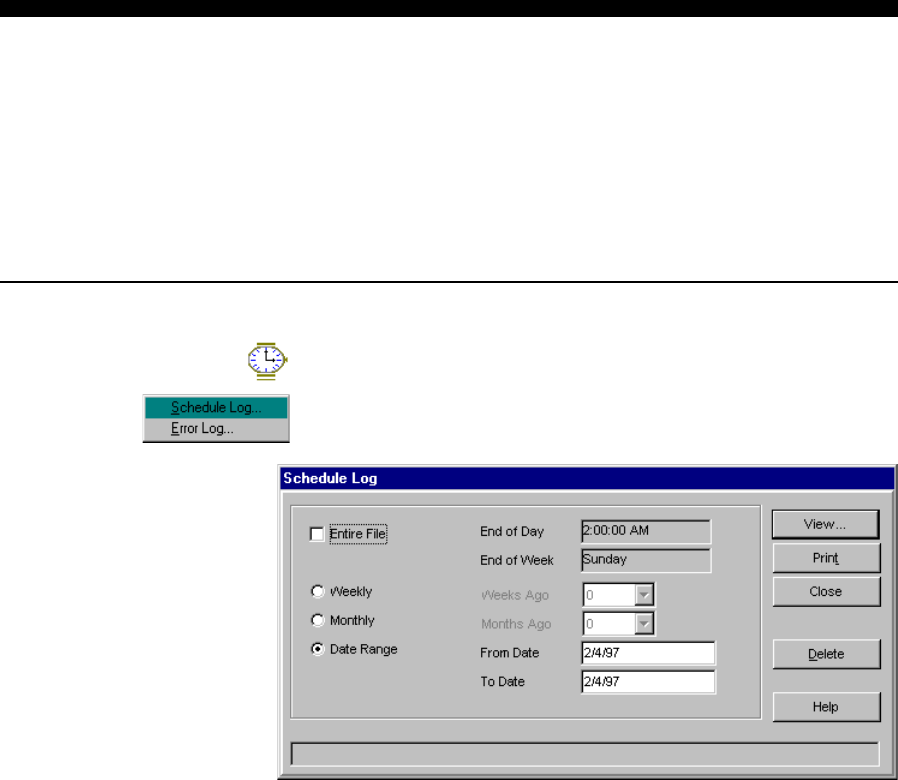
19-22 Infinity Installation/Service and User Manual
Schedule Log
The schedule log is a record of all schedule events. It provides the date(s) and time(s) schedules
are started and stopped and all the actions the schedules perform. The schedule log storage length
(how long Infinity continues to store events in the log) is set under Data Storage and Display
Options during software installation. You can view all or a portion of the schedule log and delete
all or a portion of it when you no longer need it. If you want to see more details about schedule
errors see Error Log in this section.
nTo view, print or delete the schedule log:
1. Run Schedule.
2. Pull down the Logs menu and click Schedule Log....
3. Select the portion of the log you want to view, print or
delete.
Entire File is the complete schedule log. This could be a
large file. Its size is determined by your schedule log storage
length (how old the log is), the number of schedules you run,
how often you start and stop them, the number of actions in
your schedules, etc.
Weekly is a selected business week of the log. (A business
week is defined by the End of Week day.) The week can be
the current week, 1, 2 or 3 weeks ago.
Weeks Ago specifies which weeks data to use. 0 is the
current business week (from the first day of the week to
today), 1 is the business week before the current week, 2 is
the week before that, etc.
Monthly is a selected calendar month of the log. The month
reported on can be the current month or any month up to a
year ago.
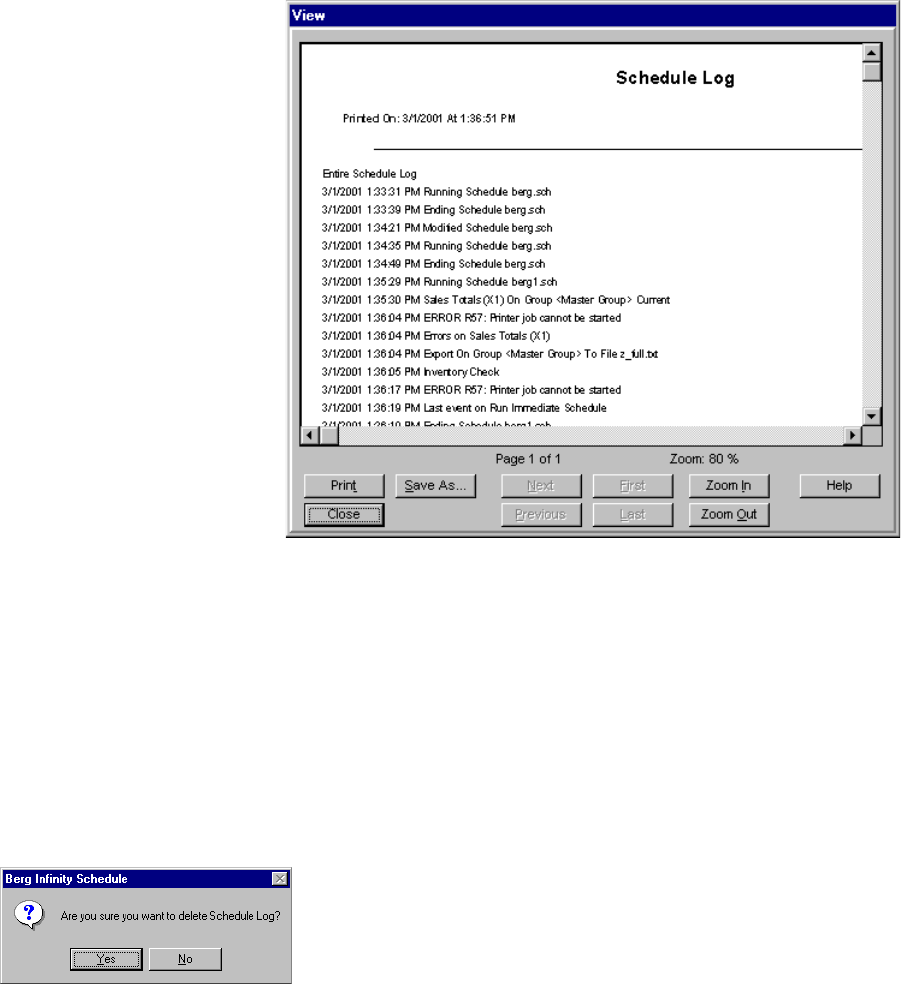
Schedules 19-23
Months Ago specifies which months data to use. 0 is the
current month (from the first day of the month to today), 1 is
the month before the current month, 2 is the month before
that, etc.
Date Range is specific range of business days of the log. (A
business day is defined by the End of Day time.)
4. To view the selected portion of the log click View.
Use the scroll bars and Zoom In and Zoom Out to
manipulate the view. You can maximize the screen by
double-clicking the title bar.
Click Save As... to save the log to file.
Click Print to print the log.
Click Close to exit the View screen.
5. To print the selected portion of the log click Print.
The default printer and printing options set under Windows
are used to print the report.
6. To delete the selected portion of the log click Delete. Click
Yes to confirm the deletion or click No to cancel the
deletion.
7. Click Close to exit the Schedule Log screen.
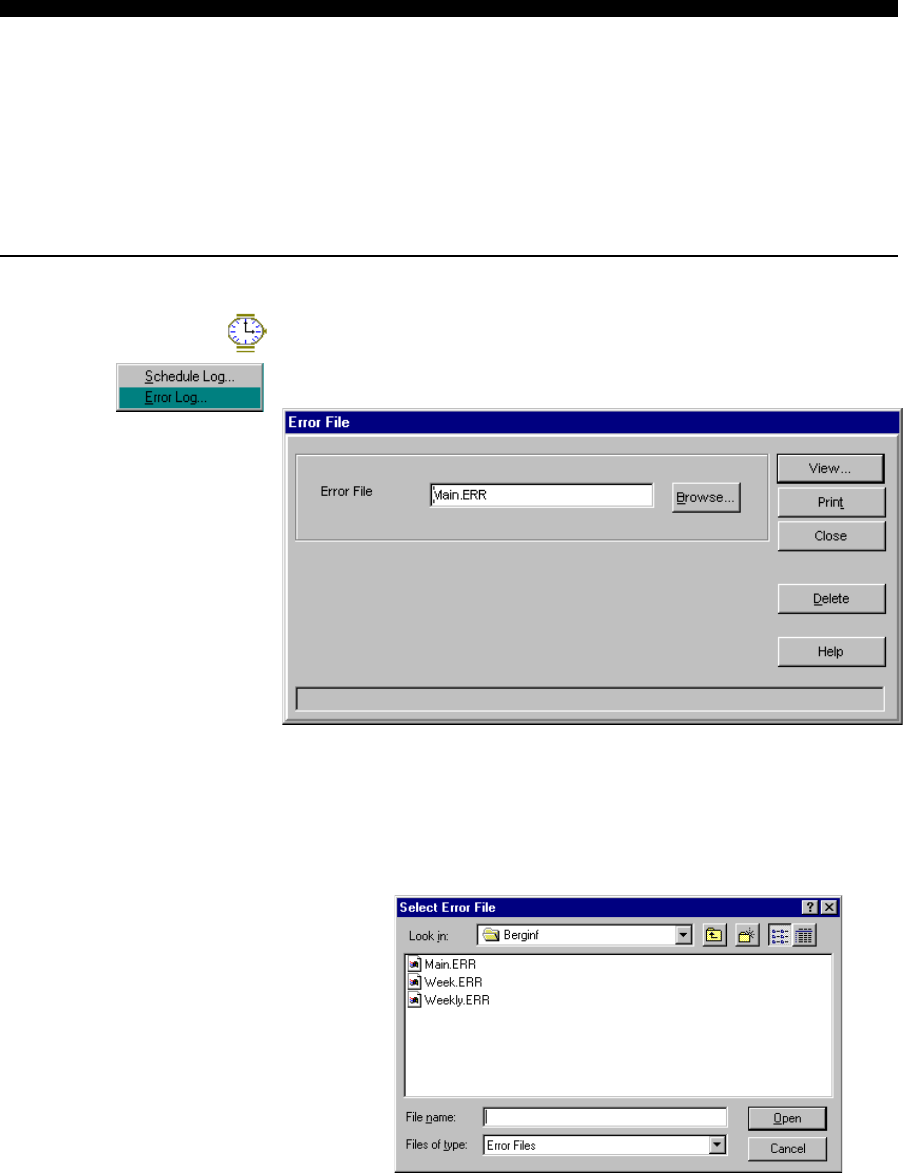
19-24 Infinity Installation/Service and User Manual
Error Log
A schedule error log is a detailed listing of errors that occurred while a particular schedule was
running. There is a different error log file for each schedule. The name of the error log file
matches the name of the schedule and has a .ERR extension. The contents of this log is especially
helpful during troubleshooting. This log is overwritten each time you start the same schedule so
check the log before restarting a schedule if you're having problems.
nTo view, print or delete the error log:
1. Run Schedule.
2. Pull down the Logs menu and click Error Log....
3. Select the File Name. The name of an error log file matches
the name of the schedule it pertains to (with a .ERR
extension.)
Click Open... if the error log file name is not displayed.
4. Click Open.
5. To view the Error Log click View.
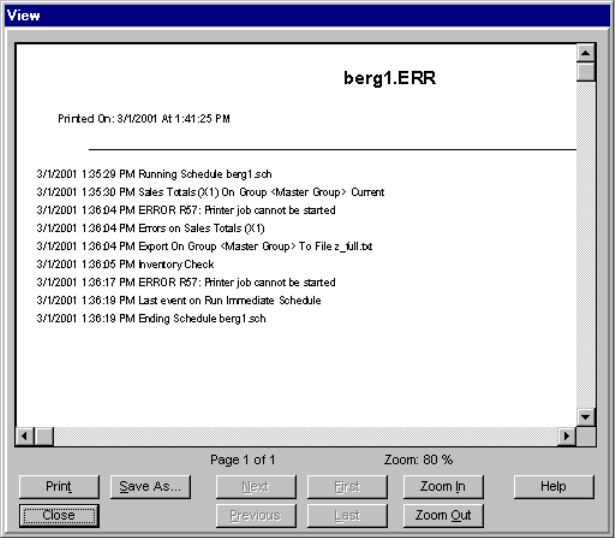
Schedules 19-25
Use the scroll bars and Zoom In and Zoom Out to
manipulate the view. You can maximize the screen by
double-clicking the title bar.
Click Save As... to save the log to file.
Click Print to print the log.
Click Close to exit the View screen.
6. To print the Error Log click Print.
The default printer and printing options set under Windows
are used to print the report.
7. To delete the Error Log click Delete.
Click Yes to confirm the deletion or click No to cancel the
deletion.
8. Click Close to exit the Error File screen.

SECTION
20
It's important to backup and maintain your Infinity database. The database
includes configuration and setup data you've entered and any accumulated
archive sales records. Berg strongly recommends backing up all configuration
and setup data as soon as you've set everything up. Then if something happens to
the database or the computer you can simply reload your copy of setup data and
not spend time re-entering everything. Infinity comes with a Utilities program to
help perform database tasks. If, as a dealer, you enter setup information off-site,
you can use the Utilities program to save setup data and reload it on the day of
installation. This section provides help with the following tasks:
Store Configuration Settings .........................................................20-2
Reload Configuration Settings ...................................................... 20-4
Backup the Full Database .............................................................20-6
Restore the Full Database ............................................................. 20-8
Restore Previous Version ............................................................20-10
Clear Sales from the Database ....................................................20-12
Check the Database for Errors ....................................................20-14
Rebuild the Database Index Files ...............................................20-16
Rebuild the Database Delete Chain ............................................ 20-17
Emergency Rebuild the Database ...............................................20-18
Repair the Database .................................................................... 20-19
Show File Versions .....................................................................20-21
Compare ECU to Database .........................................................20-23
Display ECU ............................................................................... 20-24
Clear Database Log .....................................................................20-26
Database
Management
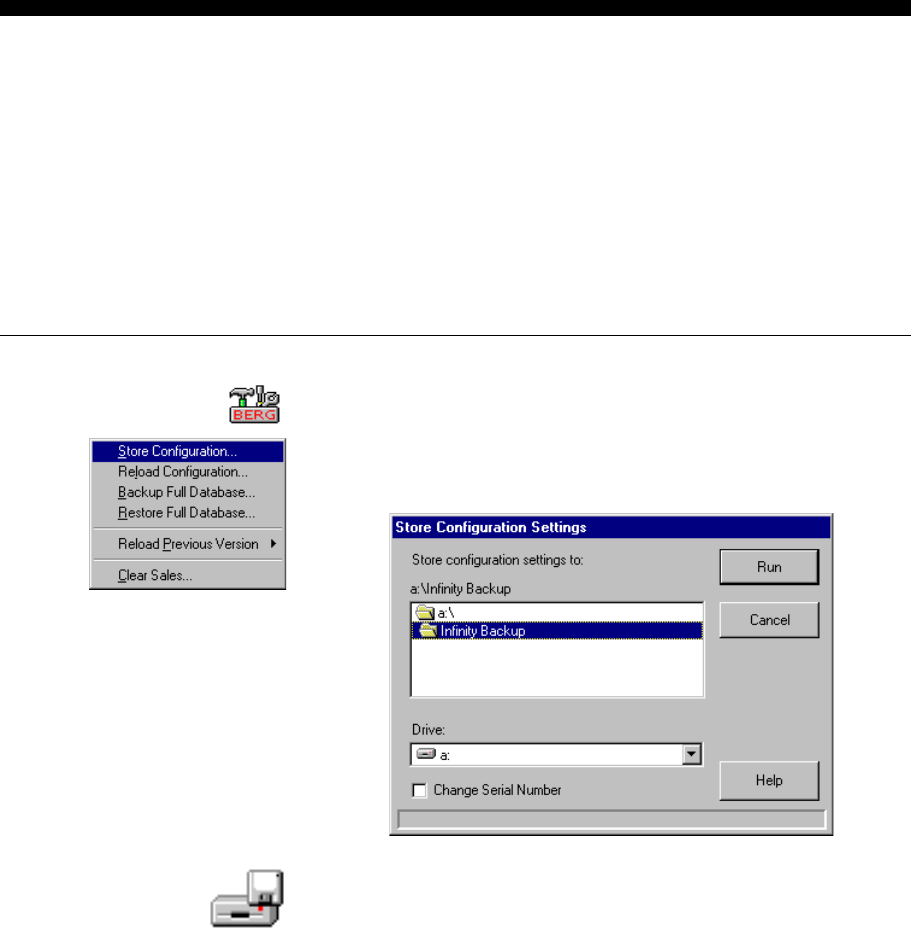
20-2 Infinity Installation/Service and User Manual
Store Configuration Settings
Infinity configuration settings include all configuration options you select during software
installation, all equipment setup data (networks, ECUs, stations, groups), all calibration settings,
all brand, price, portion and dispenser assignment data, server ID entries (if any), system report
options and schedules you have created (if any). Sales records are not included in configuration
settings. Perform this task after you've entered all your configuration settings and also anytime you
change your configuration settings. This will give you a backup copy in case something happens to
the Infinity configuration settings on your computer's hard drive. You should also perform this
task as a dealer if you are entering customer configuration settings off-site prior to installation.
nTo store configuration settings:
1. Run Utilities.
2. Pull down the Backups menu. Click Store Configuration....
3. Insert the backup disk into the selected drive.
It's a good idea to store a copy of configuration settings on a
separate floppy or other disk rather than on your hard drive.
4. Select the Drive letter and folder where you want to store the
backup copy. Berg recommends the destination be clear of all
other files.
5. Select Change Serial Number if you want to type in a
different serial number for the configuration settings.
Use this option as a dealer if you are setting up for a customer
site and you have a different serial number than the customer.
See Preconfigure Software Files in the Getting Started
section.
6. Click Run.
Database Management 20-3
7. Click Yes to confirm the store procedure.
8. If prompted, type the Current Serial Number and the
Destination Serial Number and click Continue....
The current serial number is the serial number of the
Infinity program you're using. The destination serial number
should match the customer's Infinity database.
9. Remove the backup disk. Clearly label the disk and store it
in a safe place.
Note
qStoring configuration settings with the correct serial number
is very important. You should only reload configuration
settings at an installation site that have the same serial
number and version of software as the customer's copy of
Infinity.
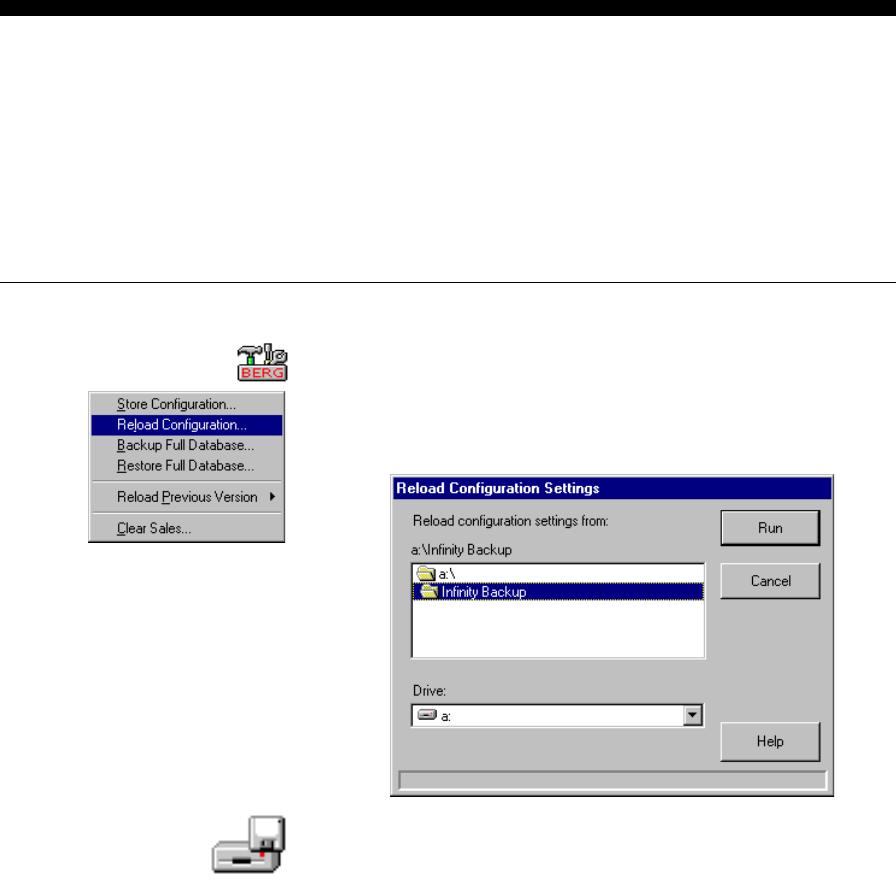
20-4 Infinity Installation/Service and User Manual
Reload Configuration Settings
Perform this task when you need to reload a previously saved copy of Infinity configuration
settings to your hard drive. As a dealer, use this procedure to load configuration settings you've
entered and saved at your office onto the computer at the customer site. You must have
previously stored configuration settings to perform this task. Reloading configuration settings
replaces any existing configuration settings. These settings do not include any sales records. For
a list of configuration settings, see Store Configuration Settings in this section.
nTo reload configuration settings:
1. Run Utilities.
2. Pull down the Backups menu. Click Reload
Configuration....
3. Insert the backup disk into the selected drive.
4. Select the Drive letter of the backup disk and the folder
where you've stored the backup copy.
5. Click Run.
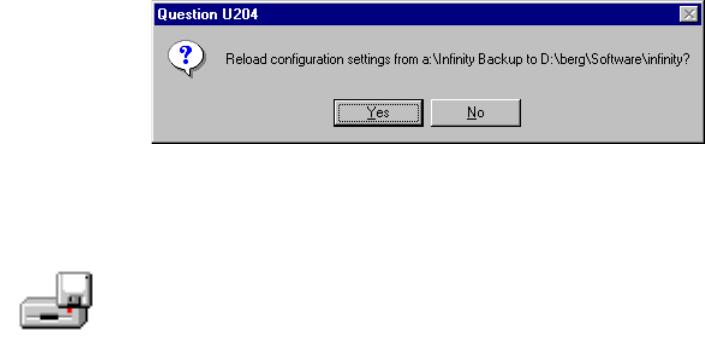
Database Management 20-5
6. Click Yes to confirm the reload procedure.
Wait while the files are reloaded on the hard drive.
7. Remove the backup disk.
Notes
qIf the serial number of the reloaded configuration settings
does not match the serial number of the existing database,
the Infinity programs will not run.
qIf you attempt to reload settings from a different version of
software, an error message will prevent you from doing so.
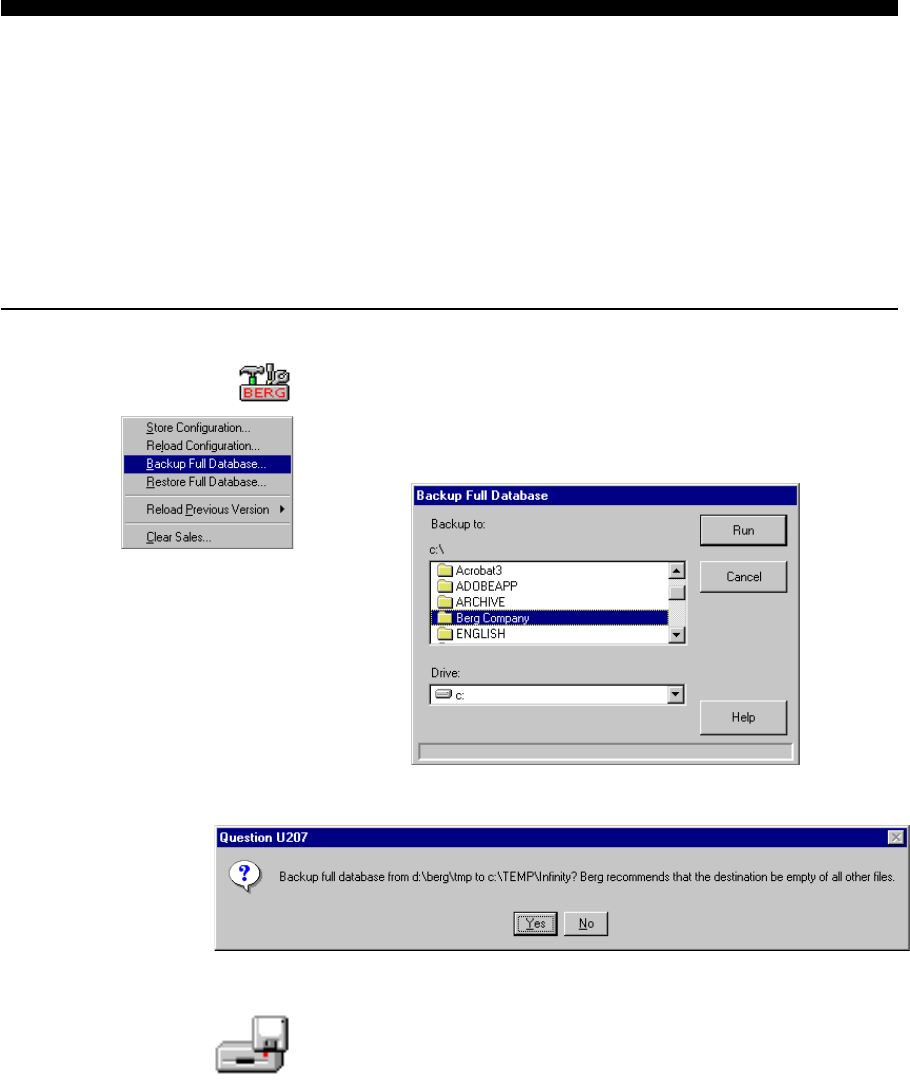
20-6 Infinity Installation/Service and User Manual
Backup the Full Database
This procedure copies all configuration and setup data and any accumulated sales records. The
amount of space required for the backup depends on the size of your database. Perform this
procedure regularly if archive sales records are essential to the management of your business. If
you want a complete, current copy of your database you need to back it up every time you clear
sales at the ECUs or make any changes to configuration and setup data. If you don't need archive
sales records or you use printed reports for your backup records, you don't need to perform a full
database backup. Use the procedure outlined in Store Configuration Settings in this section.
nTo backup the full database:
1. Run Utilities.
2. Pull down the Backups menu. Click Backup Full
Database....
3. Select the location for the backup.
4. Click Yes to continue.
If prompted, insert any backup disks into the selected drive.
Wait while the files are copied to the selected destination.
Database Management 20-7
5. Press any key when the backup is complete.
If you copied to disks, remove and clearly label them with
the date of the backup and the number of the disk.
The files are compressed
(deflated) to minimize
the space required. If you
reload the files, they will
be expanded (inflated).
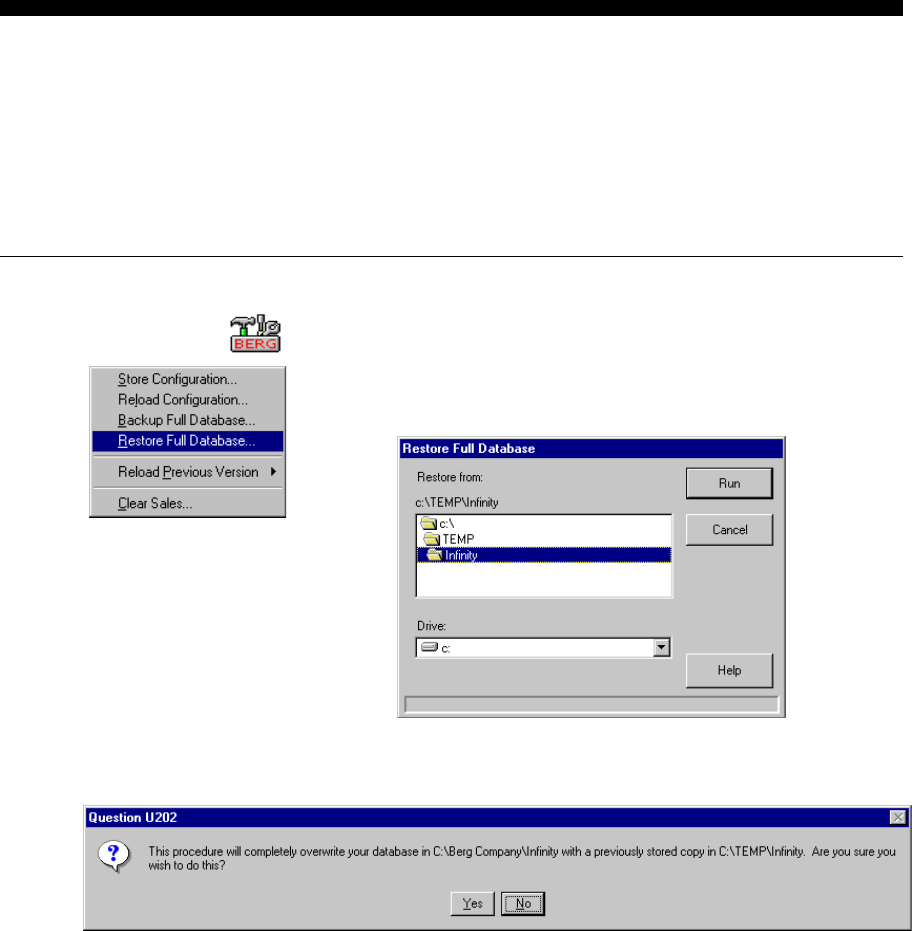
20-8 Infinity Installation/Service and User Manual
Restore the Full Database
You can only perform this procedure if you've previously backed up a full database. The only
reason you'd ever want to restore the database from a backup is if something happens to your
system database. Restoring a full database replaces all existing setup and sales data with the data
in the backup copy. If your backup copy of the database is not current when you use it to restore
the database, you'll lose any archive sales data since the date of the backup.
nTo restore a full database:
1. Run Utilities.
2. Pull down the Backups menu. Click Restore Full
Database....
3. Select the location of the backup database.
4. Click Yes to confirm the restore procedure.
5. Insert the last disk of the backup set into the selected drive.
6. Press any key to continue.
Wait while the files are copied from the disk to the hard
drive.
7. Insert additional backup disks and press any key as
prompted.
8. Remove the last backup disk.
Database Management 20-9
Notes
qIf the serial number of the restored database does not match
the serial number of the existing database, the Infinity
programs will not run.
qIf you attempt to restore a database from a different version
of software, an error message will prevent you from doing
so.
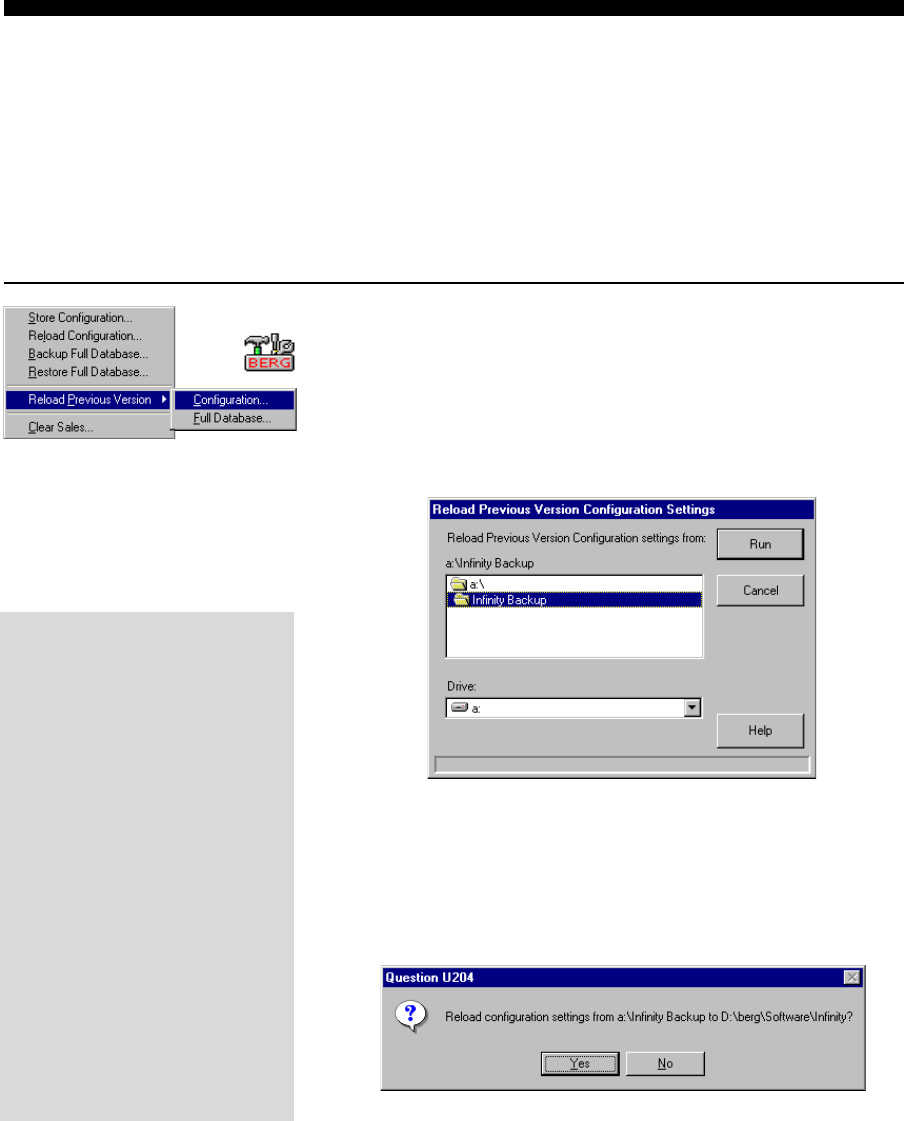
20-10 Infinity Installation/Service and User Manual
Restore Previous Version
Perform this task ONLY if it becomes necessary when upgrading to a new version of Infinity on
a new computer. If you installed the new Infinity upgrade on the new computer before
transferring your current database to the new computer, your old database is not compatible with
the new version. You can use this procedure to restore your previous version configuration
settings or full database on the new computer. After performing this task, you MUST re-install
the new Infinity upgrade.
nTo restore a previous version (configuration):
1. Run Utilities.
2. Pull down the Backups menu and point to Reload Previous
Version. Click Configuration... to reload configuration
settings from the old database.
3. Insert the backup disk into the selected drive if required.
4. Select the Drive letter of the backup disk and the folder
where you've stored the backup copy.
5. Click Run.
6. Click Yes to confirm the file path.
Warning!
Perform this procedure only
under these circumstances:
lYou haven't copied your old
version of Infinity to your new
computer.
lYou've already installed an
upgraded version of Infinity on
the new computer.
(Do not use this procedure for
routine reloading of
configuration settings or a full
database.)
lYou must re-install the
Infinity upgrade on your new
computer after performing
this procedure.
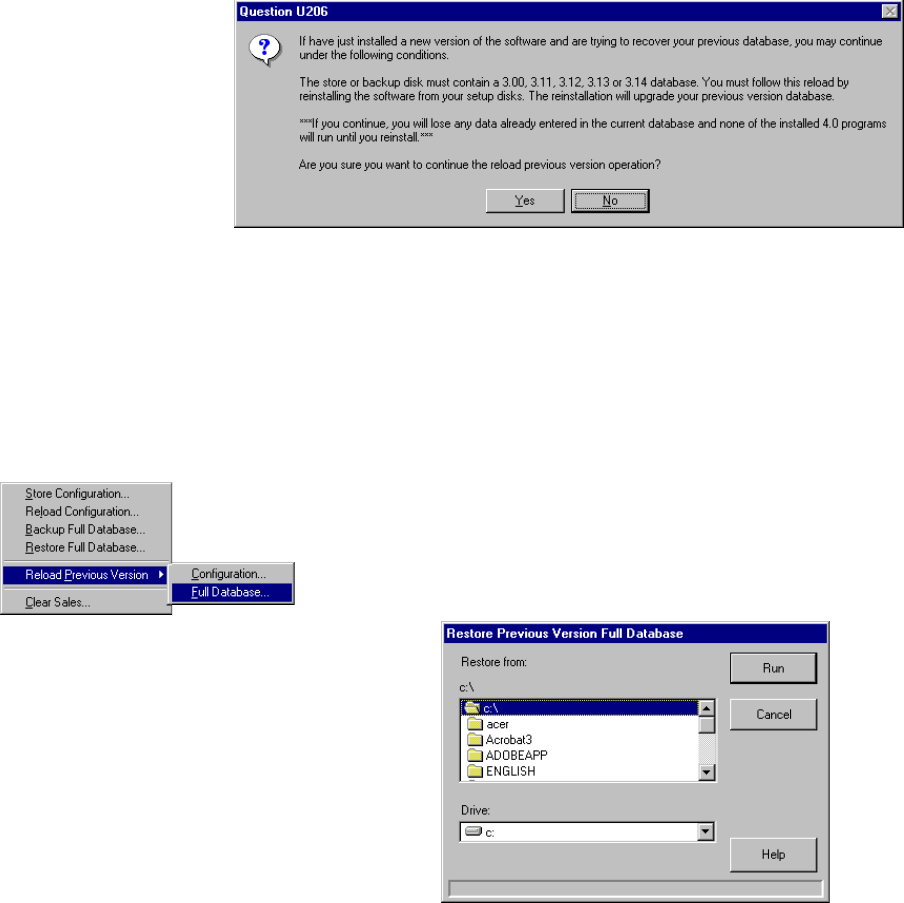
Database Management 20-11
nTo restore a previous version (full database):
1. Run Utilities.
2. Pull down the Backups menu and point to Reload Previous
Version. Click Full Database... to restore the old database.
3. Select the drive and folder of the previous version.
4. Click Run to restore the previous.
5. If necessary, insert the last disk of the backup set into the
selected drive. Press any key to continue.
6. Wait while the files are copied to the hard drive.
7. If necessary, insert additional backup disks and press any key
as prompted.
8. Remove any backup disks.
7. Click Yes to confirm the restore procedure.
Wait while the files are copied from to the hard drive.
8. Remove the backup disk if necessary.
9. Re-install the new version of Infinity.
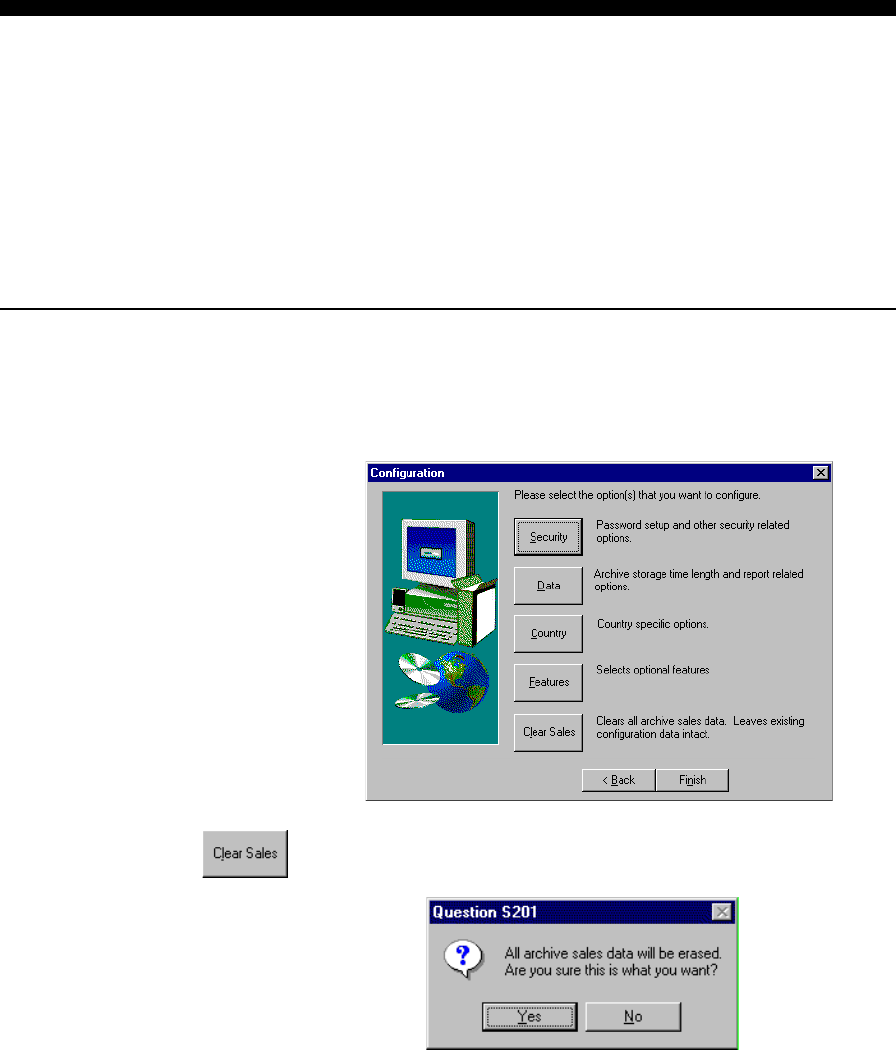
20-12 Infinity Installation/Service and User Manual
Clear Sales from the Database
Perform this task only when you want to erase all archive sales records from the computer's hard
drive. You may be directed to do this by Berg personnel or you may do it at regular intervals to
clear old records from the computer and make room for new ones. Clearing sales from the
database does not affect any configuration or setup data. You can only perform this task with
setup disk(s). Old sales records can be automatically cleared from the database by setting the
appropriate archive record storage length. See Enter Data Storage and Display Options in the
Configuration Options section.
nTo clear sales from the database:
1. Access Configuration options. See Access Configuration
Options in the Configuration Options section.
2. Click Clear Sales.
3. Click Yes to confirm the deletion of all sales records from
the computer.
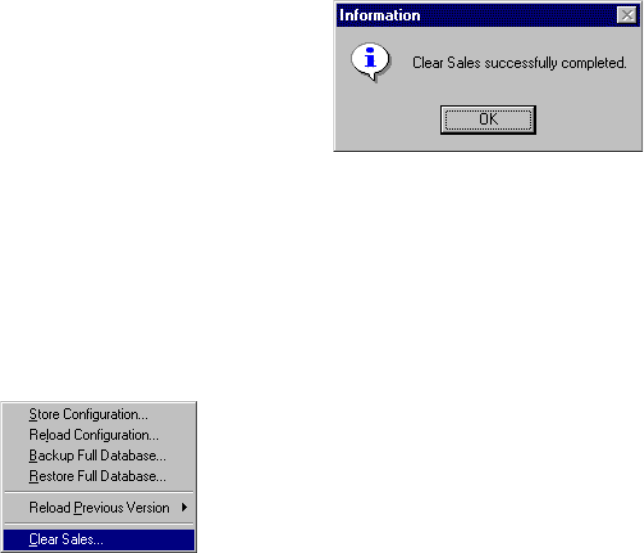
Database Management 20-13
4. Click OK when you've read the clear sales completion
message.
5. Click Finish to exit the Configuration screen.
Notes
qDon't forget to remove the setup disk from the drive.
qAlthough there is a menu item for Clear Sales... in the
Utilities program, it only directs you to Configuration
options. You can't clear sales from the Utilities program.
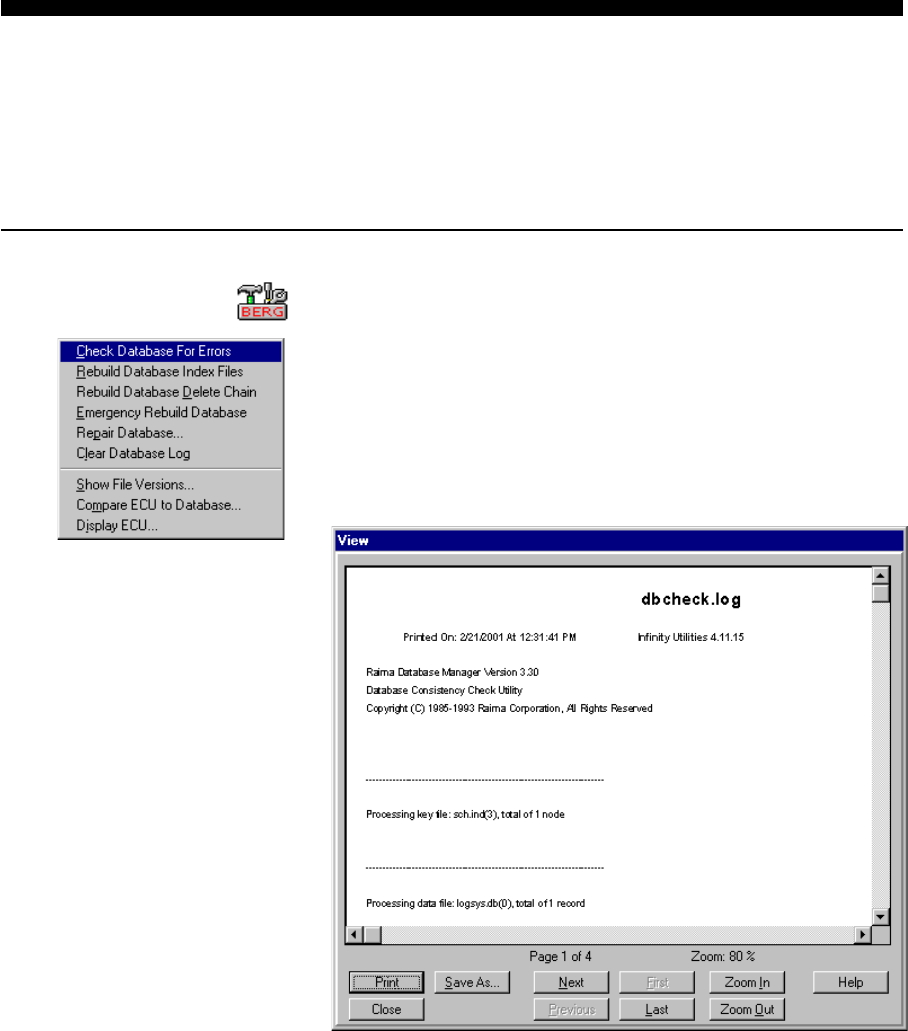
20-14 Infinity Installation/Service and User Manual
Check the Database for Errors
You'll probably only perform the tasks listed in the Diagnostics menu of the Utilities program if
directed to do so by Berg personnel. Checking the database for errors may help when
troubleshooting database problems as it searches for errors in the structure of the database. It's
one of the first steps in diagnosing a problem.
nTo check the database for errors:
1. Run Utilities.
2. Pull down the Diagnostics menu. Click Check Database for
Errors.
The results appear in an output file called dbcheck.log. You
can view, print and/or save dbcheck.log as directed by Berg
personnel.
3. To save the log to a file click Save As.... Enter the file name
and click Save.
The log is saved with the formatting information of the
current default printer.
Saved files can be opened by clicking Open on the View
screen or the Reports screen.
Database Management 20-15
4. To print the log click Print.
Youll be prompted to select a printer. The printer you select
becomes your default printer for all programs running under
Windows. If the log has multiple pages you can also select a
page range.
6. Click Close to exit the View screen.
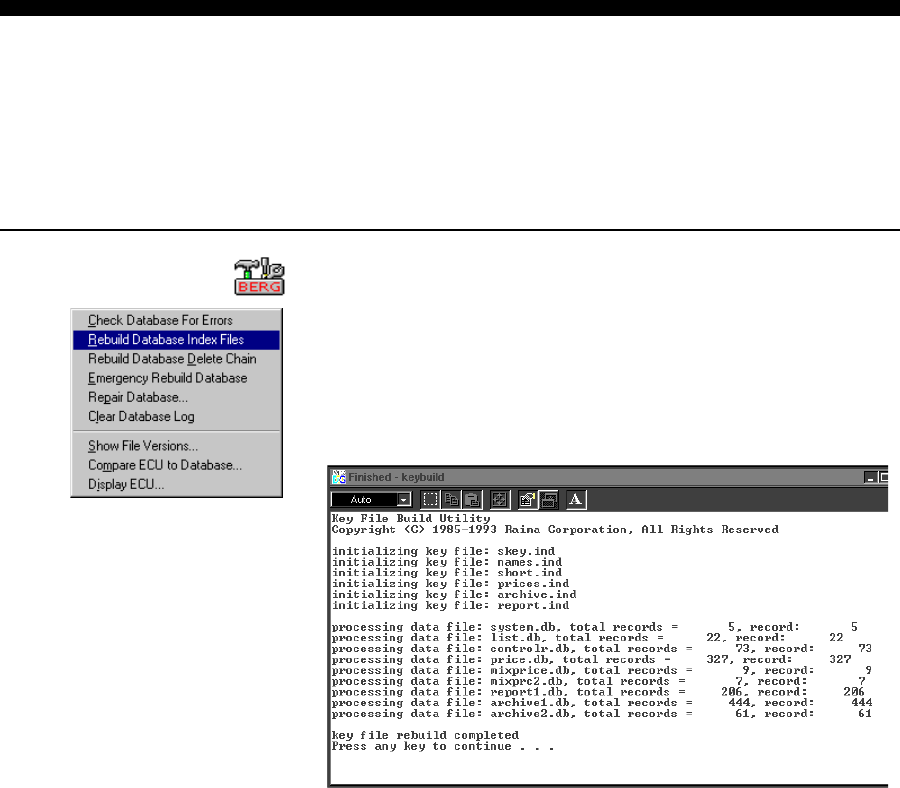
20-16 Infinity Installation/Service and User Manual
Rebuild the Database Index Files
You'll probably only perform the tasks listed in the Diagnostics menu of the Utilities program if
directed to do so by Berg personnel. You may be directed to perform this procedure after
checking the database for errors. Rebuilding index files does not change or delete any setup or
sales data.
nTo rebuild database index files:
1. Run Utilities.
2. Pull down the Diagnostics menu. Click Rebuild Database
Index Files.
Wait while the procedure is completed.
3. View the results.
4. Press any key to close the MS-DOS window.
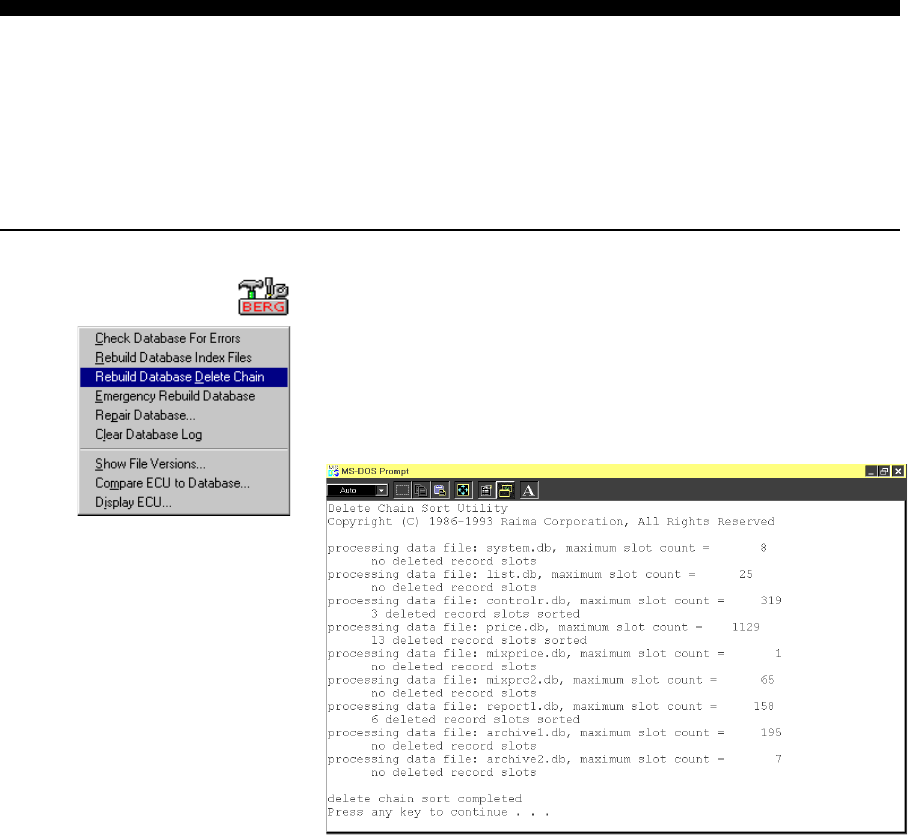
Database Management 20-17
Rebuild the Database Delete Chain
You'll probably only perform the tasks listed in the Diagnostics menu of the Utilities program if
directed to do so by Berg personnel. You may be directed to perform this procedure after
checking the database for errors. Rebuilding the delete chain does not change or delete any setup
or sales data.
nTo rebuild the database delete chain:
1. Run Utilities.
2. Pull down the Diagnostics menu. Click Rebuild Database
Delete Chain.
Wait while the procedure is completed.
3. View the results.
4. Press any key to close the MS-DOS window.
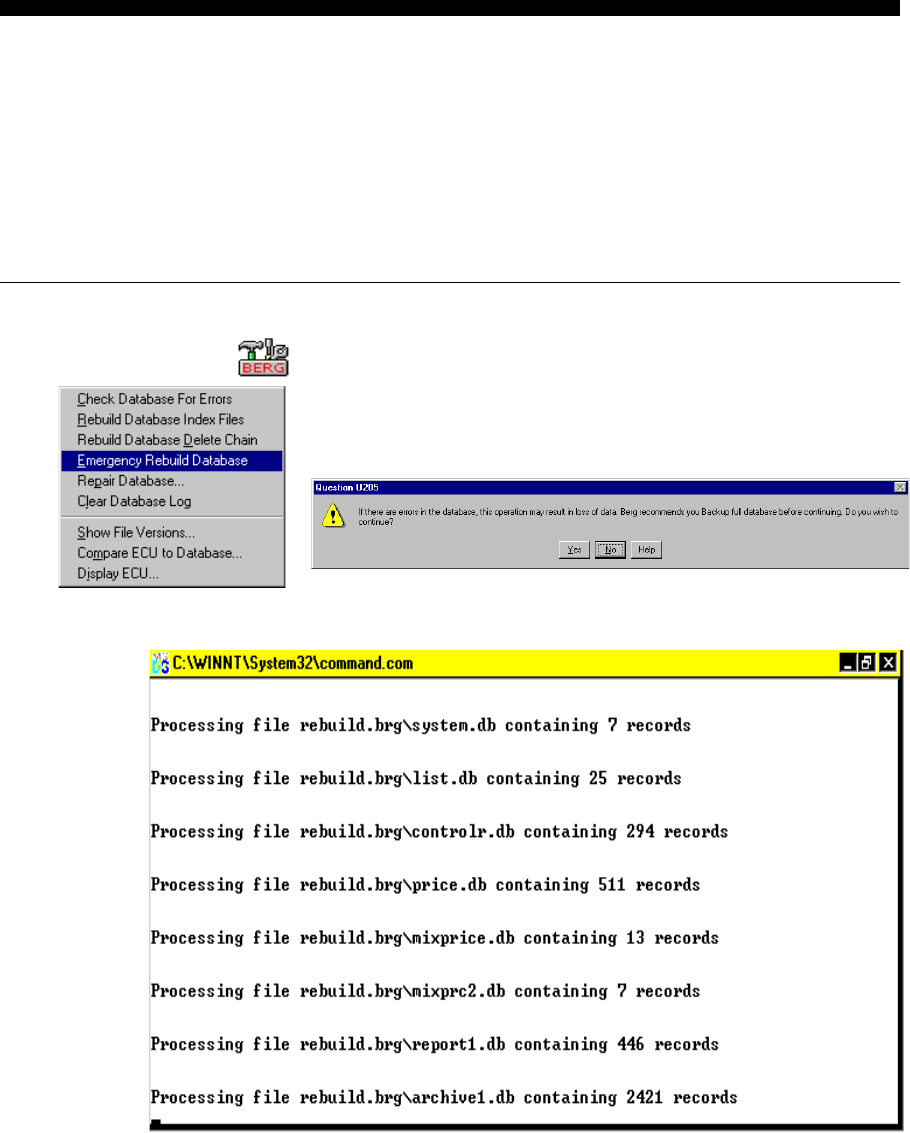
20-18 Infinity Installation/Service and User Manual
Emergency Rebuild the Database
You'll probably only perform the tasks listed in the Diagnostics menu of the Utilities program if
directed to do so by Berg personnel. You may be directed to perform this procedure after
checking the database for errors. This procedure is considered emergency because you don't want
to perform it unless you've exhausted other possible solutions. If you are directed to perform this
procedure, you'll want to backup your database first because the rebuild may result in a loss of
data. See Backup the Full Database in this section.
nTo perform an emergency rebuild of the database:
1. Run Utilities.
2. Pull down the Diagnostics menu. Click Emergency
Rebuild Database.
3. Click Yes to confirm the rebuild or No to cancel the process.
Wait while the database is rebuilt. The window closes
automatically when finished.
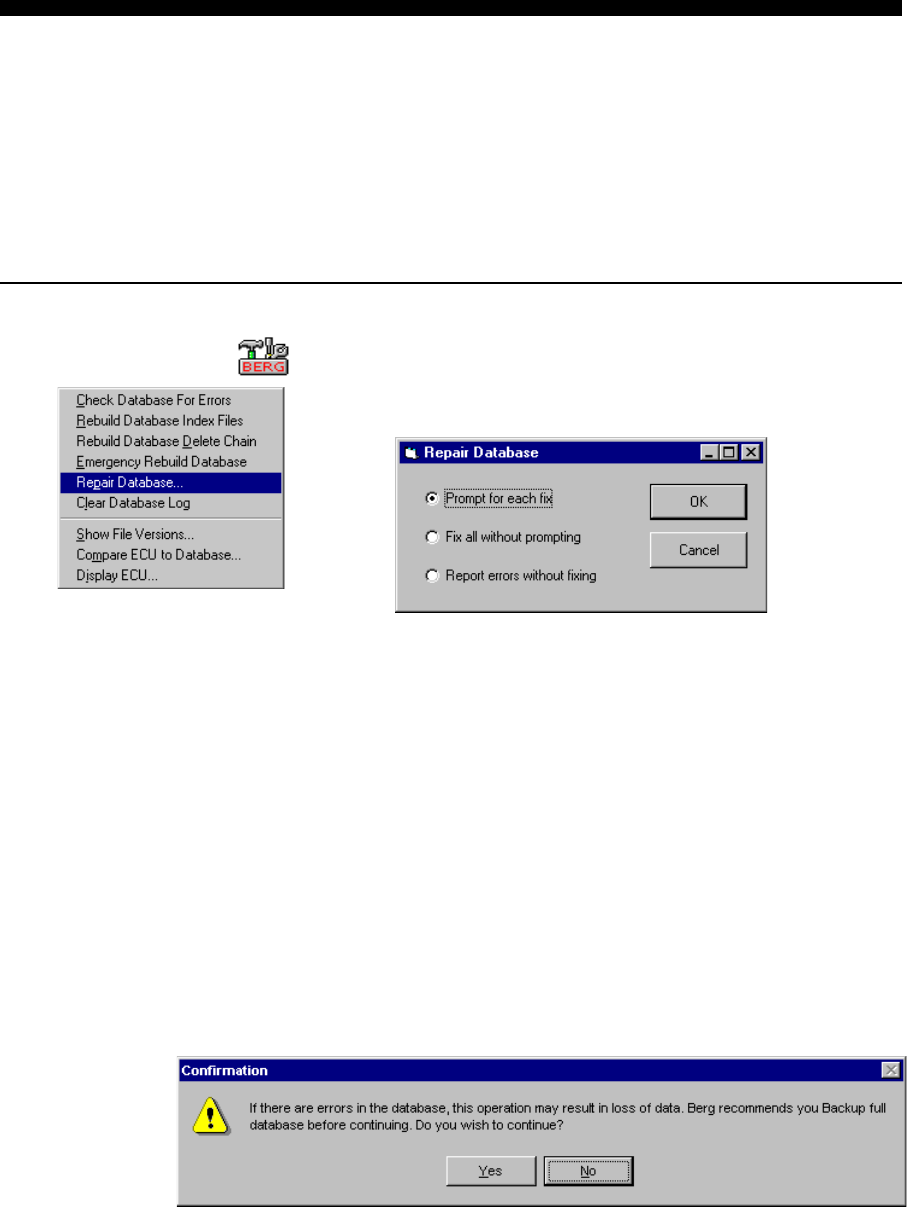
Database Management 20-19
Repair the Database
You'll probably only perform the tasks listed in the Diagnostics menu of the Utilities program if
directed to do so by Berg personnel. You may be directed to perform this procedure after checking
the database for errors and rebuilding index files. This procedure searches for inconsistencies in
the actual data of the database (e.g., a dispenser not assigned to an ECU). You can choose to view
the errors only or fix them. Fix the errors only if you are directed to do so by Berg personnel. You
may also be directed to backup your database before performing this task.
n To repair the database:
1. Run Utilities.
2. Pull down the Diagnostics menu. Click Repair Database....
3. Select a repair option.
Prompt for each fix prompts you each time an error is
found. You can then choose to fix the error or not. If your
database is large or has lots of errors, this option can take a
long time.
Fix all without prompting finds errors and fixes them
without waiting for confirmation. Select this option only if
directed by Berg personnel.
Report errors without fixing finds errors in the database
and lists them without changing anything. You can safely
select this option anytime.
4. Click OK.
5. Click Yes to continue with the repair process (if you've been
directed to do so). Click No if you want to exit the process.
(continued on next page)
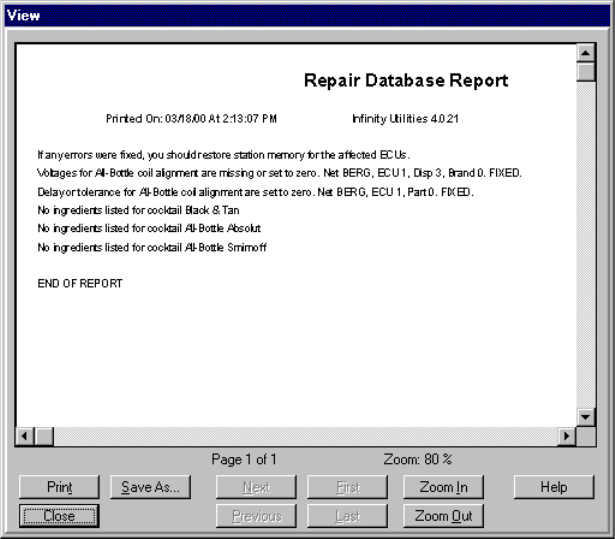
20-20 Infinity Installation/Service and User Manual
6. View the report in the View screen using the scroll bars and
Zoom In and Zoom Out buttons. You can maximize the
window by double-clicking the title bar.
7. Click Print if you want to print the Repair Database
Report.
8. Click Close to exit the View screen.
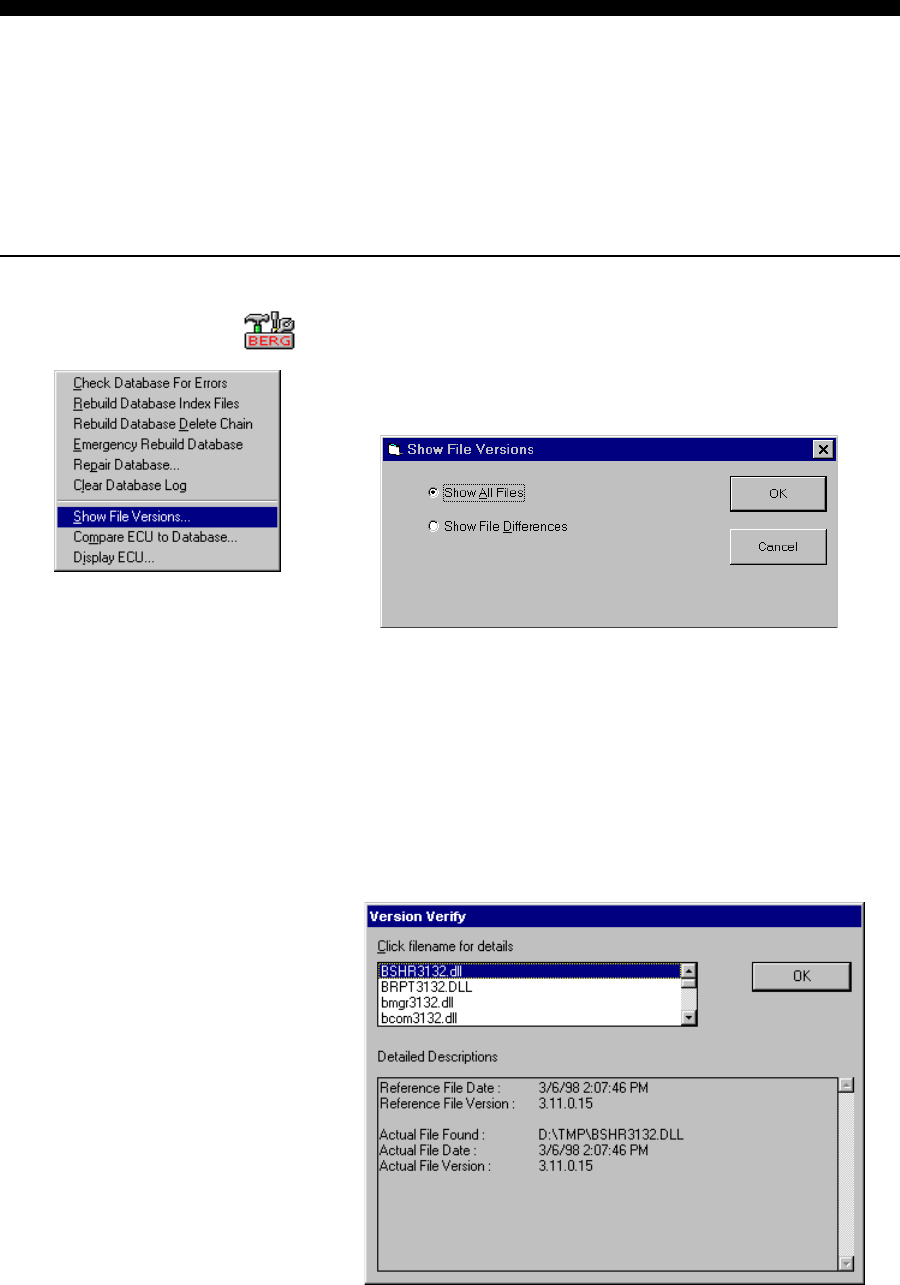
Database Management 20-21
Show File Versions
You'll probably only perform the tasks listed in the Diagnostics menu of the Utilities program if
directed to do so by Berg personnel. You may be directed to perform this procedure to check the
version numbers of various files Infinity uses to run its programs. If you've recently loaded other
software and error messages appear when you run Infinity, Berg personnel may ask you to
perform this task to determine if files used by Infinity have been affected by the other software.
nTo show file versions:
1. Run Utilities.
2. Pull down the Diagnostics menu. Click Show File
Versions....
3. Select a show file option as directed by Berg personnel.
Show all Files displays a list of version numbers for every
file used by Infinity.
Show File Differences displays a list of any file version
numbers that don't match the version numbers Infinity
expects.
4. Click OK.
5. Select a file to see more details as directed by Berg
personnel. (continued on next page)
20-22 Infinity Installation/Service and User Manual
6. Click OK to close the Version Verify screen.
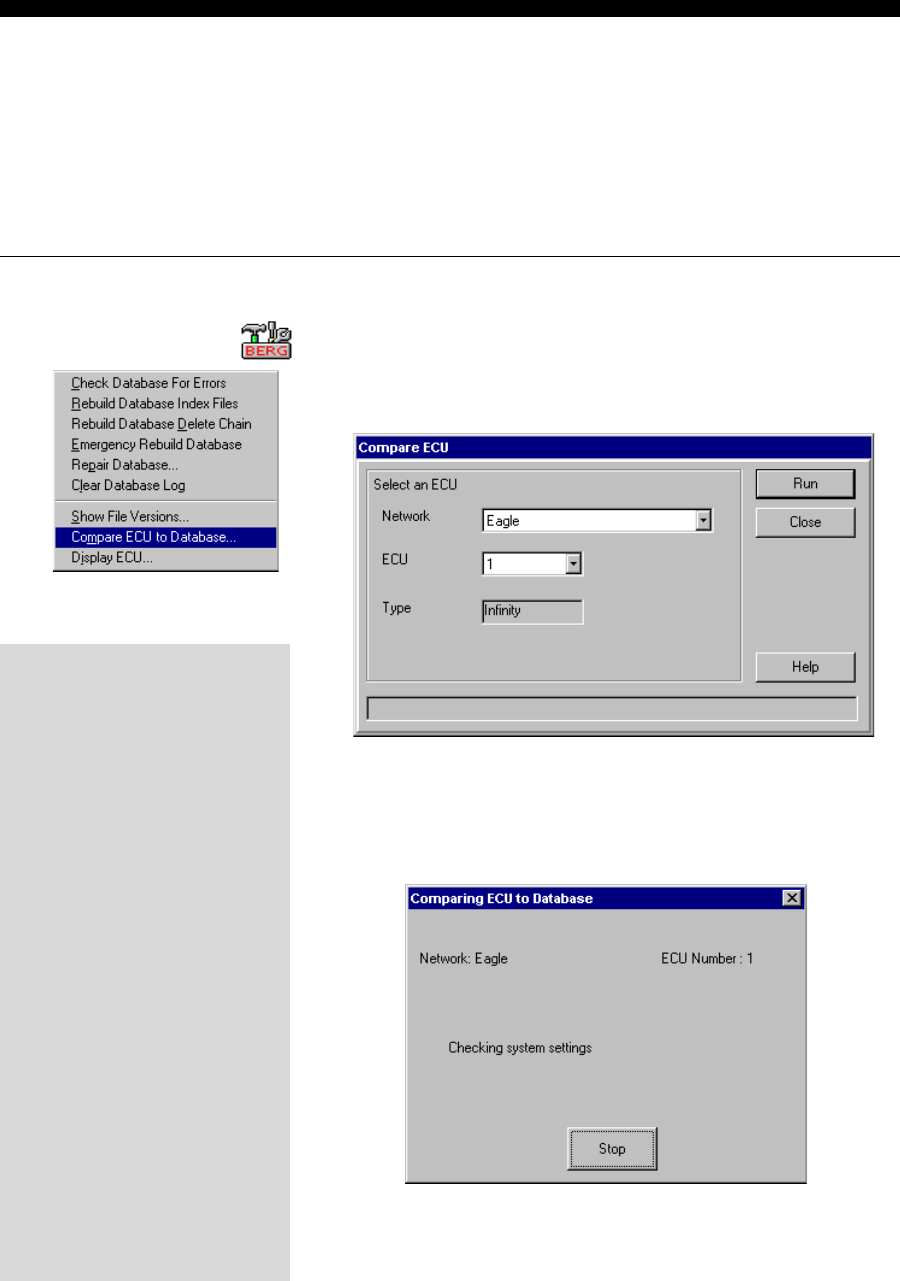
Database Management 20-23
Compare ECU to Database
If an ECU is having problems you can perform this task to compare the setup information in the
ECU with the setup information in your database. You'll be able to see which information (if any)
is different (EPROM version, dispenser assignments, ECU type, etc.). This operation doesn't help
fix the problemyou'll probably have to do a Clear and Restore Memory to re-send the setup
information from the database to the ECU. It can be useful, however, in diagnosing the problem.
nTo compare an ECU to the database:
1. Run Utilities.
2. Pull down the Diagnostics menu. Click Compare ECU to
Database....
3. Select the name of the Network.
4. Select the ECU number.
5. Click Run.
Wait while the ECU and database are compared.
6. View the results in the View screen using the scroll bars.
7. Click Close to exit the Compare ECU to Database screen.
Possible Reasons for
Differences Between ECU
and Database
lYou forgot to Clear and
Restore Memory after making
changes to setup information
at the computer.
lYou restored a previous
database and didn't Clear
and Restore Memory.
lYou didn't store alignment
values after aligning All-Bottle
7 activator rings.
lYou're connected to the wrong
ECU (verify correct ECU
number at ECU and the
computer).
lThe setup information at the
ECU has been corrupted.
lThe database information at
the computer has been
corrupted.
20-24 Infinity Installation/Service and User Manual
Display ECU
Use this diagnostic tool to see the information stored in an ECU. The report lists all ECU setup
data, prices, portions, current state and any POS drivers loaded. (It does not show any sales
information.) The ECU number must be set up in the software, but the data in the report reflects
only what is stored at the ECU. This tool is especially useful to diagnose an ECU about which
little is known.
nTo display an ECU's setup:
1. Run Utilities.
2. Pull down the Diagnostics menu. Click Display ECU....
3. Select the name of the Network.
4. Select the ECU number.
5. Click Run.
Wait while the computer communicates with the ECU.
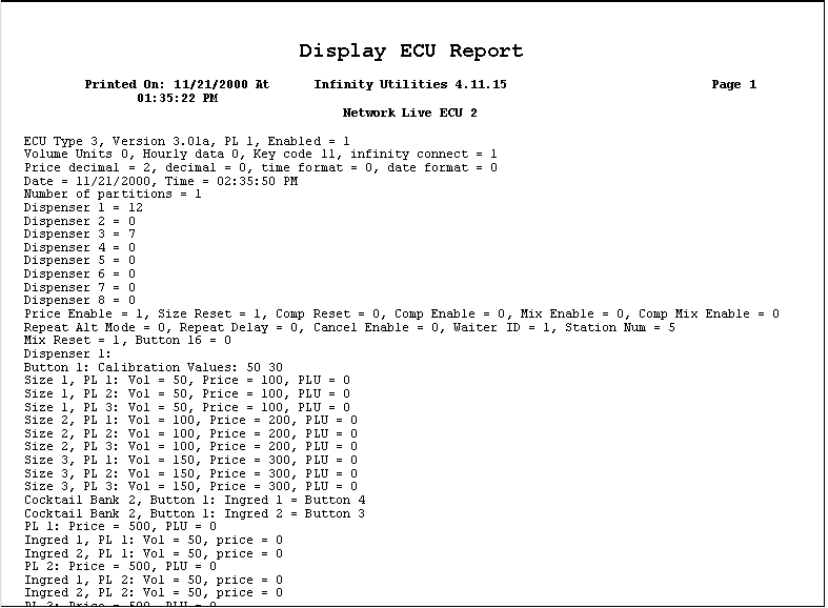
Database Management 20-25
6. View the results in the View screen using the scroll bars.
7. Click Close to exit the Display ECU screen.
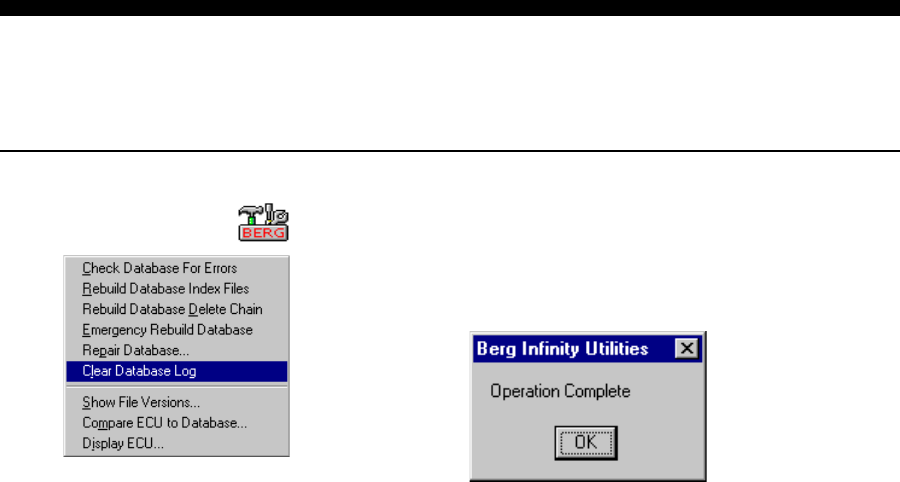
20-26 Infinity Installation/Service and User Manual
Clear Database Log
Perform this task only if directed to do so by Berg personnel.
nTo clear the database log:
1. Run Utilities.
2. Pull down the Diagnostics menu. Click Clear Database
Log.
3. Click OK when the operation is complete.

SECTION
21
Once your Infinity system is installed, you're ready to begin pouring. This
section provides help with the following tasks:
Change Price Levels at the All-Bottle Dispenser.......................... 21-2
Pour an All-Bottle Drink ...............................................................21-3
Pour a Complimentary All-Bottle Drink .......................................21-4
Pour an All-Bottle ID Drink ..........................................................21-5
Pour a Complimentary All-Bottle ID Drink .................................. 21-6
Pour a 1544 Infinity Drink ............................................................21-7
Pour a Complimentary 1544 Infinity Drink ..................................21-8
Change Price Levels at the Laser Dispenser ................................. 21-9
Pour a Laser Drink ......................................................................21-10
Pour a Laser Cocktail .................................................................. 21-11
Pour a Cocktail with Button 16 Switching ................................. 21-12
Pour a Complimentary Laser Drink ............................................21-13
Pour a Complimentary Laser Cocktail ........................................ 21-14
Pour a Complimentary Cocktail with Button 16 Switching ....... 21-15
Change the Price Level at a Tap..................................................21-16
Pour a TAP 1 Drink ..................................................................... 21-17
Pour a Complimentary TAP 1 Drink ...........................................21-18
Add a Head to a TAP 1 Drink ..................................................... 21-19
Pause a TAP 1 Pour ..................................................................... 21-20
Repeat a TAP 1 Pour ...................................................................21-21
Cancel a TAP 1 Pour ...................................................................21-22
TAP 1 Manual Pouring Operation...............................................21-23
TAP 1 End of Keg Handling .......................................................21-24
Pour with Server ID .................................................................... 21-25
Pouring Operations
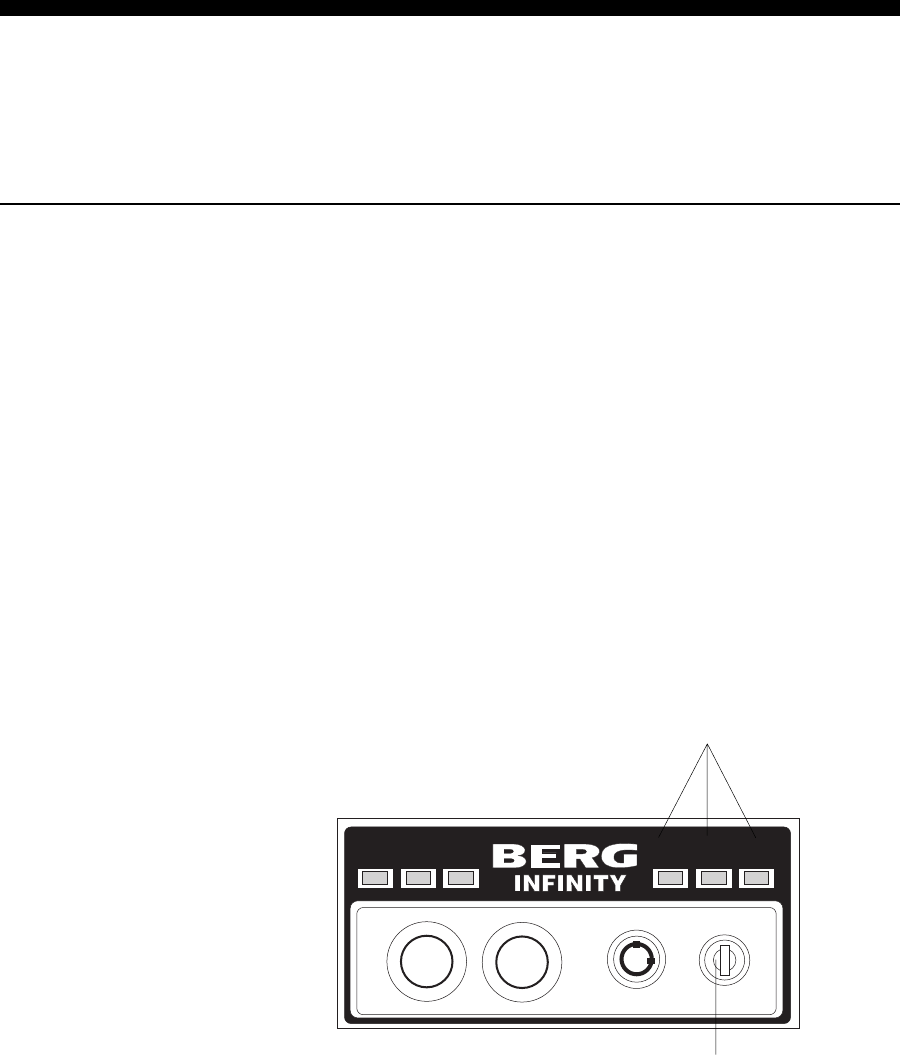
21-2 Infinity Installation/Service and User Manual
Change Price Levels at the All-Bottle Dispenser
Switching price levels at the dispenser is an option you can enable or disable at the computer. See
New ECU Setup (Infinity) or Modify an ECU in the Network and ECU Setup section. If you
enable this feature, anyone with a key can change the price level at an All-Bottle dispenser.
nTo change price levels at the All-Bottle dispenser:
1. Insert a price level lockout key in the lock under the price
level indicator lights.
2. Turn the key clockwise one quarter turn and then back to its
original position.
The price level shifts one position (A to B, B to C or C to
A). The price level lights indicate the new price level.
3. If necessary, turn the key a second time one quarter turn and
back up to shift to the next price level.
Note
qChanging the price level at one dispenser changes it for all
dispensers (Laser or All-Bottle) connected to the ECU.
R L A B C
S
Price level indicators
Price level lockout key
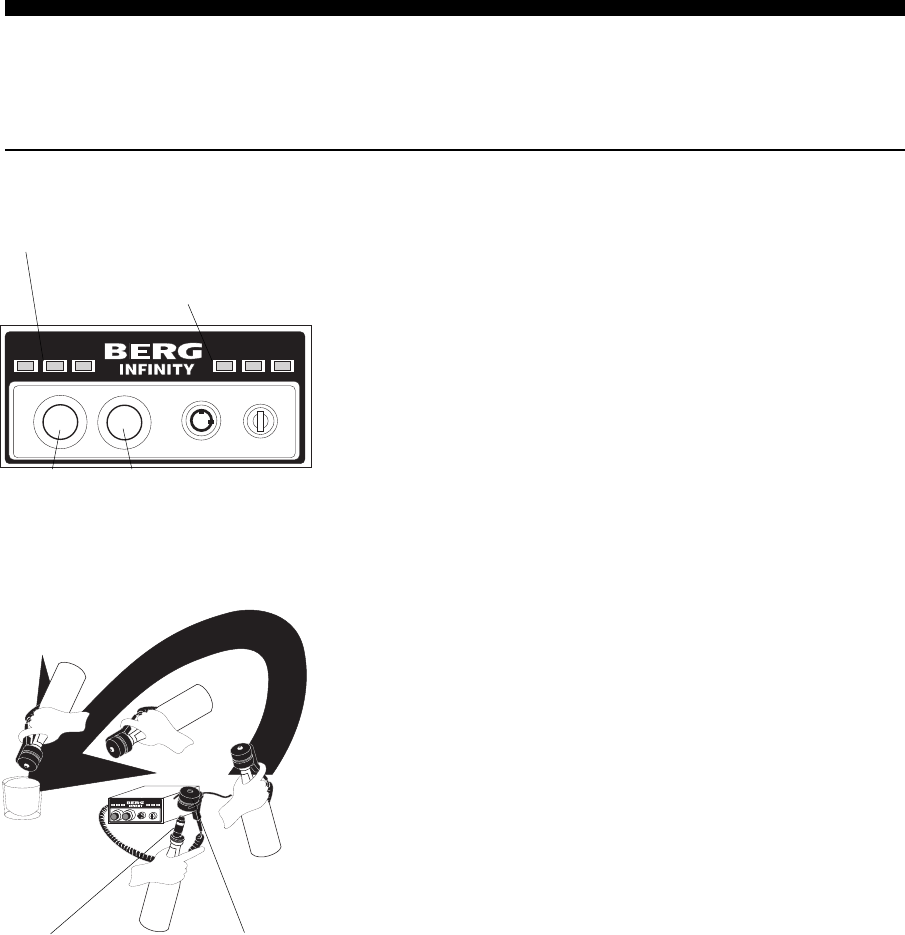
Pouring Operations 21-3
Pour an All-Bottle Drink
You can pour an unlimited number of brands using the All-Bottle dispenser.
nTo pour an All-Bottle drink:
1. Verify the correct price level indicator (A, B, or C) is lit.
If you need to change the price level, see Change Price
Levels at the All-Bottle Dispenser in this section. (This
feature must first be enabled at the computer.)
2. Verify the correct portion size indicator (S-small, R-regular,
or L-large) is lit. Change the portion size by pressing the left
button under the indicator lights for Small or the right button
for Large. If the S portion size indicator is lit, press the left
button to reset to Regular. If the L portion size indicator is
lit, press the right button to reset to Regular.
3. Pick up a bottle with a secured pourer and insert the pourer
into the activator ring (located in the ring holder).
4. Grasp the finger grip on the activator ring with your index
finger and quickly invert the bottle to a near vertical pouring
position over a glass.
The pour commences.
5. When the pour ends, tip the bottle back to an upright
position. Return the activator ring to the ring holder and the
bottle to its prior location.
Notes
qIf the pour does not immediately begin, quickly tip the bottle
and activator ring to an upright position and then back to a
vertical pouring position over the glass.
qIf the pour splashes sideways and misses the glass, you may
not have tipped the bottle to a vertical position quickly
enough.
qIf you have enabled the Size Reset feature at the computer,
the portion size indicators reset to R after every pour.
qSee the Network and ECU Setup section to enable or disable
pouring features.
RL ABC
S
R L A B C
S
Activator ringCoded pourer
Portion size indicators
Price level indicators
Left and right
buttons
21-4 Infinity Installation/Service and User Manual
Pour a Complimentary All-Bottle Drink
Complimentary pouring is an option you enable or disable at the computer for each ECU.
nTo pour a complimentary All-Bottle drink:
1. Press both buttons under the portion size indicator lights at
the same time.
The current price level indicator blinks continuously in
comp mode.
2. Verify the correct portion size indicator (S-small, R-regular,
or L-large) is lit. Change the portion size by pressing the left
button under the portion size indicator lights for Small or the
right button for Large.
3. Pick up a bottle with a secured pourer and insert the pourer
into the activator ring (located in the ring holder).
4. Grasp the finger grip on the activator ring with your index
finger and quickly invert the bottle to a near vertical pouring
position over a glass.
The pour commences.
5. When the pour ends, press both buttons under the portion
size indicator lights at the same time to return to standard
pouring mode.
OR
If you have enabled the Comp Reset option at the computer,
the dispenser automatically resets to standard pouring mode
when the complimentary pour ends.
Notes
qAll complimentary pours are computed for system reports.
qSee the Network and ECU Setup section to enable or disable
pouring features.
RL ABC
S
R L A B C
S
Activator ringCoded pourer
Portion size indicators
Price level indicators
Left and right
buttons
Pouring Operations 21-5
Pour an All-Bottle ID Drink
You can program pourers for up to 200 brands using the All-Bottle ID dispenser.
nTo pour an All-Bottle ID drink:
1. Verify the correct price level (A:, B:, C: or D:) on the LCD
display.
To change the price level, press to cycle through the
price levels.
2. Verify the correct portion size (S:, R:, L: or X:) on the
LCD display. (The portion size flashes if it is non-Regular.)
To change the portion size press (small), (regular),
(large) or (extra-large).
3. Pick up a bottle with a secured pourer and insert the pourer
into the activator ring (located in the ring holder).
Verify the correct brand name on the LCD display.
4. Grasp the finger grip on the activator ring with your index
finger and quickly invert the bottle to a near vertical pouring
position over a glass.
The pour commences.
5. When the pour ends, tip the bottle back to an upright
position. Return the activator ring to the ring holder and the
bottle to its prior location.
Notes
qIf the pour does not immediately begin, quickly tip the bottle
and activator ring to an upright position and then back to a
vertical pouring position over the glass.
qIf the pour splashes sideways and misses the glass, you may
not have tipped the bottle to a vertical position quickly
enough.
qIf you have enabled the Size Reset feature at the computer,
the portion size is reset to R after every pour.
qIf you have enabled the Show Prices and/or Show Portions
feature at the computer, the actual price and portion amount
of the pour is displayed on the LCD.
C: R:
Activator ringProgrammed
pourer
RL ABC
S
Gin
C: 2.00 R: 1.00 oz
21-6 Infinity Installation/Service and User Manual
Pour a Complimentary All-Bottle ID Drink
Complimentary pouring is an option you enable or disable at the computer for each ECU.
nTo pour a complimentary All-Bottle ID drink:
1. Press the up arrow to put the dispenser in comp mode.
"COMP" appears in the display.
2. Verify the correct portion size (S:, R:, L: or X:) on the
LCD display. (The portion size flashes if it is non-Regular.)
To change the portion size press (small), (regular),
(large) or (extra-large).
3. Pick up a bottle with a secured pourer and insert the pourer
into the activator ring (located in the ring holder).
Verify the correct brand name on the LCD display.
4. Grasp the finger grip on the activator ring with your index
finger and quickly invert the bottle to a near vertical pouring
position over a glass.
The pour commences.
5. When the pour ends, tip the bottle back to an upright
position. Return the activator ring to the ring holder and the
bottle to its prior location.
6. Press the up arrow to return to standard pouring mode.
OR
If you have enabled the Comp Reset option at the computer,
the dispenser automatically resets to standard pouring mode
when the complimentary pour ends.
Notes
qAll complimentary pours are computed for system reports.
qSee the Network and ECU Setup section to enable or disable
pouring features.
C: COMP R:
Activator ringCoded pourer
RL ABC
S
Gin
C: COMP R: 1.00 oz
Pouring Operations 21-7
Pour a 1544 Infinity Drink
You can pour four different portion sizes at four price levels for each of the fifteen 1544 Infinity
coded pourers.
nTo pour a 1544 Infinity drink:
1. Verify the correct price level button (A, B, C or D) is lit on
the front panel of the ECU.
If you need to change the price level, press a new button (A,
B, C or D) if price level changes are enabled for the ECU.
2. Select the portion size by pressing the S (small), R (regular),
L (large) or SP (special) button on the ECU's front panel.
Verify the correct portion size button is lit.
3. Pick up a bottle with a secured pourer and insert the pourer
into the activator ring (located in the ring holder).
4. Grasp the finger grip on the activator ring with your index
finger and quickly invert the bottle to a near vertical pouring
position over a glass.
The pour commences.
5. When the pour ends, tip the bottle back to an upright
position. Return the activator ring to the ring holder and the
bottle to its prior location.
Notes
qIf the pour does not immediately begin, quickly tip the bottle
and activator ring to an upright position and then back to a
vertical pouring position over the glass.
qIf the pour splashes sideways and misses the glass, you may
not have tipped the bottle to a vertical position quickly
enough.
qIf you have enabled the Size Reset feature at the computer,
the portion size indicators reset to R after every pour.
qSee the Network and ECU Setup section to enable or disable
pouring features.
RL ABC
S
21-8 Infinity Installation/Service and User Manual
Pour a Complimentary 1544 Infinity Drink
Complimentary pouring is an option you enable or disable at the computer for each ECU.
nTo pour a complimentary 1544 Infinity drink:
1. Press the right arrow button. The indicator lights on the front
panel flash while in comp mode.
2. Verify the correct price level button (A, B, C or D) is lit on
the front panel of the ECU.
If you need to change the price level, press a new button (A,
B, C or D) if price level changes are enabled for the ECU.
3. Select the portion size by pressing the S (small), R (regular),
L (large) or SP (special) button on the ECU's front panel.
Verify the correct portion size button is lit.
4. Pick up a bottle with a secured pourer and insert the pourer
into the activator ring (located in the ring holder).
5. Grasp the finger grip on the activator ring with your index
finger and quickly invert the bottle to a near vertical pouring
position over a glass.
The pour commences.
6. When the pour ends, tip the bottle back to an upright
position. Return the activator ring to the ring holder and the
bottle to its prior location.
7. Press the left arrow button to return to standard pouring
mode. The indicator lights stop flashing.
OR
If you have enabled the Comp Reset option at the computer,
the dispenser automatically resets to standard pouring mode
when the complimentary pour ends.
Notes
qAll complimentary pours are computed for system reports.
qSee the Network and ECU Setup section to enable or disable
pouring features.
RL ABC
S
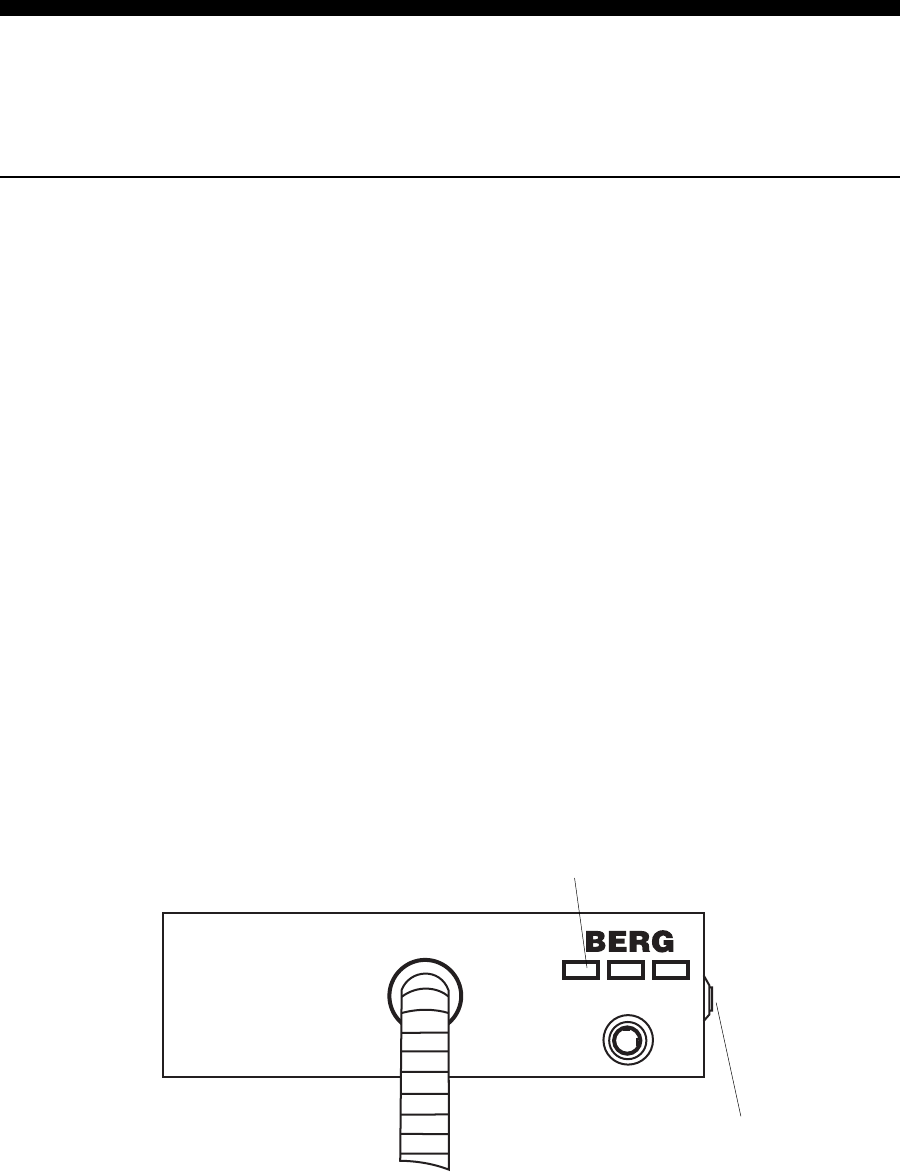
Pouring Operations 21-9
Price level indicator lights
Laser dispenser front panel Price level button
Change Price Levels at the Laser Dispenser
Switching price levels at the dispenser is an option you can enable or disable. If you enable this
feature, anyone can change the price level at a Laser dispenser.
nTo change price levels at the Laser dispenser:
1. Verify the current price level by checking the price level
indicator lights.
The left red light is A, the middle yellow light is B, the right
red light is C.
2. Press the price level button on the right side of the dispenser.
The price level shifts one position (A to B, B to C or C to
A). The price level lights indicate the new price level.
3. If necessary, press the button a second time to shift to the
next price level.
Note
qChanging the price level at one dispenser changes it for all
dispensers (Laser or All-Bottle) connected to the ECU.
qIf you're using an Infinty ECU with All-Bottle ID, you have
four price levels. When you shift to price level D, both the
right and left lights are on.
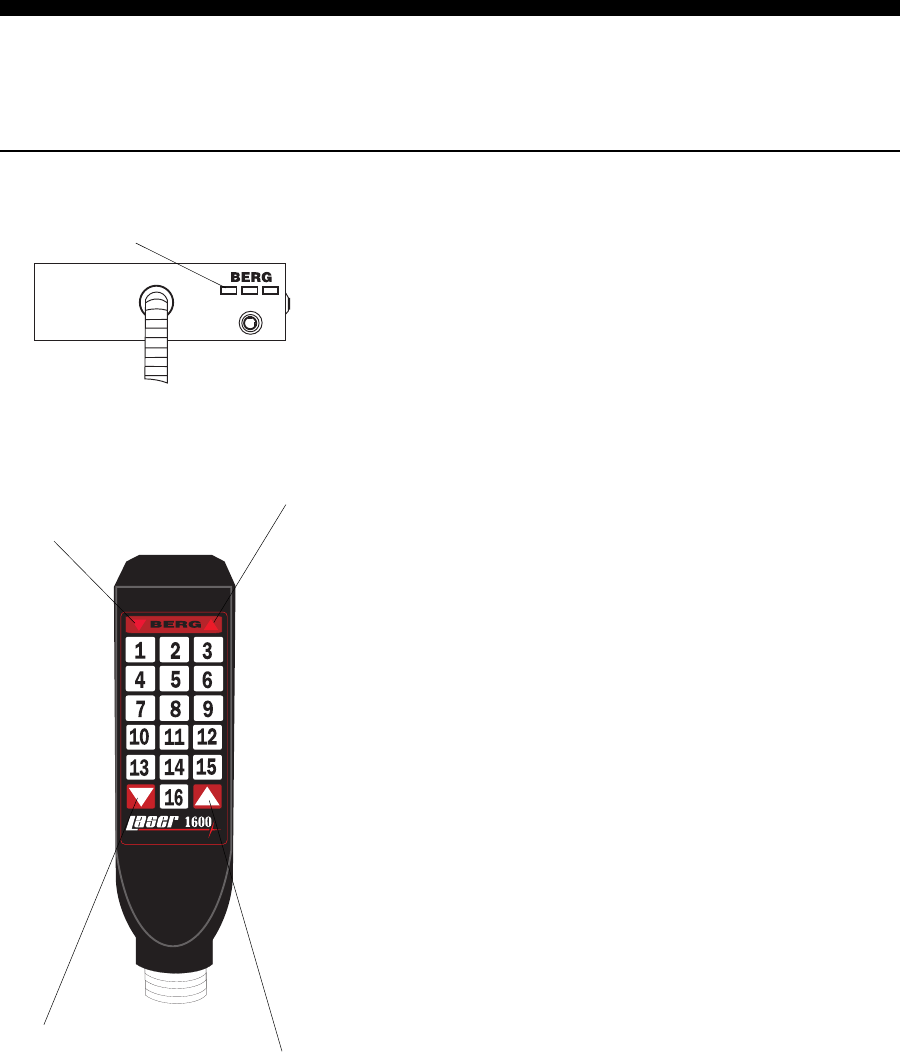
21-10 Infinity Installation/Service and User Manual
Price level indicator lights
Laser dispenser front panel
T.M.
by
Small portion size indicator
Large portion size indicator
Down arrow button
Up arrow button
Pour a Laser Drink
Depending on the Laser gun, you can pour 6, 12 or 16 different brands.
nTo pour a Laser drink:
1. Verify the correct price level indicator (A, B, or C) is lit on
the front of the dispenser.
If you need to change the price level, see Change Price
Levels at the Laser Dispenser in this section. (This feature
must first be enabled.)
2. Remove the Laser gun from the gun holder. Verify the
correct portion size indicator is lit. The Small portion size
indicator is a red triangle (or down arrow) at the top left of
the gun. The Large portion size indicator is a red triangle (or
up arrow) at the top right of the gun. If neither triangle is lit
the gun is set to Regular portion size.
3. Change the portion size by pressing the down arrow button
at the bottom left of the gun for Small or the up arrow button
at the bottom right of the gun for Large. If the Small portion
size indicator is lit, press the down arrow to reset to Regular.
If the Large portion size indicator is lit, press the up arrow to
reset to Regular.
4. Bring the Laser gun into pouring position over the glass.
5. Press the button number for the brand you want to pour.
The pour commences.
6. When the pour has ended, return the Laser gun to the holder.
Notes
qIf you have enabled the Size Reset feature, the portion size
indicators reset to Regular after every pour.
qIf you're using an All-Bottle ID dispenser, you also have a
price level D and an extra portion size. In price level D, the
left and right price level lights on the dispenser both turn on.
On the Laser gun, both the small and large size indicators turn on
for the extra size. Pressing the right arrow takes you from regular to
Large to X and back to regular.
Pouring Operations 21-11
T.M.
by
Small
portion size
indicator
Large
portion size
indicator
Down
arrow Up
arrow
Pour a Laser Cocktail
If you have a 6 brand Laser gun, you can pour up to eighteen different pre-assigned cocktailssix
each in three different "banks." If you have a 12 brand gun, you can pour thirty-six different
cocktailstwelve each in three banks. If you have a 16 brand Laser gun, you can pour forty-eight
different cocktailssixteen each in three banks. Cocktail pouring is a feature that can be enabled
or disabled (see New ECU Setup (Infinity) or Modify an ECU in the Network and ECU Setup
section).
nTo pour a Laser cocktail:
1. Remove the Laser gun from the gun holder. If the gun is in
normal pouring mode, press the down and the up arrow
buttons on the gun at the same time.
The gun is now in the Regular bank of cocktail mode. Both
portion size indicators blink continuously in Regular bank
cocktail mode.
2. To access a different cocktail bank, press the down arrow
button for the Lower bank or the Up arrow button for the
Upper bank.
The small portion size indicator stays on continuously in
Lower bank cocktail mode. The large portion size indicator
stays on continuously in Upper bank cocktail mode.
3. Bring the Laser gun into pouring position over the glass.
4. Press the button number for the cocktail you want to pour.
The pour commences.
5. When the pour ends, press the down and the up arrow
buttons on the gun at the same time as many times as needed
to return to normal pouring mode.
OR
If you have enabled the Cocktail Reset option at the
computer, the dispenser automatically resets to standard
pouring mode when the cocktail pour ends.
Laser Gun Modes
The 4 possible Laser gun modes
are:
lNormal Mode
lCocktail Mode
lComp Mode
lComp Cocktail Mode
When you press the up and
down arrow buttons at the
same time, the gun cycles
through the modes in the order
listed, skipping any that are not
enabled.
21-12 Infinity Installation/Service and User Manual
Pour a Cocktail with Button 16 Switching
If you enable the button 16 switching feature on a 16 brand Laser gun, you reduce the number of
possible cocktails to forty-five, but you also reduce the number of button presses needed to pour
each cocktail. You can enable or disable both cocktail pouring and button 16 switching (see New
ECU Setup (Infinity) or Modify an ECU in the Network and ECU Setup section).
nTo pour a Laser cocktail with button 16 switching:
1. Remove the Laser gun from the gun holder. Press button 16.
The gun is now in cocktail mode. If the gun was set to
regular size before pressing button 16, you're in the Regular
bank. Both portion size indicators blink continuously in
Regular bank cocktail mode. (If the gun was set to Small size
before pressing button 16, you're in the Lower bank, and so
on.)
2. To access a different cocktail bank, press the down arrow
button for the Lower bank, the up arrow button for the Upper
bank or the arrow corresponding to whichever portion size is
lit for the Regular bank.
The small portion size indicator stays on continuously in
Lower bank cocktail mode. The large portion size indicator
stays on continuously in Upper bank cocktail mode.
3. Bring the Laser gun into pouring position over the glass.
4. Press the button number for the cocktail you want to pour.
The pour commences.
5. When the pour ends, press button 16 to return to standard
pouring mode.
OR
If you have enabled the Cocktail Reset option at the
computer, the dispenser automatically resets to standard
pouring mode when the cocktail pour ends.
T.M.
by
Down
arrow Up
arrow
Pouring Operations 21-13
Pour a Complimentary Laser Drink
Complimentary pouring and cocktail pouring are options you can enable or disable for each ECU
(see New ECU Setup (Infinity) or Modify an ECU in the Network and ECU Setup section).
Whether or not you enable cocktail pouring determines how you access complimentary pouring
mode at the Laser gun.
nTo pour a complimentary Laser drink:
1. Remove the Laser gun from the gun holder. If the gun is in
normal pouring mode, press both the down and the up arrow
buttons on the gun at the same time. (If cocktail pouring is
enabled, you're now in cocktail mode. Press both arrow
buttons again to cycle to comp mode. If cocktail pouring isn't
enabled or you use button 16 switching, you're now in comp
mode.)
The current price level indicator light on the Laser dispenser
front panel blinks continuously in comp mode.
2. Verify the correct portion size indicator is lit. Change the
portion size by pressing the down arrow button for Small or
the up arrow button Large.
3. Bring the Laser gun into pouring position over the glass.
4. Press the button number for the brand you want to pour.
The pour commences.
5. When the pour ends, press the down and the up arrow
buttons on the gun at the same time as many times as needed
to return to normal pouring mode.
OR
If you have enabled the Comp Reset option, the dispenser
automatically resets to standard pouring mode when the
complimentary pour ends.
Note
qAll complimentary pours are computed for system reports.
Laser Gun Modes
The 4 possible Laser gun modes
are:
lNormal Mode
lCocktail Mode
lComp Mode
lComp Cocktail Mode
When you press the up and
down arrow buttons at the
same time, the gun cycles
through the modes in the order
listed, skipping any that are not
enabled.
T.M.
by
Small
portion size
indicator
Large
portion size
indicator
Down
arrow Up
arrow
21-14 Infinity Installation/Service and User Manual
Pour a Complimentary Laser Cocktail
If you enable the complimentary cocktail pouring feature, any of the cocktails assigned to the
Laser gun can be poured as complimentary drinks. (See New ECU Setup (Infinity) or Modify an
ECU in the Network and ECU Setup section for help with enabling this feature.)
nTo pour a complimentary Laser cocktail:
1. Remove the Laser gun from the gun holder. Press the down
and the up arrow buttons on the gun at the same time as
many times as needed to access comp cocktail mode.
In Regular bank comp cocktail mode, both the portion size
indicators on the gun and the price level indicator on the
Laser dispenser front panel blink continuously.
2. Access a different cocktail bank by pressing the down arrow
button for the Lower bank or the up arrow button for the
Upper bank.
The small portion size indicator stays on continuously in
Lower bank cocktail mode. The large portion size indicator
stays on continuously in Upper bank cocktail mode.
3. Bring the Laser gun into pouring position over the glass.
4. Press the button number for the cocktail you want to pour.
The pour commences.
5. When the pour ends, press the down and the up arrow
buttons on the gun at the same time as many times as needed
to return to standard pouring mode.
OR
If you have enabled the Comp Reset and Cocktail Reset
options, the dispenser automatically resets to normal pouring
mode when the complimentary cocktail pour ends. (Note that
Comp Reset and Cocktail Reset work independently of
each other.)
Laser Gun Modes
The 4 possible Laser gun modes
are:
lNormal Mode
lCocktail Mode
lComp Mode
lComp Cocktail Mode
When you press the up and
down arrow buttons at the
same time, the gun cycles
through the modes in the order
listed, skipping any that are not
enabled.
T.M.
by
Small
portion size
indicator
Large
portion size
indicator
Down
arrow Up
arrow
Pouring Operations 21-15
Pour a Complimentary Cocktail with Button 16
Switching
If you enable the complimentary cocktail pouring feature, any of the cocktails assigned to the
Laser gun can be poured as complimentary drinks. Enabling the button 16 switching feature
reduces the number of presses to pour the cocktail. (See New ECU Setup (Infinity) or Modify an
ECU in the Network and ECU Setup section for help with enabling this feature.)
nTo pour a complimentary Laser cocktail with button
16 switching:
1. Remove the Laser gun from the gun holder. Press button 16.
The gun is now in cocktail mode. Both portion size
indicators blink continuously in Regular bank cocktail mode.
2. Press the down and the up arrow buttons on the gun.
The gun is now in Regular bank comp cocktail mode. Both
the portion size indicators and the price level indicators blink
continuously.
3. To access a different cocktail bank, press the down arrow
button for the Lower bank or the up arrow button for the
Upper bank.
The small portion size indicator stays on continuously in
Lower bank cocktail mode. The large portion size indicator
stays on continuously in Upper bank cocktail mode.
4. Bring the Laser gun into pouring position over the glass.
5. Press the button number for the cocktail you want to pour.
The pour commences.
6. When the pour ends, press button 16 or the down and up
arrow buttons to return to normal pouring mode.
OR
If you have enabled the Comp Reset and Cocktail Reset
option, the dispenser automatically resets to standard
pouring mode when the complimentary cocktail pour ends.
(Note that Comp Reset and Cocktail Reset work
independently of each other.)
Laser Gun Modes
The 4 possible Laser gun modes
are:
lNormal Mode
lCocktail Mode
lComp Mode
lComp Cocktail Mode
When you press the up and
down arrow buttons at the
same time, the gun cycles
through the modes in the order
listed, skipping any that are not
enabled.
T.M.
by
Small
portion size
indicator
Large
portion size
indicator
Down
arrow Up
arrow
21-16 Infinity Installation/Service and User Manual
Change the Price Level at a Tap
If you have enabled this feature with Infinity software, you can change the price level for a TAP
1 partition from any one of the tap controllers in that partition. (See New ECU Setup (TAP 1) or
Modify an ECU in the Network and ECU Setup section for help with enabling this feature.)
nTo change the price level at a tap:
1. Press and hold the cancel button in the upper left corner of
the tap keypad.
The light goes out behind the button that corresponds to the
current price level (button 2 in this case).
Button 1 = Price Level A
Button 2 = Price Level B
Button 3 = Price Level C
2. While still holding the cancel button, press the button that
corresponds to the new price level (1 for price level A, 2 for
price level B, 3 for price level C.)
The light goes out behind the button you push, signifying the
new price level (button 3 in this case).
3. Release the cancel button.
All lights on the keypad go back on.
Note
qIf you change the price level at a tap controller, it changes
the price level for all tap controllers in that partition.
2
BERG
3
4
1
2
BERG
3
4
1
2
BERG
3
4
1
Pouring Operations 21-17
Pour a TAP 1 Drink
The keypad on each tap has 4 numbered buttons to control 4 portion sizes. If you enable the
alternate sizes feature, you can pour 4 more portion sizes at each tap (for a total of 8 different
portion sizes). See New ECU Setup (TAP 1) or Modify an ECU in the Network and ECU Setup
section for help with enabling this feature.
nTo pour a TAP 1 drink:
1. Learn the button numbers for the preset portion sizes of your
taps. The following is a typical arrangement:
Button 1 - glass size portion
Button 2 - mug size portion
Button 3 - pitcher size portion
Button 4 - add a head (splash portion)
2. Press the button on the keypad for the portion size you want
(e.g., press button 1 to pour a glass size portion). The light
behind the button you press goes out.
3. Wait for the pour to end and remove the glass. The button
light comes back on.
nTo pour an alternate size drink:
1. Press the repeat button (in the upper right corner of the
keypad.) The light behind the repeat button blinks.
2. Press the portion size button for the alternate size you want.
The light behind the button you press goes out.
Button 1 - portion size 5
Button 2 - portion size 6
Button 3 - portion size 7
Button 4 - portion size 8
3. If you enabled Alt Size Reset, all lights come back on
when the alternate size pour is completed. You are no longer
in the alternate size mode.
If you did not enable Alt Size Reset, the repeat button
continues to blink. The portion size buttons remain in the
alternate size mode until you press the repeat button again
(or the cancel button.)
Note
qTo add a head to the drink, see Add a Head to a TAP 1 Drink
in this section.
2
BERG
3
4
1
2
BERG
3
4
1
Alternate Size/Repeat Pour
lThese are mutually exclusive
features; you can't enable
alternate sizes and repeat
pours at the same time.
21-18 Infinity Installation/Service and User Manual
Pour a Complimentary TAP 1 Drink
If you enable the complimentary pouring feature for a TAP 1 ECU, any portion sizes can be
poured as complimentary drinks. (See New ECU Setup (TAP 1) or Modify an ECU in the Network
and ECU Setup section for help with enabling this feature.)
nTo pour a complimentary TAP 1 drink:
1. While holding the cancel button in the upper left hand corner
of the keypad, press button 4.
The light goes out behind button 4.
2. Release both the cancel button and button 4.
All button lights come back on.
3. Position your glass under the tap of the brand you wish to
pour.
4. Press the portion size button on the keypad (just as you
would for a normal pour).
The light goes out behind the button you press.
5. Wait for the pour to end and remove the glass.
If Comp Reset is enabled all button lights come back on and
the complimentary pouring mode is ended.
Notes
qA light goes out behind button 1, 2 or 3 when you initially
press the cancel button. This has to do with price levels and
does not affect the complimentary pour.
qTo see if the complimentary pouring mode is on, hold down
the cancel button. If button 4 is not lit, complimentary
pouring mode is on.
qIf you havent started the pour, you can undo the
complimentary pouring mode by holding down the cancel
button and pressing button 4 again.
qYou cannot repeat a complimentary pour using the repeat
button.
2
BERG
3
4
1
2
BERG
3
4
1
Pouring Operations 21-19
Add a Head to a TAP 1 Drink
One of your portion sizes may be programmed to add a splash of product to an already poured
glass, mug or pitcher. This splash is typically 1 oz (3 cl) of product that adds a head to the drink.
nTo add a head to a TAP 1 drink:
1. Pour the desired portion size.
2. Leave the glass under the tap and press the button
programmed to add a head.
The light behind the add a head button goes out.
3. Wait for the splash to top off the drink and remove the glass.
All button lights come back on.
Notes
qTypically, the add a head portion is assigned to button 4.
qFor EPROMs version 3.00 and later, the add a head limit
determines the number of consecutive add a head pours
allowed. The add a head limit is a TAP 1 ECU setup feature.
See New ECU Setup (TAP 1) or Modify an ECU in the
Network and ECU Setup section. (Any zero-priced portion
will be counted in the add a head limit.)
2
BERG
3
4
1
21-20 Infinity Installation/Service and User Manual
Pause a TAP 1 Pour
If you are interrupted during the pouring of a TAP 1 drink or you need time for the foam to settle
you can stop the pour in progress and resume it later.
nTo pause a TAP 1 pour:
1. Press the same portion size button you pressed to begin the
pour.
The light behind the button blinks and the pour stops. The
button continues blinking until you resume the pour.
2. Press the same portion size button again to resume the pour.
The light behind the button goes out and pouring continues
at the exact point it left off.
Notes
qYou can pause and resume a pour as many times as needed.
qPress the cancel button to abort a paused pour.
2
BERG
4
1
3
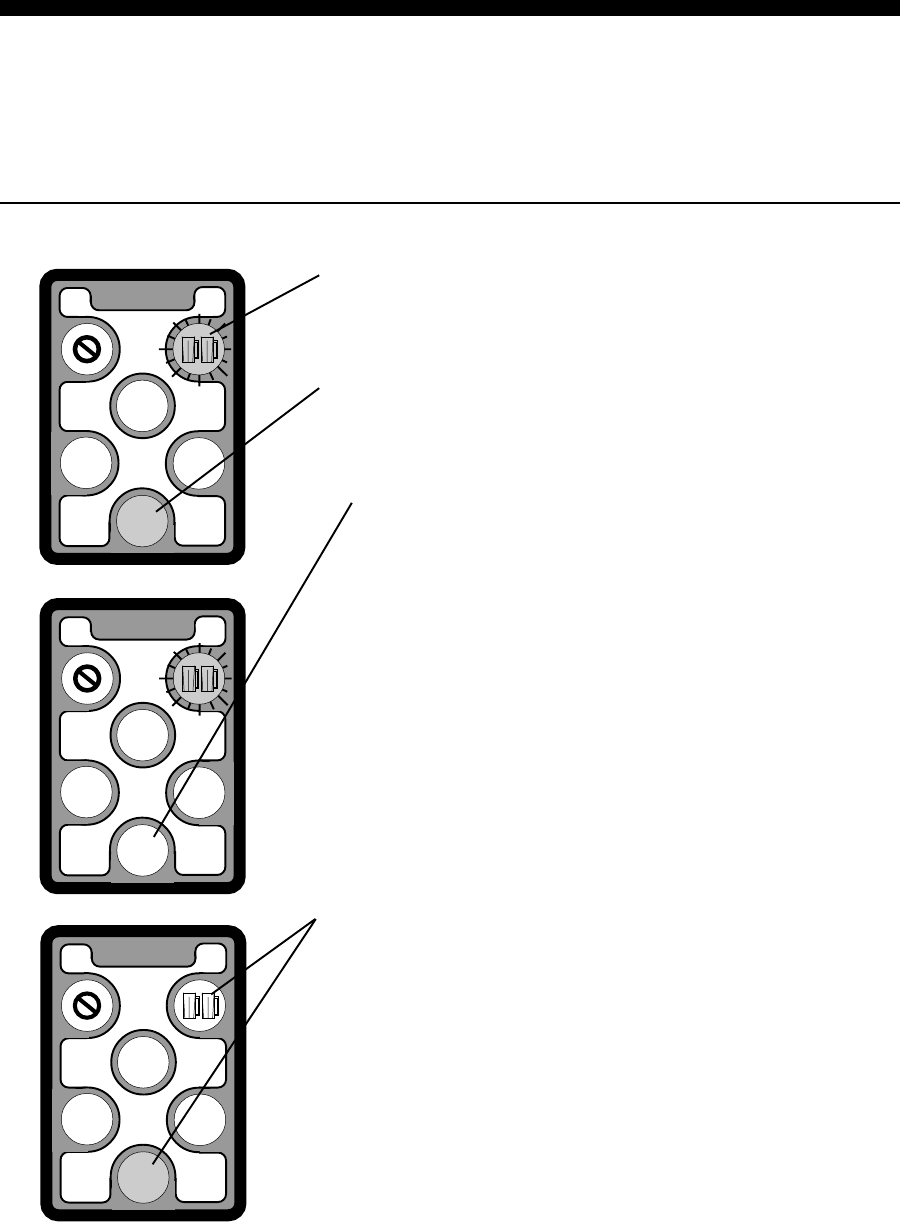
Pouring Operations 21-21
Repeat a TAP 1 Pour
If you know you will be pouring the same drink two or more times in a row, use the TAP 1 repeat
feature. This feature must be enabled with Infinity software. (See New ECU Setup (TAP 1) or
Modify an ECU in the Network and ECU Setup section for help with enabling this feature.)
nTo repeat a TAP 1 pour:
1. Press the repeat button (the button with two mugs in the
upper right corner).
The light behind the repeat button blinks.
2. Position your glass under the tap and press a portion size
button (button 1 in our example).
3. Wait for the pour to end and remove the glass.
The light behind the portion size button comes back on for
the number of seconds (1-9) specified in the software for
Repeat Delay.
4. Quickly position a new glass under the tap.
The light behind the portion size button goes out again as the
new pour begins.
5. Repeat steps 3 and 4 for as many identical drinks as you
need.
6. Press the repeat button again anytime during the pouring of
the final drink to turn the repeat feature off.
The repeat button stops blinking and the current pour
continues until finished.
Notes
qAs long as the repeat button continues to blink, you are in
the repeat mode.
qIf you press the cancel button to get out of repeat mode, it
cancels the pour in progress as well.
qYou can press the repeat button anytime before or during the
pour you want to repeat.
qAlternate sizes and repeat pours are mutually exclusive
features; you can't enable both at the same time.
2
BERG
3
4
1
2
BERG
3
4
1
2
BERG
3
4
1
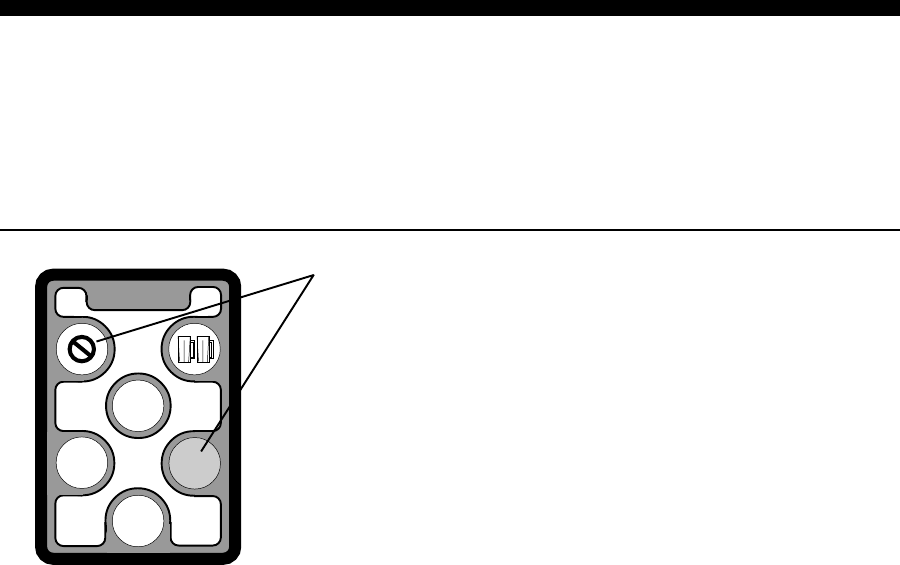
21-22 Infinity Installation/Service and User Manual
2
BERG
3
4
1
Cancel a TAP 1 Pour
You can cancel a TAP 1 pour in progress. If you have EPROM version 3.0 or above in a TAP 1
ECU, you can use Infinity software to specify whether canceled pours are counted as cancels.
(See New ECU Setup (TAP 1) or Modify an ECU in the Network and ECU Setup section for help
with this feature.)
nTo cancel a pour:
1. Press the cancel button in the upper left corner while a pour
is in progress.
The button light of the portion size being poured comes on
and any pouring operations in progress immediately cease.
Notes
qIf you are interrupted during a pour, use the pause feature
(see Pause a Pour) rather than cancel, so you can resume
pouring where you left off.
qIf you press the cancel button to get out of repeat mode, it
immediately stops the pour in progress as well.
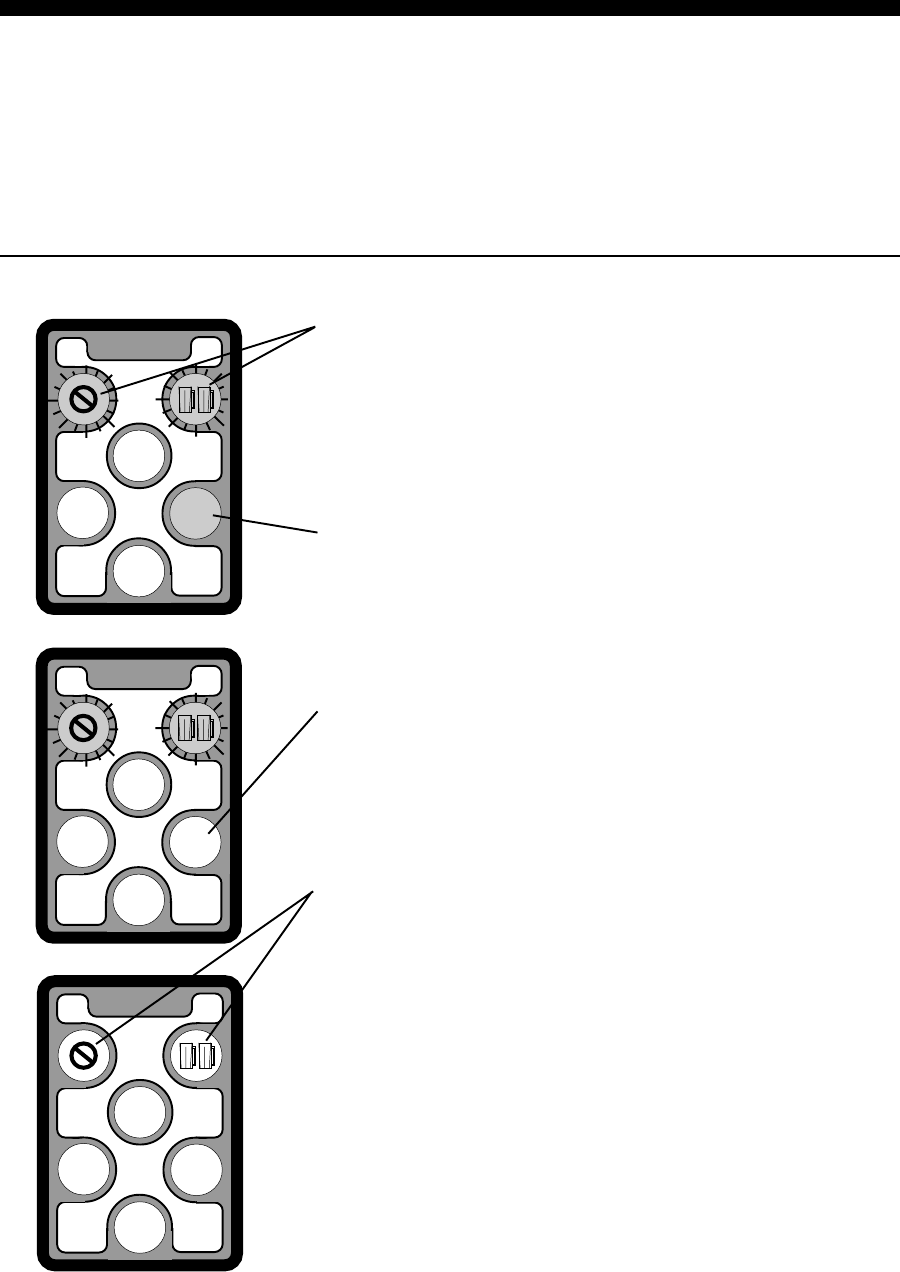
Pouring Operations 21-23
2
BERG
3
4
1
2
BERG
3
4
1
2
BERG
3
4
1
TAP 1 Manual Pouring Operation
You can convert your taps to pour manually any time you wish, but you must first enable this
feature using Infinity software. If you have flow meters installed in your lines, any manual pours
continue to be monitored by TAP 1 and appear on system reports. If you have an unusually high
number of manual pours in a report, it could be due to cleaning the system. (Clear Sales (Z)
before and after cleaning to eliminate these numbers from your sales reports.)
nTo manually pour using the TAP 1 buttons:
1. While holding the cancel button, press the repeat button.
Both the cancel and repeat buttons blink to indicate you are
in the manual pouring mode.
2. Press any one of the four portion size buttons to begin a
pour.
The light behind the pressed button goes out.
3. Press the same portion size button again to stop the pour.
The light behind the pressed button comes back on.
4. While holding the cancel button, press the repeat button to
turn off manual mode from the tap.
All lights come back on.
Notes
qPressing the cancel button alone does not cancel manual
mode. It only cancels the pour in progress.
qManual pouring continues indefinitely until you stop the
pour. All portion control is suspended.
qAll four portion size buttons function the same in the manual
mode. However, you must use the same button to start and
stop a pour.
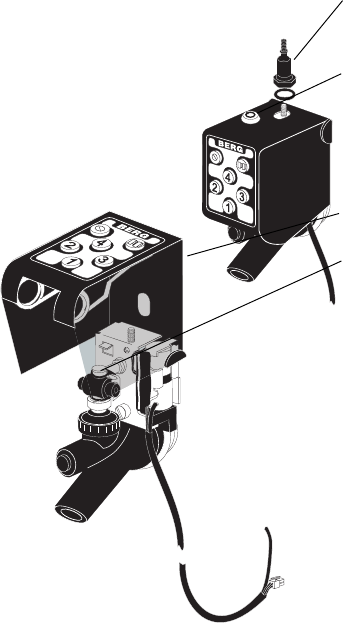
21-24 Infinity Installation/Service and User Manual
nTo manually pour using the brand handle:
1. Unscrew the decorative brand handle and remove the brand
handle flange from the top of the tap.
2. Insert the tap key (#1105) into the keylock on the top of the
tap and turn clockwise.
The tap key cannot be removed from the cover when in the
unlocked position.
3. Flip the tap cover up.
4. Operate the tap manually by pulling the brass lever forward
to pour and pushing it back to stop.
nTo convert back to TAP 1 operation:
1. Flip the tap cover down.
The tap display lights go on when the circuitry in the cover
makes adequate contact with the tap head.
2. Turn the tap key counterclockwise 90 degrees and remove
the key.
3. Replace the brand handle flange and brand handle. (Screw
the flange down securely to completely lock the tap cover.)
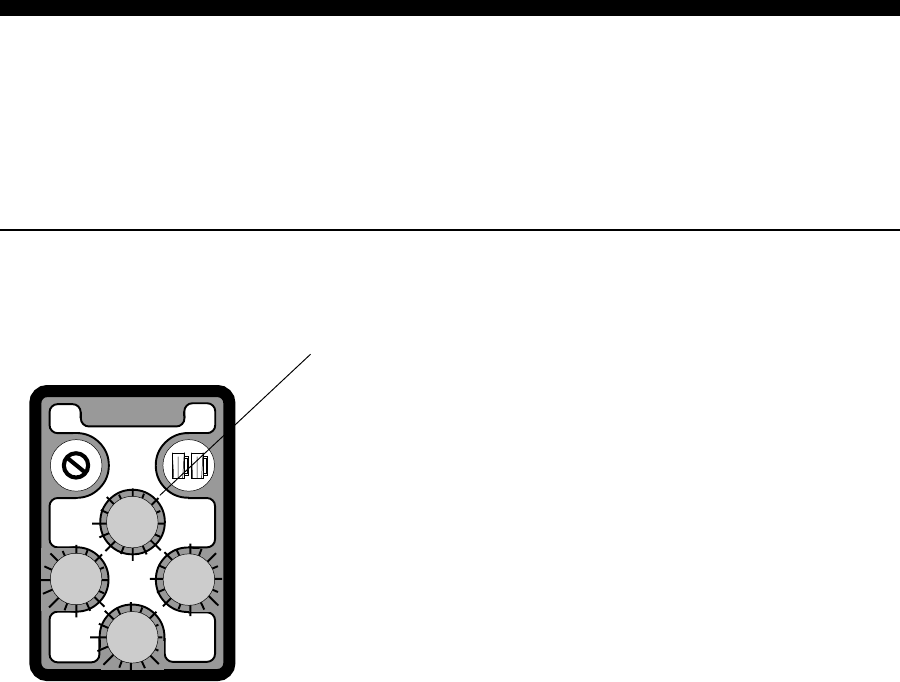
Pouring Operations 21-25
BERG
1
2
4
3
NOTE: If the lights continue
to blink after you’ve changed
the keg and finished your
pour, press the cancel button
to stop the blinking.
TAP 1 End of Keg Handling
The way you set up your TAP 1 ECU with Infinity software determines how you know when
youre out of beer at the taps. Whether or not you have flow meters, choose to run in timer mode,
or enable automatic end of keg pause determines what happens when a keg is empty. See New
ECU Setup (TAP 1) or Modify an ECU in the Network and ECU Setup section.
nIf you’ve installed flow meters AND you’re not
running in timer mode AND you’ve enabled
immediate pause:
1. Buttons 1-4 on the tap blink continuously as soon as the flow
meter detects an empty keg. (The button of the portion size
you are pouring stays unlit.)
2. All pouring operations immediately pause.
3. You can press the cancel button to cancel the paused pour in
progress and stop the blinking while you go change the keg.
Or you can press the unlit portion size button to finish the
pour at the risk of filling your line with foam. Or you can
change the keg and then resume the pour by pressing the
unlit portion size button.
nIf you’ve installed flow meters AND you’re not
running in timer mode AND you’ve enabled pause
after pour complete:
1. Buttons 1-4 on the tap blink continuously (informing you of
an empty keg) AFTER the current pour is complete.
2. Pouring operations can continue even with buttons 1-4
blinking. (Repeat drinks continue to pour unless you cancel.)
3. You can change the keg or continue pouring (at the risk of
getting foam into the line).
nIf you’ve installed flow meters AND you’re not
running in timer mode AND you’ve chosen no
indication:
1. No lights blink at the tap to inform you when the flow meter
detects an empty keg. TAP 1 uses a back up timer to
accurately complete any pour in progress.
2. The only indication of an empty keg is a foaming faucet.
nIf you’re running in timer mode:
No lights blink at the tap to inform you of an empty keg.
Foam may get into the line and pour from the tap.

21-26 Infinity Installation/Service and User Manual
Pour with Server ID
If the server ID feature is enabled for the ECU, you must insert a valid server key in a remote
server access box to pour a drink. This feature can be used to pour All-Bottle, Laser or TAP 1
drinks. (See the New ECU Setup tasks or Modify an ECU in the Network and ECU Setup section
for help with enabling this feature.)
nTo pour with server ID:
1. Insert a server key in a server key receptacle.
Each server key receptacle is associated with an Infinity
ECU, a 1544 Infinity ECU or a TAP 1 partition. While a key
remains in the receptacle, every sale from a dispenser
connected to the associated ECU or partition is written to the
key.
2. Pour a drink. (See the other tasks in this section.)
3. Remove the server key from the server key receptacle.
Notes
qWhen an Infinity ECU has server ID enabled, all lights on
the Laser front panel, the Laser guns and the I-box are off
when there is no key in the server key receptacle.
qWhen a TAP 1 partition has server ID enabled, all tap lights
in the partition are off when there is no key in the server key
receptacle.
Server Limit with Partitions
If you divide a TAP 1 ECU into
more than 4 partitions, the
number of servers whose sales
are tracked (at any given time)
is reduced from 20 per partition
to 10 per partition.

SECTION
22
Proper cleaning and maintenance of the Infinity system is essential. Refer to this
section for the following tasks:
Clean an Infinity, TAP 1 or 1544 Infinity ECU ............................ 22-2
Clean the I-Box, All-Bottle ID dispenser or Laser Dispenser.......22-3
Clean the All-Bottle Coded Pourers..............................................22-4
Clean a Laser Gun .........................................................................22-5
Clean a TAP 1 Faucet .................................................................... 22-6
Replace the Infinity ECU Battery .................................................22-8
Change the EPROM in an Infinity ECU .......................................22-9
Replace the TAP 1 ECU Battery .................................................22-10
Change the EPROM in a TAP 1 ECU .........................................22-12
Replace the 1544 Infinity ECU Battery ......................................22-14
Change the EPROM in a 1544 Infinity ECU .............................. 22-16
Change the Fuses in an Infinity ECU..........................................22-18
Maintenance and
Upgrading
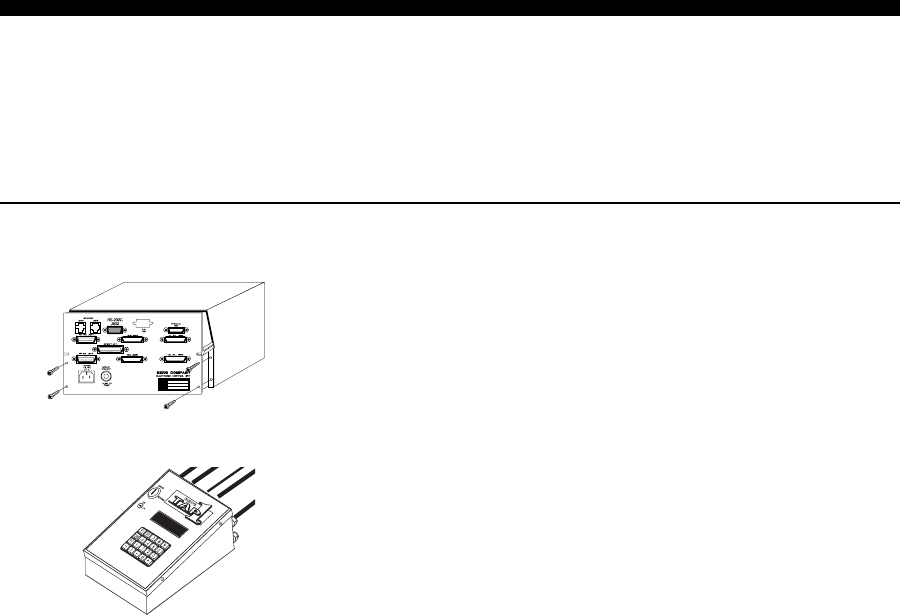
22-2 Infinity Installation/Service and User Manual
Clean an Infinity, TAP 1 or 1544 Infinity ECU
The ECU is designed to protect the electronics inside from moisture, but bartenders should still
be cautioned to avoid splashing water or drinks on the ECU. If a spill should occur on the outside
housing of an ECU, use this procedure to clean it.
nTo clean the ECU:
1. Unplug the power cord and any air solenoid cables from the
ECU.
2. Wipe the outside of the ECU with a damp (not dripping)
cloth or sponge.
Notes
qDo not attempt any more thorough cleaning of an ECU, and
absolutely do not attempt to clean any internal circuit boards
or surfaces.
qIf you think liquid may have found its way inside the ECU,
call your Berg dealer immediately.
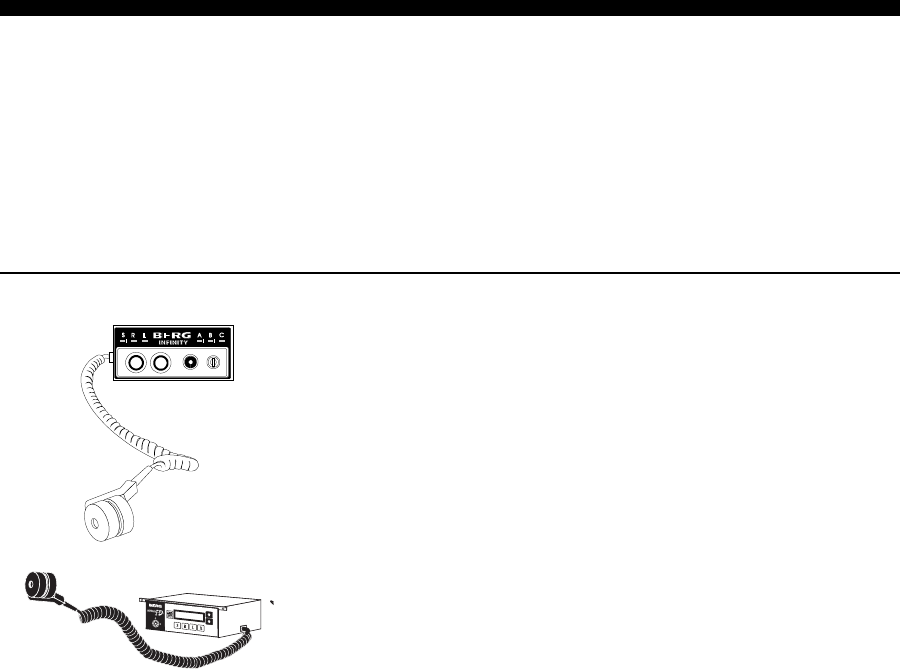
Maintenance and Upgrading 22-3
Clean the I-Box, All-Bottle ID Dispenser or Laser
Dispenser
Sensitive electronic elements are safely protected inside the I-Box, All-Bottle ID dispenser and
Laser dispenser to deliver reliable service under heavy use in bar conditions. Bartenders should
still be cautioned to avoid splashing water or drinks on the box. If a spill should occur on the I-
Box or Laser dispenser, use this procedure to clean it.
nTo clean the I-Box, All-Bottle ID dispenser or Laser
dispenser:
1. Wipe the outside with a damp (not dripping) cloth or sponge.
2. Wipe the activator ring and activator ring holder with a damp
cloth or sponge.
Notes
qDo not attempt any more thorough cleaning of an I-Box, All-
Bottle ID dispenser or Laser dispenser, and absolutely do not
attempt to clean any internal circuit boards or surfaces.
qIf you think liquid may have found its way inside the box,
call your Berg dealer immediately.
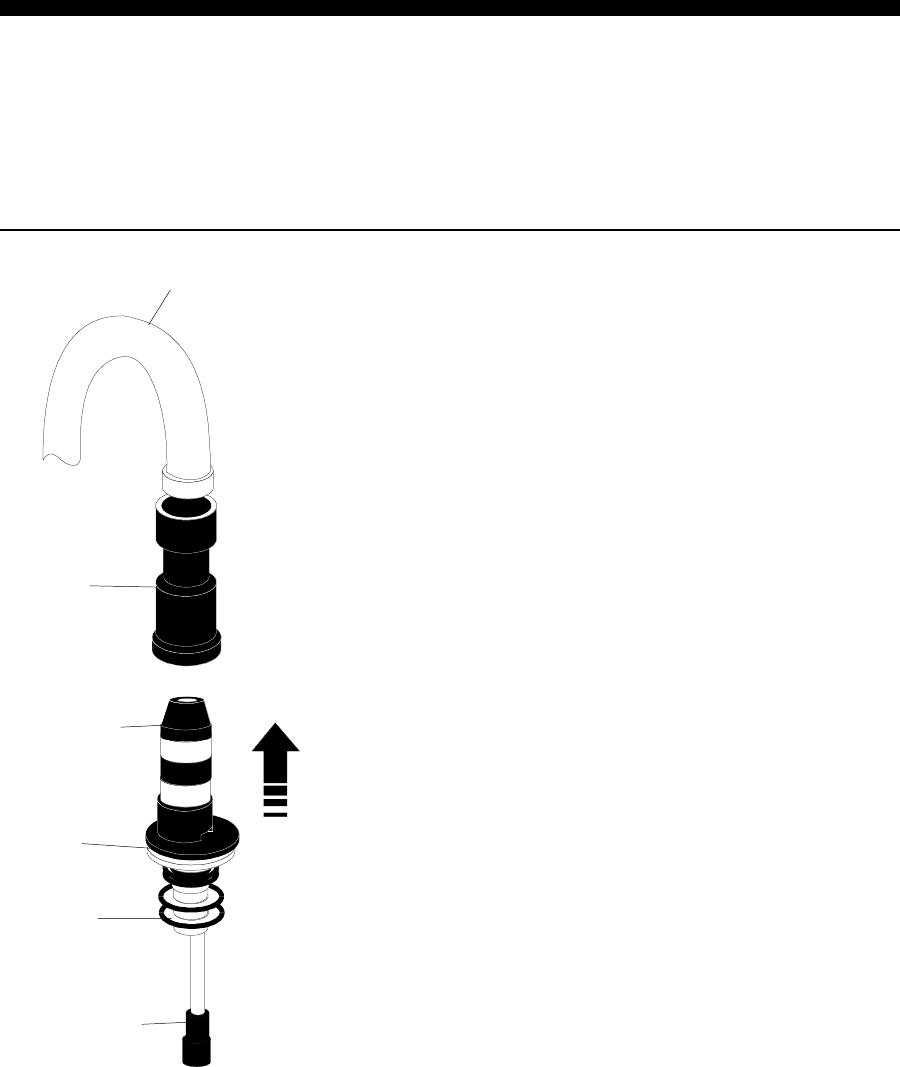
22-4 Infinity Installation/Service and User Manual
Clean the All-Bottle Coded Pourers
The All-Bottle coded pourers are carefully designed for liquor dispensing applications. They
impart no taste or odor to liquor and should only be cleaned with clear water. Each pourer should
be cleaned every time it is removed from a bottle. Berg provides a pourer washing fixture for this
purpose.
nTo clean an All-Bottle coded pourer:
1. Attach the smaller end of the pourer washing fixture (Berg
PN 9007191) to your faucet. Turn on a gentle flow of warm
water.
2. Insert a coded pourer into the pourer washing fixture with
the tip of the pourer pointed slightly away from you.
3. Snap the flange of the coded pourer into the washing fixture
and hold it there for a few seconds.
Two streams of water (one from the end of the breather tube
and the other from inside the plastic insert) flow from the
coded pourer when all passages are clear. Especially gummy
pourers may need to be held in the washing fixture a little
longer until both streams of water are running freely.
Notes
qNever clean your pourers in a dishwasher.
qNever use soap to clean a pourer. Unless removed
completely, soap can get into your liquor. It can also react
chemically with the specially formulated plastics and make
them brittle, shortening the useful life of your pourers.
qIf a pourer is removed from a bottle and allowed to dry
without being cleaned, soak it for several minutes in clear,
warm water to loosen the dried liquor before inserting the
pourer in the washing fixture. Repeat the soaking and rinsing
if necessary.
qCheck the plastic insert of a pourer when cleaning. Liquor
drying on the plastic may remove some of the plastic's
elasticity. If the plastic insert remains stiff after cleaning,
replace it.
Water faucet
Pourer washing
fixture
Breather
tube
Pourer
Plastic
insert
Flange
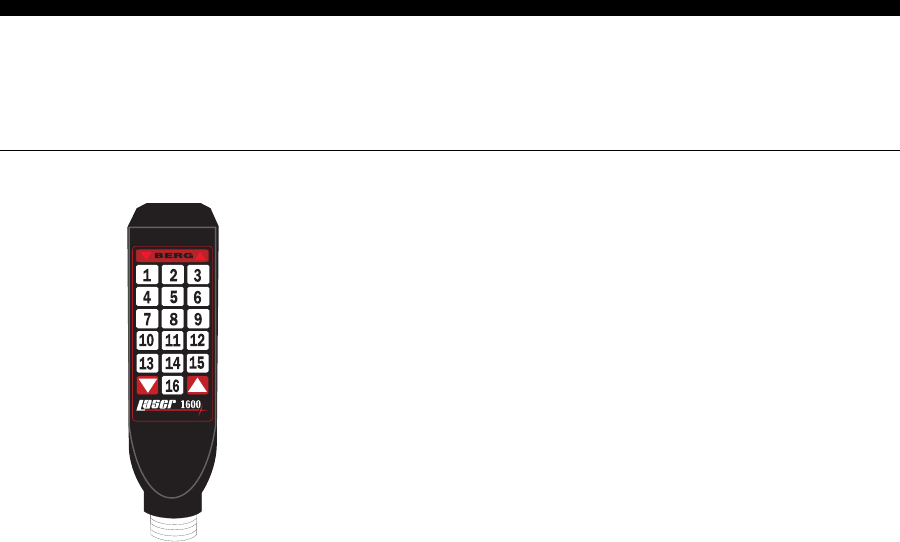
Maintenance and Upgrading 22-5
Clean the Laser Gun
The outside of the Laser gun should be cleaned regularly.
nTo clean the Laser gun:
1. Use warm water (never hot) and a mild, non-abrasive
detergent to clean the outside of the Laser gun.
2. Gently wipe the gun with a wet (not dripping) cloth or
sponge.
Avoid getting cleanser into the diffuser screens on the
bottom of the gun.
T.M.
by

22-6 Infinity Installation/Service and User Manual
Clean a TAP 1 Faucet
Regular cleaning of the plastic faucets inside the TAP 1 tap controllers is essential. Continual use
without cleaning can impair the flavor of the beverage and cause the faucets to stick and
eventually freeze up. Whether you perform your own draft system cleaning or hire someone to do
it for you, follow these steps to insure proper functioning of your taps.
nTo clean a TAP 1 faucet:
1. Unscrew the brand handle and remove the brand handle
flange from the top of the tap.
2. Insert the tap key (#1105) into the keylock and turn
clockwise 90 degrees. (The tap key cannot be removed from
the tap cover when in the unlocked position.)
3. Flip the tap cover up.
4. Remove the rubber strap from the top of the brass lever.
5. Remove the brass lever by loosening the bonnet nut.
6. Unscrew the brass thumb screw that holds the cylinder
bracket to the faucet.
7. Slide the tap cover and cylinder bracket assembly to the right
and set it aside where it will not get wet.
8. Remove the plastic faucet with a spanner wrench.
9. Clean the faucet and plunger as you would any draft system
faucet.
10. Replace the faucet using a spanner wrench.
11. Replace the tap cover and cylinder bracket assembly on the
faucet by placing it at the right side of the faucet and sliding
to the left.
12. Replace the brass thumb screw in the cylinder bracket hole
and tighten.
13. Replace the brass lever on the faucet and tighten the bonnet
nut. Make sure the bottom end of the lever penetrates the
slot in the plunger.
14. Attach the rubber strap to the brass lever by feeding the strap
behind the pusher arm and over the brass lever.
15. Flip the tap cover down. (The lights on the tap go on when
the cover is all the way down.)
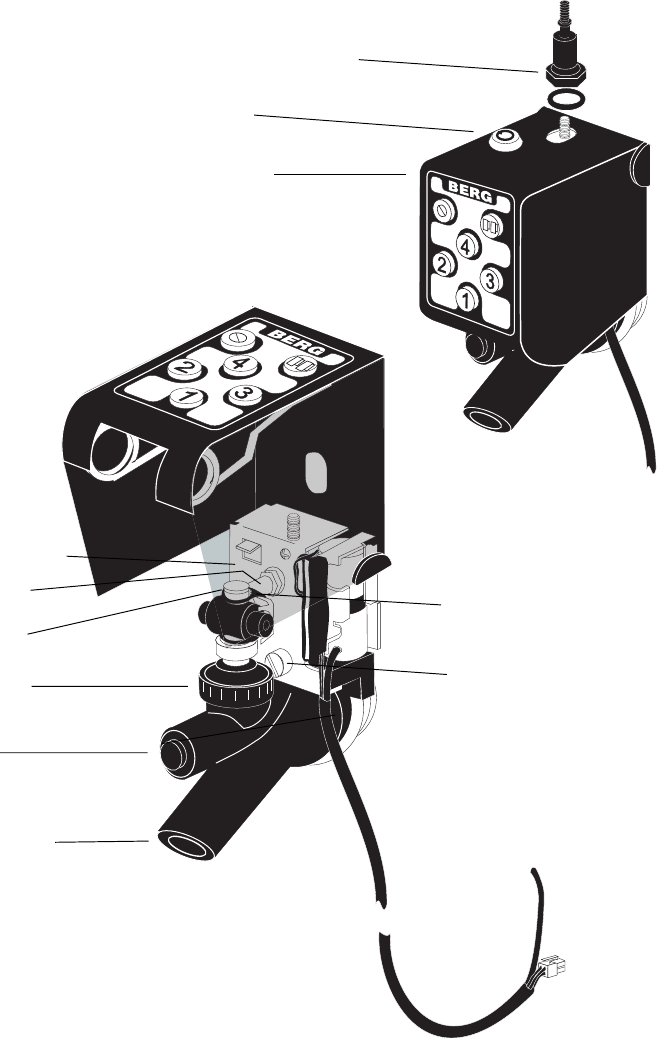
Maintenance and Upgrading 22-7
16. Turn the tap key counter-clockwise 90 degrees and remove
the key.
17. Replace the brand handle flange and brand handle. (Screw
the flange down securely to completely lock the tap cover.)
Brand handle flange
Keylock
Tap cover
Cylinder bracket
Brass lever
Pusher arm
Bonnet nut
Plunger
Plastic faucet
Brass thumb screw
Rubber strap
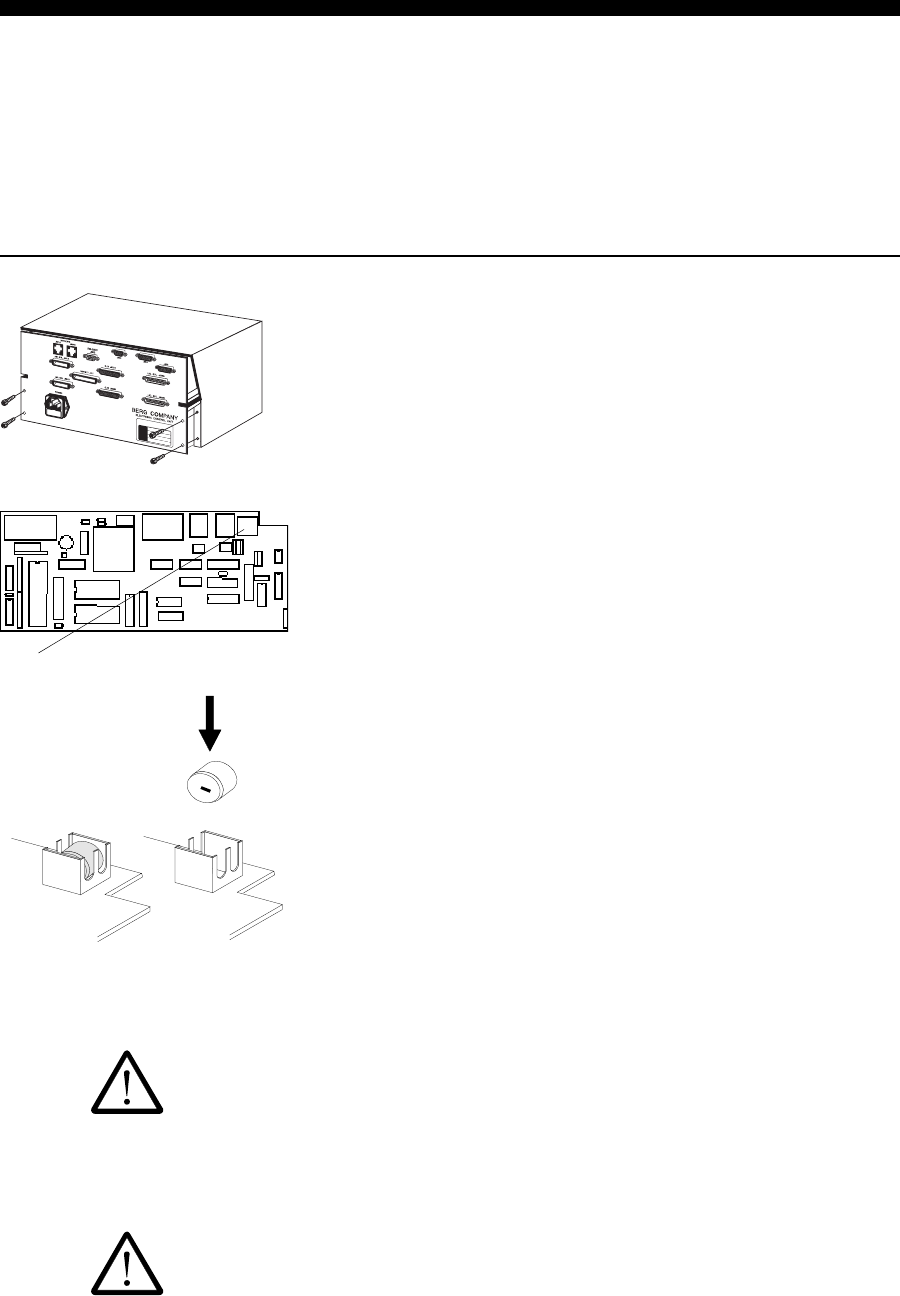
22-8 Infinity Installation/Service and User Manual
Replace the Infinity ECU Battery
If AC power to the ECU is constantly maintained, the lithium battery inside the ECU should
provide years of service. The first symptom of a dying battery may be incorrect portion sizes at
the ECUs dispensers. Often the complimentary mode and price-level functions will stop
operating properly, and sales information may be incomplete or incorrect. If symptoms indicate
that an ECUs battery is fading, the battery should be replaced using this procedure.
nTo replace the battery in an Infinity ECU:
1. Archive and clear sales (Z) for the ECU to save the latest
sales information.
2. Unplug the ECU.
3. Remove the four screws that secure the ECU chassis to its
cover, and slide the chassis out from under the cover.
The CPU board is directly accessible from above the ECU
when the cover is removed. You don't need to remove the
CPU board from the chassis.
4. Remove the old battery by inserting the tip of a small
screwdriver under it and gently prying it from its socket.
5. Insert the new battery into the battery socket, being sure to
align the positive + side of the battery with the positive
+ side of the socket. When fully inserted, the battery will
be level with the ends of the socket.
6. Slide the ECU chassis back into its mounted cover, and
secure it with the four screws.
7. Plug in the ECU.
8. At the computer, clear and restore the ECU's memory. See
Clear and Restore Memory in the ECU Diagnostics section.
Battery location on CPU board
Caution:
Lithium is poisonous if swallowed. Be careful not to puncture the battery case of
an old or new battery. Lithium batteries are not rechargeable. Lithium batteries
can overheat or rupture if shorted; handle with care and dispose of used batteries
in accordance with manufacturer's instructions. Replace an old battery with Berg
PN 8007776, a Duracell DL1/3N or a Sanyo CR1/3N. For your safety use no
substitutes without the expressed written consent of Berg Company.
Electronic components are sensitive to static electricity. If possible, avoid
working on the Infinity ECU while standing on a carpeted surface. Before you
open the ECU, discharge any static electricity from your body by touching any
known grounded metal surface. Also discharge the static repeatedly in like
manner while working on the ECU.
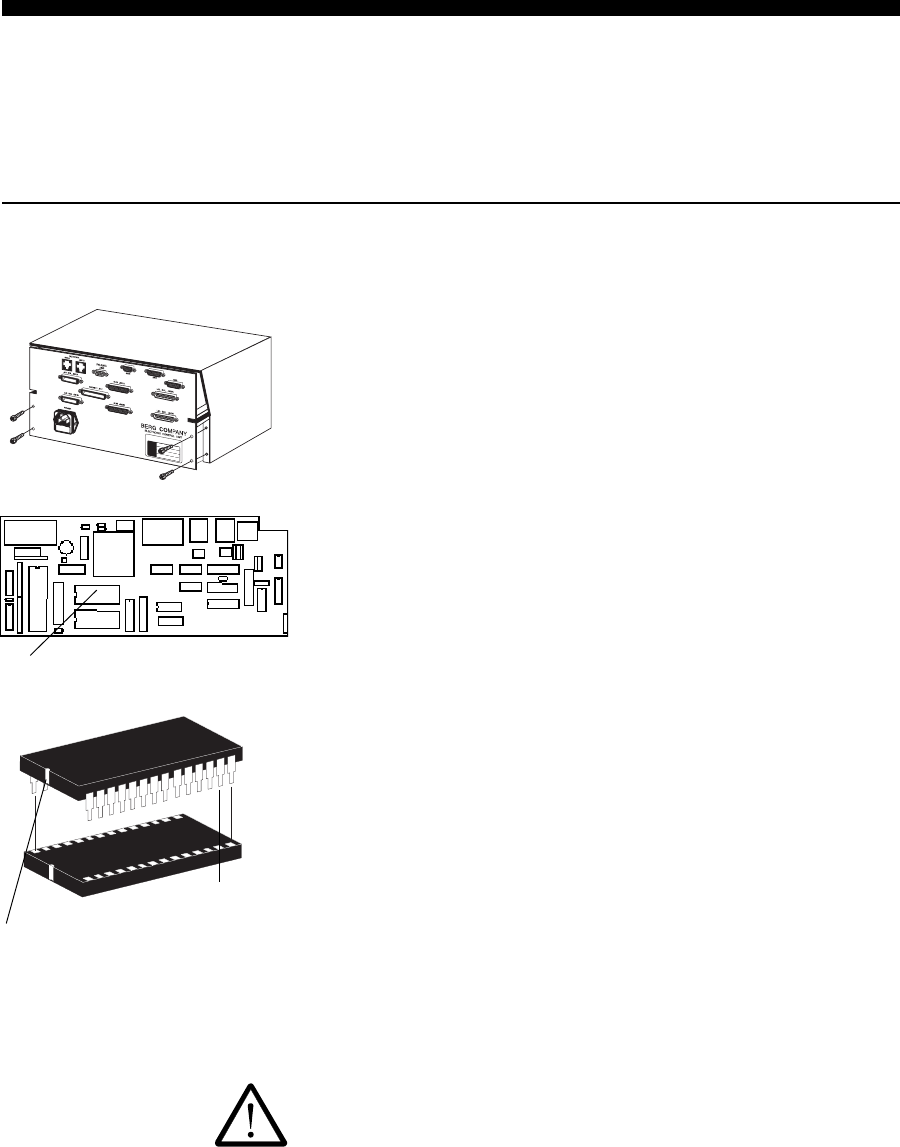
Maintenance and Upgrading 22-9
Change the EPROM in an Infinity ECU
You may need to replace the EPROM chip in the Infinity ECU. Replacing the chip is not
difficultit just requires a certain amount of care to protect the fragile pins on the sides of the
chip.
nTo change the EPROM in an Infinity ECU:
1. Archive and clear sales (Z) for the ECU to save the latest
sales information.
2. Unplug the ECU.
3. Remove the four screws that secure the ECU chassis to its
cover, and slide the chassis out from under the cover.
The CPU board is directly accessible from above the ECU
when the cover is removed. You don't need to remove the
CPU board from the chassis.
4. Remove the old EPROM with the PROM remover tool
(Berg PN 8004798). Follow the instructions accompanying
the tool. Note the orientation of the chip.
5. Insert the new EPROM into the socket by aligning the U-
shaped notch of the chip with the U-shaped notch of the
socket.
Be sure all EPROM pins are aligned with the socket. Take
care not to bend or damage any of the pins. Gently press
straight down on the EPROM until it locks into position.
6. Slide the ECU chassis back into its mounted cover, and
secure it with the four screws.
7. Plug in the ECU.
8. At the computer, clear and restore the ECU's memory. See
Clear and Restore Memory in the ECU Diagnostics section.
Caution:
Electronic components are sensitive to static electricity. If
possible, avoid working on the Infinity ECU while standing on a
carpeted surface. Before you open the ECU, discharge any static
electricity from your body by touching any known grounded
metal surface. Also discharge the static repeatedly in like
manner while working on the ECU.
EPROM location on CPU board
U-shaped notch on EPROM
Pins

22-10 Infinity Installation/Service and User Manual
Replace the TAP 1 ECU Battery
If AC power to the ECU is constantly maintained, the lithium battery inside the ECU should
provide years of service. The symptoms of a dying battery may include a "Memory Corrupt"
message on the ECU display .
nTo replace the battery in a TAP 1 ECU:
1. Archive and clear sales (Z) for the ECU to save the latest
sales information.
2. Unplug the ECU.
3. Remove the cover of the ECU by loosening the four machine
screws around its edge.
4. Remove the old battery by inserting the tip of a small
screwdriver under it and gently prying it from its socket.
5. Insert the new battery into the battery socket, being sure to
align the positive + side of the battery with the positive
+ side of the socket. When fully inserted, the battery will
be level with the ends of the socket.
6. Replace the cover of the ECU by tightening the four screws
that secure it.
7. Plug in the ECU.
8. At the computer, clear and restore the ECU's memory. See
Clear and Restore Memory in the ECU Diagnostics section.
Caution:
Lithium is poisonous if swallowed. Be careful not to puncture
the battery case when removing an old battery or inserting a new
one. Lithium batteries are not rechargeable. Lithium batteries
can overheat or rupture if shorted; handle with care and dispose
of used batteries in accordance with manufacturer's instructions.
Replace an old battery with Berg PN 8007776, a Duracell
DL1/3N or a Sanyo CR1/3N. For your safety use no substitutes
without the expressed written consent of Berg Company.
Electronic components are sensitive to static electricity. If
possible, avoid working on the ECU while standing on a
carpeted surface. Before you open the ECU, discharge any static
electricity from your body by touching any known grounded
metal surface. Also discharge the static repeatedly in like manner
while working on the ECU.
Maintenance and Upgrading 22-11
Machine screws
ECU battery
22-12 Infinity Installation/Service and User Manual
Change the EPROM in a TAP 1 ECU
As new versions of TAP 1 become available you will need to replace the EPROM in your
customers ECUs. Replacing the chip is not difficultit just requires a certain amount of care to
protect the fragile pins on the sides of the chip.
nTo change the EPROM in a TAP 1 ECU:
1. Archive and clear sales (Z) for the ECU to save the latest
sales information.
2. Unplug the ECU.
3. Remove the cover of the ECU by loosening the four machine
screws around its edge.
4. Remove the old PROM chip with the chip puller tool,
8004798, from your Berg Beer Toolkit. Note the orientation
of the chip.
5. Insert the new PROM into the socket by aligning the angled
corner of the chip with the top left corner of the socket. (It
should match the orientation of the old chip.)
Be sure all PROM pins are aligned with the socket. Take
care not to bend or damage any of the pins. Gently press
straight down on the PROM until it locks into position.
6. Replace the cover on the ECU and tighten the four screws
that secure it.
7. Plug in the ECU.
8. At the computer, clear and restore the ECU's memory. See
Clear and Restore Memory in the ECU Diagnostics section.
Caution:
Electronic components are sensitive to static electricity. If
possible, avoid working on the ECU while standing on a
carpeted surface. Before you open the ECU, discharge any static
electricity from your body by touching any known grounded
metal surface. Also discharge the static repeatedly in like manner
while working on the ECU.
Maintenance and Upgrading 22-13
Machine screws
ECU PROM chip
22-14 Infinity Installation/Service and User Manual
Replace the 1544 Infinity ECU Battery
If AC power to the ECU is constantly maintained, the lithium battery inside the ECU should
provide years of service. The symptoms of a dying battery may include loss of setup data or sales
records when the ECU is unplugged.
nTo replace the battery in a 1544 ECU:
1. Archive and clear sales (Z) for the ECU to save the latest
sales information.
2. Unplug the ECU and disconnect all cables to the back of the
ECU.
3. Loosen the two screws on each side of the ECU with a hex
wrench. Loosen the stand off nuts on the back of the ECU
with a nut driver. Open the bottom of the ECU.
4. Remove the old battery by inserting the tip of a small
screwdriver under it and gently prying it from its socket.
5. Insert the new battery into the battery socket, being sure to
align the positive + side of the battery with the positive
+ side of the socket. When fully inserted, the battery will
be level with the ends of the socket.
6. Replace the bottom of the ECU by tightening the four screws
that secure it on the sides and the stand off nuts on the back.
7. Plug in the ECU.
8. At the computer, clear and restore the ECU's memory. See
Clear and Restore Memory in the ECU Diagnostics section.
Warning:
Lithium is poisonous if swallowed. Be careful not to puncture
the battery case when removing an old battery or inserting a new
one. Lithium batteries are not rechargeable. Lithium batteries
can overheat or rupture if shorted; handle with care and dispose
of used batteries in accordance with manufacturer's instructions.
Replace an old battery with Berg PN 8007776, a Duracell
DL1/3N or a Sanyo CR1/3N. For your safety use no substitutes
without the expressed written consent of Berg Company.
Caution:
Electronic components are sensitive to static electricity. If
possible, avoid working on the ECU while standing on a
carpeted surface. Before you open the ECU, discharge any static
electricity from your body by touching any known grounded
metal surface. Also discharge the static repeatedly in like manner
while working on the ECU.
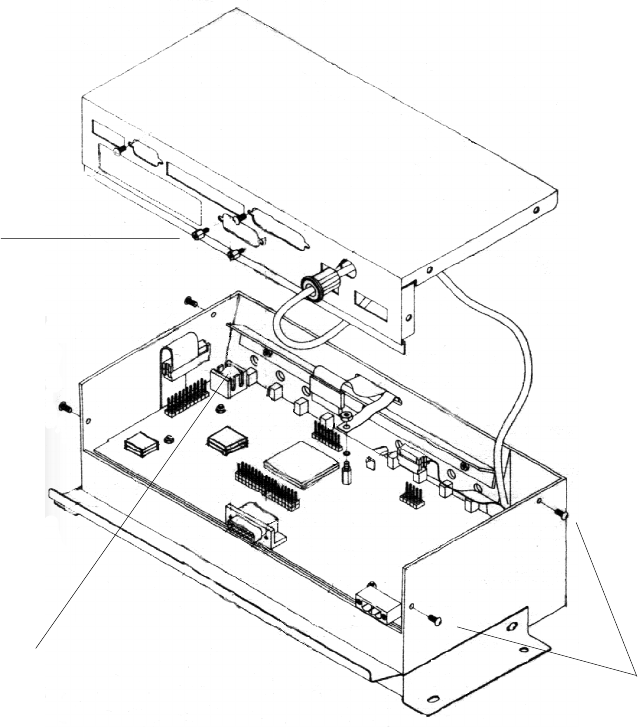
Maintenance and Upgrading 22-15
ECU battery Two screws on
each side of the
ECU
Standoff nuts
The actual base plate of
your ECU may look
slightly different.

22-16 Infinity Installation/Service and User Manual
Change the EPROM in a 1544 Infinity ECU
If you upgrade your 1544 Infinity ECU, you need to replace the EPROM chip. Replacing the
chip is not difficultit just requires a certain amount of care to protect the fragile pins on the sides
of the chip.
nTo change the EPROM in a 1544 ECU:
1. Archive and clear sales (Z) for the ECU to save the latest
sales information.
2. Unplug the ECU and disconnect all cables to the back of the
ECU.
3. Loosen the two screws on each side of the ECU with a hex
wrench. Loosen the stand off nuts on the back of the ECU
with a nut driver. Open the bottom of the ECU.
4. Remove the old EPROM with the PROM remover tool (Berg
PN 8004798). Follow the instructions accompanying the
tool. Note the orientation of the chip.
5. Insert the new EPROM into the socket by aligning the
angled corner of the chip with the angled corner of the
socket. (It should match the orientation of the old chip.)
Be sure all EPROM pins are aligned with the socket. Take
care not to bend or damage any of the pins. Gently press
straight down on the EPROM until it locks into position.
6. Replace the bottom of the ECU by tightening the four screws
that secure it on the sides and the stand off nuts on the back.
7. Plug in the ECU.
8. At the computer, clear and restore the ECU's memory. See
Clear and Restore Memory in the ECU Diagnostics section.
Caution:
Electronic components are sensitive to static electricity. To
prevent damage, the EPROM is shipped in protective anti-static
packaging. If possible, avoid opening the package or working on
the ECU while standing on a carpeted surface. Before you open
the package or the ECU, discharge any static electricity from
your body by touching any known grounded metal surface.
Discharge the static repeatedly in like manner while working on
the ECU.
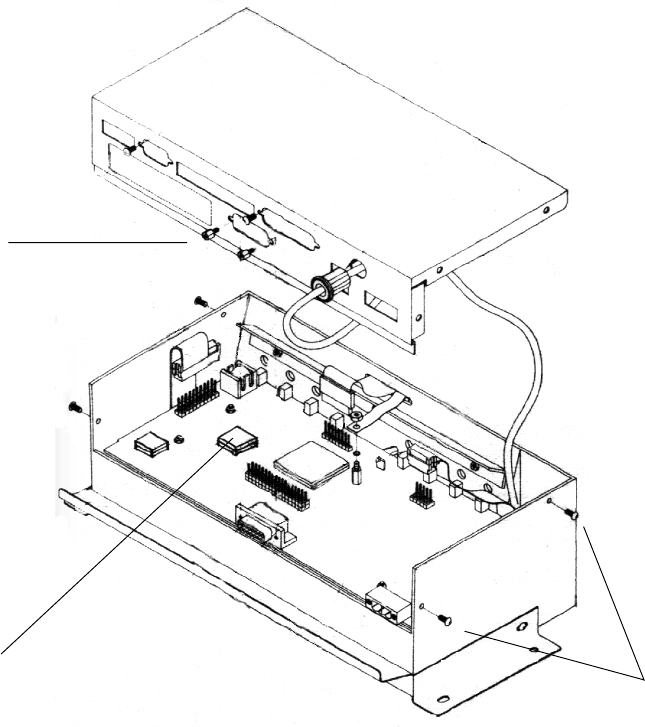
Maintenance and Upgrading 22-17
EPROM
Standoff nuts
Two screws on
each side of the
ECU
The actual base plate of
your ECU may look
slightly different.
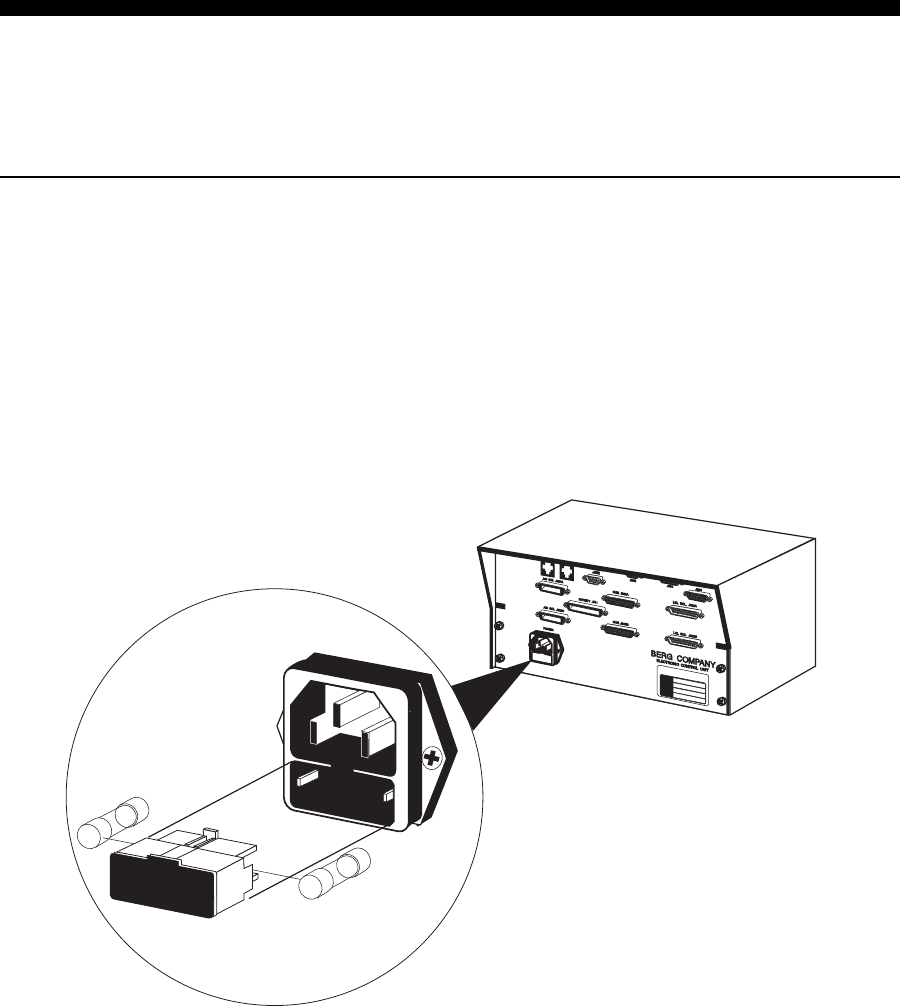
22-18 Infinity Installation/Service and User Manual
Change the Fuses in an Infinity ECU
The newer style Infinity ECU (PN 8009700) has fuses instead of the circuit breaker found on the
older ECU.
nTo change the fuses in an Infinity ECU:
1. Locate the fuse receptacle directly below the power cord
connection.
2. Open the receptacle by gently prying with a screwdriver.
3. Replace the fuses (the receptacle takes two). Use Berg PN
8008027. The fuses are 1.0 amp 5x20mm slo-blo.
4. Close the fuse receptacle.