Fuji Film 02000002 Wireless LAN Module User Manual 00 LX11 OM 200 EN 01 indb
Fuji Film Corporation Wireless LAN Module 00 LX11 OM 200 EN 01 indb
Contents
User manual 5
100
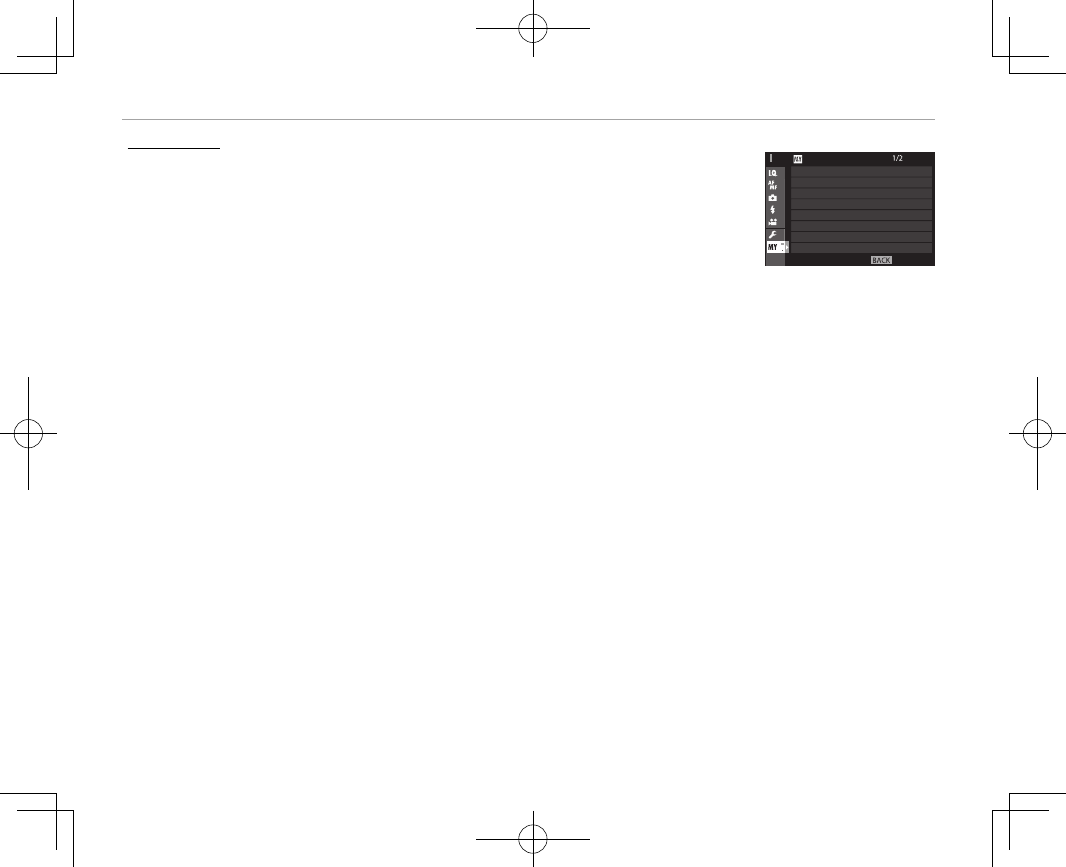
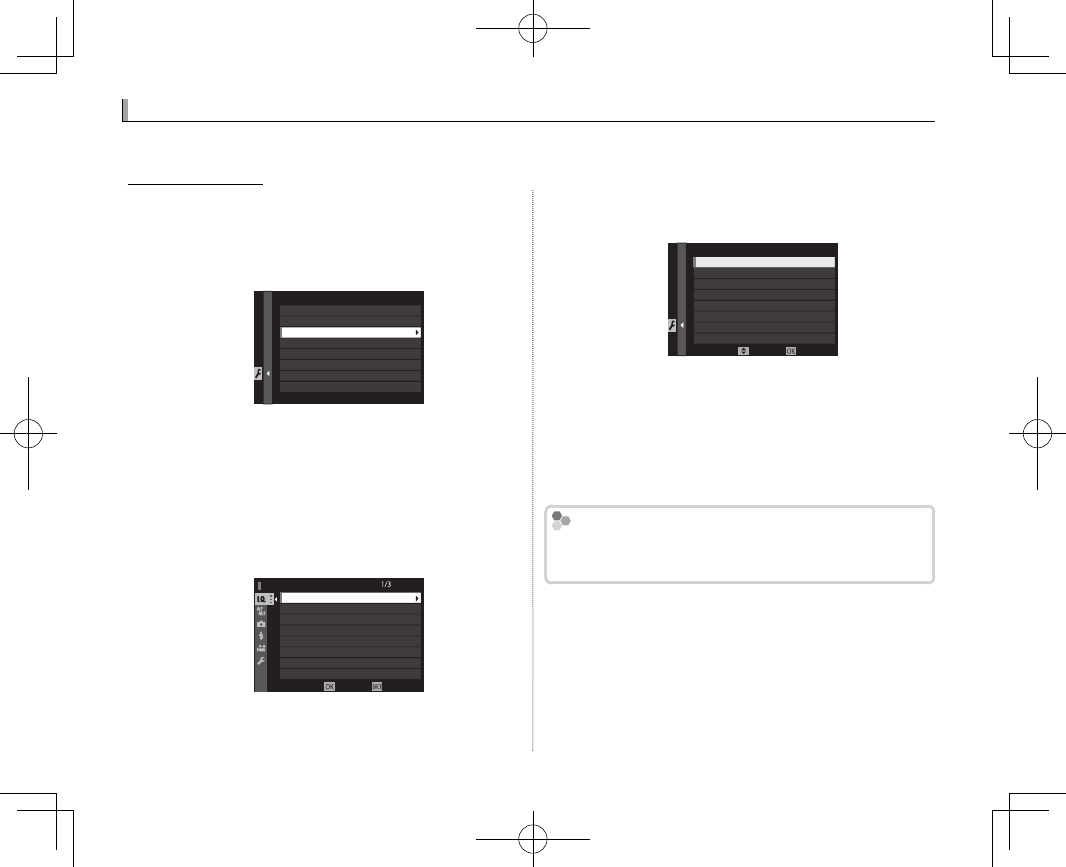
Using the Menus: Shooting Mode
E
E
MY MENU
MY MENU
To display a personalized menu of frequently-used options, press MENU/OK in
the shooting display and select the E (MY MENU) tab (P 87).
RTo edit “my menu”, select D USER SETTING> MY MENU SETTING (P 118).
RThe E tab is only available if options have been assigned to MY MENU.
EXIT
SELF-TIMER
INTERVAL TIMER SHOOTING
FILM SIMULATION BKT
PHOTOMETRY
SHUTTER TYPE
IS MODE
FACE/EYE DETECTION SETTING
ISO AUTO SETTING
MY MENU
101
Menus
Using the Menus: Playback Mode
Using the Menus: Playback Mode
The playback menu is used to adjust playback settings.
Using the Playback Menu
Using the Playback Menu
1
Press MENU/OK in playback mode to display the
menus.
EXIT
RAW CONVERSION
ERASE
CROP
RESIZE
PROTECT
IMAGE ROTATE
RED EYE REMOVA
SWITCH SLOT
PLAY BACK MENU
2
Press the selector up or down to
highlight the desired item.
3
Press the selector right to view op-
tions for the highlighted item.
4
Press the selector up or down to
highlight the desired option.
5
Press MENU/OK to select the high-
lighted option.
6
Press DISP/BACK to return to the play-
back display.
RUse the front command dial to scroll through the
menus a page at a time.
102
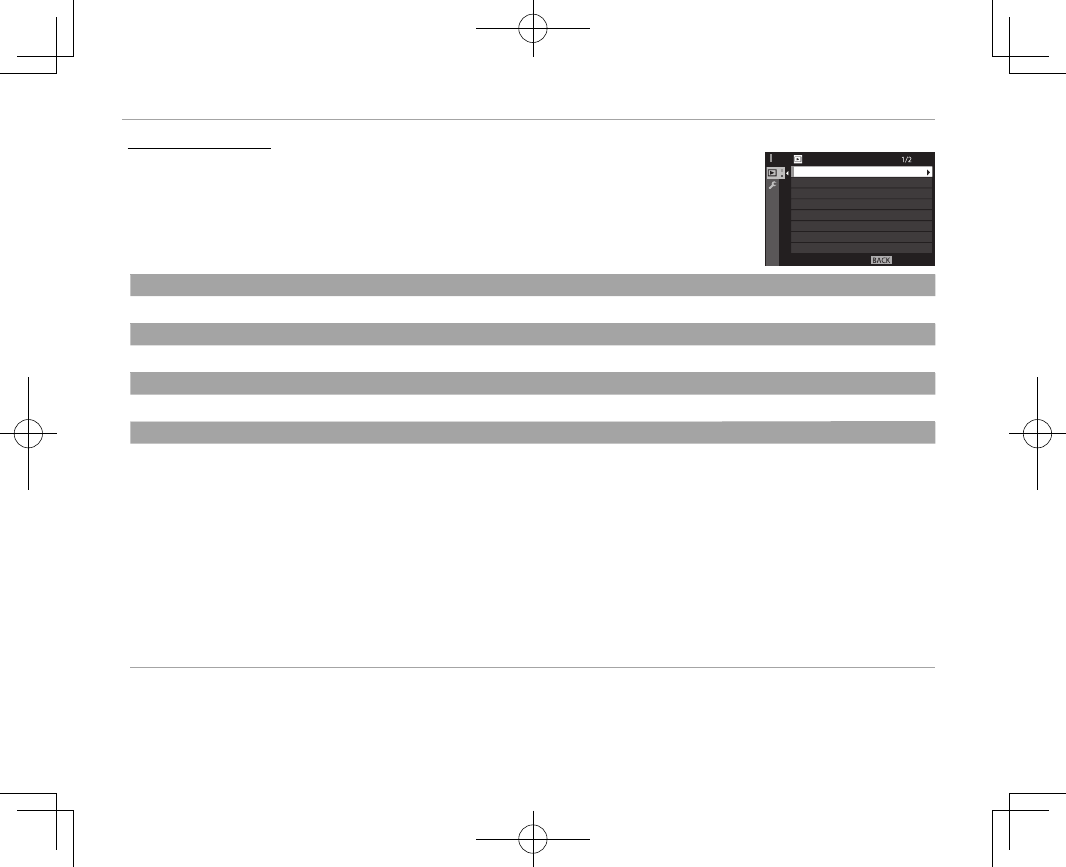
Using the Menus: Playback Mode
C
C
PLAY BACK MENU
PLAY BACK MENU
To access playback options, press MENU/OK in the playback display and select
the C (PLAY BACK MENU) tab (P 101).
EXIT
RAW CONVERSION
ERASE
CROP
RESIZE
PROTECT
IMAGE ROTATE
RED EYE REMOVA
SWITCH SLOT
PLAY BACK MENU
SWITCH SLOT
SWITCH SLOT
Choose the card from which images will be played back (P 39).
RAW CONVERSION
RAW CONVERSION
Create JPEG copies of RAW pictures (P 81).
ERASE
ERASE
Delete pictures (P 43).
CROP
CROP
Create a cropped copy of the current picture.
1 Display the desired picture.
2 Select C CROP in the playback menu.
3 Use the rear command dial to zoom in and out and press the selector up, down, left, or right to scroll the picture until the
desired portion is displayed.
4 Press MENU/OK to display a con rmation dialog.
5 Press MENU/OK again to save the cropped copy to a separate le.
RLarger crops produce larger copies; all copies have an aspect ratio of 3 : 2. If the size of the nal copy will be a, OK will be
displayed in yellow.

103
Menus
Using the Menus: Playback Mode
RESIZE
RESIZE
Create a small copy of the current picture.
1 Display the desired picture.
2 Select C RESIZE in the playback menu.
3 Highlight a size and press MENU/OK to display a con rmation dialog.
4 Press MENU/OK again to save the resized copy to a separate le.
RThe sizes available vary with the size of the original image.
PROTECT
PROTECT
Protect pictures from accidental deletion. Highlight one of the following options and press MENU/OK.
• FRAME: Protect selected pictures. Press the selector left or right to view pictures and press MENU/OK to select or deselect. Press
DISP/BACK when the operation is complete.
• SET ALL: Protect all pictures.
• RESET ALL: Remove protection from all pictures.
QProtected pictures will be deleted when the memory card is formatted (P 107).
IMAGE ROTATE
IMAGE ROTATE
Rotate pictures.
1 Display the desired picture.
2 Select C IMAGE ROTATE in the playback menu.
3 Press the selector down to rotate the picture 90° clockwise, up to rotate it 90° counterclockwise.
4 Press MENU/OK. The picture will automatically be displayed in the selected orientation whenever it is played back on the
camera.
RProtected pictures can not be rotated. Remove protection before rotating pictures.
RThe camera may not be able to rotate pictures created with other devices. Pictures rotated on the camera will not be rotated
when viewed on a computer or on other cameras.
RPictures taken with D SCREEN SETTING> AUTOROTATE PB are automatically displayed in the correct orientation during
playback (P 111).

104
Using the Menus: Playback Mode
RED EYE REMOVAL
RED EYE REMOVAL
Remove red-eye from portraits. The camera will analyze the image; if red-eye is detected, the image will be processed to create
a copy with reduced red-eye.
1 Display the desired picture.
2 Select C RED EYE REMOVAL in the playback menu.
3 Press MENU/OK.
RRed eye may not be removed if the camera is unable to detect a face or the face is in pro le. Results may di er depending on
the scene. Red eye can not be removed from pictures that have already been processed using red-eye removal or pictures
created with other devices.
RThe amount of time needed to process the image varies with the number of faces detected.
RCopies created with RED EYE REMOVAL are indicated by a e icon during playback.
RRed eye removal can not be performed on RAW images.
COPY
COPY
Copy pictures between the cards in the rst and second slots.
1
Select C COPY in the playback menu.
2
Highlight one of the following options and press the selector right:
• SLOT1 y SLOT2: Copy pictures from the card in the rst slot to the card in the second slot.
• SLOT2 y SLOT1: Copy pictures from the card in the second slot to the card in the rst slot.
3
Highlight one of the following options and press MENU/OK:
• FRAME: Copy selected pictures. Press the selector left or right to view pictures and press MENU/OK to copy the current picture.
• ALL FRAMES: Copy all pictures.
RCopying ends when the destination is full.
WIRELESS COMMUNICATION
WIRELESS COMMUNICATION
Connect to a smartphone or tablet over a wireless network (P 122).
RFor more information, visit http://fujifilm-dsc.com/wifi/.
105
Menus
Using the Menus: Playback Mode
SLIDE SHOW
SLIDE SHOW
View pictures in an automated slide show. Press MENU/OK to start. Press DISP/BACK at any time during the show to view on-screen
help. The show can be ended at any time by pressing MENU/OK.
RThe camera will not turn o automatically while a slide show is in progress.
PHOTOBOOK ASSIST
PHOTOBOOK ASSIST
Create books from your favorite photos (P 85).
PC AUTO SAVE
PC AUTO SAVE
Upload pictures to a computer over a wireless network (P 122).
RFor more information, visit http://fujifilm-dsc.com/wifi/.
PRINT ORDER (DPOF)
PRINT ORDER (DPOF)
Select pictures for printing (P 126).
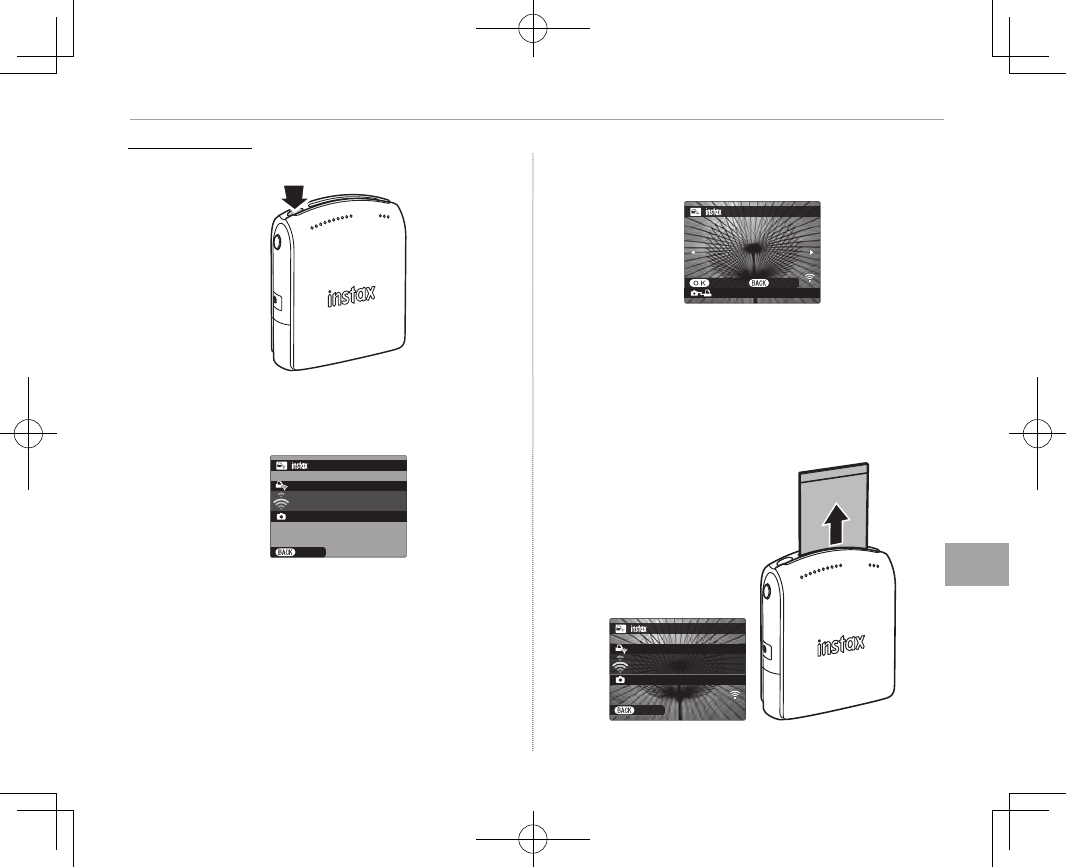
instax PRINTER PRINT
instax PRINTER PRINT
Print pictures on optional FUJIFILM instax SHARE printers (P 129).
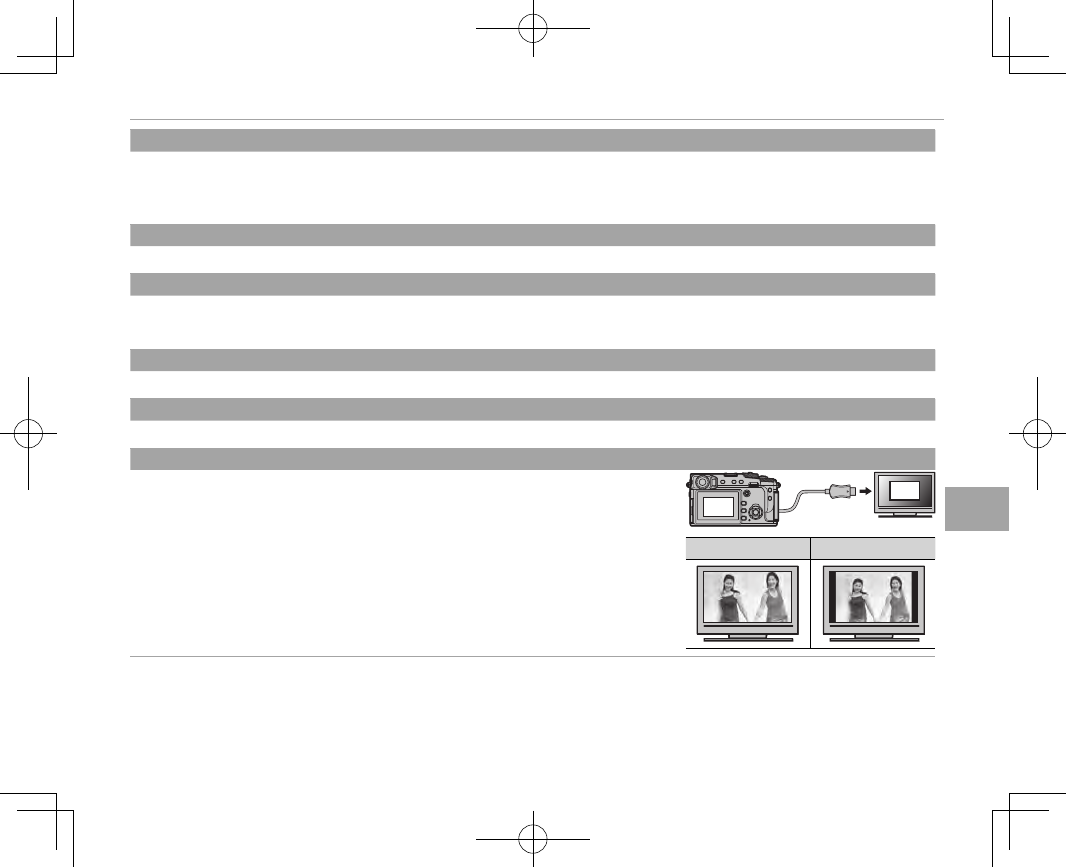
DISP ASPECT
DISP ASPECT
Choose how High De nition (HD) devices display pictures with an aspect ratio of 3 : 2
(this option is available only when an HDMI cable is connected). Select 16 : 9 to display
the image so that it lls the screen with its top and bottom cropped out, 3 : 2 to display
the entire image with black bands at either side.
3:2
16:9
16 : 9
16 : 9
3 : 2
3 : 2
106
The Setup Menu
The Setup Menu
View and adjust basic camera settings.
Using the Setup Menu
Using the Setup Menu
1
Press MENU/OK in shooting mode to display the
menus.
EXIT
IMAGE QUALITY SETTING
IMAGE QUALITY
RAW RECORDING
FILM SIMULATION
GRAIN EFFECT
DYNAMIC RANGE
WHITE BALANCE
HIGHLIGHT TONE
IMAGE SIZE
2
Press the selector left to highlight
the tab for the current menu.
Tab
EXIT
USER SETTING
SOUND SETTING
SCREEN SETTING
BUTTON/DIAL SETTING
POWER MANAGEMENT
SAVE DATA SETTING
CONNECTION SETTING
SET UP
3
Press the selector down to highlight
the D (SET UP) tab.
4
Press the selector right to display
setup menu categories.
5
Press the selector up or down to
highlight the category containing
the desired item.
6
Press the selector right to view the
option in the highlighted category.
7
Press the selector up or down to
highlight the desired item.
8
Press the selector right to view op-
tions for the highlighted item.
9
Press the selector up or down to
highlight the desired option.
10 Press MENU/OK to select the high-
lighted option.
11 Press DISP/BACK to return to the
shooting display.
RUse the front command dial to scroll through the
menus a page at a time.
107
Menus
The Setup Menu
D
D
SET UP Menu Options
SET UP Menu Options
To access basic camera settings, press MENU/OK in the playback display and se-
lect the D ( SET UP) tab (P 106).
EXIT
USER SETTING
SOUND SETTING
SCREEN SETTING
BUTTON/DIAL SETTING
POWER MANAGEMENT
SAVE DATA SETTING
CONNECTION SETTING
SET UP
■D USER SETTING
FORMAT
FORMAT
To format a memory card:
1 Highlight D USER SETTING> FORMAT in the setup menu and press MENU/OK.
2 Highlight the slot containing the card you wish to format and press MENU/OK.
3 A con rmation dialog will be displayed. To format the memory card, highlight OK and press
MENU/OK. To exit without formatting the memory card, select CANCEL or press DISP/BACK.
QAll data—including protected pictures—will be deleted from the memory card. Be sure impor-
tant les have been copied to a computer or other storage device.
QDo not open the battery-chamber cover during formatting.
RThe format menu can also be displayed by pressing the center of the rear command dial while
pressing and holding the b button.
FORMAT CARD IN SLOT 1, OK?
OK
CANCEL
ERASE ALL DATA
FORMAT
DATE/TIME
DATE/TIME
Set the camera clock (P 26, 27).

108
The Setup Menu
TIME DIFFERENCE
TIME DIFFERENCE
Switch the camera clock instantly from your home time zone to the local time at your destination when traveling. To specify the
di erence between local time and your home time zone:
1 Highlight g LOCAL and press MENU/OK.
2 Use the selector to choose the time di erence between local time and your home time zone. Press MENU/OK when settings
are complete.
To set the camera clock to local time, highlight g LOCAL and press MENU/OK. To set the clock to the time in your home time
zone, select h HOME. If g LOCAL is selected, g will be displayed for three seconds when the camera is turned on.
a
a
Choose a language.
MY MENU SETTING
MY MENU SETTING
Edit “my menu” (P 118).
SENSOR CLEANING
SENSOR CLEANING
Remove dust from the camera image sensor.
• OK: Clean sensor immediately (P xi).
• WHEN SWITCHED ON: If this option is selected, sensor cleaning will be performed when the camera turns on.
• WHEN SWITCHED OFF: If this option is selected, sensor cleaning will be performed when the camera turns o (sensor cleaning is
not however performed if the camera turns o in playback mode).
RDust that can not be removed using sensor cleaning can be removed manually (P 136).
RESET
RESET
Reset shooting or setup menu options to default values. Custom white balance, custom settings banks created using EDIT/
SAVE CUSTOM SETTING, WIRELESS SETTINGS, and the setup menu DATE/TIME, TIME DIFFERENCE options are not a ected.
1 Highlight the desired option and press the selector right.
2 A con rmation dialog will be displayed; highlight OK and press MENU/OK.
109
Menus
The Setup Menu
■ D SOUND SETTING
AF BEEP VOL.
AF BEEP VOL.
Choose the volume of the beep that sounds when the camera focuses (P 75). The beep can be muted by selecting OFF.
SELF-TIMER BEEP VOL.
SELF-TIMER BEEP VOL.
Choose the volume of the beep that sounds while the self-timer is active (P 73). The beep can be muted by selecting OFF.
OPERATION VOL.
OPERATION VOL.
Adjust the volume of the sounds produced when camera controls are operated. Choose e OFF (mute) to disable control
sounds.
SHUTTER VOLUME
SHUTTER VOLUME
Adjust the volume of the sounds produced when the shutter is released. Choose e OFF (mute) to disable the shutter sound.
SHUTTER SOUND
SHUTTER SOUND
Choose the sound made by the shutter.
PLAYBACK VOLUME
PLAYBACK VOLUME
Adjust the volume for movie playback.
110
The Setup Menu
■D SCREEN SETTING
EVF BRIGHTNESS
EVF BRIGHTNESS
Adjust the brightness of the display in the electronic view nder, or choose AUTO for automatic brightness adjustment.
EVF COLOR
EVF COLOR
Adjust the hue of the display in the electronic view nder.
LCD BRIGHTNESS
LCD BRIGHTNESS
Adjust monitor brightness.
LCD COLOR
LCD COLOR
Adjust monitor hue.
IMAGE DISP.
IMAGE DISP.
Choose how long images are displayed after shooting. Colors may di er slightly from those in the nal image and “noise” mot-
tling may be visible at high sensitivities.
Option
Option
Description
Description
CONTINUOUS
CONTINUOUS Pictures are displayed until the MENU/OK button is pressed or the shutter button is pressed halfway. To zoom in
on the active focus point, press the center of the rear command dial; press again to cancel zoom.
1.5 SEC
1.5 SEC Pictures are displayed for 1.5 seconds (1.5 SEC) or 0.5 seconds (0.5 SEC) or until the shutter button is pressed
halfway.
0.5 SEC
0.5 SEC
OFF
OFF Pictures are not displayed after shooting.
EVF AUTOROTATE DISPLAYS
EVF AUTOROTATE DISPLAYS
Choose whether the indicators in the view nder rotate to match camera orientation (P 31). Regardless of the option selected,
the indicators in the monitor do not rotate.
PREVIEW EXP./WB IN MANUAL MODE
PREVIEW EXP./WB IN MANUAL MODE
Select PREVIEW EXP./WB to enable exposure and white balance preview in manual exposure mode (P 38), or choose PREVIEW
WB to preview only white balance. Select OFF when using a ash or on other occasions on which exposure may change when
the picture is taken.
111
Menus
The Setup Menu
PREVIEW PIC. EFFECT
PREVIEW PIC. EFFECT
Choose ON to preview the e ects of lm simulation, white balance, and other settings in the monitor. Choose OFF to make
shadows in low-contrast, back-lit scenes and other hard-to-see subjects more visible.
RIf OFF is selected, the e ects of camera settings will not be visible in the monitor and colors and tone will di er from those
in the nal picture. The display will however be adjusted to show the e ects of advanced lters and of monochrome and
sepia settings.
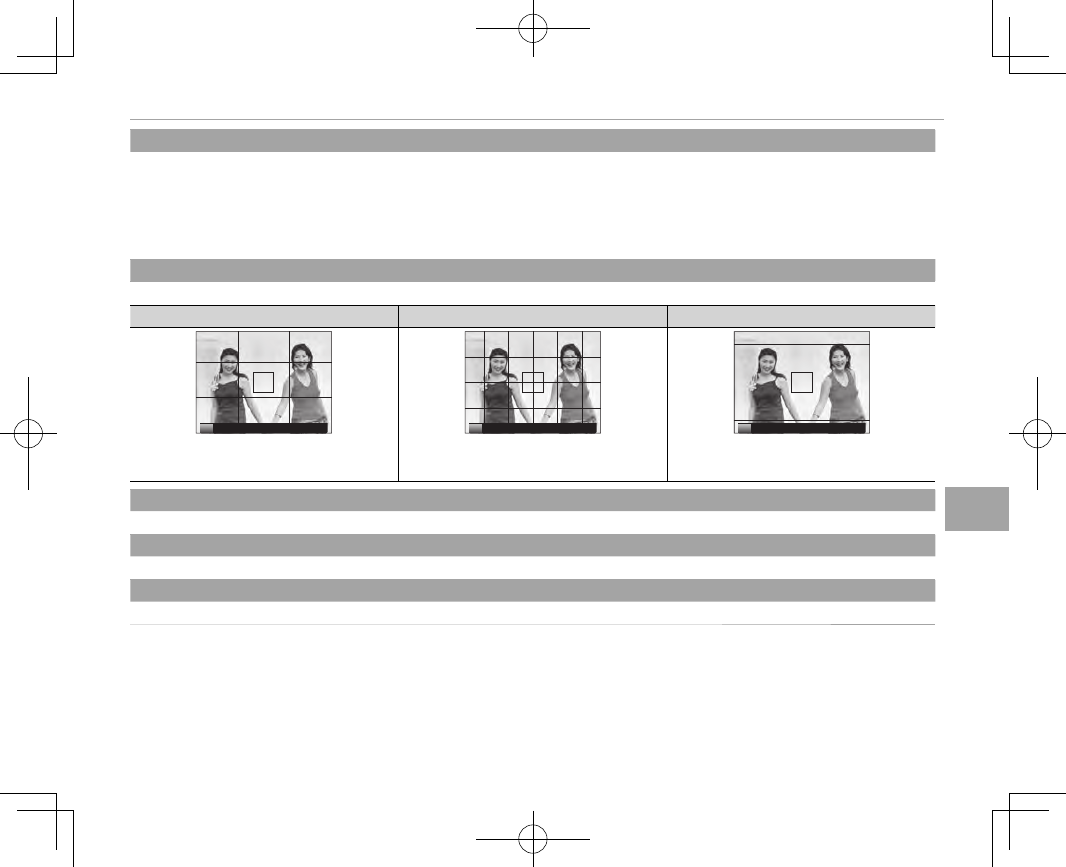
FRAMING GUIDELINE
FRAMING GUIDELINE
Choose the type of framing grid available in shooting mode.
F
F
GRID 9
GRID 9
G
G
GRID 24
GRID 24
H
H
HD FRAMING
HD FRAMING
PPP
For “rule of thirds” composition. A six-by-four grid. Frame HD pictures in the crop shown by the
lines at the top and bottom of the display.
AUTOROTATE PB
AUTOROTATE PB
Choose ON to automatically rotate “tall” (portrait-orientation) pictures during playback.
FOCUS SCALE UNITS
FOCUS SCALE UNITS
Choose the units used for the focus distance indicator (P 64).
DISP. CUSTOM SETTING
DISP. CUSTOM SETTING
Choose items for the standard display (P 33).
112
The Setup Menu
■D BUTTON/DIAL SETTING
FOCUS LEVER SETTING
FOCUS LEVER SETTING
Choose the functions performed by the focus stick (focus lever).
Option
Option
Description
Description
LOCK (OFF)
LOCK (OFF) The focus stick can not be used during shooting.
PUSH
PUSH
n
n
TO UNLOCK
TO UNLOCK Press the stick to view the focus-point display and tilt the stick to select a focus point.
ON
ON Tilt the stick to view the focus-point display and select a focus point.
EDIT/SAVE QUICK MENU
EDIT/SAVE QUICK MENU
Choose the options displayed in the quick menu (P 49).
FUNCTION (Fn) SETTING
FUNCTION (Fn) SETTING
Choose the roles played by the function buttons (P 51).
COMMAND DIAL SETTING
COMMAND DIAL SETTING
Choose the roles played by the command dials.
ISO DIAL SETTING (H)
ISO DIAL SETTING (H)
Choose the ISO sensitivity assigned to the H position on the ISO dial.
SHOOT WITHOUT LENS
SHOOT WITHOUT LENS
Choose whether shutter release is enabled when no lens is attached.
FOCUS RING
FOCUS RING
Choose the direction in which the focus ring is rotated to increase the focus distance.

113
Menus
The Setup Menu
AE-L/AF-L BUTTON SETTING
AE-L/AF-L BUTTON SETTING
Switch the roles of the AF-L and AE-L buttons.
AE/AF-LOCK MODE
AE/AF-LOCK MODE
If AE & AF ON WHEN PRESSING is selected, exposure and/or focus will lock while the AE-L or AF-L button is pressed (P 76). If AE
& AF ON/OFF SWITCH is selected, exposure and/or focus will lock when the AE-L or AF-L button is pressed and remain locked
until the button is pressed again.
AF-LOCK MODE
AF-LOCK MODE
Choose the role played by the AF-L button (P 76).
APERTURE SETTING
APERTURE SETTING
Choose the method used to adjust aperture when using lenses with no aperture rings.
• AUTO + o MANUAL: Rotate the rear command dial to choose the aperture. Rotate past minimum aperture to choose A (auto).
• AUTO: Aperture is selected automatically; camera functions in exposure mode P (program AE) or S (shutter-priority AE).
• MANUAL: Rotate the rear command dial to choose the aperture; camera functions in exposure mode A (aperture-priority AE)
or M (manual).
114
The Setup Menu
■D POWER MANAGEMENT
AUTO POWER OFF
AUTO POWER OFF
Choose the length of time before the camera turns o automatically when no operations are performed. Shorter times increase
battery life; if OFF is selected, the camera must be turned o manually. Note that in some situations the camera turns o auto-
matically even when OFF is selected.
POWER MANAGEMENT
POWER MANAGEMENT
Adjust power management settings.
Option
Option
AF performance (speed)
AF performance (speed)
LCD/EVF display quality
LCD/EVF display quality
Battery endurance
Battery endurance
HIGH PERFORMANCE
HIGH PERFORMANCE
Fast
Fast
Very high
Very high
Low
Low
STANDARD
STANDARD
Fast
Fast
High
High
Normal
Normal
ECONOMY
ECONOMY
Normal
Normal
Normal
Normal
High
High
RWhen ECONOMY is selected, the frame rate will drop when no operations are being performed. Operating camera controls
returns the frame rate to normal.
115
Menus
The Setup Menu
■D SAVE DATA SETTING
FRAME NO.
FRAME NO.
New pictures are stored in image les named using a four-digit le number assigned by adding one to the
last le number used. The le number is displayed during playback as shown at right. FRAME NO. controls
whether le numbering is reset to 0001 when a new memory card is inserted or the current memory card
is formatted.
Frame number
100-0001
Directory
number
File
number
Option
Option
Description
Description
CONTINUOUS
CONTINUOUS Numbering continues from the last le number used or the rst available le number, whichever is higher. Choose
this option to reduce the number of pictures with duplicate le names.
RENEW
RENEW Numbering is reset to 0001 after formatting or when a new memory card is inserted.
RIf the frame number reaches 999-9999, the shutter release will be disabled (P 143).
RSelecting D USER SETTING> RESET (P 108) sets FRAME NO. to CONTINUOUS but does not reset the le number.
RFrame numbers for pictures taken with other cameras may di er.
SAVE ORG IMAGE
SAVE ORG IMAGE
Choose ON to save unprocessed copies of pictures taken using
F
F FLASH SETTING> RED EYE REMOVAL (P 98).
EDIT FILE NAME
EDIT FILE NAME
Change the le name pre x. sRGB images use a four-letter pre x (default “DSCF”), Adobe RGB images a three-letter pre x (“DSF”)
preceded by an underscore.
116
The Setup Menu
CARD SLOT SETTING (STILL IMAGE)
CARD SLOT SETTING (STILL IMAGE)
Choose the role played by the card in the second slot.
Option
Option
Description
Description
SEQUENTIAL
SEQUENTIAL The card in the second slot is used only when the card in the rst slot is full.
BACKUP
BACKUP Each picture is recorded twice, once to each card.
RAW / JPEG
RAW / JPEG
As for SEQUENTIAL, except that the RAW copy of pictures taken with RAW + FINE or NORMAL + RAW selected
for H IMAGE QUALITY SETTING> IMAGE QUALITY will be saved to the card in the rst slot and the JPEG copy
to the card in the second slot.
RRegardless of the option selected for CARD SLOT SETTING (STILL IMAGE), movies will be recorded to the card in the rst
slot; if SEQUENTIAL is selected, movies will be recorded to the card in the rst slot even after recording has moved on to the
card in the second slot.
SWITCH SLOT (SEQUENTIAL)
SWITCH SLOT (SEQUENTIAL)
Choose the card that is recorded to rst when SEQUENTIAL is selected for CARD SLOT SETTING (STILL IMAGE).
117
Menus
The Setup Menu
■D CONNECTION SETTING
For more information on wireless connections, visit http://fujifilm-dsc.com/wifi/
WIRELESS SETTINGS
WIRELESS SETTINGS
Adjust settings for connection to wireless networks.
Option
Option
Description
Description
GENERAL SETTINGS
GENERAL SETTINGS
Choose a name (NAME) to identify the camera on the wireless network (the camera is as-
signed a unique name by default) or select RESET WIRELESS SETTINGS to restore default
settings.
RESIZE IMAGE FOR SMARTPHONE
RESIZE IMAGE FOR SMARTPHONE H
Choose ON (the default setting, recommended in most circumstances) to resize larger im-
ages to H for upload to smartphones, OFF to upload images at their original size. Resizing
applies only to the copy uploaded to the smartphone; the original is not a ected.
PC AUTO SAVE SETTINGS
PC AUTO SAVE SETTINGS
Choose DELETE REGISTERED DESTINATION PC to remove selected destinations, DETAILS
OF PREVIOUS CONNECTION to view computers to which the camera has recently con-
nected.
PC AUTO SAVE SETTING
PC AUTO SAVE SETTING
Choose an upload destination. Choose SIMPLE SETUP to connect using WPS, MANUAL SETUP to con gure network settings
manually.
GEOTAGGING SET-UP
GEOTAGGING SET-UP
View location data downloaded from a smartphone and choose whether to save the data with your pictures.
Option
Option
Description
Description
GEOTAGGING
GEOTAGGING Choose whether location data downloaded from a smartphone are embedded in pictures as they are taken.
LOCATION INFO
LOCATION INFO Display the location data last downloaded from a smartphone.
instax PRINTER CONNECTION SETTING
instax PRINTER CONNECTION SETTING
Adjust settings for connection to optional FUJIFILM instax SHARE printers (P 128).
118
“My Menu”
“My Menu”
Selecting the E ( MY MENU) tab displays a personalized custom menu of frequently-used options (P 100).
Editing “My Menu”
Editing “My Menu”
1
In the setup menu D USER SETTING tab,
highlight MY MENU SETTING and press
MENU/OK to display the following options
(P 106).
MY MENU SETTING
MY MENU SETTING
RANK ITEMS
REMOVE ITEMS
2
Press the selector up or down to highlight MY
MENU SETTING and press MENU/OK. Options
that can be added to “my menu” are highlight-
ed in blue.
ROptions currently in “my menu” are indicated by
check marks.
IMAGE QUALITY
RAW RECORDING
FILM SIMULATION
GRAIN EFFECT
DYNAMIC RANGE
WHITE BALANCE
HIGHLIGHT TONE
MY MENU SETTING
IMAGE SIZE
CANCELSELECT
3
Highlight an item and press MENU/OK to add it
to “my menu”.
MY MENU SETTING
1 IMAGE SIZE
SAVEMOVE
4
Press MENU/OK to return to the edit display.
5
Repeat Steps 3 and 4 until all the desired items
have been added.
R“My menu” can contain up to 16 items.
Editing “My Menu”
Editing “My Menu”
To reorder or delete items, select RANK ITEMS or RE-
MOVE ITEMS in Step 1.
119
Menus
Factory Defaults
Factory Defaults
The factory default settings for the options in the shooting and setup menus are listed below. These
settings can be restored using D USER SETTING> RESET (P 108).
■ Shooting Menu
Menu
Menu
Default
Default
H
H
IMAGE QUALITY SETTING
IMAGE QUALITY SETTING
IMAGE SIZE
IMAGE SIZE O 3 : 2
IMAGE QUALITY
IMAGE QUALITY FINE
RAW RECORDING
RAW RECORDING UNCOMPRESSED
FILM SIMULATION
FILM SIMULATION PROVIA/STANDARD
GRAIN EFFECT
GRAIN EFFECT OFF
DYNAMIC RANGE
DYNAMIC RANGE 100%
WHITE BALANCE
WHITE BALANCE AUTO
HIGHLIGHT TONE
HIGHLIGHT TONE 0
SHADOW TONE
SHADOW TONE 0
COLOR
COLOR 0
SHARPNESS
SHARPNESS 0
NOISE REDUCTION
NOISE REDUCTION 0
LONG EXPOSURE NR
LONG EXPOSURE NR ON
LENS MODULATION OPTIMIZER
LENS MODULATION OPTIMIZER ON
COLOR SPACE
COLOR SPACE sRGB
SELECT CUSTOM SETTING
SELECT CUSTOM SETTING CUSTOM 1
Menu
Menu
Default
Default
G
G
AF/MF SETTING
AF/MF SETTING
AF MODE
AF MODE SINGLE POINT
NUMBER OF THE FOCUS POINTS
NUMBER OF THE FOCUS POINTS 77 POINTS (7×11)
PRE-AF
PRE-AF OFF
AF ILLUMINATOR
AF ILLUMINATOR ON
FACE/EYE DETECTION SETTING
FACE/EYE DETECTION SETTING FACE OFF/EYE OFF
AF+MF
AF+MF OFF
MF ASSIST
MF ASSIST STANDARD
FOCUS CHECK
FOCUS CHECK OFF
INTERLOCK SPOT AE & FOCUS
INTERLOCK SPOT AE & FOCUS
AREA
AREA
ON
INSTANT AF SETTING
INSTANT AF SETTING AF-S
RELEASE/FOCUS PRIORITY
RELEASE/FOCUS PRIORITY
• AF-S PRIORITY SELECTION
• AF-C PRIORITY SELECTION
RELEASE
RELEASE
CORRECTED AF FRAME
CORRECTED AF FRAME OFF
120
Factory Defaults
Menu
Menu
Default
Default
G
G
SHOOTING SETTING
SHOOTING SETTING
SELF-TIMER
SELF-TIMER OFF
FILM SIMULATION BKT
FILM SIMULATION BKT
• FILM 1
• FILM 2
• FILM 3
PROVIA/STANDARD
Velvia/VIVID
ASTIA/SOFT
PHOTOMETRY
PHOTOMETRY MULTI
SHUTTER TYPE
SHUTTER TYPE MECHANICAL SHUTTER
IS MODE
IS MODE CONTINUOUS
ISO AUTO SETTING
ISO AUTO SETTING AUTO1
MOUNT ADAPTOR SETTING
MOUNT ADAPTOR SETTING
• BRIGHT FRAME BRIGHTNESS
• LENS REGISTRATION
0
LENS 5 (50mm)
F
F
FLASH SETTING
FLASH SETTING
FLASH MODE
FLASH MODE AUTO
FLASH COMPENSATION
FLASH COMPENSATION ±0
RED EYE REMOVAL
RED EYE REMOVAL OFF
B
B
MOVIE SETTING
MOVIE SETTING
MOVIE MODE
MOVIE MODE i 1920/60P
MIC LEVEL ADJUSTMENT
MIC LEVEL ADJUSTMENT 3
MIC/REMOTE RELEASE
MIC/REMOTE RELEASE MIC
■Setup Menu
Menu
Menu
Default
Default
D
D
USER SETTING
USER SETTING
TIME DIFFERENCE
TIME DIFFERENCE HOME
SENSOR CLEANING
SENSOR CLEANING
• WHEN SWITCHED ON
• WHEN SWITCHED OFF
OFF
ON
D
D
SOUND SETTING
SOUND SETTING
AF BEEP VOL.
AF BEEP VOL. c
SELF-TIMER BEEP VOL.
SELF-TIMER BEEP VOL. c
OPERATION VOL.
OPERATION VOL. OFF
SHUTTER VOLUME
SHUTTER VOLUME c
SHUTTER SOUND
SHUTTER SOUND SOUND 1
PLAYBACK VOLUME
PLAYBACK VOLUME 7
D
D
SCREEN SETTING
SCREEN SETTING
EVF BRIGHTNESS
EVF BRIGHTNESS AUTO
EVF COLOR
EVF COLOR 0
LCD BRIGHTNESS
LCD BRIGHTNESS 0
LCD COLOR
LCD COLOR 0
IMAGE DISP.
IMAGE DISP. OFF
EVF AUTOROTATE DISPLAYS
EVF AUTOROTATE DISPLAYS ON
PREVIEW EXP./WB IN MANUAL
PREVIEW EXP./WB IN MANUAL
MODE
MODE
PREVIEW EXP./WB
PREVIEW PIC. EFFECT
PREVIEW PIC. EFFECT ON
FRAMING GUIDELINE
FRAMING GUIDELINE GRID 9
AUTOROTATE PB
AUTOROTATE PB OFF
FOCUS SCALE UNITS
FOCUS SCALE UNITS METERS
DISP. CUSTOM SETTING
DISP. CUSTOM SETTING See page 33.
121
Menus
Factory Defaults
Menu
Menu
Default
Default
D
D
BUTTON/DIAL SETTING
BUTTON/DIAL SETTING
FOUCS LEVER SETTING
FOUCS LEVER SETTING ON
EDIT/SAVE QUICK MENU See page 47.
FUNCTION (Fn) SETTING See page 50.
COMMAND DIAL SETTING Y S.S. X F
ISO DIAL SETTING
ISO DIAL SETTING 25600
SHOOT WITHOUT LENS OFF
FOCUS RING X CW
AE-L/AF-L BUTTON SETTING AE-L/AF-L
AE/AF-LOCK MODE AE&AF ON WHEN PRESS-
ING
AF-LOCK MODE AF LOCK ONLY
APERTURE SETTING AUTO + MANUAL
D
D
POWER MANAGEMENT
POWER MANAGEMENT
AUTO POWER OFF
AUTO POWER OFF 2 MIN
POWER MANAGEMENT
POWER MANAGEMENT STANDARD
Menu
Menu
Default
Default
D
D
SAVE DATA SETTING
SAVE DATA SETTING
FRAME NO.
FRAME NO. CONTINUOUS
SAVE ORG IMAGE
SAVE ORG IMAGE OFF
CARD SLOT SETTING
CARD SLOT SETTING
(STILL IMAGE)
(STILL IMAGE)
SEQUENTIAL
D
D
CONNECTION SETTING
CONNECTION SETTING
WIRELESS SETTINGS
• RESIZE IMAGE FOR
SMARTPHONE
H
H
ON
PC AUTO SAVE SETTING
PC AUTO SAVE SETTING SIMPLE SETUP
GEOTAGGING SET-UP
• GEOTAGGING
• LOCATION INFO
ON
ON
122
Connections
Connections
Wireless Transfer
Wireless Transfer
Access wireless networks and connect to computers, smartphones, or tablets. For downloads and
other information, visit http://fujifilm-dsc.com/wifi/.
Wireless Connections: Smartphones
Wireless Connections: Smartphones
Install the “FUJIFILM Camera Remote” app on your
smartphone to browse the images on the cam-
era, download selected images, control the cam-
era remotely, or copy location data to the camera.
To connect to the smartphone, set the camera
to playback mode and press the function button
(Fn1)
.
RYou can also connect using A SHOOTING
SETTING/C PLAY BACK MENU> WIRELESS COM-
MUNICATION (P 97, 104).
Wireless Connections: Computers
Wireless Connections: Computers
Once you have installed the “FUJIFILM PC AutoSave”
application and con gured your computer as a
destination for the images copied from the cam-
era, you can upload pictures from the camera using
C PLAY BACK MENU> PC AUTO SAVE (P 105) or
by pressing and holding the function button (Fn1)
in playback mode.
123
Connections
Viewing Pictures on a Computer
Viewing Pictures on a Computer
Read this section for information on copying pictures to a computer.
Windows
Windows
Use MyFinePix Studio to copy pictures to your computer, where they can be stored, viewed, organized,
and printed. MyFinePix Studio is available for download from the following website:
http://fujifilm-dsc.com/mfs/
Once download is complete, double-click the downloaded le (“MFPS_Setup.EXE”) and follow the
on-screen instructions to complete installation. Proceed to “Connecting the Camera” (P 124) when
installation is complete.
Macintosh
Macintosh
Pictures can be copied to your computer using Image Capture (supplied with your computer) or other
software. Proceed to “Connecting the Camera” (P 124).
Viewing RAW Files
Viewing RAW Files
To view RAW les on your computer, use the RAW FILE CONVERTER, available for download from:
http://fujifilm-dsc.com/rfc/
124
Viewing Pictures on a Computer
Connecting the Camera
Connecting the Camera
1
Find a memory card containing pictures you want to copy to the computer and insert the card into
the camera.
RWindows users may require the Windows CD when starting the software for the rst time.
QLoss of power during transfer could result in loss of data or damage to the memory card. Insert a fresh or
fully-charged battery before connecting the camera.
2
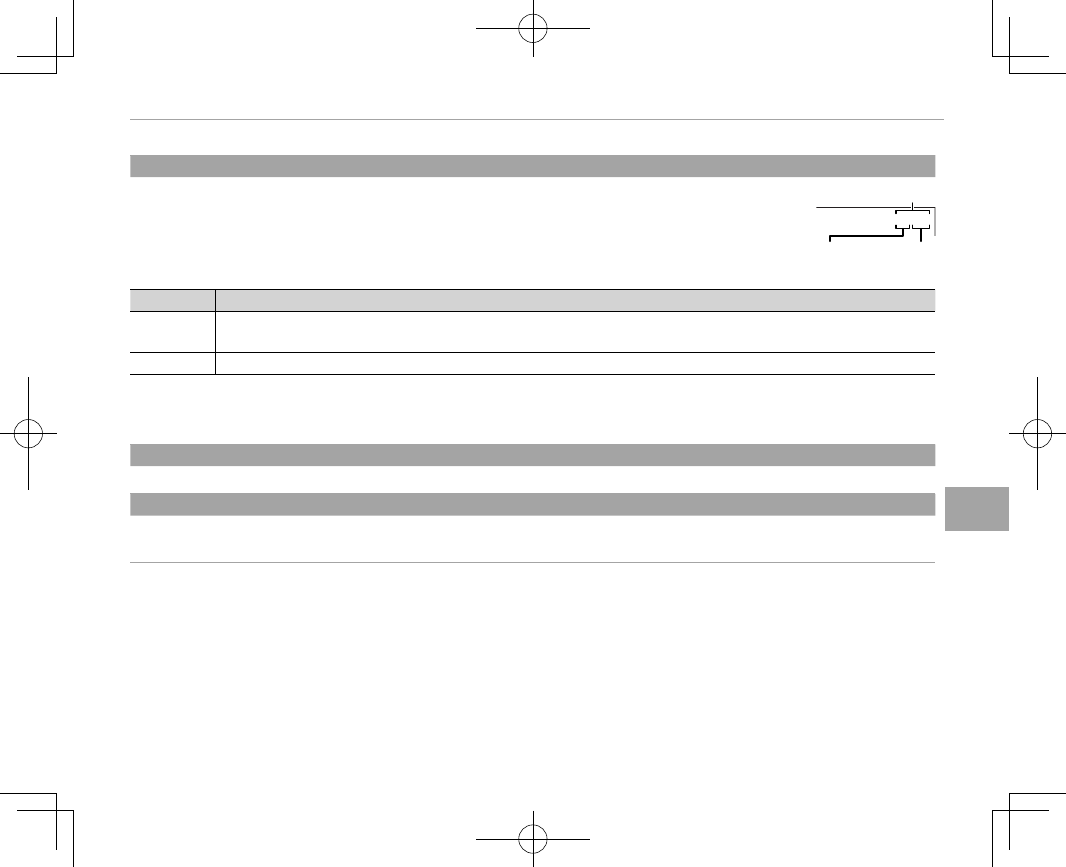
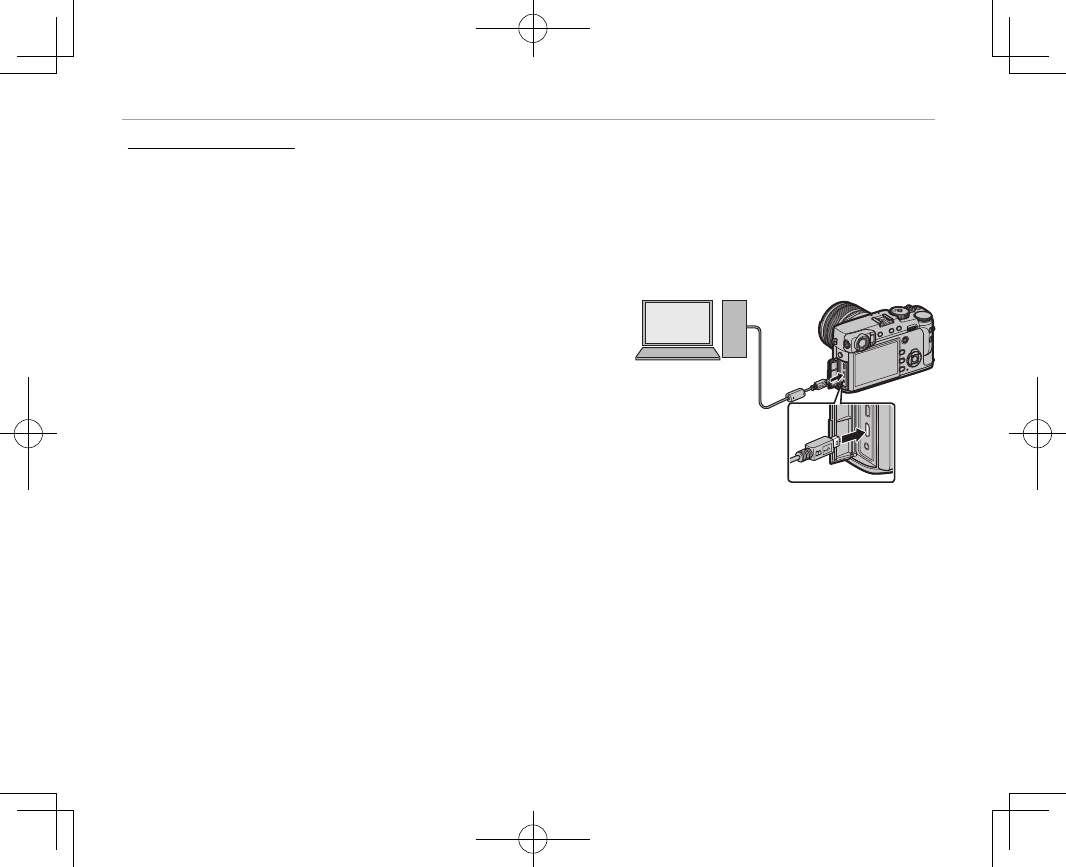
Turn the camera o and connect a USB cable (available
separately from third-party suppliers) as shown, making
sure the connectors are fully inserted. Connect the cam-
era directly to the computer; do not use a USB hub or key-
board.
QThe USB cable must be no more than 1.5m (4.9ft.) long and be
suitable for data transfer.
3
Turn the camera on.
4
Copy pictures to the computer using MyFinePix Studio or applications provided with your operat-
ing system.
For more information on using the software, start the application and select the appropriate option
from the Help menu.

125
Connections
Viewing Pictures on a Computer
QIf a memory card containing a large number of images is inserted, there may be a delay before the software
starts and you may be unable to import or save images. Use a memory card reader to transfer pictures.
QMake sure that the computer does not display a message stating that copying is in progress and that the indi-
cator lamp is out before turning the camera o or disconnecting the USB cable (if the number of images cop-
ied is very large, the indicator lamp may remain lit after the message has cleared from the computer display).
Failure to observe this precaution could result in loss of data or damage to the memory card.
QDisconnect the camera before inserting or removing memory cards.
QIn some cases, it may not be possible to access pictures saved to a network server using the software in the
same way as on a standalone computer.
QThe user bears all applicable fees charged by the phone company or Internet service provider when using
services that require an Internet connection.
Disconnecting the Camera
Disconnecting the Camera
After con rming that the indicator lamp is out, turn the camera o and disconnect the USB cable.
126
Creating a DPOF Print Order
Creating a DPOF Print Order
The C PLAY BACK MENU> PRINT ORDER (DPOF) (P 105) option can be used to create a digital “print
order” for DPOF-compatible printers.
DPOF
DPOF
DPOF (Digital Print Order Format) is standard that allows pictures to be printed from “print orders”
stored on the memory card. The information in the order includes the pictures to be printed and the
number of copies of each picture.
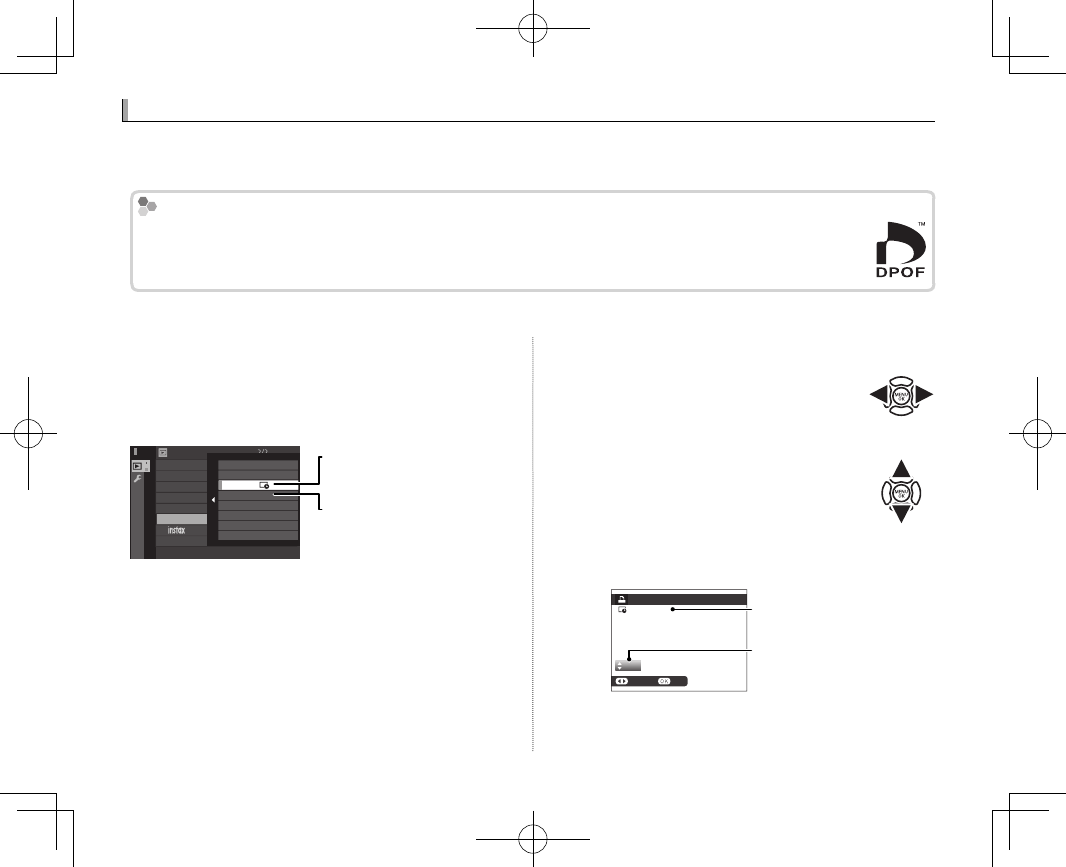
■WITH DATE s/ WITHOUT DATE
To modify the DPOF print order, select C PLAY
BACK MENU> PRINT ORDER (DPOF) (P 101)
and press the selector up or down to highlight
WITH DATE s or WITHOUT DATE.
COPY
WIRELESS COMMUNICATION
SLIDE SHOW
PHOTOBOOK ASSIST
PC AUTO SAVE
PRINT ORDER(DPOF)
PRINTER PRINT
DISP ASPECT
PLAY BACK MENU
WITHOUT DATE
RESET ALL
WITH DATE
WITH DATE s: Print date of
recording on pictures.
WITHOUT DATE: Print pictures
without date.
Press MENU/OK and follow the steps below.
1
Press the selector left or right to dis-
play a picture you wish to include in
or remove from the print order.
2
Press the selector up or down to
choose the number of copies (up
to 99). To remove a picture from the
order, press the selector down until
the number of copies is 0.
01
PRINT ORDER (DPOF)
SHEETS
SETFRAME
DPOF:
00001
Total number of prints
Number of copies
127
Connections
Creating a DPOF Print Order
3
Repeat steps 1–2 to complete the
print order. Press MENU/OK to save
the print order when settings are
complete, or DISP/BACK to exit with-
out changing the print order.
4
The total number of prints is dis-
played in the monitor. Press MENU/OK
to exit.
The pictures in the current
print order are indicated by a
u icon during playback.
■RESET ALL
To cancel the current print
order, select RESET ALL for
C PLAY BACK MENU> PRINT
ORDER (DPOF) (P 101). The
con rmation shown at right
will be displayed; press MENU/OK
to remove all pictures from the
order.
RPrint orders can contain a maximum of 999 pictures.
RIf a memory card is inserted
containing a print order cre-
ated by another camera, the
message shown at right will
be displayed. Pressing MENU/OK
cancels the print order; a new
print order must be created as
described above.
CANCELYES
RESET DPOF OK?
NOYES
RESET DPOF OK?
128
instax SHARE Printers
instax SHARE Printers
Print pictures from your digital camera to instax SHARE printers.
Establishing a Connection
Establishing a Connection
Select D CONNECTION SETTING> instax PRINTER CONNECTION SETTING (P 117) and enter the
instax SHARE printer name (SSID) and password.
The Printer Name (SSID) and Password
The Printer Name (SSID) and Password
The printer name (SSID) can be found on the bottom of the printer; the default
password is “1111”. If you have already chosen a di erent password to print
from a smartphone, enter that password instead.
SSID:instax-
12345678
XxxxxXxxx XX:
000000000
XxxxxXxxx XX:
000000000
XxxxxXxxx XX:
000
129
Connections
instax SHARE Printers
Printing Pictures
Printing Pictures
1
Turn the printer on.
2
Select C PLAY BACK MENU> instax PRINT-
ER PRINT (P 101). The camera will connect to
the printer.
FUJIFILM-CAMERA-1234
CONNECTING TO PRINTER
CANCEL
PRINTER PRINT
instax-12345678
RTo print a frame from a burst sequence, display
the frame before selecting instax PRINTER
PRINT.
3
Use the selector to display the picture you
want to print, then press MENU/OK.
100-0020
100-0020
instax-12345678
PRINTER PRINT
TRANSMIT CANCEL
RPictures taken with other cameras can not be
printed.
RThe area printed is smaller than the area visible
in the LCD monitor.
4
The picture will be sent to the printer and
printing will start.
FUJIFILM-CAMERA-1234
CANCEL
SENDING
PRINTER PRINT
instax-12345678
130
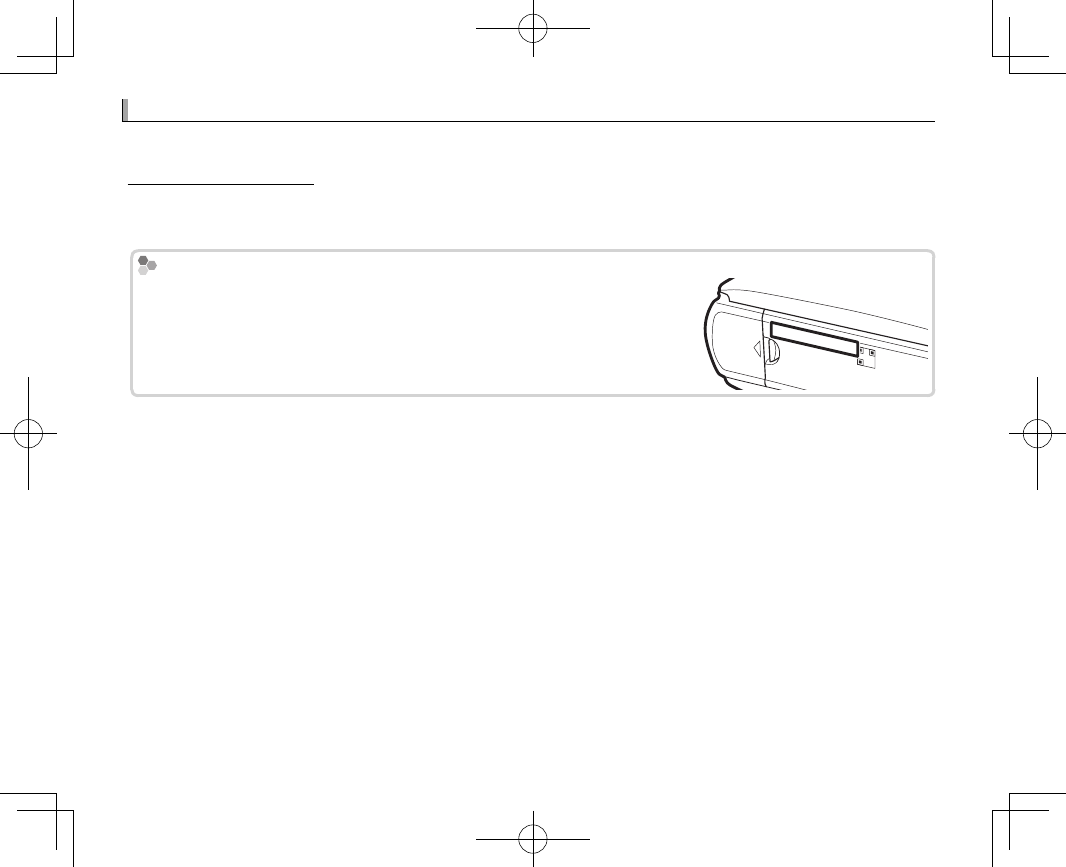
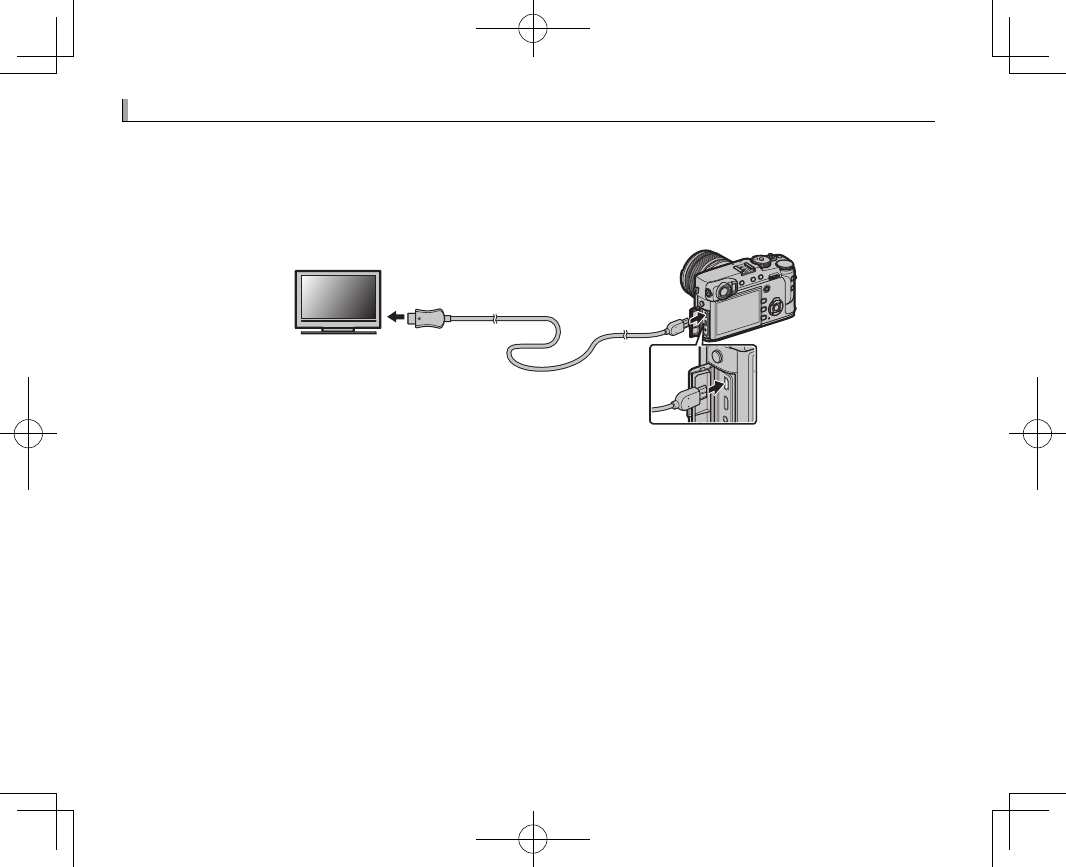
Viewing Pictures on TV
Viewing Pictures on TV
To show pictures to a group, connect the camera to a TV using an HDMI cable (available separately
from third-party suppliers; note that the TV can only be used for playback, not shooting).
1
Turn the camera o .
2
Connect the cable as shown below.
Insert into
Micro HDMI connector
Insert into
HDMI connector
QUse an HDMI cable no more than 1.5m (4.9ft.) long.
RBe sure the connectors are fully inserted.
3
Tune the television to the HDMI input channel. See the documentation supplied with the televi-
sion for details.
4
Turn the camera on and press a button. The camera monitor turns o and pictures and movies
are played back on the TV. Note that the camera volume controls have no e ect on sounds played
on the TV; use the television volume controls to adjust the volume.
RThe USB cable can not be used while an HDMI cable is connected.
RSome televisions may brie y display a black screen when movie playback begins.
131
Technical Notes
Technical Notes
Technical Notes
Optional Accessories
Optional Accessories
The camera supports a wide range of accessories from FUJIFILM and other manufacturers.
Accessories from FUJIFILM
Accessories from FUJIFILM
The following optional accessories are available from FUJIFILM. For the latest information on the accesso-
ries available in your region, check with your local FUJIFILM representative or visit http://www.fujifilm.com/
products/digital_cameras/index.html.
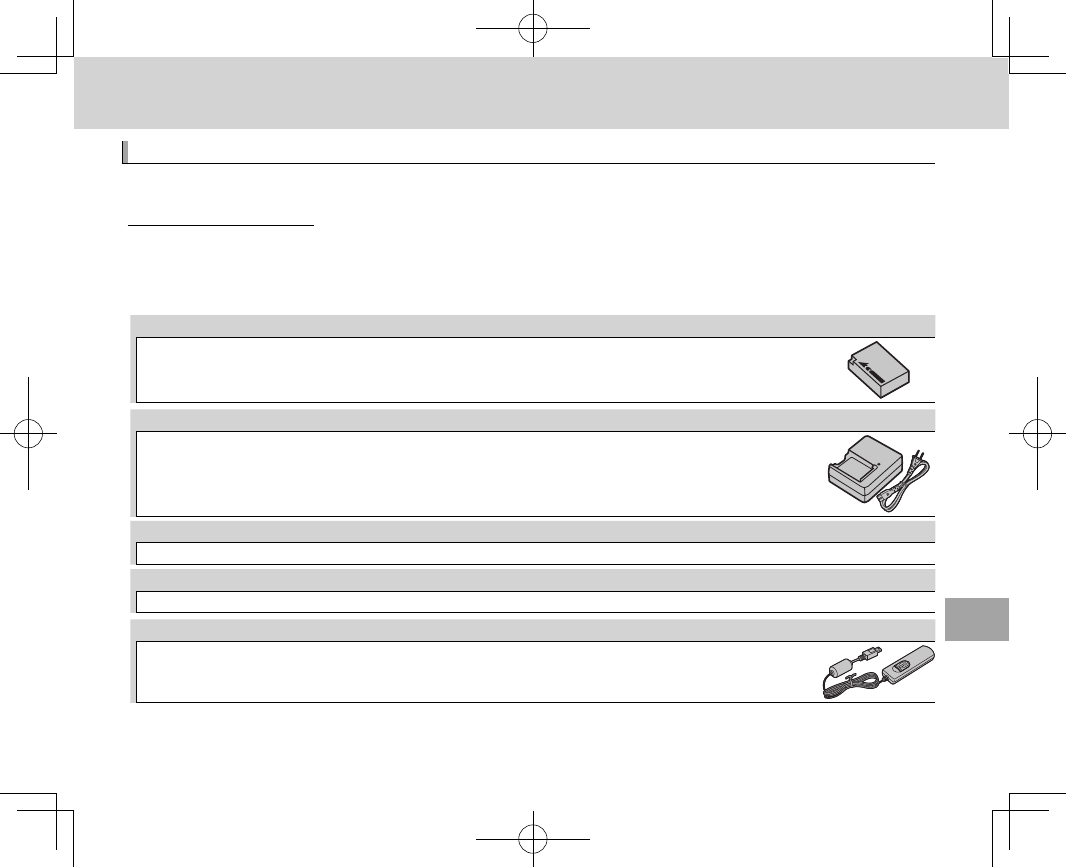
Rechargeable Li-ion batteries
Rechargeable Li-ion batteries
NP-W126: Additional large-capacity NP-W126 rechargeable batteries can be purchased as required.
Battery chargers
Battery chargers
BC-W126: Replacement battery chargers can be purchased as required. At +20 °C/+68 °F, the BC-W126
charges an NP-W126 in about 150 minutes.
AC power adapters
AC power adapters
AC-9V (requires CP-W126 DC coupler): Use for extended shooting and playback or when copying pictures to a computer.
DC couplers
DC couplers
CP-W126: Connect the AC-9V to the camera.
Remote releases
Remote releases
RR-90: Use to reduce camera shake or keep the shutter open during a time exposure.
132
Optional Accessories
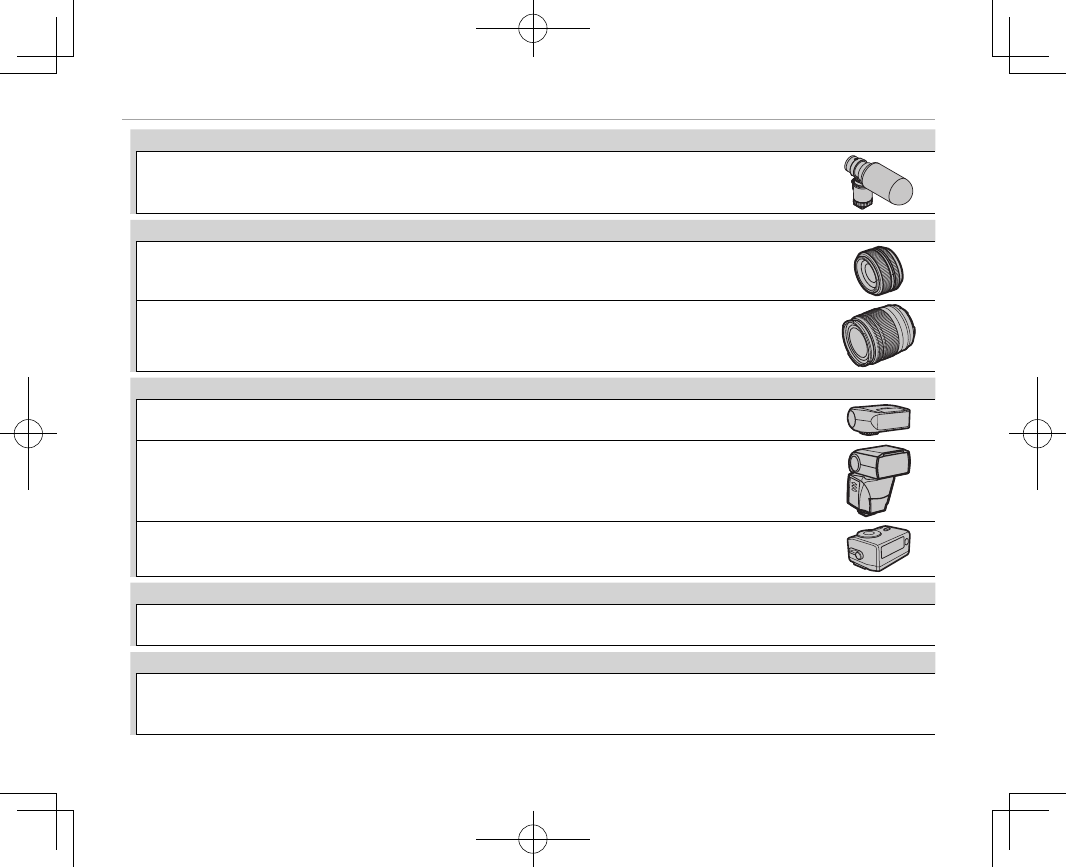
Stereo microphones
Stereo microphones
MIC-ST1: An external microphone for movie recording.
FUJINON lenses
FUJINON lenses
XF-series lenses: Interchangeable lenses for use exclusively with the FUJIFILM X-mount.
XC-series lenses: Interchangeable lenses for use exclusively with the FUJIFILM X-mount.
Shoe-mounted ash units
Shoe-mounted ash units
EF-20: This clip-on ash unit (powered by two AA batteries) has a Guide Number of 20/65 (ISO 100, m/ft.) and
supports TTL ash control. The ash head can be rotated upwards 90° for bounce lighting.
EF-42: This clip-on ash unit (powered by four AA batteries) has a Guide Number of 42/137 (ISO 100, m/ft.)
and supports TTL ash control and auto power zoom in the range 24–105 mm (35 mm format equivalent).
The ash head can be rotated 90° up, 180° left, or 120° right for bounce lighting.
EF-X20: This clip-on ash unit has a Guide Number of 20/65 (ISO 100, m/ft.).
Grips
Grips
MHG-XPRO2: Features an improved grip. Batteries and memory cards can be removed with the grip in place, and the grip is
equipped with a rail for quick-shoe camera mounts. The tripod mount can be aligned with the lens optical axis.
Leather cases
Leather cases
BLC-XPRO2: This case combines practicality with the luxury of leather and comes with a cloth that can be used to wrap the
camera before putting it in the case and on other occasions. Pictures can be taken and batteries inserted or removed with the
camera still in its case.
133
Technical Notes
Optional Accessories
Grip belt
Grip belt
GB-001: GB-001 enhances the camera’s hold, allowing users to carry the camera rmly with just one hand.
Macro extension tubes
Macro extension tubes
MCEX-11/16: Attach between the camera and the lens to shoot at high reproduction ratios.
Protective lters
Protective lters
PRF-39/PRF-43/PRF-52/PRF-58/PRF-62/PRF-67/PRF-72/PRF-77: Use to protect the lens.
Teleconverters
Teleconverters
XF1.4X TC WR: Increases the focal length of the lens by about 1.4×.
Mount adapters
Mount adapters
FUJIFILM M MOUNT ADAPTER: Allows the camera to be used with a wide selection of M-mount lenses.
Front lens caps
Front lens caps
FLCP-39/FLCP-43/FLCP-52/FLCP-58/FLCP-62/FLCP-67/FLCP-72/FLCP-72 II/FLCP-77: Protect the front lens element when the lens is not in use.
Rear lens caps
Rear lens caps
RLCP-001: Protect the rear lens element when the lens is not attached to the camera.
Body caps
Body caps
BCP-001: Cover the camera lens mount when no lens is attached.
instax SHARE printers
instax SHARE printers
SP-1: Connect via wireless LAN to print pictures on instax lm.
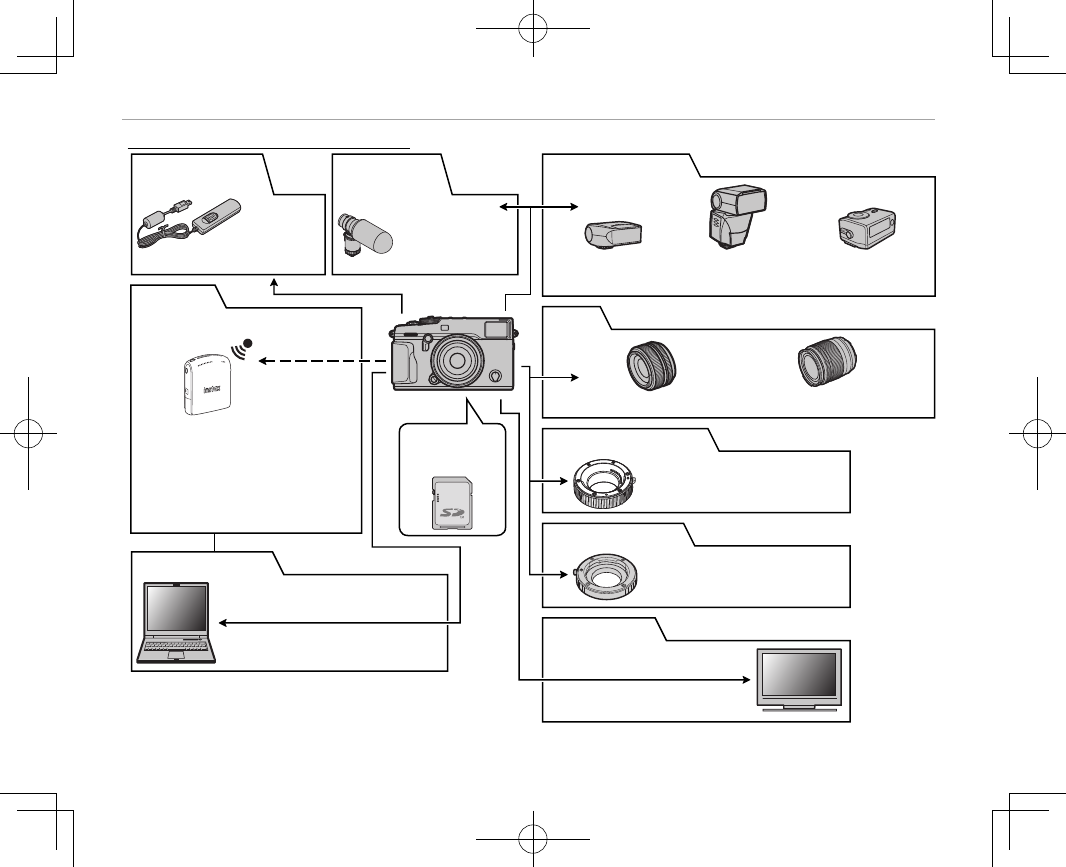
134
Optional Accessories
Connecting the Camera to Other Devices
Connecting the Camera to Other Devices
X-Pro2
■
■
Macro Extension Tube
Macro Extension Tube
MCEX-11/16 *
■
■
Computer Related
Computer Related
Computer †
■
■
Printing
Printing
* Available separately from FUJIFILM.
† Available separately from third-party suppliers. USB cables
must be no more than 1.5 m (4.9 ft.) long, HDMI cables no
more than 1.5 m (4.9 ft.) long.
USB cable †
SD/SDHC/SDXC
memory card †
■
■
Lens
Lens
XF-series lenses *XC-series lenses *
■
■
Flash Photography
Flash Photography
EF-20 shoe mount
ash *
EF-42 shoe mount
ash *
EF-X20 shoe
mount ash *
■
■
Remote Shutter
Remote Shutter
Release
Release
■
■
External
External
Microphones
Microphones
MIC-ST1 stereo
microphone *
RR-90 remote release *
■
■
M Mount Adapter
M Mount Adapter
FUJIFILM M MOUNT ADAPTER *
HDTV †
■
■
Audio/Visual
Audio/Visual
HDMI cable †
SP-1 instax SHARE printer *
Wireless LAN

135
Technical Notes
Caring for the Camera
Caring for the Camera
To ensure continued enjoyment of the product, observe the following precautions.
Use and Storage Precautions
Use and Storage Precautions
If the camera will not be used for an extended pe-
riod, remove the battery and memory card. Do
not store or use the camera in locations that are:
• exposed to rain, steam, or smoke
• very humid or extremely dusty
• exposed to direct sunlight or very high tem-
peratures, such as in a closed vehicle on a very
hot day
• extremely cold
• subject to strong vibration
• exposed to strong magnetic elds, such as near
a broadcasting antenna, power line, radar emit-
ter, motor, transformer, or magnet
• in contact with volatile chemicals such as pes-
ticides
• in contact with rubber or vinyl products
■Water and Sand
Exposure to water and sand can also damage the
camera and its internal circuitry and mechanisms.
When using the camera at the beach or seaside,
avoid exposing the camera to water or sand. Do
not place the camera on a wet surface.
■Condensation
Sudden increases in temperature, such as occur
when entering a heated building on a cold day,
can cause condensation inside the camera. If this
occurs, turn the camera o and wait an hour be-
fore turning it on again. If condensation forms on
the memory card, remove the card and wait for
the condensation to dissipate.
Traveling
Traveling
Keep the camera in your carry-on baggage.
Checked baggage may su er violent shocks that
could damage the camera.
136
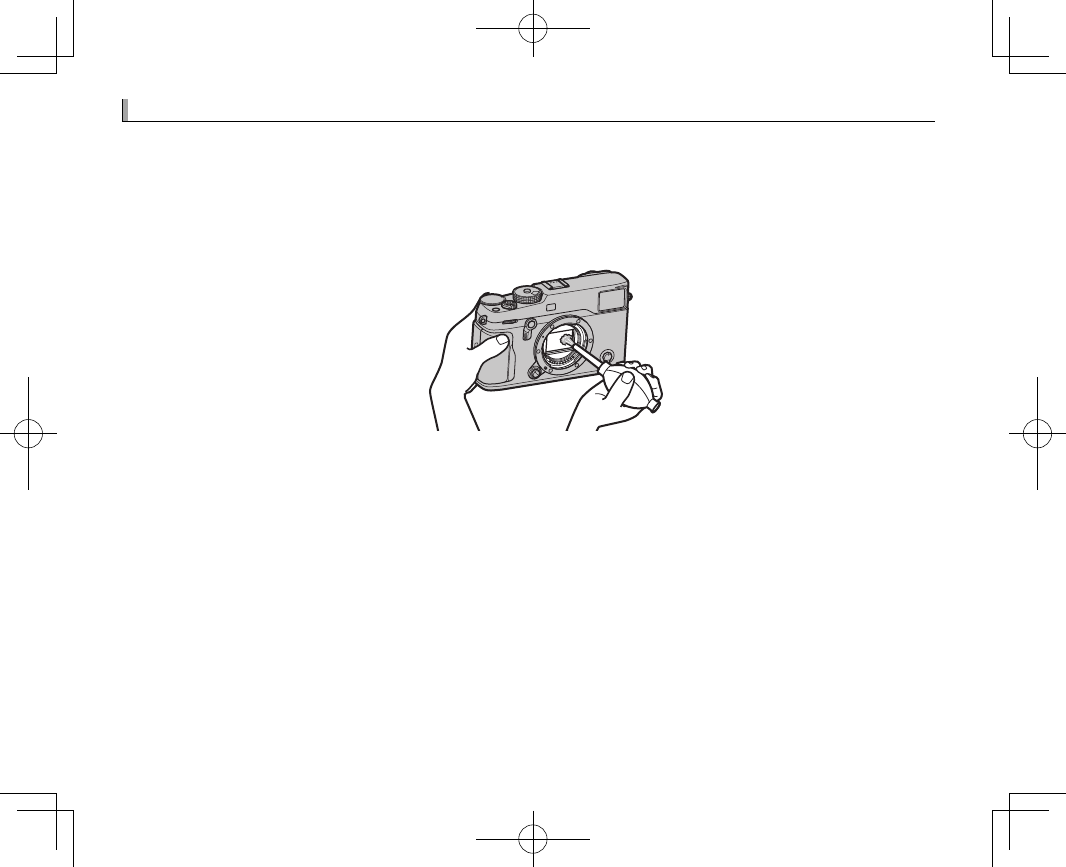
Cleaning the Image Sensor
Cleaning the Image Sensor
Multiple photographs marred by spots or blotches in identical locations may indicate the presence of
dust on the camera image sensor. Clean the sensor using D USER SETTING> SENSOR CLEANING
(P 108); if the problem persists, you can clean the sensor manually as described below. Note that there
will be a charge to repair or replace the image sensor if it is damaged during cleaning.
1
Use a blower (not a brush) to remove dust from the sensor.
QDo not use a brush or blower brush. Failure to observe this precaution could damage the sensor.
2
Check whether the dust has been successfully removed.
RRepeat Steps 1 and 2 as necessary.
3
Replace the body cap or lens.
137
Troubleshooting
Troubleshooting
Troubleshooting
Problems and Solutions
Problems and Solutions
■
■
Power and Battery
Power and Battery
Problem
Problem
Solution
Solution
The camera does not
The camera does not
turn on.
turn on.
•
•
The battery is exhausted
The battery is exhausted
: Charge the battery (
: Charge the battery (
P
P
19) or insert a fully-charged spare battery (
19) or insert a fully-charged spare battery (
P
P
20).
20).
•
•
The battery is inserted incorrectly
The battery is inserted incorrectly
: Reinsert in the correct orientation (
: Reinsert in the correct orientation (
P
P
20).
20).
•
•
The battery-chamber cover is not latched
The battery-chamber cover is not latched
: Latch the battery-chamber cover (
: Latch the battery-chamber cover (
P
P
20).
20).
The monitor does not
The monitor does not
turn on.
turn on.
The monitor may not turn on if the camera is turned off and then on again very quickly. Press the shutter button
The monitor may not turn on if the camera is turned off and then on again very quickly. Press the shutter button
halfway to activate the monitor.
halfway to activate the monitor.
The battery runs down
The battery runs down
quickly.
quickly.
•
•
The battery is cold
The battery is cold
: Warm the battery by placing it in a pocket or other warm place and reinsert it in the camera
: Warm the battery by placing it in a pocket or other warm place and reinsert it in the camera
immediately before taking a picture.
immediately before taking a picture.
•
•
There is dirt on the battery terminals
There is dirt on the battery terminals
: Clean the terminals with a soft, dry cloth.
: Clean the terminals with a soft, dry cloth.
•
•
ON
ON
is selected for
is selected for G AF/MF SETTING>
PRE-AF
PRE-AF
: Turn
: Turn
PRE-AF
PRE-AF
off (
off (
P
P
91).
91).
•
•
The battery has been charged many times
The battery has been charged many times
: The battery has reached the end of its charging life. Purchase a new
: The battery has reached the end of its charging life. Purchase a new
battery.
battery.
The camera turns o
The camera turns o
suddenly.
suddenly.
The battery is exhausted
The battery is exhausted
: Charge the battery (
: Charge the battery (
P
P
19) or insert a fully-charged spare battery (
19) or insert a fully-charged spare battery (
P
P
20).
20).
Charging does not start.
Charging does not start.
Reinsert the battery in the correct orientation and make sure that the charger is plugged in (
Reinsert the battery in the correct orientation and make sure that the charger is plugged in (
P
P
19).
19).
Charging is slow.
Charging is slow.
Charge the battery at room temperature (
Charge the battery at room temperature (
P
P
v).
v).
The charging lamp blinks,
The charging lamp blinks,
but the battery does not
but the battery does not
charge.
charge.
•
•
There is dirt on the battery terminals
There is dirt on the battery terminals
: Clean the terminals with a soft, dry cloth.
: Clean the terminals with a soft, dry cloth.
•
•
The battery has been charged many times
The battery has been charged many times
: The battery has reached the end of its charging life. Purchase a new
: The battery has reached the end of its charging life. Purchase a new
battery. If the battery still fails to charge, contact your FUJIFILM dealer.
battery. If the battery still fails to charge, contact your FUJIFILM dealer.
■
■
Menus and Displays
Menus and Displays
Problem
Problem
Solution
Solution
Display is not in English.
Display is not in English.
Select
Select
ENGLISH
ENGLISH
for
for
D
D
USER SETTING
USER SETTING
>
>
a
a
(
(
P
P
27, 108).
27, 108).
138
Problems and Solutions
■
■
Shooting
Shooting
Problem
Problem
Solution
Solution
No picture is taken when
No picture is taken when
the shutter button is
the shutter button is
pressed.
pressed.
•
•
The memory card is full
The memory card is full
: Insert a new memory card or delete pictures (
: Insert a new memory card or delete pictures (
P
P
22, 43).
22, 43).
•
•
The memory card is not formatted
The memory card is not formatted
: Format the memory card (
: Format the memory card (
P
P
107).
107).
•
•
There is dirt on the memory card contacts
There is dirt on the memory card contacts
: Clean the contacts with a soft, dry cloth.
: Clean the contacts with a soft, dry cloth.
•
•
The memory card is damaged
The memory card is damaged
: Insert a new memory card (
: Insert a new memory card (
P
P
22).
22).
•
•
The battery is exhausted
The battery is exhausted
: Charge the battery (
: Charge the battery (
P
P
19) or insert a fully-charged spare battery (
19) or insert a fully-charged spare battery (
P
P
20).
20).
•
•
The camera has turned o automatically
The camera has turned o automatically
: Turn the camera on (
: Turn the camera on (
P
P
25).
25).
Mottling (“noise”) appears
Mottling (“noise”) appears
in the monitor or view-
in the monitor or view-
nder when the shutter
nder when the shutter
button is pressed halfway.
button is pressed halfway.
Gain is increased to aid composition when the subject is poorly lit and aperture is stopped down, which may result
Gain is increased to aid composition when the subject is poorly lit and aperture is stopped down, which may result
in noticeable mottling when images are previewed in the displays. Images taken with the camera are unaff ected.
in noticeable mottling when images are previewed in the displays. Images taken with the camera are unaff ected.
The camera does not focus.
The camera does not focus.
The subject is not suited to autofocus
The subject is not suited to autofocus
: Use focus lock (
: Use focus lock (
P
P
76) or manual focus (
76) or manual focus (
P
P
63).
63).
Intelligent Face Detection
Intelligent Face Detection
is not available.
is not available.
Intelligent Face Detection is not available in the current shooting mode
Intelligent Face Detection is not available in the current shooting mode
: Choose a diff erent shooting mode (
: Choose a diff erent shooting mode (
P
P
153).
153).
No face is detected.
No face is detected.
•
•
The subject’s face is obscured by sunglasses, a hat, long hair, or other objects
The subject’s face is obscured by sunglasses, a hat, long hair, or other objects
: Remove the obstructions.
: Remove the obstructions.
•
•
The subject’s face occupies only a small area of the frame
The subject’s face occupies only a small area of the frame
: Change the composition so that the subject’s face oc-
: Change the composition so that the subject’s face oc-
cupies a larger area of the frame (
cupies a larger area of the frame (
P
P
92).
92).
•
•
The subject’s head is tilted or horizontal
The subject’s head is tilted or horizontal
: Ask the subject to hold their head straight.
: Ask the subject to hold their head straight.
•
•
The camera is tilted
The camera is tilted
: Keep the camera level.
: Keep the camera level.
•
•
The subject’s face is poorly lit
The subject’s face is poorly lit
: Shoot in bright light.
: Shoot in bright light.
Wrong subject is selected.
Wrong subject is selected.
The selected subject is closer to the center of the frame than the main subject. Recompose the picture or turn face
The selected subject is closer to the center of the frame than the main subject. Recompose the picture or turn face
detection off and frame the picture using focus lock (
detection off and frame the picture using focus lock (
P
P
76).
76).