Fuji Film 02000002 Wireless LAN Module User Manual 00 LX11 OM 200 EN 01 indb
Fuji Film Corporation Wireless LAN Module 00 LX11 OM 200 EN 01 indb
Contents
User manual 4
61
More on Photography and Playback
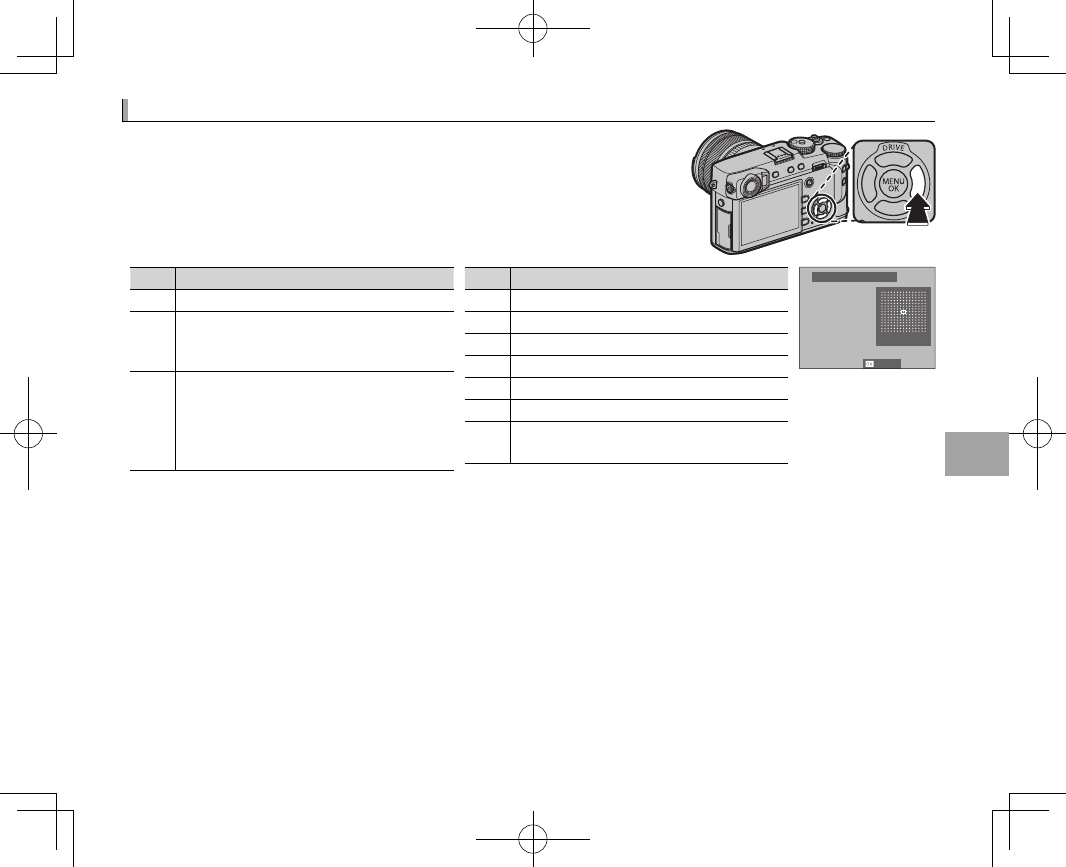
White Balance
White Balance
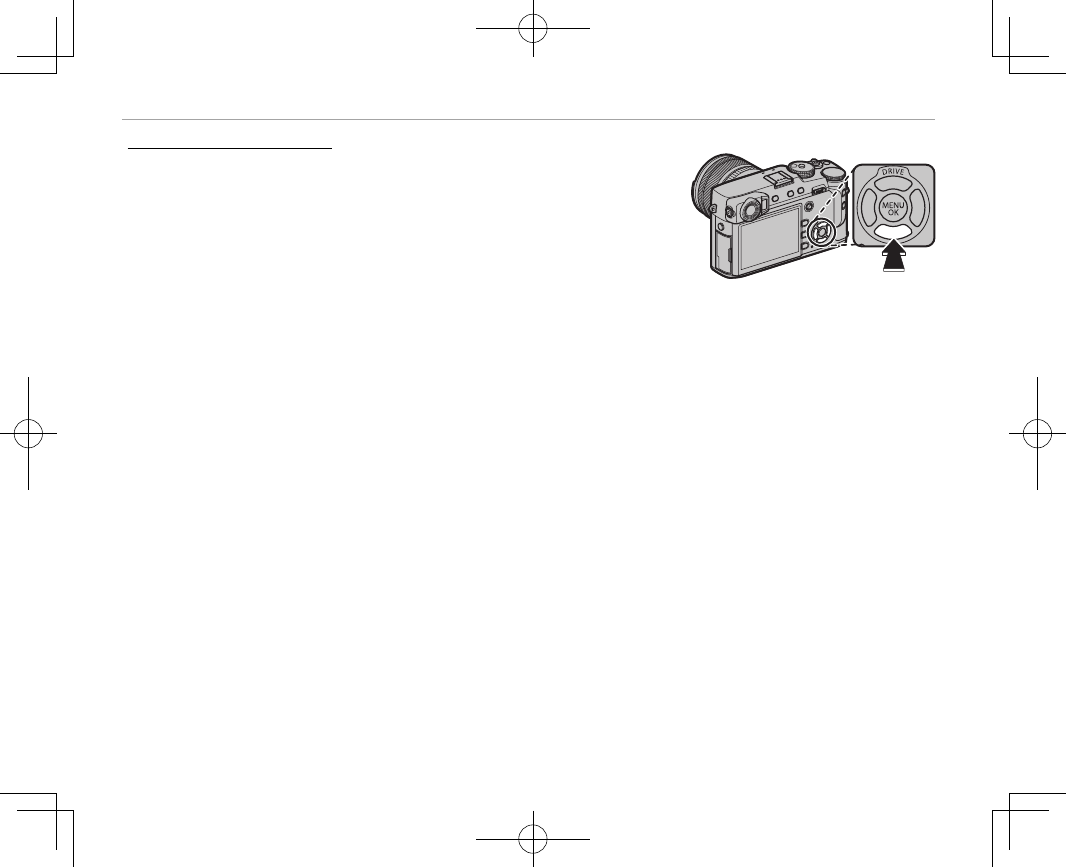
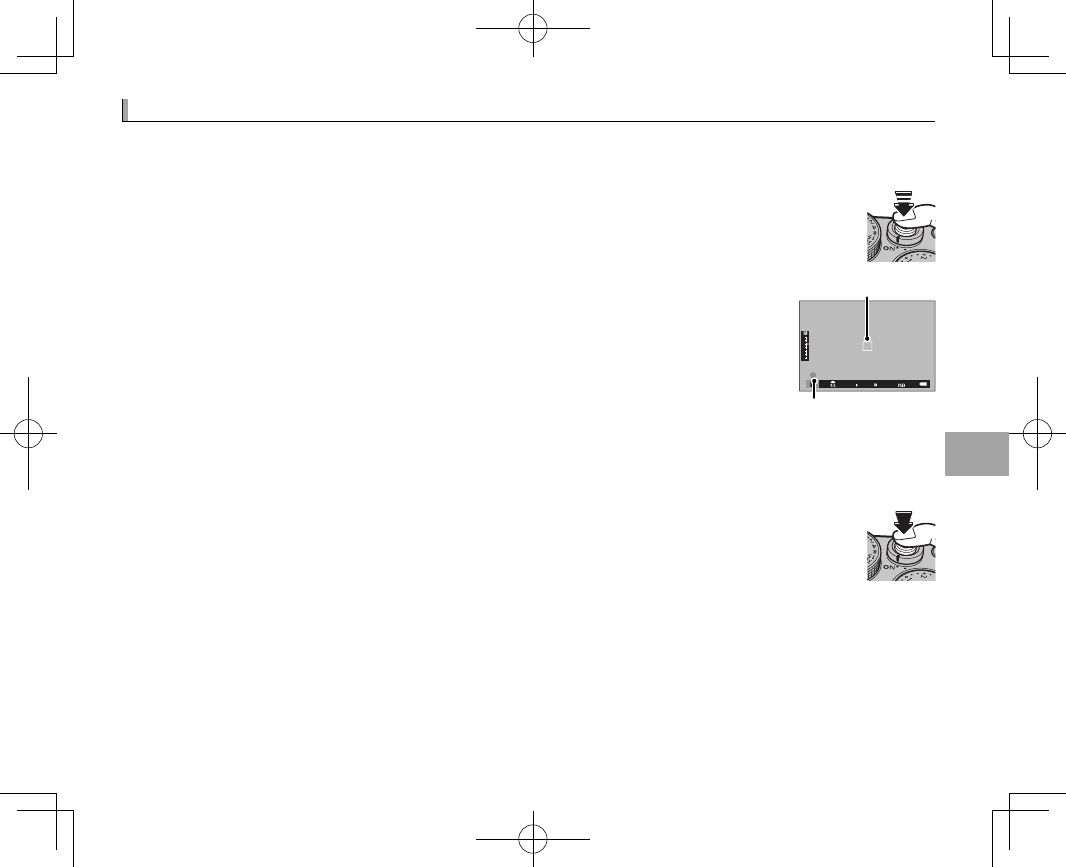
For natural colors, choose a white balance option that matches the
light source. Press the function (Fn5) button to display the options
shown below, then press the selector up or down to highlight an op-
tion and press MENU/OK to select.
Option
Option
Description
Description
AUTO
AUTO White balance adjusted automatically.
k
k
l
l
m
m
Measure a value for white balance (P 62).
k
k
Selecting this option displays a list of color
temperatures (P 62); highlight a tempera-
ture and press MENU/OK to select the high-
lighted option and display the ne-tuning
dialog.
Option
Option
Description
Description
i
iFor subjects in direct sunlight.
j
jFor subjects in the shade.
k
kUse under “daylight” uorescent lights.
l
l
Use under “warm white” uorescent lights.
m
mUse under “cool white” uorescent lights.
n
nUse under incandescent lighting.
g
gReduces the blue cast typically associated
with underwater lighting.
R:0 B:0
WB SHIFT AUTO
SET
RWhite balance is adjusted for ash lighting only in AUTO and g modes. Turn the ash o using other white
balance options (P 78).
RResults vary with shooting conditions. Play pictures back after shooting to check colors.
RWhite balance options can also be accessed using H IMAGE QUALITY SETTING> WHITE BALANCE (P 89).
62
White Balance
h
h
: Custom White Balance
: Custom White Balance
Choose h to adjust white balance for unusual lighting conditions. White balance measurement options will
be displayed; frame a white object so that it lls the display and press the shutter button all the way down to
measure white balance (to select the most recent custom value and exit without measuring white balance,
press DISP/BACK, or press MENU/OK to select the most recent value and display the ne-tuning dialog).
• If “COMPLETED!” is displayed, press MENU/OK to set white balance to the measured value.
• If “UNDER” is displayed, raise exposure compensation (P 57) and try again.
• If “OVER” is displayed, lower exposure compensation (P 57) and try again.
k
k
: Color Temperature
: Color Temperature
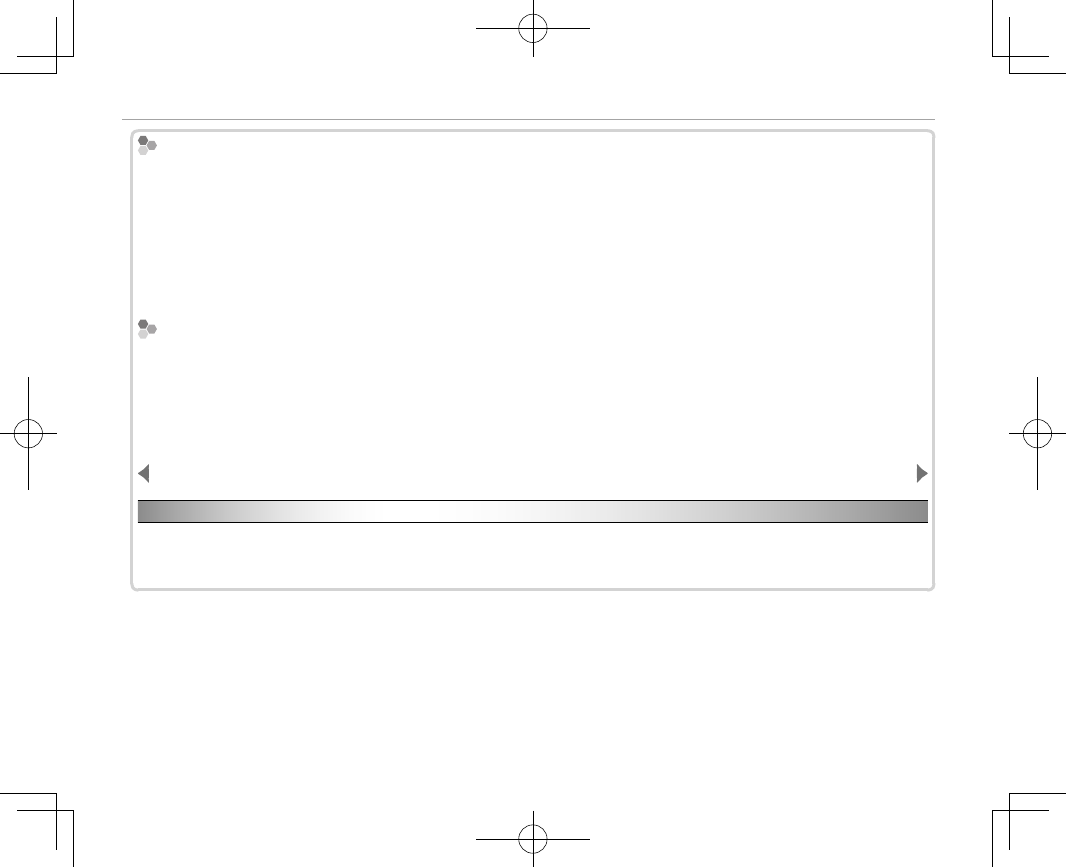
Color temperature is an objective measure of the color of a light source, expressed in Kelvin (K). Light sources
with a color temperature close to that of direct sunlight appear white; light sources with a lower color tempera-
ture have a yellow or red cast, while those with a higher color temperature are tinged with blue. You can match
color temperature to the light source as shown in the following table, or choose options that di er sharply from
the color of the light source to make pictures “warmer” or “colder.”
Choose for redder light sources
or “colder” pictures
Choose for bluer light sources
or “warmer” pictures
2,000 K
Candlelight
5,000 K
Direct sunlight
15,000 K
Blue sky
Sunset/sunrise Shade
63
More on Photography and Playback
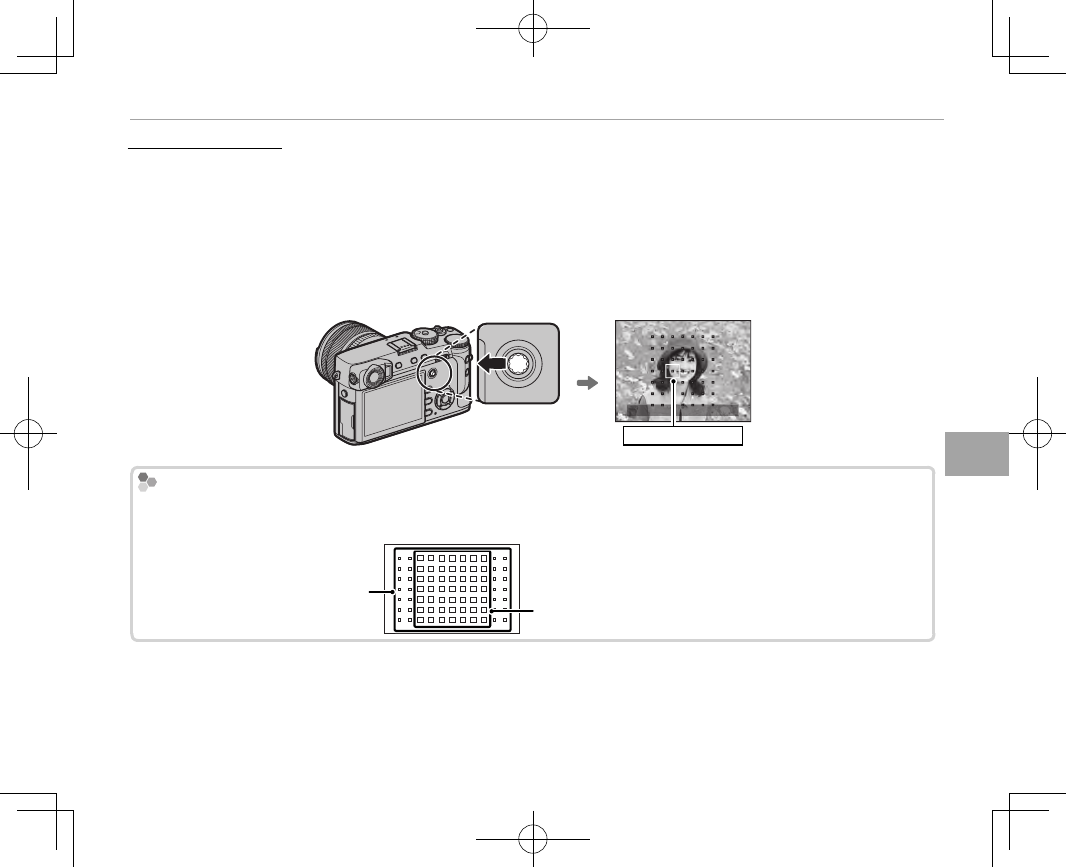
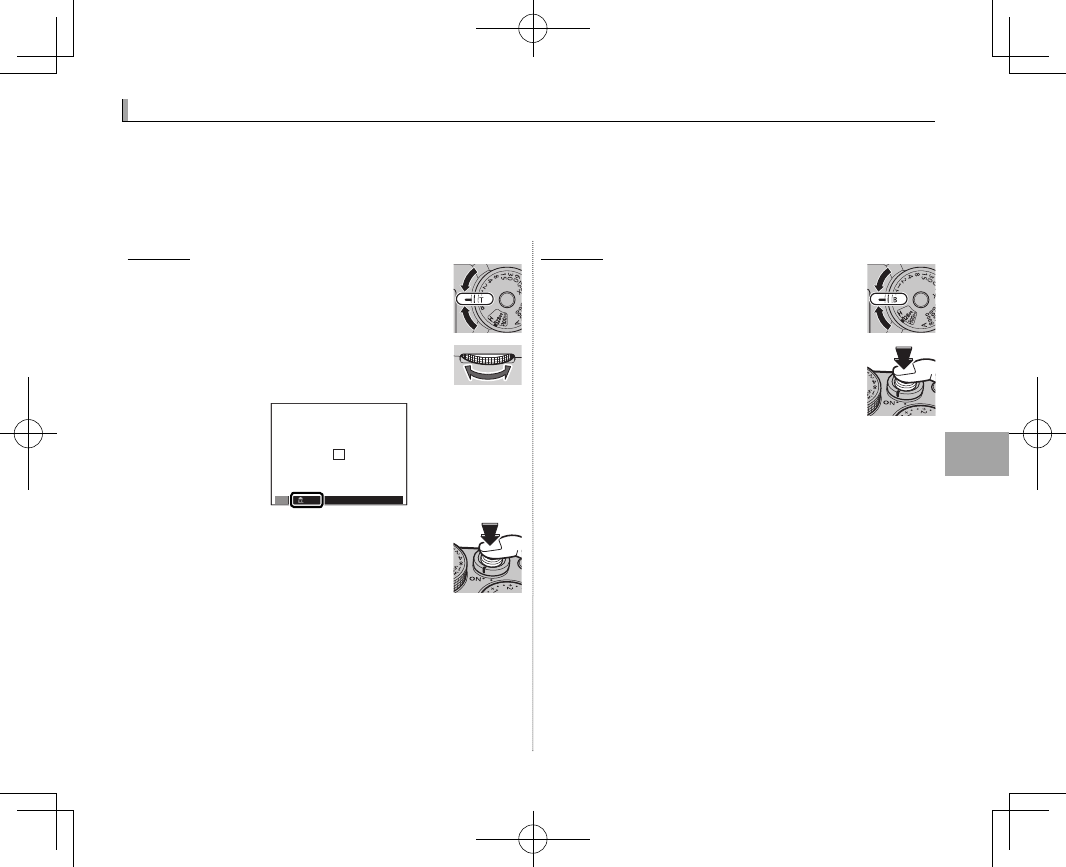
Focus Mode
Focus Mode
Use the focus mode selector to choose how the camera focuses (note
that regardless of the option selected, manual focus will be used
when the lens is in manual focus mode).
• S (single AF): Focus locks while the shutter button is pressed halfway.
Choose for stationary subjects.
• C (continuous AF): Focus is continually adjusted to re ect changes in the
distance to the subject while the shutter button is pressed halfway. Use for subjects that are in mo-
tion. Eye-detection AF is not available.
• M (manual): Focus manually using the lens focus ring. Rotate the ring left to reduce the focus distance,
right to increase. The manual focus indicator indicates how closely the focus distance matches the
distance to the subject in the focus brackets (the white line indicates the focus distance, the blue
bar the depth of eld, or in other words the distance in front of and behind the focus point that ap-
pears to be in focus); you can also check focus visually in the view nder or LCD monitor. Choose for
manual control of focus or in situations in which the camera is unable to focus using autofocus (P 77).
18
XF
ZOOM
A
18-55
23
35
55
Reduce focus
distance
Increase focus
distance
㹋
Manual focus
indicator
Manual focus
mode icon
Focus distance
(white line)
Depth of eld
(blue bar)
RUse D BUTTON/DIAL SETTING> FOCUS RING (P 112) to reverse the direction of rotation of the focus ring.
R To use autofocus to focus on the subject in the selected focus area (P 67), press the AF-L button (the size of
the focus area can be chosen with the rear command dial). In manual focus mode, you can use this feature
to quickly focus on a chosen subject using either single or continuous AF according to the option chosen for
G AF/MF SETTING> INSTANT AF SETTING (P 93).
64
Focus Mode
R The camera can show focus distance in meters or feet. Use D SCREEN SETTING> FOCUS SCALE UNITS ( P 111)
to choose the units used.
RIf ON is selected for G AF/MF SETTING> PRE-AF (P 91), focus will be adjusted continuously in modes S and C
even when the shutter button is not pressed.
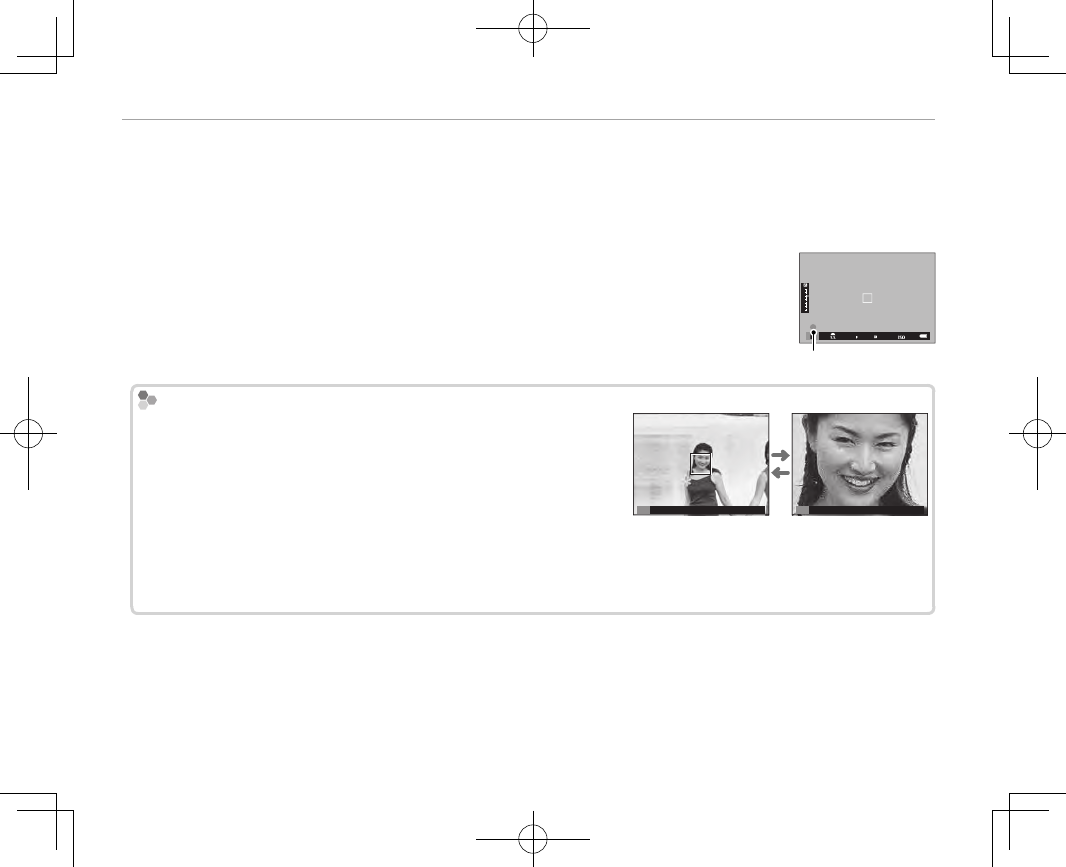
■ The Focus Indicator
The focus indicator turns green when the subject is in focus and blinks white when
the camera is unable to focus. Brackets (“( )”) indicate that the camera is focusing
and are displayed continuously in mode C. j is displayed in manual focus mode.
Focus indicator
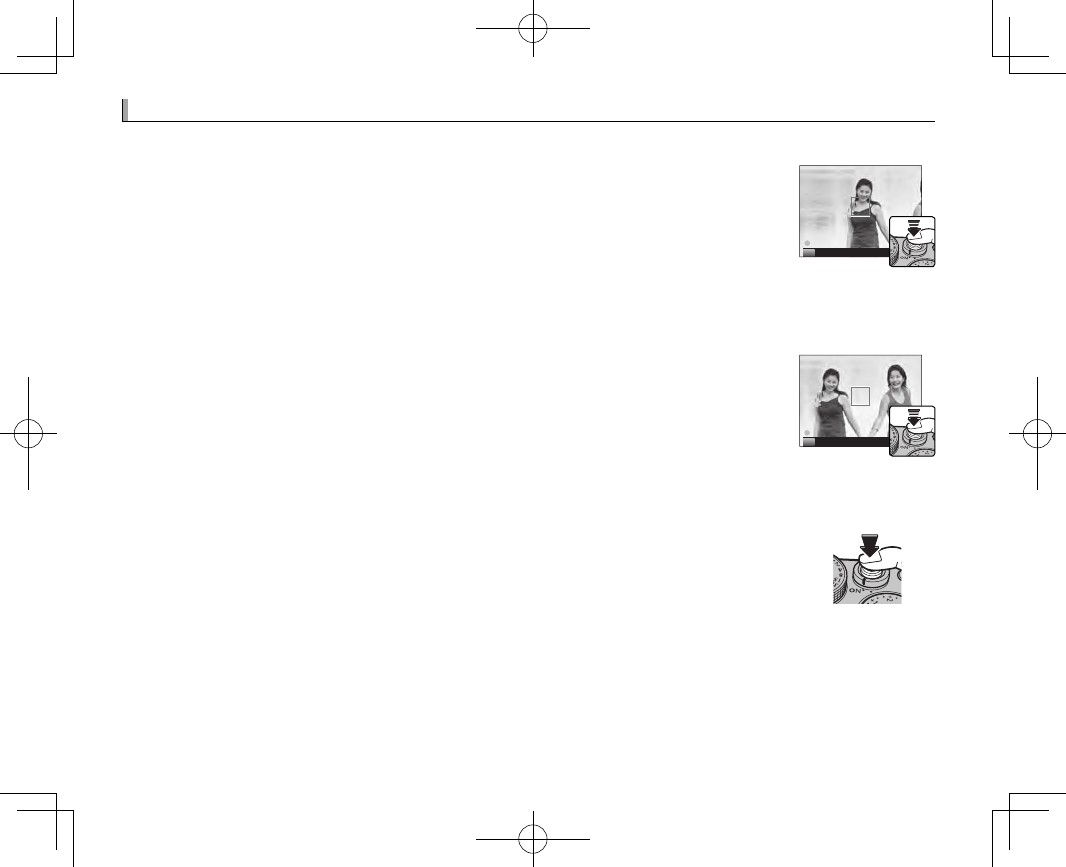
Checking Focus
Checking Focus
To zoom in on the current focus area (P 67) for precise focus, press
the center of the rear command dial. Press the center of the rear
command dial again to cancel zoom. In manual focus mode, zoom
can be adjusted by rotating the rear command dial when STAN-
DARD or FOCUS PEAK HIGHLIGHT is selected for G AF/MF SET-
TING> MF ASSIST (P 93), while if ON is selected for G AF/MF SET-
TING> FOCUS CHECK (P 93), the camera will automatically zoom in on the selected focus area when the focus
ring is rotated. Focus zoom is not available in focus mode C or when G AF/MF SETTING> PRE-AF (P 91) is on
or an option other than r SINGLE POINT is selected for AF MODE (P 66).
M M

65
More on Photography and Playback
Focus Mode
■ MF Assist
The G AF/MF SETTING> MF ASSIST (P 93) option can be used to check focus when pictures are
framed in the LCD monitor or electronic view nder in manual focus mode.
RThe MF ASSIST menu can be displayed by pressing and holding the center of the rear command dial.
The following options are available:
• FOCUS PEAK HIGHLIGHT: Highlights high-contrast outlines. Rotate the focus ring until
the subject is highlighted.
• DIGITAL SPLIT IMAGE: Displays a split image in the center of the frame. Frame the
subject in the split-image area and rotate the focus ring until the three parts of the
split image are correctly aligned.
66
Focus Mode
Autofocus Options (AF Mode)
Autofocus Options (AF Mode)
To choose the AF mode for focus modes S and C, press the function
button (Fn6) to display the options shown below, then press the selec-
tor up or down to highlight an option and press MENU/OK to select.
• r SINGLE POINT: The camera focuses on the subject in the se-
lected focus point (P 68). The number of focus points available can
be selected using G AF/MF SETTING> NUMBER OF THE FOCUS
POINTS (P 91). Use for pin-point focus on a selected subject.
• y ZONE: The camera focuses on the subject in the selected focus zone (P 69). Focus zones include
multiple focus points (7 × 7, 5 × 5, or 3 × 3), making it easier to focus on subjects that are in motion.
• z WIDE/TRACKING: In focus mode C, the camera tracks focus on the subject in the selected focus
point while the shutter-release button is pressed halfway (P 70). In focus mode S, the camera auto-
matically focuses on high-contrast subjects; the areas in focus are shown in the display. The camera
may be unable to focus on small objects or subjects that are moving rapidly.
RAF mode options can also be accessed using G AF/MF SETTING> AF MODE (P 91).
67
More on Photography and Playback
Focus Mode
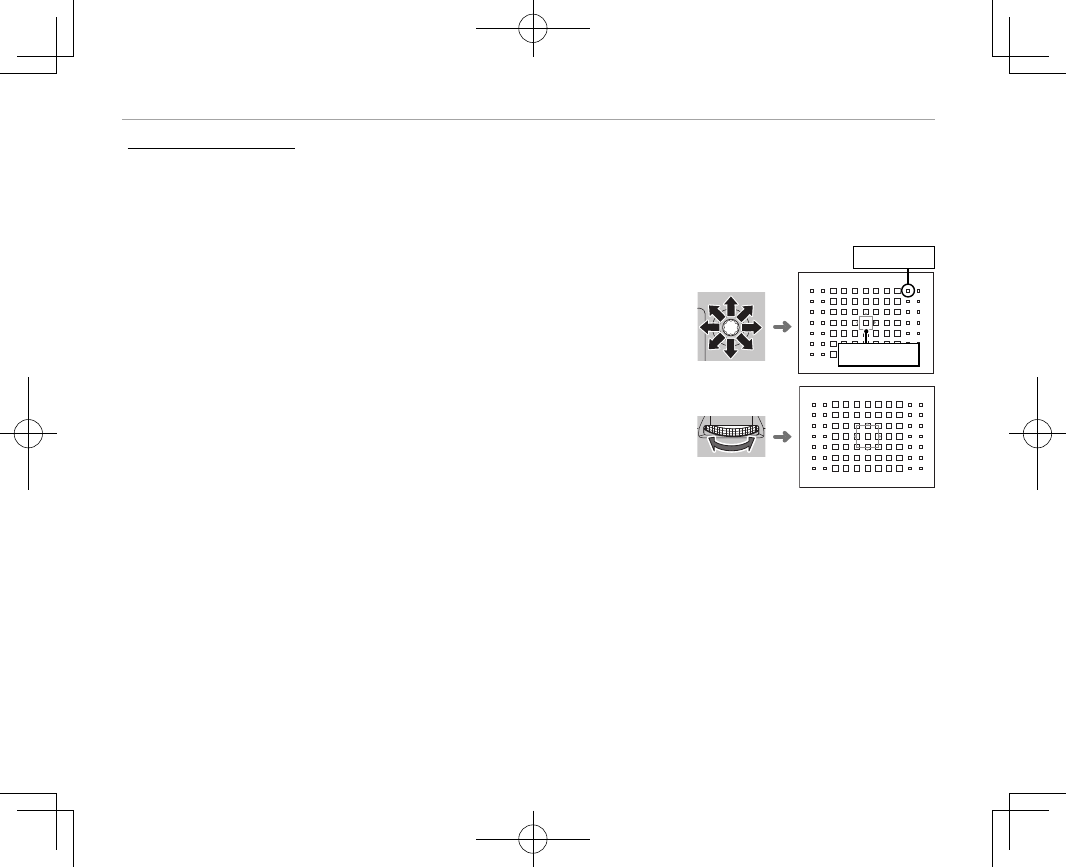
Focus-Point Selection
Focus-Point Selection
Use the focus stick (focus lever) to choose a focus point for autofocus. The procedure for selecting the
focus point varies with the option chosen for AF mode (P 66).
RFocus-area selection can also be used to choose the focus point for manual focus and focus zoom.
RThe focus-area grid is reduced to 9 × 7 at an aspect ratio of 1 : 1 (P 88).
Tilt the focus stick to position the focus frame, or press the center of the stick to return to the center
focus point.
Focus frame
Available Focus Points
Available Focus Points
Fewer focus points are available for intelligent hybrid AF, which combines phase-detection with TTL contrast-
detect AF.
Intelligent hybrid AF
(TTL contrast-detect AF + phase-detection AF)
TTL contrast-detect
68
Focus Mode
The Focus Point Display
The Focus Point Display
The focus stick (focus lever) can be used to display available focus points.
RFocus-area selection can also be accessed using G AF/MF SETTING> FOCUS AREA (P 91).
■ Single Point AF
Press the center of the focus stick to display the focus points (“+”) and
focus frame. Use the stick to position the focus frame over the desired
focus point, or press the center of the stick to return to the center point.
Focus frame
Focus point
To choose the size of the focus frame, rotate the rear command dial.
Rotate the dial left to reduce the frame by up to 50%, right to enlarge it
by up to 150%, or press the center of the dial to restore the frame to its
original size. Press MENU/OK to put your selection into e ect.

69
More on Photography and Playback
Focus Mode
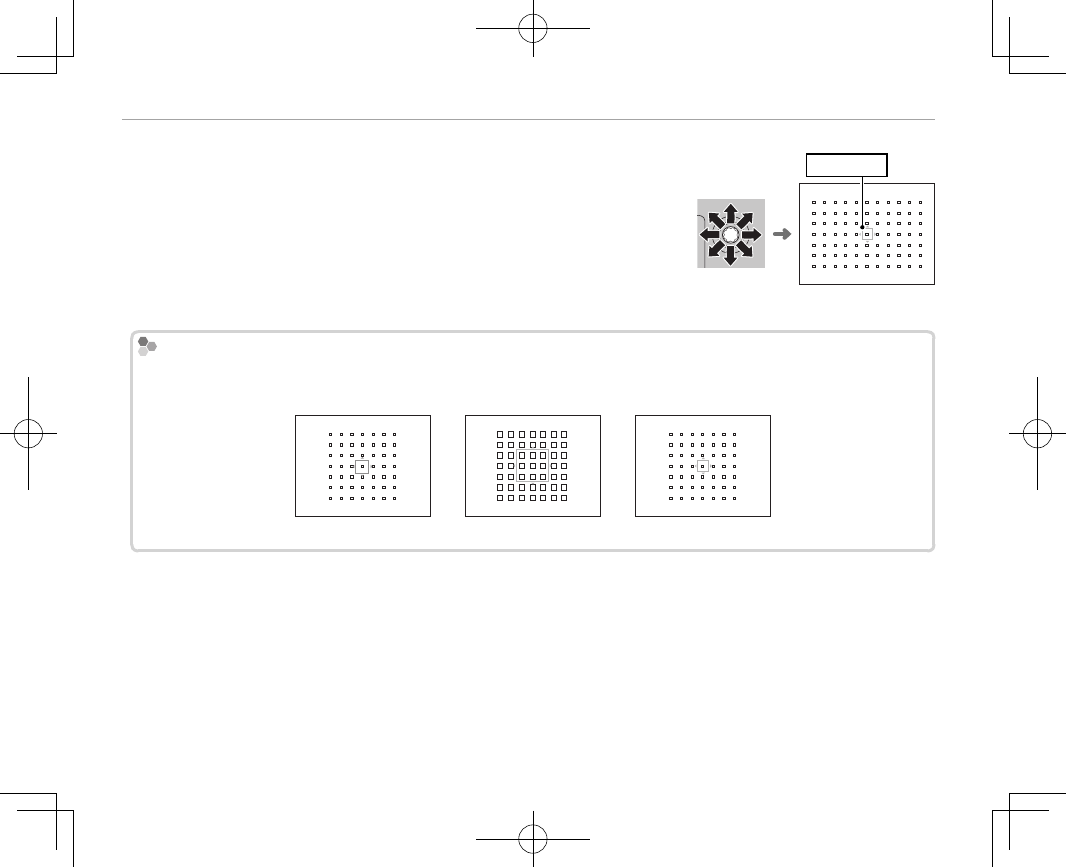
■ Zone AF
Press the center of the focus stick to display the focus zone. Use the
stick to position the zone or press the center of the stick to return the
zone to the center of the display.
Focus zone
To choose the number of focus frames in the zone, rotate the rear com-
mand dial. Rotate the dial right to cycle through zone sizes in the or-
der 3 × 3, 5 × 5, 7 × 7, 3 × 3…, left to cycle through zone sizes in reverse
order, or press the center of the dial to select a zone size of 3 × 3. Press
MENU/OK to put your selection into e ect.
70
Focus Mode
■ Tracking (Focus Mode C Only)
Press the center of the focus stick to display the focus frame. Use the
stick to position the focus frame, or press the center of the stick to re-
turn the frame to the center of the display. Press MENU/OK to put your
selection into e ect. The camera will track focus on the subject while
the shutter button is pressed halfway.
Focus frame
QManual focus-frame selection is not available when wide/tracking is selected in focus mode S.
Burst Mode Focus-Frame Selection
Burst Mode Focus-Frame Selection
When continuous high-speed (8.0 fps) is selected for drive mode, the number of focus frames available in focus
mode C drops.
Single point Zone Wide/Tracking
71
More on Photography and Playback
Long Time-Exposures (T/B)
Long Time-Exposures (T/B)
Select a shutter speed of T (time) or B (bulb) for long time-exposures.
RUse of a tripod is recommended to prevent the camera from moving during the exposure.
RTo reduce “noise” (mottling) in long time-exposures, select ON for H IMAGE QUALITY SETTING> LONG EX-
POSURE NR (P 90). Note that this may increase the time needed to record images after shooting.
Time (T)
Time (T)
1
Rotate the shutter speed dial to T.
2
Rotate the front command dial to
choose a shutter speed.
2
”
S
3
Press the shutter button all the way
down to take a picture at the select-
ed shutter speed. A count-down
timer will be displayed while the ex-
posure is in progress.
Bulb (B)
Bulb (B)
1
Rotate the shutter speed dial to B.
2
Press the shutter button all the way
down. The shutter will remain open
for up to 60 minutes while the shut-
ter button is pressed; the display
shows the time elapsed since the
exposure started.
RSelecting an aperture of A xes shutter speed at 30 s.
72
Long Time-Exposures (T/B)
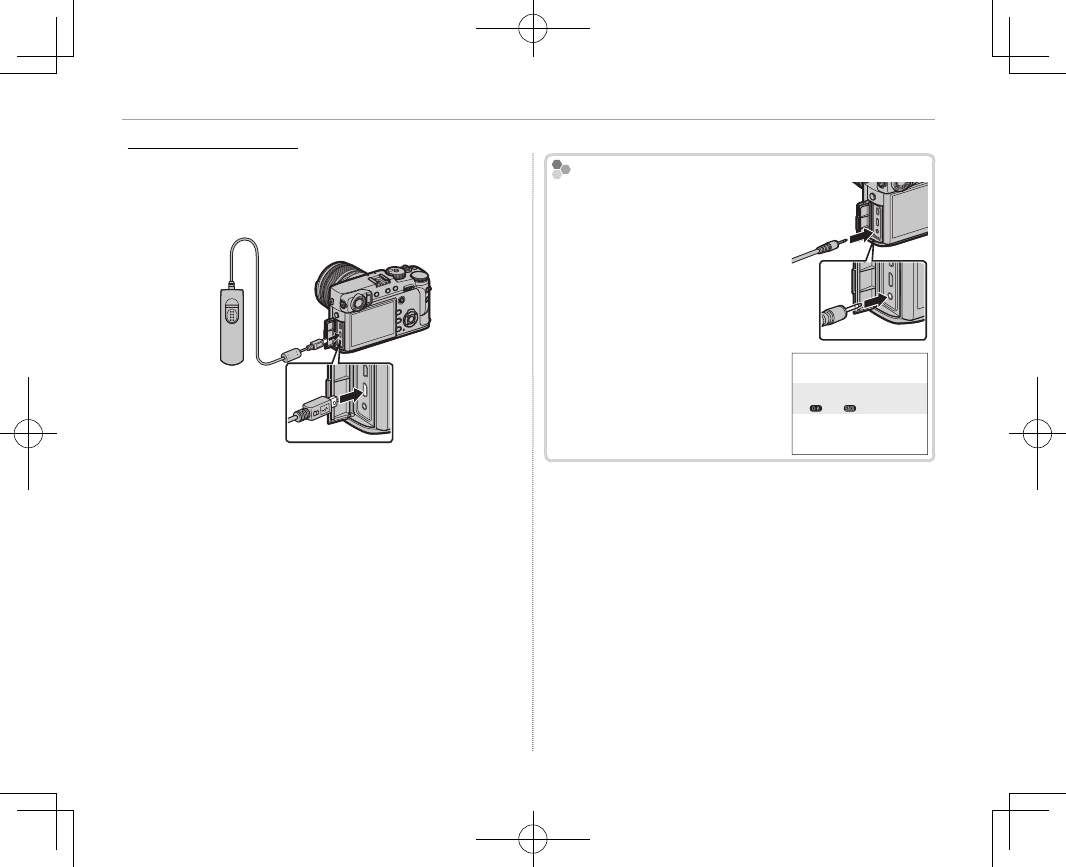
Using a Remote Release
Using a Remote Release
An optional RR-90 remote release can be used for
long time-exposures. See the manual provided
with the RR-90 for more information.
Third-Party Remote Releases
Third-Party Remote Releases
Electronic releases from third-
party suppliers can be
connect-
ed via the microphone/remote
release connector
. A con rma-
tion dialog will be displayed
when a third-party release is
connected; press MENU/OK and
select n REMOTE for MIC/RE-
MOTE RELEASE.
CHECK MIC/REMOTE RELEASE
SETTING
SKIP
SET
73
More on Photography and Playback
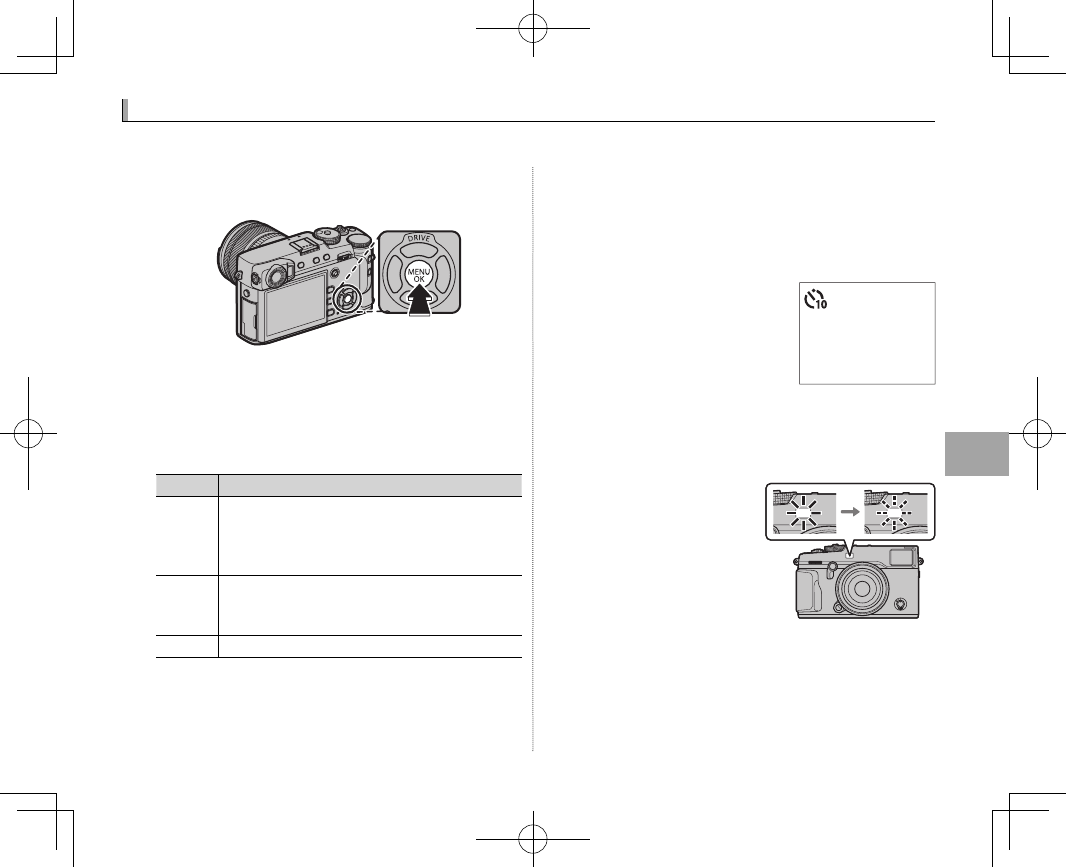
The Self-Timer
The Self-Timer
Use the timer for self-portraits or to prevent blur caused by camera shake.
1
Press MENU/OK in shooting mode to display the
shooting menu.
2
Select the A SHOOTING SETTING tab (P 87),
then highlight SELF-TIMER and press MENU/OK.
3
Press the selector up or down to highlight the
desired option and press MENU/OK to select.
Option
Option
Description
Description
R
R
2 SEC
2 SEC
The shutter is released two seconds after the
shutter button is pressed. Use to reduce blur
caused by the camera moving when the shut-
ter button is pressed.
S
S
10 SEC
10 SEC
The shutter is released ten seconds after the
shutter button is pressed. Use for photographs
in which you wish to appear yourself.
OFF
OFF Self-timer o .
4
Press the shutter button halfway to focus.
QStand behind the camera when using the shut-
ter button. Standing in front of the lens can in-
terfere with focus and exposure.
5
Press the shutter button
the rest of the way down to
start the timer. The display
in the monitor shows the
number of seconds re-
maining until the shutter is released. To stop
the timer before the picture is taken, press
DISP/BACK.
The self-timer lamp on
the front of the camera
will blink immediately
before the picture is
taken. If the two-sec-
ond timer is selected,
the self-timer lamp will blink as the timer
counts down.
RThe self-timer turns o automatically when the
camera is turned o .
9
9
74
Interval Timer Photography
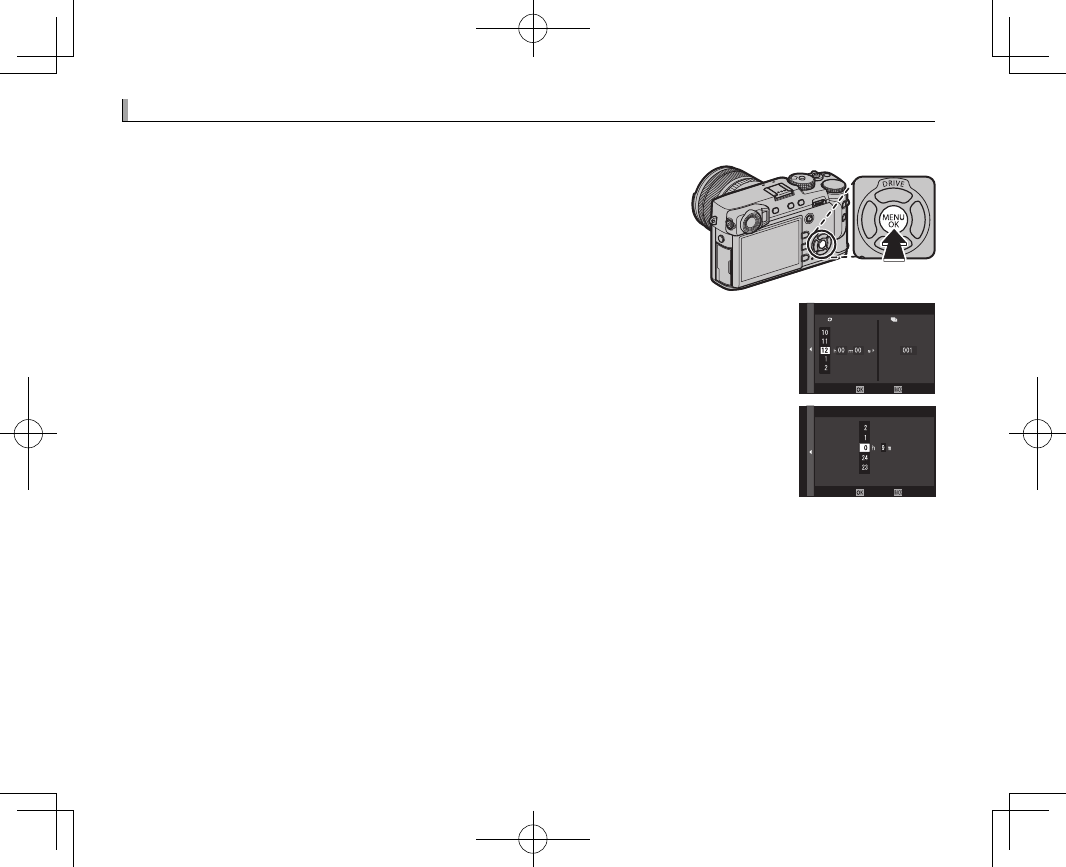
Interval Timer Photography
Follow the steps below to con gure the camera to take photos automatically at a preset interval.
1
Press MENU/OK in shooting mode to display the shooting menu.
Select the A SHOOTING SETTING tab (P 87), then highlight IN-
TERVAL TIMER SHOOTING and press MENU/OK.
2
Use the selector to choose the interval and number of shots. Press MENU/OK to
proceed.
CANCELEND
INTERVAL/NUMBER OF TIMES
INTERVAL
NUMBER OF TIMES
3
Use the selector to choose the starting time and then press MENU/OK. Shooting
will start automatically.
START WAITING TIME
ESTIMATED START TIME 11 : 00 PM
CANCELSTART
LATER
QInterval timer photography can not be used at a shutter speed of B (bulb) or with multiple exposure photog-
raphy. In burst mode, only one picture will be taken each time the shutter is released.
RUse of a tripod is recommended.
RCheck the battery level before starting. We recommend using an optional AC-9V AC power adapter and
CP-W126 DC coupler.
RThe display turns o between shots and lights a few seconds before the next shot is taken. The display can be
activated at any time by pressing the shutter button.
75
More on Photography and Playback
Focusing and Taking Pictures
Focusing and Taking Pictures
Press the shutter button halfway to focus and the rest of the way down to shoot.
1
Focus.
Frame the picture with your subject in the center of the display and press the shutter
button halfway to focus.
RIf the subject is poorly lit, the AF-assist illuminator may light (P 91).
If the camera is able to focus, it will beep twice and the focus indicator and frame in
focus will glow green. Focus and exposure will lock while the shutter button is
pressed halfway.
Focus frame
Focus indicator
If the camera is unable to focus, the focus frame will turn red, s will be displayed, and the focus indi-
cator will blink white.
2
Shoot.
Smoothly press the shutter button the rest of the way down to take the picture.
76
Focus/Exposure Lock
Focus/Exposure Lock
To compose photographs with o -center subjects:
1
Focus: Position the subject in the focus frame and press the shutter button half-
way to lock focus and exposure. Focus and exposure will remain locked while
the shutter button is pressed halfway (AF/AE lock).
P
RFocus and exposure can also be locked with the AF-L and AE-L buttons, respectively (if AE/AF LOCK is
selected for D BUTTON/DIAL SETTING> AF-LOCK MODE, pressing the AF-L button will lock both focus
and exposure; P 113).
2
Recompose: Keep the shutter button pressed halfway or keep the AF-L or AE-L but-
ton pressed.
RFocus and/or exposure will remain locked while the AF-L or AE-L button is pressed,
whether or not the shutter button is pressed halfway. If AE&AF ON/OFF SWITCH
is selected for D BUTTON/DIAL SETTING> AE/AF-LOCK MODE (P 113), focus and/
or exposure lock when the button is pressed and remain locked until the button is
pressed again.
P
3
Shoot: Press the button all the way down.
RThe roles of the AE-L and AF-L buttons can be reversed using D BUTTON/DIAL SETTING> AE-L/AF-L BUTTON
SETTING (P 113).
77
More on Photography and Playback
Focus/Exposure Lock
Autofocus
Autofocus
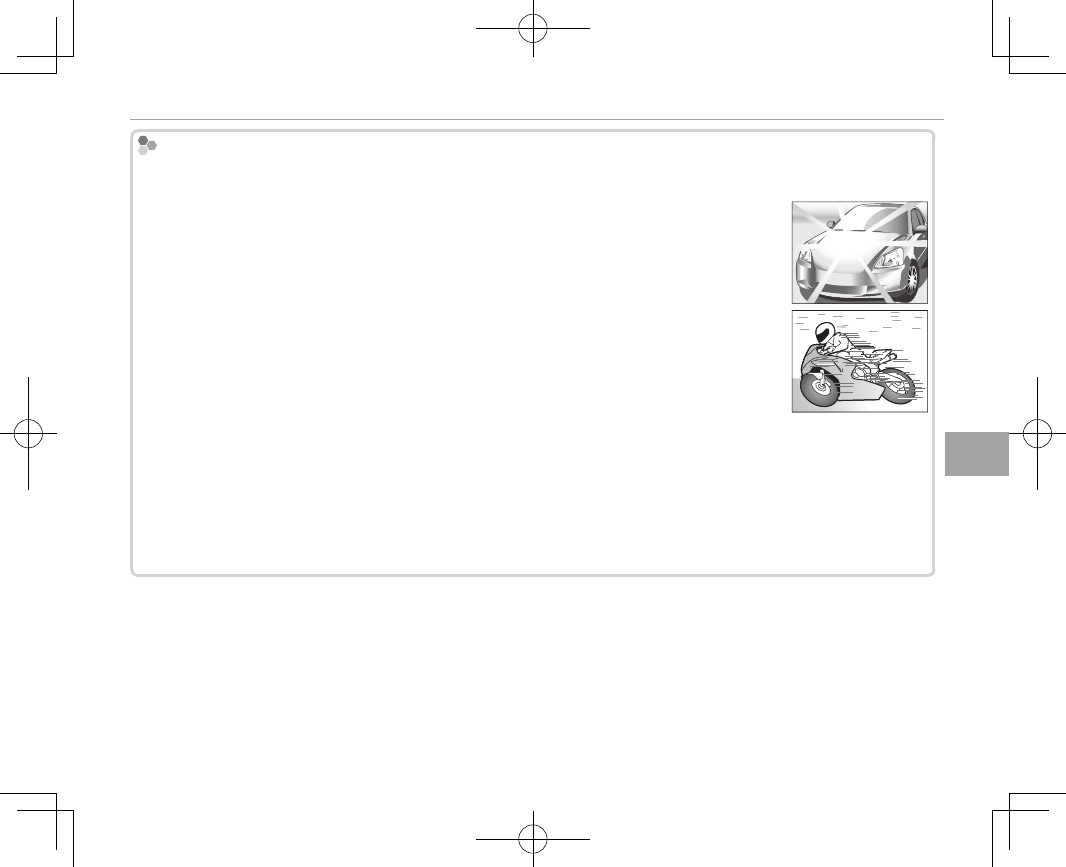
Although the camera boasts a high-precision autofocus system, it may be unable to focus on the subjects listed
below.
• Very shiny subjects such as mirrors or car bodies.
• Fast-moving subjects.
• Subjects photographed through a window or other re ective object.
• Dark subjects and subjects that absorb rather than re ect light, such as hair or fur.
• Insubstantial subjects, such as smoke or ame.
• Subjects that show little contrast with the background (for example, subjects in clothing that is the same color
as the background).
• Subjects positioned in front of or behind a high-contrast object that is also in the focus frame (for example, a
subject photographed against a backdrop of highly contrasting elements).
78
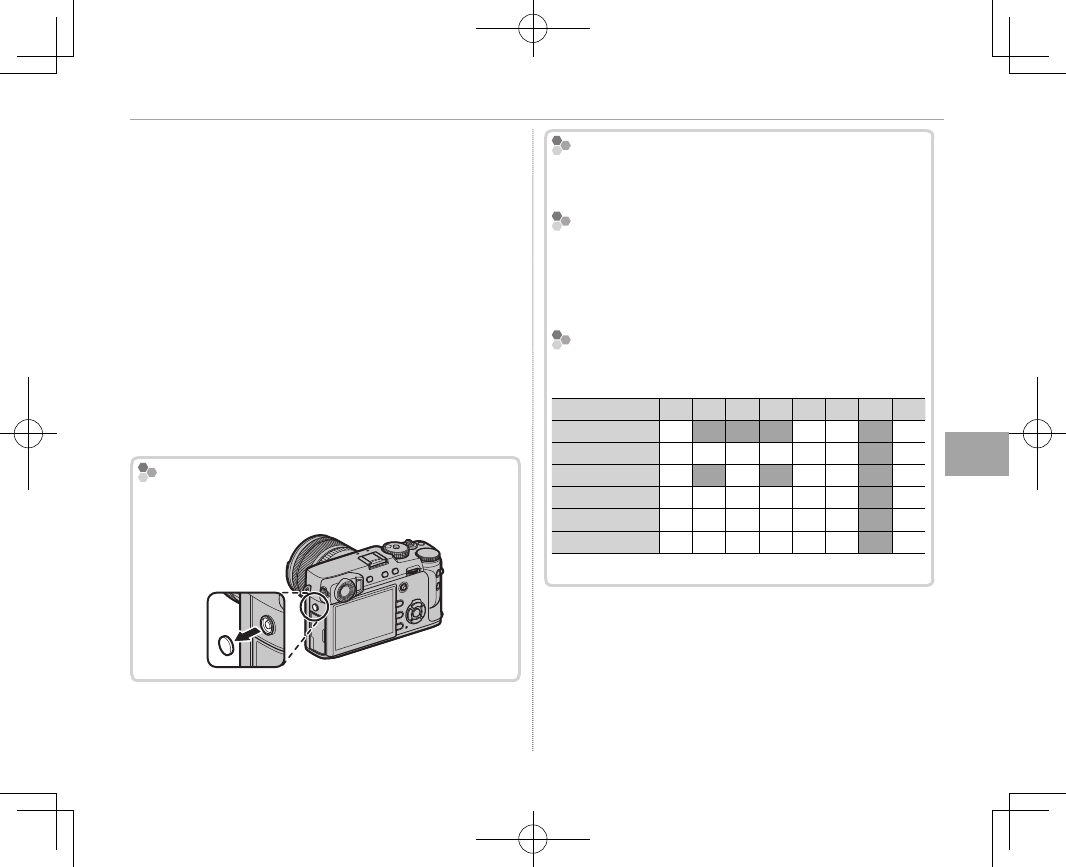
1
Remove the hot shoe cover and slide the ash
onto the hot shoe as shown, stopping when it
clicks into place.
2
Turn the ash on.
RFor more information, see the documentation
provided with the ash unit.
3
Choose a ash mode in the F FLASH SET-
TING> FLASH MODE menu (P 87).
Mode
Mode
Description
Description
A
A
(AUTO FLASH)
(AUTO FLASH)
/
/
K
K
(RED EYE REDUCTION)
(RED EYE REDUCTION)
*
*
The ash res when required. Recom-
mended in most situations.
N
N
(FORCED FLASH)
(FORCED FLASH)
/
/
L
L
(FORCED FLASH)
(FORCED FLASH)
*
*
The ash res whenever a picture is
taken. Use for backlit subjects or for
natural coloration when shooting in
bright light.
F
F
(SLOW SYNCHRO)
(SLOW SYNCHRO)
/
/
M
M
(RED EYE & SLOW)
(RED EYE & SLOW)
*
*
Capture both the main subject and
the background under low light (note
that brightly lit scenes may be overex-
posed).
l
l
(2ND CURTAIN SYNC.)
(2ND CURTAIN SYNC.)
/
/
d
d
(2ND CURTAIN SYNC.)
(2ND CURTAIN SYNC.)
*
*
The ash res immediately before the
shutter closes.
D
D
(COMMANDER)
(COMMANDER) The built-in ash can be used to control
optional remote ash units.
P
P
(SUPPRESSED FLASH)
(SUPPRESSED FLASH)
The ash does not re even when the
subject is poorly lit. A tripod is recom-
mended.
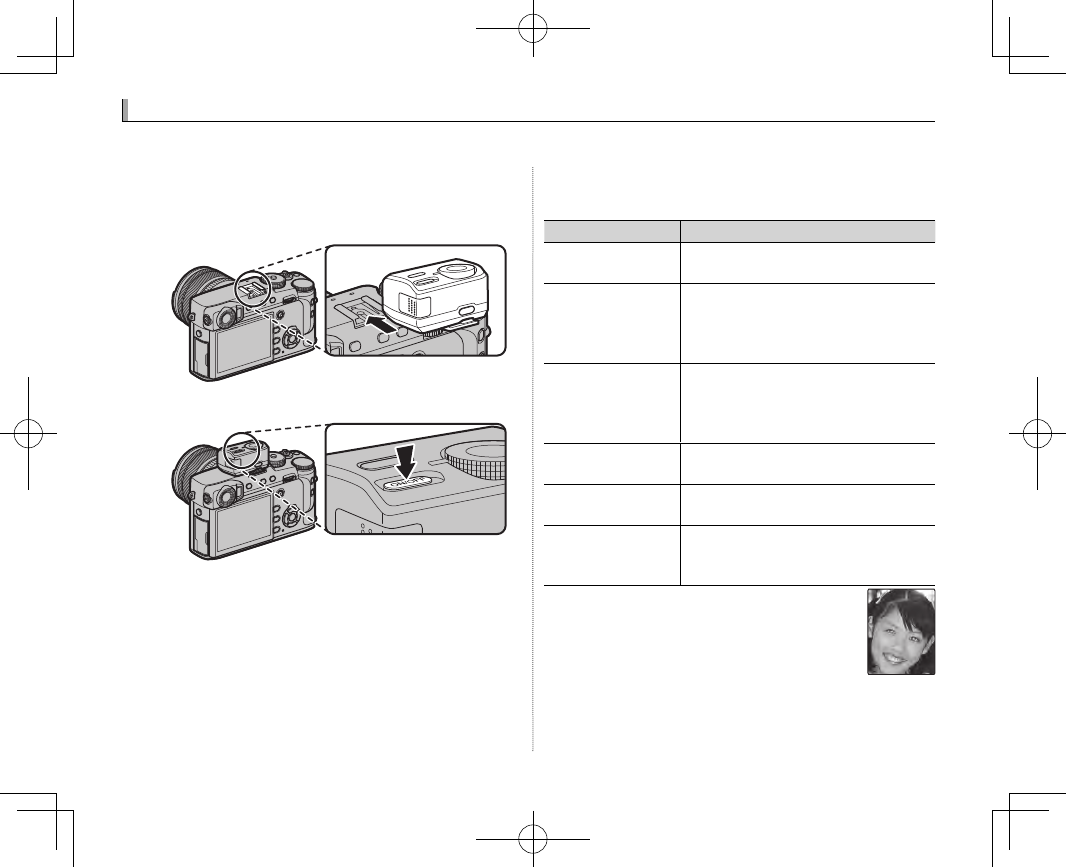
* Red-eye removal is available in these modes
when Intelligent Face Detection is active (P 92)
and red-eye removal is on (P 98). Red-eye re-
moval minimizes “red-eye” caused when light
from the ash is re ected from the subject’s
retinas as shown in the illustration at right.
Flash Photography
Flash Photography
Use an optional ash unit for additional lighting when shooting at night or indoors under low light.
79
More on Photography and Playback
Flash Photography
QDepending on the distance to the subject, some
lenses may cast shadows in photos taken with the
ash.
RLowering the ash turns the ash o (P) and pre-
vents it ring even when the subject is poorly lit; use
of a tripod is recommended. Lower the ash where
ash photography is prohibited or to capture natu-
ral lighting under dim light. We also recommend
that you lower the ash when the camera is o .
RIf p is displayed when the shutter button is pressed
halfway, the ash will re when the photo is taken.
RExcept in commander mode, the ash may re sev-
eral times with each shot. Do not move the camera
until shooting is complete.
The Sync Terminal
The Sync Terminal
Use the sync terminal to connect ash units that re-
quire a sync cable.
Flash Sync Speed
Flash Sync Speed
The ash will synchronize with the shutter at shutter
speeds of
/
s or slower.
Optional Flash Units
Optional Flash Units
The camera can also be used with optional FUJIFILM
shoe-mounted ash units (P 132). Do not use third-
party ash units that apply over 300 V to the camera
hot shoe.
Flash Mode and Shooting Mode
Flash Mode and Shooting Mode
The ash modes available vary with the shooting
mode (P 153):
Flash mode
Flash mode
P
P
S
S
A
A
M
M
j
j
Y
Y
F
F
r
r
*
*
A
A
✔
✔
✔
✔
✔
✔
✔
✔
N
N
✔
✔
✔
✔
✔
✔
✔
✔
✔
✔
✔
✔
✔
✔
F
F
✔
✔
✔
✔
✔
✔
✔
✔
✔
✔
l
l
✔
✔
✔
✔
✔
✔
✔
✔
✔
✔
✔
✔
✔
✔
D
D
✔
✔
✔
✔
✔
✔
✔
✔
✔
✔
✔
✔
✔
✔
P
P
✔
✔
✔
✔
✔
✔
✔
✔
✔
✔
✔
✔
✔
✔
* Wireless remote photography.
80
Recording Pictures in RAW Format
Recording Pictures in RAW Format
To record raw, unprocessed data from the camera image sensor, select a RAW option for image quality
in the shooting menu as described below. JPEG copies of RAW images can be created using C PLAY
BACK MENU> RAW CONVERSION, or RAW images can be viewed on a computer using the RAW FILE
CONVERTER application (P 81, 123).
1
Press MENU/OK in shooting mode to display the shooting menu. Select the H IMAGE QUALITY
SETTING tab (P 87), then highlight IMAGE QUALITY (P 88) and press MENU/OK.
2
Highlight an option and press MENU/OK. Select RAW to record only RAW images, or FINE+RAW or
NORMAL+RAW to record both JPEG copy together with the RAW images. FINE+RAW uses lower
JPEG compression ratios for higher-quality JPEG images, while NORMAL+RAW uses higher JPEG
compression ratios to increase the number of images that can be stored.
The Function Buttons
The Function Buttons
To toggle RAW image quality on or o for a single shot, assign RAW to a function button (P 51). If a JPEG option
is currently selected for image quality, pressing the button temporarily selects the equivalent JPEG+RAW option.
If a JPEG+RAW option is currently selected, pressing the button temporarily selects the equivalent JPEG option,
while if RAW is selected, pressing the button temporarily selects FINE. Taking a picture or pressing the button
again restores the previous setting.
81
More on Photography and Playback
Recording Pictures in RAW Format
Creating JPEG Copies of RAW Pictures
Creating JPEG Copies of RAW Pictures
RAW pictures store information on camera settings separately from the data captured by the camera
image sensor. Using C PLAY BACK MENU> RAW CONVERSION (P 102), you can create JPEG copies
of RAW pictures using di erent options for the settings listed below. The original image data are unaf-
fected, allowing a single RAW image to be processed in a multitude of di erent ways.
1
Press MENU/OK during playback to display
the playback menu, then press the selec-
tor up or down to highlight C PLAY BACK
MENU> RAW CONVERSION (P 101) and
press MENU/OK to display the settings listed
in the table at right.
RThese options can also be displayed by pressing
Q button during playback.
2
Press the selector up or
down to highlight a setting
and press the selector right
to select. Press the selec-
tor up or down to highlight
the desired option and press MENU/OK to select
and return to the settings list. Repeat this step
to adjust additional settings.
3
Press the Q button to preview the JPEG copy
and press MENU/OK to save.
Setting
Setting
Description
Description
REFLECT SHOOTING
COND.
Create a JPEG copy using the settings in ef-
fect at the time the photo was taken.
PUSH/PULL
PROCESSING
Adjust exposure by –1 EV to +3 EV in incre-
ments of
/
EV.
DYNAMIC RANGE Enhance details in highlights for natural
contrast (P 89).
FILM SIMULATION Simulate the e ects of di erent types of lm
(P 60).
GRAIN EFFECT Add a lm grain e ect (P 89).
WHITE BALANCE Adjust white balance (P 61).
WB SHIFT Fine-tune white balance (P 61).
HIGHLIGHT TONE Adjust highlights (P 89).
SHADOW TONE Adjust shadows (P 89).
COLOR Adjust color density (P 89).
SHARPNESS Sharpen or soften outlines (P 89).
NOISE REDUCTION Process the copy to reduce mottling (P 89).
LENS MODULATION
OPTIMIZER
Improve de nition by adjusting for di rac-
tion and the slight loss of focus at the pe-
riphery of the lens (P 90).
COLOR SPACE Choose the color space used for color repro-
duction (P 90).
CREATE
REFLECT SHOOTING COND.
PUSH/PULL PROCESSING
DYNAMIC RANGE
FILM SIMULATION
GRAIN EFFECT
WHITE BALANCE
RAW CONVERSION
CANCEL
82
Saving Settings
Saving Settings
Save up to 7 sets of custom camera settings for commonly-encountered situations. Saved settings can
be recalled using H IMAGE QUALITY SETTING> SELECT CUSTOM SETTING (P 90).
1
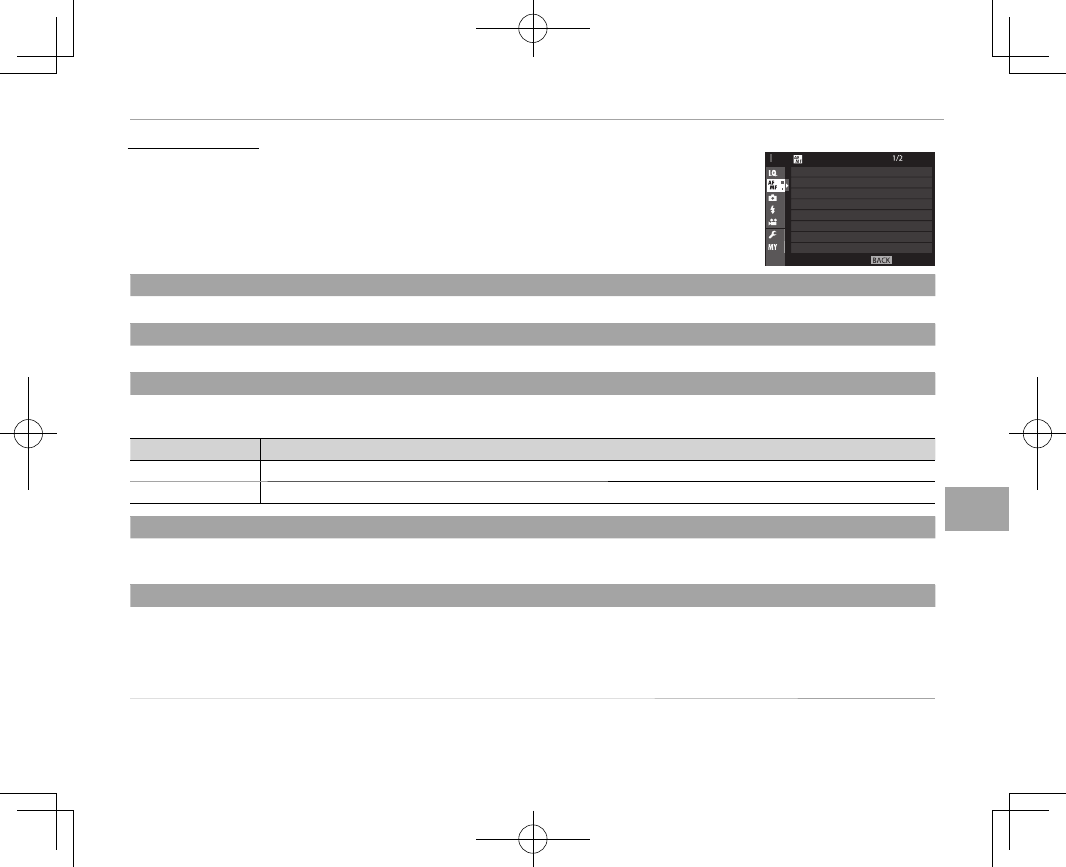
Press MENU/OK in shooting mode to display the shooting menu. Select the H IM-
AGE QUALITY SETTING tab (P 87), then highlight EDIT/SAVE CUSTOM SET-
TING (P 90) and press MENU/OK.
3/33
/
3
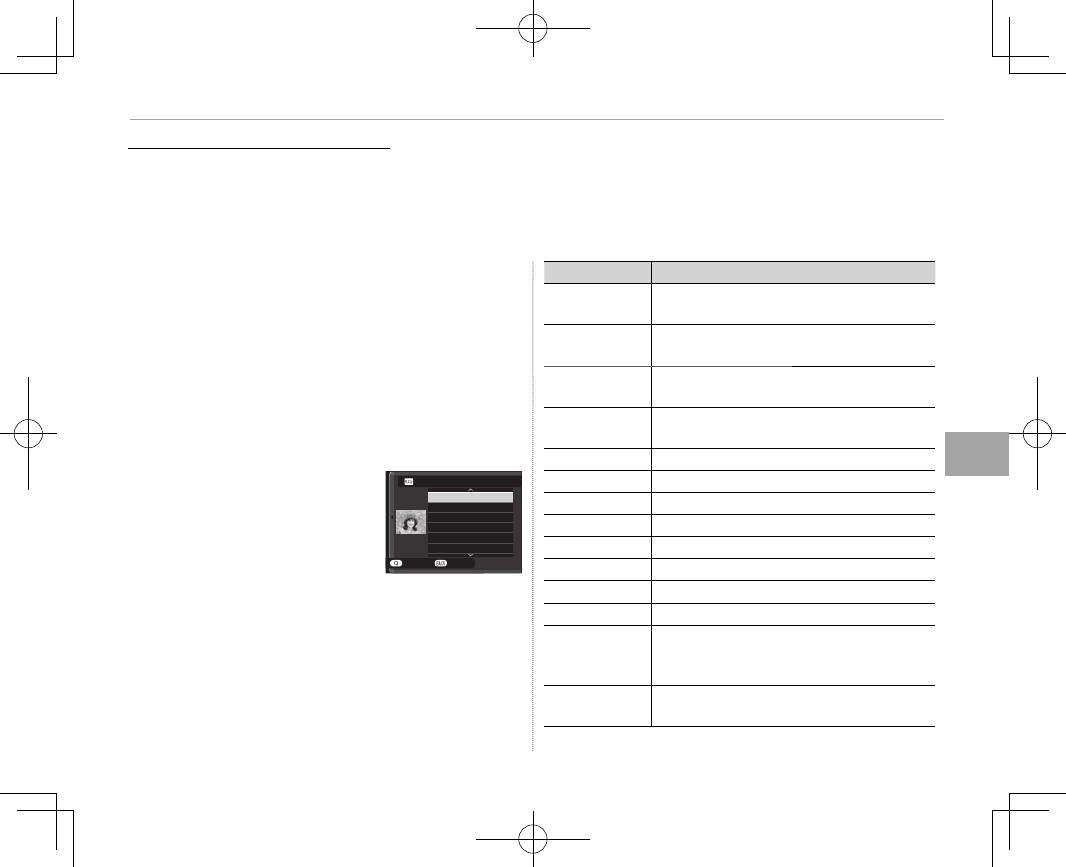
EDIT/SAVE CUSTOM SETTING
SELECT CUSTOM SETTING
IMAGE QUALITY SETTING
CUSTOM 2
CUSTOM 3
CUSTOM 4
CUSTOM 5
CUSTOM 6
CUSTOM 7
CUSTOM 1
2
Highlight a custom settings bank and press MENU/OK to select. Adjust the follow-
ing as desired and press DISP/BACK when adjustments are complete: DYNAM-
IC RANGE, FILM SIMULATION, GRAIN EFFECT, WHITE BALANCE, COLOR,
SHARPNESS, HIGHLIGHT TONE, SHADOW TONE, and NOISE REDUCTION.
XXXXX
0
0
0
1/2
BACK
DYNAMIC RANGE
FILM SIMULATION
GRAIN EFFECT
WHITE BALANCE
HIGHLIGHT TONE
SHADOW TONE
COLOR
CUSTOM 1
AUTO
AUTO
OFF
SAVE CURRENT SETTINGS
EXIT
RTo replace the settings in the selected bank with the settings currently selected with the camera, select
K SAVE CURRENT SETTINGS and press MENU/OK.
3
A con rmation dialog will be displayed; highlight OK and press MENU/OK.
CUSTOM 1 SET OK?
OK
CANCEL
SAVE CUSTOM SETTING
83
More on Photography and Playback
Using a Mount Adapter
Using a Mount Adapter
When M-mount lenses are attached using an
optional FUJIFILM M MOUNT ADAPTER, the camera
processes pictures as they are taken to maintain
image quality and correct for a variety of e ects.
Pressing the function button on the mount
adapter displays l MOUNT ADAPTOR SET-
TING options.
RMount adapter settings can also be accessing using
A SHOOTING SETTING> MOUNT ADAPTER SET-
TING (P 97).
RBefore checking focus, set the focus mode selector
to M (P 63).
Bright Frame Brightness
Bright Frame Brightness
Adjust the brightness of the bright frame in the
OVF display. Use the BRIGHT FRAME BRIGHT-
NESS option to adjust the brightness of the
bright frame in the OVF display.
Lens Registration
Lens Registration
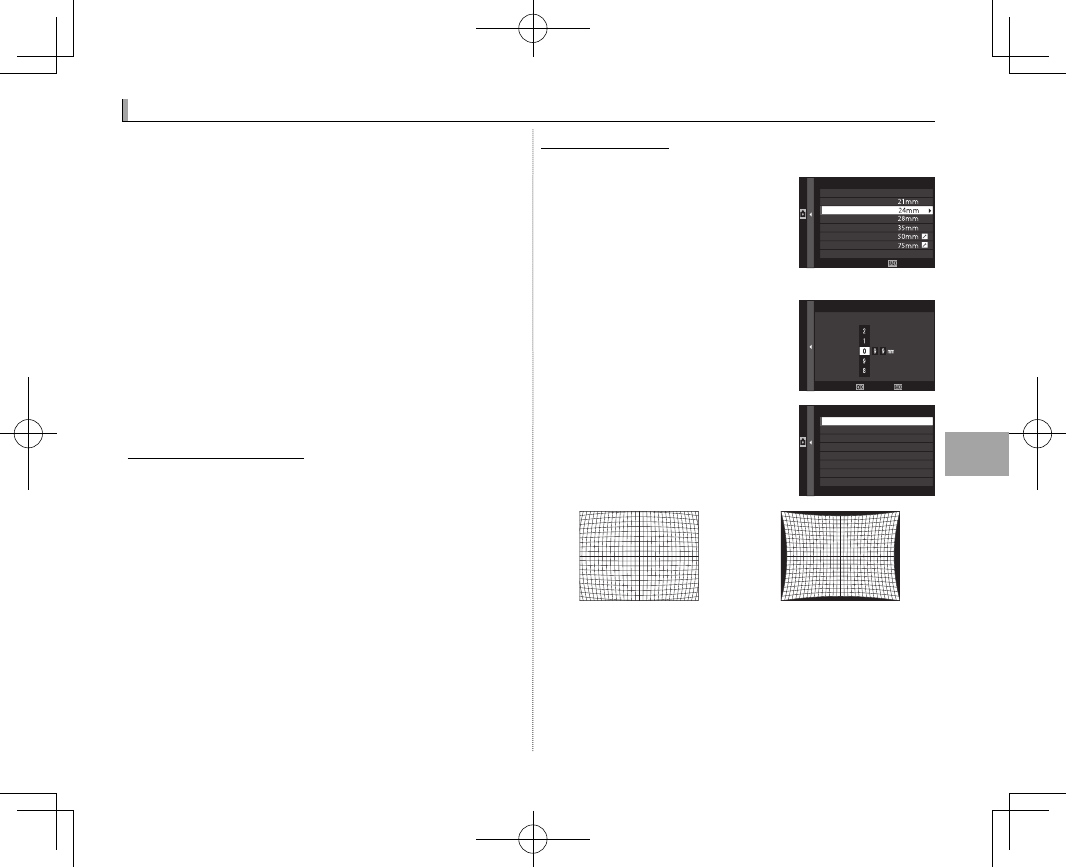
■ Choosing a Focal Length
If the lens has a focal length of
21, 24, 28, or 35 mm, choose a
matching option in the
l MOUNT ADAPTOR SET-
TING menu.
For other lenses, select option
5 or 6 and use the selector to
enter the focal length.
■Distortion Correction
Choose from STRONG, MEDI-
UM, or WEAK options to cor-
rect BARREL or PINCUSHION
distortion.
LENS5 DISTORTION CORRECTION
BARREL MEDIUM
BARREL WEAK
BARREL STRONG
OFF
PINCUSHION WEAK
PINCUSHION MEDIUM
PINCUSHION STRONG
Barrel distortion Pincushion distortion
RTo determine the amount required, adjust distor-
tion correction while taking photos of graph paper
or other objects featuring repeating vertical and
horizontal lines, such as the windows in a high-rise.
SET
LENS REGISTRATION
LENS 1
LENS 2
LENS 3
LENS 4
LENS 5
LENS 6
LENS 5
INPUT FOCAL LENGTH
CANCELSET

84
Using a Mount Adapter
■Color Shading Correction
Color (shading) variations be-
tween the center and edges
of the frame can be adjusted
separately for each corner. NEXT SET
To use color shading correction, follow the steps
below.
1
Rotate the rear command dial to choose a
corner. The selected corner is indicated by a
triangle.
2
Use the selector to adjust shading until there
is no visible di erence in color between the
selected corner and the center of the image.
Press the selector left or right to adjust colors
on the cyan–red axis, up or down to adjust
colors on the blue–yellow axis.
RTo determine the amount required, adjust color
shading correction while taking photos of blue sky
or a sheet of gray paper.
■Peripheral Illumination Correction
Choose from values between
–5 and +5. Choosing positive
values increases peripheral il-
lumination, while choosing
negative values reduces pe-
ripheral illumination. Positive values are recom-
mended for vintage lenses, negative values to
create the e ect of images taken with an antique
lens or a pinhole camera.
RTo determine the amount required, adjust periph-
eral illumination correction while taking photos of
blue sky or a sheet of gray paper.
CANCEL
SET
85
More on Photography and Playback
PhotoBook Assist
PhotoBook Assist
Create books from your favorite photos.
Creating a PhotoBook
Creating a PhotoBook
1
Select NEW BOOK for C PLAY BACK
MENU> PHOTOBOOK ASSIST (P 101) and
choose from the following options:
• SELECT FROM ALL: Choose from all available
pictures.
• SELECT BY IMAGE SEARCH: Choose from pictures
matching selected search conditions.
RNeither photographs a or smaller nor movies
can be selected for photobooks.
2
Scroll through the images and press the se-
lector up to select or deselect. To display the
current image on the cover, press the selector
down. Press MENU/OK to exit when the book is
complete.
RThe rst picture selected becomes the cover im-
age. Press the selector down to select a di erent
image for the cover.
3
Highlight COMPLETE PHOTOBOOK and
press MENU/OK (to select all photos or all pho-
tos matching the speci ed search conditions
for the book, choose SELECT ALL). The new
book will be added to the list in the photo-
book assist menu.
QBooks can contain up to 300 pictures.
QBooks that contain no photos are automatically de-
leted.

86
PhotoBook Assist
Viewing Photobooks
Viewing Photobooks
Highlight a book in the photobook assist menu
and press MENU/OK to display the book, then press
the selector left or right to scroll through the pic-
tures.
Editing and Deleting Photobooks
Editing and Deleting Photobooks
Display the photobook and press MENU/OK. The
following options will be displayed; select the
desired option and follow the on-screen instruc-
tions.
• EDIT: Edit the book as described in “Creating a
PhotoBook” (P 85).
• ERASE: Delete the book.
Photobooks
Photobooks
Photobooks can be copied to a computer using MyFinePix Studio software (P 123).
87
Menus
Menus
Menus
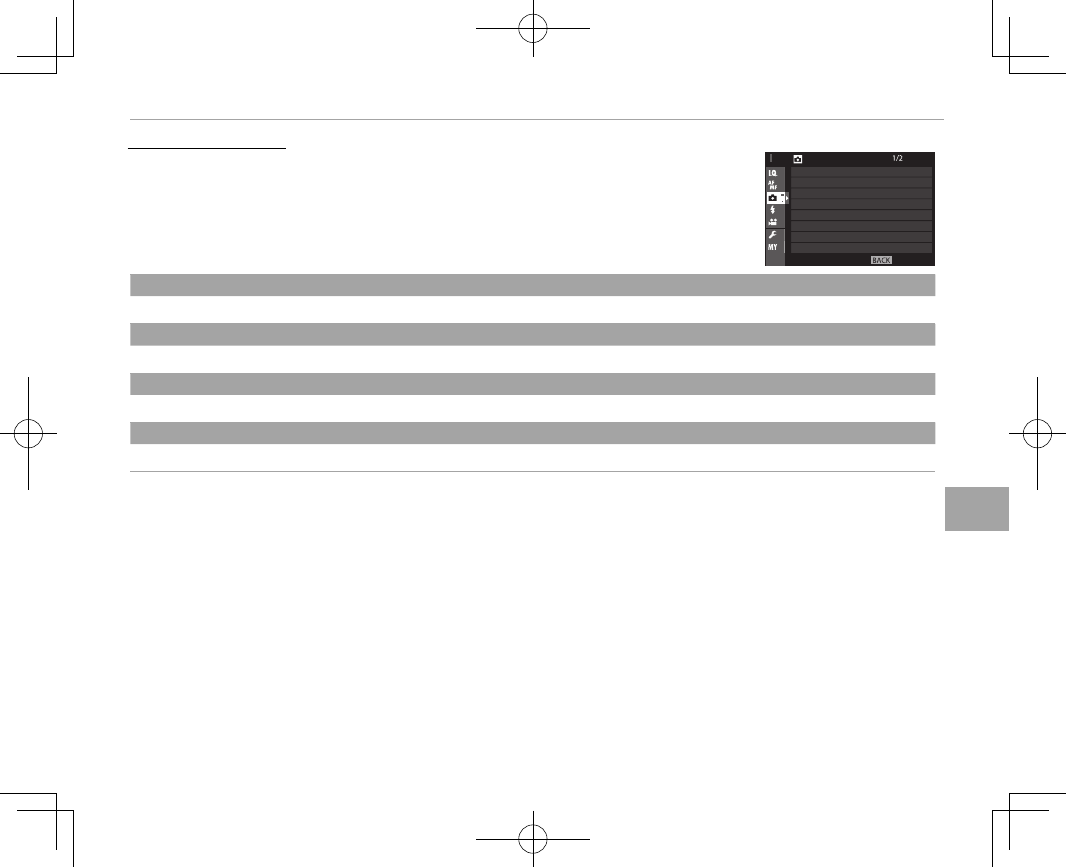
Using the Menus: Shooting Mode
Using the Menus: Shooting Mode
The shooting menu is used to adjust settings for a wide range of shooting conditions. Frequently-used
options can be saved to a personalized custom menu (“my menu”).
Using the Shooting Menu
Using the Shooting Menu
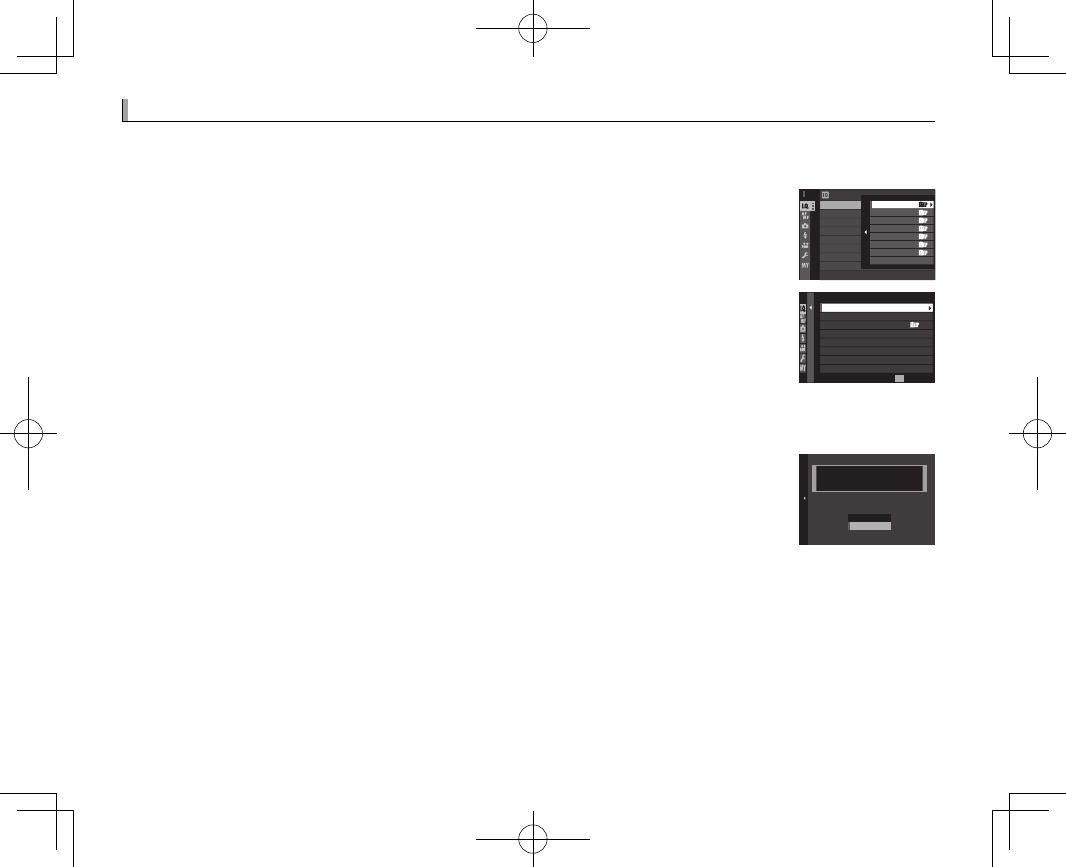
1
Press MENU/OK in shooting mode to display the
menus.
EXIT
IMAGE QUALITY SETTING
IMAGE QUALITY
RAW RECORDING
FILM SIMULATION
GRAIN EFFECT
DYNAMIC RANGE
WHITE BALANCE
HIGHLIGHT TONE
IMAGE SIZE
2
Press the selector left to highlight
the tab for the current menu.
Tab
EXIT
IMAGE QUALITY SETTING
IMAGE QUALITY
RAW RECORDING
FILM SIMULATION
GRAIN EFFECT
DYNAMIC RANGE
WHITE BALANCE
HIGHLIGHT TONE
IMAGE SIZE
3
Press the selector down to highlight
the tab (H, G, A, F, B, or E) con-
taining the desired item.
4
Press the selector right to place the
cursor in the menu.
5
Press the selector up or down to
highlight the desired item.
6
Press the selector right to view op-
tions for the highlighted item.
7
Press the selector up or down to
highlight the desired option.
8
Press MENU/OK to select the high-
lighted option.
9
Press DISP/BACK to return to the
shooting display.
RUse the front command dial to scroll through the
menus a page at a time.
88
Using the Menus: Shooting Mode
H
H
IMAGE QUALITY SETTING
IMAGE QUALITY SETTING
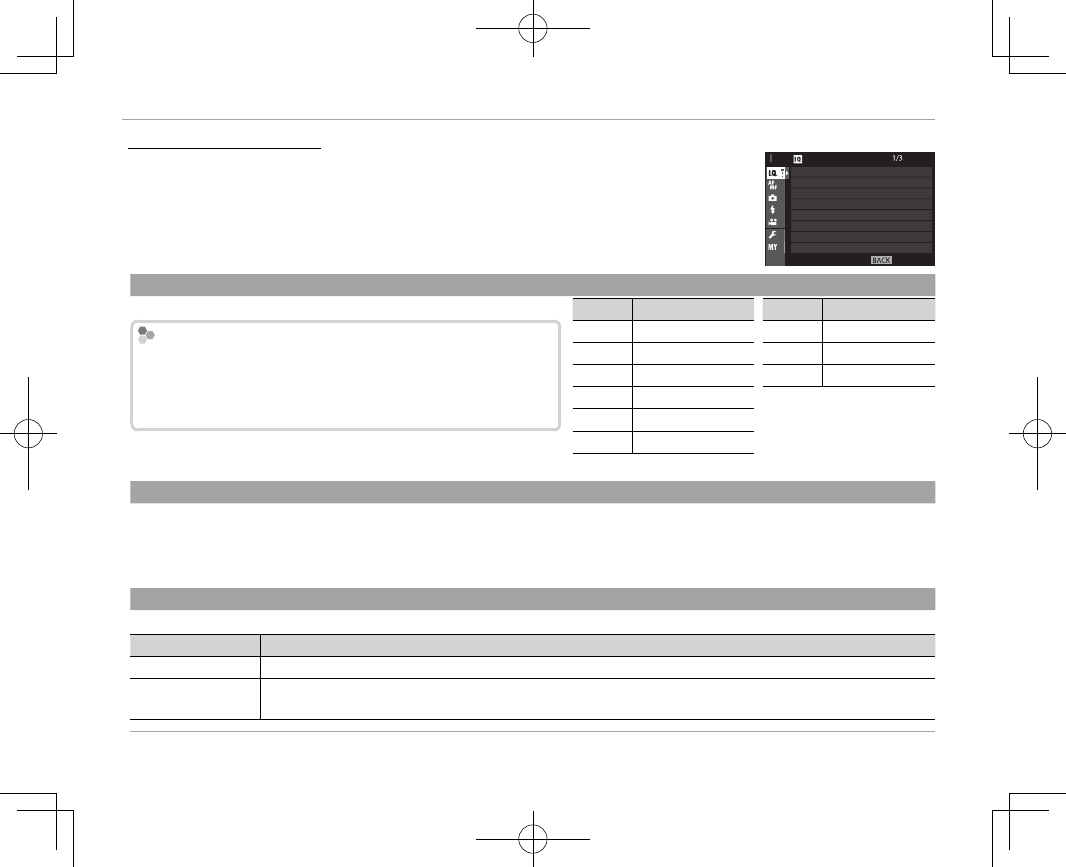
To adjust shooting settings that a ect image quality, press MENU/OK in the
shooting display and select the H (IMAGE QUALITY SETTING) tab (P 87).
EXIT
IMAGE QUALITY SETTING
IMAGE QUALITY
RAW RECORDING
FILM SIMULATION
GRAIN EFFECT
DYNAMIC RANGE
WHITE BALANCE
HIGHLIGHT TONE
IMAGE SIZE
IMAGE SIZE
IMAGE SIZE
Choose the size and aspect ratio at which still pictures are recorded.
Aspect Ratio
Aspect Ratio
Pictures with an aspect ratio of 3 : 2 have the same proportions as
Pictures with an aspect ratio of 3 : 2 have the same proportions as
a frame of 35 mm lm, while an aspect ratio of 16 : 9 is suited to
a frame of 35 mm lm, while an aspect ratio of 16 : 9 is suited to
display on
display on
H
H
igh
igh
D
D
e nition (HD) devices. Pictures with an aspect
e nition (HD) devices. Pictures with an aspect
ratio of 1 : 1 are square.
ratio of 1 : 1 are square.
IMAGE SIZE is not reset when the camera is turned o or another
shooting mode is selected.
Option
Option
Image size
Image size
Option
Option
Image size
Image size
O
O
3 : 2
3 : 2
6000 × 4000
6000 × 4000
Q
Q
3 : 2
3 : 2
3008 × 2000
3008 × 2000
O
O
16 : 9
16 : 9
6000 × 3376
6000 × 3376
Q
Q
16 : 9
16 : 9
3008 × 1688
3008 × 1688
O
O
1 : 1
1 : 1
4000 × 4000
4000 × 4000
Q
Q
1 : 1
1 : 1
2000 × 2000
2000 × 2000
P
P
3 : 2
3 : 2
4240 × 2832
4240 × 2832
P
P
16 : 9
16 : 9
4240 × 2384
4240 × 2384
P
P
1 : 1
1 : 1
2832 × 2832
2832 × 2832
IMAGE QUALITY
IMAGE QUALITY
Choose a le format and compression ratio. Select FINE or NORMAL to record JPEG images, RAW to record RAW images, or
FINE+RAW or NORMAL+RAW to record both JPEG and RAW images. FINE and FINE+RAW use lower JPEG compression ratios
for higher-quality JPEG images, while NORMAL and NORMAL+RAW use higher JPEG compression ratios to increase the num-
ber of images that can be stored.
RAW RECORDING
RAW RECORDING
Choose whether to compress RAW images.
Option
Option
Description
Description
UNCOMPRESSED
UNCOMPRESSED RAW images are not compressed.
LOSSLESS COMPRESSED
LOSSLESS COMPRESSED RAW images are compressed using a reversible algorithm that reduces le size with no loss of image data.
The images can be viewed in RAW FILE CONVERTER (P 123) or other compatible software.
89
Menus
Using the Menus: Shooting Mode
FILM SIMULATION
FILM SIMULATION
Simulate the e ects of di erent types of lm (P 60).
GRAIN EFFECT
GRAIN EFFECT
Add a lm grain e ect.
DYNAMIC RANGE
DYNAMIC RANGE
Control contrast. Choose lower values to increase contrast when shooting indoors or under overcast skies, higher values to
reduce loss of detail in highlights and shadows when photographing high-contrast scenes. Higher values are recommended
for scenes that include both sunlight and deep shade, for such high-contrast subjects as sunlight on water, brightly-lit autumn
leaves, and portraits taken against a blue sky, and for white objects or people wearing white; note, however, that mottling may
appear in pictures taken at higher values.
RIf AUTO is selected, the camera will automatically choose either
V
V 100% or
W
W 200% according to the subject and shoot-
ing conditions. Shutter speed and aperture will be displayed when the shutter button is pressed halfway.
R
R
W
W 200% is available at sensitivities of ISO 400 and above,
X
X 400% at sensitivities of ISO 800 and above.
WHITE BALANCE
WHITE BALANCE
Adjust colors to match the light source (P 61).
HIGHLIGHT TONE
HIGHLIGHT TONE
Adjust the appearance of highlights.
SHADOW TONE
SHADOW TONE
Adjust the appearance of shadows.
COLOR
COLOR
Adjust color density.
SHARPNESS
SHARPNESS
Sharpen or soften outlines.
NOISE REDUCTION
NOISE REDUCTION
Reduce noise in pictures taken at high sensitivities.
90
Using the Menus: Shooting Mode
LONG EXPOSURE NR
LONG EXPOSURE NR
Select ON to reduce mottling in long time-exposures (P 71).
LENS MODULATION OPTIMIZER
LENS MODULATION OPTIMIZER
Select ON to improve de nition by adjusting for di raction and the slight loss of focus at the periphery of the lens.
COLOR SPACE
COLOR SPACE
Choose the gamut of colors available for color reproduction.
Option
Option
Description
Description
sRGB
sRGB Recommended in most situations.
Adobe RGB
Adobe RGB For commercial printing.
PIXEL MAPPING
PIXEL MAPPING
Use this option if you notice bright spots in your pictures.
1 Press MENU/OK in the shooting display and select the H IMAGE QUALITY SETTING tab (P 87).
2 Highlight PIXEL MAPPING and press MENU/OK to perform pixel mapping.
QResults are not guaranteed.
QBe sure the battery is fully charged before beginning pixel mapping.
QPixel mapping is not available when the camera temperature is elevated.
QProcessing may take a few seconds.
SELECT CUSTOM SETTING
SELECT CUSTOM SETTING
Recall settings saved with EDIT/SAVE CUSTOM SETTING.
EDIT/SAVE CUSTOM SETTING
EDIT/SAVE CUSTOM SETTING
Save settings (P 82).
91
Menus
Using the Menus: Shooting Mode
G
G
AF/MF SETTING
AF/MF SETTING
To adjust focus settings, press MENU/OK in the shooting display and select the
G (AF/MF SETTING) tab (P 87).
EXIT
AF/MF SETTING
AF MODE
NUMBER OF THE FOCUS POINTS
PRE-AF
AF ILLUMINATOR
FACE/EYE DETECTION SETTING
AF+MF
MF ASSIST
FOCUS AREA
FOCUS AREA
FOCUS AREA
Choose the focus area (P 68). Focus-area selection can also be used to choose the focus point for manual focus and focus zoom.
AF MODE
AF MODE
Choose the AF mode for focus modes S and C (P 66).
NUMBER OF THE FOCUS POINTS
NUMBER OF THE FOCUS POINTS
Choose the number of focus points available for focus-point selection in manual focus mode or when SINGLE POINT is selected
for AF MODE.
Option
Option
Description
Description
77 POINTS (7 × 11)
77 POINTS (7 × 11) Choose from 77 focus points arranged in a 7- by 11-point grid.
273 POINTS (13 × 21)
273 POINTS (13 × 21) Choose from 273 focus points arranged in a 13- by 21-point grid.
PRE-AF
PRE-AF
If ON is selected, the camera will continue to adjust focus even when the shutter-release button is not pressed halfway. Note
that this increases the drain on the battery.
AF ILLUMINATOR
AF ILLUMINATOR
If ON is selected, the AF-assist illuminator will light to assist autofocus.
QThe camera may be unable to focus using the AF-assist illuminator in some cases. If the camera is unable to focus in macro
mode, try increasing the distance to the subject.
QAvoid shining the AF-assist illuminator directly into your subject’s eyes.
92
Using the Menus: Shooting Mode
FACE/EYE DETECTION SETTING
FACE/EYE DETECTION SETTING
Intelligent Face Detection sets focus and exposure for human faces anywhere in the frame, prevent-
ing the camera from focusing on the background in group portraits. Choose for shots that emphasize
portrait subjects. Faces can be detected with the camera in vertical or horizontal orientation; if a face is
detected, it will be indicated by a green border. If there is more than one face in the frame, the camera
will select the face closest to the center; other faces are indicated by white borders. You can also choose
whether the camera detects and focuses on eyes when Intelligent Face Detection is on. Choose from
the following options:
Option
Option
Description
Description
FACE ON/EYE OFF
FACE ON/EYE OFF Intelligent Face Detection only.
FACE ON/EYE AUTO
FACE ON/EYE AUTO The camera automatically chooses which eye to focus on when a face is detected.
FACE ON/RIGHT EYE PRIORITY
FACE ON/RIGHT EYE PRIORITY The camera focuses on the right eye of subjects detected using Intelligent Face Detection.
FACE ON/LEFT EYE PRIORITY
FACE ON/LEFT EYE PRIORITY The camera focuses on the left eye of subjects detected using Intelligent Face Detection.
FACE OFF/EYE OFF
FACE OFF/EYE OFF Intelligent Face Detection and eye priority o .
RIf the camera is unable to detect the subject’s eyes because they are hidden by hair, glasses, or other objects, the camera will
instead focus on faces.
QIn some modes, the camera may set exposure for the frame as a whole rather than the portrait subject.
QIf the subject moves as the shutter button is pressed, the face may not be in the area indicated by the green border when
the picture is taken.
93
Menus
Using the Menus: Shooting Mode
AF+MF
AF+MF
If ON is selected in focus mode S, focus can be adjusted manually by rotating the focus ring while the shutter button is pressed
halfway. Both standard and focus peaking MF assist options are supported. Lenses with a focus distance indicator must be set
to manual focus mode (MF) before this option can be used. Selecting MF disables the focus distance indicator. Set the focus
ring to the center of the focus distance indicator, as the camera may fail to focus if the ring is set to in nity or the minimum
focus distance.
AF + MF Focus Zoom
AF + MF Focus Zoom
When
When
ON
ON
is selected for
is selected for
G
G
AF/MF SETTING
AF/MF SETTING
>
>
FOCUS CHECK
FOCUS CHECK
and
and
SINGLE POINT
SINGLE POINT
selected for
selected for
AF MODE
AF MODE
, focus zoom can be
, focus zoom can be
used to zoom in on the selected focus area. Focus zoom is not available when
used to zoom in on the selected focus area. Focus zoom is not available when
ZONE
ZONE
or
or
WIDE/TRACKING
WIDE/TRACKING
is selected for
is selected for
AF
AF
MODE
MODE
. The zoom ratio (2.5× — 6×) can be selected using the rear command dial.
. The zoom ratio (2.5× — 6×) can be selected using the rear command dial.
MF ASSIST
MF ASSIST
Choose how focus is displayed in manual focus mode (P 65).
Option
Option
Description
Description
STANDARD
STANDARD Focus is displayed normally (focus peaking and digital split image are not available).
DIGITAL SPLIT IMAGE
DIGITAL SPLIT IMAGE A black-and-white (MONOCHROME) or color (COLOR) split-image display.
FOCUS PEAK HIGHLIGHT
FOCUS PEAK HIGHLIGHT The camera heightens high-contrast outlines. Choose a color and peaking level.
FOCUS CHECK
FOCUS CHECK
If ON is selected, the camera will automatically zoom in on the view through the lens when the focus ring is rotated in manual
focus mode (P 64).
INTERLOCK SPOT AE & FOCUS AREA
INTERLOCK SPOT AE & FOCUS AREA
Select ON to meter the current focus frame when SINGLE POINT is selected for AF MODE (P 66) and SPOT is selected for
PHOTOMETRY (P 59).
INSTANT AF SETTING
INSTANT AF SETTING
Choose how the camera focuses when the AF-L button is pressed in manual focus mode (P 63).
94
Using the Menus: Shooting Mode
DEPTH-OF-FIELD SCALE
DEPTH-OF-FIELD SCALE
Choose FILM FORMAT BASIS to help you make practical assessments of depth of eld for pictures that will be viewed as prints
and the like, PIXEL BASIS to help you assess depth of eld for pictures that will be viewed at high resolutions on computers or
other electronic displays.
RELEASE/FOCUS PRIORITY
RELEASE/FOCUS PRIORITY
Choose how the camera focuses in focus mode AF-S or AF-C.
Option
Option
Description
Description
RELEASE
RELEASE Shutter response is prioritized over focus. Pictures can be taken when the camera is not in focus.
FOCUS
FOCUS Focus is prioritized over shutter response. Pictures can be only taken when the camera is in focus.
CORRECTED AF FRAME
CORRECTED AF FRAME
If ON is selected, a second focus frame for focus distances of about 50 cm (1.6 ft) will be added to the display in the optical view-
nder. The focus frame for the current focus distance is displayed in green when the shutter button is pressed halfway.
ON
ON
OFF
OFF
Focus frame
Focus frame
Focus frame for focus distance of in nity
Focus frame for focus distance of about 50 cm (1.6 ft)
95
Menus
Using the Menus: Shooting Mode
A
A
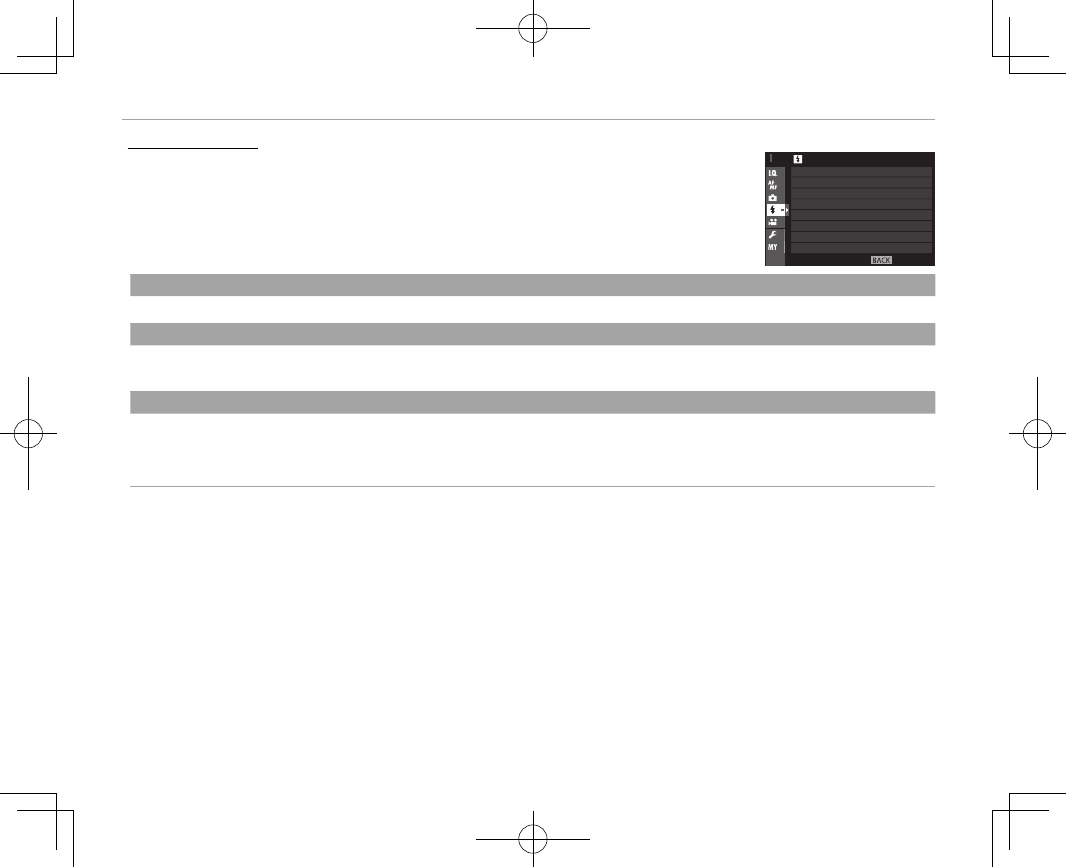
SHOOTING SETTING
SHOOTING SETTING
To adjust shooting options, press MENU/OK in the shooting display and select the
A (SHOOTING SETTING) tab (P 87).
EXIT
SHOOTING SETTING
INTERVAL TIMER SHOOTING
FILM SIMULATION BKT
PHOTOMETRY
SHUTTER TYPE
IS MODE
ISO AUTO SETTING
MOUNT ADAPTOR SETTING
SELF-TIMER
SELF-TIMER
SELF-TIMER
Take pictures with the self-timer (P 73).
INTERVAL TIMER SHOOTING
INTERVAL TIMER SHOOTING
Adjust settings for interval timer photography (P 74).
FILM SIMULATION BKT
FILM SIMULATION BKT
Choose lm types for lm simulation bracketing (P 54, 60).
PHOTOMETRY
PHOTOMETRY
Choose how the camera meters exposure (P 59).
96
Using the Menus: Shooting Mode
SHUTTER TYPE
SHUTTER TYPE
Choose the shutter type. Choose the electronic shutter to mute the shutter sound.
Option
Option
Description
Description
t
t
MECHANICAL SHUTTER
MECHANICAL SHUTTER Take pictures with the mechanical shutter.
s
s
ELECTRONIC SHUTTER
ELECTRONIC SHUTTER Take pictures with the electronic shutter.
t
t
MECHANICAL +
MECHANICAL +
s
s
ELECTRONIC
ELECTRONIC The camera chooses the shutter type according to shooting conditions.
RIf s ELECTRONIC SHUTTER or t MECHANICAL + s ELECTRONIC is selected, shutter speeds faster than
/
s can be
chosen by rotating the shutter speed dial to 8000 and then rotating the front command dial.
RWhen the electronic shutter is used, shutter speed and sensitivity are restricted to values of
/
–1s and ISO 12800–200
respectively, and long exposure noise reduction has no e ect. In burst mode, focus and exposure are xed at the values for
the rst shot in each burst.
QDistortion may be visible in shots of moving subjects with electronic shutter, while banding and fog may occur in shots taken
under uorescent lights or other ickering or erratic illumination. When taking pictures with the shutter muted, respect your
subjects’ image rights and right to privacy.
IS MODE
IS MODE
Reduce blur. This option is available only with lenses that support image stabilization.
Option
Option
Description
Description
l
l
CONTINUOUS
CONTINUOUS Image stabilization on.
m
m
SHOOTING ONLY
SHOOTING ONLY Image stabilization enabled only when the shutter button is pressed halfway or the shutter is released.
OFF
OFF Image stabilization o ; x appears in the display (P 8, 10). Recommended when using a tripod.

97
Menus
Using the Menus: Shooting Mode
ISO AUTO SETTING
ISO AUTO SETTING
Choose the base sensitivity, maximum sensitivity, and minimum shutter speed for auto ISO sensitivity control, which is selected
by rotating the ISO dial to A. Settings for AUTO1, AUTO2, and AUTO3 can be adjusted separately.
Option
Option
Default
Default
DEFAULT SENSITIVITY 200
MAX. SENSITIVITY 800 (AUTO1)/1600 (AUTO2)/3200 (AUTO3)
MIN. SHUTTER SPEED 1/60
The camera automatically chooses a sensitivity between the default and maximum values. Sensitivity is only raised above the
default value if the shutter speed required for optimal exposure would be slower than the value selected for MIN. SHUTTER
SPEED.
RIf the value selected for DEFAULT SENSITIVITY is higher than that selected for MAX. SENSITIVITY, DEFAULT SENSITIVITY
will be set to the value selected for MAX. SENSITIVITY.
RThe camera may select shutter speeds slower than MIN. SHUTTER SPEED if pictures would still be underexposed at the
value selected for MAX. SENSITIVITY.
MOUNT ADAPTOR SETTING
MOUNT ADAPTOR SETTING
Adjust settings for M-mount lenses connected using an optional FUJIFILM M MOUNT ADAPTER (P 83).
WIRELESS COMMUNICATION
WIRELESS COMMUNICATION
Connect to a smartphone or tablet over a wireless network (P 122).
RFor more information, visit http://fujifilm-dsc.com/wifi/.
98
Using the Menus: Shooting Mode
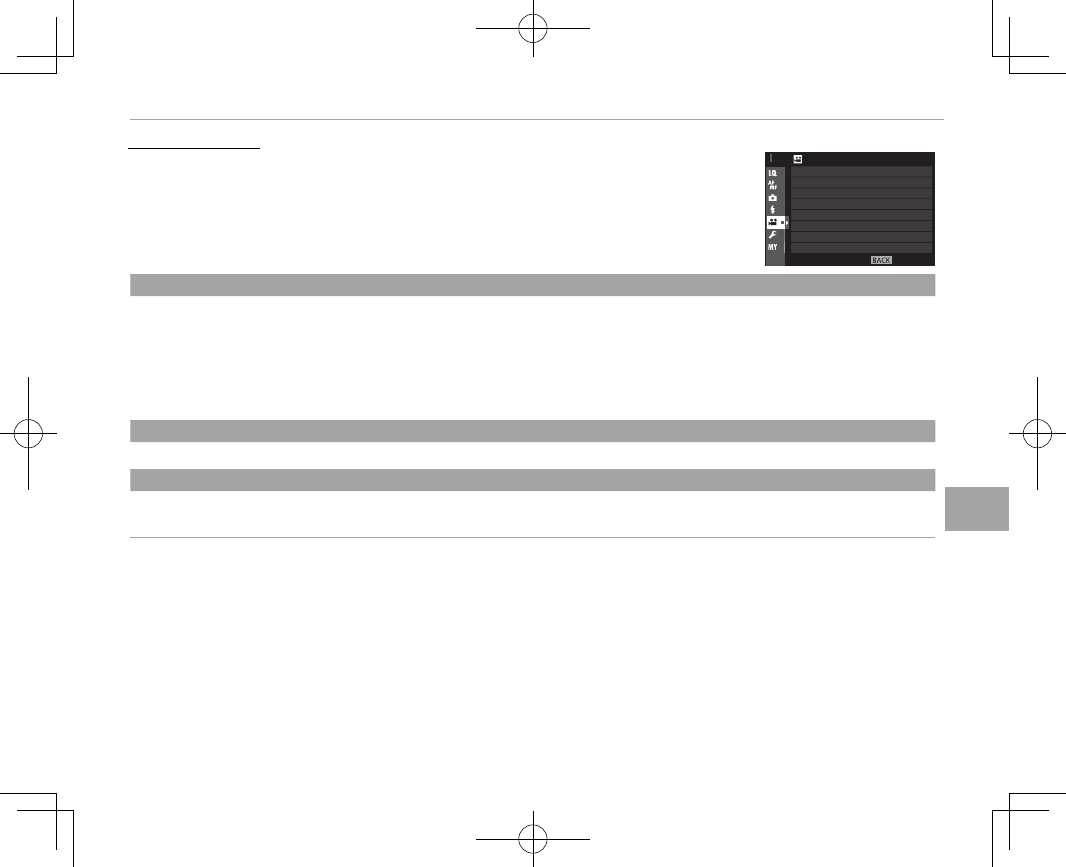
F
F
FLASH SETTING
FLASH SETTING
To adjust ash-related settings, press MENU/OK in the shooting display and select
the F (FLASH SETTING) tab (P 87).
EXIT
FLASH SETTING
FLASH COMPENSATION
RED EYE REMOVAL
FLASH MODE
FLASH MODE
FLASH MODE
Choose a ash mode (P 78).
FLASH COMPENSATION
FLASH COMPENSATION
Adjust ash brightness. Note that the desired results may not be achieved depending on shooting conditions and the distance
to the subject.
RED EYE REMOVAL
RED EYE REMOVAL
Choose ON to remove red-eye e ects caused by the ash.
RRed-eye reduction is performed only when a face is detected.
RRed-eye removal is not available with RAW images.
99
Menus
Using the Menus: Shooting Mode
B
B
MOVIE SETTING
MOVIE SETTING
To adjust options for movie recording, press MENU/OK in the shooting display
and select the B ( MOVIE SETTING) tab (P 87).
EXIT
MOVIE SETTING
MIC LEVEL ADJUSTMENT
MIC/REMOTE RELEASE
MOVIE MODE
MOVIE MODE
MOVIE MODE
Select a frame size and rate for movie recording.
• i 1080/60 P: 1920 × 1080 (60 fps)
• i 1080/50 P: 1920 × 1080 (50 fps)
• i 1080/30 P: 1920 × 1080 (30 fps)
• i 1080/25 P: 1920 × 1080 (25 fps)
• i 1080/24 P: 1920 × 1080 (24 fps)
• h 720/60 P: 1280 × 720 (60 fps)
• h 720/50 P: 1280 × 720 (50 fps)
• h 720/30 P: 1280 × 720 (30 fps)
• h 720/25 P: 1280 × 720 (25 fps)
• h 720/24 P: 1280 × 720 (24 fps)
MIC LEVEL ADJUSTMENT
MIC LEVEL ADJUSTMENT
Adjust the microphone recording level.
MIC/REMOTE RELEASE
MIC/REMOTE RELEASE
Specify whether the device connected to the microphone/remote release connector is a microphone or a remote release (P 45,
72).