Fuji Film 02000002 Wireless LAN Module User Manual 00 LX11 OM 200 EN 01 indb
Fuji Film Corporation Wireless LAN Module 00 LX11 OM 200 EN 01 indb
Contents
User manual 3
50
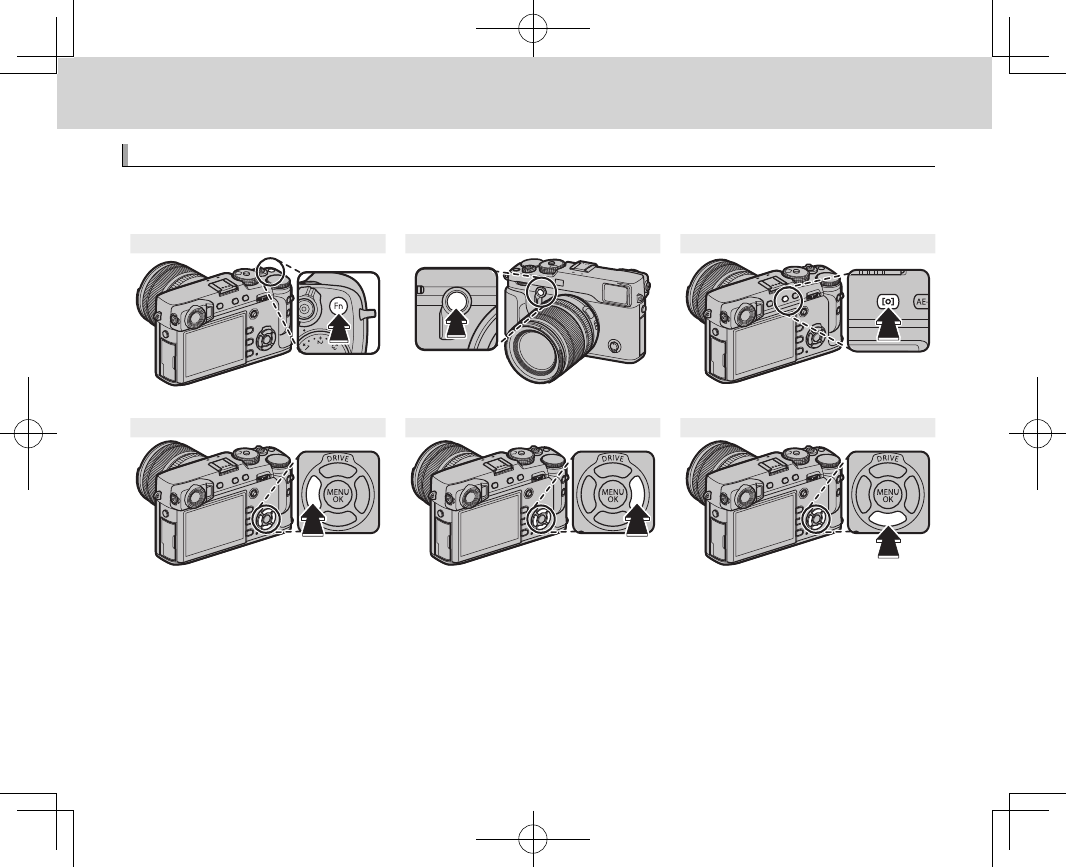
The Fn (Function) Buttons
The Fn (Function) Buttons
Using the Function Buttons
Using the Function Buttons
The roles played by each of the six function buttons can be selected by pressing and holding the but-
ton. The default options are shown below:
Fn1 button Fn2 button Fn3 button
Recording movies (P 44) Bright frame simulation (P 30) Metering (P 59)
Fn4 button Fn5 button Fn6 button
Film simulation (P 60) White balance (P 61) AF mode (P 66)
51
Using the Function Buttons
The Fn (Function) Buttons
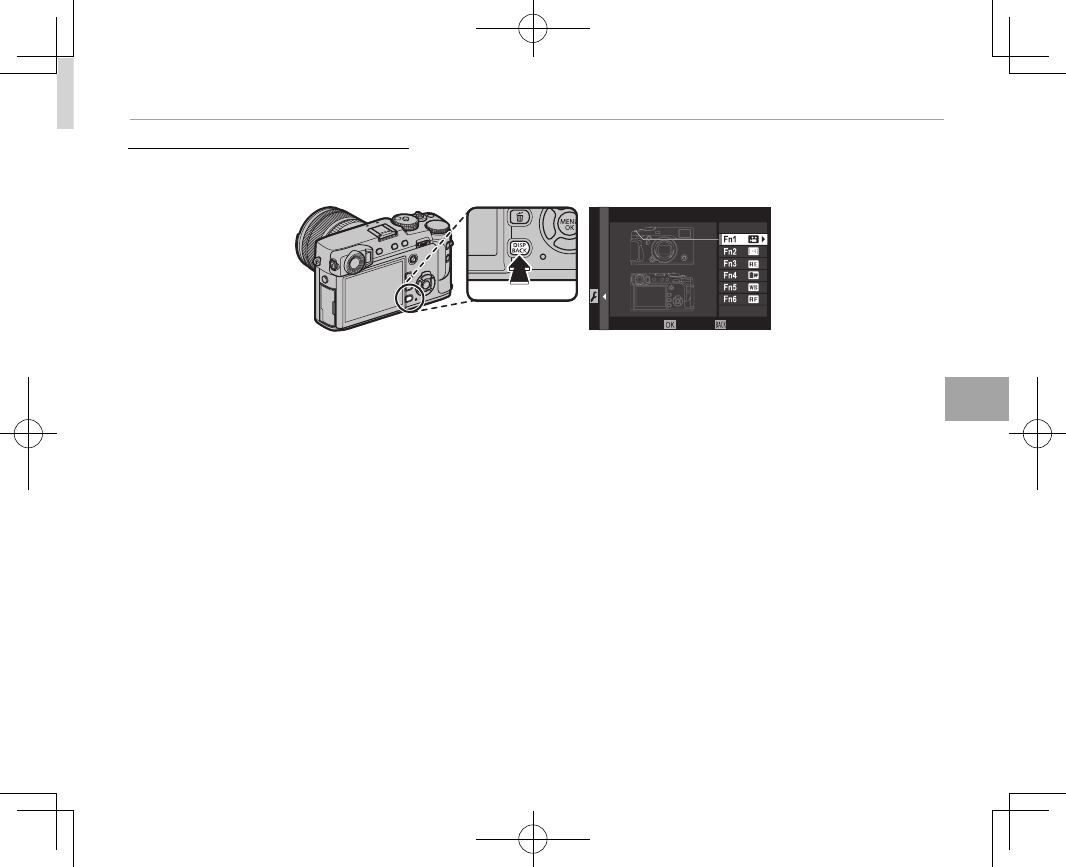
Assigning Roles to the Function Buttons
Assigning Roles to the Function Buttons
To assign roles to the function buttons, press and hold the DISP/BACK button until the menu below is
displayed. Select buttons to choose their roles.
FUNCTION (Fn) SETTING
CANCELSET
• PREVIEW DEPTH OF FIELD
• ISO AUTO SETTING
• SELF-TIMER
• IMAGE SIZE
• IMAGE QUALITY
• DYNAMIC RANGE
• FILM SIMULATION
• GRAIN EFFECT
• WHITE BALANCE
• PHOTOMETRY
• AF MODE
• FOCUS AREA
• FLASH MODE
• FLASH COMPENSATION
• SELECT CUSTOM SETTING
• MOVIE MODE
• FACE/EYE DETECTION SETTING
• RAW
• APERTURE SETTING
• WIRELESS COMMUNICATION
• SHUTTER TYPE
• PREVIEW EXP./WB IN MANUAL MODE
• PREVIEW PIC. EFFECT
• BRIGHT FRAME SIMULATOR
• BRIGHT FRAME BRIGHTNESS
• NONE
RTo disable the selected button, choose NONE.
RYou can also display options for any of the function buttons by pressing and holding the button.
RThe roles played by the six function buttons can also be selected using D BUTTON/DIAL SETTING> FUNC-
TION (Fn) SETTING (P 112).

52
More on Photography and Playback
More on Photography and Playback
Drive Mode
Drive Mode
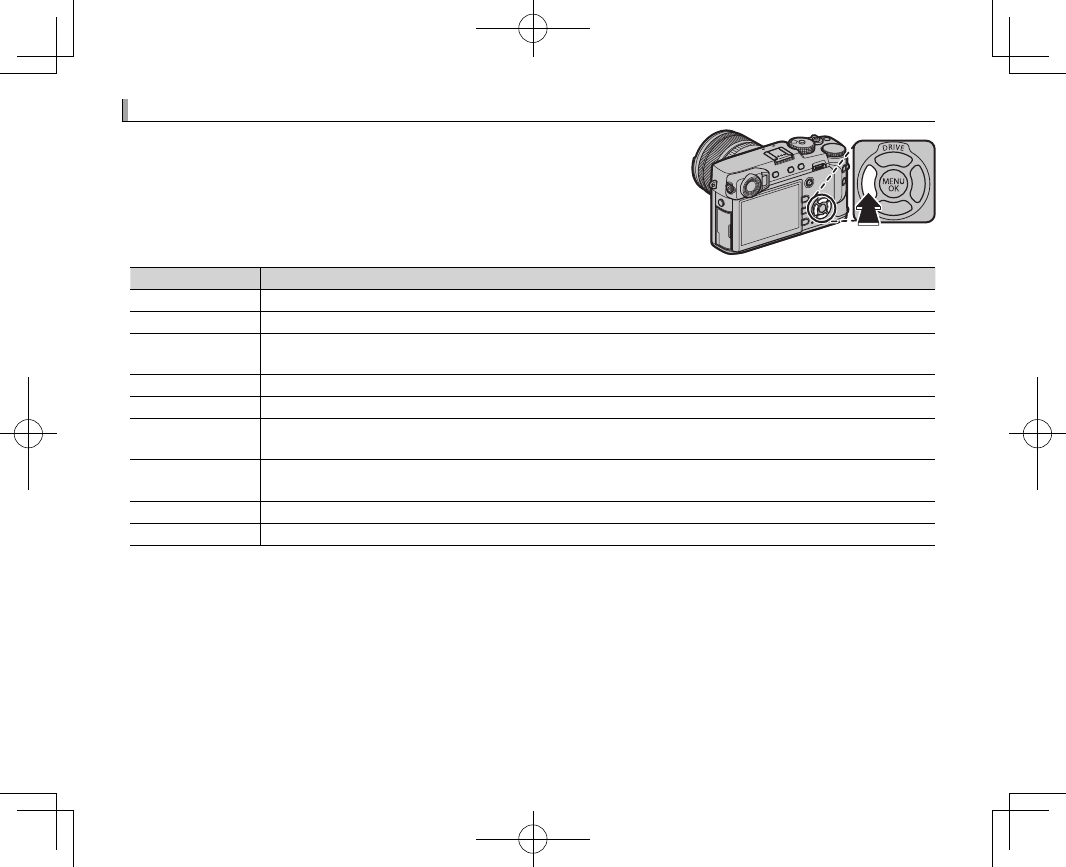
Use the DRIVE (e) button to choose the drive mode.
1
Press the DRIVE (e) button to display drive
mode options.
2
Press the selector up
or down to highlight a
drive mode.
AE BKT
Icon
Icon
Drive mode
Drive mode
P
P
B
B
STILL IMAGE
STILL IMAGE
—
—
R
R
CONTINUOUS
CONTINUOUS
53
53
O
O
AE BKT
AE BKT
54
54
W
W
ISO BKT
ISO BKT
X
X
FILM SIMULATION BKT
FILM SIMULATION BKT
H
H
WHITE BALANCE BKT
WHITE BALANCE BKT
Y
Y
DYNAMIC RANGE BKT
DYNAMIC RANGE BKT
j
j
MULTIPLE EXPOSURE
MULTIPLE EXPOSURE
56
56
Y
Y
ADVANCED FILTER
ADVANCED FILTER
55
55
3
Press the selector left or right to choose a set-
ting.
• Burst mode (CONTINUOUS): Choose the frame-
advance rate.
• AE/ISO/WB BKT: Choose the bracketing incre-
ment.
• ADVANCED FILTER: Choose a lter e ect.
• Other modes: Proceed to Step 4.
4
Press MENU/OK.
5
Take pictures.
RIn burst mode, pictures will be taken while the
shutter button is pressed. Shooting ends when
the button is released, the maximum number of
pictures has been taken, or the memory card is
full.

53
More on Photography and Playback
Drive Mode
R
R
Burst Mode (CONTINUOUS)
Burst Mode (CONTINUOUS)
Capture motion in a series of pictures.
RFrame rate varies with the subject, shutter speed, sensitivity, and focus mode and may slow as more shots are
taken.
RDepending on shooting conditions, the frame rate may drop or the ash may not re.
RAdditional time may be required to record pictures when shooting ends.
RIf le numbering reaches 999 before shooting is complete, the remaining pictures will be recorded to a new
folder (P 115).
RBurst shooting may not begin if the space available on the memory card is insu cient.
Focus and Exposure
Focus and Exposure
To vary focus and exposure with each shot, select focus mode C; in other modes, focus and exposure are deter-
mined by the rst shot in each series.
QSelecting 8.0 fps in focus mode C restricts the choice of focus frames (P 70).
QExposure and focus tracking performance may vary with aperture, sensitivity, and shooting conditions.
54
Drive Mode
Bracketing
Bracketing
Automatically vary settings over a series of pictures.
Option
Option
Description
Description
O
O
AE BKT
AE BKT
Select a bracketing amount. Each time the shutter button is pressed, the camera will take three
shots: one using the metered value for exposure (P 57), the second overexposed by the selected
amount, and the third underexposed by the same amount (regardless of the amount selected, ex-
posure will not exceed the limits of the exposure metering system).
W
W
ISO BKT
ISO BKT
Select a bracketing amount. Each time the shutter is released, the camera will take a picture at the
current sensitivity (P 58) and process it to create two additional copies, one with sensitivity raised
and the other with sensitivity lowered by the selected amount (regardless of the amount selected,
sensitivity will not exceed ISO 12800 or fall below ISO 200).
X
X
FILM SIMULATION BKT
FILM SIMULATION BKT Each time the shutter is released, the camera takes one shot and processes it to create copies at the
settings chosen using A SHOOTING SETTING> FILM SIMULATION BKT (P 60, 95).
H
H
WHITE BALANCE BKT
WHITE BALANCE BKT
Select a bracketing amount. Each time the shutter button is pressed, the camera takes three shots:
one at the current white balanced setting (P 61), one with ne-tuning increased by the selected
amount, and another with ne-tuning decreased by the selected amount.
Y
Y
DYNAMIC RANGE BKT
DYNAMIC RANGE BKT
Each time the shutter button is pressed, the camera takes three shots with di erent dynamic ranges
(P 89): 100% for the rst, 200% for the second, and 400% for the third. While dynamic range bracket-
ing is in e ect, sensitivity will be restricted to a minimum of ISO 800 (or to a minimum of ISO 200
to 800 when an auto option is selected for sensitivity); the sensitivity previously in e ect is restored
when bracketing ends.
55
More on Photography and Playback
Drive Mode
Y
Y
Advanced Filters
Advanced Filters
Take photos with lter e ects.
Filter
Filter
Description
Description
G
G
TOY CAMERA
TOY CAMERA Choose for a retro toy camera e ect.
H
H
MINIATURE
MINIATURE The tops and bottoms of pictures are blurred for a diorama e ect.
I
I
POP COLOR
POP COLOR Create high-contrast images with saturated colors.
J
J
HIGH-KEY
HIGH-KEY Create bright, low-contrast images.
Z
Z
LOW-KEY
LOW-KEY Create uniformly dark tones with few areas of emphasized highlights.
K
K
DYNAMIC TONE
DYNAMIC TONE Dynamic tone expression is used for a fantasy e ect.
X
X
SOFT FOCUS
SOFT FOCUS Create a look that is evenly soft throughout the whole image.
u
u
PARTIAL COLOR (RED)
PARTIAL COLOR (RED)
Areas of the image that are the selected color are recorded in that color. All other areas of the
image are recorded in black-and-white.
v
v
PARTIAL COLOR (ORANGE)
PARTIAL COLOR (ORANGE)
w
w
PARTIAL COLOR (YELLOW)
PARTIAL COLOR (YELLOW)
x
x
PARTIAL COLOR (GREEN)
PARTIAL COLOR (GREEN)
y
y
PARTIAL COLOR (BLUE)
PARTIAL COLOR (BLUE)
z
z
PARTIAL COLOR (PURPLE)
PARTIAL COLOR (PURPLE)
RDepending on the subject and camera settings, images may in some cases be grainy or vary in brightness and
hue.
56
Drive Mode
j
j
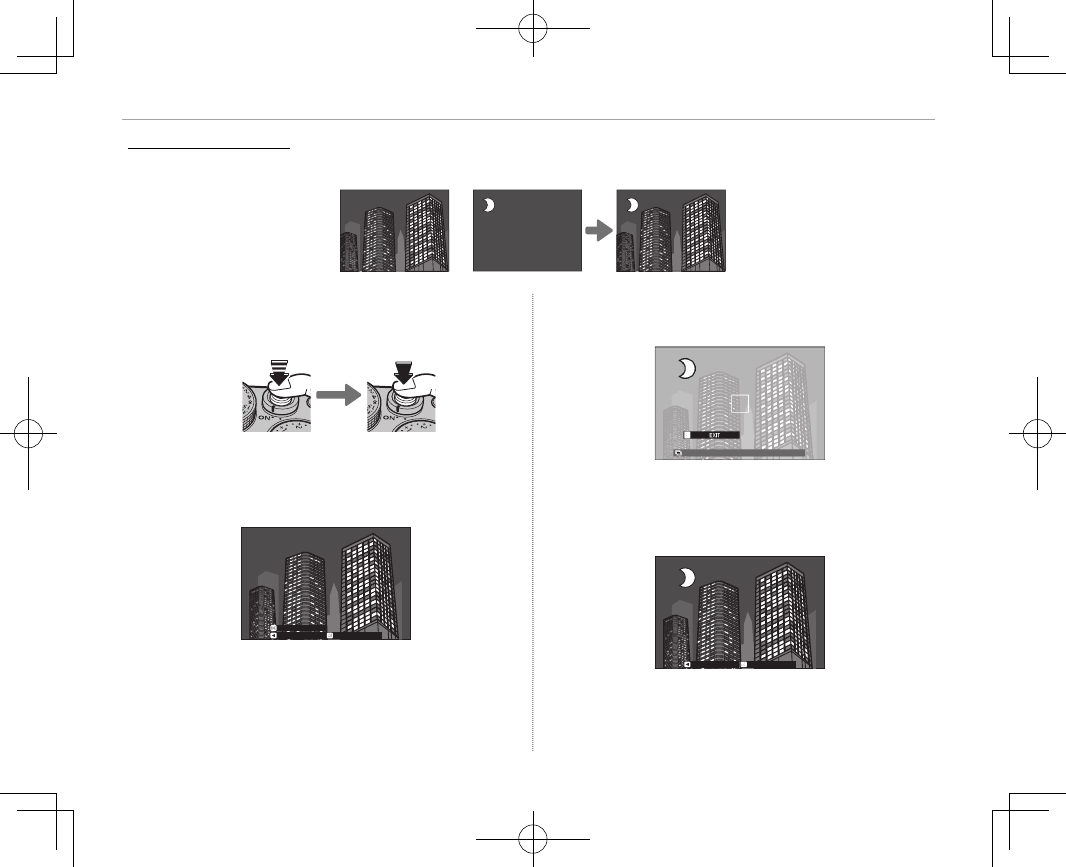
Multiple Exposures
Multiple Exposures
Create a photograph that combines two exposures.
+
1
Select j for drive mode (P 52).
2
Take the rst shot.
3
Press MENU/OK. The rst shot will be shown su-
perimposed on the view through the lens and
you will be prompted to take the second shot.
EXITRETRY
NEXT
RTo return to Step 2 and retake the rst shot,
press the selector left. To save the rst shot and
exit without creating a multiple exposure, press
DISP/BACK.
4
Take the second shot, using the rst frame as a
guide.
2.030
EXIT
5
Press MENU/OK to create the multiple exposure,
or press the selector left to return to Step 4
and retake the second shot.
EXITRETRY
57
More on Photography and Playback
Exposure Compensation
Exposure Compensation
Rotate the exposure compensation dial to adjust
exposure when photographing very bright, very
dark, or high-contrast subjects. The e ect is vis-
ible in the display.
Exposure compensation
indicator
Choose positive values (+) to
increase exposure
Choose negative values (–) to
reduce exposure
QThe amount of compensation available varies with
the shooting mode.
■C (Custom)
When the exposure compensation dial is rotated
to C, exposure compensation can be adjusted by
rotating the front command dial.
set
RThe front command dial can be used to set exposure
compensation to values between −5 and +5 EV.
RThe front command dial can be used to set shutter
speed or exposure compensation. Press the dial to
toggle between the two.
Choosing an Exposure Compensation Value
Choosing an Exposure Compensation Value
• Backlit subjects: Choose values from
+
/
EV to +1
/
EV.
• Highly re ective subjects or very bright
scenes (e.g., snow elds): +1 EV
• Scenes that are mostly sky: +1 EV
• Spotlit subjects (particularly if photographed against dark back-
grounds): –
/
EV
• Subjects with low re ectivity (pine trees or dark-colored foliage):
–
/
EV
58
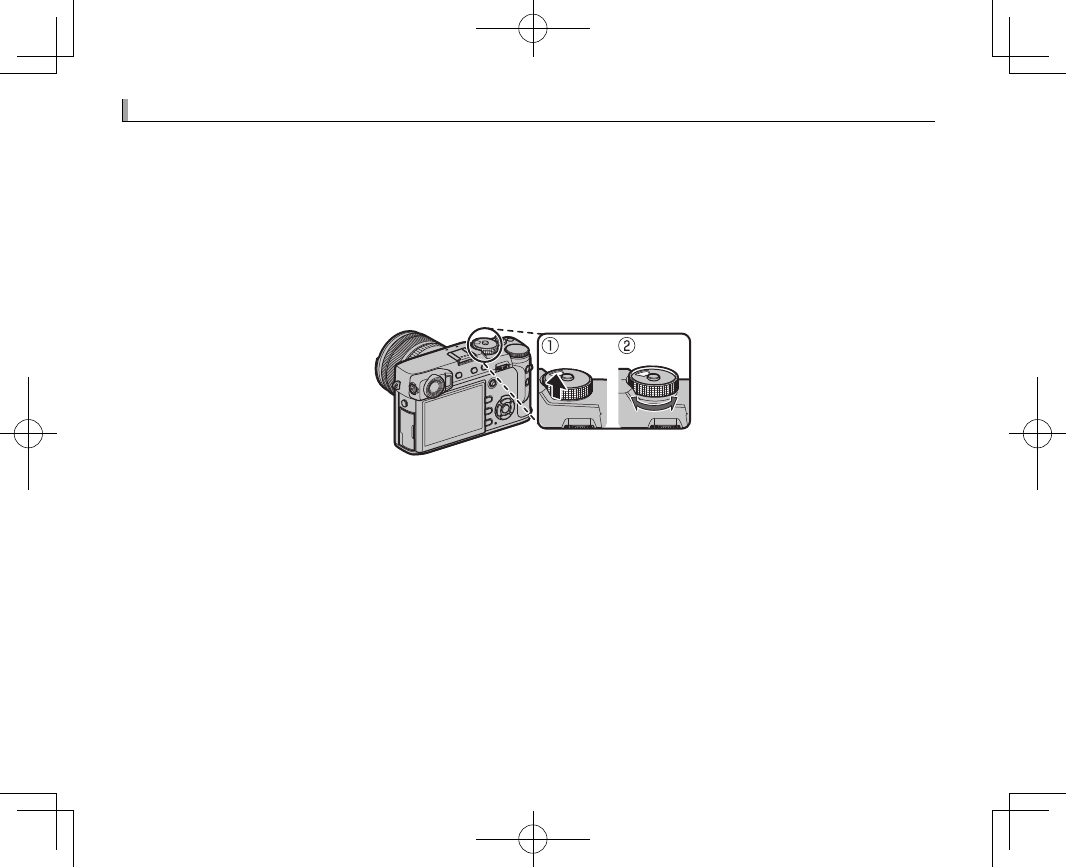
Sensitivity
Sensitivity
“Sensitivity” refers to the camera’s sensitivity to light. Lift and rotate the ISO dial to choose from val-
ues between 200 and 12800, or select L(100), H(25600), or H(51200) for special situations (P 112).
Higher values can be used to reduce blur when lighting is poor, while lower values allow slower shut-
ter speeds or wider apertures in bright light; note, however, that mottling may appear in pictures taken
at high sensitivities, particularly at H(51200), while choosing L(100) reduces dynamic range. Values
of from ISO 200 to ISO 6400 are recommended in most situations. If A is selected, the camera will ad-
just sensitivity automatically in response to shooting conditions according to the option selected for
A SHOOTING SETTING> ISO AUTO SETTING (P 97). Choose from AUTO 1, AUTO 2, and AUTO 3.
RSensitivity is not reset when the camera is turned o .
59
More on Photography and Playback
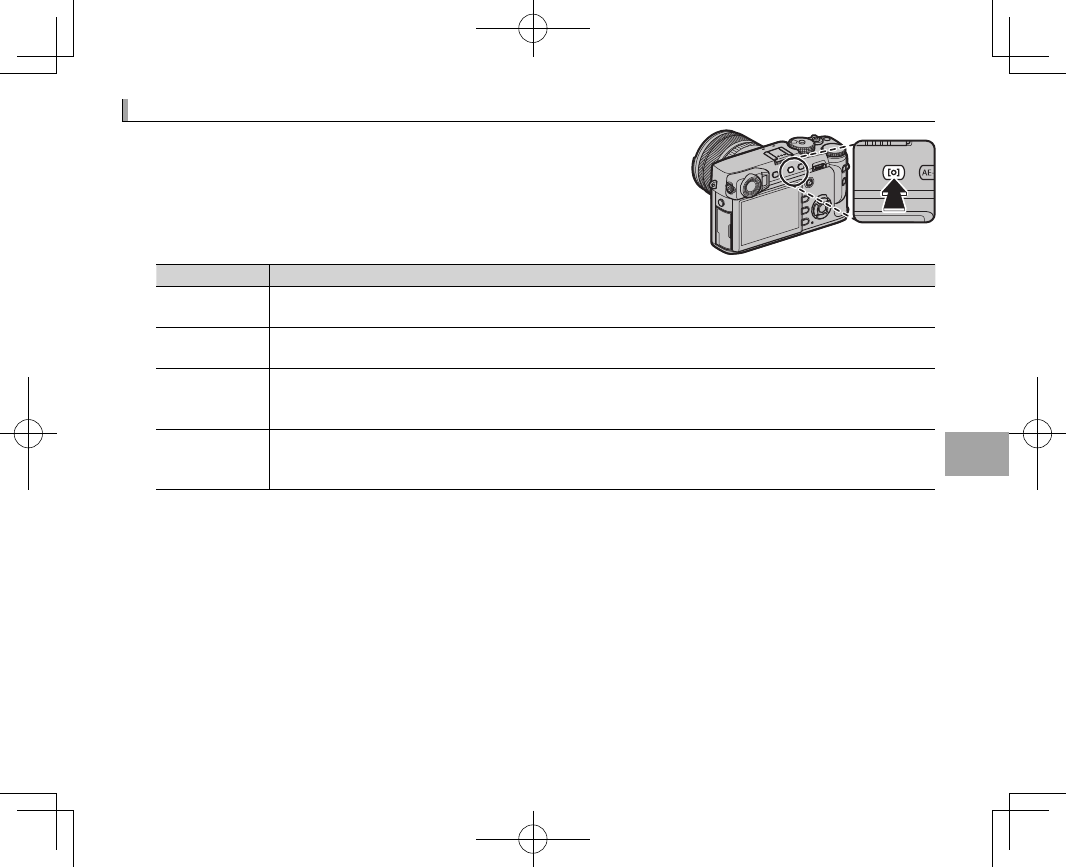
Metering
Metering
Choose how the camera meters exposure. Press the function (Fn3)
button to display the options shown below, then use the selector to
highlight an option and press MENU/OK to select.
QThe selected option will only take e ect when G AF/MF SETTING>
FACE/EYE DETECTION SETTING is o (P 92).
Mode
Mode
Description
Description
o
o
(MULTI)
(MULTI)
The camera instantly determines exposure based on an analysis of composition, color, and brightness
distribution. Recommended in most situations.
p
p
(CENTER WEIGHTED)
(CENTER WEIGHTED) The camera meters the entire frame but assigns the greatest weight to the area at the center.
v
v
(SPOT)
(SPOT)
The camera meters lighting conditions in an area at the center of the frame equivalent to 2% of the total.
Recommended with backlit subjects and in other cases in which the background is much brighter or
darker than the main subject.
w
w
(AVERAGE)
(AVERAGE)
Exposure is set to the average for the entire frame. Provides consistent exposure across multiple shots
with the same lighting, and is particularly e ective for landscapes and portraits of subjects dressed in
black or white.
RMetering options can also be accessed using A SHOOTING SETTING> PHOTOMETRY (P 95).
60
Film Simulation
Film Simulation
Simulate the e ects of di erent kinds of lm, including black-and-
white (with or without color lters). Press the function (Fn4) button to
display the options shown below, then use the selector to highlight
an option and press MENU/OK to select.
Option
Option
Description
Description
c
c
(PROVIA/STANDARD)
(PROVIA/STANDARD) Standard color reproduction. Suited to a wide range of subjects, from portraits to landscapes.
>
>
(Velvia/VIVID)
(Velvia/VIVID) A high-contrast palette of saturated colors, suited to nature photos.
e
e
(ASTIA/SOFT)
(ASTIA/SOFT) Enhances the range of hues available for skin tones in portraits while preserving the bright blues of day-
light skies. Recommended for outdoor portrait photography.
i
i
(CLASSIC CHROME)
(CLASSIC CHROME) Soft color and enhanced shadow contrast for a calm look.
g
g
(PRO Neg. Hi)
(PRO Neg. Hi) O ers slightly more contrast than h (PRO Neg. Std). Recommended for outdoor portrait photography.
h
h
(PRO Neg. Std)
(PRO Neg. Std) A soft-toned palette. The range of hues available for skin tones is enhanced, making this a good choice for
studio portrait photography.
a
a
(ACROS) *
(ACROS) * Take black-and-white photos with rich gradation and outstanding sharpness. Available with yellow (Ye),
red (R), and green (G) lters.
b
b
(MONOCHROME) *
(MONOCHROME) * Take pictures in standard black and white. Available with yellow (Ye), red (R), and green (G) lters.
f
f
(SEPIA)
(SEPIA) Take pictures in sepia.
* Filters deepen shades of gray corresponding to hues complementary to the selected color. The yellow (Ye) lter deepens purples and
blues and the red (R) lter blues and greens. The green (G) lter deepens reds and browns, including skin tones, making it a good
choice for portraits.
RFilm simulation options can be combined with tone and sharpness settings (P 89).
RFilm simulation options can also be accessed using H IMAGE QUALITY SETTING> FILM SIMULATION (P 89).