Getac Technology 101 Tablet PC User Manual Notebook
Getac Technology Corp. Tablet PC Notebook
Contents
users manual 5

CHAPTER 4
Expanding Your Computer
You can expand the capabilities of your computer by connecting other
peripheral devices. When using a device, be sure to read the instructions
accompanying the device together with the relevant section in this
chapter.
This chapter gives guidelines on installing and using these devices:
! Serial device
! IR device
! USB device
! PC Card

4-2 Expanding Your Computer
Connecting a Serial Device
Your computer has a serial port for connecting a serial device such as a
serial mouse or modem.
Follow this procedure to connect a serial device:
1. Make sure the “COM1 Port” item is set properly in the SCU program.
(See “Advanced Menu” in Chapter 5 for information.)
2. Make sure the computer is not turned on.
3. Plug the device cable to the serial port on the right side of the Tablet
PC.
4. Turn on the computer.
NOTE: Portable modems that derive power through the serial port cannot be used with
the Tablet PC. Instead, use a modem that is powered by its own internal battery or
external AC power.

Expanding Your Computer 4-3
Connecting a USB Device
Your computer has one USB port on the right side for connecting USB
devices such as digital camera, scanner, printer, modem, or mouse; and
one CCD USB port at the bottom-side for connecting an optional CCD
camera.
NOTE: You can also use the USB port located on the Expansion Port plug of the
optional CD-ROM drive module.
USB is specified to be an industry standard extension to the PC
architecture. It supports “Plug and Play” technology so you can install
and remove USB devices without turning off the computer. With its
multiple connection capability, up to 127 devices can be connected in a
daisy-chain configuration. In addition, you can use a USB hub that
converts a single USB connector into multiple ports where USB devices
can be connected.
To connect a standard USB device, simply plug the device cable to the
USB port on the right side of the Tablet PC, or through the optional
CD-ROM drive module’s Expansion Port plug.
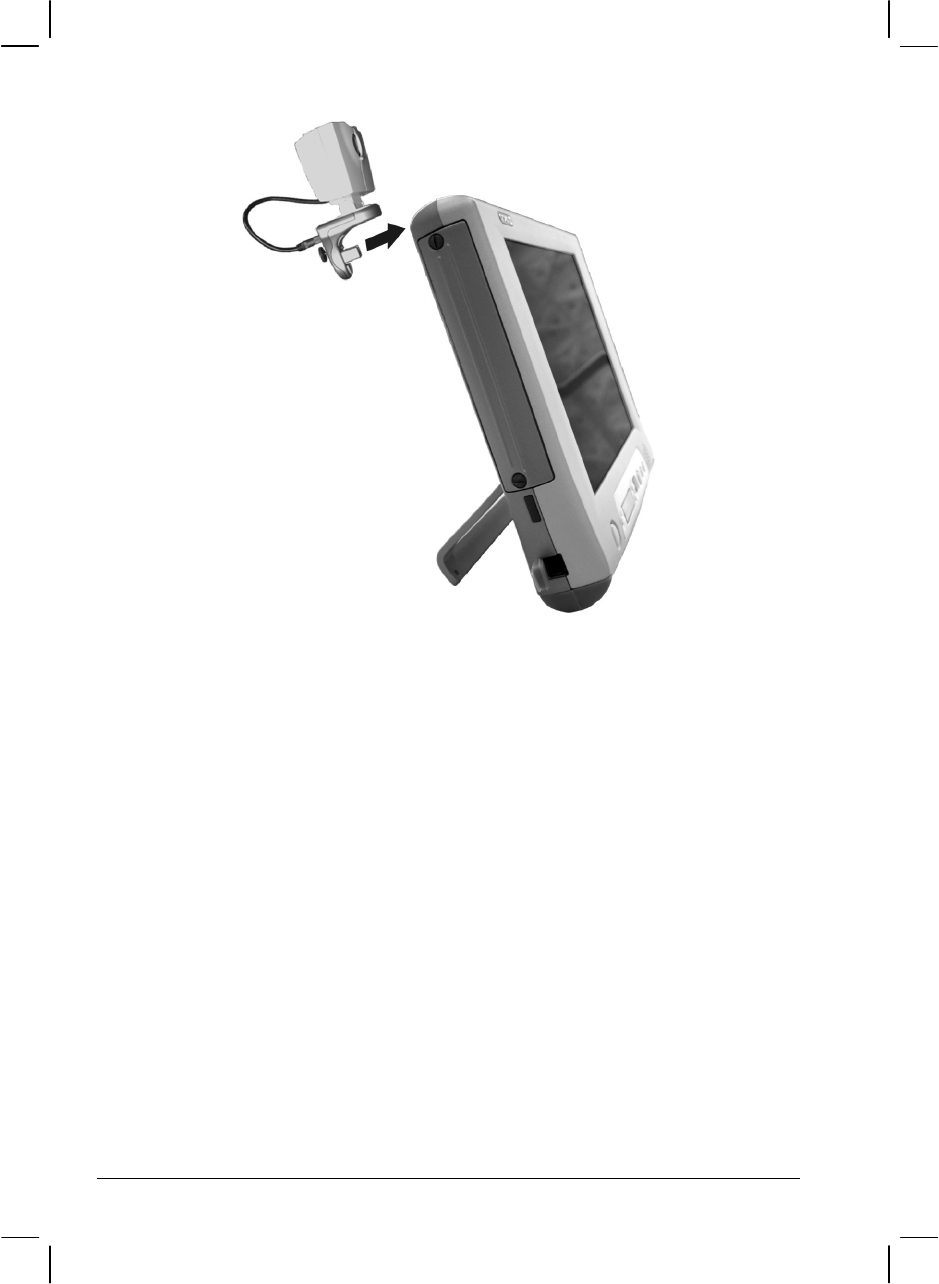
To connect an optional CCD camera, simply place the camera on top of
the Tablet PC nearest the CCD USB port. Align and plug in the golden
finger connector to the CCD USB port at the bottom-side of the Tablet PC
and secure it in place with the built-in screw. Adjust the angle of the CCD
camera according to your need.
4-4 Expanding Your Computer

Expanding Your Computer 4-5
Connecting an IR Device
Your computer has an IR (infrared) port for connecting an infrared-
equipped device wirelessly such as a wireless keyboard/mouse, another
computer, printer, or PDA (Personal Digital Assistant).
The infrared feature supports these standards:
For the front panel’s IR port
! IR keyboard/mouse that supports Forward FK34PUS002 (US
language) specification
For the left side’s IR port
! IrDA 1.1 (FIR – Fast Infrared) with 9.6 Kbps to 4.0 Mbps transfer
rate
! HPSIR – Serial Infrared mode
Follow this procedure to connect an IR device:
1. Under Windows, make sure that the IrDA Fast Infrared Port is set to
HP HSDL-2300/3600. (See “How to Use the CD” in Chapter 6 for
information.)
2. Make sure that the “COM2 Port” and its “Mode” items are set
properly in the SCU program. (See “Advanced Menu” in Chapter 5
for information.)
3. When using the front panel’s IR port:
Place the wireless keyboard where its IR port faces the IR port of
your computer within the effective range − within ±15-degrees
vertical angle and within ±30-degrees horizontal angle at no greater
than 3 meter distance.

4-6 Expanding Your Computer
When using the left side’s IR port:
Place the transmitting device where its IR port faces the IR port of
your computer within the effective range − within ±20-degrees
vertical angle and within ±20-degrees horizontal angle at no greater
than 0.8~1.0 meter distance.
Place the receiving device where the IR port of the Tablet PC faces its
IR port within the effective range − within ±15-degrees vertical angle
and within ±15-degrees horizontal angle at no greater than 0.8~1.0
meter distance.
4. To take advantage of the IR communications, you need a third party
software.
NOTE: During infrared communication, take note of the following:
! Do not move the computer and IR device.
! Do not enter Standby mode.
! Do not use a cell phone or another IR device near the computer.
! Avoid strong light such as sunlight or fluorescent light.
! Disable the screen saver.

Expanding Your Computer 4-7
Using PC Cards
Your computer has one PC Card slot to accommodate one type II card.
ZV Port and CardBus Support
Your computer’s PC Card slot supports CardBus and ZV
(Zoomed-Video) Port specifications. CardBus is the 32-bit version of PC
Card technology. It allows speeds of up to 133 Mbps at 33 MHz. Typical
applications are SCSI host bus, graphic video, and high-speed network
cards.
Inserting and Removing a PC Card
NOTE:
! Some PC Cards require additional system resources. Before using such PC card,
you may have to free other system resources for the PC Card.
! Although some PC Cards can be inserted and removed without turning off the
computer, you cannot remove or install PC Cards during Standby mode.
To insert a PC Card:
1. Locate the PC Card slot on the right side of the computer.
2. Slide the PC Card, with its label facing up, into the slot until the eject
button pops out.

4-8 Expanding Your Computer
3. When a new card is seated, the computer will detect it and try to
install the appropriate driver. Follow the on-screen instruction to
complete the process.
To remove a PC Card:
1. Your operating system may require you to stop the PC Card before
you actually remove it. (In Windows, double-click the PC Card icon
in Control Panel to stop the card.)
2. Push the eject button and the card will slide out slightly.
3. Pull the card out of the slot.

Expanding Your Computer 4-9
System Memory Upgrade
You can upgrade your computer by changing system memory to a
maximum of 128 MB on the SO-DIMM slot. However, to avoid damage
during the installation procedure, please ask your dealer for help.