Getac Technology 101 Tablet PC User Manual Notebook
Getac Technology Corp. Tablet PC Notebook
Contents
users manual 6

CHAPTER 5
Setup Configuration Utility (SCU)
SCU is a program for configuring the BIOS (Base Input/Output System)
settings of the computer.
BIOS is a layer of software, called firmware, that translates instructions
from other layers of software into instructions that the computer hardware
can understand. The BIOS settings are needed by your computer to
identify the types of installed devices and establish special features.
This chapter tells you how to use the SCU program.

5-2 Setup Configuration Utility (SCU)
When and How to Use the SCU Program
When to Use
You need to run the SCU program when:
! You see an error message on the screen requesting you to run
SETUP.
! You want to restore the factory default settings.
! You want to modify some specific settings according to the
hardware.
! You want to modify some specific settings to optimize system
performance.
Starting SCU
NOTE:
! The SETUP screens shown in this chapter are for your reference only. The actual
items or settings on your computer may differ.
! The SETUP program may have been updated after the publication of this manual.
! The settings you select in your operating system might override similar settings in
SETUP.
To run SCU, press F2 when the prompt appears in the lower left corner of
the screen during system startup. The prompt shows up on the screen for
only a few seconds. You must press F2 quickly. The SCU menu appears
as shown next.
Setup Configuration Utility (SCU) 5-3
The menu can be divided into four areas:
! On the top line is the menu bar containing the titles of the available
menus. Each menu title brings a specific menu.
! The center left column of the menu contains items that you can set for
the selected menu title. The arrow sign in front of an item indicates
there is a sub-menu for the item.
! The right column of the menu provides help information of the
selected item.
! The bottom lines give keyboard instructions for moving around and
making selections.

5-4 Setup Configuration Utility (SCU)
Moving Around and Making Selections
A brief description of keyboard (if installed) usage is listed next:
Key Function
←, → Selects a menu title.
↑, ↓ Selects an item or option.
Enter 1) Brings up the sub-menu when an item with the arrow sign is
selected.
2) Opens or closes the options window when an item is selected.
Space bar,
– Cycles through the pre-defined value for the selected item.
Pressing the space bar brings up the next value; pressing the
minus (–) key does the contrary.
Esc 1) Exits the SCU program.
2) Returns to the previous menu if in a sub-menu.
3) Closes the options window if one is open.
NOTE: You are advised to use the mouse (if installed) as it is more straightforward than
using the keyboard.
Setup Configuration Utility (SCU) 5-5
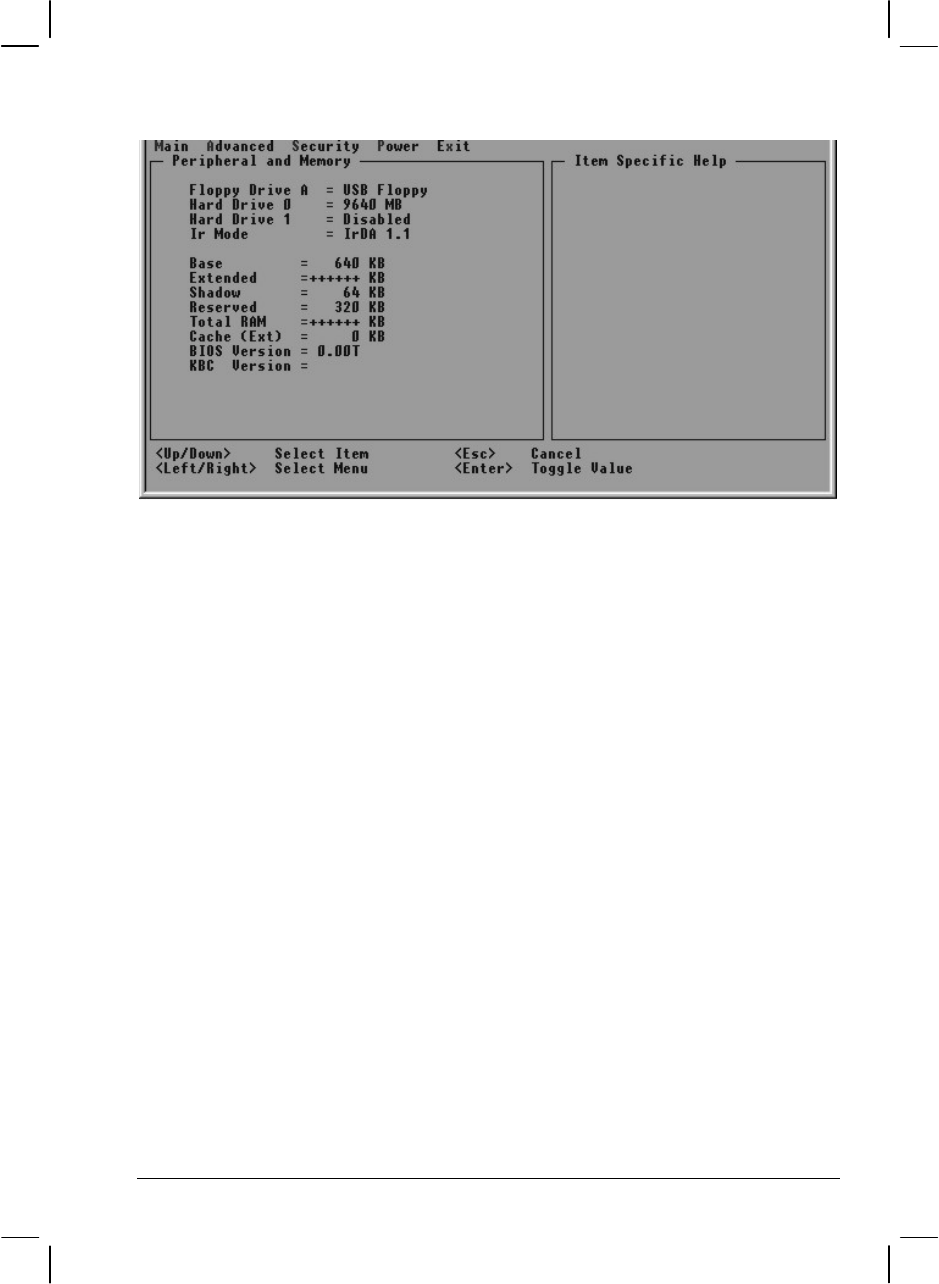
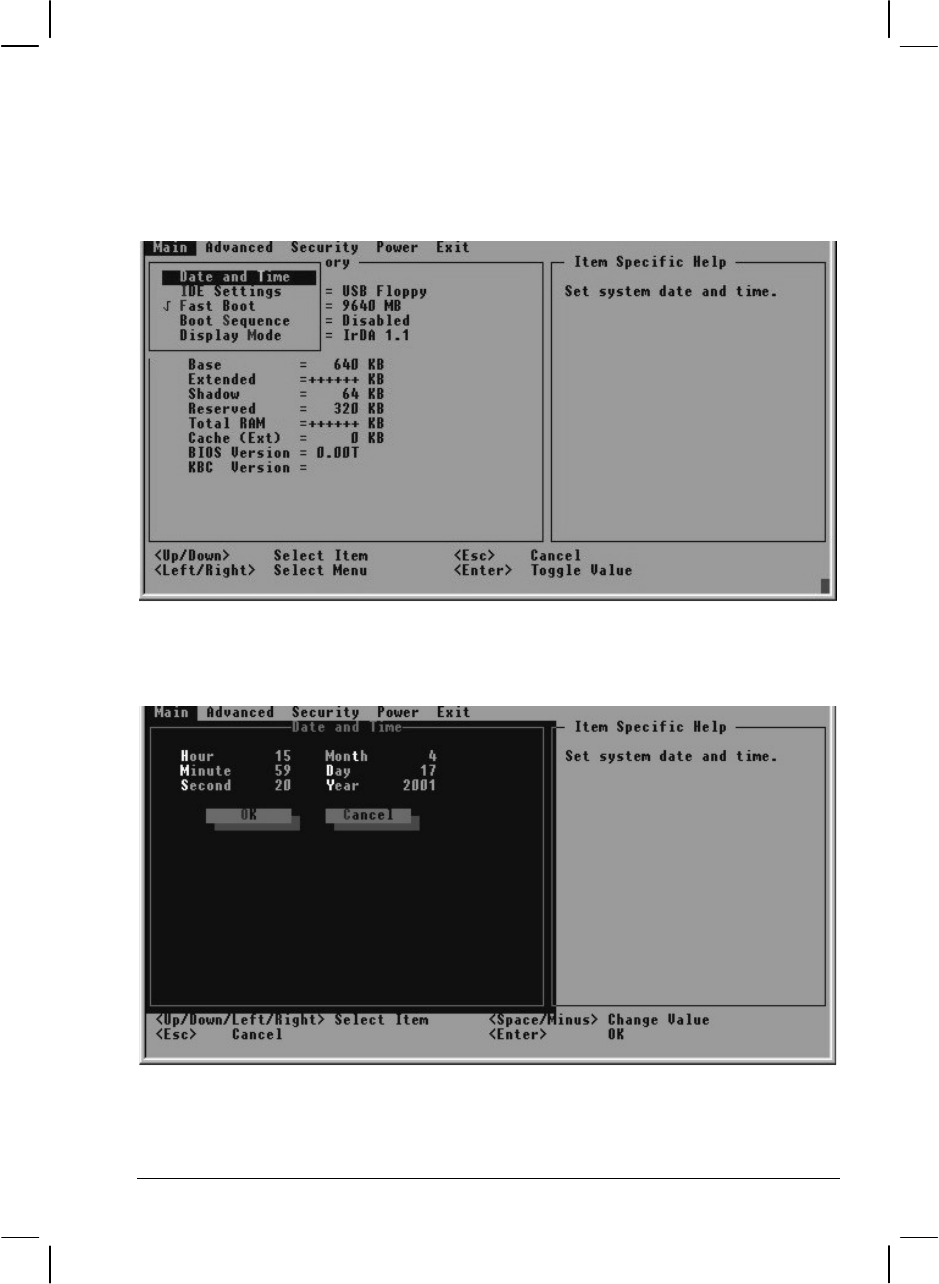
Main Menu
The Main menu contains the basic configuration settings of the system.
Date and Time
Sets the system time (Hour, Minute, Second) and date (Month, Day,
Year).
5-6 Setup Configuration Utility (SCU)
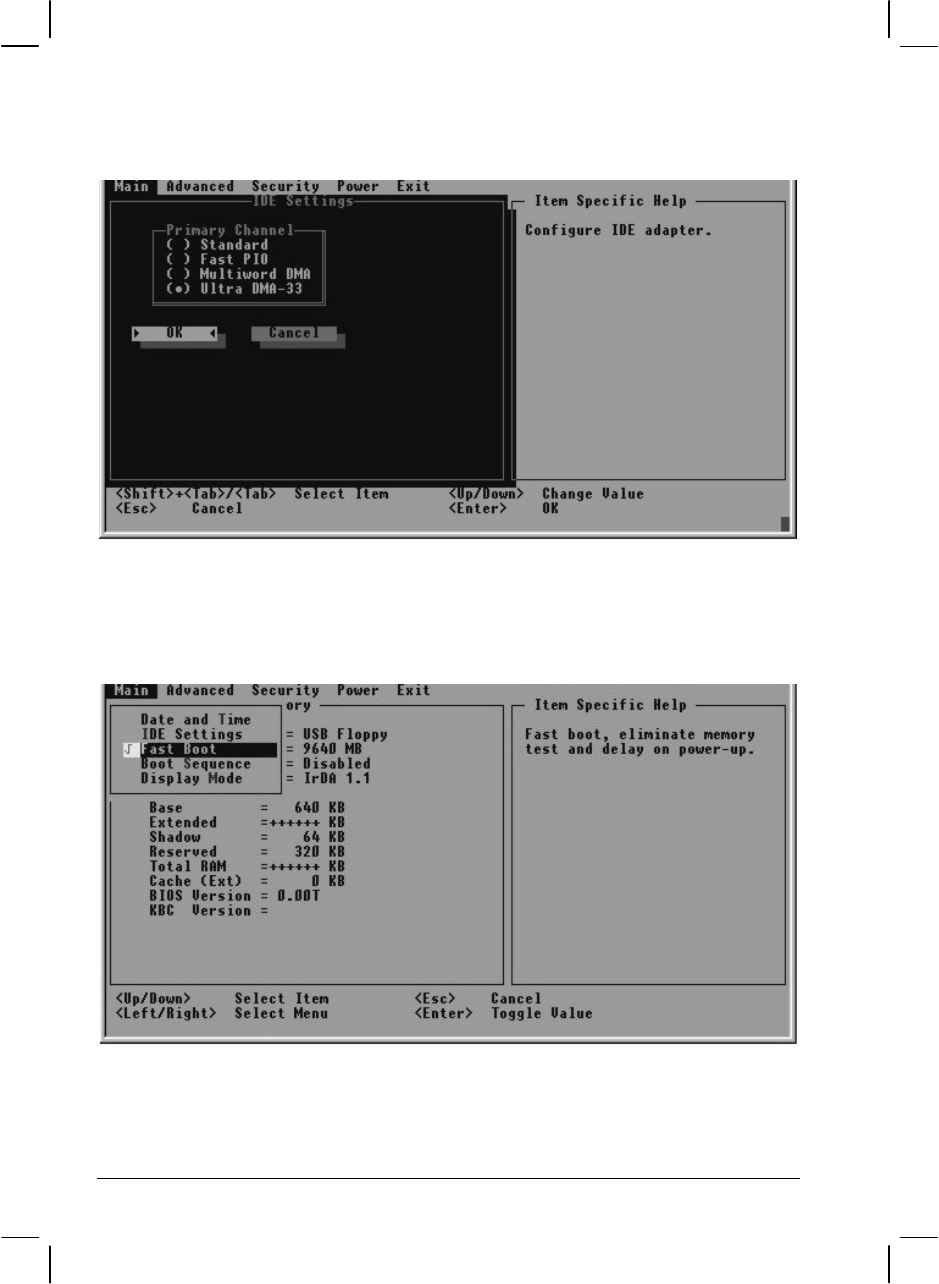
IDE Settings
Sets the type of hard disk drive installed in your system.
Fast Boot
When enabled, speeds up the booting procedure by bypassing the
memory test. A check mark indicates enabled, while underline indicates
disabled.

Setup Configuration Utility (SCU) 5-7
Boot Sequence
Sets the first, second, and third boot device. The system will try to boot
from the first device but if it is not available, will try the next boot device.
Display Mode
Sets the display output device.
5-8 Setup Configuration Utility (SCU)
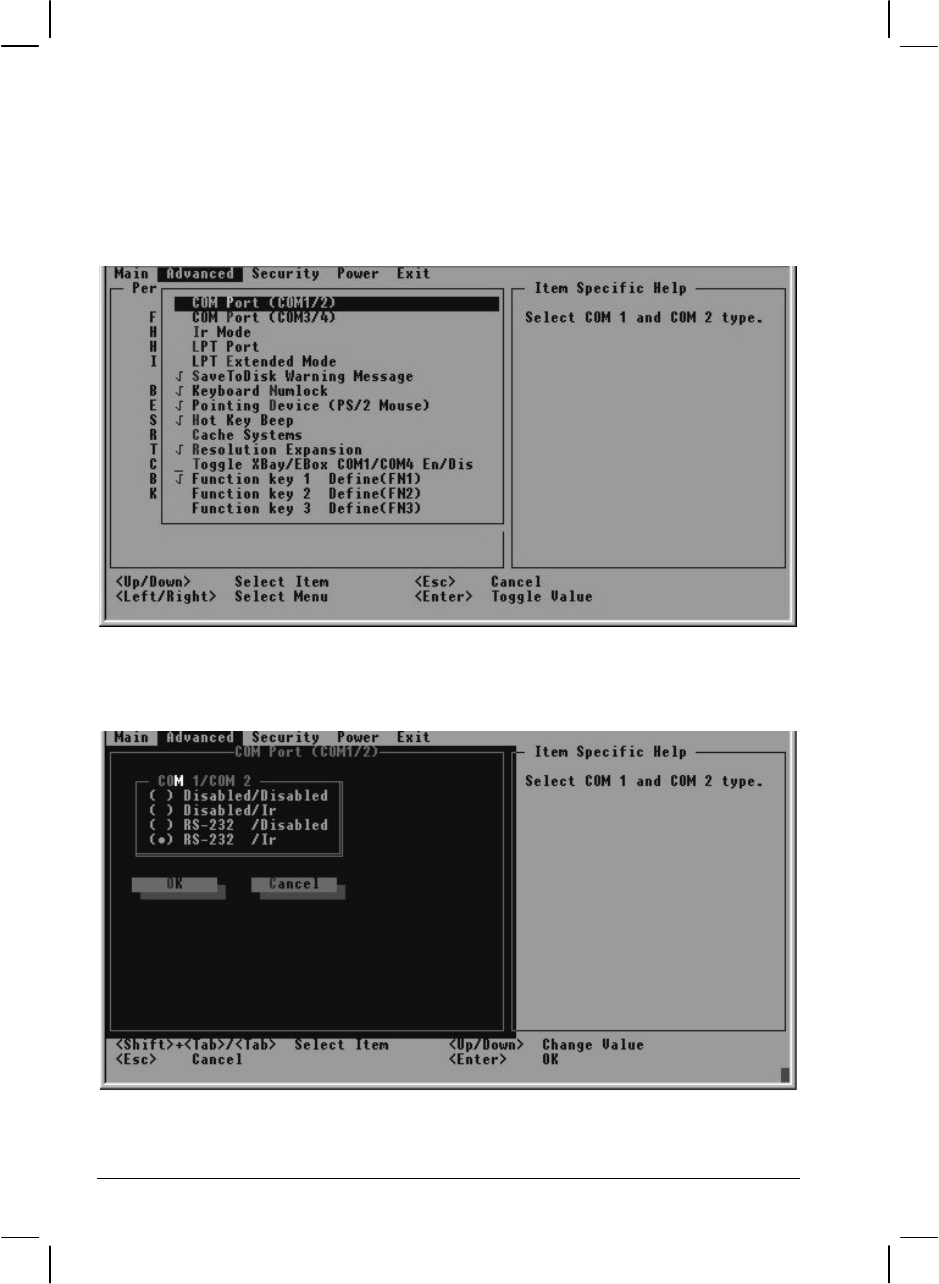
Advanced Menu
The Advanced menu contains the input/output configuration settings of
the system.
COM Port (COM1/2)
Setup Configuration Utility (SCU) 5-9
Allows you to assign COM1 and COM2 to specific functions that you
wish to use. In general, COM1 can be assigned to RS-232C (serial port)
while COM2 can be assigned to IR (infrared). Select Disabled if you need
the resources (3F8/IRQ4 of COM1 and 2F8/IRQ3 of COM2) for other
devices.
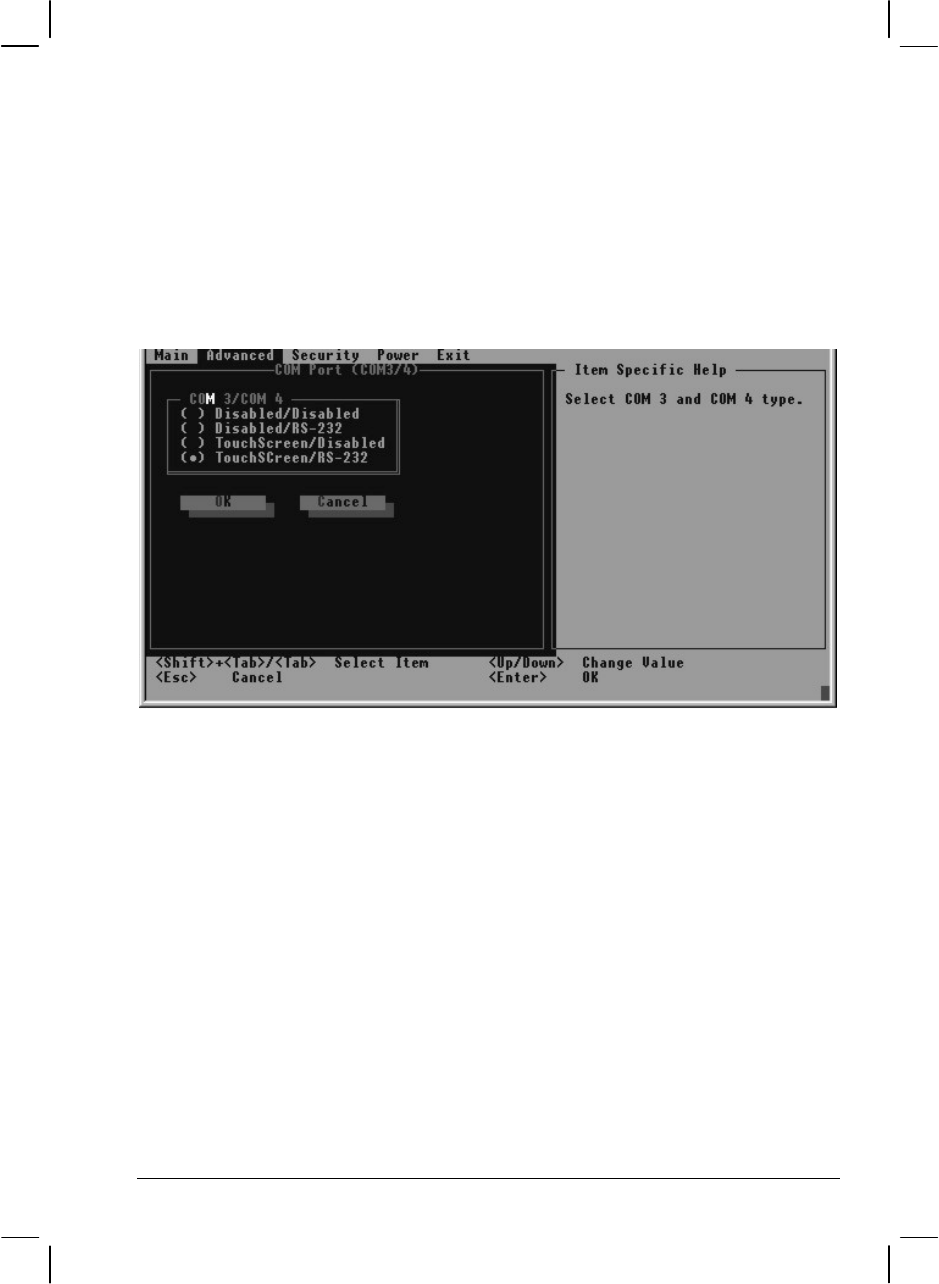
COM Port (COM3/4)
Allows you to assign COM3 and COM4 to specific functions that you
wish to use. In general, COM3 can be assigned to RS-232C (serial port) or
touchscreen, while COM4 can be assigned to RS-232C. Select Disabled if
you need the resources (3E8/IRQ5 of COM3 and 2E8/IRQ7 of COM4)
for other devices.

5-10 Setup Configuration Utility (SCU)
Ir Mode
Sets the communication compatibility mode for the IR port. Select
according to the type of device with which the Tablet PC is to
communicate with.
LPT Port
Sets the address for the LPT port (parallel port).
Setup Configuration Utility (SCU) 5-11
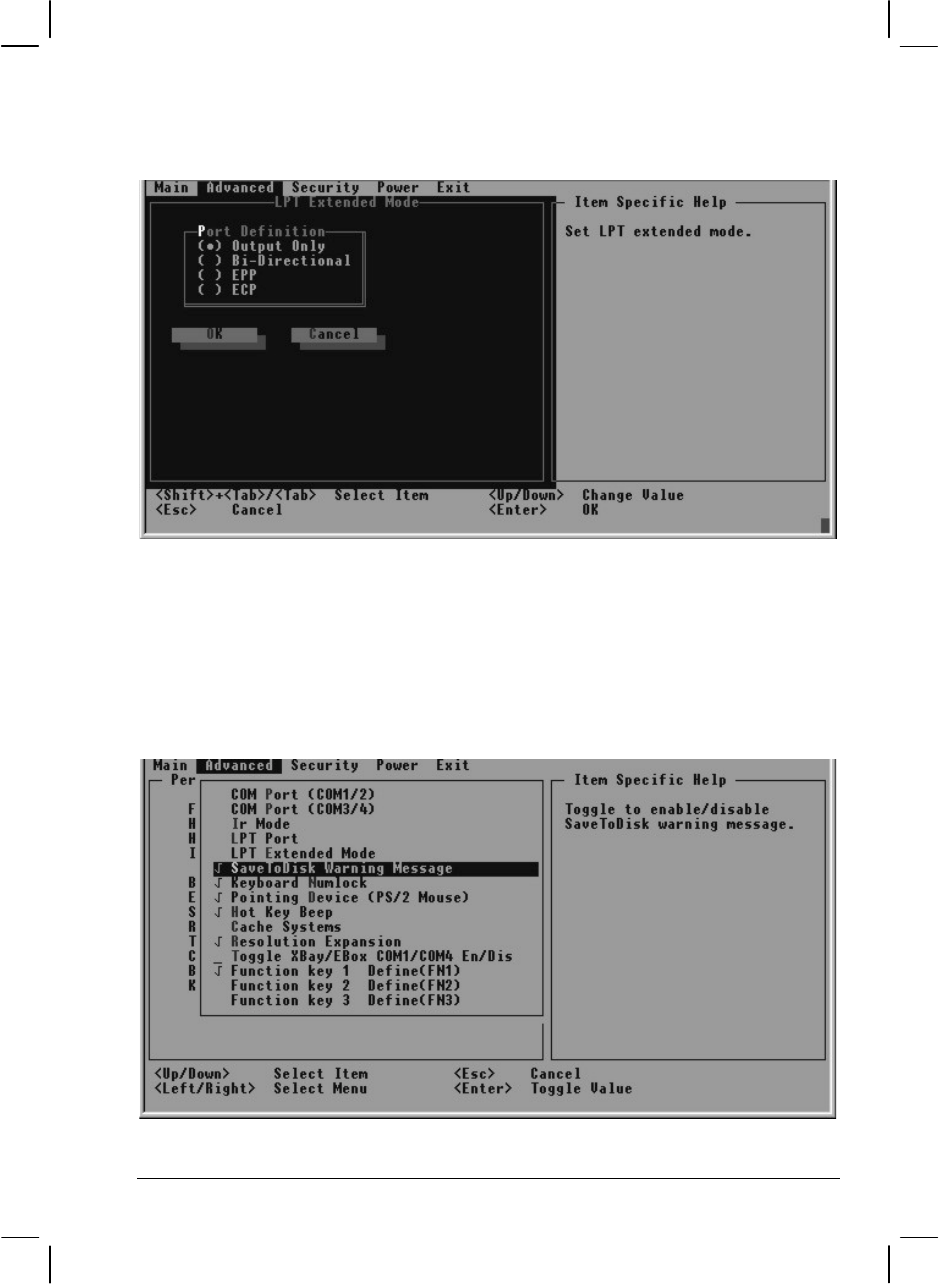
LPT Extended Mode
Sets the LPT port (parallel port) mode supported by the parallel device
you are using. Your system supports EPP (Enhanced Parallel Port) and
ECP (Extended Capabilities Port) standards that turn the standard parallel
port into a high-speed bi-directional peripheral port.
SaveToDisk Warning Message
5-12 Setup Configuration Utility (SCU)
Sets if a warning message will appear after system power on when there
is no Suspend-to-disk partition on the hard disk. A check mark indicates
enabled, while underline indicates disabled.
Keyboard Numlock
Sets if the numeric keypad will function. A check mark indicates enabled,
while underline indicates disabled.
Pointing Device (PS/2 Mouse)
Enables or disables the external PS/2 mouse. Disable this option if you
are using a serial mouse. A check mark indicates enabled, while underline
indicates disabled.
Hot Key Beep
Enables or disables the beep sound when any hot-key is pressed.
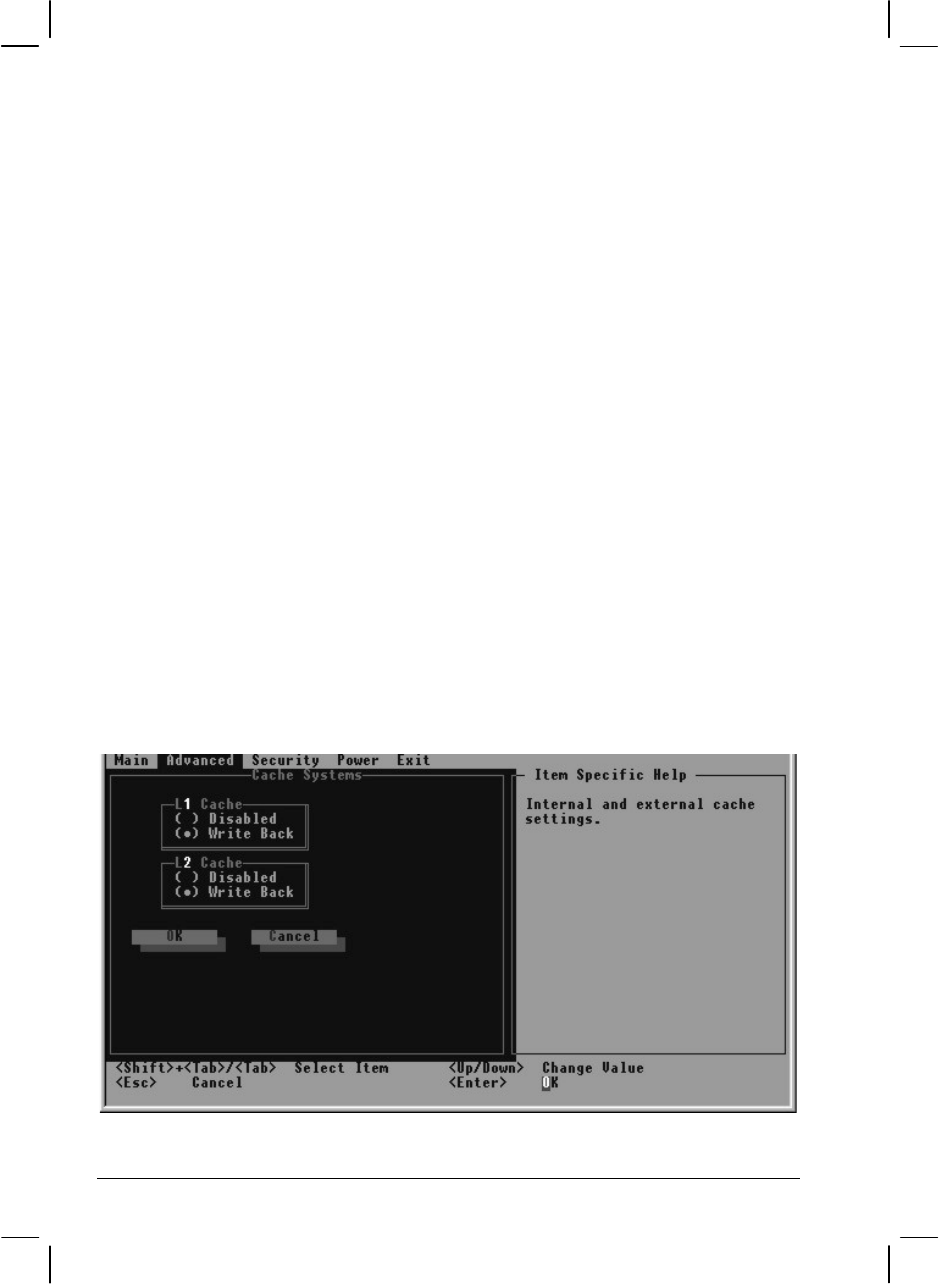
Cache Systems

Setup Configuration Utility (SCU) 5-13
Enables or disables the cache memory of your system: L1 cache (CPU
internal cache) and L2 cache (external cache). Cache memory enhances
system performance because the most frequently used data is accessed
from and written to the high-speed cache memory. For stable system
performance, you are not advised to change the default settings.
Resolution Expansion
Allows you to expand the LCD display.
Toggle XBay/EBox COM1/COM4 En/Dis
When this item enabled, COM1/COM4 on the X-Bay is enabled while
COM1/COM4 on the Expansion Box Port Replicator module is disabled.
When disabled, COM1/COM4 on the Expansion Box Port Replicator
module is enabled while COM1/COM4 on the X-Bay is disabled. A
check mark indicates enabled, while underline indicates disabled.
5-14 Setup Configuration Utility (SCU)
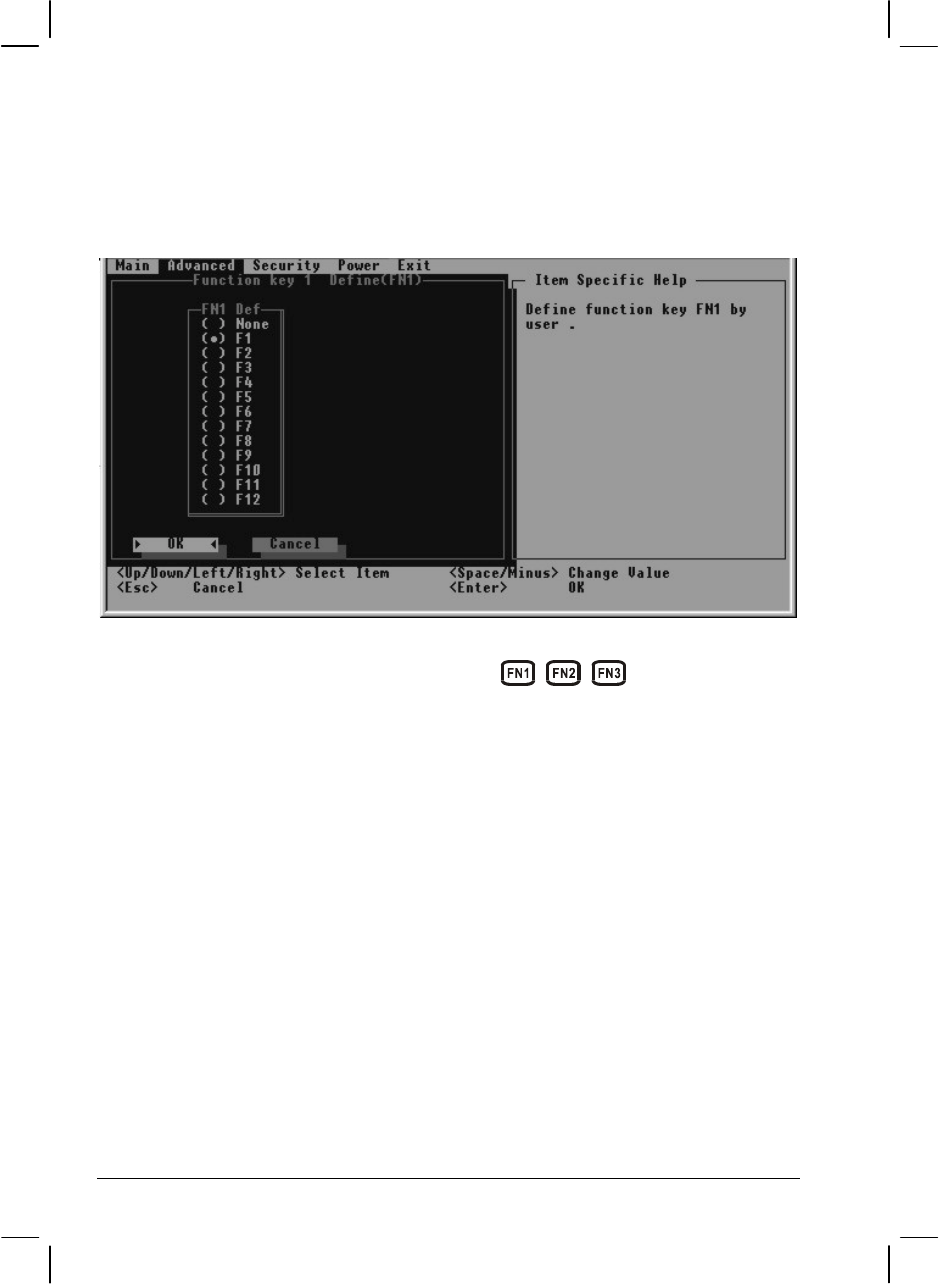
Function Key 1 Define (FN1)
Function Key 2 Define (FN2)
Function Key 3 Define (FN3)
These 3 items allow user to define the corresponding function key
associated with the 3 function buttons ( , , ) found on the front
panel.
Setup Configuration Utility (SCU) 5-15
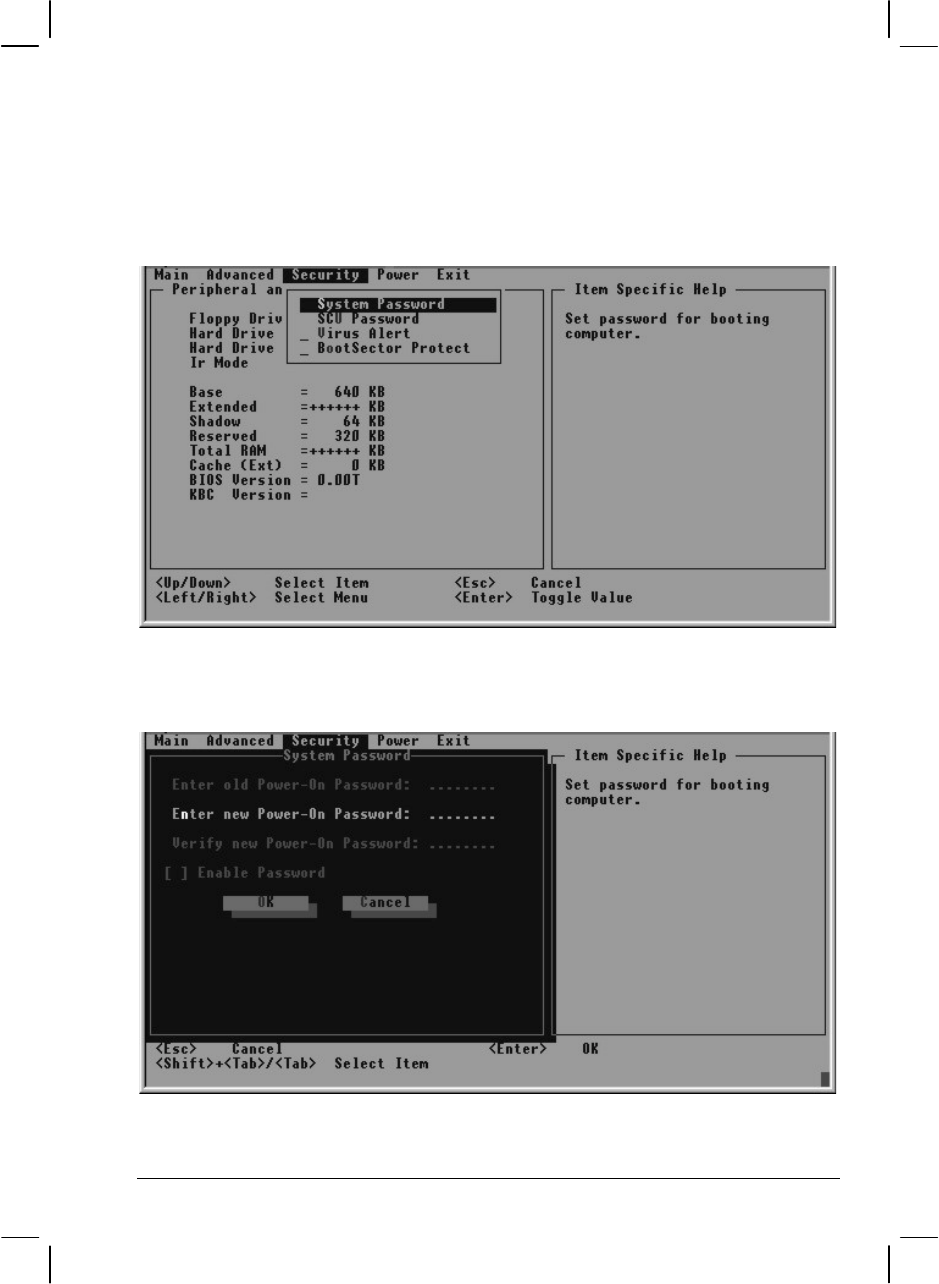
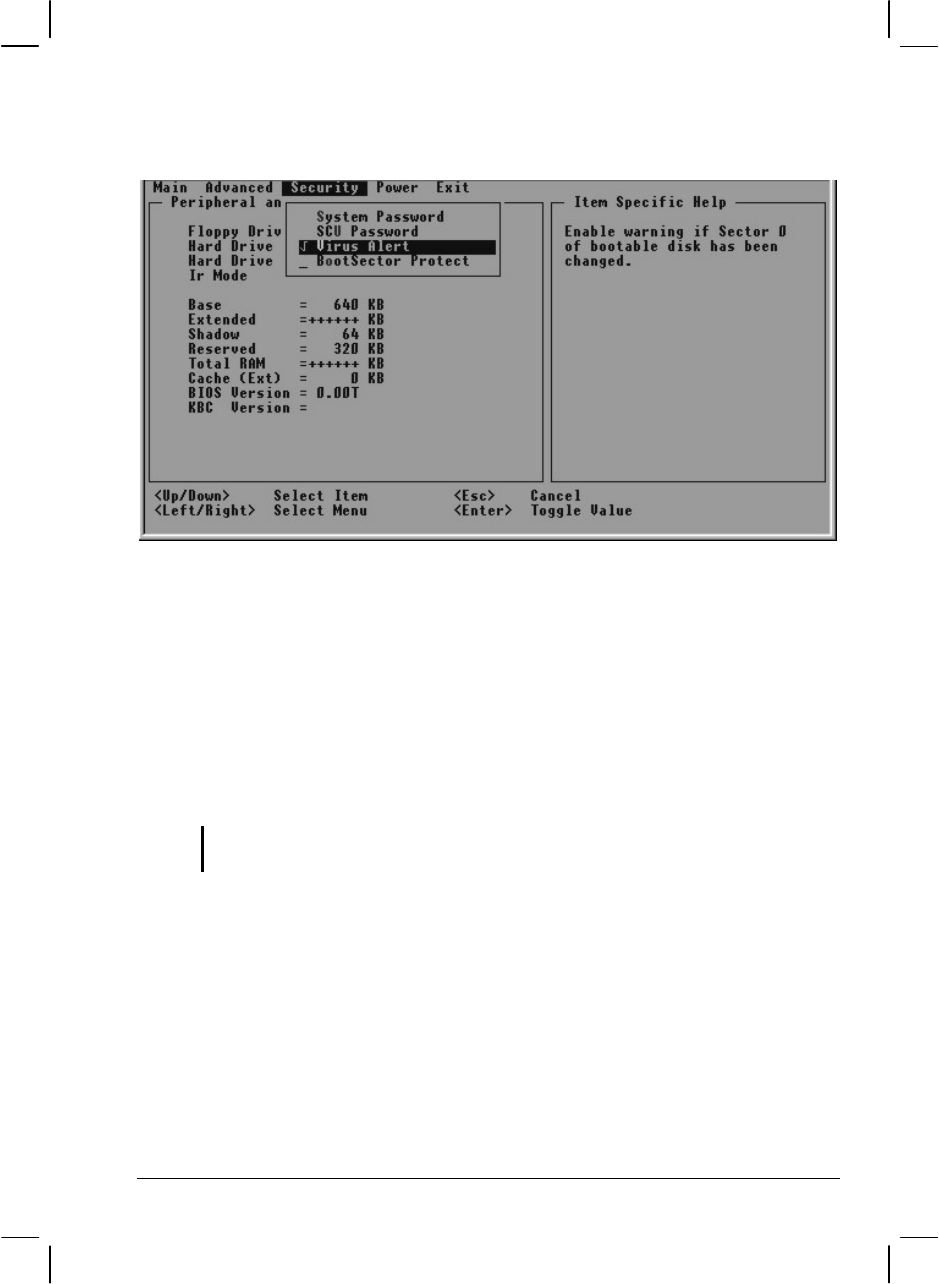
Security Menu
The Security menu contains the security setting that safeguards your
system against unauthorized use.
System Password

5-16 Setup Configuration Utility (SCU)
Sets the system password. A password is required for starting up the
system and running the SCU program. When setting password, make sure
that NumLock is off, then type the password in the entry field and press
Enter. Confirm your password by typing it again and pressing Enter. For
the password to take effect, enable the Enable Password item.
SCU Password
Sets the SETUP password. A password is required for running the SCU
program. When setting password, make sure that NumLock is off, then
type the password in the entry field and press Enter. Confirm your
password by typing it again and pressing Enter. For the password to take
effect, enable the Enable Setup Password item.
Setup Configuration Utility (SCU) 5-17
Virus Alert
Gives a warning message when the hard disk boot sector (partition table)
is about to be changed. A check mark indicates enabled, while underline
indicates disabled.
BootSector Protect
Helps prevent infection of computer viruses by protecting the hard disk
boot sector (partition table) from changes. A check mark indicates
enabled, while underline indicates disabled.
CAUTION: Disable this item before installing an operating system, running Fdisk or
Format program. Otherwise, the intended action will fail.
5-18 Setup Configuration Utility (SCU)
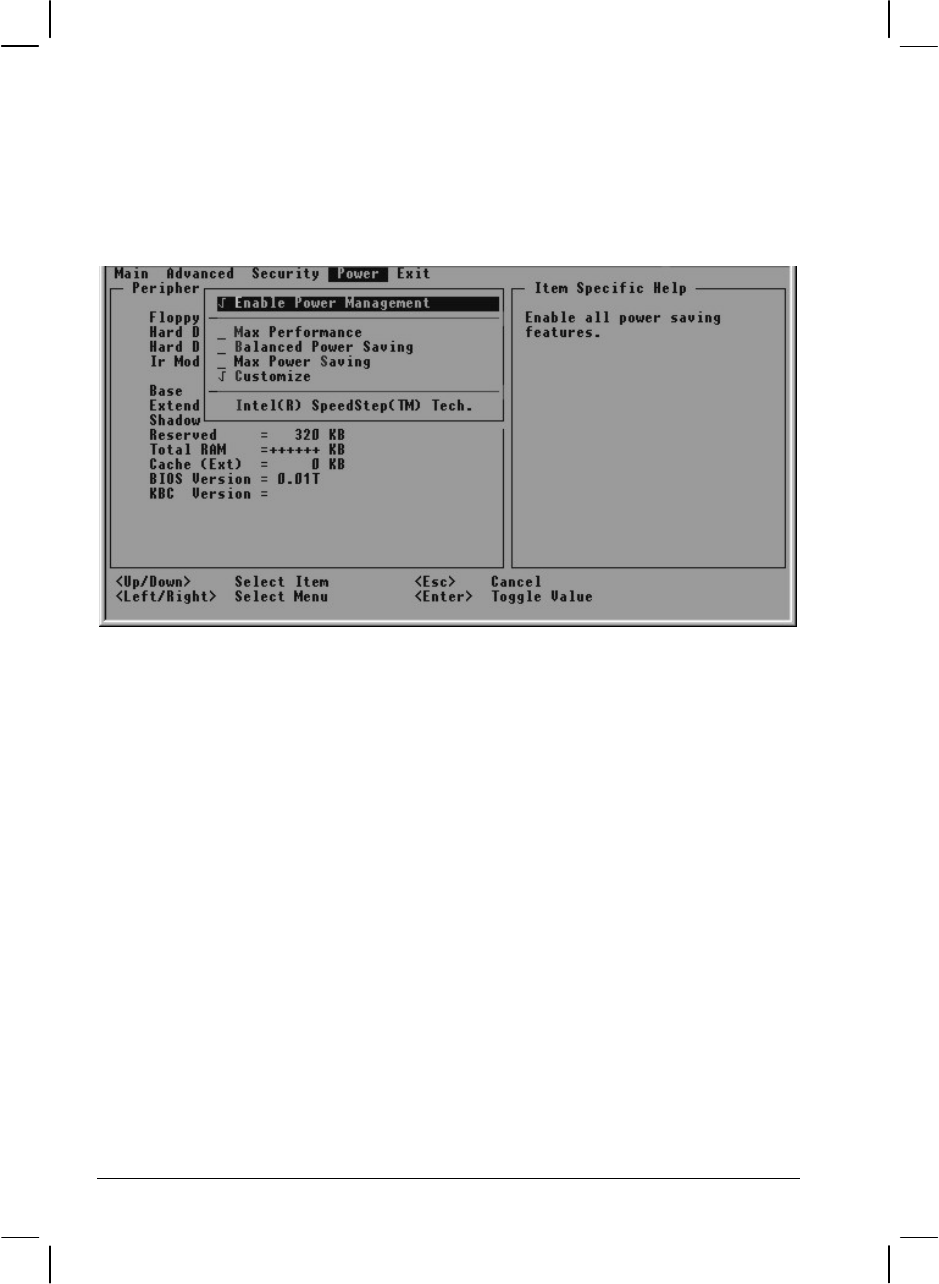
Power Menu
The Power menu contains the power management settings that help save
system power.
Enable Power Management
Serves as the master control for the power management feature. A check
mark indicates enabled, while underline indicates disabled.
Max Performance
Balanced Power Saving
Max Power Saving
Customize
You can only select one of them. A check mark indicates enabled, while
underline indicates disabled.
Max
Performance Allows maximum system performance but
shortest battery life.
Setup Configuration Utility (SCU) 5-19
Balanced
Power Saving Allows moderate system performance and
moderate battery life.
Max Power
Saving Allows the longest battery life but minimum
system performance.
NOTE: The predefined settings of the aforementioned options are viewed in the next
item.
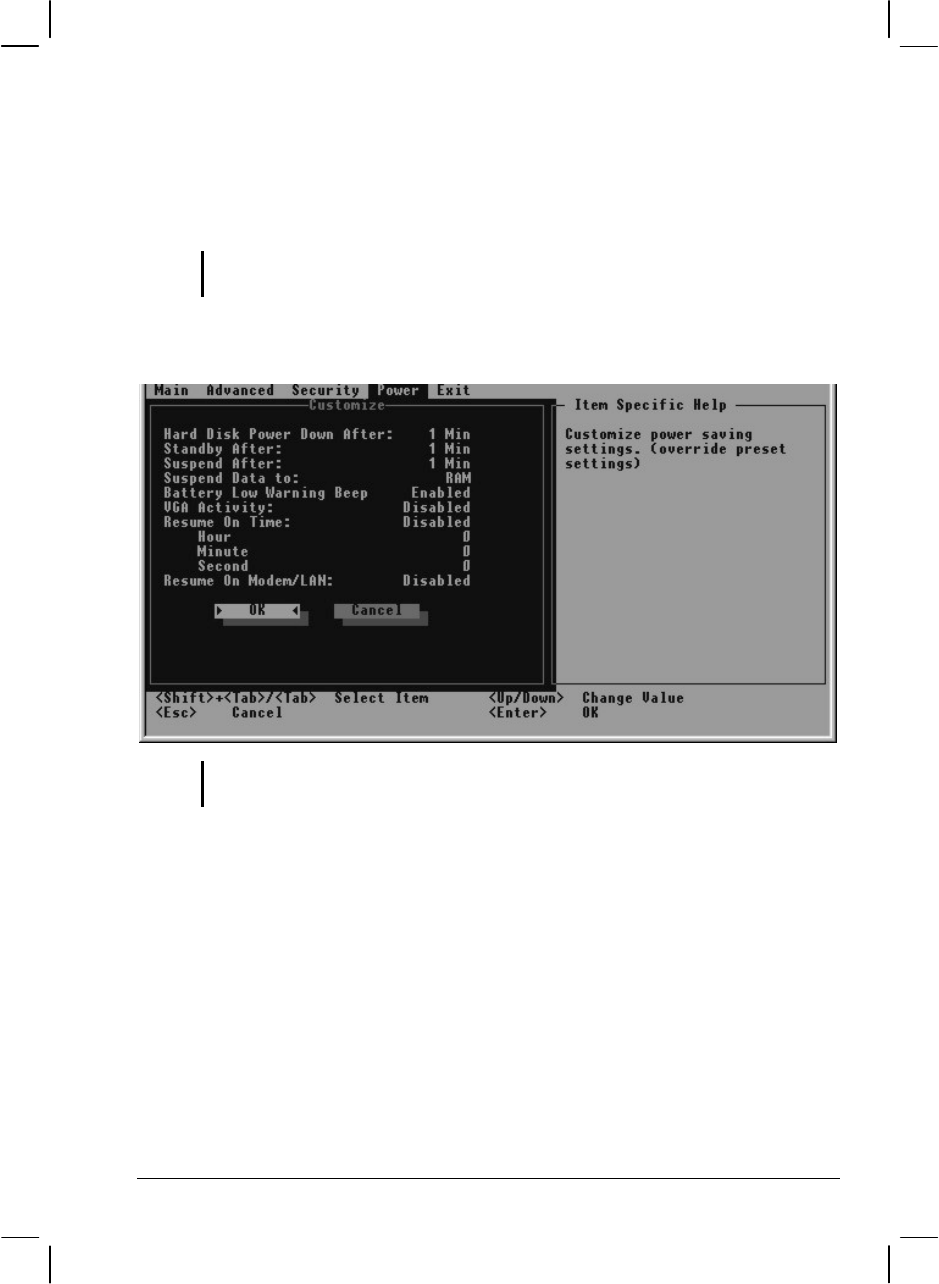
Customize
NOTE: All items except Battery Low Warning Beep do not work in ACPI-compliant
operating systems such as Windows 98, Windows Me, and Windows 2000.
Sets your own preference for the various power management settings.
Hard Disk Power Down After sets the time period of inactivity
before the hard disk will power down. The hard disk will power up
again when next accessed.
Standby After sets the time period of inactivity before entering
Standby mode. When Standby mode is in effect, several system
subsystems go into standby or off mode so that power use is reduced.
The system will wake up from Standby mode when activity is
detected.

5-20 Setup Configuration Utility (SCU)
Suspend After sets the time period of inactivity before entering
Suspend mode. It works in tandem with the previous item Standby
After. After the system enters Standby mode, it will start the timeout
period before system enters Suspend mode. What happens next upon
entering Suspend mode is determined by the next item Suspend Data
to.
Suspend Data to allows you to choose between suspending data to
RAM or to disk. When RAM is selected, system will save data to
DRAM and stay in the lowest power state. The system will wake up
when any key is pressed, or the succeeding items Resume on Time or
Resume on Modem/LAN is enabled. When Disk is selected, system
will save the data to the “suspend-to-disk” partition on the hard disk
(check your hard disk drive if it is available) and power off. When you
next power on the system preserves the exact state when you last enter
Suspend mode.
Battery Low Warning Beep allows the system to issue warning
beeps when it enters a low battery state.
VGA Activity as a means of entering power management is not
available if any video activity (e.g., screen savers) is detected. When
enabled, power management will not take effect if any VGA activity
is detected. When disabled, power management will ignore any VGA
activity.
Resume on Time allows you to set the time when the system will
wake up upon entering Suspend mode and the Suspend Data to item
is set to RAM.
Hour/Minute/Second allows you to set the specific time period to
wake up the system if the previous item Resume on Time is enabled.
Enter the value in each field by typing the number.
Resume on Modem/LAN allows you to wake up the system when the
modem receives an incoming call or LAN activity is detected upon
entering Suspend mode and the Suspend Data to item is set to RAM.
Setup Configuration Utility (SCU) 5-21
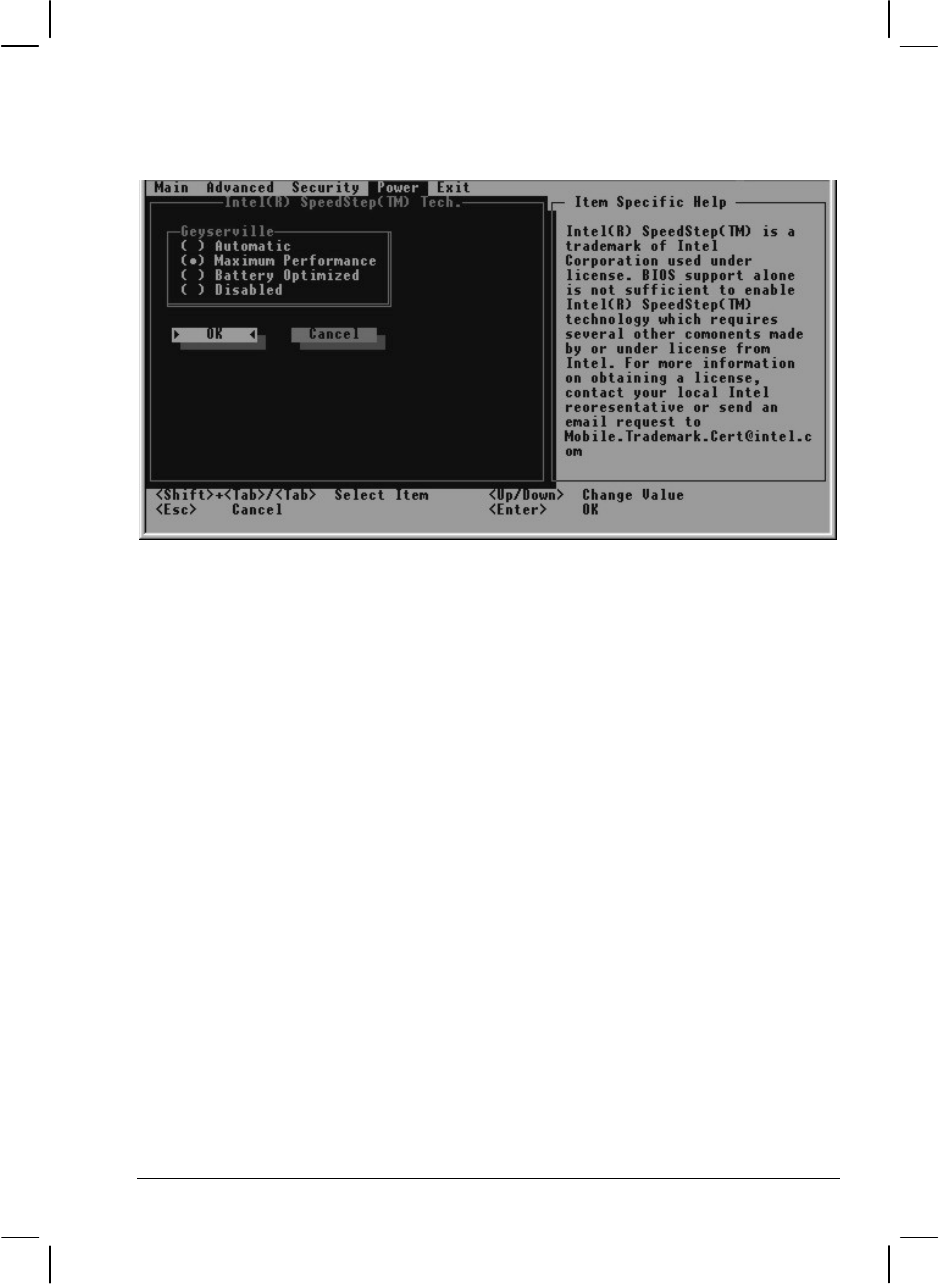
Intel® SpeedStep™ Tech.
This item is only available if the CPU you are using supports the Intel®
SpeedStep™ function. You can only select one of them.
Automatic Allows maximum CPU performance when using
AC/car power but minimum CPU performance
when using battery power.
Maximum
Performance Allows maximum CPU performance regardless o
f
power source.
Battery
Optimized Allows minimum CPU performance regardless of
power source.
Disabled Intel® SpeedStep™ function is disabled.
5-22 Setup Configuration Utility (SCU)
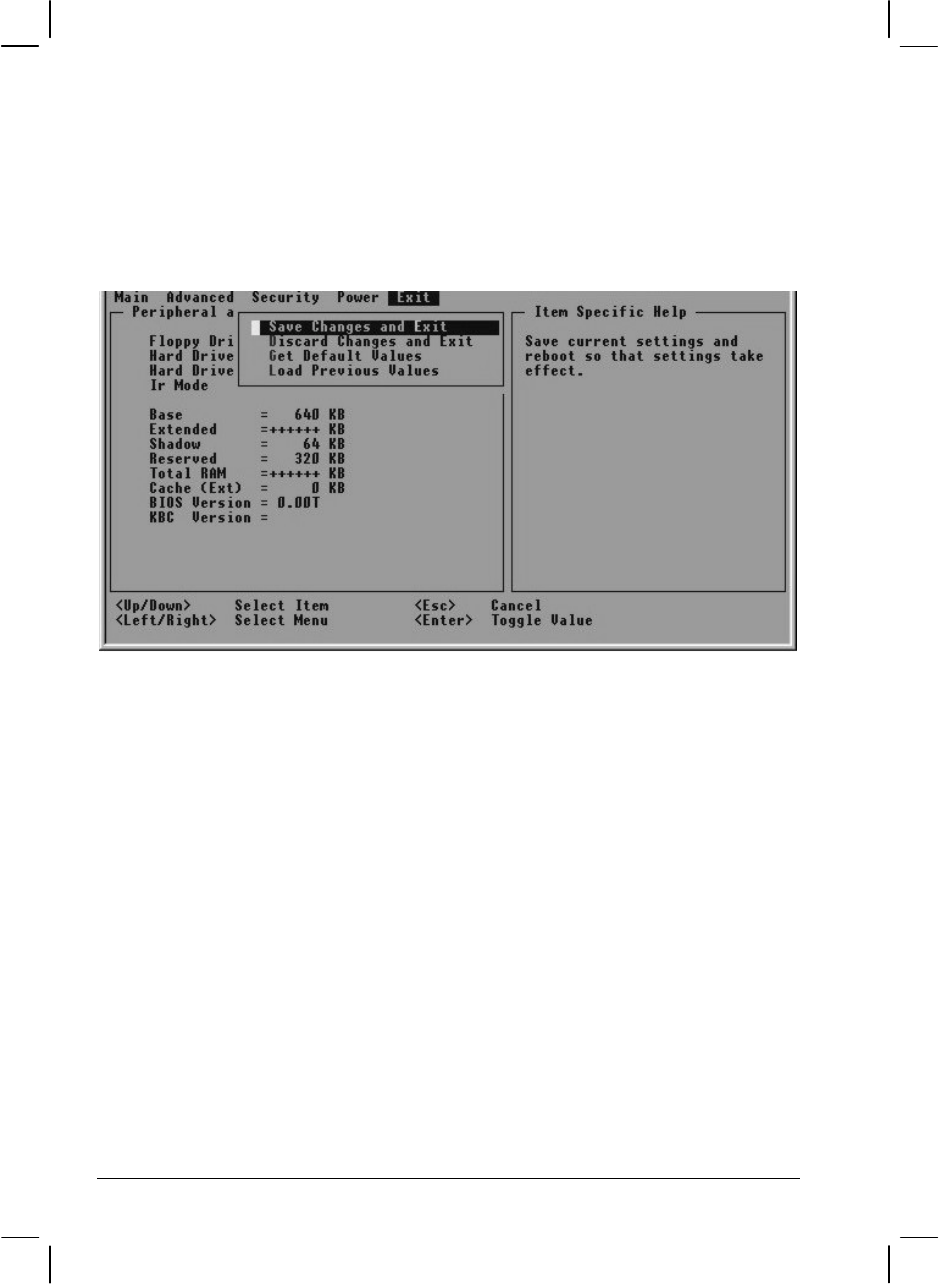
Exit Menu
The Exit menu allows you to leave the SCU program. After finished with
your settings, you must save and exit so that the new settings can take
effect.
Save Changes and Exit saves the changes you have made and exit the
SCU program.
Discard Changes and Exit exits the SCU program without saving the
changes you have made.
Get Default Values loads factory default values for all the items.
Load Previous Values restores previous values for all the items.