JADAK a business unit of Novanta MERCURY6E-M RFID Module User Manual 2
Trimble Navigation Limited RFID Module 2
UserManual.wiki
>
JADAK a business unit of Novanta
>
MERCURY6E-M User Manual
>
User Manual 2
Contents
1.
Manual
2.
User manual revised
3.
User Manual 1
4.
User Manual 2
5.
User Manual 3
6.
User Manual
7.
Users Manual
8.
Part 1
9.
Part 2
10.
Part 3
11.
Part4
12.
Compliance Statements
User Manual 2
Navigation menu
Upload a User Manual
Namespaces
Wiki Guide
HTML
PDF
Info
Views
User Manual
Discussion / Help
Navigation
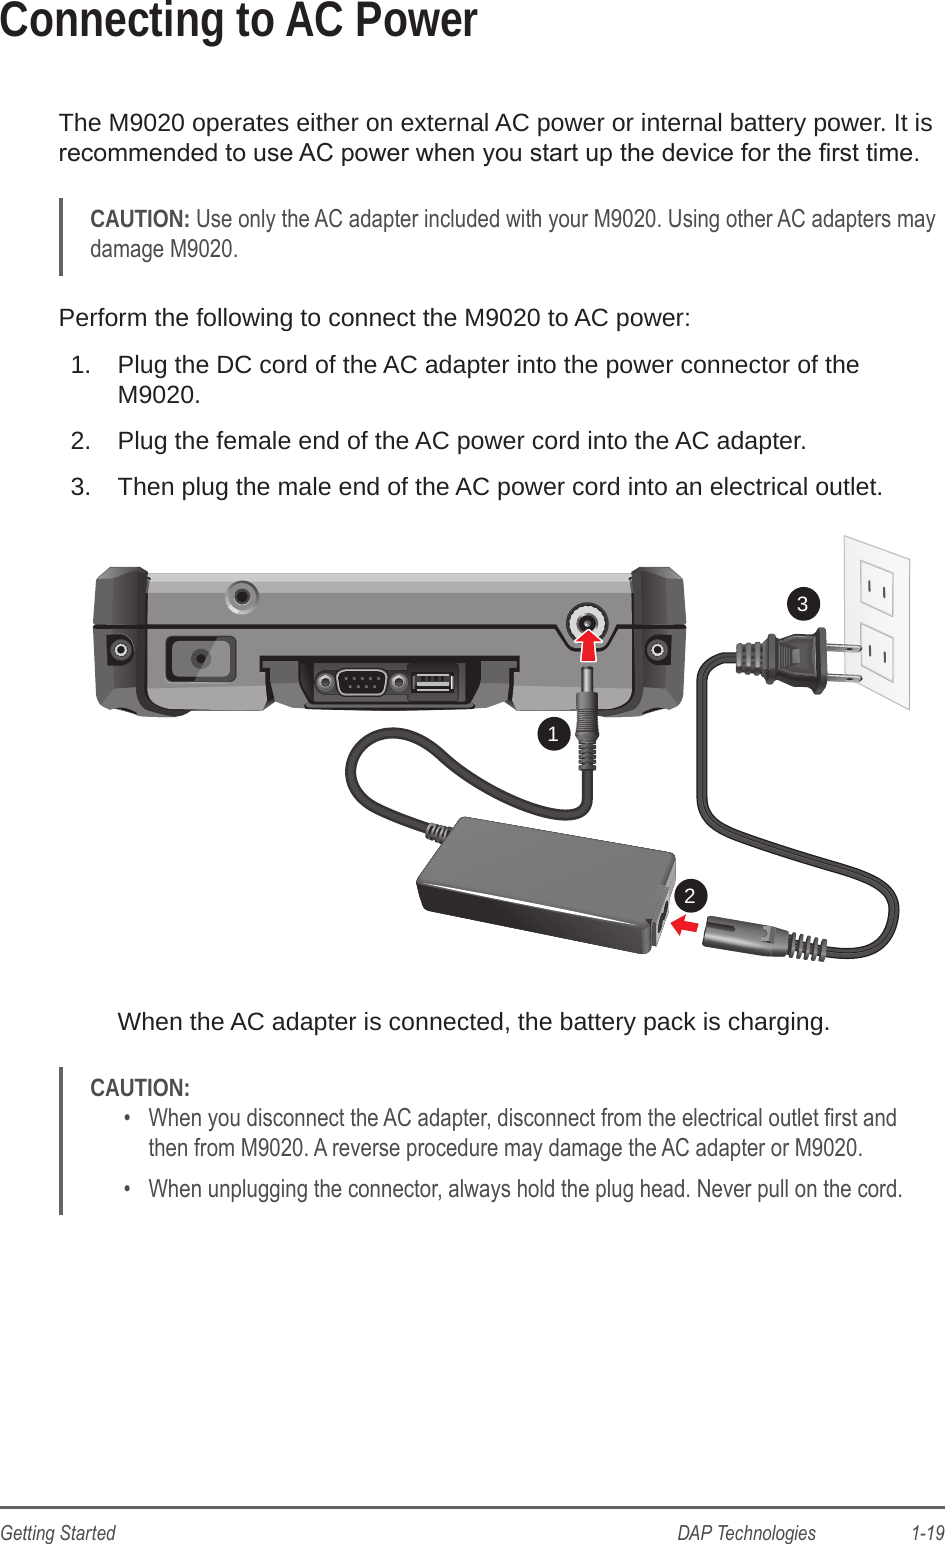
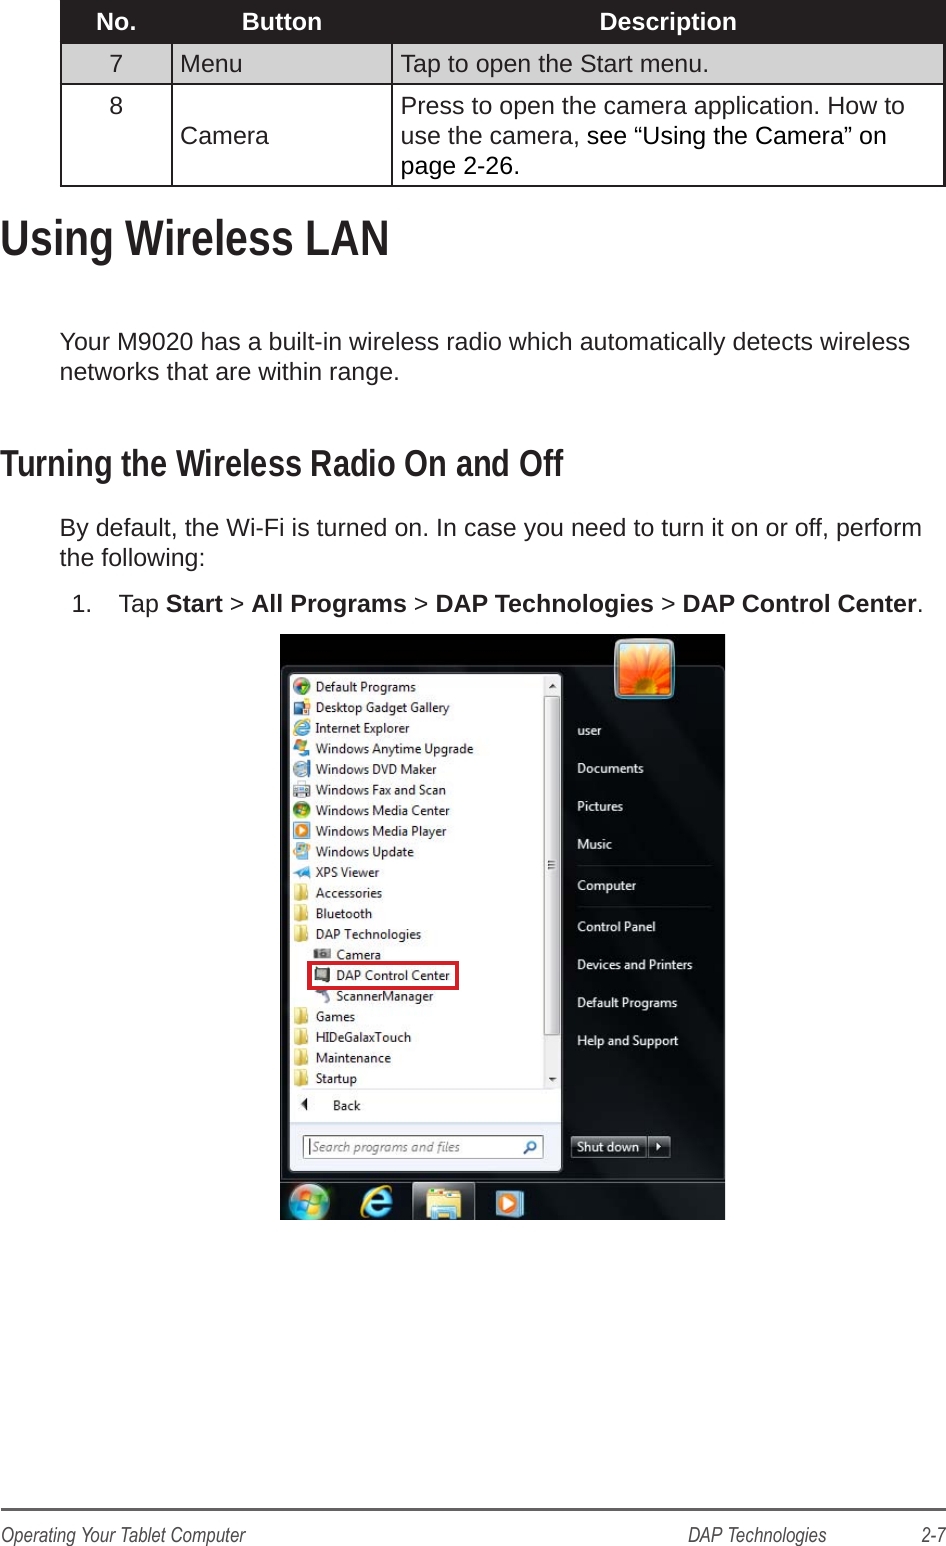
![1-20 DAP Technologies Getting StartedTurning the M9020 On and OffTurning On1. Make sure that the M9020 is either connected to AC power or that the battery pack is charged.2. Press and hold the power button ( ) for about 5 seconds, until the power LED lights up.EscTabCtrlQAZXCVBNM01245789AltShiftSDFGHJKLEnterSpaceDel Fn,.WERTYUIOP!@-=#$%^& *(?>][}{)|;\:“‘ ~`F1F2F4F3F5See the following table for the power LED indicator states:LED Color Status Battery Mode (On Battery Power) AC Mode(On External Power)Green Solid Power on. Fully charged: Both batteries are fully charged.Blinking Suspend: Every 3 seconds.Blue Solid N/A Either battery is being charged.RedBlinking(The average of two batteries)• <= 20%: every 5s.• <= 15%: every 3s.• <= 10%: every 1s.• 5%: Hibernate. (Depends on OS setting).N/ASolid Either Battery #1 or Battery #2 is missing. N/A](https://usermanual.wiki/JADAK-a-business-unit-of-Novanta/MERCURY6E-M.User-Manual-2/User-Guide-2256085-Page-4.png)
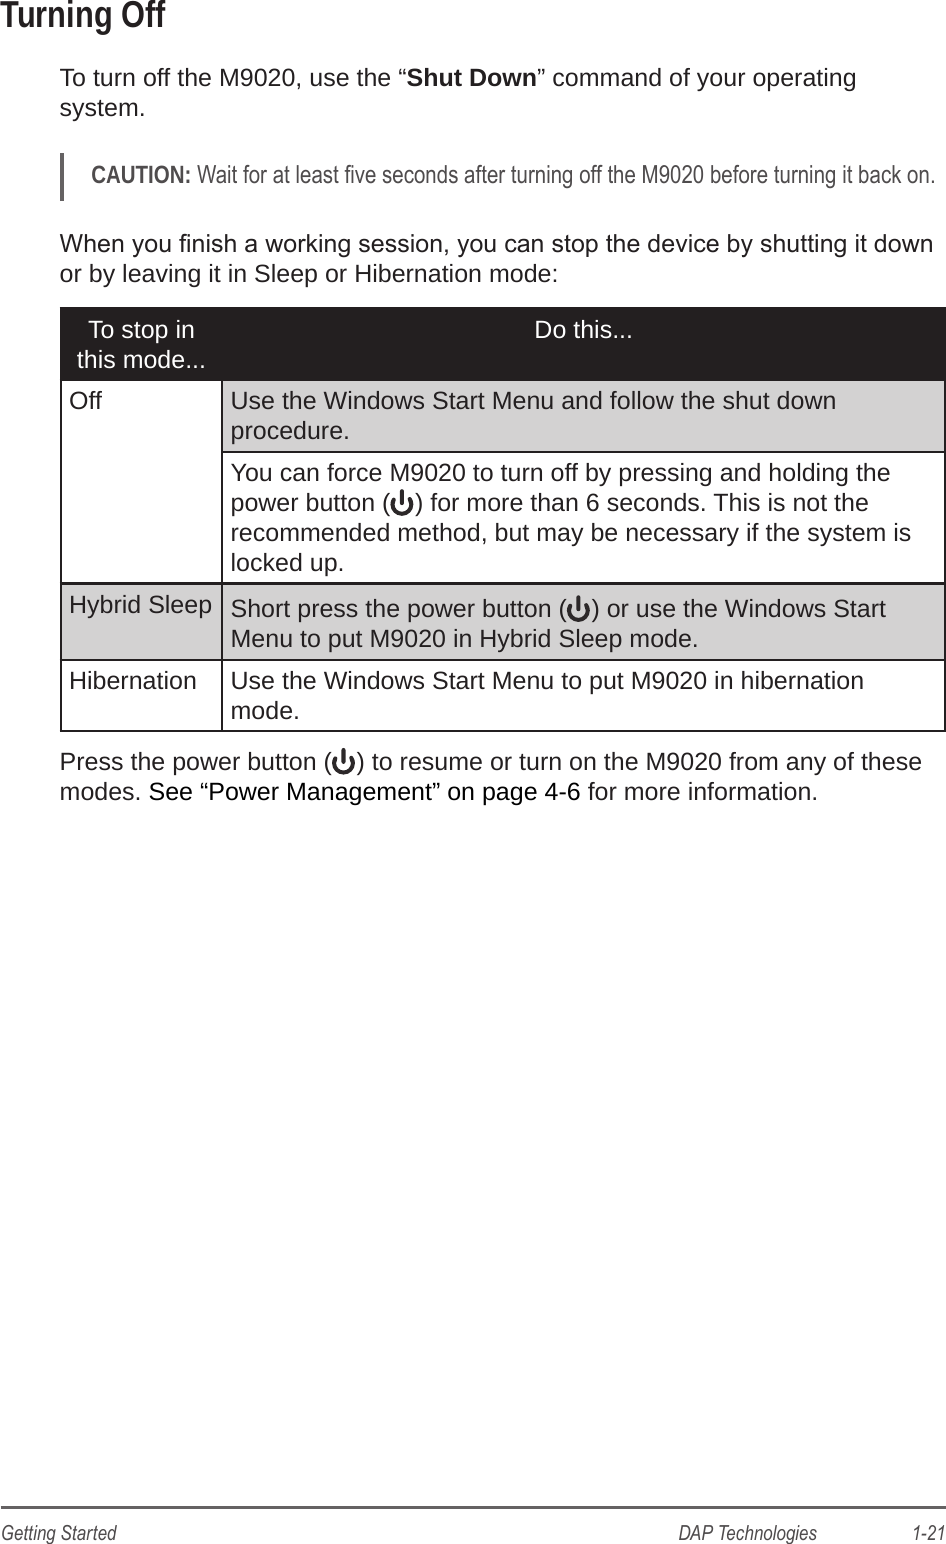
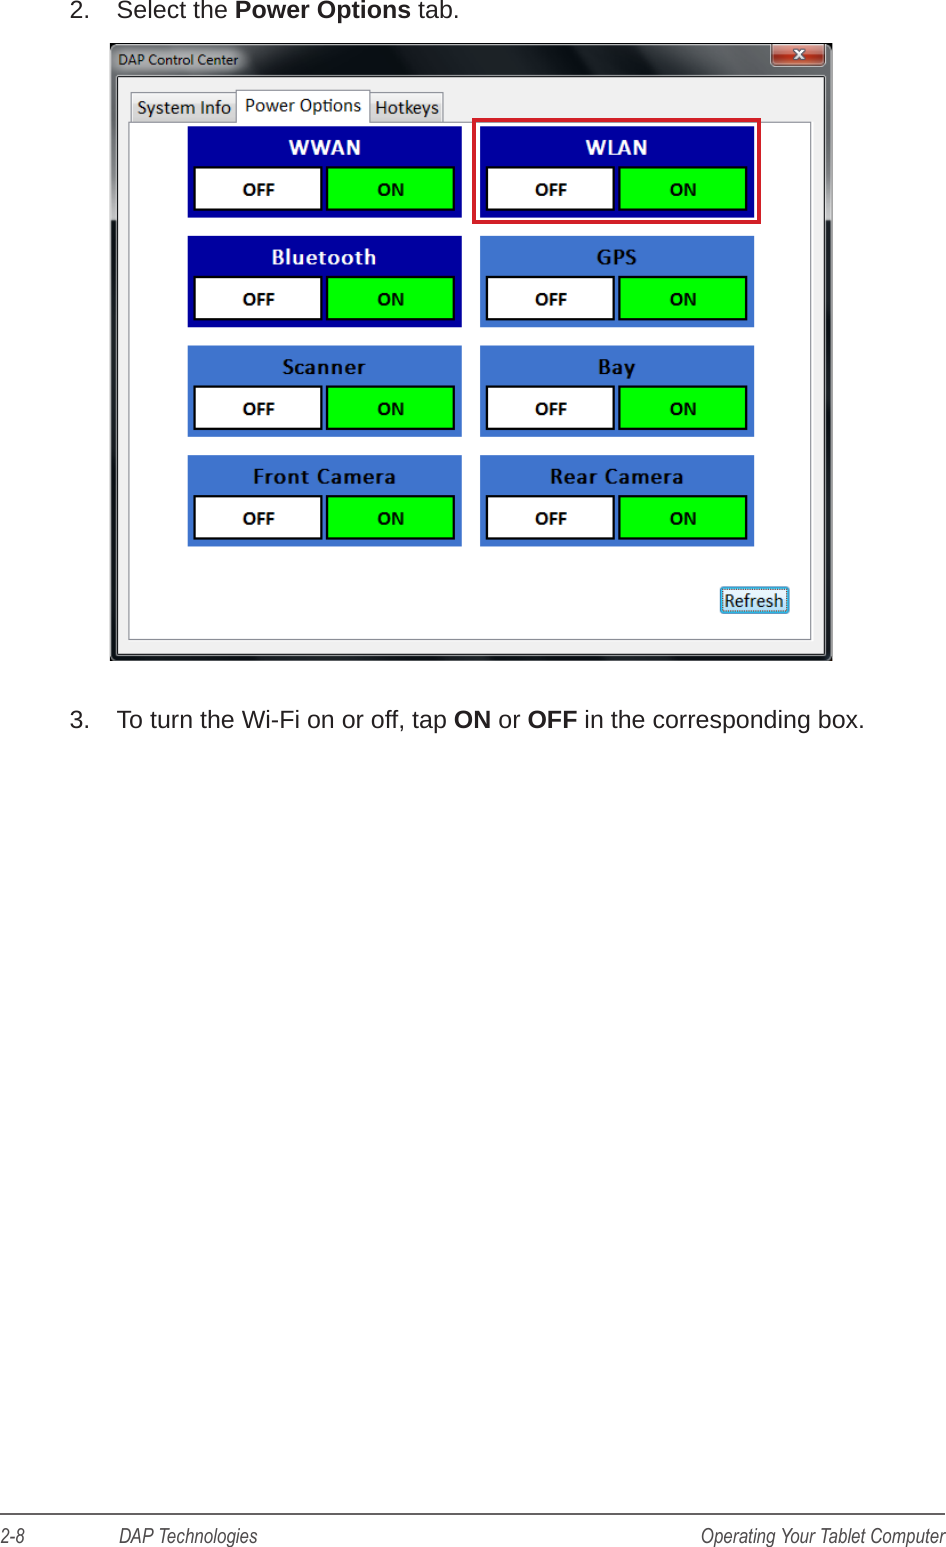
![2-2 DAP Technologies Operating Your Tablet ComputerUsing the Touch ScreenThe touch screen is a touch-sensitive device that allows you to control and make selections on the device by controlling the location of the pointer on the screen.CAUTION: Do not use sharp or pointed objects on the touch screen. These objects may scratch the screen. Use only the stylus pen or the tip of your nger.EscTabCtrlQAZXCVBNM0123456789AltShiftSDFGHJKLEnterSpaceDel Fn,.WERTYUIOP!@-=#$%^& *(?>][}{)|;\:“‘ ~`F1F2F4F3F5Here are some common terms that you should know when using the touch screen.Term ActionTap Tap gently on the touch screen to select or open an item. Tapping is the same as clicking the left mouse button of a PC.Double-tap Rapidly tap twice on the touch screen. This action is similar to double-clicking the left mouse button of a PC.Tap and hold Tap and hold the stylus lightly on the display. A big circle appears to indicate that a pop-up menu will soon appear. Lift up the stylus and a pop-up menu appears. Select the desired function. This action is similar to a right mouse click on a PC.Drag Hold the stylus on the screen and drag across the screen to select text and images or move icons to a new location.For more customized stylus settings, use the HIDeGalaxTouch available on the desktop of the device.](https://usermanual.wiki/JADAK-a-business-unit-of-Novanta/MERCURY6E-M.User-Manual-2/User-Guide-2256085-Page-7.png)
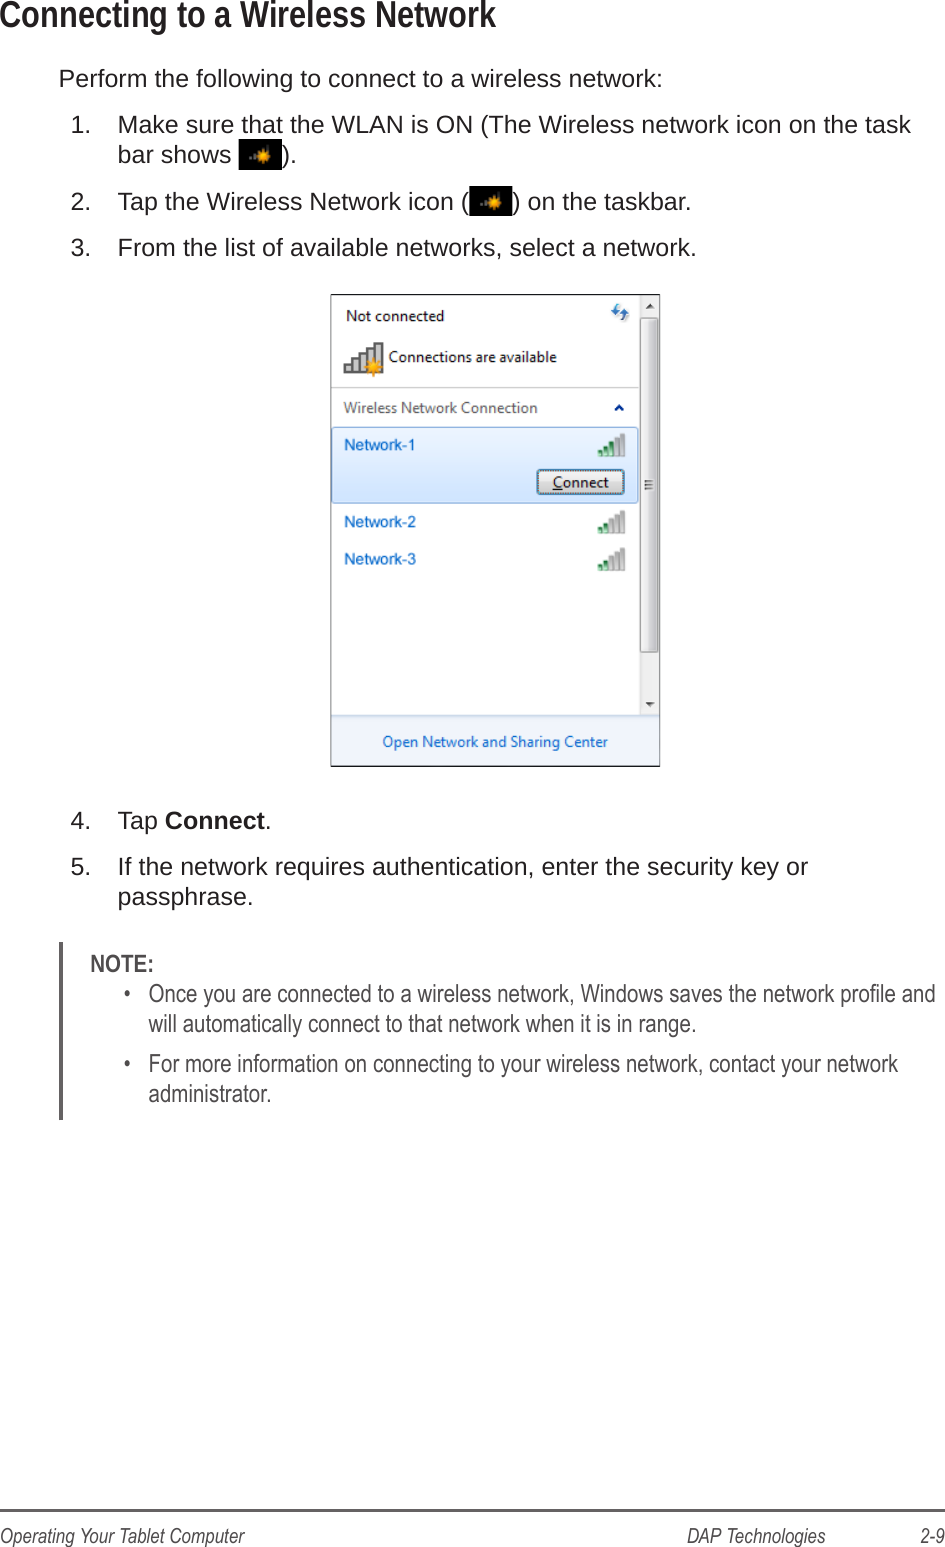
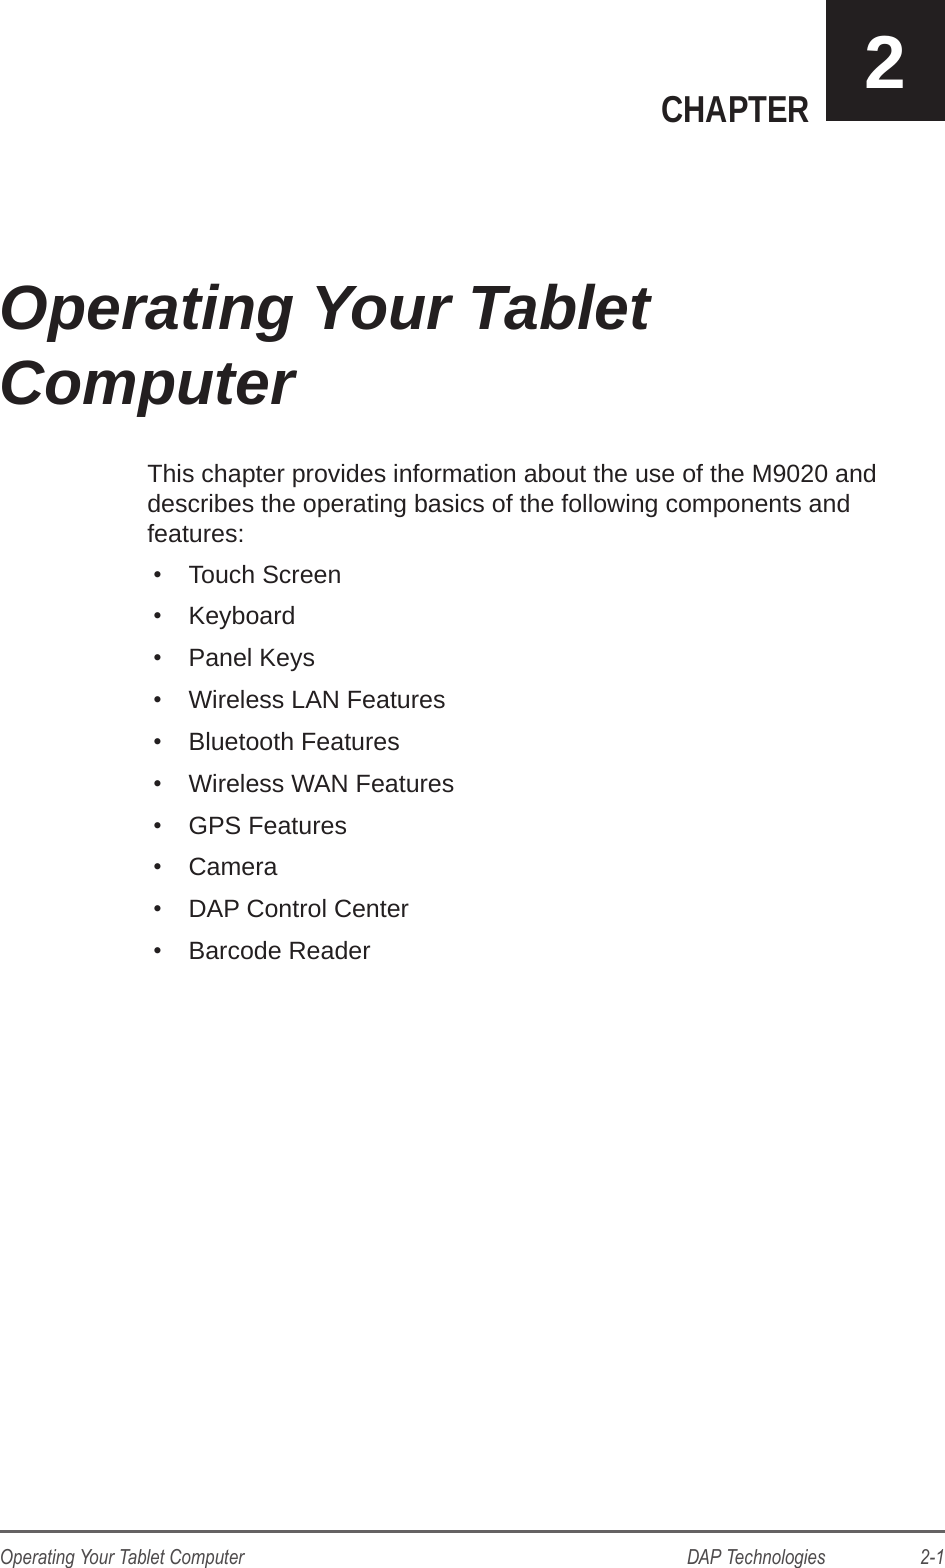
![DAP Technologies 2-5Operating Your Tablet ComputerUsing the Integrated KeyboardYour M9020 includes an integrated keyboard that allows you to enter text and perform various keyboard functions.Keyboard Overview EscTabCtrlQAZXCVBNM0123456789AltShiftSDFGHJKLEnterSpaceDel Fn,.WERTYU IOP!@-=#$%^& *(?>][}{)|;\:“‘ ~`F1F2F4F3F5Use the keyboard to type in text and numbers. If you need to use special symbols and functions, marked in yellow on the keyboard, press and hold the Fn key, and then press the corresponding symbol or function key. For example, to enter “%”, press and hold Fn key and then press the corresponding letter “T”.Special Function KeysThe following is a list of special functions, accessible via keyboard.Function DescriptionFn + Hold down Fn and press ▲ repeatedly to increase screen brightness.Fn + Hold down Fn and press ▼ repeatedly to decrease screen brightness.Fn + Hold down Fn and press ► repeatedly to increases volume.Fn + Hold down Fn and press ◄ repeatedly to decreases volume.Fn + 1Function key F11.Fn + 2Function key F12.Fn + 3Function key F13.Fn + 4Function key F14.Fn + 5Function key F15.Fn + 6Function key F6. Fn + 7Function key F7.Fn + 8Function key F8.](https://usermanual.wiki/JADAK-a-business-unit-of-Novanta/MERCURY6E-M.User-Manual-2/User-Guide-2256085-Page-10.png)
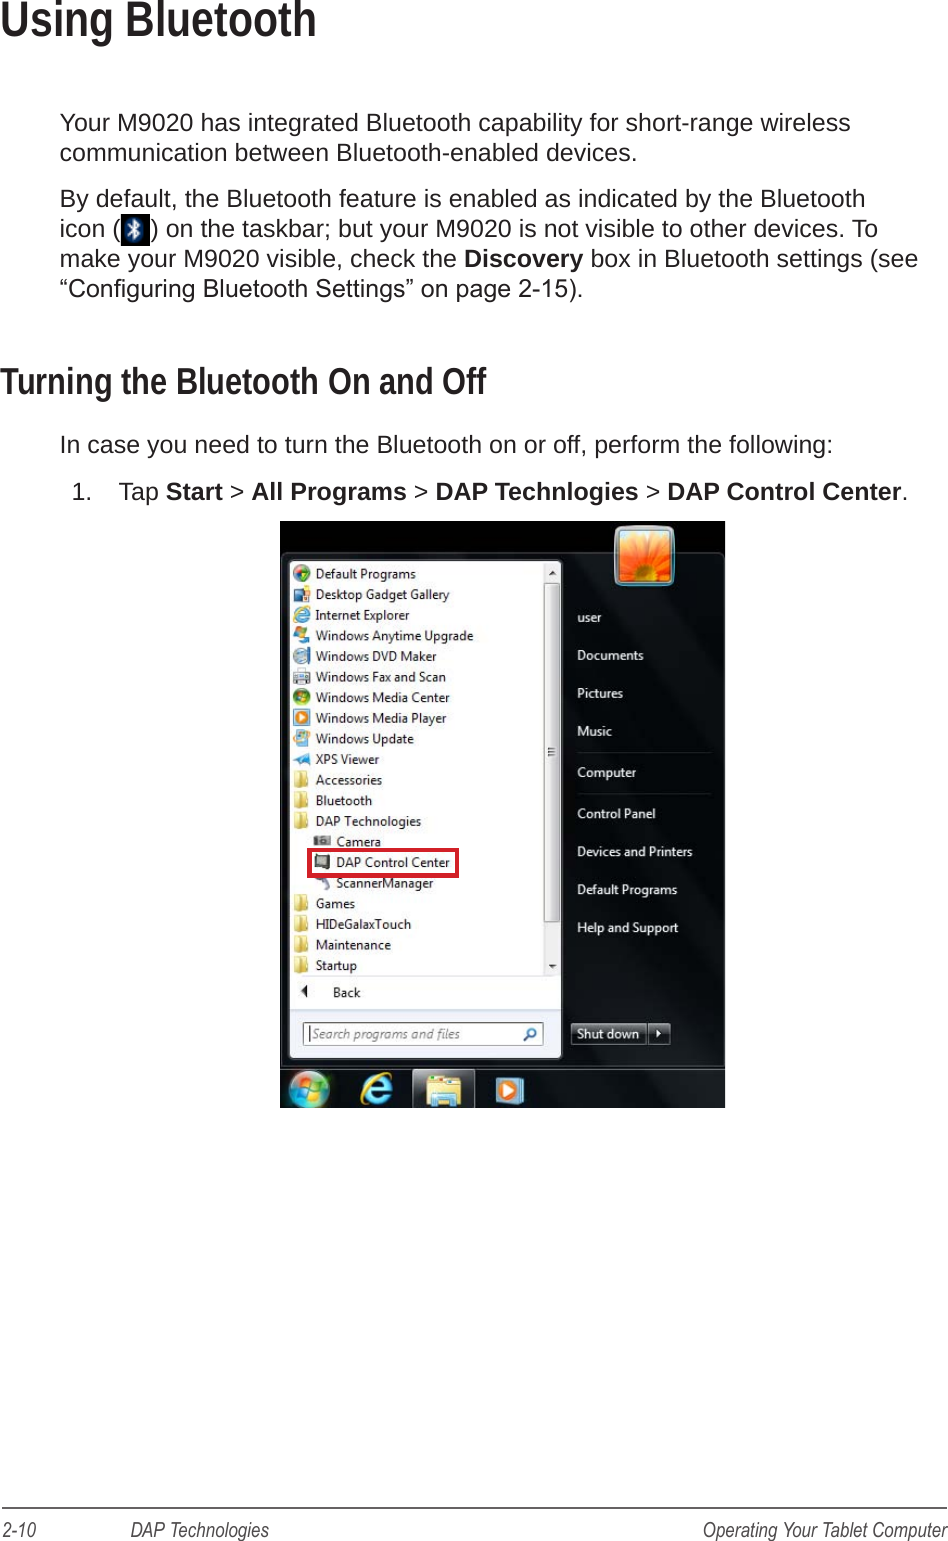
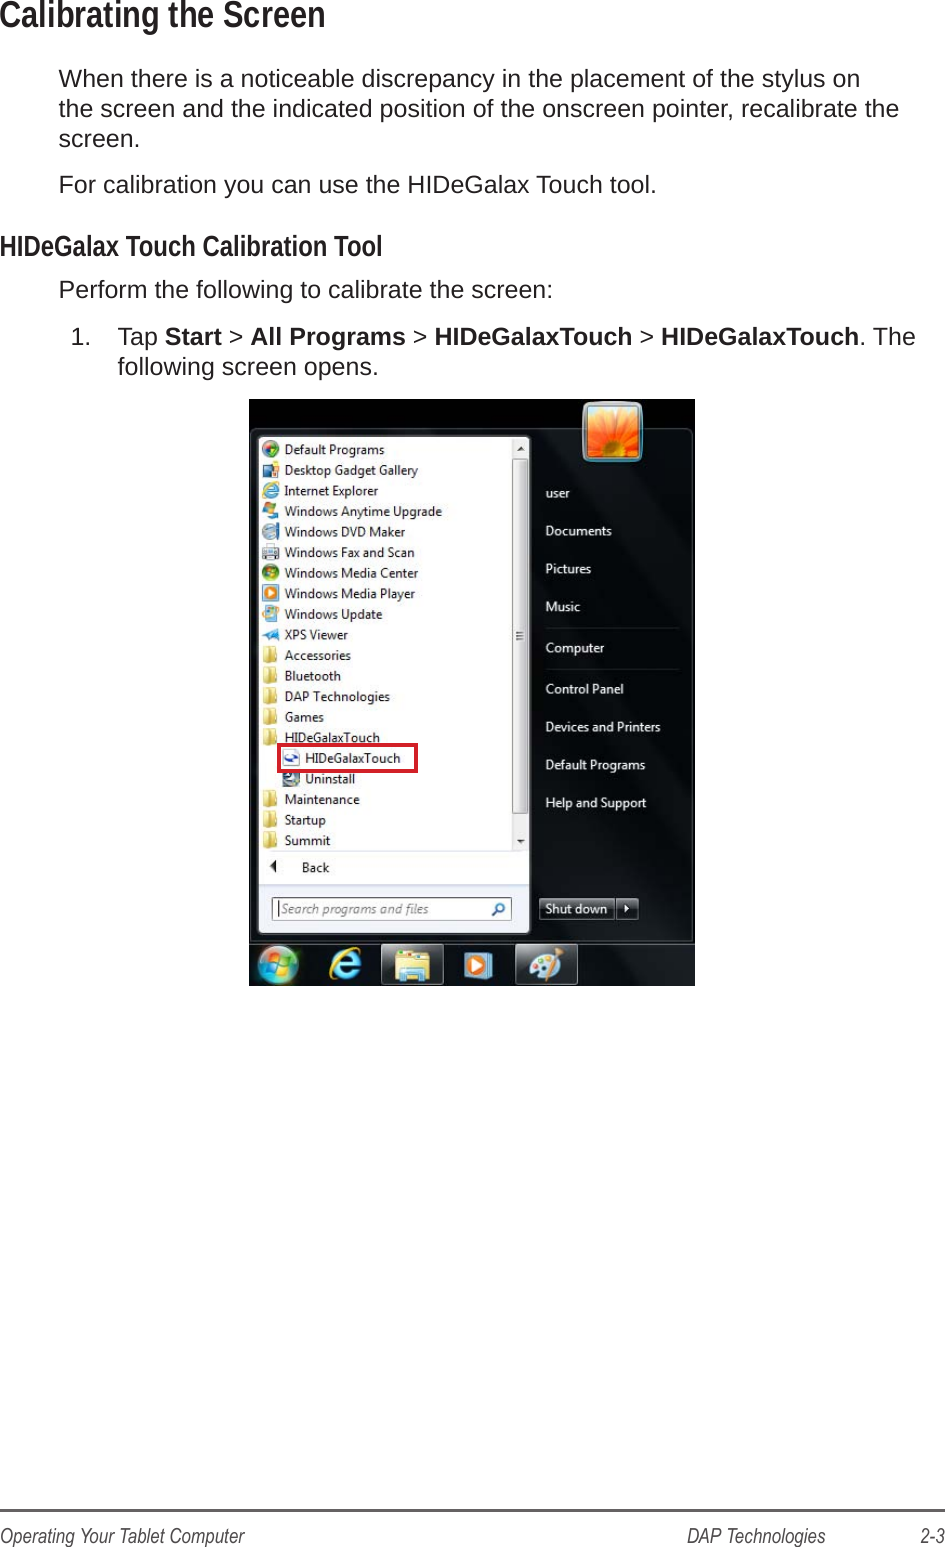
![2-6 DAP Technologies Operating Your Tablet ComputerFunction DescriptionFn + 9Function key F9.Fn + 0Function key F10.NOTE: To access the function keys F1 ~ F5, see “Using the Panel Keys” on page 2-6. Navigation KeysUse the navigations keys (◄ / ► / ▲ / ▼) to move the cursor or selection one space or line in the direction of the arrow, or scroll a webpage in the direction of the arrow.Using the Panel KeysThe Panel Keys provide shortcuts for you to utilize the common functions of your M9020, such as opening the camera, activating the bar code reader, and more.EscTabCtrlQAZXCVBNM0123456789AltShiftSDFGHJKLEnterSpaceDel Fn,.WERTYUIOP!@-=#$%^& *(?>][}{)|;\:“‘ ~`F1F2F4F3F526781534No. Button Description1 Barcode Scanner Press and hold, to scan the barcode.2F3 Programmable funciton key.3F4 Programmable funciton key. 4F5 Tap to refresh the active window in Internet Explorer.5F2 Programmable funciton key. 6F1 Programmable funciton key.](https://usermanual.wiki/JADAK-a-business-unit-of-Novanta/MERCURY6E-M.User-Manual-2/User-Guide-2256085-Page-11.png)