Kondo Kagaku T39EX2 Radio control transmitter User Manual EX 2 manual En 0530
Kondo Kagaku Co., Ltd. Radio control transmitter EX 2 manual En 0530
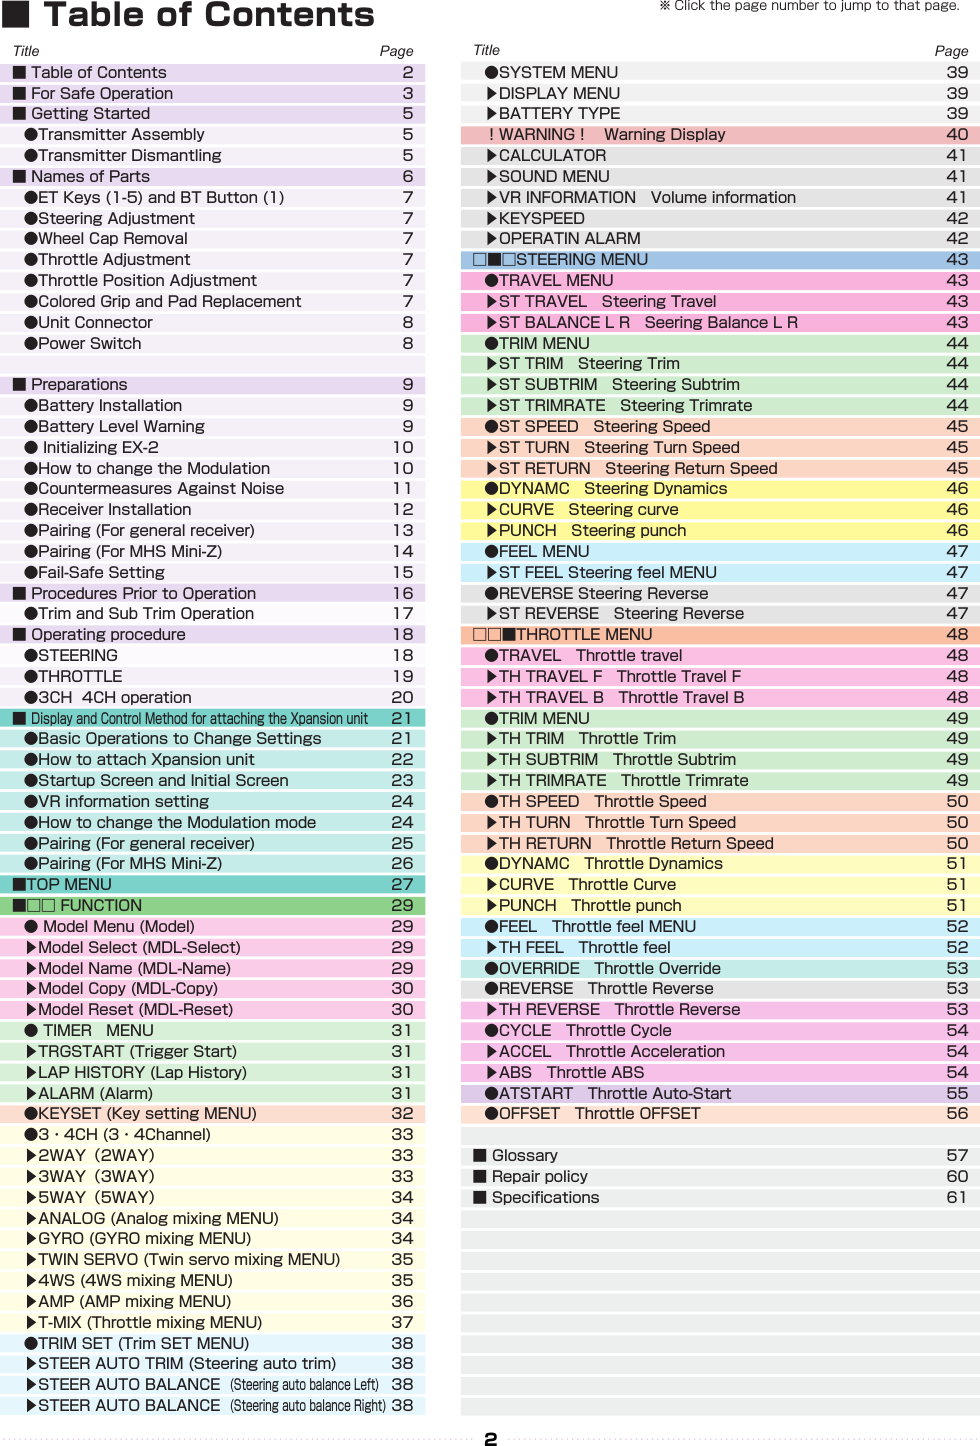
Contents
- 1. 06_1_Users_Manual_rev1
- 2. 06_2_Users_Manual_rev1
- 3. 06_3_Users_Manual_rev1
06_1_Users_Manual_rev1

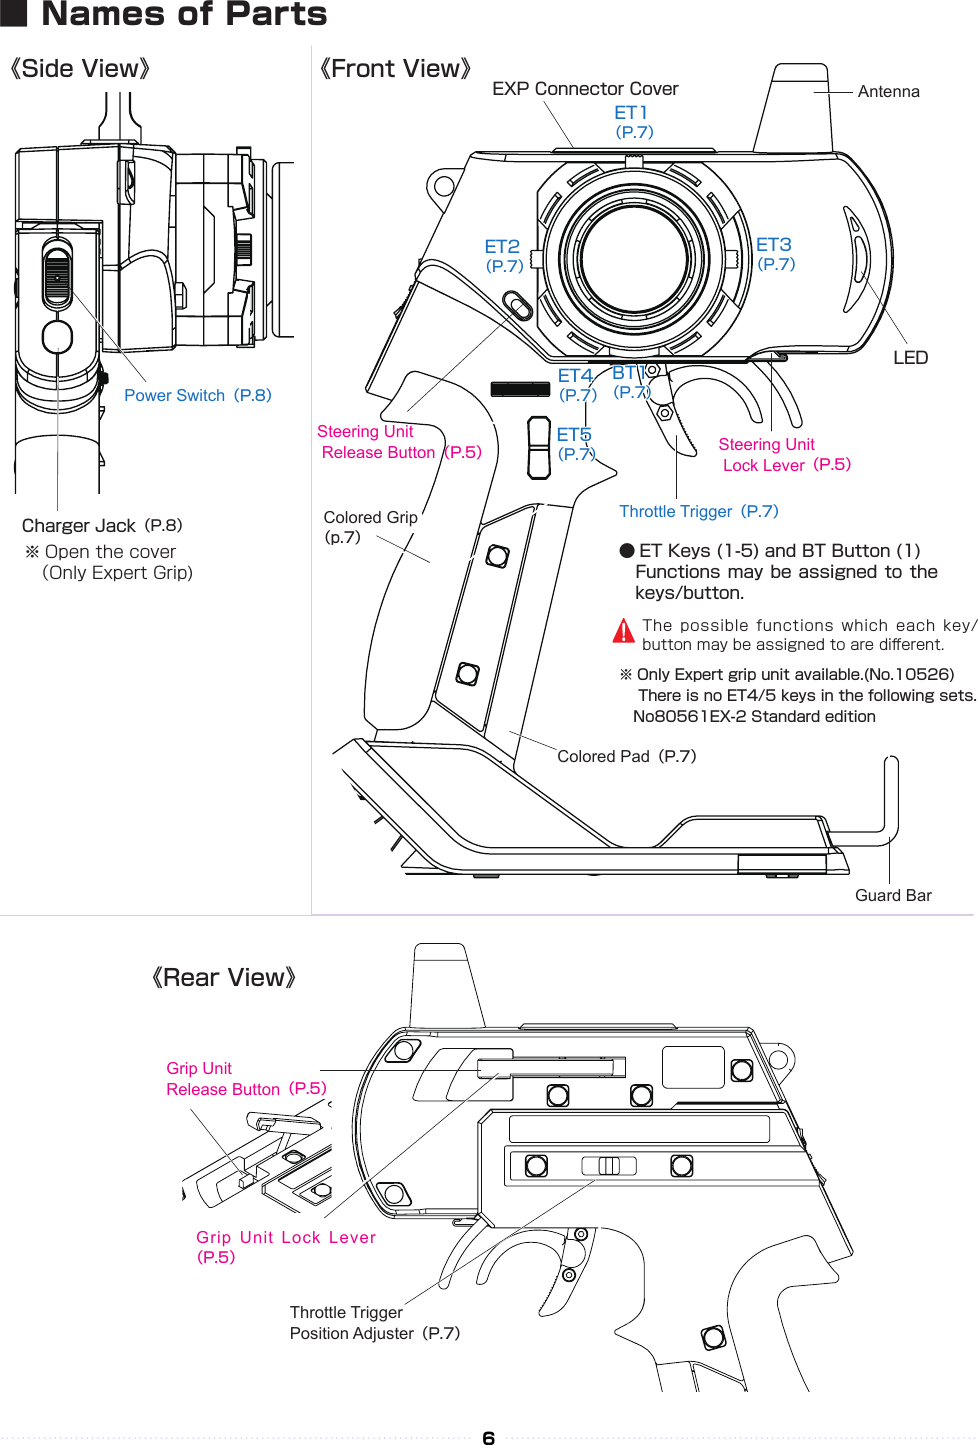
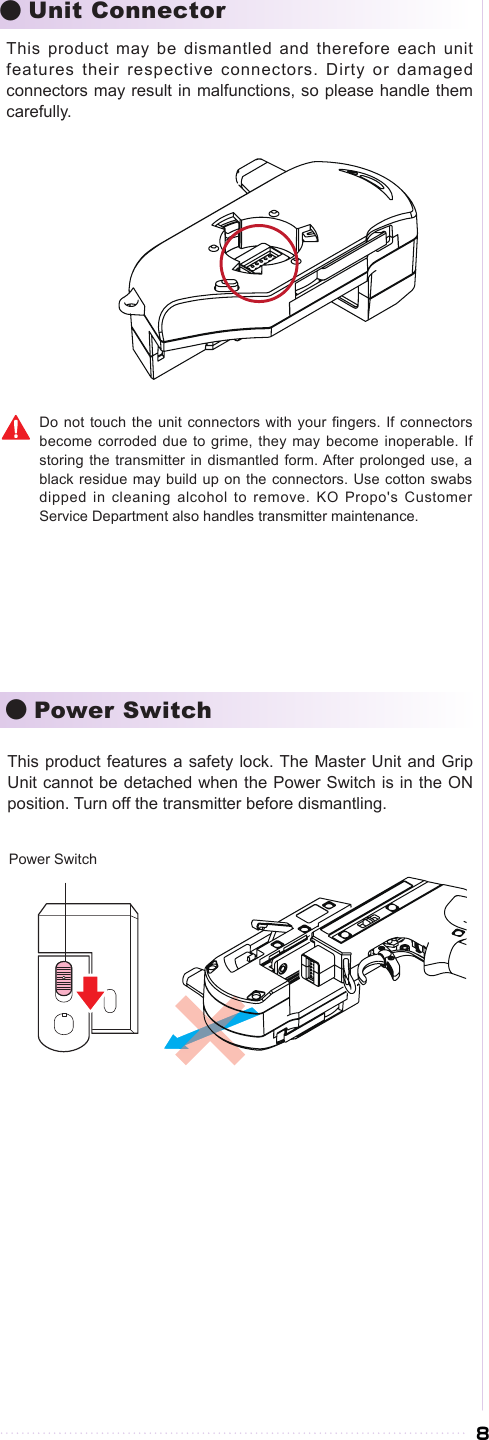
![①① ②②③③①① ②②③③①①②②5■ Getting StartedInsert the Grip Unit into the Master Unit, then attach the Steering Unit.Detach the Steering Unit, then detach the Master Unit.● Transmitter Assembly ● Transmitter Dismantling1.1.2.2.3.3.Remove the connector cover before use.If storing the transmitter in dismantled form, please remember to attach the connector covers.Assembly may dier with the included set contents.[Legend] P:Point :NoticeSteering Unit Release ButtonSteering Unit Release ButtonSteering Unit Lock LeverSteering Unit Lock LeverGrip Unit Lock Lever Grip Unit Release ButtonGrip UnitMaster UnitMaster UnitSteering UnitSteering Unit](https://usermanual.wiki/Kondo-Kagaku/T39EX2.06-1-Users-Manual-rev1/User-Guide-2644053-Page-5.png)
![The tabs on the colored grip and pad are to be inserted into holes. Note the direction.Make sure the battery box or battery pack is removed before replacing the colored grip and pad.Note direction of the of the colored grip and pad7●Steering Wheel Adjustment●Throttle Trigger Adjustment●Wheel Cap Remove●Throttle Trigger Position Adjustment●Colored Grip and Pad Replacement● ET Keys (1-5) and BT Button (1)Functions may be assigned to the keys/button.The possible functions which each key/button may be assigned to are dierent.Colored grip pad (optional) and Large/small grip pad options are available.Remove the two screws on each side of the grip to detach the grip plates, then attach the colored grip and pad.《How to change》Adjust the tension of the steering wheel spring.Insert a 1.5mm hex wrench referring to the image below. Rotate clockwise to increase tension and counterclockwise to decrease it.[How to Adjust]Hex WrenchExcessive counterclockwise rotation will result in the wheel being unable to return to neutral position. In this case, rotate clockwise until the wheel returns to neutral.Insert Wheel Cap Remover to the wheel cap spoke.Pull up Wheel cap remover with Wheel Cap.Adjust the position and angle of the brake trigger to your preferences.Loosen the hex screws on the throttle trigger with a 1.5mm hex wrench. Freely adjust the brake trigger position. Tighten the hex screws to secure.[How to Adjust]Throttle TriggerBrake Trigger Hex ScrewsBall JointThe position of the throttle trigger may be adjusted to match the user's hands. Loosen two screws on the rear side of the transmitter. Slide the Throttle Trigger Position Adjuster as desired. Tighten the loosened screws to secure.[How to Adjust]ScrewsThrottle TriggerPosition Adjuster](https://usermanual.wiki/Kondo-Kagaku/T39EX2.06-1-Users-Manual-rev1/User-Guide-2644053-Page-7.png)
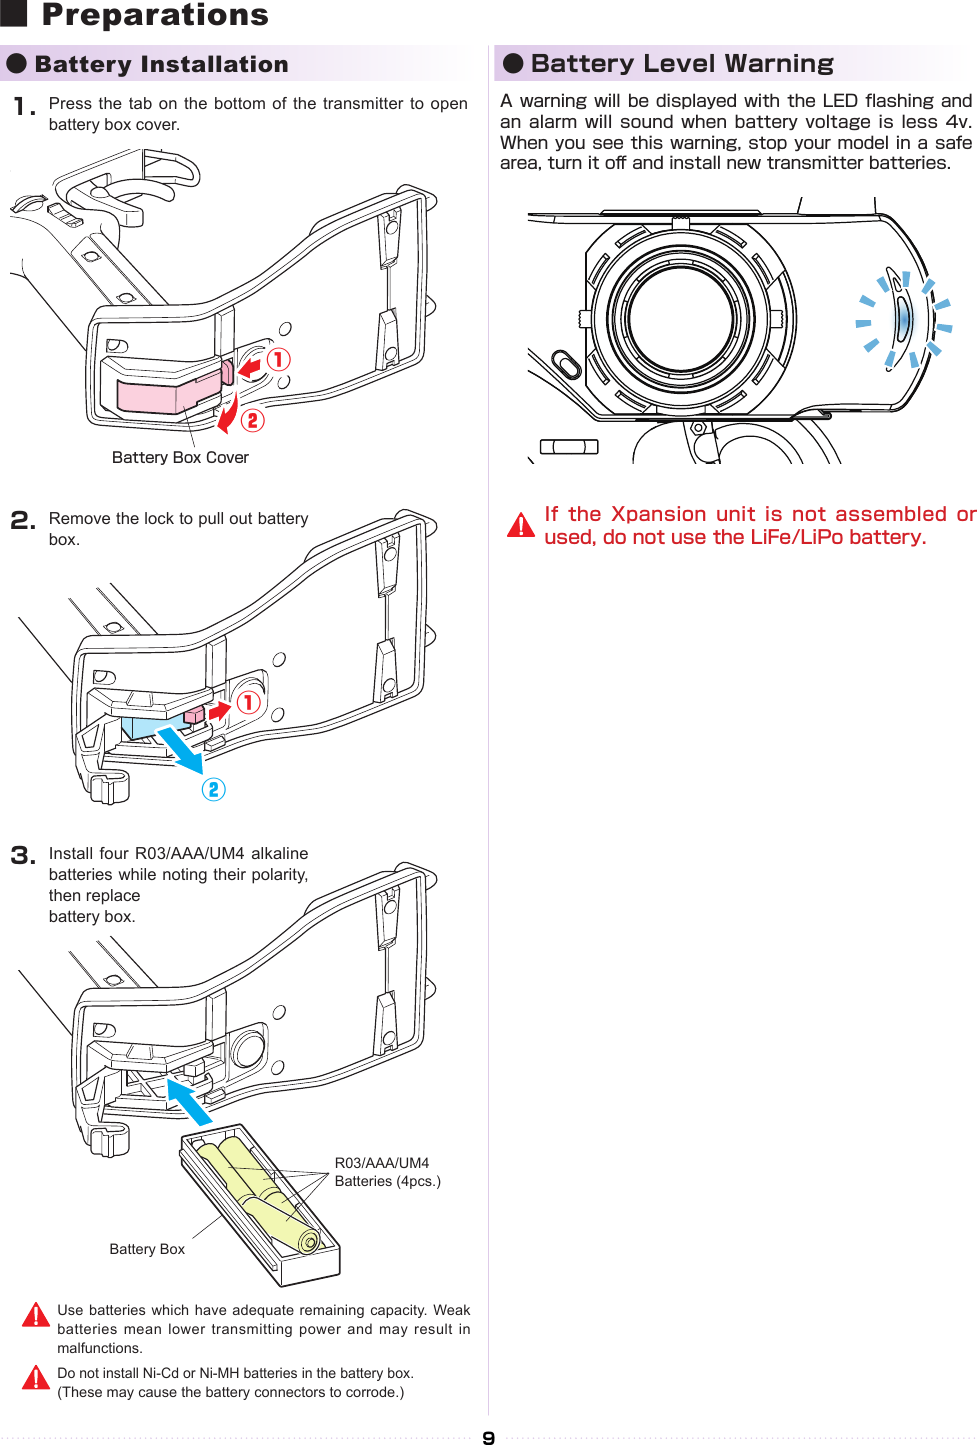
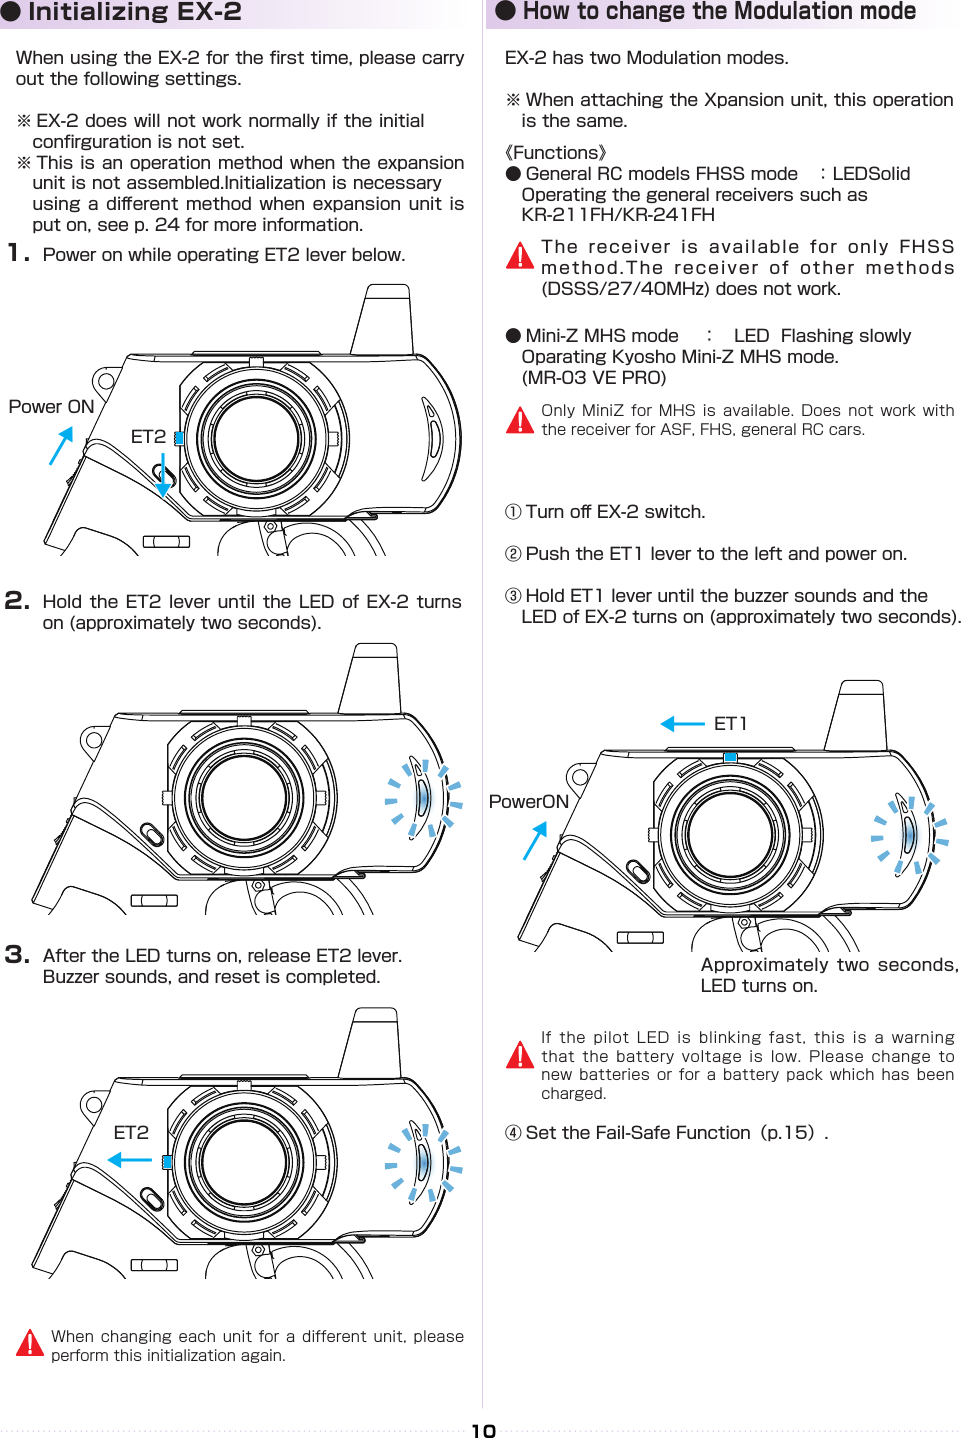
![13BATT Preparing the Transmitter① While pushing the ET2 lever up, power on.② When the ET2 lever is released, the LED turns of EX-2 LED lights up again (indicating transmitter is transmitting the pairing signal.)Case without the Xpansion unit※ Refer to p.25 pairing Operation in the case of using the Xpansion unit.In order for the receiver to operate, it must store the transmitter's unique ID in its memory in a process called “pairing.” Even if a single transmitter is used to control multiple receivers, each receiver must go through the pairing process with the transmitter before being used for the rst time. ※ Please adjust the Modulation mode before pairing.(p.10) A receiver does not work normally in dierent mode.During this process, your car may become uncontrollable if the ESC has not been adjusted. As a precaution, set your car so that its wheels do not touch the ground.Pairing procedures may not go smoothly if there are wireless LAN, microwave ovens, or other users conducting pairing procedures nearby. In this case, move some distance away or wait a while before attempting the pairing procedure again.If the mode is changed(General or France), please conduct pairing procedures with the receiver you are using again.<France mode pairing >FRANCE mode pairing is possible when the ET2 lever is released after LED turns o. Please use this feature if the situation is needed.1.2.3.ET2ET2Power ON↓↓↓● Pairing (For general receiver) Preparing the Receiver① Connect the receiver power source while pressing the setup button.② Check that the receiver's LED has lit up, then release the setup button.③ Check that the receiver's LED lights up again (indicating pairing completion)※ When pairing is complete, pressing the ENTER key on the transmitter will return the screen to the previous [2.4Gband] menu.※ Switch o the receiver, then switch it back on again for normal operations.※ The preparations below are to be carried out following the pairing procedure. Preparations for Operation① Switch o the receiver.② Switch o the EX-2 main power, then switch on EX-2 again.③ Switch on the receiver and check that the receiver LED is lit. If the LED ashes, the receiver is not getting the EX-2 signal and the pairing procedure should be repeated.Lit LEDLit LEDFlashing LED](https://usermanual.wiki/Kondo-Kagaku/T39EX2.06-1-Users-Manual-rev1/User-Guide-2644053-Page-13.png)