LG Electronics USA L06A PCS GSM Phone User Manual L 03A English Cover 1 0
LG Electronics USA PCS GSM Phone L 03A English Cover 1 0
Contents
- 1. Users Manual 1
- 2. Users Manual 2
- 3. Users Manual 3
- 4. Users Manual 4
Users Manual 2
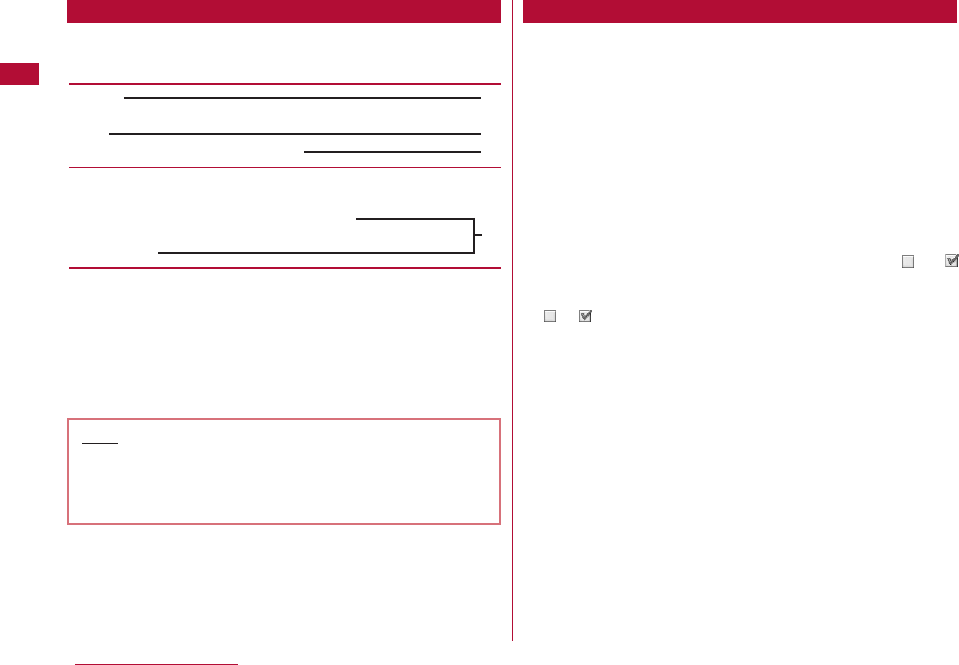
Items displayed on the sub menu may vary depending on
the settings or registered items of the FOMA terminal.
[Scroll]
Set the number of lines scrolled after pressing H on a site,
Scre
]"1 line"/"3 lines"/"5 lines"/"Page"
[Message list]
Configure Message R/F list screen display.
1 Line:Display only the subject in one line.
2 Line:Display the subject and received date and time in two
lines.
1Menu item name. Press H/ F/ Eto move the cursor to the
item and press C[Select] to select.
2Functional description of the item.
3Operational description of the item. Perform this step after
selecting a 1.
4Item names, function description of items, and operation
description of items after items are selected.
■ Description of steps starting from other than the
Standby display
At the beginning of the description, the status of the terminal
or the screen to open such as "Ringing" or "List screen" is
written.
■ Omitting C[Select] in selection operation
As shown in 3in "Example of Operations" (P37), to explain a
step to select an icon or a function from a list, operational
steps such as pressing
C
[Select] are omitted.
Similarly, to explain steps to enter a password or fix entered
characters, the operations for fixing such as
C
[OK] are
omitted.
■ Omitting Cwhen carrying out a function to make into
The instruction beginning with "Place check marks" means
that you have to enable the checkbox by pressing
C
to turn
to shown beside the desired item.
38 Before Using the Handset
Notation Rules
4
Note
・ If multiple sub menus such as the redial list screen
and the redial detail screen are collectively described,
some menu items that do not actually appear may be
included (depending on the settings or screens).
Sub Menu Example
1
2
3
Using the UIM (FOMA Card)
The UIM is an IC card that contains subscription
information, such as your phone number. You can only use
communication functions including calls, mail, and i-mode
communication with a UIM inserted in the terminal.
Inserting the UIM into another FOMA terminal allows you to
operate multiple FOMA terminal for various purposes.
For details on how to handle the UIM, refer to the UIM
instruction manual.
Inserting/Removing the UIM
・ Use the steps described in "Turning the Power Off" (P48) to
turn off the terminal, then turn over the terminal, remove the
battery pack, then remove or insert the UIM.→P43
To insert the UIM, close the FOMA terminal and hold it with
both hands.
① Insert the UIM in the direction of the arrow with the IC
To remove the UIM, close the FOMA terminal and hold it
with both hands.
① Slide the UIM in the direction of the arrow and remove it
from the FOMA Card Slot
Security Code for the UIM
You can assign two security codes, "PIN1 code" and "PIN2
code", to the UIM.→P115
39
Before Using the Handset
Inserting
Removing
Note
・ Do not misplace the removed UIM.
Note
・ Do not use excessive force inserting the UIM to avoid
damaging it.

UIM Security Function
The UIM security function UIM Operation Restriction is
embedded in the FOMA terminal as a security function to
protect your data and files.
・ When you download data or files from sites or acquire data
attached to mail with the UIM inserted into the FOMA terminal,
the UIM operational restriction function is automatically set to
these data or files.
・ Data or files with the UIM operational restriction function set
are accessible only when the same UIM used when
downloading data or files is inserted.
・ The following data/files are restricted:
- File attached to i-mode mail
- MessageR/F with file (melodies/images) attached
- Screen memo
- Images inserted in Deco-mail or signature
- i-motion
- i-
α
pli (including i-
α
pli Stand-by display)
- Image (including animation and Flash movie)
- Chaku-UtaR/Chaku-Uta FullR song
- Melody
- Mail template with motion-restricted data
- Music&Video Channel program
* "Chaku-Uta" is a registered trademark of Sony Music
Entertainment Inc.
・ In this section, the UIM that was inserted when the data or
files were obtained is called "your UIM" and any other UIM is
"another UIM".
40 Before Using the Handset
UIM Types
Please be aware that the UIM (Blue) has different functions
from the UIM (Green/White) as follows:
41
Before Using the Handset
Function UIM (Blue) UIM (Green/ Refer
White) ence
The number of digits Up to 20 Up to 26 P83
of a phone number digits digits
that can be saved to
the UIM Phonebook
WORLD WING Not available Available P322
Service dialing Not available Available P314
Note
・ Even if you set the data/file restricted with this
function for the Stand-by display wallpaper, etc., the
setting will revert to the default if another UIM is
inserted or if no UIM is inserted. When you re-insert
your UIM, the setting will revert to the original setting
you configured.
・ Pre-installed i-αppli programs are not restricted.
However, if you delete an i-αppli and then download
it, the newlydownloaded i-αppli will be restricted.
・ The following data/files are not restricted with this
function:
- Data/files obtained by using Infrared
communication, or data communications
- Images captured/edited using your FOMA terminal
・ Even if a different UIM from the time when data/files
were obtained is inserted, the data/files restricted
with this function can be deleted.
・ Settings that are saved on the UIM are as follows:
- Phone number display - SMS Center settings
- PIN1 and PIN2 codes - Select language
- SMS Validity Period
・ If the UIM is inserted into another i-Channel
compatible terminal, the ticker will not appear. The
latest information is downloaded and a ticker is
shown after you press Qin Stand-by and obtain the
channel list.
WORLD WING
WORLD WING is DOCOMO's FOMA international
roaming service that provides telephone and other
types of mobile communications. It allows the
subscriber to use the same phone number overseas as
in Japan by inserting a UIM(green/white) into a FOMA
terminal or a mobile phone designed for overseas use.
・ If you subscribed to the FOMA service after
September 1, 2005, a separate subscription is not
required. However, if you unsubscribed to the FOMA
service subscription or canceled the service, a
separate subscription is required.
・ If you initially subscribed to the FOMA service before
August 31, 2005 and have not subscribed to
"WORLD WING", a separate subscription is required.
・ This service is not available with some billing plans.
・ If your UIM (green/white) is lost or stolen overseas,
contact DOCOMO immediately and temporarily
suspend your subscription. For contact information,
see "docomo Information Center" on the back of this
manual. Call and communication charges after the
terminal was lost or stolen are still charged to you.
42 Before Using the Handset
Inserting/Removing the Battery Pack
・ Turn off the terminal and hold it closed in your hand.
① While pushing the rear cover
in the direction of
1
, slide
the cover in the direction of
2
. Lift the cover as shown
by
3
② Align the metal contacts of
the battery pack and the
FOMA terminal, attach the
battery pack in the direction
of
1
, and insert the battery
pack in the direction of
2
・ When mounting the battery
pack, press it underneath the
tab and push it down.
③ Align the tabs for the rear cover and while pushing it in
the direction of
1
, slide it in the direction of
2
and push
until it clicks to its place.
Note
・ The UIM that is not properly inserted may be
damaged by forcibly inserting the battery pack.
・ Do not use excessive force inserting the battery pack
to avoid damaging the FOMA terminal charging
terminals.
Inserting
43
Before Using the Handset
① While pushing the rear cover in the direction of
1
, slide
the cover in the direction of
2
. Lift the cover as shown
by
3
② Press down the battery pack in the direction of
1
, lift
the tab in the direction of
2
, and remove in the direction
of
3
Charging the FOMA Terminal
Use the AC adapter (optional), or DC adapter (optional)
designed for the terminal to charge the FOMA terminal.
Also use the exclusive battery pack L02 for the FOMA
terminal. Desktop Holder L02 (optional) is also available to
use.
■ Battery pack lifetime
・ Battery packs are consumables. As they are repeatedly
recharged, the available usage time will gradually become
shorter.
・ When the usage time after each recharging becomes
approximately half of the time for a new battery pack, it is
recommended that the current battery pack be replaced with a
new one as soon as possible. It is normal for the battery pack
to swell towards the end of its operational lifetime.
・ If an i-αppli or video phone is used for long periods of time while
the battery pack is being charged, the battery pack lifetime
may be shortened.
Removing
To protect the environmental, be sure to bring
the exhausted battery pack to an NTT
DOCOMO store, sales agent, or recycle shop.
■ Charging
・ For details, refer to the instruction manuals for the FOMA AC
Adapter 01/02(optional), FOMA Overseas/Domestic AC
Adapter 01 (optional) , FOMA DC Adapter 01/02 (optional) or
Desktop Holder L02 (optional).
・ The FOMA AC Adapter 01 can be used only for AC100V. The
"FOMA AC Adapter 02" and "FOMA AC Adapter 01 for Global
use" support from AC100V to 240V.
・ The adapter plug shape is designed for domestic use in Japan
(for AC100V). When you use an AC adapter that allows from
100V to 240V (with automatic voltage adjuster) overseas, a
country-tailored plug adapter may still be required. Do not
charge the terminal with a transformer designed for overseas
trips.
・ Insert the battery pack into the FOMA terminal before charging
the battery pack with the AC or DC adapter. The battery pack
cannot be charged unless it is in the terminal.
・ Plug/Unplug the connector slowly and securely while avoiding
excess force.
・ If you start charging the terminal a fully drained battery pack,
the terminal may not be turned on for a while.
・ During a long video call while the terminal is being charged, the
inside of the FOMA terminal may become hot and charging
may stop. If this happens, try charging again later.
■ Do not charge the battery pack for a long time (several
days) with the terminal power turned on.
・ If the FOMA terminal is left with the power turned on for a long
time with the charger connected, after charging completes,
the charger stops charging and the terminal uses battery
power, so battery can become discharged while connected to
the charger and the low battery alert may come quickly. In this
case, recharge the battery pack properly. Before recharging
the battery pack, disconnect the AC Adapter, DC Adapter or
Desktop Holder from the terminal and reconnect it.
■ Approximate battery pack usage time
The battery pack usage time may vary depending on the operating
environment and the battery pack deterioration.
・ Continuous call time is approximate duration of time to be spent
for talking with normal radio wave reception level.
・ Continuous standby time is approximate duration of battery time
while in motion. Depending on the battery level, set functions,
operating environment such as ambient temperature, or radio
wave reception level (Poor or weak radio wave reception level),
battery life can reduced to half. When i-mode communications
are performed, the call (communication)/standby time becomes
shorter. Even if you do not make calls or perform i-mode
communications, the call (communication)/standby time
becomes short if you compose i-mode mail, start an i-αppli or an
i-αppli Standby display, perform data communications or
multiaccess, use the camera, or playback videos or music.
・ Depending on network conditions at your location, time may be
shorter than the published values.
・ Continuous standby time in a stationary state is the average
usage time in a stationary state with normal radio wave
reception level while the terminal is closed.
・ Continuous standby time in motion is the average usage time in
a state combining "standstill", "in motion" and "out of service
area" in an area with normal radio wave reception level while the
terminal is closed.
44 Before Using the Handset
Network Network RContinuous Continuous Call
mode Standby Time Time
FOMA/3G 3G Moving: Approx. Voice call:
220 hours Approx. 150
Auto Moving: Approx. minutes
200 hours Video call:
Stationary: Approx. 100
Approx. 300 hours minutes
GSM Auto Stationary: Approx. Voice call: Approx.
300 hours 170 minutes
・ Depending on the battery pack recharge level, set functions,
operating environment such as ambient temperature, or radio
wave reception level (Poor or weak radio wave reception
level), battery life can reduced to half.
■ Estimated battery pack charging time
・ The estimated charging time is the duration of time to
charge the battery pack with the FOMA terminal turned off
and with a fully drained battery pack.
Charging takes longer with the FOMA terminal turned on.
r
Charging with the AC Adapter
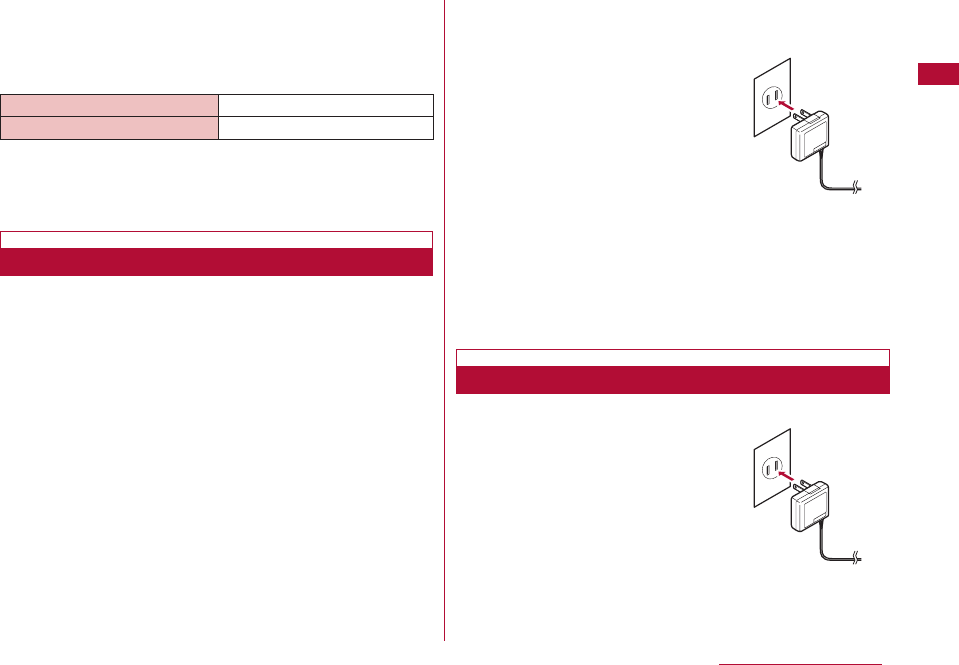
1Open the External connector terminal cover (1) and
flip it over (2)
2Insert the connector of the AC adapter, with the
inscribed arrow side up, straight into the FOMA
terminal External connector
3Connect the AC Adapter plug to an electric outlet
Charging starts, and the illumination lights.
4After charging completes, pull the AC adapter connector
straight out while pressing the release buttons
When charging completes, the illumination turns off.
・ Make sure the AC Adapter connector is facing the
correct side up. Forcibly trying to remove the adaptor
could damage the terminal.
Charging using Desktop Holder (optional)
1Insert the power plug of AC Adapter into an outlet
45
Before Using the Handset
FOMA AC adapter 01/02 Approx. 180 minutes
FOMA DC adapter 01/02 Approx. 180 minutes
AC100V
Outlet
Power Plug
AC100V
Outlet
Power Plug
46 Before Using the Handset
2Make sure the side with AC Adapter connector
( Desktop Holder side) symbol faced up and insert
horizontally into the Desktop Holder.
3Insert a FOMA terminal into the Desktop Holder along
the direction of (1).
Charging starts and the illumination turns to red.
・ Pay attention not to be caught by strap.
4After finishing charging, remove the FOMA terminal
from Desktop Holder
After charging finishes, illumination will turn off.
5Hold the Desktop Holder and horizontally pull the AC
Adapter connector (Desktop Holder side) while
pressing the release button on the connector.
・ Make sure to check the face of AC Adapter and
insert/remove horizontally.
■ DC adapter (optional)
The DC adapter supplies power to the FOMA terminal from a
12V/24V cigarette lighter socket of a car. For details, please
see the FOMA DC Adapter 01/02 instruction manual.
Note
・ You can set whether to light the Display backlight
during charging.→P107
・ During charging, the battery level icon changes in the
order of → → → (Blue) in an animation
display, and after charging completes, (Blue) lights
up.
<AC Adapter/DC Adapter>
・ Use the adapter with the specified power source and
voltage. Failing to do so may result in fire or malfunction.
<DC Adapter>
・ The DC adapter is exclusively for a negative ground
vehicle (12V/24V).
・ A fuse (2A) is a consumable item. Purchase a
replacement fuse from any car parts shop.
・ Do not charge while the car engine is not running to
avoid draining the car battery.
47
Before Using the Handset
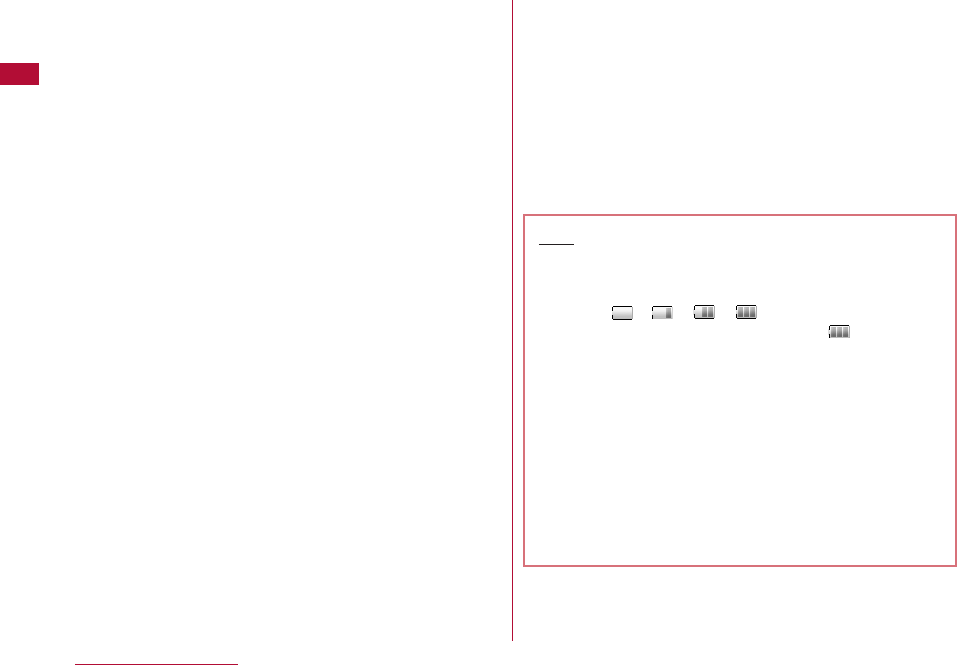
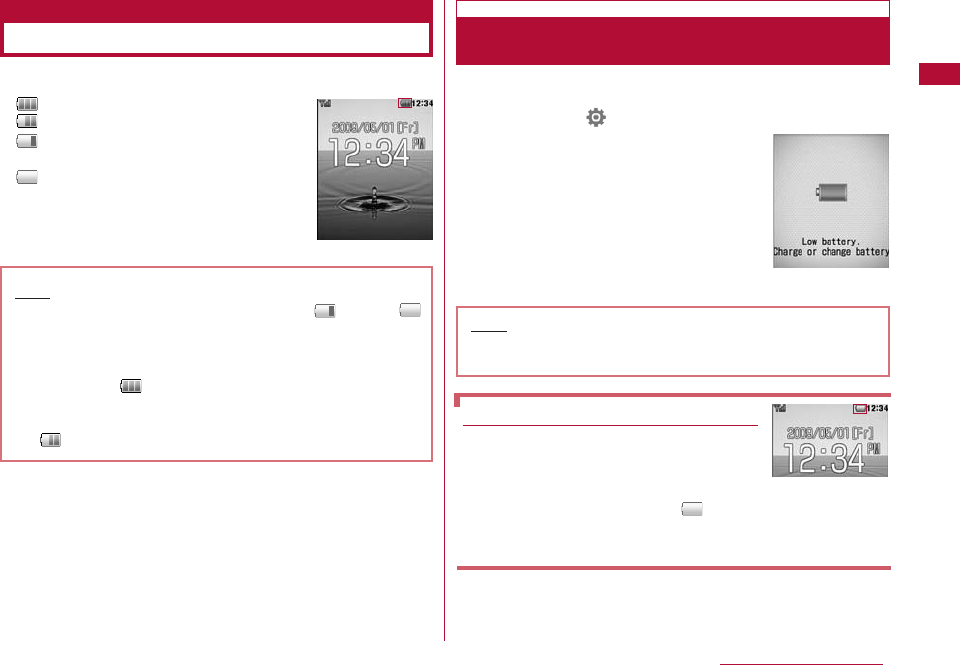
An icon indicating the approximate battery level is
displayed at the top of the screen.
(Blue): The battery is full.
(Blue): The battery is getting low.
(Red): The battery is almost completely
exhausted. Charge the battery.
(Red): The battery is almost completely
exhausted. The terminal will turn
itself off in a moment. Charge the
battery.
The approximate battery level can be checked through
display and sounds
1M[Menu] ] (Settings) ]"Others" ]"Battery level"
A warning appears, and a tone indicating
the remaining power sounds. The image
of the battery level disappears in
approximately 3 seconds.
Three beeps : The battery is full.
Two beeps : The battery is getting low.
One beep : The battery is almost
completely exhaused.
Charge the battery.
Checking the Battery Level
Battery Level
Note
・ When an icon indicating battery level is (Red) or
(Red), the camera and infrared communication are
unavailable.
・ When the color of the icon that indicates battery level
is other than (Blue) and the Music player is started,
the warning screen indicating the low battery level
appears. (This may not appear when the battery level
is Blue).
Checking Battery Level with the Sound and
Display
Note
・ When "Keypad tone" is set to "Silent" or "Manner
mode" is activated, you will not hear the beep.
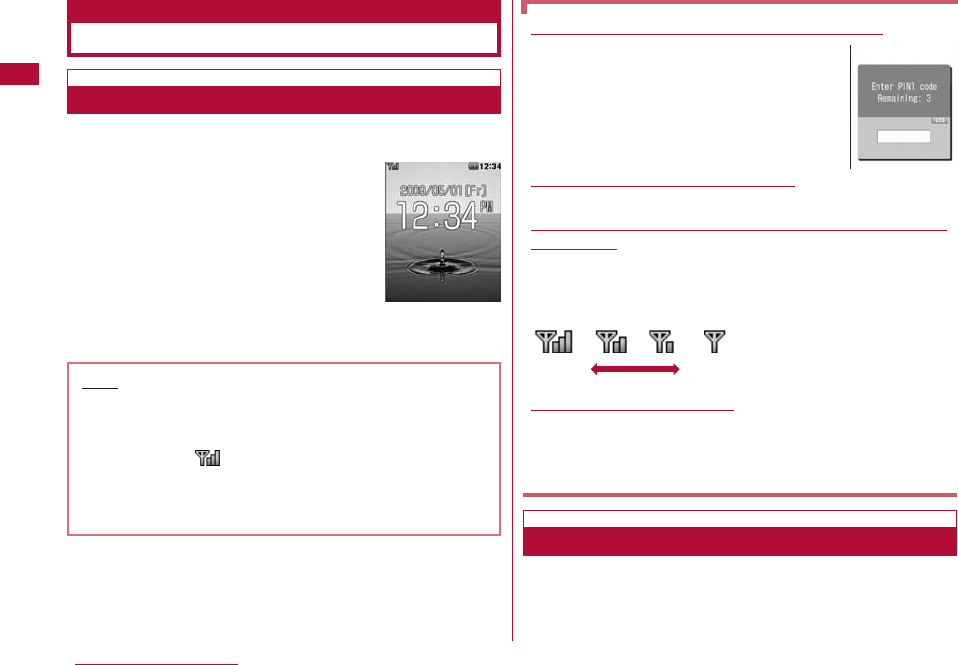
When the battery pack is running out
A warning message indicating that the
battery level is low and the battery needs
to be charged appears, and the beep
tone sounds. (Depending on the settings,
the tone may not sound.) The (Red) at the top the
screen blinks. After a little while, the terminal turns itself
off automatically.
48 Before Using the Handset
48 Before Using the Handset
1When the terminal power is turned off, P(hold down
for 2 + Seconds)
After the wakeup screen is displayed,
the Stand-by display is displayed.
1When the terminal power is turned on, P(for 2+
seconds) in Stand-by
The Exit screen opens and the power is turned off.
Turning the Terminal On or Off
Power On/Off
Turning the Power On
Note
・ A warning to insert the UIM appears if the UIM is not
inserted, or if the UIM is malfunctioning.
・ A call may be disconnected even if the terminal is not
in motion and is displayed.
・ Setting Date and Time→P49
・ Sending Caller ID→P50
・ Changing the Security Code→P116
Stand-by
Screen
When the "PIN1 code request" is set to "ON"
The PIN1 code entry screen opens.
After the correct PIN1 (P115) code is
entered, the Wakeup screen and then the
Stand-by display appears.
You can make emergency calls (to 110,
119, or 118) even when the PIN1 entry
screen is open.→P116
When the "Lock all" is set to "ON"
The Security Code is required.
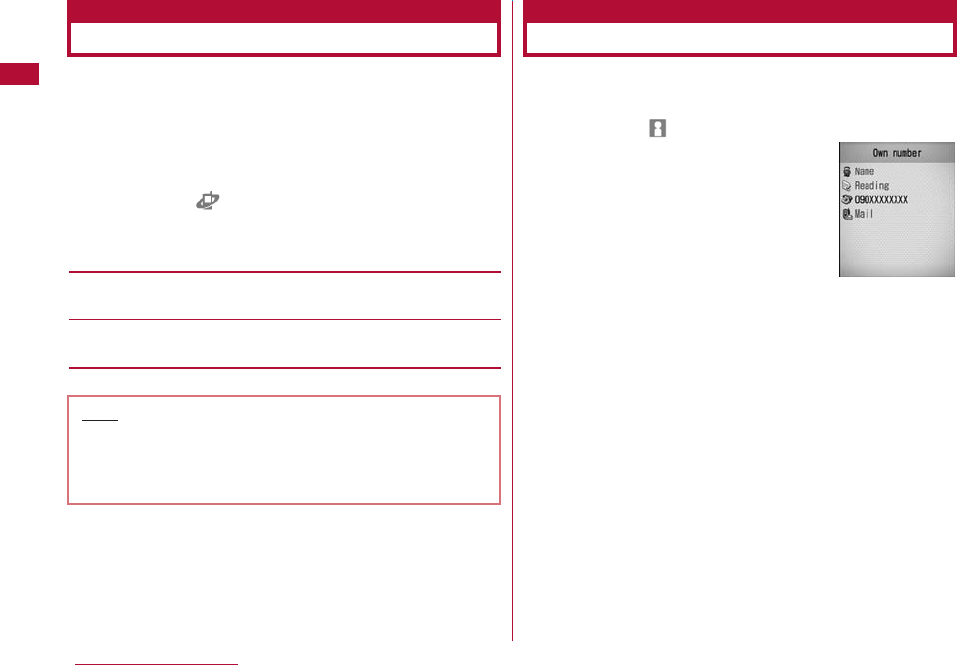
When "Out of service area" is displayed at the top of
the screen
The terminal is out of the service area or in a poor signal
area. Move to a location where the icon indicating the
signal strength appears. The signal strength is indicated
in 4 levels as follows:
Confirm the Welcome mail
"♪Welcome mail♪"is pre-saved.
Press Crepeatedly, the mail is displayed. Or follow the
instruction in "Displaying Received Mail" (p.148), the mail
is displayed."
Strong Weak
Turning the Power Off

49
Before Using the Handset
You can set to update the time automatically. The Local
time zone, Daylight Saving and Date&Time can also be set.
1M[Menu] ] (Settings) ]
"Date&Time" ]"Set Date&Time"
2Perform the following operations
[Auto time adjust]
Set whether to update the time on the FOMA terminal based on
the time information from the network.
ON : The date and time are updated automatically.
OFF : Auto update will not be performed.
[Local time zone]*
Set the time zone for the current date and time. For selecting a
country or city from the country/city name list by pressing C
[List], press M[Prev.] or I[Next] to switch the list by page.
[Daylight saving]*
Set whether to use Daylight savings time.
[Set date/time]*
You can manually set the date and time.
To set the date, use Jto move the cursor to the place to
change the date and enter the date with the dial keys (to set the
date on the calendar screen, press C [Select] in the date entry
field ). Operations on the calendar screen→P271
To set the time, use Jto move the cursor to the value to
change, enter the time with dial keys, and switch between "AM"
and "PM" with C(pressing Cin the time entry field opens the
time settings screen on which you can enter a time using dial
keys and H).
・ Depending on the settings in "Date&Time format" (P111), the
display format or order of the date and time may differ.
・ You can set the value between 1980/01/01 and
2099/12/31.
* Available when "Auto time adjust" set to "OFF".
3I[Done]
Setting the Date and Time
Set date&time
Date and Time
Settings
Screen
Note
<Auto time set Settings>
・ Time will be updated when turning the power on. Turn
the power on again if the time is not updated.
・ Time may not be updated depending on the signal
strength.
・ When using the FOMA terminal overseas, the time or
time zone may not be updated or displayed depending
on the network service in use. set the local time on
the World Clock.→P282
・ Time is not updated when an i-αppli is running or the
UIM is not inserted.
・ An error of a few seconds may occur.
50 Before Using the Handset
You can set to show/hide your Caller ID to the network in
advance.
・ Your Caller ID (phone number) is valuable information. Be
cautious about sending your Caller ID
・ Caller ID notification cannot be set when "Out of service area" is
displayed.
1M[Menu] ] (Service) ]"Caller ID notification"
2Perform the following operation
[Activate/Deactivate]
Set to show/hide the Caller ID.
[Check setting]
Check the status of the current setting.
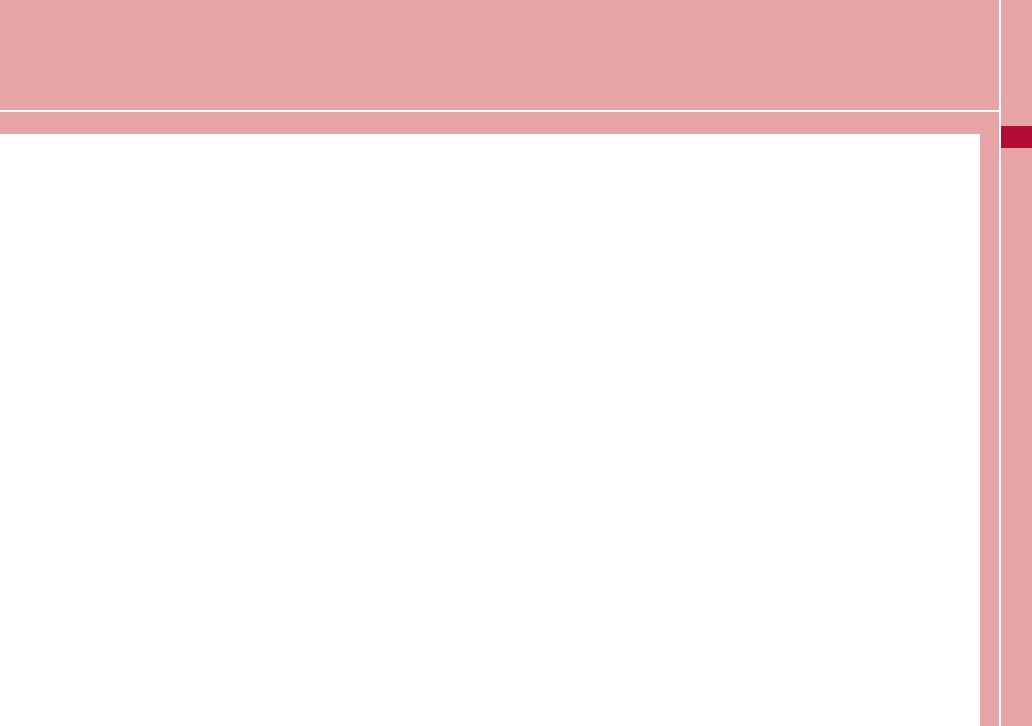
You can view your own phone number (My Number) saved
in the UIM.
1M[Menu] ](Own number)
■To view the saved detailed
information
Pressing C[Detail] and entering the
security code on the own number
screen open the own number detail
screen. You can also save items
other than the own number. → P279
・ If you have saved a phone number
other than your own number, mail
address, or URL, you can make a
call, create i-mode Mail, or connect
to a site by moving the cursor to
the item and pressing I.
Sending the Caller ID
Caller ID notification
Viewing Your Own Number
Own number
Note
・ Your Caller ID is displayed only if the other party's
phone is capable of displaying it.
・ You can set the Caller ID notification for each dialed
call. → P61
Own number
screen
Voice/Video calls
Using the Phone / Video Phone
Video calls ・・・・・・・・・・・・・・・・・・・・・・・・・・・・・・・・・・・・・・・・ 52
Making Voice/Video calls ・・・・・・・・・・・・・・・・・・・・・・・・・ 52
Using Redial/Received Call Logs ・・・・・・・・・・・・・・・・・ 57
Using the Recent Calls ・・・・・・・・・・・・・・・Recent calls 61
Showing/Hiding Caller ID for Each Call
・・・・・・・・・・・・・・・・・・・・・・・・・・・・・・・・・・・・・・・・・184/186 61
Sending Touch-tone Signals・・・・・・・・・・・・・・・・ Pause 62
Making International Calls ・・・・・・・・・・ WORLD CALL 62
Setting the Prefix to be Added to a Phone Number
・・・・・・・・・・・・・・・・・・・・・・・・・・・・・・・・・・・・・・・・・ Prefix dial 65
Making a Call by Specifying a Sub Address
・・・・・・・・・・・・・・・・・・・・・・・・・・・・・・・・・・・・・・ Sub Address 66
Reconnecting automatically when a call is
disconnected ・・・・・・・・・・・・・・・・・・・ Reconnect Alarm 66
Clarifying Your Voice in Noisy Locations
・・・・・・・・・・・・・・・・・・・・・・・・・・・・・・・・・・ Noise Reduction 66
Answering a Voice/Video call
Receiving Voice/Video calls ・・・・・・・・・・・・・・・・・・・・・・・ 67
Setting How to Answer Incoming Voice Calls
・・・・・・・・・・・・・・・・・・・・・・・・・・・・・・・・・・・・・ Answer mode 69
Ending or Holding Calls by Closing the FOMA Terminal
・・・・・・・・・・・・・・・・・・・・・・・・・・・・・・・・・・・・ Close settings 70
Adjusting the Volume during a Call
・・・・・・・・・・・・・・・・・・・・・・・・・・・・・・・・・・ Receiver volume 70
Adjusting the Ring Volume
・・・・・・・・・・・・・・・・・・・・・・・・・・・・・・ Incoming call volume 70
When You are Unable to Answer a Voice/Video call
Placing a Call on Hold When You Cannot Answer a Call
Immediately・・・・・・・・・・・・・・・・・・・・・・・・・・・・・・・・On hold 70
Setting the "On Hold Tone" ・・・・・・・・・・ On hold tone 71
Setting the Holding Tone ・・・・・・・・・・・・・Holding tone 71
Using Public Mode (Drive Mode)
・・・・・・・・・・・・・・・・・・・・・・・・・Public Mode (Drive Mode) 71
Using Public Mode (Power Off)
・・・・・・・・・・・・・・・・・・・・・・・・・・Public Mode (Power OFF) 72
Checking Missed Calls ・・・・・・・・・・・・・・・・Missed Call 73
Recording a Voice Message from a Caller When You
Cannot Answer a Call・・・・・・・・・・・・Record Message 73
Recording a Message from a Caller If You Cannot
Answer the Call While Ringing
・・・・・・・・・・・・・・・・・・・・・・・・・・・・Quick Record Message 75
Video call Settings
Setting the Image to Send to the Other Party・・・・・ 75
Changing the Video call Settings
・・・・・・・・・・・・・・・・・・・・・・・・・・・・・・Video phone settings 76
51
52 Voice/Video calls
Video calls
The Videophone call can be used with a mobile phone that
supports DOCOMO's Videophone call service.
・ DOCOMO's Video call service complies with "ISO 3GPP*1
standardized 3G-324M*2". DOCOMO's Video calls cannot
connect with handsets that support a different form of Video
call.
*1 3GPP (3rd Generation Partnership Project) is the local
standardization organization established for the
development of common technical specifications related to
3rd Generation Mobile Communication Systems
(IMT- 2000).
*2 3G-324M is the international standard of 3rd Generation
Mobile Video Phone.
・ 64K (64kbps) and 32K (32kbps) are the two types of
communication speed when making a video call. Video calls are
not available by 32K for this FOMA terminal.
・ This FOMA terminal does not support remote monitoring.
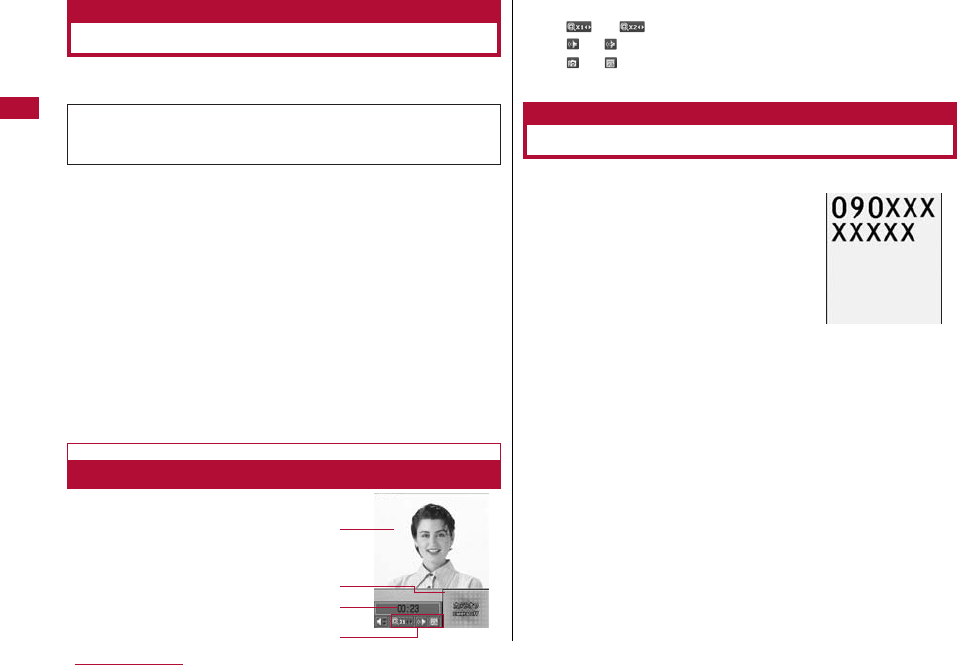
Components of Video call Screen
1Main window
The other party's image
appears by default.
2Sub window
Your image appears by default.
3Call duration
Displayed in the format of
Minutes: Seconds.
4Settings icons
/ Zoom Adjustment→P56
/ Handsfree ON/OFF State Display→P53
/ Picture mode (Camera image/Substitute image)
→P56
1
Enter a phone number
・ Up to 80 digits can be entered.
However, up to 32 digits can be
displayed.
・ Enter a number from "0" to "99" to view
the Phonebook entry of the
corresponding memory number. Also,
entering a number with 3 digits or more
finds phone numbers containing the
number from the Phonebook.→P93
・ Start from the area code even for a
local call.
・ C [Save]: Add a new or extra phone number to the
Phonebook.→P85
・ I [Mail]: Create i-mode mail to the phone number that you
entered.→P131
1
2
3
4
Phone number
entry screen
Making Voice/Video calls
Because this FOMA terminal does not have an inside camera, so
the images sending to the others will be the pictures or images
captured by the out side camera.
2
To make a voice call
A
To make a Video call
M [Menu] ]"Video phone call"
A ringback tone
sounds from the
earpiece, and the
"Calling..." dialing
screen is displayed
until the other party
answers the call.
・ C [Spk on/Spk off]:
Toggle Hands-free
ON or OFF.
・ Pressing a dial key/*/#during a call allows you to
send touch-tone signals.
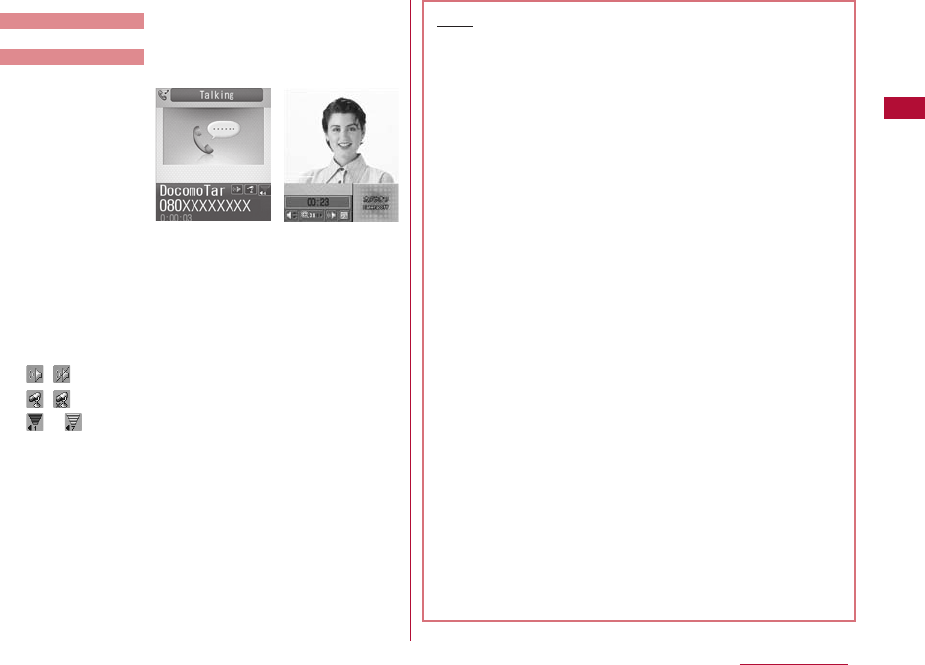
■During a voice call
During a voice call, screen will display setting status with
icons.
・ / : Hand free call ON / OFF
・ / : Mute enable / Mute disable → P55
・ to : Receive call volume → P70
■During a Video call
・ I [Substitute image/Camera image]: Switch the image
to send between the alternate image and the camera
image.
3
To terminate the call P
53
Voice/Video calls
Voice call screen Video call screen
Note
・ If you hear the voice guidance for a Caller ID Request,
make the call again sending Caller ID.
・ You cannot switch between a voice/Video call during
a call using this FOMA terminal.
・ Closing the FOMA terminal during a call terminates
the call when the "Close setting" is set to "End the
call", and holds the call when it is set to "On hold".
However, if the flat-plug earphone/microphone
(optional) is connected, closing the FOMA terminal
will not terminate the call or place the call on hold.
・ The low battery alert sounds from the Earpiece if the
battery becomes low during a call. You can continue
the call; however, the call will be terminated
momentarily when the terminal power is automatically
turned off.
・ This FOMA terminal does not support hands-free
devices (such as In-car hands-free kit 01) via a USB
connection.
<Video calls>
・ A call cannot be connected if you make a Video call
to a phone without Video call capabilities, or if the
other party's terminal is out of service area or turned
off. If you make a Video call to a phone that doesn't
support Video calls, and you have set "Auto redial as
voice" to "ON", the call will be disconnected before the
connection is established, and the terminal
automatically redials the number as a voice call.
However, if the other party uses an ISDN 64k
connection, or a video phone that does not support
the 3G-324M standard (as of March 2009), or you
dialed a wrong number, the above action may not be
taken. Communication charges may apply.
54 Voice/Video calls
Message Description
The phone number is not valid.
Busy The other party is on a call (this message
may appear when the other party's terminal
is performing packet communication
depending on the terminal).
The other party is in packet
communication.
The other party's terminal is either out of
the service area or turned off.
The Caller ID was not sent (when the call is
made to the number for Visualnet , etc.).
The call is being forwarded.
The Call forwarding service is activated,
and the forwarding destination does not
support Video calls.
Your usage fees have exceeded the limit of
your plan (Type limit or Family wide limit).
The Video call was not dialed from the
official i-mode site Information Provider
(when the call is made to V-live).
Set the "Caller ID notification" to "Notify"
and redial.
・ This message may appear for other
reasons, as well.
Check number,
then redial.
Busy with packet
transmission
Out of service
area/power off
Set caller ID to
ON
Your call is
being forwarded
Redial using
voice call
Upper limit has
been exceeded.
Connection failed
Please make your
call from the
i-mode web page
Connection
failed
To correct an entered phone number
To delete an entered digit, use L
]
Kto move the
cursor to the right of the digit and press Q.
To add a digit, use L
]
Kto move the cursor to the
position and enter the digit with a dial key.
Screen Display during Dialing
The other party's name is displayed if the other party's
phone number is saved in the Phonebook.
If a Video call could not be made
The following messages appear if a Video call could not
be made (depending on the other party's mobile phone
model or subscribed network services, the displayed
messages may not describe the actual situation).
<Video calls>
・ If you make a Video call to an emergency number
such as "110", "119" or "118", a voice call will be
made automatically.
・ Incoming i-mode mail or Message R/F during a Video
call is stored at the i-mode Center. An SMS can be
received even during a Video call.
・ There is a digital call charge for sending the
Substitute Image.
55
Voice/Video calls
1Phone number entry screen (P52)
]
M [Menu]
]
Perform the following
operations
[Video phone call]
Make a Video call.
[Caller ID]
Set whether the other party receives your Caller ID when you
make a call.→P61
[Int. call]
After selecting the country code to make a call, "009130010"
(WORLD CALL) and the country code will be inserted at the
beginning of the phone number.→P62
[Select prefix]
Add the prefix number at the beginning of the entered phone
number. You can add a prefix number only one time.→P63
[Multi number]
If you subscribe to Multi number, select the number to use when
making a call.→P315
[Compose mail]
Create new i-mode mail to the entered phone number.→P131
[Add to phonebook]
Add an entry to the Phonebook.→P84
[Search phonebook]
Search the Phonebook entry with the number already entered
→P87
1Voice call screen (P53)
]
M [Menu]
]
Perform the following operations
[New call]*1
Place the active call on hold, and dial another party.
[End active call]
Disconnect the call.
[Hold]
Place the active call on hold. To cancel, press Aor
C
[Release].
[Mute]
Enable or disable to mute your voice on the other party's terminal.
[Send my info.]
Create i-mode mail with own number entered in the message
text. →P131
[Search phonebook]*2
Search for a Phonebook entry.→P87
*1 This is not available if you do not subscribe to the Call Waiting
service.
*2 This is not available if you make a call using Redial or
Received calls, or the Phonebook is accessed. To use this
function, terminate applicable applications from the task list
screen.→P264
Sub Menu on the Phone Number Entry Screen Voice Call Screen Sub Menu
56 Voice/Video calls
1Video call screen (P53)
]
M [Menu]
]
Perform the following operations
[End call]
Disconnect the call.
[Hold]
Place the active call on hold. To cancel, press C [Camera] or I
[Alternate image].
[Camera image/Substitute image]
Switch the image to send between the alternate image and the
camera image.
[Camera set]
Configure the camera for Video calls. Press Jto select an icon.
After setting, press M [Close].
Zoom :Zoom the camera image (x1 / x2).
Brightness : Adjust the brightness of the camera image
(High / Standard /Low).
Night mode : Set this when using the camera in a dark place,
etc.
[Videophone set]
You can set the display and lighting for Video calls. After setting,
press I [Done].
Display settings
Other-Me : Display the other party's image on the main
window and your image on the sub window.
Me-Other : Display your image on the main window and the
other party's image on the sub window.
Other only : Display only the other party's image.
Me only : Display only your image.
Light
Always on : Always stays on during a call.
Terminal setting : In accord with the "Backlight" settings.
→P107
[Screen size]
Set the display size of the main window.
[Visual preference]
Set the image quality sent to the other party.
Prefer img qual :Set priority to the image quality. This option
is effective when there is little movement.
Normal : Set the sent video quality and motion to
standard.
Prefer motion spd : Set priority to motion for sent images. This
option is effective when there is a lot of
movement.
[Search phonebook]*
Search for a Phonebook entry. →P87
[Own number]
Display your phone number (Own number).
* This is not available if you make a call using Redial or Received
calls, or the Phonebook is accessed. To use this function,
terminate applicable applications from the task list screen.
→P264
Sub Menu During a Video call
Redial and the Received call logs can be used to make
phone calls. Also, the Recent calls (sent and received) can
be used to make calls.
Redial
Calling the Same Party Again
Redial maintains a list of the last 30 voice or Video calls.
The phone number and the calling date and time are stored
in the call logs.
・ If more than 30 calls are made, the most recent 30 calls are
retained
1Stand-by display
]
R
1The name saved in the
Phonebook
If the caller's name is not
saved in Phonebook, the
phone number will be
displayed.
2Outgoing phone call type
Dialing a voice call
Dialing a Video call
3The other party's phone
number
If the caller's phone number
is not saved in the Phonebook,
"Unregistered" will be displayed.
4Dialing an international call
Calling overseas from Japan
Calling from overseas during international roaming
Making an international call from overseas during
international roaming
5Which number of Multi Number is used for dialing*
/ / Basic number/Additional number 1/Additional
number 2
* Appears if you subscribe to the Multi number service.
6Call date and time
2Move the cursor to the number to redial
]
C
1Outgoing phone call type
2The name saved in the
Phonebook
If the number is not saved
in the Phonebook,
"Unregistered" is displayed.
3The other party's phone
number
4"Caller ID" setting when
dialing
Appears when you make a
call with the Caller ID (P55) set to "Notify".
5Which number of Multi Number is used for dialing*
The number of Multi number used to dial is displayed as
the name registered in "Number setting" (P315).
* : Appears if you subscribe to the Multi number service.
6Call date and time
7Call duration
8Outgoing international call
Calling overseas from Japan
Calling from overseas during international roaming
Making an international call from overseas during
international roaming
3
To make a voice call
A
To make a Video call
M [Menu] ]"Video phone call"
57
Voice/Video calls
1
24
5
6
Redial list screen
Using Redial/Received Call Logs
Redial detail
screen
1
2
3
6
7
5
8
4
3
1The Redial list screen (P57)/Redial detail screen (P57)
]
M [Menu]
]
Perform the following operations
[Video phone call]
Make a Video call.
[Compose mail]
Create i-mode mail to the phone number on the Redial screen.
→P131
[Add to phonebook]
Add a number to a Phonebook entry from the redial list.→P84
[Customize call]
You can change the phone number of the redial list (P57) and
make a call to the number.
[Change list]*
Switch logs to display.
Recent call :Display the recent call list screen.→P61
Recent mail :Display the recent mail list screen.→P161
Received Calls :Display the received call log list screen.→P59
Received Mail :Display the received mail log list screen.→P161
Sent Mail :Display the sent mail log list screen.→P161
[Delete]
Delete the selected/displayed redial entry.
[Delete all]*
Delete all redial entries.
* Not displayed on the Detail screen.
58 Voice/Video calls
Note
・ You can make a voice call by selecting an entry on
the Dialed Calls list screen and pressing A. You can
also make a Video call if you select M[Menu]
]
"Video phone call".
・ If the same phone number is saved repeatedly in the
Phonebook, the name found first in the Reading
search is displayed.
・ A call dialed with "184" or "186" will be recorded as a
different Redial entry.
・ Press I [Mail] on the Redial list screen / Redial
detail screen, to create i-mode mail to the phone
number on the selected Redial entry.
Redial List Screen / Redial Detail Screen Sub Menu
59
Voice/Video calls
Received Calls
The Received call log maintains a list of the last 30
incoming calls and Video calls. Phone numbers and
received dates/times are stored in a call log.
・ If there have been more than 30 calls received, the most recent
30 calls are retained.
1Stand-by display
]
L
1The caller's name saved in
the Phonebook
If the caller's name is not
saved, the phone number
will be displayed. If the caller
did not send the Caller ID,
the reason for No Caller ID
is displayed.
2Incoming phone call type
/ Answered /Missed
voice call (including
Rejected calls)
/ Answered /Missed Video call (including Rejected
calls)
3The other party's phone number
4Incoming international call
Incoming international call from overseas
Calling from overseas during international roaming
Incoming international call from overseas during
international roaming
5Which number of Multi Number is used for dialing*
The number of Multi number to which the call arrived is
displayed as the name registered in "Number settings".
* : Appears if you subscribe to the Multi number service.
6Received Date and Time
2Move the cursor to a log entry
]
R [View]
1The name saved in the
Phonebook
If the phone number is not
in the Phonebook,
"Unregistered" is displayed,
and if the Caller ID was not
received, "User unset" is
displayed.
2 Incoming phone call type
/ Answered/Missed
voice call (including Rejected
calls)
/ Answered/Missed
videophone call (including Rejected calls)
3The other party's phone number
4Incoming international call
Incoming international call from overseas
Calling from overseas during international roaming
Incoming international call from overseas during
international roaming
5Which number of Multi Number is used for dialing*
The number of Multi number to which the call arrived is
displayed as the name registered in "Number settings"
(P315).
* : Appears if you subscribe to the Multi number service.
6Received Date and Time
3
To make a voice call
A
To make a Video call
M [Menu] ]"Video phone call"
Received calls
list screen
Using the Received Call Log
1
24
5
6
3
Redial detail
screen
1
2
3
5
6
4
7
60 Voice/Video calls
1The Received call list screen (P59)/Received call detail
screen (P59)
]
M [Menu]
]
Performs the following operations
[Video phone call]
Make a Video call.
[Compose mail]
Create i-mode mail to the phone number on the Received calls
screen.→P131
[Add to phonebook]
Add a number to the phonebook from the Received calls.→P84
[Customize call]
You can change the phone number of the Received calls list
(P57) and make a call to the number.
[Change list]*
Switch logs to display.
Recent call :Display the recent mail list screen.→P61
Recent mail :Display the recent call list screen.→P161
Received Mail :Display the received mail log list screen.
→P57
Redial :Display the redial list screen→P161
Sent Mail :Display the sent mail log list screen.→P161
[Delete]
Delete the selected/displayed Received calls entry.
[Delete all]*
Delete all Received Calls entries.
* Not displayed on the Detail screen.
Note
・ You can make a voice call by selecting an entry on
the Received calls detail screen and pressing A.
You can also make a Video call by selecting M
[Menu]
]
"Video phone call".
・ The reason for no Caller ID is displayed in the log
entry of the call without Caller ID.→P124
・ If the same phone number is saved repeatedly in the
Phonebook, the name found first in the Reading
search is displayed.
・ The phone number dialed to make a dial-in call may be
displayed differently from the actual number in the
received call log entry.
・ Press I [Mail] on the Received call list/detail
screen, to create i-mode mail to the phone number in
the selected received call log entry.
Sub Menu of the Received Calls List/Detail Screen
61
Voice/Video calls
Up to 60 incoming and outgoing calls can be recorded in
"Recent call log".
・ If there have been more than 60 calls recorded, the most
recent 60 calls are retained
1Stand-by display
]
A
For subsequent steps and the description of screen
components, see "Redial" (P57) and "Received calls" (P59)
sections.
There are 2 ways to show/hide the Caller ID for each call:
adding "184"/"186", or using the sub menu on the Phone
number entry screen.
1Enter "184" (Do not notify)/"186" (Notify)
]
Enter the phone number
2
To make a voice call
A
To make a Video call
M [Menu] ]"Video call"
Example: Using the Sub menu of the Phone number entry screen
1Enter the phone number
]
M [Menu]
]
"Caller ID"
]
"Not notify"/"Notify"/"Cancel"
2
To make a voice call
A
To make a Video call
M [Menu] ]"Video phone call"
Using the Recent Calls
Recent calls
Note
・ The sub menu of the Recent call list screen/detail
screen is the same as the one of the Redial and
Received call list screen/detail screen.→P58、P60
Showing/Hiding Caller ID for
Each Call
184/186
Showing/Hiding the Caller ID by Adding
184/186
Showing/Hiding the Caller ID Using the Sub
Note
・ You can set to show/hide the Caller ID to the network
in advance. →P312

62 Voice/Video calls
Enter "P" and a number after the phone number and make a
voice call to send a push signal (DTMF) for the number
after "P". This is useful when you use, for example, online
ticket reservation or balance inquiry services.
・ The signal may not be received depending on the device on the
receiving side.
1Enter the phone number
]
Press * 3 times and
enter "P"
]
Enter the number to send
]
A
After the call is connected, the number after "P" is displayed.
The displayed number is send by pressing A.
WORLD CALL is an international calling service available
on DOCOMO mobile phones.
FOMA service subscribers are also signed up for WORLD
CALL at the time of initial subscription (except subscribers
explicitly declining this service).
・ This service is available in approximately 240 countries and
regions around the world.
・ Charges for "WORLD CALL" are added to the monthly FOMA
service call charges.
・ No initial fee and no fixed monthly charges apply.
・ This service is not available with some billing plans.
・ Even if the Caller ID notification is set, the Caller ID may not be
notified or phone number is not displayed correctly, depending
on the telecommunication carrier. In this case, you cannot
make a call using the Received calls.
・ For details on WORLD CALL, contact the "docomo Information
Center" shown at the back of this manual.
・ When using international carriers other than DOCOMO, please
contact the carrier directly.
・ Setting Country code: Up to 50 Country codes necessary to
make an international call can be saved.
・ Setting International prefix dial: Up to 1 numbers (prefixes) to
be added to the beginning of the phone number.
・ Making an international call (including to Japan) selecting
registered Country code :Register frequently used country
names and country codes in the "Country code list" in
"International call" to make a call quickly.
Enter the number in the following order.
1"010-Country code- Area Code
(City Code) - Phone Number"
Sending Touch-tone Signals
Pause
Making International Calls
WORLD CALL
If an overseas party uses the terminal having video call
function of telecommunication carrier supporting video
calls of FOMA overseas, you can make an International
Video call to that party by pressing M[Menu]
]
Select
"Video phone call" after the following dialing procedures.
・ For information on the countries where connection
can be made and telecommunications carriers, visit
the DOCOMO website.
・ The other party's image displayed on the FOMA
terminal may blur, and the call may not be connected
depending on the other party's terminal.
Enter the Phone Number and Make an
International Call

・ If the Area Code (City Code) starts with "", remove "0". (In a
few countries, like Italy, "0" must not be removed.).
・ An international call can be made by entering "009130-
010-Country code - Area code (City code) - other party's
phone number.
2
A
■To make an international Video call
M [Menu] and then select ]"Video phone call"
Enter "+" at the beginning of a phone number and dial to
replace "+" with an international access code
automatically.
・ The WORLD CALL (009130010) is set to be added
automatically by default.→P63
1Press 0(for 1+ seconds) to enter "+"
]
Enter
"Country Code - Area Code (City Code) - Phone Number"
・ You can also press *twice to input "+".
・ If the Area Code (City Code) starts with "", remove "0". (In a
few countries, like Italy, "0" must not be removed.)
2
A
International call:Make a call after
converting "+" into an international
access code.
Original number:Make a call without
converting "+" into an international
access code.
Cancel:Cancel dialing.
■To make an international Video call
M [Menu] and then select ]"Video phone call"
3Select a dialing method
You can select an international access code from the sub
menu and add it to the phone number.
1Enter "Country code - Area code (City code) - other
party's phone number"
・ If the Area Code (City Code) starts with "0", remove "0".
(In a few countries, like Italy, "0" must not be removed).
2M [Menu]
]
"Select prefix"
]
Select an international
access code
The selected international access code is inserted at the
beginning of the entered phone number.
3
A
■To make an international Video call
M [Menu] and then select ]"Video phone call"
63
Voice/Video calls
Making an International Call Using "+"
Dialed call
confirmation
screen
Note
・ This option is available only inside the FOMA network
service area.
・ If the phone number starts with "+81", "+" will not be
converted into the International Access Code.
Making an International Call Adding
International Access Code
Note
・ By default, WORLD CALL (009130010) is registered
to "Prefix1". →P65
64 Voice/Video calls
The International Call settings can be changed.
・
Even if the Caller ID notification is set, the Caller ID may
not be notified or phone number is not displayed correctly,
depending on the telecommunication carrier. In this case,
you cannot make a call using the Received calls.
You can set whether to add an international access code
automatically instead of "+" when you make a call by
entering "+" at the beginning of the phone number.
1M [Menu]
]
(Settings)
]
"International dial"
]
"Auto assist setting"
]
"Auto"/"OFF "
Auto:Convert "+" automatically to the number specified in
the IDD prefix setting.
None:"+" will not be coverted.
When "Auto assist setting" is set to "Auto", specify the
international access code to be added automatically.
1M [Menu]
]
(Settings)
]
"International dial"
]
"IDD prefix setting"
2Perform the following operation
[IDD prefix name]
Enter the International Dial name used in the Auto Assist
Settings.
[IDD prefix code]
Enters the International Dial number used in the Auto Assist
Settings.
3I [Done]
Set whether to automatically replace leading "0", if
entered, of a phone number with "+ Country code" during
international roaming. Also, you can specify the Country
code to be added automatically.
1M [Menu]
]
(Settings)
]
"International dial"
]
"Auto international dial"
]
Perform
the following operations
[Auto international dial]
Set whether to add a Country code automatically.
[Target country]
Set a Country code to add.
2I [Done]
Making an International Call Easily
Setting to Add the International Access Code
Automatically <Auto assist setting>
Setting International Access Codes
<International Prefix Settings>
Setting Auto Assist of Country Code
<Auto international dial>
65
Voice/Video calls
Registering a Country Code <Country code list>
Up to 50 Country codes necessary to make an
international call can be saved.
1M [Menu]
]
(Settings)
]
"International dial"
]
"Country code list"
2M [Menu]
]
Perform the following operations
・ C [Edit]: Edit the selected county code.
[Country]
Register a name of the Country code. Up to 7 full-pitch or 14
halfpitch characters can be entered.
[Country code]
5 Up to 5 digits can be entered.
3I [Done]
1"Country code list" screen (P65)
]
M [Menu]
]
Perform the following operations
[Add new]
Go to Step 2 (P65) in "Registering Country Codes "<Country
Code>" here.".
[Edit]
Edit the selected country code. Go to Step 2 (P65) in
"Registering Country Codes "<Country Code>" here.".
[Delete]
Delete the selected country code.
[Delete all]
Delete all country codes.
Up to 3 numbers (prefixes) to be added to the beginning of
the phone number such as an international access code,
"184", or "186 can be saved.
1M [Menu]
]
(Settings)
]
"Call/VT/Dialing"
]
"Prefix dial"
Setting the Prefix to be Added
to a Phone Number
Prefix dial
Country code list
screen
Sub menu of the "Country code list" screen
Note
<Edit>
・ You can edit the pre-installed country codes.
<Delete>
・ You cannot delete the country code that is set to be
added automatically in "Auto international dial" (P64).
2Select a Prefix entry field
]
Enter the Number
]
I [Done]
・ Up to ten digits can be entered as a prefix.
You can set whether digits after ":" in a phone number
with a ":" are identified as a sub-address. A sub-address is
used to access a specific device connected to an ISDN
line or to select contents on "V live".
1M [Menu]
]
(Settings)
]
"Call/VT/Dialing"
]
"Sub-address setting"
]
"ON"/"OFF"
ON :Identify the address after "
:
" as a sub-address.
OFF:The address after "
:
" will not be identified as a
subaddress.
You can set an alarm that keeps sounding until a voice or
Video call is reconnected when the call was disconnected
due to weak signals.
1M [Menu]
]
(Settings)
]
"Call/VT/Dialing"
]
"Call
feature"
]
"Reconnect alarm"
]
Select an Alarm
Alarm off :Set not to sound an alarm.
Low alarm :Set to Low alarm.
High alarm:Set to High alarm.
Noise Reduction suppresses background noises. The other
party can hear your voice clearer even in a noisy place.
66 Voice/Video calls
Note
・ Do not add Pauses and the such to the prefix. If they
are present, the call can not be connected.
Making a Call by Specifying a
Sub Address
Sub Address
Note
・ ":" is not identified as a delimiter of a sub-address if:
- ":" is entered at the beginning of the phone number.
- A specific number such as "184" or "186" is entered
at the beginning of the phone number and ":" is
entered right after it.
Reconnecting automatically when a
call is disconnected
Reconnect Alarm
Note
・ Duration for the reconnection is available varies
depending on the usage and the signal strength.
・ If the signal suddenly worsens, the call may be
disconnected without the alarm sounding.
・ The billed airtime will continue during the
reconnection attempt.
・ If the call is disconnected, the other party will hear
nothing.
Clarifying Your Voice in Noisy
Locations
Noise Reduction
67
Voice/Video calls
1M [Menu]
]
(Settings)
]
"Call/VT/Dialing"
]
"Call
feature"
]
"Noise reduction"
]
"ON"/"OFF"
ON :Activate Noise Reduction.
OFF:Deactivate Noise Reduction.
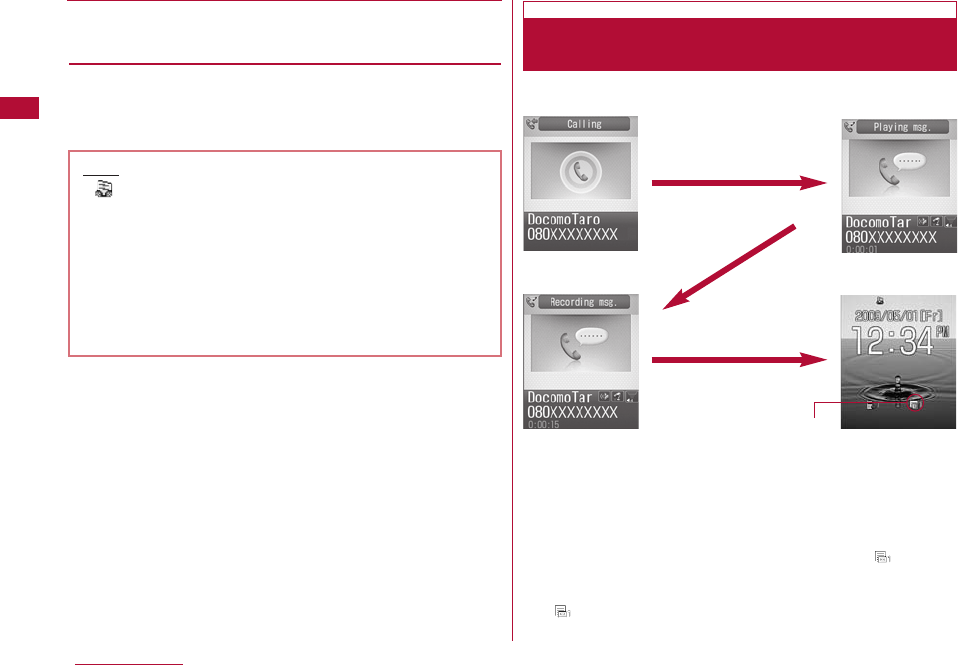
1An incoming call
arrives
The ring tone sounds.
・ P:Place the call on
response hold. →P70
■During a voice call
・ I [Silent]: Stop the
ring tone or vibration.
Pressing I [Reject]
again rejects the
call.
*:When "Manner mode" is activated or "Incoming call vol."
in "Original manner mode" is set to "Silent", press I
[Reject] to reject an incoming call.
■When a Video call is arriving
・ C [Image]: Answer the call using the substitute image.
2
A
Answer the call.
・ C[Spk on/Spk off]: Toggle Hands-free ON or OFF.
・ Pressing a dial key/*/#during a call allows you to
send touch-tone signals.
■During a Video call
・ I[Substitute image/Camera image]: Switch the image
to send between the alternate image and the camera
image.
3To terminate the call, P
Receiving Voice/Video calls
Incoming video
call screen
Incoming voice
call screen
When the caller sent the Caller ID
When the caller is registered in the Phonebook, the
phone number and registered name appear.
When the caller did not send the Caller ID
The reason for no Caller ID is displayed instead of a
phone number.→P124
Note
・ The incoming call actions such as a ring tone or
vibration vary depending on the settings in "Profile" or
the settings saved in the Phonebook.→P80, P98,
P100
・ When "Manner mode" is activated, the ringtone does
not sound. However, if "Original manner mode" is
activated, the ring tone may sound depending on the
settings.→P102
・ Closing the FOMA terminal during a call terminates
the call when the "Close setting" is set to "End the
call", and holds the call when it is set to "On Hold".
However, if the flat-plug headphone/microphone
(optional) is connected, closing the FOMA terminal
will not terminate the call or place the call on hold.

68 Voice/Video calls
・ If you subscribe to the Voice mail, Call waiting or Call
forwarding service, when "Arrival call act" is set to
"Answer" and "Set in-call arrival act" is set to
"Activate", a tone during a call sounds if a call arrives
during another call. If the tone sounds during a call,
the network services are available.→ P312
However, the tone does not sound while a call is
placed on response hold, an active voice call is
placed on hold, or a message is being recorded (P74)
because calls cannot arrive under these situations.
・ When the Public mode (Drive mode) is activated, an
incoming call is not indicated (the ringtone does not
sound). Also, even if a call arrives when the display is
turned off, the display backlight will not be turned on.
・ If you subscribe to Multi number, the name registered
in "Number settings" ( P315 ) appears according to
the number to which the call arrived.
・ You can enable "Set mute ring (sec.)" to delay the
incoming call actions for a call made from the other
party not saved in the Phonebook or without the
Caller ID.→P125
・ Use the following functions to reject incoming calls
from a caller not saved in the Phonebook or from a
specific caller.
- Reject unknown caller→P126
- Reject on List→P121
・ You cannot switch between a voice/Video call during
a call using this FOMA terminal.
・ The low battery alert sounds from the Earpiece if the
battery becomes low during a call. You can continue
the call; however, the call will be terminated
momentarily when the terminal power is automatically
turned off.
・ This FOMA terminal does not support hands-free
devices (such as In-car hands-free kit 01) via a USB
connection.
<Voice call>
・ When "Answer mode・is set to "Open flip", you can
answer a call by opening the terminal. If it is set to
"Any key answer", you can answer a call by pressing
any dial key, *key, or #key.→P69
<Video call>
・ When the Voice mail service is activated using a
Video call, an SMS notifies you of a new message.
・ Even if the Call forwarding service is activated, an
incoming Video call is not forwarded if the forwarding
destination is not a video-phone device supporting
3G-324M. Check the capabilities of the forwarding
destination device before setting Call Forwarding.
・ Incoming i-mode mail or Message R/F during a Video
call is stored at the i-mode Center. An SMS can be
received even during a Video call.
・ Video calls are not available to receive by 32K
(32kbps).
69
Voice/Video calls
Setting How to Answer
Incoming Voice Calls
Answer mode
1Incoming call screen (P67)
]
M [Menu]
]
Perform the following operations
[Voice mail]*1
Connect the incoming call to the Voice mail service center.
[Call rejection]
Reject an incoming call and hang up.
[Call forwarding]*2
Transfer an incoming call to a specified number.
*1 This is not available unless you subscribe to the Voice mail
service.
*2 This is not available unless you subscribed to the Call
forwarding service or you have specified a forwarding number.
You can set to answer an incoming voice call by opening
the FOMA terminal (Open flip) or pressing a dial key (Any
key answer) in addition to A.
1M [Menu]
]
(Settings)
]
"Call/VT/Dialing"
]
"Incoming call "
]
"Answer mode"
2Perform the following operation
[Open flip]
You can answer a call by opening the FOMA terminal.
[Any key answer]
You can answer a call by pressing a dial key, *, #in addition
to A.
[SEND key only]
You can answer a call by pressing A.
Incoming Call Screen Sub Menu
Ending or Holding Calls by
Closing the FOMA Terminal
Close settings
1M [Menu]
]
(Settings)
]
"Call/VT/ Dialing"
]
"Call
feature"
]
"Close setting"
]
Select conditions when
the terminal is closed
End the call :End the call.
On Hold :Place the active call on hold.
Mute :The call continues, however, your voice
cannot be heard by the other party.
The Receiver volume can be adjusted in 7 levels from 1 to
7.
1Incoming call screen (P53)
]
F/E
・ F: Increase the volume.
・ E: Decreases the volume.
The ring volume can be adjusted in 8 levels from 0 to 7.
1Incoming call volume (P67)
]
F/E
Press each of
F/E
changes the volume.
・ If no action is taken for approximately 2 seconds, the
sound volume adjustment screen closes automatically and
the volume is set.
1Incoming call screen (P67)
]
P
The tone set in the "On hold tone" (P71) is played. The
image set
in the "Response hold
image" (P76) appears
for Video calls.
70 Voice/Video calls
Video call hold
screen
Voice call hold
screen
Adjusting the Volume during a Call
Receiver volume
Note
・ The adjusted Receiver volume will be retained after
the call.
・ "Receiver volume" in "Volume" (P100) is also
changed.
Adjusting the Ring Volume
Incoming call volume
Note
・ This is not available when Manner mode is activated.
・ "Incoming call" in "Volume" (P99) is also changed.
Placing a Call on Hold When You
Cannot Answer a Call Immediately
On hold
2When you can resume the call A
or
C
[Release]
・ You can also cancel the hold on a Video call by pressing
C[Camera]. If you press I [Substitute Image] to cancel the
hold, the alternate image will be sent to the other party.
■To terminate a voice call/Video call
Press P.
You can select to play one of the 3 on-hold-tones
(guidance) to the callerwhen you place the call on response
hold.
1M [Menu]
]
(Settings)
]
"Call/VT/Dialing"
]
"Incoming call"
]
"On hold tone"
]
"Hold tone 1"/
"Hold tone 2"/"Hold tone 3"
・ I [Play]: Play back the hold tone.
You can select one of the 3 on-hold-tones to play for the
caller on hold.
1M [Menu]
]
(Settings)
]
"Call/VT/Dialing"
]
"Call feature"
]
"Holding tone"
]
"Hold tone 1"/
"Hold tone 2"/"Hold tone 3"
・ I [Play]: Play back the hold tone.
Public mode (Drive mode) is an automatic response service
to assist in observing manners in public locations. When
Public mode (Drive mode) is activated, a voice guidance is
played to the caller indicating that you are driving or at a
place where you cannot talk (such as on a train, bus, or in a
movie theater) and cannot answer the call, and the call is
disconnected.
・ You can set or cancel Public mode (Drive mode) only in
Standby (even when "Out of service area" is displayed).
・ This option is not available during data communication.
・ Voice mail service (*1), Call forwarding service (*1), and Caller
ID request service (*2) take priority over Public mode.
*1 Voice calls with the ring time set to other than "0 Sec." the
service is activated after the guidance for Public mode.
*2 If the other party sends the Caller ID, Public mode is
activated.
・ Public mode is not activated for calls you reject using Nuisance
call blocking service.
1The Stand-by display
]
* more than 1 second
When a call arrives, a voice guidance is played in Japanese
saying that "The person you are calling is currently driving or
in the area where mobile phones should not be used. Please
call again later" is played.
71
Voice/Video calls
Note
・ The other party is charged even during a hold.
・ If you subscribe to the Voice mail service/Call
forwarding service, you can connect the incoming call
to the Voicemail service center/forward the incoming
call to the specified phone number.→P306, P309
Setting the "On Hold Tone"
On hold tone
Setting the Holding Tone
Holding tone
Using Public Mode (Drive Mode)
Public Mode (Drive Mode)
72 Voice/Video calls
Public mode (Power Off) is an automatic response service
to assist in observing manners in public locations. When
Public mode (Power Off) is set, when a call arrives while
the power is turned off, a voice guidance is played to the
caller indicating that you are at a place where the terminal
must be turned off (such as in hospitals, in aircraft, or near
priority seats on a train) and cannot answer the call, and
the call is disconnected.
1Enter ":25251"
]
A
Public mode (Power Off) is activated (there is no change for
the Stand-by display).
After Public mode (Power Off) is set, when a call arrives while
the power is turned off, "The person you are calling is
currently in the area where mobile phone use is prohibited
and cannot answer the call. Please call again later" is played.
When Public mode (Drive mode) is activated
Even when a call arrives to your terminal, the ringtone
does not sound. appears on the Stand-by display, and
the call is recorded in the Received call log.
A voice guidance indicating that you are driving or you
are at a location where you cannot use the terminal is
played to the caller, and the call is disconnected.
To deactivate Public mode (Drive mode)
Press *(for 1+ seconds) in Stand-by.
Note
・ appears at the top of the screen when Public
mode (Drive mode) is activated.
・ Even when Public mode (Drive mode) is activated, you
can make calls as usual.
・ If Manner mode is activated concurrently, Public
mode (Drive mode) settings take precedence.
・ Tones other than from operations (ring tones or
alarms, etc.) do not sound when Public mode (Drive
mode) is activated.
・ If "Alarm", "Schedule", or "To do" alarm reaches the
specified time while Public mode (Drive mode) is
activated, the alarm tone does not sound and the
alarm screen and illumination does not appear. The
alarm setting remains and the icon on the Stand-by
display is still displayed. P267
・ Even if mail arrives when Public mode (Drive mode) is
activated, incoming mail actions such as sounding
the ring tone, or vibrating the FOMA terminal will not
take place.
Using Public Mode (Power Off)
Public Mode (Power OFF)
After activating Public mode (Power Off)
Public mode (Power Off) is activated until it is
deactivated by dialing ":25250". Turning the power on
does not deactivate the mode. Public mode (Power Off)
voice guidance is played even when you are out of
service area or in a place with weak signals. A voice
guidance indicating that you are at a location where you
must turn the terminal off is played to the caller, and the
call is disconnected.
To deactivate Public mode (Power Off)
Enter ":25250" and press A.
To confirm the setting of Public mode (Power OFF)
Enter ":25259" and press A.
If you could not answer a call, the Missed call notification
screen opens on the Stand-by display. The Received calls
list screen can be accessed from the icon, allowing you to
check the caller.
1An incoming call terminates
The Missed call icon appears on the
Stand-by display. The number of the icon
represents number of missed calls.
2C
]
Kto select
The Received call list screen (P59) appears.
When Record message is activated, if you cannot answer a
voice call, the voice guidance is played and the caller's
message is recorded.
・ Up to 5 messages can be recorded with up to 15 seconds per
message.
・ Record message does not start when a Video call arrives. The
FOMA terminal answers the call normally.
1M [Menu]
]
(LifeKit)
]
"Record message"
]
"Record msg. settings"
2Perform the following operation
・ C [List]: List of items is displayed.
[Activate record msg.]
When activate Record message, set to "ON".
[To answer]*
Enter the time after a call arrives and before Record message
starts between 0 and 120 seconds.
73
Voice/Video calls
Checking Missed Calls
Missed Call
Stand-by
Missed call icon
(The number indicates
the number of calls).
Note
・ After the Received call list screen opens, will
disappear. You can also select and hold Qfor 1+
seconds to clear the icon.
Recording a Voice Message from a
Caller When You Cannot Answer a
Call
Record Message
Setting the Record Message
[Answer message]*
Select an answer message.
・ I You can listen to the response message.
*Available when "Activate record msg." is set to "ON".
3I [Done] When a voice call arrived, the caller's voice is recorded.
■To talk with the caller while the response message is
played or a message is being recorded
Press A.
■To play a recorded message
In Stand-by, press C[OK]] Jand then select (number
is number of items) or press Ufor 1+ seconds. The Record
Message list screen (P75) is displayed.
・ will disappear after the recorded message is deleted.
74 Voice/Video calls
Note
・ appears at the top of the screen when the Record
Message is activated.
<Response Time>
・ If the set Response time is longer than the set
ringing time for the Voice mail service/Call forwarding
service, a network service takes precedence.
・ If the response time is set shorter than the set "Set
mute ring (sec.)" (P125), Record message starts
without ringing.
When a Call Arrives with Record
Message Activated
A call is arriving
The set time has elapsed
Recorded
A new Record message icon
appears (the number indicates
the number of calls)
The Stand-by
display opens
Playing a response
message
Recording a
message
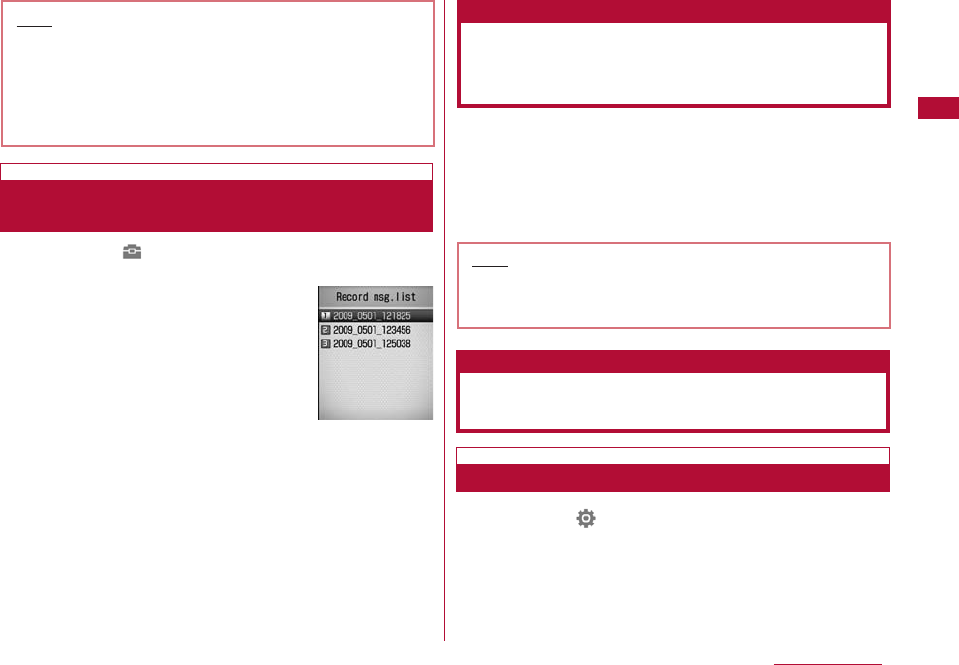
75
Voice/Video calls
1M [Menu]
]
(LifeKit)
]
"Record message"
]
"Record msg. list"
・ I [Delete]: The selected recorded
message is deleted.
■To delete all recorded messages
M[Menu] on the Record Message list
screen ] Select "Delete all".
2Move the cursor to the recorded message
]
C [Play]
The recorded message is played.
・ C [Stop]:Stop the message.
・ Q:Return to the Record Message list screen.
Even if Record Massage is disabled, you can record the
caller's message with easy operation.
1Incoming Call Screen (P67)
]
Efor 1+ seconds
Caller's message will be recorded after streaming a
guidance.
1M [Menu]
]
(Settings)
]
"Call/VT/Dialing"
]
"Video
phone"
]
"Substitute image"
]
"Default"/"Select image"
]
I [Done]
・ When "Select image" is selected, press D]C[List] in
the "Select file" field and then select from the images
saved in "My picture" in "Data box".→P239
Note
・ When "圏外" is displayed, the terminal is turned off, or
"Public mode (Drive mode)" is activated, messages
cannot be recorded.
・ If a call arrives when the Additional guidance is being
played or when a message is being recorded in
Record message, the call is rejected.
Playing/Deleting Messages in Record
Message
Record message
list screen
Recording a Message from a Caller
If You Cannot Answer the Call While
Ringing
Quick Record Message
Note
・ If 5 messages are already recorded, "Record
Message" will not start and you cannot record the
caller's message.
Setting the Image to Send to the
Other Party
Setting the Substitute Image
Substitute image
1M [Menu]
]
(Settings)
]
"Call/VT/Dialing"
]
"Video Phone"
]
"Response hold image"
]
"Default"/
"Select image"
]
I [Done]
・ When "Select image" is selected, press D ]C[List] in the
"Select file" field and then select from the images saved in
"My picture" in "Data box".→P239
1M [Menu]
]
(Settings)
]
"Call/VT/Dialing"
]
"Video phone"
]
"Holding image"
]
"Default"/
"Select image"
]
I[Done]
・ When "Select image" is selected, press D ]C[List] in the
"Select file" field and then select from the images saved in
"My picture" in "Data box".→P239
1M [Menu]
]
(Settings)
]
"Call/VT/Dialing"
]
"Video phone"
]
"Videophone set"
2Perform the following operation
・ C [List]: List of items is displayed.
[Display setting]
Set whether the image is displayed on the main window or sub
window for Video calls.
Other-Me :The other party's image is displayed on the main
window, and your image on the sub window.
Me-Other :Your image is displayed on the main window, and the
other party's image on the sub window.
Other only:Display only the other party's image.
Me only :Display only your image.
[Send camera image]
Set whether your camera image is sent to the other party.
When "OFF" is set, the other party receives the substitute image.
[Screen size]
Set the display size of the main window.
[Visual preference]
Set the image quality sent to the other party.
Prefer motion spd:The image is sent with maximized image
quality. This option is effective when there is
little movement.
Normal :Set the sent video quality and motion to
standard.
Prefer img qual :Set priority to motion for sent images.
This option is effective when there is a lot of
movement.
76 Voice/Video calls
Setting the Response Hold Image
Response hold image
Setting the Response Hold Image
Response hold image
Setting the Holding Image
Holding image
Changing the Video call Settings
Video phone settings

77
Voice/Video calls
[Light]
Set the talking screen's backlight level.
Always on :Always stays on during a call.
Terminal setting :In accord with the "Backlight" settings.→P107
[Auto redial as voice]
You can set whether to automatically redial after switching to a
voice call if the terminal of the other party does not support video
calls.
[Hand-free switch]
Set whether to use Hands-free during a Video call.
3I [Done]

Phonebook
Phonebook on the FOMA Terminal・・・・・・・・・・・・・・・・・ 80
Saving to the FOMA Terminal Phonebook ・・・・・・・・・ 80
Saving to the UIM Phonebook ・・・・・・・・・・・・・・・・・・・・・ 83
Saving Contacts to the Phonebook from Received or
Dialed Calls ・・・・・・・・・・・・・・・・・・・・・・・・・・・・・・・・・・・・・・・・ 84
Saving/Editing a Group Name ・・・・・・・・・・・・・・・・・・・・・ 85
Making a Call from the Phonebook
・・・・・・・・・・・・・・・・・・・・・・・・・・・・・・・・ Search phonebook 86
Viewing Phonebook Entries・・・・・・・・・・・・・・・・・・・・・・・・ 88
Editing a Phonebook Entry ・・・・・・・・・・・・・・・・・・・・・・・・ 91
Deleting Phonebook entries ・・・・・・・・・・・・・・・・・・・・・・・ 92
Checking the Phonebook Capacity and Utilization
・・・・・・・・・・・・・ Number of saved Phonebook entries 93
Phonebook Settings ・・・・・・・・・・・・・・・・・・・・・・・・・・・・・・・ 93
Making a Call with the Least Number of Buttons
・・・・・・・・・・・・・・・・・・・・・・・・・・・・・・Dialing Quick Search 94
Displaying the Call/Mail History ・・・・・・・・・・・・・・・・・・・ 95
79
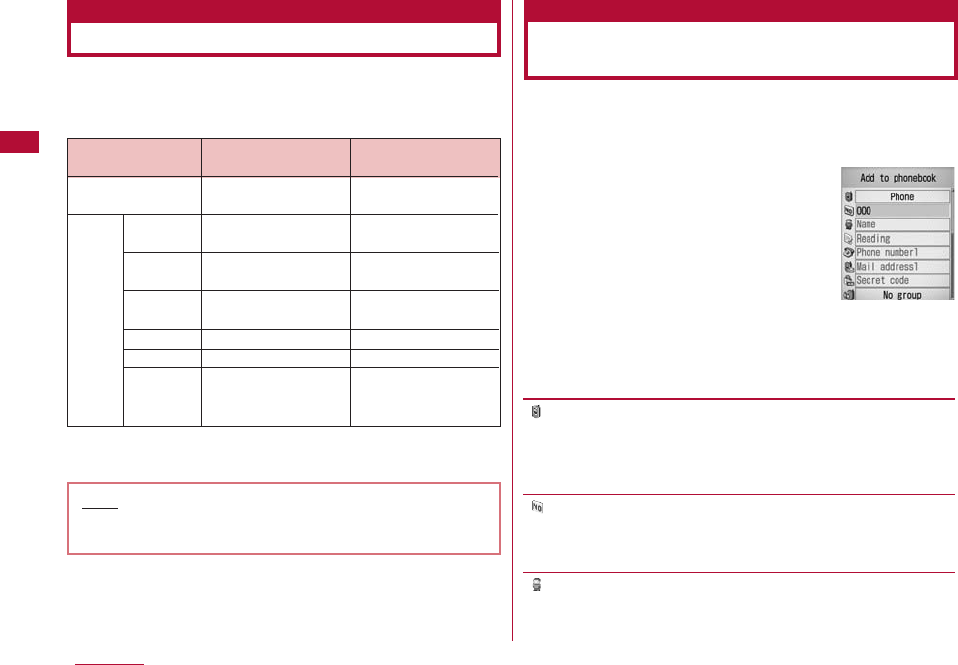
There are two Phonebooks: one is saved on the FOMA
terminal (Phone) and the other is saved on the UIM.
The following can be saved/set for each Phonebook.
* Depending on the saved contents, 1000 entries may not
be saved.
Note that the service counter such as a docomo shop
may not be able to copy Phonebook data from your existing
FOMA terminal to the new one, depending on the
specifications.
1The Stand-by display
]
D(for 1+
seconds)
2Perform the following operations
[ Save to]
Select the saving location. This section explains the case where
"Terminal" is specified as the saving destination. When "UIM" is
specified as the saving destination, the Add to UIM Phonebook
screen is displayed. →P83
[ Memory No.]
The smallest un-assigned number is allocated to a new record
automatically. You can still re-allocate it to your favorite number
from 000 to 999 manually.
[ Name]
Up to 16 full-pitch or 32 half-pitch characters can be entered.
Enter using Kanji, Hiragana, Pictographs, symbols, alphanumeric
characters, or Katakana.
80 Phonebook
Add to Phonebook
screen (FOMA
terminal)
Phonebook on the FOMA Terminal
FOMA terminal
Phonebook UIM PhonebookItem
Up to 1000 entries*
1
5
3
31 group
1
Secret code, Ring
tone, Mail tone, etc.
Name
(Reading)
Phone
Number
Mail
Address
Group
Image
Other
setting
items
Up to 50
1
1
1
11 group
Not available
Not available
Number of
Entries
Entry
Details
Note
・ If you insert your UIM into another FOMA terminal,
your Phonebook data is available on it.
Saving to the FOMA Terminal
Phonebook

[ Reading]
Enter or edit when necessary.Up to 32 half-pitch characters can
be entered. Enter using Katakana, alphanumeric characters, or
symbols.
[ Phone number]
Up to 26 digits can be entered.
] Enter the phone number ]Select an icon
・ You can select "International dial", "Select prefix" or "Cancel" by
pressing M[Menu] on the Phone number entry screen. Press
I[Cancel] to cancel the entry.
[ Mail address]
Up to 50 half-pitch characters can be entered. Enter using
alphanumeric characters or symbols.
] Enter the mail address ]Select an icon
[ Secret code]*1
Enter the security code, and set the secret code.
] Enter the Terminal security code ] Select an icon for the
phone number/mail address ] Enter the secret code
[ (Select a group)]
You can select from among 31 types of groups, from "No group
and from "グループ1 (Group1)" to "グループ30 (Group 30)". Groups
can be used for the Group search (P87)
[ Image]*2 *3
Select an image, or i-motion movie to be displayed when
sending/receiving calls or when checking a Phonebook entry.
Character : Set the Character image. Press Hto select
a category (hair, face, top, bottom,
accessories, and scenery), and press Jto
select an item from the selected category.
After the selection, press C[Done].
My picture : Select from images saved in "My picture" in
the "Data box".→P239
i-motion : Select a video/i-motion movie saved in
"i-motion" in the "Data box".→P249
Take picture : Start the camera, and set the captured still
image.→P200
Terminal setting : In accord with the "Call display" settings.
→P105
[ Ringtone]*2 *3
Select a ring tone for incoming voice/video calls from the caller
saved in the Phonebook.
Music : Select a Chaku-Uta-Full®song saved in
"Music" in the "Data box". →P217
Go to Step 3 (P214) in "Setting a Chaku-
Uta-Full®Song as a Ring Tone".
Melody : Select from melodies saved in "Melody" in
the "Data box".→P254
i-motion : Select a video/i-motion movie saved in
"i-motion" in the "Data box".→P249
Terminal setting :In accord with the "Select ring tone" setting.
→ P98
[ Mail ringtone]
Select a ring tone to be played for incoming mail from the sender
saved in the Phonebook.
・ Available set items are the same as for Ringtone.
[ URL]
Up to 256 half-pitch characters can be entered.
[ Zip code]
Up to 7 half-pitch characters can be entered.
81
Phonebook
[ Home address]
Up to 100 full-pitch or 200 half-pitch characters can be entered.
Enter using Kanji, Hiragana, Pictographs, symbols, alphanumeric
characters, or Katakana.
[ Company name]
Up to 50 full-pitch or 100 half-pitch characters can be entered.
Enter using Kanji, Hiragana, Pictographs, symbols, alphanumeric
characters, or Katakana.
[ Job title]
Up to 50 full-pitch or 100 half-pitch characters can be entered.
Enter using Kanji, Hiragana, Pictographs, symbols, alphanumeric
characters, or Katakana.
[ Co. zip code]
Up to 7 half-pitch characters can be entered.
[ Co. address]
Up to 100 full-pitch or 200 half-pitch characters can be entered.
Enter using Kanji, Hiragana, Pictographs, symbols, alphanumeric
characters, or Katakana.
[ Memo]
Up to 100 full-pitch or 200 half-pitch characters can be entered.
Enter using Kanji, Hiragana, Pictographs, symbols, alphanumeric
characters, or Katakana.
[ (Birthday)]
Enter the birthday
[ Substitute image]
Set the substitute image for a video call.
Data box : Select from images saved in "My picture" in
the "Data box".→P239
Terminal setting : In accord with the "Call display" settings.
→P105
[ (Secret)]
This option appears when Secret mode (P121) is set to "On".
Set this option to "ON" if you want to save the created
Phonebook entry as secret data.
*1 For details about the Secret code, refer to "Mobile Phone
User's Guide [i-mode] FOMA version".
*2 If you select "Terminal setting" either for "Select ring tone"
(P95) or "Call display"(P105) and you specify a movie/
i-motion movie with video/audio as the ring tone or call
display for a specific caller, this option will be overridden and
the movie/i-motion will be invoked and played when a call from
that caller arrives.
*3 If you specify a movie/i-motion movie with video/audio for
"Display setting", the same file will be set for "Call display"
automatically, and vice versa.
3I[Done]
82 Phonebook
Note
<Secret code>
・ If you add a new mail address defined as "Phone number
+ secret code@docomo.ne.jp" to the Phonebook, you may
not send mail or reply to that contact. Save the mail
address in the format "Phone number@docomo.ne.jp"
first, then insert the Secret code.
<Image>
・ Up to 100K Image can be set.

1"Add to phonebook" screen (P80)
]
(Save to) field
]
"UIM"
2Perform the following operations
[ (Save to)]
Select the saving location. When "Terminal" is specified as the
saving destination, the FOMA terminal (Phone) phonebook entry
screen is displayed.→P83
[ Name]
Up to 10 full-pitch or 21 half-pitch characters can be entered.
Enter using Kanji, Hiragana, symbols, alphanumeric characters, or
Katakana.
[ Reading]
Enter or edit when necessary. Up to 12 full-pitch or 25 half-pitch
characters can be entered. Enter using full-pitch katakana,
halfpitch alphanumeric characters, or half-pitch symbols.
[ Phone number]
For a green or white UIM, up to 26 digits can be entered. For a
blue UIM, up to 20 digits can be entered.
・ You can select "International dial", "Select prefix" or "Cancel" by
pressing M[Menu] on the Phone number entry screen. Press
I[Cancel] to cancel the entry.
[ Mail address]
Up to 50 half-pitch characters can be entered. Enter using
alphanumeric characters or symbols.
[ (Select a group)]
You can select from among 11 types of groups, from "No group"
and from "グループ1 (Group1)" to "グループ10 (Group 10)". Groups
can be used for the Group search (P91)
3I[Done]
83
Phonebook
<Secret>
・ When the Secret mode setting (P121) is set to
"Secret data only mode", the Phonebook entry is
saved as secret data.
・ The secret entry is displayed only when the "Secret
mode" is set to "ON" or "Secret data only mode".
・ Secret entries cannot be saved in the UIM Phonebook.
・ The names saved in the secret entries are shown in
the Redial log, history, or mail list/detail screen only
when the "Secret mode" is set to "ON" or "Secret data
only mode". The phone numbers and mail addresses
are shown when the "Secret mode" is set to "OFF".
・ When the "Secret mode" is set to "OFF", the name,
image, melody saved to the secret contact will not be
used when you receive a call or mail from the contact.
Saving to the UIM Phonebook
Add to Phonebook
Screen (UIM)
84 Phonebook
You can save entries to the Phonebook from the list or
detail screen of the call history, mail, or SMS that contains
a phone number, mail address, or URL. Also, you can save a
phone number currently being entered/displayed on the
phone number entry screen or web site, etc.
1Open the screen containing items to save
■To save phone numbers using Dialed calls list screen
(P57), Dialed calls detail screen (P57), Received calls list
screen (P59), or Received calls detail screen (P59):
M[Menu] ]Select "Add to phonebook".
・ To save phone numbers from the "Dialed calls" or
"Received calls" list screen, select the target number
from the history first.
・ If the phone number is already saved in the Phonebook,
the "Add to phonebook" can not be selected.
■To save phone numbers from the Phone number entry
screen
・ Press C[Save].
■To save a sender or recipient mail address
Press M[Menu] in the Mail detail screen ]Select
"Store" ] "Store address".
・ If there are several mail addresses, select the one to
save first.
■To save items using other screens
Move the cursor to select an item or phone number on the
screen and
press M[Menu] ]Add to phonebook" ]Select "Add to
registration".
2Perform the following operations
[New registration]
Add a new entry to the Phonebook. Go to Step 3.
・ The Add to phonebook screen opens with the new entry already
entered.
[Add registration]
Select a Phonebook entry to which an item is added. Press
M[Menu] on the Phonebook entry screen to change the
Phonebook search method.→P87
] Select a Phonebook entry to which the item is to be added
・ The Add to phonebook screen with an item already added is
displayed.
・ When you add an item to a Phonebook entry on the UIM, the
Add to phonebook screen opens with the overwritten contact
information.
3Modify/save the Phonebook entry
]
I[Done]
・ For steps to register, see Step 2 in "Saving to the FOMA
Terminal Phonebook" (P80).
Saving Contacts to the Phonebook
from Received or Dialed Calls
Note
・ If you attempt to input a string longer than the
maximum number of characters allowed, a warning
screen notifying of the problem is displayed. Then,
the truncated string will be shown on the Add to
phonebook screen.
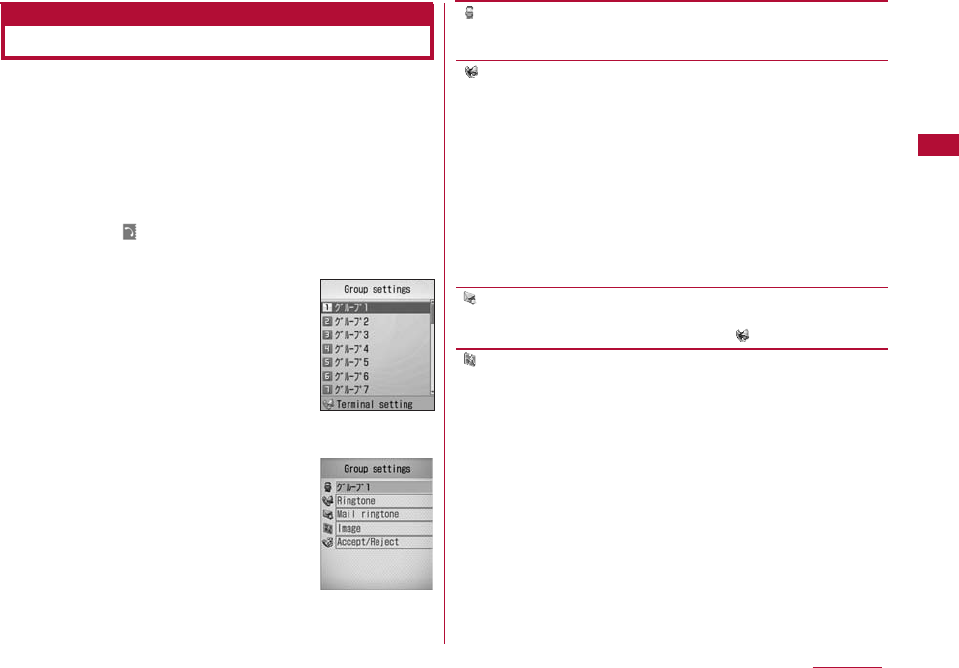
You can group the contacts in the FOMA terminal
Phonebook or UIM Phonebook. Up to 31 groups can be
saved in the FOMA terminal Phonebook, and up to 11
groups can be saved in the UIM Phonebook (including "No
group").
・ "No group" cannot be edited.
・ Only a category name and members can be saved/edited in the
UIM Phonebook.
1M[Menu]
]
(Phonebook&Logs)
]
"Search
phonebook"
]
"Group search"
]
Move the cursor to the
target group
]
I[Set]
・ I[FOMA card/Phone] : Switch between
the terminal and the UIM group settings.
・ J: Display the settings of the selected
group.
・ For the operations on the screen (Group
list screen) that opens for "Group
search", see Step 2 in "Searching
Phonebook" (P87)
2C[Set]
3Perform the following operations
[ (Group name)]
Up to 10 full-pitch or 21 half-pitch characters can be entered.
Enter using Kanji, Hiragana, pictographs, symbols, or Katakana.
[ Ringtone]*1 *2
Set the ring tone for a call.
Music : Select a Chaku-Uta-Full®song saved in
"Music" in the "Data box". →P217
Go to Step 3 (P214) in Setting a Chaku-Uta-
Full®Song as a Ring Tone.
Melody : Select from melodies saved in "Melody" in the
"Data box".→P254
i-motion : Select from videos/i-motion movies saved in
"imotion" in the "Data box".→P249
Terminal setting : In accord with the "Select ringtone" setting.
→P98
[ Mail ringtone]
Set the ring tone for incoming mail.
・ Available set items are the same as for " Ringtone".
[ Image]*1 *2
Add an image to a group.
My picture : Select from images saved in "My picture" in
the "Data box". →P239
i-motion : Select from videos/i-motion movies saved in
"imotion" in the "Data box". →P249
Take picture : Start the camera, and set the captured still
image. →P200
Terminal setting : In accord with the "Call display" settings.
→P105
85
Phonebook
Saving/Editing a Group Name
Group settings
list screen
Group settings
screen
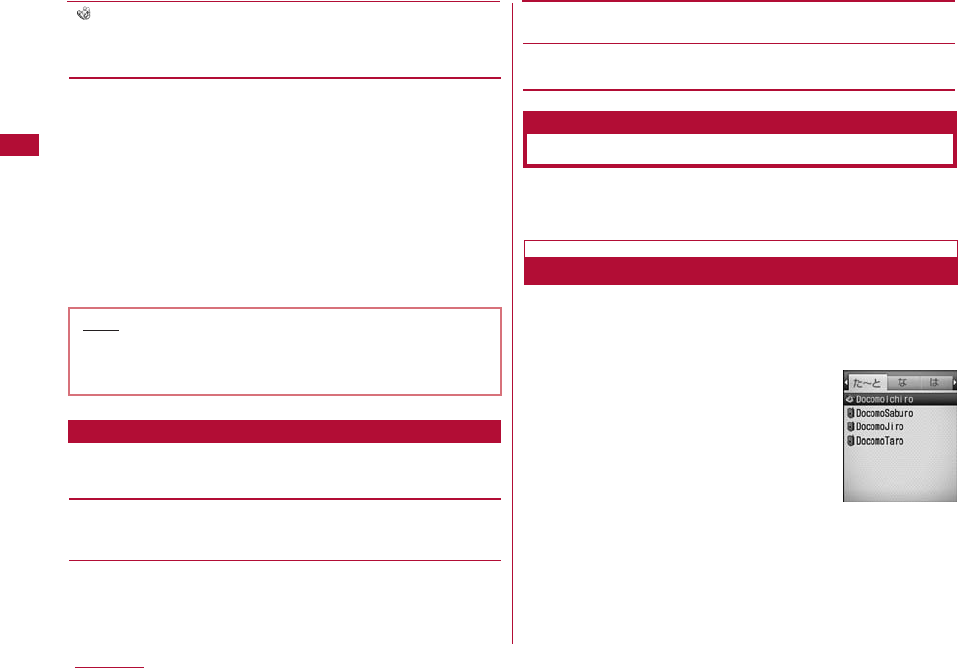
[ Accept/Reject]
Set to accept/reject calls by groups.
] Enter the Terminal security code ]"Not set"/"Reject call"/
"Accept call"
*1 If you select "Display setting" either for "Select ring tone"
(P98) or "Call display" (P105) and you choose movie/
i-motion with video/audio as the ring tone or call display for a
specific caller, this option will be overridden and the movie/i-
motion will be invoked and played when a call from that caller
arrives.
*2 If you specify a movie/i-motion movie with video/audio as the
ring tone for "Display setting", the same file will be set for
"Call display" automatically, and vice versa.
4I[Done]
1Group setting list screen (P85)
]
M[Menu]
]
Perform
the following operations
[Reset]
Reset the selected group settings. The group name is restored
to its default.
[Move]
Change the display position of the selected group.
] Locate the new display position ]C[OK]
[Set]
Edit the selected group settings. →P85
[Reset all]
Reset all group settings and group order.
・ To search Phonebook entries set as secret, set the "Secret
mode" to "ON" in advance.→P121
You can quickly make a call after invoking the Phonebook.
1Stand-by display
]
D
・ The entries found by the default search method appear in
the Phonebook entry list screen.→P94
86 Phonebook
Note
<Accept/Reject call>
・ The setting in "Accept/Reject call" (P91) in the
Phonebook takes precedence.
Sub Menu on the Group Setting List Screen
Making a Call from the Phonebook
Search phonebook
Calling after Invoking the Phonebook
Phonebook
Contact list screen
(Example: When
searching a data)
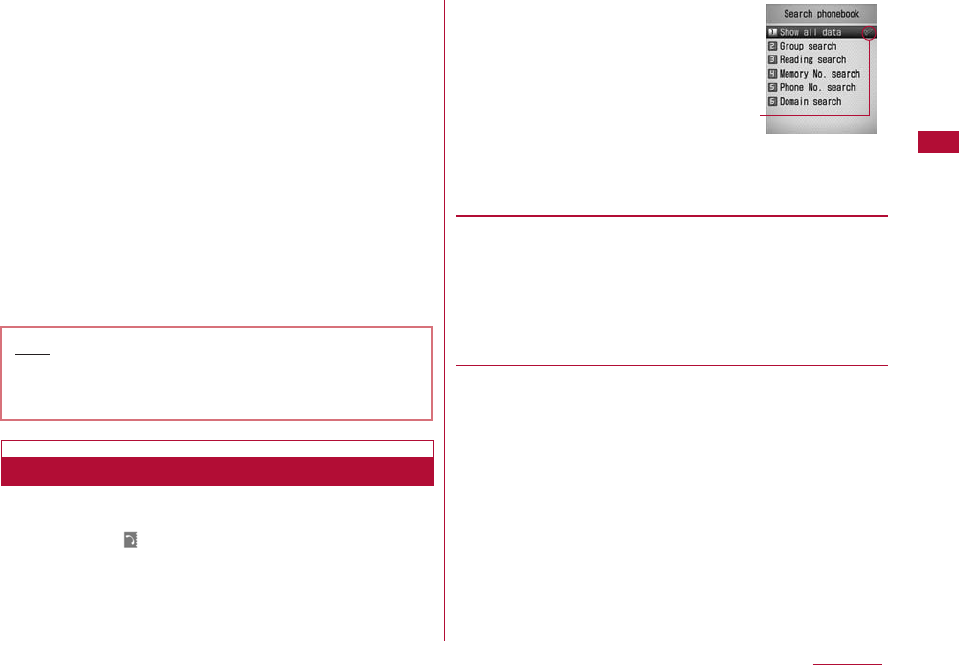
2Select a Phonebook entry
The Phonebook detail screen opens with the phone number
displayed.
■When multiple phone numbers are saved in the
Phonebook entry
Press Hto select the number to dial.
・ Press Ato display the saved number in the Phone
number selection screen. Use Hto move the cursor to
the phone number ]C[Select] to make a call.
3I[Send]
・ You can also make a call by pressing C[Display] ]C
[Send] after you highlight the desired phone number on the
Phonebook detail screen.
■To make a video call
Select M[Menu] ]"Call function" ]"Video phone call".
You can use various ways to search a Phonebook entry.
1M[Menu]
]
(Phonebook&Logs)
]
"Search
phonebook"
・ I[Default]: The
highlighted search method
is set as the search
method of the Phonebook
list screen that opens
when you press Din
Stand-by. is displayed to
the default search method.
2Perform the following operations
[Show all data]
Display all Phonebook entries for readings starting with (あ line to
わ line) line and "others" (for readings other than the Japanese
Kana syllables).
・ Press Jto switch the reading line.
・ You can switch the displayed line by pressing the keys 1to
0, *(あ line to わ line, and others) corresponding to
reading lines.
[Group search]
Phonebook entries are searched/displayed per group (Group list
screen). Switch between FOMA terminal (Phone) Phonebook and
UIM Phonebook with J. Select a group with H]C[Select] to
display Phonebook entries saved in the group.
・ In the group list screen, you can perform the following
operations.
- Scroll the screen by page using F/E.
- You can move the cursor by entering a group number (1 to
31) with dial keys.
87
Phonebook
Search Phonebook
screen
The default
search
method is
indicated
Note
・ If the "Secret mode" is set to "Secret data only mode"
(P121), only Phonebook entries set as Secret (P82)
can be searched/displayed.
Searching Phonebook
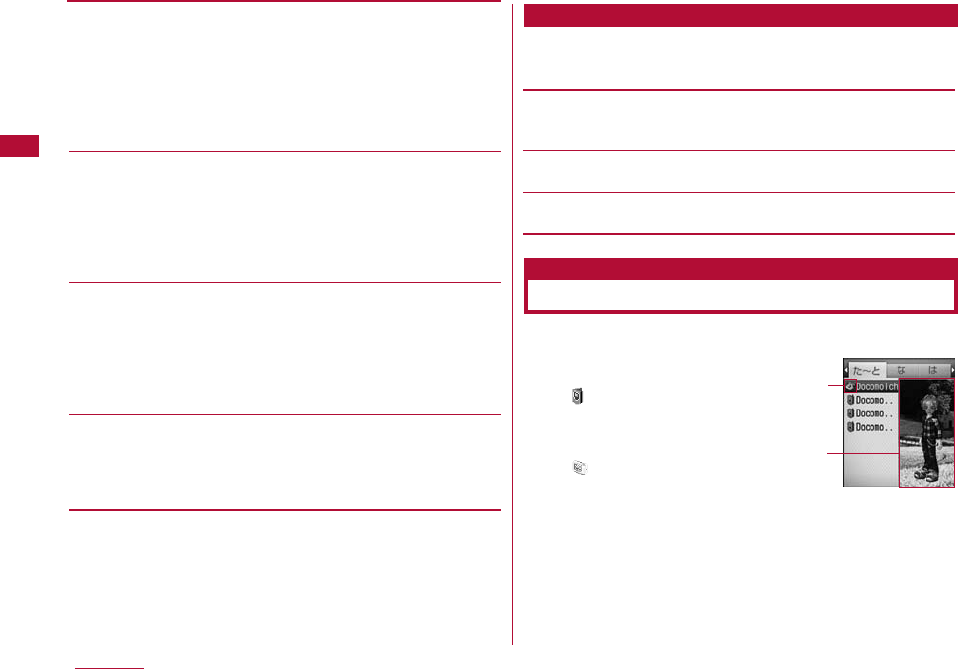
88 Phonebook
Sub Menu on the Group List Screen
[Reading search]
Enter a part of the contact name "reading", and search all
Phonebook entries. Up to 32 half-pitch characters can be
entered for a reading.
・ All Phonebook entries are displayed when a reading is not
entered.
・ You can search readings using other than the leading
character.
[Memory No. search]
All Phonebook entries in the FOMA terminal (phone) are displayed
every 50 entries.
・ Press Jto switch to the display by memory number.
・ The UIM Phonebook can not be displayed.
・ Phonebook entries can also be displayed by entering memory
numbers with dial keys.
[Phone No. search]
Enter a part of a saved phone number to search all Phonebook
entries. Up to 26 digits can be entered for a phone number.
・ All Phonebook entries are displayed when a phone number is
not entered.
・ You can search phone numbers using other than the leading
digits.
[Domain search]
Display Phonebook entries with mail addresses saved, per
domain name.
・ Press Jto switch the target domain.
・ Register a domain to be searched in advance. →P94
1"Search phonebook" screen (P87)
]
"Group search"
]
M[Menu]
]
Perform the following operations.
[View UIM/View phone]
Switch between the UIM Phonebook and FOMA terminal (Phone)
Phonebook group search screens and display them.
[Set]
The Group setting screen (P85) is displayed.
[Select]
Select the highlighted group.
1Stand-by display
]
D
1Saving locations for Phonebook
entries
Save in the FOMA terminal
(Phone) Phonebook(An icon
assigned to "Phone Number 1"
is displayed).
Save in the UIM Phonebook
2Phonebook entry image display
When an image is assigned to
the phonebook entry, it is
displayed on the screen.
Viewing Phonebook Entries
Phonebook list
screen
1
2
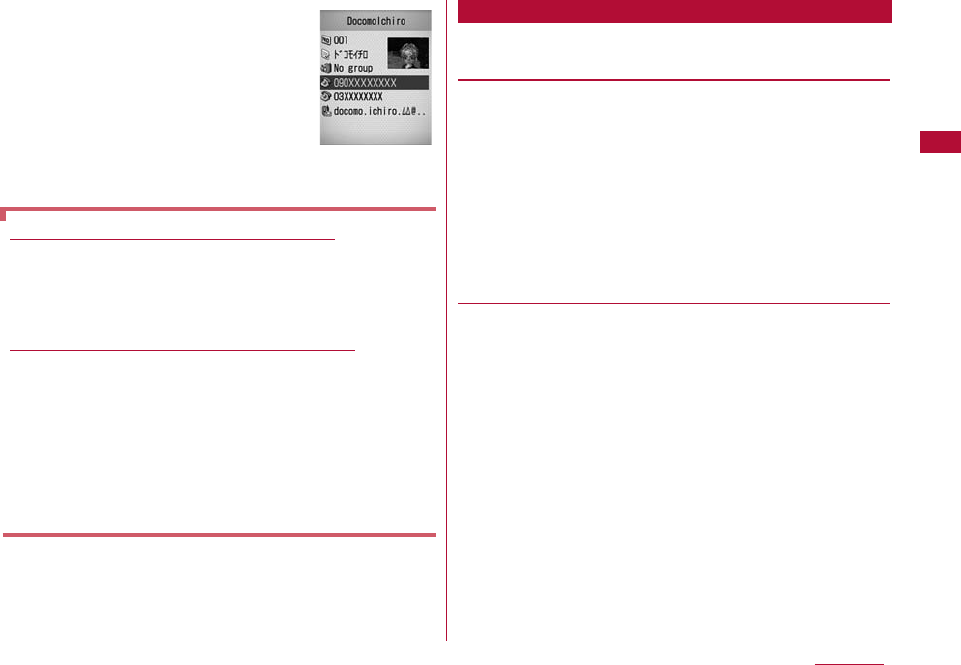
2Select a Phonebook entry
・ When an image is assigned to the
phonebook entry, it is displayed on the
screen.
・ The same icon as on the Add to
Phonebook screen is displayed for each
item. →P80
1Phonebook list screen (P88)
]
M[Menu]
]
Perform
the following operations
[Mail/URL]
Create mail or access a URL.
Compose mail : Create i-mode mail addressed to the mail
address or phone number in the selected
Phonebook entry →P131
Attach to mail :Create i-mode mail with the selected
Phonebook entry attached. →P131
Compose SMS : Create an SMS message addressed to the
phone number in the selected Phonebook
entry.→P168
Connect to URL : Connect to the URL saved in the currently
selected Phonebook entry.
[Call function]
Select the calling method. If multiple phone numbers are saved,
after selecting the calling method, further select the number
from the Phone number selection screen.
Video phone call : Make a video call.
Customize call : Make a call after changing the registered
phone number.
Int. Call(Japan) : When you make a call from overseas to a
phone number in Japan saved in the
phonebook, the Country Code for Japan "+81"
is added automatically at the beginning of the
phone number.
・ If the phone number has a leading "0", it is
automatically deleted.
89
Phonebook
Search Phonebook
detail screen
Operations on the Phonebook list screen
Select a Phonebook entry with a phone number and a
mail address saved, and press Ato make a call or press
I[Mail] to create mail. If multiple phone numbers or mail
addresses are registered, the Phone number or mail
address selection screen opens.
Operations on the Phonebook detail screen
After selecting a saved phone number, mail address, or
URL, the following items appear at the lower right soft
key. You can perform the following operations by
pressing I.
Send : Make a voice call to the selected phone
number.
Mail : Create a message using the selected phone
number/ mail address. →P131
Connect : Connect to the site of the selected URL.
Sub Menu in the Phonebook List Screen
[Add new]
Create a new Phonebook entry. →P80
[Edit]
Edit the selected Phonebook entry. →P91
[Copy]
Copy the selected Phonebook entry.
to the UIM*1 : Copy the selected Phonebook entry to the UIM.
to the phone*2 : Copy the selected Phonebook entry to the
terminal.
[Delete]
Delete saved data from the Phonebook.
Focused data : Delete the selected Phonebook entry.
all in phone :Delete all Phonebook data on the terminal.
all in UIM :Delete all Phonebook data saved on the UIM.
[Multiple choice]
Select multiple Phonebook entries to copy or delete. After you
select the storage location to save multiple phonebook entries
from "Phone"/"UIM" (FOMA terminal (Phone) Phonebook/UIM
Phonebook), perform the following operations.
] Place check marks next to the entries to select ]M[Menu]
Copy to UIM*1 : Copy the selected Phonebook entries to the
UIM.
Copy to phone*2 :Copy the selected Phonebook entries to the
terminal.
Delete :Delete the selected Phonebook entries.
Mark/Unmark :Delete or unmark all entries saved in the
Phonebook.
[Search by]
Re-search the Phonebook by another search method. →P87
[Send Ir data]
Send a Phonebook entry to an external device using infrared
transmission. →P259
Focused data : Send the selected Phonebook entry.
all in phone :Send all data saved in the terminal Phonebook.
all in UIM :Send all data saved in the UIM Phonebook.
[Create domain list]*3
Create a list of domains to be searched using "Domain search".
→ P94
*1 This appears for the FOMA terminal Phonebook.
*2 This appears for UIM Phonebook.
*3 This appears only for the Domain search.
1Phonebook detail screen (P88)
]
M[Menu]
]
Perform
the following operations:
[Mail/URL]
Create mail or access a URL.
Compose mail : Create i-mode mail addressed to the mail
address or phone number saved in the
displayed Phonebook entry. →P131
Attach to mail :Create i-mode mail with the displayed
Phonebook entry attached. →P131
Compose SMS :Create an SMS addressed to the phone
number in the displayed Phonebook entry.
→P168
Connect to URL :Access the URL saved in the selected
Phonebook entry.
90 Phonebook
Sub Menu in the Phonebook Detail Screen

[Call function]
Select the calling method.
Video phone call : Make a video call.
Customize call : Make a call after changing the registered
phone number.
Int. call (Japan) : When you make a call from overseas to a
phone number in Japan saved in the
phonebook, the Country Code for Japan "+81"
is added automatically at the beginning of the
phone number.
・ If the phone number has a leading "0", it is
automatically deleted.
[Edit]
Edit the displayed Phonebook entry. →P91
[Copy]
Copy item : Select and copy from the contents of the
displayed Phonebook entry.
to the UIM*1 : Copy the displayed Phonebook entry to the
UIM.
to the phone*2 : Copy the displayed Phonebook entry to the
terminal.
[Delete]
Delete the displayed Phonebook entry.
[Send Ir data]
Send the displayed Phonebook entry using infrared transmission.
→P259
[Accept/Reject call]
Set to accept or reject calls per phone number in the
FOMA terminal Phonebook.
・ Selecting is available when the cursor has been moved to a
phone numbers.
・ A phone number saved in the "Reject on List" (P123) cannot be
set to "Accept call".
] Enter the security code ]"Not set"/"Reject call"/"Accept call"
*1 This appears for the terminal Phonebook.
*2 This appears for the UIM phonebook.
1Phonebook detail screen (P88)
]
M[Menu]
]
[Edit]
]
Edit the entry
Use the same steps in "Saving to the FOMA Terminal
Phonebook" (P80) or "Saving to the UIM Phonebook" (P83)
to edit the entry.
■To save a Phonebook entry to another memory number
A new memory number is added if the existing memory
number is changed and saved. The original Phonebook
entry is left intact.
(Enter memory number) ]Enter any un-assigned
memory number (000-999)
2Press I[Done] when finished editing
]
"Yes"
91
Phonebook
Editing a Phonebook Entry
92 Phonebook
Deleting Phonebook entries
Deleting One or All Entries
Example: To delete a Phonebook entry from the Phonebook
entry list screen
1Move the cursor to the Phonebook entry on the
Phonebook entry list screen (P88)
]
M[Menu]
]
"Delete"
]
Select a deleting method
Focused data : Delete the selected Phonebook entry.
all in phone :Delete all Phonebook entries saved on the
FOMA terminal. The security code is required
to delete.
all in UIM :Delete all Phonebook entries saved on the
UIM. The security code is required to delete.
2"Yes"
The selected/displayed Phonebook entry will be deleted.
■To delete a Phonebook entry from the Phonebook detail
screen
You can delete only one Phonebook entry at a time from
the Phonebook detail screen.
Phonebook detail screen (P88) ]M[Menu] ]"Delete"
]"Yes"
・ If either of the terminal (Phone) Phonebook or UIM Phonebook
is displayed, Phonebook entries will be deleted from the
displayed (active) Phonebook.
1Phonebook list screen (P88)
]
M[Menu]
]
[Multiple choice]
]
"Phone"/"UIM"
2Place check marks next to the entries to delete
]
M
[Menu]
]
"Delete"
・ After placing check marks next to all unnecessary entries,
select "Delete".
3"Yes"
The selected Phonebook entries will be deleted.
Selecting and Deleting Multiple Phonebook
Entries

You can check the available space in the terminal/UIM
Phonebook.
1M[Menu]
]
(Phonebook&Logs)
]
"No. of
Phonebook"
・ "Secret entry" is displayed when the "Secret mode" is set to
"On" or "Secret data only mode".
You can specify Phonebook entries or images to be
invoked from the Stand-by display.
1M[Menu]
]
(Phonebook&Logs)
]
"Phonebook settings"
2Perform the following operations:
[Default mode]
Set the search method to be invoked when accessing the
Phonebook list screen directly from the Stand-by display.
[Create domain list]
Create a list of domains to be searched using the Domain search.
Select an unfilled column in the list and enter a domain name.
] Enter a domain name ]C[Set]
[Display image]
Set whether to display the image assigned to the Phonebook
entry.
[
93
Phonebook
Checking the Phonebook Capacity
and Utilization
Number of saved Phonebook entries
Phonebook Settings To edit the domain name
Select the domain you want to edit from the list
]
C
[Select]
]
Edit the domain name.
You cannot edit "@docomo.ne.jp" in the domain list.
To delete the entered domain name
Select the domain you want to delete from the list
]
M
[Menu]
]
Select "Delete".
In Stand-by, you can enter a 1- or 2-digit memory number
with dial keys from "0" to "99" to make a call to the phone
number saved in the corresponding FOMA terminal
Phonebook entry. If you enter a 3 or more digits, the phone
numbers saved in the FOMA terminal Phonebook which
contain the number sequence you entered are displayed on
the screen.
Example: To access a Phonebook entry by entering a
memory number
1Enter a 1- or 2-digit number
]
A
■If you enter 3 or more digits
The phone numbers saved in the Phonebook containing
the entered number sequence will be displayed. D]
Press Hto select a phone number and press A.
・ M[Menu]: Display the sub menu of the Phone number
entry screen. →P55
・ I [Mail] :If you enter a 1- or 2-digit number, i-mode mail
with the address found in the Phonebook entry already
entered will be created. If you enter 3 or more digits, an
i-mode mail can be created to an address containing the
entered number sequence. → P131
・ H: When you enter a 1- or 2-digit number, the
Phonebook entries assigned to the previous and
subsequent memory numbers will be displayed. If you
enter 3 or more digits, select a phone number to call.
・ J: If the entered number has 2 or fewer digits, you can
select phone numbers saved in the accessed
Phonebook entry.
94 Phonebook
Making a Call with the Least
Number of Buttons
Dialing Quick Search
The content of
the Phonebook
entry of the
entered phone
number or the
corresponding
memory
number is
displayed.
Note
・ When "Dialing Quick Search" in the "Dialing" is set to
"OFF", this function does not work. →P106
・ This function does not work when you enter a 2-digit
number which begins with "0" such as "01" because it
is not recognized as a memory number.
・ This function does not work for the UIM phonebook.
1M[Menu]
]
(Phonebook&Logs)
]
[Call/Mail history]
]
Select the log to be displayed
Received calls :Show logs for received voice/video calls.
→P59
Redial : Show redial logs for voice/video calls.→P57
Received mails :Show received mail logs.→P161
Sent mails :Show the Sent mail logs.→P161
95
Phonebook
Displaying the Call/Mail History
Note
・ Received mails can be accessed from the Stand-by
display by pressing L.
・ Redial can be accessed from the Stand-by display by
pressing R.


Sound/Screen/Light Settings
Tone Settings
Changing the Ring tone・・・・・・・・・・・Select ring tone 98
Setting the Volume of Ring Tone, Alarm, etc.
・・・Volume 99
Notifying of Incoming Calls/Mail or Alarm Time with
Vibration ・・・・・・・・・・・・・・・・・・・・・・・・・・・・・・・・・Vibration 100
Setting the Sound When a Key is Pressed
・・・・・・・・・・・・・・・・・・・・・・・・・・・・・・・・・Select effect tone 101
Notifying of a Call Almost Disconnected with Alarm
Sound ・・・・・・・・・・・・・・・・・・・・・・・・・・・・・・・・Quality alarm 102
Setting Ring Time Duration for Incoming Mail
・・・・・・・・・・・・・・・・・・・・・・・・・・・・・・・・・・Mail ring duration 102
Muting Terminal Tones ・・・・・・・・・・・・・・Manner Mode 102
Changing Manner Mode ・・・・・・・・・Manner mode set 103
Screen/Light Settings
Changing the Appearance of Stand-by Display
・・・・・・・・・・・・・・・・・・・・・・・・・・・・・・・・・・・Standby display 103
Setting the Image for Incoming Calls ・・Call display 105
Setting the Display of the Dialing Screen
・・・・・・・・・・・・・・・・・・・・・・・・・・・・・・・・・・・・・・・・・・・・・Dialing 106
Setting a Wake-up Display・・・・・・・・Wake-up display 106
Displaying an Image Saved in a Phonebook Entry on
the Incoming Call Screen
・・・・・・・・・・・・・・・・・・・・・・・・・Display phonebook image 107
Setting the Clock on the Sub Display
・・・・・・・・・・・・・・・・・・・・・・・・・・・・・・・・・・Sub display clock 107
Setting the Back Light of the Main Display
・・・・・・・・・・・・・・・・・・・・・・・・・・・・・・・・・・・・・・・・・・Backlight 107
Using the Power Saving Mode for the Main Display
・・・・・・・・・・・・・・・・・・・・・・・・・・・・・・・・・Power saver mode 108
Setting a Theme for Display Colors・・・Color theme 108
Changing the Appearance of Main Menu
・・・・・・・・・・・・・・・・・・・・・・・・・・・・・・・・・・・・・Menu settings 108
Switching to Normal Menu ・・・・・・・・・・・Normal Menu 109
Setting Incoming Lighting/Blinking Colors or Patterns
・・・・・・・・・・・・・・・・・・・・・・・・・・・・・・・・・・・・・・・Lighting LED 110
Changing the Font Size ・・・・・・・・・・・・・・・・・・Font size 111
Setting the Time Format ・・・・・・・Date&Time format 111
Switching the Display Language to English
・・・・・・・・・・・・・・・・・・・・・・・・・・・・・・・・・・・Select language 112
97
You can change the ring tone for voice/video calls, mail,
etc.
・ In addition to the pre-installed ring tones and melodies, i-motion
movies, melodies and Chaku-Uta®songs, Chaku-Uta-Full®songs
downloaded from i-mode sites or websites can be set as ring
tones.
1M[Menu]
]
(Settings)
]
"Sounds&Vibration"
]
"Select ring tone"
2Perform the following operations:
・ C[List]: The ring tone settings screen of the selected
item opens.
[Voice call]
Select the ring tone for a voice call.
Music : Select from Chaku-Uta-Full®songs saved in "Music" in
the "Data box". →P217
Go to Step 3 (P214) in Setting a Chaku-Uta-Full®
Song as a Ring Tone.
i-motion : Select from videos/i-motion movies saved in
"imotion" in the "Data box".→P249
Melody : Select from melodies saved in "Melody" in the "Data
box".→P254
[Video call]
Select the ring tone for a video call.
・ Available set items are the same as for voice call.
[Mail]
Select the ring tone for mail.
・ Available set items are the same as for voice call.
[Message R]
Select the ring tone for a Message R.
・ Available set items are the same as for voice call.
[Message F]
Select the ring tone for a Message F.
・ Available set items are the same as for voice call.
[SMS]
Select the ring tone for SMS.
・ Available set items are the same as for voice call.
3I[Done]
98 Sound/Screen/Light Settings
Changing the Ring tone
Select ring tone
Note
・ The name of a ring tone is its file name.
・ The following file formats can be set for a ring tone
(however, some files such as restricted files or files
including only movies or sounds may not be set).
SMF, MFi, MP4 (Mobile MP4), and AMR
・ When a video/i-motion movie is set as a ring tone
(Chakumotion), the "Call display" (P105) will be
changed accordingly.
・ Audio only videos/i-motion movies can be set for
"Mail", "Message F", "Message R" and "SMS" ring
tones.
・ When a video/i-motion movie with graphics is set as a
ring tone, the incoming display will be automatically
reset to the default if you change the ring tone to a
video/i-motion movie without graphics.
・ Graphic only videos/i-motion movies cannot be set as
a ring tone.
01 ブギ・ウギ 11 Alarm01 23 Power On
02 ゴーゴーカート 12 Alarm02 24 Power Off
03 ハワイアンド
リーム
04 再会 15 Message01 27 Ring03
05 ウェイティング 16 Message02 28 Ring04
06 彼女について 17 Message03 29 Ring05
07 桜 18 Message04 30 Ring06
08 蝶 19 Message05 31 Ring07
09 あなたとともに 20 Message06
10 ピアサー・デュ・
アモーレ
1M[Menu]
]
(Settings)
]
"Sounds&Vibration"
]
"Volume"
2Perform the following operations
・ J: Adjust the sound volume of the selected item.
When the volume level is set to the lowest, "Silent" is
displayed and the tone does not sound. Every time the
volume is adjusted, the tone for the item sounds* in the
new volume (Except "Receiver volume").
* : The default tone sounds for the item with imotion or
Chaku-Uta-Full®set as the ring tone. However, if you
select a Chaku-Uta-Full®in "Full song ring tone", the
Chaku-Uta-Full®will be used as the ring tone.
・ C[Select]: Volume setting screen of the selected item is
displayed.
[Incoming call]*
Adjust the ring tone volume for a voice/video call.
[Mail/Message/SMS]*
Adjust the ring tone volume for Mail/Message R/F.
[Alarm/Schedule]*
Adjust the alarm tone volume for Alarm/Schedule.
[Keypad tone]
Adjust the volume of the keypad sound.
[Flip tone]
Adjust the volume of a sound when the FOMA terminal is
opened/closed.
[Menu effect]
Adjust the main menu operation sound volume.
99
Sound/Screen/Light Settings
List of the Pre-installed Ring tones
13 Alarm03 25 Ring01
14 Alarm04 26 Ring02
21 Message07
22 Message08
Setting the Volume of Ring Tone, Alarm, etc.
Volume
100 Sound/Screen/Light Settings
[Power On/Off]
Adjust the volume of the sound when the terminal is turned
on/off.
[Popup tone]
Adjust the volume of the sound when the popup window is
displayed.
[Receiver volume]
Adjust the earpiece volume. It cannot be muted.
* Maximize the volume to display "Step" and to increase the
sound volume progressively.
3I[Done]
You can set the terminal to vibrate when a call or mail
arrives or at a Schedule alarm time.
1M[Menu]
]
(Settings)
]
"Sounds&Vibration"
]
"Vibrator"
2Perform the following operations:
・ J: Set the vibration pattern of the selected item. Every
time the vibration pattern is changed, the terminal vibrates
in the new pattern.
・ C[List]: Vibration pattern setting screen of the selected
item is displayed.
[Incoming call]
Set the vibration pattern for an incoming voice/video call.
[Mail/Message/SMS]
Sets the vibration pattern for incoming mail/Message R/F.
[Alram/Schedule]
Set the vibration pattern for the Alarm/Schedule alert.
3I[Done]
Notifying of Incoming Calls/Mail or
Alarm Time with Vibration
Vibration
Note
・ Adjust the receiver volume while making a call.→P70
You can set the sound effects when a key is pressed or a
function is performed.
1M[Menu]
]
(Settings)
]
"Sounds&Vibration"
]
"Select effect tone"
2Perform the following operations:
・ C[List]: List of the options for the selected item is
displayed.
[Dial sound]*
Select the effect sound when a dial key,* key, or # key is pressed
on the Stand-by screen or the Phone number entry screen (P52).
If set to "Japanese", "English", or "Korean", the numbers entered
with dial keys will be read aloud.
[Flip tone]*
Select the effect sound when the FOMA terminal is opened/
closed.
[Menu effect]*
Select the effect sound when a main menu item is selected.
[Power On]
Select the effect sound when the terminal is turned on.
Music : Select from Chaku-Uta-Full®songs saved in "Music"
in the "Data box" →P217
Go to Step 3 (P214) in Setting a Chaku-Uta-Full®
Song as a Ring Tone.
i-motion : Select from videos/i-motion movies saved in
"imotion" in the "Data box".→P249
・ Graphics only videos/i-motion movies cannot be
set.
Melody : Select from melodies saved in "Melody" in the "Data
box".→P254
[Power off]
Select the effect sound when the terminal is turned off.
・ Available set items are the same as for Power on.
[Low battery alert]
Set whether to sound an alarm when the battery level is low.
* Press M[Play] on the Sound effect select screen to sound
the effect tone selected by pressing J. Press M[Mute] to
not sound the tone. You can also check the effect sound by
pressing I[Play] and Hon the Sound effect list screen.
However, you can not check the effect sound when setting to
"Silent" in "Volume".
3I[Done]
101
Sound/Screen/Light Settings
Select effect
tone screen
Setting the Sound When a Key is
Pressed
Select effect tone
The FOMA terminal uses this function to sound an alarm
tone during a voice or videophone call warning you that the
signal quality is deteriorating and the call is likely to be
disconnected.
・ If the signal rapidly deteriorates, the call may be disconnected
without warning.
1M[Menu]
]
(Settings)
]
"Call/VT/Dialing"
]
"Call feature"
]
"Quality alarm"
]
"Alarm off"/
"Low alarm"/"High alarm"
You can set how many times or for how long the ring tone
sounds when mail arrives.
1M[Menu]
]
(Settings)
]
"Sounds&Vibration"
]
"Mail ring duration"
2Perform the following operations:
・ C[List]: List of items is displayed.
[Mail ring]
OFF : Set not to sound a ring tone.
1 cycle :
Ring once (maximum 30 seconds) with the length
setting of music or melody that is set as a ring tone.
Select time: Set the duration of the ring tone. ]D]Enter ring
time between 1-30 seconds in the ring time field
3I[Done]
Turn off the tones that sound from the terminal so as not
to disturb others.
1#(1+ seconds)
102 Sound/Screen/Light Settings
Notifying of a Call Almost
Disconnected with Alarm Sound
Quality alarm
Setting Ring Time Duration for
Incoming Mail
Mail ring duration
Muting Terminal Tones
Manner Mode
To cancel Manner Mode
Press #(for 1+ seconds) in Stand-by.
Note
・ There are 2 types of Manner Mode: "General manner"
and "Original manner mode".→P102
・ appears at the top of the screen when Manner
Mode is activated.
・ A notification screen appears when you attempt to
play a melody, video, or i-motion movie, when Manner
Mode is activated.
・ Even when Manner Mode is activated, the camera
shutter tone sounds.
・ While "Manner mode" is active, incoming
voice/videophone call, mail/message, and
alarm/schedule alert are notified with vibration. The
vibration pattern follows "Vibrator" settings (if "OFF" is
set, "Pattern 1" is applied).
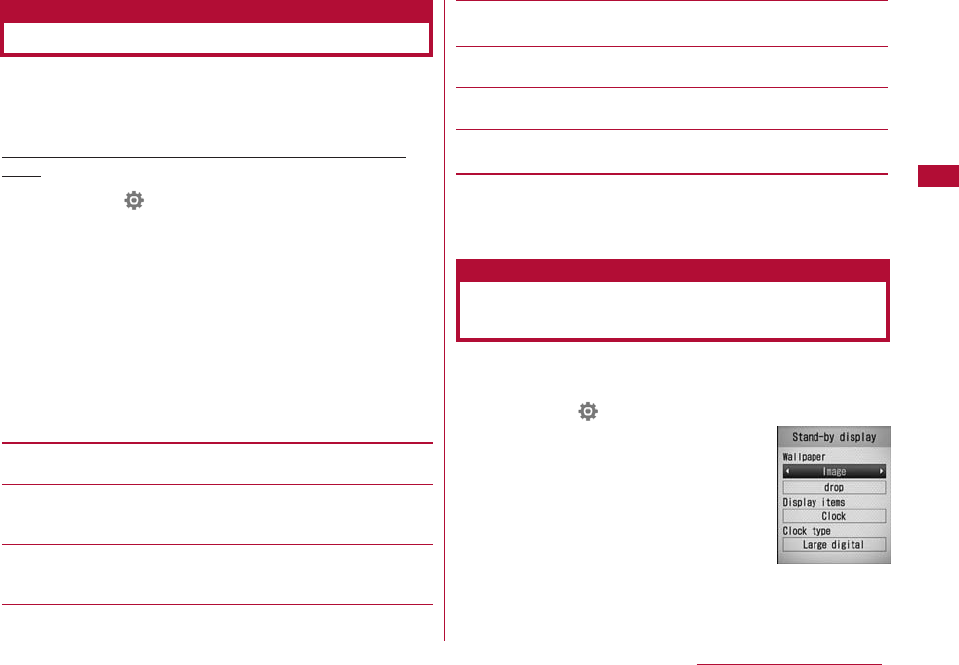
Selects the action of Manner Mode from "General manner"
and "Original manner mode".
The setting of the set Manner mode can be changed for
the Original manner mode.
Example: To change the settings of the Original manner
mode
1M[Menu]
]
(Settings)
]
"Sounds&Vibration"
]
"Manner mode set"
]
Move the cursor to the "Original
manner"
]
I[Edit]
■To select the Manner mode type
"General manner"/"Original manner"
] Press C.
The Manner mode setting will terminate.
2Perform the following operations:
・ J: Select the vibration pattern or volume of the selected
item. When the volume level is the lowest, "Silent" is
displayed and the tone sound not sound.
・ C[List]: Vibration patterns and volume setting screen of
the selected item is displayed.
[Incoming call vib.]
Set the vibration pattern for an incoming voice/video call.
[Mail/SMS vib.]*
Sets the vibration pattern for incoming mail/Message R/F.
・ Available set items are the same as for incoming call vib.
[Alarm/Schedule vib.]*
Set the vibration pattern for the Alarm/Schedule alert.
・ Available set items are the same as for incoming call vib.
[Incoming call vol.]*
Adjust the ring tone volume for an incoming voice/video call.
[Mail/SMS vol.]*
Adjust the ring tone volume for incoming mail/Message R/F.
[Alarm/Schedule vol.]*
Adjust the alarm tone volume for Alarm/Schedule.
[Effect/Popup tone]
Adjust the effect sound or volume when the popup is displayed.
[Low battery alert]
Set whether to sound an alarm when the battery level is low.
*
When the volume level is set to the highest, (Step up) is
displayed to increase the sound progressively.
3I[Done]
Set the items (Wallpaper, Clock, Calendar, Schedule) to be
shown on the Stand-by display.
1M[Menu]
]
(Settings)
]
"Display"
]
"Stand-by
Display"
103
Sound/Screen/Light Settings
Changing Manner Mode
Manner mode set
Changing the Appearance of
Stand-by Display
Stand-by display
Stand-by display
2Perform the following operations:
・ C[List]: List of the options for the selected item is
displayed.
・ M[Preview]: The selected preview screen is displayed.
[Wallpaper]
Set an image to be displayed as the Wallpaper.
Image : Select from images saved in "My picture" in the
"Data box".→P239
i-motion : Select from videos/i-motion movies saved in
"imotion" in the "Data box".→P249
] D ]in the image name field, C[List] ]Select an image
[Display items]
Set the display of the Clock or Calendar on the Stand-by display.
Do not show : The Clock and the Calendar will not be
displayed.
Clock : The Clock will be displayed.
Calendar*1 : The Calendar will be displayed.
Calendar+Schedule*1
: Display a calendar and schedule events for
today.
[Clock type]*2
Set the display of the Clock.
Small digital : Reduce the display size of the digital clock.
Large digital : Enlarge the digital clock to fit to the screen.
Analog : Set to display the analog clock on the screen.
Dual clock : Display the time/date of two countries or
regions, and cities on the Stand-by display.
Select the city, area, or country for the clock
displayed on the bottom using the "Second
city".
[2-nd city]*3
Set the city for the second clock.
] C[List] ]Do not show Select a city by using J
*1 This cannot be selected if a Flash movie is set as Wallpaper.
*2 This appears when "Clock" is selected in "Display items".
*3 This appearswhen "Dual clock" is selected in "Clock type".
3I[Done]
104 Sound/Screen/Light Settings
Note
・ Some data may not be set for the Stand-by display.
・ The video/i-motion movie or Flash movie set as the
Wallpaper starts when the FOMA terminal is opened
and stops when the terminal is closed. You can use
Pto start or stop.
・ Web To function is not available from a video/i-motion
movie set as the Wallpaper.
・ When the stand-by screen is displayed, Flash image
or GIF animation, such as clock, will stop playing
after a certain time.
<Display items>
・ If "Clock" is selected, "Clock type" will be set to "Dual
Clock" automatically when the time zone option in
"Auto time set" (P49) or "Local time zone"(P49) is set
to other than GMT+9:00・(not in Japan)
<Clock type>
・ You can only select "Dual Clock" when the time zone
option in "Auto time set" (P49) or "Local time
zone"(P49) is set to other than GMT+9:00・(not in
Japan).
Set an image shown on the screen when a call arrives.
1M[Menu]
]
(Settings)
]
"Display"
]
"Call display".
2Perform the following operations:
・ C[List]: List of the options for the selected item is
displayed.
・ M[Preview]: The selected preview screen is displayed.
[Incoming voice call]
Set an image shown on the screen when a voice call arrives.
Image : Select from images saved in "My picture" in the
"Data box".→P239
i-motion : Select from videos/i-motion movies saved in
"imotion" in the "Data box".→P249
] D]on the image name field, C[List] ]Select an image
[Incoming video call]
Set an image to be displayed on the incoming voice call screen.
・ Set items and operations are the same as in "Incoming voice
call".
3I[Done]
105
Sound/Screen/Light Settings
Setting the Image for Incoming
Calls
Call display
・ After you set this option, the following screen will be
displayed after you press
C
in Stand-by and highlight
the clock
]C
[OK].
- Small digital, Large digital, Analog, Alarm list screen
(P267) will be displayed.
- "Dual Clock"
The "Time and Date settings" screen (P49) opens
when you select the Home clock located in the
upper part of the screen, and the "Stand-by display"
screen opens when you select the Sub clock
located on the lower part of the screen.
<Calendar type>
・ After this option is set, Stand-by screen
]C
]
alendar display
]C
[OK] to display the Calendar
screen of the schedule (P271).
・ After this option is set, Stand-by screen
]C
]
chedule display
]C
[OK] to display the Schedule
list screen (P272). The Calendar screen of the
schedule also displays from the Stand-by screen
using the same way of setting to [Calender].
Note
・ An audio only video/i-motion movie cannot be set as
the Call display.
・ When a movie/i-motion movie with sound is set for
the Call display, the "Select ring tone" (P98) will be
set to the same video/imotion movie.
・ If you use a video/i-motion movie with sounds as a
caller's image and you change it to a video/i-motion
movie without sounds, the ring tone settings are
restored to the default automatically.
Set the screen displayed when numbers are entered in
Stand-by.
1M[Menu]
]
(Settings)
]
"Display"
]
"Dialing"
2Perform the following operations:
・ C[List]: List of the options for the selected item is
displayed.
[Motion dialing]
Set the display method of the entered numbers.
Digital : Display numbers in a digital design.
Painting : Display numbers in a painting design.
OFF : Display numbers with decoration set to OFF.
[Dialing quick search]
Set whether to search a Phonebook entry when the
corresponding number for the entry is entered with 1 digit or 2
digits.
[Dialing font color]
Set the font color of the number entered when "Motion dialing" is
set to "OFF".
3I[Done]
Set the Wake-up screen that opens when you turn the
terminal power on.
1M[Menu]
]
(Settings)
]
"Display"
]
"Wake-up
display"
2Perform the following operations:
・ C[List]: List of items is displayed.
・ M[Preview]: The selected image is shown.
[Wake-up display]
Set an image shown on the screen when the terminal is starting.
Image : Select from images saved in "My picture" in the
"Data box". →P239
i-motion : Select from videos/i-motion movies saved in
"imotion" in the "Data box". →P249
] D]on the image name field, C[List] ]Select an image
3I[Done]
106 Sound/Screen/Light Settings
Setting the Display of the Dialing
Screen
Dialing
Setting a Wake-up Display
Wake-up display
Note
・ Flash movies cannot be set as the wake up screen.
Sound/Screen/Light Settings 107
When a call with Caller ID from the caller saved in the
Phonebook arrives, the image set in the Phonebook will be
displayed.
1M[Menu]
]
(Settings)
]
"Call/VT/Dialing"
]
"Incoming call"
]
"Display phonebook image"
]
"ON"/"OFF"
You can change the design of the clock shown on the sub
display.
1M[Menu]
]
(Settings)
]
"Display"
]
"Sub display
clock"
]
Select a clock
You can set the main display backlight (Backlight).
1M[Menu]
]
(Settings)
]
"Display"
]
"Backlight"
2Perform the following operations:
・ C[List]: List of the options for the selected item is
displayed.
[Display duration]
Set the Display backlight duration of the main display between
10-180 seconds.
[Display brightness]
Set the backlight level of the main display.
[AC connected]
Set the lighting when the AC charger is connected.
Display setting : In accord with the setting in "Display duration"
and "Display brightness".
Always on : Light is always on.
3I[Done]
Displaying an Image Saved in a
Phonebook Entry on the Incoming
Call Screen
Display phonebook image
Note
・ The priority order for images displayed on an incoming
call is as follows:
1Image set to a Phonebook entry
2Image set to a Group in the Phonebook
3Image set for the Call display
Setting the Clock on the Sub
Display
Sub display clock
Setting the Back Light of the Main
Display
Backlight
Set the backlight brightness of the main display to the
lowest level in the power saving mode.
1M[Menu]
]
(Settings)
]
"Others"
]
"Power saver
mode"
]
"ON"/"OFF"
You can select a combination of screen colors and a menu
format.
1M[Menu]
]
(Settings)
]
"Display"
]
"Color theme"
]
"Illumination dot"/ "Sparkling wine"
Illumination dot:Display the menu options as a list of icons
with the black-based color scheme.
Sparkling wine :Display the menu in a list with bright
wine-red color scheme.
You can set whether to display the guidance for the icon
selected on the Main Menu.
1Select M[Menu]
]
(Settings)
]
"Display"
]
"Menu
settings"
]
"Menu guidance"
]
"ON"/"OFF"
You can change the display format of the Main menu. Also,
you can save up to two combinations of Main menu icons.
Example: Changing the combination of Main menu icons
1Select M[Menu]
]
(Settings)
]
"Display"
]
"Menu
settings"
]
"Menu customization"
]
"Customize
1"/"Customize 2"
Select a name of the combination of icons
from "Customize1" or "Customixe2".
・ To open a preview screen of the main
menu, move the cursor to an item to
change and press M[Preview] on the
"Menu customization" screen.
108 Sound/Screen/Light Settings
Using the Power Saving Mode for
the Main Display
Power saver mode
Setting a Theme for Display Colors
Color theme
Changing the Appearance of Main
Menu
Menu settings
Displaying Guidance for the Main Menu
Menu guidance
Changing the Display Format of the Main
Menu Customization
Customization
Screen
109
Sound/Screen/Light Settings
■When you do not wish to change the combination of icons
Select "Color theme setting". The main menu display will
be in accord with the "Color Theme setting". Menu
customization terminates.
2Move cursor to an icon to change
]
C[Change]
]
Select a new icon
]
I[Done]
]
"Yes"
Select an icon from images saved in "My picture" in the "Data
box".
■To cancel changing of the icons
Select "No" on the confirmation screen for saving.
When purchasing, a menu is set to "Simple Menu" that
contains only In Simple Menu, the font size for Phonebook
entries and mail message text will be enlarged.Simple
menu can switch with Normal menu.
1Press the M[Menu] button in Stand-by.
Simple menu appears.
2Press I[Settings]
3Press Hto move the cursor over "Off", and press C
[Select]
The menu is switched to the normal menu.
To initialize the main menu to the default settings
On the customization screen you want to
restore M[Menu]
]
"Restore to default"
]
Select "Yes"
Note
・ JPEG or GIF images in 80x70 pixels or smaller can
be used as icons for customization. The first frame
will be displayed when you use an animation GIF as
menu icon.
To restore the Simple menu
Select M[Menu]
]
I[Settings]
]
"ON"
Note
・ The Simple menu offers larger fonts for menu items,
Phonebook entries, Redial/Received calls, Sent mail/
Received mail, mail list/detail screen, i-mode, and
characters being entered.
・ The font size cannot be changed.
・ To use a menu option not displayed in the Simple
menu, select "Normal menu". The default main menu
appears temporarily.
Switching to Normal Menu
Normal Menu
Switching from Simple Menu to Normal Menu
You can set the incoming or alarm illumination to ON or
OFF, or set a combination of illumination colors for each
item.
1M[Menu]
]
(Settings)
]
"Display"
]
"Lighting LED"
2Perform the following operations:
・ C[List]: List of the options for the selected item is
displayed.
[Lighting]
Set whether to light/blink the illumination light.
[Incoming voice call]*
Set an illumination pattern/color for an incoming voice call.
[Incoming video call]*
Set illumination pattern/color for an incoming video call.
[New mail]*
Set illumination pattern/color for incoming mail.
[New message R]*
Set illumination pattern/color for an incoming Message R.
[New message F]*
Set illumination pattern/color for an incoming Message F.
[New SMS]*
Set illumination pattern/color for an incoming SMS.
[New Voice mail]*
Set illumination pattern/color to indicate that a new message is
recorded at the Voice mail center.
・ To light the illumination when a new message is being
recorded, select "Tone/Vibration message notification" (P306)
]"Yes".
[New Record message]*
Set illumination patter/color to indicate that a new message is
recorded in Record message.
[Playing music]*
Set illumination pattern/color when music is played.
[Alarm]*
Set illumination pattern/color when an alarm is activated.
[Schedule/To do list]*
Set illumination pattern/color for the set time of a Schedule
event/To do list task.
[During call]*
Set illumination pattern/color during a call.
[Missed call]*
Set whether to light the illumination if you missed a call.
[Unread message]*
Set whether to light the illumination when there is an unread
message.
* Available when "Lighting LED" is set to "ON"
3I[Done]
110 Sound/Screen/Light Settings
Setting Incoming Lighting/ Blinking
Colors or Patterns
Lighting LED
Note
・ A color cannot be selected for Pattern 5 - 7.
・ The illuminations for "Missed call" and "Unread
message" light/blink up to 6 hours, and other
illuminations light/blink up to 30 seconds.

111
Sound/Screen/Light Settings
You can change the font size for menu items, Phonebook
entries, Redial/Received calls, Sent mail/Received mail,
mail list/detail screen, i-mode, and characters being
entered.
1M[Menu]
]
(Settings)
]
"Display"
]
"Font size"
]
"Normal"/"Large"/"User set"
Normal :The standard font size is used for all items.
Large : The larger font size is used for all items.
User set:You can set a font size for each item.
]D]Select an item ]Change the font size
2I[Done]
You can set the display format for date/time.
1M[Menu]
]
(Settings)
]
"Date&Time"
]
"Date&Time format"
2Perform the following operations:
・ C[List]: List of the options for the selected item is
displayed.
[Date format]
Set the display format for the date.
] "DD/MM/YYYY"/"MM/DD/YYYY"/"YYYY/MM/DD"
[Time format]
Set the display format for the time.
] "12-hour"/"24-hour"
3I[Done]
Changing the Font Size
Font size
Note
・ When "Simple menu" is set to "On", the font size
cannot be changed.
・ "Small" can be selected for "Mail" and "i-mode" (the
same font size as in Mail settings and i-mode
settings will be used).
Setting the Time Format
Date&Time format
Note
・ yyyy=year, mm=month, and dd=day in the display.
112 Sound/Screen/Light Settings
Switching the Display Language to
English
Select language
You can switch the language of the displayed on the FOMA
terminal between Japanese and English.
1M[Menu]
]
(Settings)
]
"Others"
]
"バイリンガル"
]
"日本語"/"English"
Note
・ When set to English, "Select language" is displayed
as "バイリンガル (Bilingual)"
・ The setting of this function is recorded on the UIM. If
another UIM is inserted into the phone, the setting on
another UIM has priority.
Security Settings
Passwords
Passwords ・・・・・・・・・・・・・・・・・・・・・・・・・・・・・・・・・・・・・・・・ 114
Changing the Security Code Change Security code 116
Setting the PIN codes ・・・・・・・・・・・・・・・・・・ PIN code 116
Unblocking a Blocked PIN ・・・・・・・・・・・・・・・・・・・・・・・・・ 117
Restricting Terminal Operations
Lock Functions ・・・・・・・・・・・・・・・・・・・・・・・・・・・・・・・・・・・・ 117
Locking the Terminal to Prevent Use by Others
・・・・・・・・・・・・・・・・・・・・・・・・・・・・・・・・・・・・・・・・・・・ Lock all 118
Disabling Making/Receiving Calls ・・・・・・・・・・・・・・・・・ 118
Disabling Phonebook or Schedule Viewing
・・・・・・・・・・・・・・・・・・・・・・・・・・・・・・・・・ Data access lock 119
Restricting Call/Mail/Data Transfers
Setting Redial/Received Call Log Display
・・・・・・・・・・・・・・・・・・・・・・・・・・・・・Display call/mail logs 121
Displaying Secret Data ・・・・・・・・・・・・・・Secret mode 121
Rejecting Calls from a Specific Number
・・・・・・・・・・・・・・・・・・・・・・・・・・・・・・・・・・・・・Reject on List 121
Rejecting All Incoming Calls ・・・・・・・Reject all calls 123
Setting Actions When Calls Arrive from Unknown
Callers ・・・・・・・・・・・・・・・・・・・・・・・・・・Anonymous caller 124
Muting Ring tones for Unknown Callers
・・・・・・・・・・・・・・・・・・・・・・・・・・Set mute ring (seconds) 125
Rejecting Calls from an Unknown Caller
・・・・・・・・・・・・・・・・・・・・・・・・・・・・Reject unknown caller 126
Resetting Various Functions ・・・・・・・Reset settings 127
Deleting Saved Data All at Once・・・・Clear memory 127
Other "Security Settings"
Other "Security Settings" ・・・・・・・・・・・・・・・・・・・・・・・・・ 128
113
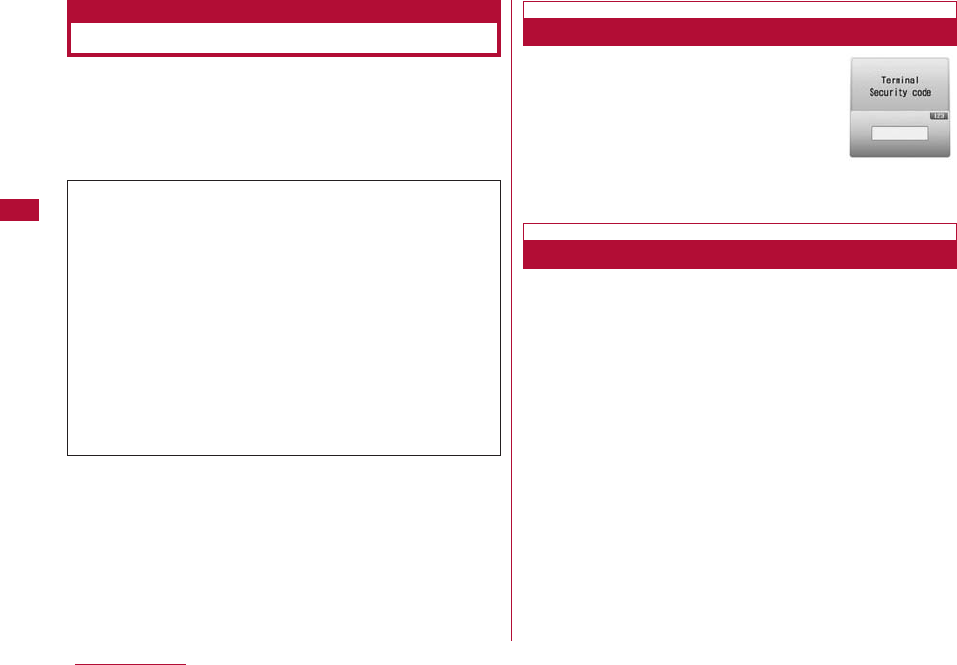
114 Security Settings
Passwords
Some functions of the FOMA terminal require a password.
In addition to the Security Code, there are the network
security code and the i-mode Password. These passwords
help you utilize your terminal.
・
Entered security code, network security code, and i-mode
password are displayed as "*".
The Security Code is set to "0000" by
default, however, you can change the code
yourself.→P116
If the Security Code entry screen opens,
enter the 4-8 digit Security Code and press
C[OK].
The Network security code is a 4-digit number to be used
for confirming subscriber's identity at an acceptance of
order at a docomo shop, docomo Information Center, or
"お客様サポート(User support)" and accessing network
services. You can set any number at subscription, and can
change the number yourself.
If you have "docomo ID/ Password" for "My docomo" which
is a total support site for a PC, you can change the
Network security code from a PC. From i-mode, you can
change the Network security code by accessing "お客様サポ
ート(user support)" then "各種設定(確認・変更・利用)
(Settings (Confirmation・change・use))".
・ For "My docomo" and "お客様サポート(User support)", see the
back of this manual.
Security Code
Entry Screen
Warning about Passwords
・Avoid setting a password using your birthday, a part of
your phone number, your address or room number,
1111 or 1234, that can be easily guessed by others.
Be sure to write down the set passwords and store
them in a separate location.
・Do not reveal your passwords to others. DOCOMO is
not responsible for damage caused by misuse of your
security codes by others.
・If you forget your passwords, you need to bring an ID
(driver's license, etc.), the terminal and the UIM to a
service counter such as a docomo shop. For details,
contact a "docomo Information Center" on the back of
this manual.
Security Code
Network Security Code
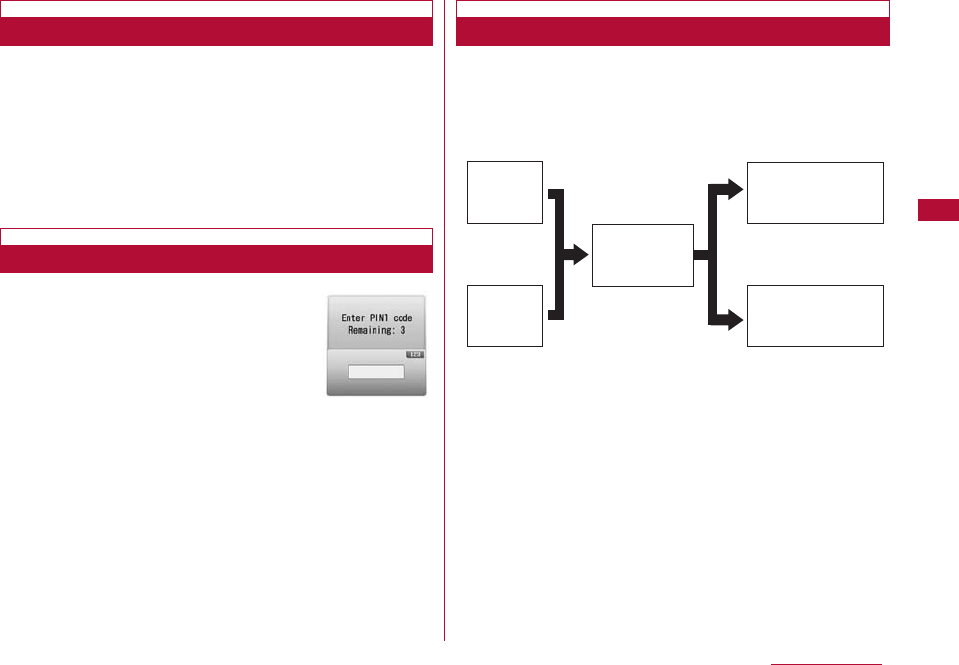
The 4-digit "i-mode password" is required to add/remove
from my menu, or change message service, fee based
i-mode services or cancellation. (Some other information
service providers may set passwords for their sites) The
i-mode password is set to "0000" by default, however, you
can change it at any time. Access "iMenu" ]"ENGLISH" ]
"Options" ]"Change i-mode Password" if you are using
i-mode.
You can assign PIN1 and PIN2 codes to
the UIM. These codes are set to "0000"
by default, however, you can change them
yourself.→P117
The PIN1 code is a 4- to 8-digit number
(code) required to identify the user every
time the UIM is inserted into the terminal
or the terminal power is turned on in order
to prevent unauthorized use. The PIN1
code entry is required to make or receive
calls, and operate the terminal. The PIN2
code is a 4- to 8-digit number used to
reset outgoing call charges, incoming call
charges (if any) and the total of both, to reset total call
charges.
If the PIN/PIN2 code entry screen opens, enter the 4- to 8-
digit PIN/PIN2 codes and press C[OK].
・ Use the PIN1 and PIN2 codes you set previously if you
purchase a new terminal but keep the same UIM.
The PIN Unblock Code is an 8-digit number used to unblock
the PIN1 or PIN2. →P116
You cannot change it.
・ If you fail to enter the correct PIN Unblock code 10 times in a
row, the UIM will be completely locked.
115
Security Settings
i-mode Password
PIN1/PIN2 codes
PIN1 code
entry screen
(Example: for
PIN1 code)
PIN Unblock Code
Define new
PIN1/PIN2 codes
Failed 10
times in a row
Passed
Failed 3 times
in a row
Input PIN
unlock code
Contact docomo
shop service
counter
Input PIN 1
code
Input PIN 2
code
116 Security Settings
Changing the Security Code
Change Security code
Setting the PIN codes
PIN code
The security code can be changed.
1 M[Menu] ](Settings) ]"Lock/ Security"
]"Change Security code"
2 Enter the current security code
The Change Security code screen opens.
3 Enter a new security code
4 Enter the Security code you entered in Step 3 again.
PIN1 code request
Set the FOMA Terminal so that it displays PIN1 Code entry
screen and cannot be used without entering the PIN1 code
at startup.
1 M[Menu] ](Settings) ]"Lock/ Security" ]"PIN
code" ]Enter the security code ]"PIN1 code request"
]"ON"/ "OFF" ]Enter PIN1 code
ChangePIN1/PIN2 code
・ Set "PIN1 code request" to "ON" before changing the PIN1
code.
1 M[Menu] ](Settings) ]"Lock/ Security"
]"PIN code" ]Enter the Terminal
2 "Change PIN1 code"/"Change PIN2 code" ]Enter the
current PIN1/PIN2 code
The new PIN/PIN2 code entry screen opens.
3 Enter the new PIN1/PIN2 code (4- to 8-digit)
The new PIN/PIN2 code re-entry screen opens.
4 Re-enter the PIN1/PIN2 code entered in Step 3
Requiring the PIN1 Code when the Terminal
is Turned
Making emergency calls (to 110, 119 or 118) when
the PIN1 entry Screen is Open
You can make emergency calls (to 110, 119 or 118)
even when the PIN1 code entry screen is open after the
terminal is turned on.
]I[Emergency] ]Move the cursor to the emergency
number ]C [OK]/A.
Changing PIN1/PIN2 Code
If you enter an incorrect PIN1/PIN2 code three times in a
row and the PIN lock screen opens, enter the PIN unblock
code to cancel the lock.
・ You need to set a new PIN 1/PIN2 code after unblocking the
PIN code.
1 PIN Lock screen ]Enter the PIN Unblock code (8 digits)
The new PIN1/PIN2 code entry screen opens.
2 Enter the new PIN1/PIN2 (4- to 8-digit)
The re-entry screen for confirmation opens.
3 Re-enter the PIN1/PIN2 code entered in Step 2
117
Security Settings
Unblocking a Blocked PIN Lock Functions
Lock
Function
Lock all
Call/Mail lock
Self mode
Data access
lock
Display call/
mail logs
Secret mode
Description
Lock the terminal to prevent
unauthorized use.
To prevent unauthorized use of the
FOMA terminal, you can disable making
calls, entering an address with dial
keys, answering calls, or displaying mail.
You can disable all network functions,
such as making/receiving calls, using
i-mode, or sending/receiving mail.
You can specify certain functions to
lock.
You can hide Redial, Received calls,
Sent mail log, and Received mail log.
You can keep someone from displaying
the Phonebook entries, Schedule
events, or To Do tasks set as secret
data.
Refer
ence
P117
P118
P119
P119
P121
P121
118 Security Settings
Locking the Terminal to Prevent
Use by Others
Lock all
Calling Emergency Numbers (110, 119, or 118)
During Lock all
Emergency numbers (110, 119, and 118) can be called
during Lock all.
] I[Emergency] ] Move the cursor to the emergency
number ] C[OK]/A.
To Cancel Lock all
Enter the security code. If an incorrect security code is
entered 5 times, the terminal automatically turns itself
off.
You can lock the terminal to prevent anyone from using it.
・ When Lock all is activated, the only operations you can perform
are turning power On/Off, making emergency calls, answering
Incoming voice/video calls, and canceling Lock all.
1 M[Menu] ](Settings) ] "Lock/ Security" ] "Lock"
] "Lock all" ] Enter the security code ] "Yes"/"No"
Call/Mail lock
You can disable making calls, entering an address with dial
keys, answering calls, or displaying mail.
1 M[Menu] ](Settings) ] "Lock/ Security"
] "Lock" ] "Call/Mail Lock" ] Enter the security code
2 Perform the following operations:
・ C[List]: List of items is displayed.
[Call/Mail Lock set]
Set whether to activate the Call/Mail Lock.
[Dialing call lock]*
Disable the following operations.
・ Making calls entering numbers with dial keys
・ Making calls using Received calls or mail history
・ Making calls to a phone number in the redial list (while allowing
calls to a number saved in the Phonebook or an emergency
number such as "110", "119", or "118")
・ Saving, editing, or deleting Phonebook entries (including
sending or receiving via infrared communication)
Disabling Making/Receiving Calls
Disabling Outgoing or Incoming
Communications
[Send mail lock]*
Disable the following operations.
・ Entering a mail address with dial keys
・ Sending mail to an address in the redial or received call log
(while allowing mail to an address saved in the Phonebook)
・ Performing data communications connecting to a PC, etc.
・ Saving, editing, or deleting Phonebook entries (including
sending or receiving via infrared communication)
[Incoming call lock]*
Disable incoming calls. While activated, a missed call icon will not
be displayed and the Received call log cannot be viewed.
[Received mail display lock]*
Prevent to display sent/received Message R/F. While activated,
an icon indicating incoming mail will not be displayed, and mail in
the FOMA terminal and received mail log can not be viewed.
*
Available when "Call/Mail lock" is set to "ON".
3 I[Done]
Self mode
You can disable all network functions, such as making/
receiving calls, using i-mode, or sending/receiving mail.
Infrared data communication is also not available.
1 M[Menu] ](Settings) ]"Call/VT/ Dialing" ]"Self
mode" ]"ON"/"OFF" ]"Yes"
You can lock specified functions and require the security
code to use the terminal, or restrict the use of the
terminal.
1 M[Menu] ](Settings) ]"Lock/ Security"
] "Lock" ] "Data access lock" ] Enter the security
code
2 Perform the following operations:
・ C[List]: List of items is displayed.
119
Security Settings
Stopping All Incoming/Outgoing Calls
Note
・ Self mode is deactivated if you call an emergency
number (110, 119, or 118).
・ When Self mode is activated, callers will hear a
message indicating that the terminal is off or out of
service area.
・ The Voice mail service and the Call forwarding service
still work in Self mode.
・ All mail, Message R/F and SMS received while in Self
mode will be stored at the i-mode center and the SMS
center (respectively). To receive them, deactivate
Self mode, and check new messages/SMS.
Disabling Phonebook or Schedule
Viewing
Data access lock

[Data access Lock set]
Set whether to activate the Data access lock.
After setting the Data access lock, the security code is required
to use the selected functions.
[Phonebook]*
The Phonebook can not be used until the Security code is
entered.
・ In the Redial list or logs, the phone number or mail address sent
by the caller/sender will be displayed instead of the name
saved in the Phonebook.
・ Receiving Phonebook entries using infrared communication
becomes unavailable.
[Data box]*
The files in the Data box can not be used until the Security code
is entered.
・ Receiving data such as images or melodies to be saved in the
Data box using infrared communication becomes unavailable.
[Record message]*
The Record message can not be used until the Security code is
entered.
・ If the Record message is set to "ON" and locked, is not
displayed on the Stand-by screen even when a message is
recorded.
[Schedule]*
The Schedule function can not be used until the Security code is
entered.
・ An alarm set for a Schedule event will not sound.
・ Receiving schedule events using infrared communication
becomes unavailable.
[i-mode]*
i-mode can not be used until the Security code is entered.
・ i-mode connections such as "Web to" other than from the i-mode
menu screen become unavailable.
・ i-Channel tickers will not be displayed.
・ Software will not be updated.
・ Receiving Bookmarks using infrared communication becomes
unavailable.
[i-αppli]*
i-αppli can not be used until the Security code is entered.
・ Receiving i-αppli using infrared communication becomes
unavailable.
* Available when "Data access Lock set" is set to "ON".
3 I[Done]
120 Security Settings
Note
・ In the following situations, you can access the
functions by entering the security code.
- To access a function from the Main menu or Custom
menu
- press a button assigned for accessing the function
in Stand-by
- To access the function from the New task screen
(P263) or Task List screen(P264)
You can disable display of redial, received call, sent mail,
and received mail logs.
1 M[Menu] ](Settings) ]"Lock/ Security" ]
"Display call/mail logs" ] Enter the security code
2 Perform the following operations:
The items set to "OFF" will not be displayed.
・ C[List]: List of items is displayed.
[Redial logs]
Set whether to display the redial list.
[Received call logs]
Set whether to display Received calls.
[Sent mail logs]
Set whether to display the sent mail log.
[Received mail logs]
Set whether to display Received mail.
3 I[Done]
You can set whether to display a secret Phonebook entry/
Schedule event.
1 M[Menu] ](Settings) ]"Lock/ Security"
] "Secret mode" ] Enter the security code ] Select a
Secret mode setting
OFF:Display only data other than secret data.
Secret mode:Display secret and general data.
Secret data only mode:Display only secret data.
You can reject calls from the specific parties stored in the
list.
・ This function is available only when the caller sends Caller ID.
・ It is recommended that you set the Caller ID request
concurrently.
121
Security Settings
Setting Redial/Received Call Log
Display
Display call/mail logs
Displaying Secret Data
Secret mode
Note
・ If "Received call logs" is set to "OFF", recorded
messages in Record message cannot be played.
Rejecting Calls from a Specific
Number
Reject on List
You can register up to 20 phone numbers to be rejected.
1 M[Menu] ](Settings) ]"Call/VT/ Dialing" ]
"Incoming call" ]"Accept/Reject call" ]Enter the
security code ]"Accept/ Reject set" ]Move to the
cursor to "Reject on list" ]I[List] ]I[Add]
2 Perform the following operations:
[Reject types]
Select actions for rejected calls.
・ C[List]: List of items is displayed.
Silent:Receive a call without the ring tone. will be displayed
on the list.
Disconnect call:Incoming call actions will not take place. will
be displayed on the list.
[Reject number]
Specify the phone number to reject.
・ M[Search]: Search and set a phone number from the
Phonebook. The name saved in the Phonebook is displayed on
the list.
・ C[Select]: Enter and set a phone number. The entered phone
number is displayed on the list.
3 I[Done]
122 Security Settings
Saving a Phone Number to Reject
Reject on List
screen
Note
・ If the reject on list is not empty, save a new phone
number by pressing ] M[Menu] ]"Add new".
To delete a saved phone number
Select the number to delete from the Reject on list
screen ]M[Menu] ]"Delete"/"Delete all" ]"Yes"
To edit a saved phone number
Select a phone number to edit on the Reject on list
screen ]M[Menu] ]Select "Edit"
1 M[Menu] ] (Settings) ]"Call/VT/Dialing" ]
"Incoming call" ]"Accept/Reject call" ]Enter the
security code ]"Accept/Reject set" ]"Reject on list"
■To Release
Select "Accept" on the "Accept/Reject call" screen.
You can mute the ring tone for all incoming calls or
disconnect calls before incoming call actions take place.
1 M[Menu] ](Settings) ]"Call/VT/ Dialing"
]"Incoming call" ]"Accept/Reject call" ]Enter the
security code ]"Accept/ Reject set" ]"Reject all
calls" ]"Silent"/ Disconnect call"
Silent:Receive all calls with the muted ring tone.
Disconnect call:Incoming call actions for all incoming
calls will not take place.
■To Release
Select "Accept" on the "Accept/Reject call" screen.
123
Security Settings
Setting the Reject on List
Note
・ When the Reject call list is activated, and a call from
a party registered in the Reject call list arrives,
appears on the Stand-by display and the call is
recorded in the Received call log as a missed call.
The other party hears a busy signal.
・ i-mode mail or SMS messages are received
regardless of rejection settings.
Rejecting All Incoming Calls
Reject all calls
Note
・ When a call arrives when "Disconnect call" is set, the
call is not indicated, appears on the Stand-by display
(with the number of the calls), and the call is
recorded in the Received call log as a missed call.
The other party hears a busy signal.
・ i-mode mail or SMS messages are received
regardless of rejection settings.
124 Security Settings
You can set whether to accept or reject calls without
Caller ID per reason for no Caller ID.
1 M[Menu] ](Settings) ]"Call/VT/ Dialing"
]"Incoming call " ]"Anonymous caller" ]Enter the
security code
2 Perform the following operations:
・ C[List]: List of items is displayed.
[User unset]
Set options for calls without Caller ID because the caller chose
not to send Caller ID.
Disable :Cancel the setting.
Reject call :Reject a call.
Silent alert :Receive a call without the ring tone. You can
select an image saved in "My picture" in the
"Data box" for the Incoming call screen.→
P239
]
D
]
field
]
"Image"/"i-motion"
]
Select the Image
Alert setting :You can select a file from the "Data box" for
the Incoming call screen or the ring tone.
Incoming call screen:
]
D
]
Select field
]
"Image"/"i-motion"
]
Select a file
Ring tone:
]
D
]
Select field
]
"Music"/"i-
motion"/"Melody"
]
Select a ring
tone
・ Go to Step 3 in "Setting a Chaku-Uta-Full song
as a Ring tone" (P214) if you select "Music".
[Pay phone]
Set an option for calls made from payphones.
・ Set items and operations are the same as in "User unset".
[Not support]
Set an option for calls made from overseas or from a fixed line
phone via forwarding services, from which Caller ID cannot be
sent. (Caller ID may be sent depending on the carrier.)
・ Go to Step 3 in "Setting a Chaku-Uta FullR Song as a Ring
Tone" (P215) if selected a Chaku-Uta FullR song saved in
"MUSIC".
3 I[Done]
Setting Actions When Calls Arrive
from Unknown Callers
Anonymous caller
125
Security Settings
You can set the terminal not to ring when a call arrives
from a caller not saved in the Phonebook or without Caller
ID. This prevents nuisance calls such as "one ring calls"
that are disconnected after a short ringing time.
1 M[Menu] ] (Settings) ]"Sounds&Vibration" ]
"Set mute ring (sec.)"
2 Perform the following operations:
・ C[List]: List of items is displayed.
[Set mute ring time]
Set whether to activate Set mute ring time. When set to "ON",
the following items can be selected.
[Mute time]*
You can set the mute time from when a call arrives until the
ringing action starts between 1 and 99 seconds.
[Missed call logs]*
Set whether to show the Received call logs for the call that was
terminated within the time specified in "Mute time".
*
Available when "Set mute ring time" is set to "ON".
3 I[Done]
Security Settings
Note
・ When User unset is activated, if a call without Caller
ID set to be rejected arrives, the call will not be
indicated, is displayed on the Stand-by screen, and
the call is recorded in Received call log as a missed
call. The other party hears a busy signal. Calls are
rejected even when the Voice mail or Call forwarding
service is activated. However, if Ringing Time is set
to 0 second or the FOMA terminal is out of service
area or turned off, network services start.
・ i-mode mail or SMS messages are received
regardless of rejection settings.
・ If you specify a movie/i-motion movie with video/audio
as the ring tone or call display in "Select ring tone"
(P98) or "Call display"(P105), this option will be
overridden and the movie/i-motion will be invoked and
played when a call from that caller arrives in spite of
the following selecting.
- If you select to "Silent alert"
- If you select "Display setting" either for "Select ring
tone" or "Call display".
・ If you specify a movie/i-motion movie with video/audio
as the ring tone for "Display setting", the same file will
be set for "Call display" automatically, and vice versa.
<User unset>
・ If the Caller ID Request service is activated, it takes
precedence over the settings of "Anonymous caller".
The caller hears a message requesting Caller ID.
Muting Ring tones for Unknown
Callers
Set mute ring (seconds)
You can set to reject calls from callers not saved in the
Phonebook.
・ This function is available only when the caller sends Caller ID.
・ It is recommended that you set the Caller ID request and
"Anonymous caller" concurrently.
1 M[Menu] ](Settings) ]"Call/VT/ Dialing" ]
"Incoming call" ]"Accept/Reject call" ]Enter the
security code ]"Reject unknown" ]"ON"/"OFF"
126 Security Settings
Note
・ When a relevant caller calls while this function is
activated, incoming call actions, such as sounding
the ring tone, will not take place for the set time;
however, the Incoming call screen opens.
・ This option works even when Secret mode is set
enabled and a call from a caller whose Phonebook
entry is set as secret arrives.
<Set mute ring (seconds)>
・ If the Ring Delay is set longer than the response time
of the Voice mail/Call forwarding service, network
services start without the ringing action.
・ If the Ring Delay is set longer than the response time
of "Record message", the Record Message starts
without the ringing action.
・ You cannot activate "Set mute ring (sec.)" when
"Reject unknown" is set to "ON".
Rejecting Calls from an Unknown
Caller
Reject unknown caller
Note
・ The terminal does not start incoming call actions for
a rejected incoming call, however, the call is recorded
in the Received call log. The other party hears a busy
signal.
・ Calls are rejected even when the Voice mail or Call
forwarding service is activated. However, if the
ringing time is set to 0 second, network services
start.
・ i-mode mail or SMS messages are received
regardless of rejection settings.
・ When "Set mute ring (sec.)" is set to "On", or when
"Data access lock" is set to "On" and a check mark is
placed next to "Phonebook", you cannot activate
"Reject unknown".
127
Security Settings
You can restore the settings of various functions to the
defaults.
・ For functions that can be restored to the defaults, see
the "Menu List" (P346).
1 M [Menu]](Settings) ]"Others"]"Reset/ Clear"
]"Reset settings"]"Yes" ] Enter the security code.
You can delete the saved data.
1 M [Menu]](Settings) ]"Others"]"Reset/ Clear"
]"Clear memory"
2 Place check marks next to the items to be deleted ]
I [Done] ]"Yes" ]Enter the security code
Pre-installed data : Delete default data in the "Data
box".
User Data : Delete all data other than default
data in the "Data box".
PIM data : Delete data in the "Phonebook" and
"Stationery".
Restoring Various Function
Settings to Their Defaults
Reset/Clear
Note
・ Perform "Reset settings" only when the battery level
is sufficient to complete the task.
・ While resetting, applications/communications are not
available
Deleting All Saved Data at Once
Clearing Memory
Note
・ The total call duration and total call cost will not be
deleted.
・ Protected data is also deleted.
・ Data saved in the UIM will not be deleted.
・ The mail "♪Welcome Mail♪"will not be deleted.
<User Data>
・ After deleting the user data, the ticker of the
i- Channel will not appear. When the information is
automatically updated, or you download the latest
information by pressing Qthe ticker reappears
automatically.
<Pre-installed data>
・ Some files that are used for default settings will not
be deleted.
・ Usage of WOW LG
If the registered data when purchasing of i-αppli,
Deco-mail pictures, Decomail pictographs, Wallpaper
(Stand-by display), Frames, Stamps, or Melodies is
deleted, download the deleted data from "WOW LG".*
"i menu"]"メニューリスト"]"ケータイ電話メーカー"
]"WOW.LG"
*Fees for packet communication will be charged.
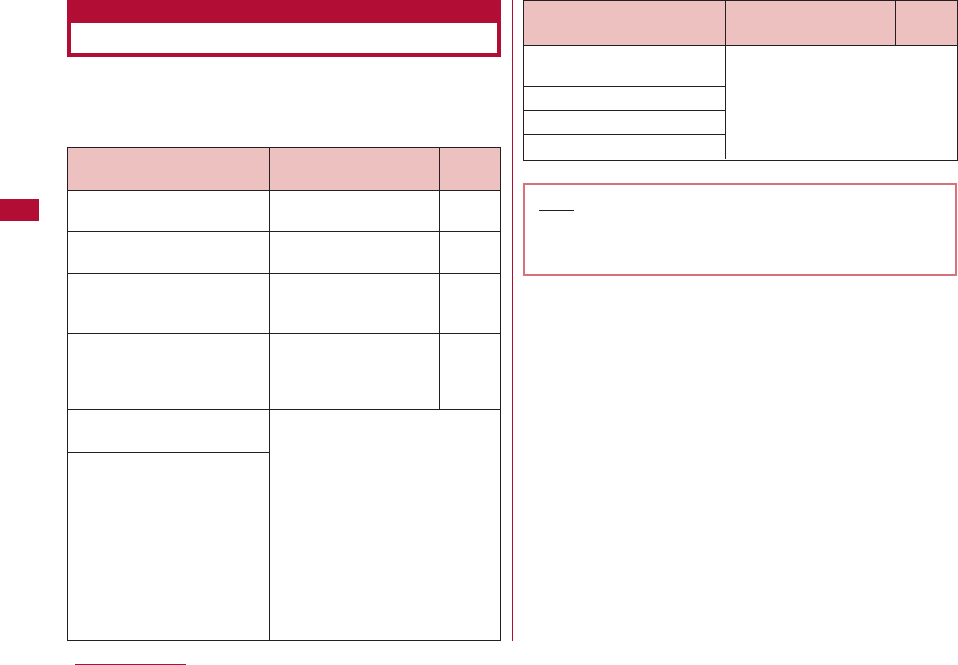
128 Security Settings
In addition to the security functions described in this
chapter, the following functions and services are available.
Please use them for your convenience
Other "Security Settings"
Function name/
Service name
Nuisance call blocking
service
Caller ID request service
Software update
Receive option
"i-mode Disaster Message
Board" Service
Spam Mail Prevention
(Reject mail with URLs)
(Reject/Receive Mail
Settings)
(Kantan Mail Settings)
(Reject mass i-mode Mail
Senders)
(Reject SMS)
(Reject Unsolicited Ad Mail)
(Confirm Settings)
Purpose
To reject "nuisance call"
To reject a call from a
caller without Caller ID
To update software on
the FOMA terminal when
necessary
To accept only
necessary mails when
receiving a large amount
of i-mode mails
Refer
ence
P311
P312
P385
P142
Function name/
Service name
Suspending/reopening mail
functions
Limiting mail size
Keitai-osagashi Service
imadoko-search
Purpose Refer
ence
Note
・ The priority when setting to prevent nuisance call at
the same time is "Nuisance call blocking service" →
"Reject on List/Anonymous caller".
see "Mobile Phone User's Guide
[i-mode] FOMA version".
see "Mobile Phone User's Guide
[i-mode] FOMA version".
Mail
What is i-mode Mail? ・・・・・・・・・・・・・・・・・・・・・・・・・・・・・・ 130
Displaying the Mail Menu ・・・・・・・・・・・・・・ Mail Menu 130
Creating i-mode Mail/Deco-mail
Creating and Sending i-mode Mail
・・・・・・・・・・・・・・・・・ Creating and sending i-mode mail 131
Creating and Sending Deco-mail・・・・・・・・ Deco-mail 134
Decorating the Text ・・・・・・・・・・・・・・・・・・・・・・・・・・・・・・ 135
Creating Deco-mail Using a Template ・・ Template 137
Attaching a File ・・・・・・・・・・・・・・・・・・・・・・・ Attach file 139
Receiving/Operating i-mode Mail
When i-mode Mail is Received
・・・・・・・・・・・・・・・・・・・・・・ Automatic Reception of Mail 141
Selecting and Receiving i-mode Mail
・・・・・・・・・・・・・・・・・・・・・・・・・・・・・・・・・・・・ Receive option 142
Checking for New i-mode Mail
・・・・・・・・・・・・・・・・・・・・・・・・・・・・・・ Check new message 144
Replying to i-mode Mail ・・・ Replying to i-mode Mail 144
Forwarding i-mode Mail to Another Receiver
・・・・・・・・・・・・・・・・・・・・・・・・・・・Forwarding i-mode Mail 145
Registering Mail Addresses/Phone Numbers to the
Phonebook ・・・・・・・・・・・・・・・・・・・・・・・・・・・・・・・・・・・・・・・・ 145
Playing/Saving an Attached File from i-mode Mail ・・・ 146
Operating Mail BOX
Displaying Mail in Inbox/Outbox or Unsent Messages
・・・・・・・・・・・・・・・・・・ Inbox/Outbox/Unsent message 148
Using Mail History
Using Mail Logs
・・・・・・・・・ Received Mails/Sent Mails/Recent Mails 161
Configuring Mail Settings
Setting FOMA Terminal Mail Functions Settings
・・・・・・・・・・・・・・・・・・・・・・・・・・・・・・・・・・・・・・・ Mail setting 162
Using the Message Service
When Receiving Message R/F
・・・・・・・・・・・・・・・・・・・・・・・・・・・・・・・・・ Receive Message 164
Checking for New Message R/F
・・・・・・・・・・・・・・・・・・・・・・・・・・・・・・ Check new message 165
Viewing New Message R/F
・・・・・・・・・・・・・・・・・・・・・・・・・・・・ Message R/MessageF 166
Using SMS
Creating and Sending SMS
・・・・・・・・・・・・・・・・・・・・・・・・・・・・・・ SMS Compose/Send 168
Automatically Receiving SMS (Short Message Service)
Messages ・・・・・・・・・・・・・・・・・・・・・・・・・・ Receive SMS 170
Checking for SMS (Short Message Service)
Messages ・・・・・・・・・・・・・・・・・・・・・・・ Check new SMS 171
Configuring SMS Settings ・・・・・・・・・ SMS Settings 171
129

Upon subscription to i-mode, you can send and receive
email via the Internet, as well as between i-mode terminal.
In addition to the message text, a total of 2MB in 10 files
(JPEG, etc.) can be attached. Also, i-mode mail can be
decorated by changing the font color, size, or background
color of the message text. In addition, you can insert
Deco-mail pictographs from the many pre-installed ones
that can be inserted in the same manner as Pictographs,
to easily create and send expressive mail.
・ For details about i-mode mail, refer to "Mobile Phone User's
Guide [i-mode] FOMA version".
1 The Stand-by display ]g]Perform the following
operations:
[Inbox]
Display the received mail folder list screen.→P148
[Outbox]
Display the sent mail folder list screen.→P149
[Unsent message]
Display the unsent maillist screen.→P149
[Compose message]
Create new i-mode mail.→P131
[Check new messages]
Receive i-mode mail stored in the i-mode Center by checking new
messages.→P144
[Receive option]
You can check subjects of i-mode mail stored in the i-mode
Center, and select mail to be received, or deleted without
reception from the i-mode Center.→P142
[SMS]
Compose new SMS, or receive SMS stored in the SMS Center by
checking new SMS. →P168、P170
[Template]
Display a list of saved templates. →P138
[Mail setting]
Set mail functions. →P162
130 Mail
What is i-mode Mail?
Displaying the Mail Menu
Mail Menu
i-mode menu
screen
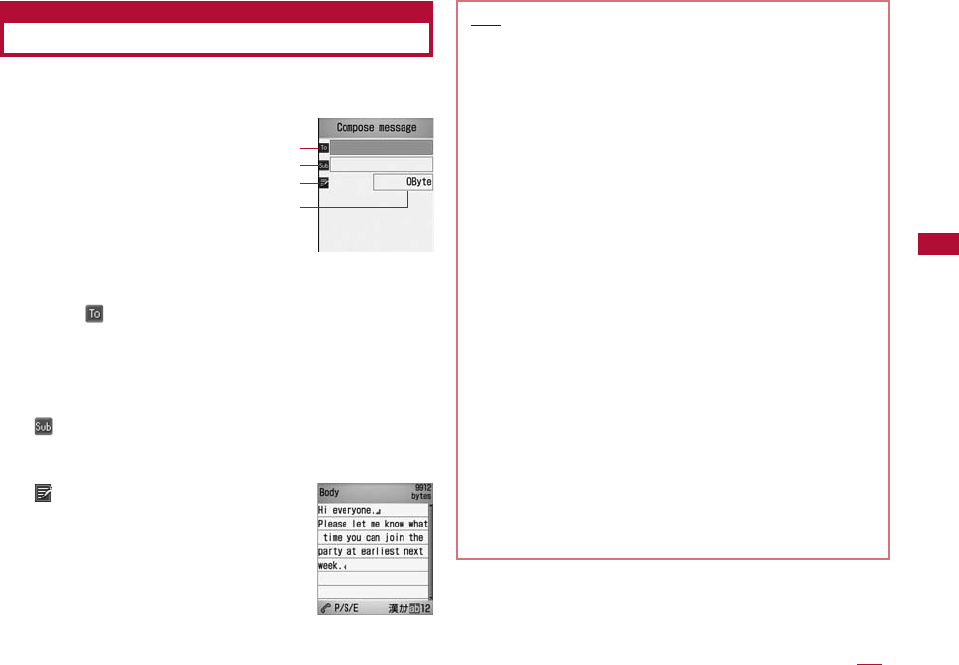
1 The Stand-by display ]g ]"Compose message"
2 Select (Receiver) field ]"Direct input" ]Enter the
address
・ Up to 50 half-pitch characters can be entered.
・ The address can be selected from Sent mail logs, or
Received mail logs or Phonebook→P132
3 (Select (Subject) field ]Enter the subject
・ Up to 15 full-pitch or 30 half-pitch characters can be
entered.
4 (Select (Message text) field ]
Enter the message
・ Up to 5000 full-pitch or 10000
halfpitch characters can be entered.
5 I[Send]
131
Mail
Compose i-mode
mail screen
Receiver
Subject
Message
The total number of bytes of
characters and decoration in
the message text
Creating and Sending i-mode Mail
Creating and sending i-mode mail
Message text
entry screen
Note
・ To decorate mail →P134
・ To send with attachments →P139
・ You can insert a line feed in the message text.
The line feed is counted as 1 full-pitch character.
・ A space is counted as 1 half-pitch character when press
R
.
・ Characters may not be sent correctly to the receiver depending
on the signal strength.
・ Entire words of Subject may not be received depending on the
model or type of mobile of receiver.
・ Half-pitch katakana and pictographs (E-Moji) except for mail
exchanged between i-mode terminal may not be displayed
correctly.
・ The secret code is added automatically when mail whose address
is set with the secret code is sent. However, the address of the
sent mail does not display the added secret code.
・ Even if i-mode mail is sent successfully, an error message
"Transmission failed" may appear depending on the signal
strength.
・ If you use Deco-mail pictographs in mail, the mail is automatically
sent as Deco-mail.
・ If you send a mail with emotional pictographs to the other carrier's
mobile phone, they will be automatically replaced with the similar
pictographs that the carrier/mobile phone supports. However,
they may not be displayed properly depending on the mobile
phone type or its functions.
・ i-mode mail that is successfully sent will be saved in the Outbox. If
the total number or total size of the stored sent mail exceeds the
limit, the oldest messages will be overwritten first. Protect sent
messages that you want to keep.
1 i-mode mail creation screen(P131) ]M[Menu] ]
Perform the following operations:
[Send]
Send mail.
[Preview]
Display a preview of the mail to be sent.
[Save]
Save mail that is being created or edited as unsent mail.
[Add address]
Send mail to several addresses Up to five addresses can be
added.
Sent address:Select an address from the Sent mail logs.
Rcv. address:Select an address from the Received mail logs.
Open phonebook:Select an address from the phonebook.
Direct input:Enter the receiver address directly.
[Delete address]
Delete a selected receiver address.
[Cng. rcv. type]
Change to To:Change the selected receiver to To. The mail
address entered in the To field will be shown to the recipient.
Change to Cc:Change the selected receiver to Cc. You can
specify additional addresses to send a copy of the same mail to
other recipients in addition to the direct recipients. The mail
address entered in the Cc field will be shown to other recipients.
・ The mail address may not be displayed depending on the
recipient's terminal, device or mail software.
Change to Bcc:Change the selected receiver to Bcc. You can
specify addresses of recipients of the copy, however, the identity
will not be shown to other recipients. The mail addresses entered
in the Bcc field will not be shown to other recipients.
[Attach file]
Add a new attached file / View/play or delete the attached file.
→P140
[Template]
Load template:Open a template to create Deco-mail.→P137
Save template:Save the current Deco-mail as a template.
[Activate camera]
Photo mode:Capture and attach a still image.
]Take a still picture ]C[OK]
Video mode:Capture and attach a video.
]Take a video ]C[OK]
[Header/Sign.]
Attach header:Attach the set header.
Attach Signature:Attach the set signature.
[Delete body]
Delete the message text.
[Delete mail]
Delete mail that is being composed.
132 Mail
i-mode Mail Creation Screen Sub Menu
Note
<Add address>
・ When selecting a Phonebook entry with multiple mail
addresses saved, you need to further specify which
addresses are to be added for recipients.
<Cng. rcv. type>
・ This option is not available when no address is
entered.
<Template>
・ If the message text is already entered, a confirmation
screen whether to delete the text opens. To load the
template, select "Yes".
1 Message text entry screen(P131)
]
M[Menu]
]
Perform the following operations:
[Decorate mail]
Open the palette to select the decoration to Deco-mail
(Decoration).→P135
[Range choice]
Specify the range of text to decorate. Go to Step 2 in "Changing
Decoration"(P137).
・ This option cannot be selected when no text has been entered
in the message.
[Common phrases]
Enter or edit Common phrases.→P297
[Edit character]
Select a character/decoration in the body and copy/cut/paste.
Undo the last entry or pasting of characters.→P301
[Edit dictionary]
Edit a dictionary stored in the FOMA terminal.→P302
[Quote]
Quote the contents of a phonebook entry.→P296
[Input setting]
Configure the character entry.→P296
[Special input]
Enter a space, line feed, or Kuten code.→P297
[Header/Sign.]
Attach aheader:Attach the set header.
Attach asignature.:Attach the set signature.
[Jump]
Top:Move to the top of the displayed message text.
Bottom:Move to the bottom of the displayed message text.
[Property]
Display detailed information about the attached file.
[Preview]
Open the preview screen of the message text.
133
Mail
Message Text Entry Screen Sub Menu
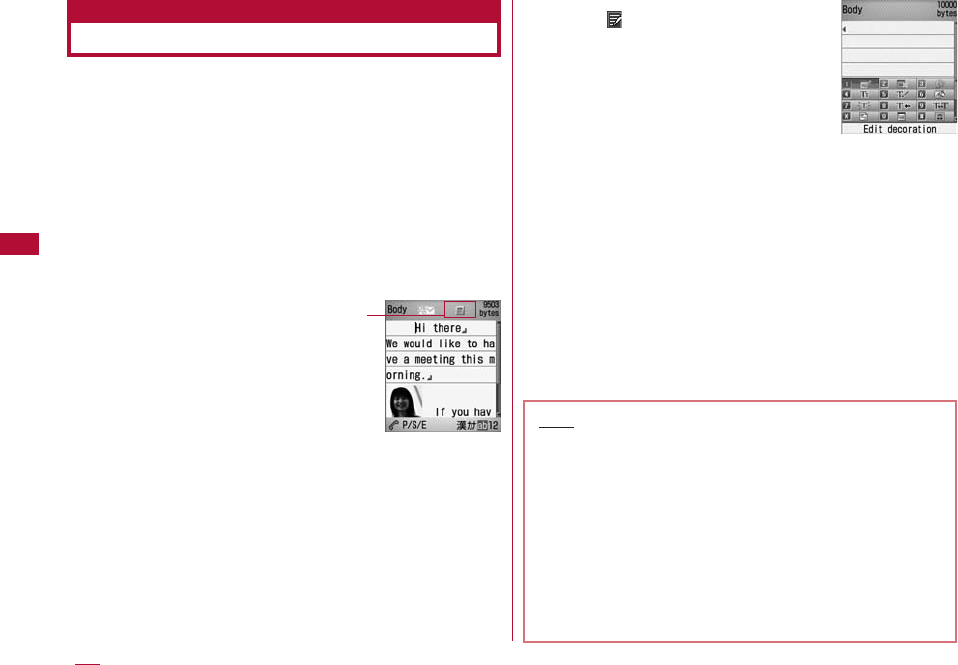
134 Mail
You can create your own designed mail by adding
decorations such as changing font size, font color or
background color, or inserting images while editing an
i-mode mail message.
・ Deco-mail up to 100KB can be sent.
・ Up to 20 images within 90KB can be inserted.
・ When a Deco-mail non-compatible terminal receives a
Deco-mail, the mail contains a URL to browse or the message
with only text will be shown in some Deco-mail incompatible
terminals.
・ If insert the Pictographs (E-Moji) into text, it will change into
Deco-mail.
1 The Stand-by display ]g ]"Compose message"
2 Enter the receiver and subject
・ Entering the receiver and subject →Steps 2 and 3 in
"Creating and Sending i-mode Mail" (P131)
3 Select (Message text) field
]
M[Menu]
]
"Decorate mail"
4 Use the palette to decorate the message text
■To select a decoration before entering characters
For operations, see "Decorating the Text" (P135).
■To decorate entered characters
For operations, see "Changing Decoration" (P137).
5 I[Body]
■To view the Deco-mail message
M[Menu]
]
Select "Preview".
6 C[Set]
]
I[Send]
The set decoration appears
at the cursor position
Message text
entry screen
Palette display
screen
Note
・ If you exchange Deco-mail with non Deco-mail i-mode
terminal, the decorations may not be displayed
correctly .
・ After decorated text is deleted, the decoration codes
may remain and this may result in a reduction in the
number of characters available to enter to the text.
Cancel any decoration before deleting the text. When
you delete the text by pressing Qfor 1+ seconds,
the text including any decoration will be deleted.
・ If a template contains an image that cannot be sent
by mail, the image may be deleted.
Creating and Sending Deco-mail
Deco-mail
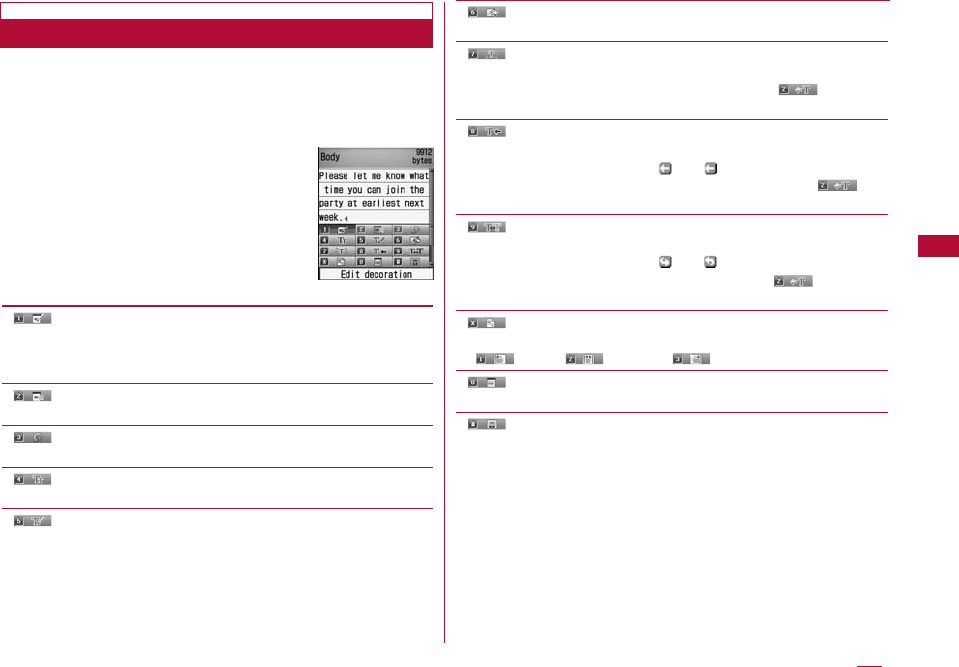
1 Message text entry screen (P131)
]
M[Menu]
]
"Decorate mail"
]
Perform the following operations:
・ I[Body]: Switch from palette functions to character
entry.
[ (Edit decoration)]
Specify the range of text to decorate.→P137
・ This option cannot be selected when no text has been entered
in the message.
[ (Cancel decoration)]
Delete decoration in the line at the cursor.
[ (Undo)]
Restore a set decoration to the previous state.
[ (Font size)]
Set a font size.
[ (Font color)]
Set the color for characters.
]Select a color ]Enter text
[ (Background color)]
Set a background color of the message text.
[ (Blink)]
Make characters blink.
・ To finish entering characters that blink, select (Blink :
End).
[ (Ticker)]
Set a ticker to the text.
・ Characters entered between and appear as a ticker.
・ To finish entering characters to be the ticker, select
(Ticker : End).
[ (Swing)]
Set the text to swing.
・ Characters entered between and swing.
・ To finish entering characters to swing, select (Swing :
End).
[ (Word alignment)]
Set a position to enter characters or insert an image.
](Left)/ (Center)/ (Right)
[ (Insert line)]
Insert a line in message text.
[ (Insert image)]
Databox:Insert an image saved in "My picture" to the messagel
text. ]Move the cursor to the folder ]C[Open] ]Select an
image.
Still image photo graphy:Capture and insert a still image.
]Take a still picture ]C[OK]
135
Mail
Decorating the Text
[ (Copy)]
Specify the range and copy text, an image, or a line.
]Use Kto select the start point ]Use Kto select the end
point
[ (Cut)]
Specify the range and cut text, an image, or a line.
]Use Kto select the start point ]Use Kto select the end
point
[ (Paste)]
Paste the copied or cut data after the cursor.
[ (Copy decoration)]
Copy all decorations set to the line at the cursor.
[ (Paste decoration)]
After copying decorations using "Copy Decoration", you can
paste them in the line at the cursor.
[ (Reset all settings)]
Delete all set decorations.
136 Mail
Note
<Copy/Cut>
・ When characters with "Ticker" or "Swing" set are
selected and copied or cut, "Ticker" or "Swing" will not
take effect.
<Font size>
・ The size of Deco-mail pictographs cannot be
changed.
<Font color>
・ Pictographs (E-Moji) are also displayed in the
specified color. To restore the default color, select "
(Default)" from the color palette.
<Blink>
・ When characters set to blink are displayed on the
preview screen or the Compose message screen, the
characters stop blinking after a certain period of time.
<Insert image>
・ Up to 90KB or 20 images can be inserted. The
number of available attachments may be reduced
depending on the file size. If the maximum number of
images or size is exceeded, a warning message
appears.
・ By default, images are saved in the "Decomail picture"
and "Decomail pictograph" folders.
・ If the same image is inserted more than once, it is
considered that one image is inserted.
137
Mail
1 Mail Message text entry screen(P131)
]
M[Menu]
]
"Decorate mail"
]
Select (Edit decoration)
2 Use Kto specify the start point
・ I[SelAll]: Select the entire message.
3 Use Kto select the end point
]
Select Decoration
・ Operate Decoration→P135
Templates are form data for Deco-mail with decorations
such as the font size and image insertion already set. In
addition to the pre-installed templates, you can use
templates downloaded from sites.
1 i-mode mail screen(P131)
]
M[Menu]
]
"Template"
]
"Load template"
]
"Yes"
・ If the mail has message text entered, the entered text
will be deleted and the template will be loaded.
2 Select a template
]
C[Select]
The selected template is inserted in the message text.
・ Selecting a template then pressing Jallows you to
select the template while viewing.
・ You can edit the message text after inserting a template.
Changing Decoration Creating Deco-mail Using a
Template
Template
138 Mail
Create user-defined templates. Created templates are
saved in the "Template" of Mail menu.
1 The Stand-by display ]g]"Template"
]
M[Menu]
]
"New template"
2 Creating Templates
・ Decorating operations→P135
3 After creating a Template
]
C[Set]
]
C[Select]
]
Edit the title
]
I[Done]
You can edit user-defined templates.
1 The Stand-by display ]g
]
"Template"
2 Select a Template
]
C[Edit]
]
Edit the template
・ Decorating operations→P135
3 After editing the template
]
C[Select]
]
"Overwrite
save"/"New save"
Save:Save the edited template over the source template.
New save:Save the edited template as a new template.
]
C[Select]
]
Edit the title
4 I[Done]
Creating a New Template
Note
・ Undecorated text cannot be saved as a template.
Template list
screen
Editing Templates
1 Template list screen (P138)
]
Move the cursor to a
template
]
M[Menu]
]
Perform the following
operations:
[New template]
Create a new template.→P138
[Edit template]
Edit the selected template.→P138
[Edit title]
Edit the title of the selected template.
[Info]
Display the selected template's properties.
[Sort]
Display the properties of the selected template.
[Delete]
Delete one:Delete the selected template.
Del. selected:Select and delete templates.
]Place check marks next the templates to
delete ]I[Done] ]"Yes"
・ Press M[Menu] and select "Select all" or "Release all".
Delete all:Delete all templates.
]Enter the security code ]"Yes"
[Memory status]
Display the number of saved templates.
You can send i-mode mail with images or melodies
attached.
・ Up to 2MB or 10 files can be attached. The number of available
attachments may be reduced depending on the file size.
・ The following file types can be attached:
- Images (JPEG, GIF)
- Videos/i-motion movies
- Melodies
- Phonebook entries
- Schedule events
- To Do
- Bookmarks
・ A file prohibited to be attached to mail or to be output from the
FOMA terminal cannot be attached.
1 i-mode mail creation screen(P131)
]
M[Menu]
]
"Attach file"
]
Perform the following operations:
139
Mail
Template list screen sub menu
Attaching a File
Attach file
[Attach file]
Image:Select from images saved in "My picture" of the "Data
box".
]Move the cursor to the folder ]C[Open] ]Select an image
Movie:Select from videos/i-motion movies saved in "imotion" of
the "Data box".
]Move the cursor to folder ]C[Open] ]Select a movie
Melody:Select from melodies saved in "Melody" of the "Data
box".
]Move the cursor to folder ]C[Open] ]Select a melody
Phonebook:Select a Phonebook entry.
Calendar:Select a schedule event saved in the FOMA Terminal.
]Select a date ]Select the Schedule event
To Do:Select a To Do task saved in the FOMA Terminal
Bookmark:Select from bookmarks saved in "Bookmark" of
"i-mode".
]Move the cursor to the folder ]C[Open] ]Select a bookmark
2 Select a receiver address and send the message
For further operations, see [Creating and Sending
i-mode Mail] (P131)
1 Compose message screen (P131)
]
Select a desired
attachment field with a file attached
]
Perform the
following operations)
[Add attach]
Add an attach file.
→P
140
[Del. attach]
Delete the selected attachment.
[Play/disp file]
Play or display the attached file.
140 Mail
Note
・ Attached GIF images and melodies cannot be
received with an i-mode terminal using the mova
service.
・ A video/i-motion movie over 2MB cannot be attached.
Reduce the size under "Clipping" to the available size
before attaching it. →P253
・ Depending on the recipient terminal, a video may be
displayed coarsely or as sequential still images. It is
recommended that you use the following settings to
capture a movie if you send it to the terminal models
which are not corresponding to 2M bite terminal
models. Size restriction: 500KB, Select Size: QCIF
(176×144), Quality: Super fine
・ Some i-motion movies may not be attached.
Playing/Displaying/Deleting an Attached File

141
Mail
When the FOMA terminal is in the service area, i-mode mail
is automatically sent from the i-mode Center.
1 After the i-mode mail is received, appears at the
top of the screen
When the reception is completed, the
Reception result screen opens.
・ The previous screen returns if no
operation is performed for approximately
30 seconds.
・ Selecting "Mail" opens the Inbox list
screen.
・ Until the Detail screen of received i-mode
mail is opened, appears at the top of
the screen and (the number indicates
the number of messages) appears on
the Stand-by screen.
When i-mode Mail is Received
Automatic Reception of Mail
Reception
result Screen
Note
・ When new i-mode mail is delivered, other i-mode mail
and/ or Message R/F stored in the i-mode Center are
received at the same time.
・ When Receive option for i-mode mail has been set,
sent i-mode mail is stored in the i-mode Center. You
can check the subject of i-mode mail stored in the
center before selecting and receiving the mail.
→P142
・ If mail is received from a terminal that is capable of
setting To, Cc, or Bcc, you can check how the mail
was addressed to you using the FOMA terminal.
→P151
・ Melodies, videos and still images can be received as
attachments to i-mode mail. Incompatible files may be
automatically deleted at the i-mode Center. If an
attached file is deleted, "Del. attach" is added is
inserted to the message text.
・ Files attached to a mail cannot be saved in the FOMA
terminal when the FOMA terminal does not support
the file type but can be forwarded.
・ Up to 100KB of i-mode mail including attachments
can be automatically downloaded. Attachments over
100KB can be manually downloaded from the i-mode
center.→P146
・ You can set whether to receive attached melodies or
images under "Receive attach file".→P162
・ If the size of a received mail exceeds the number of
characters set under "iMenu"
]
"English"
]
"Options"
]
"Mail Settings"
]
"Limit Mail Size",
you can select and download the attached file or the
data whose name appears in the message text.→
P146
・ If the total number or total size of the received mail
(i-mode mail and SMS) stored in the FOMA terminal
exceeds the limit, the oldest read messages will be
overwritten first. Protect the received messages you
want to keep.
・ Incoming mail is saved at the i-mode Center when:
- Power is off
- A video call in progress
- Self mode is activated
- The terminal is out of service area
- The "Receive option set" is set to "ON"
- The Inbox is full with protected or unread mail
・ When mail is kept at the i-mode Center, or
appears. When the terminal power is off or the
terminal is out of service area, these icons may not
be displayed even there is i-mode mail at the i-mode
Center.
・ If multiple i-mode mail messages or Message R/F are
received concurrently, the ring tone set to the i-mode
mail or Message R/F received the last sounds.
1
After the i-mode mail is received, appears at the top of
the screen ]
"Mail"
]
Select a folder
2 Select mail to be displayed
You can check the subject of i-mode mail stored in the
i-mode Center, and select mail to be received or deleted at
the i-mode Center before downloading all new messages.
To use the Receive option, set "Receive option" to "ON" in
advance.
Set "Receive option" to "ON" to receive selected i-mode
mail.
1 The Stand-by display ]g
]
"Receive option"
]
C[Select]
]
select "ON"
]
I[Done]
After this option is set, i-mode mail will not be received
automatically.
142 Mail
Displaying New i-mode Mail
Received mail
Note
・ Images attached to i-mode mail may not be properly
displayed.
・ Incompatible attachments cannot be saved to the
"Data box", however, they can be forwarded.
・ The following shows the available file type of
display/playback/save when attached in i-mode mail.
- Images available to use as a Deco-mail pictogram
- Movie/i-motion
- Melody
- Schedule
- To Do
- Bookmark
Selecting and Receiving i-mode Mail
Receive option
Setting the Receive option
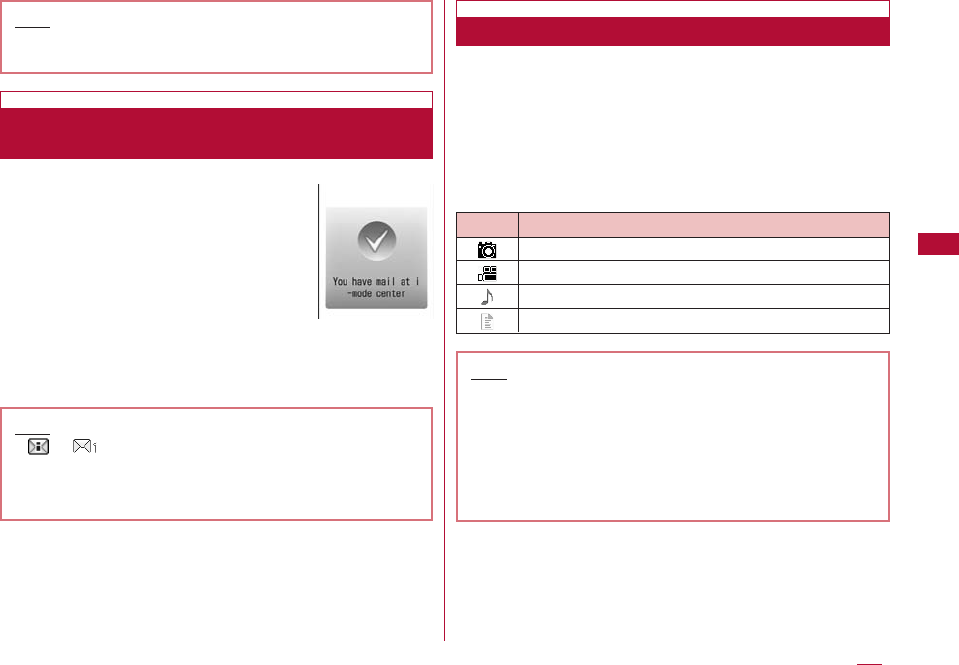
1 The Notification of received mail
screen opens
Press C[Select] or Q/Pto close the
notification screen.
After "Receive option" is set to "ON", perform the following
steps to select and receive i-mode mail:
1 The Stand-by display ]g
]
"Receive option"
For subsequent steps, see "Mobile Phone User's Guide
[i-mode] FOMA version".
■ Icons displayed on the Receive option screen indicating
attachments
143
Mail
Note
・ Set "Receive option" to "OFF" in "Receive option set"
(P162).
Note
・ or indicating the incoming i-mode mail will not
be displayed, and the mail ring tone will not sound.
・ The i-Channel ticker stops while the Notification of
received mail screen is displayed.
If i-mode mail arrives when the Receive
option is set
Setting the Receive Option for i-mode Mail
Notification of
received mail
screen
Icon File type
An image is attached.
An i-motion movie is attached.
A melody is attached.
Another type of file is attached.
Note
・ Even when "Receive option set" is set to "ON", all
messages will be received when "Check new
messages" is used. If you do not want to receive mail,
delete "Mail" from the items to be checked.→P162
・ Receive option can also be performed from "iMenu".
Select "iMenu"
]
"メニューリスト(Menu List)"
]
"メール選択受信 (Receive Option)".
i-mode mail that could not be received because the FOMA
terminal was out of service area or from other reasons are
stored in the i-mode Center. You can receive stored i-mode
mail by checking to the i-mode Center.
・ appears at the top of the screen when mail is kept at the
i-mode Center.
・ You can select items to check (mail or Message R/F) under
"Check new messages" (P162).
・ You cannot check new messages while out of the service area.
1 Stand-by display
]
g(for 1+ seconds)
When checking is completed, the check result screen
opens.
You can reply to the sender of i-mode mail. Replying can be
made by entering new text or quoting the text of received
i-mode mail.
1 Received mail detail screen(P148)
]
M[Menu]
]
"Reply"
]
"Reply"/ "Reply quoted"
・ You can reply to mail also by pressing I[Reply] on the
Received mail detail screen.
・ If the mail is sent to multiple receivers, you can select
"Reply all" or "Rep. quoted all".
2 Enter the subject and the message text
・ "Re:" is added to the subject.
・ When replying by quoting, ">" is added at the beginning of
the quoted message.
・ Editing the subject and message.(P131).
3 I[Send]
144 Mail
Checking for New i-mode Mail
Check new message
Note
・ Even when i-mode mail is kept at the i-mode Center,
may not appear on the screen if mail arrived while the
FOMA terminal power was turned off.
Replying to i-mode Mail
Replying to i-mode Mail
Note
・ After exceeding the storage capacity of Outbox, a
reply cannot be created. Delete mail saved in Outbox
before replying.
・ The reply to received Deco-mail with quotation has
original decoration and images entered in the
message text. However, restricted images will not be
entered.
You can forward received i-mode mail to another receiver.
1 Received mail detail screen (P148)
]
M[Menu]
]
"Forward"
2 Enter the receiver
・ "Fw:" is added to the subject.
・ Editing the receiver and message text (P131).
3 I[Send]
You can save mail addresses/phone numbers from mail to
the Phonebook.
1 Received mail detail screen (P148)
]
Move the cursor
to the addresses/number to save
]
M[Menu]
]
"Store"
]
"Add to ph.book"
2 "Yes"
Go to Step 2 in "Saving Contacts to the Phonebook from
Received or Dialed Calls" (P85).
1 Received mail detail screen(P148)
]
M[Menu]
]
Select "Store"
]
"Store address"
If there are multiple recipients/senders, further select the
addresses/phone numbers to register.
Go to Step 2 in "Saving Contacts to the Phonebook from
Received or Dialed Calls" (P85).
145
Mail
Forwarding i-mode Mail to Another
Receiver
Forwarding i-mode Mail
Note
・ When a file that is prohibited from being
attached/distributed from the FOMA terminal is
attached/pasted to an i-mode mail to be forwarded,
the file will be deleted.
・ After the storage capacity of the Outbox is exceeded,
you cannot forward the mail. Delete mail saved in the
Outbox before forwarding.
・ The forwarded Deco-mail has original decoration and
images entered in the message text. However,
restricted images will not be entered.
Registering Mail Addresses/ Phone
Numbers to the Phonebook
To register an address/phone number from the message text
To save a receiver, sender address, or phone number
You can play or save an image, melody, video or i-motion
movie attached or pasted to i-mode mail.
When the size of a received message including
attachments exceeds 100 KB, you will need to download
the attachments from the i-mode Center.
・ All the attached files selected are downloaded regardless of
the setting of "Receive attach file" option in "Mail setting" of
"Communication".
・ Expired files cannot be downloaded.
1 Received mail detail screen (P148)
]
Select a file
name
1 Received mail detail screen (P148) ]Move the cursor
to the attached file
・ C[Select]: Display/Play the selected attachment.
2 M[Menu] ]"Attach file" ]Perform the following
operations:
[Save]
Save the selected attachment.
・ Obtained images will be saved in "i-mode" folder in "My picture"
of the "Data box". (If the image can be used as a Deco-mail
pictograph, it will be saved in "Deco-mail pictogram" folder.)
・ Movies/i-motion movies will be saved in the "i-mode" folder in
"imotion" of the "Data box".
・ Melodies will be saved in the "i-mode" folder in "Melody" of the
"Data box".
・ Phonebook entries will be saved to the Phonebook in the FOMA
terminal.
・ Schedule events will be saved to Schedule in the FOMA
terminal.
・ To Do tasks will be saved to the To do list in the FOMA
terminal.
・ Bookmarks will be saved in "Bookmark" in the "i-mode" folder.
・ Attached files other than the above cannot be saved.
[View/Play]
Play/Display the selected attachment.
[Delete]
Delete the selected attachment.
146 Mail
Playing/Saving an Attached File
from i-mode Mail
Retrieve Selected Attached File
Note
・ If the available space of the Inbox is smaller than the
file size, the attachment cannot be retrieved.
Displaying/Playing/Saving//Deleting an
Attached File
1 Received mail detail screen (P148)
]
M[Menu]
]
"Inline image"
2 Select an image
]
Perform the following operations:
[Save inline img]
Save the selected image in the "i-mode" folder in "My picture" of
the "Data box".
[Prop inline img]
Display detailed information about the selected image.
147
Mail
Note
・ Large i-mode mail may be rejected by the i-mode
Center, and an error message may be returned to the
source address.
・ i-mode mail that is 100KB (with attachments
included) or smaller can be automatically downloaded.
Attachments larger than 100KB can be manually
downloaded from the i-mode center.
・ Set a size limit for i-mode mail messages in advance.
・ An image that is larger than the screen is reduced
and displayed.
・ Some images, videos/i-motion movies may not be
displayed or played.
・ When "Melody auto play" is set to "ON", an attached
melody is played automatically when you open a
received i-mode mail.
・ Software that supports i-motion mail is required to
play it on a PC.
Saving Attached Images