LG Electronics USA L06A PCS GSM Phone User Manual L 03A English Cover 1 0
LG Electronics USA PCS GSM Phone L 03A English Cover 1 0
Contents
- 1. Users Manual 1
- 2. Users Manual 2
- 3. Users Manual 3
- 4. Users Manual 4
Users Manual 3

148 Mail
・ To display contents of a folder with security set, enter the
Terminal Security code.
・ Up to 1000 incoming i-mode mail and SMS messages can be
saved in the Inbox. However, the savable number depends on
the amount of the data.
・ By default, "♪Welcome mail♪" mail is saved. This mail does not
include any charge.
・
It is not possible to send e-mail back to
"♪Welcome mail♪"
.
1 The Stand-by display ]g
]
"Inbox"
2 Select a folder
・ I[Reply]: Reply to the sender and/or
multiple recipients. →P144
3 Select a message
・ J:Open the previous or next mail.
・ I[Reply]: Reply to the sender and/or
multiple recipients. →P144
Displaying Mail in Inbox/ Outbox or
Unsent Messages
Inbox/Outbox/Unsent message
Displaying Received Mail
Inbox list
screen
Received mail
list screen
Received mail
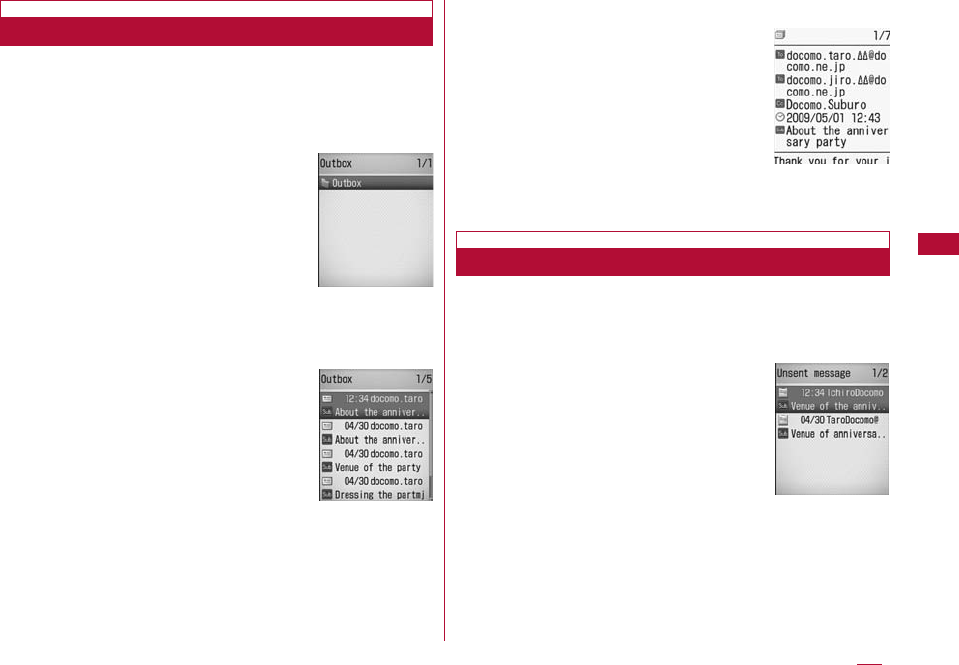
・ Up to 500 i-mode mail, SMS, and unsent messages can be
saved in the Outbox. However, the savable number depends on
the amount of the data.
1 The Stand-by display ]g
]
"Outbox"
2 Select a folder
3 Select a message
・ J:Open the previous or next mail.
・ I[ReEdit]: Open the Compose
message or SMS screen.→P131, P168
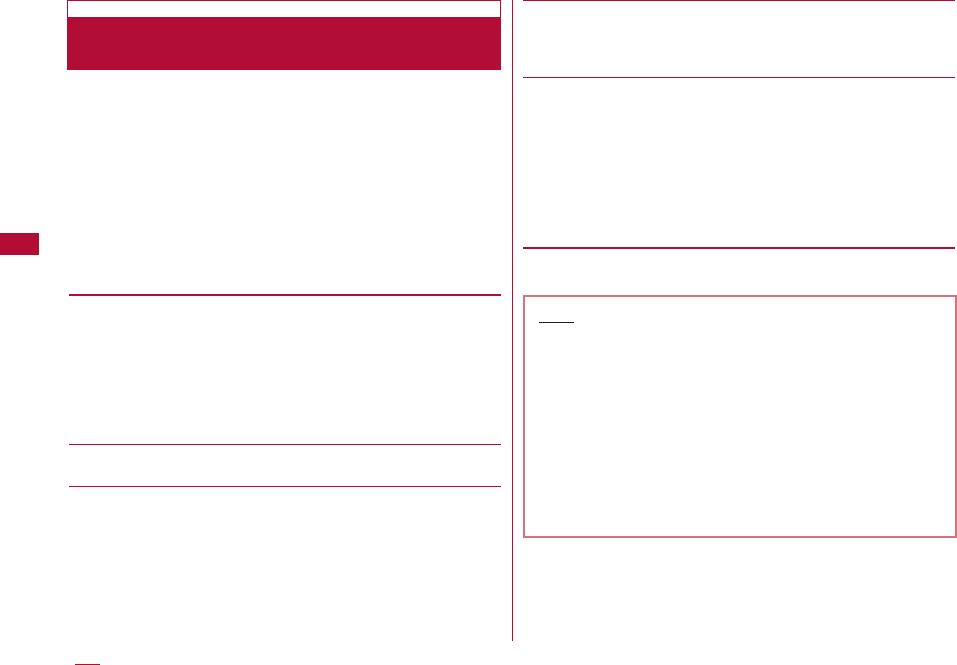
・ Messages saved as Unsent message are included in the
maximum number of savable messages in the Outbox.
1 The Stand-by display ]g
]
"Unsent message"
・ I[Delete]: Delete i-mode mail or SMS.
2 Select a message
The Compose i-mode mail or SMS screen opens depending
on the type of the selected mail, and the unsent mail can
be edited.
149
Mail
Outbox list
screen
Sent mail
details screen
Unsent
message
screen
Sent mail list
screen
Displaying Sent Mail
Displaying Unsent Messages
150 Mail
Set conditions for automatically saving mail in specified
folders.
・ This option is not available with the default "Inbox" and "Outbox".
1 Received mail folder list screen(P148)/Sent mail folder
list screen (P149)
]
Move a cursor to a folder
]
M[Menu]
]
"Auto sort"
・ I[Phonebook]: Select and set sort to mail addresses
from the Phonebook.
2 M[Menu]
]
Perform the following operations:
[Address]
Set mail address as a sorting condition. You can specify more
than one mail address.
Sent address:Select an address from the sent mail logs.
Rcv. address:Select an address from the received mail logs.
Open phonebook:Select and set sort to addresses from the
Phonebook.
Direct address:Directly enter and set a mail address.
[Subject]
Set a mail subject as a condition.
[Reply invalid]*
Route messages with Reply impossible to the selected folder.
[Switch view]
Select a view to display the condition of "Auto sort" setting.
Name:Display the name saved in the Phonebook.
Address:Display the mail address.
[Release]
Select a view to display the condition of "Auto sort" setting.
Release one:Delete the selected Auto sort condition.
Release sel:Select and delete the auto-sort condition.
]Place check marks next to the conditions to be deleted ]
I"Done" ]"Yes"
・ Press M[Menu] to select "Mark all", "Unmark all", or "Switch
view"
Release all:Delete all conditions set to the selected folder.
* This icon is not displayed for the sent mail.
Sorting Sent/Received Mail Automatically
to Folders
Note
・ You cannot set multiple conditions such as
"Address", "Subject", and "Reply impossible" to the
same folder concurrently.
・ The same sorting conditions as ones set to another
folder cannot be set.
・ If set to sorting mail address, set domain name
(including after @). For example, when set from
Outbox address list or Inbox address list, if receiving
or sending mail using only the phone number, the
domain name is not included. For this condition,
sorting will not be recognized.
Auto sort
151
Mail
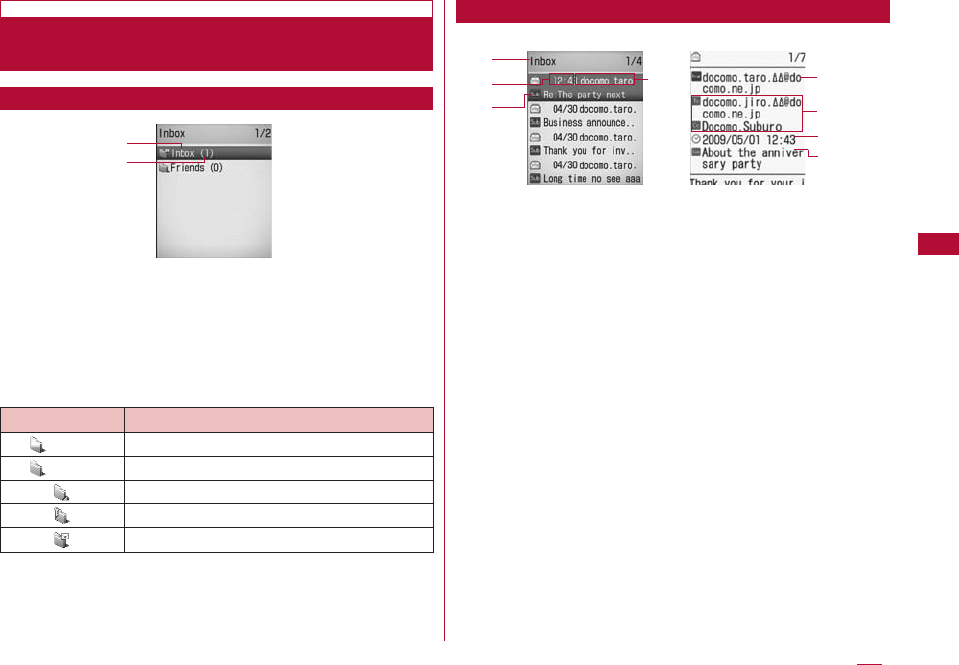
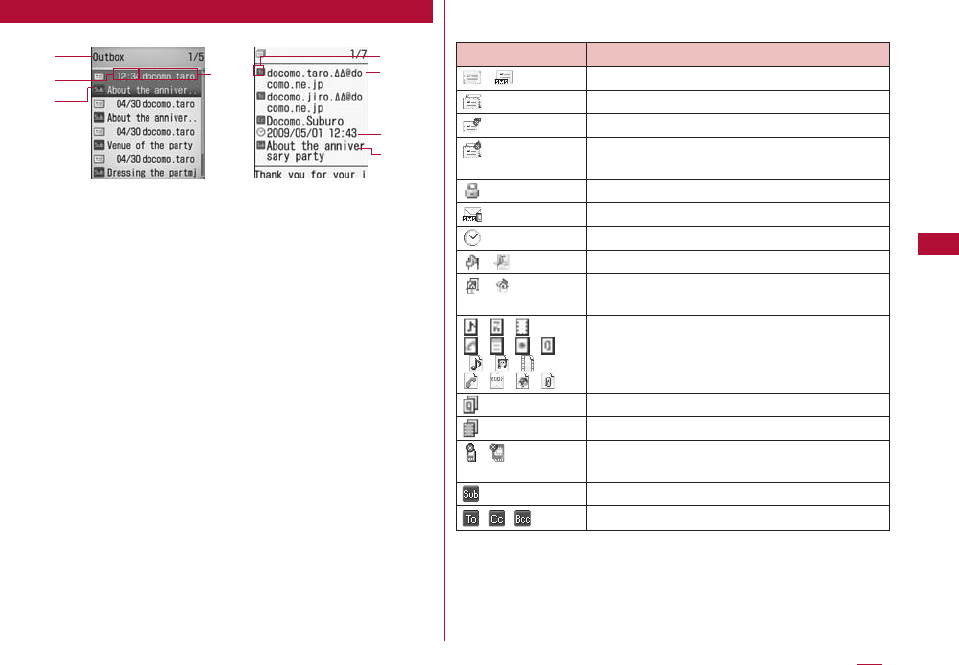
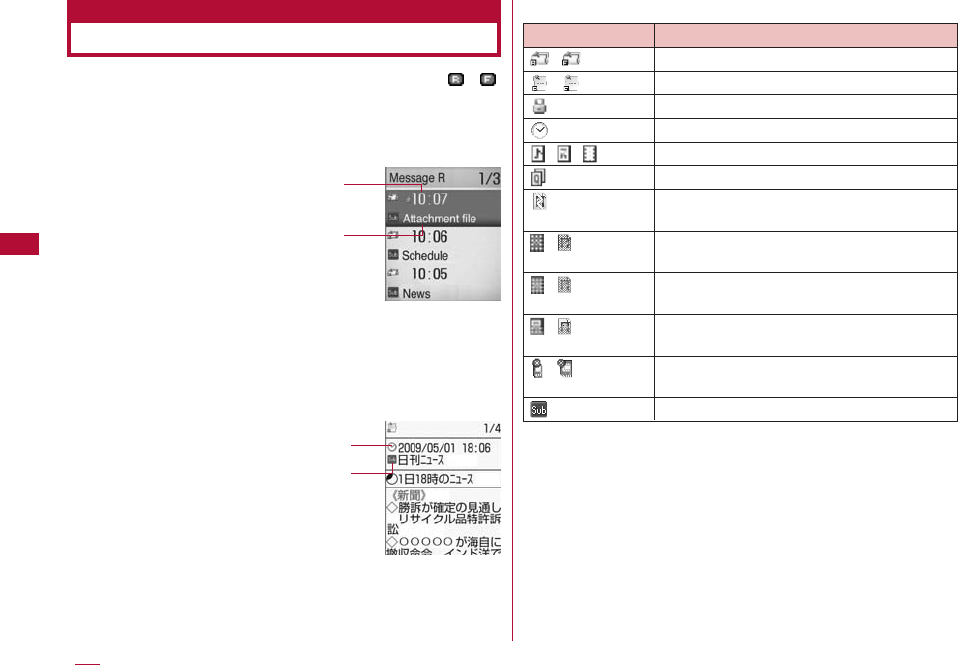
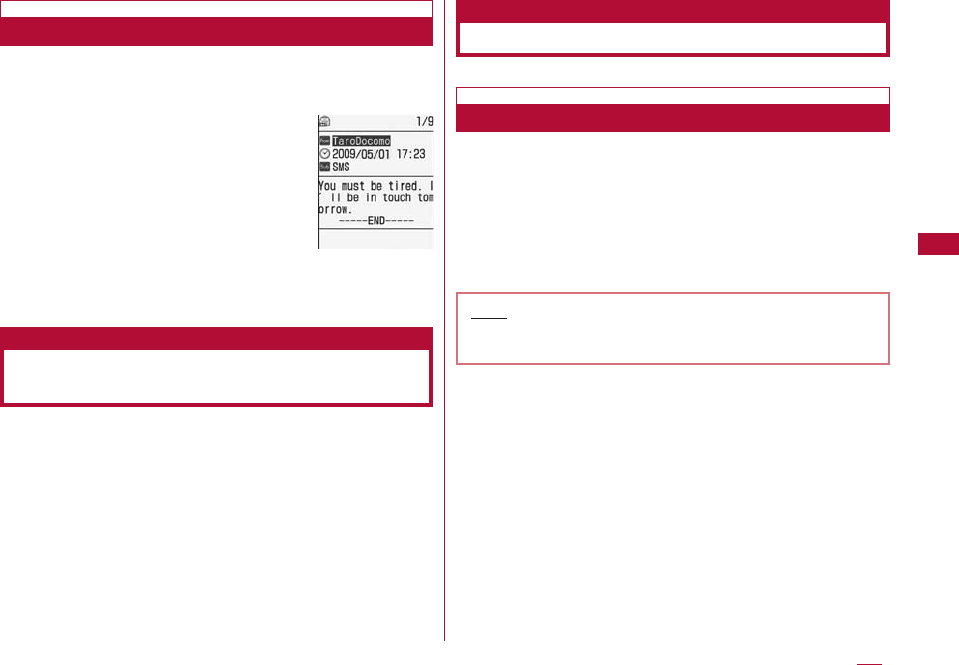
1Folder name
2Number of unread messages
This is displayed on the Inbox list screen.
■ Icons displayed on the Inbox/Outbox screen
1Displayed folder name
2Received date and time
On the Received mail list screen, messages received before
today have the date displayed, and messages received today
have the time displayed.
3Sender's phone number/mail address
If the phone number or mail address is saved in the
Phonebook, the name in the Phonebook appears.*
* When the name is set to appear in "Switch view" → P155
4Subject
"SMS" is displayed for an SMS message.
5Address types and multiple recipients
If you send mail to multiple recipients, their address types
(To or Cc) are displayed. If the mail address is saved in the
Phonebook, the name in the Phonebook appears.
Received/Sent/Unsent Mail Screen
Components
Received/Sent Mail Folder List Screen
Icon Description
(Gray) "Inbox"/"Outbox" (Default folders)
(Blue) User defined folder
Auto sort
Security is set
Unread mail
Example: Inbox
list screen
Received mail
list screen
Received mail
detail screen
1
2
Received mail list screen/Received mail detail
1
23
4
3
5
2
4
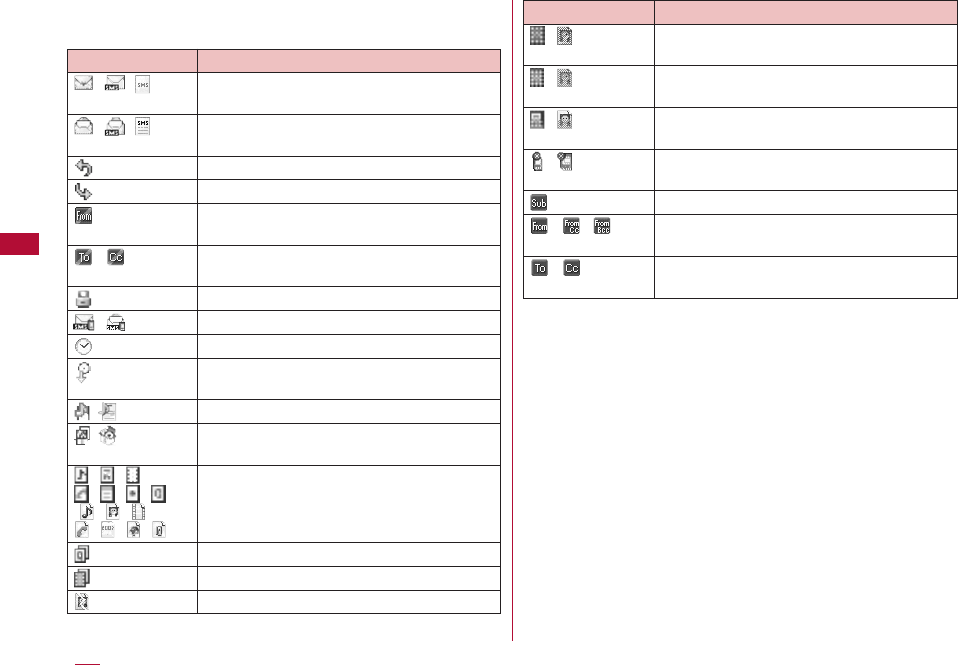
■ Icons displayed on the Received mail list screen/ Received
mail detail screen
* Different icons indicated with ( ) appear on a detail screen.
152 Mail
Icon
/ /
/ /
/
/
( )
( )
/ / /
/ / /
( / / /
/ / / )
Description
Unread i-mode mail/SMS/SMS report
request
Read i-mode mail/SMS/SMS report
request
Replied
Forwarded
Sender mail address to which the reply
cannot be sent
Invalid multiple recipient addresses to
which the reply cannot be sent
Protected.
Unread/read SMS saved in the UIM
Received date and time
The received date and time of SMS is
not in Japan time
A melody is attached.
The i-αppli can be started from the
message text.
Melody/Still Image/Video/Phonebook
entry/ Schedule event/Bookmark/other
file is attached.
Files of multiple types attached
Multiple files of the same type attached
Damaged file
Icon
( ) (Gray)
( ) (Blue)
( ) (Blue)
( )
/ /
/
Description
Deleted attachment (Example. For a still
image)
Attached file un-retrieved or failed to be
retrieved (Example: For a still image)
Attached file partially retrieved
(Example: For a still image)
Attached file set with UIM restriction
function
Subject
The message was sent with the
address as To, Cc, or Bcc
Multiple recipient address types other
than own address (To/Cc)
1Displayed folder name
2Sent date and time
On the Outbox list screen, messages sent before today have
the date displayed, and messages sent today have the time
displayed.
3Recipient phone number/mail address
If the phone number or mail address is saved in the
Phonebook, the name in the Phonebook appears.*
* When the name is set to appear in "Switch view"→P158
4Subject
"SMS" is displayed for an SMS message.
5Receiver type
Indicate the receiver type of the sent mail (To, Cc, or Bcc).
■ Icons displayed on the Outbox list screen/Outbox detail
screen
* Different icons indicated with ( ) appear on a detail screen.
153
Mail
Icon
/
( )
( )
/ / /
/ / /
( / / /
/ / / )
( )
/ /
Description
Sent i-mode mail or SMS
i-mode mail sent to multiple recipients
Failed to be sent
Mail that failed to be sent to multiple
recipients
Protected.
SMS saved in the UIM
Sent date and time
A melody is attached.
The i-αppli can be started from the
message text.
Melody/Still Image/Video/Phonebook
entry/ Schedule event/Bookmark/other
file is attached.
Files of multiple types attached
Multiple files of the same type attached
A file set with UIM restriction function
is attached.
Subject
Sent as To/Cc/Bcc
Outbox list screen/Outbox detail screen
Sent mail list
screen
Sent mail
details screen
1
23
4
3
5
2
4
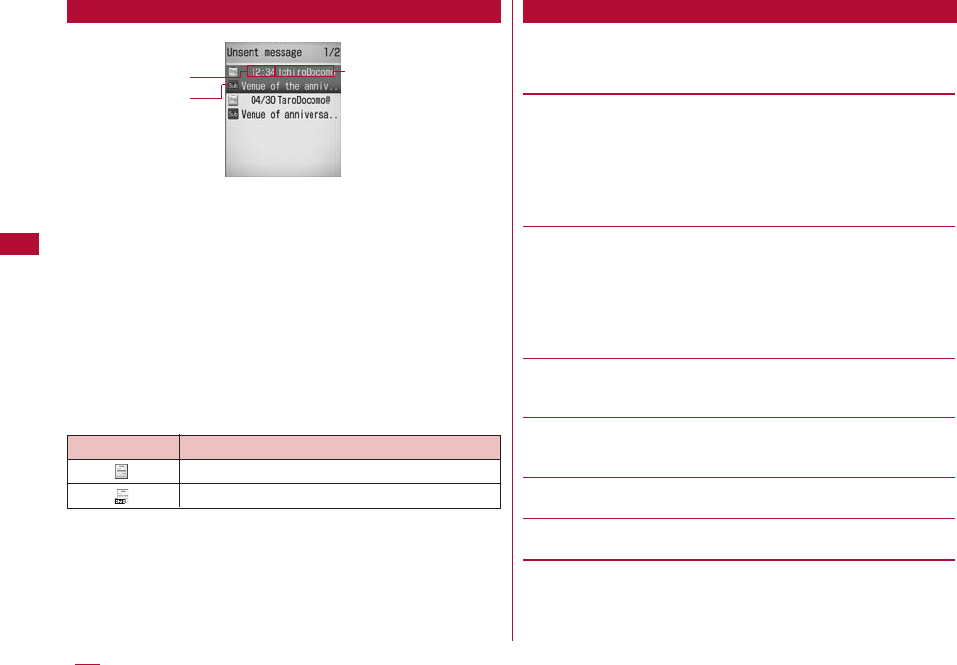
1Saved date and time
Messages saved before today have the date displayed, and
messages saved today have the time displayed.
2Subject
"SMS" is displayed for an SMS message.
3Recipient phone number/mail address
If the phone number or mail address is saved in the
Phonebook, the name in the Phonebook appears.*
* : When the name is set to appear in "Switch view"→P160
■ Icons displayed on the Unsent mail list screen
* Other than the above, same icons as for sent mail are used.
1 Inbox list screen(P148)/Outbox list screen (P149)
]
M[Menu]
]
Perform following operations:
[Manage folders]
Create folder:Create a folder.
Rename folder:Change the name of the selected folder.
Sort folder:Select the display position of the folders and sort
folders.
Fold. security:Set or release security to the selected folder.
]Enter the security code ]"Yes"
[Delete]
Delete one:Delete the selected folder.
]Enter the security code ]"Yes"
Del. all read*:Delete all read messages in Inbox.
]Enter the security code ]"Yes"
Delete all:Deletes all messages in Inbox/Outbox.
]Enter the security code ]"Yes"
[Auto sort]
Set conditions for mail to be saved automatically in specified
folders. →P150
[Send all Ir data]
Send all mail in Inbox/Outbox via infrared.→P259
]Enter the security code ]Enter the password ]"Yes"
[Memory status]
Display number of messages in Inbox/Outbox.
[Open folder]
Display contents of the selected folder.
* This item is not displayed for sent mail.
154 Mail
Unsent mail list screen
Unsent mail
list screen
Icon Description
Unsent i-mode mail
Unsent SMS
Received Mail Folder/Sent Mail Folder List Screen Sub Menu
13
2
155
Mail
1 Received mail list screen (P148)
]
Move the cursor to
mail
]
M[Menu]
]
Perform the following operations:
[Move]
Move this:Move the displayed mail to another folder.
Move selected:Select mail and move them to another folder.
]Place check marks next to the messages to move ]I[Done]
]Select a destination folder
・ Press M[Menu] to select "Mark all", "Unmark all", or "Switch
view"
Move all:Move all mail in the folder to another folder.
[Delete]
Delete one:Delete the selected message.
Del. selected:Delete selected message.
]Place check marks next to the messages to be deleted ]
I[Done] ]"Yes"
・ Press M[Menu] to select "Mark all", "Unmark all", or "Switch
view"
Del all read:Deletes all read messages in the folder.
]Enter the security code ]"Yes"
Delete all:Delete all mail in the folder.
]Enter the security code ]"Yes"
SMS rmv. in fd.:Delete all SMS reports in the folder.
]Enter the security code ]"Yes"
Note
<Manage folders>
・ If I[Add] is pressed on the Inbox/Outbox list screen,
a folder can be added.
<Rename folder/Sort folders/Delete one/Auto sort>
・ This option is not available for the default "Inbox" and
"Outbox" folders.
<Delete>
・ A folder containing protected mail cannot be deleted.
・ Protected mail or SMS saved in the UIM are not
deleted.
・ If "Delete one" is selected for a folder with unread
mail, a confirmation for deletion appears. Select "Yes"
to delete.
Received Mail List Screen Sub Menu
156 Mail
[Display settings]
Switch view:Set the mail display method.
Sort:Set conditions to rearrange the messages.
[Filter]
Display messages that meet certain conditions.
Address:Display only mail from a specific address
]Select an item ]Select/input the address
Subject:Display mail with a specific subject.
Unread:Display only unread mail.
Read:Display only read mail.
Protected:Display only protected mail.
Not protected:Display only unprotected mail.
Image:Display only mail with an image attached.
i-motion:Display only mail with an i-motion movie attached.
Melody: Display only the mail with melody attached.
Mail: Display only i-mode mail.
SMS: Display only SMS/ SMS arrival
All: Display all the mails in folder.
[Read all]
Mark all mail in the folder as read.
[Protect on/off]
Mark all mail in the folder as read.
One on/off:Protect or unprotect the selected mail.
Select on/off:Select and protect or unprotect mail.
]Place check marks next to the messages to be protected ]
I[Done] ]"Yes"
・ Press M[Menu] to select "Mark all", "Unmark all", or "Switch
view"
Protect all:Protect all mail in the folder.
Unprotect all:Unprotect all mail in the folder.
[Ir exchange]
Send:Send selected mail via Infrared.
Send all:Send all mail in the folder via infrared.→P259
]Enter the security code ]Enter the password ]"Yes"
[UIM]
Copy to UIM:Copy the selected SMS to the UIM.
Move to UIM:Move the selected SMS to the UIM.
Copy from UIM: Copy the selected SMS to the terminal.
Move from UIM:Move the selected SMS to the terminal.
[Memory status]
Display the number of messages in Inbox.
Note
<Delete>
・ If there are unread messages, a confirmation for
deletion appears. Select "Yes" to delete.
<Filter>
・ Addresses matched completely and subjects
matched even partially are displayed.
1 Received mail detail screen (P148)
]
M[Menu]
]
Perform the following operations:
[Reply]
Reply to the displayed mail.→P144
[Forward]
Forward the displayed mail.→P145
[Move]
Move the displayed mail to another folder.
[Delete]
Delete the displayed mail.
[Protect on/off]
Protect or unprotect the displayed mail.
[Store]
Save phone numbers or email addresses from the displayed mail
to the Phonebook. →P145
[Attach file]
Save, play/view, or delete files attached to the displayed mail.
→ P146
[Inline image]
Save images contained in the displayed mail or view detailed
information.→P147
[Display settings]
Scroll:Set the number of lines scrolled when His pressed on
the mail display screen.
Font size:Set a font size for the message text on the Message
display screen.
[Copy]
Copy contents of the displayed mail.
Body:Select and copy contents of text.→P301
Subject:Copy the subject.
Sender:Copy the destination. If there are multiple addresses,
select an address from the Mail address list screen.
[Save template]
Save Deco-mail as a template.
]C[Select] ]Edit the title ]I[Done]
[Export]
Ir exchange:Send the displayed mail via IrDA.
UIM:Copy or move the displayed SMS to the UIM, or copy or
move the selected SMS from the UIM to the terminal.
157
Mail
Received Mail Detail Screen Sub Menu
Note
<Protect>
・ Up to 1000 messages can be protected.
<Delete>
・ Protected mail cannot be deleted.

158 Mail
1 Sent mail list screen (P149)
]
Move the cursor to mail
]
M[Menu]
]
Perform the following operations:
[Edit]
Edit and send sent mail.→P131, P170
[Move]
Move this:Move the displayed mail to another folder.
Move selected:Select mail and move them to another folder.
]Place check marks next to the messages to move ]I[Done]
]Select a destination folder
・ Press M[Menu] to select "Mark all", "Unmark all", or "Switch
view"
Move all:Move all mail in the folder to another folder.
[Delete]
Delete one:Delete the selected message.
Del. selected:Select and delete messages.
]Place check marks next to the messages to be deleted ]
I[Done] ]"Yes"
・ Press M[Menu] to select "Mark all", "Unmark all", or "Switch
view"
Delete all:Delete all mail in the folder.
]Enter the security code ]"Yes"
[Display settings]
Switch view:Set the mail display method.
Sort:Set conditions to rearrange the messages.
[Filter]
Display messages that meet certain conditions.
Address:Display only mail sent to a specific address.
]Select an item ]Select/input the address
Subject:Display only mail with a specific subject.
Protected:Display only protected mail.
Not protected:Display only unprotected mail.
Image:Display only mail with an image attached.
i-motion:Display only mail with an i-motion movie attached.
Melody:Display only mail with a melody attached.
Mail: Display only i-mode mail.
SMS: Display only SMS/SMS arrival
All: Display all the mails in folder.
Sent Mail List Screen Sub Menu
[Protect on/off]
One on/off:Protect or unprotect the selected mail.
Select on/off:Select and protect or unprotect mail.
]Place check marks next to the messages to be protected ]
I[Done] ]"Yes"
・ Press M[Menu] to select "Mark all", "Unmark all", or "Switch
view"
Protect all:Protect all mail in the folder.
Unprotect all:Unprotect all mail in the folder.
[Ir exchange]
Send:Send selected mail via Infrared.
Send all:Send all mail in the folder via infrared.→P259
]Enter the security code ]Enter the password ]"Yes"
[UIM]
Copy to UIM:Copy the selected SMS to the UIM.
Move to UIM:Move the selected SMS to the UIM.
Copy from UIM: Copy the selected SMS to the terminal.
Move from UIM:Move the selected SMS to the terminal.
[Memory status]
Display the number of messages in Outbox.
1 Sent mail details screen (P149)
]
M[Menu]
]
Perform the following operations:
[Edit]
Edit and send sent mail.→P131、P170
[Move]
Move the displayed mail to another folder.
[Delete]
Delete the displayed mail.
[Protect on/off]
Protect or unprotect the displayed mail.
[Store]
Save phone numbers or email addresses in the displayed mail to
the Phonebook. →P145
[Attach file]
Save, play/view, or delete files attached to the displayed mail.→
P146
[Inline image]
Save images contained in the displayed mail or view detailed
information.→P147
159
Mail
Note
<Filter>
・ Addresses matched completely and subjects
matched even partially are displayed.
Sent Mail Details Screen Sub Menu
160 Mail
[Display settings]
Scroll:Sets the number of lines scrolled when His pressed on
the mail Display Screen.
Font size:Set a font size for the message text on the Message
display screen.
[Copy]
Copy contents of the displayed mail.
Body:Select and copy contents of text.→P301
Subject:Copy the subject.
Sender:Copy the destination. If there are multiple recipients,
select addresses to copy.
[Save template]
Save Deco-mail as a template.
]C[Select] ]Edit the title ]I[Done]
[Export]
Ir exchange:Send the displayed mail via IrDA.
UIM:Copy or move the displayed SMS to the UIM, or copy or
move the selected SMS from the UIM to the terminal.
1 Unsent mail list screen (P149)
]
Move the cursor to
mail
]
M[Menu]
]
Perform the following operations:
[Delete]
Delete one:Delete the selected message.
Del. selected:Select and delete messages.
]Place check marks next to the messages to be deleted ]
I[Done] ]"Yes"
・ Press M[Menu] to select "Mark all", "Unmark all", or "Switch
view"
Delete all:Delete all unsent messages.
]Enter the security code ]"Yes"
[Display settings]
Switch View:Set the mail display method.
Sort:Set conditions to rearrange the messages.
[Filter]
Display messages that meet certain conditions.
Address:Display only mail sent to a specific address.
]Select an item ]Select/input the address
Subject:Display only mail with a specific subject.
Image:Display only mail with an image attached.
i-motion:Display only mail with an i-motion movie attached.
Melody:Display only mail with a melody attached.
Mail:Display only i-mode mail.
SMS:Display only SMS.
All: Display all the mails in folder.
[Ir exchange]
Send:Send selected mail via Infrared.
Send all:Send all unsent messages via infrared. →P259
]Enter the security code ]Enter the password ]"Yes"
[Memory status]
Display number of unsent messages.
Note
<Protect>
・ Up to 500 messages can be protected.
<Delete>
・ Protected mail cannot be deleted.
Unsent Mail List Screen Sub Menu

Sent mail logs. Also, up to 60 entries of sent/received mail
will be saved in "Recent mail". These logs can be used to
compose mail, and save addresses to the phonebook.
・ If the maximum number of recordable entries has been
exceeded, the oldest entries will be overwritten first.
Example: When displaying the received mail logs
1 The Stand-by display
]
L(Hold for 1 seconds)
■To display Sent mails logs
The Stand-by display
]
R(for 1
seconds)
■To display recent mail
The Stand-by display
]
A(for 1
seconds)
2 Select an entry in the log
・ I[Mail]: Create mail to the receiver or sender of the
selected entry.
1The name saved in the Phonebook
2Other party's mail address
3Receive/Sent date & time
■ Icons displayed on the received mail log/send log/Recent
Mails
* The received/sent date and time is shown in the local time.
161
Mail
Using Mail Logs
Received Mails/Sent Mails/Recent Mails
Example:
Received Mail
History List
Screen
Example:
Received Mail
History List
Screen
1
2
3
Icon Description
Received mail
Sent mail
Received SMS
Sent SMS
Mail and SMS that were Received/Sent
while Roaming*
1 Press Hto move the cursor to the received/sent log
]
M[Menu]
]
Perform the following operations:
[Video phone call]
Make a video call to the selected log entry.
[Compose mail]
Create mail to the address or sender of the selected log entry.
Go to Step 3 in "Creating and Sending i-mode Mail" (P131).
[Add to phonebook]
Save the mail address of the selected log entry to the
phonebook. Go to Step 2 in "Saving Contacts to the Phonebook
from Received or Dialed Calls" (P85).
・ Save only unsaved mail addresses.
[Customize call]
Edit the phone number of the selected log entry and dial.
[Change list]*
Recent call:Display all incoming and outgoing call log entries.
Recent mail:Display all incoming and outgoing mail log entries.
Received calls:Display Received calls.
Received Mail:Display received mail log entries.
Redial:Display phone redial log entries.
Sent Mail:Display Sent mail log entries.
・ The item for the currently displayed log is not shown.
[Delete]
Delete the selected log entry.
[Delete all]*
Delete all entries from the mail logs.
* This option does not appear on the Received mail logs/Sent
mail logs/Recent mail detail screen.
Auto sort
1
The Stand-by display ] g]
"Mail setting"
]
"Communication"
]
Perform the following operations:
[Receive option set]
To enable/disable the Receive option (P142), set whether to
receive i-mode mail automatically.
On:Mail will not be received automatically.
Off:Mail will be automatically received.
iI[Done]
[Receive attach file]
Specify attached files to be retrieved when i-mode mail is
received.
]Place check marks next to items to be downloaded ]
I[Done]
[Check new messages]
Specify request items when using "Check new messages".
]Place check marks next to the items to check ]I[Done]
162 Mail
Received Mail Log/Sent Mail Log/Recent Mail Sub Menu
Setting FOMA Terminal Mail
Functions Settings
Mail setting
Configuring Network Settings
Edit
1
The Stand-by display ] g]
"Mail setting"
]
"Edit"
]
Perform the following operations:
[Edit header]
Set a header to be inserted to i-mode mail text.
]C[Edit] ]Enter a header
[Edit signature]
Set a signature to be inserted to i-mode mail text.
]C[Edit] ]Enter a signature
[Edit quotation]
Set a symbol indicating quotation from received mail used for
replying by quoting.
]C[Select] ]Enter a quotation symbol ]I[Done]
[Auto attach]
Set whether to automatically attach a header or signature when
composing i-mode mail.
]Place check marks next to items to be attached ]I[Done]
Display
1
The Stand-by display ] g]
"Mail setting"
]
"Display"
]
Perform the following operations:
[Font size]
Set a font size for text on the Mail detail screen.
[Scroll]
Set the number of lines scrolled when His pressed on the Mail
detail screen or the Preview screen
[Mail list]
Set how to display mail on the Mail list screen.
[Folder security]
Set security for Inbox/Outbox and Unsent message in the Mail
menu. To display security-enabled mail, the security code must
be entered.
]Enter the security code ]Place check marks next to items to
enable ]I[Done]
[Melody auto play]
Set whether to automatically play attached or pasted melodies
on the Mail display screen.
[Receiving display]
Set whether to notify with a ring tone or Receive results screen
when i-mode mail or Message R/F is received while operating the
FOMA terminal (displaying other than Stand-by display).
Alarm mode:Open the Received results screen.
Operation mode:FOMA terminal operations will take precedence
without the Received result screen being displayed.
163
Mail
Note
<Receive option set>
・ When this option is set to "ON", i-mode mail cannot be
received automatically. Incoming i-mode mail is kept
at the i-mode Center, and the Receive notify screen
(P143) appears.
<Attach File>
・ If the attached file set not to be received arrives, the
file name is contained in the message text. You can
select and receive attachments. →P146
Editing Header/Signature/Quotation
Configuring Display Settings

164 Mail
Others
1
The Stand-by display ] g ]
"Mail setting"
]
"Others"
]
Perform the following operations:
[Check setting]
Confirm the contents set in "Mail setting".
[Reset setting]
Reset the contents set in "Mail setting" to the default.
]Enter the security code ]"Yes"
When the terminal is in the service area, Messages R/F are
sent automatically from the i-mode Center. When
Messages R/F arrives, the display, ring tone or vibration
notifies you of new messages.
・ Up to 100 each MessageR or MessageF can be
saved.However, the number of savable messages varies
depending on the message size.
When Message R/F arrives, the newest message appears
automatically.
・ "Message auto-display" can be configured to allow the detail
screen to automatically open after a Message R/F arrives.
→ P165
1 Automatically Receiving a Message R/F When it
Arrives
・ After Message R/F is received, the reception result is
displayed.
・ The previous screen returns if no operation is performed
for approximately 30 seconds.
Configuring Other Settings
Note
<Reset Settings>
・ The header and signature will be reset.
Note
<Receiving display>
・ Even if 「Alarm mode」 is being set, depending on the
function which is being used, the result of receiving
message will not be displayed.
When Receiving Messages R/F
Receive Message
Viewing New Message R/F
Auto-display Message
Set how to automatically display Message R/F.
1
The Stand-by display ] I ]
"i-mode setting"
]
"Display"
]
"Auto-display"
]
Perform the following operations:
Message R preferred:If a Message R and F are received
simultaneously, MessageR is automatically shown.
Message R Only:Only MessageR is automatically
displayed.
Message F preferred:If a Message R and F are received
simultaneously, MessageF is automatically shown.
Message F Only:Only Message F is automatically
displayed.
Auto-display off:Messages are not displayed
automatically.
Melody Auto Play
Set how to automatically display Message R/F.
Set whether to automatically play a melody when Message
R/F is displayed.
1
The Stand-by display ] I ]
"i-mode setting"
]
"Display"
]
"Melody auto play"
]
"ON"/"OFF"
Message R/F that were not received because the terminal
was out of service area are stored at the i-mode Center,
and , or will appear at the top on the screen.
Checking new messages downloads the stored Messages
R/F.
・ You cannot check new messages when the terminal is out of
service area.
・ Item to check ( i-mode mail or Messages R/F) in "Check new
messages" (P162).
1 g(for 1+ seconds) in Stand-by
When checking is completed, the Reception result screen
opens.
2 "Message R"/"Message F"
165
Mail
Displaying Messages R/F Automatically
Playing a Melody Automatically When
Message R/F is Displayed
Checking for New Messages R/F
Check new message
Note
・ Incoming Message R/F is saved at the i-mode Center
when:
- Power is off - A video call in progress
- Self mode is activated - The terminal is out of
service area
- The FOMA Terminal MessageR/F mailbox is full
When Messages R/F arrive from the i-mode Center, ,
appears at the top of the screen.
1
The Stand-by display ] I]
"Message"
]
"Message R"/
"Message F"
1Received date and time
2Subject
2 Select a Message R/F
・ I[Delete]: Delete the selected Message R/F
1Received date and time
2Subject
■ Icons displayed on the Message R/F list/detail screen
* Different icons indicated with ( ) appear on a detail screen.
166 Mail
Icon
/
/
/ /
( ) (Gray)
( ) (Blue)
( ) (Blue)
( )
Description
Unread Messages R/F
Read Messages R/F
Protected.
Received date and time
A melody/still image/video is attached.
Multiple files are attached.
Damaged attachment or attachment
that failed to be downloaded
Deleted attachment (Example. For a still
image)
Attachment that is not downloaded
(Example: For a still image)
Attached file partially retrieved
(Example: For a still image)
Attachment with UIM security function
activated
Subject
Viewing New Message R/F
Message R/MessageF
Example:
Message R
Screen
Example:
MessageR
Screen
1
2
1
2

167
Mail
1 MessageR/F List screen (P166)
]
Move the cursor to
a message
]
M[Menu]
]
Perform the following
operations:
[Delete]
Delete one:Delete the selected Message R/F.
Delete selected:Select and delete Message R/F.
]Place check marks next to the Messages R/F to delete ]
I[Done] ]"Yes"
・ Press M[Menu] to select "Mark all", "Unmark all", or "Switch
view"
Del all read:Delete all read Messages R/F.
]Enter the security code ]"Yes"
Delete all:Delete all Message R/F.
]Enter the security code ]"Yes"
[Display settings]
Switch View:Set the display method of the Message R/F list
screen.
1 lines:Display only the subject in one line.
2 lines:Display the subject and received date and time in two
lines.
Sort:Rearrange Message R/F by the set conditions.
[Filter]
Display only the Message R/F that meet certain conditions.
Subject:Display only the Message R/F with a specific subject.
Unread:Display only the unread Message R/F.
Read:Display only the read Message R/F.
Protected:Display only the protected Message R/F.
Not protected:Display only the unprotected Message R/F.
Image:Display only the Message R/F with attachments.
Melody:Display only the Message R/F with a melody attached.
All:Display all Message R/F.
[Read all]
Mark all Message R/F to "read".
[Protect on/off]
One on/off:Protect or unprotect the selected Message R/F.
Select on/off:Select and protect/unprotect Messages R/F.
]Place check marks next to the Messages R/F to delete ]
I[Done] ]"Yes"
・ Press M[Menu] to select "Mark all", "Release all", or "Switch
view"
Protect all:Protect all Messages R/F.
Unprotect all:Unprotect all Messages R/F.
[Memory status]
Display the number of Messages R/F.
Messages R/F List Screen Sub Menu
Note
<Delete>
・ If there are unread Messages R/F, a confirmation for
deletion appears. Select "Yes" to delete.
168 Mail
Messages R/F Detail Screen Sub Menu
1 MessageR/F detail screen(P166)
]
M[Menu]
]
Perform the following operations:
[Delete]
Delete the displayed Message R/F.
[Protect on/off]
Protect or unprotect the displayed Message R/F.
[Add to ph.book]
Save the mail address or phone number contained in the
message text of the displayed Message R/F to the phonebook.
]Select the address to save to the phonebook ]"Yes" Go to
Step 2 in "Saving Contacts to the Phonebook from Received or
Dialed Calls" (P85).
[Attach file]
Save/play/display an attachment of the currently displayed
Message R/F.
Perform the following steps to save attachments.
]Select the attachment ]"Save" ]"Yes" Perform the following
steps to play/display the attachment.
[Inline image]
Save an image inserted in the currently displayed Message R/F.
]Select the image ]"Save" ]"Yes"
・ To view information about the selected image, select "File
property".
[Background Image]
Save the background image used in the displayed Message R/F.
]"Save" ]"Yes"
・ To view information about the image, select "File property"
[Display settings]
This option is not available.
・ You can send and receive SMS to/from parties of overseas
carriers other than DOCOMO. Visit DOCOMO website for
countries and overseas carriers available.
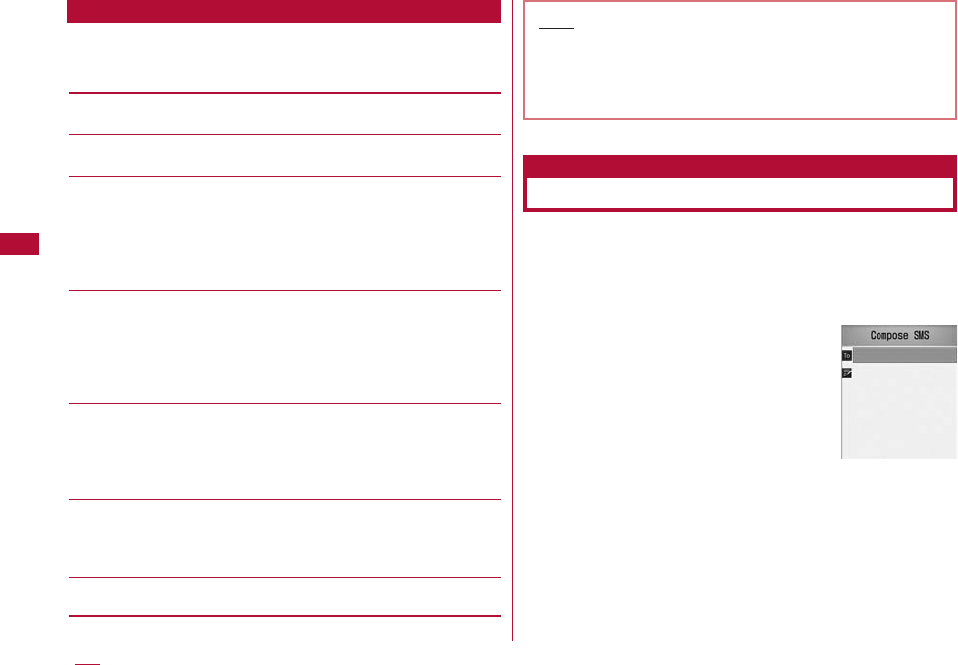
1
The Stand-by display ] g]
"SMS"
]
"Compose SMS"
Note
<Protect>
・ Up to 100 each Message R/F can be protected.
<Delete>
・ Protected messages cannot be deleted.
Creating and Sending SMS
SMS Compose/Send
Compose SMS
Screen
169
Mail
2 Select (Receiver) field
]
"Direct input"
]
Enter the
phone number
・ Up to 21 digits (including "+" can be entered.
・ You can select "Int. call", "Select prefix" or "Cancel" by
pressing M[Menu] on the Phone number entry screen.
Press I[Cancel] to cancel the entry.
・ The address can be selected from the Phonebook, Sent
mail logs and Received mail logs.→P169
3 Select (Body) field
]
Enter the message text
・ The number of characters which can be entered differs
depending on the settings in "SMS input character".
→P172
4 I[Send]
Note
・ For a destination of an overseas carrier other than
DOCOMO, enter in the order of "+" (Press 0for 1+
seconds), "Country Code" and "other party's mobile
phone number". For the mobile phone number, skip the
leading "0", if any. Numbers may be entered in the
order of "010", "Country Code" and the "other party's
mobile phone number" (to reply to overseas SMS
received, enter "010").
・ Characters may not be sent correctly to the other
party depending on the signal strength.
・ When you send an SMS to a receiver who uses a
foreign carrier and some of the characters you send
are not supported by the carrier, those characters
may not be displayed correctly.
・ Even if you set "Activate/Deactivate" to "Not notify",
your Caller ID is sent to the other party.
・ You cannot reply to SMS sent with Unknown ID or
from a public phone.
・ When sending mail, the excluding "Pictographs"
, will be changed to half byte space.
170 Mail
1 Create SMS screen (P168)
]
M[Menu]
]
Perform the
following operations:
[Send]
Send SMS.
[Save]
Save SMS being created or edited as Unsent mail.
[Add address]
Sent address:Select an address from the Sent mail logs.
Rcv. address:Select an address from the Received mail logs.
Open phonebook:Select an address from the phonebook.
Direct input:Enter the receiver address directly.
[Report request]
Set whether to request an SMS delivery notification when SMS is
delivered.→P170
[Validity period]
Set the duration a sent SMS can be kept undelivered at the SMS
center.→P172
[Delete body]
Delete the message text.
[Delete SMS]
Delete the SMS being composed.
When the FOMA terminal is in the service area, SMS is
automatically received.
・ Up to 1000 received SMS messages including i-mode mail can
be saved. However, the savable number depends on the
amount of the data.
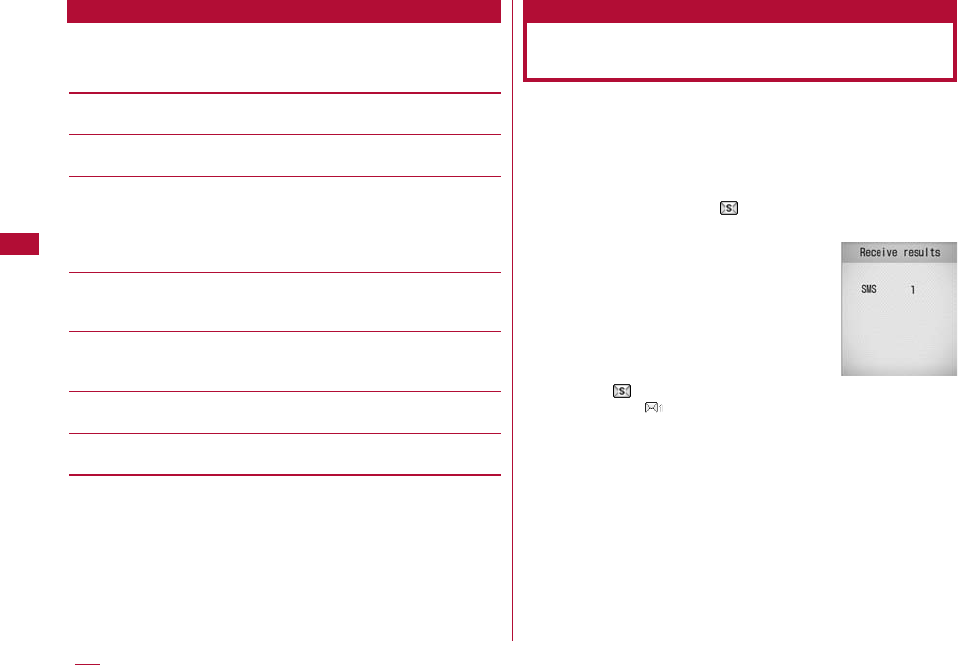
1 When SMS is received appears at the top of the
screen
When the reception is completed, the
Reception result screen opens.
・ The previous screen returns if no
operation is performed for approximately
30 seconds.
・ Selecting "SMS" opens the Inbox list
screen.
・ Until the Detail screen of received SMS
opens, appears at the top of the
screen and (the number indicates the
number of messages) appears on
the Stand-by screen.
Create SMS Screen Sub Menu
Automatically Receiving SMS
(Short Message Service) Messages
Receive SMS
Reception
result screen
1 Received result screen (P170)
]
"SMS"
]
Select a
folder
2 Select the SMS to display
SMS that could not be received because the terminal was
out of service area (or for other reasons) are stored in the
SMS Center. You can receive stored SMS by checking the
SMS Center.
・ You cannot check new messages while out of the service area.
1
The Stand-by display ]
g
]
"SMS"
]
"Check new SMS"
When the reception is completed, the Reception result
screen opens.
Set whether to request an SMS delivery report after the
SMS is delivered. If this option is set to "ON", an SMS
report request indicating that the SMS has been delivered
to the receiver will be sent to you.
1
The Stand-by display ]
g
]
"Mail setting"
]
"SMS"
]
"SMS report request"
]
"ON"/"OFF"
171
Mail
Viewing New SMS
Received Mail
Details screen
Checking for SMS (Short Message
Service) Messages
Check new SMS
Configuring SMS Settings
SMS Settings
SMS Report
Note
・ An SMS report will show the sent time and the
number of the receiver.
172 Mail
SMS Validity Period
Set the length of period that a sent SMS will be kept at the
SMS center delivered because the recipient terminal is out
of service area, etc.
・ If "0 day" is selected, sending the SMS message is retried after
a while, then the message is deleted from the SMS center.
1
The Stand-by display ]
g
]
"Mail setting"
]
"SMS"
]
"SMS Validity Period"
]
Select a period
Set the maximum number of characters that can be
entered in an SMS message text.
1
The Stand-by display ]
g
]
"Mail setting"
]
"SMS"
]
"SMS Validity Period"
]
Select a period
Japanese (70 characters):Set the maximum number of
characters to 70.
English (160 characters):Set the maximum number of
characters to 160. Japanese may not be entered.
You can specify the SMS center.
1 M[Menu]
]
(Settings)
]
"International roaming"
]
"Network"
]
"SMS center"
]
Perform the following
operations:
[SMSC]
DOCOMO:Set DOCOMO as the SMS center.
Others:Set a carrier other than DOCOMO as the SMS center.
[Address]
When "Others" is selected for "SMS center", enter the connection
address of the SMS center.
[Type of number]
Set when "Others" is selected for "SMS center".
unknown:If you do not know whether the SMS center phone
number is for international calls, select this option.
international:If the SMS center phone number is for
international calls, select this option.
2 I[Done]
SMS input character
SMS Center
* You usually do not need to change this setting.
i-mode/i-motion/i-Channel
i-mode ・・・・・・・・・・・・・・・・・・・・・・・・・・・・・・・・・・・・・・・・・・・・・ 174
Displaying the i-mode Menu ・・・・・・・・・ i-mode Menu 174
Accessing Sites
Accessing Sites ・・・・・・・・・・・・・・・・・・・・・・・・・・・・・・・・・・ 175
Operations on i-mode/Web Sites ・・・・・・・・・・・・・・・・・・ 177
Saving Entries in My Menu ・・・・・・・・・・・・・ My Menu 179
Changing the i-mode Password
・・・・・・・・・・・・・・・・・・・・・・・・・ Change i-mode Password 180
Opening a Web Site ・・・・・・・・・・・・・ Internet Access 180
Saving and Quickly Displaying a Site/Homepage
・・・・・・・・・・・・・・・・・・・・・・・・・・・・・・・・・・・・・・・・Bookmarks 181
Save Site Contents ・・・・・・・・・・・・・・・・・Screen Memo 183
Downloading Images/Melodies from a Site
Downloading Data from Sites ・・・・・・・・・・・・・・・・・・・・・ 186
Useful i-mode Functions
Using the Phone To/Mail To/Web To/i-αppli To
Functions
・・・・Phone To/Mail To/Web To/i-αppli To function 188
Configuring i-mode Settings
Configuring i-mode Settings ・・・・・・・ i-mode setting 189
Using Security Certificates
Manipulating SSL Certificates SSL Certificate Info 192
Using i-motion
i-motion ・・・・・・・・・・・・・・・・・・・・・・・・・・・・・・・・・・・・・・・・・・・ 193
Downloading i-motion Movies from Sites
・・・・・・・・・・・・・・・・・・・・・・・・・・・・・・・・ i-motion Download 193
Using i-Channel
i-Channel ・・・・・・・・・・・・・・・・・・・・・・・・・・・・・・・・・・・・・・・・・・ 195
Displaying the i-Channels ・・・・・・・・・・・・・・・・・・・・・・・・・ 195
Configuring i-Channel Settings ・・ i-Channel Setting 196
173
174 i-mode/i-motion/i-Channel
i-mode
i-mode is a service that allows the display of an i-mode
supporting FOMA terminal (i-mode terminal) to be used with
online services such as site access, Internet access, or
i-mode mail.
・ i-mode is a fee-based service requiring a separate subscription.
・ For details about i-mode, refer to "Mobile Phone User's Guide
[i-mode] FOMA version".
i-mode Menu
Displaying the i-mode Menu
You can use i-mode functions from the i-mode Menu.
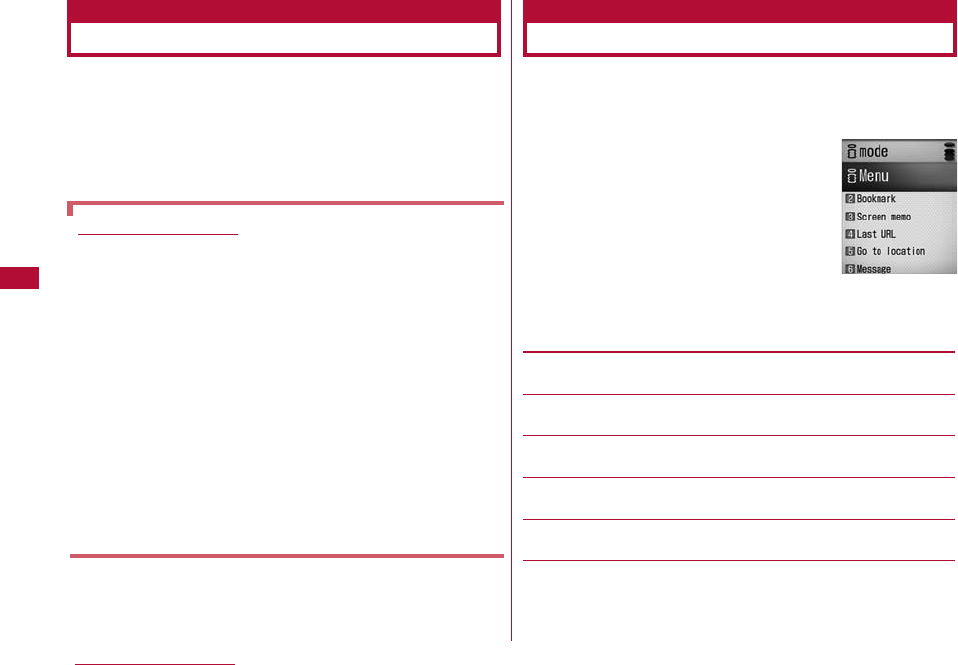
1 The Stand-by display ]I]Perform the following
operations:
[iMenu]
Connect to the i-mode Center.→P175
[Bookmark]
Open the Bookmark folder list screen.→P182
[Screen memo]
Open the Screen memo list screen.→P184
[Last URL]
Open the last viewed i-mode site or web site.→P177
[Go to location]
Enter a URL to connect to the Internet.→P180
[Message]
Display a list of Message R/F.→P166
i-mode menu
screen
Before Using i-mode
・ Contents of sites and web sites are generally
protected by copyright law. Data, such as text or
images you download to the i-mode terminal from
sites or web sites, can be used only for personal
entertainment, but cannot be used, in whole or in part,
as it is or after modification, for sale or redistribution,
without the consent of the copyright holders.
・ If you insert another UIM or turn the terminal power on
without the UIM, depending on the model of the
terminal, still images, videos, melodies, mail
attachments (still images, videos or melodies), screen
memos, or Messages R/F cannot be viewed or played.
・ When a file with UIM restrictions is set as the Stand-
by display or ring tone, the setting will revert to its
default if a different UIM is inserted or the terminal
power is turned on without a UIM.
[i-Channel]
Open the i-channel menu screen.→P196
[Check new messages]
Check whether i-mode mail or Message R/F is stored at the
i-mode Center.→P165
[i-mode setting]
Configure the terminal i-mode functions.→P189
Accessing Sites
You can use various services offered by IP (Information
Providers).
・ Services vary depending on the Information Provider. Some
sites require a separate subscription.
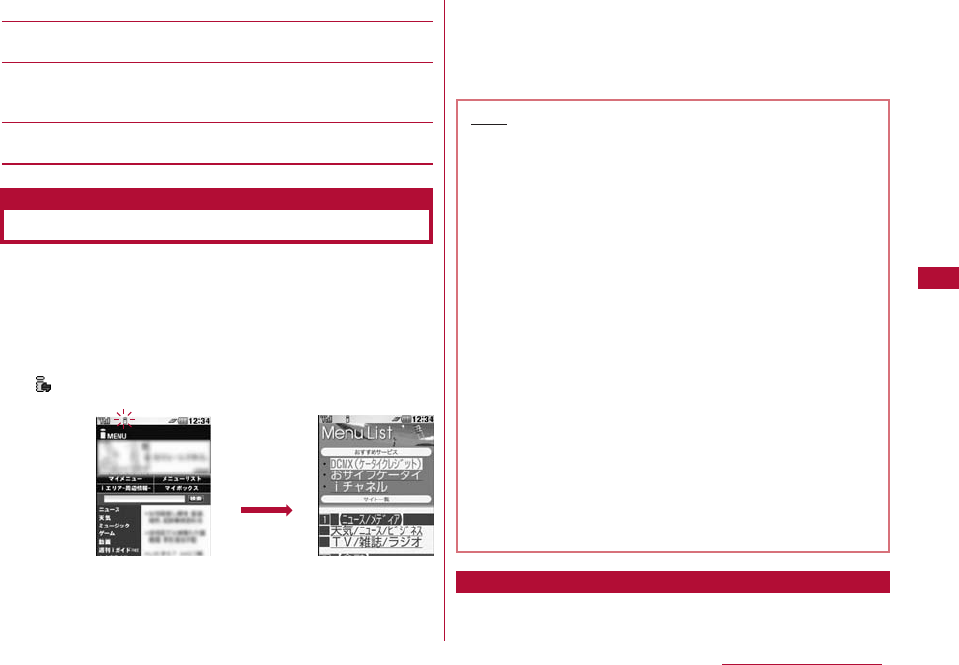
1 i-mode menu screen(P174) ]"iMenu" ]
"メニューリスト/検索(Menu list/Search)"
appears at the top of the screen during i-mode
communication.
・ Press I[Stop] to cancel a page download.
2 Select an item (link)
・ I[Bookmark]: Save the URL of the current page as a
Bookmark.
・ P: Exit i-mode. Select "Yes".
1 From the currently accessed
site ]M[Menu] ]Perform the following operations:
175
i-mode/i-motion/i-Channel
C[Select]
Note
・ When a number appears in front of a linked item,
press the corresponding Dial Key to access the site.
It may not be possible to connect to some sites.
・ Some sites may require the "serial number of your
mobile phone/UIM" to be sent in order to gain access.
The "serial number of your mobile phone/UIM" is sent
to the Information Provider (IP) so that the IP can
recognize you and provide customized information.
The serial number is also used to judge whether the
contents that the IP provides can be used on your
mobile phone. The "serial number of your mobile
phone/UIM card" is sent via the Internet to the IP and
it may be seen by a third party. This action does not
reveal your postal address, age, or sex to the
Information Provider.
・ When information about the music played by your
mobile phone is required from the website, a
confirmation screen for sending music information
appears. When "Yes" is selected, the information
(title, artist name, play date/time) of the music played
by your mobile phone is sent. The music information
to be sent is used by the IP (Information Provider) to
provide you with customized information, etc.
Site Display Screen Sub Menu
176 i-mode/i-motion/i-Channel
[Bookmark]
Save:Save the URL of the current site as a Bookmark. Go to
Step 2 in "Saving in Bookmarks" (P181).
List:Open the Bookmark folder list screen.→P182
Save:Save the current page as a Screen memo.→P181
List:Open the Screen memo list screen.→P182
[Save image]
Save images contained in the current page.→P186
[Show properties]
Show URL:Display the URL of the current page.
Page properties: Display the URL and title of the current page.
Certificates:If the current page is an SSL page, the SSL
certificate is displayed.
[Go to location]
Input address:You can access a web site by entering its URL.
Go to Step 2 (P180) in "Opening Web Site".
URL history:You can visit a web site by selecting an entry in
the URL history. Go to Step 2 in "Using the URL History" (P181).
[Home]
Connect to the URL set as "Home".
[Reload]
If the site is updated, the updated page opens.
[Compose message]
Create i-mode mail with the URL of the open page pasted in the
message text. Go to Step 2 in "Creating and Sending i-mode
Mail" (P131). Select from the following options when a linked
item is selected.
This page:Attach the URL of the current page.
Link page:Attach the URL of the link.
[Change char code]
If characters are not displayed correctly, change the character
encoding.
[Add to phonebook]
Save a phone number or mail address on the web page to the
Phonebook.→P179
[Retry]
Play an animation/Flash movie contained in the current page
from the beginning.
[Settings]
Image display:Set whether to display images contained on the
current page.
Sound effect: Set whether to play sound effects in the Flash
movie contained on the current page.
i-motion type: Specify the i-motion type to download. →P194
Note
<Change character encoding>
・ If characters are not displayed correctly, repeat the
steps. However, after the character code is changed
4 times, the default character encoding returns.
・ Characters may not be displayed correctly even after
repeatedly changing the encoding.
・ The new character encoding is valid only for the open
site.
<Image display>
・ Images may not be displayed correctly even if set to
"Display". In this case, appears.
177
i-mode/i-motion/i-Channel
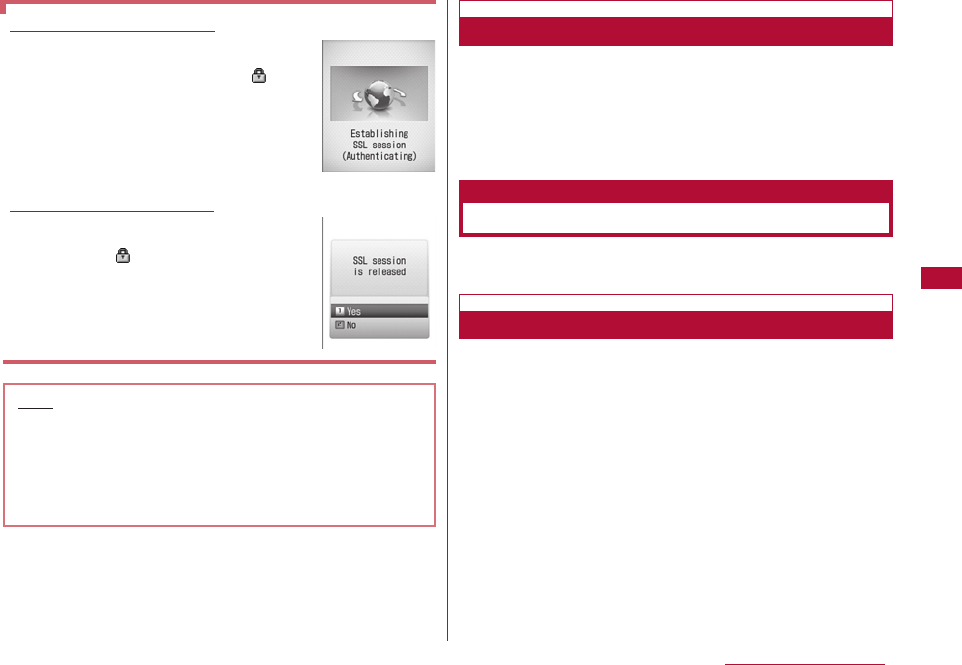
To download an SSL page
The screen to the right opens when you
access an SSL site. After the download is
completed, the SSL page opens and
appears on the top of the screen.
To return to a normal site
The screen to the right opens when you return
to a non-SSL site. Select "Yes" to return to a
normal site, and disappears.
Note
・ If the SSL Certificate has already expired or the site
does not support SSL, a warning indicating that this
site may not be secure may appear. To connect,
select "Yes". However, your personal information
(credit card number or contact address) may not be
sent safely.
Last URL
Open the Most Recently Accessed Web Page
After i-mode is terminated, the URL of the last open page
is saved in "Last URL". You can re-connect to the most
recently accessed page using Last URL.
1 i-mode menu screen (P174) ]"Last URL" ]
C[Connect]
Operations on i-mode/Web Sites
This section describes basic operations on i-mode/Web
sites (pages).
Going Back to the Previous Page/Going
The FOMA terminal temporarily saves the displayed site
data in a Cache.
Data saved to the cache can be displayed, without
revisiting the site, by pressing J.
・ However, the site will be reloaded if the data is larger than the
cache size, or if the site requires the latest information always
be loaded.
・ Entered characters or settings at the site will not be stored in
the cache.

・ Terminating i-mode deletes data from the cache.
Example: Pages are displayed in the order of Screen
"A" → "B" → "C" → "B" → "D"
If opening the pages in the order "A" → "B" → "C", then returning
to "B", and opening "D", "C" is deleted from the cache. Pressing
Jdisplays "B" ⇔ "D".
Selecting Links or Items
You may need to perform operations using the following
items while connected to i-mode. For details, refer to
"Mobile Phone User's Guide [i-mode] FOMA version".
178 i-mode/i-motion/i-Channel
Name Display Details
example
Radio button You can select only
1 item.
Check box You can select
multiple items.
Text box You can enter text.
Select a text box to
open the text entry
screen.
Pull down menu Select an item from
a list of options.
Click pull down
menus to display
the items.
(Not selected)
(Selected)
(Not selected)
(Selected)
Note
<Text Box>
・ You can enter a Phonebook entry or your own number
saved in the FOMA terminal into a text box by
performing the following steps: M[Menu] ]"Quote" ]
"Phonebook"/"Own number"
Note
・ Page navigation may differ when a Flash movie is
displayed.
…Paging order
LL
L
…Reverse paging order starting from
screen "D"
Selecting Links or Items
179
i-mode/i-motion/i-Channel
The FOMA terminal supports Flash, an animation
technology using images and sounds. You can access
sites that provide various kinds of animations using the
terminal. You can also download a Flash file and set it for
the Stand-by display.
You can save a phone number or mail address displayed at
a site to the Phonebook.
1 From the currently accessed site ]Move the cursor to
a phone number/mail address ]M[Menu] ]"Add to
ph.book" ]"Yes"
Go to Step 2 in "Saving Contacts to the Phonebook from
Received or Dialed Calls" (P85).
Frequently accessed sites can be saved in My Menu for
quick connection.
・ Up to 45 entries can be saved in My Menu.
・ Some sites cannot be saved in My Menu.
1 Display a site to save ]Select "マイメニュー登録(Store
in My Menu)"
・ Item names may vary depending on the site.
2 Select i-mode password text box ]Enter the i-mode
password ]"OK"
・ The entered i-mode password is masked by asterisks ":".
・ i-mode password→P180
Displaying Flash Movies
Note
・ Even if a Flash file is displayed, the animation may
not work correctly.
・ Some Flash files use data about your FOMA terminal.
To allow Flash files to use the data, set "Use phone
info" to "Yes".
・ If the Flash movie contains audio, it will be played in
the volume set from the Flash playback screen
(P242). To turn off sound effects, set "Sound effect"
to "OFF".→P189
・ If you play a Flash file with vibration set, the terminal
vibrates regardless of the "Sounds&Vibration" (P100)
settings on the terminal.
・ Flash movies are not displayed if "Images" is set to
"OFF". →P190
・ Flash movies may appear differently depending on the
location they are saved, the Data box, or Screen
memo.
・ Flash sound effects are not played if they are set to
the Stand-by display / Call Display.
Adding a Mail Address/Phone Number to
Phonebook
Saving Entries in My Menu
My Menu
Note
・ When you subscribe to a fee-based site in "メニューリ
スト (Menu list)", the site is added to My Menu
automatically.
180 i-mode/i-motion/i-Channel
1 i-mode menu screen (P174) ]"iMenu" ]"English
iMenu" ]"My Menu" ]Select the site to access
"i-mode Password" (4 digit) is required to subscribe to and
unsubscribe from message services or fee-based i-mode
sites, or configure mail settings. The password is set to
"0000" by default. Change it to a number of your own
choice. Do not reveal your i-mode password to others.
1 i-mode menu screen(P174) ]"iMenu" ]"English ]
"Options" ]"Change i-mode Password"
2 Select the "Current Password" text box ]Enter the
i-mode password (4 digits)
3 Select "New Password" text box ]Enter a new i-mode
password (4 digits)
4 Select the "New Password (Confirmation)" text box ]
Enter the new i-mode password (4 digits)
5 "Select"
You can view a web site by entering its URL. A URL
consists of half-pitch alphanumeric characters and
symbols.
1 i-mode menu screen (P174) ]"Go to location"
2 "Input address" ]Enter the URL ]C[Set]
・ Up to 256 half-pitch characters can be entered.
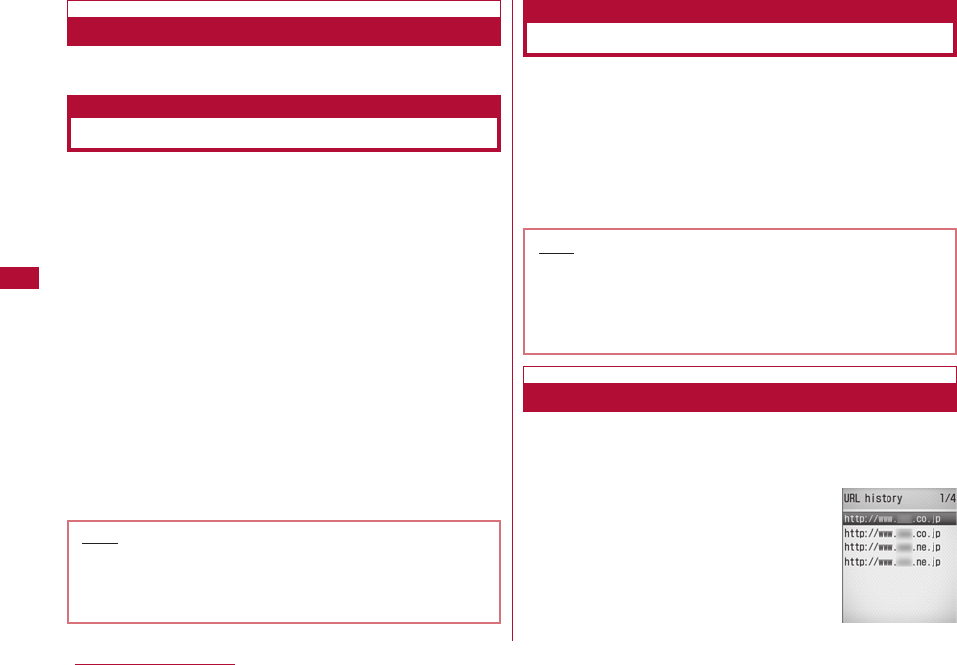
Up to 10 previously entered URLs are stored in the URL
History. You can access a web site by using the URL
history.
1 i-mode menu screen (P174) ]"Go
to location" ]"URL history"
Accessing a Site from My Menu
Changing the i-mode Password
Change i-mode Password
Opening a Web Site
Internet Access
Note
・ If you forget the i-mode password, you need to bring a
picture ID such as your driver's license to a service
counter such as a docomo shop to have the i-mode
password reset to "0000".
Note
・ Web sites that do not support i-mode may not be
displayed correctly.
・ When the same URL as a history entry is accessed,
the old URL is overwritten and the entry is shown as
the latest URL in the history.
Using the URL History
URL history
list screen
2 Select the URL to access
1 URL history list screen (P180) ]Move the cursor to a
URL history entry ]M[Menu] ]Perform the following
operations:
[Connect]
Connect to the selected entry in the URL history.
[Edit URL]
Edit and connect to the URL of the selected history entry.
]
Edit URL
]
C[Set]
[Delete]
Delete one:Delete the selected URL history entry.
Del. selected:Select and delete an entry in the URL history.
]
Place check marks next to the URL history entries to delete
]
I[Done]
]
"Yes"
・ Press M[Menu] and select "Mark all" or "Unmark all"
Delete all:Delete entire URL history.
]
Enter the security code
]
"Yes"
[Compose message]
Create i-mode mail with the URL of the selected history entry
already pasted in the message text. Go to Step 2 in "Creating
and Sending i-mode Mail" (P131).
Save frequently accessed sites or web sites in Bookmarks
to display the page quickly.
・ Up to 100 URLs can be saved in the Bookmarks folder.
1 From the currently accessed site ]I[BK.mark]
2 Edit the title ]I[Done] ]Select a destination folder
・ If there is already the same URL saved, a confirmation
screen to overwrite appears. Select "Yes".
181
i-mode/i-motion/i-Channel
Note
・ If more than 10 URLs are saved in the history, the
oldest URL will be overwritten first.
・ The URL visited will be re-displayed at the top of the
URL history.
URL History List Screen Sub Menu
Note
・ Up to 256 half-pitch characters can be entered for a
URL saved as a Bookmark.
・ Up to 12 full-pitch or 24 half-pitch characters can be
saved for a Bookmark title.
・ If the maximum number of Bookmarks has been
saved, a confirmation screen appears. Select "Yes" ]
Select a folder ]Select Bookmark to delete ]Select
a destination folder.
Saving and Quickly Displaying a
Site/Homepage
Bookmarks
Saving in Bookmarks
182 i-mode/i-motion/i-Channel
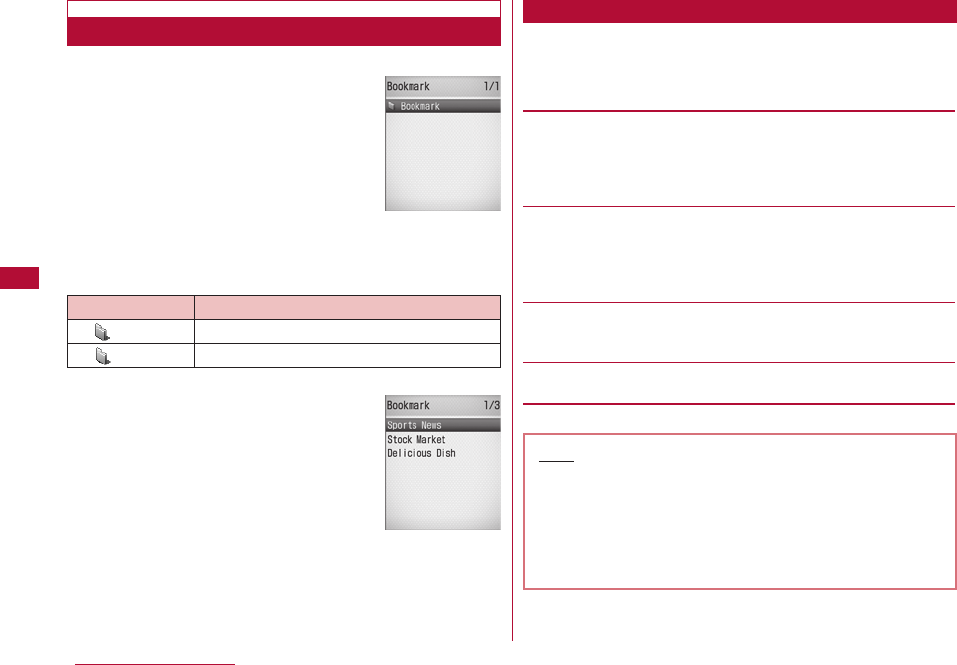
1 i-mode menu screen (P174) ]"Bookmark"
・ I[Add]: You can add a folder.
Up to 16 full-pitch or 32 half-pitch
characters can be entered for a
folder name.
■ Icons displayed on the Bookmark folder list screen
2 Select a Folder
3 Select the Bookmark URL to access
・ I[URL]: Display the URL.
1 Bookmark list screen (P181) ]Move the cursor to
folder ]M[Menu] ]Perform the following
operations:
[Manage folder]
Create folder:You can add a folder. Up to 16 full-pitch or 32
half-pitch characters can be entered for a folder name.
Rename folder:Edit the selected folder name.
Sort folder:Sort the selected folders.
[Delete]
Delete one:Delete the selected folder.
]
Enter the security code
]
"Yes"
Delete all:Delete all Bookmarks.
]
Enter the security code
]
"Yes"
[Send all Ir data]
Send all bookmarks via Infrared.(P259)
]
Enter the security code
]
Enter the password
]
"Yes"
[Memory status]
Display the number of saved bookmarks.
Accessing Web Sites from Bookmarks
Icon Description
(Gray) "Bookmark" (pre-installed folder)
(Blue) User defined folder
Bookmark list
screen
Bookmark
Folder List
Bookmark Folder List Screen Sub Menu
Note
<Rename folder/Sort folder/Delete 1 folder>
・ The pre-installed "Bookmark" folder cannot be
renamed, moved, or deleted.
<Delete one>
・ If there is a bookmark in the folder, a confirmation
appears. Select "Yes" to delete.
1 Bookmark list screen (P181) ]Move the cursor to a
bookmark ]Select the bookmark ]
M
[Menu] ]
Perform the following operations:
[Connect]
Connect to the selected bookmark site.
[Edit title]
Edit the title or URL of the selected Bookmark.
]Edit the title or URL ]I[Done]
[Move]
Move this:Move the selected bookmarks to another folder.
Move selected:Select and move a bookmark.
]
Place check marks next to the bookmarks to
move
]
I[Done]
]
Select a destination folder
]
Press M[Menu] and select "Mark all" or "Unmark all"
Move all:Move all bookmarks in the folder to another folder.
[Delete]
Delete one:Delete the selected bookmark.
Del. selected:Select and delete bookmarks.
]Place check marks next to the bookmarks to delete ]
I[Done] ]"Yes"
・ Press M[Menu] and select "Mark all" or "Unmark all".
Delete all:Delete all bookmarks.
]Enter the security code ]"Yes"
[URL]
Display the URL of the selected Bookmark.
[Copy URL]
Copy the URL of the selected Bookmark.
[Compose message]
Create i-mode mail with the selected bookmark attached. Go to
Step 2 in "Creating and Sending i-mode Mail" (P131).
[Ir exchange]
Send:Send the selected bookmark via Infrared.
Send all:Send all bookmarks in the folder via infrared.(P259)
]Enter the security code ]Enter the password ]"Yes"
[Memory status]
Display the number of saved bookmarks.
You can save the currently open page as a screen memo.
Saved Screen memo pages can be opened without
connecting to i-mode.
・ Up to 50 Screen memos can be saved. However, fewer pages
can be saved if the saved pages are long.
・ Up to 100 Kbytes per page can be saved.
1 From the currently accessed site ]M[Menu]
]"Screen memo" ]"Save" ]"Yes"
183
i-mode/i-motion/i-Channel
Bookmark Folder List Screen Sub Menu
Save Site Contents
Screen Memo
Saving Screen Memos
Note
・ If the maximum number of Screen memos have
already been saved, a prompt appears to ask whether
you want to select and delete a memo. To select,
choose "Yes" ]and select a Screen memo to delete.
184 i-mode/i-motion/i-Channel
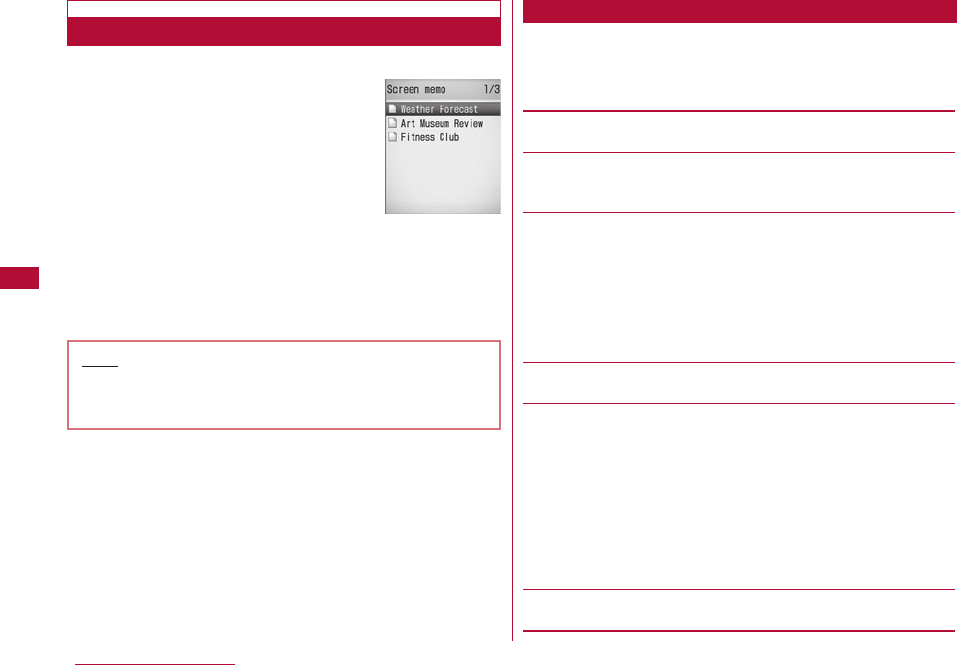
1 i-mode menu screen (P174) ]"Screen memo"
2 Select the Screen memo to view
The Screen memo detail screen is displayed.
・ I[URL]: Display the URL.
1 Screen memo list screen(P184)
]
Move the cursor to
a Screen memo
]
M[Menu]
]
Perform the following
operations
[Display]
View the selected Screen memo.
[Edit title]
Edit the title of the selected Screen memo. Up to 12 full-pitch or
24 half-pitch characters can be entered for a title.
[Delete]
Delete one:Delete the selected Screen memo.
Del. selected:Select and delete a Screen memo.
]Place check marks next to the Screen memos to delete ]
I[Done] ]"Yes"
・ Press M[Menu] and select "Select all" or "Release all".
Delete all:Delete all bookmarks.
]Enter the security code ]"Yes"
[URL]
Display the URL of the selected Screen memo.
[Protect on/off]
One on/off:Disable/Enable the protection for the selected
Screen memo.
Select on/off:Select a Screen memo and protect or unprotect
it.
]Place check marks next to the Screen memos to protect ]
I[Done]]"Yes"
・ Press M[Menu] and select "Select all" or "Release all".
Unprotect all:Unprotect all Screen memos.
]Enter the security code ]"Yes"
[Memory status]
Display the number of Screen memos
Viewing Screen Memos
Screen memo
list screen
Note
・ The information saved in a Screen memo is from the
time it was saved. The memo may not contain the
latest information.
Screen Memo List Screen Sub Menu
1 Screen memo details screen
]
M[Menu]
]
Perform
the following operations
[Save image]
Save an image contained in the Screen memo. Go to Step 2 in
"Saving Images from a Site or Screen memo" (P186).
[Show properties]
URL:Display the URL of the displayed Screen memo.
Page properties:Display the URL and the title of the displayed
Screen memo.
Certificates:If the displayed Screen memo is an SSL page, the
SSL certificate is displayed.
[Add to Phonebook]
Save a phone number or mail address on the web page to the
Phonebook.→P179
[Retry]
Play a Flash movie or an animation contained in the Screen
memo from the beginning.
[Sound effect]
Set whether to play sound effects of the Flash movie contained
in the displayed Screen memo.
On:The Flash movie sound effects will be played.
Off:The Flash movie sound effects will not be played.
[Edit title]
Edit the title of the displayed Screen memo. Up to 12 full-pitch or
24 half-pitch characters can be entered for a title.
[Delete]
Delete the Screen memo that is currently displayed.
[Protect on/off]
Protect or unprotect the displayed Screen memo.
185
i-mode/i-motion/i-Channel
Screen Memo Detail Screen's Sub Menu
Note
<Delete>
・ Protected Screen memos cannot be deleted.
Unprotect them before deleting.
<Protect on/off>
・ Up to 10 Screen memos can be protected. The
number of Screen memos that can be protected may
vary depending on the data size.
You can download files or data such as images or melodies
from sites and save them to the FOMA terminal.
You can save images contained in the displayed site or
Screen memo to the terminal.
・ Obtained images will be saved in the "i-mode" folder in "My
Picture" of the "Data box".
・ The format types of image file available to save are JPEG and
GIF of up to 100Kbytes size.
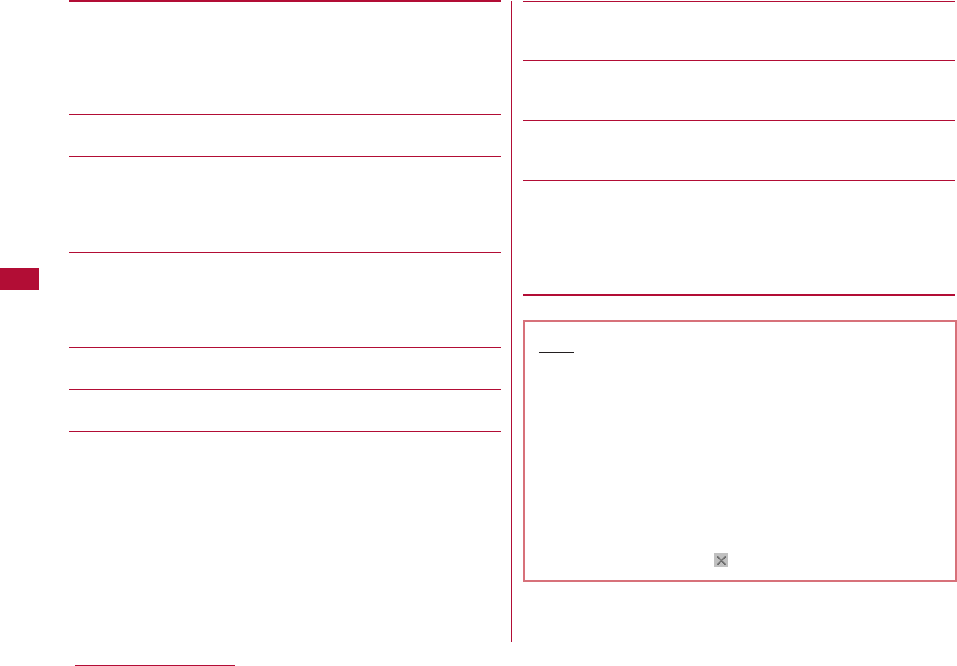
Example: To save the image displayed on a web page
1 From the currently accessed site ]M[Menu] ]"Save
image"
2 "Select image" ]Select an image
■To save the background image from a site
Select "Save background".
3 "Yes"
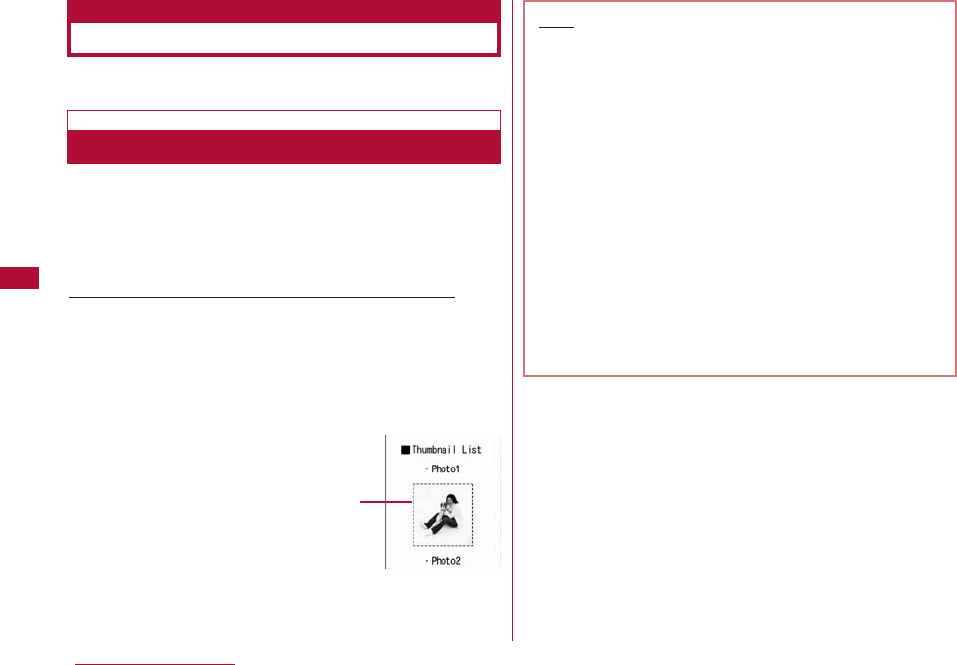
186 i-mode/i-motion/i-Channel
A savable image has a
dotted border.
Note
・ Images cannot be saved if "Images" is set to "OFF".
・ Each image file name must be unique in the same
folder.
・ Some images saved on the FOMA terminal may not
properly display even if they are displayed on the site.
・ Some obtained images may not be displayed correctly.
・ Image files in JPEG, GIF, or Progressive JPEG*
formats cannot be displayed after they are saved if
the size (pixels) exceeds the following. However, they
can be output to external devices such as being
attached to mail.
- JPEG image files that exceed 1600x1200 pixels
- GIF or Progressive JPEG image files that exceed
800x600 pixels
* Progressive JPEG is an image format that is used in
the Internet. The image looks coarse at the beginning
of the download and the image sharpness improves
as the download progresses.
Downloading Data from Sites
Saving Images from a Site or Screen Memo
Save image
187
i-mode/i-motion/i-Channel
・ Downloaded melodies will be saved in the "i-mode" folder in
"Melody" of the "Data box".
1 From the currently accessed site ]Select a melody
After the download completes, a confirmation appears.
2 "Save"
Play:Play the downloaded melody.
File property:Display information about the downloaded
melody.
Back:Return to the site without saving the melody.
You can download templates for Deco-mail.
・ Downloaded templates are saved in the "Template" (P138) of
the Mail menu.
1 From the currently accessed site ]Select a template
After the download completes, a confirmation appears.
2 "Save"
Preview:Display the downloaded template.
File property:Display information about the downloaded
template.
Compose mail:Use a downloaded template to create
Deco-mail.
Back:Return to the site without saving the template.
3 I[Done]
・ To rename and save a file, select C[Edit] ]Rename the
file ]Press I[Done].
・ Downloaded dictionaries will be saved in "Download Dictionary"
(P303).
・ Up to 10 dictionaries can be saved. However, no more than five
dictionaries are available at one time.
1 From the currently accessed site ]Select a dictionary
After the download completes, a confirmation appears.
Note
・ Download may not be possible depending on the site.
・ Each melody file name must be unique in the same
folder.
・ Some downloaded melodies may not be played
correctly.
・ Some downloaded melodies may have a section to be
played already specified. These melodies will be
played entirely in the playback, however, when the
melody is set for a ring tone, only the specified part is
played.
Downloading Melodies from Sites
i-melody
Downloading Templates from a Site
Download Templates
Downloading Dictionaries from a Site
Download Dictionaries
188 i-mode/i-motion/i-Channel
2 "Save"
View:Display information about the downloaded dictionary.
Back:Return to the site without saving the dictionary.
3 Select a saving destination
・ If you are only using four or fewer dictionaries, a
confirmation whether to enable the downloaded dictionary
appears. Select "Yes" to enable it.
When a phone number, mail address or URL is highlighted
on a web page or in mail, you can use it to easily make a
call, send i-mode mail or access the web site.
・ Phone To, AV Phone To, Mail To, or Web To function in mail
sent from a PC may not be available.
Make a voice call (Phone To)/video call (AV Phone To) to
the highlighted phone number at a site or in mail.
1 Select a phone number ]Perform the following
operations
Make Call:Make a voice call.
Video phone:Make a video call.
Copy:Copy the selected phone number.
Add to phonebook:Add the selected phone number to the
Phonebook.
Go to Step 2 in "Saving Contacts to the Phonebook from
Received or Dialed Calls" (P84).
You can send mail to an Email address highlighted on a
site page or in mail.
1 Select a mail address
・ Go to Step 3 in "Creating and Sending i-mode Mail"
(P131).
Access a URL highlighted on a site page or in mail.
1 Select a URL
・ When you access a URL shown in mail, press
C[Connect] after Step1.
Using the Phone To/Mail To/
Web To/i-αppli To Functions
Phone To/Mail To/Web To/i-αppli To function
Note
・ Using Downloaded Dictionaries→P303
Note
・ The Phone To/AV Phone To function may not be
available depending on the site.
Phone To/AV Phone To Function
Mail To Function
Web To Function
Note
・ The Mail To function may not be available depending
on the site.
You can start i-αppli from a URL highlighted on a site or in
i-mode mail.
・ If a check mark is not placed next to "Site i-αppli to"(P233) or
"Mail i-αppli to" in "Set i-αppli to", the i-αppli will not start.
1 Select i-αppli information ]"Yes"
Set the functions for i-mode or Message R/F.
Network
1 i-mode menu screen (P174) ]"i-mode setting" ]
"Communication" ]Perform the following operations:
[Connection timeout]
Set the time until the connection is automatically terminated if
no response was returned due to network traffic.→P191
[Check new messages]
Specify request items when using "Check new messages".
]
Place check marks next to the items to check
]
I[Done]
Display
1 i-mode menu screen (P174) ]"i-mode setting" ]
"Display" ]Perform the following operations
[Images]
Set whether to display images or Flash movies contained on site
pages or Screen memos.
[Sound effect]
Set whether to play sound effects of Flash movies contained on
sites or Screen memos.
[Use phone info]
When a Flash image is displayed on a site or in a Screen memo,
information saved on the terminal may be required. Set whether
to use the information from the phone in this case.
[Font size]
Set the font size for sites, Screen memos, or message text in
Message R/F.
189
i-mode/i-motion/i-Channel
i-αppli To Function
Note
・ The Web To function may not be available depending
on the site.
・ How a URL is displayed may vary depending on the
site.
・ The Web To function may be available using a
highlighted item other than a URL.
Note
・ Some i-αppli, that immediately start directly from the
site using the i-αppli To function, may not be saved.
Configuring i-mode Settings
i-mode setting
Configuring Network Settings
Configuring Display Settings
190 i-mode/i-motion/i-Channel
[Scroll]
Set the number of lines scrolled with each
H
press on sites,
Screen memos, or Message R/F.
[Message list]
Set the display method of the Message R/F list screen.
1 line:Display only the subject in one line.
2 lines:Display the subject and received date and time in two
lines.
[Auto-display]
Set how Messages R/F are displayed automatically.→P165
[Melody auto play]
Set whether to automatically play a melody when a Message
R/ F is displayed.→P165
Home
To set the home URL, select "Home" from the site display
screen sub menu.
1 i-mode menu screen (P174) ]"i-mode setting" ]
"Home"
2 Select "Enable" ]Select the "http" field ]Enter the
URL ]I[Done]
Others
1 i-mode menu screen (P174) ]"i-mode setting" ]
"Others" ]Perform the following operations:
[Check settings]
Check the options set in "i-mode setting".
[Reset settings]
Reset the options set in "i-mode setting" to the default.
]
Enter the security code
]
"Yes"
Note
<Images>
・ Images may not be displayed correctly even when
"Images" is set to "ON". In this case, appears.
<Sound effect>
・ Even if "Sound effect" is set to "ON", some sound
effects may not sound depending on the Flash movie.
<Use phone info.>
・ When this option is set to "Yes", the battery level,
signal strength, Date & Time, Ring Volume,
Language, and terminal model information may be
sent to the IP (Information Provider) via the Internet,
and a third party may intercept the information.
Configuring the Home Setting
Configuring Other Settings
Note
・ If "Home" is set to "Disable", even selecting "Home"
does not open the specified page. The URL entered in
the "http://" field will remain intact.
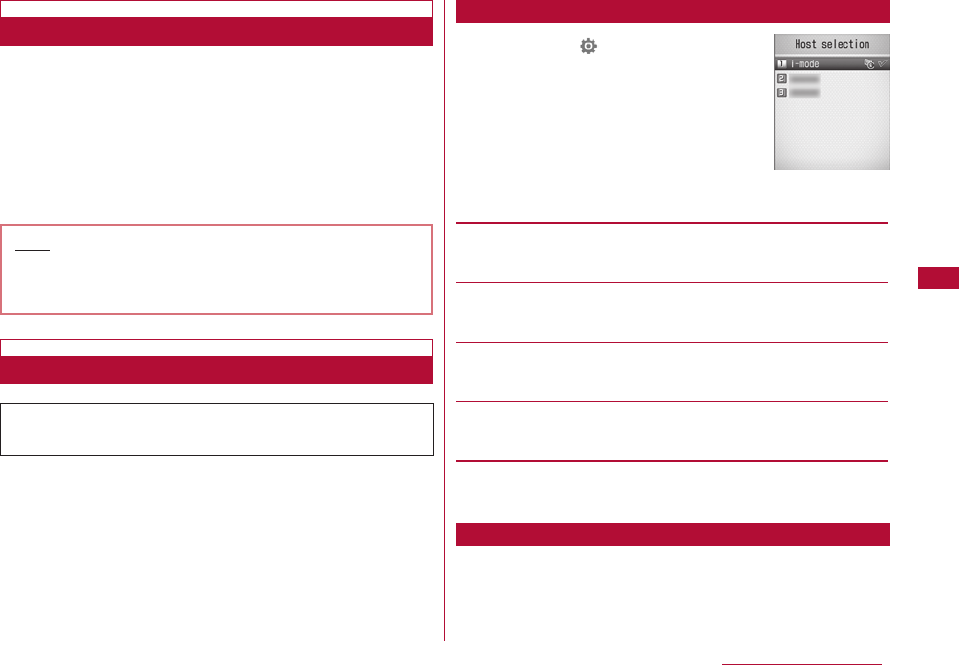
Connection timeout
Set the time until the connection is automatically
terminated if no response was returned due to network
traffic.
1 i-mode menu screen (P174) ]"i-mode setting" ]
"Communication" ]"Connection timeout" ]"60
seconds"/"90 seconds"/"Unlimited"
・ If "Unlimited" is selected, the connection will not be
automatically terminated.
Host Selection
Set an APN (Access Point Name) when you use services
other than i-mode (DOCOMO). i-mode and i-mode mail
become unavailable when you connect to an APN other
than DOCOMO.
1 M[Menu]
]
(Settings)
]
"International roaming"
]
"Network"
]
"Host selection"
2 I[Add]
]
Enter the security code
]
Perform the following operations:
[Host name]
Enter the host name within 15 full-pitch or 30 half-pitch
characters.
[Host number]
Enter the number of the access point within 99 half-pitch
alphanumeric characters.
[Host address]
Enter the host address within 30 half-pitch alphanumeric
characters.
[Host address 2]
Enter the host address for i-channel within 30 half-pitch
alphanumeric characters.
3 I[Done]
1 Host selection screen(P191)
]
Select the access
point to change
191
i-mode/i-motion/i-Channel
Setting the Connection Timeout
Changing the Access Point from i-mode
Note
・ Even if this option is set to "Unlimited", the
connection attempt may be terminated because of
the signal strength.
* If you use the i-mode service of DOCOMO, do not
change the access point.
Adding Access Points
Changing the Access Point
Host selection
screen
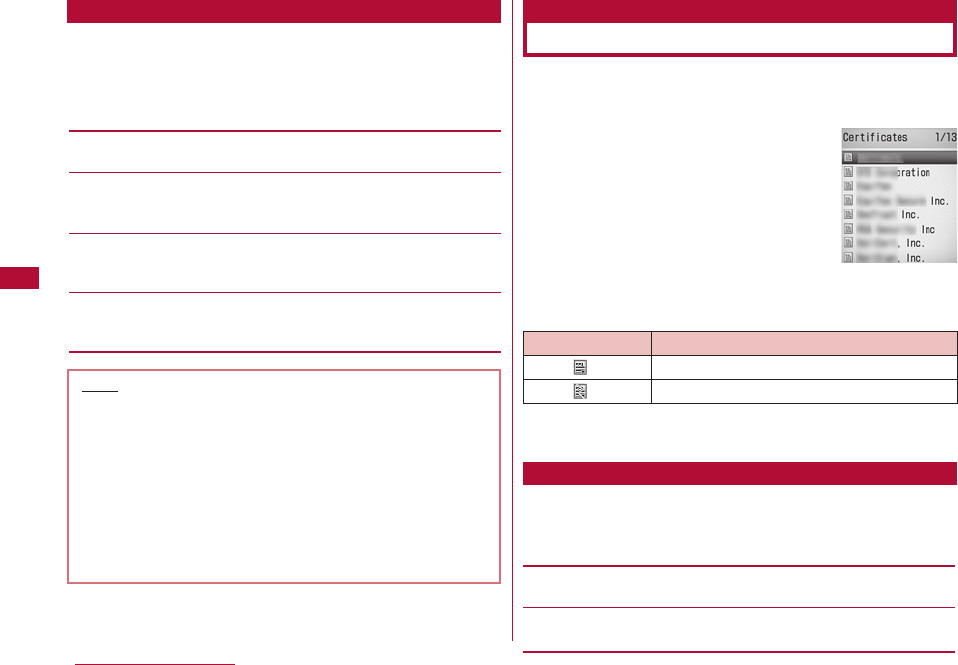
1 Host selection screen (P191)
]
Move the cursor to an
access point
]
M[Menu]
]
Perform the following
operations:
・ This option is not available while "i-mode" is selected.
[Add new]
Add a new access point.→P191
[Edit]
Edit the access point settings.
]Enter the security code ]Edit the settings ]I[Done]
[Delete]
Delete the selected access point.
]"Yes" ]Enter the security code
[View]
Display the selected access point settings.
・ C[Edit]: Edit the access point settings.
You can view an SSL Certificate, or set a certificate valid
or invalid.
1 i-mode menu screen (P174)
]
"i-mode
setting"
]
"Certificates"
・ C[Select]: Display the contents of the
selected certificate.
■ Icons displayed on the Certificate list screen
2 Move the cursor to a certificate
]
I[Invalid] / [Valid]
1 Certificate list screen (P192)
]
Move the cursor to a
certificate
]
M[Menu]
]
Perform the following
operations:
[Certificate Info]
Display detailed information about the selected certificate.
[Valid/Invalid]
Set the selected certificate to valid or invalid.
192 i-mode/i-motion/i-Channel
Host Selection Screen Sub Menu
Note
・ Pake-Hodai/Pake-Hodai Full/Pake-Hodai Double is not
applied to packet communication with an APN other
than "i-mode".
・ When an access point is changed, the i-Channel
ticker does not appear. When the information is
updated or you download the latest information by
pressing Q in Standby, the ticker will appear
automatically.
・ If the current access point is deleted, "i-mode" will be
set as the default host.
Manipulating SSL Certificates
SSL Certificate Info
Certificate List Screen Sub Menu
Certificate list
screen
Icon Description
Valid certificate
Invalid certificate
i-motion movies are videos with graphics and audio. They
can be obtained from i-motion sites, played, saved, and set
as the Stand-by display or a ring tone, etc.
There are 2 types of i-motion movies.
■ Standard type
There are 2 formats of the Standard type.
1The format in which an i-motion movie can be played after
download (Up to 500KB)
2The format in which an i-motion movie can be played during
the download (Up to 500KB)
・ Some standard type i-motion movies cannot be saved.
■ Std/Streaming types
You can play this type of i-mode movie while it is being
downloading. Up to 2MB of i-motion movie can be played. The
data will be deleted after playback. It cannot be saved on the
FOMA terminal.
Up to 1000 i-motion movies can be saved. However, the
savable number depends on the amount of the data.
・ Downloaded i-motion movies are saved in the "i-mode" folder in
"i-motion" of the "Data box".
1 From the currently accessed site
]
Select an imotion
movie
・ When "i-motion auto play" is set to "ON", an i-motion movie
is played automatically after being downloaded.
Operations during Playback→P250
■Std/Streaming-Type i-motion movies
・ The Playback confirmation screen opens. Select "Yes"
to play the i-motion movie while it is being downloaded.
・ When "i-motion type" is set to "Standard type", you
cannot play the i-motion movie during the download.
Switch the type to "Std/Streaming", and download the
imotion movie again.→P194
2 After the downloadQ
]
"Save"
Play:Play a downloaded i-motion movie.
File property:Display detailed information about the
downloaded i-motion movie.
Back:Return to the Site display screen without saving the
i-motion movie.
193
i-mode/i-motion/i-Channel
Certificates used for SSL communication
These certificates are issued by an authentication
company, and are saved on the terminal by default.
i-motion
i-motion Types
Note
・ i-motion movies that can be downloaded and played
are in the MP4 (Mobile MP4) format. i-motion movies
in the ASF format cannot be downloaded or played.
Downloading i-motion Movies from
Sites
i-motion Download
194 i-mode/i-motion/i-Channel
When a ticker is set in an i-motion movie, the ticker is
displayed during playback. If a phone number, a mail
address, or an URL is included in the ticker, you can use
Phone To, AV Phone To, Mail To, or Web To functions after
the ticker is finished.
1 After an i-motion playback is finished
]
Select an item
i-motion Auto Play
Set whether to play an i-motion movie automatically when
it is downloaded from a site or mail.
1 i-mode menu screen (P174)
]
"i-mode setting"
]
"i-motion"
]
"i-motion auto play"
]
"ON"/"OFF"
i-motion type
Set the type of the new i-motion movie to download from a
site.
1 i-mode menu screen (P174)
]
"i-mode setting"
]
"i-motion"
]
"i-motion type"
]
Select the type
Standard type:Only standard-type i-motion movies will be
downloaded.
Std / Streaming:The standard or streaming type i-motion
movies will be downloaded.
Note
・ Depending on the connected site or i-motion movie,
some i-motion movies may not be downloaded, or
played during the download.
・ If you play a movie while downloading it, the movie
may stop playing or the picture may become distorted
due to signal strength.
・ Each i-motion file name must be unique in the same
folder.
・ Some i-motion movies cannot be saved on the FOMA
terminal.
・ Some i-motion movies have playback restrictions.
appears for an i-motion movie with fixed number of
plays set. appears for the i-motion movie with the
playback expiration or playback restrictions set.
Expired i-motion movies cannot be played.
・ Some downloaded i-motion movies may not play
correctly.
When a Link is Set in Ticker
Setting Whether to Play an i-motion Movie
Automatically
Setting Whether to Play an i-motion Movie
Automatically
Setting Whether to Play an i-motion Movie
Automatically
Specifying a Type of i-motion Movie to
Download
Note
・ Even if this option is set to "OFF", streaming-type
i-motions will be automatically played.
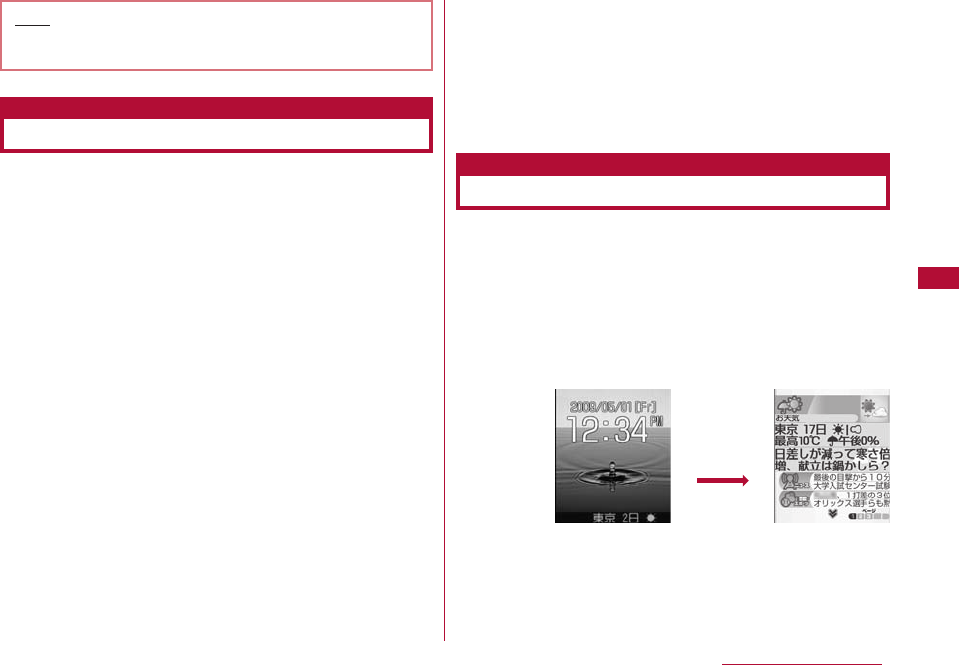
195
i-mode/i-motion/i-Channel
i-Channel is a service through which provides information
such as news or weather forecasts to i-Channel compatible
terminal. (Only Japanese)
The latest updated information receives automatically that
is displayed in a ticker on the Stand-by display. Press Q
to open the channel list with the updated information.
Moreover, you can obtain useful information by selecting
favorite channels from the channel list. The view of
i-Channel list→P195
・ i-Channel is a fee-based service requiring a separate
subscription (an i-mode contract is necessary for this
subscription).
There are 2 types of i-channel "Basic channels" provided by
DOCOMO and "Favorite channels" provided by IP
(Information Service Provider). "Basic channels" are
provided by DOCOMO. They are saved by default and
immediately become available upon subscription to
i-Channel. Packet communication charges do not apply to
automatic update of information delivered to "Basic
channels". "Favorite channels" are provided by an IP
(Information Provider) other than DOCOMO and are
available when you register your favorite channels. The
i-Channel service fee does not include Packet
communication charges for automatic update of
information delivered to "Favorite channels". However,
"Basic channels" and "Favorite channels" require packet
communication charges for viewing detailed information
from a channel list, in addition to the i-Channel service fee.
The i-Channel service charge does not include the packet
communication charges for auto-updating the "Basic
channels" information that is delivered during International
Roaming.
・ For details about i-Channel, refer to "Mobile Phone User's Guide
[i-mode] FOMA version".
If you subscribed to i-Channel, information appears in a
ticker on the Stand-by Display as the information is
received.
・ To display the ticker automatically , set "Ticker display" to "ON".
→P196
・ When Public mode (Drive mode) is set, the ticker will not be
displayed.
1 Stand-by display
]
Q
2 Select a channel
The site is connected and detail information appears.
・ L:The Channel list screen returns.
Note
・ To download streaming type i-motion movies,
"Std/Streaming" must be set.
i-Channel
Displaying the i-Channels
Q
Ticker
Ticker
Channel list
You can set whether to display the ticker on the Stand-by display
or to set the ticker display speed. All i-channel information on the
FOMA terminal can be deleted.
1 I
]
"i-Channel"
]
Perform the following operations:
[i-Channel list]
Open the Channel list screen.
[Ticker setting]
Ticker display:Set whether to display a Ticker on the Stand-by
display.
Ticker speed:Set the ticker display rate.
[Reset i-Channel]
Delete the i-Channel data downloaded in FOMA terminal to reset
Ticker Display to its default status when purchasing.
Note
・ While information is being received, blinks.
・ Even when the information arrives, a ring tone does
not sound nor does the terminal vibrate. The
illumination does not light/blink either.
・ Information may not be received when the terminal
power is turned off, while the terminal is out of
service area, or when the signal reception is weak.
Press Qin Stand-by to receive information. Then the
obtained information will be displayed automatically in
the ticker on the Stand-by display. Also, information
may not be received if the default settings are kept.
In this case, hold down Q. The information will be
received and it will be displayed in the ticker on the
Stand-by display automatically.
・ In some conditions, information may be received only
when a channel list is displayed.
・ If you change the access point in "Host selection" of
"i-mode setting", the access point of i-Channel is also
changed. (Normally, you do not need to change the
settings).
・ The ticker will not appear after i-Channel is canceled.
・ When an i-motion movie is set to the Standby display,
the ticker will not appear during playback.
・ There may be a warning of failure to acquire channel
information if:
- the i-Channel access point has been changed
- The UIM has been replaced
Configuring i-Channel Settings
i-Channel Setting
Note
<Ticker display>
・ If you cancel the i-mode service before canceling
i-channel, the "Ticker display" setting remains.
196 i-mode/i-motion/i-Channel
Camera
You have no right to copy, modify, or distribute contents such as
text, images, music, or software downloaded from web sites on
the Internet, or images captured by the cameras of this product
without permission from the copyright holder except when the
copy or quote is for personal use that is allowed under Copyright
Law. Note that it may be prohibited to capture or record live
performances or exhibitions even for personal use. Refrain from
taking portraits of other persons and uploading such portraits to
websites without their consent, as this violates portrait rights.
Please be considerate of other people's privacy when
capturing and sending pictures using camera-equipped
mobile phones.
Before Using the Camera ・・・・・・・・・・・・・・・・・・・・・・・・・ 198
Capturing Still Images ・・・・・・・・・・・・・・・ Photo-mode 200
Capturing Movies ・・・・・・・・・・・・・・・・・・・・ Movie-mode 203
Changing the Capture Settings ・・・・・・・・・・・・・・・・・・・ 205
Changing the Camera Settings
・・・・・・・・・・・・・・・・・・・・・・・・・・・・・・・・・・ Camera Settings 206
197
Copyrights and Portrait Rights

198 Camera
Before Using the Camera
・ The camera employs high precision technology, but some
pixels or lines may seem brighter or darker than others.
Also, when you capture images in places with insufficient
lighting, noises seen as white lines increase.
This is normal.
・ Clean the lens with a soft cloth before capturing. If the
lens is stained with fingerprints or oil, the captured image
may appear out of focus or blurred.
・ Do not leave the terminal in a warm place or under a
direct sunlight for a long period of time. The quality of
captured images or video may deteriorate.
・ If you capture under a fluorescent light, mercury lamp or
sodium lamp flickering at high speed, flickering such as
stripes may appear. The color tone of still images or
movies may vary depending on the capturing timing.
・ Do not expose the lens to direct sunlight for a long period
of time and do not point at the sun or a bright light
directly. The image may become discolored or the camera
may fail.
・ Do not cover the lens with your fingers, hair or the
terminal strap when capturing.
・ Capturing a fast moving object may result in an image
slightly distorted from the image displayed on the screen
at the time of capturing, or the image may be blurred.
・ When the battery level is low, you may not be able to
save captured still images or movies. Check the battery
level before using the camera.
・ Captured still images or movies may differ from the actual
subjects in brightness or color tone.
・ Even in Manner mode, the shutter tone sounds at a fixed
volume. The shutter tone sounds from the Speaker even
when a Flat-plug earphone/microphone with switch
(optional) is connected to the FOMA terminal.
To take a still image or movie using camera.
Make sure to open the FOMA terminal when using
camera. The image will be displayed the same as the one
shown in the FOMA terminal. (Not mirror image)
Notes for Capturing Images
Using the Camera
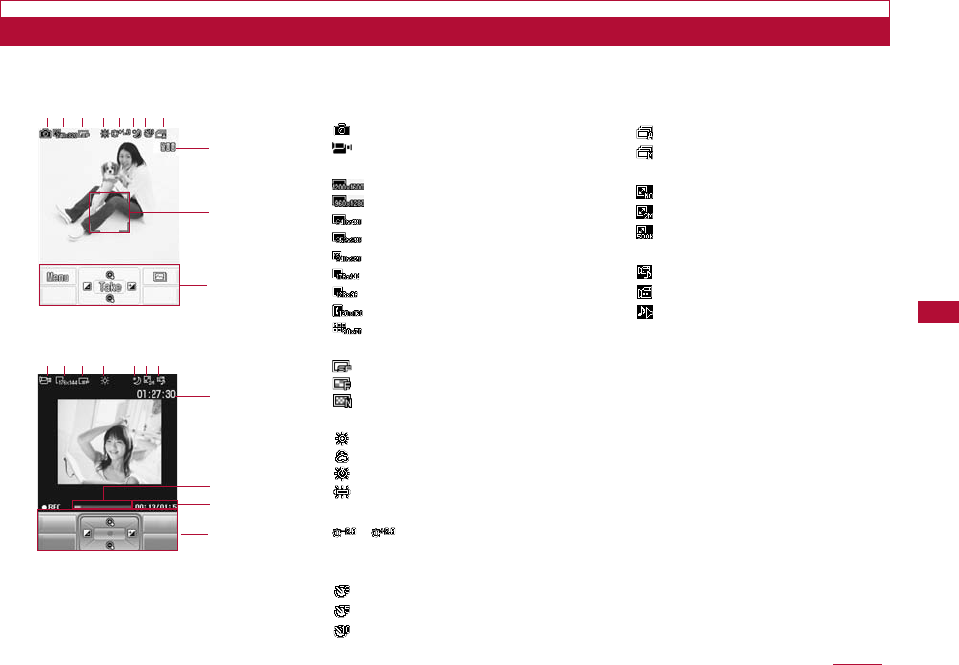
1Camera-mode→P201, P204
Photo-mode
Movie-mode
2Image size→P201, P204
UXGA (1200×1600)
SXGA (960×1280)
VGA (640×480)
CIF (352×288)
Wallpaper (240x320)
QCIF (176x144)
Sub-QCIF (128x96)
Phonebook (120x160)
Menu-icon (80x70)
3Quality→P201, P204
Super fine
Fine
Standard
4White balance→P202, P204
Daylight
Cloudy
Incandescent
Fluorescent
5Brightness→P205
~
Brightness level
6Night mode→P202, P204
7Auto timer→P202
3sec
5sec
10sec
8Continuous mode→P201
Auto
Manual
9Size restriction→P204
No restriction
2MB
500KB
!Type→P204
Sound+Video
Movie only
Sound only
"Shooting frame
#Capture progress bar
Display the elapsed capture time with
a bar.
$Number of available shots
(Still image capture screen)/
Maximum capturing duration
(Movie capture screen)→P389, P390
%Elapsed capture time/Maximum
capture time
Display the elapsed capture time/
Maximum capture time
&Control Keys
Keys available for navigation
Still image
123 45678
$
"
&
Movie capture
123 4 69!
$
%
#
&
The meanings of marks (icons and others) on the still image photography/video capture screen are as follows:
199
Camera
Capture Screen Components
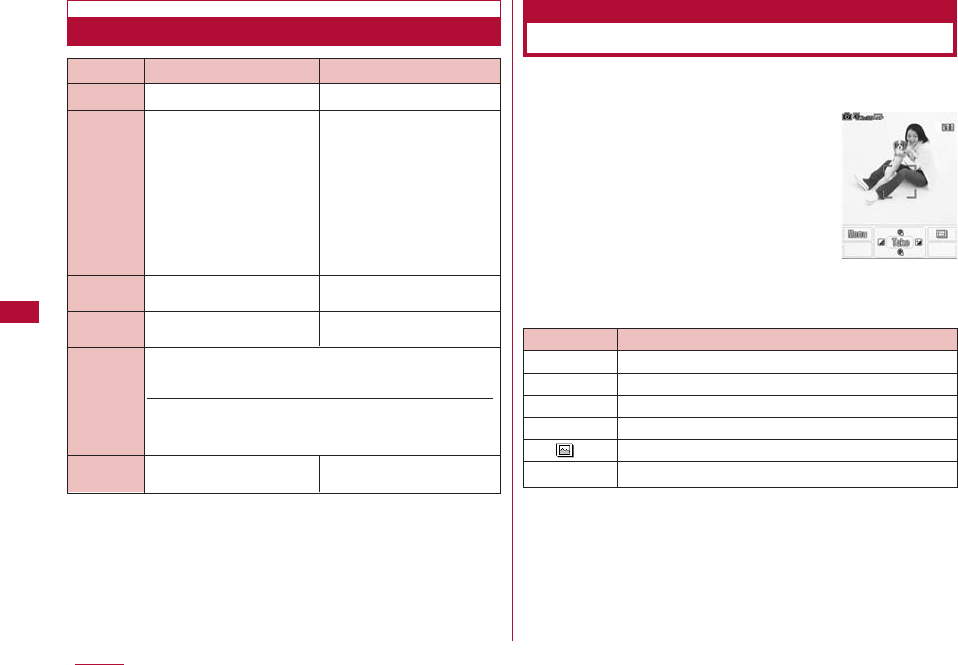
200 Camera
* The video file name does not contain the capture time in
seconds.
・ Captured still images are stored in the "Camera" folder under
"My Picture" in the "Data box" on the FOMA terminal.
1 Stand-by display]
G
■ Key operations on the still image capture screen
*
If a still image is already saved in "Camera" folder in "My
picture", the still image list screen in "Camera" is
displayed.
Still Image File Movie File
File Format JPEG MP4(Mobile MP4)
Resolution
Encoding − Video: MPEG-4
Format Voice: AMR
File .jpg .3gp
Extensi on
File Name The year, month, date, hour and minute of the time of
capture will be added automatically.
Example: If taken at 10:10:10 seconds on 2009/05/1
Photo-mode: "P2009_0501_101010"
Movie-mode: "V2009_0501_1010_0"*
Maximum Approx.1600Kbytes Approx. 80Mbytes
File Size
Save Format of Still Images or Movies
QCIF (176x144)
Sub-QCIF (128x96)
UXGA (1200×1600)
SXGA (960×1280)
VGA (640×480)
CIF (352×288)
Wallpaper (240x320)
QCIF (176x144)
Sub-QCIF (128x96)
Phonebook (120x160)
Menu-icon (80x70)
Capturing Still Images
Photo-mode
Still image
capture screen
Key Description
C[Take] Shutter
HZoom
J Brightness controls
M[Menu] Display sub menu
I[ ] Display "My picture" folder list screen*
Q[Cancel] Exit Photo-mode
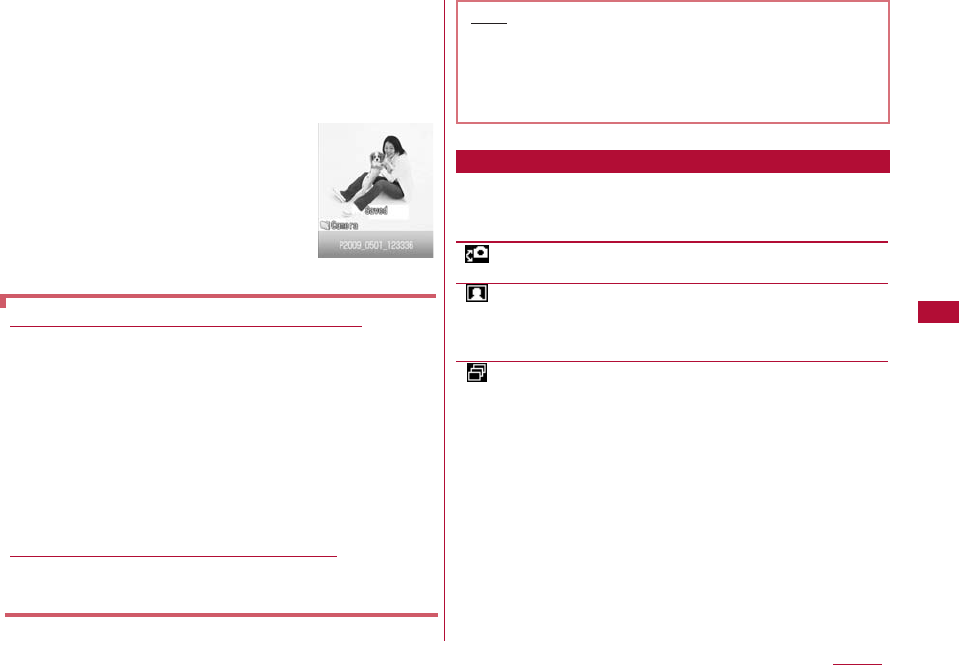
201
Camera
2 Frame the shot ]C[Take]
After an image is captured, the Confirm save screen
opens, and you can select whether to save the image.
3 C[Save] ]Select the saving destination folder ]C
[OK]
The confirmation save screen is
appeared, press C[OK] to save the
captured image and the still image
captured screen returns.
■To cancel saving
Press I[Cancel].
・ Press I[Mail] on the Confirm save
screen to create i-mode mail with
the captured still image attached.
1 Still image capture screen(P200)] M [Menu] ]
Perform the following operations
[ Camera-mode]
Change modes
[ Shoot with frame]
Add a frame to the subject when capturing an image.
Off : No frame is attached.
Choose frame : Select a frame from "My picture".
[ Continuous mode]
Capture continuous (sequential) images when the shutter is
pressed.
Up to 6 continuous images smaller than CIF 352×288 pixels, or
up to 4 images of CIF 352×288 pixels.
Off : No continuous capturing.
Auto : Take continuous pictures by pressing the shutter
once. Images are captured with approx. 0.7 second
intervals.
Manual : Take continuous pictures by repeatedly pressing the
shutter.
For images captured with "Continuous mode"
You can select, delete, or display images to save on the
Confirm save screen.
・ To save selected images, select images to save and
press C[Save] or M[Menu] ]"Save selected". The
"Specify saving destination" screen opens.
・ To save all captured images, press M[Menu] ]"Save
all". The Specify saving destination screen opens.
・ To send selected images via mail, select images to send
and press M[Menu] ]"Send via mail".
・ To delete selected images, select images to delete and
press M[Menu] ]"Delete".
・ To display only the selected images, press I[View].
When "Auto saving" (P206) is set to "ON"
If you press C[Take], a still image is captured and
automatically saved in the destination specified under
"Auto saving" (P206).
Confirm save
Note
・ Even when Manner mode is activated, the shutter
tone sounds when capturing.
・ When a still image is being displayed, the illumination
keeps red. While taking the video, the illumination
blinks.
Still Image Capture Screen sub menu
[ Night mode]
Activate when capturing images in dark places.
[ Effect]
Add an effect when capturing images.
[ White balance]
Set hue/tint for the image. When set according to the capturing
conditions, a naturally colored image can be produced.
[ Auto timer]
Set the number of seconds from the time the shutter is pressed
until the picture is taken.
[ Select size]
Set the image size to take.
[ Quality]
Select the image quality of still images.
1 Confirm Save screen (P200)]M[Menu] ]Perform the
following operations:
[New picture]
Return to the still image capture screen.
[Send via mail]
Create i-mode mail with the captured image attached.→P131
[Edit image]
Edit the captured still image.→P244
[Delete]
Cancel save and delete the still image.
[Set as wallpaper]
Set the captured image as the Stand-by display wallpaper.
202 Camera
Note
・ If the "Select size" is set to "UXGA (1200x1600)
,SXGA (960x1280)", the zoom feature cannot be
used.
<Continuous mode>
・ When "Continuous mode" is set, the picture size is
reduced to "CIF (352x288) " if the "Select size" is set
larger than "CIF (352x288)".
・ When "Continuous mode" is set, the "Auto timer" is
disabled.
Confirm Save Screen sub menu
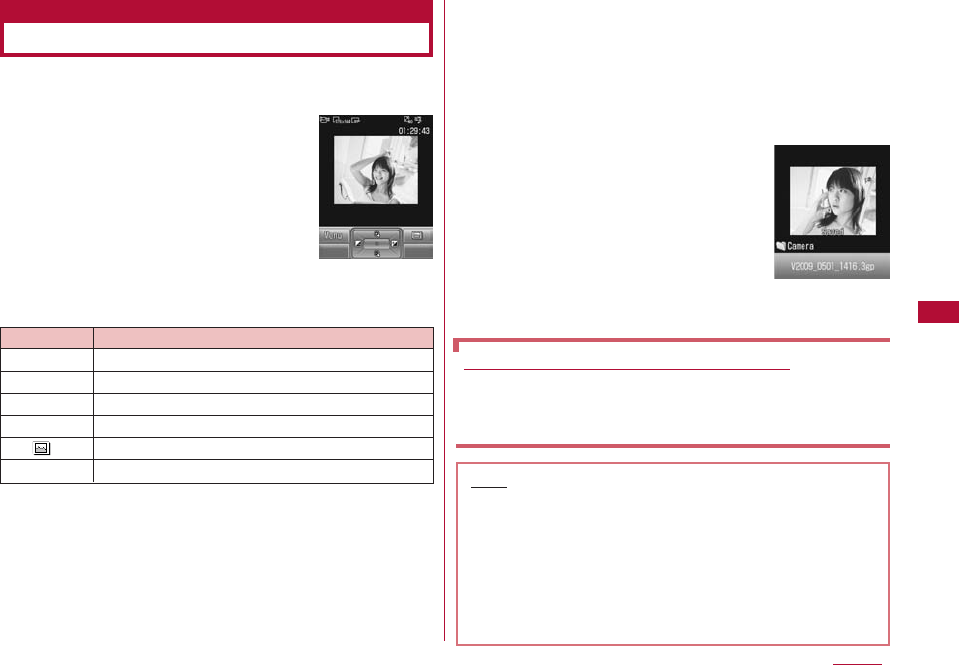
203
Camera
・ Captured still images are stored in the "Camera" folder under
"My Picture" in the "Data box" on the FOMA terminal.
1 Stand-by display]
G
(For 1+
seconds)
■ Key operations on the Movie capture screen
*1 This is available during a movie capture.
*2 If a still image is already saved in "Camera" folder in "i-motion",
the video list screen in "Camera" is displayed.
2 Frame the shot]
C
Start capturing a movie.
3 To stop capturing ]C
After a movie is captured, the Confirm save screen
opens, and you can select whether to save the video.
・ From the Confirm save screen, select M[Menu] ]
"Play" to play the video.
4 C [Save] ]Select a destination folder ]C[OK]
Press C[OK] to save the captured
video. After that, the Movie capture
screen appears.
■To cancel saving Press I[Cancel]
・ Press I[Mail] on the Confirm save
screen to create i-mode mail with
the captured video attached.
Capturing Movies
Movie-mode
Movie capture
screen
Key Description
CStart capturing/End capturing
HZoom*1
J Brightness controls*1
M[Menu] Display sub menu
I[ ] Display "i-motion" folder list screen*2
Q[Cancel] Exit Movie-mode
Confirm save
screen
When "Auto saving" (P206) is set to "ON"
C[Start capturing] Capturing ends, and the captured
video automatically will be saved in the destination
specified under "Auto saving" (P206). The Confirm save
screen opens and the Movie capture screen returns.
Note
・ Even when Manner mode is activated, the shutter
tone sounds when capturing starts and ends.
・ When movie capture screen is being displayed, the
illumination keeps red. While capturing movie, the
illumination blinks.
・ Video capturing will be terminated when it is
interrupted by a call. After the call is terminated, the
Confirm save screen appears.
1 Movie capture screen (P203) ]M [Menu]]Perform
the following operations:
[ Camera-mode]
Change modes
[ Size restriction]
Limit the file size of a captured movie.
[ Night mode]
Activate when capturing images in dark places.
[ Effect]
Add an effect when capturing images.
[ White balance]
Set hue/tint for the image. When set according to the capturing
conditions, a naturally colored image can be produced.
[ Select size]
Set the image size to take.
[ Quality]
Set the image quality of movies.
[ Type]
Set whether graphics or sounds are to be included in movies.
[ Common mode]
Movies captured when "Common mode" is activated can be
played regardless of the type or model of the FOMA terminal.
1 Confirm Save screen (P203)]M[Menu] ]Perform the
following operations:
[New movie]
Return to the Movie capture screen.
[Send via mail]
Create i-mode mail with the captured movie attached.→P131
[Delete]
Cancel saving the movie and delete it.
[Set as wallpaper]
Set as the Stand-by display wallpaper.
204 Camera
Movie Capture Screen Sub Menu
Note
・ When "Common mode" is set to "ON", "Quality" is not
available.
Confirm Save Screen sub menu
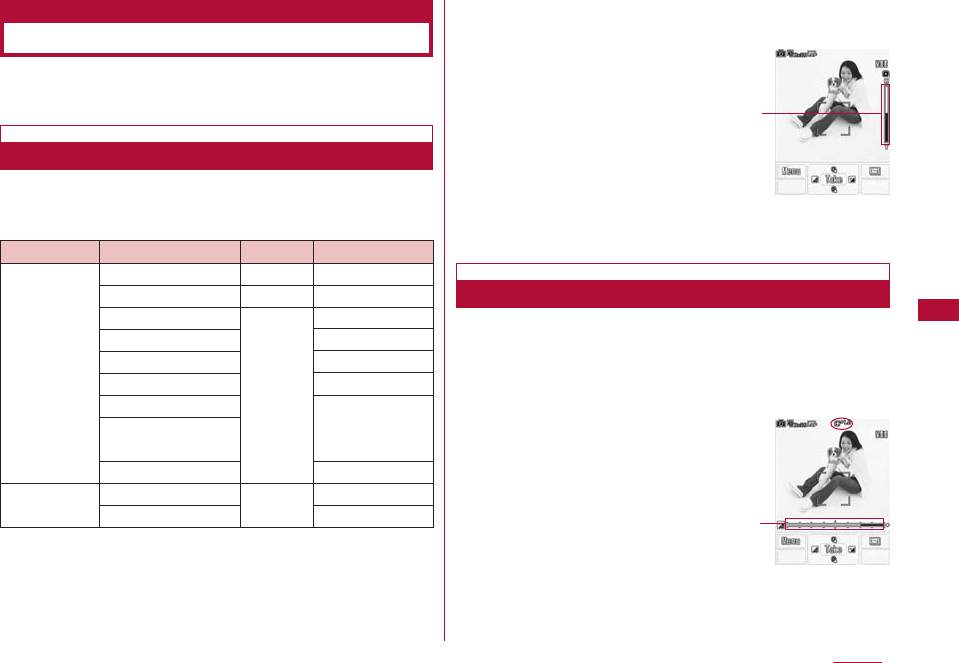
Set the image zoom magnification.
Available maximum magnifications are as follows:
Set the Camera functions according to the capturing
conditions The maximum zoom of each image size is shown
below.
1 Still image capture screen (P200) / movie capture
screen (P203) ]Use Hto set zoom
Adjust the brightness (exposure) of the image.
The brightness can be set from -2 to +2.
1 Still image capture screen (P200) / movie capture
screen (P203) ]J Select brightness (exposure) of
the image
205
Camera
Changing the Capture Settings
Using Zoom
Adjusting Brightness
Zoom Settings
(Example: Still image
capture screen)
Zoom
Brightness
Display brightness
(Example: Still image
capture screen)
Camera mode Image size Zoom
Maximum magnification
SXGA (1280x960) − −
SXGA (1280x960) − −
VGA (640x480) Approx.1.8
CIF (352x288) Approx.2.1
Wallpaper (240x320) Approx.2.2
Photo mode QCIF (176x144) 10steps Approx.2.7
Sub-QCIF (128x96)
For the Phonebook Approx.2.8
(120x160)
Menu-icon (80x70) Approx.3.4
Movie mode QCIF (176x144) 10steps Approx.2.1
Sub-QCIF (128x96) Approx.2.3

Set the number of seconds from the time the shutter is
pressed until an image is captured.
・ The Auto Timer is not available for movie capturing.
1 Still image capture screen (P200)]M[Menu]]
[Auto timer]
2 "None"/"3sec"/"5sec"/"10sec"
(the number represents the number
of seconds) appears at the top of the screen.
3 C [Take]
Auto timer starts. An image is captured after the set
number of seconds automatically.
After the shutter button is pressed, Illumination flashes
before the image is captured.
Set whether to save the captured still image/movie
automatically.
1 M [Menu] ](Camera) ]"Camera settings"
]"Saving option"]Perform the following operations:
・ C [List]: List of items is displayed.
[Auto saving]
Set whether to save the captured image automatically.
[Save picture to]*
Specify the saving destination for a still image.
[Save movie to]*
Specify the saving destination for a movie.
* This appears when "Auto saving" is set to "On".
2 I [Done]
206 Camera
Setting the Auto Timer Changing the Camera Settings
Camera Settings
Saving Option
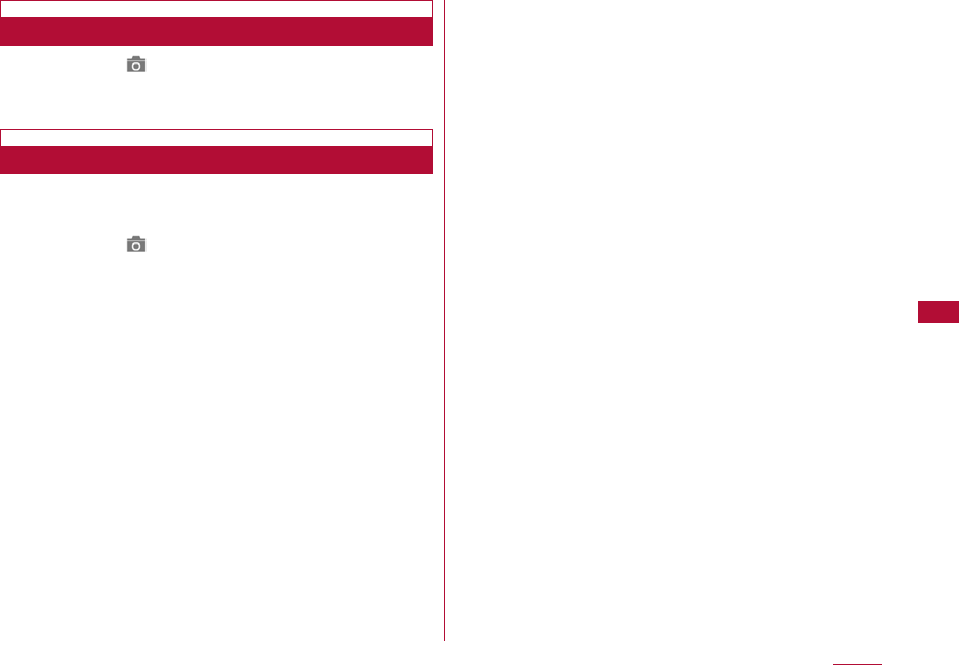
207
Camera
1 M [Menu] ](Camera) ]"Camera settings"
]"Shutter sound"]Select a shutter tone
Selecting an item plays the sound.
The flicker on the screen under a fluorescent light, etc. may
be reduced.
1 M [Menu] ](Camera) ]"Camera settings"
]"Flicker tuning" ]Select the tuning method
Auto : Suppress the flicker automatically.
50Hz: Select this option in the location where the
frequency of the power is 50Hz.
60Hz: Select this option in the location where the
frequency of the power is 60Hz.
Setting the Shutter Sound
Tuning Flicker


Music
・ This FOMA terminal can play back Chaku-Uta-Full®songs.
・ Download a Chaku-Uta-Full®songs using i-mode.
・ Before downloading Chaku-Uta-Full®songs from a Web site,
read the license agreement (license and prohibited activities,
etc.) carefully.
・ Chaku-Uta-Full®songs saved in the FOMA terminal can be
played for personal use only. When playing music, do not violate
a third party's intellectual property rights such as copyright, or
other rights. Do not copy or move Chaku-Uta- Full®songs saved
in the FOMA terminal to a PC.
Playing Music ・・・・・・・・・・・・・・・・・・・・・・・・・・・・・・・・・・・・・ 210
Saving a Chaku-Uta-Full®song ・・・・・・・・・・・・・・・・・・・・ 210
Playing a Chaku-Uta-Full®Song ・・・・・・・・・・・・・・・・・・・ 210
Using Playlist ・・・・・・・・・・・・・・・・・・・・・・・・・・・・・・・・・・・・・ 215
Managing Folders, Playlists, and Chaku-Uta-Full®
Songs ・・・・・・・・・・・・・・・・・・・・・・・・・・・・・・・・・・・・・・・・・・・・・ 217
Playing Chaku-Uta-Full®Songs Suitable for Special
Listening Circumstances ・・・・・・・・・・・・・・・ Music life 219
209
Chaku-Uta-Full®
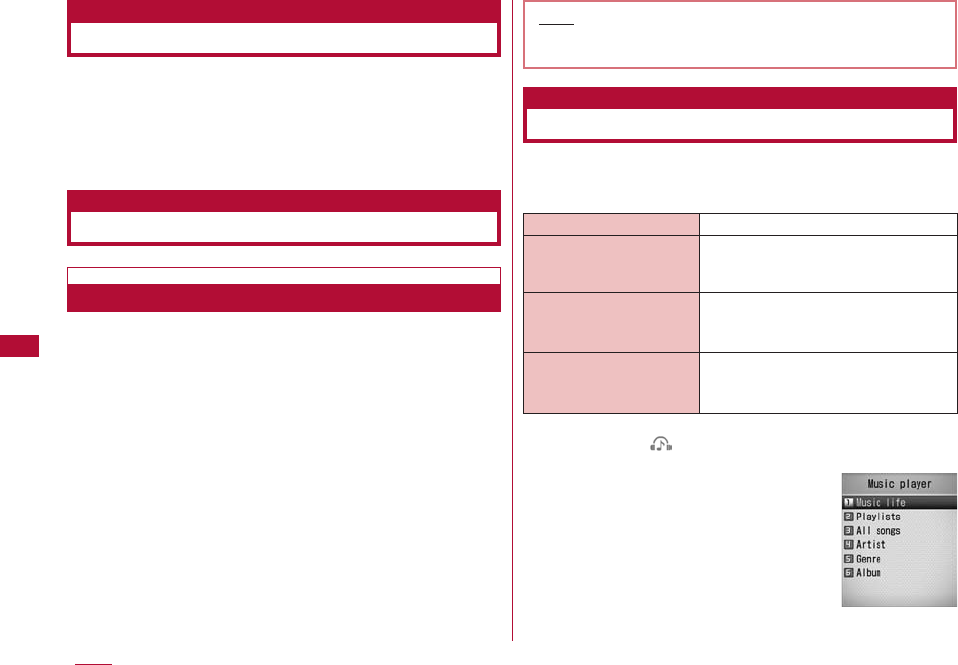
210 Music
Playing Music
You can play music with the FOMA terminal in one of the
following 2 ways:
・ Playing music with the Music player Play a Chaku-Uta-Full®
song downloaded from a site.
・ Playing an i-motion movie Play an audio only i-motion movie
downloaded using i-mode and saved in the Data box. →P249
Saving a Chaku-Uta-Full®song
Downloading a Chaku-Uta-Full
®
song
・
Up to 1000 Chaku-Uta Full
®
songs of up to 5MB each
can be saved.
・
Downloaded Chaku-Uta-Full
®
songs will be saved in the
"i-mode" folder or "Music" in the "Data box".
1 Access a site that provides Chaku-Uta- Full®songs ]
Select a Chaku-Uta-Full®song to download
After the download completes, a confirmation appears.
2 "Save" ]Select save location
Play : Play the downloaded Chaku-Uta-Full
®
song.
File property : Display information about the downloaded
Chaku-Uta-Full
®
song
Back : Return to the Web site without saving the
Chaku-Uta-Full
®
song.
Playing a Chaku-Uta-Full®Song
You can play a Chaku-Uta-Full®song saved in the FOMA
terminal.
■ Available Chaku-Uta-Full®File Format
1 M[Menu] ](MUSIC)]"Music player"]Perform the
following operations:
Note
・ Each Chaku-Uta-Full
®
song name must be unique in
the same folder.
File Format MP4
Bit rate
MPEG-4 AAC: 8-128 Kbps
HE-AAC: 8-128 Kbps
Enhanced aacPlus: 16-48 kbps
The number of Approx. 1000 songs
songs that
can be saved
The number of Up to 10
playlists that can
be created
MUSIC screen
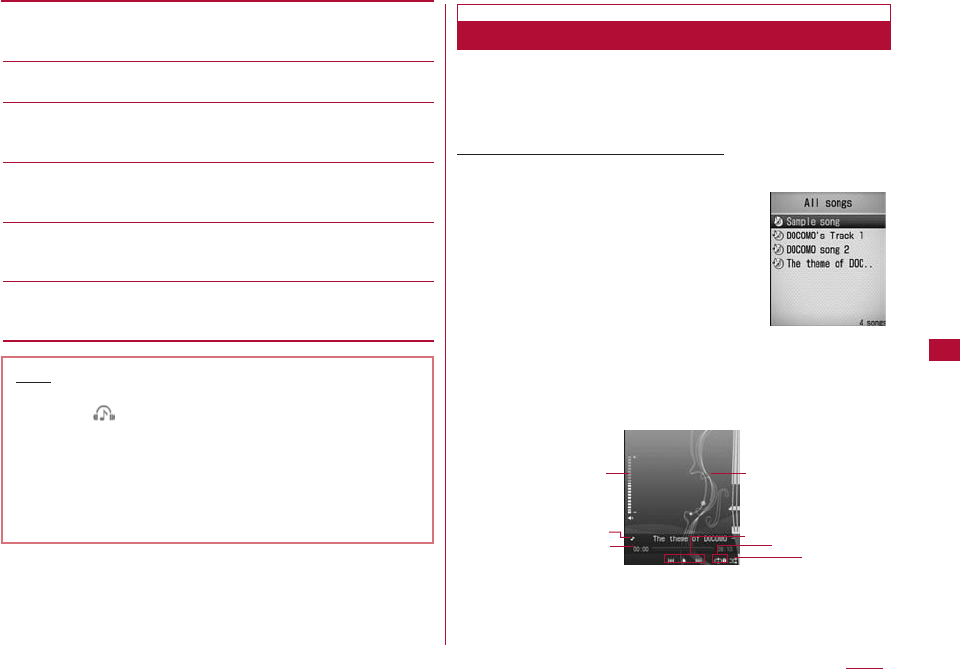
211
[Music life]
Play Chaku-Uta-Full®songs suitable for special occasions or
circumstances.→P219
[Playlists]
Display, create, or play a Playlist.→P215
[All songs]
Up to 50 songs saved in the FOMA terminal will be displayed.→
P211
[Artist]
Sort and display Chaku-Uta-Full®songs in the "All songs" folder
by artist.
[Genre]
Sort and display Chaku-Uta-Full®songs in the "All songs" folder
by genre.
[Album]
Sort and display Chaku-Uta-Full®songs in the "All songs" folder
by album.
You can continuously play all songs saved in the FOMA
terminal, or only songs specified by artist name, genre, or
album title.
Example: To play music in "All songs"
1 Music Player screen (P210)]"All
songs"
2 Move the cursor to a Chaku-Uta-Full
®
song ]C"Play"
Chaku-Uta-Full®songs will be played in the order of
appearance starting from the selected Chaku-Uta-Full
®
song.
Music
Note
・ To play the last played song, in Stand-by select M
[Menu]](MUSIC) ]"Recent played"
・ Sorting conditions for Artists, Genre and Album is in
accordance with the detailed information about a
Chaku-Uta-Full
®
song.
・ When you enjoy the programs overseas, the actual
expiration date may be earlier or later than the date
displayed for the program.
Chaku-Uta-Full
®
Music player screen
3
1
2
6
754
Continuously Playing Chaku-Uta-Full
®
Songs
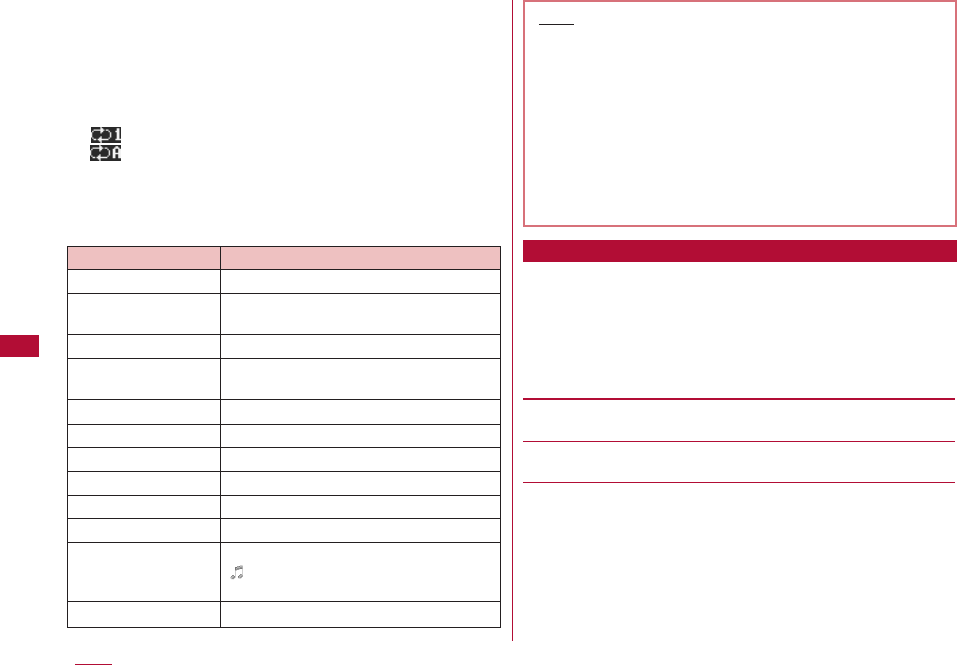
1Album title, artist name and song title
2Playback progress bar/Elapsed time/Total time
The bar shows the playback elapsed time.
3Volume
4Shuffle setting
This appears when "Shuffle ON" is selected
5Repeat setting
Current song
All songs
6Jacket image/Stand-by image/Lyrics
7Playback status
■ Key operations on the Music player screen
1 Chaku-Uta-Full
®
list screen (P211) ]Move the cursor
to a Chaku-Uta-Full
®
song]M[Menu] ]Perform the
following operations:
・ C[Play] : Play from the selected Chaku-Uta-Full®song.
・ I [Playlist]: Add the selected Chaku-Uta-Full®song to a
playlist.→P217
[Play]
Play from the selected Chaku-Uta-Full®songs.
[Add to playlist]
Add the selected Chaku-Uta-Full®song to a playlist.→P217
[Multiple choice]
Select and play multiple Chaku-Uta-Full®songs Operations
during playback are the same as for a Playlist.→P215
]
Place check marks next to Chaku-Uta-Full®songs to play
]
I[Play]
・ Press M[Menu] to select "Play", "Add to playlist", or "Mark/
Unmark". Selecting "Add to playlist" allows you to add Chaku-
Uta-Full®songs with check marks to a playlist.
212 Music
Sub Menu on the Chaku-Uta-Full®List Screen
Key Description
CPause/Play
C(for1+seconds) Cue the songup to the beginning, then
pause
H F /EAdjust the volume
L /RCue the song up to the beginning or play
the previous/Play the next song
L/R(Hold down) Rewind/fast forward while being pressed
#Switch the Shuffle setting
*Switch the Repeat setting
1-5Change the screen design
7/9Display the previous/next image
8Switch Jacket image/Lyrics/Hide
I[List] Open the Chaku-Uta-Full
®
list screen
is displayed at the right side of the
song title while list screen is displayed.
PQuit the Music player
Note
・ The music continues even if you close the FOMA
terminal when the Music player screen is open.
・ Playback is paused for the following occasions. The
playback will resume automatically after the operation
completes.
- When a voice or video call arrives
- When i-mode mail or SMS is received
- When an alarm sounds
・ Sound effects such as the key tone do not sound
during Chaku-Uta-Full
®
playback.
213
Music
[Search]*
Specify "Title", "Artist", "Album", "Genre", or "Year" to search for a
Chaku-Uta-Full®song.
]
Select an item
]
Enter the item
]
I[Search]
・ All Chaku-Uta-Full®songs that match all specified conditions
are displayed.
[Sort]
Set conditions to rearrange Chaku-Uta-Full®songs.
[File property]
Display or edit the information of the selected Chaku-Uta-Full®
song.
]
Select an item
]
I[Edit]
]
Edit the item
・ Some items cannot be edited.
* This will not appear on the Chaku-Uta-Full®list screen in
Artists/Genre/Album.
1 Music player screen (P211)]M[Menu]]Perform the
following operations:
[Go to MUSIC]
Open the MUSIC screen while a Chaku-Uta-Full®song is being
played.→P210
[List]
Open the Chaku-Uta-Full®list screen.→P211
[File property]
Display the information of the Chaku-Uta-Full®song in playback.
[Shuffle ON/ShuffleOFF]
Enable or disable shuffle play.
[Set repeat]
None: Playback is not repeated.
Current song:The Chaku-Uta-Full®song in playback is repeated.
Play all: Play all Chaku-Uta-Full®songs on the Chaku-Uta-Full®
list screen repeatedly.
[Jacket image]
Display or save the Jacket image to the Data box. →P214
[Lyric]
Display or save the Lyrics to the Data box. →P214
[Set as tone]
Set the Chaku-Uta-Full®song in playback as a ring tone. →P214
[Player skin]
Change the appearance of the Music player screen.
[Connect to URL]
Access the site if the Chaku-Uta-Full®song in playback contains
a URL.
Sub Menu on the Music Player Screen
1 Music player screen (P211)] M [Menu]]
"Set as tone"
2 Select a ring tone type
Voice ringtone :Set as a ring tone for a voice call.
Video ringtone :Set as a ring tone for a video call.
Mail tone :Set as a ring tone for i-mode mail.
Message R tone :Set as a ring tone for Message R.
Message F tone :Set as a ring tone for Message F.
SMS :Set as a ring tone for SMS.
Alarm tone :Set as an alarm tone.
3 Select a range to set as the ring tone
[Full song ring tone]
Set the entire Chaku-Uta-Full®song in playback as a ring tone.
[Point ring tone]
If the Chaku-Uta-Full®song in the playback has already a range
specified, this option can be selected.
[Free point ring tone]
Specify and set starting and ending points as a range for the ring
tone.
]
Use Jto find a start point
]
M[Start]
]
J UseJto find an end
point
]
M [Done]
Viewing Images or Lyrics Contained in a
Chaku-Uta-Full
®
Song
You can view and save Jacket images, Stand-by images, or
Lyrics contained in a Chaku-Uta-Full
®
song.
1 Music player screen (P211)]M[Menu] ]"Jacket
image"/"Lyric"]Perform the following operations:
[Next image]
View the next image or lyrics.
[Previous image]
View the previous image or lyrics.
[Full view]
View an image or lyrics to fit the screen.
[Display ON / OFF]
Show/hide the image or lyrics.
[Save in databox]
Save the displayed image or lyrics to "i-mode" in "My Picture" in
the "Data box".
214 Music
Note
・ To select a Chaku-Uta-Full
®
song as Alarm, setting the
Chaku-Uta Full
®
wanted to "ON" in advance is required.
・ If selecting "Alarm tone", further select which alarm.
・ Some Chaku-Uta-Full
®
songs cannot be set as a ringtone.
Setting a Chaku-Uta-Full
®
song as a Ring
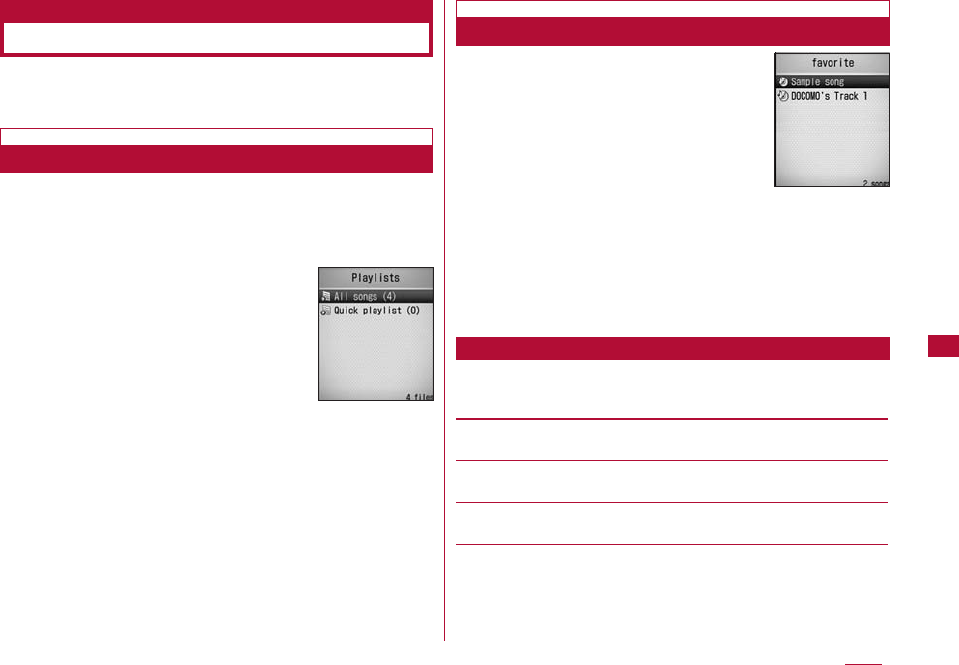
215
Music
Using Playlist
You can specify the order in which to play Chaku-Uta-Full
®
songs in a Playlist. You can play any songs in the order of
your choice from all songs saved in the FOMA terminal.
Setting a Chaku-Uta-Full
®
song as a Ring
Up to 10 Playlists and up to 50 Chaku-Uta-Full
®
songs per
Playlist can be saved.
1 Music player screen (P210)]"Playlists"
2 I [New] ]Enter a Playlist name
Up to 30 full-pitch or half-pitch characters can be entered.
3 Place check marks next to Chaku-Uta-Full
®
songs to
add]I[Done]
・ M[Menu]: You can select "File property", "Mark all",
"Unmark all", or "Sort".
1 Playlist screen (P215) ]Select a
Playlist
2 Move the cursor to a Chaku-Uta-Full
®
song ]C"Play"
Chaku-Uta-Full
®
songs will be played in the order of appearance
starting from the selected Chaku-Uta-Full
®
song.
1 Playlist screen (P215)]Move the cursor to a
Playlist]M[Menu]]Perform the following operations:
[Play]
Play the selected Playlist.
[New playlist]
Create a Playlist.→P215
[Rename]
Change the Playlist name.
[Copy playlist]
Copy the selected Playlist and create a new Playlist.
]
"OK"
]
Enter a new playlist name
Charging with the AC Adapter
Sub Menu on the Playlist List Screen
Playlist screen
List screen for
Chaku-Uta Full
in Playlists
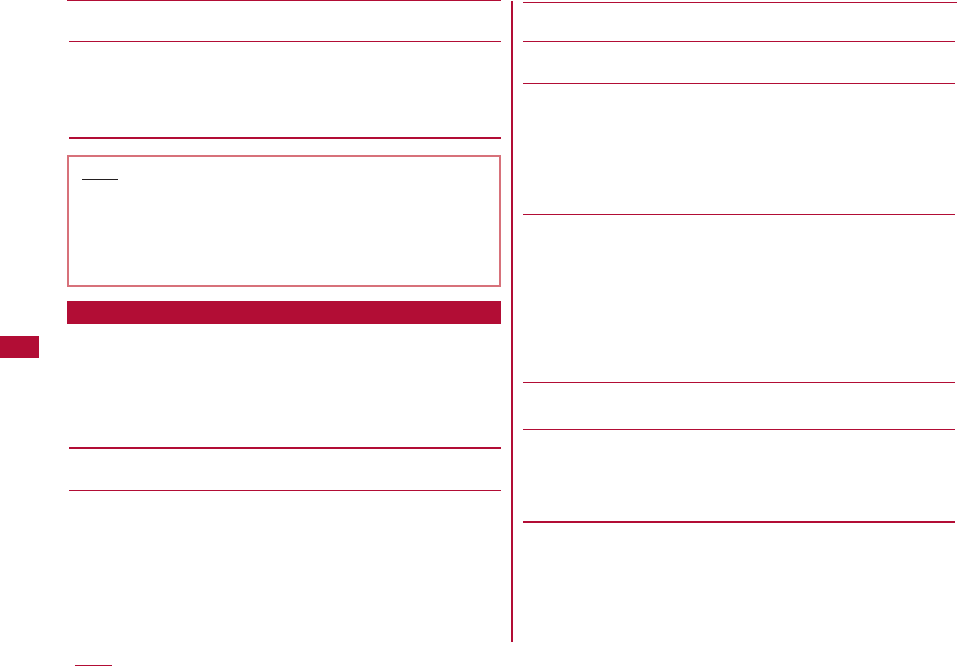
216 Music
[Delete playlist]
Delete the selected Playlist.
[Multiple choice]
Select and delete Playlists.
]
Place check marks next to Playlists to
delete
]
I[Delete]
]
"Yes"
・ Press M[Menu] to select "Delete" or "Mark/Unmark".
1 Playlist Chaku-Uta-Full
®
list screen (P215) ]Move the
cursor to a Chaku-Uta-Full
®
song]M[Menu]
]Perform the following operations:
・ I[Add]: Add the displayed Chaku-Uta-Full®song to a
playlist.
[Play]
Play from the selected Chaku-Uta-Full®songs.
[Add songs]
Add the displayed Chaku-Uta-Full®song to a playlist.
]
Place check marks next to Chaku-Uta-Full®songs to add
]
I[Done]
・ You can select "File property", "Mark all", "Unmark all", or "Sort"
using M[Menu].
[Move]
Change the order of the selected Chaku-Uta-Full®songs.
[Delete from list]
Delete the selected Chaku-Uta-Full®song from the playlist.
[Multiple choice]
Select and play multiple Chaku-Uta-Full®songs operations during
playback are the same as for a Playlist.→P215
]
Place check marks next to Chaku-Uta-Full®songs to play
]
I [Play]
・ Press M[Menu] to select "Play", "Delete from list", or "Mark/
Unmark".
[Search]
Specify "Title", "Artist", "Album", "Genre", or "Year" to search for a
Chaku-Uta-Full®song.
]
Move the cursor to an item
]
Enter the item
]
I[Search]
・ All Chaku-Uta-Full®songs that match all specified conditions
are displayed.
・ Press M[Menu] to select "Play", "Add to playlist", "Save",
"Multiple choice", "Sort" or "File property". Selecting "Save"
deletes Chaku-Uta-Full®that were not found from the Playlist.
[Sort]
Rearrange Chaku-Uta-Full®songs based on the sort.
[File property]
Display or edit the information of the selected Chaku-Uta-Full®
song.
]
Move the cursor to an item
]
I[Edit]
]
Edit the item
・ Some items cannot be edited.
Note
<Rename/Delete playlist>
・ These options are not available for "All songs" and
"Quick playlist".
<Copy playlist>
・ This option is not available for "All songs".
Sub Menu on the Playlist Chaku-Uta-Full®List Screen
217
Music
1 Music player screen (P210)]"All songs"
2 Move the cursor to a Chaku-Uta-Full
®
song to
add]I[Playlist]]Select a Playlist
The Chaku-Uta-Full®song is added to the selected Playlist.
・ I[New]: Create a new Playlist with the selected
Chaku-Uta-Full®song.
■To add multiple Chaku-Uta-Full
®
songs
M[Menu]
]
"Multiple choice"
]
Place check marks next
to Chaku-Uta-Full®songs to save
]
M[Menu]
]
Select
"Add to Playlist".
Press Afor 1+ seconds on the Chaku-Uta-Full
®
list
screen (P211) to save the selected Chaku-Uta-Full
®
song
to the "Quick playlist". This option is useful to collect your
favorite Chaku-Uta-Full
®
songs.
To play the saved Chaku-Uta-Full
®
song, select the "Quick
playlist" on the Playlist screen.
Chaku-Uta-Full
®
songs are saved in the "Music" folder in
the Data box.
Delete or move a Chaku-Uta-Full
®
song from the Data box.
1 M[Menu]](Data box)]"Music"
Performing these steps may start playing an available
Chaku-Uta-Full®song. In this case, press Q.
・ I [Switch]: Switch between list and picture display.
2 Move the cursor to a folder ]C[Open] ]Move the
cursor to a Chaku-Uta-Full
®
song ] M[Menu] ]
Perform the following operations:
■Managing Playlists
"Playlist" ] Move the cursor to a playlist ]M [Menu]
Refer to "Sub Menu on the Playlist List Screen"
(P285) for information on the sub menu items.
[Files]
Play : Play the selected Chaku-Uta-Full®song.
Move : Move the selected Chaku-Uta-Full®song to
another folder.
]
Select the destination folder
]
I [Move]
Copy : Copy the selected Chaku-Uta-Full®song to
another folder.
]
Select the destination folder
]
I [Copy]
Delete : Delete the selected Chaku-Uta-Full®song.
Delete all : Delete all Chaku-Uta-Full®songs in the folder.
Rename : Change the display name of the selected
Chaku-Uta-Full®song.
Reset name : Reset the display name of the selected file to its
default name.
[Multiple choice]
Select and delete multiple Chaku-Uta-Full®songs
]
Place check marks next to songs to delete
]
I[Delete]
]
"Yes"
Adding a Chaku-Uta-Full
®
Song to the
Quick Playlist
Managing Folders, Playlists,
and Chaku-Uta-Full®Songs
Adding a Chaku-Uta-Full
®
Song to a Playlist
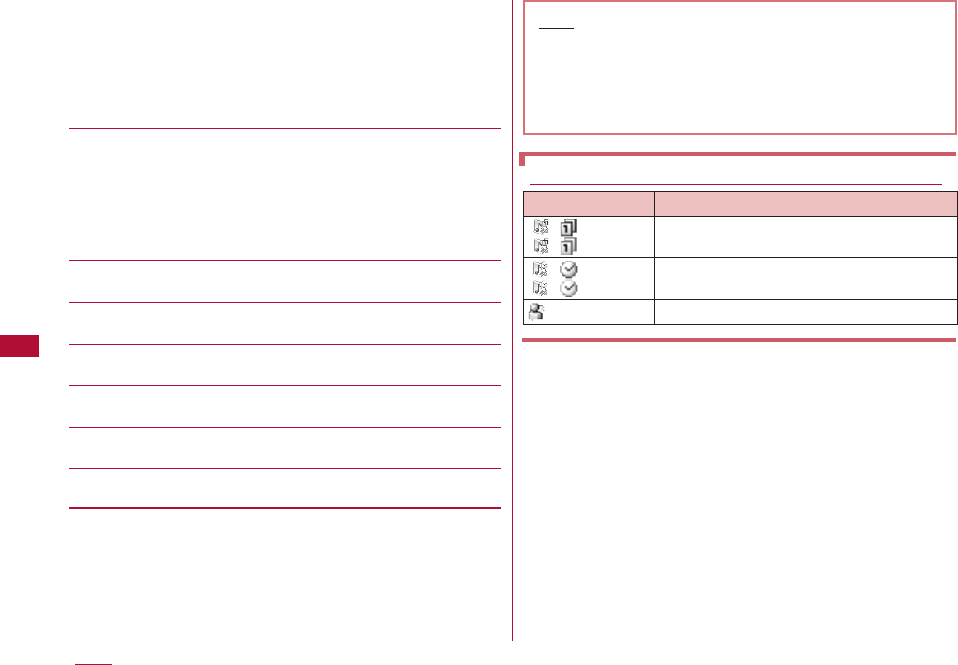
218 Music
・ You can move/copy multiple Chaku-Uta-Full®songs by
performing the following steps:
] Place check marks next to Chaku-Uta-Full
®
songs to move
or copy]M[Menu] ]"Move"/"Copy" ] Enter the security
code ] Select the destination folder ] I "Move"/"Copy"
・ Press M[Menu] to select from "Mark", "Mark all", "Unmark",
and "Unmark all".
[File property]
Display or edit the information of the selected Chaku-Uta-Full®
song.
]
Move the cursor to the item
]
I [Edit]
]
Edit the item
・ Some items cannot be edited.
・ Move the cursor to an edited item and press M[Restore to
default]
→
OK to undo editing.
[Send via・compose mail]
This option is not available.
[Set as]
Set the selected Chaku-Uta-Full®song as a ring tone.→P214
[List view/Grid view]
Switch between list and picture display.
[Sort]
Set conditions to rearrange Chaku-Uta-Full®songs.
[Memory info.]
Display the status of storage space of the "Data box".
[New folder]
Create a new folder.
Note
・ When the "Playlist" folder is open, press I[New] to
create a new Playlist.→P215
・ If a Chaku-Uta-Full
®
song saved in a Playlist is deleted,
the Chaku-Uta-Full
®
song will be removed from the
Playlist.
Icon Description
( in blue)/ Play count is limited but still playable/
( in orange) Reached the limit and not playable
( in blue)/ Not expired (Playable)/
( in orange) Expired (Not playable)
File with UIM restriction function activated
Icons appear for Chaku-Uta-Full
®
songs in the "Data
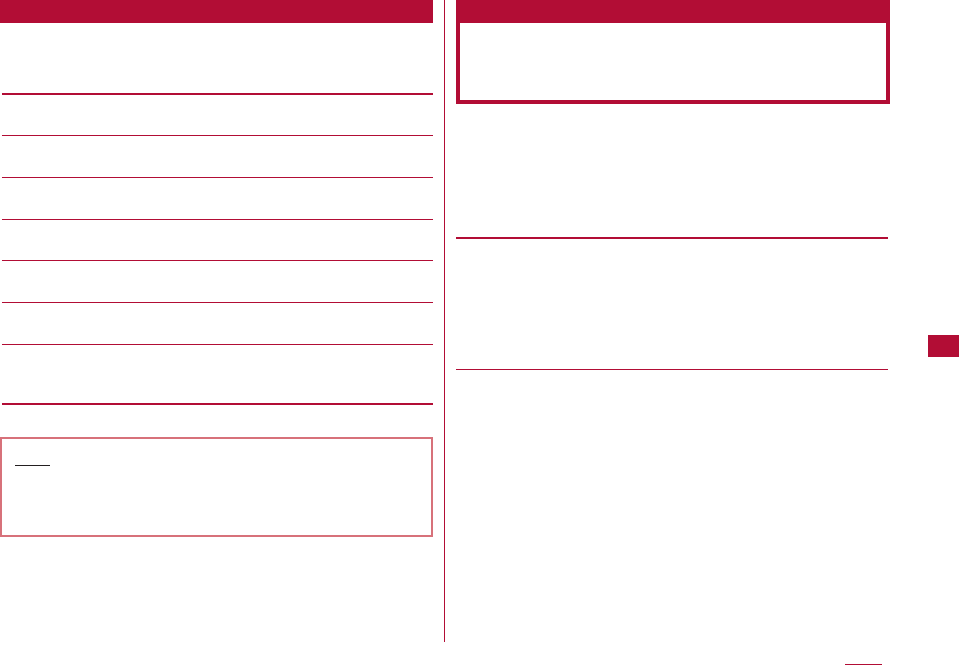
219
Music
Sub Menu while a Folder Selected
1 Move the cursor to the certificate]M [Menu] ]
Performs the following operations:
[Rename]
Edit a folder name
[New folder]
Create a new folder.
[Delete]
Delete the selected folder.
[List view/Grid view]
Switch between list and picture display.
[Sort]
Set conditions to rearrange Chaku-Uta-Full®songs in a folder.
[Memory Info]
Display the status of storage space of the "Data box".
[Folder property]
The folder size, the number of files in the folder, and the number
of folders in the folder are displayed.
You can play Chaku-Uta-Full
®
songs suitable for use when
commuting, playing sports, or going to bed.
1 "Music player" screen (P210) ]"Music life"]Perform
the following operations:
[Train]
Vocal sound is emphasized so that lyrics can be clearly heard
even in a low volume when you commute.
Playlist : Select from "All songs", "Quick playlist" or your
playlist.
・
C[List] : List Playlists.
Vocal : Place emphasis on vocal sounds.
[Sports timer]
Songs are played for a set period. You can use this option as a
timer when you want to run for a certain time. The selected
Playlist is repeatedly played for the specified time period.
Playlist : Select from "All songs", "Quick playlist" or your
playlist.
・
C[List] : List Playlists.
Playing time: Enter the playback time. 1Up to 1200 minutes
can be entered.
Note
・ The "Playlist" folder cannot be renamed or deleted.
<New folder>
・ You cannot create a sub folder in a user-defined folder.
Playing Chaku-Uta-Full®Songs
Suitable for Special Listening
Circumstances
Music life

[Sleeping]
You can set an off timer to stop the playback automatically when
lying in bed listening to music. The volume is gradually reduced
for about five minutes, and fades out about 50 seconds before
stopping the playback. The selected Playlist is repeatedly played
for the specified time period.
Playlist : Select "All songs", "Quick playlist" or your playlist.
・
C[List] : List songs from the Playlist.
Playing time:Enter a value of minutes until the playback
stops.1Up to 1200 minutes can be entered.
2 I[Play]
220 Music