LG Electronics USA L06A PCS GSM Phone User Manual L 03A English Cover 1 0
LG Electronics USA PCS GSM Phone L 03A English Cover 1 0
Contents
- 1. Users Manual 1
- 2. Users Manual 2
- 3. Users Manual 3
- 4. Users Manual 4
Users Manual 4

i-αppli
What is an i-αppli? ・・・・・・・・・・・・・・・・・・・・・・・・・・・・・・・・ 222
Downloading i-αppli from a Site ・・・・・・・・・・・・・・・・・・・ 222
Starting an i-αppli ・・・・・・・・・・・・・・・・・・・・・・・・・・・・・・・・ 223
Start an i-αppli from a Site or Mail
・・・・・・・・・・・・・・・・・・・・・・・・・・・・・・・・ i-αppli To Function 233
Automatically Starting i-αppli ・・・・・ Auto start set 233
Viewing Various Information ・・・・・・・・・・・・・・・・・・・・・・ 234
Deleting i-αppli ・・・・・・・・・・・・・・・・・・・・・・・・・・・・・・・・・・・・ 235
Using Various i-αppli Functions ・・・・・・・・・・・・・・・・・・・ 235
221
"i-αppli" is software for i-mode compatible mobile phones.
Downloading various software from i-mode sites allows
updating stock price or weather information automatically,
playing games without connecting to a network, or using
the FOMA terminal more conveniently.
・ Packet communication charges apply.
・ When using overseas, packet communication charges differ
from domestic charges.
→
P322
・ For details about i-αppli, refer to the "Mobile Phone User's
Guide [i-mode] FOMA version".
Downloading i-αppli from a Site
You can download an i-αppli from a site and save it to the
FOMA terminal.
・ Up to 500KB of an application can be downloaded.
・ Up to100 downloaded applications can be saved. This number
may be reduced by the software data size.
1
From the currently accessed site
]
Select a program
・ I[Cancel]:Cancel downloading.
■When "Display SW info" is set to "Display"
Software information is displayed. C[OK]
]
"Yes" to
download the program.
2
After the download is completed
]
"Yes"
The downloaded software starts.
・ Depending on the software, after the software is
downloaded, a screen where you set operating condition
may be displayed. The settings can be changed from
"Software set" later. → P226
222 i-αppli
Note
・ At the start of downloading, a confirmation screen
may appear notifying you that the application will use
"the phoneinformation data (stored data and serial
number of your mobile phone/UIM)". Press "Yes" to
start downloading. Select
I
[Detail] to check the
details of the phone information to be used. In this
case, the "serial number of your mobile phone/UIM" is
sent to the IP (Information Provider) over the Internet,
and it could be intercepted by a third party. However,
this action does not reveal your phone number, postal
address, age, or gender to the IP or others.
・ If you attempt to re-download software that has
already been downloaded with a different UIM, a
confirmation asking whether to overwrite appears.
Select "Yes" to overwrite.
・ If the maximum number of software programs which
can be saved is exceeded or if there is not enough
memory space, a confirmation for deletion of another
i-αppli appears. If there is not enough free memory
space, you can select i-αppli to delete, checking the
required memory space to store the new application.
Select "Yes" to delete ]Place check marks next to
i-αppli to delete ]
I
[Delete]. ]Select "Yes" to
delete the marked software and to start the download.
・ If the download of software fails due to weak signal
reception, the software cannot be saved.
・ Even if the download of software fails due to weak
signal reception after old software was deleted to
increase the available space on the terminal, the old
software cannot be restored.
・ Some software that starts immediately after being
downloaded cannot be saved.
What is an i-αppli?
Downloading i-αppli from a Site
223
Note the followings if you download a mail-connected
i-αppli.
・ If you download a mail-connected i-αppli, a folder specific to the
mail-connected i-αppli is created in Inbox and Outbox. A reated
folder takes the downloaded mail-connected i-αppli name and it
is unchangeable.
・ Up to 17 (100 including all other i-αpplis) mail-connected
i-αpplis can be saved.
・ If you attempt to download a mail-connected i-αppli, which will
use an existing folder for a mail-connected i-αppli saved in the
FOMA terminal, the attempt will be denied.
・ If there is only a folder for a mail-connected i-αppli left in the
FOMA terminal, you can download a mail-connected i-αppli
which uses that folder. If the folder is not used, you can delete
it and create a new folder. A mail-connected i-αppli will not be
downloaded if you do not create a folder for it.
・ You cannot delete a folder if a mail-connected i-αppli that uses
that folder still exists in the FOMA terminal. If you delete folders
that no mail-connected i-αppli uses, folders created in both
Inbox and Outbox are deleted at once.
・ If you delete folders that no mail-connected i-αppli uses, you
can choose whether to delete all folders automatically created
at once.
You cannot delete folders, however, if they have any protected
messages in them.
Display Software info
What is an i-αppli?
Set whether to display software information before
downloading the software.
1
M[Menu]
]
"iαppli"
]
"iαppli settings"
]
"Display SW
info"
]
"Display"/"Not display"
1
The Stand-by display
]
I(for 1+ seconds)
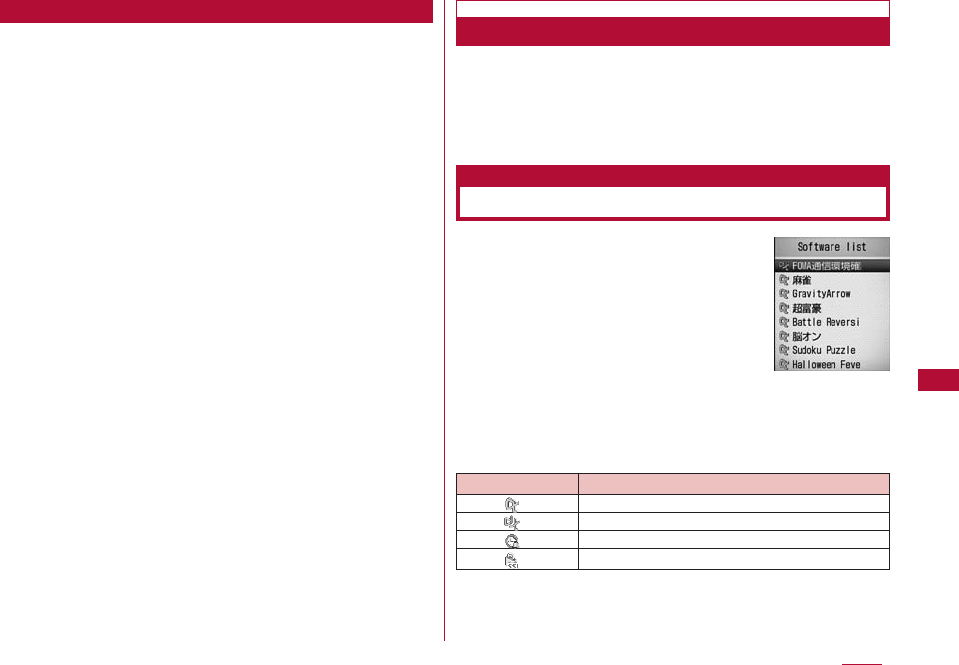
■ Icons on the Software List screen
i-αppli
Downloading a Mail-Connected i-αppli
View i-αppli Information at download time
Starting an i-αppli
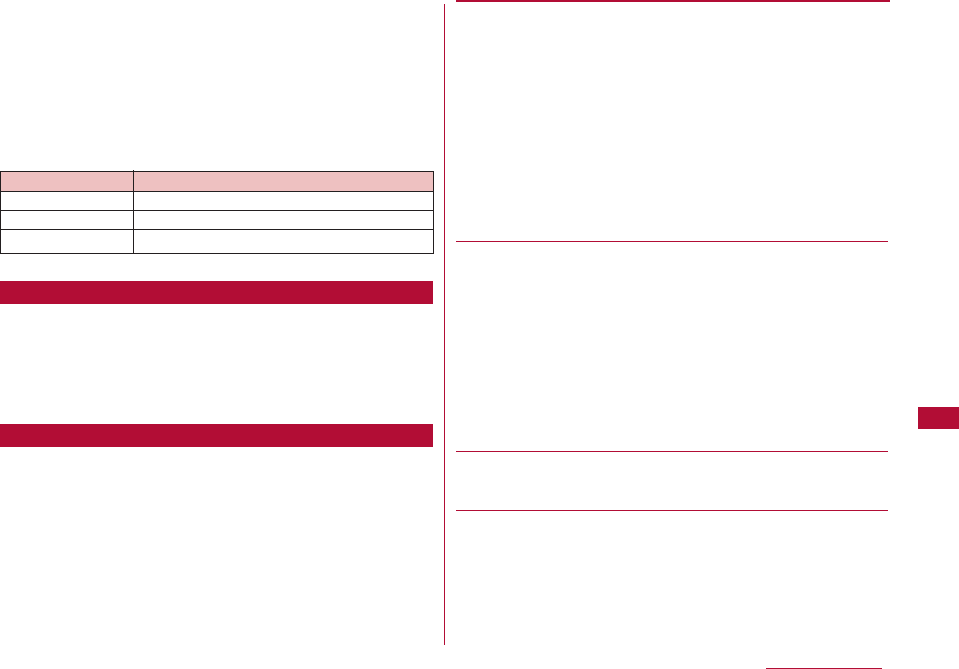
Icon Description
Standard i-αppli
i-αppli DX
Auto-start set i-αppli
i-αppli downloaded from an SSL site
Software list
screen
2
Select software
・ If "Network set" of "Software set" is set to "Confirm every
session", a confirmation whether to allow the
communication appears. Select"Yes"/"No"
■To exit an i-αppli
P
]
Select "Yes".
224 i-αppli
To start software from other software
Some software can start a specified i-αppli without
returning to the Software list screen.
・
If the software to be started is not saved in the FOMA
terminal, you need to download it.
・ If the software to be started is not specified, select a software
following the instruction on the screen.
If a security error occurs
If you attempt to perform operations that are not
permitted for the software, a security error is indicated
and the error is recorded in "Security error history".
→ P234
If a problem occurs with the software
If a problem occurs with the software, you can check the
contents using the Trace info. → P234
To i-αppli creators
If software does not behave as expected while being
created, you may want to refer to the Trace info.
Note
・ Some software performs communication while
running. You can change the settings in "Network
set" of "Software set" to not automatically perform
communication.→P225
・ If there is an incoming voice or video call when the
software is running, you can answer the call pausing
the software. After the call is terminated, the
previous screen returns.
・ Even when the software is running, you can receive
mail or Message R/F. The software keeps running,
and , , appears at the top of the screen. To
view the received mail or Message R/F, terminate the
software.
・ Images used by an i-αppli* or data you enter may be
automatically sent to a server via the Internet.
* Images used by the i-αppli include: images captured
with Camera that is started from a Camera-linked
(linkage) application, images obtained using infrared
communication function of the i-αppli, images
downloaded from a site or web site, and images
obtained from the Data box by the i-αppli.
・ You cannot start software downloaded using a
different UIM.
・ Depending on i-αppli, the tone may not sound.
・ Depending on the software, an IP (Information
Provider) can access programs saved on your
terminal and directly disable their use. In this case,
the software cannot be run or updated, however, it
can still be deleted, or the software information can
still be shown. To use the software again, signals to
enable the software must be sent. Contact your IP.
・ Depending on the software, the IP may send data to
a program saved on your terminal.
・ In the event that the IP disables/re-enables the
software or sends data, your terminal performs
communication and blinks. Packet communication
charges do not apply in this case.

225
i-αppli
1
Software list screen (P217)
]
Move the cursor to
software
]
M[Menu]
]
Perform the following operations:
[Set iαppli TO]
Set conditions to start the selected software.→ P233
[Auto start time]
Set whether to start the selected software automatically, and
set the date and time to start if the auto start is specified.
→ P233
[Software set]
Set the selected software.→P225
[Software info]
Display the selected software information such as a name and
version of the i-αppli . The displayed items differ depending on
the software.
[Upgrade]
Upgrade the selected software.
[Delete]
Delete software.→ P235
Set operating conditions for each software program.
You can set an application to perform communications
automatically while it is running or decide separately
whether to allow it to browse icon information, Phonebook,
etc.
・ Some items may not be changed depending on the software.
1
Software list screen(P223)
]
Move cursor to the program
]
M[Menu]
]
[Software set]
]
Perform the following
operations:
[Network set]
Set whether to allow communications while software is running.
[Icon info]
Set whether to permit the use of icons for i-mode mail, Message
R/F, in/out of service area, battery level, or Manner Mode when
the software starts.
[View P.book/call records]
Set whether to allow software to browse the Phonebook and call
history when the software is started.
[Change ring tone/image]
Set whether to allow software to automatically change an image
or melody set for a ring tone or the Stand-by display when the
software is started
Software List Screen Sub Menu
Note
<Upgrade>
・ During an update, a confirmation may appear
notifying you of the use of terminal data (stored data
or serial number of the terminal/UIM)". Select "Yes" to
start downloading. Select
I
[Detail] to check the
details of the terminal data to be used. In this case,
the "serial number of your mobile phone/UIM" is sent
to the IP (Information Provider) over the Internet, and
it could be intercepted by a third party. However, this
action does not reveal your phone number, postal
address, age, or gender to the IP or others.
Setting i-αppli Operating Conditions

226 i-αppli
The software you deleted after purchasing is available to
download from "WOW LG" of i Menu site.
→
P128
Various games to train the brain are available. You can play
game by selecting either right brain or left brain or measure
the abilities.
1
Software list screen (P223)
]
"脳オン"
]C
The menu screen opens.
2
Perform the following operations:
・ Push I [終了(Exit)] to exit.
[ゲームスタート (Start the game)]
Start the game.
・ For each game, use Hto select an item.
左脳(Left brain) : You can select out of 4 games to buff up the
left brain
]
Move the cursor to the game to
play
]C]
Move the cursor to the level with
which you want to play
]C
右脳(Right brain) : You can select out of 4 games to buff up the
right brain..
]
Move the cursor to the game to
play
]C]
Move the cursor to the level with
which you want to play
]C
試験 (Test) : Measure the left-brain/right-brain skills.
]
Move the cursor to the game to play
]C
]
Move the cursor to the level with which you
want to play
]C
Note
・ Depending on the settings, the software may not
connect to the network or icon information (unread
messages or battery level, etc. will not be sent).
<Network Set>
・ When this is set to "No", the software may not start,
or realtime information may not be provided.
・ When this is set to "Yes", the software automatically
connects to the network. While connected, packet
communication charges apply.
<Icon info>
・ When set to "Yes", information about the status of
the terminal as indicated by the presence of icons for
unread mail, messages, battery level, Manner Mode,
inside the service area, and outside the service area
may be sent to Information Providers (IP) via the
Internet in the same manner as the "serial number of
your mobile phone/UIM" is sent. The icon information
may be intercepted by a third party. Software that
needs Icon data may not function if this is set to "No".
Pre-installed i-αppli
脳オン
227
i-αppli
[環境設定 (Environment settings)]
Adjust sound in 8 levels or reset the history and score of game.
・ Push I[戻る(Back)] to back to menu screen.
[ヘルプ (Help)]
Display the description of the game and how to play it.
・ Push I [戻る(Back)] to back to menu screen.
[ゲーム成績 (Game result)]
Shows recorded game results by graphs or numeric values.
・ Push I [戻る(Back)] to back to menu screen.
[終了 (Exit)]
Exit the game.
■ Operations during the game
Enter a number from 1 - 9 in an empty cell. However, the
same number cannot be entered more than once for each
vertical or horizontal row, or for a block of 3x3 cells framed
with a thick line.
1
Software list screen (P223)
]
"Sudoku Puzzle"
The menu screen opens after the game title screen.
2
Perform the following operations:
[ゲームスタート (Start the game)]
Start the game. Select a level.
[ランキング (Ranking)]
Open the list of high scores.
[オプション (Options)]
Set whether to sound the tone or display hints.
・ Selecting "リセット (Reset)" restores the settings and the high
score entries to their defaults.
[ヘルプ (Help)]
Display the description and rules for the game.
[終了 (Exit)]
Terminate the i-αppli.
* Press I[メニュー (Menu)] to return to the menu screen.
Key Description
1∼9
Select an answer.
M
[OK] /[確認 (Check)] Select an item.
I
[ポーズ (Pause)] Suspend the game. You can select
from "ゲームを続ける (Resume)"/"終了
(Exit)".
I
[戻る (Back)] Close the paused screen.
Move the cursor to
select an item.
Sudoku Puzzle

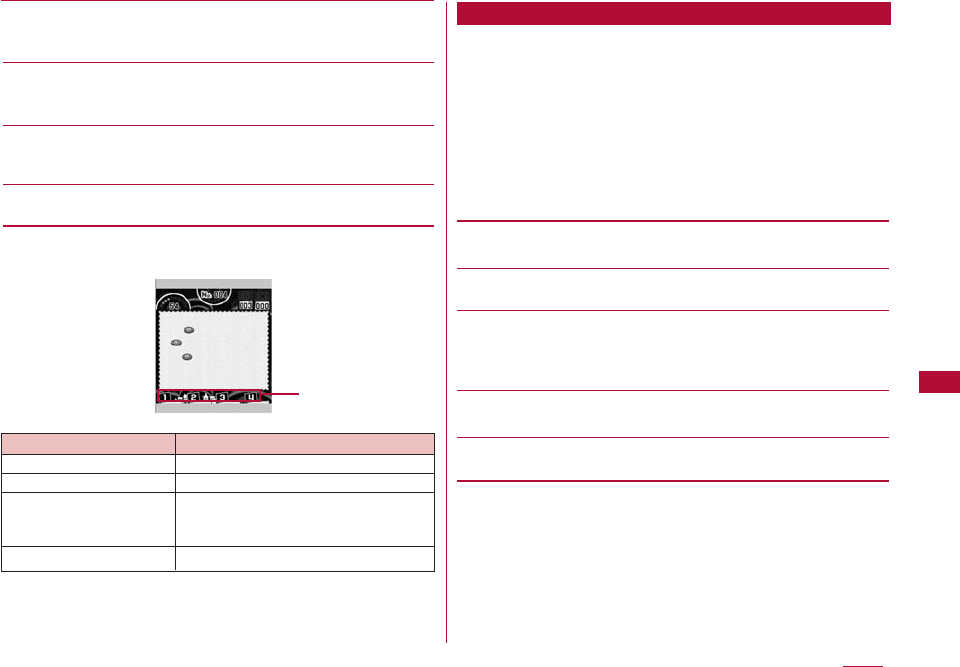
■ Operations during the game
This is a puzzle in which you try to erase 3 or more
adjacent same type of monsters at once. The game ends
when all the monsters are erased.
Think carefully about the order of the monsters to delete.
If there are any remaining monsters at the end, you will
lose.
1
Software list screen (P223)
]
"Halloween Fever"
The menu screen opens.
2
Perform the following operations:
・ Press I[終了(Exit)] to exit.
[スタート (Start)]
Start the game.
[ステージ (Stage)]
Press Jto select the finished stage.
[ヘルプ (Help)]
Display the description and how to play the game.
[サウンドオン(Sound on)/サウンドオフ(Sound off)]
Ctoggles the sound effects on or off.
■ Operations during the game
Halloween Fever
Elapsed time
Key Description
K
Move the cursor
M
[消す(Erase)] Delete the entered number
I
Pause the game. You can select from
[ポーズ (Pause)] "セーブ (Save)", "ニューゲーム (Start a new
game)", "リスタート (Restart)", and "終了
(Exit)"
Only one session can be saved.
1∼9
Enter a number
C]J]C
228 i-αppli
Move the cursor
and select
Key Description
K
Move the cursor
C
Select
I
[メニュー (Menu)] Selecting "はい (Yes)" ends the game,
and the menu screen opens.
*
Restart the game.
#
Return to the previous screen.
This is a chess game in which you try to surround the
playmate's chess pieces on every side with your pieces,
and the playmate's chess pieces will become to yours. The
one who has more chess pieces at the end of game will be
the winner.
1
Software list screen (P223)
]
"Battle Reversi"
The game title list screen appears.
2
Press any button
The menu screen appears.
3
Perform the following operations
Press I[終了(Exit)] to exit.
[シングルモード(Single mode)]
A mode to play with a pretend playmate.
The game starts after you selected your character, your chess
pieces color (white or black) and playmate's character.
・ Press I[もどる(back)] to go back to menu screen before
game starts.
[バトルモード(Battle mode)]
A mode to play with your friend with your cellphone.
The game starts after you selected your character, your chess
pieces color (white or black) and playmate's character.
・ Press I[もどる(back)] to go back to menu screen before
game starts.
[データボックス(Data box)]
Display every game's result (scores in win, draw or loss games,
etc.).
Press M[キャラクター(Character)] to show your signed up
character.
・ Press I[もどる(back)] to go back to menu screen.
[環境設定(Environment settings)]
Set or reset time limit or sound.
・ Press I[もどる(back)] to go back to menu screen.
[キーマップ(Key map)]
Display buttons description that using in this game.
・ Press I[もどる(back)] to go back to menu screen.
[ヘルプ(Help)]
Display game content and operations.
・ Press I[もどる(back)] to go back to menu screen.
■ Operations during the game
229
i-αppli
Battle Reversi
Select where to put
your chess piece with
cursor
230 i-αppli
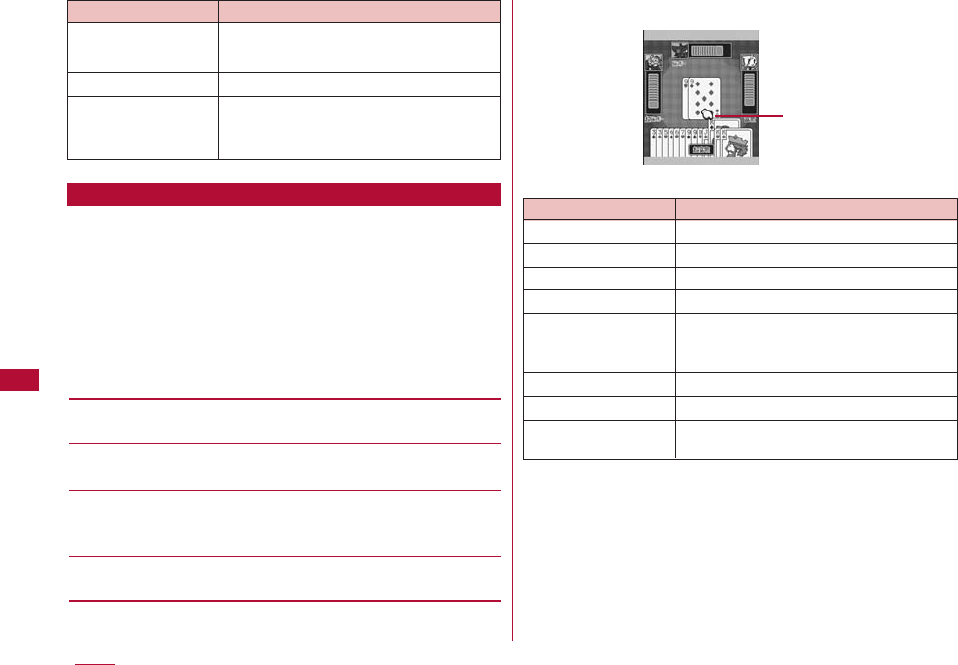
Try to throw a higher card than the previous player. Players
are ranked in the order of ascending priorities who finished
cards earlier.
1
Soft List Display (P223)
]
" 超富豪 "
Menu is displayed.
2
Next
・ Press M [終了(end)] to end this game.
[PRACTICE GAME]
One game COM competition mode.
[RANKING GAME]
5 games COM competition mode.
[CONTINUE]
Restart the game was paused. Choose the game if game data
was saved.
[RANKING GAME]
More detail rules, and sound ON/OFF can be set.
■ Game Operation
Use cursor to choose
the thrown card
Key Description
J
/
4
/
6
Move cursor
U
/
2
Choose a card
D
/
8
Cancel the card chosen
C
/
5
Throw the card chosen
M
[タイトル(Title)] Press "Yes" to end the game and show
title screen. Press "End" to end the
game.
I
[開始(Start)] Start a game
I
[パス(Pass)] Pass
*
Switch between sound ON and sound
OFF
K
/
2
/
8
/
4
/
6
C
/
5
I
[ポーズ(pause)]
Move the cursor
Select items
Selecting "はい(Yes)" ends the game
and show result screen. Selecting
I
[
終了(end)
] to end the game.
Key Description
超富豪
Enjoy mahjong with the pretend playmates.
1
Soft List Display (P223)
]
" GravityArrow "
Menu is displayed.
2
Next
・ Press M[終了(End)] to end this game
[GAME START]
Start the game.
[SOUND ON/SOUND OFF]
Press C to switch the Sound ON/OFF
■ Game Operation
231
i-αppli
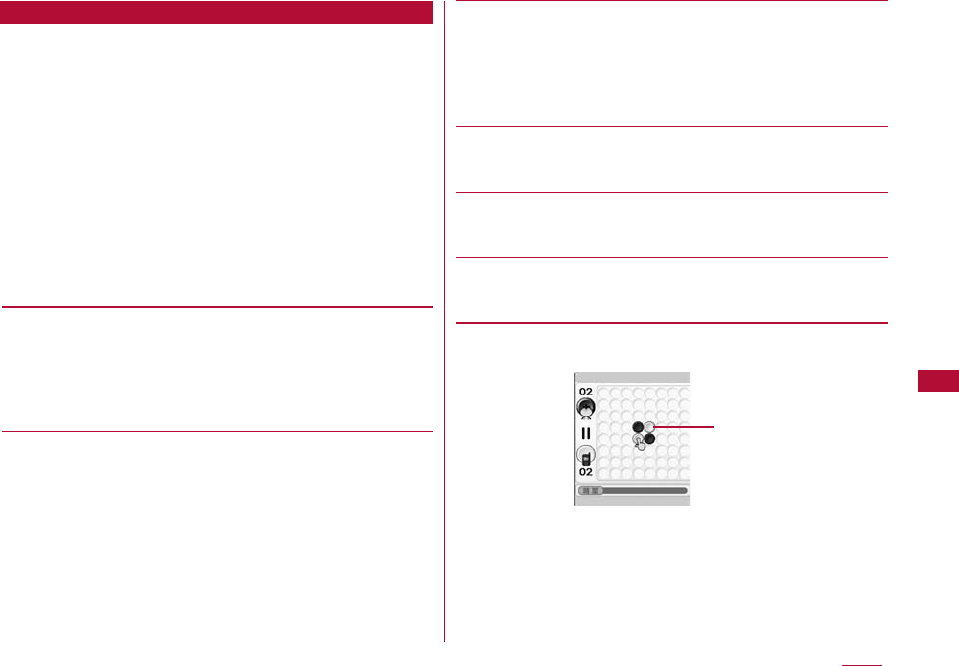
GravityArrow
Key Description
K
/
2
/
8
/ Move the ball
4
/
6
C
/
5
Switch the ball
M
[中断(Pause)]/ Pause/Restart
[再開(Restart)]
I
[タイトル(Title)] Press "Yes" to end the game and show
title screen. Press "End" to end the
game.
*
Switch between sound ON and sound
OFF
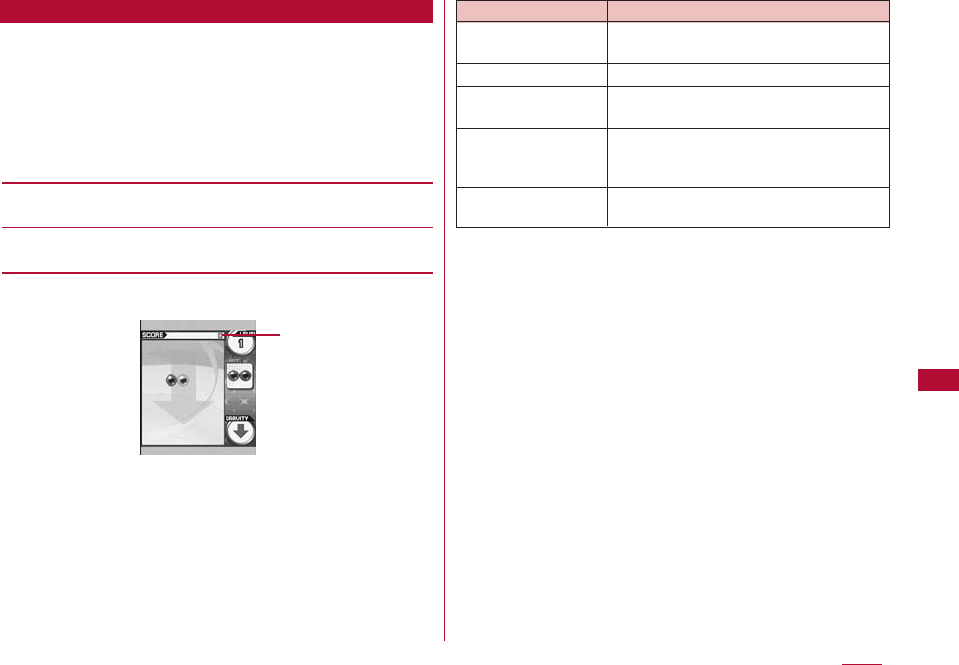
The scores now
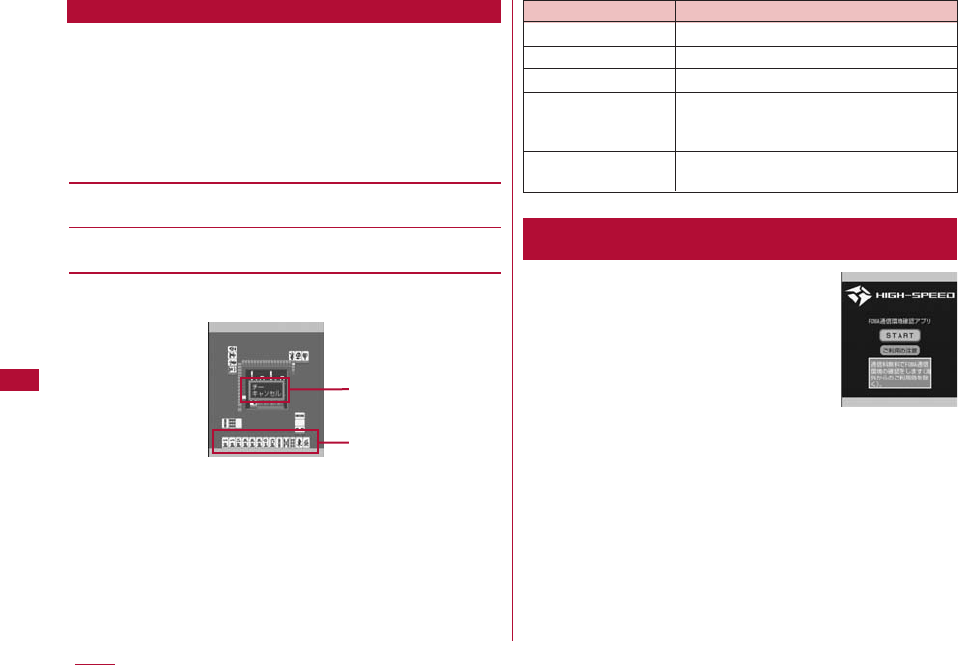
Enjoy mahjong with the pretend playmates.
1
Soft List Display (P223)
]
" 麻雀 "
Menu is displayed.
2
Next
・ Press M[終了(End)] to end this game
[GAME START]
Start the game.
[SOUND ON/SOUND OFF]
Press C to switch the Sound ON/OFF
■ Game Operation
・ The screen image only provides an
example. It may differ from actual one.
FOMA環境通信確認アプリ(FOMA Communication Environment
Check Application) is an application to confirm if the FOMA
terminal is in a FOMA HIGH-SPEED Area.
・ When using FOMA環境通信確認アプリ (FOMA Communication
Environment Check Application), please agree with the "Usage
and Warning" section.
・ When confirming the Communication Environment, the
diagnostic result may differ, depending on the Communication
Environment (weather, radio wave, network, etc.), even if you
use the FOMA terminal at same place, same time (sometimes
"Out of service area" may be displayed).
・ Using other functions while using this application may cause
an application error.
232 i-αppli
Choose the tile with
cursor
Key Description
J
/
4
/
6
Move cursor
C
/
5
Decide the tile will be thrown
M
[得点(Score)] Show score
I
[タイトル(Title)] Press "Yes" to end the game and show
title screen. Press "End" to end the
game.
*
Switch between sound ON and sound
OFF
FOMA環境通信確認アプリ(FOMA Communication
Environment Check Application)
麻雀
Only displayed at
[ポン]/[チー]
233
i-αppli
Set whether to start software from a site, mail, or via
infrared communication.
1
Software list screen(P223)
]
Move the cursor to
software
]
M[Menu]
]
"Set iαppli to"
]
Place check
marks next to software to be started
Site i-αppli to:Start the software from a site.
Mail i-αppli to:Start the software from mail.
Ir i-αppli to:Start the software via infrared communication.
2
I[Done]
・ Date and Time need to be set in advance to start an i-αppli
automatically.→ P48
Auto Start
You can set whether to start i-αppli automatically.
1
M[Menu]
]
"iαppli"
]
"iαppli settings"
]
"Auto start set"
]
"ON"/"OFF"
Auto Start Time
Set the date and time when the software starts automatically.
This option can be set for to up to 3 software programs.
1
Software list screen(P223)
]
Move the cursor to the
software
]
M[Menu]
]
"Auto start time"
]
Perform the
following operations:
[Time interval set]
Applications will be started automatically with set intervals.
[Start time set]
Place check marks when you want to set the time when the i-αppli
automatically start.
[Time]*
Set the time and date for auto-start.
To set the date, use Jto move the cursor to the place to
change the date and enter the date with the dial keys (to set the
date on the calendar screen, press C[Select] in the date entry
field ). Operations on the calendar screen → P271
To set the time, use Jto move the cursor to the value to
change, enter the time with dial keys, (pressing C[Select] in
the time entry field opens the time settings screen on which you
can enter a time using dial keys and H).
・ Depending on the settings in "Date&Time format" (P52), the
display format or order of the date and time may differ.
[Repeat]*
Select a repeating pattern for auto-start.
1 Time: The software starts automatically only once at the set
date and time.
Setting Start Date/Time
Start an i-αppli from a Site or Mail
i-αppli To Function
Automatically Starting i-αppli
Auto start set
Setting to Automatically Start i-αppli
234 i-αppli
Daily:The software starts automatically at the set time every
day.
Weekly:The software starts automatically at the set time on
the specified days of the week every week. → Place
check marks next to the days to auto-start every week
* Can be set by marking "Start time set"
2
I[Done]
1
M[Menu]
]
[iαppli]
]
[iαppli info]
]
Perform the
following operations:
[Security error history]
Display a log of errors of software that was terminated due to a
security errors.
・ I[Delete]: Delete the selected error history entry.
[Auto start info]
You can check whether software automatically started. You can
view the information and the latest date and time when software
started for up to 3 software programs set to start automatically.
Start ○: The software automatically started successfully
Start ×: The software failed to start automatically
Start −: The software has not started because the set time has
not arrived
[Trace info]
Display trace information for the software.
・ I[Delete]: Delete trace information for the software.
Viewing Various Information
Note
・ History or information which is not traced will not be
shown.
Note
・ The software will not automatically start when:
- The FOMA terminal power is turned off
- A call or communication is in progress
- Another function is running
- "Lock all" is set (even from the security code entry
screen)
- An "i-αppli" in "Data access lock" currently is "ON"
(even from the security code entry screen)
- The Auto-start time is the same as the scheduled
time for software update, an alarm, Schedule event,
or To Do alarm
- The i-αppli was downloaded using another UIM
- The i-αppli has "Network set" to "Confirm every
session"
- The same i-αppli has a set intervals to start within
10 minutes
・ Software will not start at the set time if other
software is running at that time. Also, the software
may not start while other functions are running.
・ If auto starts fails, appears on the Stand-by
display. Selecting the icon displays the Auto start
info (P234). disappears after the Auto start info is
viewed.
i-αppli information
235
i-αppli
1
Software list screen(P223)
]
Move the cursor to software
]
M[Menu]
]
[Delete]
]
Perform the following
operations:
This item:You can delete the selected software.
Selected items:Select and delete items.
]
Place check marks next to the software to be
deleted
]
I[Delete]
]
"Yes"
All items:Delete all software.
]
Enter the security code
]
"Yes"
Some i-αppli use terminal functions and connect to sites.
・ You need to download i-αppli that support the function in
advance.
・ For some i-αppli, operations may be different, or functions may
not be available.
・ When the camera is started by an i-αppli, captured
images will not be saved in "My picture" in the "Data box",
however, they are saved and used as a component of the
i-αppli.
1
Capture an image with the camera using an i-αppli
1
Perform infrared communication using an i-αppli
Using the Camera from an i-αppli
Using Infrared Communication from an i-αppli
Note
・ You may not be able to exchange data with some
devices even if they have the infrared capability.
・ You can also start an i-αppli by receiving i-αppli
activation data via infrared communication.
・ When infrared communication is in progress, any
connection with sites or reception of Mail will be
cancelled.
Note
・ When "Auto start time" is set, a confirmation for
disabling the option appears. Select "Yes" to disable.
Using Various i-αppli Functions
Deleting i-αppli


Data Management
Data box・・・・・・・・・・・・・・・・・・・・・・・・・・・・・・・・・・・・・・・・・・・ 238
Making Full Use of Still Images
Displaying Images ・・・・・・・・・・・・・・・・ Picture viewer 239
Editing Still Images ・・・・・・・・・・・・・・ Edit Still Images 244
Creating Animations ・・・・・・・・・・・・・・・・・・・ Animation 247
Making Full Use of Videos
Playing Videos/i-motion Movies
・・・・・・・・・・・・・・・・・・・・・・・・・・・・・ Video/i-motion Player 249
Editing Videos/i-motion Movies
・・・・・・・・・・・・・・・・・・・・・・ Edit Videos/i-motion Movies 253
Making Full Use of Melodies
Playing Melodies ・・・・・・・・・・・・・・・・・・・ Melody player 254
Exchanging Data via Infrared Communication
Using Infrared Communication ・・・・・・・・・・・・・・・ IrDA 257
Exchanging Data One Piece at a Time
・・・・・・・・・・・・・・・・・・・・・・・・ Send IrDA/Receive Ir Data 259
Receiving or Sending All Data
・・・・・・・・・・・・・・・・ Send All via IrDA/Receive All IrDA 259
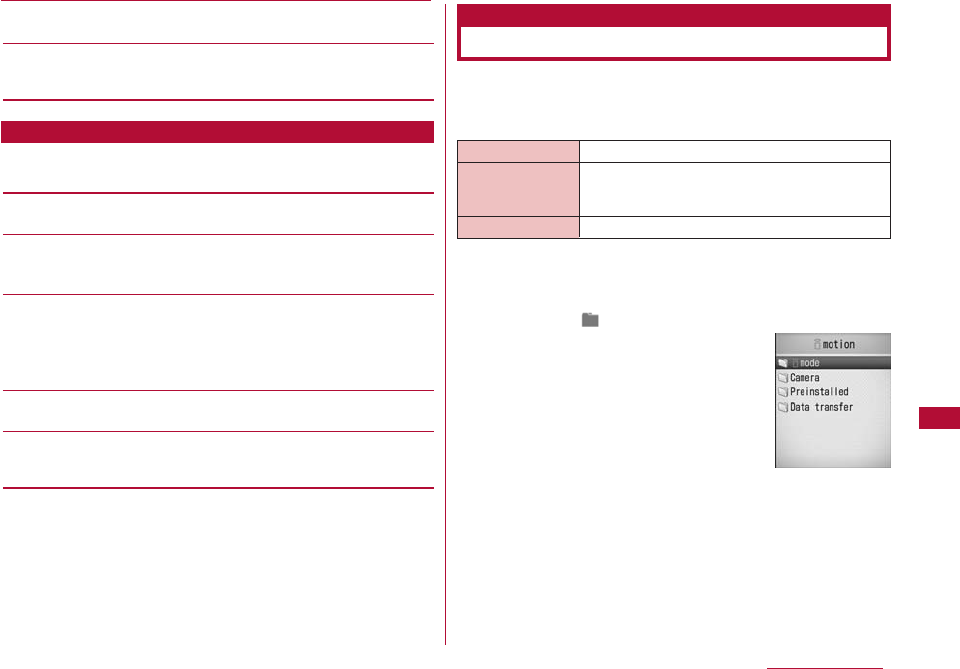
237
The Data box contains the items and folders shown in the
following tables. Data obtained from sites or i-mode mail
are saved in folders according to their categories.
・ Up to 20 folders can be added to My picture, Music, i-motion, or
Melody.
・ Files saved in My picture, Music, i-motion, or Melody can be
moved to other folders within the category.
* Pictographs (E-Moji) will be saved directly into the "Pictographs
(E -Moji)" folder. Except for Pictographs (E-Moji), others will not
be saved in "Pictographs (E -Moji)" folder.
* Still images and Flash movie files do not have titles.
Icons displayed on the file list screen
238 Data Management
My picture
i-mode Still images, etc. obtained from sites or mail
Camera Still images captured by the Camera
Decomail picture Pictures for Deco-mail provided by default
Deco-mail pictographs pre-installed or
downloaded from web sites or mail
Preinstalled Still images provided by default
Data transfer Still images, etc. obtained via infrared
communication
Item Still images that can be used for frames or
stamps
Animation User defined animations, etc.
Music
i-mode Chaku-Uta-Full®downloaded from a site
Playlists Playlists created with the Music player
i-motion
i-mode Videos/i-motion movies downloaded from
sites or mail
Camera Videos captured by the Video Camera
Preinstalled Videos provided by default
Data transfer Videos, etc. obtained via infrared
communication
Decomail
pictograph*
Melody
i-mode Melodies, etc. downloaded from sites or mail
Preinstalled Melodies provided by default
Data transfer Melodies, etc. obtained via infrared
communication
Descriptions of Displayed Name, File Name, and Title
Still images, Flash movies, videos/i-motion movies, and
melodies saved in the FOMA terminal have more than one
name.
Displayed Name Names that appear on list screens in the
Data box, or on Display/playback screens
File Name Names that appear on a PC or other terminals
Title* Names for management of the L-06A (they
cannot be edited)
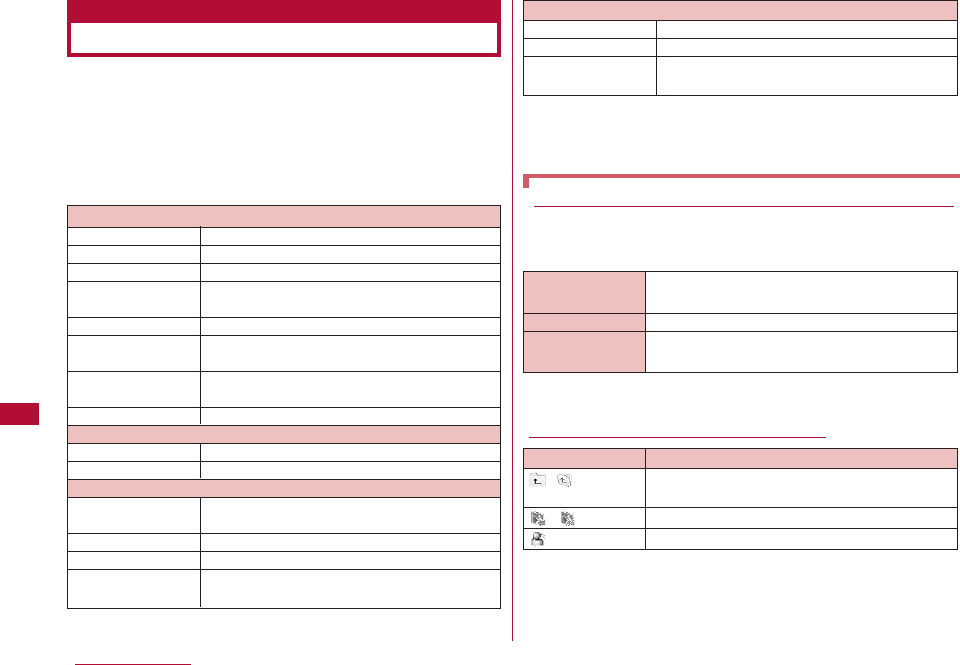
Icon Description
( *1) Display the list screen of the next higher
folder
/ Files that can be sent/cannot be sent
File restricted
Data box
File Format* JPEG, GIF
Pixels JPEG: Up to 1200 x 1600 pixels Progressive
JPEG, GIF: Up to 800x600 pixels
File Size Up to 2MB
File Extension jpg, gif
*1 Appears in a list view.
*2 Icons that appear on the screen vary depending on
the type of the list screen.
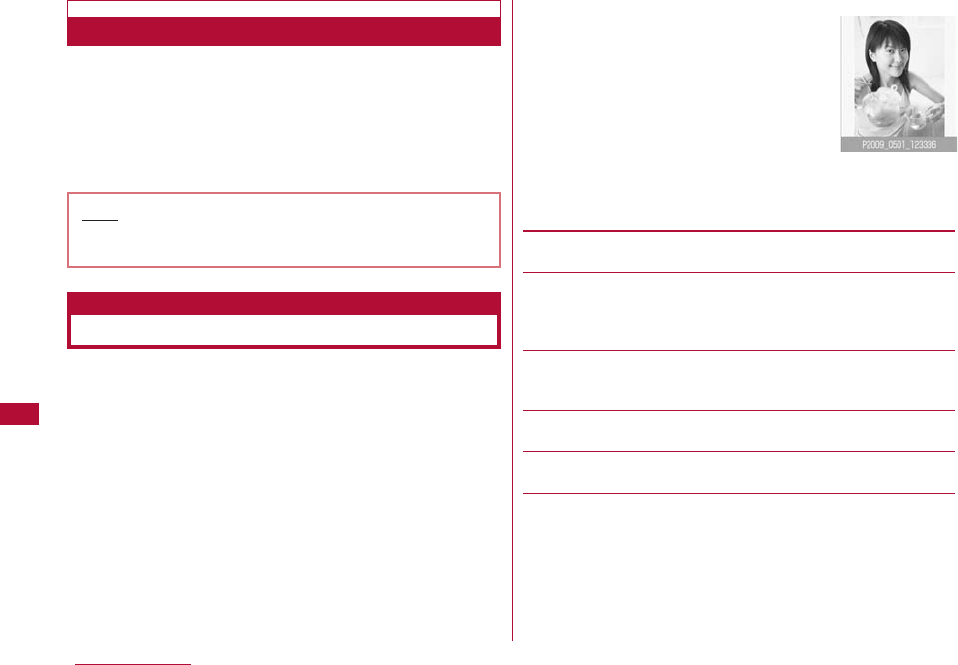
You can display still images you have captured, or obtained
from sites or i-mode mail.
■Available File Formats
* Even if a file is in a compatible file format, it may not be
displayed depending on the file.
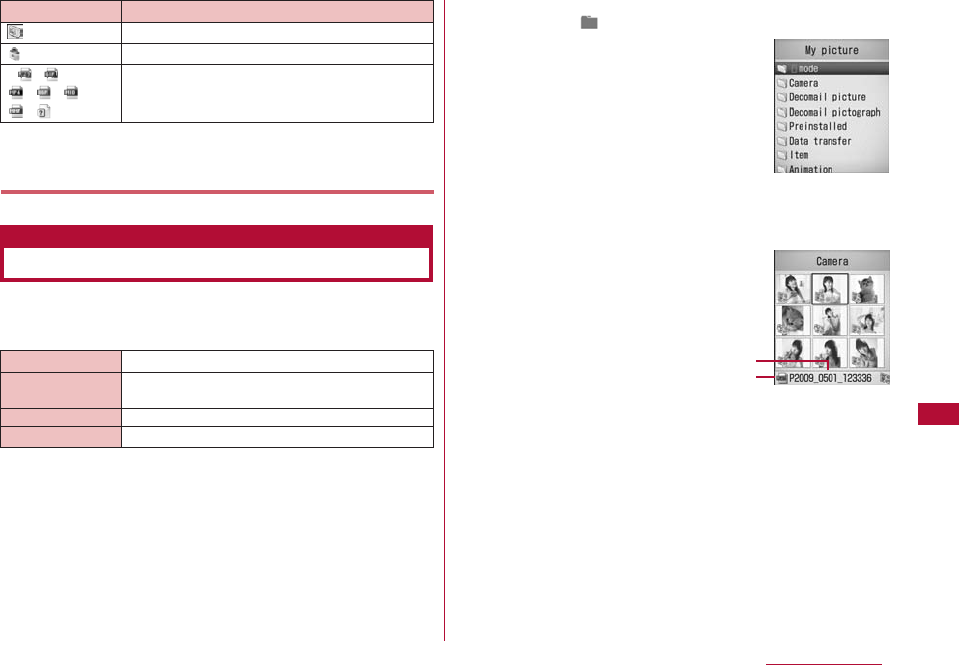
1
M[Menu]
]
(Data box)
]
"My picture"
・ I[Switch]: Switch between list and
picture display.
2
Move the cursor to a folder
]
C[Open]
・ I[Mail]: Display the Compose message
screen with the selected file attached.
・ Icons displayed on the list screen
→ P238
1Display name of the selected file
2Type of the selected file
239
Data Management
Icon Description
File with UIM restriction activated
A file prohibited to be redistributed
File type (JPEG/GIF/MP4 (file extension: mp4)
/MP4 (file extension: 3gp)/SMF/MFi/Others
(unsupported files))
*2 / /
/ / /
/
Displaying Images
Picture viewer
My Picture
Screen
Still image file
list screen
2
1
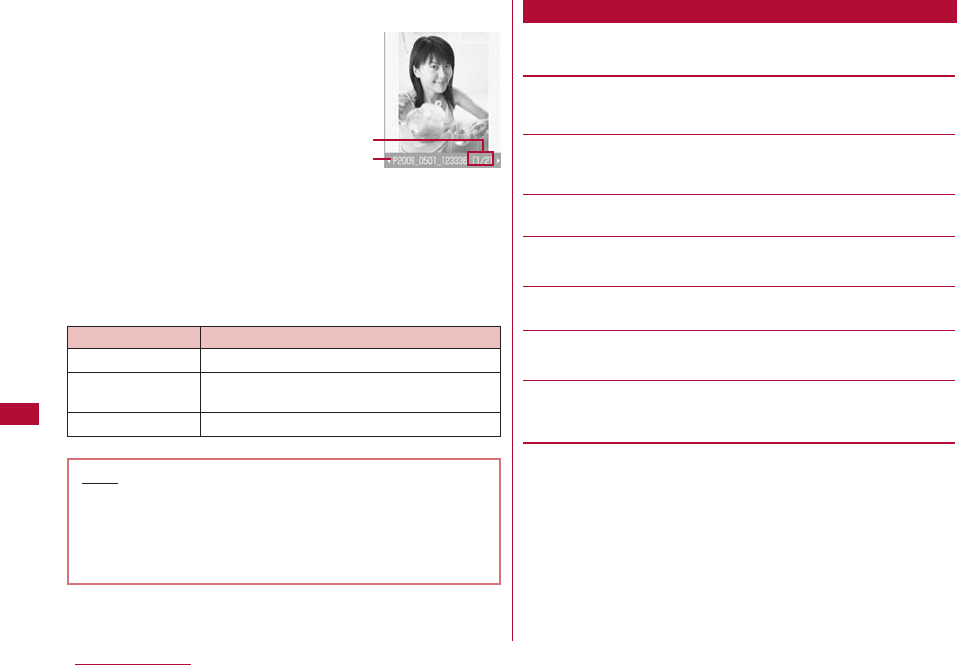
240 Data Management
3
Move the cursor to a file
]
C[View]
1Sequential number/number of saved files
Display the sequential number of the current file and the
total number of saved files in the folder.
2Display name of the file
■Available File Formats
1
My Picture screen(P239)
]
Move the cursor to a folder
]
M[Menu]
]
Perform the following operations:
[Rename]
Change the name of the selected folder. Up to 30 full-pitch or
half-pitch characters can be entered.
[New folder]
Create a folder.
・ You cannot create a sub folder in a user-defined folder.
[Delete]
Delete the selected folder.
[List view/Grid view]
Switch how to display folders.
[Sort]
You can sort folders by setting a condition.
[Memory Info.]
Display the status of storage space of the "Data box".
[Folder property]
Display the name of the selected folder and the number of files in
the folder.
Key Description
J
Display the previous/next file
C[Full]
Display a full image, hiding the Soft
keys/return to the original display size
I
[Mail] Send the displayed image by mail → P131
Note
・ An i-mode mail with the selected image attached can
be created by pressing
I
[Mail] on the still image file
list screen.
・ Some images not captured with L-06A may not be
displayed on the Still image file list screen.
Sub Menu on the My Pictures Screen
Still image file
list screen
2
1
1
Still image file screen (P239)
]
Move the cursor to a file
]
M[Menu]
]
Perform the following operations:
[Files]
View:Display the selected file.
Edit:Edit the selected file.→ P244
Move:Move the selected file to another folder.
]
Select a destination folder
]
I[Move]
Copy:Copy the selected file to another folder.
]
Select a destination folder
]
I[Copy]
Delete:Delete the selected file.
Delete all:Delete all files in the folder.
]
"Yes"
]
Enter the security code
Rename:Change the display name of the selected file.
[Multiple choice]
Select and delete files.
]
Place check marks next to files to delete
]
I[Delete]
]
"Yes"
・ You can move/copy multiple files by performing the following
steps:
]
Place check marks next to files to move/copy
]
M[Menu]
]
"Move"/"Copy"
]
Select the destination folder
]
I[Copy]/[Move]
・ You can also select "Delete", "Mark", "Mark all", "Unmark", or
"Unmark all" by pressing M[Menu].
[File property]
Display the file name, size and type, etc. of the selected file.
→ P243
[Send via]*
Mail:Create i-mode mail with the selected file attached.
Go to Step 2 in "Creating and Sending i-mode Mail" (P131).
IrDA:Send a file using Infrared communication.
[Set as]
Set the selected file as the Stand-by display or Call display
Stand-by display:Set as the Stand-by display.
Voice call display:Set as a Voice call display.
Video call display:Set as a Video call display.
Wake-up display:Set as the Wake-up display.
[List view]
Switch the display format of files.
[Sort]
Sort files by specifying a condition.
[Memory info.]
Display the status of storage space of the "Data box".
[New folder]
This item is not available.
* This is not available for Flash files.
1
Still image display screen(P240)
]
M[Menu]
]
Perform the following operations:
[Edit image]*
Edit the displayed file.→ P244
[Delete]
Delete the displayed file.
[Edit title]
Edit the name of the displayed file.
241
Data Management
Sub Menu on the Still Image File List Screen
Sub Menu on the Still Image Display Screen
242 Data Management
[File property]
Display the file name, size and type, etc. of the displayed file.
→ P243
[Send via]*
Mail:Create i-mode mail with the selected file attached. Go to
Step 2 in "Creating and Sending i-mode Mail" (P131).
IrDA:Send a file using Infrared communication.
[Full screen]
View the image in Full screen. (In Full screen view, the following
operations are available.)
・ C/Q: Restore the full image to the original display.
・ J: Display the next/previous image.
[Zoom]
Display an enlarged image.
・ M[+]: Enlarge the image
・ I[-]: Restore the previous zoom ratio
・ K: Move the display position
・ The entire image and the displayed area appear at the lower
right of the screen.
[Set as]
Set the displayed file as the Stand-by display or Call display.
Stand-by display:Set as the Stand-by display.
Voice call display:Set as a Voice call display.
Video call display:Set as a Video call display.
Wake-up display:Set as the Wake-up display.
[View settings]
Set the display method of an image, a zoom ratio, or interval
between animation frames. → P243
* This is not available for Flash files.
You can view Flash movies downloaded from a site, etc.
■Available File Formats
* Even a file in a compatible file format may not save/play
depending on the file.
1
M[Menu]
]
(Data box)
]
"My picture"
2
Move the cursor to a folder
]
C
[Open]
3
Move the cursor to a file
]
C
[View]
1Sequential number/number of saved files
Display the sequential number of the current file and the
total number of saved files in the folder.
2Display name of the file
Viewing Flash Movies
File Format* Flash
File Size Up to 100KB
File Extension swf
Flash movie
playback screen
2
1
243
Data Management
■Key operations on the Flash movie playback screen
1
Flash playback screen(P242)
]
M
[Menu]
・ The sub menu on the Flash playback screen is the
same as the "Sub Menu on the Still Image Display
Screen" (P241). However, "Edit image" and "Send via"
are not available.
1
Still image list screen (P239)/Still image display screen
(P240)/Flash playback screen (P242)
]
M
[Menu] ]
"File property"
・
I
[Edit]: Edit properties.
■Information displayed on the File property screen
* This is not displayed for a Flash file.
Set the display method of an image, a zoom ratio, or
interval between animation frames.
1
Still image display screen (P240)/Flash playback screen
(P242)/Animation list screen (P247)
]
M[Menu]
]
"View settings"
]
Perform the following operations:
[View type]
Normal:Display the image in its original size.
Fit to screen:Display the image enlarged to fit the screen.
[Zoom type]
Normal:Zoom in on an image enlarged to fit the screen.
Same magnification:Zoom in on an image displayed in its
original size.
[Animation interval]
Set the interval between animation frames.
2
I[Done]
Key Description
J
Display the previous/next file
C[Full]
Display a full image, hiding the Soft keys/
return to the original display size
I
[Retry] Play the Flash movie from the beginning
F
/
E
Enlarge the image/return to the previous
ratio
H
Move the display position when the image is
enlarged
・
The entire image and the displayed area
appear at the edge of the screen.
Sub Menu on the Flash Playback Screen
Viewing Image Information
Item Description
File name
Display the file name
File size
Display the file size
File type*
Display the file format
Date & Time
(Saved)
Display the saved date and time
Display size* Display the resolution
File restriction Display whether the file is restricted
Source Display the source
Setting the View of a Still Image
244 Data Management
You can restrict files. The recipient cannot send or forward
a restricted file received by mail.
1
Select a file to restrict
]
M[Menu]
]
"File property"
The File property screen opens.
2
Move the cursor to the "File restriction" field
]
I[Edit]
]
"File Restricted"
You can edit still images. The edited still image is saved in
the same folder as the source file.
・ Only JPEG files can be edited. However, it may not be possible
to edit some files.
・ Editing a still image repeatedly may reduce the image quality or
increase the file size.
1
Still image display screen (P240)
]
M[Menu]
]
"Edit image"
2
M[Menu]
]
Perform the following operations:
[Save]
Save the edited still image. Go to Step 5.
[Rotate]
Left:Rotate the image 90 degrees counterclockwise.
Right:Rotate the image 90 degrees clockwise.
180:Rotate the image 180 degrees.
[Mirror]
Left/Right:Flip the image horizontally.
Up/Down:Flip the image vertically.
[Resize]
You can change the image size.→ P245
[Crop]
You can cut out a part of an image.→ P246
[Insert]
You can add a frame, stamp, or text.
Frame:Add a frame to an image.
]
Select a folder
]
Select a frame
・ After selecting a frame, you can select "Change frame"
or "Rotate" by pressing M[Menu].
Stamp:Add a stamp to an image.→ P246
Text:You can add text to an image.→ P246
Note
・ This option cannot be changed for a file downloaded
from a site.
Editing Still Images
Edit Still Images
Still image edit
screen
Restricting Files
245
Data Management
[Retouch]
Change the brightness, contrast, or color tone of an image.
]
Use Jto switch to the item to retouch
]
C[Select]
・ Adjust the item with J.
・ If selecting "Auto level" or "Auto enhance", the image is
adjusted automatically.
・ If selecting "Color adjust" or "Level adjust", adjust each color
with K.
・ Pressing M[List] also enables you to select the item to
retouch.
[Effect]
Set special effects to an image.
]
Use Jto switch to the item to set
]
C [Select]
・ Depending on items, adjust with J.
・ If selecting "Rotation" or "Spotlight", adjust each item with K.
・ Pressing M[List] also enables you to select the item to set.
[Send via mail]
Create i-mode mail with the edited image attached.
[Undo]
Cancel the performed operation and restore the previous state.
3
C[OK]
■ To cancel editing
Press I[Cancel].
4
C[Save]
■ To restore to the previous state
Press I[Undo].
5
"New file"
■ To overwrite the original file
Select "Original file".
1
Still image edit screen (P244)
]
M[Menu]
]
"Resize"
2
Select an image size
3
C[OK]
・ Go to Step 4 (P244) in "Editing Still Images".
Note
<Frames>
・
Frames are in four sizes: CIF (352x288), QVGA
(240x320), QCIF (176x144), and Sub-QCIF (128x96).
・ You can only select a frame of the same size as the
source image.
<Retouch>
・ A source image larger than 640 x 480 pixels cannot
be retouched.
<Effect>
・ An effect cannot be added to a source image larger
than 640 x 480 pixels or with either side smaller
than 8 pixels.
Changing the Image Size
Note
・ An image cannot be resized when the vertical or
horizontal size of the source image is smaller than 8
pixels.
・ If a size with different proportions than the source is
selected, the original proportions will be retained for
the resized image.
246 Data Management
1
Still image edit screen (P244)
]
M[Menu]
]
"Crop"
2
Select a cropping size
]
Use K to move the frame to the
area to be cropped
]
C [Select]
■ When "User define" is selected
Use Kto move the cursor to a start point
]
C[Select]
]
K to move the cursor to an end point
]
C[Select] to
set the area to crop.
3
C[OK]
・ Go to Step 4 (P244) in "Editing Still Images".
1
Still image edit screen (P244)
]
M[Menu]
]
"Insert"
]
"Stamp"
2
Select a folder
]
Select a stamp
]
K to move the stamp
to the position
]
C[OK]
■ To add another stamp
Press M [Menu]
]
"Change stamp"
]
select a folder
]
select a stamp
]
Kto move the stamp to the position
]
C [OK].
■ To rotate the stamp
M[Menu]
]
Select from "Rotate"
]
"Left"/"Right"
and"180".
3
I[Done]
・ Go to Step 4 (P244) in "Editing Still Images".
You can add text to an image. You can also change the
font color or size, rotate the text, or paste speech bubbles.
1
Still image edit screen (P244)
]
M[Menu]
]
"Insert"
]
"Text"
2
Enter the text to paste
3
M[Menu]
]
Modify text
[Edit text]
Change the pasted text.
[Font size]
Specify the font size.
[Font color]
Change the pasted text color.
Cropping an Image
Note
・ An image cannot be resized when the vertical or
horizontal size of the source image is smaller than 8
pixels.
Adding a Stamp
Note
・ A Stamp cannot be added to a source image larger
than 640 x 480 pixels or with either side smaller
than 24 pixels.
Pasting Characters
247
Data Management
[Rotate]
Rotate the text.
[Comic]
Add a speech bubble.
4
Use K to specify the location
5
I[Done]
・ Go to Step 4 (P244) in "Editing Still Images".
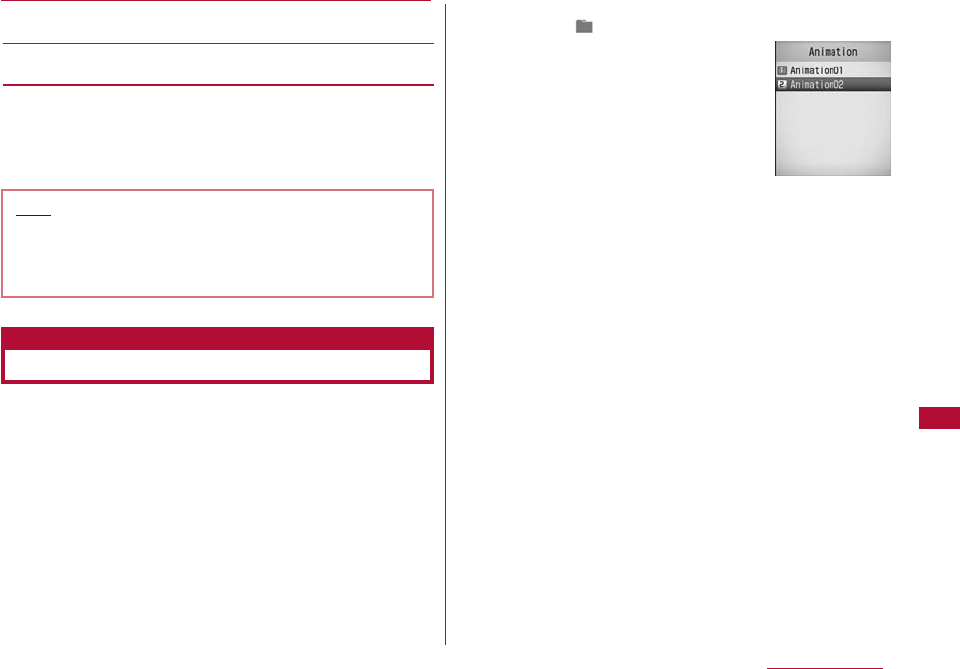
You can create an animation with up to 20 frames using
saved still images.
・ Up to 30 animations can be created.
・ Up to 640 x 480 pixels of still images can be used for
creating the animation.
1
M[Menu]
]
(Data box)
]
"My picture"
]
"Animation"
2
I[New]
]
Enter a display name of the file
3
C[Add]
]
Move the cursor to a folder
]
C[Open]
]
Select an image
Selecting an image displays the registered image file name.
■ To delete an added image
Move the cursor to an image to delete and Press M
[Delete].
4
Repeat Step 3 to save images
]
I[Done]
Note
・ Text cannot be added to an image when the vertical
or horizontal size of the source image is smaller than
24 pixels or when the source image size is larger
than 640x480.
Creating Animations
Animation
Animation list
screen
248 Data Management
1
Animation list screen(P247)
]
Move the cursor to an
animation
]
C[View]
■Key operations while viewing animation
You can perform the following operations from the
selection screen to save images:
・
I
[View]:The selected image is displayed.
1
From a screen where an image is selected (P247)
]
M
[Menu]
]
perform the following operations:
[Select]
Add the selected image file to the animation.
[View]
Display the selected file.
[File property]
Display the file name, size and type, etc. of the selected file.
→ P243
[List view/Grid view]
Switch the display format of files.
[Sort]
Sort files by specifying a condition.
[Memory info.]
Display the status of storage space of the "Data box".
[New folder]
The item not available to use.
1
Animation list screen (P247)
]
Move the cursor to an
animation
]
M[Menu]
]
Perform the following operations:
[Add images]
Add images to the selected animation.
[Delete]
Delete the selected animation.
[Edit title]
Edit the display name of the selected animation. Up to 30
full-pitch or half-pitch characters can be entered.
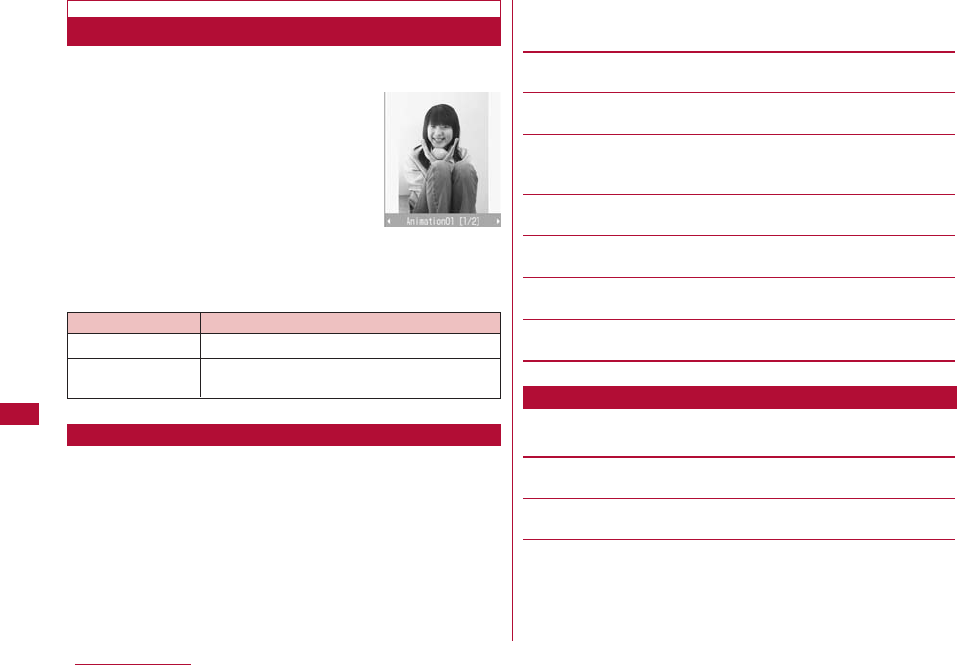
Viewing Animation
Animation
display screen
Image File Selection Screen Sub Menu
Sub Menu on the Animation List Screen
Key Description
J
Play the previous/next animation
C[Full]
Display a fit-to-screen animation, hiding the
Soft keys/return to the original display size
249
Data Management
[Set as stand-by]
Set the selected animation as the Stand-by display.
[View settings]
Set the display method of an image, a zoom ratio, or interval
between animation frames.→ P243
1
Animation display screen(P248)
]
M[Menu]
]
Perform
the following operations:
[Delete]
Delete the selected animation.
[Edit title]
Change the display name of the displayed animation. Up to 30
full-pitch or half-pitch characters can be entered.
[Full screen]
View the animation in Full screen. (In Full screen view, the
following operations are available.)
・
C
/
Q
: Restore the full image to the original display.
・
J
: Display the next/previous animation.
[Set as stand-by]
Set the selected animation as the Stand-by display.
[View settings]
Set the display method of an image, a zoom ratio, or interval
between animation frames.→ P243
You can play video clips you have captured, or i-motion
movies obtained from sites or i-mode mail.
■Available File Formats
* Even a file in a compatible file format may not play
depending on the file.
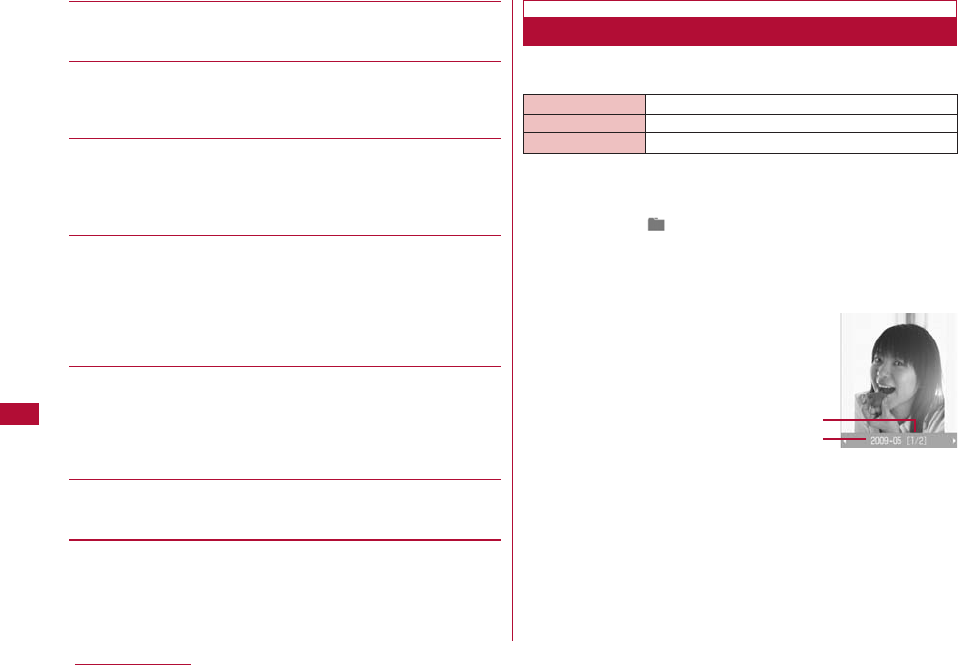
1
M[Menu]
]
(Data box)
]
"i-motion"
・ I[Switch]: Switch between list and
picture display.
Animation Display Screen Sub Menu
Playing Videos/i-motion Movies
Video/i-motion Player
File Format* MP4 (Mobile MP4)
Encoding Method MP4 file
Graphics: MPEG-4 and H.263
Audio: AMR and AAC
File Extension mp4 and 3gp
i-motion movie
250 Data Management
2
Move the cursor to a folder
]
C [Open]
・ I[Mail]: Display the Compose message
screen with the selected file attached.
・ Icons displayed on the list screen
→P238
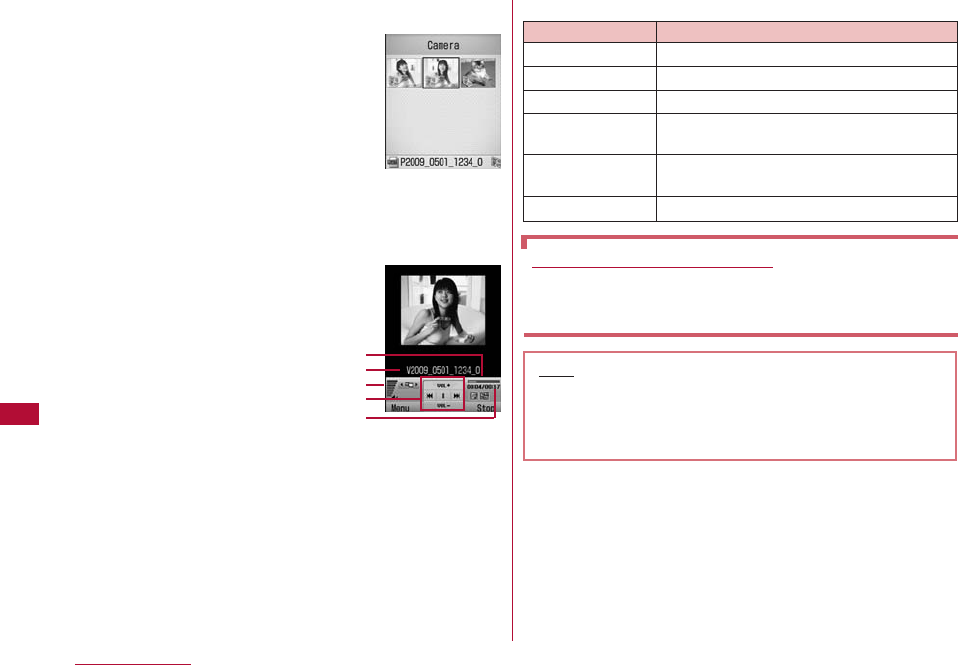
3
Move the cursor to a file
]
C [Play]
1Display the name of a file
2Playback progress bar
Shows the playback elapsed time.
3Volume
4Control Keys
Indicates available navigation keys.
5Elapsed time/total time
■Key operations on the i-motion playback screen
When Link is Set in The Ticker
After i-motion playback ends, a confirmation screen
opens asking whether to use Phone To/AV Phone
To/Web To/Mail To. To use the function, select an item.
Note
・ Some files may not be played and rewound during
playback.
・ When you fast forward or rewind an i-motion movie
during playback, the i-motion movie is paused.
Key Description
C
Pause/Play
IStop
J
Play the previous/next file
L(Hold down)
While being pressed, rewinds the
movie/sound
R(Hold down)
While being pressed, fast forwards the
movie/sound
F
/
E H
Adjust the volume
i-motion File list
screen
i-motion movie
playback screen
2
3
4
5
1
251
Data Management
1
i-motion screen (P249)
]
Move the cursor to a folder
]
M[Menu]
・ The sub menu of the i-motion screen is the same as the
"sub menu on the My Picture Screen" (P240).
1
i-motion file list screen (P250)
]
Move the cursor to a file
]
M[Menu]
]
Perform the following operations:
[Files]
Play:Play the selected file.
Move:Move the selected file to another folder.
]
Select the destination folder
]
I [Move]
Copy:Copy the selected file to another folder.
Select the destination folder I[Copy]
Delete:Delete the selected files.
Delete all:Delete all files in the folder.
]
"Yes"
]
Enter the security code
Rename:Change the display name of the selected file.
Reset name:Reset the display name of the selected file to its
default name.
[Multiple choice]
Select and delete files.
]
Place check marks next to files to delete
]
I [Delete]
]
"Yes"
・ You can move/copy multiple files by performing the following
steps:
]
Place check marks next to files to move/copy
]
M [Menu]
]
"Move"/"Copy"
]
Select the destination folder
]
I [Copy]/[Move]
・ You can also select "Delete", "Mark", "Mark all", "Unmark", or
"Unmark all" by pressing M [Menu].
[File property]
Display the file name, size and type, etc. of the selected file.
→ P253
[Send via]
Mail:Create i-mode mail with the selected file attached. Go to
Step 2 in "Creating and Sending i-mode Mail" (P131).
IrDA:Send a file using Infrared communication.
[Set as tone]
Set the selected file as a ring tone, etc.
Voice ringtone:Set as a ring tone for a voice call.
Video ringtone:Set as a ring tone for a video call.
Mail tone:Set as a ring tone for mail.
Message R tone:Set as a ring tone for Message R.
Message F tone:Set as a ring tone for Message F.
SMS:Set as a ring tone for SMS.
Alarm tone:Set as an alarm tone.
[Set as display]
Set the selected file as the Stand-by display or Call display
Stand-by display:Set as the Stand-by display.
Voice call display:Set as a Voice call display.
Video call display:Set as a Video call display.
Wake-up display:Set as the Wake-up display.
[List view/Grid view]
Switch the display format of files.
[Sort]
Sort files by specifying a condition.
[Memory info.]
Display the status of storage space of the "Data box".
[New folder]
This item is not available.
Sub Menu on the i-motion Screen
Sub Menu on the i-motion File List Screen
252 Data Management
1
i-motion playback screen(P250)
]
M[Menu]
]
Perform
the following operations:
[Play]
Play an i-motion movie.
[Send via mail]
Create i-mode mail with the selected file attached. Go to Step 2
in "Creating and Sending i-mode Mail" (P131).
[Set as tone]
Set the file in playback as a ring tone.
Voice ringtone:Set as a ring tone for a voice call.
Video ringtone:Set as a ring tone for a video call.
Mail tone:Set as a ring tone for mail.
Message R tone:Set as a ring tone for Message R.
Message F tone:Set as a ring tone for Message F.
SMS:Set as a ring tone for SMS.
Alarm tone:Set as an alarm tone.
[Set as display]
Set the selected file as the Stand-by display or Call display
Stand-by display:Set as the Stand-by display.
Voice call display:Set as a Voice call display.
Video call display:Set as a Video call display.
Wake-up display:Set as the Wake-up display.
[Expand]
Display a fit-to-screen video/i-motion movie, hiding Soft keys, etc.
・ Press Qto restore its original display size.
[Mute/Unlock mute]
Mute or un-mute the sound.
[Edit]
Edit the video/i-motion in playback.→ P253
[File property]
Display the file name, size and type, etc. of the file in playback.
→P253
Sub Menu on the i-motion Playback Screen
Note
・ While the sub menu is accessed, the video/i-motion
movie in playback is paused.
<Set as/Set as display>
・ Videos/i-motion movies, that were sent to a PC or
another FOMA terminal via Infrared communication or
DOCOMO Keitai datalink and sent back to the FOMA
terminal, cannot be set as Chaku-motion or an
incoming call screen.
253
Data Management
1
i-motion file list screen (P250)/i-motion playback screen
(P250)
]
M[Menu]
]
"File property"
・ I[Edit]: Edit properties.
■Information displayed on the File detail screen
You can edit videos/i-motion movies. The edited
video/imotion movie will be saved in the same folder as the
source file.
・ The preinstalled files cannot be edited.
・ Some files may not be edited.
・ The Ticker displayed on i-motion movies cannot be edited.
You can extract a still image from a video/i-motion movie.
The extracted image is saved under the "Camera" folder in
"My picture" in "Data box".
1
i-motion playback screen (P250)
]
Display the image to be
extracted as a still image
・ Operations during i-motion playback
]
P250
2
M[Menu]
]
"Edit"
]
"Capture"
You can extract a part of a video/i-motion movie.
The trimmed movie/i-motion will be saved in the folder
saving the file of original edition.
Viewing Video/i-motion Movie Information
Item Description
File name
Display the file name
File size
Display the file size
File type
Display the file format
Date & Time
(Saved)
Display the saved date and time
Play time Display the file playback duration
Display size Display the resolution
Audio Display the sound format
File restriction Display whether the file is restricted
→P244
Ringtone Display whether the file can be set as a ring
tone
Receive display Display whether the file can be set as the
Stand-by display or Call display
Title Display the default title of the file
Creator Display creator information
Copyright Display copyright information
Description Display the file description
Source Display the source
Editing Videos/i-motion Movies
Edit Videos/i-motion Movies
Extracting a Frame of a Video as a Still
(Capture)
Extracting a Video (Trimming)
254 Data Management
1
i-motion playback screen (P250)
]
M[Menu]
]
"Edit"
]
"Clipping"
]
Perform the following operations:
[500KB]
Extract the video beyond the starting point to 500KB or smaller
and save it.
[2MB]
Extract the video beyond the start point to 2MB or smaller and
save it.
[Bound]
Crop and save the video from the selected starting point to a
selected ending point.
]Press
C
to play a video/i-motion ]At the start point to
clip
M
[Start] ]At the end point to clip
M
[End]
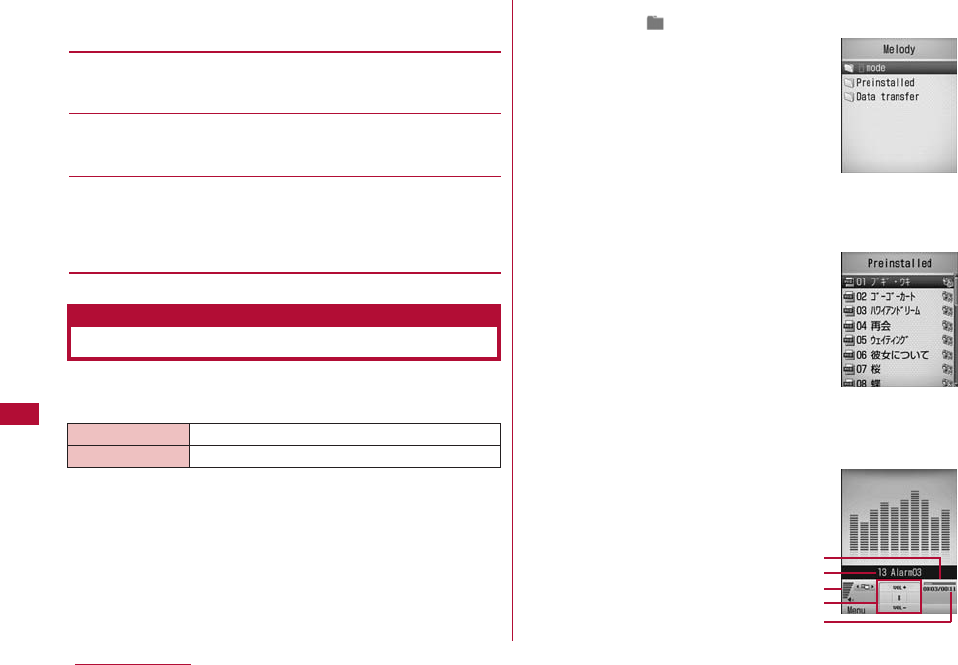
You can play pre-installed melodies or melodies
downloaded from sites.
■Available File Formats
* Even a file in a compatible file format may not play
depending on the file.
1
M[Menu]
]
(Data box)
]
"Melody"
2
Move the cursor to a folder
]
C[Open]
・ Icons displayed on the list screen
→P238
3
Move the cursor to a file
]
C[Play]
・ I[Mail]: Display the Compose message
screen with the selected file attached.
Playing Melodies
Melody player
File Format* SMF and MFi
File Extension mid and mld
Melody screen
Melody file list
screen
Melody playback
Screen
2
3
4
5
1
255
Data Management
1Display the name of a file
2Playback progress bar
Shows the playback elapsed time
3Volume
4Control Keys
Available navigation keys are shown.
5Elapsed time/total time
■Key operations on the Melody playback screen
1
Melody screen (P254)
]
Move the cursor to a folder
]
M
[Menu]
・ The sub menu of the Melody screen is the same as the
"Sub Menu on the My Picture Screen" (P240). However,
"List display・picture display" is not displayed.
1
Melody file list screen (P254)
]
Move the cursor to a file
]
M[Menu]
]
Perform the following operations:
[Files]
Play:Play the selected file.
Move:Move the selected file to another folder.
]
Select the destination folder
]
I [Move]
Copy:Copy the selected file to another folder.
]
Select the destination folder I [Copy]
Delete the selected file.
Delete:Delete the selected files.
Delete all:Delete all files in the folder.
]
Yes
]
Enter the security code
Rename:Change the display name of the selected file.
Reset name:Reset the display name of the selected file to its
default name.
[Multiple choice]
Select and delete files.
]
Place check marks next to files to delete
]
I [Delete]
]
"Yes"
・ You can move/copy multiple files by performing the following
steps:
]
Place check marks next to files to move/copy
]
M [Menu]
]
"Move"/"Copy"
]
Select the destination folder
]
I [Copy]/[Move]
・ You can also select "Delete", "Mark", "Mark all", "Unmark", or
"Unmark all" by pressing M [Menu].
[File property]
Display the name, size and type, etc. of the selected melody.
→ P257
[Send via]
Mail:Create i-mode mail with the selected melody attached.
Go to Step 2 in "Creating and Sending i-mode Mail" (P131).
IrDA:Send a file using Infrared communication.
Key Description
C
Pause/Play
J
Play the previous/next file
F
/
E H
Adjust the volume
Sub Menu on the Melody Screen
Sub Menu on the Melody File List Screen
256 Data Management
[Set as]
Set the selected file as a ring tone, etc.
Voice ringtone:Set as a ring tone for a voice call.
Video ringtone:Set as a ring tone for a video call.
Mail tone:Set as a ring tone for mail.
Message R tone:Set as a ring tone for Message R.
Message F tone:Set as a ring tone for Message F.
SMS:Set as a ring tone for SMS.
Alarm tone:Set as an alarm tone.
[Sort]
Sort files by specifying a condition.
[Memory info.]
Display the status of storage space of the "Data box".
[New folder]
This option is not available.
1
Melody playback screen (P254)
]
M[Menu]
]
Perform
the following operations:
[Send via mail]
Create i-mode mail with the melody in playback attached. Go to
Step 2 in "Creating and Sending i-mode Mail" (P131).
[Set as]
Set the file in playback as a ring tone.
Voice ringtone:Set as a ring tone for a voice call.
Video ringtone:Set as a ring tone for a video call.
Mail tone:Set as a ring tone for mail.
Message R tone:Set as a ring tone for Message R.
Message F tone:Set as a ring tone for Message F.
SMS:Set as a ring tone for SMS.
Alarm tone:Set as an alarm tone.
[Mute]
Mute or un-mute the sound.
[File property]
Display the file name, size and type, etc. of the melody in
playback.→ P257
Sub Menu on the Melody Playback Screen
Note
・ While the sub menu is accessed, the melody playback
is paused.
257
Data Management
1
Melody file list screen (P254)/Melody playback screen
(P254)
]
M[Menu]
]
"File property"
・ I[Edit]: Edit properties.
■Available File Formats
You can exchange Phonebook entries, Schedule events or
Bookmarks with a device equipped with infrared
communication capabilities.
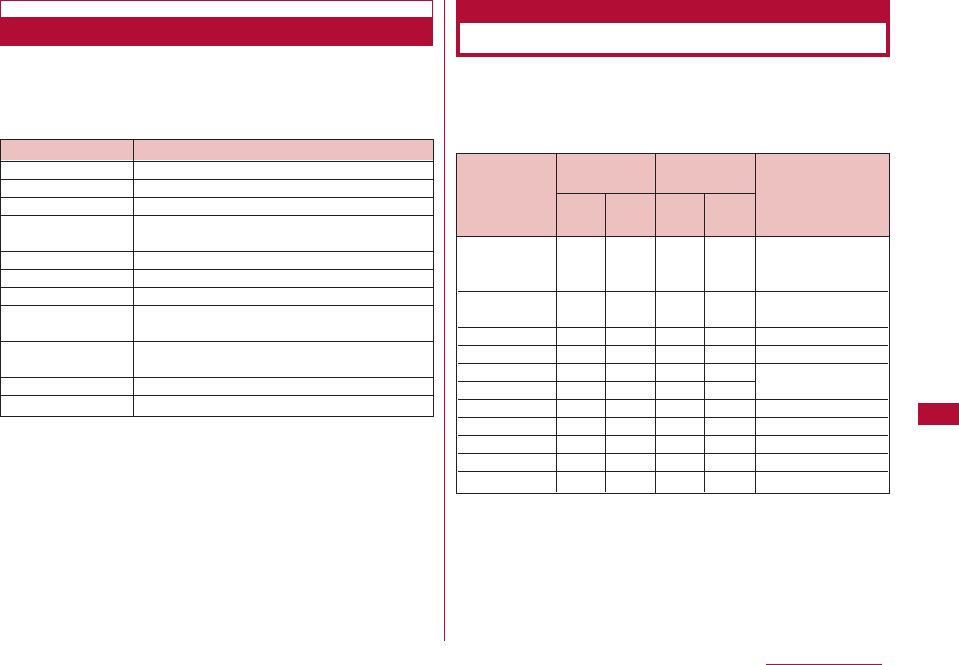
■Available Data for Transfer
*1 Received To Do tasks with the alarm set prior to the set time
may not be correctly saved.
*2 Up to 2 MB of data per file can be sent or received.
*3 Up to 100 KB of data per file can be sent or received.
*4 Received Bookmarks may not be filtered depending on the
other party's terminal model.
Viewing Melody Information
Item Description
File name
Display the file name
File size
Display the file size
File type
Display the file format
Date & Time
(Saved)
Display the saved date and time
Play time Display the file playback duration
Display size Display the resolution
Audio Display the sound format
File restriction Display whether the file is restricted
→ P244
Ringtone Display whether the file can be set as a ring
tone
Title Display the default title of the file
Source Display the source
Using Infrared Communication
IrDA
Data type
Phonebook
entries ○○○○See P80
(Personal info)
Schedule ○○○○Up to 200
events
To Do*1 ○○○○Up to 50
Received mail ○○○○Up to 1000
Sent mail ○○○○
Up to 500
Unsent mail ○○○○
Image files*2 ○×○×Up to 1000
Videos*2 ○×○×Up to 1000
Melodies*3 ○×○×Up to 1000
Bookmarks*4 ○○○○Up to 100
Memo ○○○○Up to 50
Number of pieces
to be stored
Receiving
capability
Sending
capability
One
item
One
item
All
items
All
items
258 Data Management
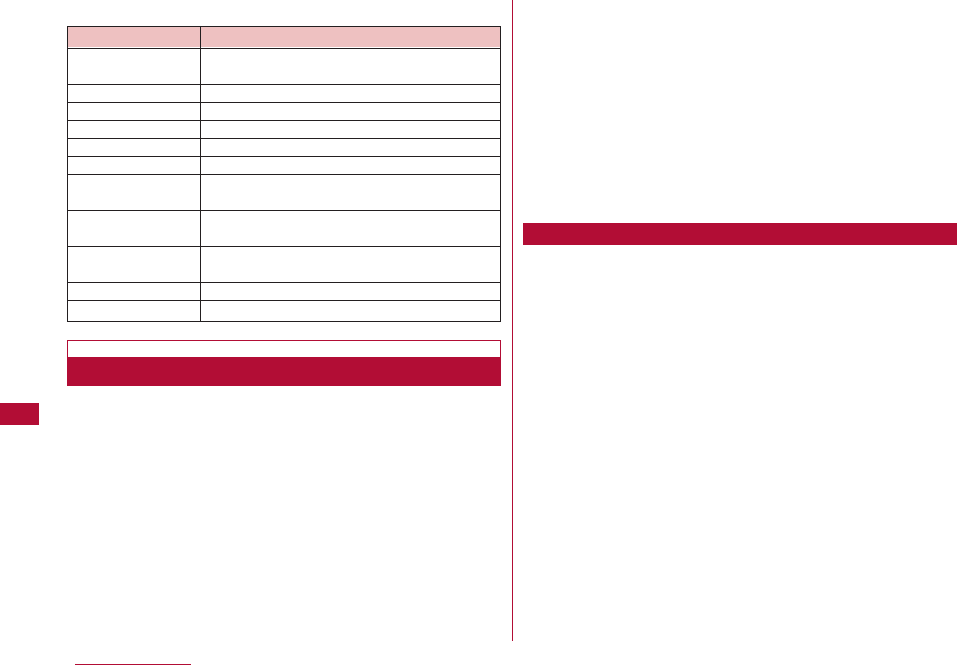
■Saving destination of data received via Infrared
・ Use infrared devices within a distance of approximately
20 cm.
・ Do not move the FOMA terminal until the data exchange
completes.
・ If you hold the FOMA terminal in your hand, be sure to
hold it securely, so that it does not shake.
・ Calls, i-mode, and data transfer are not available during
infrared communication because the terminal is in the
same status as out of service area.
・ Data may not be transferred depending on the other
party's FOMA terminal conditions. Depending on the other
party's terminal model, the filter setting of received mail
or Bookmarks, or category setting of Phonebook entries
may not be reflected, or the content of Deco-mail may not
be saved correctly.
・ Infrared communication between the L-06A terminal and
a non-FOMA device may result in data not being received
or displayed correctly.
・ Communication may take a while depending on the
amount of data to be transferred. Also, the data may not
be received.
・ Communications may not be performed successfully
under direct sunlight, directly under a fluorescent light, or
near another infrared device, due to possible interference.
・ Attachments to i-mode mail are also forwarded. However,
some types of attachments may not be forwarded.
Data type Storage Location
Phonebook
entries
Phonebook entries
Schedule events
Schedule events
To Do
To do list
Received mail Inbox
Sent mail Outbox
Unsent mail Unsent message
Still images The "Data transfer" folder in "My picture" in
the "Data box"
Movies The "Data transfer" folder in "i-motion" in the
"Data box"
Melodies The "Data transfer" folder in "Melody" in the
"Data box"
Bookmarks The "Bookmark"folder
Memo Memo
Performing Infrared Communication
Cautions on Data Transfer
259
Data Management
・ When a message text contains pictographs (E-Moji) or
symbols, they may not be displayed correctly on a
recipient terminal or PC that is not capable of displaying
them.
・ Depending the type of the receiving device, all subjects
of mail may not be received.
・ Infrared communication is not available when Lock all,
Data access lock is set, or when Self mode is activated.
・ Large size mail may not be sent correctly.
・ Only downloaded attachments are forwarded when mail is
forwarded.
・ Set the receiving device to infrared receiving mode before
sending data.
Example: Sending one Phonebook entry
1
Stand-by display
]
DMove the cursor to a Phonebook &
Logs entry
]
M[Menu]
]
"Send Ir data"
]
"Focused data"
]
Yes"
1
M[Menu]
]
(LifeKit)
]
"Receive Ir data"
]
"Receive"
]
"Yes"
2
Perform infrared transmission operations on the sending
device
Start infrared communication.
3
"Yes"
You can exchange all data in a batch with a PC or another
FOMA terminal.
・ To exchange all data, a session code is used to identify
the sender and receiver correctly. The session code is
any 4- digit number and should be entered both in the
sending and receiving devices before sending/receiving
data.
・ Set the receiving device to the infrared receiving mode
before sending data.
Example: Sending all Phonebook entries on the FOMA terminal
1
Stand-by display
]
D
]
M[Menu]
]
"Send Ir data"
]
"all
in phone"
Exchanging Data One Piece at a Time
Send IrDA/Receive Ir Data
Sending Data One Piece at a Time
Note
・ A warning appears if the destination cannot be found.
Verify the distance and angle with the other party.
Receiving Data One Piece at a Time
Receiving or Sending All Data
Send All via IrDA/Receive All IrDA
Sending All Data
260 Data Management
・ If a Phonebook entry has an image set, a warning
indicating that it may take a while to send is displayed.
Select "Yes" to send.
2
Enter the security code
]
Enter the session code
]
"Yes"
Start infrared communication.
・ Receiving all data overwrites the data on the FOMA
terminal and deletes all saved data including protected
mail. Verify that important data has been saved
elsewhere before sending or receiving all data.
1
M[Menu]
]
(LifeKit)
]
"Receive Ir data"
]
"Receive all"
]
"Yes"
2
Enter the Security code
]
Enter the session code
3
Perform infrared transmission operations on the sending
device
Start infrared communication.
4
"Yes"
Note
・ A warning appears if the destination cannot be found.
Verify the distance and angle with the other party.
・ Files in "My picture", "i-motion" and "Melody" cannot be
sent as a batch (one file can be sent at a time).
Receiving All Data
Convenient Functions
Multi-access ・・・・・・・・・・・・・・・・・・・・・・・・・・Multi-Access 262
Multitasking ・・・・・・・・・・・・・・・・・・・・・・・・・・・Multitasking 263
Using One Touch Keys ・・・・・・・・・・・・・・・One touch key 265
Sounding an Alarm at Set Times ・・・・・・・・・・・・・Alarm 267
Managing Schedule Events ・・・・・・・Schedule events 269
Managing To Do Tasks ・・・・・・・・・・・・・・・・・To Do list 273
Managing Anniversaries ・・・・・・Remembering dates 276
Quick Access to Frequently Used Functions
・・・・・・・・・・・・・・・・・・・・・・・・・・・・・・・・・・・・・ Custom Menu 278
Registering Your Name and Image ・・Own number 279
Checking Call Duration/Call Cost ・・・・・・・・・・・・・・・・・・ 280
Setting a Call Cost Limit ・・・・・・・・・Set call cost limit 281
Using the World Time ・・・・・・・・・・・・・・・・・・・World time 282
Using the Stopwatch・・・・・・・・・・・・・・・・・・・・Stopwatch 283
Using the Unit Converter ・・・・・・・・・・・Unit converter 283
Using the Calculator ・・・・・・・・・・・・・・・・・・・・Calculator 286
Using Memos ・・・・・・・・・・・・・・・・・・・・・・・・・・・・・・・・Memo 287
Talking Using the Flat-plug Earphone/microphone with
Switch・・・・・・・・・・・・・・・・・・・・・・・・・・・・・・・・・・・・・・・・・・・・・・ 288
Automatically Answering a Call Connecting the Flat-plug
Earphone/microphone with Switch
・・・・・・・・・・・・・・・・・・・・・・・・・・・・・・・・・・・・・・ Auto Answer 290
Chiming the Hour ・・・・・・・・・・・・・・・・・・Hour indication 290
Checking Memory Usage ・・・・ ・・・・・Memory status 291
261
262 Convenient Functions
Multi-access
Multi-access is a function that allows the use of three lines
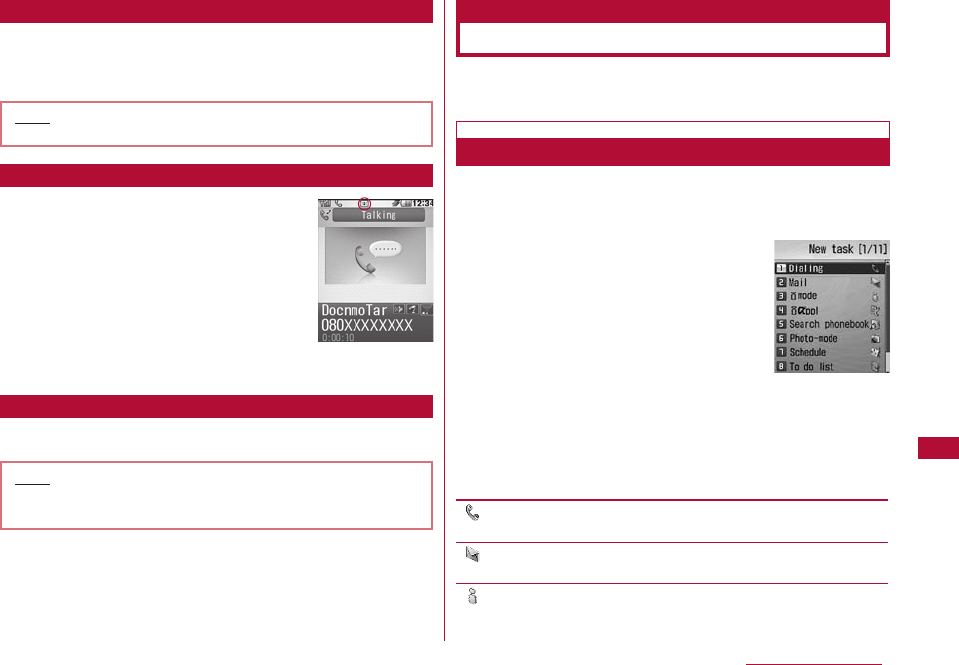
(voice call, packet communication, and SMS) concurrently.
By invoking the New task (P263) screen, a voice call can
be made during packet communication such as i-mode.
Example: Making a voice call during i-mode operation
1 i-mode screen(P175)] N(1+seconds) ]"Dialing"
Main menu appears.
2 Enter a phone number ] A
A voice call can be received during packet communication
such as i-mode.
Example: Receiving a voice call during i-mode operation
1 A call arrives
The Incoming call screen opens.
2 A
During a voice call, you can perform operations such as
sending/receiving mail or connecting to i-mode.
Communication Type Available Lines
Voice call 1 line
Packet communication including i-mode, 1 line
i-αppli, i-mode mail, and PC connections
SMS 1 line
Multi-Access
Note
・ Combinations of Lines.
・ During Multi-access, communication charges apply
for each connected line.
・ During a video call, Multi-access is disabled except
for incoming SMS.
Making a Voice Call during Packet
Communication
Note
・ To return to the i-mode screen from the Voice call
screen press N and select "i-mode".
Note
・ To return to the i-mode screen from the Voice call
screen press Nand select "i-mode".
Receiving a Voice Call during Packet
Communication
Using Other Communications during a
Voice Call
263
1 Voice call screen ] N(1+ seconds)]"Mail"
2 Create and send mail
An icon (P35) to notify of incoming mail
appears at the top of the screen.
1 Voice call screen ] N(1+ seconds)]"i-mode" ]"iMenu"
This FOMA terminal provides multitasking that allows you
to start and operate multiple applications concurrently.
To launch a new function while another function is running,
open the New task screen (Task manager).
1 While using an application]N(for 1+
seconds)
・ Unavailable functions are grayed out.
2 Select an application to start
・ Available applications vary depending on the currently
running application and its operating status.
[ Dialing]
The Phone number entry screen opens.→P52
[ Mail]
The Mail menu screen opens.→P130
[ i-mode]
The i-mode menu screen opens.→P174
Convenient Functions
Voice call
screen
Sending Mail
Note
・ Creating and sending mail →P131、P168
Note
・ To return to the Voice call screen, press P] Select
"Yes"
Receiving Mail
Connecting to i-mode
Multitasking
Multitasking
Task manager
Launching a New Function
New task
Screen
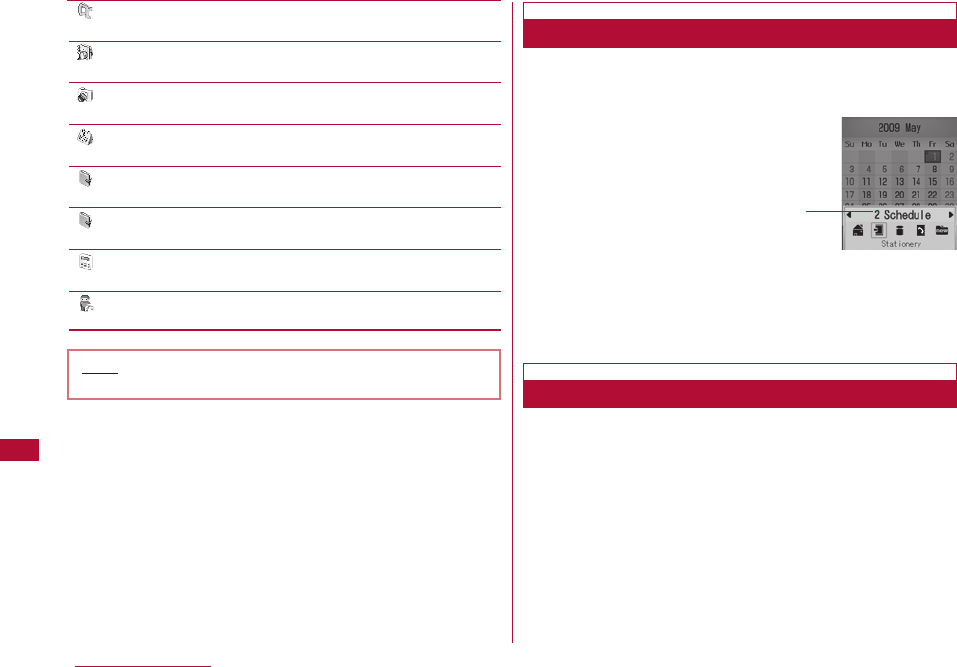
264 Convenient Functions
[i
α
ppli]
The Software list screen opens.→P223
[ Search phonebook]
The Search phonebook screen opens.→P87
[ Photo-mode]
The Still image capture screen opens.→P200
[ Schedule]
The Month view calendar screen opens.→P269
[ To do list]
The To do list screen opens.→P273
[ Memo]
The Memo list screen opens.→P287
[ Calculator]
The Calculator screen opens.→P286
[ Own number]
The Own number screen opens.→P50
To switch or view applications, open the Task list screen.
1 While using an application]N
Select New task on the Task list screen
to open the New task screen that allows
you to launch another application.
2 Use Kto select an application
The screen for the selected application will be displayed.
Close the currently displayed application and open the
previously displayed application.
1 While using an application]Q/P
・ To close an application, make it current application first.
・ Repeat these steps to close other applications.
Note
・ Combinations of Applications →P359
Switching/Viewing Applications
Task list
Screen
Terminating an Application
The running applications
are listed
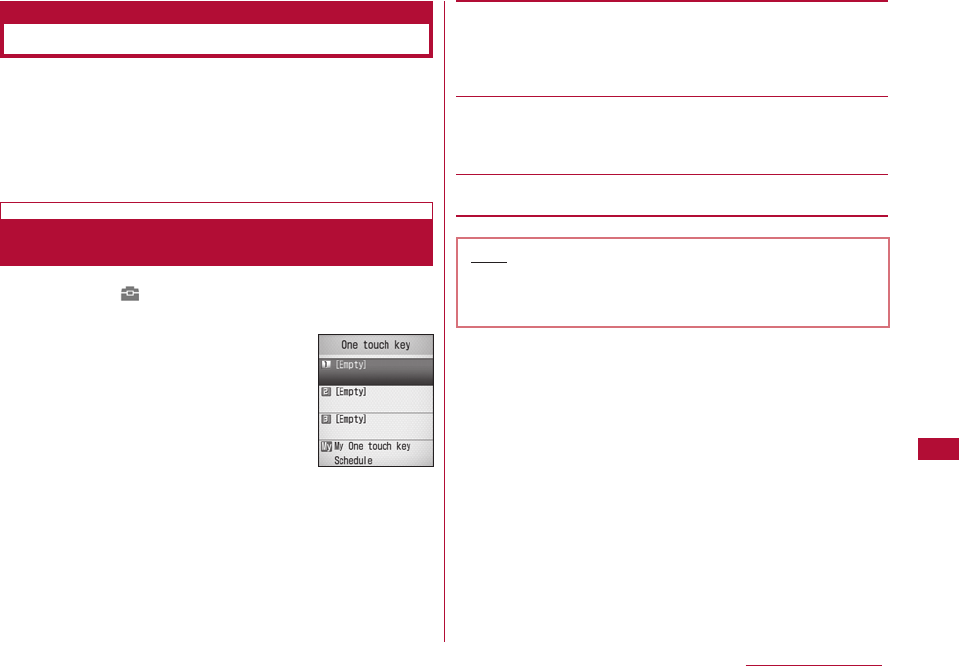
A phone number and a mail address can be assigned to
h/j /k One Touch Keys. You can view the
phone number and the mail address with a single
keystroke.
A frequently used function can be assigned to la One
touch hot key. You can access the function with a single
keystroke.
1 M[Menu]](LifeKit)]"One Touch Key"
・ I[Delete]: Delete the content of the selected key.
2 Move the cursor to the number of a One Touch Key (1-
3) ]C[Register]]Perform the following operations
・ If you select an already used number, press C[Change].
[Search phonebook ]
Set up a number using a Phonebook entry.
・ When selecting a Phonebook entry with multiple mail addresses
saved, you need to further specify which addresses are to be
registered to the key.
[Direct input]
Enter a name, phone number, and mail address.
]
Select a field
]
Enter the Name/Phone number/Mail address
]
I [Done]
[Cancel]
Cancel registering.
265
Convenient Functions
Using One Touch Key
One Touch Key
Registering a Phone Number and Mail
Address to a One Touch Key Note
<Register direct>
・ A phone number and a mail address assigned to One
touch hot keys is not saved in the Phonebook.
266 Convenient Functions
1 One Touch Key list screen (P265) ]M [Menu] ]
Perform the following operations
[Copy from Phonebook]
Set up a number using a Phonebook entry.
Selected slot: Register the Phonebook entry of the Memory
number from 000 to 002 based on the selected
One Touch Key number (1-3).
All (1-3) : Register the Phonebook entries of the Memory
numbers from 000 to 002 to One Touch Key
h/j/k.
[Register direct input]
Enter a name, phone number, and mail address for the selected
One Touch Key.
]
Select a field
]
Enter the Name/Phone number/Mail address
]
I [Done]
[Delete]
Delete the content of the selected One Touch Key.
1 Stand-by screen h/j/k
The content of the One Touch Key appears.
2Aor C [Call]
gor I [Mail]
M [Menu]]Perform the following operations:
[Video call]
Make a video call.
[Compose mail]
Compose i-mode mail.→P131
[Compose SMS]
Compose an SMS message.→P168
[Change]
Change the contents of the One Touch Key.
[Int. call (Japan)]
When you make a call from overseas to a phone number in Japan
saved in the Phonebook, the Country code for Japan "+81" is
added automatically at the beginning of the phone number.
・ If the phone number has a leading "0", it is automatically
deleted.
Using sub menu
To compose mail
To make a call
Making a Call/Composing Mail Using One
Touch Key
Note
<Register direct>
・ A phone number and a mail address assigned to One
touch keys is not saved in the Phonebook.
Sub Menu on the One Touch Key List Screen
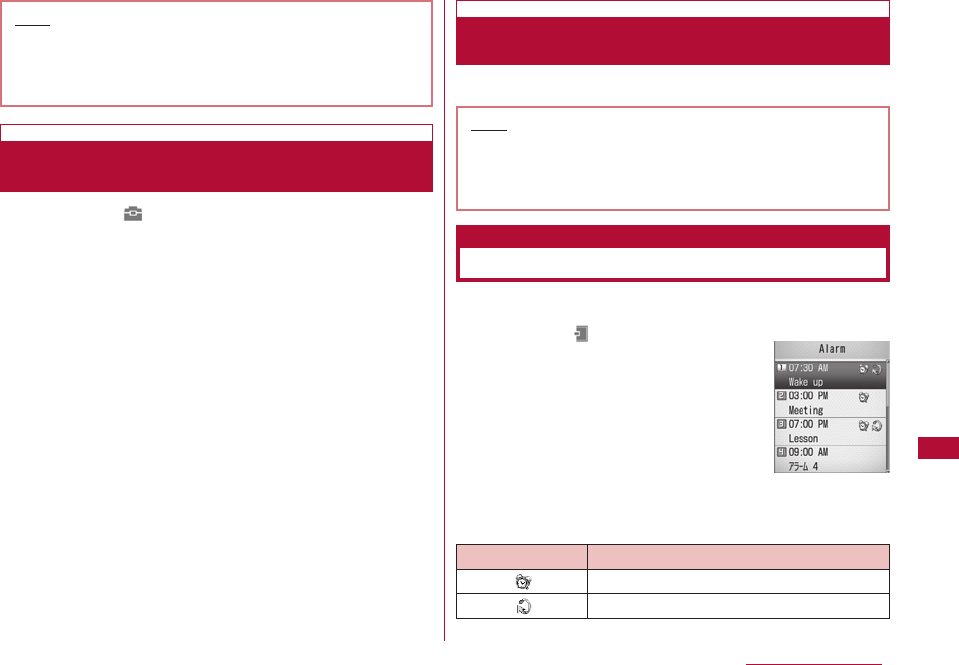
267
Convenient Functions
1 M[Menu] ](LifeKit) ]"One Touch Key" ]Move the
cursor to "My One Touch Key" ]C[Register]
A list of functions that can be assigned to One Touch Key
appears.
2 Select an item ]Select a function
1 Stand-by display ]l
The FOMA terminal can be used as an alarm clock. Up to
10 alarms can be registered.
1 M[Menu]](Stationery)]"Alarm"
・ Press I to set the selected alarm
"On"/ "Off".
■Icons displayed on the Alarm list screen
Assigning a Frequently Used Function to
One Touch
Accessing a Function Using a One Touch
Key
Note
・ You can also select a function to access from My
One Touch key menu that appears when l is
pressed for 1+ seconds in Stand-by (items in My
menu cannot be changed).
Sounding an Alarm at Set Times
Alarm
Alarm list
screen
Icon Description
Alarm set to "ON".
Alarm with "Set repeat" set.
Note
・ You can also make a call by pressing h/j/k
for 1+ seconds in Stand-by. During International
roaming, a message appears and you can select
"International call", "Normal call", or "Cancel".
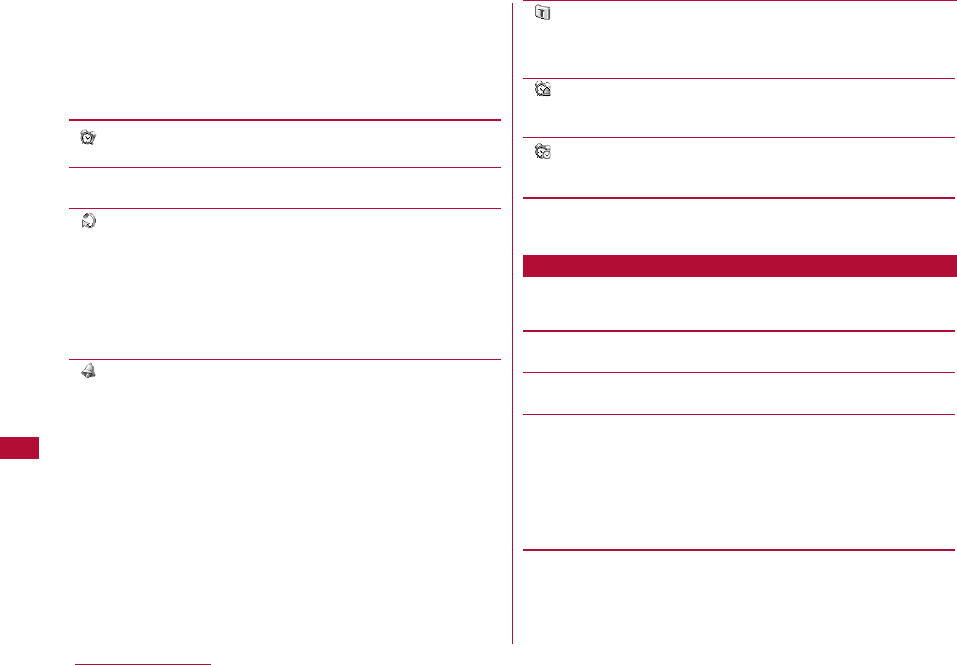
2 Move the cursor to an alarm to be edited ]C[Edit]
3 Perform the following operations:
・ C[List]: List of the options for the selected item is
displayed.
[ (ON/OFF list)]
Set whether to enable the alarm.
[(Set time)]
Set the time for the alarm to sound.
[ (Set repeat)]
Select a repetition type.
・ If you select "Daily except holiday", the alarm does not sound on
Sundays and holidays set in "Set holiday" (P272).
If "Weekdays" is selected, perform the following steps to specify
the days of the week for the alarm to start:
]
D
]
C[List] on "Su Mo Tu We Th Fr Sa" field
]
Place check
marks next to days of the week
]
I [Done]
[ (Alarm tone)]
Select an alarm tone.
Music :Select from Chaku-Uta-Full®songs saved in "Music"
in the "Data box.→P217
Go to Step 3 (P214) in "Setting a Chaku-Uta-Full®
Song as a Ring Tone".
i-motion :Select from videos/i-motion movies saved in
"imotion" in the "Data box".→P249
Melody :Select from melodies saved in "Melody" in the "Data
box".→P254
[ (Memo)]
Up to 7 full-pitch or 15 half-pitch characters can be entered. The
entered text is displayed on the Alarm screen after the alarm
starts.
[ (Turbo alarm)]
Set whether to enable the Turbo Alarm that increases its volume
levels up to the maximum volume and vibrates the terminal.
[ (Snooze)]
Select an interval between snooze tones. To deactivate Snooze,
select "OFF".
4 I[Done]
1 Alarm list screen (P267)]M[Menu]]Perform the
following operations
[Edit]
Edit the selected alarm.→P267
[Turn On/Turn Off]
Set the selected alarm "ON"/"OFF".
[Multiple choice]
Select alarms and set whether to enable the alarms.
]
Place check marks next to the alarms
]
M[Menu]
]
"On"/"Off"
・ You can also select "Mark/Unmark"
]
"Mark all", "Mark" *,
"Unmark" *, or "Unmark all" by pressing M[Menu].
*: Either one appears depending on the alarm status.
268 Convenient Functions
Sub Menu on the Alarm List Screen
269
Convenient Functions
You can save a schedule event such as a meeting or
appointment. Up to 200 Schedule events and up to 100
holidays can be saved.
1 M[Menu]](Stationery)]"Schedule"]Move the
cursor to the day to be saved in Schedule ] I [New]
] Perform the following operations
・ C[List]: List of the options for the selected item is
displayed.
・ When the cursor is in the time setting field, you can stop
creating a schedule event by selecting M[Cancel] ]
"Yes".
When the alarms for "Alarm" and "Schedule"/"To Do"
reach the specified time
The following actions are performed by function.
Alarm
The alarm screen appears, the alarm tone sounds and
the illumination lights.
・ To stop the alarm, press C[OFF]. Unless you stop the
alarm, the alarm tone repetitively rings 12 times at 5
minute intervals, then stops.
・ You can press I[Snooze] to temporarily stop the
alarm with its (Snooze) activated. When the snooze
interval time is up, the alarm starts ringing again.
・ While the alarm tone is ringing with (snooze setting)
activated, the alarm counter will be reset right after you
press I[Snooze], then the alarm will starts ringing
over from scratch.
Schedule events
The schedule alarm screen appears, the alarm tone
sounds and the illumination lights.
・ To stop the alarm, press C[OK] and then C[OFF] on
the Schedule detail screen.
・ To sound the alarm tone again, select I[Snooze] ]
Select a snooze interval.
・ If the alarm for Schedule is not stopped, the alarm tone
sounds again in about 5 minutes regardless of the
setting of the snooze interval time.
To Do
The To Do alarm screen appears, the alarm tone sounds
and the illumination lights.
・ To stop the alarm, press C[OK] and then C[OFF] on
the To Do detail screen.
When the alarm for Alarm, Schedule and To Do are set to
the same time
The priority order for the alarm is Alarm
→
Schedule alarm
→
To Do alarm.
When Public mode (Drive mode) is set
Alarm will not sound.
・ Alarm will be notified at the set time after the following
day.
・ Alarm for a Schedule event/To do task will not be
notified afterward and remains on the Stand-by
display. To delete the icon, delete the relevant Schedule
event/To do task or change alarm setting to "No alarm".
Managing Schedule Events
Schedule events
Registering Schedule Events

[ (Start Date)]
Specify the date to start the Schedule event. To enter a date,
use Jto move the cursor to the position and enter a number
with dial keys. Press C[List] to select the day from a calendar.
[ (End Date)]
Specify the date to complete the Schedule event. To enter a
date, use Jto move the cursor to the position and enter a
number with dial keys. Press C [List] to select the day from a
calendar.
・ The end date cannot be set earlier than the start date.
[ (Set time)]
Specify the times to start/end the Schedule event.
All day : Save the schedule event for a whole day without
specifying time.
Set time : After setting, use Dto move the cursor and enter
the start and end time of the schedule event.
Use Jto move the cursor to the position and enter
the time with dial keys and switch between "AM" and
"PM" with C(pressing Cin the time field opens the
Time settings screen that allows you to enter time
with dial keys and H).
・ The end time cannot be set earlier than the start
time.
・ Depending on the settings in "Date&Time format"
(P111), the display format or order of the date and
time may differ.
[ (Category)]
Select a category for the Schedule event. Icons vary depending
on the selected category.
[ (Subject)]
Up to 200 full-pitch or 400 half-pitch characters can be entered.
Up to 2 subjects are displayed at the bottom of the Monthly view
screen.
A subject is required to register a Schedule event.
The summary is displayed on the Alarm screen that opens when
alarm starts.
[ (Summary)]
Up to 20 full-pitch or 40 half-pitch characters can be entered.
[ (Set alarm)]
Set whether to be notified with an alarm tone of the set starting
date and time.
If you select other than "No alarm", perform the following steps to
select the alarm tone.
]
D
]
C[Select] on field
]
Select a type of the alarm tone
Music : Select from Chaku-Uta-Full®songs saved in "Music" in
the "Data box.→P217
Go to Step 3 (P214) in "Setting Chaku-Uta-Full®as a
Ring tone".
i-motion : Select from videos/i-motion movies saved in "imotion"
in the "Data box".→P249
Melody : Select from melodies saved in "Melody" in the "Data
box".→P254
[ (Set repeat)]
You can set a schedule event to recur periodically. Select "Once"
not to repeat. If "Weekdays" is selected, perform the following
steps to specify the day of the week:
]
D
]
C[List] on "Su Mo Tu We Th Fr Sa" field
]
Place
check marks next to days of the week
]
I [Done]
[ (Secret)]
This option appears when Secret mode (P121) is set to "ON".
Set this option to "ON" if you save the created schedule event as
secret data.
2 I [Done]
270 Convenient Functions
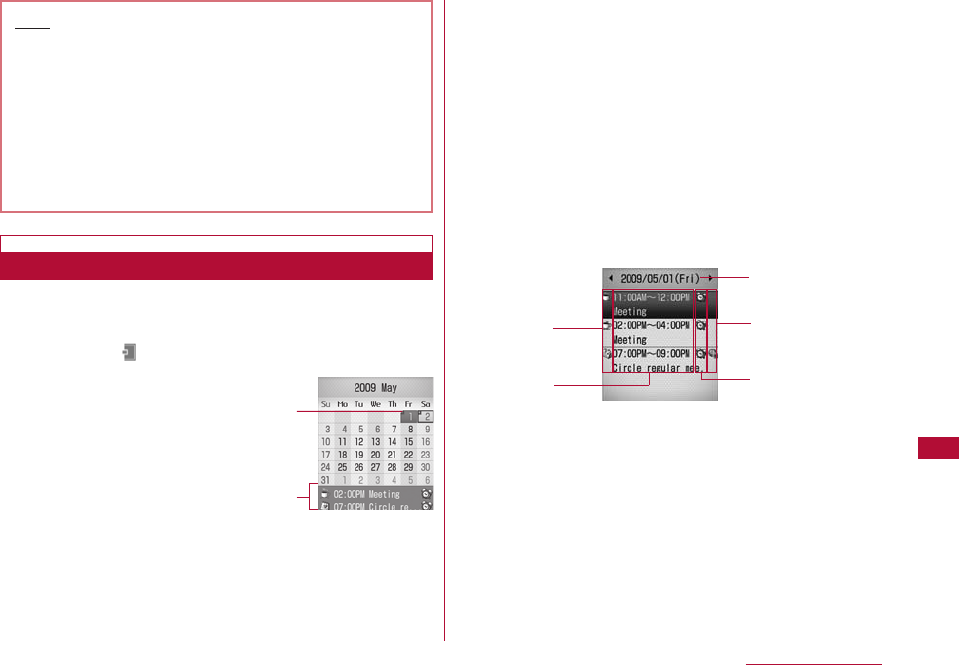
271
Convenient Functions
You can view settings of a schedule event from the
Calendar screen.
1 M[Menu]](Stationery)]"Schedule"
1The day when a schedule event is set
2A schedule event saved for the highlighted day
Up to 2 events will be displayed. Schedule events that
have passed their start times will not be displayed.
・ 1/3: Switch the view to yearly.
・ 7/9/F/E: Switch the view to monthly.
・ 5:Return to the current date.
・ On the Monthly view, blue indicates Saturdays, and red
indicates Sundays and holidays.
・ You can switch between the Monthly and Weekly view of the
Calendar screen.→P272
2 Select a day to view
・ J: Switch to the previous/next day.
1Date
2Icon indicating a "Category"
3Start time-End time, Subject
4Icon indicating a schedule event set for other than Japan
time
Appears if the schedule event's "Local time zone" (P48) is set
to other than "GMT+9:00" (outside of Japan).
5Alarm icon
Appears when the alarm is set to sound.
Note
<Secret>
・ When the "Secret mode" (P123) is set to "Secret only
mode", the Schedule entry is saved as secret data.
・ The secret Schedule is displayed when the "Secret
mode" is set to "On" or "Secret only mode".
・ At the set time of a secret Schedule event while the
"Secret mode" is set to "OFF", the alarm tone sounds,
however, the description of the event will not appear,
and "Secret" appears on the notification screen.
Viewing Schedule Events
Calendar
screen
1
2
Schedule list
screen
1
2
3
4
5
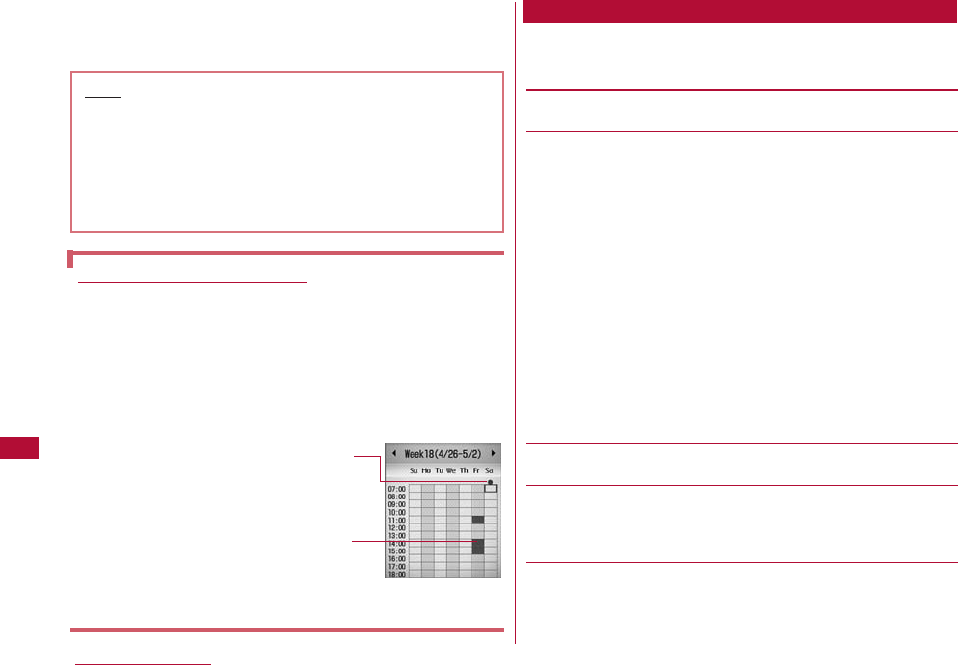
3 Select the event to view
The Schedule detail screen opens.
1 Month view screen (P271)/Week view screen (P272)
]M [Menu] ]Perform the following operations:
[Add new]
Register a new Schedule event.→P269
[Set holiday]
Set or release a selected day as a holiday.
To set a day as a holiday, select "Set holiday"
]
select an option
from the following
]
enter a "Holiday name"
]
I[Done].
On the day : Set the highlighted day as a holiday.
Weekly : Set the day of the week of the highlighted day
as a weekly holiday.
Monthly : Set the date of the highlighted day as a
monthly holiday.
Annually : Set the date of the highlighted day as an
annual holiday.
Duration(2-31): Set a period from 2 to 31 days as holidays
from the highlighted day. Enter the number of
days in the "Duration (2-31)" field.
・ To cancel holidays, select "Clear holiday"
]
"Yes". Select "Yes"
on the Confirmation of deletion of repeat screen for a holiday
set as "Weekly", "Monthly", "Annually", or "Duration (2-31)".
[Week view/Month view]
Switch the view by week or by month.→P271
[Go to date]
The Calendar for the specified day appears. Use Jto move the
cursor to the position in the "Go to date" field, and enter the date
and time with dial keys.
[Delete]
Register a new Schedule event.→P269
Previous entries : Delete all events scheduled prior to today.
All entries : Delete all Schedule events.
272 Convenient Functions
Sub Menu on the Calendar View
Switching the Calendar View
The Calendar screen can be viewed on monthly basis or
weekly basis.
Perform the following steps to switch views temporarily.
]On the Calendar screen M[Menu] ]"Weekly view" /
"Monthly view"
Perform the following steps to switch default.
]In calender screen M[Menu]]"Settings" ]default
view field C[List] ]"Monthly view"/"Weekly view"
・Use Hto scroll the screen to view the hidden hours
Weekly view
An "All day" schedule
event is set for the day
Set time for the schedule event
Note
・ National Holidays are based on "国民の祝日に関する法律
及び老人福祉法の一部を改正する法律(平成17年法律第43
号までのもの (law relating to national holidays and
old-age persons' welfare, as amended (Law No. 43,
2005))". Spring Equinox Day and Autumnal Equinox
Day are released in an official gazette on February 1
and may not be exact (as of March, 2009).
273
Convenient Functions
[Send all via IrDA]
Send all Schedule events via IrDA.→P259
[Memory info.]
Schedule events and holidays status will be displayed.
・ If "Secret mode" is set to "ON" or "Secret data only mode", the
number of pieces of secret data is shown in "Secret".
[Reset holiday]
Restores the default holiday set in "Set holiday".
[Settings]
Configure how the Calendar screen will be displayed.
Default view : Configure the display format of the
Calendar screen when launching Schedule.
Monthly view type : Select a starting day of the week from
Sunday or Monday.
Weekly start time : Configure the starting time displayed in the
Week view.
1 Schedule list screen (P271)/Detail screen ]M
[Menu] ]Perform the following operations:
[Add new]
Register a new Schedule event.→P269
[Send via]*1
Send the selected schedule events as an i-mode mail
attachment or via Infrared communication.
[Edit]*1
Edit the selected Schedule event.→P269
[Multiple choice]*2
You can select and delete scheduled events set to the selected
day.
]Place check marks next to the schedule events to delete
]I [Delete] ]"Yes"
・ You can select "Mark all" or "Unmark all" from "Delete" or "Mark/
Unmark" by pressing M[Menu].
[Go to date]*2
The Calendar for the specified day appears. Use Jto move the
cursor to the position in the "Enter date you want to go to" field,
and enter the date and time with dial keys.
[Delete]
Delete the selected schedule event and holiday.
*1 Not available when you are using the default or "Set holiday"
configuration.
*2 Not displayed on the Schedule detail screen.
Up to 50 To Do tasks can be entered.
Sub Menu on the Schedule List Screen/Detail Screen
Managing To Do Tasks
To Do list
Registering To Do Tasks
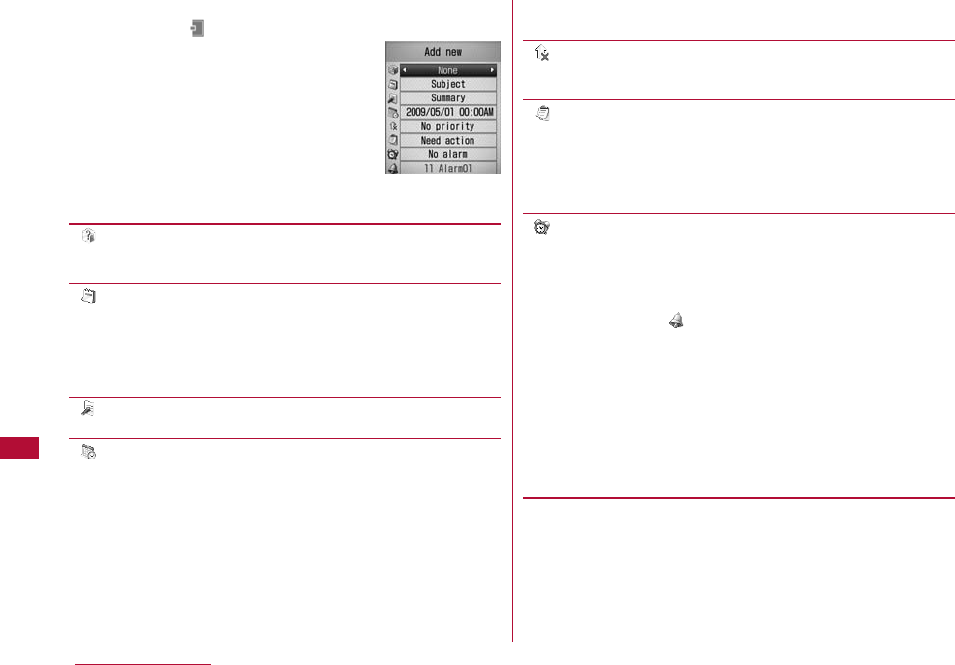
274 Convenient Functions
1 M[Menu]](Stationery)]"To do list"] I [New]
] Perform the following operations:
・ C [List]: List of the options for the
selected item is displayed.
・ When the cursor is in the due date
setting field, you can stop creating a
To Do task by selecting M[Cancel] ]
"Yes".
[ (Category)]
Select the category of the To Do task. Icons vary depending on
the selected category.
[ (Subject)]
Up to 200 full-pitch or 400 half-pitch characters can be
entered. The subject is displayed on the To Do list
screen. A Subject is required to register a To Do task.
The summary is displayed on the Alarm screen that opens when
the alarm starts.
[ (Summary)]
Up to 20 full-pitch or 40 half-pitch characters can be entered.
[ (Due date)]
Set the due date of the To Do task. To set the date, use Jto
move the cursor to the place to change the date and enter the
date with the dial keys (to set the date on the calendar screen,
press C [Select] in the date entry field ). Operations on the
calendar screen→P271
To set the time, use Jto move the cursor to the value to
change, enter the time with dial keys, and switch between "AM"
and "PM" with C (pressing Cin the time entry field opens the
time settings screen on which you can enter a time using dial
keys and H).
・ Depending on the settings in "Date&Time format", the display
order or format for the date and time may differ.→P111
[ (Priority)]
Select a priority of the To Do.task Icons vary depending on the
selected priority.
[ (Status)]
Select a status of the To Do task. Icons vary depending on the
selected status.
・ When "Completed" is selected, the due date and the subject will
be crossed out, and the task appears after To Do tasks with
status other than "Completed" on the To Do list screen.
[ (Set alarm)]
Set whether to be notified with an alarm tone at the set due date
and time.
If you select other than "No alarm", perform the following steps to
select the alarm tone.
D ]C[Select] on field ]Select a type of the alarm
tone
Music : Select from Chaku-Uta-Full®songs saved in "Music" in
the "Data box". →P217
Go to Step 3 (P214) in "Setting a Chaku-Uta-Full®
Song as a Ring Tone".
i-motion : Select from videos/i-motion movies saved in "imotion"
in the "Data box". →P249
Melody : Select from melodies saved in "Melody" in the "Data
box". →P254
2 I [Done]
New Memo
Creation Screen
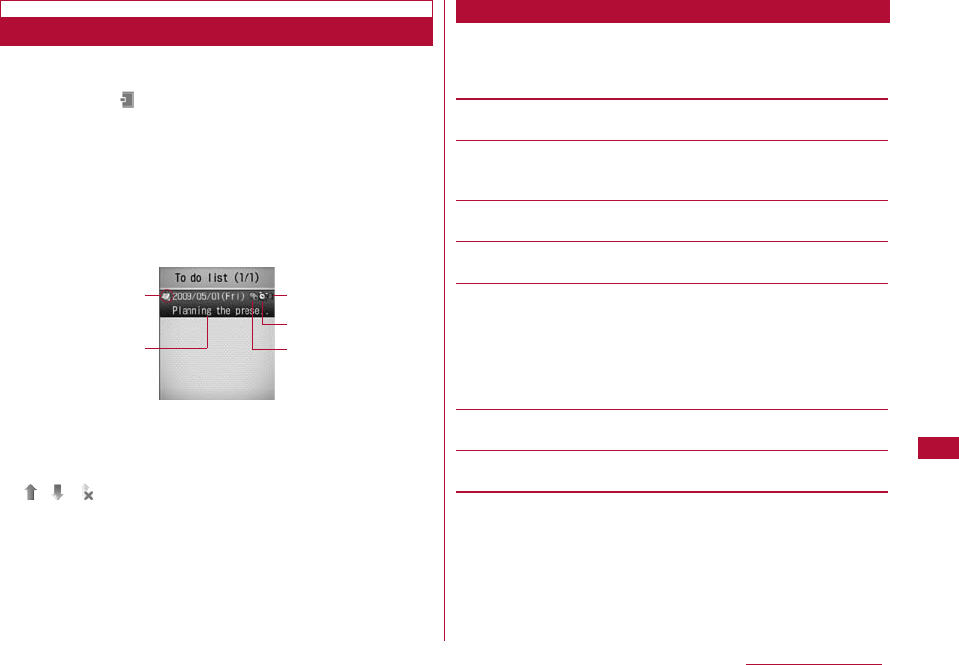
275
Convenient Functions
You can list and view registered To Do tasks.
1 M[Menu]](Stationery)]"To Do list"
・ Saved To Do tasks are listed in the order of HighlowNo
Priority. When two or more To Do tasks have the same level
of Priority, the task with earlier due date is listed first.
When To Do tasks have same due date, the one with
earliest registered date is listed first.
・ For To Do tasks with "Status" set to "Completed", the due
date and the subject are crossed out and the task appears
after To Do tasks with status other than "Completed".
1Icon indicating a "Status"
2Due date and subject
3Priority
/ / "High"/"Low"/"No priority"
4To Do task with the alarm set
5Icon indicating a To Do task set for other than Japan time
Appears if this To Do task was registered while the terminal
"Local time zone" (P49) is set to other than "GMT+9:00".
2 Select a To Do task to view
The To Do detail screen opens.
1 To do list screen (P275) or To Do detail screen ] M
[Menu] ] Perform the following operations:
[Add new]
Create a new To Do entry.→P274
[Send via]
Send the selected To Do tasks as i-mode mail attachment or via
Infrared communication.
[Edit]
Edit the selected To Do task.→P274
[Change status]
Change the "Status" of the selected To Do task.→P274
[Multiple choice]*
You can select and delete To do tasks.
]Place check marks next to To do tasks to delete ]I
[delete] ]"Yes"
・ You can also select "Mark all" or "Unmark all" from "Mark/
Unmark" by pressing M[Menu].
[Delete]
Delete the selected To Do task.
[View calendar]
Display the current date of the calendar.
* This does not appear on the To Do detail screen.
Viewing To Do Tasks
To Do List Screen
Sub Menu on the To Do List/Detail Screen
13
4
5
2
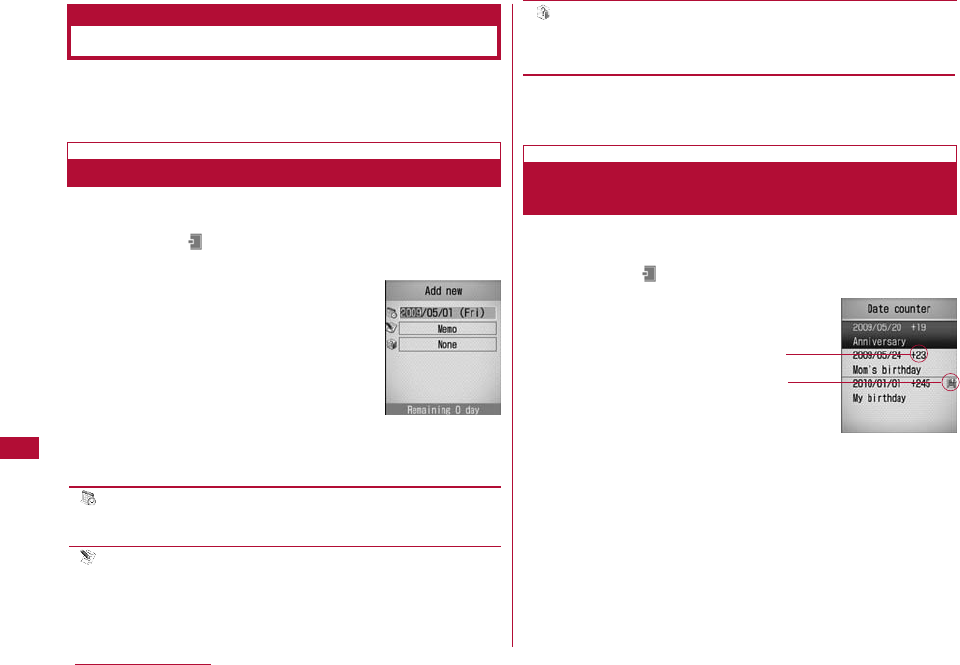
276 Convenient Functions
Managing Anniversaries
Remembering dates
Date Counter
Registration
Screen
Checking the Number of Days Remaining
Using the Date Counter
Date counter
Registering in Date Counter
You can display the number of days until an important
event on the Stand-by screen or find the number of days
quickly by using the Date counter and Date search.
Up to 30 important events can be tracked for remaining
days.
1 M[Menu]] (Stationery)]"Remembering dates" ]
"Date counter" ] I[Add] ]Performs the following
operations:
[ (Date)]
Specify the date of an event. To enter a date, use Jto move
the cursor to the position and enter a number with dial keys.
[ Memo]
Up to 40 full-pitch or 80 half-pitch characters can be entered.
The memo is displayed on the Date counter list screen. You
cannot save events to the Date Counter without a memo.
[ (Category)]
Select the event category. Icons vary depending on the selected
category. Press C[List] to select a category and icon from the
Icon list screen.
2 I[Done]
You can find the number of days remaining until the saved
event.
1 M[Menu]](Stationery)]"Remembering dates" ]
"Date counter"
1Counter display
Display with - : Show the elapsed days from the set date
to today.
Display with + : Show the remaining days from today to
the set date.
2Icon to display on the Stand-by display
An event that is to be displayed on the Stand-by screen.
Date Counter
List Screen
1
2
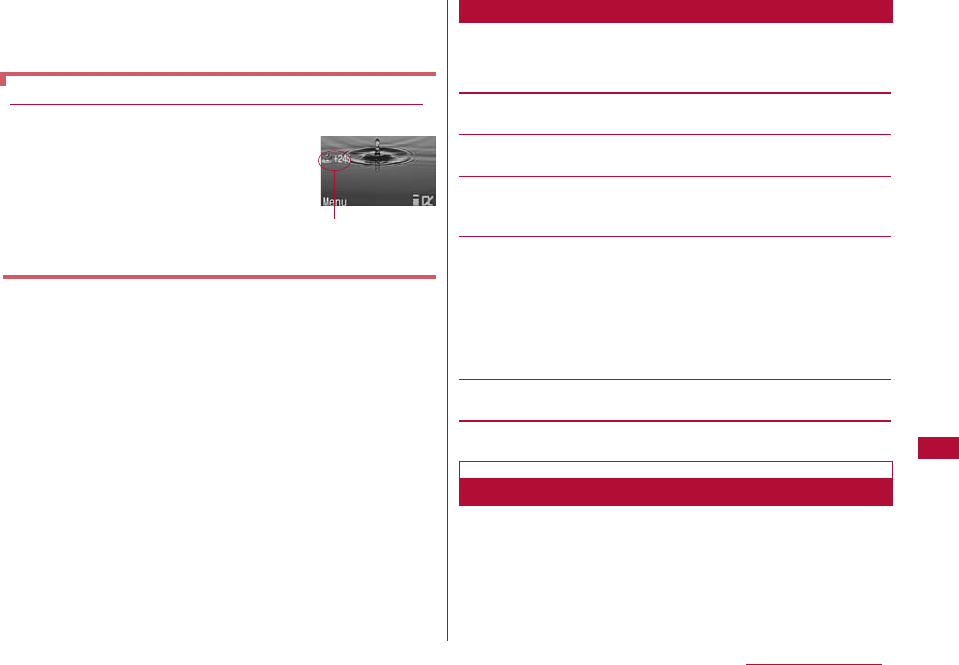
277
Convenient Functions
2 Select an event to find the days
The Event detail screen opens. 1 Date counter list (P276)/detail screen ] M [Menu] ]
Perform the following operations:
[Add new]
Save a new event.→P276
[Edit]
Edit the selected event.→P276
[Display day on stand-by screen/Cancel displaying]*
Specify whether to show the Date counter for the selected event
on the Stand-by display.
[Multiple Choice]*
You can select and delete events.
]Place check marks next to events to delete]I[delete]
]"Yes"
・ You can also select "Mark"*, "Mark all"*, "Unmark"*, "Unmark all"*
from "Delete" or "Mark/Unmark" by pressing M[Menu].
* Items displayed vary depending on the status of an event.
[Delete]
Delete the selected event.
* This does not appear the Detail screen.
You can find the date when the designated days passed
after the starting date. For example, you can easily find the
date 100 days after today. You can check out the date up
to 9999 days after today.
To display the remaining days on the Stand-by display
You can select one of the registered
events and show the days remaining
until that event on the Stand-by display.
Perform the following steps from the
"Date counter" screen to display the
remaining days:
]Move the cursor to the event ]
M[Menu] ]"Display on stand-by screen"
Sub Menu on the Date Counter List/Detail Screen
Category and
remaining days
for an event
Using Date Search
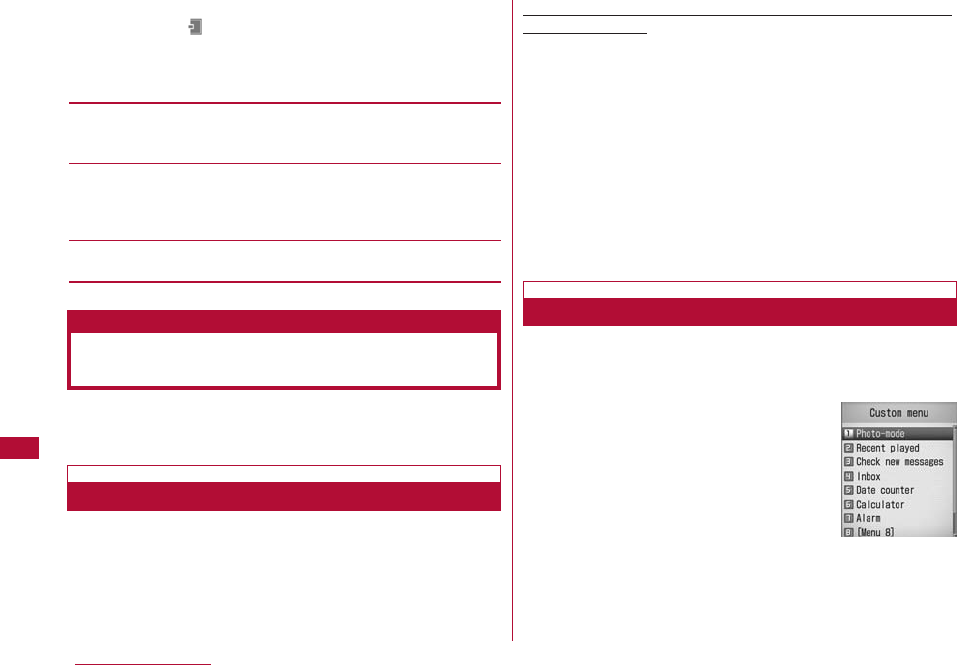
278 Convenient Functions
1 M[Menu]](Stationery)]"Remembering dates" ]
"Date search"]Perform the following operations:
・ I [Reset]: Reset the set value.
[From]
Specify the date to start searching. Use Jand dial keys to
enter the date.
[After]
Enter the number of days after the starting date using dial key.
For example, to find the date 100 days after "From", enter
"100".
[Result]
Show the date when the designated days passed.
You can quickly access frequently used functions by
saving them to the Custom menu.
You can save up to 10 frequently used functions to the
Custom menu. You can also change the default functions.
Example: To register a function to an unused custom menu
number [Menu 8]
1 M[Menu] (for 1+ seconds) ]Move the cursor to
"Menu 8" ] I [Add]
The "Add new" screen opens.
■To change the assigned function
Select the function
]
Press I [Edit]
2 Select a function
The selected function will be registered to the Custom
menu number.
・ A currently registered function cannot be registered again.
1 The Stand-by screen ] M[Menu] (for 1+ seconds)
・ You can also perform the following steps:
M[Menu]
]
I[Custom]
2 Select a function to access
Quick Access to Frequently Used
Functions
Custom Menu
Creating the Custom Menu
Using the Custom Menu
Custom menu
screen
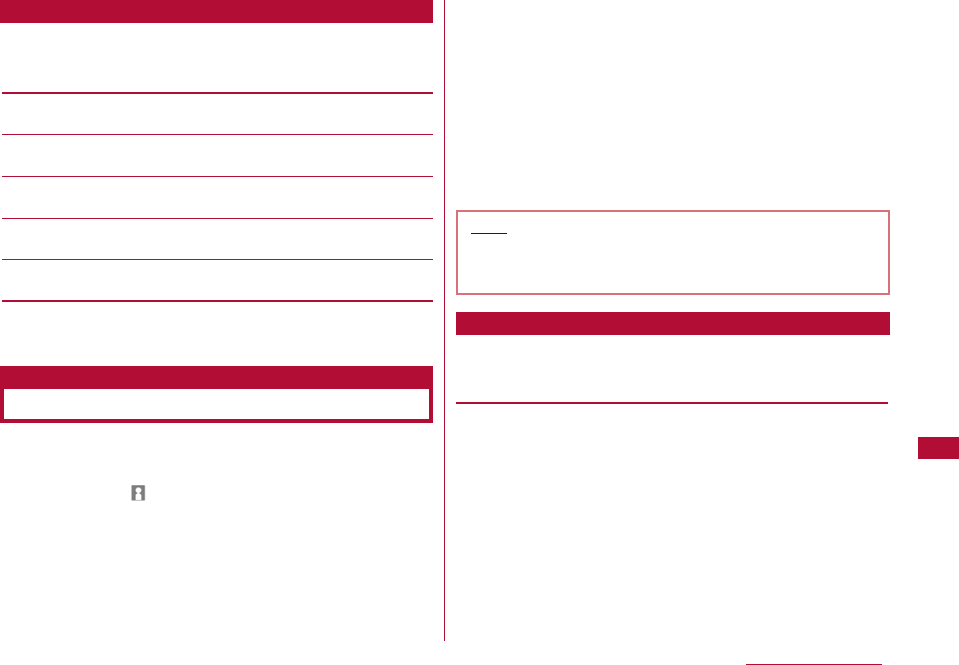
279
Convenient Functions
1 Custom menu screen (P278) ] M [Menu] ] Perform
the following operations:
[Add new]*1
Select and register a function selected from the list.→P278
[Open]*2
Start the selected function.
[Edit]*2
Change the registered function.
[Delete]*2
Delete the selected function.
[Delete all]
Delete all registered functions.
*1 This appears when an unused menu number is selected.
*2 This appears when a registered function is selected.
You can store your personal information in the FOMA
terminal.
1 M [Menu] ](Own number)] C [Detail] ] Enter
the security code
The Own number detail screen opens.
2 M [Menu]]"Edit"
The Edit own number screen opens.
3 Enter the information] I [Done]
For steps to register, see Step 2 in "Saving FOMA Terminal
Phonebook (Phone) Contacts" (P80). You cannot set
secret data.
・ The pre-installed own number cannot be changed or
deleted.
1 Own number detail screen ]M[Menu]]Perform the
following operations:
[Mail/URL]
Create mail using the saved mail address, or connect to a site to
the saved URL.
Compose mail : Create i-mode mail addressed to other than
own number or own mail address.
Attach to mail : Create i-mode mail with Own number
information attached.
Compose SMS : Create an SMS message addressed to other
than own number.
Connect to URL : Connect to the saved URL.
Sub Menu on the Custom Menu Screen
Registering Your Name and Image
Own number
Note
・ If you change a mail address using i-mode, the
address saved to this function will not be updated
automatically.
Sub Menu on the Own Number Detail Screen
[Edit]
You can edit items on the Own number detail screen.→P279
[Send Ir data]
Send the information on the Own number detail screen via
infrared communication.→P260
[Copy item]
You can copy the contents of saved items on the Own number
detail screen.
[Customize call]
Change the saved number other than own number, and make a
call to the new number. Use C [Save] to save the phone number
to the Phonebook.
[Reset]
Delete all registered personal information.
You can check the last and accumulated call duration and
costs of voice and video calls.
・ Voice call duration and digital communication duration (video
call duration) are displayed for Call duration. Call duration
includes both incoming and outgoing calls.
・ Call cost includes only outgoing calls. However, calls made to
toll free numbers or the information number (104) have "0 YEN"
or "** YEN" displayed.
・ Call costs are stored in the UIM. When a different UIM is used,
the stored call costs appear (storing started in December,
2004).
・ The displayed call duration and call cost can be reset.
・ The displayed call duration and cost are approximate values
and may be different from actual ones. Note that call cost does
not include the consumption tax.
You can check the duration of the previous and accumulated
duration of voice and video calls.
1 M[Menu]](Phonebook & Logs) ]"Call duration"
[Last voice Call]
Display the duration of the latest voice call.
[Last video Call]
Display the duration of the latest video call.
Checking Call Duration/Call Cost
Note
・ The call duration/cost for i-mode communication and
packet communication is not included. For checking
i-mode usage charges, refer to "Mobile Phone User's
Guide [i-mode] FOMA version".
Call duration
Checking Call Duration
280 Convenient Functions
281
Convenient Functions
[Total voice Call]
Display the total duration of voice calls from the last reset until
now.
[Total video Call]
Display the total duration of video calls from the last reset until
now.
Call cost includes only outgoing calls.
1 M[Menu]](Phonebook & Logs) ]"Call costs"
]Check call costs
[Last voice call cost]
Display the previous voice call cost.
[Last video call cost]
Display the previous video call cost.
[Total calls cost]
Display the total cost of calls from the last reset until now.
[Reset date & time]
Display the last reset date and time.
1 M [Menu]](Phonebook & Logs) ]"Call costs"
]Check call costs
2 I [Reset] ] Enter the PIN2 code ] "Yes"
Set the limit of total call cost as threshold so that you will
be notified when the cost reached the limit.
1 M [Menu] ](Phonebook & Logs) ]"Call costs" ]"Set
call cost limit"
2 Enter the security code ] Perform the following
operations:
Note
・ The displayed Call duration returns to 0 (zero)
seconds and starts counting when the duration
exceeds 99hours, 59minutes and 59seconds.
・ The ringing and dialing durations are not counted.
To reset individual items for "Call duration" settings
Move the cursor to the item to reset ]I [Reset] ]Enter
the security code ] Select "Yes".
To reset all items for "Call duration" settings
You can reset all items at one time.
]M [Menu] ]"Reset all" ]Enter the security code ]"Yes"
Call costs
Checking Call Costs
Note
・ International call costs of WORLD CALL are counted.
Call costs to use other international telephone
services are not counted.
Resetting Total Call Costs
Setting a Call Cost Limit
Set call cost limit
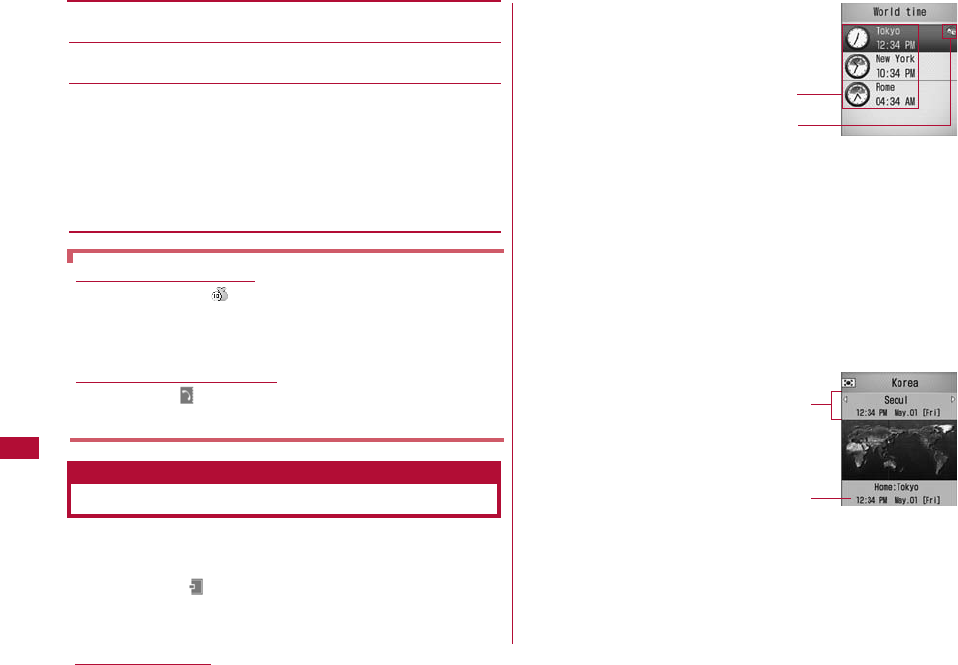
[Set limit]
Set whether to limit total call costs.
[Call cost limit]
Set the limit of the total call cost.
[Notification]
Select how to indicate that the total call cost has reached its
limit.
OFF : You will not be notified.
Sound+Icon : You will be notified with the call cost icon + the
call cost tone.
Icon : You will be notified with the call cost icon.
You can view the date and time in major cities around the
world stored in the FOMA terminal.
1 M [Menu]](Stationery) ] "World time"
・ C[Change]: Change the selected city.
The World time setting screen opens.
1Home icon
Indicates the city set as Home.
* The home city set in the World time is linked with the
city set in "Local time zone" in "Set Date&Time"(P48).
Changing the city in one setting changes the other city
automatically. Therefore, you cannot change the Home
city if "Auto time set" in "Set Date&Time" is set to "ON".
2The currently specified city and time
2 I [Add]
・ C[List]: Open the list of cities
and select a city.
Press M[Prev.] or I[Next] to
switch the city name list by page.
1The currently selected city name, date, and time
2Date and time of Home (own country)
282 Convenient Functions
If the limit is exceeded
The call cost icon appears on the Stand-by display.
When you set "Set call cost limit" to "Sound+Icon", the
call cost tone sounds after the call that reached the
limit.
To hide the Call cost icon
]M [Menu] ](Phonebook & Logs) ] "Call costs" ]
"Delete call cost icon"
Using the World Time
World time
World time list
screen
1
2
World time
setting screen
1
2
283
Convenient Functions
3 Press Jto select a city to add
The selected city is added to the World time list screen.
1 World time list screen (P282) ] M [Menu] ] Perform
the following operations:
[Change home City]*1
Change the city set as Home.
[Change City]*2
Change the selected city.
[Daylight Saving]*1
Set whether to use Daylight savings time.
[Analog Clock On/Analog Clock Off]
Set whether to display the analog clock on the World time list
screen.
[Delete]*2
Delete the selected city.
[Delete all]*2
Delete all cities except the Home city.
*1 This option is not available when "Auto time set" is set to
"ON".
*2 This option is not displayed when the home city is selected.
You can use the FOMA terminal as a stopwatch.
1 M [Menu]](LifeKit)]"Stopwatch"
・ C[Start]/[Stop] : Start or stop counting.
・ I [Reset]: Reset the counted result.
・ I[Lap]: Displayed during the counting Each press of
this key displays the lap time at that moment at the
bottom of the screen.
You can convert the units for measuring currency, area,
length, weight, temperature, volume, or speed.
This option is useful in occasions such as exchanging from yen
to dollars.
Sub Menu of the World Time List Screen
Using the Stopwatch
Stopwatch
Using the Unit Converter
Unit converter
Converting Currency Units

284 Convenient Functions
Before converting, set the exchange rate.
1 M [Menu]](Stationery)]"Unit converter" ]
"Currency"
2 Select the currency unit field] M [Rate]
・ "YEN", "USD", "Euro", and "Currency 1-3"
are registered by default.
3 Perform the following operations:
[(Currency name field)]
Press C[Select] to change the currency. Up to 10 full-pitch or
20 half-pitch characters can be entered.
・ "YEN" in the top row cannot be changed.
[(Exchange rate field)]
Set the exchange rate. Up to 10 digits (including the decimal
point) can be entered. Up to 2 digits can be entered after the
decimal point. For example, to exchange between US dollars and
yen (example: one US dollar is 120 yen), set 120 to "YEN" and 1
to "USD".
・ M[.]/#: Enter the decimal point.
・ Q : Delete from the last entered digit.
4 I [Done]
Convert the one currency to another based on the rates set for
those 2 currencies.
1 Select two currencies from the Currency unit field in
the Currency exchange screen (P284)
・ C[List]: The Currency list screen opens.
2 Enter the amount in the value entry field of the source
currency
The converted amount will be displayed in the other value
entry field. You can enter/convert in either value entry field.
・ Up to 10 digits (including the decimal point) can be
entered. However, if the converted value exceeds 14
digits (including the decimal point) or 2,147,483,647, no
more digits can be entered.
・ If the currency in the Currency unit field is changed after
the amount was entered, the new amount will be
displayed in the lower value entry field using the amount
in the upper value entry field as the source.
Setting the Exchange Rate
Currency
exchange screen
Convert Currencies
Currency unit field
Value entry field
285
Convenient Functions
・ #:Enter the decimal point.
・ Q: Delete from the last entered digit.
・ I[Reset]: Delete all entered numbers.
Convert one defined area unit to another type of defined area
unit.
1 M [Menu]](Stationery)]"Unit converter" ]
"Surface"
2 Select a unit in the Surface unit field (two places)
・ C[Unit]: The unit list screen opens.
3 Enter the value in the value entry field of the source
surface
The converted value will be displayed in the other value
entry field. You can enter/convert in either value entry field.
・ The description of the values is the same as for the
Currency conversion screen.→P284
You can convert temperature between Fahrenheit (°F) and
centigrade (℃).
1 M [Menu]](Stationery)]"Unit converter" ]
"Temperature" ] Enter the temperature either in
"Celsius" or "Fahrenheit"
The converted temperature will be displayed in the other
value entry field. You can enter/convert in either value
entry field.
・ From -40 to 309, or up to 10 digits (including-(minus)
and the decimal point) can be entered.
・ M[-]: Enter - (minus) before the value.
・ #:Enter the decimal point.
・ Q : Delete from the last entered digit.
・ I [Reset]: Delete all entered numbers.
1 M [Menu]](Stationery)]"Unit converter" ]
"Length"/"Weight"/ "Temperature"/"Volume"/"Velocity"
Perform the same subsequent steps as in "Converting Area
Units" (P285).
Converting Area Units
Converting Temperature Units
Converting Length, Weight, Volume, and
Speed
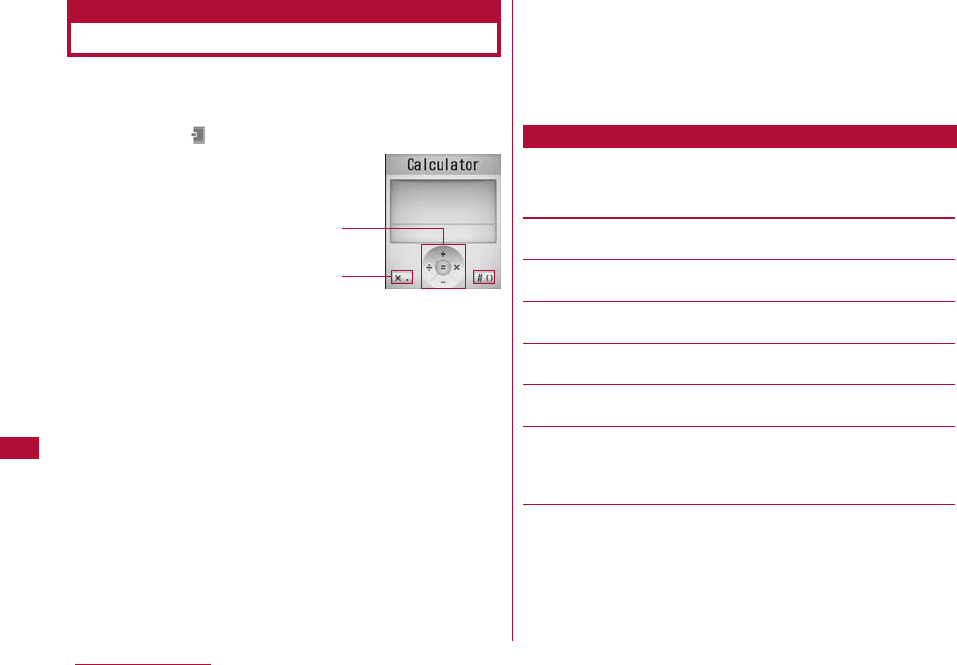
286 Convenient Functions
You can use the Calculator to perform arithmetic operations,
and calculations with functions.
1 M [Menu]](Stationery)]"Calculator"
1Arithmetic operation (+, −, ×, ÷(/), =):
Use K, C.
2Keyboard
Use *, or #.
2 Calculating
・ *:Enter the decimal point.
・ #: Enter ( ) parentheses.
・ Q : Delete from the last entered digit.
・ I [AC]: Clear all entered numbers and calculated results.
1 Calculator screen (P286) ]M [Func.] ]Perform the
following operations:
[+/−]
Switch the sign (+/-) of the entered number.
[sin]
Perform the trigonometric function.
[cos]
Perform the trigonometric function.
[tan]
Perform the trigonometric function.
[log]
Calculate the logarithm of a number.
[ln]
Calculate the natural logarithm of a number.
Calculate the natural logarithm of the specified positive value
(logarithm with the base of e).
[exp]
Calculate the value of a number raised to an exponential level.
Using the Calculator
Calculator
Sub Menu on the Calculator Screen
Calculator
1
2
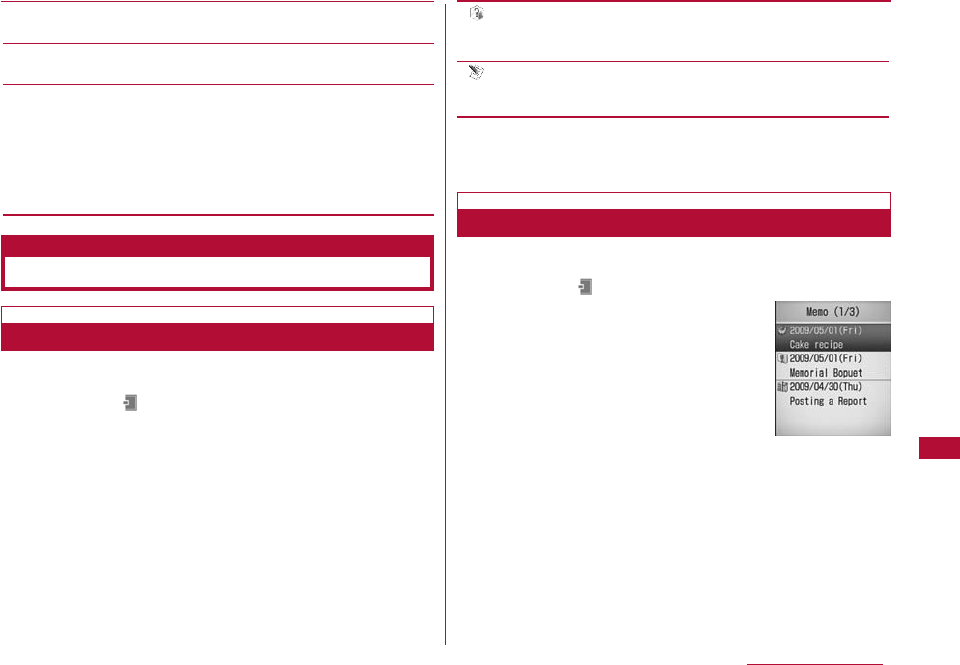
287
Convenient Functions
[sqrt]
Calculate the square root of a number.
[deg]
Set the unit of angle to "degree".
[rad]
Set the unit of angle to "radian".
Radian expresses an angle using the constant number π(180
degrees equal πradians).
One radian (360 degrees/2π is approximately 57.29578
degrees; One degree (2π/360 degrees) is approximately
0.01745 radian (where π=3.141592653).
Create and save a memo. Up to 50 memos can be saved.
1 M [Menu]](Stationery)]"Memo"] I [New] ]
Perform the following operations:
・ C [List]: List of items opens.
[ (Category)]
Select a type (category) of Memo. Icons vary depending on the
selected category.
[ (Subject)]
Enter a memo. Up to 50 full-pitch or 100 half-pitch characters
can be entered. A blank memo cannot be saved.
2 I [Done]
You can list and view saved memos.
1 M [Menu]](Stationery)]"Memo"
2 Select a memo to view
The Memo detail screen opens.
・ C [Edit]: The new memo creation screen opens.
・ I [Mail]: The Compose message screen with the
contents of "Category" and "Memo" already inserted in the
message text opens.
Using Memos
Memo
Creating Memos
Memo List
screen
Viewing Modifying a Memo
288 Convenient Functions
1 Memo list screen (P287)/Detail screen ]M[Menu]
]Perform the following operations:
[Add new]
Save a new memo.→P287
[Send via]
Send the selected memo as an i-mode mail attachment or via
Infrared communication. You can also send all memos via Infrared
communication.
[Edit]
Edit the selected memo.→P287
[Delete]
Delete the selected memo.
[Multiple choice]*
Select and delete memos.
]
Place check marks next to memos to delete
]
I[delete]
]
"Yes"
・ You can also select "Mark all" or "Release all" from "Mark/
Unmark" by pressing M[Menu].
* This is not displayed on the Detail screen.
You can connect a flat-plug earphone/microphone with switch
(optional) to the FOMA terminal to make and receive calls.
Specify the phone number to call using a memory number
of the Phonebook in the FOMA terminal while connecting
the flat-plug earphone/microphone with switch.
・ The phone number saved as "Phone number 1" in the
terminal Phonebook will be specified.
1 M [Menu]](Settings)]"Call/VT/ Dialing" ]
"Earphone" ] Perform the following operations:
[Switch call]
Selecting "ON" allows you to make calls by pressing the switch of
the flat-plug earphone/microphone with switch.
Sub Menu on the Memo List Screen/Memo Detail Screen
Talking Using the Flat-plug
Earphone/microphone with Switch
Configuring Switch Actions
289
Convenient Functions
[Memory number]*
Enter the memory number of the Phonebook.
This option can be selected from the Phonebook search screen
by pressing C [Search].
* Set "Switch call" to "ON" to make this setting available.
2 I [Done]
Press the switch of the flat-plug earphone/microphone with
switch to make a voice call to the number assigned to the
memory number of the Phonebook set under the Earphone
setting (P288).
1 Press the switch of the Flat-plug Earphone/
Microphone with Switch once
2 To end the call, press the switch of the flatplug
earphone/microphone with switch for 1+ seconds.
1 A call arrives ] Press the switch of the flatplug
earphone/microphone with switch
Answer the call.
・ When a video call arrives, the camera image is sent to
the other party.
■To reject incoming calls without answering
Press the switch of the flat-plug earphone/ microphone
with switch for 2+ seconds.
2 To end the call, press the switch of the flatplug
earphone/microphone with switch for 1+ seconds.
If you subscribe to the Call waiting service and activated
the service, when a voice call arrives during another voice
call, you can answer the second call by pressing the switch
of the flat-plug earphone/microphone with switch.
1 A call arrives ] Press the switch of the flat-plug
earphone/microphone with switch
The active voice call is placed on hold and you can answer
the incoming call. The connecting 3-way screen opens.
■To reject incoming calls without answering
Press the switch of the flat-plug earphone/ microphone
with switch for 2+ seconds.
■To activate the held call during the 3-way connection
Press the switch of the flat-plug earphone/ microphone
with switch for 2+ seconds.
2 To end the call, press P
・ While the Connecting 3-way screen is displayed, you
cannot terminate the call by pressing the switch of the
flat-plug earphone/microphone with switch.
Answering a Call during a Call
Note
・ When using the flat-plug earphone/microphone with
switch, a call will not be terminated or placed on hold
if the terminal is closed during the call regardless of
"Close setting" (P70).
Making a Call Using the Switch
Receiving a Call Using the Switch
290 Convenient Functions
You can set to answer a call automatically when the flatplug
earphone/microphone option with switch is connected after the
set ring time has elapsed.
1 M [Menu]](Settings)]"Call/VT/Dialing" ]
"Incoming call"]"Auto answer"]Perform the following
operations:
[Auto answering]
Selecting "ON" allows you to answer calls automatically using the
flat-plug earphone/microphone with switch.
[Delayed time]*
Enter the time until the call is automatically received.
* Set "Auto answering" to "ON" to make this setting available.
2 I [Done]
Set whether to sound a tone each hour, on the hour.
1 M [Menu]](Settings) ]"Date&Time" ] "Hour
indication" ] Perform the following operations:
[Set sound]
Specify the tone.
・ Press C[List] to open the Set sound list screen.
・ Press Jto sound the selected tone. From the list screen,
press I[Play]
]
Hto sound the tone. However, if 「Popup
display」 in 「Volume Setting」 is set to 「mute」, Set sound will
not be confirmed.
[Time]
Set the time to sound the tone.
Use Jto move the cursor to the position and enter the time
with dial keys, and switch between "AM" and "PM" with C
(pressing C in the time field opens the Time settings screen
that allows you to enter time with dial keys and H).
・ Depending on the settings in "Date&Time format", the display
order or format for the date and time may differ.→P111
2 I [Done]
Automatically Answering a Call
Connecting the Flat-plug
Earphone/microphone with Switch
Auto Answer
Note
・ If you set Auto Answer ring time (duration) to earlier
time than the start of the Voice mail or Call
forwarding service, or Record message, this function
takes precedence.
Chiming the Hour
Hour indication
Note
・ The indication volume sounded when confirming
settings and notifying every hour follows
"Alarm/Schedule".→P99
291
Convenient Functions
You can check used and free space of the FOMA terminal
memory.
・ The space used in the FOMA terminal includes the
files/data for the following functions
- Data box (My Picture, i-motion, Melody, and Music)
- Phonebook - Schedule - Holiday
- Memo - To Do - Date counter
1 M [Menu]](Settings) ]"Others" ]"Memory status"
2 Select a memory to view
Databox memory :Display the amount of data saved in
the "Data box".
Personal info. :Display the amount of data saved in
the Phonebook, Schedule, Holiday,
Memo, To do, and Date counter.
UIM memory :Display the amount of data saved on
the UIM.
Checking Memory Usage
Memory status


Character Entry
Character Input・・・・・・・・・・・・・・・・・・・・・・・・・・・・・・・・・・・・ 294
Entering Characters ・・・・・・・・・・・・・・・・・・・・・・・・・・・・・・・ 295
Configuring Character Input Settings
・・・・・・・・・・・・・・・・・・・・・・・・・・・・・・・・・・・・・・Input Setting 298
Modifying/Registering Common Phrases ・・・・・Edit 299
Copying/Cutting and Pasting Characters ・・・・・・・・・ 301
Using the Kuten Code to Enter Characters
・・・・・・・・・・・・・・・・・・・・・・・・・・・・・・・・・・Kuten Code Input 301
Registering Frequently Used Words
・・・・・・・・・・・・・・・・・・・・・・・・・・・・・・・・・・・・・Edit dictionary 302
Initializing Learned Data ・・・・・・・・ Reset learnt info 303
Using Downloaded Dictionaries
・・・・・・・・・・・・・・・・・・・・・・・・・・・・・Download Dictionaries 303
293
For details about Kuten code list, see "Kuten Code List" (PDF format) contained in the bundled CD-ROM or available
at the DOCOMO website. Adobe®Reader®is required to open "Kuten Code List" in PDF format. If the program is not
installed on your PC, install Adobe®Reader®contained in the bundled CD-ROM first. For details about using the
program, see "Adobe Reader Help".
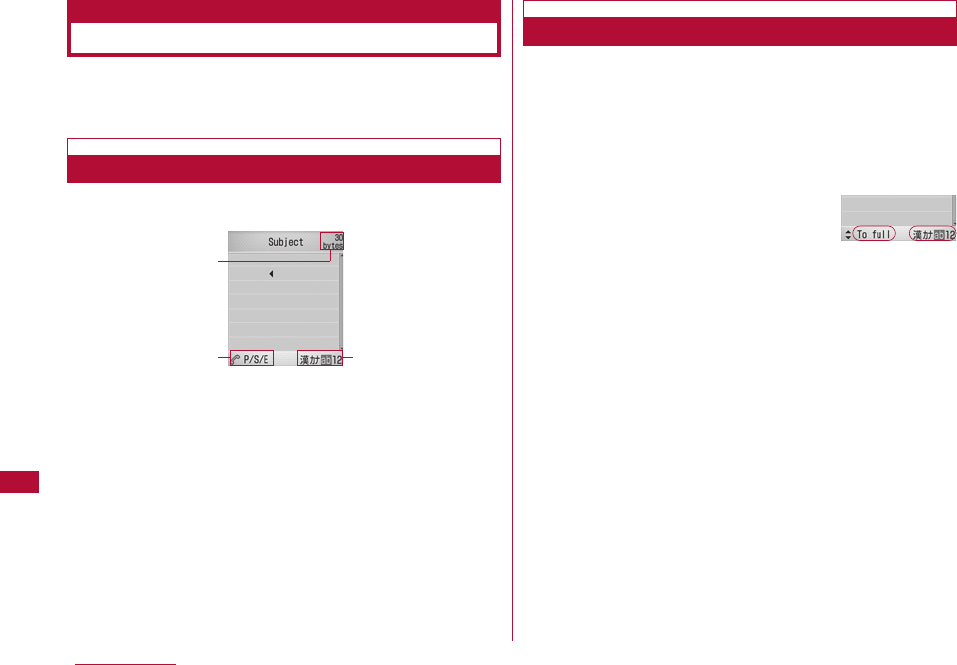
Character Input
Various operations require entering characters, such as
registering to the Phonebook or creating mail. Learn how
to enter characters to fully use the FOMA terminal.
Character input screen
The Character input screen shows the current input mode
and operation guide.
1Available number of characters
Indicates number of bytes or number of characters that can
be input further.
2Operation guide field
Shows switching among pictographs, symbols, and
emoticons, and switching between full- and half-pitch
characters.
3Input mode field
Shows the input mode.
Switch input modes for entering various types of
characters. In some input modes, you can switch between
full and half-pitch characters.
・ Depending on the input screen, it may not be possible to
switch input modes.
1 Character input screen (P294) ]I[Mode]
2 I[Change]/ J]C[Select]
Each press of I[Change] or Jswitches the input
mode.Pressing Hbefore [Select] switches between full
and half-pitch (excluding Hiragana or Kanji input mode).
・ After switching the input mode, you can enter characters
in the selected input mode without pressing C[Select].
漢 (kanji):Hiragana or Kanji character input mode
カ (katakana):Katakana character input mode
a/A*(ab/AB*) :Alphabetic character input mode
1 (12):Numeric input mode
*: Press M[Upper] to change to upper case.
294 Character Entry
Switching Input Modes
Switching
input modes
Character
Input screen
1
23
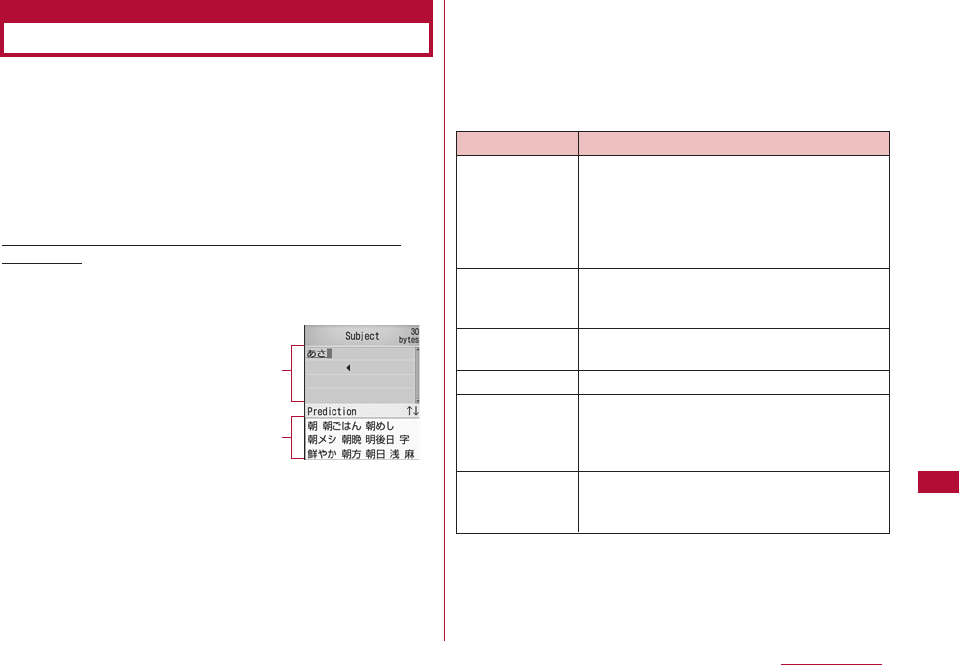
295
Character Entry
Entering Characters
In the Hiragana and Kanji input mode, you can enter
characters using the Prediction function that predicts
conversion options from the characters being entered, and
the Next phrase prediction function that predicts the next
phrase.
・ You can turn the Prediction function on or off in "Prediction" in
"Input setting".
・ For characters that can be entered with the keys, see "Dial Key
Assignments to Characters" (P357).
Example: Entering characters in the Hiragana and Kanji
input mode
1 Enter characters on the Character input screen
(P294)
Conversion options predicted by the Prediction function are
displayed.
・ If the Prediction is set to "OFF", conversion options will
not appear.
・ When entering Kana kanji, Katakana, Kanji entry mode,
approximately 1.5 seconds after characters are entered,
the cursor moves to right automatically (Auto cursor
function). However, this does not work in the Numeric
input mode. The Auto cursor function can be disabled, or
the the time before the cursor moves can be changed.
→P298
・ The cursor also moves when pressing R(the cursor
moves when pressing Din other than the Hiragana and
Kanji input mode).
■ Keys and functions other than character entry
Character Entry field
Prediction option field
Key Description
*Toggle between upper and lower case.
* The key is not available for characters
that cannot be toggled or in the
Numeric input mode. Characters that
can take a voiced symbol will be toggled
after the voiced symbol is added.
#/DInsert line feeds after characters are
converted/fixed. Only Dis available in
the Numeric input mode.
#Restore the previous state of characters
converted or fixed.
QErase the character in front of the cursor.
QErase all characters converted or fixed
after the cursor. When the cursor is at
the end of text, all characters will be
erased.
#Display the characters assigned to a key
in the reverse order by pressing this key
before characters are fixed.
(1+ seconds)
(for 1+
seconds)
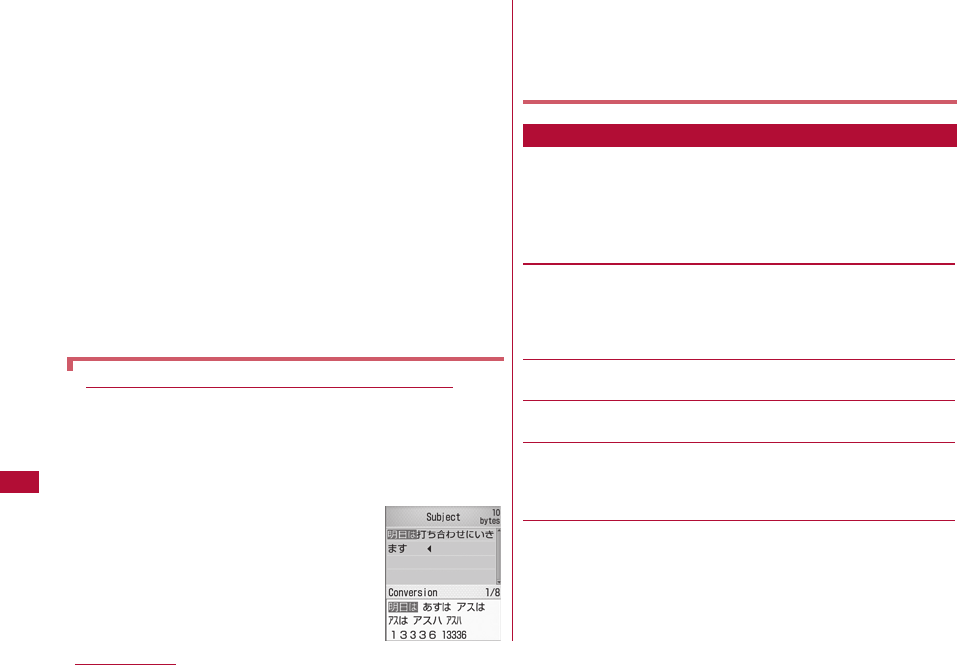
2 Use Hto move the cursor to the conversion option
field
・ C[Set]: Fix the entered characters. In the Hiragana and
Kanji input mode, press this key to fix the characters
without converting them.
・ M[KanaA1]: Display conversion options combined with
Katakana and alphanumeric characters.
・I[Conv.]: Display conversion options without using the
Prediction function. Press when there is no conversion
option you want to enter at the prediction option field.
3 Move the cursor to the characters to convert ]C
[Select]
The entered characters are fixed. Conversion options
predicted by the Next phrase prediction function appear in
the display area. If desired characters are displayed,
perform Step 2 to 3 to select and enter the characters.
・ Press Qto cancel conversion and to resume entering
characters.
Converting Characters without the Prediction Function
Perform the following steps if desired characters are not
shown as conversion options or if Prediction is set to "OFF":
① Enter characters on the Character input screen (P294)
・ After entering characters, if the cursor is in the Predicted
conversion option area, press Qto move the cursor to
the character input area.
②I[Conv.]
Conversion options for the highlighted
area will be displayed.
・ To change the highlighted area, use
Jto move the cursor.
③ Use Hto move the cursor to the conversion option
display area
④ Move the cursor to the characters to convert ]C[Select]
The entered characters are fixed. As each phrase is
converted, the next phrase will be highlighted.
・ Displayed items vary depending on the options or entered
characters on the Character input screen.
1 Character input screen (P294)]M[Menu]]Perform
the following operations:
[Common phrases]
Select and enter a saved common phrase.
Input :
Select and enter a saved common phrase.
Edit :
You can create and save a common phrase, or edit a
saved common phrase.→P299
[Edit character]
Copy or cut characters specifying a range and paste.→P301
[Edit dictionary]
Register a word.→P302
[Quote]
Phonebook :
Quote an entry to the Phonebook.
Own number :
Quote your phone number. The security code
is required to quote.
[Input setting]
Full/Half :
Switch between full-/half-pitch input mode.
Upper/Lower :
Switch between upper/lower case input mode
in the Alphabetic mode
296 Character Entry
Sub Menu on the Character Input Screen
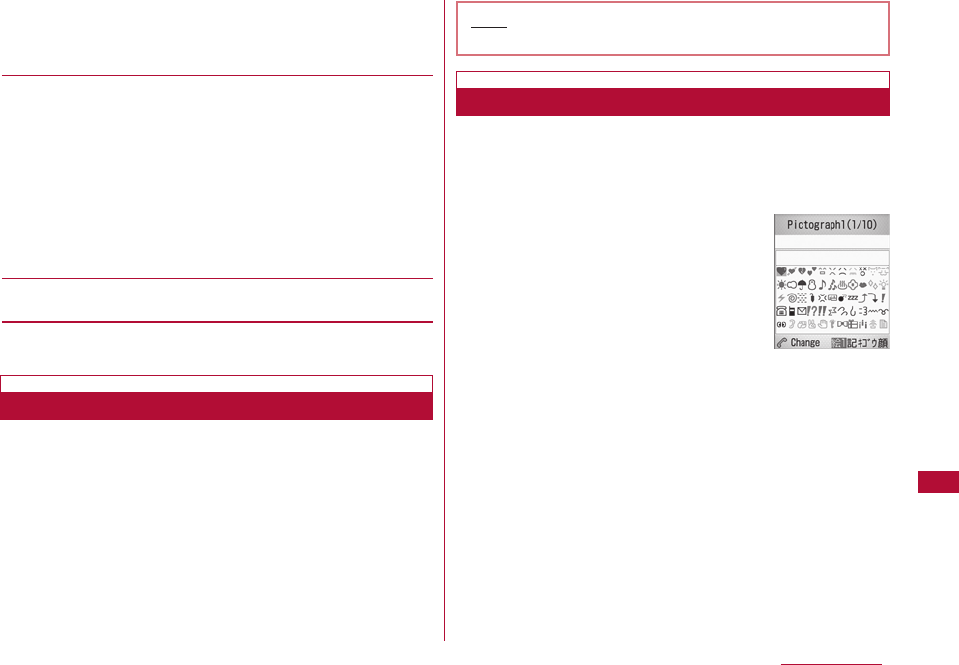
297
Character Entry
Note
・ Common phrases can be edited/registered.→P299
Pictograph list
Screen
Prediction :
Activate or deactivate the prediction function.
→ P298
Auto cursor :
Set whether to automatically fix the entered
characters and move the cursor.→P299
[Special input]
Space :
Enter a space before the cursor.
Changing line :
Enter a linefeed before the cursor.
Kuten Code :
Enter a character using its Kuten code.
→P301
Pictograph :
Select and enter a pictograph from a list.*
Full symbol :
Select and enter a full-pitch symbol from a
list. *
Half symbol :
Select and enter a half-pitch symbol from a
list. *
Emoticon :
Select and enter an emoticon from a list. *
[Cancel]
Erase all entered characters.
*: Use Ato switch the input screen.→P297
Entering Common Phrases
You can enter text using common phrases saved in the
FOMA terminal.
・ By default, "Original-1" and "Original-2" are empty.
1 Character input screen (P294)]M[Menu]]"Common
phrases"]"Input"
The list of Common phrase category screen opens.
2 Select a type ]Select a common phrase
The common phrase is entered.
Entering Pictographs/Symbols/Emoticons
You can switch the input modes of pictographs/symbols/
emoticons using A.
・ Depending on the current input screen, these characters may
not be entered or modes may not be switched.
1 Character input screen (P294) ]A
Each press of Aswitches the input
mode, and the list screen opens.
絵:Pictograph input mode
記:Full-pitch symbol input mode
キゴウ : Half-pitch symbol input mode
顔:Emoticon input mode
2 Move the cursor to the pictograph/symbol/emoticon
]C[Select]
The selected character will be entered.
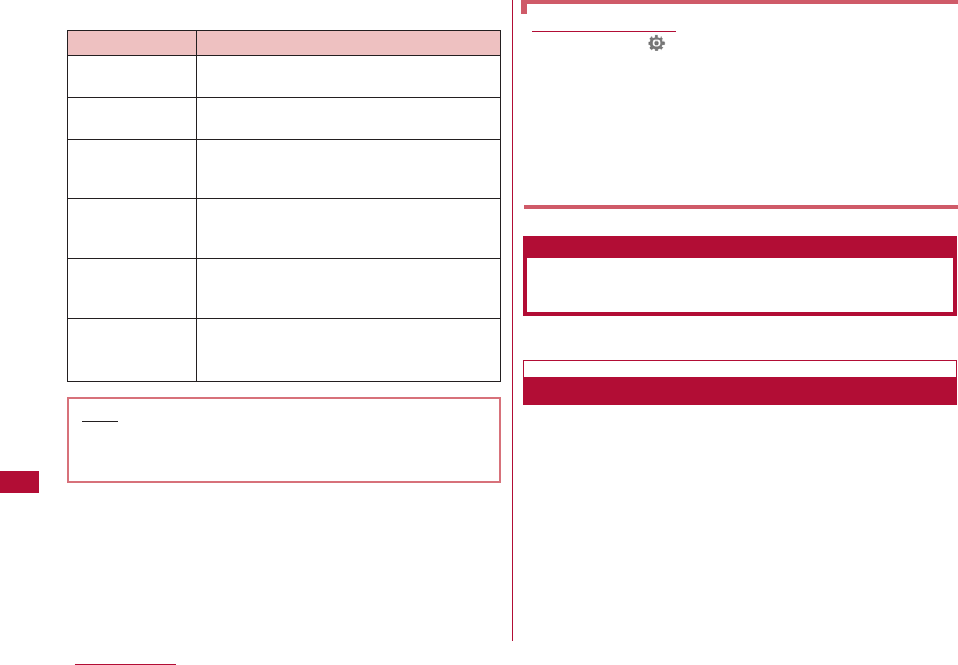
298 Character Entry
■ Available Keys on the List Screen and Their Functions
■Entering Pictographs/Symbols/Emoticons
Consecutively
Characters of each input mode can be consecutively
entered.
]Each input mode screen
I
[Cont.] ]
Select
characters consecutively
]
II [Set]
Configure various settings related to character input.
Set whether to enable the Prediction function that displays
conversion options matching with the beginning of the
characters being entered, or the Next phrase prediction
function that displays the predicted next phrase, in the
Hiragana and Kanji input mode.
1 Character input screen (P294)]M[Menu] ]"Input
setting" ]"Prediction" ]"ON"/"OFF"
Character Entry
Key Description
#/EDisplay list screens in the order of the
screen numbers.
*/FDisplay list screens in the reverse order
of the screen numbers.
1/2/3Move the cursor to the left/center/right
of the top row on the Pictograph/symbol
list screen.
4/5/6Move the cursor to the left/center/right
of the middle row on the Pictograph/
symbol list screen.
7/8/9Move the cursor to the left/center/right
of the bottom row on the Pictograph/
symbol list screen.
0Switch between "Pictograph1" and
"Pictograph2" "Pictograph D (Decomail
Pictures)" on the Pictograph list screen.
Editing Emoticons
①M[Menu] ](Settings) ]"Others" ]"Character
input" ]"Edit emoticon"
The Edit emoticon screen opens.
② Select a category ]Select an emoticon to edit ]I
[Edit]
The Character input screen opens with the selected
emoticon entered.
③ Change the Emoticon ]C[Set]
The new emoticon is saved overwriting the existing one.
Note
・ Depending on the current input screen, these
characters may not be entered or modes may not be
switched.
Configuring Character Input
Settings
Input Setting
Set Prediction
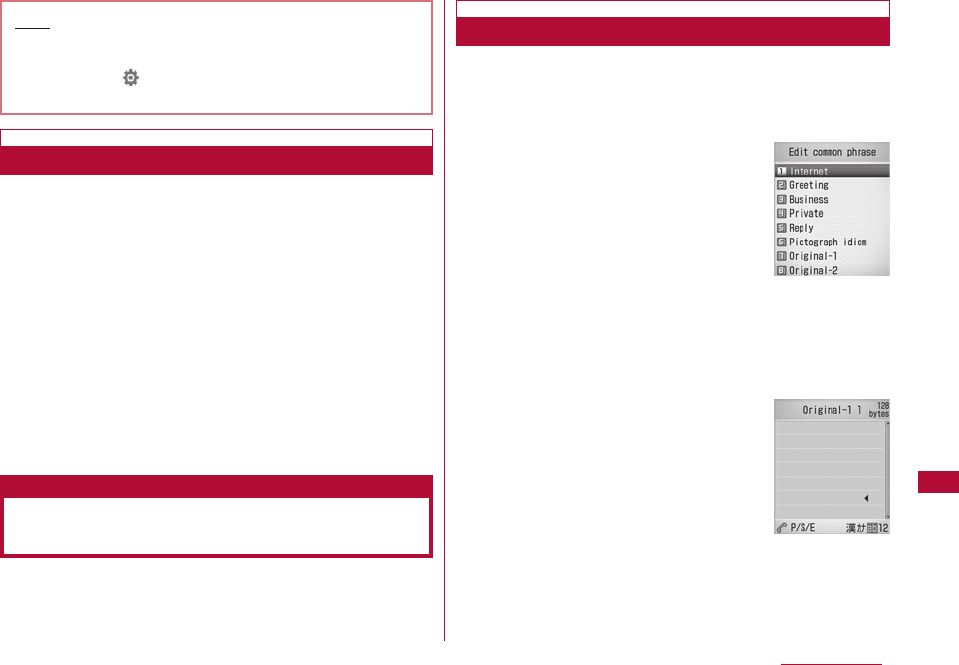
299
Character Entry
You can configure the input method so that cursor moves
to a new position for the next input automatically after a
set time so that another character can be entered with the
same key.
1 Character input screen (P294)]M[Menu] ]"Input
setting" ]"Auto cursor" ]Select the speed
OFF :
Characters are not automatically fixed.
Slow :
Characters are fixed approximately two seconds
after being entered.
Normal :
Characters are fixed approximately 1.5 seconds
after being entered.
Fast :
Characters are fixed approximately 1 seconds
after being entered.
Register frequently used greetings or phrases as common
phrases to enter them quickly.
Newly defined common phrases can be saved in "Original-
1" or "Original-2". Up to 10 common phrases can be saved.
1 Character input screen (P294)]M[Menu]]"Common
phrases"]"Edit"
The common phrase types are listed.
2 "Original-1"/"Original-2" ]Move the cursor to a phrase
type for adding a phrase ]I[Edit]
Up to 64 full-pitch or 128 half-pitch
characters can be entered.
Character Entry
Note
・ You can also set the Prediction input by performing
the following steps:
M [Menu] ] (Settings) ]"Others" ]"Character
input"]"Prediction input"]"On"/"Off"
Fixing Entered Characters Automatically
Modifying / Registering
Common Phrases
Edit
Registering Common Phrases
Edit common
phrase List
screen
Edit common
Phrase screen
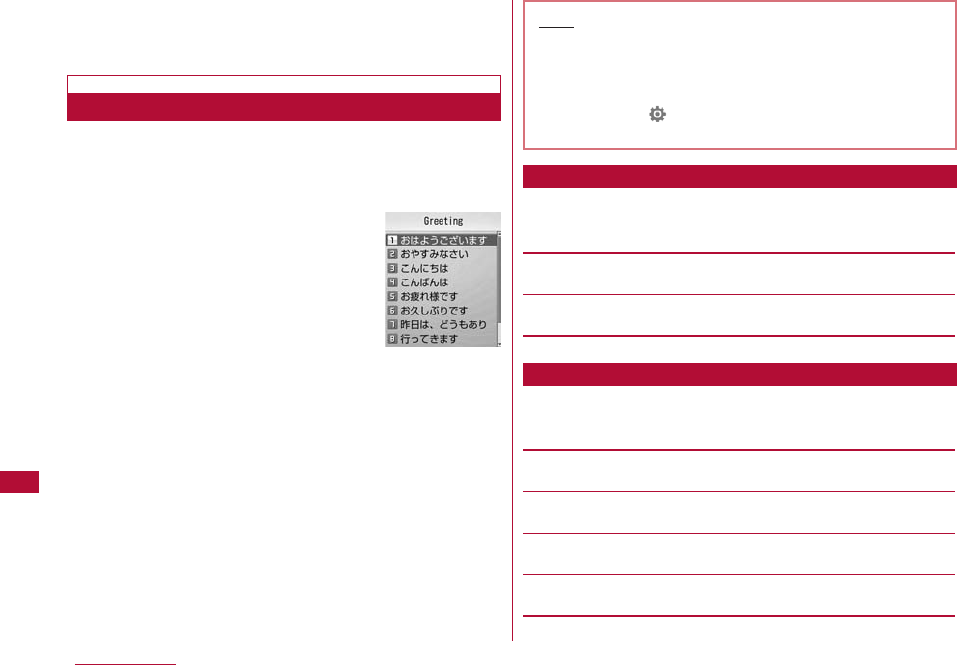
300 Character EntryCharacter Entry
3 Enter text to register ]C[Set]
The common phrase is registered.
You can edit a pre-installed common phrase.
1 Character input screen (P294)]M[Menu] ]"Common
phrases"]"Edit"]Select a common phrase type
2 Move the cursor to a phrase ]C[Edit]
The Common phrase edit screen opens with the selected
common phrase entered.
・ Press C [Select] to open the full screen with the
common phrase entered.
3 Edit the common phrase ]C[Set]
The common phrase is registered.
1 The Edit common phrase screen (P299) ]M[Menu]
]Perform the following operations:
[Reset all]
Restore all common phrases to their defaults.
[Cancel]
Terminate editing a common phrase.
1 Common phrase list screen (P300) /Display all screen
(P299)]M [Menu] ]Perform the following operations:
[Delete 1 item]
Delete the selected common phrase.
[Reset 1 item] *1
Restore the selected common phrase to its default.
[Category reset] *2
Restore all common phrases in the category to their defaults.
[Cancel]
Terminate editing a common phrase.
Editing Pre-installed Common Phrases
Sub Menu on the Common Phrase List/Display
"Greeting"
Common Phrase
List Screen
Note
・ You can also edit common phrases saved in a user-
defined folder.
・ You can also perform the following steps to save or
edit a common phrase.
M[Menu] ] (Settings) ]"Others" ]"Character
input" ]"Edit common phrase"
Common Phrase Edit Screen Sub Menu
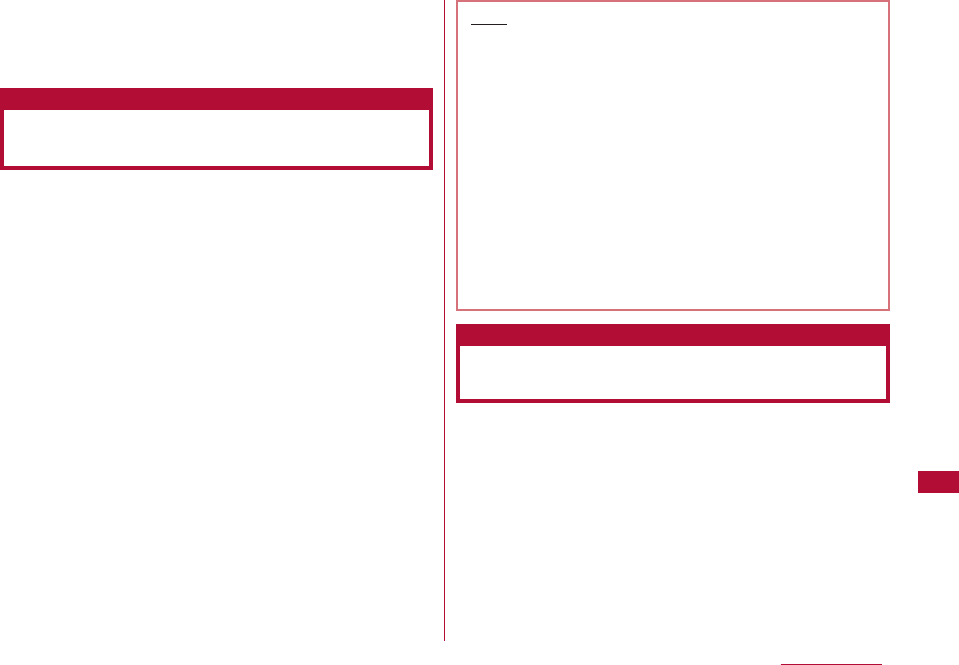
301
Character Entry
*1 A common phrase whose type is "Original-1" or "Original-2"
cannot be selected.
*2 Not displayed in the sub menu for "Display all" screen.
You can copy/cut characters and paste them to other
locations or on other screens. Copied/cut characters can
be pasted any number of times until the FOMA terminal is
turned off or another copy/cut is performed.
1 Character input screen (P294) ]M[Menu] ]"Edit
character" ]"Copy"/"Cut"
2 Use Kto move the cursor to the starting point ]C
[Select]
3 Use Kto move the cursor to the ending point
]C[Select]
4 Open the character input destination screen ]Use
Kto move the cursor to the position to paste
5 M[Menu] ]"Edit character" ]"Paste" ]"Yes"
・ To undo a cut or paste operation, select M[Menu] ]
"Edit character" ]"Undo"
You can enter a 4-digit Kuten Code to enter a letter,
numeric character, or symbol, etc.
・ For the "Kuten Code List", refer to the "Kuten Code List" on the
contained in the bundeled CD-ROM in PDF format.
Character Entry
Copying/Cutting and Pasting
Characters
Note
・ If copied or cut text contains more characters than
the allowable number of characters, the excess
characters are truncated when pasted.
・ Characters can be pasted only if copied or cut text
can be entered in the destination text. For example,
Hiragana or Kanji characters cannot be pasted in the
mail address field (half-pitch alphanumeric
characters).
・ Line feeds in a copied text string are replaced with
halfpitch spaces if the text is pasted to an input
screen that does not allow linefeeds.
・ When pasting in the Deco-mail message after
copying or cutting, the decoration information will
also be pasted (except for some decoration
information).
Using the Kuten Code to Enter
Characters
Kuten Code Input
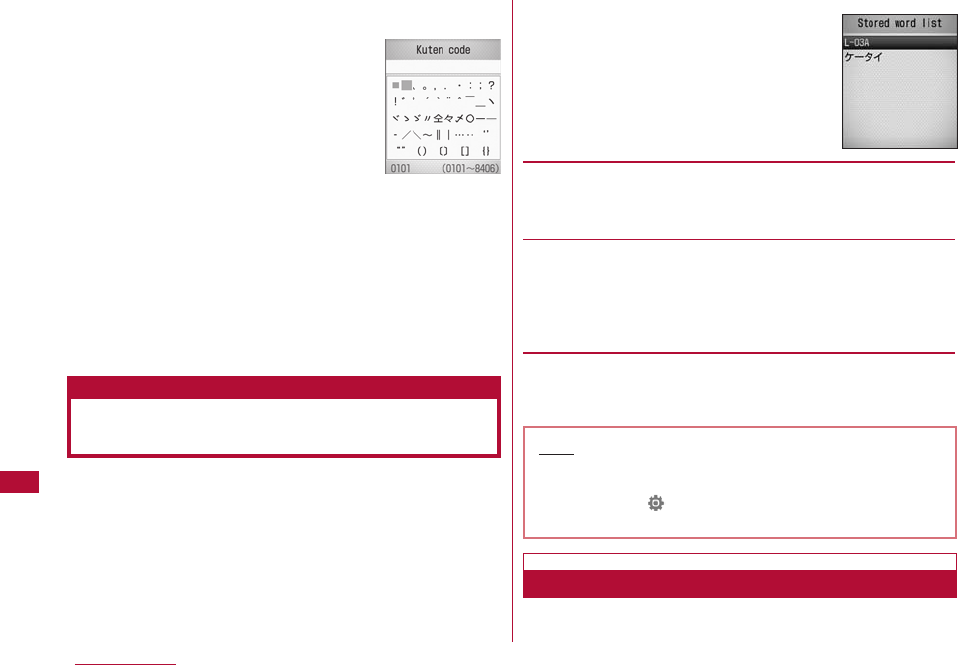
302 Character EntryCharacter Entry
1 Character input screen (P294) ]M[Menu] ]"Special
input" ]"Kuten code"
2 Enter the Kuten code (4-digit number) for the
character ]C[Select]
The associated character is entered.
・ If you proceed to press [Cont.], you can enter consecutive
characters using Kuten codes.
・ You can also select characters by moving the cursor with
K.
You can register up to 100 words not listed as conversion
options, or words with difficult readings, along with the
readings. Registered words will be displayed as conversion
options when the readings are entered.
1 Character input screen (P294) ]M
[Menu] ]"Edit dictionary"
・ To view registered words, select a
dictionary and press C.
2 I[Add] ]Select or save the
following item
[Reading]
Enter the reading that is used to find the registered word. Up to
14 full-pitch Hiragana characters only can be entered.
・
Spare cannot be entered.
[Word]
Enter the word to register. Up to 14 full-pitch or 28 half-pitch
characters can be entered. On the Character input screen, after
the characters of a "Reading" are entered, the registered word
appears as a conversion option.
・
Linefeed cannot be entered.
3 I[Store]
The word is registered to the dictionary.
You can delete one word or all words registered using "Edit
dictionary".
Registering Frequently Used
Words
Edit dictionary
Note
・ You can also perform the following steps to register a
word.
M[Menu] ](Settings) ]"Others" ]"Character
input" ]"Edit dictionary"
Kuten Code
input screen
Deleting Words

303
Character Entry
Example: Deleting one word
1 Move the cursor to the word to delete on the Stored
word list screen (P302)
2 M[Menu] ]"Delete 1 item" ]"Yes"
The selected word will be deleted.
■To delete all words
Select M[Menu]
]
"Delete all"
]
"Yes" on the Stored
word list screen.
Restore the learned data concerning character entry
saved in the FOMA terminal to its default.
1 M[Menu] ](Settings) ]"Others" ]"Character
input" ]"Reset learnt info" ]"Yes"/"No"
You can enable dictionaries downloaded from i-mode sites,
etc. and use them for character conversion. Up to five
dictionaries can be enabled.
・ Up to 10 dictionaries can be stored in the FOMA terminal.
1 M[Menu] ](Settings) ]"Others" ]"Character
input" ]"Download dictionary"
2 Place check marks next to dictionaries to enable ]C
[Enable]
Each checked dictionary is enabled.
■To disable a dictionary
Select an enabled dictionary and press C[Disable].
1 Downloaded dictionary screen (P303) ]M[Menu] ]
Perform the following operations:
・ I[View]: Display details of the dictionary.
[Delete]
Delete the selected dictionary.
[Delete all]
Delete all listed dictionaries.
Learned Data
converted by selecting from conversion options, or
characters fixed by pressing
C
without conversion. The
next time you enter the same first character, the learned
word appears as the first conversion option.
Using Downloaded Dictionaries
Download Dictionaries
Downloaded
Dictionary
screen
Sub Menu on the Downloaded Dictionary Screen
Initializing Learned Data
Reset learnt info

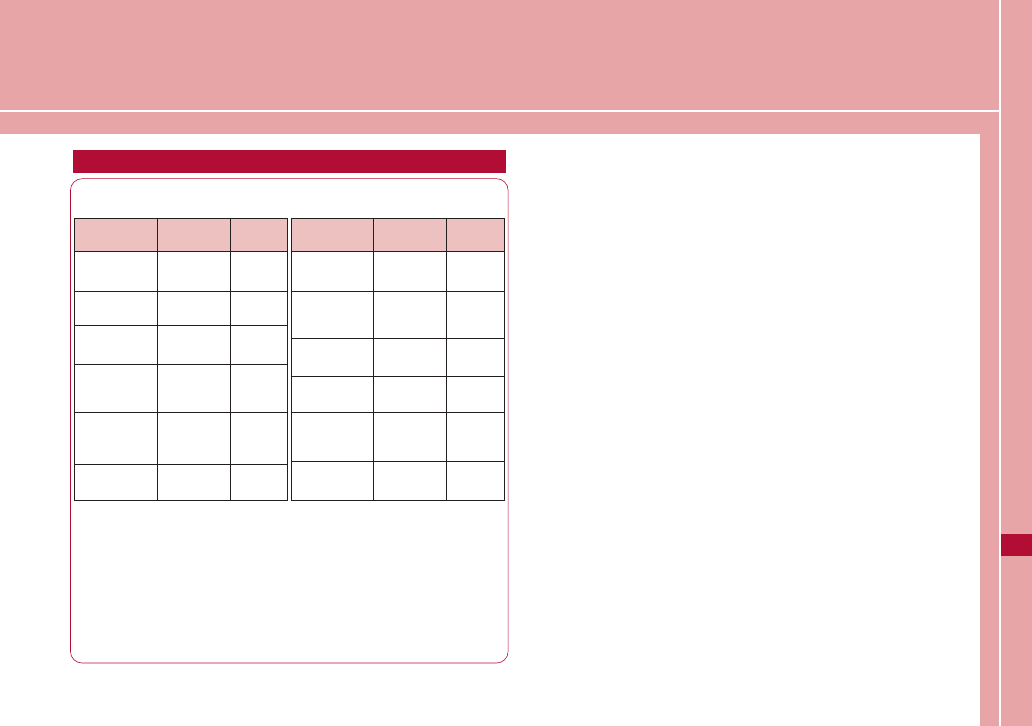
Network Services
The following DOCOMO network services are available for the
FOMA terminal.
Voice Mail Service・・・・・・・・・・・・・・・・・・・・・・ Voice mail 306
Call Waiting ・・・・・・・・・・・・・・・・・・・・・・・・・・・ Call waiting 307
Call Forwarding Service ・・・・・・・・・・・Call forwarding 309
Nuisance Call Blocking Service
・・・・・・・・・・・・・・・・・・・・・・・・・・・・Nuisance Call Blocking 311
Caller ID Notification Service
・・・・・・・・・・・・・・・・・・・・・・・・・・・・・・Caller ID notification 312
Caller ID Request ・・・・・・・・・・・・・・・ Caller ID request 312
Set In-call Arrival Act ・・・・・・・ Set in-call arrival act 312
Selecting Actions to an Incoming Call during a Call
・・・・・・・・・・・・・・・・・・・・・・・・・・・・・・・・・・・・ Arrival call act 313
Dual Network Service ・・・・・・・・・・・・・・ Dual Network 313
English Guidance ・・・・・・・・・・・・・・・・ English guidance 314
Service Numbers Available・・・・・・ Service numbers 314
Setting Remote Control ・・・・・・・・・・ Remote Control 315
Multi Number ・・・・・・・・・・・・・・・・・・・・・・・・ Multi number 315
OFFICEED ・・・・・・・・・・・・・・・・・・・・・・・・・・・・・・・・・・・・・・・・・ 317
Registering and Using a New Service
・・・・・・・・・・Additional Services (USSD Registration) 317
Registering Additional Guidance
・・・・・・・・・・・・・・・・・・・・・・・・・・・・・・・・・・・Additional guide 318
305
Network Services Available
Service name Monthly
charge
Subscription
Voice Mail
Service
Call Waiting
Service
Call Forwarding
Service
Nuisance call
Blocking
Service
Caller ID
Notification
Service
Caller ID Display
Request Service
Required
Required
Required
Not
required
Not
required
Not
required
Charged
Charged
Free
Free
Free
Free
*Public Mode P71, P72
・ You cannot use network services while you are out of service area or where
there is no signal reception.
・ For subscription or inquirios, contact the "
docomo Information Center
" listed
on the back of this manual.
・ "OFFICEED" is a fee-based service requiring a separate subscription.
For details, see the web page "NTT DOCOMO Business Online"
(http://www.docomo.biz/d/212/).(Japanese only)
・ This manual contaios an overview of network services available through
operation of FOMA terminal menus. For details, see "Mobil Phone User's Guide
[Network Services].
Service name Monthly
charge
Subscription
Dual Network
Service
English
Announcement
Service
Multi
Number
Public mode
(Drive mode)*
Public mode
(Power off)*
Required
Not
required
Required
Not
required
Not
required
Charged
Free
Charged
Free
Free
OFFICEED
Required Charged
306 Network Services
When your terminal is out of the service area or turned off,
or you cannot answer a call, this service automatically
responds to incoming voice/video calls and records
messages.
・ Up to 3 minutes can be recorded per voice message, and
messages can be recorded for up to 20 voice calls and 20
video calls. Messages are retained at the center for up to 72
hours.
・ When a message is recorded, (with the number of received
messages) appears on the Stand-by display. However, if a video
message is recorded, does not appear on the Standby
display but an Incoming mail information(SMS) notifies you of
the messages.
・ When Record Message (P73) is activated concurrently, to use
the Voice mail service first, set the ringing time of the Voice
mail service shorter than the Response Time of Record
Message.
・ If you do not answer an incoming voice or video call when the
Voice mail service is activated, the call is recorded as a
"Missed Call" in Received Calls and appears (with the
number of the missed calls).
Step 1 : Activate the Voice Mail Service
Step 2 : A call arrives*
Step 3 : Caller records a message
Step 4 : Play the message
* When you are in a hurry, you may want to record a message
without listening to the Response Greeting of the Voice mail
service. In this case, you can immediately start recording a
message by pressing "#".
1 M[Menu] ](Service) ] "Voice mail" ]Perform
the following operations:
[Activate]
Activate the Voice mail service.
[Set ring time]
Set time before connecting to the Voice mail service center after
a call arrives.
]
"Yes"
]
Enter a ring time
Voice Mail Service
Voice mail
Basic Flow of Voice Mail Service
Note
・ In Step 2, if you are in service area and the FOMA
terminal is turned on, a ring tone sounds until the set
ring time elapses. When an incoming call is not
answered while a ring tone is sounding, the call is
connected to the Voice mail service center. The ring
time can be changed.
・ In Step 3, when a message is recorded, appears (the
number is the number of recorded messages) on the
Stand-by display, and calls are recorded in Received
calls as missed calls. However, if you set "Set ring
time" to 0, missed calls will not be recorded in
Received calls.
・ Even when the Voice mail service is deactivated, you
can forward an incoming voice call to the Voice mail
center manually using the sub menu.→P69
・ To change the settings to connect video calls to the
Voice mail center, make a voice call to "1412".
Using the Voice Mail Service
307
Network Services
[Deactivate]
Deactivate the Voice mail service.
[Check setting]
Check the current settings of the Voice mail service.
Press M[Menu] to activate/deactivate the Voice mail service,
or set a ring time.
[Play messages]
Make a call to the Voice mail service center and play the
recorded voice mail message.
[Voice mail setting]
Make a call to the Voice mail service center, and change the
settings according to the voice guidance.
[Check messages]
Check whether there are new messages.
[Notify missed call]
An SMS will be sent to notify you of missed calls when calls
arrived while the terminal is turned off or out of service area, after
the terminal is turned on or in service area.
Activate :
Activate the Notify missed call service.
call notification
Deactivate :
Deactivate the Notify missed call service.
Check setting :
Check the status of the Notify missed call
setting.
[Del. Voicemail icon]
Hide displayed in the icon display area.
[Tone/Vibration message notification]
Set whether to notify you of a new recorded message with
illumination and a ring tone.
When a call arrives during another call, a call termination
during a call tone sounds. You can place the active call on
hold and answer the other call. You can also place the
active call on hold to make another call.
・ To use the "Call waiting" service, set "In-call arrival act"
(P312) to "Answer" in advance. If this option is set
otherwise, an incoming voice call during another voice call
cannot be answered even if the "Call waiting" service is
activated.
・ The Call waiting service is not available when:
- Dialing a number or ringing the other party
- A voice call arrives during a video call
- A video call arrives during a voice call
1 M[Menu] ](Service)]"Call waiting"]Perform the
following operations:
Call Waiting
Call waiting
Using Call Waiting
Note
・ Even when you activate "SMS一括拒否 (Reject All
SMS)", the notification will be received.
308 Network Services
[Activate]
Activate the "Call waiting" service.
[Deactivate]
Deactivate the "Call waiting" service.
[Check setting]
Check whether the Call waiting service is activated or
deactivated.
When a call arrives during a voice call, the call termination
tone during a call sounds from the earpiece, and the
Incoming call screen opens.
1 A call arrives]A
The active voice call is placed on hold, and you can answer
the incoming voice call. A message "Connecting 3-way"
appears on the 3-way connection screen.
・ I[Switch]: Each press this key toggles between the
active call and the held call.
・ C[Spk on/Spk off]: Toggle Hands-free between On and Off.
・ P: End the active call.
You can make a new voice call placing the active voice call
on hold.
1 Voice call screen (P53)]C OK ]M[Menu] ]"New
call" ]Enter a phone number ]A
The new call becomes active, the previous call is placed on
hold, and the connecting 3-way screen opens.
・ To switch to a held call, press C OK ]M [Menu] ]
[Switch].
・ To end the held call, switch to the call by performing the
above steps and press P.
Answer an incoming voice call after terminating the active
voice call. You can answer the call even when the Call
waiting service is activated.
1 A call arrives]C OK ]M[Menu]]"End active call "
The Voice call termination screen opens, and the Incoming
voice call screen for the incoming call opens.
■to answer the call after terminating the held call
C OK ]
M[Menu]
]
"End the call"
]
"End held call
・ When connecting 3-way, The held call is terminated, and
you answer the incoming call.
2 A
Answering a Call Placing the Active Call on
Hold
Making a Call Placing the Active Call on
Hold
Answering an Incoming Call Terminating
the Active
Note
・ If you deactivate Call waiting, you cannot answer a
call even when you hear in-call arrival tone during a
call with "Set in-call arrival act" activated.

309
Network Services
Sub Menu of the Incoming Call Screen during a Call Screen
1 When a call arrives during a call, press C OK ]M
[Menu] ]perform the following operations:
[Voice mail]*1
Connect the incoming call to the Voice mail service center.
[Call rejection]
Reject an incoming call and hang up.
[Call forwarding] *2
Forward an incoming call to the specified number.
[End active call]
Terminate the active call. A call is arriving.
[Mute]
Mute or un-mute the active call.
*1 This is not available unless you subscribe to the Voice mail
service.
*2 This is not available unless you subscribe to the Call
forwarding service and you have specified a forwarding
number.
1 The 3-way connecting screen C OK ]M[Menu] ]
Perform the following operations:
[Switch]
Switch between the active call and held call.
[End call]
Select and terminate a call.
End active call :
Terminate the active call. The held call
automatically becomes active.
End held call :
Terminate all calls.
End all calls
[Mute]
Mute or un-mute the active call.
[Send my info.]
Create i-mode mail with own number entered in the message
text. →P131
[Search phonebook] *
Search for a Phonebook entry.→P87
* This cannot be used when the Phonebook is accessed. To use
this function, terminate applicable functions from the task list
screen. → P264
When your terminal is out of service area or switched off, or
a call was not answered within the set ring time, this
service forwards the voice/video call.
・ Video calls are forwarded only to a video call capable
destination complying with 3G-324M.
・ The subscriber to the Call forwarding service is changed for
forwarding a call to a destination.
・ This service is not available with some billing plans.
・ When Record message (P73) is activated concurrently, to use
the Call forwarding service first, set the ring time of the Call
forwarding service shorter than the Ring time of Record
message.
・ If an incoming voice or video call is not answered when the Call
forwarding service is activated, the call is recorded as a Missed
call in Received calls and appears (the number is the
number of missed calls).
Sub Menu on the 3-way Connecting Screen
Call Forwarding Service
Call forwarding

310 Network Services
Step 1 : Register the phone number of the forwarding
destination
Step 2 : Activate the "Call forwarding" Service
Step 3 : A call arrives
Step 4 : Forward the call to the destination
1 M[Menu] ](Service) ]"Call forwarding" ]Perform
the following operations:
[Activate]
Activate the "Call forwarding" service.
Register the :
Register the phone number of the
forwarding number
forwarding destination. Press M[Search]
to find the
number from the Phonebook.
Set ring time :
Set the duration from when a call arrives
until the call is forwarded.
[Deactivate]
Deactivate the Call forwarding service.
[Register the forwarding number]
Register the phone number of the forwarding destination. Press
M[Search] to find the number from the Phonebook.
・ Press
I
[Done], a confirmation appears. Selecting "Yes"
changes the forwarding destination number and activates the
Call forwarding service.
[Setting if forwarding number busy]
Set whether to connect to the Voice mail service center when
the forwarding destination is busy.
[Check setting]
Check the current setting of the Call forwarding service.
・ This cannot be operated from a menu.
・ For details, refer to "Mobile Phone User's Guide [Network
services]".
1 Enter "1429" ]A
Follow the voice guidance.
Basic Flow of the "Call forwarding" Service
Note
・ In Step 3, when you are in a service area and the
terminal is turned on, a ring tone sounds until the set
Ring time elapses. If an incoming call is not answered
while a ring tone is sounding, it is forwarded to the
forwarding destination. The ring time can be changed.
・ In Step 4, when the call is forwarded, the call is
recorded as a Missed call in Received calls. However,
if you set the ring time to zero, missed calls will not
be recorded in Received calls.
・ Even when the "Call forwarding" service is
deactivated, an incoming call can be forwarded to a
forwarding destination manually from the sub menu.→
P76
・ You cannot answer a call if you do not subscribe to
the Call waiting service even if you hear a call
termination tone during a call.
Using the Call Forwarding Service
Enable or Disable Forwarding Guidance
311
Network Services
This service rejects incoming nuisance calls. After a phone
number is registered to be rejected, all incoming calls from
that number will be automatically rejected, and the voice
guidance is played to the caller.
・ Up to 30 phone numbers can be registered.
・ Even when a call arrives from the phone number to be rejected,
the ring tone does not sound. Also, the call is not recorded in
Received calls.
1 M[Menu] ] (Service) ]"Nuisance call blocking" ]
Perform the following operations:
[Register nuisance caller]
Register the phone number of the last incoming call you
answered to set to reject calls from the number.
[Register selected number]
Set to reject the phone number you selected.
[Delete all entries]
Delete all phone numbers registered as nuisance callers.
[Delete last entry]
The last registered phone number is deleted.Repeat the same
steps to delete a phone number from the last saved number, one
at a time.
[Check the number of entries]
Check the number of the rejected callers.
Nuisance Call Blocking Service
Nuisance Call Blocking

You can notify the other party of your caller ID (phone
number) when you call. Your Caller ID will be displayed on
the other party's phone if the phone is a digital phone and
capable of displaying Caller ID.
・ Your Caller ID is valuable information. Be cautious about
sending your Caller ID.
1 M[Menu] ] (Service) ]"Caller ID notification" ]
Perform the following operations:
[Activate/Deactivate]
Set whether to send or hide your Caller ID to the other party. The
network security code is required to configure the setting.
[Check setting]
Check the current status of the Caller ID notification service.
This service responds a voice/video call without Caller ID,
plays a voice guidance requesting the caller send Caller ID,
and terminates the call automatically.
・ Calls that did not arrive due to the Caller ID request service are
not recorded in Received calls, and the Missed Call notification
screen does not appear.
1 M[Menu] ] (Service) ]"Caller ID request" ]
Perform the following operations:
[Activate]
Activate the caller ID request.
[Deactivate]
Deactivate the caller ID request.
[Check setting]
Check the current status of Caller ID request.
Activate or deactivate incoming call actions set in "Arrival
call act" Also, you can check the current settings.
1 M[Menu] ] (Service) ]"Set in-call arrival act" ]
Perform the following operations:
[Activate]
Activate the actions set in "Arrival call act"
[Deactivate]
Deactivate the actions set in "Arrival call act"
[Check setting]
Check the current setting of "in-call arrival act".
312 Network Services
Caller ID Notification Service
Caller ID notification
Caller ID Request
Caller ID request
Note
・ This service is applicable only to calls with "User
unset" set as a reason for hiding Caller ID.
Set In-call Arrival Act
Set in-call arrival act
You can set how to respond to an incoming voice/video
call during a call when you subscribe to the Voice mail, Call
waiting, and Call forwarding services.
・ You cannot respond to an incoming call during a call if you do
not subscribe to the Voice mail, Call waiting, and Call
forwarding services.
・ Activate "Set in-call arrival act." to use Arrival call act.
1 M[Menu] ](Service) ]"Arrival call act" ]Perform
the following operations:
Answer
Calls are received. Incoming call action
will follow the settings of the Voice mail,
Call waiting, and Call forwarding services
when they are activated.
Voice mail
The Voice mail service answers a call.
Calls are connected to the Voice mail
service even when Call waiting is
activated.
Call forwarding
Forward a call to the registered phone
number. Calls are forwarded even when
the Voice mail or Call waiting is
activated.
Call rejection
Calls are rejected..
This service allows you to use the mova service with your
FOMA terminal phone number. You can switch between
FOMA and mova depending on the service area.
・ You cannot use the FOMA service and mova service
concurrently.
・ Switch the services using the Dual Network service when the
terminal is not accessing a network.
1 M[Menu] ] (Service) ]"Others" ]"Dual network"
]Perform the following operations:
[Dual network switching]
Switch mova to FOMA to make the FOMA terminal available.
[Check setting]
Check the current status of the setting.
313
Network Services
Selecting Actions to an Incoming
Call during a Call
Arrival call act
Dual Network Service
Dual Network
Note
・ When switching from FOMA to mova, operate from a
mova terminal.
<Dual network switching>
・ Switching the network during communication forcibly
terminates the connection.
Note
・
Incoming voice or videophone calls are recorded in
Received calls regardless of the arrival all act setting.
314 Network Services
The voice guidance played when a network service such
as the Voice mail service is activated or when the terminal
is out of service area can be played in English.
■ Incoming calls (Guidance to the caller)
■ Outgoing calls (Guidance to you)
・ When the caller is using this service at the same time, the
caller's settings for making calls have precedence over the
receiver's settings for receiving calls. Therefore, match the
caller's settings for making calls and the receiver's settings for
receiving calls.For example, if receiver's language is set to
Japanese+English, English guidance is not played unless
caller's language is set to English.
1 M[Menu] ](Service) ]"Others" ]"English
guidance" ]Perform the following operations:
[Guidance setting]
Configure the guidance settings.
Outgoing+
Incoming call
:Set guidance languages for incoming and
outgoing calls. Select the language after you
select "Yes".
Outgoing call
:Set a guidance language for outgoing calls.
Select the language after you select "Yes".
Incoming call
:Set a guidance language for incoming calls.
Select the language after you select "Yes".
[Check guidance setting]
Check the current setting of Guidance Setting.
You can make a call to a
docomo Information Center
or
Contacts for Repairs.
・ Depending on your UIM, the items displayed may differ or some
items may not be displayed.
1 M[Menu] ](Service) ]"Others" ]"Service
numbers" ]Perform the following operations:
[ドコモ故障問合せ]
Call inquiries when malfunction happens.
[ドコモ総合案内・受付]
Call for overall instruction or information.
English Guidance
English guidance
Service Numbers Available
Service numbers
Language Description
Japanese The Japanese guidance is played.
The English guidance will follow the
Japanese guidance.
The Japanese guidance will follow the
English guidance.
Language Description
Japanese The Japanese guidance is played.
English The English guidance is played.
Japanese+
English
English+
Japanese

315
Network Services
You can set so that a landline phone or pay phone with the
touch tone system or a DOCOMO terminal can be used to
operate the Voice mail or Call forwarding service.
・ To use the Voice mail or Call forwarding service overseas,
Remote control must be activated before leaving Japan.
1 M[Menu] ](Service) ]"Others" ]"Remote
control" ]Perform the following operations:
[Activate]
Activate Remote control.
[Deactivate]
Deactivate Remote control.
[Check setting]
Check the status of the remote control setting.
This service allows you to use up to 2 extra phone
numbers, Additional number 1 and Additional number 2, as
your FOMA terminal phone number in addition to the basic
subscription phone number.
・ On the Dialing/Incoming screen, names corresponding to Multi
number (Basic number/Additional number1/Additional
number2) appear.
・ When you dial from Dialed calls or Received calls, the Multi
number dialed from/received to is displayed, and this number is
used to dial.
You can register or set a name, a number, and a ring tone
for additional numbers.
1 M[Menu] ] (Service) ]"Others" ]"Multi number"
]"Number setting" ]Perform the following operations:
[Basic number: Name]
Enter a name for the Basic number.
[Phone number]
Display your phone number (Basic number).
[Additional no1: Name]
Enter a name of additional number 1.
[Phone number]
Enter a phone number of additional number 1.
[Additional no2: Name]
Enter a name of additional number 2.
Setting Remote Control
Remote Control
Multi Number
Multi number
Number
setting screen
Registering Additional Number(s)
Number Settings
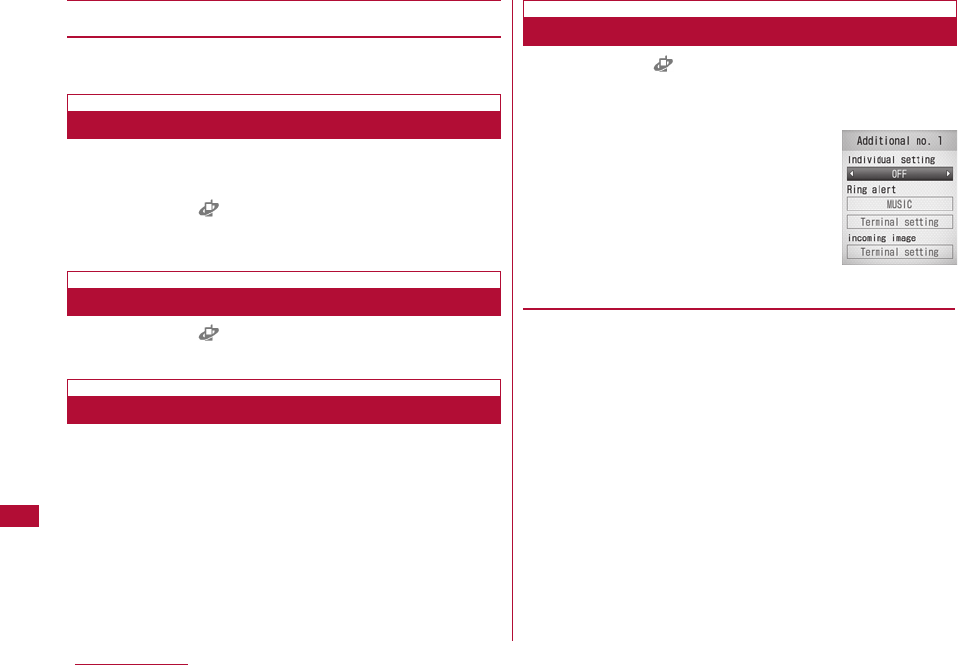
[Phone number]
Enter a phone number of additional number 2.
2 I[Done]
You can set a registered additional number as the default
number used for making calls.
1 M[Menu] ] (Service) ]"Others" ]"Multi number"
]"Set multi number" ]"Basic number"/"Additional
number1"/"Additional number2" ]"Yes"
1 M[Menu] ] (Service) ]"Others" ]"Multi number"
]"Check setting" ] "Yes"
1 Enter a phone number
2 M[Menu] ]"Multi number" ]Select a name of the
additional number
3 A
1 M[Menu] ] (Service) ]"Others" ]"Multi number"
]"Ring tone & image setting" ]Select an additional
number ]Perform the following operations:
・ C[List]: List of items opens.
[Individual setting]
Select whether to set the ring tone or image.
316 Network Services
Setting the Primary Number
Checking the Primary Number Settings
Selecting Caller ID for Each Call
Setting Ring Tone and Image
Additional
317
Network Services
[Ring alert]
Set the ring tone.
Music :
Press Dto move the cursor to the field below, and
select from Chaku-Uta-Full®songs saved in "Melody"
in the "Data box".→P217
Go to Step 3 (P214) in "Setting a Chaku-Uta-Full®
Song as a Ring tone".
i-motion :
Press Dto move the cursor to the field below, and
select from videos/i-mode movies saved in "imotion"
in the "Data box".→P249
Melody :
Press Dto move the cursor to the field below, and
select from melodies saved in "Melody" in the "Data
box".→P254
OFF :
No ring tone is set.
[incoming image]
Set an image to be shown on the incoming call screen.
Image :
Select from images saved in "My picture" in the "Data
box".→P239
i-motion :
Select from videos/i-motion movies saved in "imotion"
in the "Data box".→P249
2 I[Done]
"OFFICEED" is an internal voice call service with fixed
charges offered for an in-building mobile communication
system IMCS. It requires a separate subscription.
For details, see the web page "docomo Business Online"
(http://www.docomo.biz/html/product/officeed/?DCMB_
AREA=03&path=212) (Japanese only).
When DOCOMO offers a new network service, you can add
the service into the menu. Up to 10 new network services
can be registered.
Register a service name and "Special number"/"Service
number (USSD)" given by DOCOMO.
・ Service number (USSD) is a code to be sent to Service Center.
Registering and Using a New
Service
Additional Services (USSD Registration)
Adding Services
Note
・ If you specify a video/i-motion with video/audio for
"Select ring tone" (P98) or "Call display"(P105), and
you select "Terminal setting" for either "Ring alert" or
"Incoming image", this option will be overridden and
the movie/imotion will be played when an applicable
voice/video call arrives.
OFFICEED
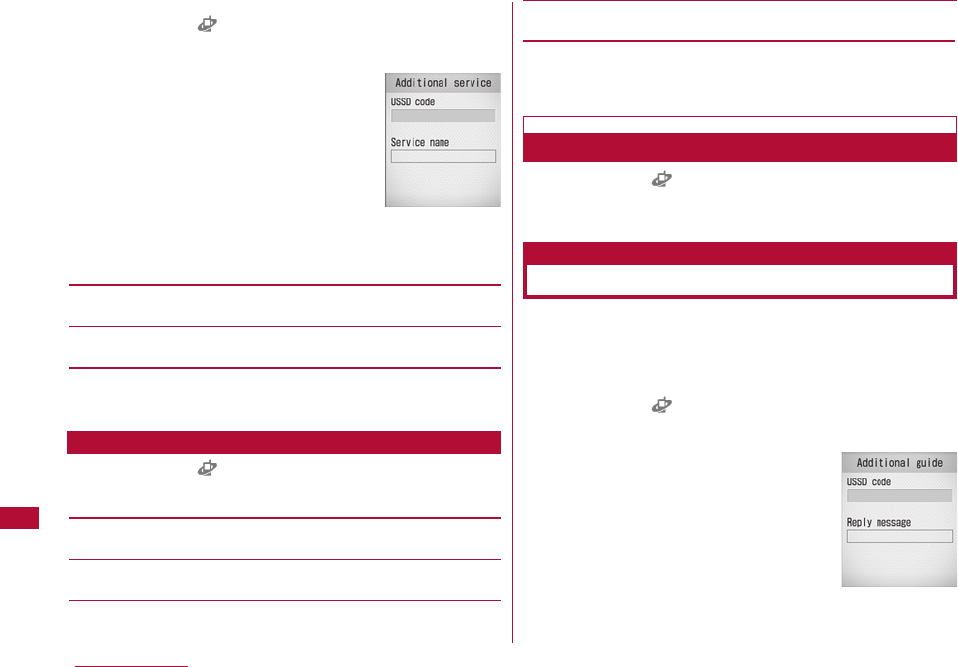
318 Network Services
1 M[Menu] ] (Service) ]"Others" ]"Additional
service" ]Move the cursor to "Not recorded" ]I
[Edit] ]Perform the following operations:
[USSD code]
Register the Service number (USSD).
[Service name]
Enter a service name.
2 C[OK]
1 M[Menu] ] (Service) ]"Others" ]"Additional
service" ]M[Menu] ]Perform the following
operations:
[Edit]
Modify the selected service.
[Select]*1
Perform the selected service.
[Delete]*1
Delete the selected service.
[Delete all]*2
Delete all added services.
*1 This appears only when the recorded item is selected.
*2 This option appears only when more than one item is
registered.
1 M[Menu] ] (Service) ]"Others" ]"Additional
service" ]Select a service
Connect to Service Center.
Up to 10 response messages, that correspond to a service
code (USSD) returned from the service center when
additional services connect to the center using the USSD,
can be saved.
1 M[Menu] ] (Service) ]"Others" ]"Additional
guide" ]Move the cursor to "Not recorded" ]I[Edit]
]Perform the following operations:
Performing Added Services
Registering Additional Guidance
Additional guide
Additional
guidance Edit
screen
Additional
services Edit
screen
Sub Menu on Additional Service List Screen
319
Network Services
[USSD code]
Register Service number (USSD).
[Reply message]
Register an Additional guidance name.
2 C[OK]
1 M[Menu] ] (Service) ]"Others" ]"Additional
guide" ]M[Menu] ]Perform the following operations:
[Edit]
Modify the selected guidance.
[Delete]*1
Delete the selected/displayed guidance.
[Delete all]*2
Delete all guidance.
*1 This appears only when the recorded item is selected.
*2 This option appears only when more than one item is
registered.
Sub Menu on the Additional Guidance List Screen

Overseas Use
Overview of International Roaming (WORLD WING)
・・・・・・・・・・・・・・・・・・・・・・・・・・・・・・・・・・・・・・・・・・・・・・・・・・・・ 322
Services Available Overseas ・・・・・・・・・・・・・・・・・・・・・・ 322
Differences in Communication Services ・・・・・・・・・・・ 323
Checking before Using Overseas・・・・・・・・・・・・・・・・・・ 324
Making Calls Overseas ・・・・・・・・・・・・・・・・・・・・・・・・・・・・ 328
Receiving Calls Overseas ・・・・・・・・・・・・・・・・・・・・・・・・・ 331
Setting Telecommunication Carrier Search Mode
・・・・・・・・・・・・ Network Search Mode/Network Mode 332
Setting Preferred Telecommunication Carrier
・・・・・・・・・・・・・・・・・・・・・・・・・・・・・・・・ Preferred NW lists 333
Displaying the Network Name while Roaming
・・・・・・・・・・・・・・・・・・・・・・・・・・・・ Operator name display 333
Activating the Roaming Guidance
・・・・・・・・・・・・・・・・・・・・・・・・ Roaming guidance setting 334
Setting to Accept No Incoming Calls during Roaming
・・・・・・・・・・・・・・・・・・・・・・・・・・・・・・・・・・・・・・・ Call barring 334
Using Network Services during Roaming・・・・・・・・・・ 335
321
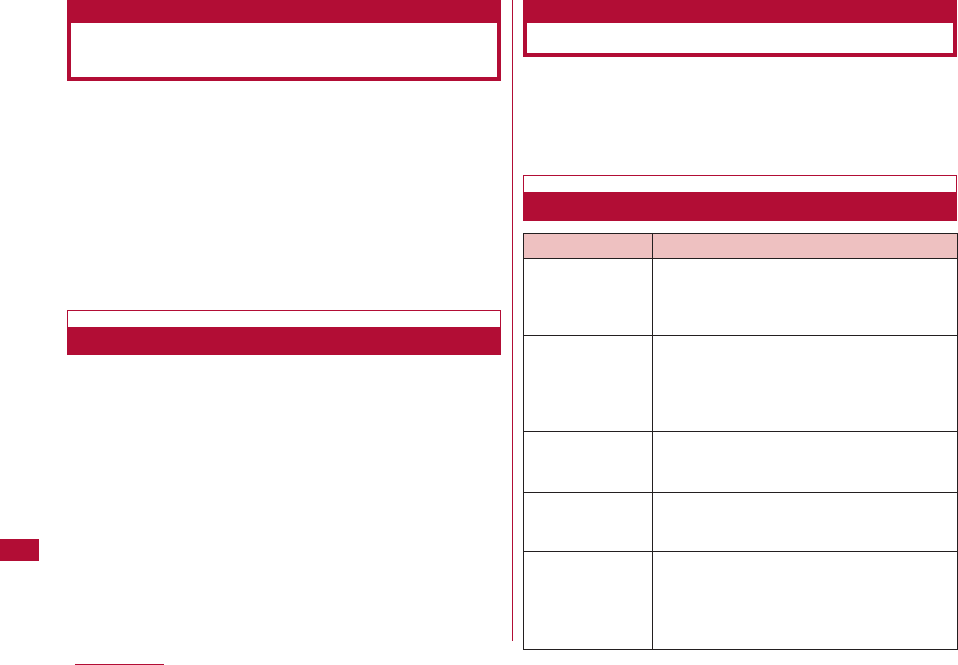
322 Overseas Use
International roaming (WORLD WING) is a service that
allows to talk or make communications over an affiliated
overseas carrier's network using the same phone number
as that used domestically.
For details of the services available during international
roaming, refer to the "Mobile Phone User's Guide
[International Services]". Also, in DOCOMO "International
service website", you can see the latest information on
international services and download the latest issue of the
"Mobile Phone User's Guide [International Services]".
If you subscribed to the FOMA service after September 1,
2005, a separate subscription is not required.
・ If you subscribed to the FOMA service after September 1,
2005, a separate subscription is not required. However, if you
unsubscribed to the FOMA service subscription or canceled the
service, a separate subscription is required.
・ If you initially subscribed to the FOMA service before August
31, 2005 and have not subscribed to "WORLD WING", a
separate subscription is required.
Before use the FOMA terminal overseas, please view the
followings for reference.
・ "Mobile Phone User's Guide [International Services]"
・ "Mobile Phone User's Guide [Network Services]"
Communication services available vary depending on the
overseas carrier and/or network used. For details of
communication services available in international roaming,
refer to the "Mobile Phone User's Guide [International
Services]" or DOCOMO website.
Overview of International
Roaming (WORLD WING)
Subscribing to WORLD WING
Services Available Overseas
Communication Services Available
Service Description
Voice call Using the same phone number as that
used in Japan, you can make/receive
calls in another country and make
international calls to a third country.
Video Calls You can make or receive an international
video call with a user using the terminal
supporting video calls of an overseas
specific 3G carrier or a FOMA terminal
user in Japan.
You can use i-mode to acquire
information from Japan and the country
you where you are.
Using the same mail address as that
used in Japan, you can send/receive i-
mode mail.
You can download information
periodically as in Japan.*3 You can also
press the i-Channel assigned key to
open a channel list and download
detailed information.*4
i-mode*1
i-mode mail
i-Channel*2
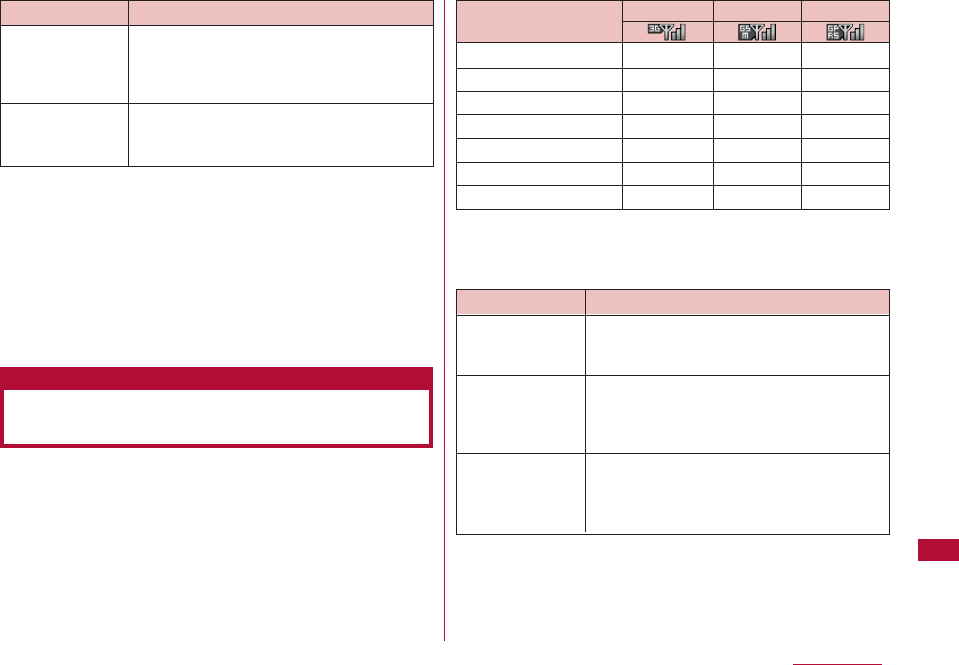
323
Overseas Use
*1 To set overseas use in i-mode is required.
*2 This may not be available depending on the carrier or area.
To set overseas use in i-mode is required.
*3 Auto Update is suspended automatically if the terminal is
connected to an overseas carrier. To resume automatic
update of i-Channel overseas, you need to perform i-Channel
settings again. However, packet communication charges
apply in addition to the monthly charge.
*4 Packet communication charges apply for i-Channel
communication (including Basic Channels).
You need to specify the network search mode and the
preferred network to which the connection is established
first, to use the terminal overseas.→P332
○: Available
×: Not available
■ Overseas Networks
*1 Abbreviation of 3rd Generation Partnership Project. This is a
regional standards organization for developing common
technical specifications for the third generation mobile
communications system (IMT-2000).
Data
Communication
Service Description
SMS You can send or receive SMS to/from a
FOMA user in Japan and a user of an
oversea telecommunication carrier other
than DOCOMO.
You can connect a PC or other devices
to use data communication (packet data
communication).
Service
Voice calls
Video Calls
i-mode
i-mode mail
SMS
i-Channel
Data Communication
○
○
○
○
○
○
○
○
×
×
×
○
×
×
○
×
○
○
○
○
○
GSM GPRS
3G
GSM*2
GPRS*3
Network Description
W-CDMA(3G) W-CDMA is a third generation mobile
communication network complying with
3GPP*1 global standards.
GSM is the second generation mobile
communication network in a digital
communication system that is most
widely used around the world.
GPRS is the 2.5 generation mobile
communication system that enables
highspeed packet communication using
GSM.
Differences in Communication
Services
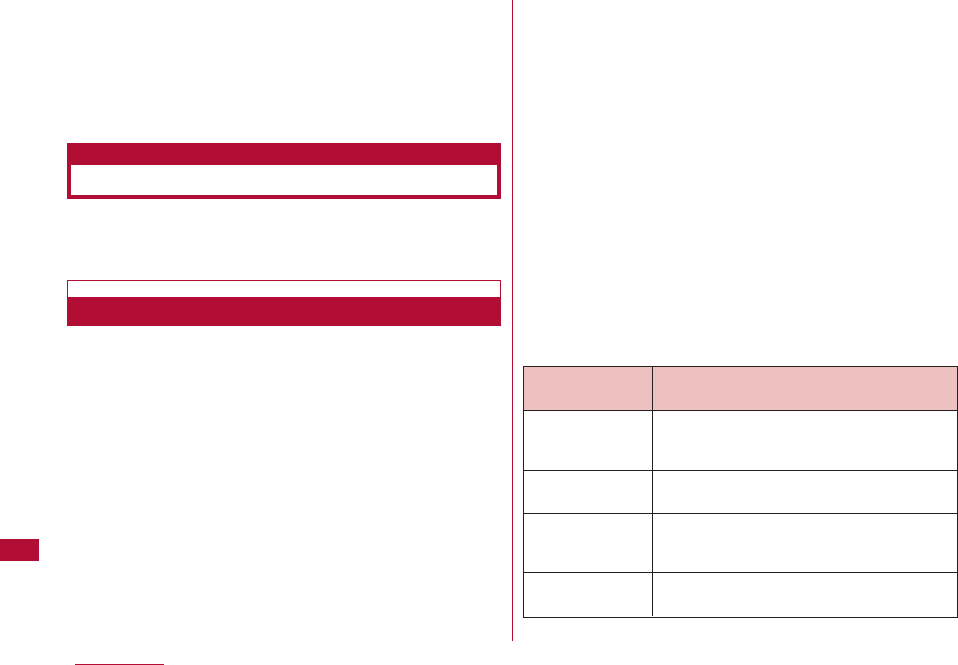
324 Overseas Use
*2 Abbreviation of Global System for Mobile Communications.
This is the second generation mobile communication network
in a digital communication system that is most widely used
around the world.
*3 Abbreviation of General Packet Radio Service. This service
offers enhanced data communication such as packet
communication by increasing the speed of GSM.
STEP1 : Preparation before departure
STEP2 : Using overseas
STEP3 : Setting after returning to Japan
■ Subscription
If you have not subscribed to WORLD WING (P322),
subscribe to the service.
・ Install a UIM supporting WORLD WING. (Green/White).
■ Communication services, etc. in countries and regions
For information such as countries, areas, or
telecommunication carriers available, visit DOCOMO
"International service website".→P332
■ Charging
・ Cautions When Handling the AC Adapter →P21
・ Charging Using the AC Adapter →P43、P45
■ Using i-mode
You have to configure "International Settings" in advance. Select
"i Menu" ]select "English " ]"Options" ]"International Settings"
]i-mode Settings" to open the setup screen. i-mode setting can
be done in this screen.
For detailed information refer to "Mobile Phone User's Guide
[i-mode] FOMA version"
■ Setting network services
You can activate or deactivate the subscribed network
services overseas. The following network services can be
accessed:
・ Caller ID notification service*1 *2
・ Voice mail service*1 *3
・ Call forwarding service*1 *3
・ Caller ID request service*1
・ Call waiting service*1
・ English guidance*1
・ Nuisance call blocking service*1
・ Roaming guidance*1
・ Call barring
*1 This may not be activated in some service areas.
*2 Caller ID may not be sent correctly or not be sent at all.
*3 To operate overseas, you need to activate the "Remote
control" (P315, P336) before leaving Japan.
■ Convenient functions and services available overseas
Checking before Using Overseas
Preparation before Departure
Description
The other party is notified with a voice
guidance that the terminal is in
international roaming.
Reject reception during international
roaming.
You can view the date and time in two
countries or regions, and cities
simultaneously.
You can convert currencies by setting
an exchange rate.
Functions
and services
Roaming
guidance
[international]
Call barring
Dual clock
display
Unit converter
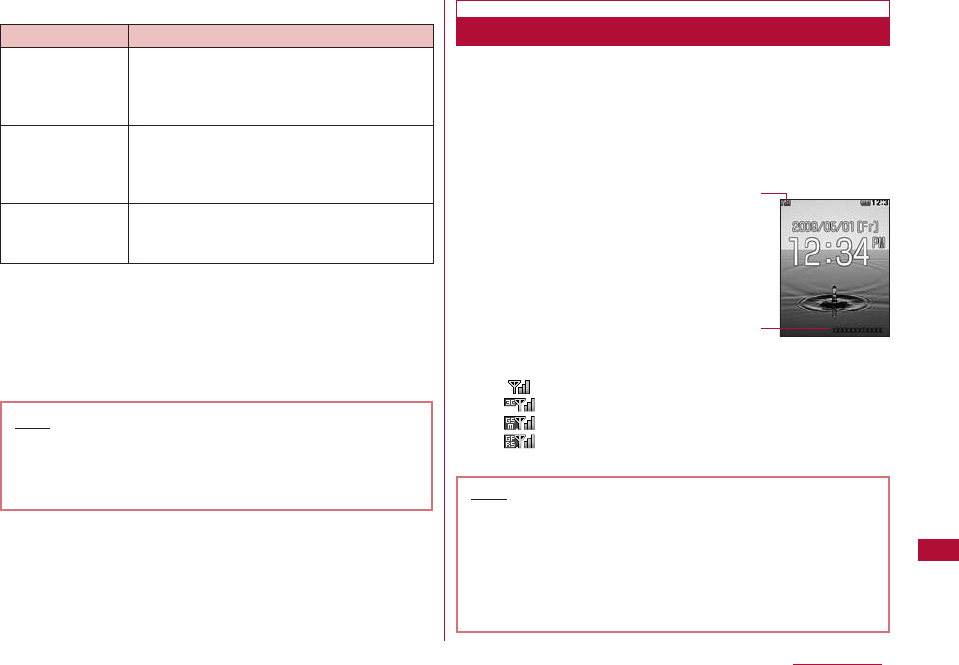
325
Overseas Use
■ Recommended Guide Books in addition to This Manual
■ Billing of charges
Overseas charges are billed with your monthly charge.
Note that they may appear on a billing invoice of the next
month or later due to the situation of the operator of your
country of stay. Also note that the billing invoice for charges
in the same charging period may be sent to you in a different
month.
■ Network switching
"Network search mode" is set to "Auto" by default. When you
use the FOMA terminal in Japan or during connecting to 3G
network, it is recommended to switch "Network mode" to
"WCDMA only" to reduce the consumption of the battery pack.
→P332
・ To switch networks manually P332
■ Main Display
The network name does not appear
when the terminal is connected to
the FOMA network in Japan.
・To display network name when
roaming→P333
1Icons indicating the connected network
Connected to a FOMA network in Japan
Connected to a 3G network overseas
Connected to a GSM network overseas
Connected to a GPRS network overseas
2Connected network name
Title Description
This book describes how to use i-mode
and i-mode mail overseas and their fees,
etc.
This book describes details about the
international roaming service including
contents of the service, usage fees, and
precautions.
This book describes contents, settings,
precautions and such of network
services.
Note
・ This manual contains a quick manual for "Overseas
Use" that can be used conveniently for referencing
operations. Use the quick manual as a reference
when using the FOMA terminal overseas.
Overseas Use
1
2
Mobile Phone
User's Guide
[i-mode] FOMA
version
Mobile Phone
User's Guide
[International
Services]
Mobile Phone
User's Guide
[Network Services]
Note
・ If Auto time adjust is set to "ON", when receiving the
information related to time difference from network
telecommunication carrier overseas, FOMA terminal will
adjust the time automatically. The time adjusted will be
different depending on telecommunication carriers.
・ Time may not be adjusted automatically. For this situation,
adjust time manually.→P49
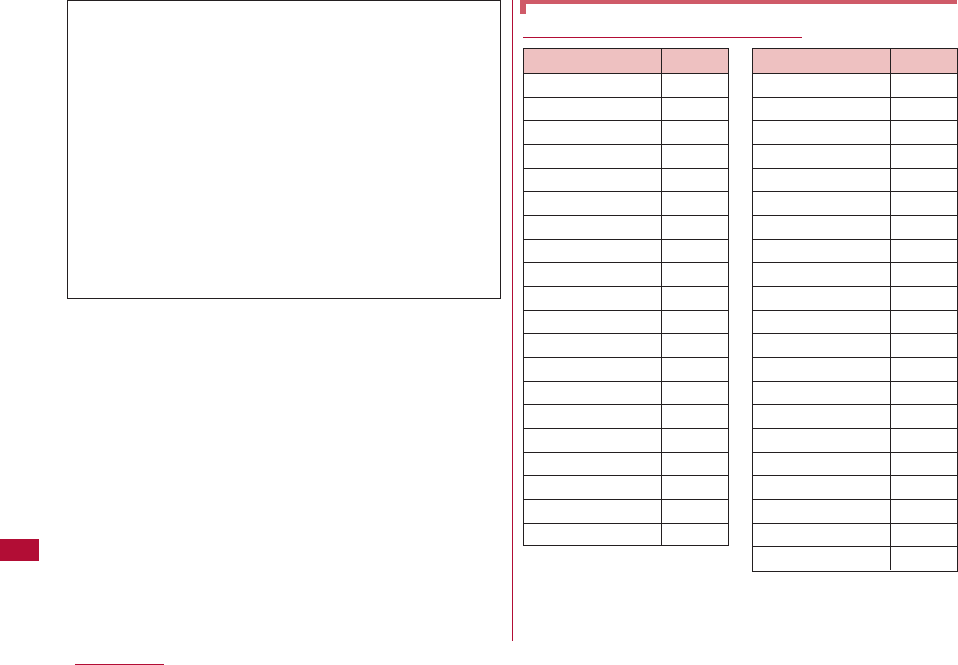
326 Overseas Use
Country Codes for Major Countries
* The codes may be changed.
* For the codes of the other countries and details, visit the
DOCOMO International service website.
* From a fixed line phone, International phone call charges to
Japan apply.
Inquiries from abroad
If a UIM (Green/White) is lost or stolen overseas, contact
DOCOMO quickly to have the disconnection procedure
done. For loss or theft of the terminal, settlement of
accumulated charges, or terminal failure while overseas,
refer to "For loss or theft of the terminal or charges while
overseas" or "For a terminal failure while overseas" on the
back of this manual. Call and communication fees are
charged to you even after the terminal was lost or stolen.
・
Add "International Access Code (Table 1)", or
"International Prefix Number for the Universal Number
(Table 2)" that is assigned to the country you stay, to
the head of your number for inquiries.
・
For the latest information on the International access
code or the International prefix number for universal
numbers, visit the DOCOMO International website.
Area Code
Australia 61
Austria 43
Belgium 32
Brazil 55
Canada 1
China 86
Czech 420
Egypt 20
Fiji 679
Finland 358
France 33
Germany 49
Greece 30
Hong Kong 852
Hungary 36
India 91
Indonesia 62
Italy 39
Japan 81
Korea 82
Area Code
Macau 853
Malaysia 60
Maldives 960
Netherlands 31
New Caledonia 687
New Zealand 64
Norway 47
Peru 51
Philippines 63
Russia 7
Singapore 65
Spain 34
Sweden 46
Switzerland 41
Tahiti 689
Taiwan 886
Thailand 66
Turkey 90
U.K. 44
U.S.A. 1
Vietnam 84
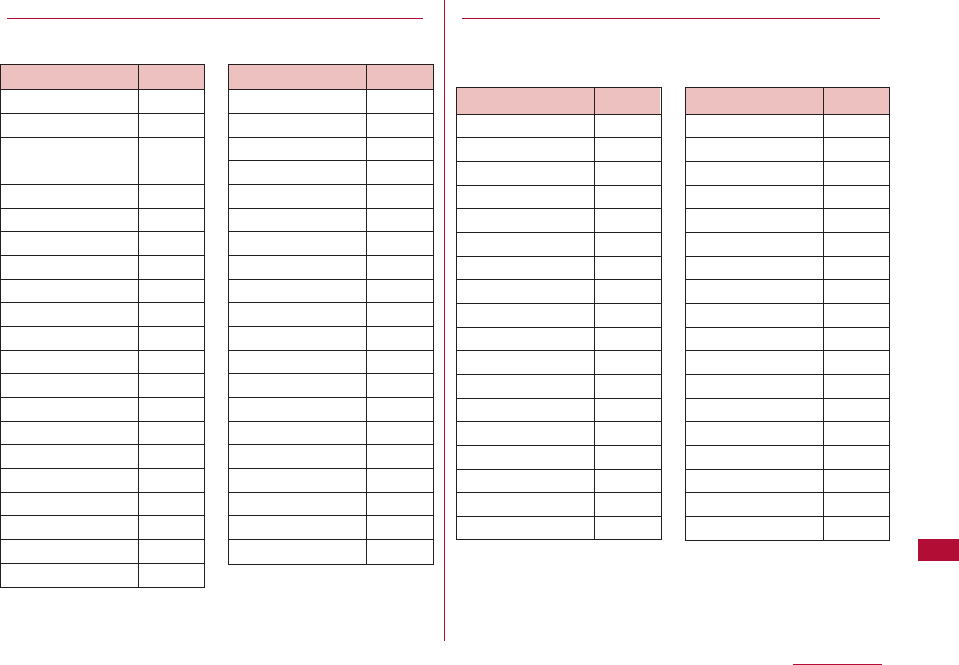
327
Overseas Use
International Access Codes of the country (Table 1)
International access codes for major countries are as
follows:
International Access Code for your Current Location
(Table2)
International access numbers for major countries are as
follows.
・
The codes may be changed.
・
For the codes of the other countries and details, visit the
DOCOMO International service website.
Area Code
Australia 0011
Belgium 00
Brazil 0021/
0014
Canada 011
China 00
Czecho 00
Denmark 00
Finland 00
France 00
Germany 00
Greece 00
Hong Kong 00
Hungary 00
India 00
Indonesia 001
Ireland 00
Italy 00
Korea 001
Luxembourg 00
Macau 00
Area Code
Malaysia 00
Monaco 00
Netherlands 00
New Zealand 00
Norway 00
Philippines 00
Poland 00
Portugal 00
Russia 00
Singapore 00
Spain 00
Sweden 00
Switzerland 00
Taiwan 00
Thailand 00
Turkey 00
U.A.E. 00
U.K. 00
U.S.A. 00
Vietnam 00
Area Code
Argentina 00
Australia 0011
Austria 00
Belgium 00
Brazil 0021
Bulgaria 00
Canada 011
China 00
Colombia 009
Denmark 00
Finland 990
France 00
Germany 00
Hong Kong 001
Hungary 00
Ireland 00
Israel 014
Italy 00
Area Code
Korea 001
Luxembourg 00
Malaysia 00
Netherlands 00
New Zealand 00
Norway 00
Peru 00
Philippines 00
Portugal 00
Singapore 001
South Africa 09
Spain 00
Sweden 00
Switzerland 00
Taiwan 00
Thailand 001
U.K. 00
U.S.A. 011

328 Overseas Use
・
Domestic call charges for your overseas stay may apply
to calls.
・
If you make a call from a hotel, you may be charged for
the telephone usage from the hotel. In that case, you are
responsible for the charge.
・
If you make a call from a mobile phone, the domestic call
charge for your overseas stay applies to that call.
・
The universal numbers are only available in the countries
listed in "International Prefix Number for the Universal
Number".
When you return to Japan, the FOMA terminal connects to
the FOMA network and appears at the top of the
screen.
・ If the FOMA network is not connected, check whether "Network
mode" and "Network search mode" are both set to "Auto".
When you and the other party are using a
telecommunication carrier capable to handle FOMA video
calls, international video calls are also available.
・ For information about the countries or areas, and
telecommunication carriers that support FOMA video calls, visit
DOCOMO "International service website.→P332
・ Depending on the terminal of the other party of an international
video call, the video streaming may fail, or the connection may
not be established.
・ Even if the Caller ID notification is set, the Caller ID may not be
notified or phone number is not displayed correctly, depending
on the telecommunication carrier. In this case, you cannot
make a call using the Received calls.
Setting after Returning to Japan
Making Calls Overseas

329
Overseas Use
Make a call prefixing "+" and a country code to the other
party's phone number.
・ Press 0for 1+ seconds to enter "+".
・ To call an overseas WORLD-WING user, dial "81" as the country
code of Japan.
1 0(for 1+ seconds) ]Enter "Country Code - Area
Code (City Code) - Phone Number"
・ When making a call to a fixed phone in Japan from
abroad, enter "81" as the country code.
・ If the Area Code (City Code) starts with "0" remove "0". (In
a few countries, like Italy, "0" must be removed.)
・ When making a call to a mobile phone or PHS in Japan,
omit the leading "0" as well.
・ Country code →P326, 327, 328
2 A
■To make a video call
M[Menu] ]Select "Video phone call"
If a call is made using an entry in Redial or Received calls
or the Phonebook in which a phone number with a leading
"0" is recorded/registered, the leading "0" is automatically
replaced with "+ Country code (+81)".
・ Your terminal is configured to enter "+81" (country code of
Japan) automatically by default.→P64
1 Display an entry in history/Phonebook
■Using Redial logs
Open the Redial screen (P57) or the Dialed calls detail
screen (P57).
■Using Received call log
Open the Received call log screen (P59) or the
Received call detail screen (P59).
■Using Phonebook
Open the Phonebook list screen (P88) or the
Phonebook detail screen (P89).
2 Select an entry in the history or Phonebook ]A
■When two or more phone numbers are saved in the
Phonebook entry on the Phonebook list screen
Press Hto select the number to dial.
■When two or more phone numbers are saved in the
Phonebook entry on the Phonebook detail screen
Press Hto display the phone number to call, and
press I[Send].
Making an International Call (Including to
Japan)
Making a Call Easily to Japan
3 A
・ The Dialing confirmation screen shows a phone number
prefixed with "+ Country code".
■To make a video call
M[Menu]
]
Select "Video phone call"
4 "International call"
Original number without changing
: The leading "0" will not
be replaced with
"+Country code".
Cancel :
Dialing will be canceled.
Register frequently used country names and country codes
in the "Country code list" in "International call" to make a
call quickly.
1 Enter "Area code - other party's phone number"
2 M[Menu] ]"Int. call"
The Select country screen opens.
3 Select a country code
The "+ Country code" is added at the beginning of the
phone number.
・ When the entered phone number starts with "0", it is
replaced with "+ Country code".
4 A
■To make a video call
M[Menu]
]
Select "Video phone call"
Make a call by dialing the other party's phone number from
the area code (city code).
・ If you make a call to an overseas WORLD WING user, make an
international call using the same steps in "Making an
International Call (Including to Japan)" (P329) even if you and
the other party are in the same country or region.
・ When "Auto international dial" is set to "ON", the Dialing
confirmation screen opens if a call is made to a phone number
whose area code (city code) starts with "0" from an entry in the
Phonebook or Dialed/Redialed calls list. In this case, select
"Original No" to make a call.
330 Overseas Use
Making an International Call (Including to Japan) Selecting
Registered Country Code
Note
・ This function is available only out of the FOMA
network service area (during international roaming).
Note
・ By default, 22 country codes are stored in the Select
country screen. Country codes can be added.→P65
・ Available operations on the Country code selection
screen (P65) are the same as on the Country code
list screen.
Making a Domestic Call
1 A call arrives
The ring tone sounds.
・ I [Silent] : Stop the ring tone
・ P:Place the call on response hold.→P70
2 A
Answer the call.
■Receiving video calls by still image
Press
A
■Receiving video calls by image
Press
C
[image]
3 To end the call P
331
Overseas Use
Receiving Calls Overseas
When you and the other party are using a
telecommunication carrier that handles FOMA video calls,
international video calls are available by pressing M
[Menu] ]Select "Video phone call" after the international
call dialing procedure.
・For information such as countries or telecommunication
carriers available, visit the DOCOMO International service
website.
・Depending on the terminal of the other party of an
international video call, the video streaming may fail, or
the connection may not be established.
Note
・ When a call arrived during international roaming, the
call will be forwarded from Japan to other countries.
For caller communication fee to Japan will be
charged, while for receiver fee will be charged
including the international forward fee.
Making calls to your FOMA terminal from Japan
You can receive calls to your phone number in Japan.
Receiving a call to your FOMA terminal from an
overseas caller
You can receive a call via Japan regardless of where you
are. Similarly to making an international call to Japan, you
can be called using the following steps.
Make a call by entering "International Access Code*1-
81*2‐ your phone number excluding leading the "0"*3"
*1 When dialing to a mobile phone, you may be able to
dial by entering "+" instead of the International Access
Code.
*2 Enter the country code of Japan.
*3 Enter "90-XXXX-XXXX" when the number starts with
"090" or "80-XXXX-XXXX" when it starts with "080".

332 Overseas Use
Select a search mode to find available networks when the
network is switched overseas.
・ "Network search mode" is set to "Auto" by default. When you
use the FOMA terminal in Japan or during connecting to 3G
network, it is recommended to switch "Network mode" to
"WCDMA only" to reduce the consumption of the battery pack.
1 M[Menu] ] (Settings) ]"International roaming" ]
"Network" ]Perform the following operations:
[Network search mode]
Auto:
Automatically search and set the network.
Manual:
The Network search screen appears. Select and set a
network from the list.
]
"Yes"
]
Select a network
・ Available networks are followed by the circular mark.
Network re-search
:Search for networks using the same
method (Auto/ Manual) as the previous
search.
[Network mode]
Specify the network to search for.
・ Check available communication systems in the country of use
before specifying a network.→P324
Auto :
Search for all available networks regardless of
their communication systems.
WCDMA only :
Search only for WCDMA networks.
GSM only :
Search only for GSM networks.
[Preferred NW lists]
You can prioritize networks to be searched or set.→P333
[Operator name display]
Set whether to show the network name that is currently
connected on the Stand-by display. →P333
[Host selection]
Specify a host other than i-mode.→P191
[SMS center]
Set the SMS center address.→P172
Setting Telecommunication Carrier
Search Mode
Network Search Mode/Network Mode
Note
・ After coming back to Japan, if the icon indicating the
network status remains out of the service area, set
"Network mode" to "Auto" or "WCMDA only" and
"Network search mode" to "Auto".
<Network search mode>
・ Searching for networks may take a long time.
・ When this option is set to "Auto", networks will be
searched automatically when the terminal power is
turned on or the terminal moves out of the service
area.
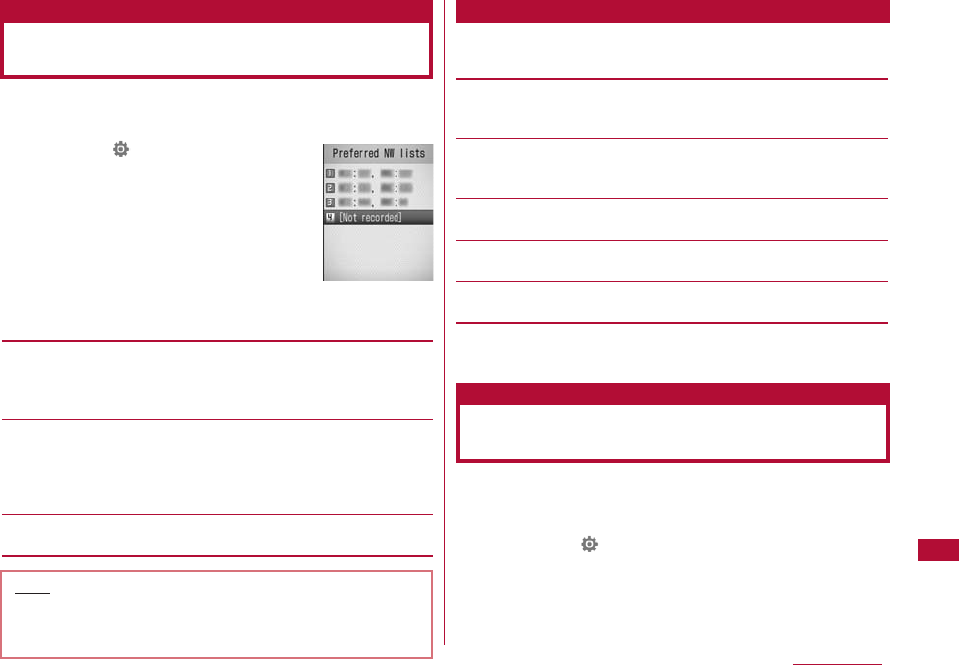
333
Overseas Use
You can register up to 20 networks to be searched or set
by priority.
1
M[Menu]] (Settings)]"International
roaming"]"Network"]"Preferred NW lists"
The preferred network list screen opens.
・ If networks have been already
registered, the network names appear
in order of priority.
・ C[Change]: Replace the selected
network with another network.
2 I[Add] ]Perform the following operations:
[UPLMN manual select]
Add a network to the Preferred list by entering MCC (country
code) and MNC (network code).
]Enter an MCC and MNC ]I[Done] ]"Yes"
[UPLMN select by list]
Select and add a network from the default network list.
]Select a network ]"Yes"
・ I[Country]: Select a country name to specify an available
network in the country from the list.
[Set VPLMN to UPLMN]
Add the network currently connected.
1 Preferred NW lists screen (P333)]M[Menu] ]
Perform the following operations:
[Add new]
Search and add a newly found network to the selected
network. Go to Step 2 in "Setting Preferred Networks" (P333).
[Change]
Replace the selected network with another network. Go to Step
2 in "Setting Preferred Networks" (P333).
[Delete]
Delete the selected network.
[Move up]*
Move the selected network up one in the list.
[Move down]*
Move the selected network down one in the list.
* This may not appear depending on the current position in the
list.
Specify whether to show the network name currently
connected on the Stand-by display.
1 M[Menu] ] (Settings) ]"International roaming" ]
"Network" ]"Operator name display" ]"ON"/"OFF" ]
"Yes"
Setting Preferred
Telecommunication Carrier
Preferred NW lists
Sub menu of the Preferred NW lists screen
Note
・ Depending on the signal strength, a network that is
not registered may be connected.
・ The settings of this function are saved on the UIM.
Displaying the Network Name while
Roaming
Operator name display
334 Overseas Use
Before leaving Japan, you can set to play a voice prompt
indicating that you are overseas.
・ Setting must be done while in Japan.
・ The service may not be operable when "圏外" is displayed.
1 M[Menu] ](Service) ]"Others" ]"Roaming
guidance setting" ]Perform the following operations:
[Activate]
Activate the roaming guidance.
[Deactivate]
Deactivate the roaming guidance.
[Check setting]
Activate the roaming guidance.
2 "Yes"
You can set so that all incoming calls, mail, etc, are all
restricted during roaming. You can also set to restrict only
incoming video calls.
1 M[Menu] ] (Settings) ]"International roaming" ]
"Call barring" ]Perform the following operations:
[Activate -roam]
Start call barring.
]Select from the following options ]Enter the Network
security code ]"Yes"
Barring all incoming calls :
Restrict all incoming calls.
Data calls barring :
Restrict only incoming video calls.
(Only inside the 3G network service
area).
[Deactivate - roam]
]Enter the Network security code ]"Yes"
[Check setting - roam]
Check the current status of the setting.
Activating the Roaming Guidance
Roaming guidance setting
Note
・ When deactivating the guidance, a call tone set by
the overseas carrier sounds.
・ Even if you activated this option, a voice guidance in
a foreign language may be played due to the
overseas carrier's services.
Setting to Accept No Incoming
Calls during Roaming
Call barring
Note
・ This may not be set depending on international
carriers.
335
Overseas Use
You can use network services of the Voice mail service,
Call Forwarding service, and Roaming guidance overseas.
・ To use Voice mail (int.) or Call forwarding service (Int.),
subscription to Voice mail or Call forwarding service is required.
・ To use the network service overseas, activate Remote Control
beforehand. → P315
・ International call charges to Japan apply.
・ The services may not be operable in some countries.
・ Some overseas carriers may not offer this option.
You can activate/deactivate the Voice mail service
overseas. You can also play recorded messages or change
the settings following a voice guidance.
・ The service may not be operable when "圏外" is displayed.
1 M[Menu] ](Settings) ]"International roaming" ]
"Voice mail (Int.)" ]Perform the following operations:
[Activate]
Activate the Voice mail service.
[Deactivate]
Deactivate the Voice mail service.
[Play messages]
Play a Voice mail message.
[Voice mail setting]
Change the settings following a voice guidance.
[Set ring time]
Set time before connecting to the Voice mail service center after
a call arrives.
2 "Yes"
3 Operate according to the voice guidance
Using Network Services
during Roaming
Operating the Voice Mail Service Overseas
Voice Mail (International)
Note
・ To use the Voice mail service outside the service
area at your overseas location, you need to turn off
the terminal where signals can be received in
advance.
336 Overseas Use
You can activate/deactivate the Call forwarding service
overseas.
・ The service may not be operable when "圏外" is displayed.
1 M[Menu] ] (Settings) ]"International roaming" ]
"Call forwarding (Int.)" ]Perform the following
operations:
[Activate]
Activate the Call forwarding service.
[Deactivate]
Deactivate the Call forwarding service.
[Call forwarding settings]
Check the current status of the setting.
2 "Yes"
3 Operate according to the voice guidance
You can activate/deactivate the Roaming guidance
overseas.
・ The service may not be operable when "圏外" is displayed.
1 M[Menu] ](Settings) ]"International roaming" ]
"Roaming guide (Int.)"
2 "Yes"
3 Operate according to the voice guidance
You can activate/deactivate the Remote access overseas.
・ The service may not be operable when "圏外" is displayed.
1 M[Menu] ](Settings) ]"International roaming" ]
"Remote access setting(Int.)"
2 "Yes"
3 Operate according to the voice guidance
Call Forwarding (International)
Operating the Call Forwarding Service
Overseas
Roaming Guide (International)
Note
・ To use this service outside the service area at your
overseas location, you need to turn off the terminal
where signals can be received in advance.
Operating the Roaming Guidance Overseas
Setting the Remote Access Overseas
Remote Access Setting (International)
337
Overseas Use
You can activate/deactivate the Caller ID request service
overseas.
・ The service may not be operable when "圏外" is displayed.
Even if "Caller ID request service" is activated, an incoming call
may be displayed as "Not Support" overseas.
1 M[Menu] ](Settings) ]"International roaming" ]
"Caller ID request (Int.)"
2 "Yes"
3 Operate according to the voice guidance
Operating the Caller ID Request Service
Overseas
Caller ID request (International)

PC Connection
Data Communications Available from the FOMA
Terminal ・・・・・・・・・・・・・・・・・・・・・・・・・・・・・・・・・・・・・・・・・・・ 340
Precautions before Use ・・・・・・・・・・・・・・・・・・・・・・・・・・・ 341
Before Using・・・・・・・・・・・・・・・・・・・・・・・・・・・・・・・・・・・・・・・ 342
Preparing for Data Transfer (OBEXTM Communication)
・・・・・・・・・・・・・・・・・・・・・・・・・・・・・・・・・・・・・・・・・・・・・・・・・・・・ 343
Preparing for Data Communications・・・・・・・・・・・・・・・ 343
AT Commands ・・・・・・・・・・・・・・・・・・・・・・・・・・・・・・・・・・・・・ 344
Using the bundled CD-ROM・・・・・・・・・・・・・・・・・・・・・・・・ 344
Introduction to DOCOMO Keitai datalink ・・・・・・・・・・ 344
339
For details about data communication, refer to the "PC Connection Manual" (PDF format) contained in the bundled CD
or available at the DOCOMO website.
Adobe®Reader®is required to open the "PC Connection Manual" in the PDF format. If the program is not installed on
your PC, install Adobe®Reader®contained in the bundled CD.
For details about using the program, see "Adobe Reader" Help.
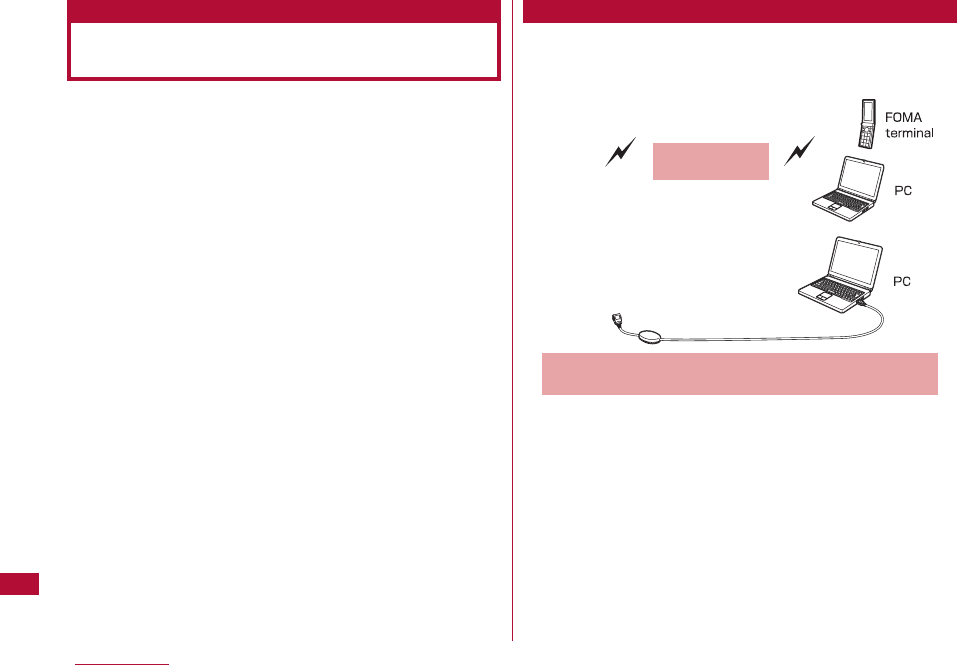
340 PC Connection
When the FOMA terminal is connected to a PC, data
communication is available with packet communication and
OBEXTM Communication(data transfer).
・ This FOMA terminal does not support 64K data
communication.
・ This FOMA terminal does not support Remote Wakeup.
・ This FOMA terminal does not support FAX communication.
・ This FOMA terminal is not compatible with the DOCOMO PDA
"musea" or "sigmarionⅢ"
Sends or receivers images, songs, contacts, or mails to
exchange them between, for example, the FOMA terminal
and a PC.
Data Communications Available
from the FOMA Terminal
Data Transfer (OBEXTM Communication)
Infrared Transmission
(P257)
・FOMA USB Cable with Charge Function 01/02 (optional)
・DOCOMO Keitai datalink (P344)
* This FOMA terminal can not send images to a PC.

341
Communication charges are based on the amount of data
exchanged※1. Packet communication is a suitable way of
using the terminal to send and receive data when the
terminal needs stay connected to the network.
Communication speed depends on communication
environment and network congestion.
Using an access point of DOCOMO internet connection
service such as "mopera U" allows you to use high-speed
communication at the maximum rate of 3.6Mbps for
receiving and 384kbps for sending (based on best-effort
connection)*2.
*1 Communication charges become high when you exchange a
large amount of data.
*2 ・The maximum speed of 3.6Mbps for receiving and 384kbps
for sending are theoretical values and they do not show the
actual performance. The actual performance depends on
your communication environment and network congestion.
・If you connect to an area which is out of the FOMA
HIGHSPEED Area or an access point that does not support
HIGH-SPEED, the connection for both sending and receiving
will be limited to 384kbps at maximum rate.
The FOMA L-06A can use an access point even overseas
that supports W-CDMA or GPRS packet communication to
perform data communication.
Fees to an Internet service provider (ISP) are required to
connect to the Internet. These connection fees, paid to the
ISP, are separate from the FOMA service fees. For detailed
information on connection fees, contact your ISP.
You can use "mopera U", DOCOMO Internet connection
service. A separate subscription (fee-based) is required to
use "mopera U".
For packet communication, use an access point compatible
with packet communication.
・ DoPa access points cannot be connected.
・ For service contents of "mopera" and its connection settings,
visit "mopera" web site.
http://www.mopera.net/mopera/index.html
The following conditions* must be met to connect between
the FOMA terminal and a PC to perform communication.
However, even if the conditions are met, communication
may still not be possible depending on the amount of
traffic at the base station or the signal strength.
・ FOMAUSB Cable with Charge Function 01/02 (optional) must
be available on the PC.
・ The FOMA terminal must be in a FOMA service area.
・ The access point must support FOMA packet communication.
* These conditions are for domestic use in Japan.
PC Connection
Packet communication
Precautions before Use
Internet Service Provider Fees
Setting the Internet Connection Internet service providers, etc.
Conditions for Packet Communication

The following operating environment is required for a PC to
use data communication:
*1 DOCOMO does not guarantee proper operation if you upgrade
your OS.
*2 The operating environment of DOCOMO Connection Manager
is Windows 2000 SP4 or later, or Windows XP SP2 or later.
For detailed operating environment, check DOCOMO website.
*3 Required memory or hard disk space may vary depending on
the PC system configuration.
*However, USB2.0 HIGHSPEED does not support.
*4 DOCOMO Connection Manager requires 15MB or more.
To use data communications, the following devices and
software are required in addition to the FOMA terminal and
a PC:
・ FOMA USB Cable with Charge Function 01/02 (optional) or
FOMA USB Cable (optional)
・ CD-ROM for FOMA L-06A (bundled)
Item Requirements
PC Main Unit ・ PC-AT compatible machine with a CD-
ROM drive
・ USB port (in accord with Universal
Serial Bus Specification Rev1.1/2.0)*
* However, this FOMA terminal does
not support "USB2.0 High-Speed".
・ Display resolution of 800x600 pixels,
High Color (65,536 colors) or higher
recommended
OS*1*2 ・ Windows Vista, Windows XP, or
Windows 2000 (Japanese versions)
・ Windows Vista: 512M bytes or more
・ Windows XP: 128M bytes or more*2
・ Windows 2000: 64M bytes or more*2
・ Available space of 5M bytes or more*2
342 PC Connection
Before Using
Operating Environment
Required
Memory*3
Hard Disk
Space *3*4
The following warning screen may appear when you
insert the bundled CD in a PC. This warning is
displayed according to the security settings of the
Internet Explorer. There is no problem with using the
software.
Click [はい (Yes)].
Required Devices
Note
・ Purchase the exclusive FOMA Cable with Charge
Function 01/02 or FOMA USB Cable. A generic USB
cable for PC cannot be used because it does not fit
the FOMA USB connector.
・ The terminal may not work properly with a USB HUB.
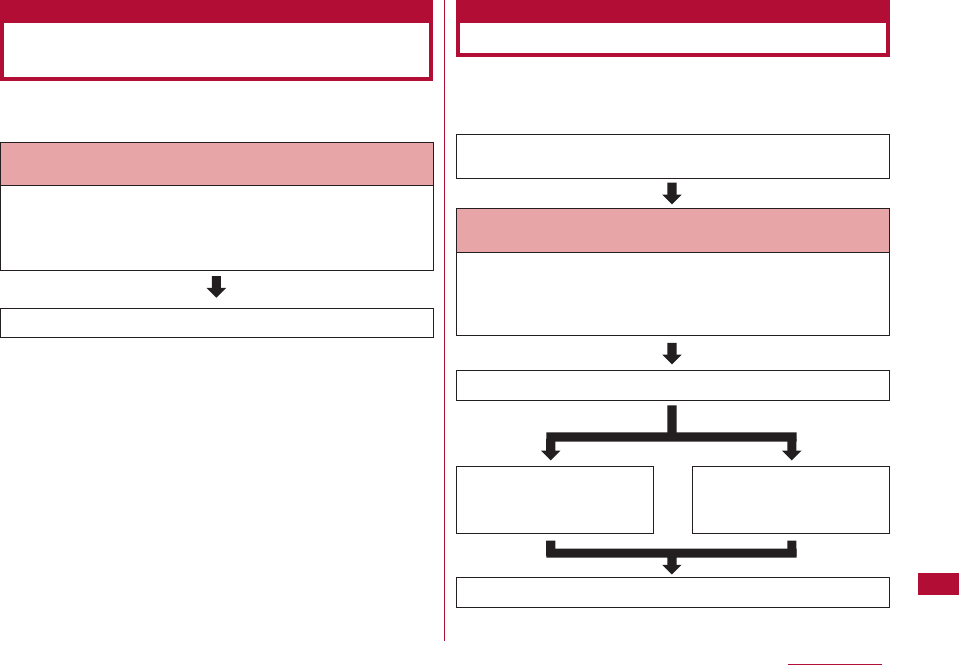
343
PC Connection
To use "FOMA USB Cable with Charge Function 01/02
(optional)", install L-06A communication setting files.
The flow for preparing to connect the FOMA terminal and a
PC for performing packet communication is as follows. For
details, see "PC Communication Manual" (PDF format).
Preparing for Data Transfer
(OBEXTM Communication)
Preparing for Data Communications
・Install from the bundled CD
or
・Download and install the files from the DOCOMO
website
Download and install L-06A Communication
Setting Files
・Install from the bundled CD
or
・Download and install the files from the DOCOMO
website
Download and install L-06A Communication
Setting Files
Data Transfer
Connect the FOMA terminal and a PC using a FOMA USB
Cable with Charge Function 01/02
Check after installation
Connect
Configure using the
installed DOCOMO
Connection Manager
Configure without using
the DOCOMO
Connection Manager
344 PC Connection
An AT command is an instruction used by a PC to check
function settings or status of the FOMA terminal. For
details, refer to "PC Connection Manual" (PDF format)
contained in the bundled CD.
The bundled CD contains software that is necessary to
perform data communication on the FOMA terminal, and
"PC Connection Manual" and "Kuten Code List" instruction
manuals (PDF format). For details, refer to the bundled
CDROM.
"DOCOMO Keitai datalink" is a software program to allow
you to make a backup of Phonebook entries or mail on your
terminal and edit them. It is offered at the DOCOMO
website. For details and to download the software, visit the
following web site. http://datalink.nttdocomo.co.jp/
(Japanese only)
Introduction to DOCOMO Keitai
datalink
Note
・ "L-06A Communication Setting Files (drivers)" and
"DOCOMO Connection Manager", that are software
programs for data communication contained in "CD-
ROM for FOMA L-06A", can also be downloaded at
the DOCOMO website.
http://www.nttdocomo.co.jp/support/download/
Software for Data Communication Contained in
"CD-ROM for FOMA L-06A"
L-06A Communication Setting Files (Drivers)
These files (drivers) are required for communication or file
transfer when the FOMA terminal and a PC are
connected using the FOMA USB Cable with Charge
Function 01/02 (optional).
DOCOMO Connection Manager
This software is designed to allow users to setup dial-up
connection, etc. that is necessary to perform data
communications quickly.
AT Commands
Using the Bundled CD-ROM
Note
・ For details about downloading, transferable data,
operating environment such as supported OS,
installing, operating, or restrictions, visit the above
web site. For operations after installing the software,
see Help of the software. To use DOCOMO Keitai
datalink, a USB Connection Cable (optional) is
required.
Appendix/Troubleshooting
Menu List ・・・・・・・・・・・・・・・・・・・・・・・・・・・・・・・・・・・・・・・・・ 346
Dial Keys Assignments to Characters ・・・・・・・・・・・・ 357
Combinations of Multiaccess Functions ・・・・・・・・・・ 358
Combinations of Multitask Functions ・・・・・・・・・・・・・ 359
Services Available from the FOMA Terminal ・・・・・・ 360
Options and Related Devices ・・・・・・・・・・・・・・・・・・・・・ 361
Interfacing to External Devices
Video Play Software ・・・・・・・・・・・・・・・・・・・・・・・・・・・・・・ 361
Troubleshooting
Troubleshooting ・・・・・・・・・・・・・・・・・・・・・・・・・・・・・・・・・・・ 362
Error Messages ・・・・・・・・・・・・・・・・・・・・・・・・・・・・・・・・・・・ 367
Warranty and After-sales Service ・・・・・・・・・・・・・・・・ 382
i-mode Malfunction Diagnosis Site ・・・・・・・・・・・・・・・・ 384
Updating Software ・・・・・・・・・・・・・・・・・・・・・・・・・・・・・・・・ 385
Major Specifications ・・・・・・・・・・・・・・・・・・・・・・・・・・・・・・ 390
Number of Items that can be Stored, Registered and
Protected on the FOMA Terminal ・・・・・・・・・・・・・・・・・ 393
SAR Certification and Other Information ・・・・・・・・・・ 394
Export Administration Regulations ・・・・・・・・・・・・・・・・ 396
Intellectual Property Issues ・・・・・・・・・・・・・・・・・・・・・・・ 397
345
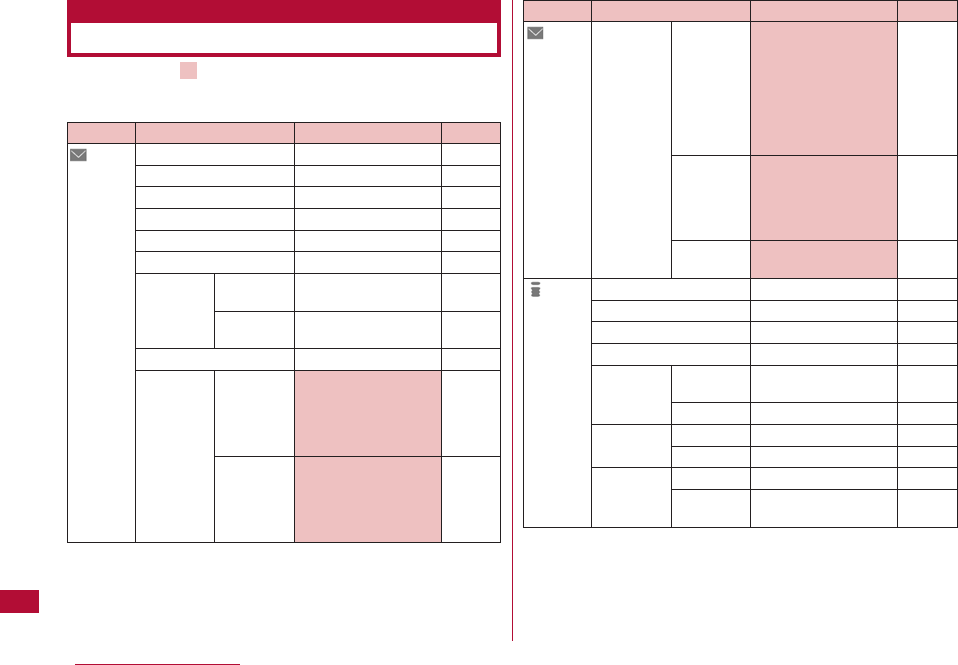
Functions with indicated in the "Default settings:"
column are those that can be initialized to their defaults
with "Reset settings". → P290
346 Appendix/Troubleshooting
Menu List
Mail
Function name
Inbox
Outbox
Unsent message
Compose message
Check new messages
Receive option
SMS Compose
SMS
Check new
SMS
Template
Mail setting Communicat
ion
Edit
Default settings
♪Welcome mail♪
Empty
Empty
−
−
−
−
−
Pre-installed data only
Receive option set: OFF
Receive attach file:
All items are selected
Check new messages :
All itemsare selected
Edit header: None
Edit signature: None
Edit quotation: >
Auto attach:
"Signature" is selected
Reference
P148
P149
P149
P131
P144
P144
P168
P171
P137
P162
P163
Mail
i-mode
Function name
Mail setting Display
SMS
Others
iMenu
Bookmark
Screen memo
Last URL
Go to Input
location address
URL history
Message MessageR
MessageF
i-Channel i-Channel list
Ticker setting
Default settings
Font size: Standard
Scroll: 1 line
Mail list: 2 lines name
Folder security: None is
selected
Melody auto play: ON
Receiving display: Alarm
mode
SMS report request: OFF
SMS validity period: 3
days
SMS input character:
Japanese (70characters)
Check setting: -
Reset setting: -
−
Empty
Empty
−
−
No entries
No messages
No messages
Basic channels
Ticker display : ON
Ticker speed: Normal
Reference
P163
P171
P164
P175
P182
P183
P177
P180
P180
P166
P166
P195
P196
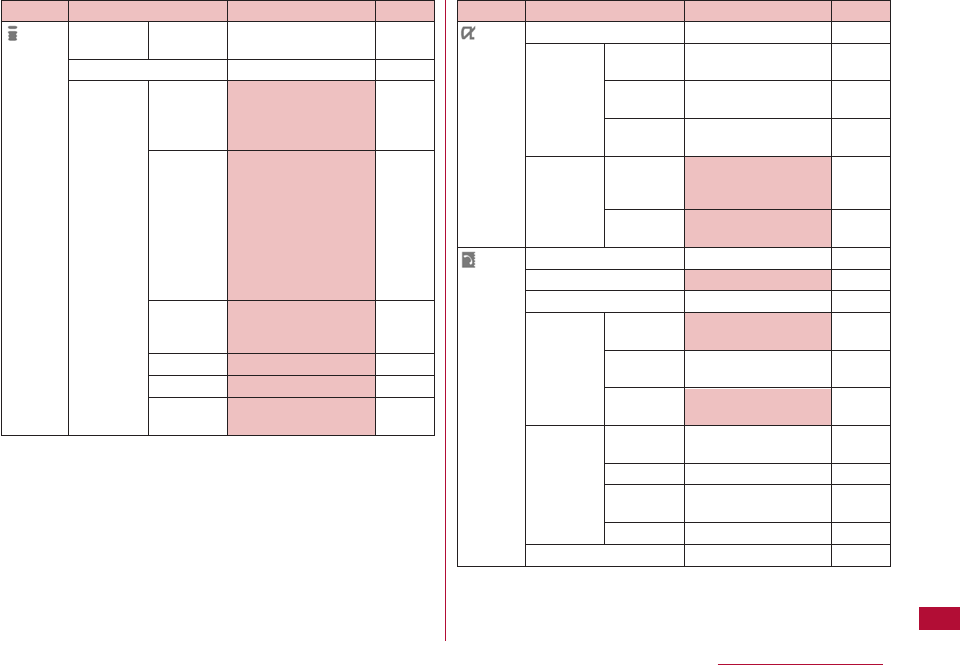
347
Appendix/Troubleshooting
i-mode
Function name
i-Channel Reset
i-Channel
Check new messages
i-mode Communicat
setting ion
Display
i-motion
Home
Certificates
Others
Default settings
−
−
Connection timeout : 60
seconds
Check new messages : All
items are selected
Images : ON
Sound effect : ON
Use phone info: Yes
Font size: Standard
Scroll: 1 line
Message list: 2 lines
Auto-display: MessageR
preferred
Melody auto play: ON
i-motion auto play: ON
i-motion type: Standard
type
Disable, No URL
All are valid
Check settings : -
Reset settings : -
Reference
P196
P165
P189
P189
P194
P194
P190
P192
P190
iαppli
Phonebook
& Logs
Function name
Software list
iαppli Security
info error history
Auto start
info
Trace
info
iαppli Display
settings SW
info
Auto start
set
Add to phonebook
Search phonebook
No. of phonebook
Phonebook Default mode
settings
Create
domain list
Display
image
Call/Mail Received
history calls
Redial
Received
mails
Sent mails
Call duration
Default settings
Only pre-installed i-αppli
No entries
No information
No information
Not display
ON
Empty
Show all data
−
Show all data
@docomo.ne.jp
Show
Empty
Empty
Empty
Empty
−
Reference
P223
P234
P234
P234
P223
P233
P80
P87
P92
P93
P93
P93
P57
P57
P161
P161
P280
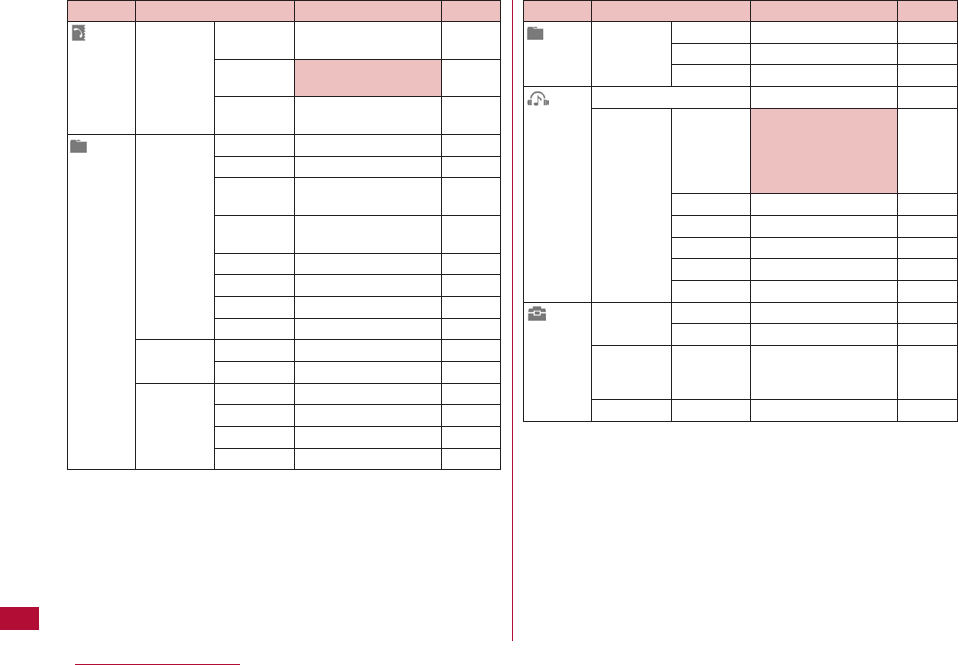
348 Appendix/Troubleshooting
Phonebook
& Logs
Data box
Function name
Call costs Check call
costs
Set call cost
limit
Delete call
cost icon
My Picture i-mode
Camera
Decomail
picture
Decomail
pictograph
Preinstalled
Data transfer
Item
Animation
Music i-mode
Playlists
i-motion i-mode
Camera
Preinstalled
Data transfer
Default settings
−
OFF
−
None
None
Only pre-installed files
Only pre-installed files
Only pre-installed files
None
Only pre-installed files
None
None
None
None
None
Only pre-installed files
None
Reference
P281
P281
P282
P239
P239
P239
P239
P239
P239
P239
P239
P217
P217
P249
P249
P249
P249
Data box
MUSIC
LifeKit
Function name
Melody i-mode
Preinstalled
Data transfer
Recent played*
Music player Music life
Playlists
All songs
Artist
Genre
Album
Receive Ir Receive
data Receive all
One touch key
Custom menu
Default settings
None
Only pre-installed files
None
−
Train : All songs, level 2
Sports timer : All songs
30 Minutes
Sleeping : All songs
30 Minutes
Empty
Empty
Empty
Empty
Empty
−
−
1-3: Empty
My One Touch key:
Schedule
−
Reference
P254
P254
P254
P210
P219
P215
P211
P211
P211
P211
P259
P260
P265
P278
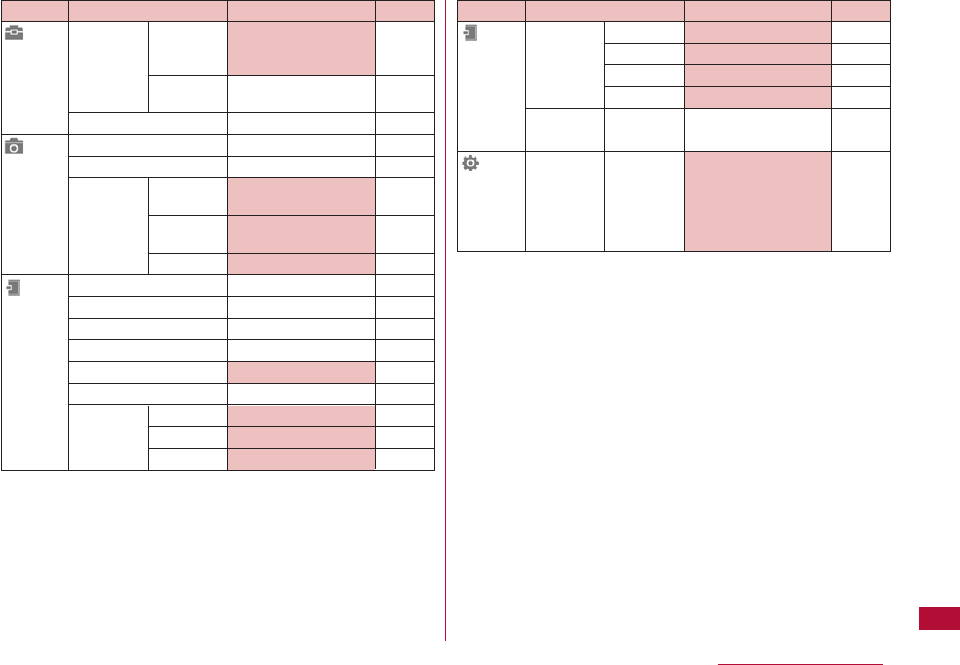
349
Appendix/Troubleshooting
LifeKit
Camera
Stationery
Function name
Record Rcd.
message msg.
set
Message
List
Stopwatch
Photo-mode
Movie-mode
Camera Saving
setting option
Shutter
sound
Tuning
Schedule
Alarm
Memo
To do list
World time
Calculator
Unit Currency
Converter Surface
Length
Default settings
Activate record msg.:
OFF
Empty
−
−
−
Auto saving: OFF
Shutter sound 1
Auto
Empty
Empty
Empty
Empty
Tokyo
−
Yen/US Dollar
Acre/Hectare
mm/cm
Reference
P73
P75
P283
P200
P203
P206
P207
P207
P269
P267
P287
P273
P282
P286
P283
P285
P285
Stationery
Settings
Function name
Unit Weight
Converter Temperature
Volume
Velocity
Remembering Date counter
dates Date Search
Sounds& Ring tone
Vibration
Default settings
mg/g
F/C
Milliiter/Liter
km/h/meter/sec
Empty
−
Voice call: 25 Ring01
Video call: 26 Ring02
Mail:15 Message01
Message R:16 Message02
Message F:17 Message03
SMS: 18 Message04
Reference
P285
P285
P285
P285
P276
P277
P98
350 Appendix/Troubleshooting
Settings
Function name
Sounds& Effect tone
Vibration
Volume
Vibrator
Manner mode
set
Mail ring
duration
Set mute ring
(sec.)
Display Stand-by
Call display
Wake-up
display
Default settings
Dial sound: Digital tone
Flip tone: Flip tone 1
Menu effect: Menu
effect 2
Power On: 23 Power On
Power Off: 24 Power Off
Low battery : ON
Incoming call: Level4
Mail/Message/SMS: Level4
Alarm/Schedule: Level4
Keypad tone: Level2
Flip tone: Silent
Menu effect: Level2
Power On/Off: Level4
Popup: Silent
Receiver Level4
(All) OFF
General manner
1 cycle
OFF
Wallpaper : Image, drop
Display items: Clock
Clock type: Large digital
Incoming voice call: Image,
incoming_call_white
Incoming video call: Image,
incoming_call_white
Image, pwron
Reference
P101
P99
P100
P103
P102
P125
P103
P105
P106
Settings
Function name
Display Sub display
clock
Font size
Dialing
Menu
settings
Backlight
Color theme
Default settings
Analog clock 1
User set
Motion dialing: OFF
Dialing quick search: ON
Dialing font color: Black
Simple menu: ON
Menu customization: Color
theme setting
Menu guidance: ON
Display duration : 30
seconds
Display brightness :
100 %
AC connected : Display
setting
Sparkling wine
Reference
P107
P111
P106
P108
P108
P108
P107
P108
351
Appendix/Troubleshooting
Settings
Function name
Display Lighting LED
Default settings
Lighting: ON
Select patterns
Incoming voice call:
Pattern 1/Red
Incoming video call:
Pattern1/Green
New mail: Patter 5/
Red&Green
New message R:
Pattern 2/Red
New message F:
Pattern 2/Green
New SMS: Patter 6/
Red&Green
New Voice mail:
Pattern 4/Red
New Record
message: Pattern 4/
Green
Playing music: Patter
7/Red&Green
Alarm: Pattern 3/Red
Schedule/To do list:
Pattern 3/Green
During call: OFF
Missed call: ON
Unread message:
ON
Reference
P110
Settings
Function name
Call/VT/ Incoming
Dialing call
Default settings
Answer mode : SEND
key only
Auto answer:
- Auto answering:
OFF
Accept/Reject call:
- Accept/Reject set:
Accept
- Reject unknown:
OFF
Anonymous caller:
(All items) Disable
On hold tone : Hold
tone 1
Display phonebook
image : ON
Reference
P69
P290
P122,
123
P126
P124
P71
P107
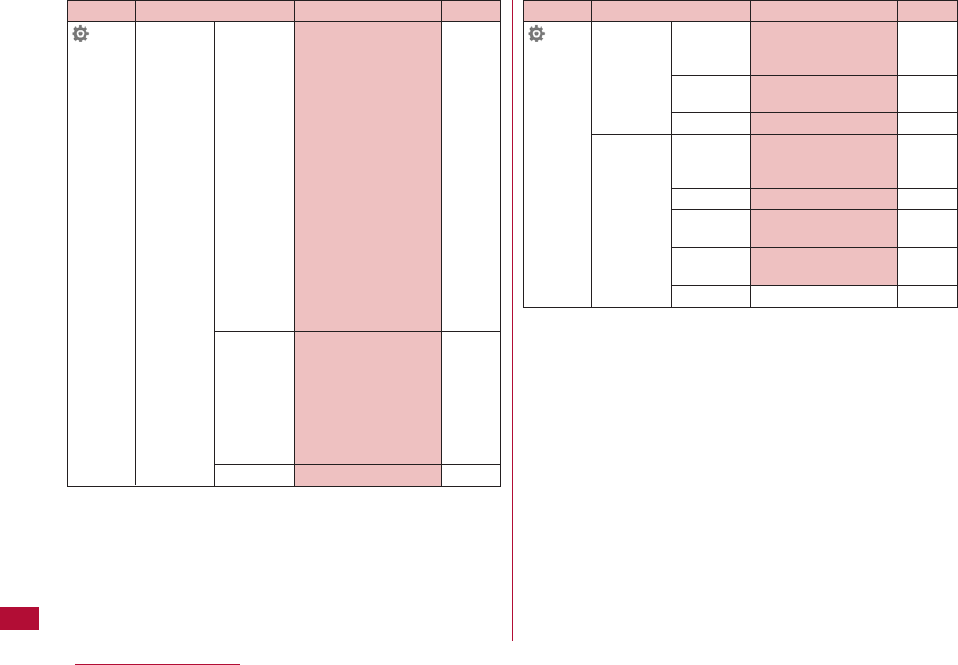
352 Appendix/Troubleshooting
Settings
Function name
Call/VT/ Video phone
Dialing
Call feature
Self mode
Default settings
Videophone set:
- Displaying setting :
Other-Me
- Send camera
image: OFF
- Screen size: Large
- Visual preference:
Normal
- Light: Always on
- Auto redial as voice:
OFF
- Hand-free switch:
ON
Substitute image:
Default
Response hold
image: Default
Holding image:
Default
Reconnect alarm :
Alarm Off
Quality alarm : Alarm Off
Holding tone : Hold
tone 1
Close setting : End
the call
Noise reduction: ON
OFF
Settings
Function name
Call/VT/ Prefix dial
Dialing
Sub-address
setting
Earphone
Lock/ Lock
Security
Secret mode
Display call/
mail logs
Change
Security code
PIN code
Default settings
PREFIX 1 : 009130010
PREFIX 2/PREFIX 3:
Empty
ON
Switch call: OFF
Lock all : Not set
Call/Mail lock: OFF
Data access lock : OFF
OFF
(All items) ON
Security code (4 digits):
0000
−
Reference
P65
P66
P288
P118
P118
P119
P121
P121
P116
P116
Reference
P76
P76
P76
P76
P76
P76
P76
P75
P76
P76
P66
P102
P71
P70
P66
P119
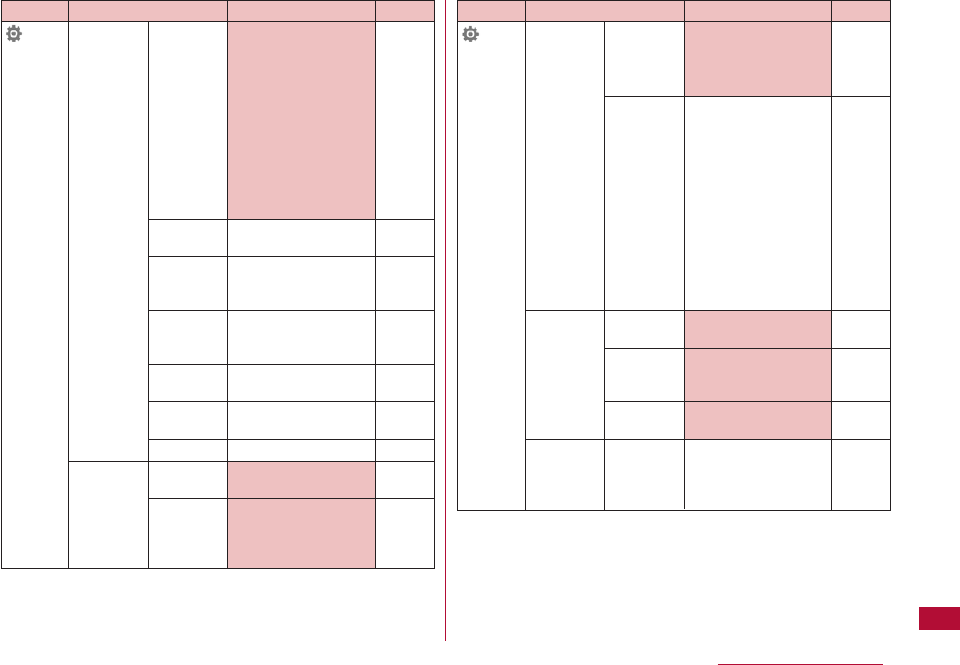
Default settings
Auto international dial
: ON
Target country :
Japan +81
China 86, Taiwan
886, Japan 81, Korea 82,
Hong Kong 852,
U.S.A. 1, U.K. 44, Italy 39,
India 91, Indonesia 62,
Australia 61,
Netherlands 31,
Canada 1, Singapore 65,
Spain 34, Thailand 66,
Germany 49,
Philippines 63, France 33,
Brazil 55, Vietnam 84, and
Malaysia 60
Auto time adjust: ON
Date format : YYYY/MM/
DD
Time format : 12-hour
Set sound : OFF
−
353
Appendix/Troubleshooting
Settings
Function name
International Network
roaming
Voice mail
(Int.)
Call
forwarding
(Int.)
Remote
access
setting (Int.)
Caller ID
request (Int.)
Roaming
guide (Int.)
Call barring
International Auto assist
dial setting
IDD prefix
setting
Default settings
Network search
mode: Auto
Network mode: Auto
Preferred NW lists
: (The contents saved
in the UIM is
displayed)
Operator name
display : ON
Host selection : i-mode
SMS center :
DOCOMO
−
−
−
−
−
−
Auto
IDD prefix name:
(WORLDCALL)
IDD prefix code :
009130010
Reference
P332
P332
P333
P333
P191
P172
P335
P336
P336
P337
P336
P334
P64
P64
Settings
Function name
International Auto
dial international
dial
Country
code list
Date&Time Set
Date&Time
Date&Time
format
Hour
indication
Others Character
input
Reference
P64
P65
P48
P111
P290
P298
P299
P302
P303
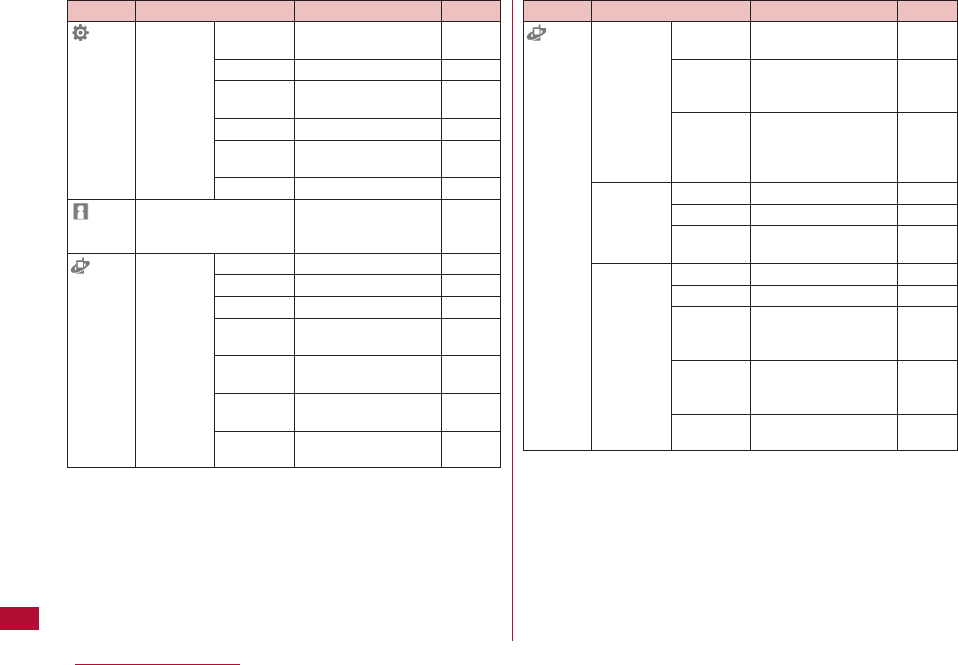
354 Appendix/Troubleshooting
Settings
Own
number
Service
Function name
Others Memory
status
バイリンガル
Power saver
mode
Reset/Clear
Software
update
Battery level
Voice mail Activate
Set ring time
Deactivate
Check
setting
Play
messages
Voice mail
setting
Check
messages
Default settings
−
Japanese
OFF
−
−
−
Empty
−
−
−
−
−
−
−
Reference
P291
P112
P108
P127
P385
P46
P279
P306
P306
P307
P307
P307
P307
P307
Service
Function name
Voice mail Notify missed
call
Del.
voicemail
icon
Tone/
Vibration
message
notification
Call waiting Activate
Deactivate
Check
setting
Call Activate
forwarding Deactivate
Register the
forwarding
number
Setting if
forwarding
number busy
Check
setting
Default settings
−
−
−
−
−
−
−
−
−
−
−
Reference
P307
P307
P307
P308
P308
P308
P310
P310
P310
P310
P310
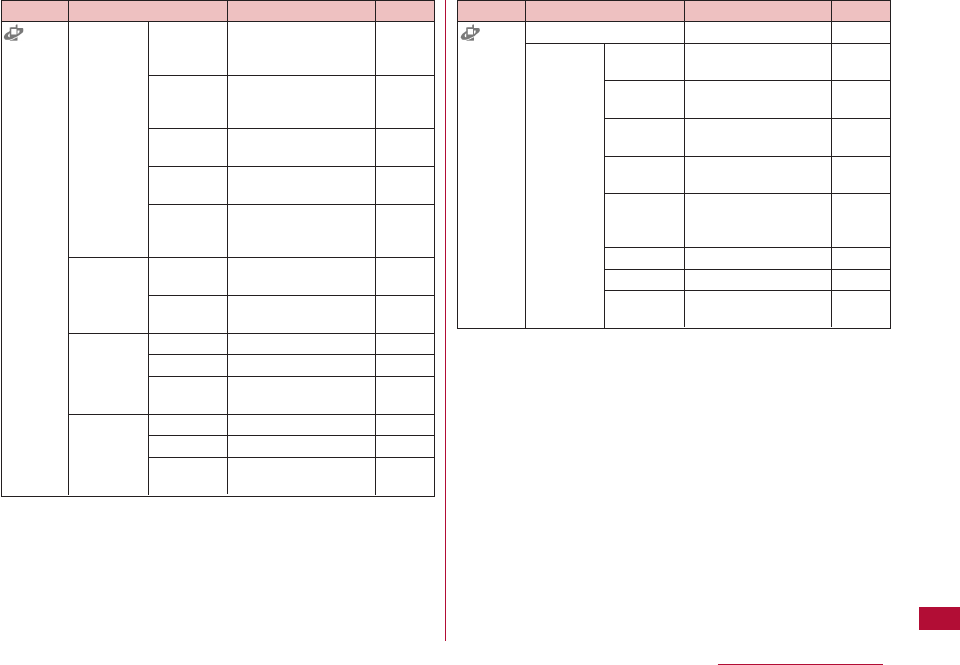
355
Appendix/Troubleshooting
Service
Function name
Nuisance Register
call blocking nuisance
caller
Register
selected
number
Delete all
entries
Delete last
entry
Check the
number of
entries
Caller ID Activate/
notification Deactivate
Check
setting
Caller ID Activate
request Deactivate
Check
setting
Set in-call Activate
arrival act Deactivate
Check
setting
Default settings
−
−
−
−
−
−
−
−
−
−
−
−
−
Reference
P311
P311
P311
P311
P311
P312
P312
P312
P312
P312
P312
P312
P312
Service
Function name
Arrival call act
Others Additional
service
Additional
guide
English
guidance
Service
numbers
Roaming
guidance
setting
Multi number
Dual network
Remote
control
Default settings
Answer
Empty
Empty
−
−
−
−
−
−
Reference
P313
P317
P318
P314
P314
P334
P315
P313
P315
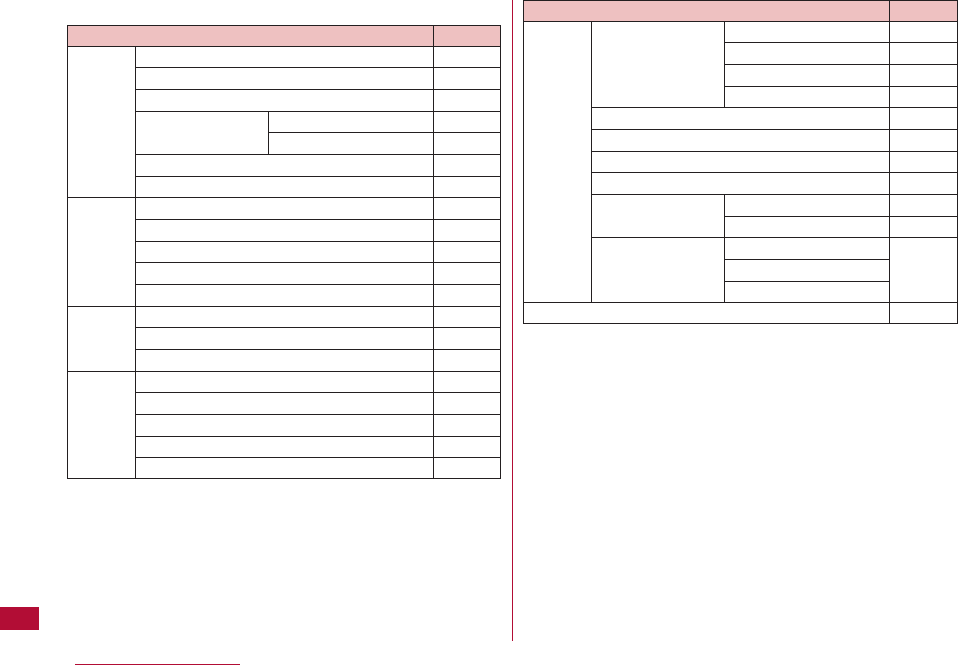
■ Simple Menu Item List
356 Appendix/Troubleshooting
Phone
Mail
i-mode
Camera
Search phonebook
Redial
Record message
Delete last entry Record msg. settings
Record msg. list
Add to phonebook
Own number
Inbox
Outbox
Unsent message
Compose message
i mode information
i-menu
Bookmark
Screen memo
Photo-mode
Movie-mode
View photo
View movie
Camera Settings
P87
P57
P59
P74
P75
P80
P279
P148
P148
P149
P131
P188
P175
P182
P184
P200
P203
P239
P249
P206
Function name Reference Settings/
Tools
Ring tone settubgs Select ring tone
Select effect tone
Volume
Vibrator
Stand-by display
One touch key
Alarm
Calculator
Call cost/duration Call duration
Call costs
Voice mail Activate
Deactivate
Play messages
P98
P101
P99
P100
P103
P265
P267
P286
P280
P281
P306
P109
Function name Reference
Normal menu
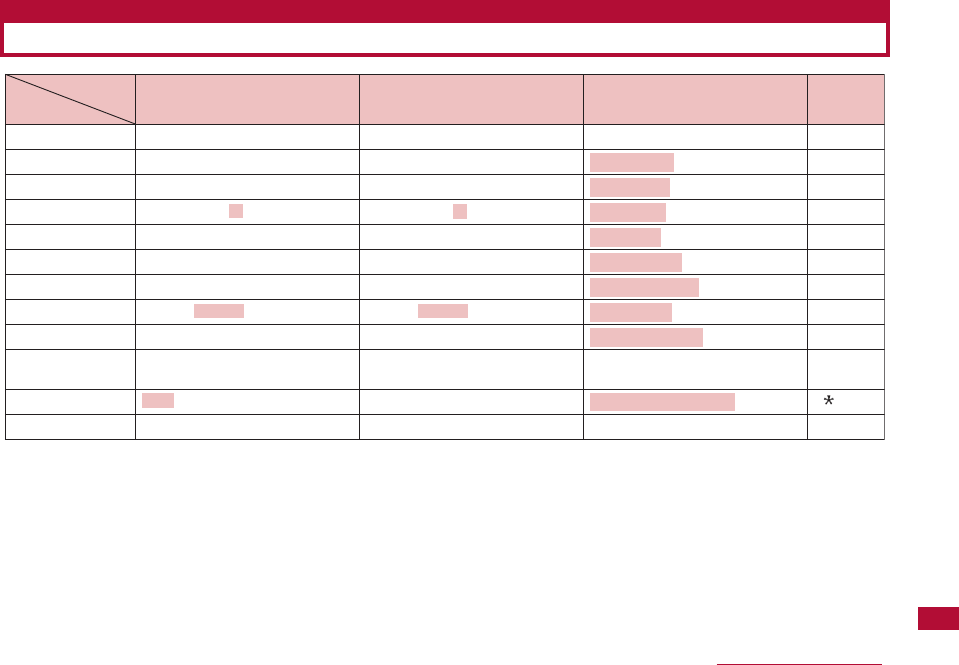
357
Appendix/Troubleshooting
*1 In full-pitch character entry, "∼" is entered.
*2 Press *to switch between upper and lower case.
*3 Lower case "ワ" can be entered in full-pitch character entry.
*4 These can be added or entered when a character has not been set. For characters that can take only a voiced sound symbol, " ゛"
is added, and for characters that can take both voiced and semi voiced sound symbol, "゛"or "゜" is entered.
*5 These symbols can be entered when they are valid in that field.
Entry Modes
Hiragana and Kanji Katakana
Key
1あ い う え お ぁ ぃ ぅ ぇ ぉ ア イ ウ エ オ ァ ィ ゥ ェ ォ . @ / : -
~
*1 1
22 コ ケ ク キ カ こ け く き か
33 ソ セ ス シ サ そ せ す し さ
4た ち つ て と *2 タ チ ツ テ ト *2 4
55 ノ ネ ヌ ニ ナ の ね ぬ に な
66 ホ ヘ フ ヒ ハ ほ へ ふ ひ は
77 モ メ ム ミ マ も め む み ま
8や ゆ よ *2 ヤ ユ ヨ *2 8
99 ロ レ ル リ ラ ろ れ る り ら
0わ を ん ゎ □(Space)
、 。 ー・!?
ワ ヲ ン ヮ*3 □(Space)
、 。 ー・!?
□(スペース)! ? - , ' ; ( ) " _
~*1 & ¥
0
**4 、 。 ー・!? ゛ ゜、 。 ー・!? :+P*5
##(Line feed) *5
a b c A B C *2
d e f D E F *2
っ ッ g h i G H I *2
j k l J K L *2
m n o M N O *2
p q r s P Q R S *2
ゃ ゅ ょ ャ ュ ョ t u v T U V *2
w x y z W X Y Z *2
゛ ゜
! ? - , ' ; ( ) " _ ?
*1
& ¥
Alphabetic characters Digits
(Line feed)(Line feed)
Dial Keys Assignments to Characters

358 Appendix/Troubleshooting
○: Can be launched.
△: Can be launched under certain conditions
×: Cannot be launched.
*1 If you subscribe to the Call waiting service, you can place the current voice call on hold and make another call.
*2 If you subscribe to the Call waiting service, you can place the current voice call on hold and answer the call. If you subscribe to the
Voice mail service/Call forwarding service, the function can be launched.
*3 The call is recorded in Received call log as a missed call.
*4 The i-αppli cannot initiate communication.
*5 Available only for outgoing calls using Phone To function. In that case, i-mode will be disconnected.
*6 After i-mode or i-mode mail is terminated, mail will be received.
Combinations of Multiaccess Functions
Packet
Voice calls Video calls i-mode i-mode mail SMS communication
connected to a PC
Outgoing Incoming Outgoing Incoming Connect Send Receive Send Receive Send Receive
Voice calls △*1 △*2 ××
*3 ○*4 ○○○○○×
Video calls × ×*3 ××
*3 ××××○××
i-mode ○ ○ △*5 ×*3 ×××
*6 ×○××
i-mode mail ○ ○ × ×*3 ×××
*6 ×○××
Packet ○ ○ × ×*3 ××××○××
Application in
progress
New
communication
application
359
Appendix/Troubleshooting
○: This can run concurrently.
×: This cannot run concurrently.
*1 Excluding "Receive Ir Data".
*2 "Schedule", "To Do list", and "Memo" can be launched from the new task screen.
*3 This task can be launched to set a melody, a Chaku-Uta-Full®song, or an image to a Schedule event or To Do task.
*4 This can be launched from the submenu.
*5 Playback will be paused before the new task is launched. After the task is finished, you can resume playback.
*6 This can be launched from "Service numbers".
*7 This can be launched from "Select ring tone", "Stand-by display", "Call display", or "Wake-up display".
*8 This can be launched from options in "Reject on list" and "Call forward".
*9 This can be launched when you add an image while adding/editing a Phonebook entry.
Combinations of Multitask Functions
Voice call Video Calls Mail i-mode i-αppli Phonebook Data box MUSIC LifeKit*1 Camera Stationery Service/
Settings
Voice calls ○ × ○ ○ × ○ ○*3 ×××○
*2 ×
Video calls × × × × × ○*4 ××××××
Mail ○ ○ × × × ○ ○*3 ○×○○
*2 ×
i-mode ○ × × × × ○ ○*3 ○×○○
*2 ×
i-αppli × × × × × × × × × × × ×
Phonebook ○ ○ ○ ○ × × ○ ○ × ○*9 ××
Data box ○ ○ ○ ○ × ○ × ○ × ○ ○*2 ×
i-motion ○ ○ ○ ○ × ○ × ○ × ○ ○*2 ×
MUSIC*5 ○○○○×○○×××××
LifeKit*1 ○○○○×○○
*3 ○××××
Camera ○ ○ ○ ○ × ○ ○*3 ○××××
Stationery ○ ○ ○ ○ × ○ ○*3 ○××××
Service/Settings ○*6 ××××○
*8 ○*7 ○××××
Running
Application
New Application
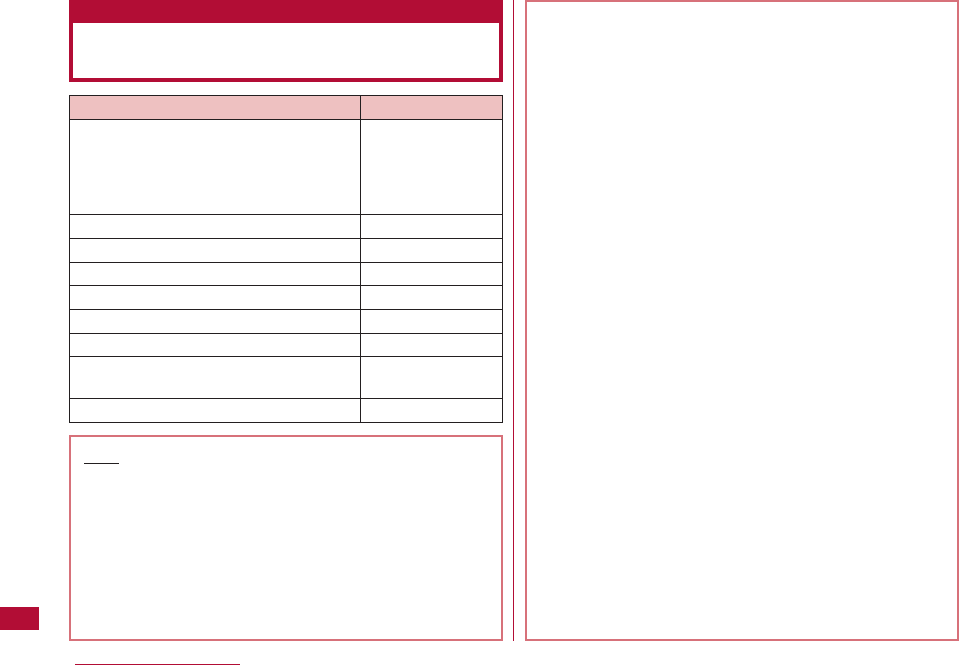
360 Appendix/Troubleshooting
Services Available from the FOMA
Terminal
Services Available from the FOMA Terminal Phone Number
Directory assistance of fixed line phones (No prefix) 104
and DOCOMO mobile phones
(pay service: service and call charges)
(No assistance provided for subscribers
not listed)
Telegraph (charges apply : telegram fee) (No prefix) 115
Time check (charges apply) (No prefix) 117
Weather forecast (charges apply) Area code + 177
Police emergency (No prefix) 110
Fire and ambulance (No prefix) 119
Marine emergency call and accident reports (No prefix) 118
Message Dial for times of disaster (No prefix) 171
(charges apply)
Collect call (Charges apply to the receiver) (No prefix) 106
・ When you use "Call Forwarding" from a fixed line phone and
have specified a mobile phone as its forwarding destination,
the caller may hear a ring tone even if the mobile phone is
busy, out of service area, or turned off depending on the
settings of the fixed line phone and mobile phone.
・ Services such as a call to 116 (NTT sales center), Dial Q2,
Message Service and credit card calls are unavailable.
(Credit card calls can be made from a fixed line phone or
public phone to a FOMA terminal.).
・ Even when the UIM is not inserted, emergency phone
numbers (911, 999, 112, 000, and 08) can be dialed to
make an emergency call overseas.. However, when the Self
Mode is set to "ON", emergency calls cannot be made.
・ This FOMA terminal supports "緊急通報位置通知 (Emergency
Location Report)". When calling 110, 119 , or 118 from the
FOMA terminal, your current location (location information)
is automatically provided to concerned organizations such
as the police. The organization may not receive accurate
location information depending on your current location or
the signal reception. If you do not send your Caller ID such
as dialing with "184" added per call, the location
information and Caller ID will not be sent. However, if the
concerned organization judges the information is
necessary to protect a human life, it may acquire your
location information and Caller ID. Different organizations
and locations may be implementing the "Emergency
Location Report" system on different dates.
・ For a call to 110, 119 or 118 from the FOMA terminal,
because the police or fire department may try to contact
you, inform them that you are calling using a mobile phone
and give your phone number and detailed information about
the place where you are. Do not move around while you are
talking during an emergency call to avoid it being terminated
unexpectedly. Do not turn the terminal power off
Note
・ If you use the collect call service (106), the receiver of the
call is charged for the call cost and a commission of 90 Yen
(94.5 Yen including tax) per call (as of March 2009).
・ When you use the directory assistance service (104), you
are charged for the call cost and service charge of 100
Yen(105 Yen including tax). This service is provided free of
charge for those visually impaired or physically disabled in
the upper body. For details, call 116 (NTT sales contact)
from a fixed line phone (as of March 2009).
361
Appendix/Troubleshooting
Using the FOMA terminal with various optional devices
makes it more convenient for various uses, both personal
and business. Some of the products listed below may be
unavailable in some areas.
For details, contact a service counter such as a docomo
shop. For details about optional devices, see the related
operation manuals.
・ Battery Pack L02
・ Back Cover L10
・ Flat-plug Earphone/microphone with Switch P01/P02
・ Earphone Plug Adapter P001
・ Earphone/microphone with Switch P001/P002*1
・ FOMA Dry Battery Adapter 01
・ Bone conduction microphone/receiver
・ In-Car Holder 01
・ FOMA Indoor Booster Antenna*2
・ FOMA Portable Charging Adapter 01
・ Carry Case S 01
・ FOMA USB Cable with Charge Function 01/02*3
・ FOMA Indoor Booster Antenna (Stand Type)*2
・ FOMA USB Cable*3
・ FOMA AC adapter 01/02*4
・ FOMA AC adapter 01 for Global use*4
・ Flat-plug Stereo Earphone Set P01
・ Stereo Earphone Set P001*1
・ FOMA DC Adapter P01/P02
・ Desktop Holder L02
*1 Earphone Plug Adapter P001 is required for connecting with
the L-06A.
*2 For domestic use.
*3 The terminal may not work properly with a USB HUB.
*4 Charging Using the AC Adapter →P43 to P45
You need Apple Computer Inc.'s QuickTime Player (free of
charge) Version 6.4 or higher (or Version 6.3 + 3GPP) to
play videos (in the MP4 file format) captured with the
FOMA terminal on a PC.
You can download the QuickTime Player from the following
web site:
http://www.apple.com/jp/quicktime/download/win.html
immediately after the call is over; and keep the FOMA
terminal ready to receive calls for approximately 10 minutes.
・ Depending on the area you are calling from, you may not be
connected to the local police or fire department. In such
case, use a public phone or fixed line phone nearby.
Note
・ You need a PC connected to the Internet to download
the software. Separate communication charges may
apply for downloading.
・ For details about operating environment, downloading
or operations, visit the above web site.
Options and Related Devices
Video Play Software
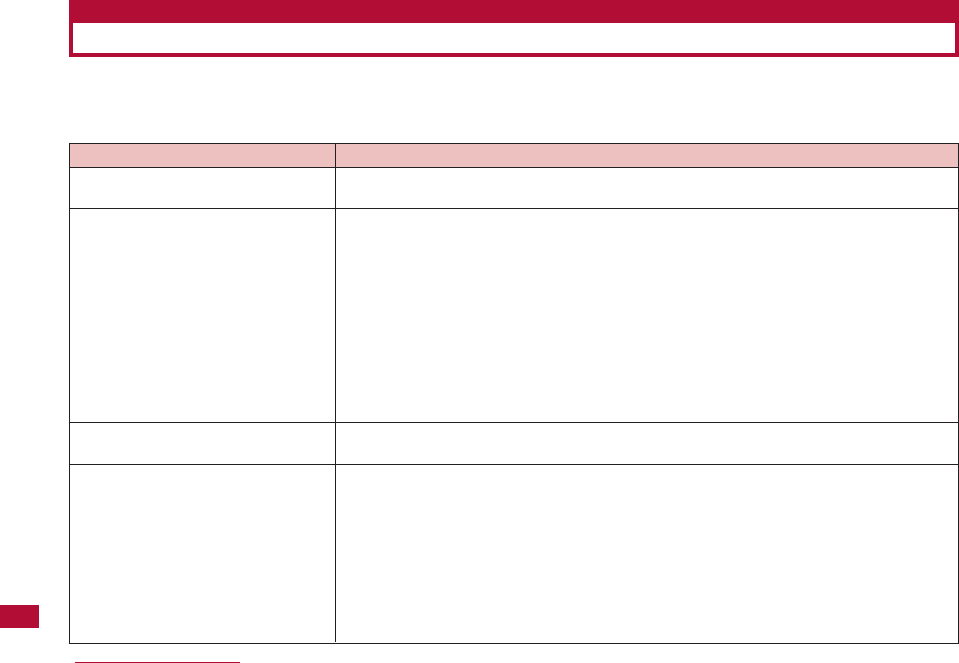
362 Appendix/Troubleshooting
Check whether the terminal software requires update first, if required, update the software (Software update
→r
efer to
P384). If the problem is not improved even following the check list, please contact with a repair counter designated by
DOCOMO, or the service center.
Troubleshooting
Symptom
The FOMA terminal cannot be powered
on
Charging is not available (the dial light/
charging light of FOMA terminal does
not light, or illumination blinks)
The FOMA terminal warms up during
the operation or charging
Battery lifetime becomes short
Check
・ Is the battery pack inserted correctly? →P42
・ Is the battery pack charged? →P45
・ Is the battery pack inserted correctly? →P42
・ Is the adapter power plug correctly connected to an electric outlet or cigarette lighter
socket? →P45
・ Is the AC adapter connected to the terminal properly? →P45
・ Is the AC adapter's connector connected to FOMA terminal or table holder (optional)
properly if AC adapter (optional) is used?
・ Does FOMA terminal's charging terminal become dirty if table holder is used? If it becomes
dirty, Wipe the connector terminals with a clean dry cloth or cotton swab.→P20
・ Charging light may blink, if a call or other functions are operated long time while FOMA
terminal is charging. Please recharge the FOMA terminal after the temperature drop down.
・ FOMA terminal, battery pack and adapter (including the chargers) will become warm while
using, charging, or operating i-αppli, television call long time. This is normal.→P20
・ Is FOMA terminal left out of service area long time? FOMA terminal takes more power for
searching signals in a location out of service area →P390
・ The actual time that a battery pack holds its charge depends on how the FOMA terminal is
used and how close the battery pack is to the end of its useful life →P390
・ Battery packs are consumables. Using time will become shorter and shorter by charge
repeatedly.→P43
Depending on the usage, a battery pack may run out of its charge extremely quickly even if
it is fully charged. Purchase a new battery pack as specified in this manual.
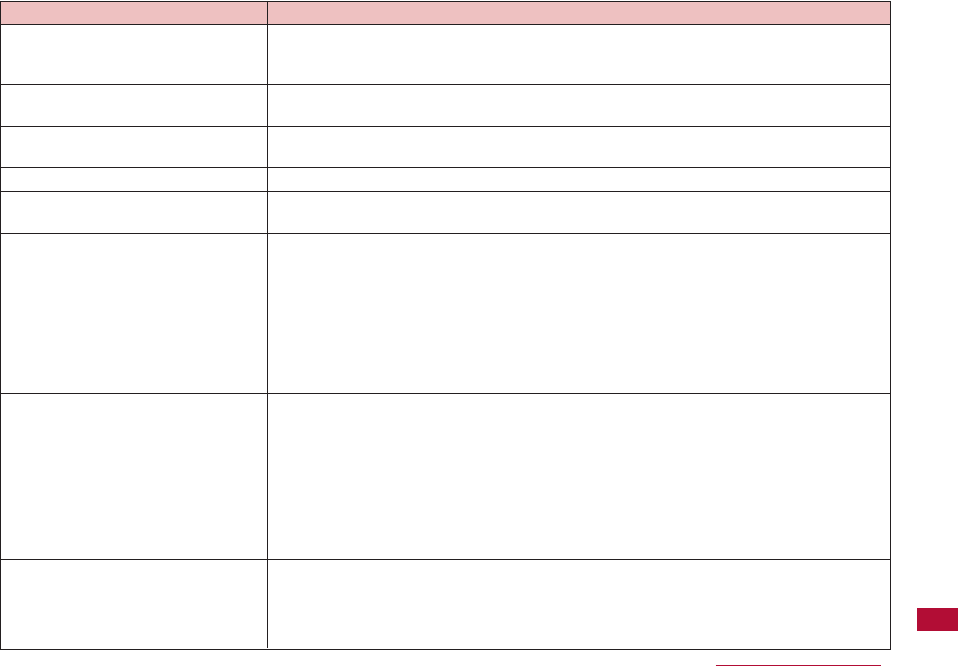
363
Appendix/Troubleshooting
Symptom
The FOMA terminal powers off and
powers on automatically.
No operation is performed even if a key
is pressed
Display reaction is slow after a key is
pressed
FOMA card cannot be recognized
A call cannot be made even if the dial
button/ key is pressed
The ring tone do not sound
Call is not available( the icon indicating
the network status is still shown as out
of service area even the FOMA terminal
is removed to service area, or call
cannot be made or received even in the
location with good signal reception)
Display is not bright enough
Check
・ If the connector terminals become dirty, the contact may become loose, and the FOMA
terminal power may be turned off. Wipe the connector terminals with a clean dry cloth or
cotton swab. →P20
・ Is Lock all set? →P117
・ Display reaction may be slow if a lot of data is saved in FOMA terminal. →P389
・ Does FOMA card is inserted correctly? →P39
・ Is Lock all set? →P118
・ Is Self mode set? →P119
・ Is Silent set at Volume settings' Incoming call volume? →P99
・ Is Public mode, Manner mode, Self mode or Privacy mode set? →P71, P103, P119
・ Check these settings : Accept/Reject call settings, Anonymous caller settings, Set mute
ring time, and Reject unknown. →P122. P123. P124. P125
・ Is the response time of the Voice mail/Call forwarding service set at 0 second? →P71
・ Is "To answer" time of "Record message" set at 0 second? →P73
・ Have you sent the auto answer time to "O second"? →P286
・ Turn off and turn it back on, or reset battery and FOMA card →P39, P42, P48
・ Even [in service area], [Display the signal strength: State of 3 antenna bars displayed],
depending on the signal, call is not available sometimes. Please move to the other place
and try again →P48
・ Is "Accept/Reject call set? →P118
・ Calls and messages will be difficult to make and send out in the crowd. The message
[Please wait] will be displayed and accompany with a sound like the ring tone. Please move
to the other place or try again later. →P73
・ Is Display off time settings set? →P108
・ Adjust the Backlight Display brightness. →P107
・ Is "Power saver mode" set to "ON"? →P108
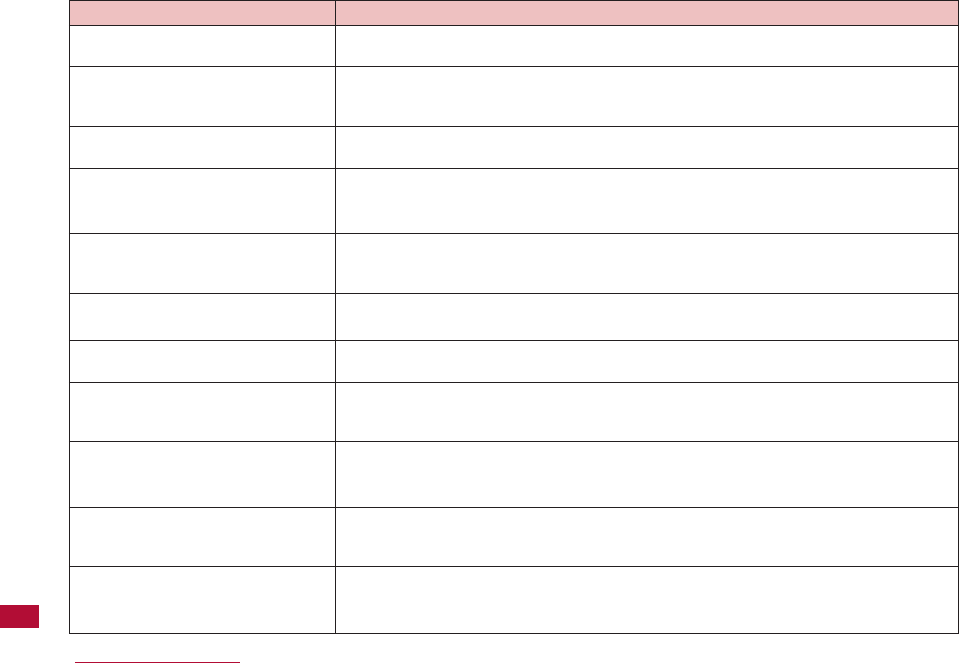
364 Appendix/Troubleshooting
Symptom
The other party's voice is too low or too
loud during a call
Images or melodies set for some
functions do not work, and default
settings are used
A message is not automatically
received
i-mode, i-mode mail, i-αppli and
i-Channel cannot be connected
i-mode mark does not disappear and
keeps blinking continuously
Still images or movies look blurred
Data cannot be transferred
[X] mark appears when trying to display
the image, playing for demonstration or
preview
Image cannot be display as the
attachment file is deleted
A phone number is dialed, but a busy
tone sounds and the call cannot be
connected
The icon indicating the network status
remains out of service area and "Out of
service area" is displayed
Check
・ Did you change the "Volume" setting?
・ Is the same UIM inserted that was installed when images or melodies were obtained?
→P40
・ If you have set "Revive option setting" to "ON", set it to "OFF".
・ Is "Host selection" set to something other than "i-mode"? →P191
・ If you had started using the FOMA terminal before you subscribed to i-mode, turn the FOMA
terminal off and then turn it back on.
・ If i-mode access breaks down between or after i-mode(center) information or sending
/receiving mail, i-mode mark keeps blinking. i- mode is stopped automatically if there is no
data being transferred. And i-mode also can be stopped by pressing power button. →P174
・ Change to close-up mode for close-up shooting. →P205
・ Check camera lens is dirty or have mist or not. →P198
・ Is a USB HUB being used? The FOMA terminal may not work properly with a USB HUB. →
P361
・ [X] mark may appear when the image data is corrupted. →P190
・ Check the [Attachment File Settings]. →P139
・ Check the [Limit Mail Size Settings]. For the detail, see "Mobile Phone User's Guide
[i-mode] FOMA version". →P147
・ Did you enter the city code? →P52
・ Is the phone out of service area? →P47
・ Are you out of service area, or in the location with week/poor signal reception? →P48
365
Appendix/Troubleshooting
■ When overseas
Symptom
The Terminal security code entry
screen appears on the Stand-by display
A different ring tone sounds for
incoming mail
Accumulated call costs are not
counted
"Please wait." or "No lines/ channels are
available" is displayed.
"Time out." appears and i-mode mail and
SMS cannot be sent
Check
・ Is Lock all set? →P117
・ Is the sender saved in the Phonebook with a different ring tone? →P81
・ Is the sender saved in the Phonebook under a group with a different ring tone assigned?
→P85
・ Have you exceeded the call charge limit? Reset the accumulated call costs to restart
counting. →P281
・ Audio line/packet communication facility failed, or audio line/packet communication network
is extremely busy. Try again later. →P334
Symptom
The icon indicating the network status
remains as out of service area, and the
international roaming service is not
available
A voice call or videophone call cannot
be received
Check
・ Are you out of the international roaming service area, or in a location with weak signal
reception?
・ Check whether you are in an available service area and whether you are using an international
carrier listed in the "Mobile Phone User's Guide [International Services]" or at the DOCOMO
International service website.
・ Launch "NW search mode" to search for a compatible operator. →P332
・ Switch 3G/GSM to [Automatic] status or an available network. And please turn off the FOMA
terminal then turn it back if [Automatic] status is selected in Japan. →P332
・ Is "Bar incoming when roam" set to "Active"? →P334
・ The videophone is not available during GSM/GPRS network. →P323
366 Appendix/Troubleshooting
Symptom
A voice call or videophone call cannot
be received suddenly even it was
available
The other party's caller ID is not
notified. The notified caller ID is not the
other party's. The FOMA terminal does
not perform operations using
phonebook data or Valller ID
Notification.
Videophones, i-mode mail, SMS, and
packet communication are not available
Calls or mail cannot be received
After returning to Japan, the network
status icon still shows out of service
area
Check
・ Please check the accumulative amount at
docomo Information Center
. Before start using
the international roaming service (WORLD WING), setting an end service approximate
amount is required. Service is stopped when the amount exceed the end service approximate
amount. Settle the bill can start to use this service again. →P322
・ Check Internet settings. Application of some special networks may not be available if
Internet is set as [automatic]. Change the set to [manual] and fit the network
environment(3G or GSM). →P332
・ If the used network or operator does not notify the caller ID, the caller ID does not appear on
the FOMA terminal screen even when the caller ID is notified. Depending on the used
network or operator, the notified caller ID may be different from the other party's. →P62
・ Check whether you are in an available service area and whether you are using an
international carrier listed in the "Mobile Phone User's Guide [International Services]" or at
the DOCOMO International service website →P322
・ Switch to an available network. →P332
・ Is "Call barring" activated? →P334
・ Is "Network search mode" set to "Manual" ?
→P332
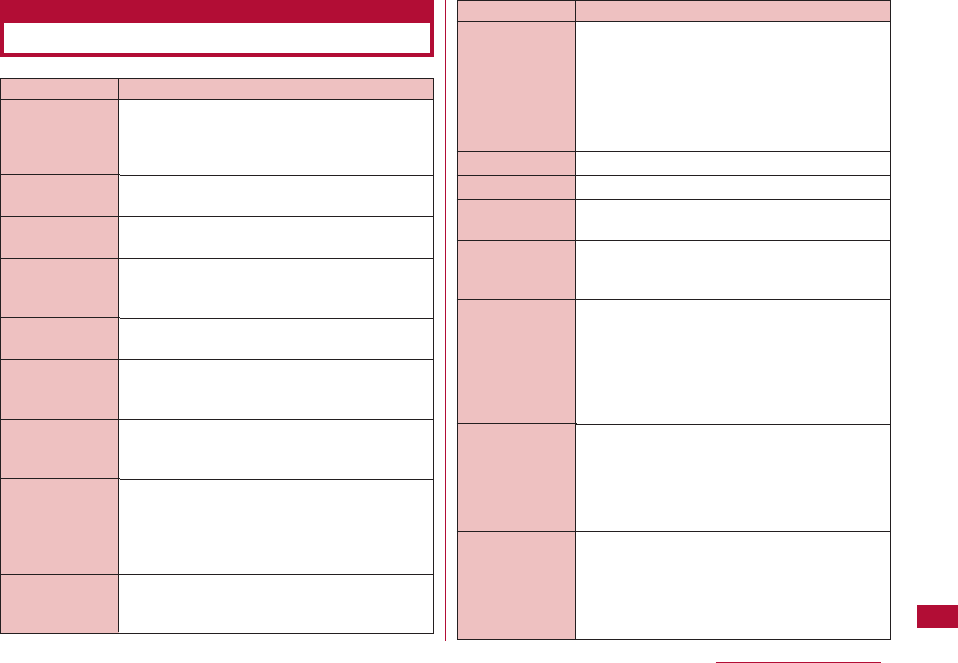
367
Appendix/Troubleshooting
There was not enough storage space in the
inbox when attempting to obtain the selected
received attached file. Delete unnecessary
received mail.
The SMS cannot be sent to the entered
address. Check the address.
No address was entered. Enter an address.
Mail could not be sent to the displayed
address properly.
The file/data could not be moved because an
error or another problem occurred.
There is data that could not be saved because
there was not enough storage space in the
saving location. Delete unnecessary files.
The terminal was unable to connect because
there was no response from the site or web
page. Try again.
Another i-αppli is set to start automatically at
the same time. Two or more i-αppli cannot
start automatically at the same time. Two or
more i-αppli cannot start automatically at the
same time.
The file/folder cannot be created or saved
because a file/folder of the same name already
exists.
Not enough data
memory
Please check
address
Input address
Could not send
to the following
address (561)
Move failed
Some data
couldn't be saved
No response
(408)
Same time
already set
Same file already
exists
Error Messages
DescriptionError Messages
MessageF cannot be received while you are
abroad. Remove the check mark from
"MessageF" in the "Check new messages"
settings.
No song exists. Save a Chaku-Uta-Full®song.
No applicable Chaku-Uta-Full®song exists.
The operation cannot be performed because
no song is selected. Select a song.
Up to 50 songs can be registered to one
playlist. Delete unnecessary Chaku-Uta-Full®
songs from the playlist.
Images were deleted from the message
because the total file size of images inserted
in Deco-mail exceeded the set value.
The operation could not be performed properly
because the image is invalid.
Images cannot be downloaded because
"Display image" is set to "OFF." Change the
setting.
MessageF
cannot be
received while
you are abroad.
Check the Center
Inquiry functions
(566)
No song!
Cannot find file!
Select items
Cannot add
songs!
Too much image
data Images
removed from
message Image
size is over
Reduce image in
message
Error in image;
cannot be
displayed
correctly Error in
image Does not
work correctly
View images set
to "OFF"; can't be
downloaded View
images to "Off"
Can't be
downloaded
DescriptionError Messages
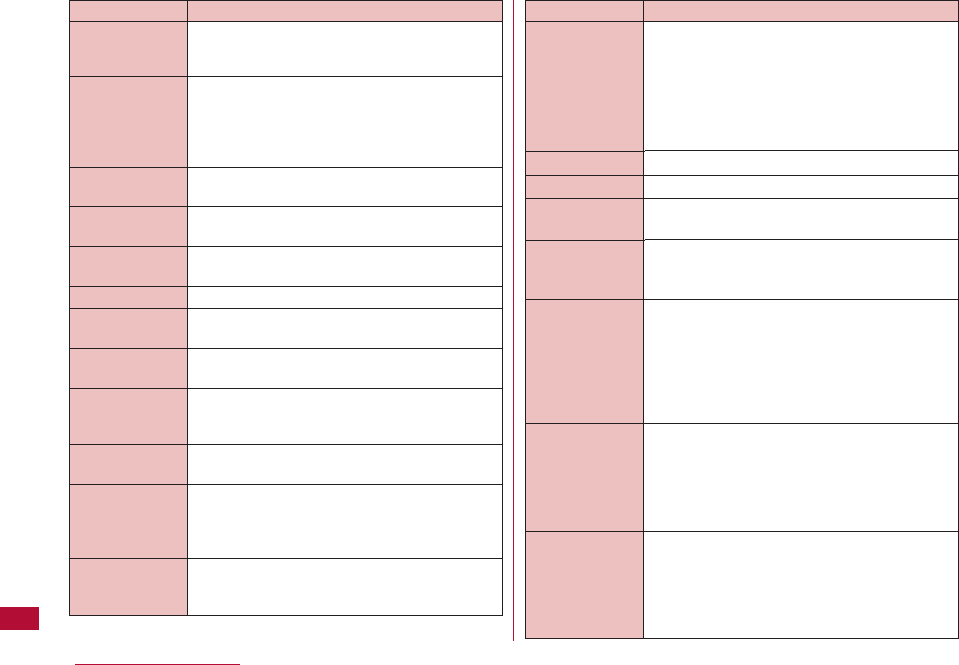
368 Appendix/Troubleshooting
The file cannot be saved because it is a Flash
file that cannot be saved or an image that has
only been partially downloaded.
The maximum number of images that can be
inserted in Deco-mail has been reached. Delete
images in the message.
The screen memo cannot be displayed
because an error or other problem occurred.
No screen memos have been registered.
The screen memo cannot be added because
an error or other problem occurred.
The terminal failed to start the i-αppli DX.
The image cannot be cropped because an error
occurred.
No country code (MCC) was entered. Enter the
country code.
The operation cannot be performed because
the terminal is in a location with no signal or
out of the FOMA service area.
No subject was entered for schedule or To Do.
Enter a subject.
The UIM cannot be recognized or the wrong
type of UIM is inserted. Reinsert the UIM or
insert the correct UIM and then try the
operation again.
"Select size" is set to "UXGA (1200x1600)" or
"SXGA (960x1280)". To use the zoom, set the
image size smaller.
DescriptionError Messages
MessageF cannot be received while you are
abroad. Remove the check mark from
"MessageF" in the "Check new messages"
settings.
No song exists. Save a Chaku-Uta-Full®song.
No applicable Chaku-Uta-Full®song exists.
The operation cannot be performed because
no song is selected. Select a song.
Up to 50 songs can be registered to one
playlist. Delete unnecessary Chaku-Uta-Full®
songs from the playlist.
Images were deleted from the message
because the total file size of images inserted
in Deco-mail exceeded the set value.
The operation could not be performed properly
because the image is invalid.
Images cannot be downloaded because
"Display image" is set to "OFF." Change the
setting.
MessageF
cannot be
received while
you are abroad.
Check the
Center Inquiry
functions (566)
No song!
Cannot find file!
Select items
Cannot add
songs!
Too much image
data Images
removed from
message Image
size is over
Reduce image in
message
Error in image;
cannot be
displayed
correctly Error in
image Does not
work correctly
View images set
to "OFF"; can't be
downloaded View
images to "Off"
Can't be
downloaded
DescriptionError Messages
Save image?
The number of
images does
over Reduce
images in the
message
Failed to load
screen memo
No screen
memos
Cannot add
screen memo
Software failed
Failed capture
Enter MCC
Out of service
area
Enter subject
This Card cannot
be recognized
Can't zoom in
case of this size
369
Appendix/Troubleshooting
A problem was detected during the
authentication process of the SSL. The
connection will be terminated.
A connection could not be established
because a modified SSL certificate was
received.
The file cannot be downloaded because it is
invalid or an error occurred.
This data may not play properly.
The file cannot be acquired because it is
invalid or an error occurred.
The selected data cannot be attached to mail.
The file cannot be saved because the validity
period of the i-motion or a Chaku-Uta-Full®song
has expired, or there are no remaining
playbacks available.
The data cannot be obtained because the
clock has not been set.
The file cannot be selected because it is in an
unsupported format.
The file cannot be attached to i-mode mail.
Functions are limited because a different UIM
card is inserted than the one that was inserted
when the data was downloaded from a site, the
file was attached to mail, or MessageR/F was
saved.
Certificate is
rejected.
(tampered)
Unable to
download.
This data may
not be displayed
Unable to
acquire
Cannot forward
this item
Unable to
acquire
Set the clock to
obtain data
File format not
supported
This file cannot
be attached
Some functions
is limited in UIM
DescriptionError Messages
The terminal is set not to obtain streaming
type i-motion. Change the setting.
No more folders can be added because the
maximum number of folders has been reached.
No more screen memos can be protected.
The content cannot be downloaded because it
is invalid.
The data is not completely downloaded.
The mail cannot be sent because it exceeds
the maximum possible size for sending.
Reduce the size of the message or delete
attached files.
The data cannot be played because it contains
an error.
The data cannot be played.
The data could not be played because an error
or other problem occurred.
The file cannot be played because the
playback period set to i-motion or a Chaku-Uta-
Full®has not yet started. Play the file on or
after the day for which playback is possible.
The file cannot be played because it is not
currently in the playback period set to imotion
or a Chaku-Uta-Full®. Play the file during the
playback period.
* Where X represents year, month, day, and
time.
Invalid content.
Change i-motion
type for replay
Cannot create
folder
Too many items
are protected
Invalid content,
Download failed
Incomplete
downloading
Size overReduce
the message or
delete attached
file
Playback error
Cannot play this
data
Unable to play
Replay period
has not yet
started Unable
to play
Replay is
restricted
(XXXX/XX/XX、
XX:XX) -
(XXXX/XX/XX、
XX:XX)
DescriptionError Messages
370 Appendix/Troubleshooting
The file cannot be played because the i-motion
or a Chaku-Uta-Full®song has expired. You
cannot play the file after the expiration date.
* Where X represents year, month, day, and
time.
The data cannot be obtained because it is
invalid or today's date is not in the playback
period.
Nothing can be played because no file has
been played before.
The reception was stopped because the page
at the site or web is too large; only a part is
displayed.
The download was stopped because the data
exceeded the maximum size that can be
downloaded/obtained.
The data cannot be obtained because the data
size exceeds the maximum for retrieving.
The data could not be received because it
exceeds the maximum size.
The data cannot be downloaded because it
exceeds the maximum size of data that can be
downloaded.
Replay is
restricted
(XXXX/XX/XX、
XX:XX)
Unable to obtain
data due to
replay restriction
data error
no recent played
info!
Size of this page
is not supported
Unable to
download
Unable to
download
Data exceeds
maximum size
(452)
Unable to
download, Data
exceeds
maximum size
DescriptionError Messages
The screen memo cannot be protected
because the maximum number has been
exceeded. Up to 10 screen memos can be
protected.
The site or web page is automatically
forwarded to another URL, or the URL has
changed.
The terminal cannot connect to the site or web
page.
The terminal will delete the attached file and
forward the message because the file is
copyright protected.
The data cannot be deleted because an error
occurred.
The operation cannot be performed because
there is no bookmark that can be deleted.
There is no message that can be deleted
because all messages are protected.
There is no message that can be deleted
because no message exists or all messages
are protected.
The terminal failed to delete the data because
an error or a problem occurred.
Deletion was cancelled because an error or a
problem occurred.
A new folder cannot be created because the
number of folders that can be created (20) has
been reached.
No more memos
can be protected
Up to 10 screen
memos can be
protected
URL address
changed (301)
Connection
failed(403)
File with
copyright will be
deleted
Cannot be
deleted
There is no
bookmark that
can be deleted
There is not a
message to
delete
There is no mail
that can be
deleted
Failed to delete
Canceled
deleting
Number of
creating folder is
20EA
DescriptionError Messages
371
Appendix/Troubleshooting
DescriptionError Messages
A maximum number of 3 i-αppli can be set to
start automatically.
The terminal failed to send the SMS. Wait a
while and then try again.
There is not enough battery power. Charge the
battery.
The end time is set earlier the start time on
the same day. Set an end time that is later
than the start time.
The end date is set earlier than the start date.
Set the schedule event so that the end date is
the same or later than the start date.
The terminal is receiving data. Wait a while.
The selected message cannot be received
because the host address set for "Host
Selection" is wrong. Check the setting and
then try again.
SMS cannot be received because there is not
enough storage space in the Inbox.
Delete unnecessary received mail.
The i-mode mail cannot be received because
there is not enough storage space in the
Inbox. Delete unnecessary received mail.
SMS cannot be moved/copied from the UIM
because there is not enough storage space in
the Inbox. Delete unnecessary received mail.
3 i-αppli have
been already
registered for
auto-start
Please wait
Low battery.
Can't update
Invalid end time
Invalid end date
Receiving.
Please wait
Cannot receive
message
There is no
empty space in
the Inbox
Please delete
unnecessary mail
to receive SMS
Inbox is full
DescriptionError Messages
You have not subscribed to the i-mode service.
The terminal failed to send an SMS because
the service is not provided.
The file cannot be specified because it is an i-
motion movie with only video or audio.
The file cannot be played because it is not
supported.
The operation cannot be performed because it
is not supported.
The site or web page may not exist, or the URL
may be wrong. Check the URL and then try
again.
There is no data available at the specified site.
The specified software cannot be started
because it does not exist.
The operation cannot be performed because
the specified software cannot be started.
There were no messages that matched the
conditions specified for the filter operation.
There was no mail that matched the conditions
specified for the filter operation.
The site or web page may not exist, or the URL
may be wrong. Check the URL and then try
again.
An invalid number was entered, or no number
was entered. Enter a valid number.
The message cannot be sent because the mail
address is invalid.
Service is not
registered
Service is not
provided
Not supported
format
Not supported
Page is not
found(404)
No content is
available (204)
No requested
software
Requested
software
unavailable
No messages
No data
Unable to
retrieve the
requested URL
(504)
Invalid number!
Invalid address
372 Appendix/Troubleshooting
There are no received messages.
The SMS failed because the recipient rejected
the message.
The reception was cancelled.
There are no SSL certificates.
There is not enough storage space for
Schedule. Delete unnecessary schedule
events.
The mail address cannot be set because it is
already set for auto sort.
The network cannot be registered because it is
already registered.
The host name cannot be registered because
it is already registered.
The network cannot be registered because it is
already registered.
The URL cannot be saved because it is already
registered in the FOMA terminal.
The message cannot be sent because it is
already stored on the server.
The operation cannot be performed because all
the data is invalid.
Some of the parameters are out of range.
The file attached to the i-mode mail cannot be
played because it is too large.
No messages
Reception
rejected
Canceled
receiving
No Certificates
Schedule is full
Already set
Already exists
Host name
already exists
Already exist
Same URL
already saved
Already received
message on
server
All data is invalid
Could not parse
all mail to
parameters
Cannot play for
limit size
DescriptionError Messages
The terminal was unable to connect properly
because of an error at the access point.
i-αppli attempted to perform a prohibited
activity.
The connection was interrupted because an
error or a problem occurred.
There is no host address entered. Enter the
host address.
There is no host name entered. Enter the host
name.
There is no access point number entered.
Enter the access point number.
A connection cannot be established because
the host address set for "Host Selection" is
wrong. Check the setting and then try again.
A connection cannot be established because
there is a problem with the network. Wait a
while and then try again.
The traffic to the i-mode center is heavy. Wait
a while and then try again.
The attached file linked to the i-mode mail
could not be downloaded within the set time.
Do you want to try downloading again?
The ring tone could not be set because an
error occurred.
The operation cannot be performed because
self mode is set. Set self mode to "OFF".
Connection
failed(400)
Software
terminated due
to security error
Connection
interrupted
Host address is
empty
Host name is
empty
Access point is
empty
Connection failed
Connection failed
(562)
Time out
Time out
Resume
download?
Failed set !
Self mode is set
DescriptionError Messages
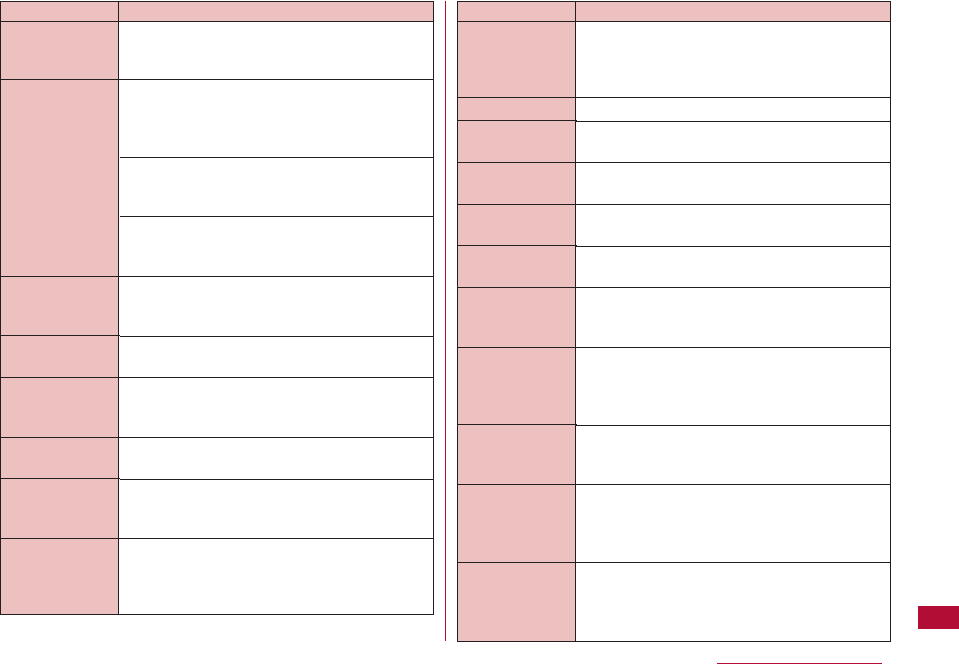
373
Appendix/Troubleshooting
The selected image could not be inserted
because it exceeds a specified value.
The terminal cannot connect to the network
because it is out of the service area or in a
location with no signal. Move to a location with
a strong signal and set the network.
The list of networks cannot be displayed
because there is no UIM inserted. Insert the
UIM before using the option.
The network list could not be saved with
"UPLMN select by list" in "Preferred network
lists."
The template cannot be saved because there
are no decorations.
The terminal is preparing to send the i-mode
mail. Wait a while.
The mail could not be sent properly. Check the
address and then try again.
The mail/SMS could not be sent properly.
The mail could not be sent properly.
* Where X represents a number to indicate an
error type.
The mail space for the recipient is full.
Not able to
insert a chosen
image
Service
unavailable
No decorations.
Cannot save as
template
Preparing to
send
Address is not
valid Check the
address (451)
Could not send
mail
Transmission
failed (XXX)
Could not send
mail
Server is
full(551)
DescriptionError Messages
SMS cannot be copied/moved from the UIM
because there is not enough storage space in
the Outbox. Delete unnecessary sent and
unsent mail.
There is no mail in Outbox.
SMS sending was rejected.
Sending was cancelled.
The i-αppli cannot be updated because it has
already been updated to the latest version.
The i-αppli data cannot be downloaded
because it contains an error.
The i-αppli data cannot be downloaded
because it contains an error.
The data cannot be displayed because it is not
supported.
Invalid characters or no characters were
entered for the title name. Enter a valid title
name.
The terminal searched for a network for the set
amount of time, but no network could be found
Check whether the "Network mode" setting is
correct.
The operation cannot be performed because
Dialing Restriction is set. Remove the
checkmark for "Keypad dial lock" in the
Call/Mail lock settings.
Outbox is full
No messages
Transmission
rejected
Cancelled
sending
Software already
updated
This software
contains an error
Download
canceled due to
the SW error
The data cannot
be displayed
because it is not
supported
Invalid title
Time out
Keypad dial lock
DescriptionError Messages
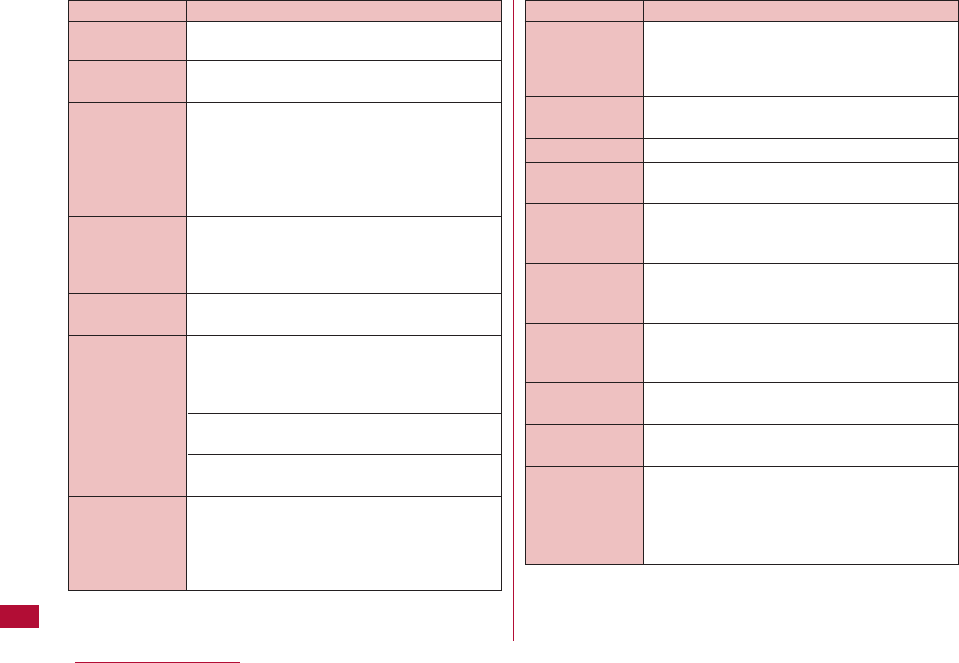
374 Appendix/Troubleshooting
The data could not be downloaded because an
error or a problem occurred.
i-αppli of the same version has already been
downloaded.
This message will be displayed when extremely
large amount of data is transferred via your
terminal. This message is displayed only when
you subscribe to the fixed amount service for
i-mode packet communication. Wait for a while
and try again later after you see this message.
The line is very busy. Wait a while and then try
again.
* Where X represents a number to indicate an
error type.
The entered security code is incorrect. Enter
the correct security code.
An incoming call was rejected because it was
from a caller not registered in the Phonebook.
To receive calls from callers not in the
Phonebook, set "Reject unknown" to "OFF."
An incoming call was rejected because it was
from a caller registered in "Reject on list".
An incoming call was rejected because "Reject
all calls" is set to "Disconnect call".
i-Channel information was not downloaded
because a part or all channel information could
not be downloaded. Move to a location with a
strong signal and then press Qin stand-by to
receive the information.
Download failed
Already
downloaded
Usage is
currently
restricted
Try again later
i-mode mail
service is busy
Please try again
later(XXX)
Security code
error
Call rejected
Failed to retrieve
channel
information
DescriptionError Messages
The connection was suspended because the
set amount of time elapsed without finding the
other party. Check the distance from the other
device, angle, and operating procedure.
Communication failed because the operation
was suspended.
The battery level is low. Charge the battery.
The operation cannot be performed because
the data is invalid.
The country name and country code were not
entered. Enter the country name and country
code.
Downloading was suspended because the
terminal is out of service area. Move to a
location with a strong signal.
The operation cannot be performed because
there is not enough battery power.
Charge the battery and try again.
The function cannot be used because there is
not enough battery power. Charge the battery.
There is no file that can be attached.
The attached file will be deleted and the mail
will be forwarded because a different UIM card
is inserted than the one that was inserted
when the i-mode mail attachment file was
received.
Connection
suspended
Exchange failed
Battery low
Invalid data
Input data
Receiving
canceled
Low battery
Cannot start
Photo-mode
Low battery
Can't use
No attachable
file
Attached file is
deleted
DescriptionError Messages
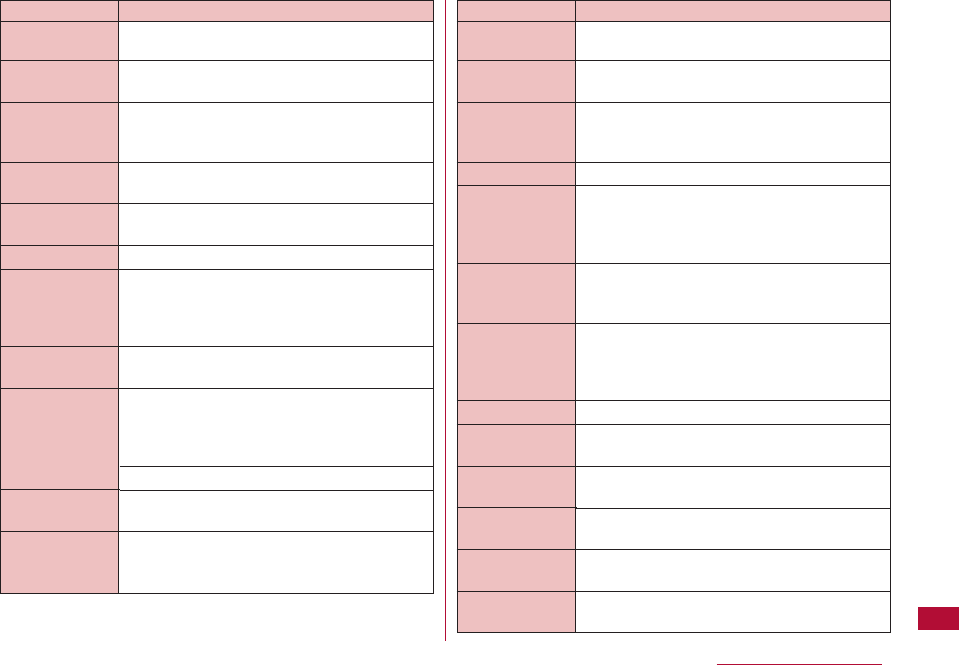
375
Appendix/Troubleshooting
There is not enough storage space for Template.
Delete unnecessary templates.
The size of the template exceeds the specified
value. Delete the message or inserted images.
There is not enough storage space for the
phonebook entry. Delete unnecessary
phonebook entries.
No entry is saved in the Phonebook.
The video could not be edited because an error
occurred.
The terminal failed to check for new SMS.
The operation cannot be performed because
user registration is taking place. Wait a while
and try again.
The bookmark cannot be added because there
is no bookmark data that can be added.
Sending is not possible because too many
characters were entered in the site or web
page input field. Delete some characters and
then try sending again.
URL is too long to display.
The input data contains an error. Check the
input data.
A connection cannot be established because
the authentication type is not supported.
Template is full
Size over
Phonebook is full
No Phone
number
Failed Clipping
Check failed
Registration is in
progress Wait a
while and try
again (554)
No bookmark
data
Too much data
was entered
Input error(205)
Authentication
type is not
supported (401)
DescriptionError Messages
The wrong security code was entered. Enter
the correct security code.
The connection was suspended because
authentication failed.
The Network security code entered was
incorrect. Enter the correct network security
code.
The MNC was not entered. Enter the MNC.
While attempting to download the remaining
data of a partially saved file, the data was
deleted because an error occurred and the
download failed.
The user name or password entered in the
authentication screen of a site or web page
was wrong. Enter the information again.
The mail cannot be received because the
terminal is attempting to overwrite a message
that is currently being displayed.
There are no files in the folder.
The file cannot be played because the data is
not supported or corrupted.
The operation cannot be performed because
the file that was obtained is corrupted.
The operation cannot be performed because
the selected file does not exist.
The operation cannot be performed because
the file is invalid.
The mail is forwarded with the pasted file
deleted because it cannot be forwarded.
Authentication
failed
Authentication
canceled(401)
Enter correct
network security
code
Enter MNC
Unable to
acquire
remaining data
Data deleted
Password is not
correct(401)
Receiving failed
Because mail to
indicate can't
replace it.
There are no files
This file is not
supported
Invalid File(493)
Cannot find file
File error
File is deleted
DescriptionError Messages
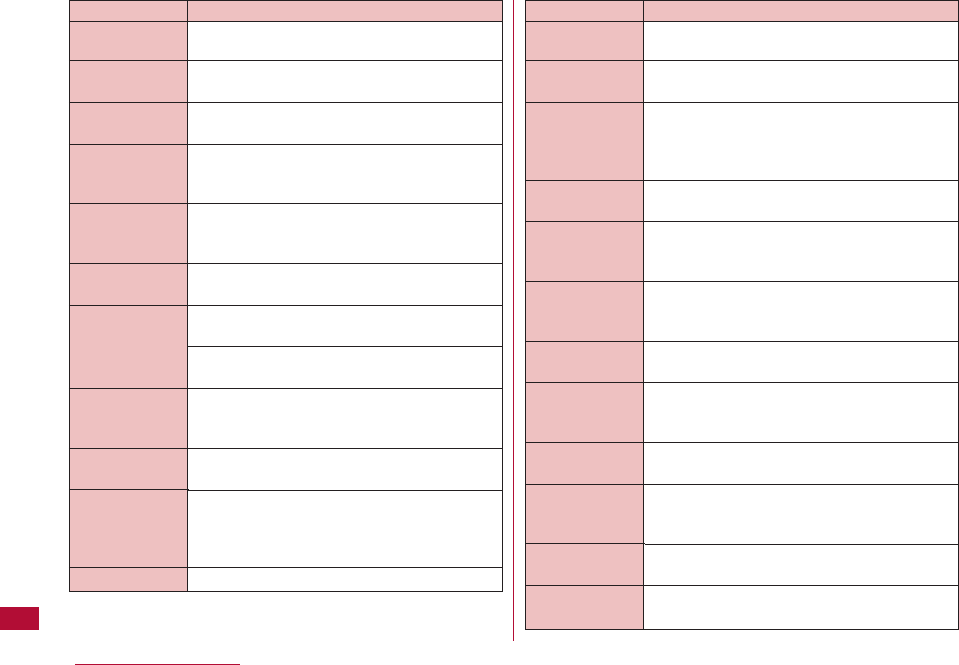
376 Appendix/Troubleshooting
The file could not be moved/copied because
an error occurred.
The maximum attachment size has been
exceeded.
The file could not be saved because an error or
a problem occurred.
Invalid characters or no characters were
entered for the folder name. Enter a valid folder
name.
The selected folder cannot be deleted.
* Where XXX represents the applicable folder
name.
An invalid address was deleted.
The operation cannot be performed because
an inappropriate file is selected.
The operation cannot be performed because
the data is invalid.
Invalid characters or no characters were
entered for the folder name. Enter a valid folder
name.
There is not enough storage space for the
bookmark. Delete unnecessary bookmarks.
Some bookmarks cannot be displayed because
there are too many bookmarks.
There are no bookmarks added.
Failed to create
file
Attached file size
is over
Cannot save file
Incorrect folder
name
XXX folder can't
delete
Delete invalid
address
Invalid data is
included
Invalid title
Bookmark is full
Too many
bookmarks
Some cannot be
displayed
No bookmarks
DescriptionError Messages
The bookmark cannot be added because an
error or a problem occurred.
The operation cannot be performed because
an unknown error occurred.
The song cannot be added because the
maximum number of playlists/songs in each
playlist has been added. Delete unnecessary
playlists/songs.
Up to 10 playlists can be added. Delete
unnecessary playlists.
Protection cannot be cancelled because there
is no protected mail.
Protection cannot be cancelled because there
are no protected messages.
There is no mail that can be protected
because any mail is already protected.
There are no messages that can be protected
because any messages are already protected.
There are no protected messages.
An attached file can no longer be obtained
because the retention period at the i-mode
center has expired.
The data could not be saved because an error
occurred.
Saving was cancelled because an error or a
problem occurred.
Cannot add
bookmark
Unknown error
Cannot add to
playlist!
Cannot create
playlist!
There is no mail
to cancel
protection
There is not a
message to
protect
There is no mail
to protect
There are no
messages to
protect
No protected
messages?
Retention period
has expired(492)
Fail to save
Canceled saving
DescriptionError Messages
377
Appendix/Troubleshooting
The operation cannot be performed because
there is not enough storage space in the
saving location. Delete unnecessary files.
A connection cannot be established because
the home page is not set.
The home page is set to "Disable". Set it to
"Enable."
No more settings can be configured. Delete
unnecessary items.
The mail cannot be sent because the
maximum number of characters that can be
entered for a message has been exceeded.
Reduce the size of the message.
The mail cannot be saved because the
maximum number of characters that can be
entered for a message has been exceeded.
Reduce the size of the message.
The mail cannot be sent because the number
of inserted images exceeds the specified
number. Delete images in the message.
The mail cannot be saved because the number
of inserted images exceeds the specified
number. Delete images in the message.
No save area
Home page not
set
Home page
disabled
Terminal memory
is full
Cannot send
message; for
size over Delete
some message
Cannot save
message; for
size over
Delete message
Cannot send
message; for
number of
images over
Reduce images
in the message
Cannot save
message; for
number of
images over
Reduce images
in the message
DescriptionError Messages
The maximum possible number of characters for
the message has been exceeded.
Reduce the size of the message.
The message cannot be edited.
The data cannot be saved because it is a
Flash file.
The data cannot be saved because it is an
unplayed Flash animation.
A phone number/mail address or a function is
not assigned to the One touch hot key. Assign
them.
There is not enough storage space for unsent
messages. Delete unnecessary unsent or sent
messages.
There are no unsent messages.
The operation cannot be performed because
some items have not been entered.
An empty message cannot be saved.
The operation cannot be performed because
the Music player is running. Quit the Music
player.
The operation cannot be performed because
the received data contains an error.
Message entry
size exceeds
limit
Delete message
Cannot edit
message
Cannot save
image without
playing
Not registered
Register from
one touch key
menu
Unsent message
mail is full
No messages
There's empty
input
Input required
Empty message
cannot be saved
Music player is
running
Received invalid
data
DescriptionError Messages
378 Appendix/Troubleshooting
The specified site or web page is not
supported.
* Where X represents a number to indicate an
error type.
Check whether the URL is correct.
* Where X represents a number to indicate an
error type.
The received data cannot be displayed
because it contains an error.
* Where X represents a number to indicate an
error type.
The value is outside the setting range of the
date search.
The file or folder cannot be saved or created
because an invalid character was entered for
the file name or folder name.
There is no Message F.
There is no Message R.
There is not enough storage space for
MessageR/F. Delete unnecessary
MessageR/F.
The message cannot be displayed because
the message data is corrupted.
There is not enough storage space for memos.
Delete unnecessary memos.
The operation cannot be performed because
there is not enough storage space in the save
location. Delete unnecessary files.
Up to 10 access points can be registered.
Delete unnecessary access points.
Invalid
Data(XXX)
Invalid date
Invalid file name
is included
No messages
Folder is full
Message data
invalid
Memo is full
Memory is full
Not enough
memory
Can't save
DescriptionError Messages
A video cannot be recorded because there is
not enough memory.
There is not enough storage space in the
moving/copying destination. Delete
unnecessary files.
The process will be suspended because there
is not enough memory. If you see this
message frequently, turn off, then turn on your
terminal.
i-mode will be terminated because there is not
enough memory.
The process will be suspended because there
is not enough memory.
There is not enough storage space for both
received mail and Message R/F. Delete
unnecessary received mail and Message R/F.
No more characters can be entered because
the number of entered characters exceeds the
limit.
The data is being loaded. Please wait.
The data is being loaded. Please wait.
There are too many entries for the list. . Delete
unnecessary items.
The operation cannot be performed because
you have not subscribed to WORLD WING.
Not enough
memory
Can't record
Not enough
memory
Memory shortage
Memory shortage
Stop Browser
Memory shortage
Return to Main
Menu
Folder is full
Characters are
too long to enter
Loading
Loading
Please wait.
Reject list full
International
roaming service
denied
DescriptionError Messages
379
Appendix/Troubleshooting
The period specified is incorrect. Set a period
from 2 to 31 days.
Up to 50 songs can be added to the Quick
playlist. Delete unnecessary Chaku-Uta-Full®
songs from the Quick playlist.
There are too many bookmarks. Delete
unnecessary bookmarks.
An i-αppli could not be started automatically due
to the UIM security. Insert the UIM that was
inserted when the file was obtained and try
again.
The operation cannot be performed due to the
UIM security. Insert the UIM that was inserted
when the file was obtained and try again.
A different UIM card is inserted than the one that
was inserted when the data was downloaded
from a site, or the mail attachment file or
MessageR/F was saved. Insert the same UIM
that was inserted when you downloaded or
saved the data.
The mail cannot be sent due to the UIM
security. Insert the UIM that was inserted
when the mail was created and try again.
i-αppli could not be started automatically due
to the UIM security. Insert the UIM that was
inserted when the file was obtained and try
again.
Set a period from
2 to 31 days
Can't save over
50 songs
Bookmark is full
Activation failure
because of
different UIM
Invalid UIM,
requested
service not
available
Invalid UIM
cannot send
Activation failure
because of
different UIM
DescriptionError Messages
An i-αppli that is linked to the UIM inserted at
the time of download from a site cannot be
started. Insert the UIM that was inserted when
the i-αppli was downloaded.
Some data subject to restrictions such as
images cannot be displayed because a different
UIM card is inserted than the one that was
inserted when the data was downloaded from a
site, or the attached file or MessageR/F was
saved. Insert the same UIM that was inserted
when you downloaded or saved the data.
A different UIM card is inserted than the one
that was inserted when the screen memo was
saved. Insert the same UIM card that was
inserted when you saved the screen memo.
The UIM is being read. Wait a while and try
again.
The UIM card is not inserted. Insert the UIM
and try again.
The specified software cannot be started
because a different card is inserted than the
one inserted when the software was
downloaded from a site. Insert the UIM that
was inserted when the software was
downloaded.
An i-αppli that is linked to the UIM inserted at
the time of download from a site cannot be
started. Insert the UIM that was inserted when
the software was downloaded.
Invalid UIM.
Requested
software can't
start
Invalid UIM,
incorrect display
UIM reading
UIM not ready
Invalid UIM.
Requested
software can't
start
Invalid UIM.
Start not
possible
DescriptionError Messages
380 Appendix/Troubleshooting
This message will be displayed when an i-αppli
performs a lot of data transfer within a short
time.
Select "Yes" to continue using the i-αppli.
Select "No" to continue using the i-αppli
without communication.
Select "Terminate" to end the i-αppli.
The i-αppli cannot be started because "Site
i-αppli to" is not enabled. Enable the function
and try again.
The i-Channel information cannot be received
because the UIM is not inserted properly, or
there is a problem with the UIM. Check the
UIM.
The data cannot be obtained because the data
size exceeds the limit.
Download was canceled because the data size
exceeds the limit.
The line facility failed, or the line is very busy.
Wait a while and try again.
No check marks are placed for items of the
"Check new messages" settings. Place check
marks to items and try again.
If an incorrect PIN1/PIN2 code is entered 3
times in a row, the PIN lock is set. Enter the PIN
Unblock code.
Data
transmission is
frequent
Continue
transmission?
Yes/No/
Terminate
i-αppli To
function is not
set
Cannot receive i-
Channel
information
The i-motion
movie exceeds
playable size
Received data
exceeds i-motion
playable size
Network traffic
to i-mode center
is heavy
Please wait
(555)
All items in
"Check new
messages" set
to OFF
PIN1 (PIN2)
code locked
DescriptionError Messages
If an incorrect PIN1/PIN2 code is entered 3
times in a row, the PIN lock is set. Enter the PIN
Unblock code.
An incorrect PUK code was entered. Enter the
correct PUK code.
If you enter an incorrect PUK code 10 times in a
row, the PUK code is blocked. Contact a
docomo shop counter.
If you enter an incorrect PUK code 10 times in a
row, the PUK code is blocked. Contact a
docomo shop counter.
There is no network that can be selected.
The terminal failed to send the SMS. Check the
"SMS Center" setting.
A connection could not be established because
a modified SSL certificate was received or an
SSL error occurred.
A problem was detected during the
authentication process of SSL.
The connection will be terminated.
A session was not possible because of an
authentication error on the server.
The certificate of the FOMA terminal is set to
invalid. Change the setting to establish a
connection.
The SSL session was terminated because you
canceled it.
There is not enough space in the storage
location for To Do entries. Delete unnecessary
To Do entries.
PIN1(PIN2) code
not recognized
PUK code error
PUK code not
recognized
PUK blocked
No PLMN found
Please check
SMS Center
settings
SSL session
cannot be
established
SSL session
failed
SSL certificate
not valid
SSL session
terminated
To do is full
DescriptionError Messages
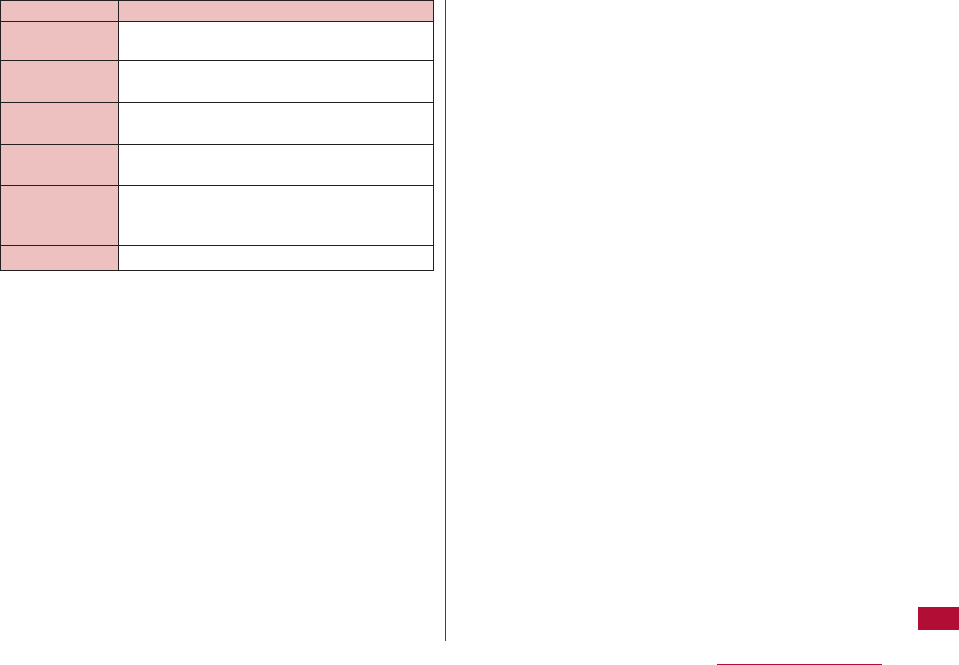
381
Appendix/Troubleshooting
There is no address set for the To field. Set at
least one address for the To field.
The URL cannot be registered because it
contains too many characters.
The terminal cannot connect to the site or
Internet because the URL is invalid.
The operation cannot be performed because
there is no entries in URL history.
The FOMA USB Cable with Charge Function
01/02 is connected. Disconnect the cable and
try again.
An error occurred while an i-αppli is running.
Please set "To
type" receiver
URL too long to
register
Invalid URL
No URL history
Unplug the USB
cable
i-αppli error
DescriptionError Messages
382 Appendix/Troubleshooting
・ Be sure to receive a warranty at the time you purchase your
FOMA terminal. Read contents of the warranty and confirm
items such as the "shop name and the date of purchase" and
keep it in a safe place. If necessary items are not described,
immediately contact the shop where you purchased the FOMA
terminal. The warranty for free repair is valid for one year from
the date of purchase.
・ This product and its accessories are subject to change, in part
or whole, for improvement without prior notice.
・ The saved contents of phonebook and other functions may be
altered or lost by failure, repair or other handling of the FOMA
terminal. It is recommended that you write down the contents
of the Phonebook as a precaution. If a FOMA terminal is
repaired, with some exceptions, information downloaded with i-
mode or i-αppli is not transferred to the repaired FOMA
terminal, because of the Copyright Law.
* If you have a PC, your Phonebook data can be transferred to
and stored on your hard drive using DOCOMO keitai datalink
(P361) and FOMA USB Cable with Charge Function 01/02
(optional) or FOMA USB Cable (optional).
Before requesting for repairs, read "Troubleshooting" in this
manual. If the problem still persists, call the Contact for
Repairs as listed on the back of this manual.
Take your FOMA terminal to a service center designated by
DOCOMO. Repairs are accepted during business hours of
the service center. Be sure to bring the warranty when you
visit.Please note that depending on the malfunction, it may
take more days to repair.
■ During the Warranty period
・ The FOMA terminal will be repaired at no charge subject to
the conditions of the warranty.
・ The warranty must be presented when requesting the repair.
You will be charged for repair if the warranty is not presented
or the trouble or damage is caused by your inappropriate use
of the terminal.
・ You are charged even during the warranty period for repair of
failures caused by the use of devices or consumable items
that are not DOCOMO-specified.
・ You will be charged for repair of the LCD screen or the
connectors.
■ Repair may not be possible in the following cases:
・At a service center, when perspiration is detected, (e.g., the
moisture detection seal is reacted).
・When corrosion due to exposure to moisture, condensation
or sweat is found in a test result; or if any of the internal
boards are damaged or deformed (When the
Headphone/Microphone Jack, the external connector
terminals or the LCD liquid is damaged or its case is
cracked, repair may not be possible).
* Since these conditions are outside the scope of the
warranty, any repairs, if at all possible, will be charged.
■ After expiration of the warranty
・ All repairs that are requested are charged.
Warranty and After-sales Service
Warranty
After-sales Service
If you have problems with the FOMA terminal
If Repair is required after the inquiry

383
Appendix/Troubleshooting
■ Replacement parts
・ Replacement parts (parts required to maintain production
function) will be kept in stock for at least four years in
principle after termination of production. However, repair may
still not be possible due to a lack of replacement parts
depending on the failure. Even after the parts holding period,
some failures may be repairable. Call the Contact for Repairs
as listed on the back of this manual.
・ Do not modify the FOMA terminal or its accessories.
- Fire, injury or damage may result.
- The modified FOMA terminal (in a way such as part
replacement, remodeling, or painting) will be repaired only
after the terminal is restored to its original condition
(containing DOCOMO genuine parts only). However, depending
on the details of modification, repair may be refused.
Modifications may include the following: Applying a label on
the LCD or keys
Decorating the FOMA terminal using adhesive
Replacing the case with the one other than a DOCOMO
genuine part
- Repair of failure or damage caused by modification is charged
even during the warranty period.
・ Do not remove rating stickers placed on the FOMA terminal.
The inscription stickers certify that the FOMA terminal satisfies
specific technical standards. If stickers are removed
intentionally or are reattached in such a way that confirmation
of the sticker's contents is impossible, repair or servicing may
be refused because confirmation of whether or not the device
conforms to relevant technical standards cannot be made.
・ Various function settings and information including total call
time may be cleared (reset) by failure, repair or other handling of
FOMA terminal. In such a case, you have to make function
settings again.
・ The FOMA terminal contains magnetic components given
below. Keep cash cards and other objects vulnerable to
magnetism away from such components or they may become
unusable. Magnetic components: Speaker and Earpiece
・ If the FOMA terminal gets wet or moistened, immediately turn
the power OFF, remove the battery pack, and bring the terminal
to a DOCOMO service center. Note that, depending on the
conditions of the FOMA terminal, it may not be possible to
repair it.
・ Write down and keep separately the data you registered in your
FOMA terminal. DOCOMO will not accept any liability
whatsoever for changes or loss of information.
・ The data you created, or imported or downloaded from external
sources may be altered or lost as a result of changing the
FOMA terminal model or repairing the terminal. DOCOMO is not
responsible for data alteration or loss under these
circumstances. Under some circumstances, DOCOMO may
replace your FOMA terminal with its equivalent instead of
repairing it. Data including images or melodies downloaded from
the official i-mode site the FOMA terminal and user-defined data
will be transferred to another terminal only when the terminal is
repaired (some data may not be transferred. Depending on
severity of the failure, data may not be transferred.)
* Depending on the volume of the data saved in a FOMA
terminal, it may take more time or be unavailable to transfer
the data.
Notes
Phonebook and Downloaded Data
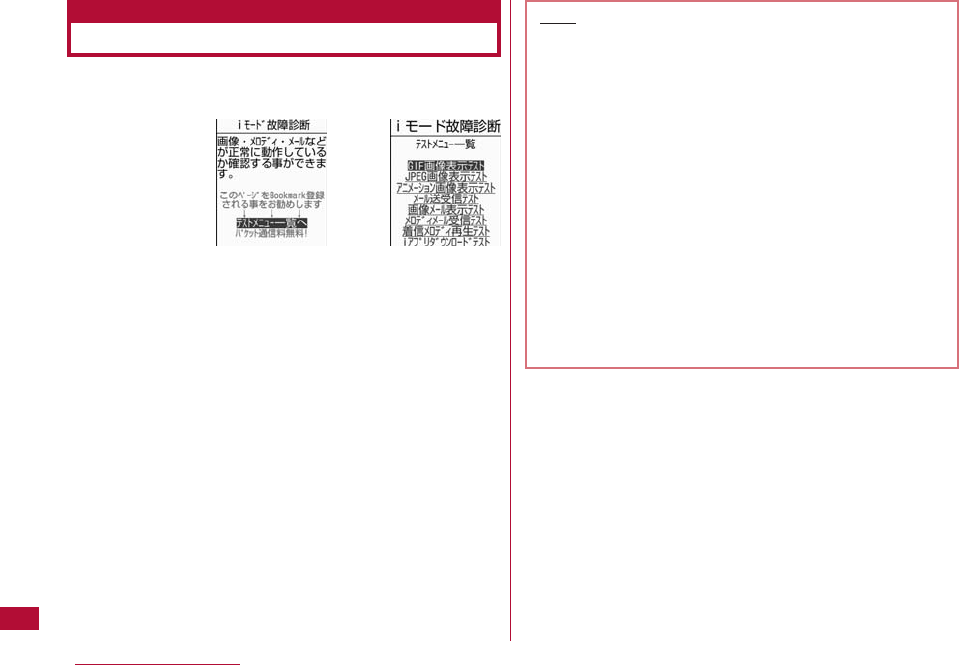
384 Appendix/Troubleshooting
You can check whether your FOMA terminal is properly
sending/receiving mail, downloading images or melodies
yourself.
・ Access method to "iモード故障診断(i-mode malfunction
diagnosis site)"
i-mode site: iMenu ]お知らせ(Information) ]サービス・機能
(Service/Function) ]iモード(i-mode) ]iモード故障診断(i-mode
malfunction diagnosis site)
i-mode Malfunction Diagnosis Site
Test menu
list screen
Top screen
]
Note
・ Packet communication charges free for the
i-mode malfunction diagnosis.
* Charges apply when accessing from overseas.
・ Test items will differ depending on the FOMA terminal
model. Test items may change.
・ Before diagnosing operations for each test item by
performing the test, read the warnings on the site
carefully.
・ When accessing the i-mode malfunction diagnosis
site, and performing the sending mail test,
information unique to your FOMA terminal (such as a
model name and mail address) is automatically sent
to the server (i-mode malfunction diagnosis server)..
The information sent is used only for i-mode
malfunction diagnosis.
・ After the diagnosis, if you think that the terminal is
malfunctioning, call "Contact for Repairs" as listed on
the back of the manual.
385
Appendix/Troubleshooting
Updating Software
Software update
About Updating Software
This function checks whether the FOMA terminal software
requires update after connecting with network and, if
required, updates the software by downloading a part of it
using packet communication*.
Functions and operations of FOMA terminal will be
improved by updating the important part of the software.
* Packet communication for software update is free of
charge
When updating software is required, visit DOCOMO website
or "お客様サポート(user support)" from "i menu".
Software may be updated in the following two methods:
"Update now" and "Timed update".
・ Update now: Update the software immediately.
・ Timer update: The software is automatically updated at the
scheduled date and time.
・ Software update is available even if you set the access
point other than i-mode.
・ Fully charge the battery pack before updating software.
・ Software update is not available when:
- Lock all is set
- Another function is running
- The date and time are not set
- The FOMA card (UIM) is not inserted
- The battery is not fully charged
- "Out of service area" appears at the top of the screen
- Self mode is set
- Terminal power is off
- International roaming
・ Software update (downloading and rewriting) may take a
while.
・ Updating software with the "PIN1 code request" set to "ON"
displays the PIN1 code entry screen at the automatic
restart after overwriting the software. You cannot
make/receive calls or perform communication until you enter
the correct PIN1 code.
・ You cannot make or receive calls or use communication or
other functions while updating software (you can receive
voice calls while downloading).?When updating software,
SSL communication will be conducted to a server
(DOCOMO website). Set "ON" in SSL certificate.
(SSL certificate settings when purchasing P192)
Note
・ Do not remove the battery pack when updating
software. Update may fail.
・ Software update can be conducted with the
Phonebook data, camera image data, download data
registered in FOMA terminal.Note th at data may not
be able to protected depending on your terminal
(malfunction, damage, dropped in water, etc.)To make
a backup for necessary data is recommended.
However, please note that for some download data
backup is not available.
When Using
・ It is recommended that you update software* in a location
with strong signal reception with three antenna bars
displayed in stationary state.
* If the signal becomes weak during software download, or
download is suspended, retry software update in a location
with strong signal reception.
・ When your software is up to date, a message indicating
that "No update required Use it as usual" appears when you
check availability of software update.
・ After software is updated, an icon indicating the i-mode
Center storage status disappears. When mail is delivered
during software update with "Receive option" set to "ON", a
screen indicating that there is mail may not appear after
software update.
・ When software is updated, information unique to your
terminal (such as a terminal model and the serial number) is
automatically sent to the server (software update server
managed by DOCOMO). DOCOMO does not use the sent
information for other purposes than Software update.
・ If software update fails, a message indicating "Rewriting
failed" appears. All operations become unavailable. In this
case, bring your FOMA terminal to a DOCOMO service
center.
・ It is not available to use during overseas.
Check whether the FOMA terminal software update is
necessary.
1 M[Menu]] (Setting) ]"Other" ]"Software update"
・ When software update has been reserved already,
Reservation note screen will be displayed.
2 Check the contents on the confirmation screen and
press "OK"]"OK"]"YES"
・ The communication starts to check whether software
update is necessary. If update is necessary, "Update is
necessary" will be displayed. You can choose either
"Update immediately" or "Reserve"
・ When software update is not necessary, "Update is not
necessary" will appear. Use it as usual.
386 Appendix/Troubleshooting
Starting Software Update
Note
・ Software update confirmation screen will be displayed
even in default setting, software is available to
update.

1 On the software update confirmation screen, select
"Update now" ]"OK" on the download start screen.
・ Download starts, and when the download is completed,
the confirmation screen for software rewriting is
displayed.
2 "OK"
・ The rewriting starts,automatically and the software
update confirmation screen appears after completion.
・ All operations will be disabled during rewriting.And it can
not be disconnected during updating.
3 "OK"
Updating Software Immediately
Note
・ If disconnected during download, the downloaded
data will be deleted.
・ As soon as download starts, the update will be
conducted whether or not select menu.
387
Appendix/Troubleshooting
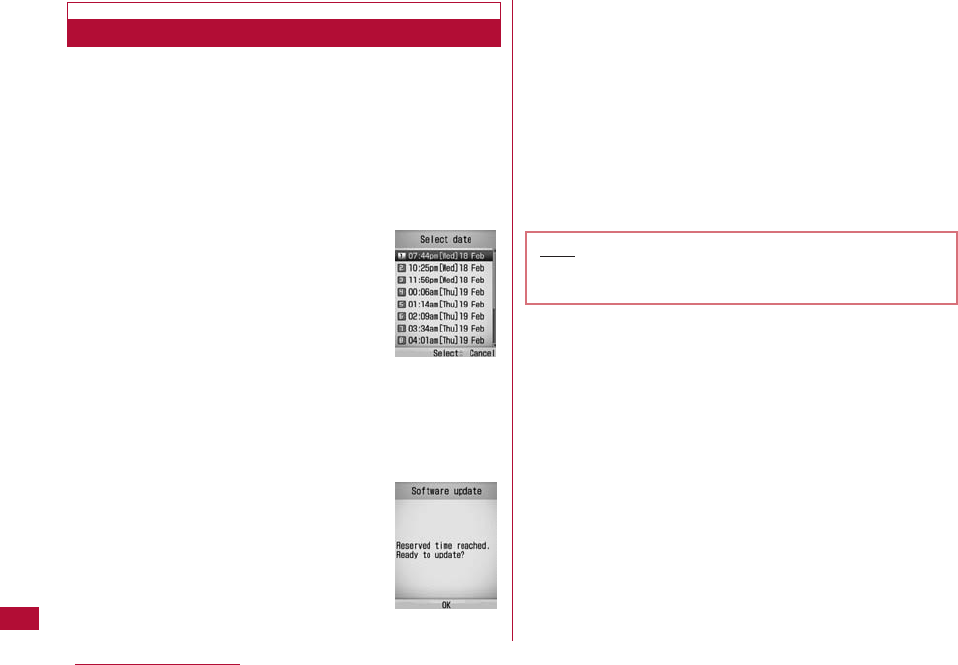
You can select the date and time to update software.
For the situations when it takes a long time to download or
a server is crowded, to set the time of starting software
update through communicating with the server in advance
is available.
1 Select "Reserve" on the software update confirmation
screen
・ The available date and time selection screen appear.
2 Select the date and time
・ At the scheduled date and time, the software update
starts automatically.
・ Select "Others" on the desired date and time screen to
set the desired date and time separately.
■ When select "Others"
After communicating with a server, the desired data and
time are available to select. Whether or not the
reservation is available is shown on time select screen
like the followings:
○
: Much is available,
△
: A little is available,
×
: Not available
If a desired time is selected, a second time selection will
appear after communicating with the server.
3 "OK"
・ Communicate with the server again to finish
Updating Software on Scheduled Date
Note
・ When software update is scheduled, the time of the
server is displayed.
388 Appendix/Troubleshooting
389
Appendix/Troubleshooting
When the reserved time comes, software update will start
automatically after 5 seconds. Select "Software update" from setting menu and enter the
terminal password to confirm the reserved time.
You can change or cancel the reserved time from
confirming reservation screen. Select "Change" to change
the reserved time. Select "Cancel" to cancel the reserved
time.
If select "NO" or "Cancel" in each screen, ending operation
screen will be displayed.
If select "YES", software update will be finished and go
back to the stand-by screen. If select "NO", it will go back
to the former screen.
Ending software update
Confirming/changing/canceling the reserved time
When the reserved time comes
Note
・ Note that if you use other functions, the software
update may not start at the scheduled time.
・ If alarm is running, the software update may not be
started.
・ If you perform "Clear memory"(P127) after the
reservation is set, the software update may not be
started at the scheduled time. Reschedule the time
for update.
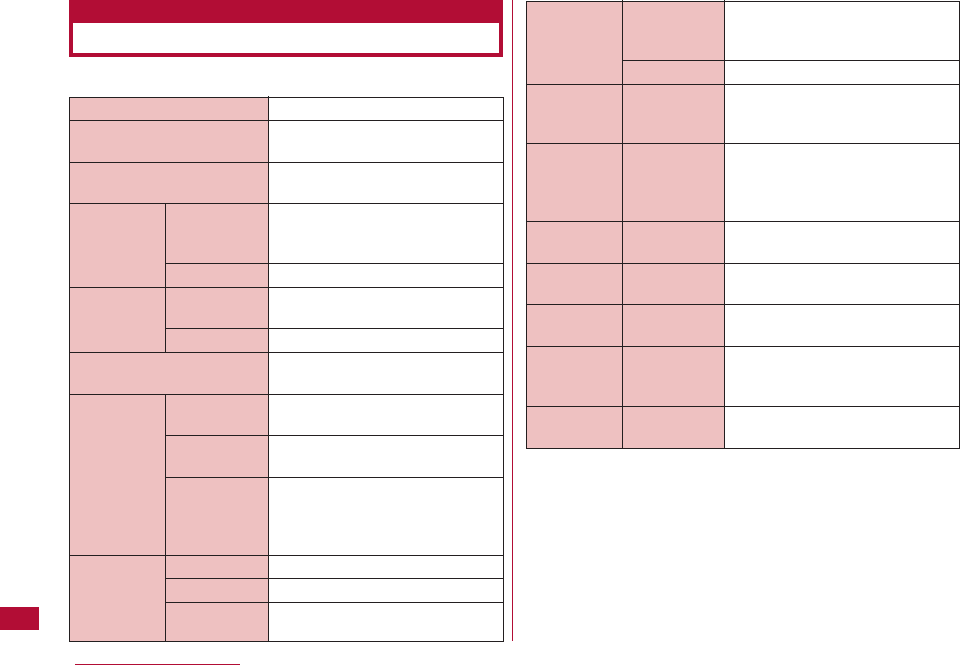
■ Phone
*1 Image size : 128
×
96 Image quality: Standard File size: 10K
*2 It is maximum recording time of saving per movie into the
FOMA terminal under the following conditions.
・ Image size: Sub-QCIF
・ Restriction of file size: none
・ Quality: Standard (Standard, normal, etc.)
・ Type: Image +Voice
The maximum time of recording depends on record size,
quality and the image being taken.
*3 File format: AAC
Model name
Dimensions (HxWxD)
Weight
Continuous FOMA/3G
Standby
Time GSM
Continuous FOMA/3G
Call Time
GSM
Charging time
Color LCD Type
Size
Pixels
Image Type
Censor Size
Effective
Pixels
L-06A
Approx. 100mm×Approx.
51mm×Approx. 16.8mm
Approx. 100g (with battery pack
installed)
Moving: Approx. 220 hours (3G)
Moving: Approx. 200 hours (Auto)
Stationary: Approx. 300 hours (Auto)
Stationary Approx. 300 hours (Auto)
Voice call: Approx. 150 minutes
Video Call: Approx. 100 minutes
Approx. 170 minutes
AC Adapter: Approx. 180 minutes
DC Adapter: Approx. 180 minutes
Main display: TFT 262,144 colors
Sub display: TFT 65536 colors
Main display: Approx. 2. 4 inches
Sub display: Approx. 1.3inches
Main display: 76,800 pixels
(240 dot×320 dot)
Sub display: 20,480 pixels
(128 dot×160 dot)
CMOS
1/5.0 inches
Approx. 2.00 M pixels
390 Appendix/Troubleshooting
Major Specifications
Approx. 200M pixels
Approx. 3.4 times
Approx. 544
*1
(when purchased)
Approx. 995
*1
(after deleting
preinstalled data that can be deleted)
CIF(352x288) : 4 Wallpaper
(240x320)/QCIF (176x144)/
Sub-QCIF (128x96)/Phonebook
(120x160)/menu icon(80x70) : 6
JPEG
Approx.60 minutes*2
MP4
Chaku-Uta-Full
®
: Approx. 720
minutes*3
i-motion : Approx. 250 minutes*3
Approx. 102 MB
Camera Recorded
pixels
(maximum)
Zoom (Digital)
Storage Still images
Continuous
mode
Still image
file format
Movie record
time
Movie file
format
Music Continuous
playback playback
time
Capacity
Chaku-Uta®/
Chaku-Uta Full®

■ Battery Pack
・ Continuous call time is approximate duration of time to be
spent for talking with normal radio wave reception level.
・
Continuous standby time is approximate duration of battery time
while in motion. Depending on the battery level, set functions,
operating environment such as ambient temperature, or radio
wave reception level (Poor or weak radio wave reception level),
battery life can reduced to half. When i-mode communications
are performed, the call (communication)/standby time becomes
shorter. Even if you do not make calls or perform i-mode
communications, the call (communication)/standby time
becomes short when you compose i-mode mail, start a
downloaded i-αppli, start the i-αppli stand-by display, perform
data communications or multiaccess, use a camera, or play
videos or music.
・ Continuous standby time in a stationary state is the average
usage time in a stationary state with normal radio wave
reception level while the terminal is closed.
・ Continuous standby time in motion is the average usage time
in a state combining "standstill", "in motion" and "out of service
area" in an area with normal radio wave reception level while the
terminal is closed.
・ The estimated charging time is the duration of time to charge
the battery pack with the FOMA terminal turned off and with a
fully drained battery pack.The charging time becomes longer
with the FOMA terminal turned on.
The number of still images that can be saved on
theFOMA terminal varies depending on the resolution,
image quality, capture conditions, and capture objects.
・The number of savable still images after deleting images,
which can be deleted, in all the data already registered in a
terminal
Quality Super fine Fine Standard
Resolution
UXGA
(1200×1600) Approx. 210 Approx. 400 Approx. 640
SXGA
(960×1280) Approx. 450 Approx. 720 Approx. 995
VGA
(640×480) Approx. 995 Approx. 995 Approx. 995
CIF
(352×288) Approx. 995 Approx. 995 Approx. 995
Wallpaper
(240×320) Approx. 995 Approx. 995 Approx. 995
QCIF
(176×144) Approx. 995 Approx. 995 Approx. 995
Sub-QCIF
(128×96) Approx. 995 Approx. 995 Approx. 995
Phonebook
(120×160) Approx. 995 Approx. 995 Approx. 995
Menu-icon
(80×70) Approx. 995 Approx. 995 Approx. 995
391
Appendix/Troubleshooting
Battery Pack L02
Lithium ion battery
DC 3.7V
860mAh
Model name
Dry battery
Nominal voltage
Nominal capacity
Approximate Number of Savable Still Images
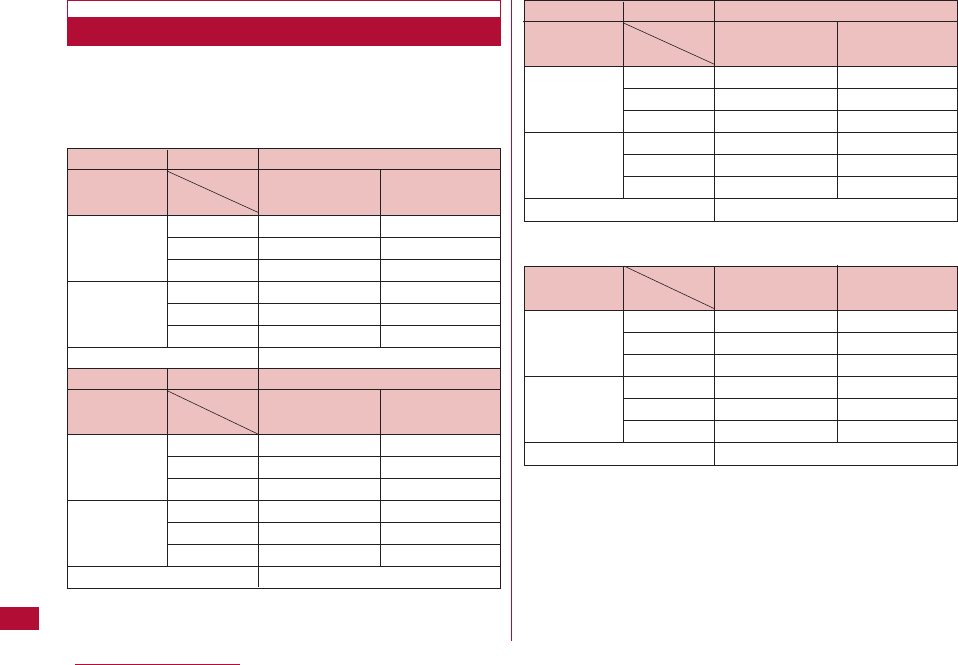
392 Appendix/Troubleshooting
The movie capture duration varies depending on the
movie length, quality, capture conditions, and capture
objects.
■ Continuous capturing duration per video clip
■ Continuous capturing duration per video clip
・The number of savable still images after deleting the images,
which can be deleted, in all the data already registered in a
terminal.
Approximate Movie Capture Duration
Capture Type Size restriction No restriction
Resolution
QCIF Sub-QCIF
Quality (176x144) (128x96)
Audio and Super fine Approx.60 minutes Approx.60 minutes
Graphics Fine Approx.60 minutes Approx.60 minutes
Standard Approx.60 minutes Approx.60 minutes
Graphics only Super fine Approx.60 minutes Approx.60 minutes
Fine Approx.60 minutes Approx.60 minutes
Standard Approx.60 minutes Approx.60 minutes
Audio only Approx.60 minutes
Capture Type Size restriction 2Mbyte
Resolution
QCIF Sub-QCIF
Quality (176x144) (128x96)
Audio and Super fine Approx.100 seconds Approx.186 seconds
Graphics Fine Approx.132 seconds Approx.234 seconds
Standard Approx.187 seconds Approx.315 seconds
Graphics only Super fine Approx.110 seconds Approx.225 seconds
Fine Approx.150 seconds Approx.297 seconds
Standard Approx.225 seconds Approx.441 seconds
Audio only Approx.19 minutes
Capture Type Size restriction 500Kbytes
Resolution
QCIF Sub-QCIF
Quality (176x144) (128x96)
Audio and Super fine Approx.24 seconds Approx.46 seconds
Graphics Fine Approx.32 seconds Approx.58 seconds
Standard Approx.46 seconds Approx.78 seconds
Graphics only Super fine Approx.27 seconds Approx.55 seconds
Fine Approx.37 minutes Approx.73 seconds
Standard Approx.56 minutes Approx.110 seconds
Audio only Approx.364 seconds
Capture Type
Resolution
QCIF Sub-QCIF
Quality (176x144) (128x96)
Audio and Super fine Approx94 minutes Approx161 minutes
Graphics Fine Approx118 minutes Approx231 minutes
Standard Approx161 minutes Approx245 minutes
Graphics only Super fine Approx103 minutes Approx189 minutes
Fine Approx133 minutes Approx240 minutes
Standard Approx189 minutes Approx326 minutes
Audio only Approx1084 minutes
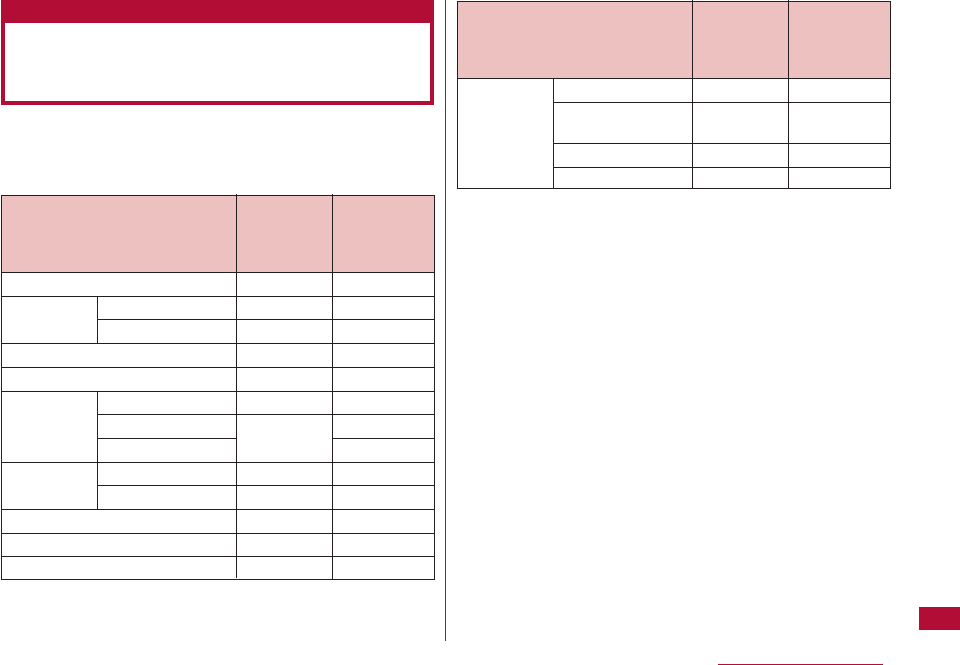
The maximum number of items that can be stored or
protected varies depending on the data size or memory
usage.
*1 Up to 50 entries can be saved in the UIM.
*2 Including the number of "
♪Welcome mail♪
" saved in "Inbox"
folder.
*3 Including data registered when purchased.
393
Appendix/Troubleshooting
Number of Items that can be
Stored, Registered and Protected
on the FOMA Terminal
Type
Databox Image
Video/i-motion
movie
Melody
Animation
Maximum Maximum
Number of Number
Saved Items Protected
Items
1000*3 −
1000*3 −
1000*3 −
30 −
Type
Phonebook
Schedule Schedule events
Holiday
To Do
Memo
Mail Received mail
Sent mail
Unsent message
Message Message R
Message F
Bookmarks
Screen memo
appli
Maximum Maximum
Number of Number
Saved Items Protected
Items
1000*1 −
200 −
100 −
50 −
50 −
1000*2 1000
500 500
−
100 100
100 100
100 −
50 10
100*3 −
394 Appendix/Troubleshooting
Mobile phone L-06A meets the technical regulation defined
by the government for absorption of radio waved to human
body. This technical regulation has been established based
on scientific studies so that radio waves emitted from
radio devices such as mobile phones used near a human
head give no bad influence to the humanc health. It defines
that Specific Absorption Rate (SAR), representing the
average amount of energy of radio waves absorbed to a
temporal part of human body, should not exceed a
permissible value of 2W/kg*. This permissible value
includes a substantial safety margin designed to assure
the safety of users, regardless of the age, body size and
other conditions of individuals and is equal to the
international guideline recommended by International
Commission of Non-Ionizing Radiation Protection (ICNIRP)
which has cooperative relationships with World Health
Organization (WHO).
All mobile phones should be confirmed to comply with the
governmental regulation according to Radio Law before
they are released. The SAR value of L-06A is 0.543 W/kg.
This value has been acquired by Telecom Engineering
Center (TELEC) and is the maximum value of those
measured under the maximum transmission power of the
mobile phone in the procedure defined by the government.
Though there may be some differences in SAR value
among individual products, they all meet the technical
regulation. In addition, mobile phones are designed to have
the lowest transmission power required for communication
with base stations; therefore, the SAR value during actual
phone operation becomes smaller. SAR value of this mobile
phone meets the regulations of individual countries it is
available.
For further information about SAR, visit the following web
sites:
Ministry of Internal Affairs and Communications
:http://www.tele.soumu.go.jp/j/ele/index.htm
Association of Radio Industries and Businesses
:http://www.arib-emf.org/index.html
DOCOMO
:http://www.nttdocomo.co.jp/product/
LG Mobile
:http://jp.lgmobile.com/
* The technical regulation is defined in Article 14-2 of the
Ministry Ordinance Regulating Radio Equipment.
THIS MODEL PHONE MEETS THE U.S. GOVERNMENT'S
REQUIREMENTS FOR EXPOSURE TO RADIO WAVES.
Your wireless phone contains a radio transmitter and receiver.
Your phone is designed and manufactured not to exceed the
emission limits for exposure to radio frequency (RF) energy set
by the Federal Communications Commission of the U.S.
Government. These limits are part of comprehensive guidelines
and establish permitted levels of RF energy for the general
population. The guidelines are based on standards that were
developed by independent scientific organizations through
periodic and thorough evaluation of scientific studies. The
exposure standard for wireless mobile phones employs a unit of
SAR Certification and Other Information
Specific Absorption Rate (SAR) of Mobile
Phones
Radio Frequency (RF) Signals

395
Appendix/Troubleshooting
measurement known as the Specific Absorption Rate (SAR). The
SAR limit set by the FCC is 1.6W/kg.* Tests for SAR are
conducted using standard operating positions accepted by the
FCC with the phone transmitting at its highest certified power
level in all tested frequency bands. Although the SAR is
determined at the highest certified power level, the actual SAR
level of the phone while operating can be well below the
maximum value. This is because the phone is designed to
operate at multiple power levels so as to use only the power
required to reach the network. In general, the closer you are to a
wireless base station antenna, the lower the output.
Before a phone model is available for sale to the public, it must
be tested and certified to the FCC that it does not exceed the
limit established by the U.S. government-adopted requirement for
safe exposure. The tests are performed on position and locations
(for example, at the ear and worn on the body) as required by FCC
for each model. The highest SAR value for this model phone as
reported to the FCC when tested for use at the ear is
0.246W/kg, and when worn on the body, is 0.052W/kg. (Body-
worn measurements differ among phone models, depending upon
available accessories and FCC requirements).
While there may be differences between the SAR levels of
various phones and at various positions, they all meet the U.S.
government requirement.
The FCC has granted an Equipment Authorization for this model
phone with all reported SAR levels evaluated as in compliance
with the FCC RF exposure guidelines. SAR information on this
model phone is on file with the FCC and can be found under the
Display Grant section at http://www.fcc.gov/oet/fccid after
search on FCC ID BEJL705I.
For body worn operation, this phone has been tested and meets
the FCC RF exposure guidelines when used with an accessory
designated for this product or when used with an accessory that
contains no metal and that positions the terminal a minimum of
2.5 cm from the body.
* In the United States, the SAR limit for wireless mobile phones
used by the public is 1.6 watts/kg (W/kg) averaged over one
gram of tissue. SAR values may vary depending upon national
reporting requirements and the network band.
The product “L-06A” is declared to conform with the
essential requirements of European Union Directive 1999/5/EC
Radio and Telecommunications Terminal Equipment Directive
3.1(a), 3.1(b) and 3.2.
This mobile phone complies with the EU requirements for
exposure to radio waves.
Your mobile phone is a radio transceiver, designed and
manufactured not to exceed the SAR* limits** for exposure to
radio-frequency (RF) energy, which SAR* value, when tested for
compliance against the standard was 0.569W/kg. While there
may be differences between the SAR* levels of various phones
and at various positions, they all meet*** the EU requirements
for RF exposure.
* The exposure standard for mobile phones employs a unit
of measurement known as the Specific Absorption Rate,
or SAR.
** The SAR limit for mobile phones used by the public is
2.0 watts/kilogram (W/kg) averaged over ten grams of
tissue, recommended by The Council of the European
Union. The limit incorporates a substantial margin of
safety to give additional protection for the public and to
account for any variations in measurements.
*** Tests for SAR have been conducted using standard
operating positions with the phone transmitting at its
highest certified power level in all tested frequency
bands. Although the SAR is determined at the highest
Declaration of Conformity

396 Appendix/Troubleshooting
Important Safety Information
certified power level, the actual SAR level of the phone
while operating can be well below the maximum value.
This is because the phone is designed to operate at
multiple power levels so as to use only the power
required to reach the network. In general, the closer you
are to a base station antenna, the lower the power
output.
AIRCRAFT
Switch off your wireless device when boarding an aircraft or
whenever you are instructed to do so by airline staff. If your
device offers a 'flight mode' or similar feature consult airline staff
as to whether it can be used on board.
DRIVING
Full attention should be given to driving at all times and local
laws and regulations restricting the use of wireless devices while
driving must be observed.
HOSPITALS
Mobile phones should be switched off wherever you are
requested to do so in hospitals, clinics or health care facilities.
These requests are designed to prevent possible interference
with sensitive medical equipment.
PETROL STATIONS
Obey all posted signs with respect to the use of wireless devices
or other radio equipment in locations with flammable material and
chemicals. Switch off your wireless device whenever you are
instructed to do so by authorized staff.
INTERFERENCE
Care must be taken when using the phone in close proximity to
personal medical devices, such as pacemakers and hearing aids.
Pacemakers
Pacemaker manufacturers recommend that a minimum
separation of 15cm be maintained between a mobile phone and
a pacemaker to avoid potential interference with the pacemaker.
To achieve this use the phone on the opposite ear to your
pacemaker and do not carry it in a breast pocket.
Hearing Aids
Some digital wireless phones may interfere with some hearing
aids. In the event of such interference, you may want to consult
your hearing aid manufacturer to discuss alternatives.
For other Medical Devices:
Please consult your physician and the device manufacturer to
determine if operation of your phone may interfere with the
operation of your medical device.
This product and its accessories may fall under the
category of application of Japan Export Control
Regulations ("Foreign Exchange and Foreign Trade Law"
and relevant laws and regulations). U.S. Re-export
Regulations (Export Administration Regulations: EAR) is
applied to this product and its accessories. If you export or
re-export this product or its accessories, please follow the
necessary procedures at your own risk and expense. For
details about the procedures, contact the Ministry of
Economy, Trade and Industry or the U.S. Department of
Commerce.
Export Administration Regulations
397
Appendix/Troubleshooting
Intellectual Property Issues
Copyrights and Portrait Rights
You have no right to copy, modify, or distribute the contents such
as text, images, music, or software downloaded from web sites on
the Internet, or images captured by the cameras of this product
without permission from the copyright holder except for when the
copy or quote is for personal use that is allowed by the Copyright
Law. Note that capture or recording of live performances or
exhibitions may be prohibited, even for personal use.
Refrain from taking portraits of other persons and uploading such
portraits on websites without consent, as this violates portrait
rights.
Trademarks
・ "docomo STYLE series", "FOMA", "mova", "i-mode", "i-αppli",
"i-αppli DX", "WORLD CALL", "WORLD WING" "Public mode",
"i-area", "i-motion", "i-motion mail", "Chaku-motion", "Deco-mail",
"mopera", "mopera U", "sigmarion", "musea", "Dual Network",
"visualnet", "V-live", "i-Channel", "DoPa", "OFFICEED", "IMCS",
"FOMA" logo, "i-mode" logo, "i-αppli" logo, "HIGH-SPEED" logo are
trademarks or registered trademarks of NTT DOCOMO, INC.
・ The name of the Free Dial Service and its logo are registered
trademarks of NTT Communications Corporation.
・ "Multitask" is a trademark of the NEC Corporation.
・ "Catch Phone (Call Waiting Service)" is a registered trademark
of the Nippon Telegraph and Telephone Corp.
・ Quick Time is a trademark of Apple Inc. in the United States
and/or other countries.
・ Powered by JBlendTM Copyright 2002-2007 Aplix Corporation.
All rights reserved.
JBlend and its related trademarks are trademarks or
registered trademarks of Aplix Corporation in Japan
and/or other countries.
・ This product preloaded with NetFront Sync Client from
ACCESS Co., Ltd.
Copyright©2007 ACCESS CO., LTD. All rights
reserved.
・ Microsoft®, Windows®and Windows Vista®are
trademarks or registered trademarks of U.S. based
Microsoft Corporation in the U.S.A. and other countries.
・ Other company names or product names mentioned in this
content are the trademarks or registered trademarks of their
respective owners.

398 Appendix/Troubleshooting
Others
・ Flash®LiteTM developed by Adobe Systems Incorporated is
installed on this product.
Copyright©1995-2007 Adobe Macromedia Software LLC.
All rights reserved.
Adobe, Flash and Flash Lite are registered
trademarks or trademarks of Adobe Systems
Incorporated in the U.S.A. and other countries.
・ A module developed by the Independent JPEG Group is
integrated into this product.
・ This manual abbreviates operating systems (Japanese version)
as follows:
- Windows Vista is an abbreviation of Windows Vista®(Home
Basic, Home Premium, Business, Enterprise, and Ultimate)
operating system.
- Windows XP is an abbreviation of Microsoft®Windows®XP
Professional operating system, or Microsoft®Windows®XP
Home Edition operating system.
- Windows 2000 is an abbreviation of Microsoft®Windows®
2000 Professional operating system.
・ This product is licensed based on the MPEG-4 Patent Portfolio
License. If you use MPEG-4 videos for private purpose without
any profits, you are allowed to use them only when:
- Recording MPEG-4 videos that are compliant with the
standard of MPEG-4 Visual.
- Playing back MPEG-4 videos that consumers recorded for
non-commercial activities.
- Playing back MPEG-4 videos obtained from MPEG-LA
licensees.
For details, contact MPEG LA, LLC.
・ Licensed by QUALCOMM Incorporated under one or more of the
following United States Patents and/or their counterparts in
other nations;
4,901,307 5,504,773 5,109,390 5,535,239
5,267,262 5,600,754 5,416,797 5,490,165
5,101,501 5,511,073 5,267,261 5,568,483
5,414,796 5,659,569 5,056,109 5,506,865
5,228,054 5,544,196 5,337,338 5,657,420
5,710,784 5,778,338