LG Electronics USA PF80AJE DLP PROJECTOR User Manual G User s manual
LG Electronics USA DLP PROJECTOR G User s manual
Contents
User Manaul Part 3
20 PREPARATION
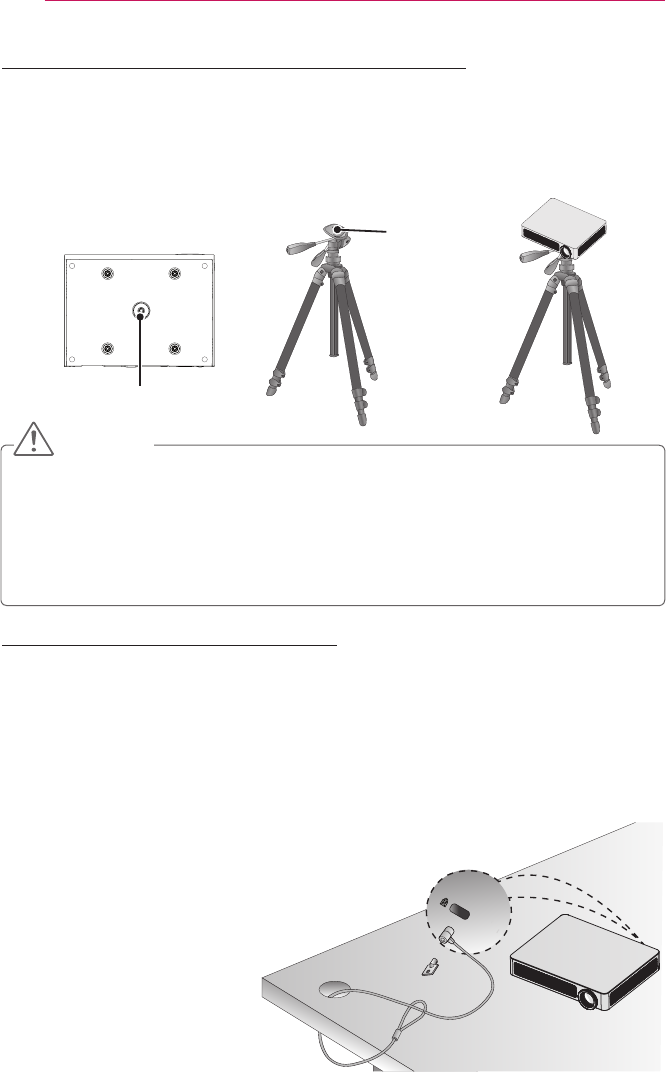
How to Install the Projector On a Tripod
yYou can install this projector using a camera tripod.
As shown below, you can mount the projector instead of a camera on the tripod.
yWhen stabilizing the tripod, we recommend using a locking bolt of standard size
4.5 mm or less. The maximum size allowed for the locking bolt is 5.5 mm.
(If it is longer than the maximum allowed size, it may damage the projector.)
+⇒
The projector is
connected to this part. Tripod
Bolt used to
attach the
projector
Bottom side of the projector
CAUTION
yIf you are using a tripod, be careful not to apply external force to the tripod. Doing
so may damage the projector.
yDo not place the tripod on an unstable surface.
yBe sure to use a tripod with a maximum load capacity of 3 kg or more.
yTo use the projector safely, position the tripod legs so that they are as wide and
stable as possible and be sure to securely attach the projector to the tripod.
Kensington Security System
yThis projector has a Kensington Security Standard connector. Connect a Kensington
Security System cable as shown below.
yFor more information on installation and use of the Kensington Security System,
refer to the user’s guide provided with the Kensington Security System.
yThe Kensington Security System is an optional accessory.
yWhat is Kensington? Kensington is a company that provides security systems for
laptops and other electronic devices. Website: http://www.kensington.com
21
REMOTE CONTROL
REMOTE CONTROL
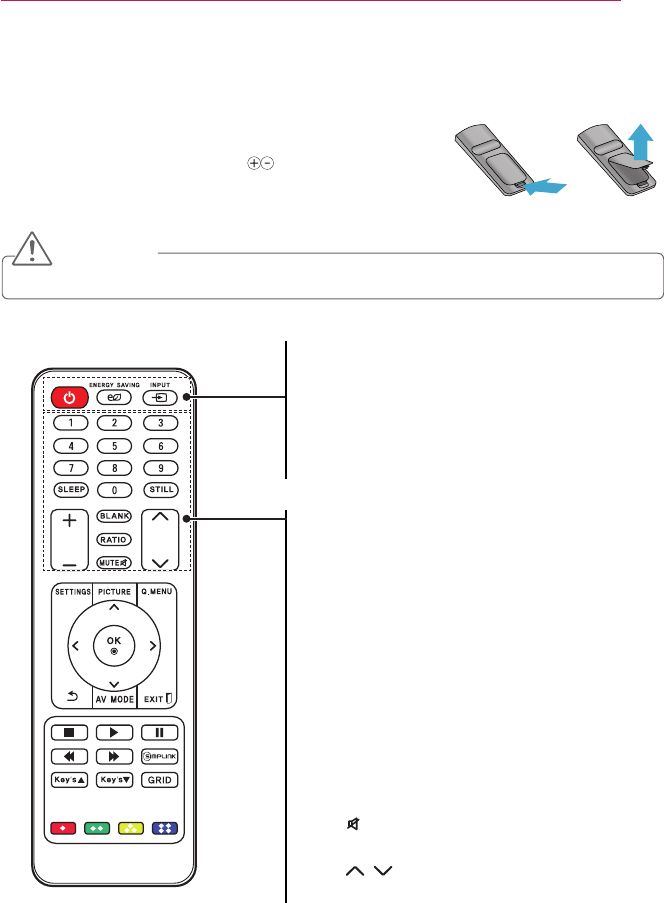
Open the lid at the back of the remote control and insert
the batteries as described in the instructions.
Use new batteries and do not mix regular or rechargeable
batteries. (1.5 V AAA)
CAUTION
yDo not mix new batteries with old ones.
70- 1"(&
POWER
Turns the projector on or off.
ENERGY SAVING
Adjusts the screen brightness.
INPUT
Changes the input source.
Number buttons
Enters a number.
SLEEP
Sets the sleep timer.
STILL
Stops the video being played.
VOL +, -
Adjusts the volume level.
BLANK
Blanks the screen.
RATIO
Changes the aspect ratio of the screen
per pressing of the button.
MUTE
Mutes the sound of the projector.
PAGE ,
Moves to the previous/next page.
22 REMOTE CONTROL
70- 1"(&
NOTE
yWhen using the remote control, the optimal operation range is
6 meters or less (left/right) and within a 30 degree arc of the
remote control IR receiver.
yIf a cable is connected to the back port, the optimal operating
range is 3 meters or less (left/right) and within a 30 degree arc of
the remote control IR receiver.
yFor seamless operation, do not block the IR receiver.
yWhen you carry the remote control in the portable bag, make
sure that the buttons on the remote control are not pressed by the
projector, cables, documents or any other accessories in the bag.
Otherwise, it may significantly reduce the battery life.
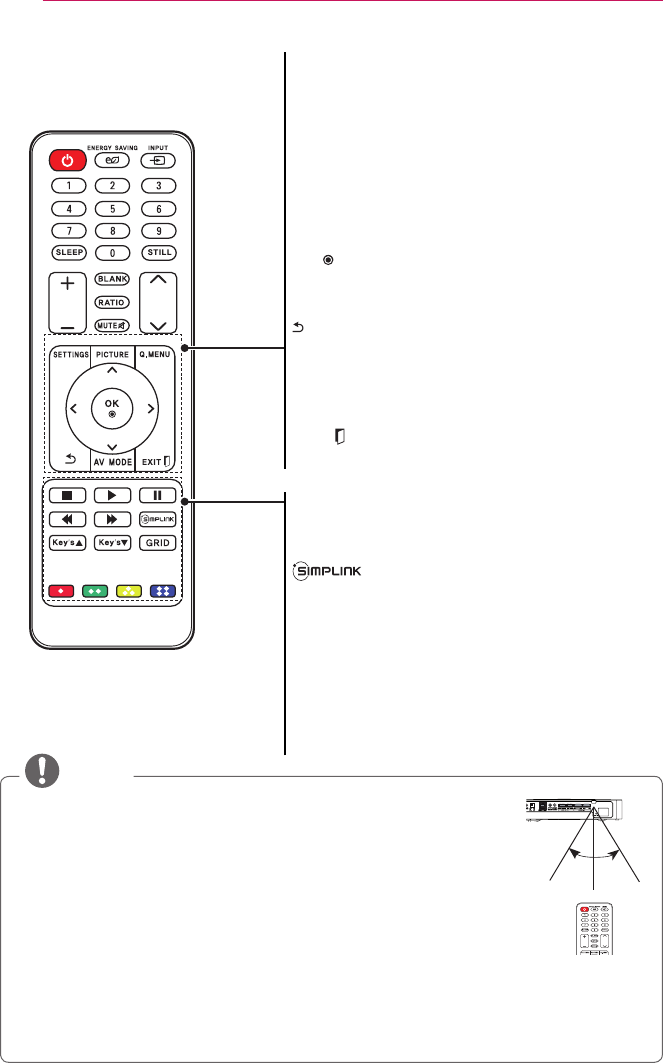
SETTINGS
Displays or closes the Settings menu.
PICTURE
Changes the picture mode per press of the
button.
Q.MENU
Allows you to change the settings easily.
Up/Down/Left/Right buttons
Switches between menu functions.
OK
Shows the current mode and saves changes to
the settings.
Returns to the previous screen.
AV MODE
Selects AV mode for the genre of the program
being watched.
EXIT
Exits the menu.
Playback control buttons
Controls the playback of multimedia content on
the SmartShare.
Allows you to use the SIMPLINK function.
Key's ▲, ▼
Adjusts the Keystone function.
GRID
Shows 20 grids built into projector to align and
compose images and designs.
Color buttons
Sets detailed settings or gesture for each menu.
70- 1"(&
30 ° 30 °
23
Using the PROJECTOR
Using the PROJECTOR
Watching Projector
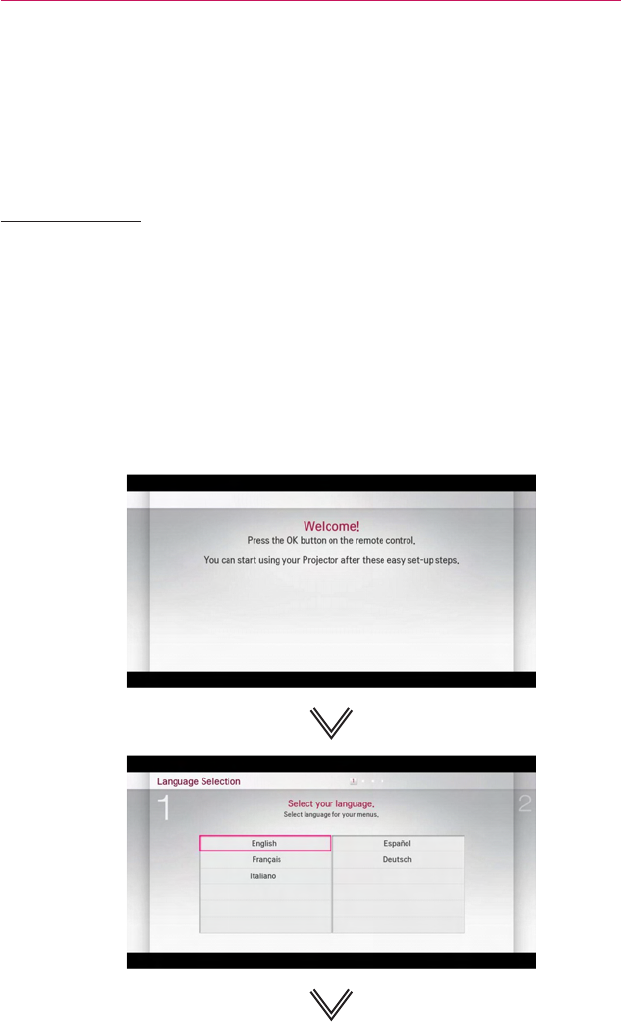
Initial Setup
The menu screen display in this owner's manual is an example to help users
understand how to operate the product and may look different from the actual screen.
1 Connect the power cord correctly.
2 After waiting for a moment, press the POWER button on the remote control or the
control panel.
3 When you turn on the Projector for the rst time, a setting screen appears as shown
below. Here, you can specify the items required for watching the Projector more
easily.